OFFICIAL: Hangar Queen Campaign
Bayern, Germany
Joined: January 02, 2011
KitMaker: 279 posts
AeroScale: 239 posts
Posted: Sunday, June 19, 2011 - 12:19 AM UTC
Hi all,
during an epic buddy-buddy modelling session (overall rating:


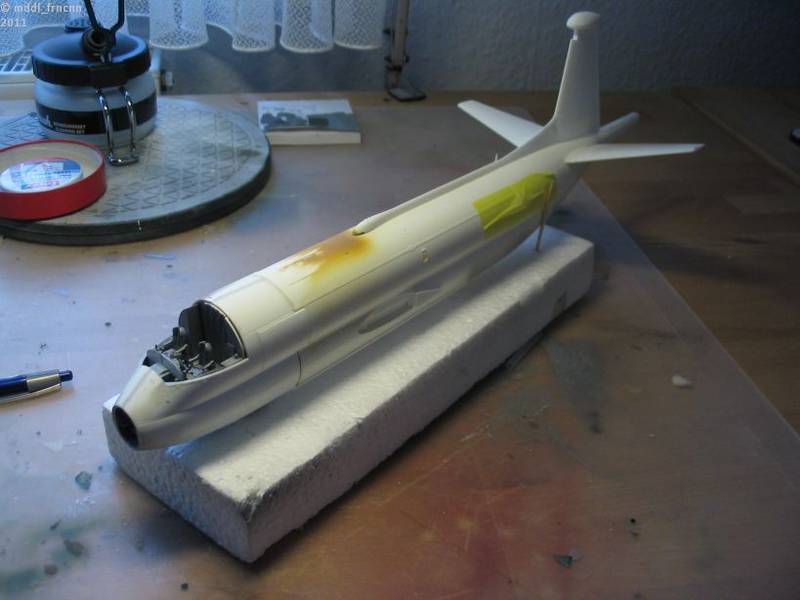
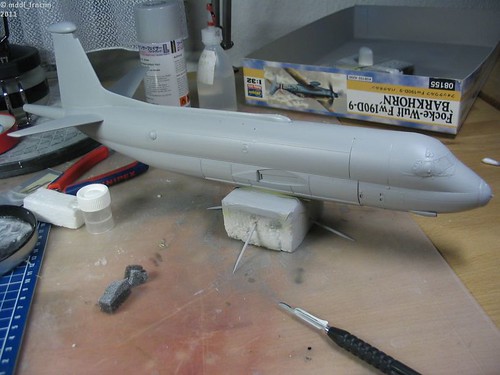
) yesterday with Rebilda at his humble home I could almost complete the Atlantic´s fuselage. I also added some additional lead weight in the fuselage halves before glueing them together. The whole fuselage is so heavy now, it could be easily used as a club...
Again one step forward...
Servus,
Sebastian
LtCol Henry Blake: "Radar, whatever it is: sign it, cancel it or order five more!"
Joined: December 23, 2007
KitMaker: 1,596 posts
AeroScale: 1,275 posts
Posted: Sunday, June 19, 2011 - 09:18 AM UTC

#042
England - North East, United Kingdom
Joined: November 18, 2006
KitMaker: 2,828 posts
AeroScale: 1,720 posts
Posted: Sunday, June 19, 2011 - 09:56 AM UTC
Quoted Text
I'm afraid there's no official gallery for this campaign yet.
Err yes there is.... This campaign was started in 2010 so the Gallery is in that folder
Hangar Queen GalleryIf you have to log in and it take you to the home page then the gallery is
Aeroscale » Aeroscale Campaigns » 2010 Aeroscale Campaigns » Hangar Queen
Hope this helps
Modellers Creed: This is my toolbox. There are many like it, but this one is mine. My toolbox is my best friend. It is my life. I must master it as I must master my life. My toolbox, without me, is useless. Without my toolbox, I am useless.
Joined: December 23, 2007
KitMaker: 1,596 posts
AeroScale: 1,275 posts
Posted: Sunday, June 19, 2011 - 06:30 PM UTC
Quoted Text
This campaign was started in 2010 so the Gallery is in that folder
Probably that's the reason why it wasn't in 2011 folder

Sometimes I can't believe how stupid a man can be (in this case me). Thank's a lot Allen.
Wisconsin, United States
Joined: September 11, 2009
KitMaker: 1,917 posts
AeroScale: 563 posts
Posted: Monday, June 20, 2011 - 03:02 AM UTC
Yes, thanks Allen! I was a little slow to respond there-- busy weekend.

I spent Fathers' Day watching Indycars at Milwaukee with about 10,000 friends. Those drivers come from most of the countries represented here on Kitmaker.
Anyway, exciting to see the gallery fill up!
Thanks everyone,
-Sean.

Current: model railroad layout
Stalled a while ago:
. 1950's Chrome, WW II Twins
Last completed: Police Car
Indiana, United States
Joined: February 15, 2010
KitMaker: 167 posts
AeroScale: 141 posts
Posted: Monday, June 20, 2011 - 10:55 AM UTC
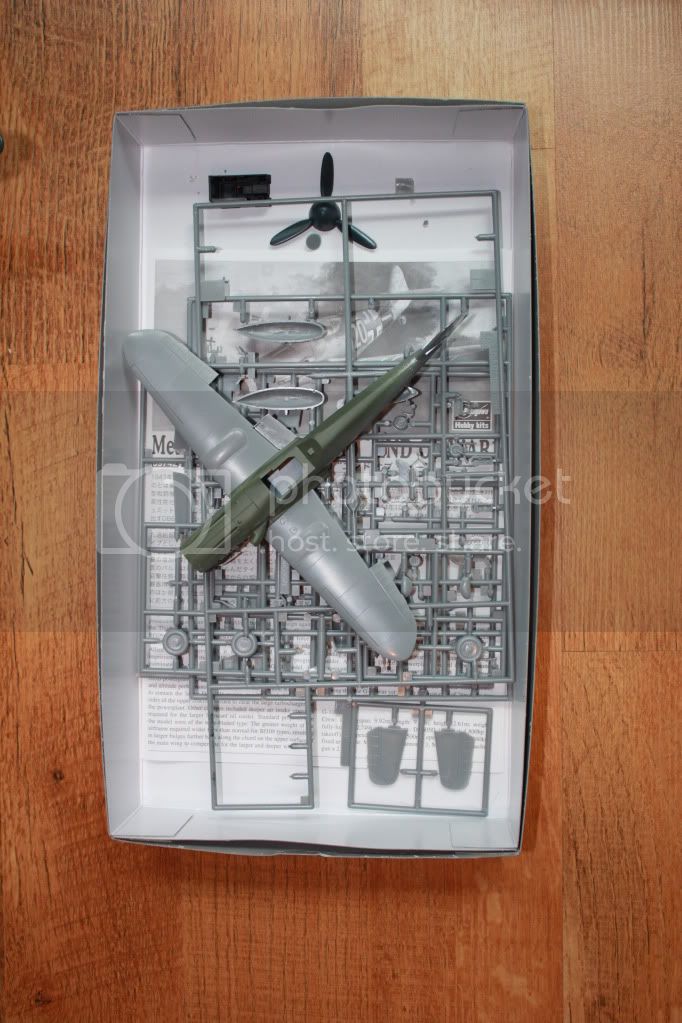
I stumbled across Michal's Mustang thread the other day and it lead me to this campaign. Can I still get in with this Bf109G-10? It was one of the first planes I attempted after getting back into the hobby last year, and I kinda messed up the upper seam and sanded it almost flat. I put it in the box for awhile, but now I'm pretty sure I can handle rescribing the few details I obliterated.
Wisconsin, United States
Joined: September 11, 2009
KitMaker: 1,917 posts
AeroScale: 563 posts
Posted: Monday, June 20, 2011 - 12:53 PM UTC
Certainly, Ray! That's what this campaign is for!
I'll consider that photo your start photo, and you're on your way!
thanks for posting. Always eager to watch another one develop from tragedy to triumph.
-Sean.
P.S. edit: A quick check and I don't see you enlisted, so go over to the campaigns tab and select Hangar Queen and hit that ENLIST button.
The campaign ends on September 15th, so you have just under 3 months left to work some magic.
Current: model railroad layout
Stalled a while ago:
. 1950's Chrome, WW II Twins
Last completed: Police Car
Wisconsin, United States
Joined: September 11, 2009
KitMaker: 1,917 posts
AeroScale: 563 posts
Posted: Tuesday, June 21, 2011 - 01:54 AM UTC
Thanks to HeyLoad and Mecenas for your gallery photos, very nice. A lot of sharkteeth smiling there!
SellSword is enlisted, so we're up to 45 entrants.

Thanks, guys!
-Sean.

Current: model railroad layout
Stalled a while ago:
. 1950's Chrome, WW II Twins
Last completed: Police Car
Indiana, United States
Joined: February 15, 2010
KitMaker: 167 posts
AeroScale: 141 posts
Posted: Tuesday, June 21, 2011 - 12:22 PM UTC
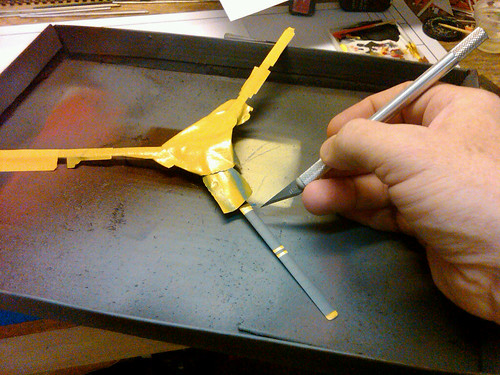
Progress for me! On a modeler's skill basis also. I have doubted my skills at rescribing panel lines and have avoided doing so completely til now. Since I boxed this kit up after destroying a few lines I figured there wasn't a lot to lose if I gave it a try. Anyways, I did it! I'm sure that at close inspection there are some flaws, but for me it's a personal victory and with more practice I hope I won't fear this task so much any more!
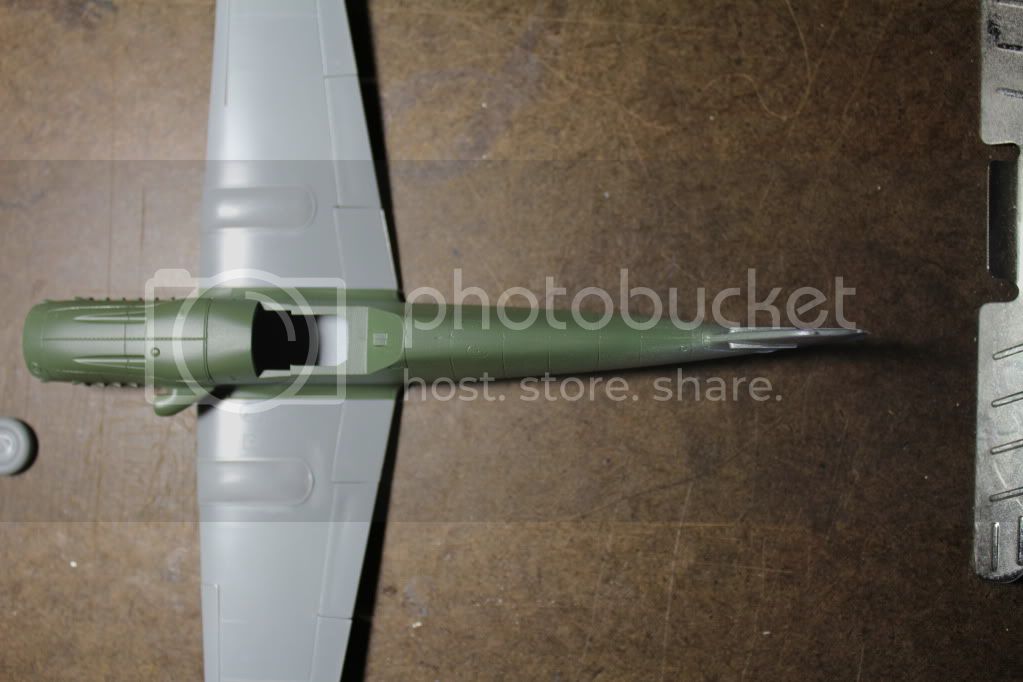
Here you can see where I screwed up with my sanding and pretty much flattened the entire upper surface of the rear fuselage.
Dymo Tape and scriber...
rescribed and sprayed with a base coat of RLM 76 Model Master Acryl
Wisconsin, United States
Joined: September 11, 2009
KitMaker: 1,917 posts
AeroScale: 563 posts
Posted: Wednesday, June 22, 2011 - 11:50 PM UTC
SellSword- your progress is looking good.
others- I never got around to sending PM's to those enlisted with no posts. We're doing fine here anyway.
Here's a quick update on my progress (juggling two builds simultaneously, using my short attention span to its fullest!)...
Wheels attached, so it's starting to look like it should. Some paint touchup is needed, but I rushed and put on a coat of Future anyway, anticipating decaling next.
thanks!
-Sean.
Current: model railroad layout
Stalled a while ago:
. 1950's Chrome, WW II Twins
Last completed: Police Car
Bayern, Germany
Joined: January 02, 2011
KitMaker: 279 posts
AeroScale: 239 posts
Posted: Monday, July 04, 2011 - 06:35 AM UTC
Hi!
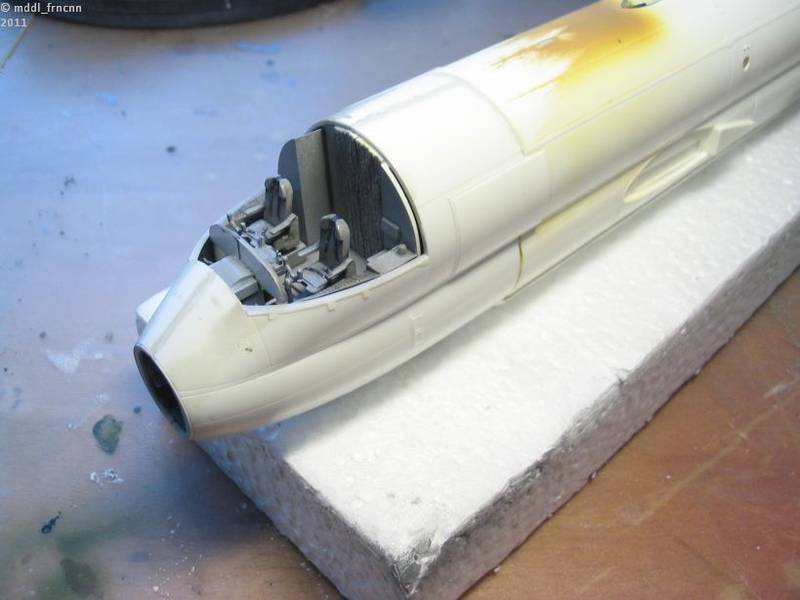
Some minor update: I closed the cockpit with the 2 transparent parts. The gap was sealed with stretched sprue and carefully applied Squadron putty, thinned with liquid cement.
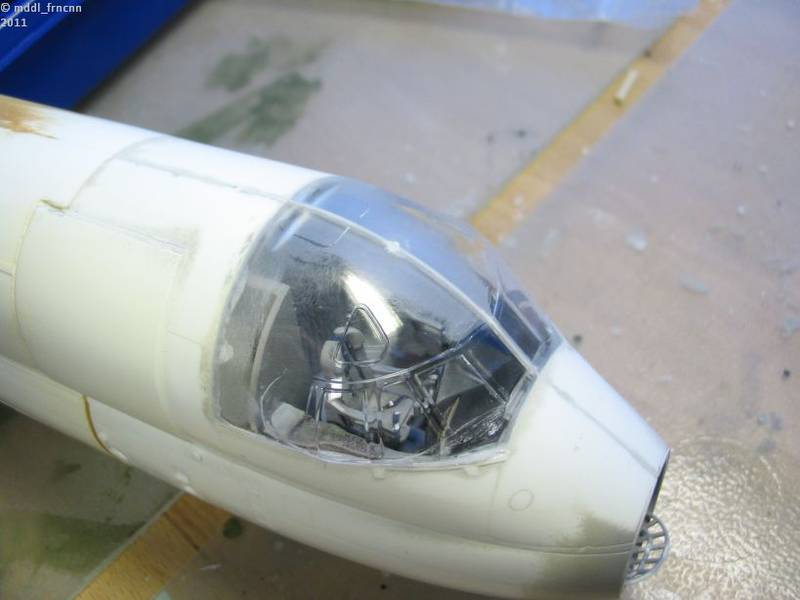
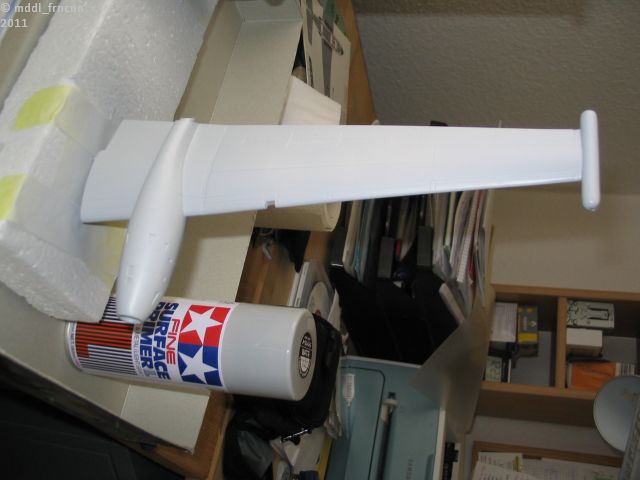
In the meantime I sprayed both wings with Tamiya grey primer from the ratlle can. So I can see any imperfections. There is still a plenty to do...
This primer smells like hell and is comparatively expensive (10 /15 $) per can) but it is worth every cent. It dries very fast, has good filling properties and the painted surface is very smooth. My modelling buddy Rebilda recommended this stuff to me and I really really appreciate this. Thanks!
@ Michael: Nice Mustang! Greetings to Poland!
@ Ray: Go ahead with your Messerschmitt! I am glad to see an Augsburg Eagle in this campaign.
@ Sean: this is a very cool looking (and rarely kitted) helicopter. Very attractive!
Servus,
Sebastian
LtCol Henry Blake: "Radar, whatever it is: sign it, cancel it or order five more!"
Wisconsin, United States
Joined: September 11, 2009
KitMaker: 1,917 posts
AeroScale: 563 posts
Posted: Tuesday, July 05, 2011 - 01:38 AM UTC
Sebastian, thanks for the tip on Tamiya primer. I'll try that sometime!
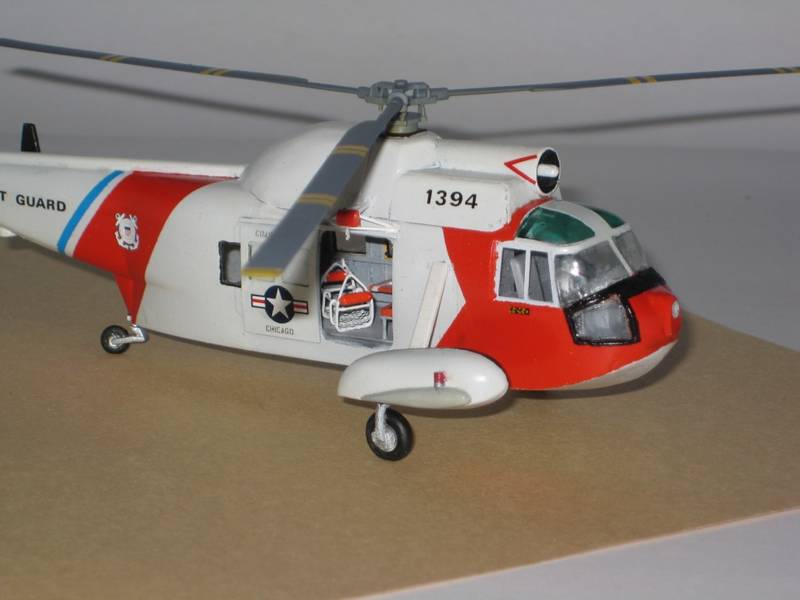
For mine, I've started to scratchbuild a 3-rotor head, using 3 of the kit's 5 blades. It WON'T be a good replica of the real thing, but it will hold.
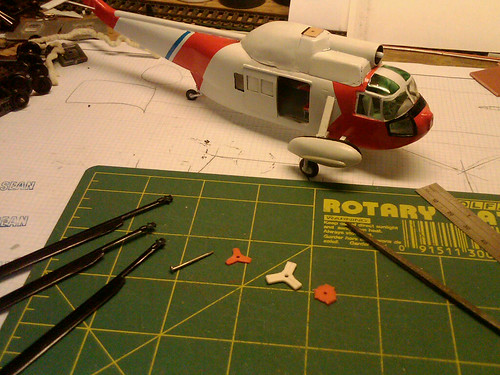
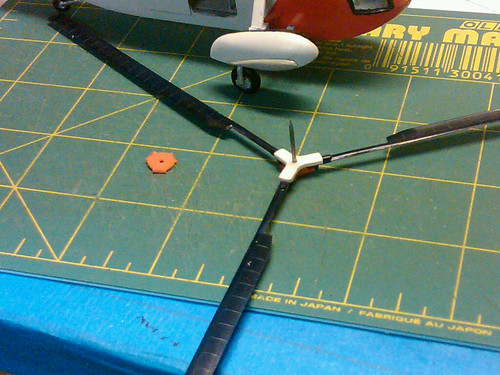
Then, my favorite part-- Decal Time!

Also barely visible is a scratchbuilt tail rotor.
(Sorry about the fingerprints on the lens there. I keep blinking my eyes when I look at that last photo. That's just my cellphone camera, so it gets handled a lot, with no cover.)
Thanks,
Sean.
Current: model railroad layout
Stalled a while ago:
. 1950's Chrome, WW II Twins
Last completed: Police Car
#041
Kobenhavn, Denmark
Joined: July 20, 2006
KitMaker: 10,069 posts
AeroScale: 3,788 posts
Posted: Tuesday, July 05, 2011 - 02:57 AM UTC
Nice progress, Sebastian. Thanks for the tip on the surface primer. I had some bad experiences recently with basecoats leaving an uneven surface and grainy in some places and smooth in others. Maybe the Tamiya base coat is the answer.
A colourful build, Sean. Looking forward to see that finished rotor.
Campaign'oholic - 252+ campaigns completed
#057
Bayern, Germany
Joined: May 11, 2010
KitMaker: 248 posts
AeroScale: 123 posts
Posted: Tuesday, July 05, 2011 - 04:18 AM UTC
M-Frank my man!!!!!!!!!!!! You ever thought that would happen the tranparencies on your Atlantique?!
There were times when we were joking about that happening soon....
Looks great, man. I see you managed to not marr the windows while sanding. Something I rarely am able to...
Concerning Tamiya primer: no substitute, the best there is, ready to build a long and wonderful relationship on. Belive you me, guys, I really always have a few cans on stock.
Trick is: short blasts at a really short distance. The surface will look soaked for a few seconds then dries up to a smooth finish and EVERY detail still as deep as it was. Maybe for some really old Hasegawa kits you'll need to deepen the panellines before but everytthing else:
Try it and you're sold.!
If thou art pained by any external thing, it is not this that disturbs thee, but thy own judgment about it.
Marcus Aurelius
England - East Midlands, United Kingdom
Joined: February 07, 2004
KitMaker: 911 posts
AeroScale: 415 posts
Posted: Wednesday, July 06, 2011 - 05:55 AM UTC
Well, since I'm committing myself to finishing some of my many half-finished builds I figured I'd better enlist in this one!
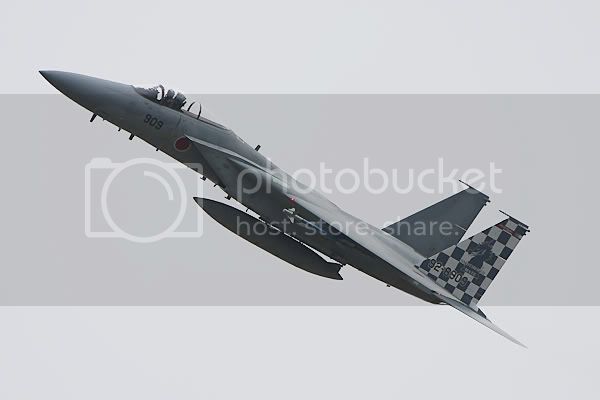
My model is a Hasegawa 1/72 F-15J and when last seen 18 months ago, she looked like this
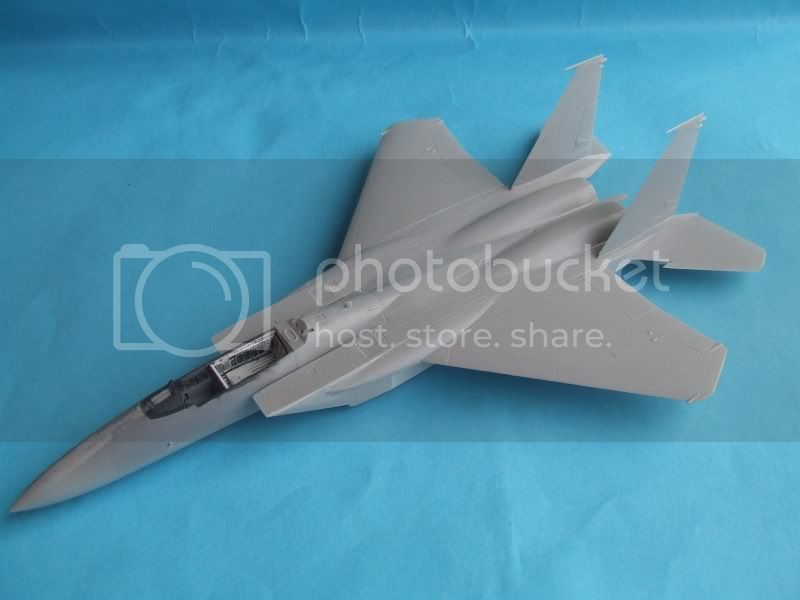
This was originally an entry in The Great Checkerboard campaign, and when finished should look something like this
"Nelson be damned.......Lets get the hell out of here!"
Indiana, United States
Joined: February 15, 2010
KitMaker: 167 posts
AeroScale: 141 posts
Posted: Wednesday, July 06, 2011 - 09:24 AM UTC
I plan to give that primer a try myself. I've attempted the Tamiya liquid surface primer from the bottle and the results have been mixed. Also, it gunks my airbrush up horribly

I've tried several solvents from mineral spirits to denatured alcohol and nothing seems to do the job well... I'm willing to pay a few extra bucks for a product that works properly!
Wisconsin, United States
Joined: September 11, 2009
KitMaker: 1,917 posts
AeroScale: 563 posts
Posted: Wednesday, July 06, 2011 - 10:01 AM UTC
RedwingNev- welcome aboard! An F15! Nice choice. I don't personally recognize the prototype aircraft-- is that JASDF? I only see the circle. That'll look nice, judging by the work so far in the cockpit and the smooth seams.
thanks for posting and for joining up!
cheers,
Sean.

Current: model railroad layout
Stalled a while ago:
. 1950's Chrome, WW II Twins
Last completed: Police Car
Wisconsin, United States
Joined: September 11, 2009
KitMaker: 1,917 posts
AeroScale: 563 posts
Posted: Friday, July 08, 2011 - 03:36 PM UTC
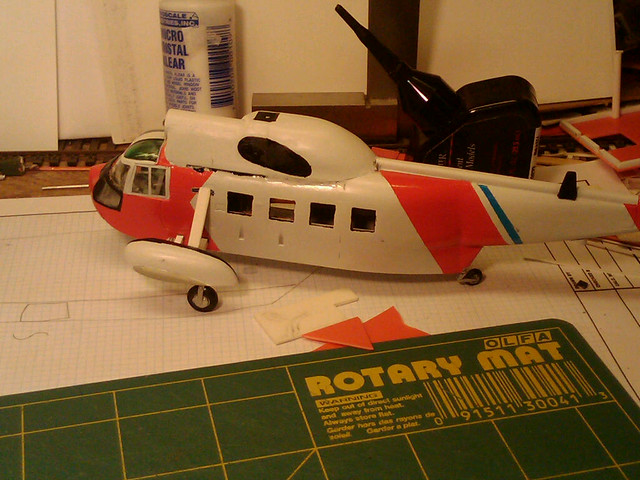
Well, I may not be leading from the front, but I painted the warning stripes on the complete rotors, and...
...FINISHED!!
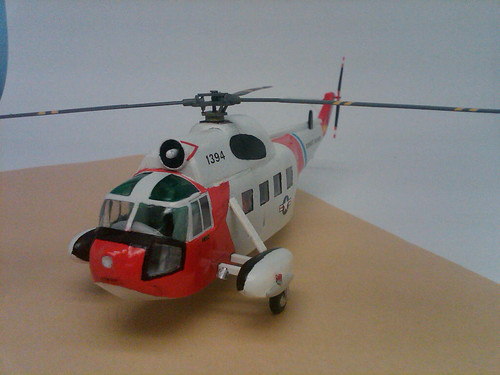

That's quite exhilarating to finish that old hangar queen. She's been around the workshop soooo many years, and it finally paid off! My dad came over tonight and I immediately gave it to him-- he's USCG Reserve Retired, and he's been picked out of Lake Michigan on this particular helicopter during training. That's a whole different treat, to be able to give something to somebody that has so much meaning to them.
Anyway, I don't have my list with me for this campaign, but let's finish out strong! 2 1/2 more months!
Thanks guys,
Sean.
Current: model railroad layout
Stalled a while ago:
. 1950's Chrome, WW II Twins
Last completed: Police Car
Bayern, Germany
Joined: January 02, 2011
KitMaker: 279 posts
AeroScale: 239 posts
Posted: Saturday, July 09, 2011 - 07:32 AM UTC
Hello everybody.
@ Sean: Great little Heli! I know how you must feel to see this model finished. I have finally found some time to read all the posts written here for this campaign. Now I know a little bit the history behind your model and about the efforts you have put in to finish.
BTW (1): I know it is a liitle bit late but regarding...
Quoted Text
Just a random thought...
I know in Britain and her former colonies a ship is a "she", and in Germany it's a "he". Does that apply to their aircraft too? Would any German hangar queens actually be hangar kings?
In German, the expression plane is neutral ("das Flugzeug"), so neither male nor female. Depends on the particular plane whether it is considered male or female.
For example we say "der Tornado" (=male), "die Ju-52" (=female), "die BAC Lightning" (=female) and finally "die Breguet Atlantic" (=female). So a s far as I am concerned, I call my Atlantic a Hangar "QUEEN"
Although she is not really a beauty queen I think...
BTW (2):
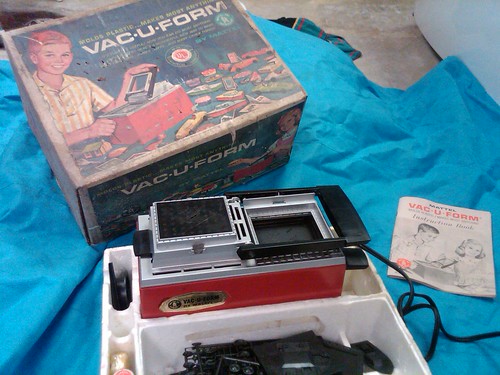
Sean, what is that Mattel vacuforming tool which you have used? Mattel is also well-known here in Germany (Barbie dolls and Hot Wheels toy cars), but vacuforming tools??
Servus,
Sebastian
LtCol Henry Blake: "Radar, whatever it is: sign it, cancel it or order five more!"
Bayern, Germany
Joined: January 02, 2011
KitMaker: 279 posts
AeroScale: 239 posts
Posted: Saturday, July 09, 2011 - 08:21 AM UTC
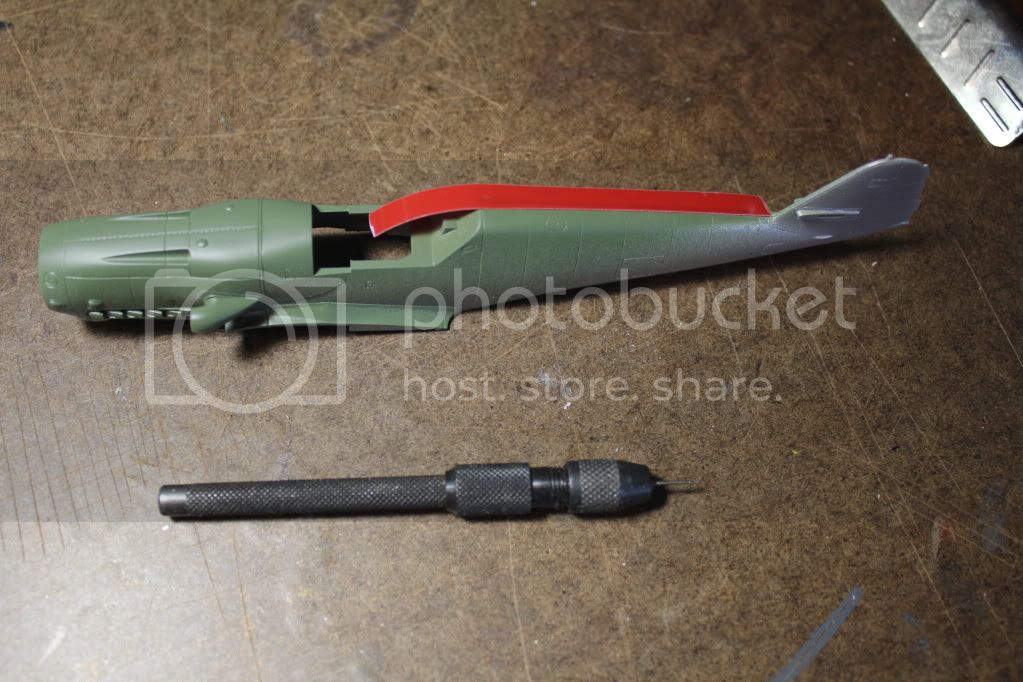
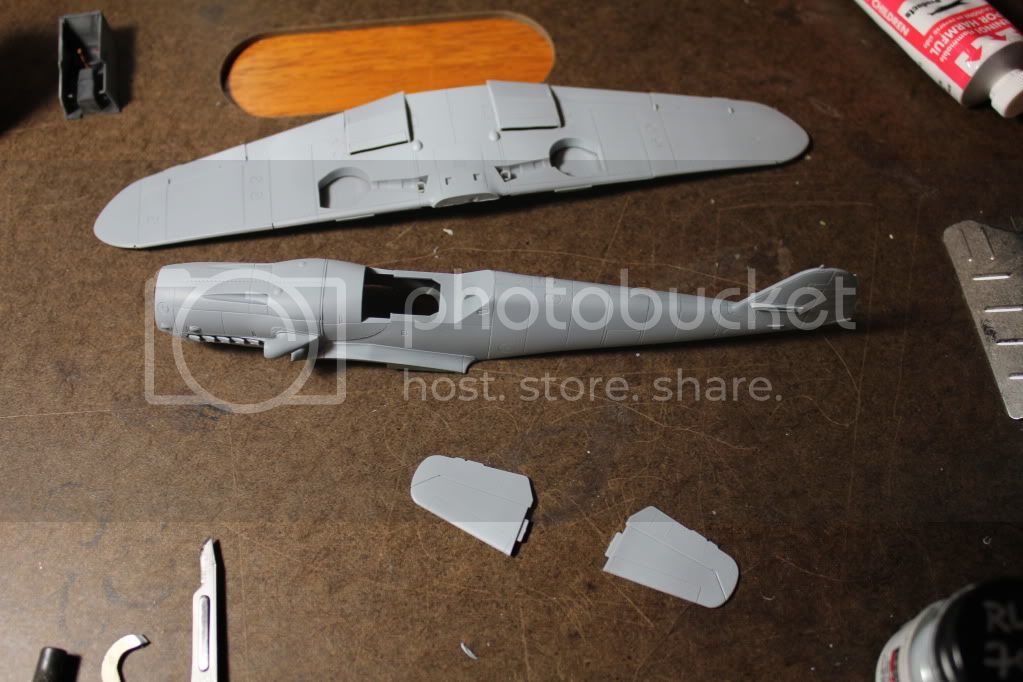
...some additional photos:
I have primed the whole fuselage with Tamiya Fine Surface Primer from the rattle can. Now I can detect any imperfections. And there are a lot...

But I have already considered that. The Atlantic is no "shake and bake" kit. And I am not a "shake and bake" modeller...
Here are the pix:
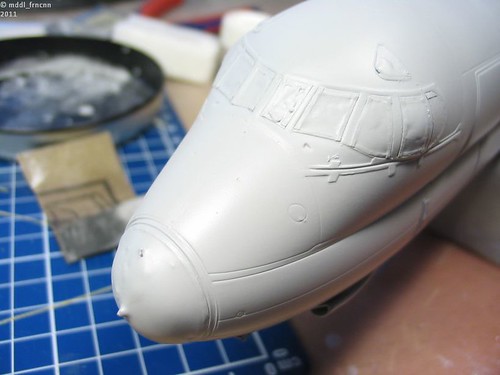
When both the fuselage and the wings are done, I am going to handle all the other parts. But before I want to sand some areas and rescribe them.
Keep the posts coming
!
Servus,
Sebastian
LtCol Henry Blake: "Radar, whatever it is: sign it, cancel it or order five more!"
#439
Washington, United States
Joined: November 05, 2005
KitMaker: 4,950 posts
AeroScale: 3,192 posts
Posted: Saturday, July 09, 2011 - 06:28 PM UTC
Sebastian, Back in the 60's Mattel made a toy called a Vac-U-Form. It came with sheets of 2x2 or 2.5 x 2.5 styrene(?) about .03 thick. You put one of the sheets in a holder and heated it up. Then you placed a form on the vacuum table. When the plastic was hot enough you flipped it over onto the vacuum stage and then pumped the air out till the part was like the form. They only built them for a few years then everyone got concerned with kids and hot plastic. They probably sold for under U$20 back in '64. Now you might find them on E bay or at model shows for well over U$50.
Hanger Queens in Waiting:
Monogram 1/72 F8F-1
Corsair the Sky Pirate - 1/72 Ace A-7D
Century Series - Airfix 1/72 F-105G
Anti Shipping - Academy 1/72 PBJ-1D
Academy 1/72 F-84E
#042
England - North East, United Kingdom
Joined: November 18, 2006
KitMaker: 2,828 posts
AeroScale: 1,720 posts
Posted: Saturday, July 09, 2011 - 11:33 PM UTC
Modellers Creed: This is my toolbox. There are many like it, but this one is mine. My toolbox is my best friend. It is my life. I must master it as I must master my life. My toolbox, without me, is useless. Without my toolbox, I am useless.
Wisconsin, United States
Joined: September 11, 2009
KitMaker: 1,917 posts
AeroScale: 563 posts
Posted: Sunday, July 10, 2011 - 02:52 AM UTC
I know we're getting off-topic, but it took me a while to get to a computer this weekend. Here's mine...
and what's left of the box cover art...
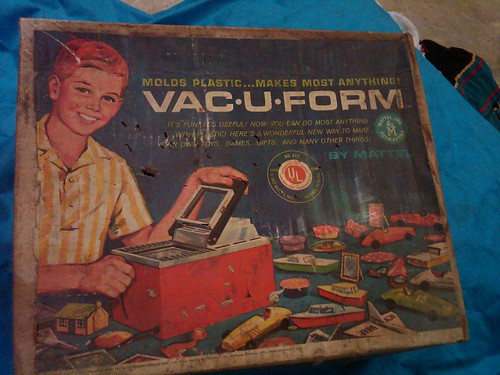
See? What could be more wholesome fun for that well-groomed child than molten plastic?
Anyway, back on topic-- we've got 7 complete builds by 6 members in the
gallery . Looking forward to more. Awesome work, everybody.
Thanks!
-Sean.

Current: model railroad layout
Stalled a while ago:
. 1950's Chrome, WW II Twins
Last completed: Police Car
Indiana, United States
Joined: February 15, 2010
KitMaker: 167 posts
AeroScale: 141 posts
Posted: Sunday, July 10, 2011 - 02:29 PM UTC
Hey Sean, that helo looks amazing! I especially dig the rescue basket, and I agree that giving models as gifts to those who have a history with the real deals is a great feeling! I built a 1950 chevy truck for my father-in-law for Christmas last year and he thought it was the coolest thing ever how I made it look just like his real one.
Sebastian, das Ding ist richtig schoen! I'm not familiar with that particular bird, but it looks like quite a challenge! Ich kann kaum abwarten bis es fertig ist!
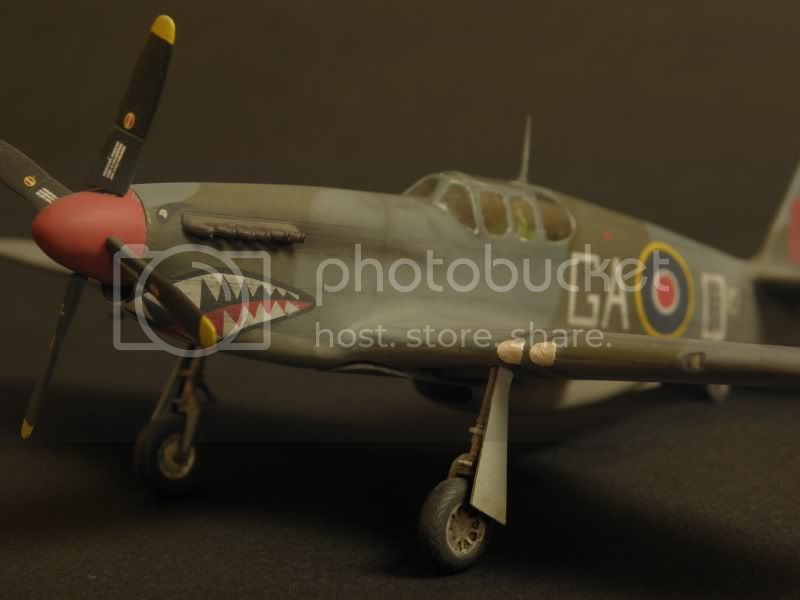
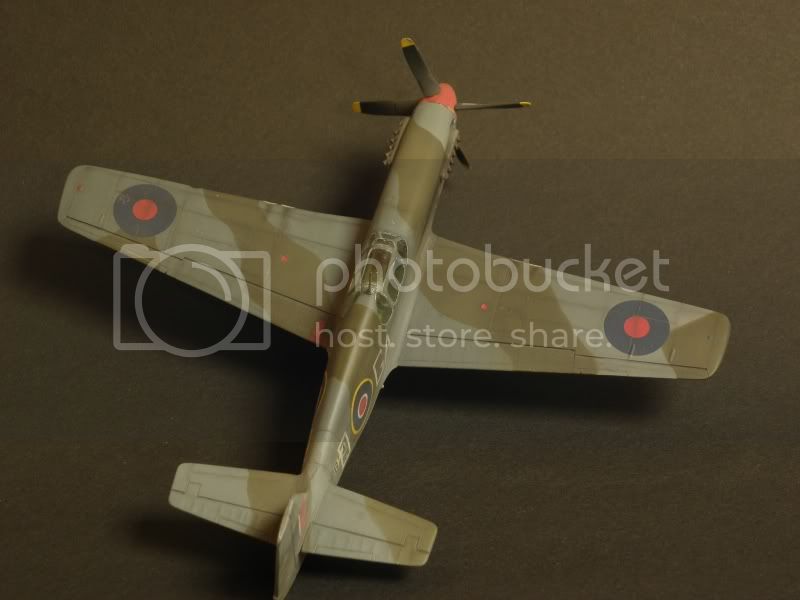
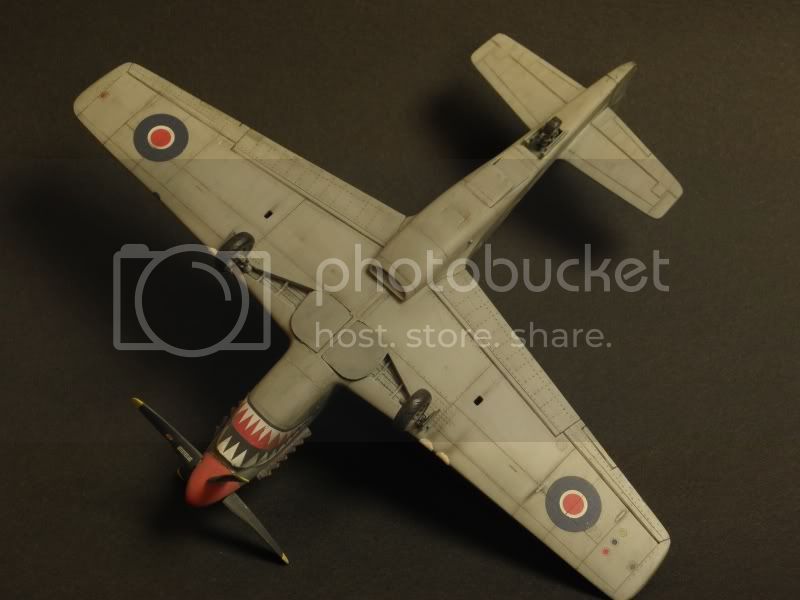
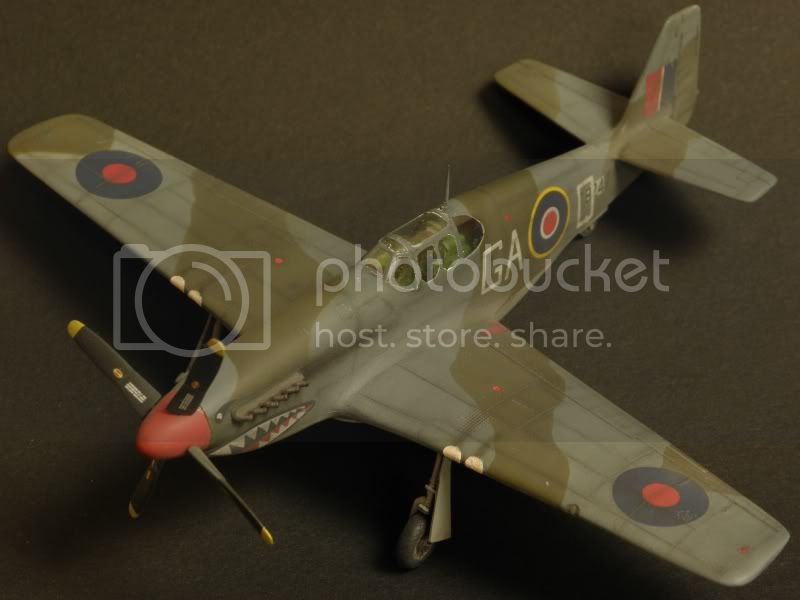
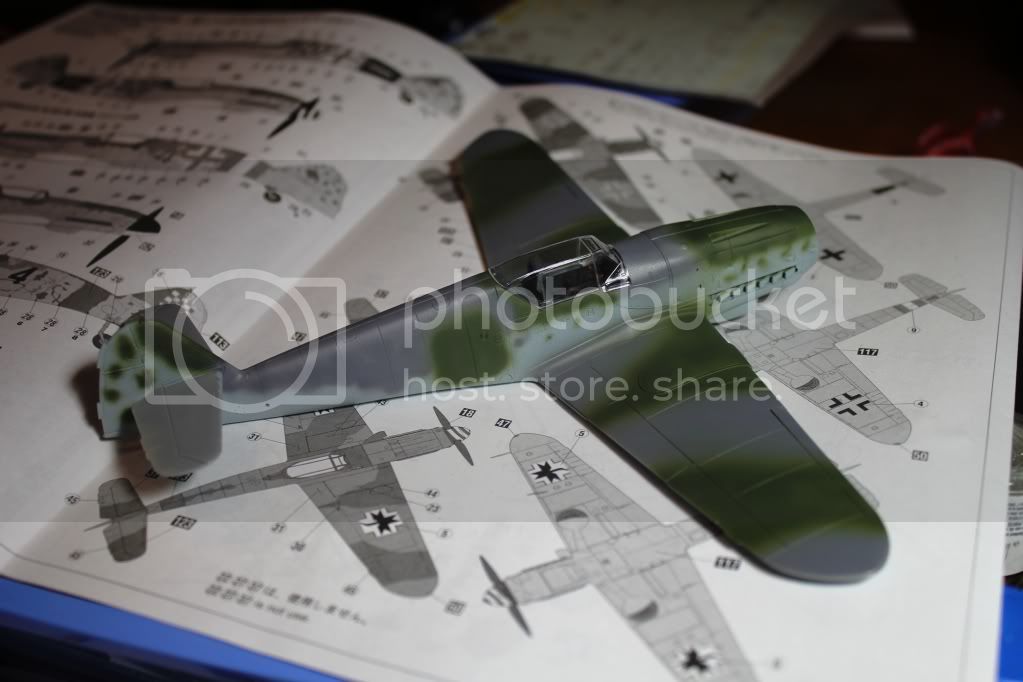
Here's my latest progress, once again working outside my comfort zone, completely freehand airbrushed the camo!
Texas, United States
Joined: February 22, 2008
KitMaker: 5,026 posts
AeroScale: 2,811 posts
Posted: Sunday, July 10, 2011 - 02:45 PM UTC
@ Sean: I remember when the Vacuform came out, it was out of my parents reach so none for me until the late 1960s' when it was the thing to have to make your own canopies.
@ Ray: the 109 is looking good, your colors are crisp.
Bob
If it aint broke dont fix it.