Early Aviation
Discuss World War I and the early years of aviation thru 1934.
REVIEW 1:32 AEG G.IV
Holdfast
Staff MemberPresident
IPMS-UK KITMAKER BRANCH
#056
_VISITCOMMUNITY
England - South West, United Kingdom
Joined: September 30, 2002
KitMaker: 8,581 posts
AeroScale: 4,913 posts
Posted: Saturday, April 18, 2015 - 10:57 AM UTC

Quoted Text

@ Mal - I'll try to do the lozenges for you at some point. Do remember, though, they are totally different for the late-model kit. These are the large, painted (not printed) type.


Don't sweat over them, only do them if you really do find the time. Even better if these are painted on
Merlin
Staff MemberSenior Editor
AEROSCALE
#017
_VISITCOMMUNITY
United Kingdom
Joined: June 11, 2003
KitMaker: 17,582 posts
AeroScale: 12,795 posts
Posted: Tuesday, April 21, 2015 - 11:44 PM UTC
Hi Mal

I'll try to remember. I'll be using some of the kit decals as tests for the review build, even though I'm tackling the early version that won't need them.

Heaven! It's looking like I'll get a day away from work tomorrow, so I intend to treat myself to some quality time at the workbench.

All the best

Rowan
Merlin
Staff MemberSenior Editor
AEROSCALE
#017
_VISITCOMMUNITY
United Kingdom
Joined: June 11, 2003
KitMaker: 17,582 posts
AeroScale: 12,795 posts
Posted: Wednesday, April 22, 2015 - 10:19 PM UTC
Hi again

I managed to spend a couple of hours starting the detail painting. Nothing to show for it yet, but it was a treat to get some modelling done.

All the best

Rowan
JackFlash
_VISITCOMMUNITY
Colorado, United States
Joined: January 25, 2004
KitMaker: 11,669 posts
AeroScale: 11,011 posts
Posted: Thursday, April 23, 2015 - 04:28 AM UTC

Quoted Text

Cheers everyone for looking in.

@ Stephen - Be careful what you hint at - you'll have a queue a mile long at your door if people think you're giving away the Wingnut Wings samples you received!. . .


Wow, did you take that out of context!
Merlin
Staff MemberSenior Editor
AEROSCALE
#017
_VISITCOMMUNITY
United Kingdom
Joined: June 11, 2003
KitMaker: 17,582 posts
AeroScale: 12,795 posts
Posted: Thursday, April 23, 2015 - 11:50 PM UTC

Quoted Text


Quoted Text

Cheers everyone for looking in.

@ Stephen - Be careful what you hint at - you'll have a queue a mile long at your door if people think you're giving away the Wingnut Wings samples you received!. . .


Wow, did you take that out of context!


Hi Stephen

Don't worry, I haven't booked a ticket to the States to join the queue - it did seem too generous to possibly be true.

Back to the build - it was a double-shift at work today, so no extra progress, but I hope to put in an hour or so tomorrow morning before getting back to the grindstone.

All the best

Rowan
Merlin
Staff MemberSenior Editor
AEROSCALE
#017
_VISITCOMMUNITY
United Kingdom
Joined: June 11, 2003
KitMaker: 17,582 posts
AeroScale: 12,795 posts
Posted: Saturday, April 25, 2015 - 12:00 AM UTC
Hi again

I got off to a shaky start first thing this morning when I managed to mix a tube of water colour paint in with the oils! Definitely a point at which to go for another cup of coffee.

After that, things picked up and I started to get reasonable results. Still a long way to go but, all being well, I'll get another session in after work on Sunday, so I'll aim to take a couple of pics for an update.

All the best

Rowan
Merlin
Staff MemberSenior Editor
AEROSCALE
#017
_VISITCOMMUNITY
United Kingdom
Joined: June 11, 2003
KitMaker: 17,582 posts
AeroScale: 12,795 posts
Posted: Sunday, April 26, 2015 - 02:45 PM UTC
Hi again

A quick update just to reassure you all that the build hasn't stalled. Having recovered from my oil/watercolour mix-up, I dived into the scary bit:


Then it was a question of progressively removing the excess paint to create a shaded effect:


I may knock it back a bit more in places - there's still highlighting and pastels to play with. Anyone who builds clean will probably find it all a bit too much for their taste, but I can't resist going for a grimy, well "lived in" look on a subject like this.

All the best

Rowan
Merlin
Staff MemberSenior Editor
AEROSCALE
#017
_VISITCOMMUNITY
United Kingdom
Joined: June 11, 2003
KitMaker: 17,582 posts
AeroScale: 12,795 posts
Posted: Sunday, April 26, 2015 - 11:31 PM UTC
Hi again

I did intend to devote my one day off to a full-on day of modelling... but, instead, I took the opportunity to chill out, cook a nice vegetable curry and blitz the conservatory ready to plant this year's tomato victims - ably assisted by Athene, Castle Aeroscale's resident mouser.


Hmmm - the weathering on that old board in the background could serve as inspiration for my oil paints technique! And the chipping on the floor...

All the best

Rowan
Merlin
Staff MemberSenior Editor
AEROSCALE
#017
_VISITCOMMUNITY
United Kingdom
Joined: June 11, 2003
KitMaker: 17,582 posts
AeroScale: 12,795 posts
Posted: Tuesday, April 28, 2015 - 01:44 AM UTC
Hi again

"Events dear boy..."

Whether or not Macmillan ever said it, now's the time to quote it! The unfolding tragedy in Nepal has obviously sidelined everything through my work for Oxfam.

If you want to help, please click HERE

There will also be other charities tying into the global response - please do help however you can.

All the best

Rowan
Merlin
Staff MemberSenior Editor
AEROSCALE
#017
_VISITCOMMUNITY
United Kingdom
Joined: June 11, 2003
KitMaker: 17,582 posts
AeroScale: 12,795 posts
Posted: Wednesday, April 29, 2015 - 12:54 AM UTC
Hi again

All being well, I'll get a good few hours in on the kit tomorrow to make up for some double-shifts I've done. I want to really begin pulling the cockpit together and make a proper start on the engines.

All the best

Rowan
OEFFAG_153
_VISITCOMMUNITY
Västra Götaland, Sweden
Joined: February 19, 2010
KitMaker: 1,473 posts
AeroScale: 1,450 posts
Posted: Wednesday, April 29, 2015 - 06:43 PM UTC
Briliant progress on the cockpit Rowan. I do like mine well weathered, just like you!

/Mikael
Merlin
Staff MemberSenior Editor
AEROSCALE
#017
_VISITCOMMUNITY
United Kingdom
Joined: June 11, 2003
KitMaker: 17,582 posts
AeroScale: 12,795 posts
Posted: Thursday, April 30, 2015 - 11:13 AM UTC
Many thanks Mikael

If I manage to produce results anything like as good as your superb builds I'll be mighty, mighty pleased!

I made a bit of progress yesterday (not as much as I'd hoped, of course), and decaled the instruments and worked on details like the bombs. I ended up wasting a lot of time looking for items that were right under my nose, and I'm feeling pretty lousy this morning, so maybe it was the start of a cold throwing me off. Anyway, at least I managed to find a little momentum for the build again.

No fresh pics yet, but I hope to have something to show over the weekend. Sadly, I have to work both days; and on Bank Holiday Monday, so I'll lose that as an opportunity to crack on.

All the best

Rowan
Holdfast
Staff MemberPresident
IPMS-UK KITMAKER BRANCH
#056
_VISITCOMMUNITY
England - South West, United Kingdom
Joined: September 30, 2002
KitMaker: 8,581 posts
AeroScale: 4,913 posts
Posted: Thursday, April 30, 2015 - 12:36 PM UTC
Looking good Rowan I too prefer the weathered look Nice looking tomato plants too, I think
Merlin
Staff MemberSenior Editor
AEROSCALE
#017
_VISITCOMMUNITY
United Kingdom
Joined: June 11, 2003
KitMaker: 17,582 posts
AeroScale: 12,795 posts
Posted: Friday, May 01, 2015 - 12:41 AM UTC
Cheers Mal

Yep - six different varieties of tomatoes that I hope I don't manage to torture too much this summer!

Back to the build, I managed a little bit more this morning before work, so steady (snail-speed) progress. The Bank Holiday weekend will be a bit of a mess, but I hope to get some snap-shots taken.

All the best

Rowan
CaptnTommy
_VISITCOMMUNITY
Connecticut, United States
Joined: October 26, 2009
KitMaker: 424 posts
AeroScale: 389 posts
Posted: Sunday, May 03, 2015 - 09:01 PM UTC
You are going to put scuff marks on those lovely floors I hope.

If you have a piece of plywood and some light gray paint (actually any will do): 1) paint the surface 2) get on your work/gardening shoes/footwear 3) go out in the garden or the street 4)move around or scrape you feet on the ply as you would a doormat. After a few days you will get a 1/1 representation of the AEG rear cockpit floor.

I happen to have some thirty year old cellar stairs that give me the a good impression.

the wear area on a plywood floor gets pretty messed and bare wood shows through, pretty fast. And is the least of a maintainer's worries.

Nice job Merlin!!

Captn Tommy
CaptnTommy
_VISITCOMMUNITY
Connecticut, United States
Joined: October 26, 2009
KitMaker: 424 posts
AeroScale: 389 posts
Posted: Sunday, May 03, 2015 - 09:05 PM UTC
Looking at your Tomato picture that painted cement floor looks just about right for a multi mission cockpit! It's about the same area too

Enjoy

Captn Tommy
Merlin
Staff MemberSenior Editor
AEROSCALE
#017
_VISITCOMMUNITY
United Kingdom
Joined: June 11, 2003
KitMaker: 17,582 posts
AeroScale: 12,795 posts
Posted: Monday, May 04, 2015 - 12:17 AM UTC
Hi Tom

Many thanks for looking in - your kind words are much appreciated.

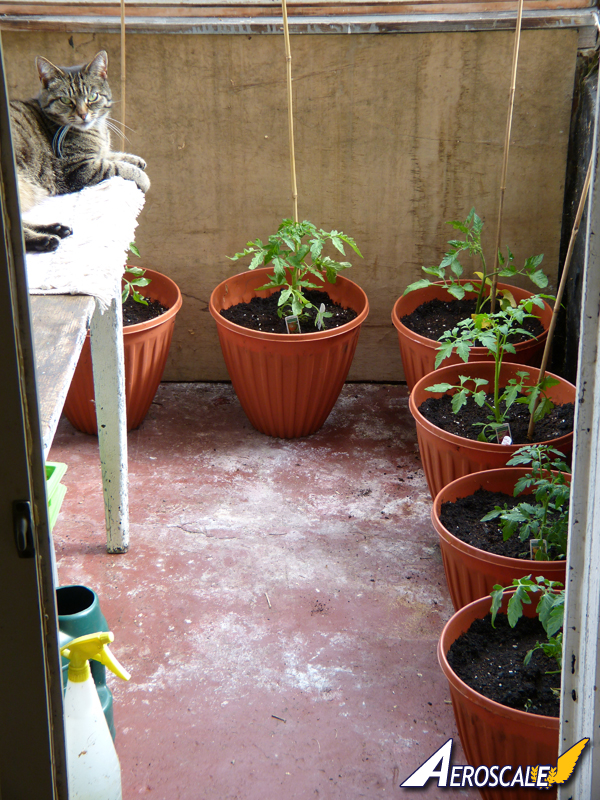
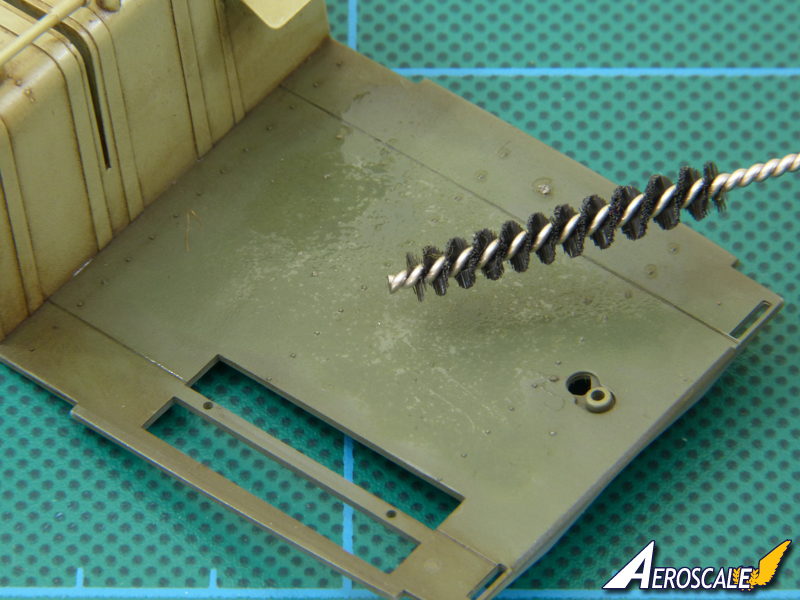
As you no doubt spotted, I'm also looking at that greenhouse floor, thinking... hmmmm. 
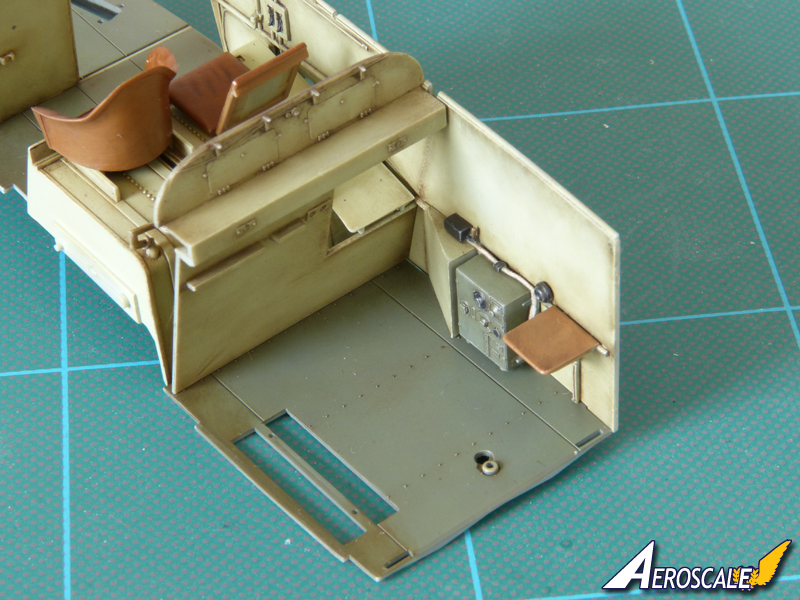
Fear not, I fully intend to scuff the kit floor a bit. I'll put the bulkheads in place to get an idea just where the crew would have stood - and I'm presuming they'd have worn hob-nailed boots? (Stephen, that'd a great chance for you to delve into your references for us all) - so, yeah, a bit of weathering is in the forecast.

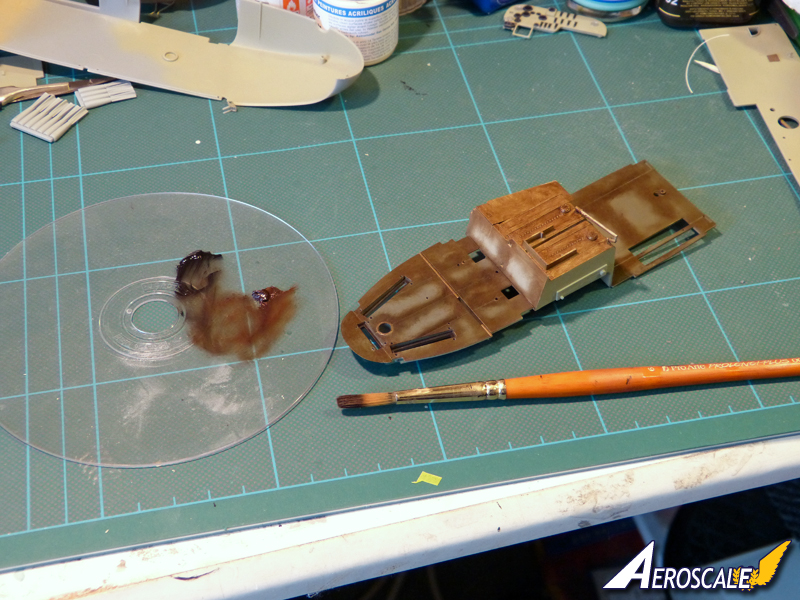
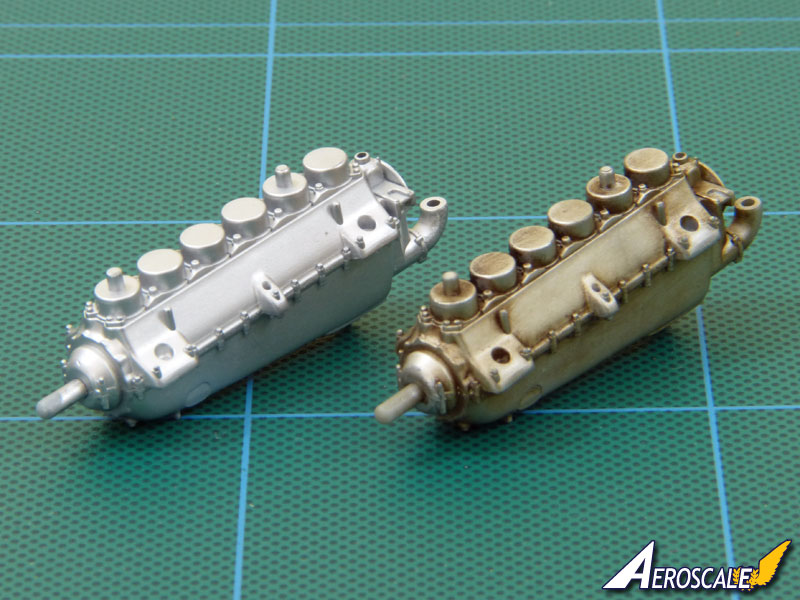
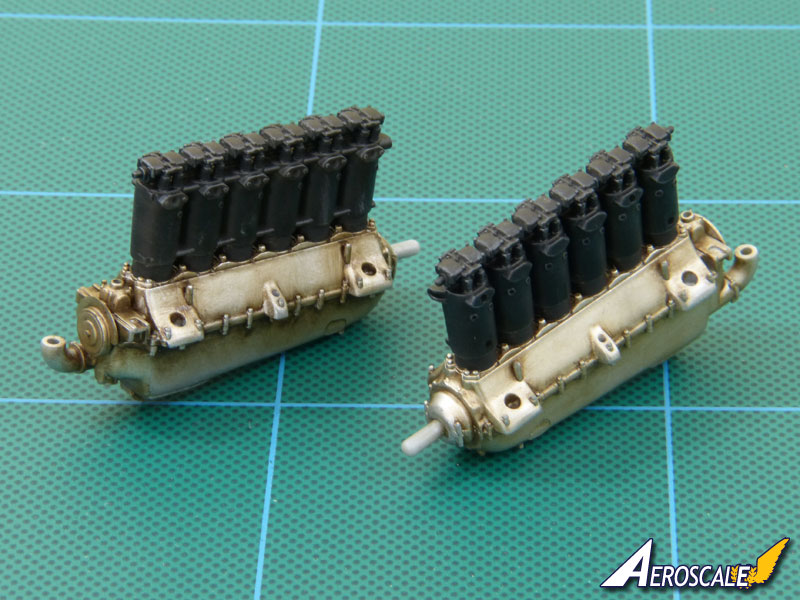
Likewise with the engines:


Sorry, I should have warned you to wear shades! But don't worry - they won't look like this for long! I managed to spray base-coats of Gunze-Sangyo Aluminium and Humbrol Satin Black before heading off to work this morning. I'll get a good coat of Kleer/Future on (hopefully tomorrow, work permitting) before going to town with oils.

I didn't get as much done as I'd hoped this weekend, but working for Oxfam I know the time has been better spent helping those in need.

All the best

Rowan
Merlin
Staff MemberSenior Editor
AEROSCALE
#017
_VISITCOMMUNITY
United Kingdom
Joined: June 11, 2003
KitMaker: 17,582 posts
AeroScale: 12,795 posts
Posted: Monday, May 04, 2015 - 11:02 PM UTC
Hi again

A quick update to show work in progress on the engines as the oils begin to dirty things up:


All the best

Rowan
Merlin
Staff MemberSenior Editor
AEROSCALE
#017
_VISITCOMMUNITY
United Kingdom
Joined: June 11, 2003
KitMaker: 17,582 posts
AeroScale: 12,795 posts
Posted: Tuesday, May 05, 2015 - 01:53 PM UTC
Hi again

Obviously, a lot still to do, but here's an idea of how the engines are beginning to look:


If I'd stopped to think, I'd have applied the maker's data-plate decals first, but it hopefully won't be a problem to add them later.

All the best

Rowan
Merlin
Staff MemberSenior Editor
AEROSCALE
#017
_VISITCOMMUNITY
United Kingdom
Joined: June 11, 2003
KitMaker: 17,582 posts
AeroScale: 12,795 posts
Posted: Wednesday, May 06, 2015 - 12:54 AM UTC
Hi again

Nothing to illustrate from this evening's efforts - just small stuff towards tying the interior together.

I'm psyching myself up for the weathered floor. Tom's right - it just does need to be done. If I'd sprayed a light tone earlier, I would have used random masking to create the scuff marks. As thing have worked out, it's reminded me (literally, as I type) of a product I've never tried before...

But I'm not going to tell you what it is yet and, with that thought, I'll leave you all on the edge of your seats until the next instalment! Actually - I'm excited to see how it works too, because it's something 've wanted to try for while.

All the best

Rowan
Merlin
Staff MemberSenior Editor
AEROSCALE
#017
_VISITCOMMUNITY
United Kingdom
Joined: June 11, 2003
KitMaker: 17,582 posts
AeroScale: 12,795 posts
Posted: Thursday, May 07, 2015 - 12:40 AM UTC
Hi again

Nothing to show yet, but I plucked up the courage to tackle the floor and sprayed some neat RLM 02 over the areas where I think there might have been some wear and tear. Hopefully, this will end up looking like some sort of primer showing through in places. If not, there'll be some repainting to do.

It should be dry enough by morning to move on to the next stage, so I'll take some photos then and keep my fingers crossed it's not a disaster. I've not done any tests - there's nothing like diving in at the deep end and trying a technique for the first time on the most expensive kit I've ever built!

All the best

Rowan
CaptnTommy
_VISITCOMMUNITY
Connecticut, United States
Joined: October 26, 2009
KitMaker: 424 posts
AeroScale: 389 posts
Posted: Thursday, May 07, 2015 - 01:44 AM UTC
Merlin
On the scuffing front ( mice patina on the crankcases BTW) I have used an ink eraser, the white ones at the end of some cheap ball point pens or to be found in an art shop in pencil form. these are the erasers with fine grit not the newer ones that are smooth. The ones at the tip of the pens are great as you can make circular scratches like a foot turning in a small place.

Captn Tommy
Holdfast
Staff MemberPresident
IPMS-UK KITMAKER BRANCH
#056
_VISITCOMMUNITY
England - South West, United Kingdom
Joined: September 30, 2002
KitMaker: 8,581 posts
AeroScale: 4,913 posts
Posted: Thursday, May 07, 2015 - 11:37 AM UTC
Those engines are looking nice Rowan
Merlin
Staff MemberSenior Editor
AEROSCALE
#017
_VISITCOMMUNITY
United Kingdom
Joined: June 11, 2003
KitMaker: 17,582 posts
AeroScale: 12,795 posts
Posted: Thursday, May 07, 2015 - 11:45 AM UTC
Cheers Mal

There's obviously a fair way to go, but they seem to be coming to life nicely. Fingers crossed I don't mess them up.

All the best

Rowan
Merlin
Staff MemberSenior Editor
AEROSCALE
#017
_VISITCOMMUNITY
United Kingdom
Joined: June 11, 2003
KitMaker: 17,582 posts
AeroScale: 12,795 posts
Posted: Thursday, May 07, 2015 - 11:36 PM UTC
Hi again

That nice clean floor is no more. I've taken the opportunity to use AK Interactive's Heavy Chipping for the first time, and I think the result is quite encouraging:


Because I'd already painted the floor, I had to add an extra step and spray a coat of what would become the undercoat.

Once that was dry, I sprayed a good coat of Heavy Chipping. Once that in turn had dried, I sprayed a coat of (as near as I could match the mix) the original colour of the floor. The match isn't perfect at this stage, because I'd already stained the original with oils:


After letting that dry - not long, because it's all GS Mr Color acrylic - I wetted the surface with water and scrubbed it gently with a stiff brush (The Airbrush Company's Cleaning Set:


I think the result is pretty good...


I'll definitely use this product again (I imagine it's similar to the hairspray technique - something I've never tried). I can see it being really useful for simulating corrosion and heavily weathered finishes. Wing-roots on WW2 fighters are an obvious target.

All the best

Rowan