History.
Sweden wished to ensure its continued neutrality through a policy of armed strength during World War II but were effectively denied access to foreign weapons. The original design studies began in 1939, based around the use of a "buried" Bristol Taurus engine. The project remained dormant until 1941. In response to the need for air defence, and faced with the prospect of imported designs being unavailable due to the war, Sweden undertook an indigenous rearmament programme including an advanced fighter. The low-wing monoplane Saab 21 fighter was ultimately designed round a license-produced version of the Daimler Benz DB 605B engine, featured innovations such as tricycle landing gear, heavy forward-firing armament, ejector seat, and a twin-boom pusher layout that later allowed the type to be modified with a turbojet engine.
The advantages of a pusher design, are that the view forward is unobstructed and armament can be concentrated in the nose, while a major drawback is difficulty in escaping from the aircraft in an emergency, as the pilot could get drawn into the propeller blades. SAAB deliberated between systems that would eject the pilot, or jettison the propeller or the engine, (via a system of explosive bolts) and eventually installed an early non-patented ejector seat developed by Bofors for the purpose and tested in 1943.
The first of three J 21 prototypes flew on 30 July 1943 flown by SAAB test pilot Claes Smith. During the takeoff, the wrong flap setting resulted in the prototype running into a fence at the end of the runway, damaging one of the landing gears. The subsequent test flight ended with a successful landing on the undamaged undercarriage units.
A total of 54 J 21A-1 fighters constructed at the main plant in Trollhättan were delivered from December 1945, followed by 124 and 119 examples respectively of the J 21A-2 with revised armament and the J 21A-3 fighter-bomber. Utilized mainly in the bomber role, the limitation of the design led to a proposed front-engine replacement, the J 23. An evaluation of the two designs led to the decision to retain the J 21 series but to consider the modification of the airframe to accommodate a jet engine. While production line J 21A series aircraft were first selected for conversion, the initial piston-engine version continued in production in five series "batches" that were completed in 19481949. In service use, the J 21A was phased out after 1954.
Source: Wikipedia
The Kit.
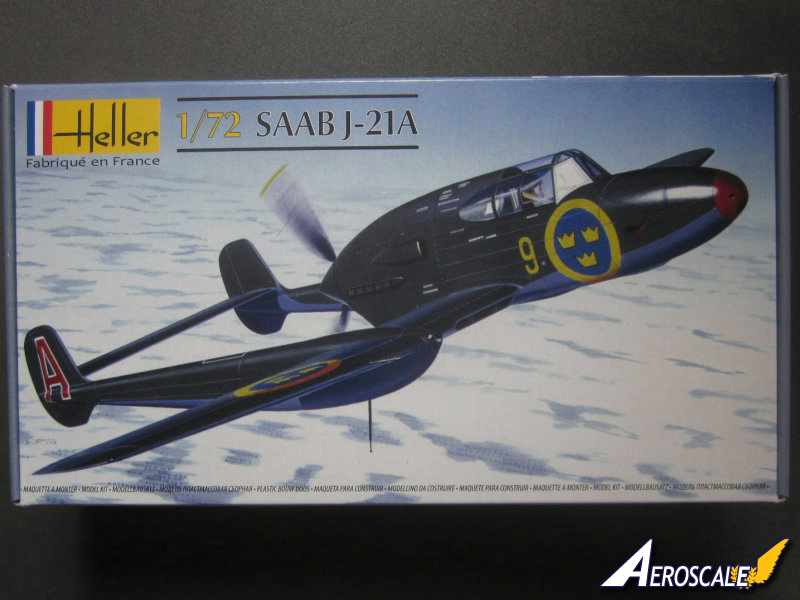
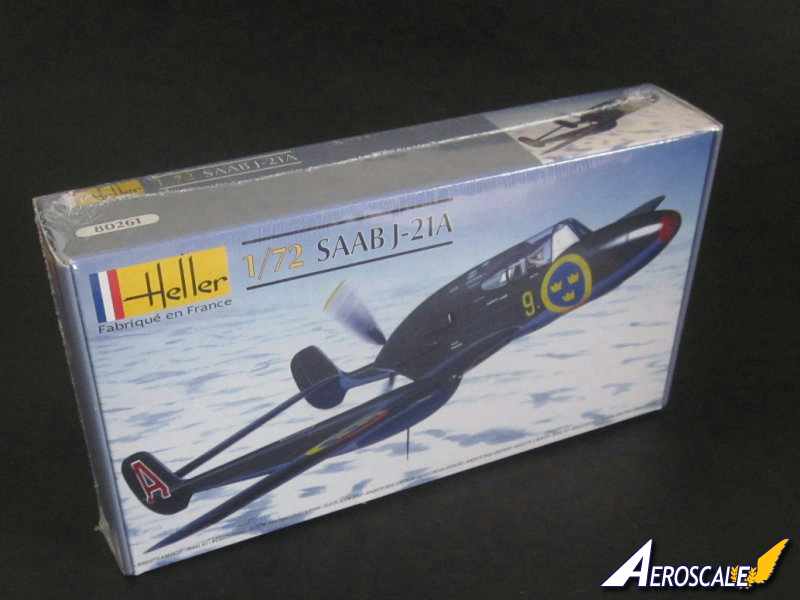
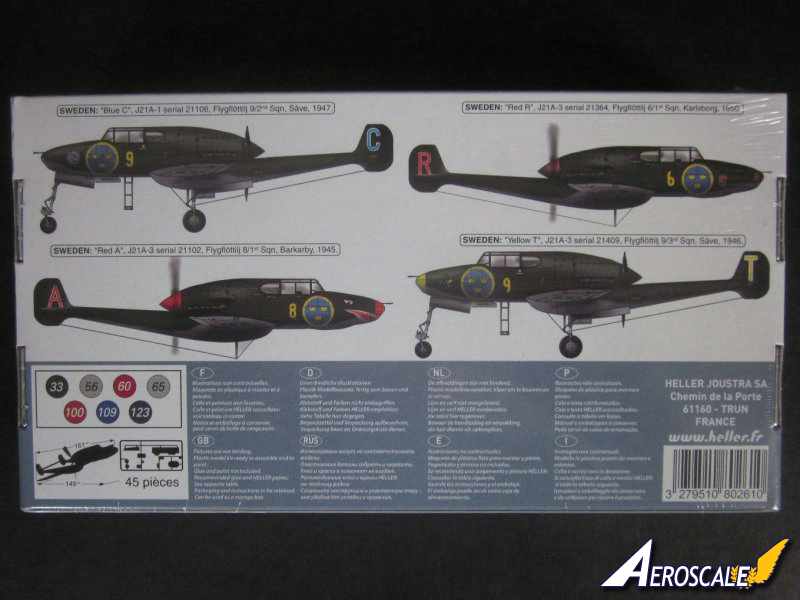
The parts are contained in a newly designed top opening hinged box that is shrink wrapped for extra security. The rear of the box is illustrated with side profiles of each of the four choices of markings with this release. The inside of the box has printed on it, illustrated and written [in eight languages] tips on building techniques.
Contents:
4 x light grey plastic sprues with 33 parts.
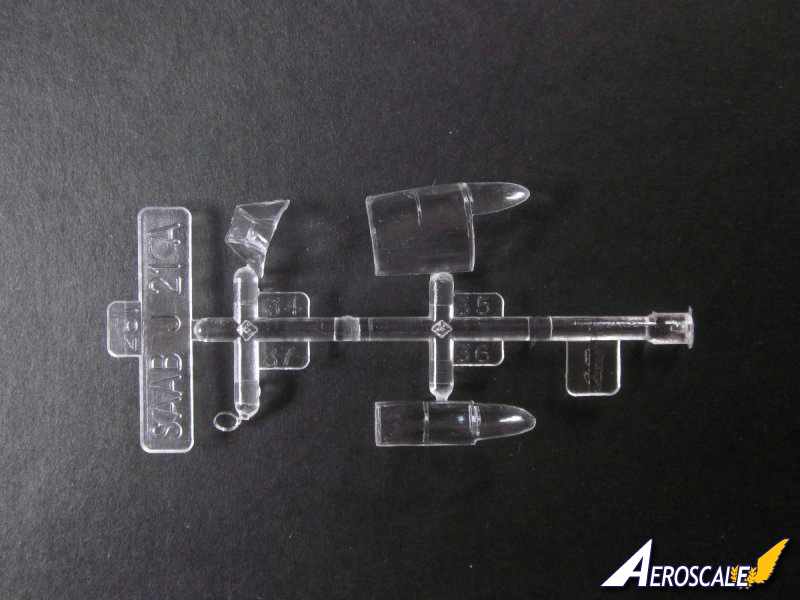
1 x clear plastic sprue with 4 parts.
1 x sheet of decals.
1 x double sided A5 sheet of instructions, painting and decal guide.
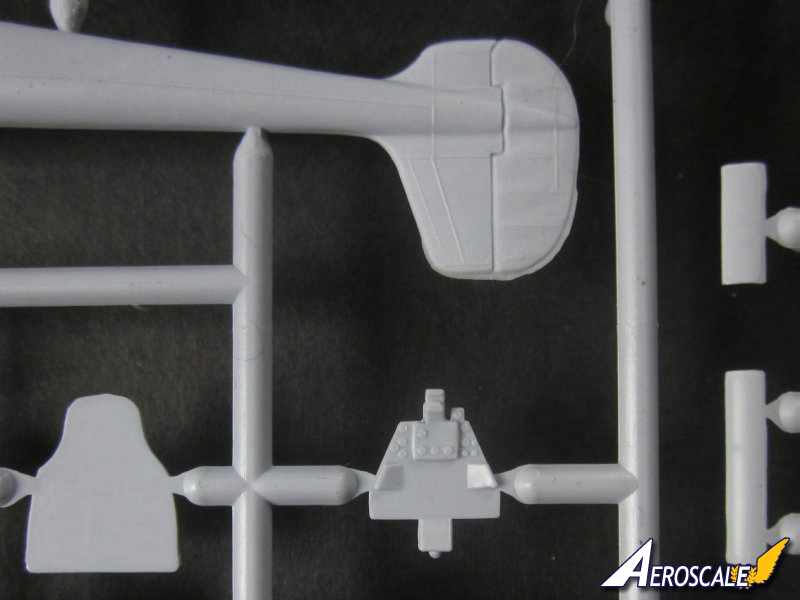
Cockpit: is made up of a cockpit floor with moulded side console and rudder pedals. There is no representation of controls or instruments on the side panels. There is a separate rear bulkhead, ejection seat, instrument panel and a rather unconvincing control stick. The instrument panel has low relief central console and dials and also a gunsight moulded on the top. There is no clear parts to represent the glass of the gunsight. The cockpit interior is mostly black in colour.
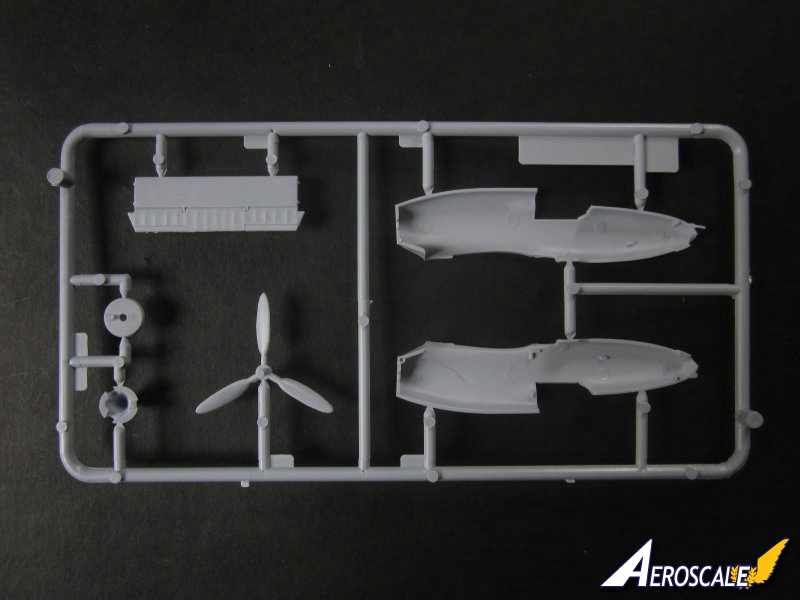
Fuselage and tail booms: The fuselage is split vertically and is very cleanly moulded with very delicate raised panel lines. A test fit of the fuselage halves results in a superb fit once the two tiny locating pins are lined up with their respective locating holes. A word of caution in that the plastic will only need liquid glue to join them. The exhausts are moulded to the rear of the fuselage, you may want to drill out the exhaust ends. Also moulded onto the fuselage is the upper cannon in the nose. There is a small transparent part that represents the landing light that is attached into a recess in the nose. There is a separate air intake for the supercharger to add to the starboard side of the fuselage just above the exhaust pipes. The intake will benefit from a little drilling out to give the intake some depth. There is no detail inside the front undercarriage bay, the forward part of the cockpit floor acts as the roof of the bay.
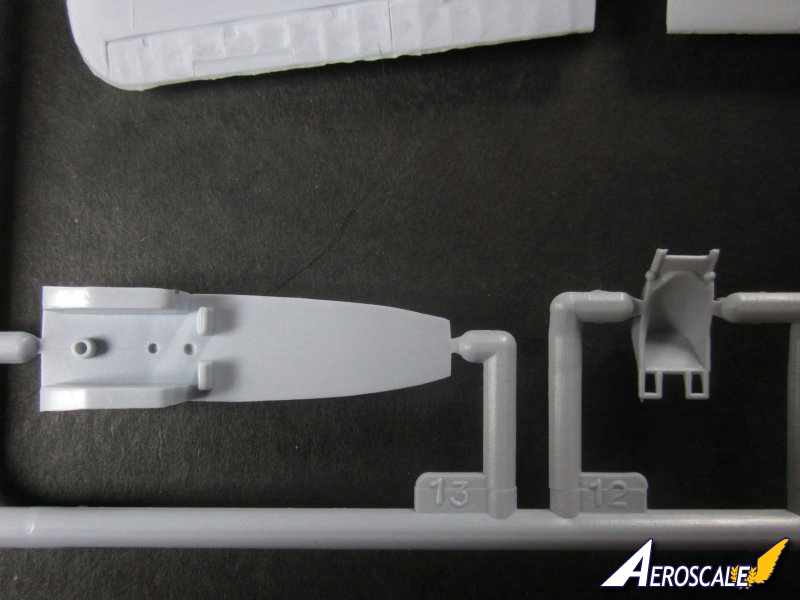
The three propeller blades are moulded in one piece. The spinner is attached to a backplate.
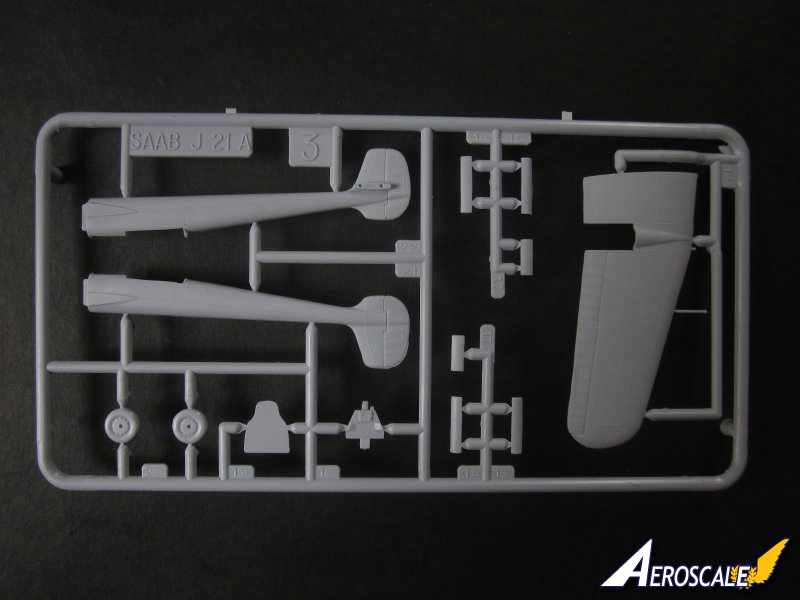
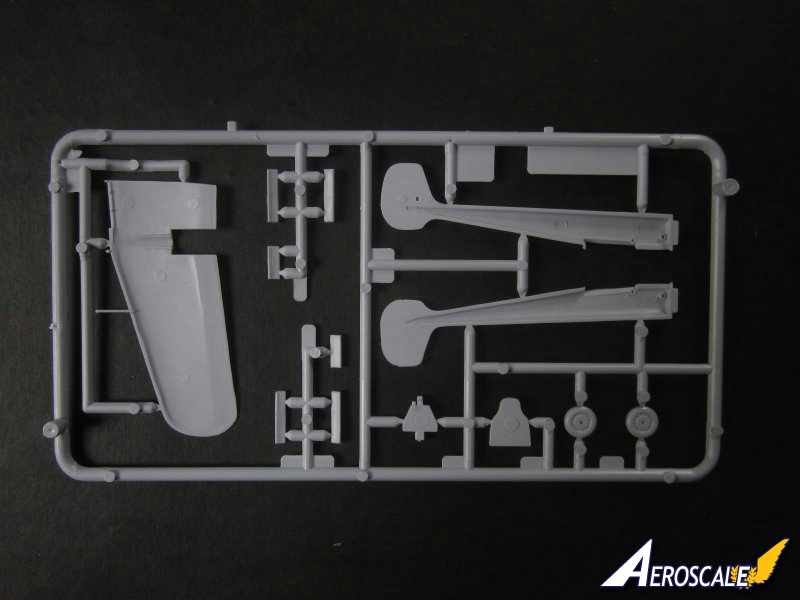
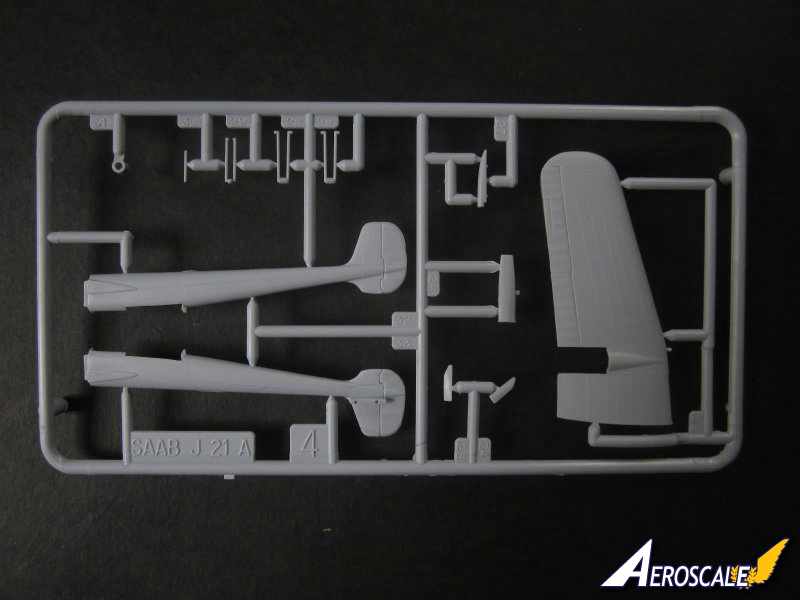
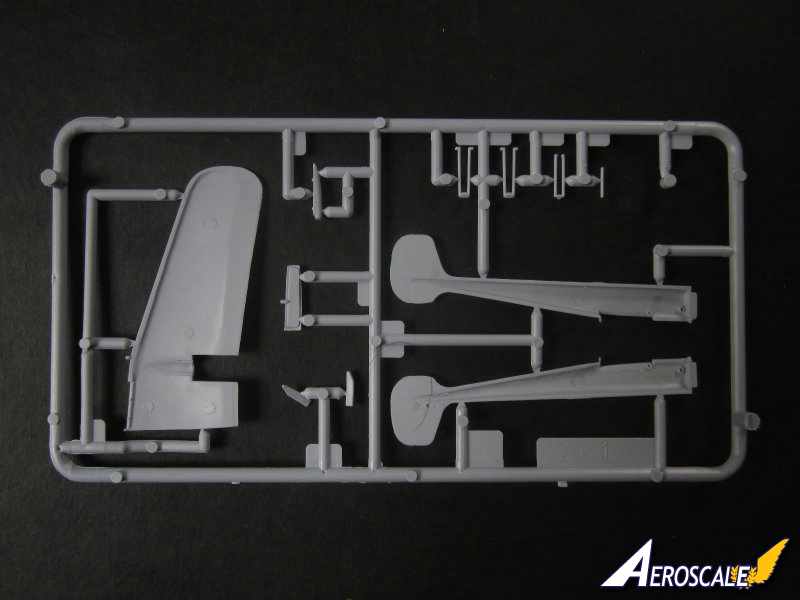
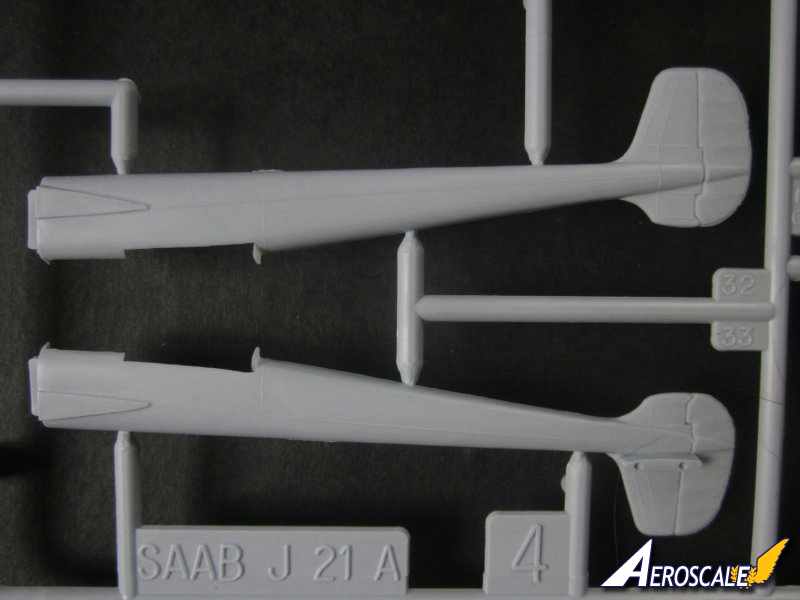
Each tail boom comes in two parts and are split vertically with raised panel lines. A little care will be needed to align the halves as there are no locating pins. The tail and rudders are moulded integrally. The instructions advise that the the oleo and retracting jacks of the main undercarriage need to be fitted before assembling the booms. There is no detail in the undercarriage bay, but I doubt much will be seen when the gear doors are attached. The inside of the undercarriage bays and the undercarriage doors are painted matt aircraft blue, a somewhat vague description of the colour. It is worth noting that the colour references are entirely for the Heller paint range. The stretched canvas on the rudders are nicely represented, although there is a little flash to clean up on the trailing edges. Where the booms fit into the wing there is a very positive looking lug that will give a fair bit of strength to the joint. A aerial mast is supplied and fitted under the starboard boom. The aerial wire is shown in the side profiles, but it is difficult to determine where the two ends of the wire are attached on the airframe.
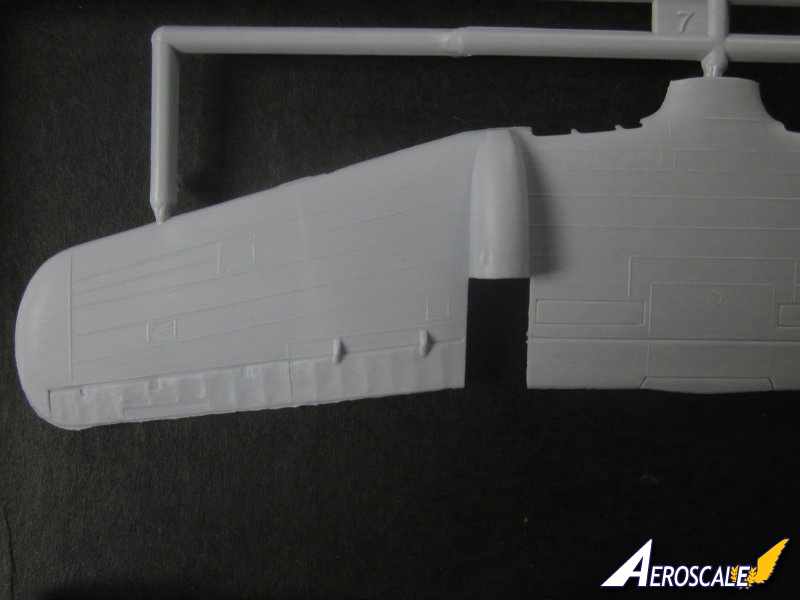
Wings and horizontal tail: The wings are made from three pieces, a one piece lower and two piece upper. A little care will be needed to align the halves as there are no locating pins. The shape of the wing is captured very well, with the distinctive swept wings outboard of the tail booms. Again the panel lines are raise although what looks like a pair of airbrakes just inboard of the tail booms on the lower wing have recessed outlines. The representation of the stretched canvas on the ailerons seem to have been reworked with a slight loss of detail in parts. Trailing edges have a little rough flash and just needs a quick swipe with a sanding stick. There is a cut out in the wing where the tail booms fit. The radiator inlets in the leading edge of the wings are very well done, although there are no radiators. The pitot tube is moulded into the upper starboard wing. One area that has been overlooked are the lights located in the tip of the forward most part of the booms. The instructions suggest painting the area with silver paint to represent the glass of the lights.
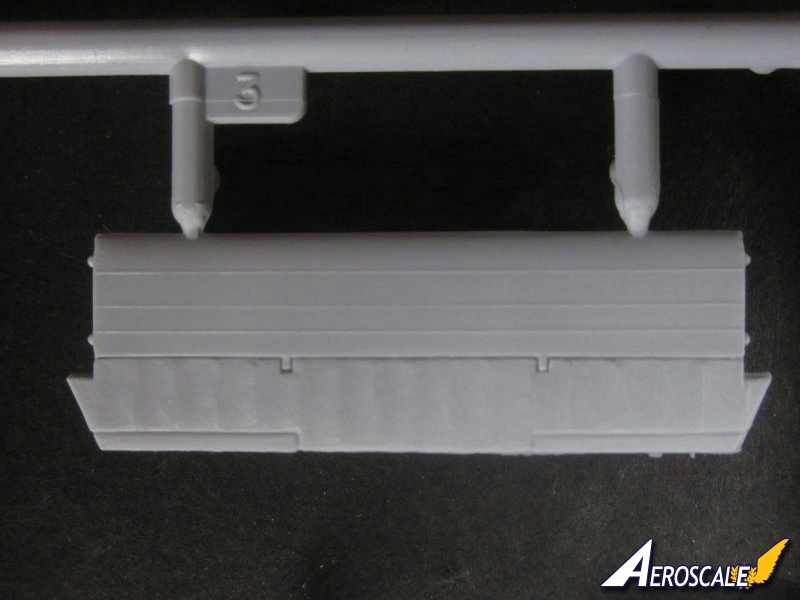
The horizontal tail surface is moulded in one piece, the stretched canvas on the elevators are nicely represented. It fits into the booms with the help of four small moulded pins.
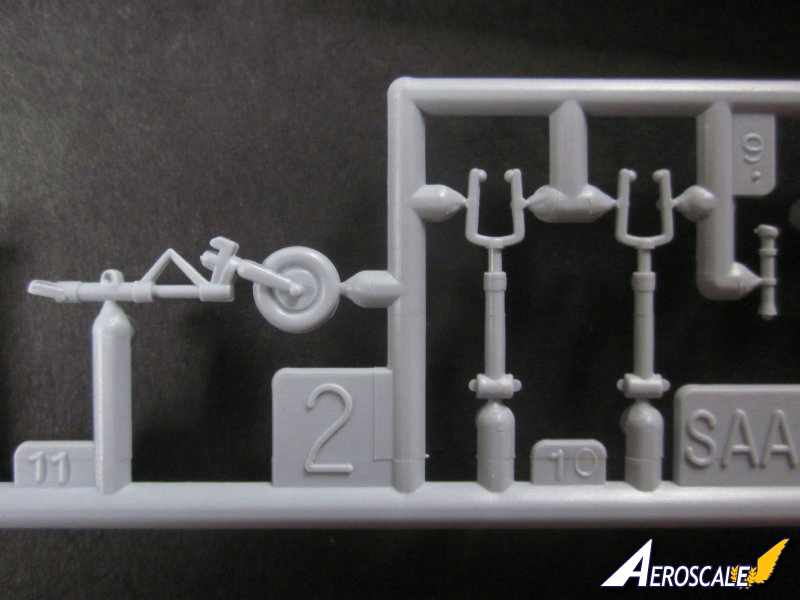
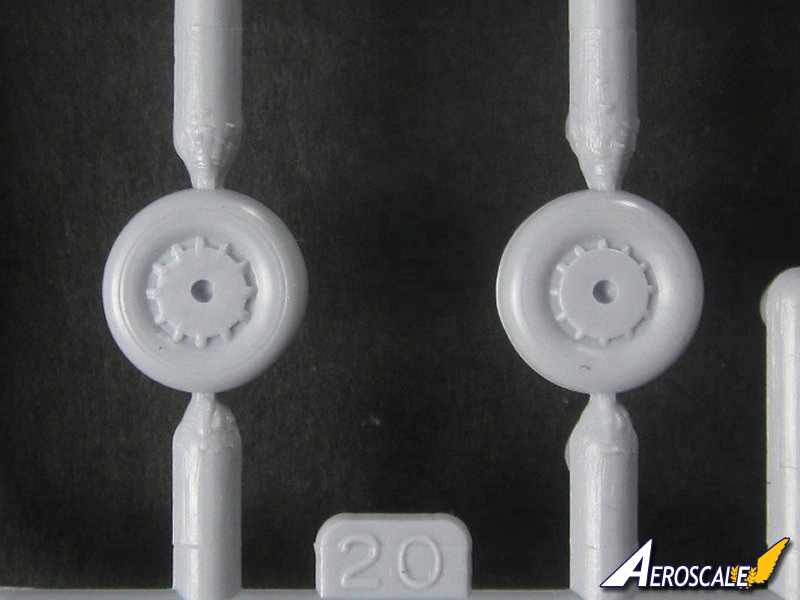
Undercarriage: each unit of the main undercarriage is made up from three parts including separate torsional links. The undercarriage units are attached to four locating points on the inner walls of the booms. The one piece wheels are movable if you elect not to glue them in place. The wheels are nicely detailed with part of the spokes exposed beyond the hubs. The tyres should be a little more agricultural, with deep treads. But the tyres may vary depending on the airstrip. There are three undercarriage doors to attach for each unit.
The front undercarriage is made up from two pieces. Although the wheel is moulded with the oleo some shading will create the illusion of the wheel being separate. The oleo and the retracting jacks fit into the roof of the undercarriage bay through two holes. There are three doors to attach to the fuselage.
Canopy: is made up from three pieces, the windscreen and the two part canopy with the rear most fixed glazing attached. I think because of the way the canopy is made up, this will possibly be the trickiest part of the kit.
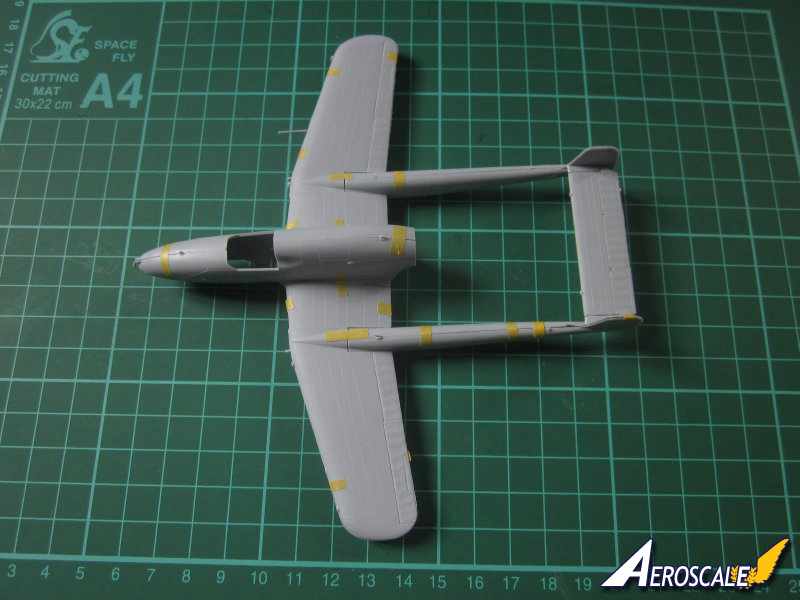
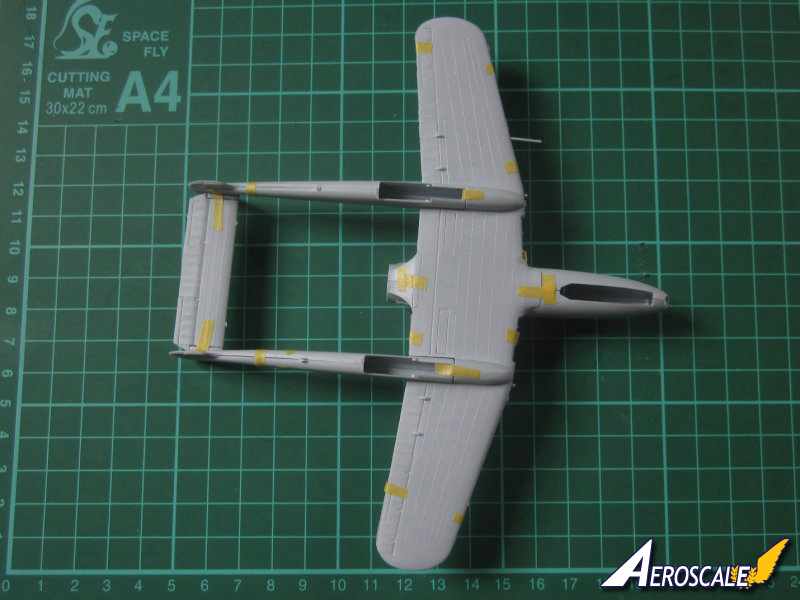
Dry fit: I could not resist having a go at putting this delightful looking kit together using masking tape. The results are very good indeed. Bare in mind that the very minor gaps will respond much better to liquid glue than masking tape. While in this state the taped model survived a close examination by my better half, she was very curious about this strange looking fighter.
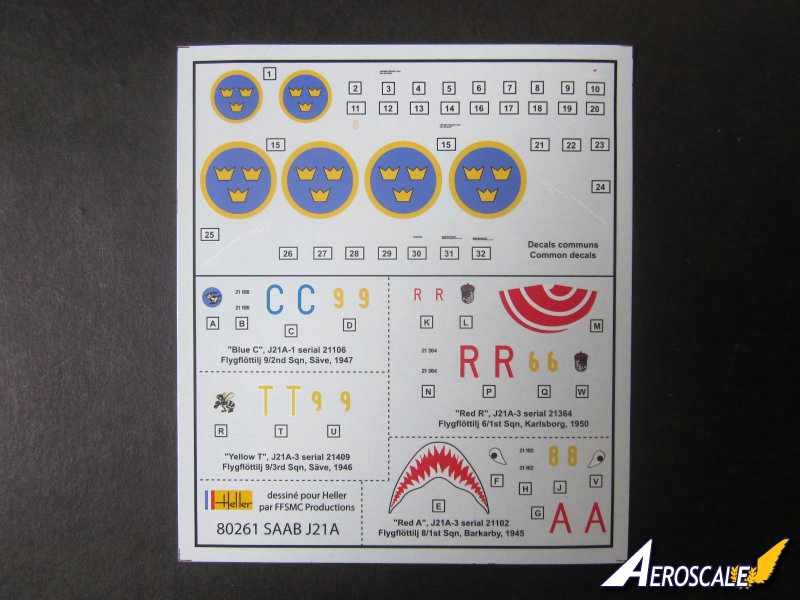
Decals are newly designed and printed by FFSMC Productions. Decals look very good and are matt with excellent colour depth, perfect register and minimal carrier film. Along with the markings there are a number of stencils. There is even a red and white spiral decal for the spinner of Red R. If it fits the spinner it will save an enormous amount of work masking.
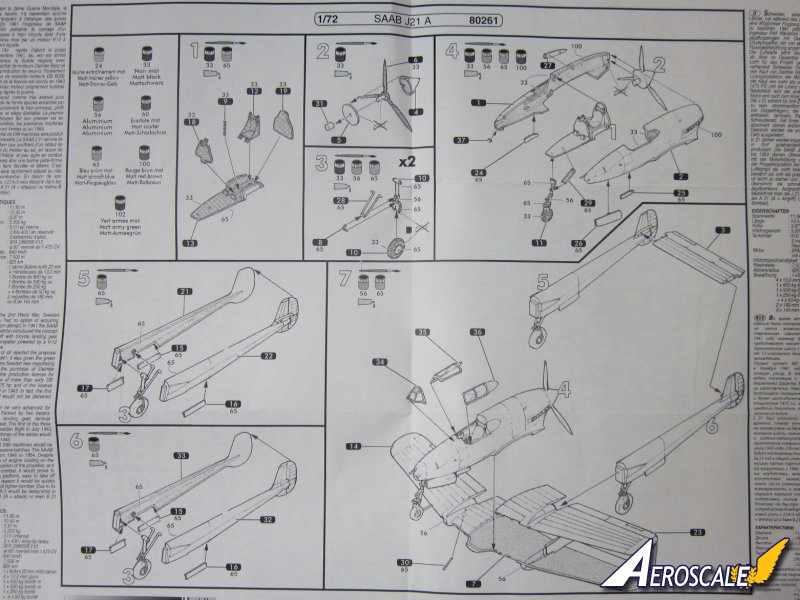
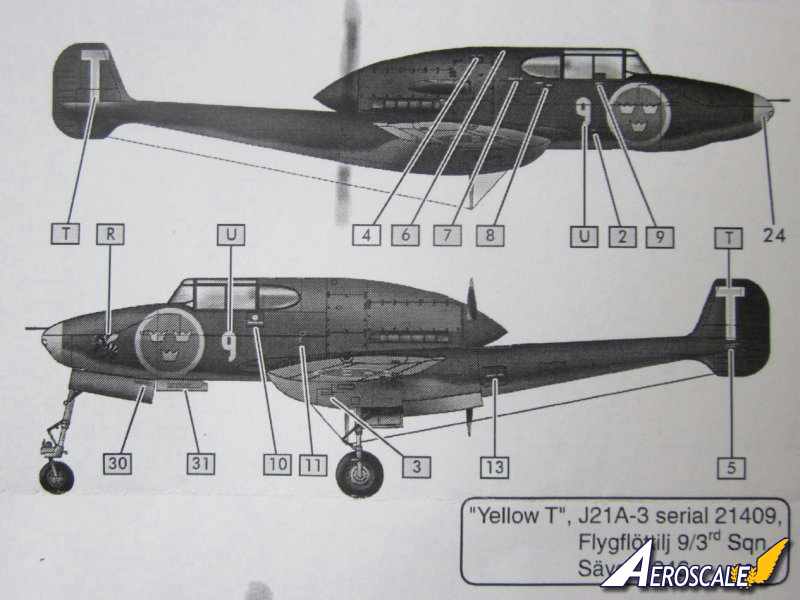
Instructions: the exploded line drawings are very clear on what goes where. Also included are painting instructions for the various internal parts that will be seen. On the rear of the construction instructions is the painting guide. There is a large upper plan view and a rather odd partial plan view of the undersuface. Odd in that the rearmost part of the booms and tail are missing. There are also port and starboard profile images of each of the four aircraft. These are backed up with colour profile views of the four aircraft on the rear of the box.
Markings: as mentioned are for four aircraft:
Blue C J21A-1 serial no 21106, Flyglöttilj 9/2nd Sqn, Säve, 1947.
Red A J21A-3 serial no 21102, Flyglöttilj 8/1st Sqn, Barkarby, 1945.
Yellow T J21A-3 serial no 21409, Flyglöttilj 9/3rd Sqn, Säve, 1946.
Red R J21A-3 serial no 21364, Flyglöttilj 6/1st Sqn, Karlsborg, 1950. Preserved in the Swedish Air Force Museum in Linköping.
All aircraft are finished dark green on the upper and side surfaces and blue grey on the lower.
Reference:
http://www.ipmsstockholm.org/magazine/2000/02/stuff_eng_detail_j21.htm .
Conclusions.
This is a real gem of a kit, it looks accurate, it fits well and construction is very straightforward. In fact you could probably start it and finish it on a wet weekend/bank holiday. The raised panel lines as far as I am concerned are not a issue and are the only hint at the age of this kit. There are only a few and if they bother you too much they could easily be re-scribed. I am really pleased that Heller have re-released this excellent kit, particularly as I remember building it the first time it came out. Heller keep up the good work re-releasing these kits please. Nice one Heller.


Comments