In 1948 the Royal Air Force was desperately short of twin engine night fighter jets. Although the Gloster Meteor NF.11 was in production, pressure meant that it looked as though the RAF would have to continue to rely on the DH Mosquito to provide the bulk of their night fighter force. However in 1947, de Havilland were working on a single engine night fighter as a private venture, known as the DH. 113. They took the Vampire FB.Mk.5 fuselage and designed a new front section, similar in layout to the Mosquito cockpit and housing the A1 Mk 10 radar. It was armed with four 20mm cannons located beneath the cockpit. The DH. 113 was sent down to Boscombe Down for trials and the only major criticism was the lack of ejection seats for the crew. A criticism that was also true of the Meteor and Venom night fighters already in production. However, in the DH. 113's favour, it was found to be a more stable gun platform, with a greater range then the other two aircraft.
Due to continuing production and development issues with the Meteor and Venom, it was decided that the DH. 113 would be taken into service as a stop gap measure, known as the Vampire NF.Mk.10. It first entered service with No 25 Sqn at RAF West Malling on 26th July 1951, replacing the Mosquito NF.36. The Vampire NF.Mk.10 had a very short period of service and most were withdrawn after only two and a half years, being replaced by the Gloster Meteor NF.11 and the de Havilland Venom NF.2.
After retirement from front line RAF service in 1954, the aircraft were returned to de Havilland for overhaul before some were sold off to India and Italy. One example was provided to Switzerland for evaluation. The remainder stayed in service with the RAF as NF.[T].10's and used as training aircraft for advanced navigational training. The last of these were retired from service in 1959.
Source: Chris Hughes.
The Kit.
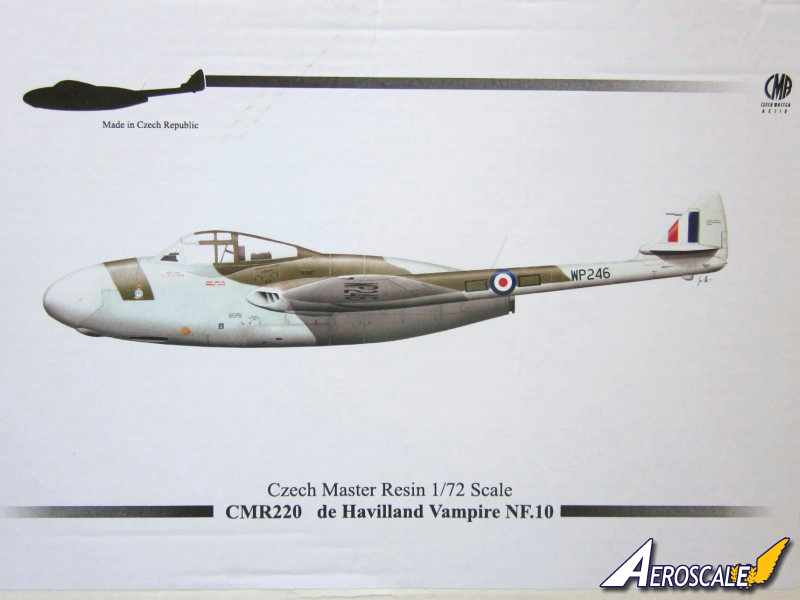
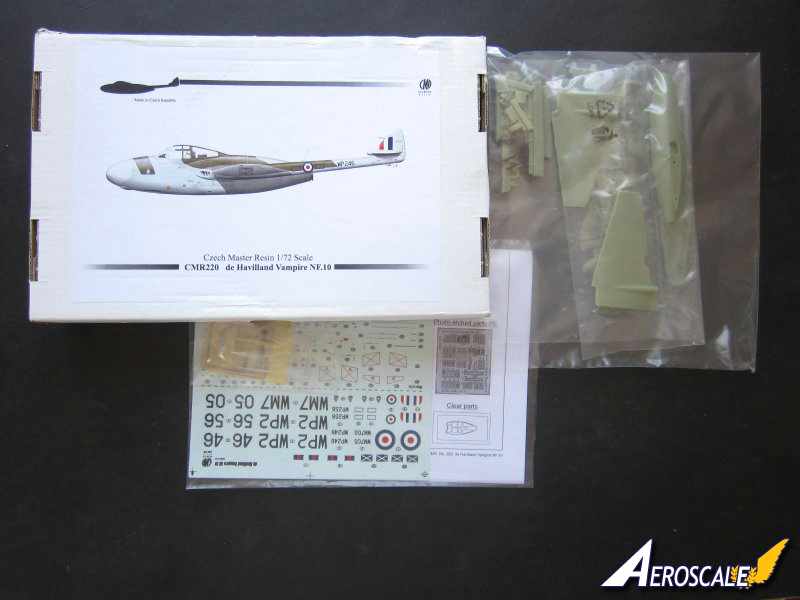
Very sturdy top opening box with reinforced ends. There is an excellent illustration on the box cover of WP246 that would look great released as a separate print. All resin parts are placed in multi cell plastic bags. Canopies, masks, decals and photo etched [PE] parts are sealed separately. Contents
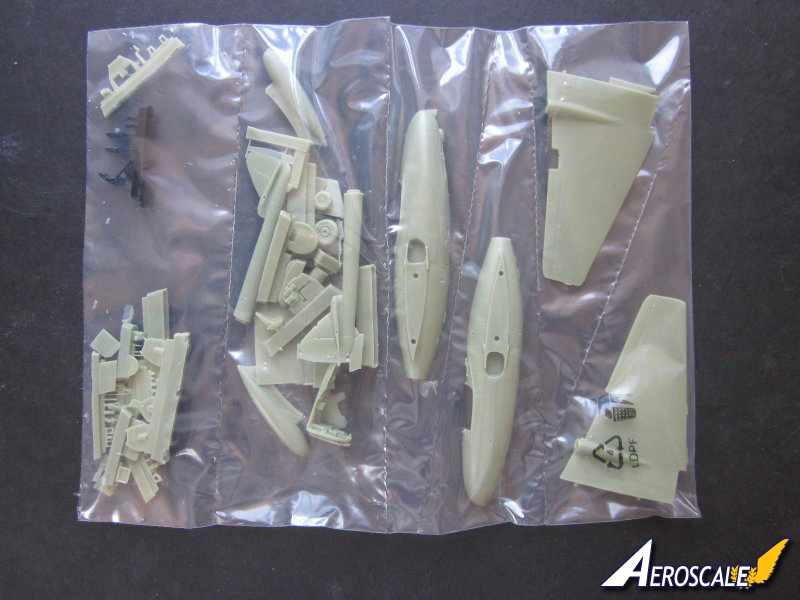
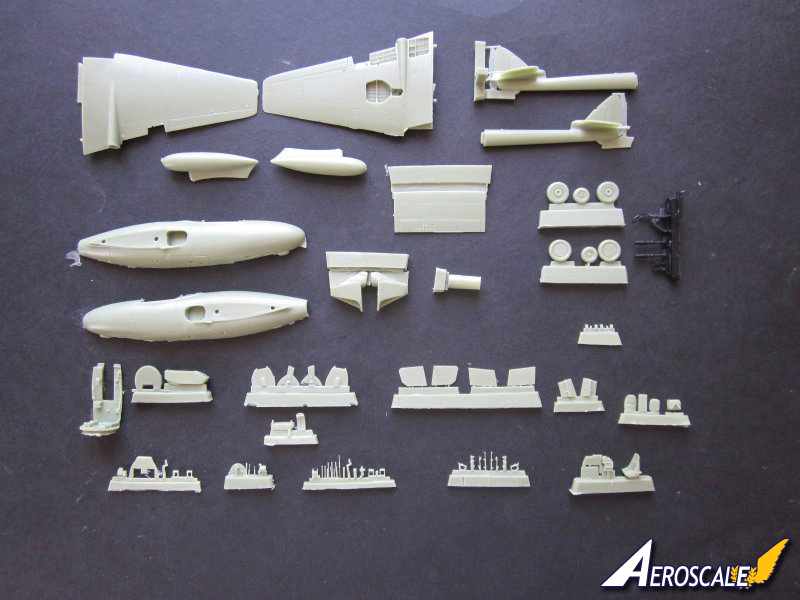
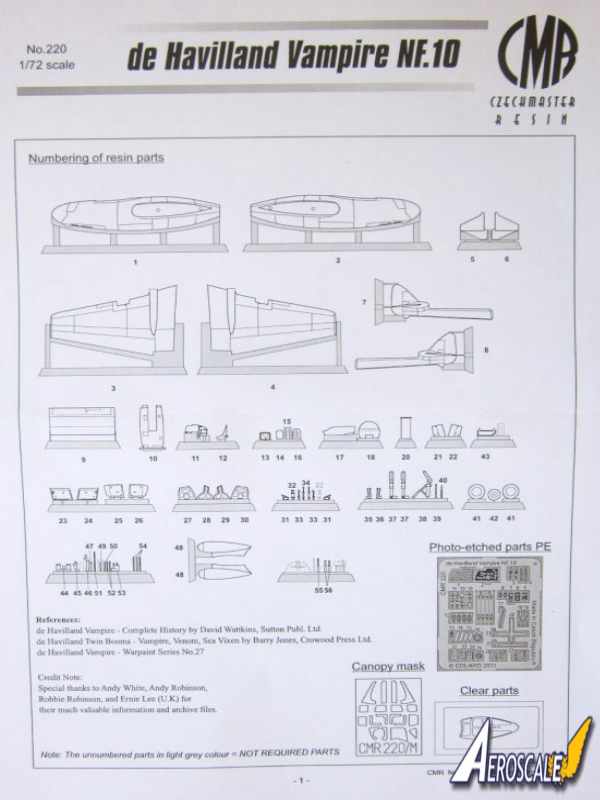
Approx 56 resin parts including two resin wing fuel tanks.
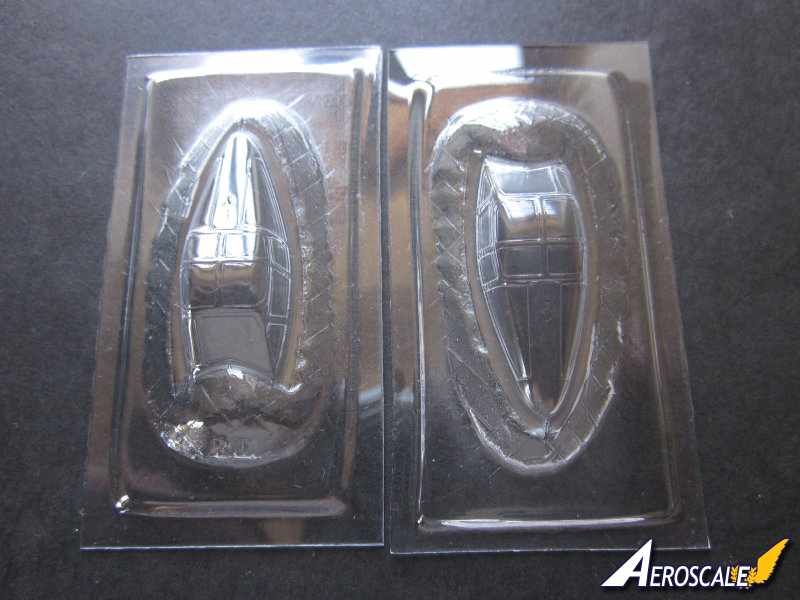
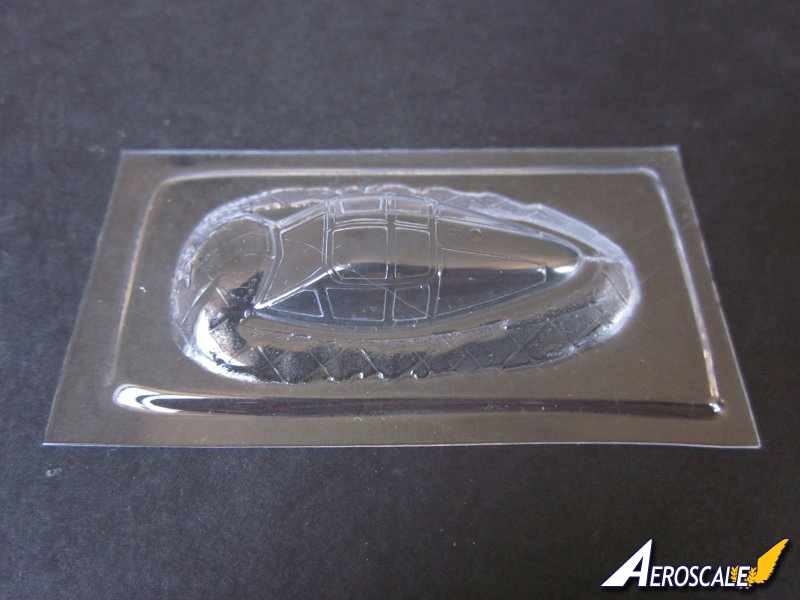
-2 x vac formed canopies. Canopies are in the closed position.
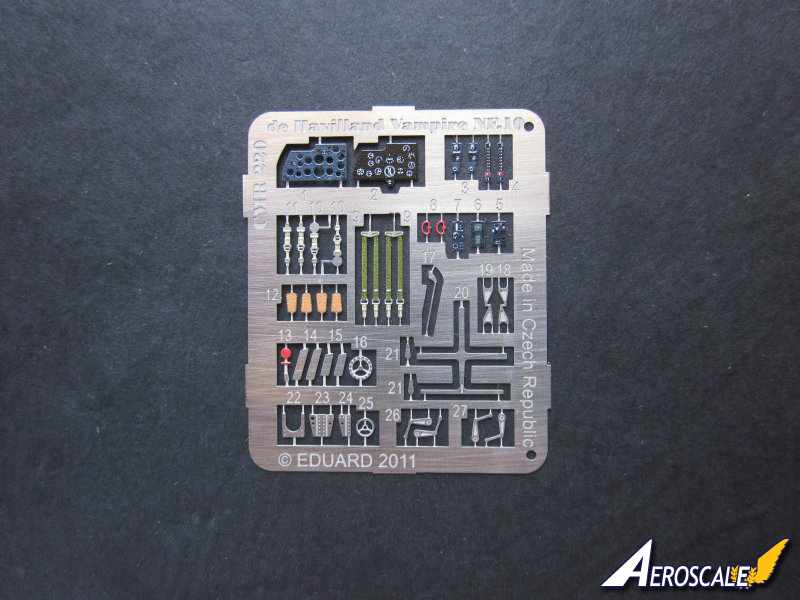
-1 x pre painted PE sheet created by Eduard.
-1 x set of paint masks for the canopy, created by Eduard.
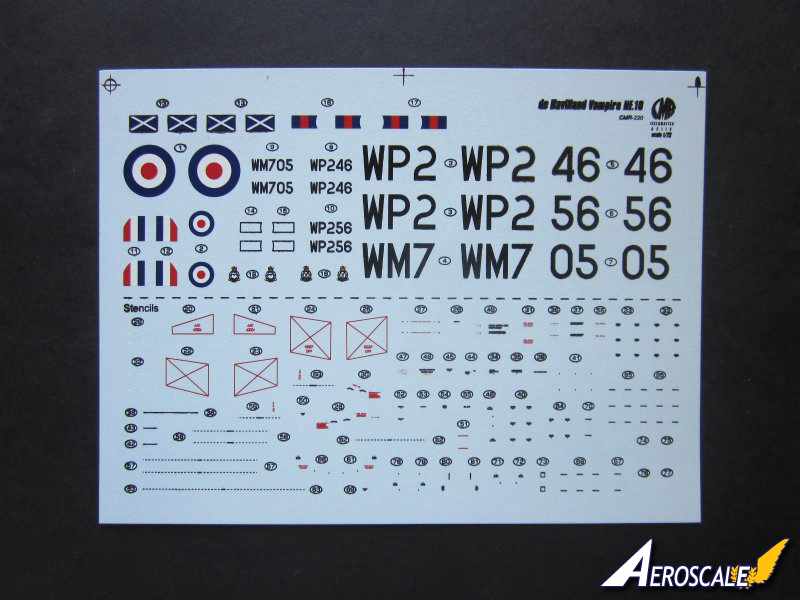
-1 x decal sheet.
-4 x A4 pages construction guide including parts map.
-2 x A4 pages of painting instructions.
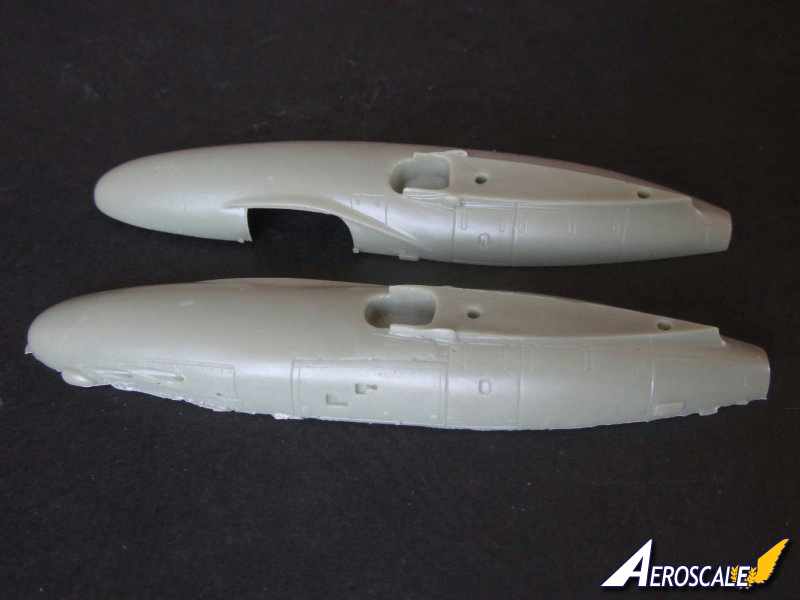
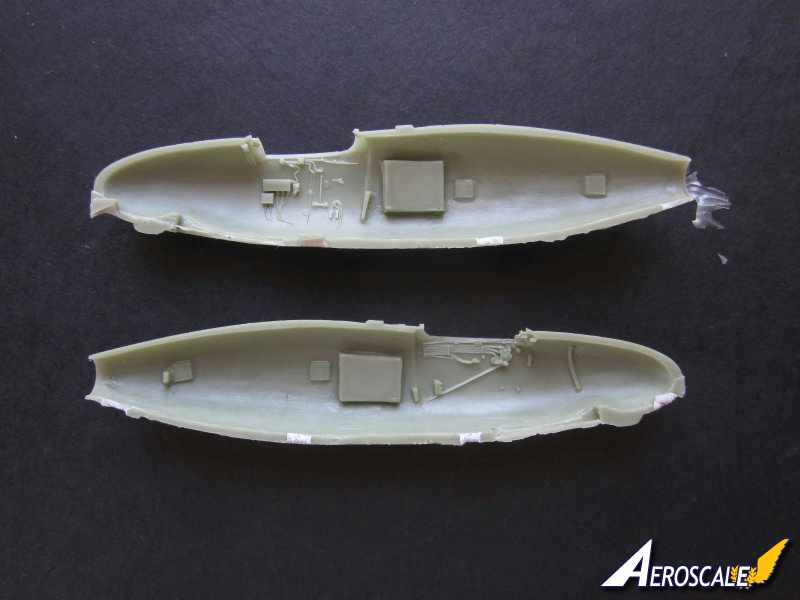
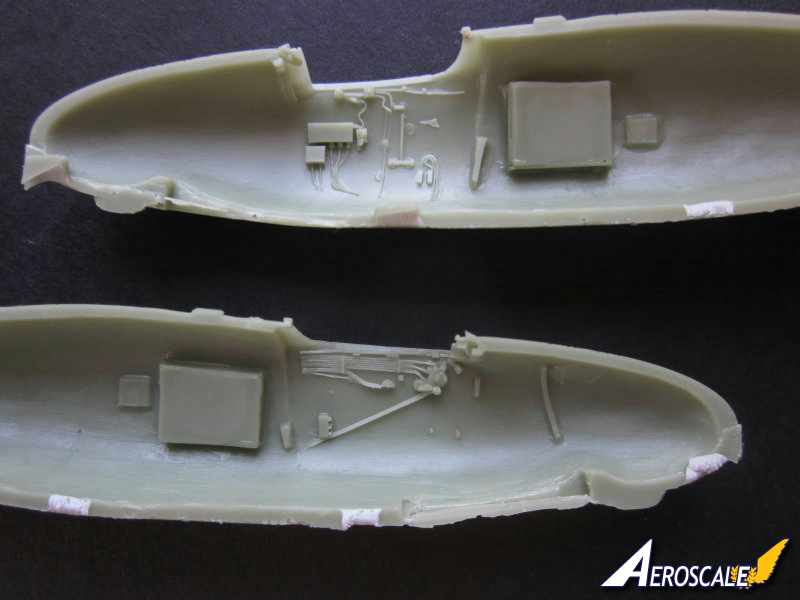
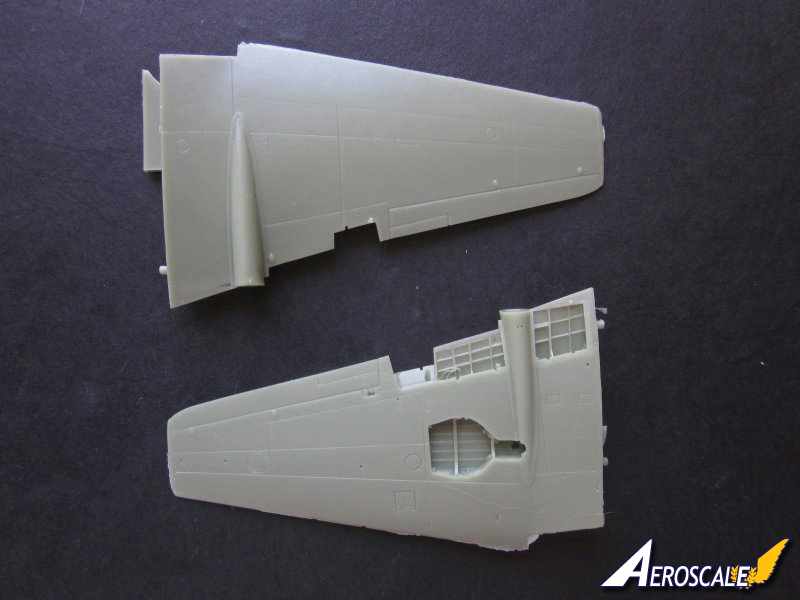
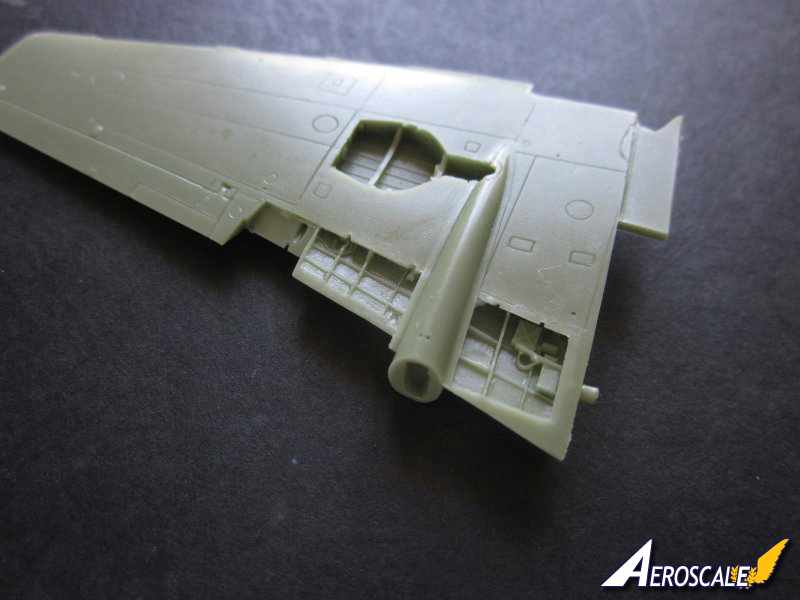
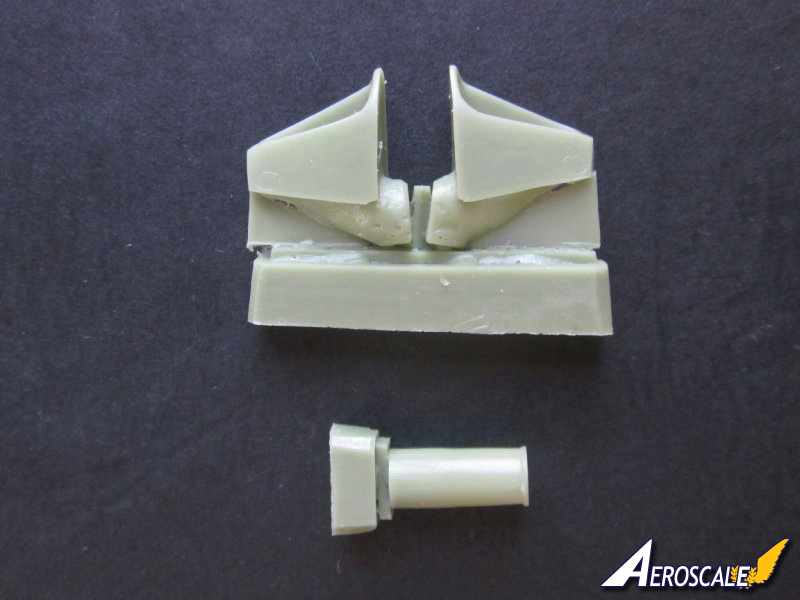
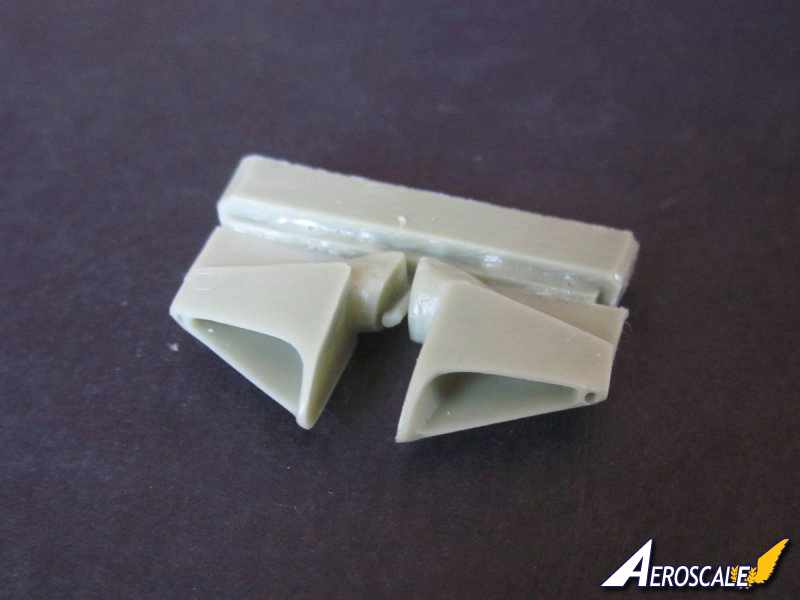
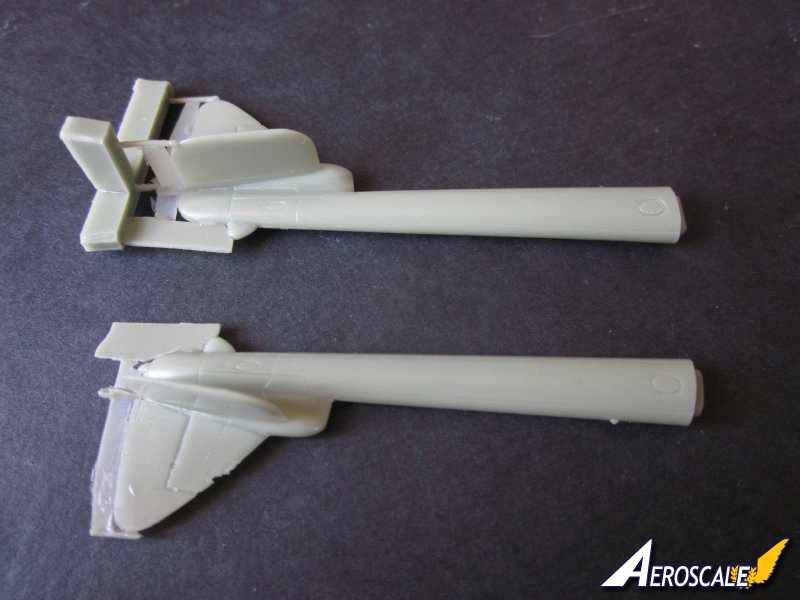
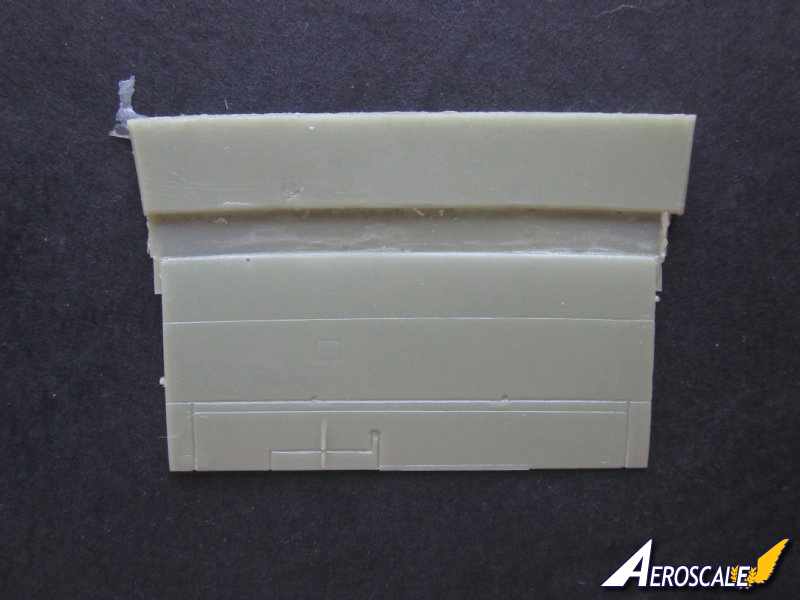
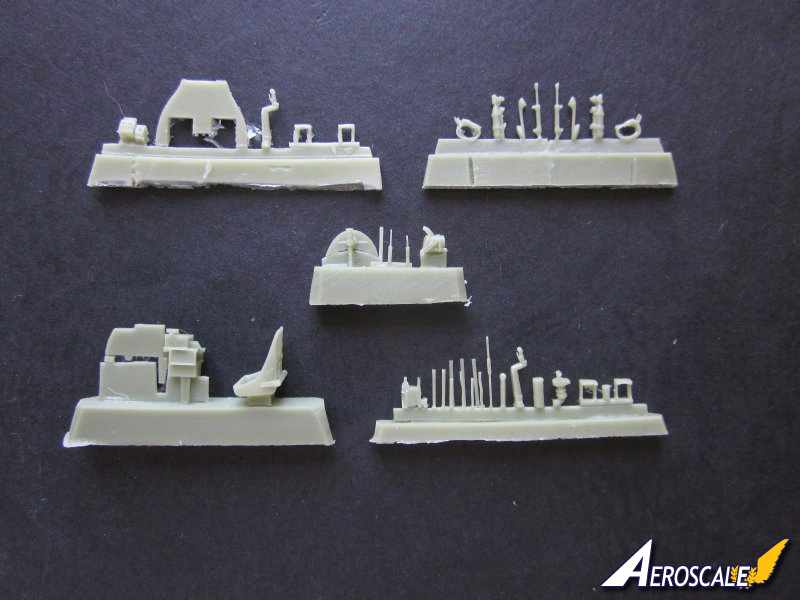
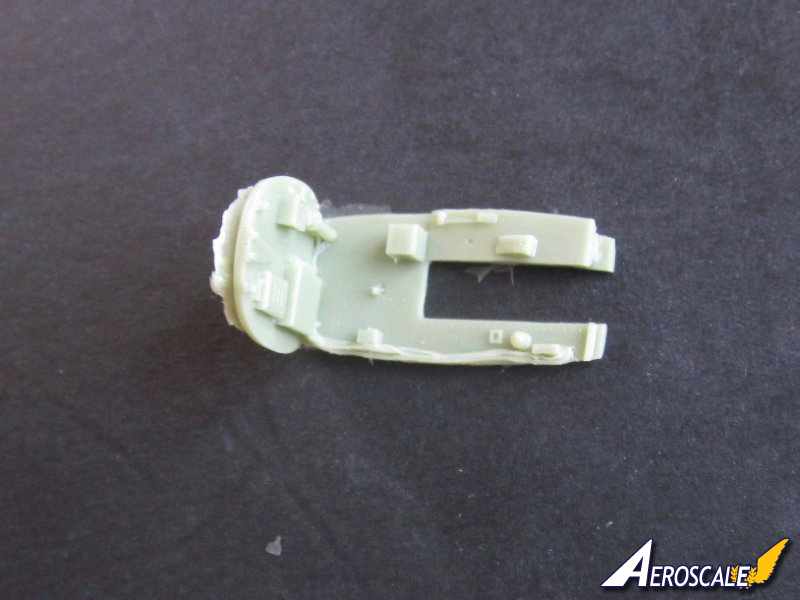
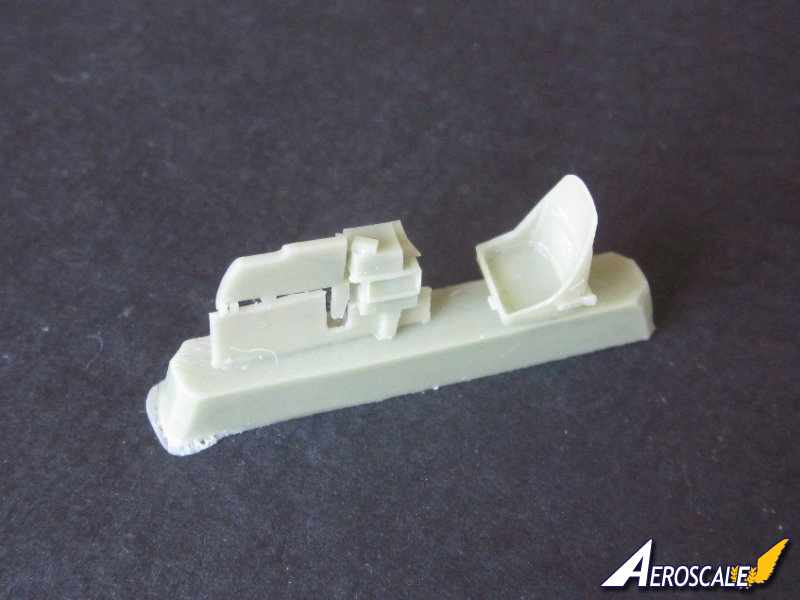
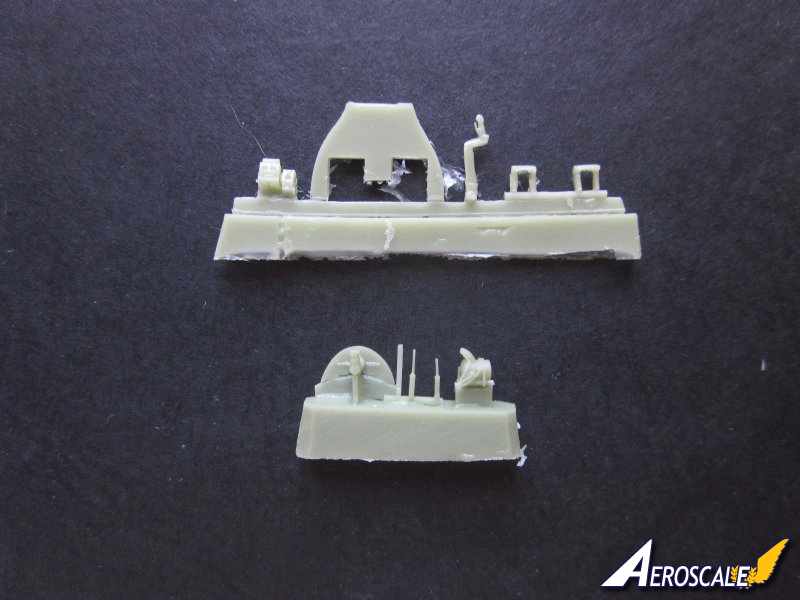
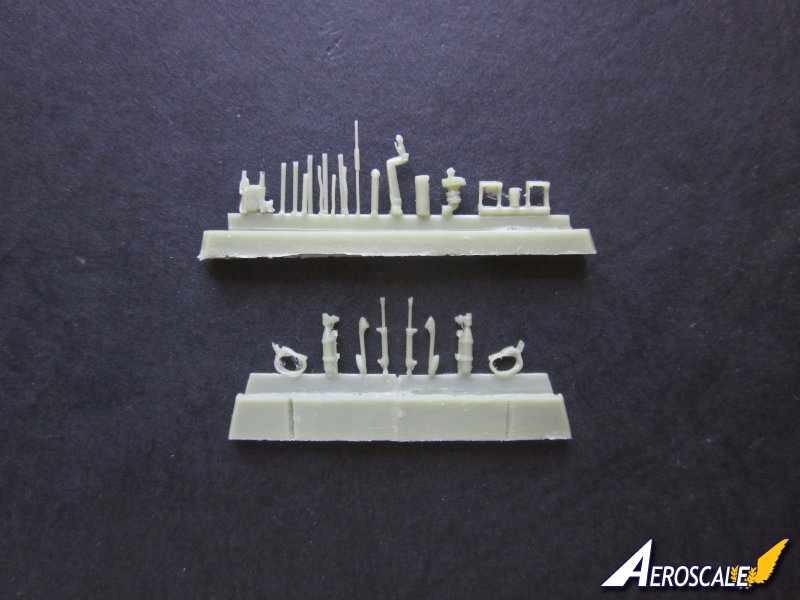
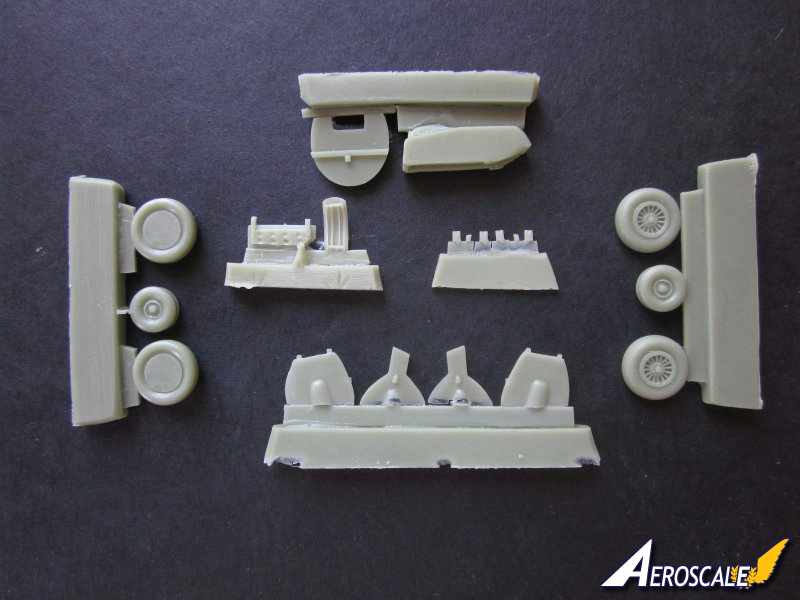
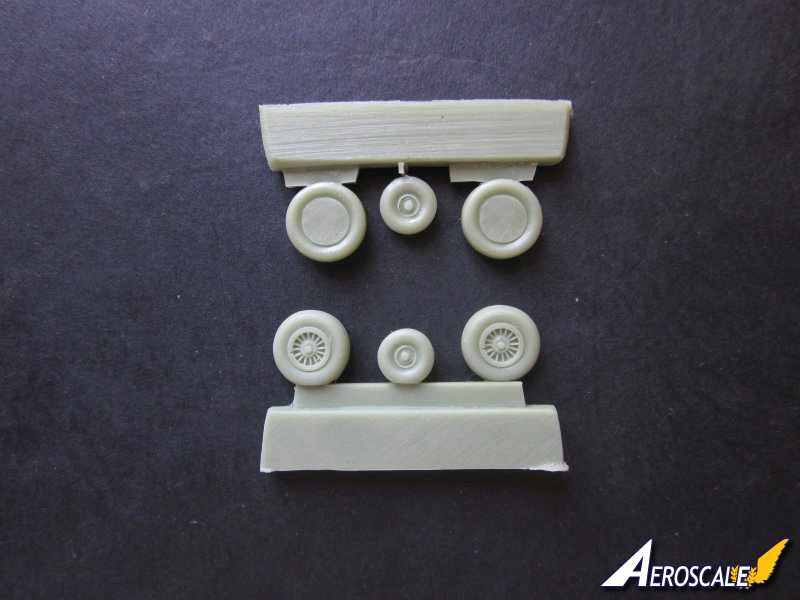
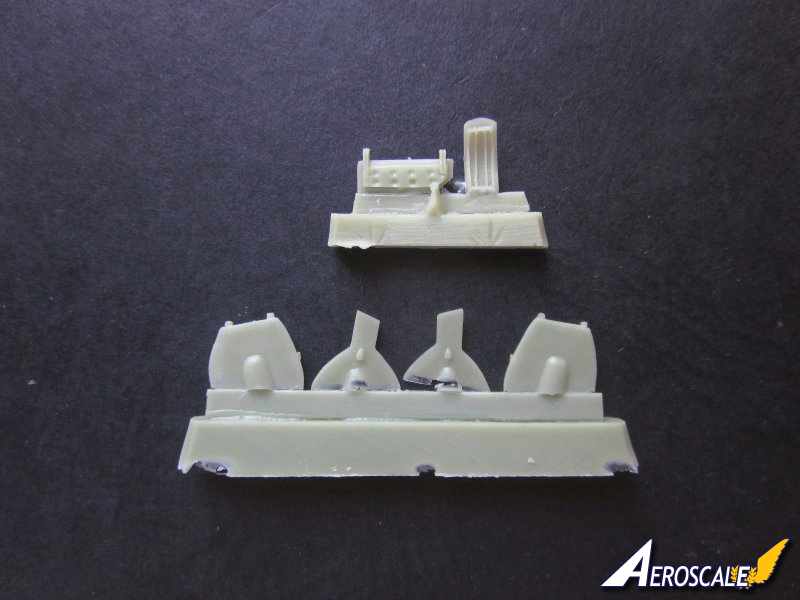
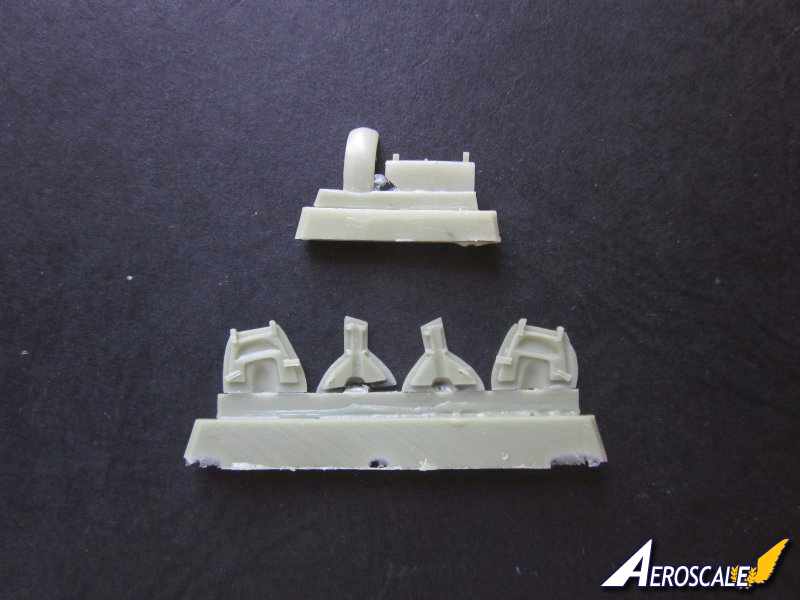
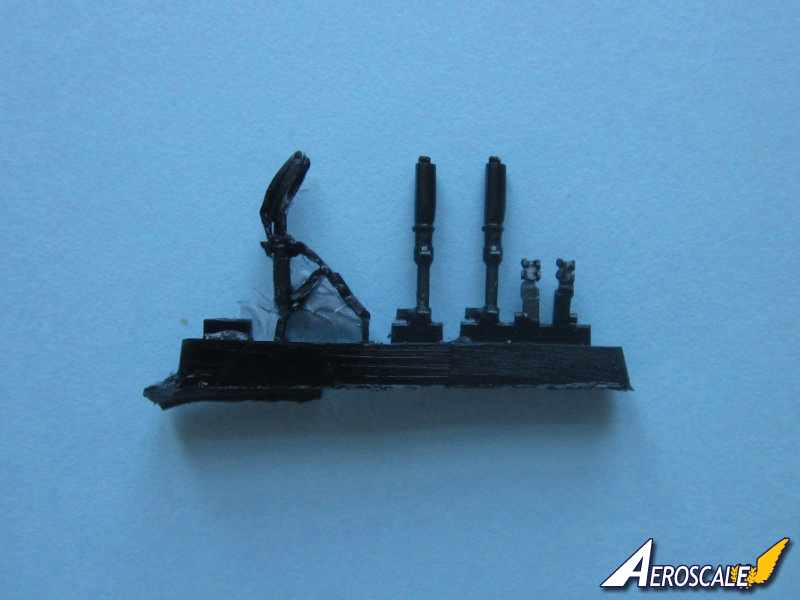
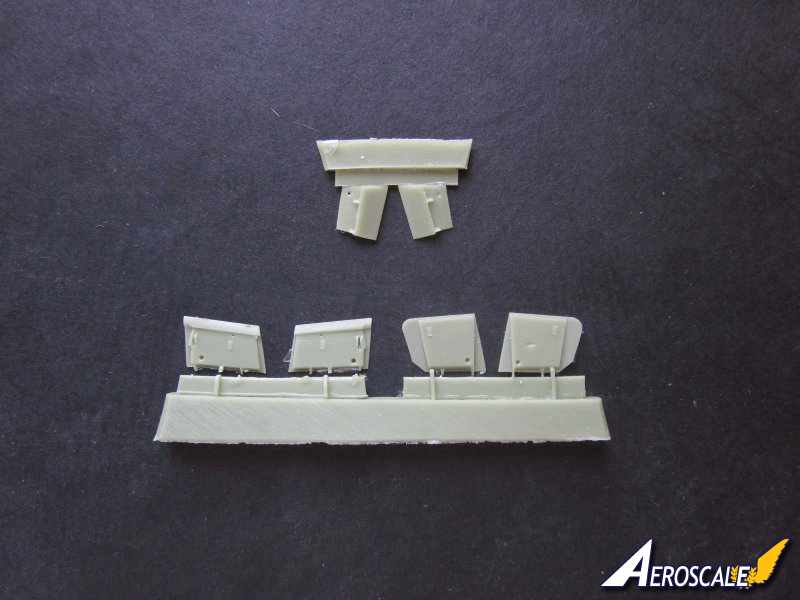
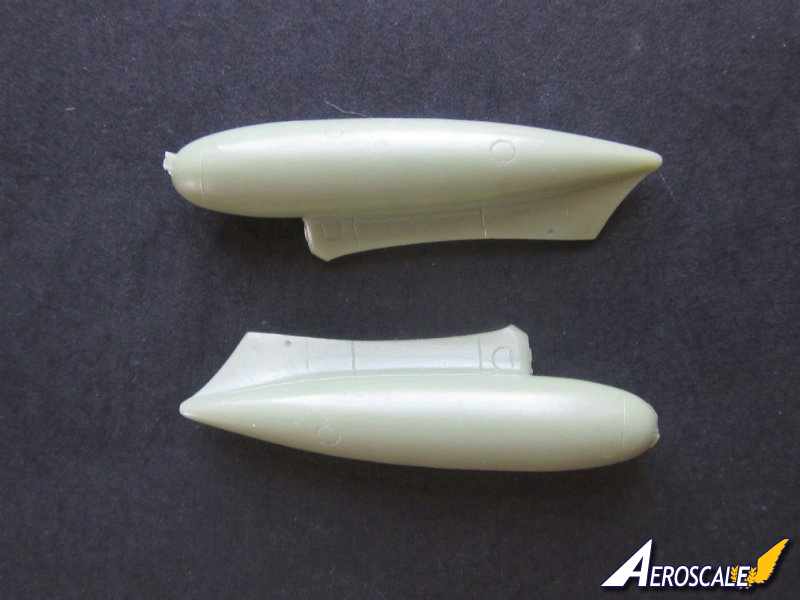
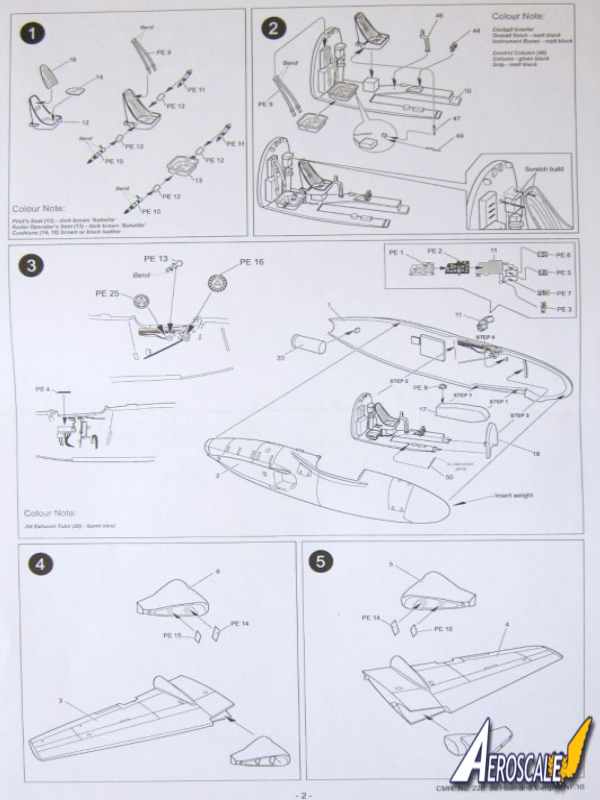
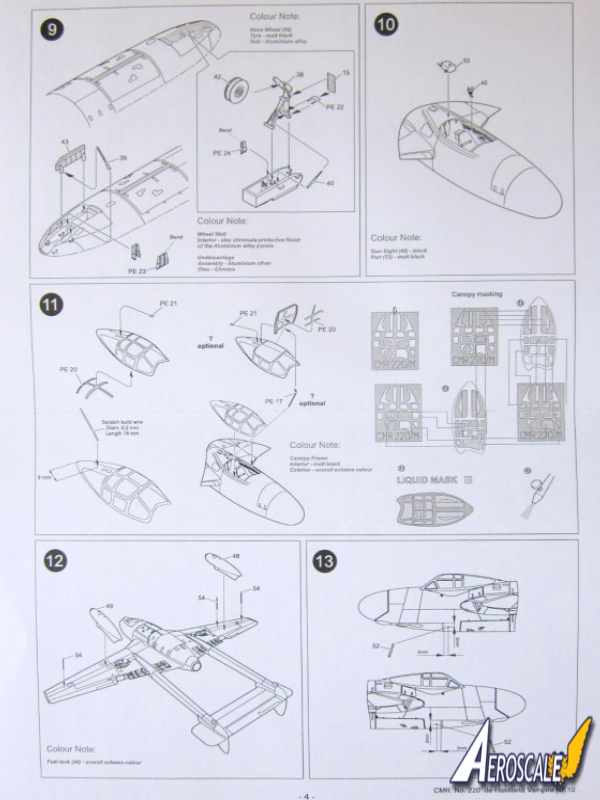
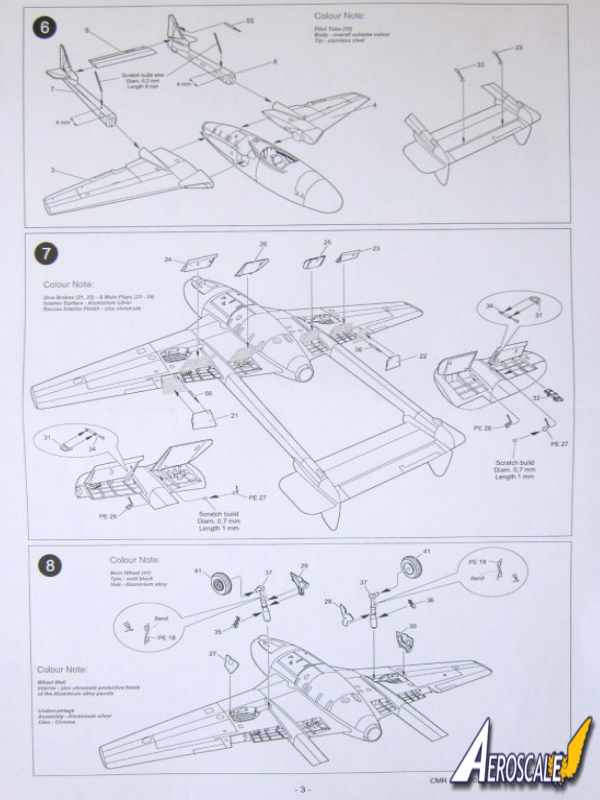
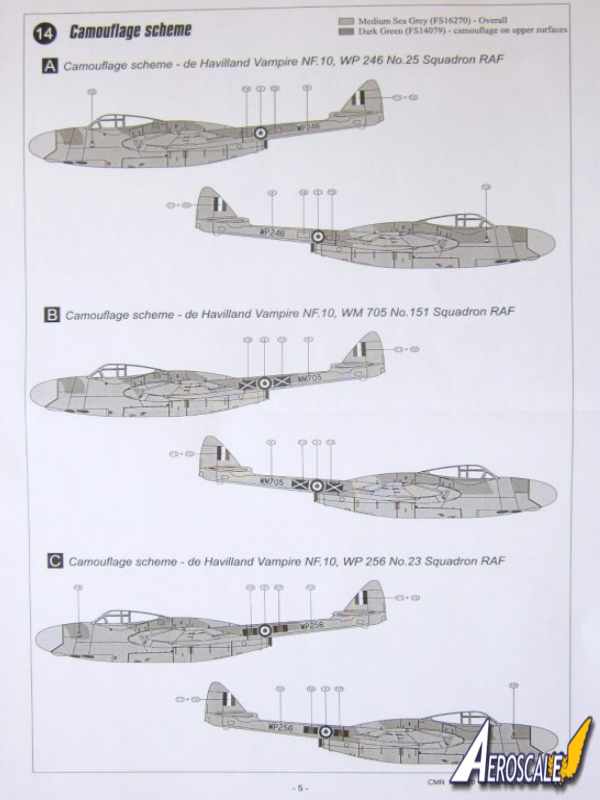
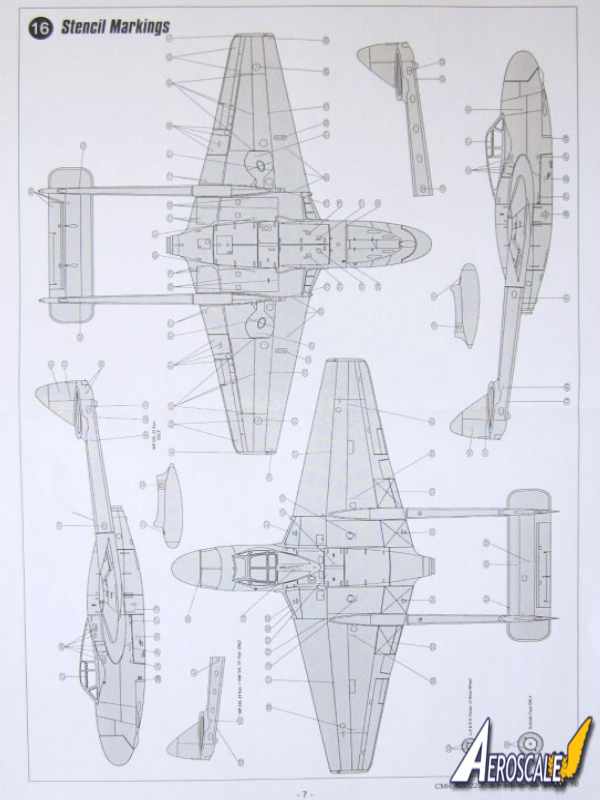
-1 x A4 page stencil guide. Cockpit: is made up from around 13 resin parts and quite a few photo etched parts. The pilots seat looks very good, on the real thing it was made from bakelite. There are separate cushions for the back and and seat pan. The poor old radar operator had too make do with a bakelite pan to sit on! There are pre painted photo etched seat harnesses for both seats. The rear bulkhead is combined with the cockpit floor. There is a cutout in the floor to accommodate the wheel well for the nose gear. A smaller bulkhead for the forward part of the cockpit must be added to the floor before the fuselage halves are joined [don't forget to weight the nose]. The pre coloured photo etched instrument panel is typical Eduard. The instrument panel is fixed onto a small sheet with the instrument dials printed onto it. This in turn is fixed to the resin instrument panel. The resin instrument panel is nicely done, the radar operators side has further pre coloured photo etched parts to be added. There are some excellent photo etched trim wheels for the fuselage side on the left of the pilots seat. The inside of the cockpit walls have good low relief detailing such as cables and boxes. A little scratch building is required to construct two reinforcement rods between the rear of the pilots seat and the rear bulkhead. Colour notes are provided for the cockpit, but the colour is dominated by black. Canopy: a special mention for the two vac formed parts which are real gems. There are quite a few frames forming the canopy, and each one is beautifully formed. With the amount of glass panes in the canopy the Eduard paint masks will be very useful. If you want to display the canopy open, then some very careful cutting will be required as the top of the canopy hinges up for crew access. The chances are you may have to utilise both canopies if you want to display the canopy open. As well as masks for the outside of the canopy CMR have provided masks for the inside of the canopy hatch. An aerial needs to be scratch built for the rear of the canopy, all dimensions for the aerial length and positioning are provided. A nice touch is the inclusion of a photo etched prop to keep the canopy hatch open. Fuselage: is split vertically. The cut outs for the front undercarriage well will need the very thin layer of flash removing before installing the one piece undercarriage well. The front undercarriage well does not have a lot of detail just like the real thing although there are some photo etched parts to add. The recesses for the cannon troughs and the spent cartridge chutes are nicely done. The area where the wings locate has four holes for the four locating pegs in the wings. There is a hole in each fuselage halve where the air ducts for the engine are located. The mating surfaces of the fuselage will need a few swipes with a sanding stick to clean up the edges and the remains of the stubs that were attached to the casting blocks. The exhaust pipe for the Goblin engine needs to be fitted before the fuselage halves are glued. Panel, fasteners and rivet detail are finely recessed. There is low relief detailing representing cables and a box on the rearmost part of the cockpit decking. The overall shape of the fuselage looks superb. A look over both fuselage halves revealed a few tiny air bubbles that should be very easy to fill using correction fluid or filler. Wings: the two one piece wings have very positive pegs to fit into the fuselage wing roots. A test dry fit of the wings to the fuselage reveals an excellent fit. The two air intakes for the engines are cast separately, which offers the advantage of more accurate depth to the intakes. This approach to creating a more realistic looking air intakes does mean that some care will be needed to ensure a good fit with minimum amount of blending into the wing, but I think it's worth it. There are two vanes to glue into each of the intakes. The main wheel and the flap interior wells are beautifully detailed with low relief frame work and actuating mechanisms. The joint for the tail booms is on the trailing edges of the wings. The flaps and the airbrakes can be displayed open or closed. The two part flaps are extremely thin and will need some care separating them from their blocks. If you decide to display your Vampire with flaps down then there are four tiny PE flap actuators arms and a number of resin parts to fit in place and two resin actuators arms on the airbrakes. As with the fuselage the panel lines are beautifully done, crisp and recessed. There are two 100 gallon fuel tanks that can be fitted to the wings if you wish. Tail booms and tail: Each boom is cast in one piece and includes the fin, rudder and the extended outer tail wing. The rudders have incredibly thin trailing edges. There is a stub that provides good support for the attachment of the boom to the wings. A dry test fit of the wing to the boom showed that there is an excellent fit. There are two small 8 mm long aerials that you need to create and glue, one on each boom. The one piece tail wing, which locates low down on the tail fin has four small pegs that fit into four small holes in the bullet fairings on the tail fins. The tail wing needs separating from it's block, but the contact area between the two is very thin, so the tail wing should separate easily enough. Again the trailing edges are realistically thin. There are two resin mass balances to be added to the under surface of the tail wing. Undercarriage: the undercarriage legs are cast in black resin and are possibly stronger than the resin used in the rest of the kit. The detail is very good, the front undercarriage unit is cast in one piece including the actuator arm, there is a little thin flash to remove. The wheels are rather nicely done, the distinctive twin raised tread of the front wheel is faithfully reproduced. The cast detail of the spokes for the main wheels is superb. I am not sure if the inclusion of the two sets of wheels was meant, but the wheels with the spokes are the ones used for this aircraft [see image right]. There are PE torsion links for the legs. The resin undercarriage doors have wonderful low relief detail cast on them. Aerials: there are a number of resin aerial included with this kit that fit under the wing and lower fuselage directly below the cockpit. I think it would be prudent to replace them with something less brittle. But they are there if you wish to use them. Markings: three schemes are provided by CMR all RAF machines: [A] NF.10, WP246 No. 25 Squadron, RAF. [B] NF.10, WM705 No. 151 Squadron, RAF. [C] NF.10, WP256 No. 23 Squadron, RAF.
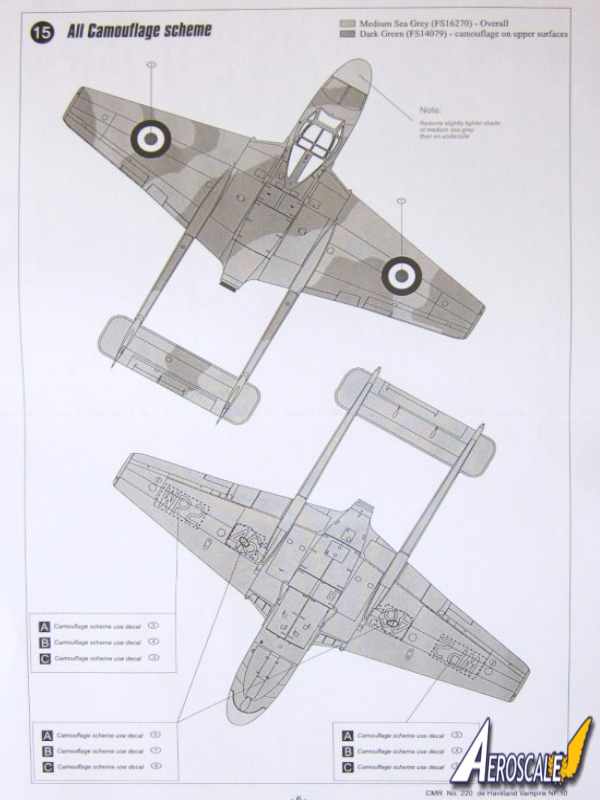
Camouflage is med sea grey [FS16270] overall with dark green [FS14079] disruptive camouflage on the upper surfaces. The radome is a slightly lighter shade of medium sea grey. The painting guides show both port and starboard profiles of each aircraft and a upper and lower plan views. Also included are the location points of the roundels and squadron number under the wings. Decals: Decals have very good colour depth and are glossy and thin. There are quite a few stencils to apply. Some of the smaller stencils are a little blurred on closer inspection, but that is being downright fussy. Instructions: the four pages of instructions taking you through 13 building stages, includes some very fine exploded line drawings as well as a parts key with all the components numbered. There are very useful colour notes for the various internal parts such as the cockpit, wheel and flap wells. There are also clear instructions of what to do with the PE parts as some require some bending. There is a very helpful guide for applying the paint masks to the windscreen and canopy. The paint guide has port and starboard profiles as well as upper and lower plan views. Each scheme is on a A4 sheet with details of the positioning of roundels, serial numbers, and the large squadron codes under the wings.
Conclusions.
I don't know if there are many Vampires NF.10's out there represented in 1/72 scale [if at all], but I have to say that CMR produce by far the best looking Vampires I have seen. Accurate in outline and with plenty of detail, that will embarrass some of the larger kit producers. This kit will reward the modeler, with an outstanding model well worth the price. This two seater will make a great contrast to the single seat Vampires. I have no hesitation in highly recommending this kit. If you choose to buy one you wont be disappointed. Nice one CMR.
SUMMARY
Highs: Attention to detail, quality of the castings, straight forward build, PE parts, paint masks, too many to mention.Lows: Some of the smaller stencils look a bit fuzzy.Verdict: The resin components have excellent detail and the one piece wings, tail booms and tail plane will certainly speed up construction. Also CMR attention to detail is superb.
Our Thanks to Czech Master Resin! This item was provided by them for the purpose of having it reviewed on this KitMaker Network site. If you would like your kit, book, or product reviewed, please contact us.


Comments