Looking startlingly like the Beatles' Yellow Submarine with wings, a comically underdeveloped contraprop and a rather more subdued paint job, the Gannet is generally acknowledged as one of the uglier aircraft ever to operate off Her Majesty's ships. If the camel is a horse designed by committee, then surely that august body of designers must have moved on to the Gannet as their next project. However, like the camel, it proved to be a particularly capable beast, answering the Royal Navy's need (learned hard in the 1940's North Atlantic) for a dedicated anti-submarine patrol aircraft. It performed that task between 1954 and the mid-60's until it was eventually replaced by helicopters. It then carved an irreplaceable niche as a fleet early warning platform and carrier-on-board-delivery aircraft until it was retired in the late 70's, to be greatly lamented by the Op CORPORATE fleet in the South Atlantic in 1982. The German, Australian and Indonesian navies also operated the aircraft.
First impressions
The kit comes from Classic Airframes and is my second foray into the modelling world after a long break. It represents either the AS1 or AS4 versions, although it appears that there is very little difference between the two and, in any case, the instructions dont actually explain what you need to do to distinguish between them.
The parts all appear to be of good quality, with inscribed panel lines and fairly fine detailing. There appears to be some flash and an initial attempt to mate the two fuselage halves suggests that there may be some sanding at the seams ahead. There are a number of resin components, including the cockpit, wheels and wheel wells and these certainly are very flashy. The problem here is that some of the bits are so small that it's difficult to tell what is meant to be thin panel and what is actually flash. The other concern with the resin parts is the size of the pour blocks to which they are attached. These may well be par for the course but, to this tyro, they look huge compared to some of the components that they carry; detaching them will be a serious difficulty with the basic toolset that I use. In my opinion many of these resin components would have been perfectly adequate in styrene. Add to this that none of the parts are numbered (there is a key in the instructions, so you're not entirely in the dark), there aren't any locating pins and the instructions are quite basic and difficult to interpret - this is going to be a fun project!
Finally, there don't seem to be many parts for a 1/48th scale kit: the wings can't be modelled folded, there are no stores and the control surfaces are all fixed. Overall, therefore, my impression is that this kit is quite overpriced for what you get and for the problems you'll have to deal with and I would guess that the pricing is a function of the rarity of the kit and the subject - I think it's the only 1/48 scale Gannet on the market.
Build
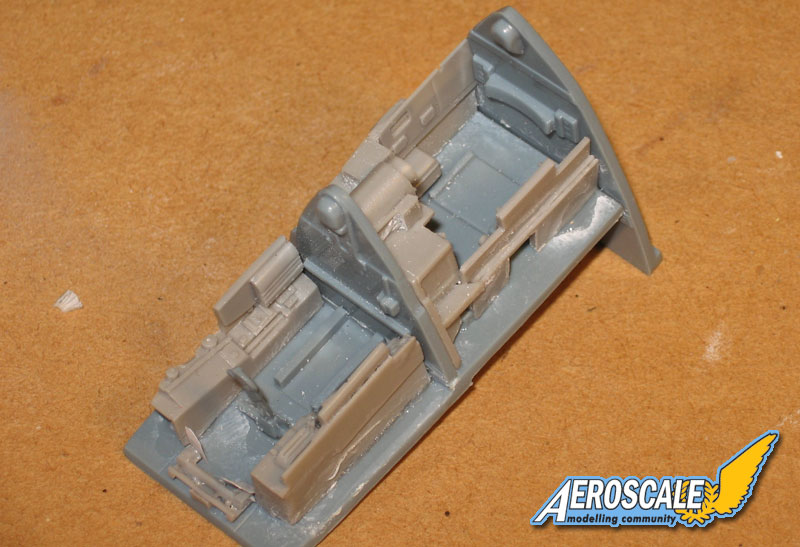
Several resin parts are used to form the three cockpits and these must be constructed (and painted) first. It is there that I came unstuck - never having encountered resin components before. They need a lot of careful cutting to part them from the rather substantial pour blocks, and my first failure was to cut the pan out of one of the crew seats during this process.
Care should also be taken in constructing the cockpit, which must eventually fit inside the fuselage halves. So, my second mistake was to position the pilot's side consoles at the edge of the cockpit floor. This makes the whole assembly too wide to fit inside the cockpit and the correct positioning for these consoles is a few millimetres inboard, with their inner edges in-line with the scribed lines on the cockpit floor. The rudder pedals - another resin component suffered a similar fate to the seat and the pedals came away from the rudder bar. These I replaced using paper as theyre deep inside the cockpit, the loss wasnt too great a blow.
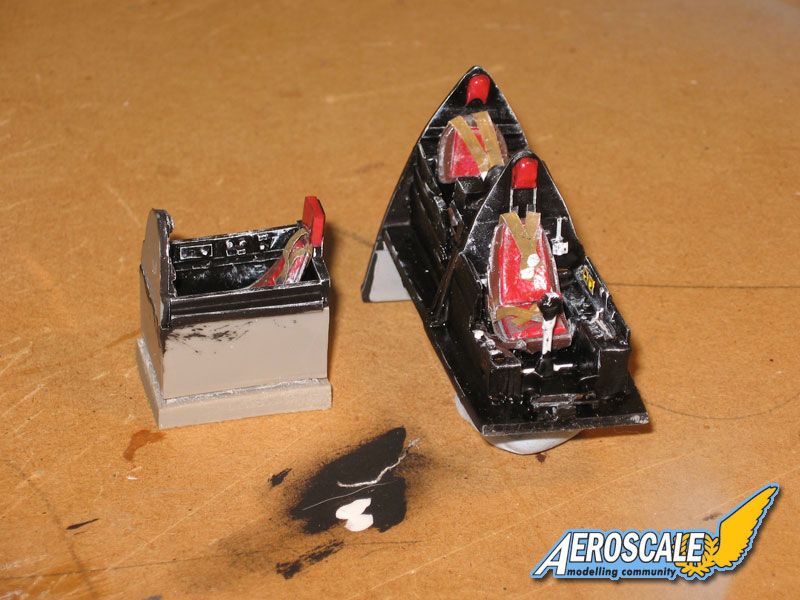
I sprayed the cockpit with Tamiya Grey Primer, painted it black with white and silver highlights, weathered it a little to bring out the detail and then installed the seats. I added home-made harnesses to the seats, made from paper and seat cushions made from (wait for it) Blutack which was self adhesive and easy to shape and seemed to take the acrylic paint nicely. I dont know about the authenticity of the seat colours, but they look fine to me. Youll also want to paint the inside of the fuselage in the region of the cockpits at this stage.
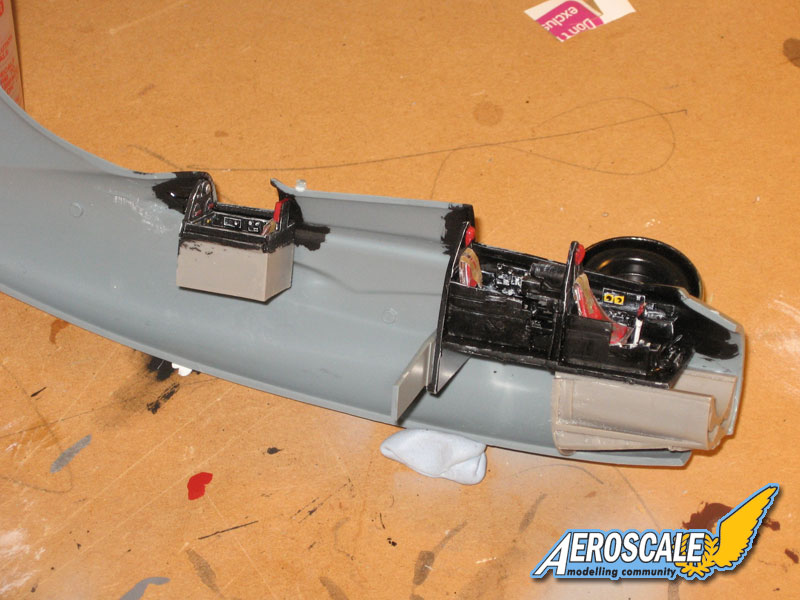
Fitting the fuselage halves had worried me as there are a number of parts that need to go inside that must fit perfectly if the two halves are to go together well: without locating pins for the fuselage or the internals, this could have gone badly. The cockpit in particular looked like a bit of a pig because there are four parts (including the wing spar) that need to mate with each other. In the end, I dry fitted the fuselage with the spar in place and the cockpit loose inside. Once the fuselage was taped firmly together, I manoeuvred the cockpit onto the spar so that it sat well in the fuselage opening, glued the cockpit to the spar and left it all to dry. I then broke the fuselage apart, installed the other items (the rear cockpit and nose gear well more dry fitting tests needed here, put the fuselage back together, glued it, taped it and retired to the veranda for a Pimms and a nervous breakdown.
In the event, even this approach wasnt fool proof; I later discovered that the fixed canopy between the two front cockpits wouldnt locate properly as it fouled against the partition behind the pilots seat which was an infinitesimal amount out of true. I had to sand the partition down some to get the fit I needed, and even then, the canopies didnt mate well to the fuselage.
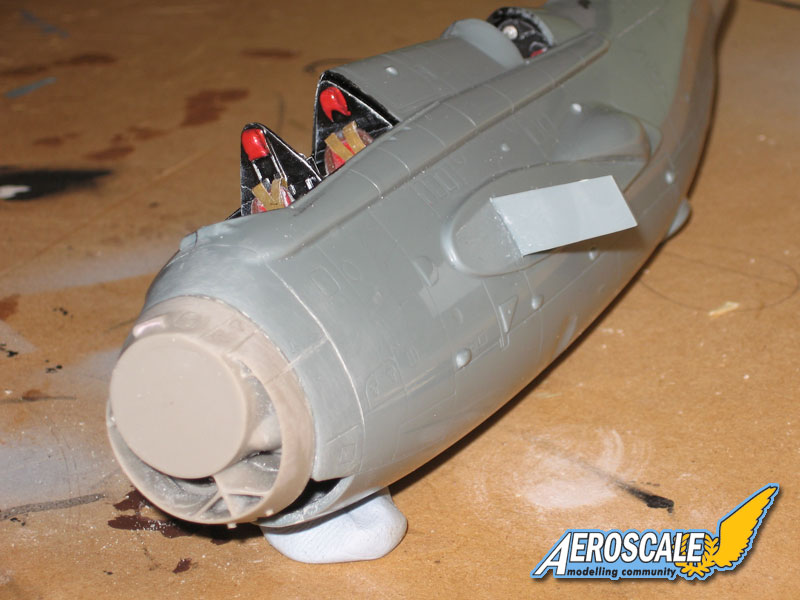
You should take careful note of the nose gear well (more resin!): there is a stop-ridge inside one half of the fuselage which allows you to position the well at the correct depth, but there is no way of fixing the correct rotation of the part (around the aircrafts long axis)with any accuracy and dry fitting doesnt help much. The upshot is that, in my model, the nose gear well was slightly incorrectly rotated and was I to have extended the nose gear, it would have been very obviously off kilter. Fortunately, I had always intended to model the gear up (thats my excuse and Im sticking to it!) which makes the part almost superfluous and rendered the error insignificant.
I dealt with the pour block on the back of the resin nose section (and indeed on most of the other resin parts) by rubbing it down on a sheet of coarse sandpaper on a board until almost there and then taking off the last millimetre or so on a sheet of fine paper. This didnt take as long as I expected, but it created a lot of dust, so I did it in the kitchen. Make sure that you leave this particular step until the fuselage has been put together as youll need to offer the nose up to the fuselage to make sure youve sanded down far enough but not too far. Of course, youll find that the bugger doesnt quite fit, no matter how careful you are. The diameter of the nose section at the bottom, near the nose gear well, is very slightly smaller than the fuselage at that point, so that the fuselage flares out slightly and no amount of sanding or dry fitting will solve that.
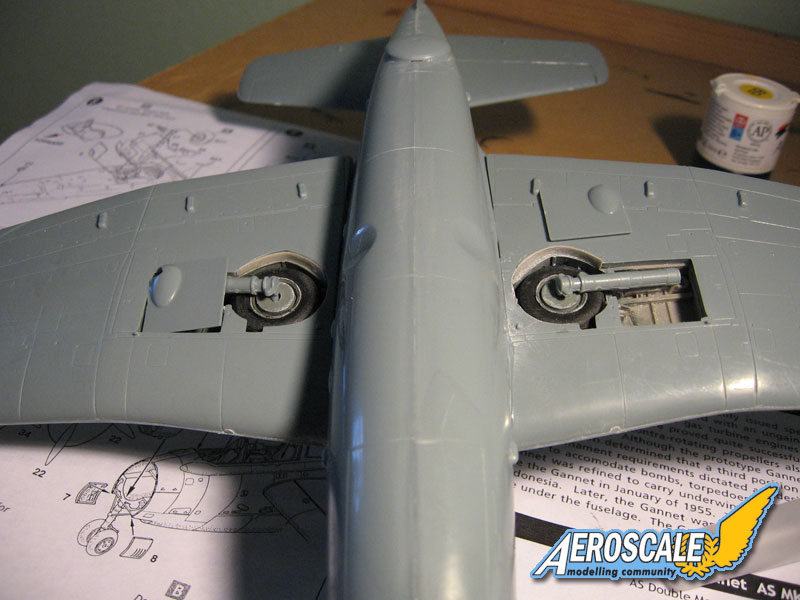
The wings went together well, with the wheel wells already painted, but a dry fitting showed that there was work to be done at the wing root seams, Not possessing any Milliput, a frantic order to the online store was needed, with the inevitable delay while the stuff was posted and then held up in a delivery strike (god bless the Royal Mail!).
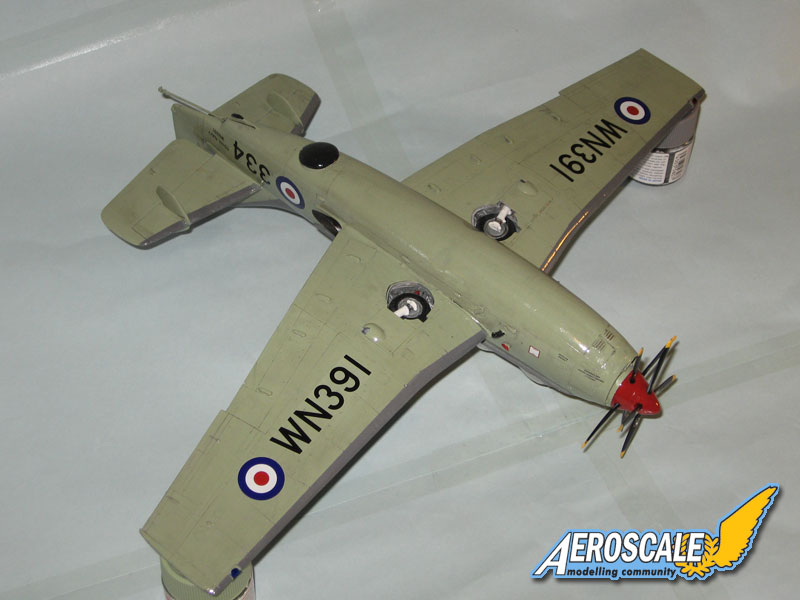
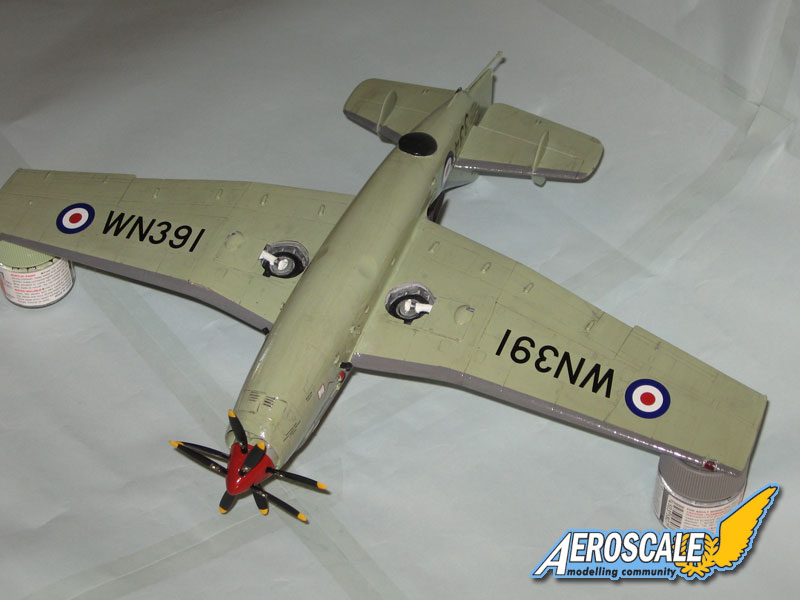
Id like to say that all the other bits and pieces went together without drama. Unfortunately (and didnt I just guess that this was going to happen!) I ran into some difficulty putting the main gear in the raised position. The wheels sit uncovered in their well with the main oleo leg running outboard to the hinge point, partly covered by the only undercarriage door. The wells arent deep enough to take the wheels and oleos and the doors foul against the oleos (lets gloss over the fact that the doors dont fit into the well either thats a minor problem). I flapped about this for a bit, considering just omitting the oleos completely, and then struck on the solution of grinding down the upper (hidden) surface of the wheel to about half its original thickness (a trial and error process) so that they sat deeper in the wells, leaving plenty of room between them and the doors for the oleos. Sorted! Time for another Pimms!
Painting & decals
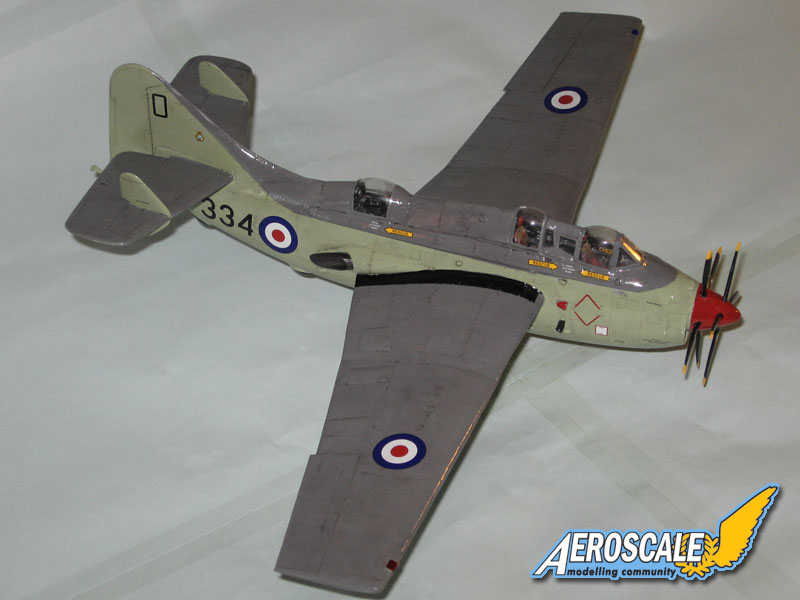
Well, after all that it was a pleasure to start painting the model. I spent some time doing the various little bits and pieces such as the props, exhausts and canopies, and then moved on to the aircraft itself. Having taped off the cockpits and undercarriage, I sprayed the lot in Tamiya grey primer and left it to dry for a while then got on with the fun bit. I started with the main colour - Sky - which is rather green and certainly doesnt evoke sky to me. Indeed, its rather putrid and doesnt look very authentic as it goes on. However, when complimented by the upper surface colour, dark sky grey, it begins to take on a rather more convincing hue, and when its varnished it looks even better. Id guess, looking at some of the colour photos on the interwebs, the Sky should probably be a little lighter, especially if youre going for a faded look.
Masking off the boundary between these two shades is a fiddly process and I cant claim to have got it quite right. Over the primer, the model only seemed to need one coat of each colour. I touched in a few details, including the wing walk wing lights and radome, tidied up the paint job, attached the prop and moved on to the decals.
Well, I never used the Microscale set and solvent kit when I used to model back in the good old days and all I can think is why not? What a wonderful invention. If Id had that stuff for my most recent model (the Trumpeter 1/48 Wyvern) the finish would have been many times better.
The Gannet kit gives you a choice of Royal Navy, Australian, German or Indonesian markings and I went, rather predictably, for the RN aircraft. The instructions have the rather cryptic warning that not all aircraft carried stencils shown. What does that mean? Is the decal plan wrong? Certainly the RN markings seem to include two different aircraft codes WN391 and 334 on the same airframe, and the pilots step down guides come in a choice of black or red. Well, being too lazy to do any further research, I followed the instructions slavishly and hoped for the best.
Finish
I worked out the panel lines by giving the aircraft a light wash with the dregs of my thinners jar and then pushing the pigment into the panels with a 00 brush. This I allowed to dry for a short while and then wiped it off with a cloth, very slightly dampened with thinner. Because this last step removed more of the pigment than I wanted, I had to repeat the process a couple of times until Id achieved the desired look a slightly oily grubby finish but nothing too dirty or extreme. The good thing was also that, left overnight, the effect dried away to an even less intrusive finish that I was particularly pleased with.
I think that the approved method is to do this after the model has been varnished, but I wanted to experiment with my own ideas and this certainly looked a lot better than my previous efforts on the Wyvern which were somewhat overdone.
One thing I did note was that the wash slightly damaged some of the paint work. Most of the model was done in acrylics, but I used Humbrol flat black enamel for the wing walk strip. The wash got in amongst this and caused it to bubble and craze a little perhaps it was the enamel-on-acrylic combination that made it vulnerable or perhaps it is just something to watch out for on enamel painted models. Nevertheless, the crazing did dry out and was ultimately no worse for it.
I decided not to damage the paintwork on the leading edges and around the cockpit because I was worried about overdoing the weathering. Similarly, I only added a very light dry-brushing to bring out the raised details. I guess that, except in the most extreme cases, less is most definitely more when it comes to weathering. Last of all a coat of gloss varnish. I suspect that satin would have been a better choice to simulate the scaled down gloss of the maritime aircraft, but to be honest I rather like the shiny look that the gloss gives the model.
Well, actually the real last job was to try and clean up the canopies which had suffered a little from the gluing process. A very careful scraping with a scalpel to get the worst of it off, followed by a gentle buffing with a toothpaste impregnated Q-tip. While it didnt fix the damage completely, it helped a bit.
Parting thoughts
I maintain that this a hugely overpriced product at nearly £40 I would want more parts, more options, better detail and, primarily, far fewer fitting errors. Perhaps this is what I should expect of a limited run kit (never done one of those before) but I really dont appreciate spending half an hour grinding down a pour block on the back of a beautifully detailed resin component, only to find that its too small (or too big or the wrong shape) for the model. My first kit, the Trumpeter 1/48 Wyvern, cost more than £10 less than the Gannet, but it had external weapons, the choice of wings folded or extended and was of altogether better quality (and all that without the need for resin).
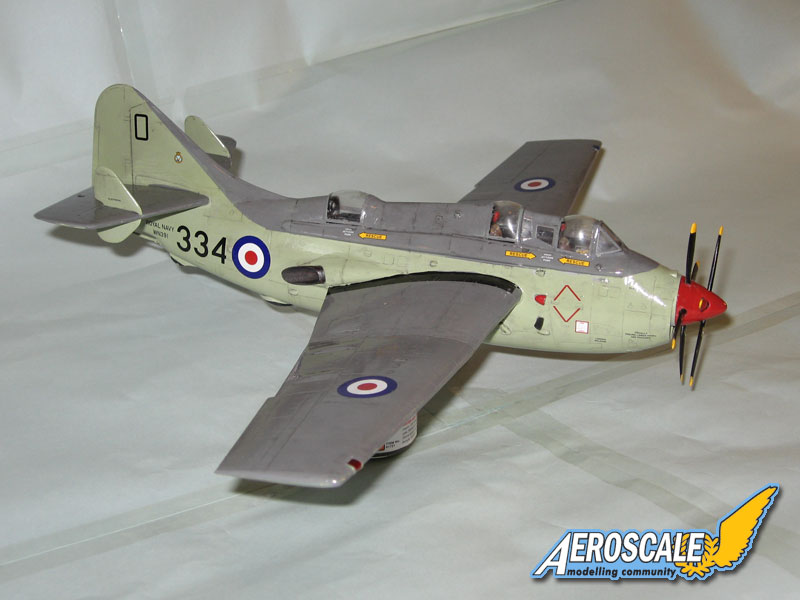
Ill admit that the Gannet build taught me quite a few lessons in dealing with its foibles and flaws and Im sure that my next kit will be the better for it. The final product, as you can see, wont win any competitions and has a definite amateurish look to it, but its scrubbed up nicely and has taken up a place of honour next to my small, but growing collection.
Onwards and upwards!
Please remember, when contacting retailers or manufacturers, to mention that you saw their products highlighted here - on AEROSCALE.
SUMMARY
Highs: One of the only 1/48 scale Gannet kits available, so considerable rarity value and it's a high quality rendering. Sufficiently challenging to be an interesting build, but simple enough that a moderately experienced modeller should have no trouble.Lows: Horribly overpriced and sadly underspecced, it is a very basic offering with none of the options that I would have thought should be standard on a £40 kit such as wing fold, weapons, conversions and the like.Verdict: With a bit of hard work and a lot of patience, this kit builds up into a very good looking product. Poor value for money, but ff it's the subject you're after, that won't matter.
About Campbell McAulay (crookedmouth) FROM: ENGLAND - EAST ANGLIA, UNITED KINGDOM
In my far distant youth I enjoyed building kits of all sorts but mostly armour and aeroplanes. After I married & spawned, I lost the habit and had to concentrate on more mundane matters as nappies, tantrums, and, more lately, snappish teenage daughters. Now, only recently, and perhaps as an escape ...
Hi Campbell,
Excellent review! Welcome to Aeroscale as well. What a great way to present yourself.
I can understand your frustration about such an expensive short run kit. However, these are often the only option if you want to build aircraft which aren't covered by more established manufacturers. Anyway, as you've said, there is a lot to learn from such builds so thank you for sharing your experience with us...
By the way, do you plan to put the model on a display stand?
Jean-Luc
Jean Luc - thanks for your comments.
No - I wasn't going to mount the model - it's hanging from my study ceiling with a Wyvern, Skyhawk and Skyraider. My wife hates them!


Comments