After months of tantalizing us with of first the 3-D computer renders, then the test-shots and, recently, a built-up pre-production kit - Eduard have released their long-awaited Messerschmitt Bf 110E. It's easily Eduard's most ambitious project ever and will undoubtedly build into a superbly impressive model.
The sturdy box is packed to the brim with separately bagged sprues. This is a complex kit and consists of:
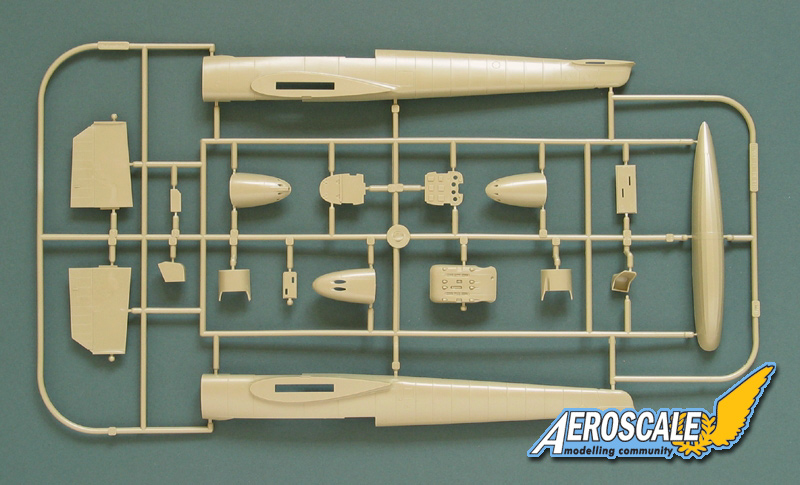
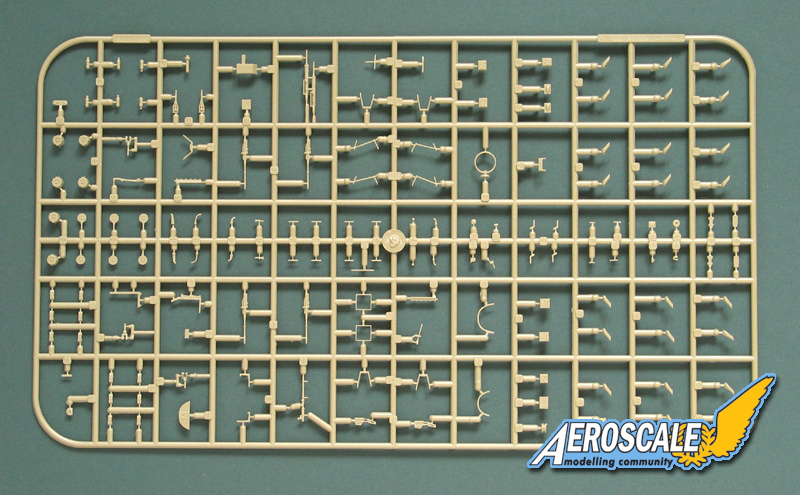
331 x pale olive styrene parts (55 un-used) on 7 sprues
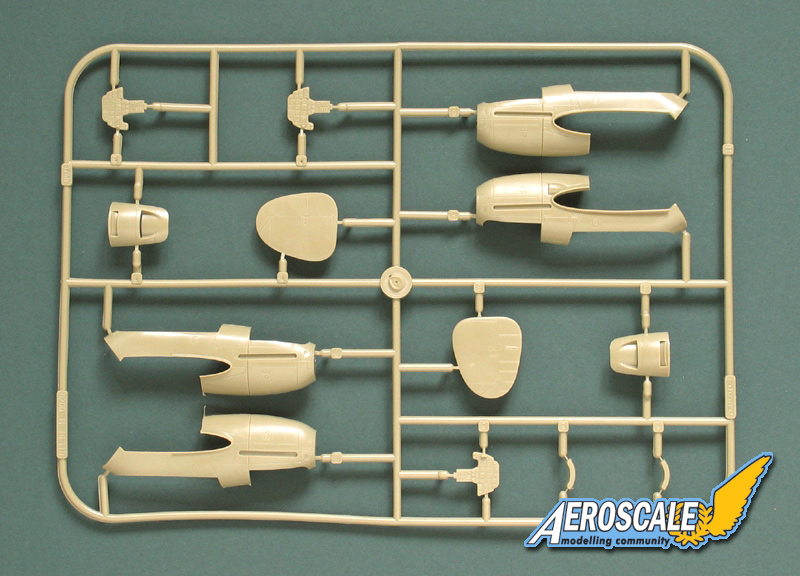
13 x clear parts on 2 sprues
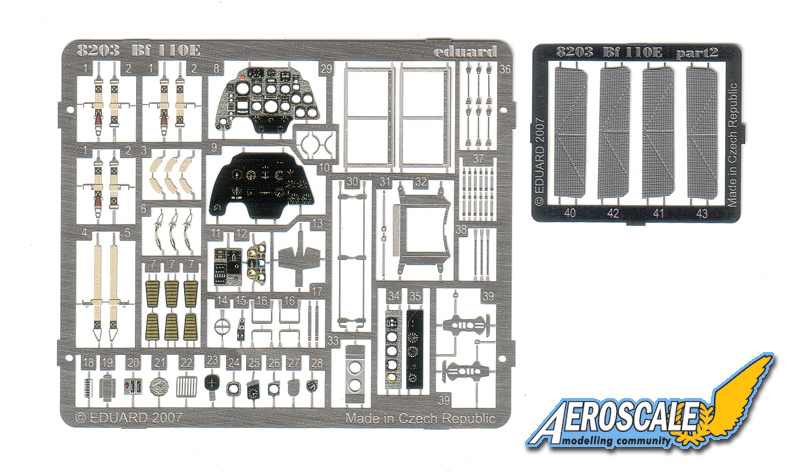
80 x etched steel parts - some pre-painted
1 x resin part
Decals for 5 x colour scheme
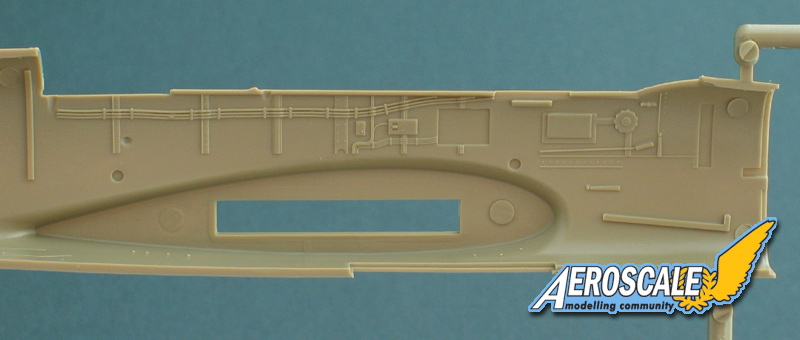
One look at the number of parts should be fair warning, but it's probably worth stating anyway - this isn't a kit for beginners! Some of the construction is quite complex with multiple sub-assemblies each made up of a number of parts in themselves. For instance, the cockpit alone comprises 130 parts - making it quite possibly the most detailed cockpit yet in a mainstream kit.
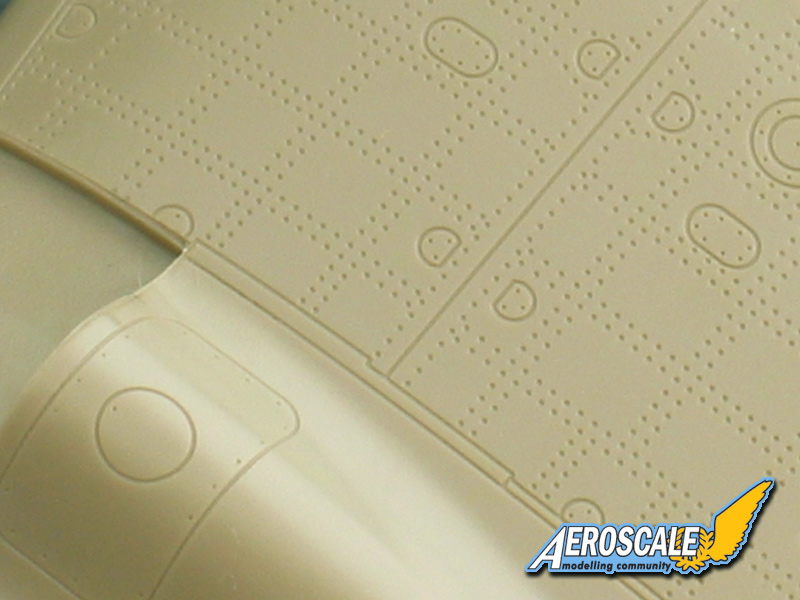
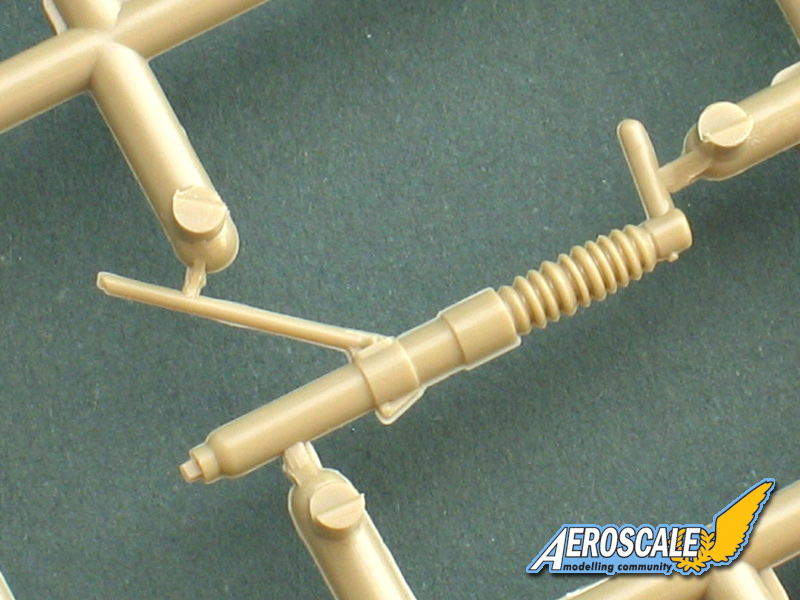
The parts are crisply moulded. I found no sign at all of any sink-marks, but there is a slight fringe on the mould lines on some of the smaller parts (visible in the photo of the undercarriage leg) and an occasional hint of fine "flash". However, this should clean off easily enough. The surface finish consists of precisely engraved panel lines and delicate embossed riveting. This is most pronounced on the wing topsides between the nacelles - elsewhere, the rivets merely follow the panel lines. Fabric surfaces are depicted with just lightly done rib tapes.
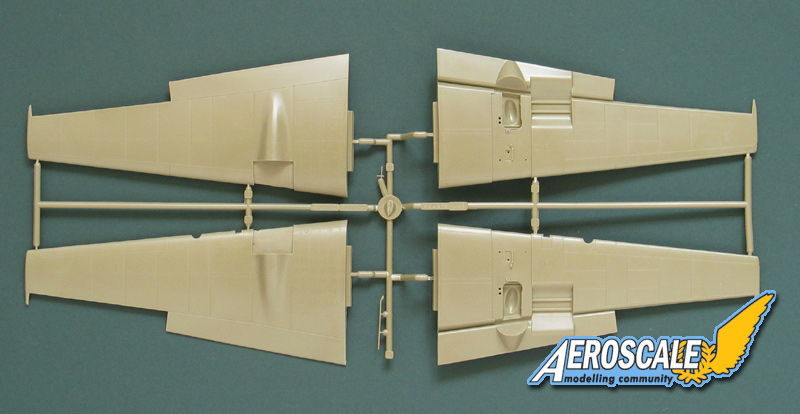
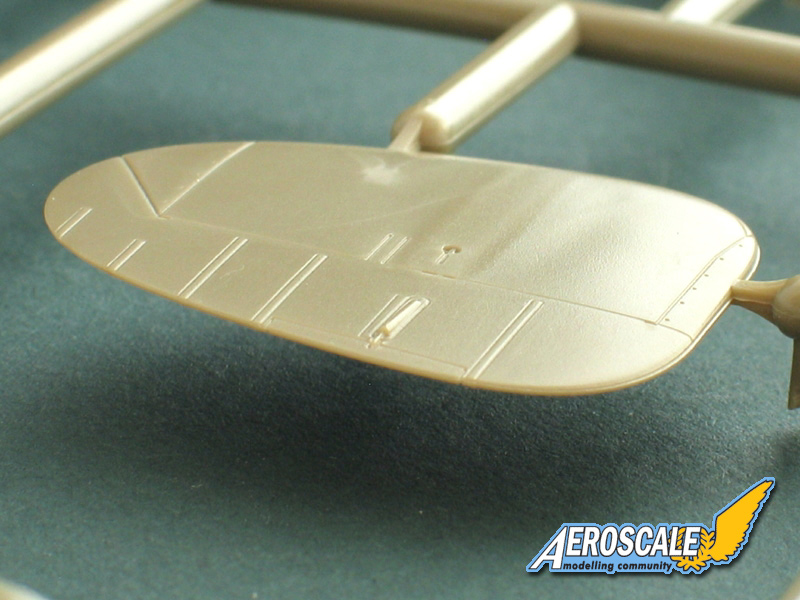
The ailerons are separate, while other control surfaces are just marked by heavier engraved lines. The leading edge slats and flaps are moulded shut and raised respectively, but this isn't too much of a loss, as this matches most of the period photos I've checked.
Test Fit
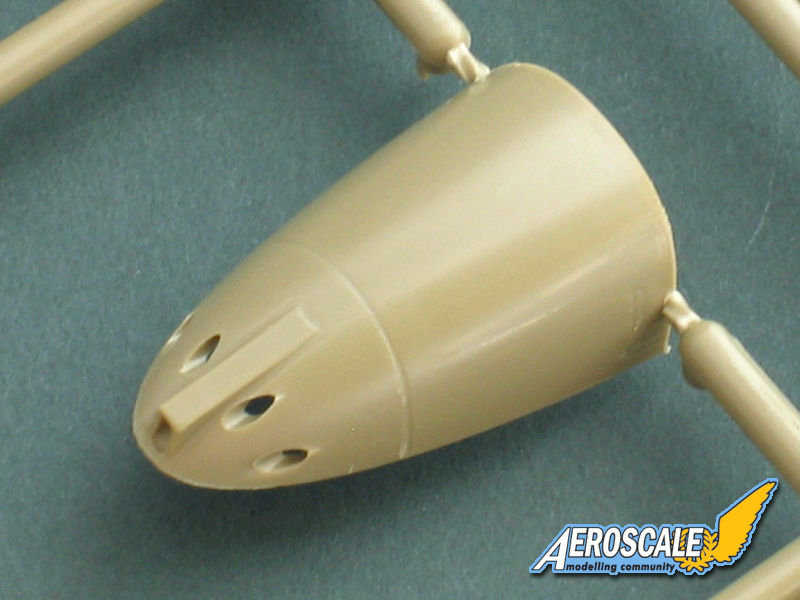
The breakdown of the basic airframe is pretty straightforward, but with a separate nose section and nacelles to allow for future versions (an early-style nose gun-cover is on the sprues). One thing that's apparent immediately is that the parts are quite thin, with a tendency to flex a bit. The wing halves in the sample kit are slightly warped, making them splay apart towards to tips, but the gap closes with minimal pressure and the trailing edge is straight and thin thanks to the lower panel joint being inset slightly from the edge itself.
The wings are an extremely tight fit to the fuselage, so the slots for the tabs will need easing a little. While checking the fit, I noticed that the wing-roots have a faintly "milled" surface and slight step near the trailing edge. A few moments' work with wet & dry paper will take care of this. Because the fuselage halves are so thin and flexible, test fitting the wings tends to pull them apart. Hopefully, adding the cockpit tub will provide the necessary rigidity to bear the weight of the wings and maintain the correct dihedral.
The nacelles seem a fair fit - better below the wings than above. Again, they have a tendency to flex, which makes dry-fitting difficult, but it looks like a little filler will be needed on the top-side joint. But remember - this is without the internal structure to give any strength to the thin parts.
The tail surfaces fit very neatly and have impressively thin trailing edges.
Highlights of the kit
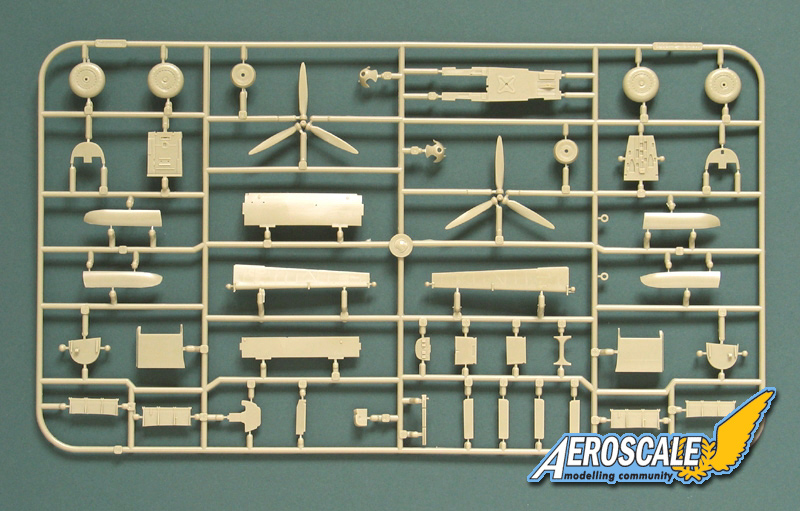
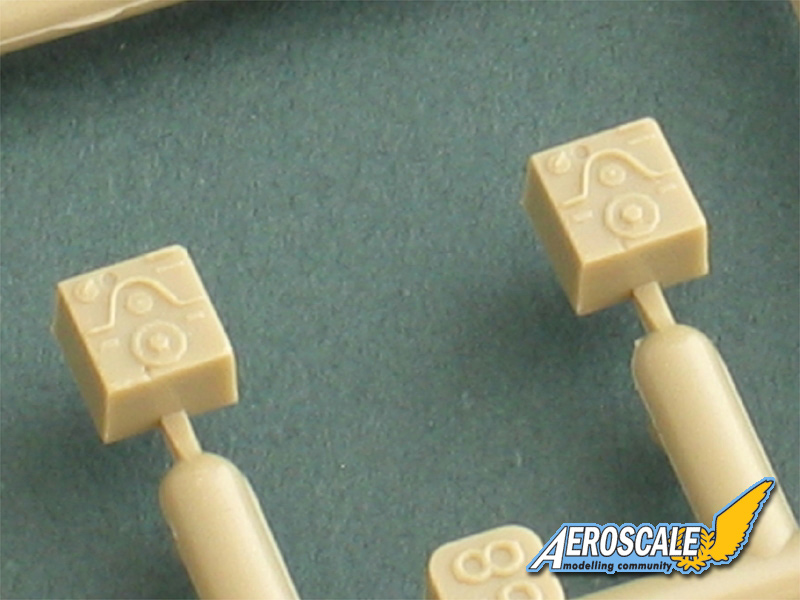
Well, there's obviously the cockpit! That phenomenal parts-count certainly isn't wasted, with excellent detail in the pilot's "office", the underfloor cannons and the equipment in the rear cockpit. The ammunition drums are all made up of several parts, which obviously complicates things, but gets over any possibility of sinkage on thick parts. The centre seat can be modelled raised or folded and most of the instrument panels and consoles are supplied with the option of moulded or etched versions.
The nose-bay is detailed with machine-guns, ammunition feeds and compressed air bottles, while the inside of the cover itself has separate stiffeners and air vent.
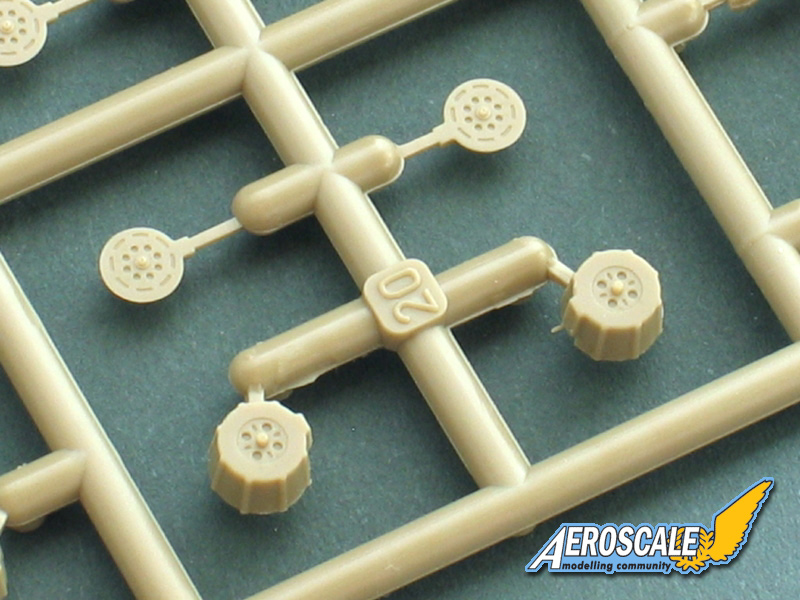
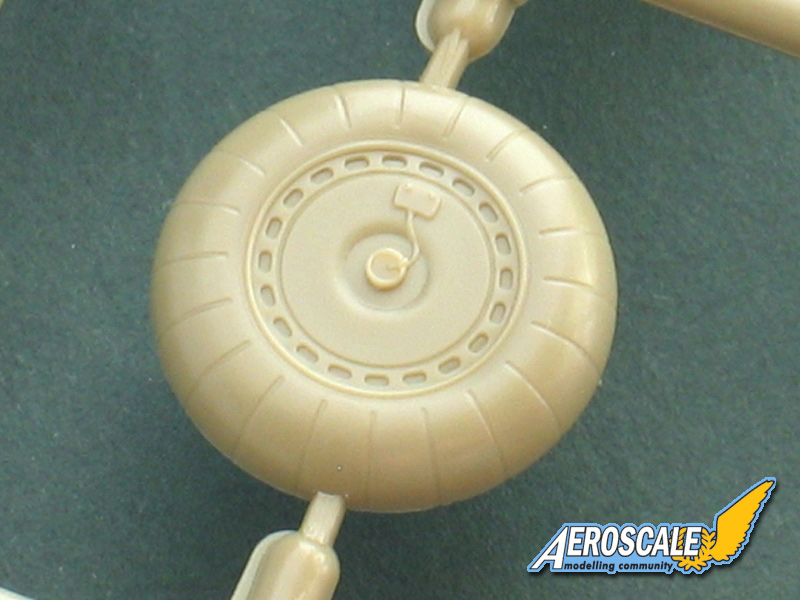
The undercarriage and wheel wells are nicely handled, with detailed liners for the wells and no less than 9 parts for each main-gear leg. The wheels have good hub detail and tyre treads, while there's a choice of tail wheels with a one-piece version or a separate wheel and fork. The wheel are all moulded "un-weighted".
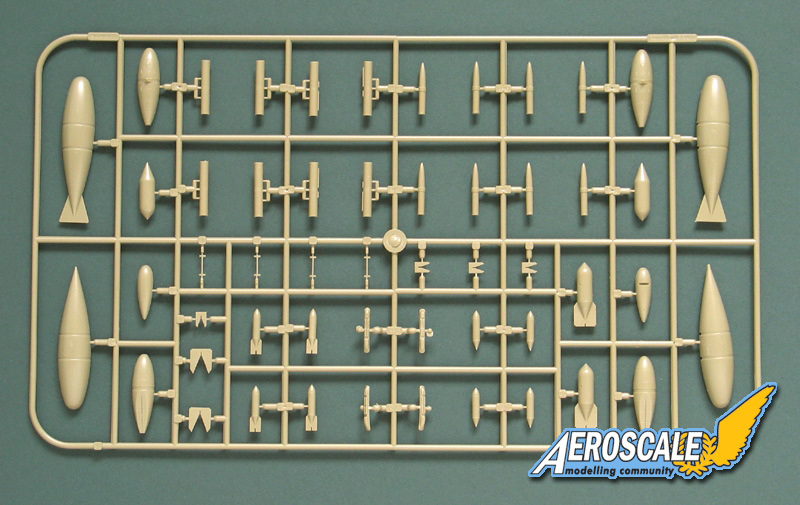
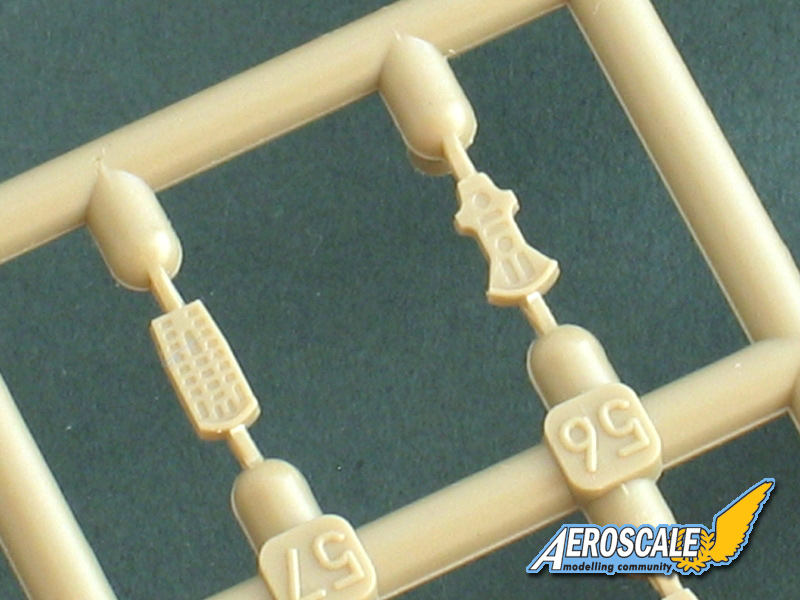
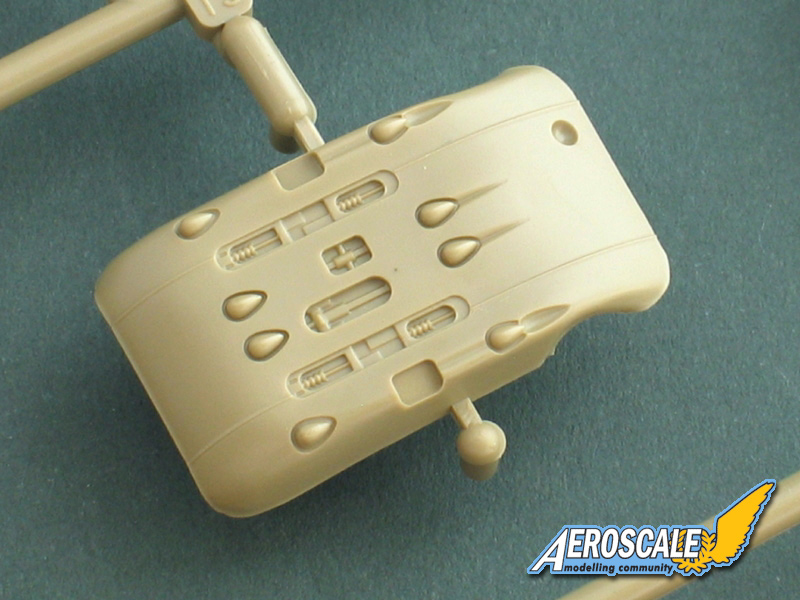
The kit is supplied with 250kg and 500kg bombs with excellent thin tail fins. The under-fuselage ETC 500 rack is very nice indeed with almost the kind of detail I'd be happy to see on a resin aftermarket part.
The canopies are really impressive and can be modelled open or closed. There are etched frames to add to the inside of open panels and, above all, the clear parts are very thin and clear - probably as thin as can safely be injection moulded. Accompanying the transparencies is a set of kabuki tape painting masks - a real plus with the number of individual panels to tackle.
Instructions and decals
The assembly instructions consist of a 20-page A-4 booklet. The diagrams are clearly drawn and the construction is broken down into manageable chunks (there are no numbered stages, as such). Gunze Sangyo paint numbers are keyed to most parts.
Decals are provided for 5 colour schemes:
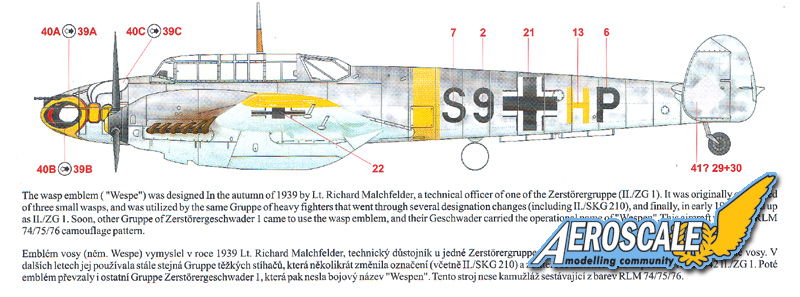
A. S9 NN, 5./ZG 1 "Wespen", flown by Lt. Herber Kutscha, Russia, 1942 in winter camouflage.
B. G9 JM, 4./NJG 1, St. Trond, Belgium, February 1942, with interesting RLM 72 upper surfaces.
C. LN LR, 1.(Z)/JG 77, Lt. Felix-Maria Brandis, Malmi, Finland, 1942.
D. W.Nr 4035, Sonderkommando Junk, Iraq, May 1941 wearing Iraqi markings.
There's a fifth scheme illustrated on the front page:
S9 HP, 6./ZG 1 "Wespen".
Backing everything up is a comprehensive set of stencils with a full-page placement guide. The decals themselves are thin and glossy with minimal carrier film. Swastikas are included and there's an additional sheet with upper-side crosses that escaped the main sheet. The registration looks excellent throughout.
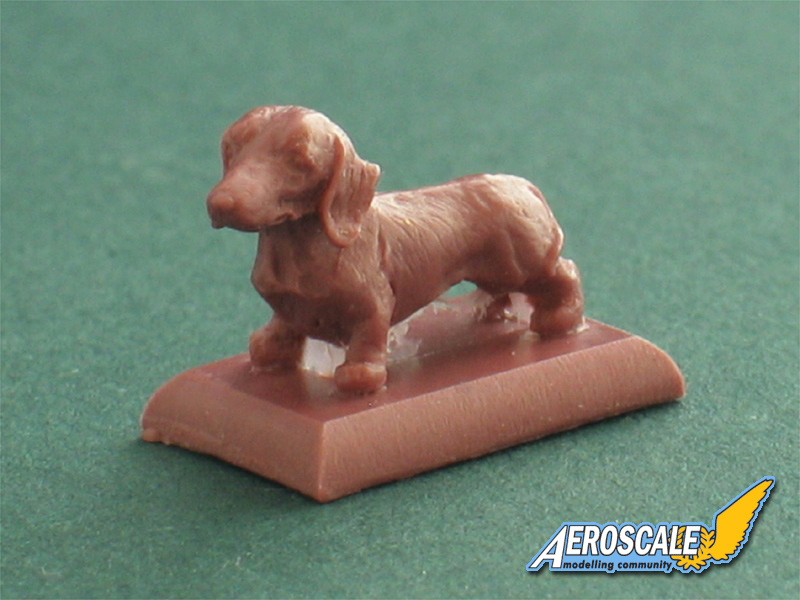
The resin part?
As a bonus, each Bf 110 kit includes one of 3 resin dachshunds that depict the mascots of 1.(Z)/JG 77. The dog is very nicely sculpted and cast in 1/48 scale so, apart from its obvious use with the Bf 110, it'll make a nice change from the obligatory Alsatian included in sets of Luftwaffe figures.
Conclusion
Eduard's Messerschmitt Bf 110E is a beautiful kit and deserves to be a huge success. It certainly isn't going to be a kit that "builds itself" and its complexity and detail means it's most suitable for modellers with a bit of experience. That said, the end result should be absolutely superb. It easily surpasses the old Fujimi kit in every department - there's really is no comparison - and sets new standards for the kind of detail that can be incorporated into a mainstream kit cockpit. I can't wait to start building it! Look out for updates in the Forum.
Please remember, when contacting retailers or manufacturers, to mention that you saw their products highlighted here - on AEROSCALE.
SUMMARY
Highs: Very highly detailed and beautifully moulded. Excellent etched details and painting masks included.Lows: All that detail means this is a complex kit that's not suitable for beginners.Verdict: Eduard's Bf 110E is a stunner. The cockpit is the most detailed I've ever seen in a mainstream kit, but the high number of parts and complex subassemblies mean this could be a challenging build.
Our Thanks to Eduard! This item was provided by them for the purpose of having it reviewed on this KitMaker Network site. If you would like your kit, book, or product reviewed, please contact us.
About Rowan Baylis (Merlin) FROM: NO REGIONAL SELECTED, UNITED KINGDOM
I've been modelling for about 40 years, on and off. While I'm happy to build anything, my interests lie primarily in 1/48 scale aircraft. I mostly concentrate on WW2 subjects, although I'm also interested in WW1, Golden Age aviation and the early Jet Age - and have even been known to build the occas...
Hi all
Shock! Horror! I'm finally back from work and (touch wood! ) should be able to get back to the workbench this weekend. In the meantime, dusting off the poor Bf 110, here's a warning of what not to do...
Eduard's instructions for the nacelles seem to go contrary to standard modelling "logic", in that they show the wheelwell sidewalls being fitted after the the nacelle itself is attached to the wings.
For the sake of experiment, I tried fitting them earlier (luckily, only with double-sided tape) which would make painting easier...
The reason for Eduard's assembly sequence is clear. With one sidewall fitted, you can fiddle the nacelle around the undercarriage attachments... but with both fitted, it just seems too tight and there's a real danger of breaking something. So, my advice is to stick with Eduard's instructions.
Looking at the flaps, it seems Eduard might have missed something. At the time of my review, I had two conflicting references on the subject of whether the flaps were fabric-covered or not. Now I've just received Kagero's Bf 110 Vol. 2 which includes plans for the Bf 110E. These and a number of photos I've looked at of battle-damaged Bf 110s seem to confirm that the original flaps were partially fabric-covered.
I haven't had a chance to get up to RAF Hendon to examine their preserved Bf 110G but, although this is basically an OOB review build, I'll add rib-tapes and show the metal panelling as per Kagero's plans.
More later - hopefully without such a big delay this time!
All the best
Rowan
Sorry to Neil and Steffen for a belated thank you for checking through their refs! Many thanks to both of you - I really appreciate the effort... and as you can see, the point of committing to paint is a bit further off than I'd have liked...
All the best as ever
Rowan
For anyone interested in building this kit, Brett Green of hyperscale has posted a nice little resource guide for it at LINK find it on the news page for 16th OCt.
It's in PDF file so it can be downloaded and printed much better. Apparently it will be a regular (3 monthly) feature for major new releases. Looks like a nice idea.
For me though, i'll be happy when this kit just arrives in the LHS
Andrew
Hi Carl
Glad to hear your '110 arrived safely - it's a beautiful kit, isn't it.
Have I made any more progress? I'm afraid not - whatever free time I have from work has to go into Site admin and reviewing the new releases flooding in these days. Don't worry, as you can imagine, I'm eager to get back to the workbench when I finally get a chance.
All the best
Rowan
Yes it is. But I think all these new Eduard kits easily fall into that category. I would love to get started on it, but I haven't even started my D.VIIs or 190s yet. One thing for sure though, when that 1/32 109 E comes out, it will be first on the workbench.
Here's the direck link to Hyperscale's download section (just in order you might be interested to have a printed version of Brett's feature article on Eduard's 1/48 Bf-110E).
Sorry to Neil and Steffen for a belated thank you for checking through their refs! Many thanks to both of you - I really appreciate the effort... and as you can see, the point of committing to paint is a bit further off than I'd have liked...
All the best as ever
Rowan [/quote]
..no problem Rowan ...FWIW I've finally located at the bottom of a large pile of mags a copy of German mag Jet & Prop issue Nov/December 1991 - article entitled 'Lebenslauf einer Zerstoerer Gruppe' - plenty of nice images of S9 coded machines, including an entire line-up ...and a couple of other random images such as this one;
Many thanks Neil
While I was tinkering with the '190 at the weekend, I happened to do a "stock-check" on my '110 build. I don't want to make the mistake of getting distracted all over again but, once I've got my current projects out of the way (including a complete spring-clean and re-think of my work-room to make enough space to actually build something in... ), I'll get back to it.
All the best
Rowan


Comments