This little 2-seater first saw light in the early '30s as the Taylor Cub, which later developed into the J3. This in turn became the O-59 when it entered the Army Air Corps. The first to be delivered had a 50 hp engine, while a later upgrade was a 65 hp engine - this version was originally called the O-59A, but due to a designation change became the L-4A.
Later versions were the L-4B, which was equipped with radio (the "A" didnt have a generator so you had to bring a battery operated radio) and a newer engine. Later US Army models sported a variable pitch propeller and further improvements, but the basic design remained the same.
The plane has a tube frame body with a canvas-covered fuselage and is a light, rugged reliable 2-seater. It is fun and easy to fly and maintain and was very affordable back - nowadays, good quality stuff costs.
A large number were built, and today a lot still are in airworthy condition, but due to changes during restoration it is difficult to see if they are J3s or Army L-4s.
Bronco models
This Company has been around for a few years and have so far marketed some nice tanks including a very nice Comet in 1:35, a submarine in 1:350, a ship in 1:700 and a series of nuts and bolts for upgrading.
They have a somewhat weird way of marketing, sometimes with a long time from the announcement 'till the kit hits the market. In this case things are a bit different, since this kit hit the shops more or less out of the blue without much in terms of publicity - it isnt even featured on Bronco Models homepage!
Initially this kit was only to be found in very few online dealers, but now it seems to be spreading to more and more. I cannot comment on availability in "ordinary" hobby shops, but I doubt many carry these kits.
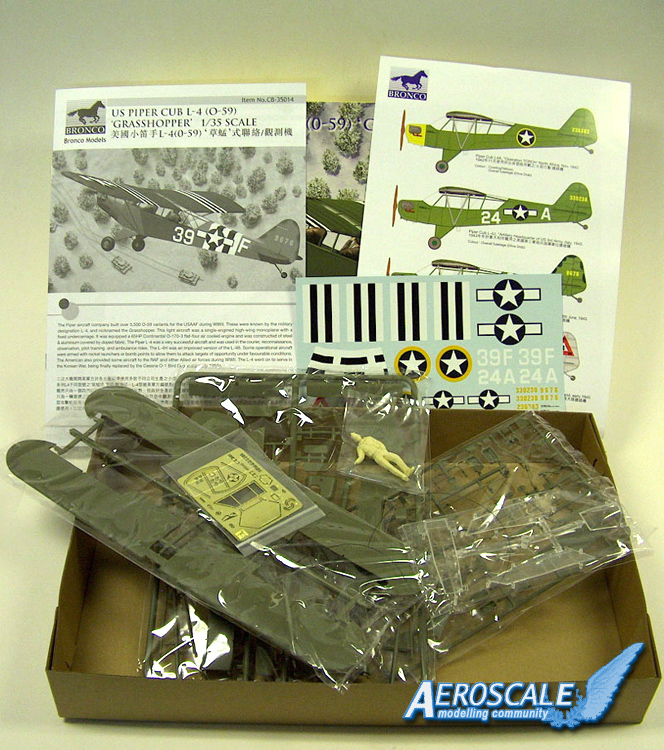
The kit - in the box
This is the first airplane I have bought in more than 25 years, but I must say that the subject was so appealing, that I simply could not resist. That said, I must also admit that my library doesnt contain much in terms of reference material - but then again, this bird is pretty simple and theres always the Internet. Oh yes, Im going to build it too.
The sturdy box with a somewhat dull box art. Inside is:
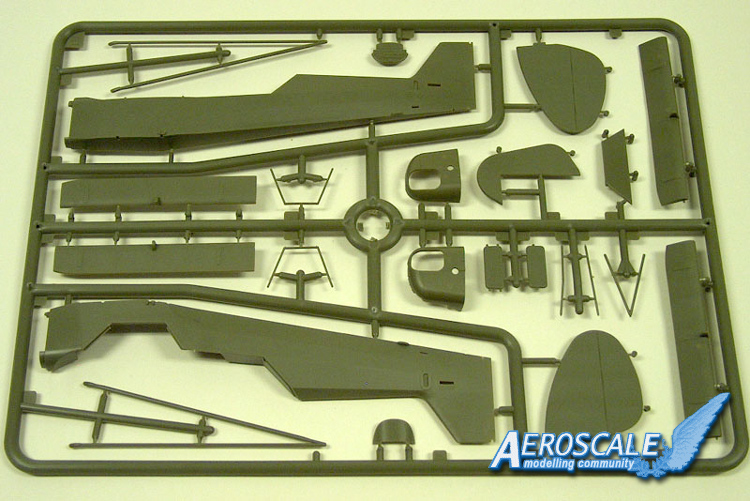
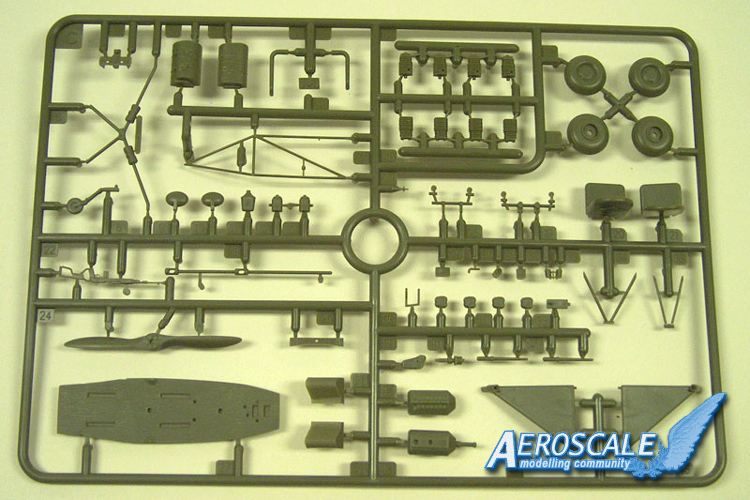
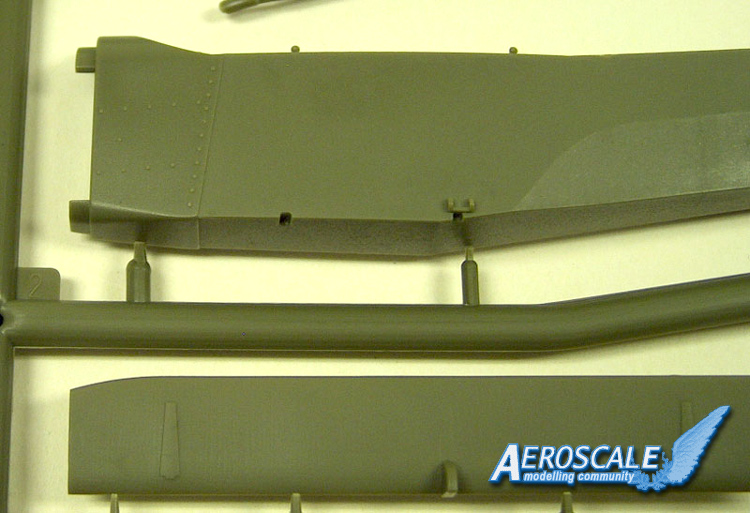
3 x olive-green sprues,
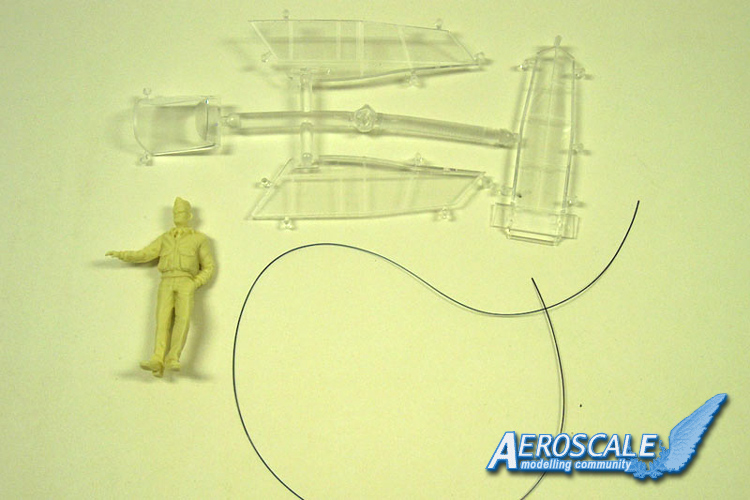
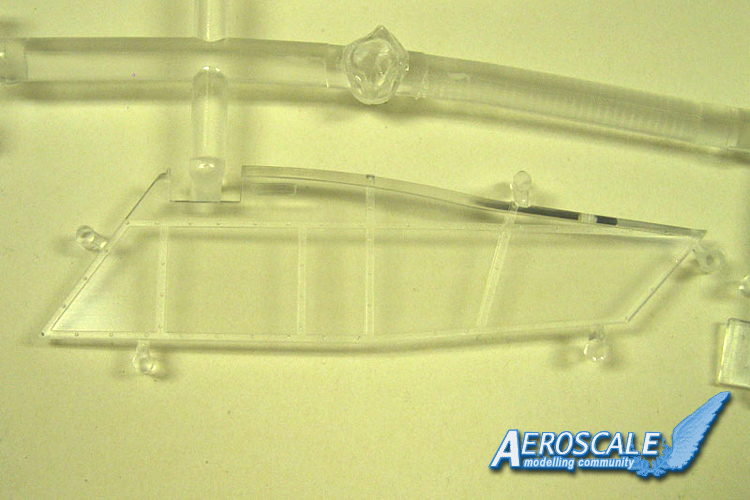
1 x clear sprue,
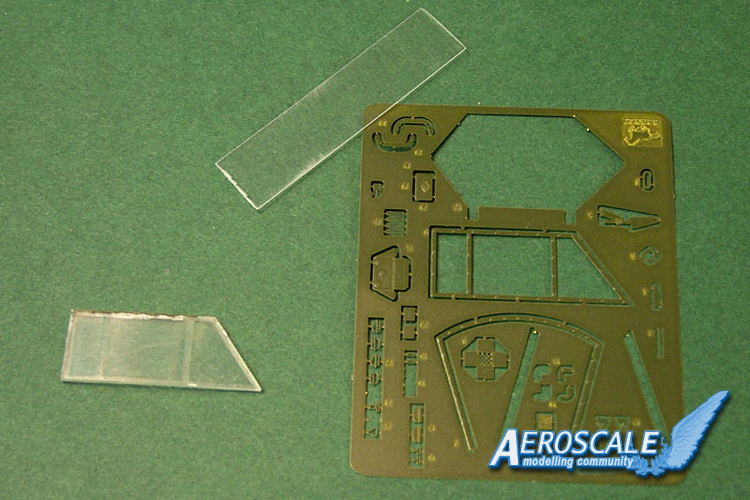
a small sheet of clear styrene,
a sheet of photo-etch,
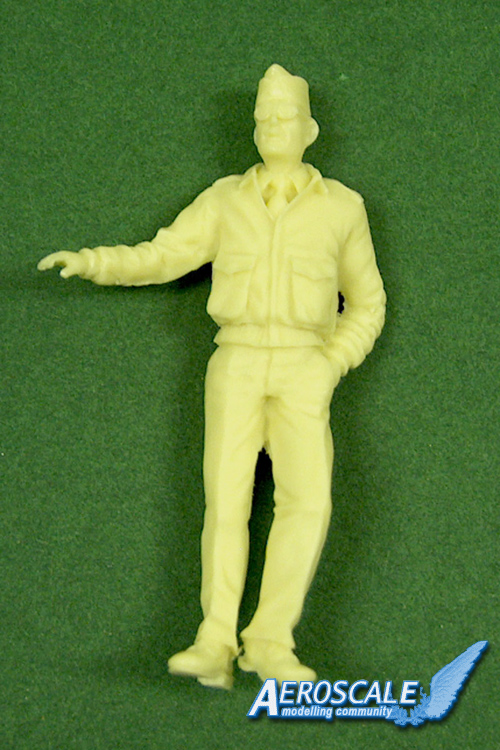
a standing pilot figure in resin,
some soft styrene string for the antenna and
the instructions and decals.
Quality, moulding and details
A look at the parts shows a minimum of mold seams, no flash or sink marks, and very few knockout marks mostly located in the cockpit or places where they are hidden.
The surface texture on the wings and body is excellent and captures the canvas surface nicely. Care will be needed to bring out this during painting, as it really is very fine in nature.
The clear parts are detailed well enough, but are a bit on the thick side. You are given the choice of adding bolts on the front screen either with small styrene bolts from the sprue or with photo-etch parts. Engineering-wise, this seems to be an unnecessarily complicated solution which is bound to give problems if you are not very careful with the glue.
Thin parts are thin - care is needed when cutting and cleaning and the level of detail is ok, considering the nature of this quite simple plane. But there seems to be room for improvements for anybody with better reference material than me, but I will stick to a more or less out of the box build.
The Kit - on the workbench.
The instructions deal with the small and relatively bare cockpit first. The floor is wooden, and the instructions tell you to go for a wooden colour. I dont have any reference to prove it, but my guess is, that many military L-4´s would be painted green on the flooring. Wood-grain is represented but will need a heavy wash to be visible trough the canopy.
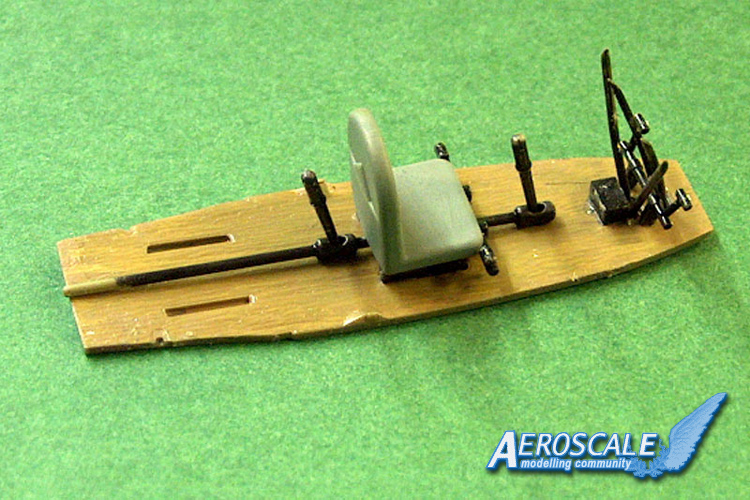
You are given the choice of two different rear seats. A bucket-type seat (like the front seat) and a bench-style seat. The bucket seats are molded in one part and are rather plain with little texture - the seat in itself looks a little on the short side, but its nothing a little putty cant handle.
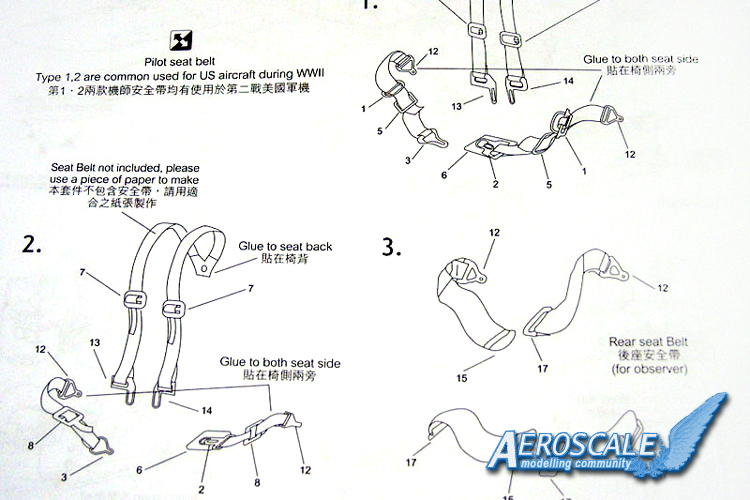
Seatbelts have to be made up from a lot of individual PE buckles combined with paper. Why not just supply a complete set of PE seatbelts with straps and buckles and all? Besides the annoying and fiddly work, the numbers on the PE fret are completely mixed up and make no sense at all when it comes to the parts needed for the seatbelts.
The kit supplies some bedrolls and weapons to populate the cockpit, but no crew aside from a standing figure in resin - more about him later
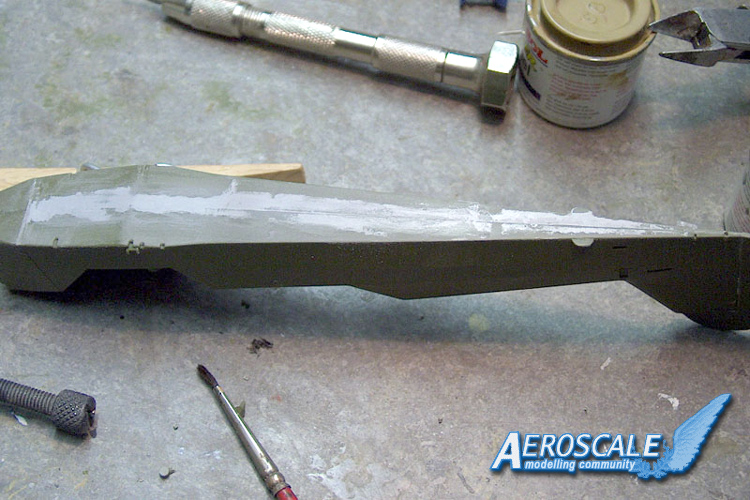
The fuselage is split in two halves and these were a bit warped on my sample - a fate some other parts share. The fit of the fuselages halves wasn't impressive, and tape, glue and putty was needed to achieve a decent finish. Even then the tail looks off kilter - I hope that placing the model on slightly uneven ground might hide that.
I choose to add the landing gear and other details on the fuselage before beginning on the canopy to make it easier to paint without too much masking.
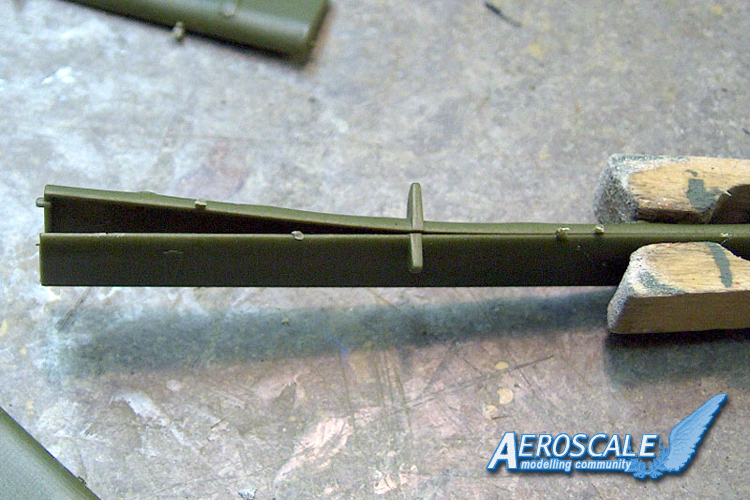
Next steps are the internal frameworks that support the wings, these parts represent the tube frame and are nicely done and fittingly thin. The fit of the front part of this framework is partly left to guesswork, since the upper part obviously connects to the middle wing support, but the lower two legs magically attach to well somewhere...
When it comes to the canopy parts I must confess to being a bit disappointed - there is a number of reason for this:
1. The parts are rather thick
2. There are only frame details on one side despite the parts being flat. Considering the large area of glass, the frames really should be represented on the inside of the windowpanes as these will be visible from the outside. Taking into account that there already are molded details on the inside (pitch controls?), it makes it even more weird that the interior frames arent represented.
3. The door has to be cut open which, due to the thick parts, is kind of "fun" but aided by well defined scribed line.
4. Lastly, you have to add frame/bolts to the windscreen as either a piece of photo-etch or individual bolts - which just cries out for spilling glue on the window. Both ways must be characterised as a piece of incomplete engineering.
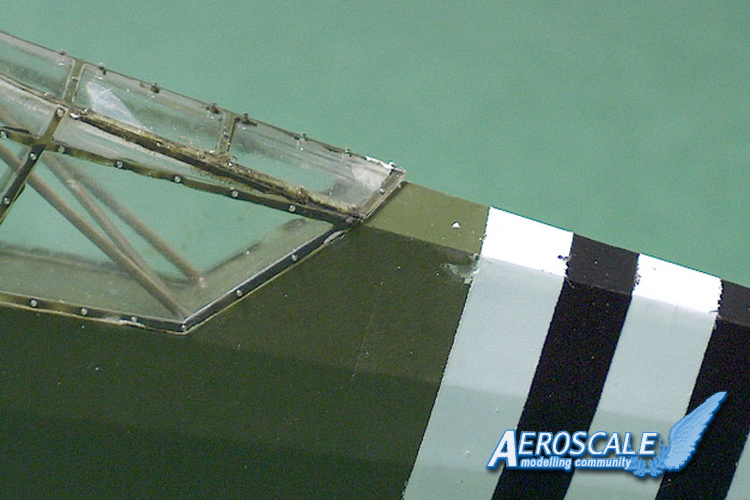
Attaching the canopy and frame support is rather fiddly and needs lots of care. Therefore I decided to assemble all the clear parts first and added the framework to the canopy. The thickness of the canopy represents a real problem when it comes to the molded on details like the throttles on the left-hand side of the cockpit and the overall fit. The result is, that the clear parts protrude over the fuselage parts both in the left side and on the top and to prevent that you have to both remodel the throttle parts and trim the fuselage or the windowpanes to make them sit flush with the top of the fuselage
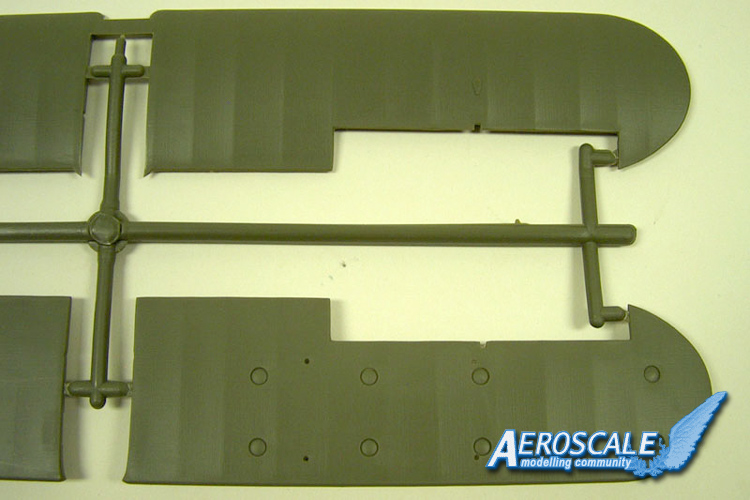
Wings are divided into a full-span upper part giving extra stability and 2 separate parts for the underside. The ailerons are separate and show considerable warping so care is needed. The control surfaces are moveable, but are best glued in place.
The texture on the wings is excellent and finely represents the fabric surface of the wings. On the underside both sides sports 8 indentions, and I quite frankly dont have clue to what they are supposed to represent - be careful with the putty to preserve the surrounding textures or use punched out styrene discs to cover them.
A problem I found was that the fit of my upper wing was so tight that it made the wings bend upwards too much - to overcome this I decided to cut the middle connector and fill it later.
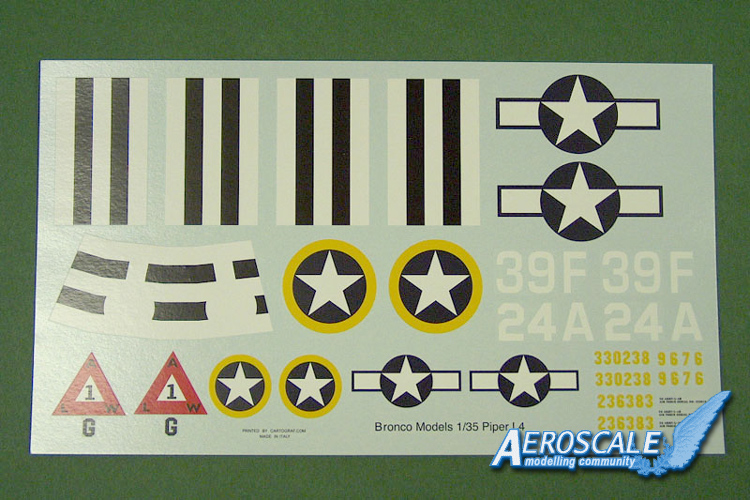
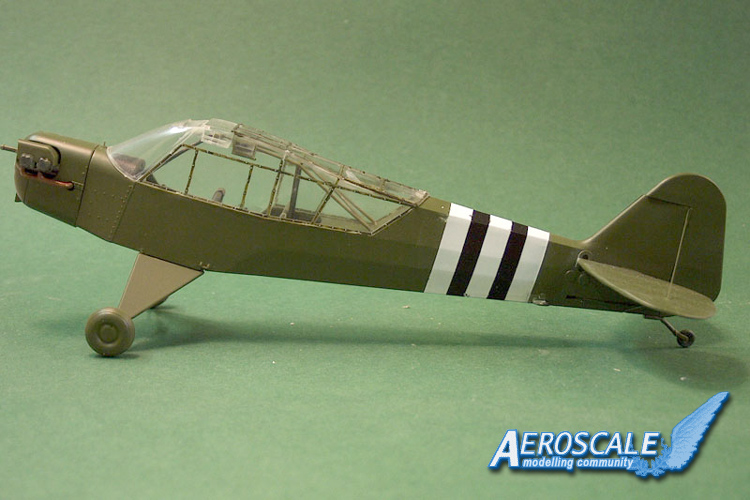
Adding wing supports are easy, but it might be wise to add invasion stripes before doing so if you are building that version. I sprayed mine on, so I cant comment on the fit of the kits decals; the supplied instructions and color sheet dont tell you the correct placement, so you have to do a bit of research.
The engine is nicely reproduced and goes together without much fuss - unfortunately most will be hidden when adding the cowl. But for a repair scene the engine would look real nice. The parts layouts does seem a bit overdone with the cylinders all made up from three pieces each where current level of moulding technique should allow one part to suffice.
The Figure
A standing resin figure comes with the kit representing a USAAF pilot. He would be quite nice, if it wasnt for the molded-on sunglasses that dont look convincing - otherwise he looks good with nice and sharp details.
Conclusion
This is not really a bad kit, but it's not a great kit either, which comes from a number of design-related choices that leave the impression that this kit was not really finished before going in the market.
Bronco have obviously mastered the molding technique to a point where they can deliver great details, very small parts and very nice textures. Besides that, they also have the guts to choose some very interesting subjects - but and its a big but... its really, really annoying that the potential to do a great kit is missed by not finishing the job properly.
The idea of including photo-etch is basically nice, but it misses the point if the PE parts cant compete with the styrene molding in details, or if they are as annoying to work with as the seatbelts.
It might just be me, maybe Im spoiled with the latest armour releases or not on par with the current state of the art in airplanes but overall Im not impressed by Bronco's effort, but then again, this is the only game in town, and will build into a decent model, but its hard to give it more that 7 out of 10 - and even then, I might have been too kind and influenced by the choice of subject.
SUMMARY
Jan Klarbæk builds Bronco's attractive L-4 Grasshopper - cleverly scaled to tie in with mainstream AFV kits.


Comments