Introduction
Aircraft related buildings are difficult to find in kit form, especially in 1/48 scale. I don't think a mainstream manufacturer will ever produce a range of control towers and airfield barracks in quarter scale, because there are simply not enough potential buyers for such "niche market" kits. So, if you want to build a larger WW2 RAF (or USAAF 8th Force) airfield diorama, you have to wait for alternative companies to release models such as this 1/48 scale WW2 Airfield Tower by Flightpath.
History
This kit represents the most common type of WW2 control tower, which was used by all commands of the RAF and on many USAAF airfields. The kit allows both pre-1943 (12779/41 - large front windows) and post-1943 (343/43 - smaller inset front windows) versions to be built.
The content
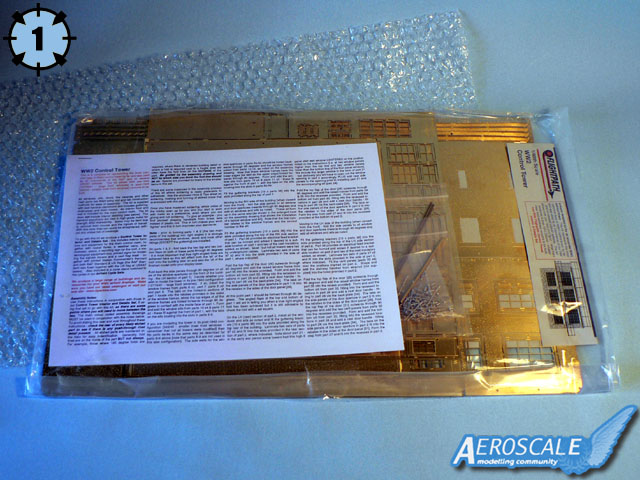
There is no cardboard box this time, as the kit comes in a simple plastic "bag" (picture 1), but it was protected with plastic bubble-wrap and a sturdy piece of melamine wood to avoid damage during transportation.
The content of the kit is the following (picture 2):
- four big photo etched brass sheets
- one bag with detail parts
- 10 page instruction "booklet" (10 A4 sheets)
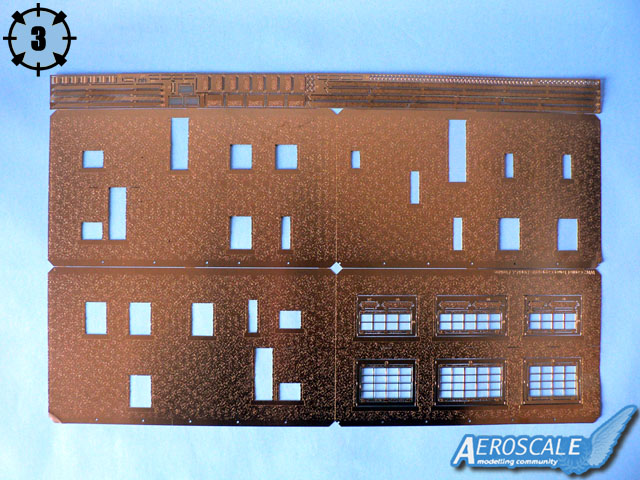
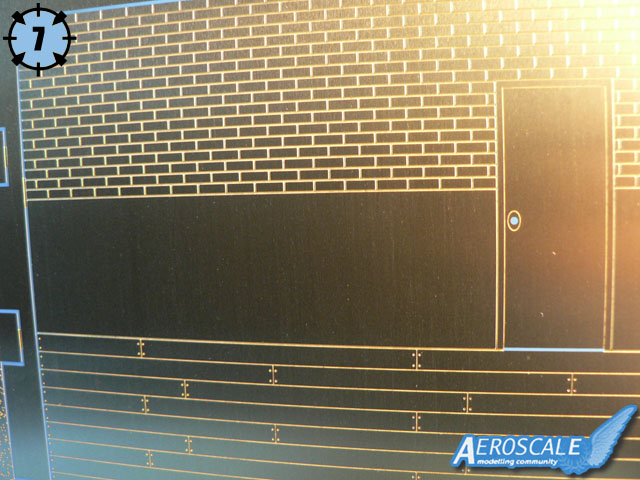
The photo etched brass sheets are quite impressive. To give you an idea of their size, put two A4 paper sheets side by side (this gives an A3 format), and you will have approximatively the dimensions of the one representing the main walls of the tower (picture 3)!
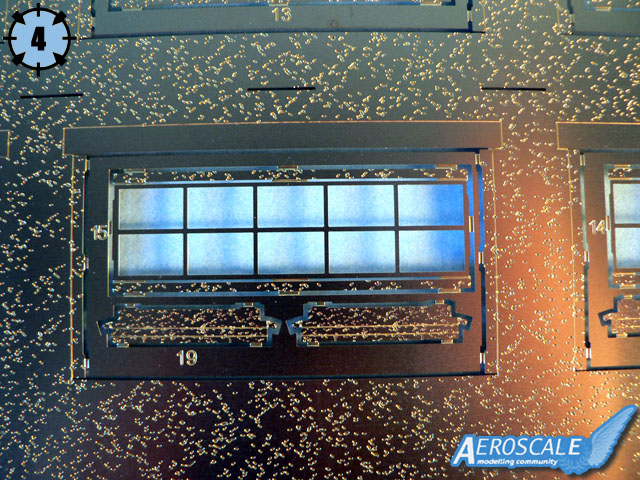
The brass used to make this photo etched kit is quite thick (a good thing considering the size of the parts), but this didn't prevented the details being nicely rendered (picture 4). My only complaint would be that the walls have a somewhat "artificial" texture on them. This was also the case in Flightpath's Nissen Hut and Airfield Hut kits. I think some additional texturing will improve the overall look of the finished building.
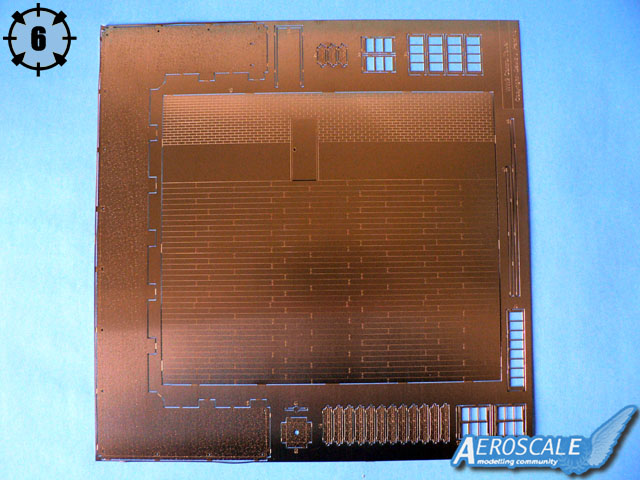
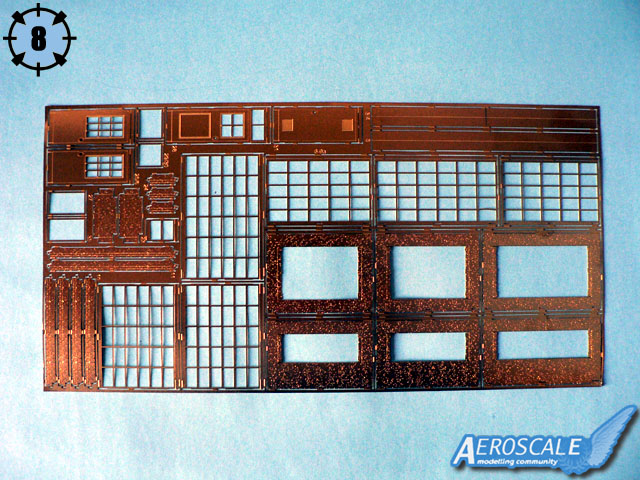
Two PE brass sheets represent the roof and the interior parquet flooring (picture 5 and 6). The details are also somewhat artificial as they are too "clean" (picture 7). Here also, I believe some texturing will improve things. The last sheet (picture 8) mainly includes the alternative windows for a post-'43 version of the tower.
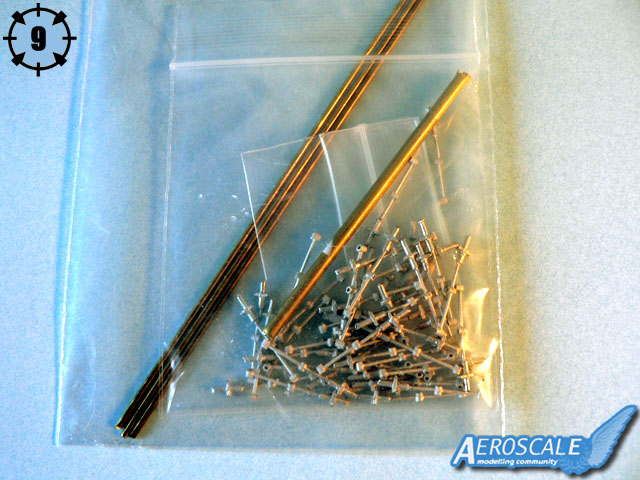
A small plastic bag includes all the detail parts Flightpath wasn't able to produce using the photo etching technique (picture 9), mainly the handrail stanchions in high-grade metal and the down pipes in brass.
Instructions and building
Here is an excerpt from the kit's instructions about what's provided in the kit:
All windows, sills, doors, the veranda and other main parts are fitted using slot and tab construction methods for ease of assembly. The kit is supplied with cast handrail stanchions and includes guttering, down-pipes and drain covers. An interior floor and walls is included for the main control room.
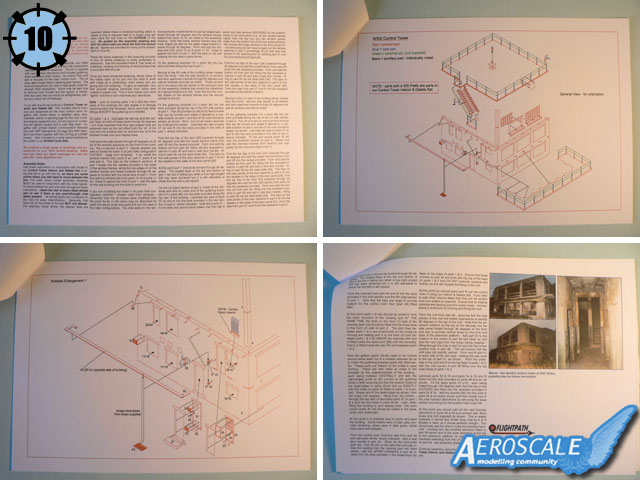
For such a unusual kit, detailed and precise instructions are vital. Flightpath's Control Tower assembly guide is composed of both text and drawings (picture 10). The text will give you the best building sequence, while the plans will give you a visual reference. It is good the instructions are only printed on one side of the A4 sheets as this gives you the possibilty to read the text and see the drawings at the same time.
Frankly, I don't know if the kit will be strong enough if built as per instructions. I must confess I haven't built any of Flightpath's photo etched buildings so far but I think the brass must be backed with another material (plastic or wood) to give it more thickness and more strength. In the instructions it is recommended to use soldering to join the largest PE parts together, this pretty much says it all...
Unfortunately no painting guide is provided for the control tower and you will have to check your references for the exact colors to use (both for the outside and the inside).
Conclusion
Flightpath's 1/48 scale WW2 Control Tower is a very original model kit. Once assembled, it will represent a nice replica of the real building and a fantastic subject in a diorama, especially if you also buy the additional
Interior and Detail Set. However the complexity of it's construction, the difficulty in working with large photo etched pieces and most of all the price, will probably only make this kit suitable for experienced diorama builders with a lot of display space and a very comprehending wife/girlfriend.
As a last note, if you need a good diorama idea to go with the Control Tower model, here is one based on a story told to David Parkins (creator of the kit) by his uncle:
[...]Another visitor was a Colonel from the USAAF, who in early '45 would park his P-47 next to the tower whilst visiting from mainland Europe for the weekend, in order to visit the wife of an absent army officer in nearby Ringwood. To keep quiet about the mistress and keep an eye on the P-47, Albert (the Author's uncle)
was given drink and Lucky Strikes by the Colonel.
Please remember, when contacting retailers or manufacturers, to mention that you saw their products highlighted here - on
AeroScale.


Comments