Every era has its icons, and for aviation of the early fifties, those were without a doubt, the American F-86 Sabre and the Soviet MiG-15, clashing over the Korean peninsula during the Korean War. The genesis of the F-86 Sabre evolution was a step-by-step approach in the interest of improving performance and flying characteristics. Thus, the early F-86F Sabre was generally an F-86E with a more powerful J-47GE-27 engine. With more power, the F-86F was now almost the equal to the MiG-15 in rate of climb while being some 30 mph (48 km/h) faster. Apart from a lower service ceiling, another weak point that remained with the early F variants was that they were unable to outmaneuver the MiG-15 at combat altitudes of over 40,000 ft (12,200 m). Ultimately, this was solved with a new wing. Work on the new F-86F Sabre began on 31st July 1950, and, after successful tests, a contract for the first 109 F-86Fs was approved on the 11th of April, 1951. Because of technical problems with the new power unit, the first planes did not make it into service until December, 1951. Apart from the more powerful engine, the F-86F introduced a standard flat windscreen and a simpler, but more reliable A-4 gunsight with a gun camera. The strengthened wing was another improvement, so that drop tanks and bombs of up to 1,000 lb could be carried, beginning with the F-86F-5. Starting with the F-86F-25 and F-30 versions, a second pair of underwing pylons was added, solving another problem. When bombs were carried on the two existing pylons, no drop tanks could be fitted and the combat radius was as small as 50 miles. Therefore, another pair of underwing pylons helped substantially, as it allowed for carriage of both bombs and drop tanks. As a result, the combat radius for bombing missions rose to 568 miles, and the Sabre became a true fighter-bomber. The F-86F-25 and F-30 were basically the same aircraft, the F-25 being produced at a Columbus factory and the F-30 in Inglewood. They were, as stated previously, nearly equal to the MiG-15 in performance, with one exception - combat maneuverability. This weakness was adressed with the development of a new wing called the '6-3'. With it, the 'definitive Sabre' of the Korean War emerged. This new wing had the leading edge extended by 6 in (152 mm) at the root and 3 in (76 mm) at the wingtip and that´s why it became known as the '6-3 wing'. The wing area increased from 287.9 sq ft (26.78 m2) to 302.3 sq ft (28.12 m2). Automatic slats on the leading edge were deleted and, in order to optimise airflow over the wing, a 5 in (127 mm) high wing fence was installed on the leading edge at 70 per cent span. With the new wing, the maximum speed of the Sabre increased from 688 mph (1106 km/h) to 695 mph (1118 km/h) at sea level and from 604 mph (972 km/h) to 608 mph (978 km/h) at 35,000 ft (10 688 m). Of greater importance was the improvement in maneuverability at high altitudes and Mach numbers. The new wing effectively enabled Sabre pilots to keep inside the MiG-15 in a dogfight. The only major drawback of the 6-3 wing was an increase of stall speed from 128 mph (205 km/h) to 144 mph (231 km/h). The first fifty conversion kits for modification of existing F-86Fs in Korea to the 6-3 standard were shipped in September, 1952, and pilots soon discovered its advantage. All the F-86Fs were upgraded with the new wing shortly afterwards and starting with production numbers 51-133341 (171st produced F-86F-25) and 52-4505 (200th produced F-86F-30), all new aircraft were delivered with the 6-3 wing. Later on, some of the aircraft received the wing from the F-86F-40, which sported the automatic slat on the leading edge of 6-3 wing and the wingspan was lengthened by 12 in (305 mm). Because of this development, it is possible to spot the same aircraft with any of these wing configurations during different stages of its service life. Info from the Eduard instructions
In the box
The Ultimate Sabre boxing is packed in the standard top opening box adorning a colour drawing of one of the marking options for the Sabre on the lid.
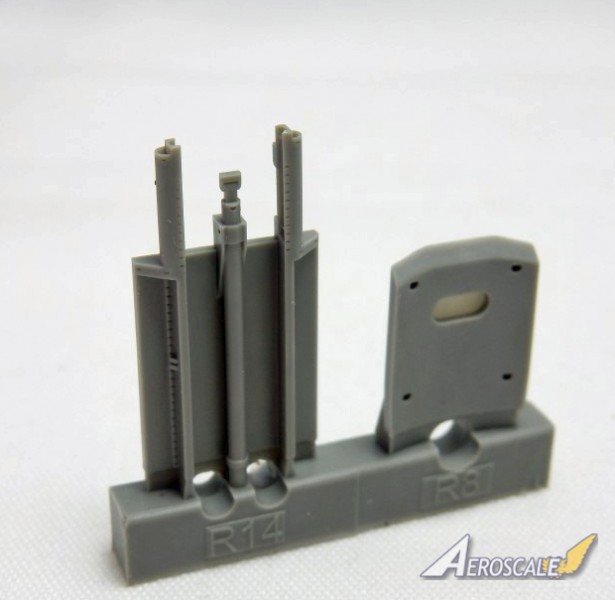
Packed inside you will find seven light grey sprues and one clear sprue, eight resin parts, two photo etch sheets, a mask set, a large decal sheet and the colour instruction manual.
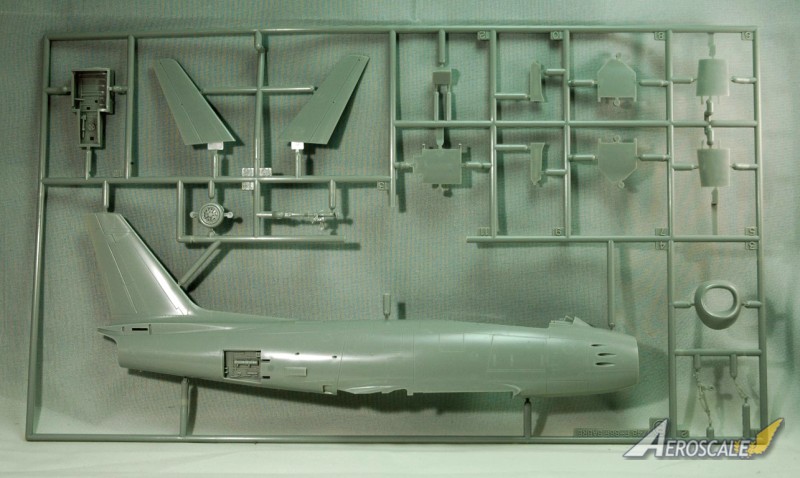
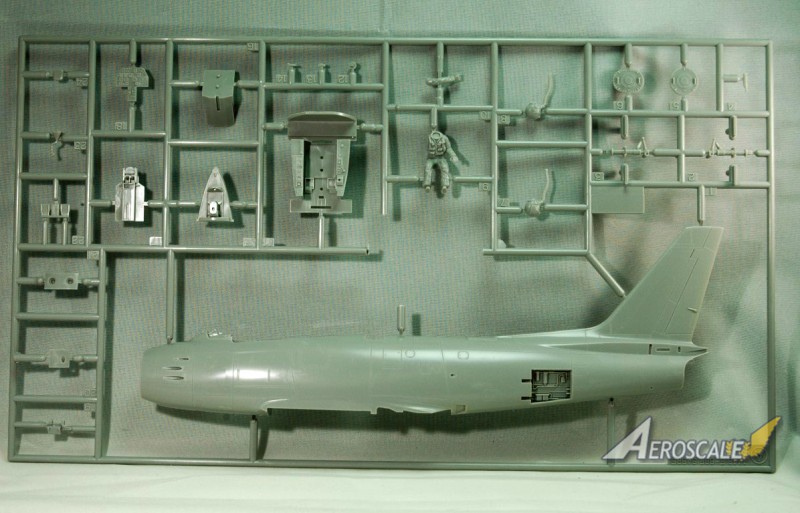
The plastic sprues are from the Hasegawa kit first released in 1996, and they have held up well, with no flash or discrepancies found on the plastic.
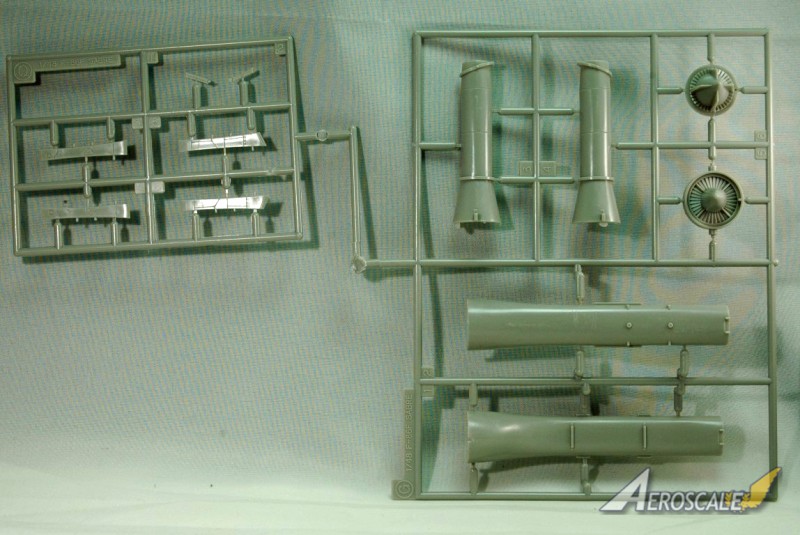
Pin marks are virtually non existent, but there is a couple inside the exhaust pipe which will need to be sorted out before you close the pipe up, as they are near the end of the exhaust and will be seen.
Exterior detail is remarkably good, with some crisp recessed panel and rivet marks along the fuselage and wings.
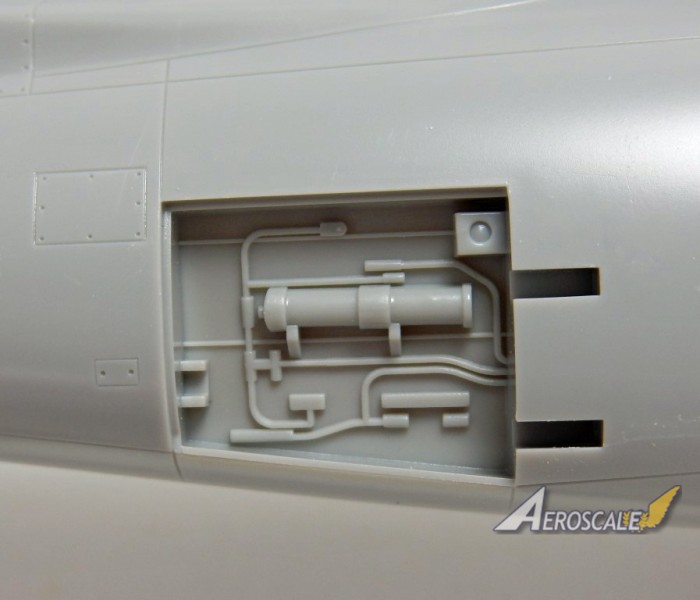
The fuselage halves have the tail and rudder moulded as part of each fuselage half, so if you want to position the tail off center then surgery will need to be done. The two fuselage air brakes can be modelled as open or closed. Detail is pretty good for the air brakes with the pistons and wiring for the moulded in the internal bays. The air brakes have some nice detail for the inside face and come with separate actuators.
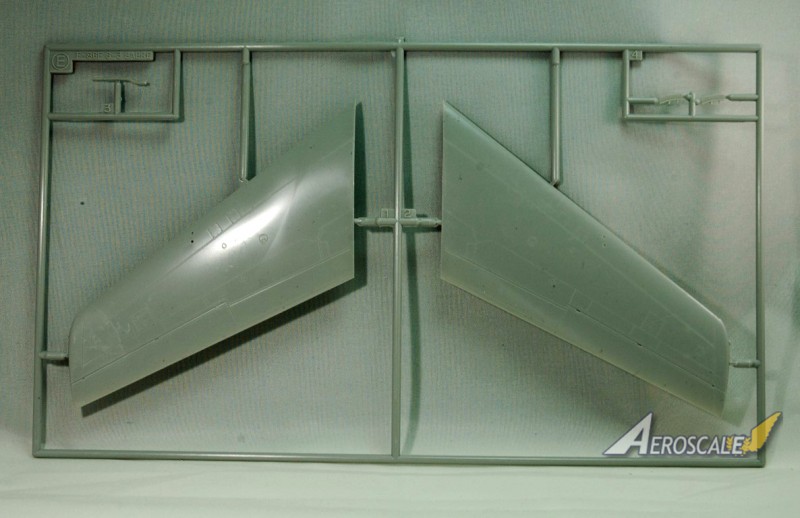
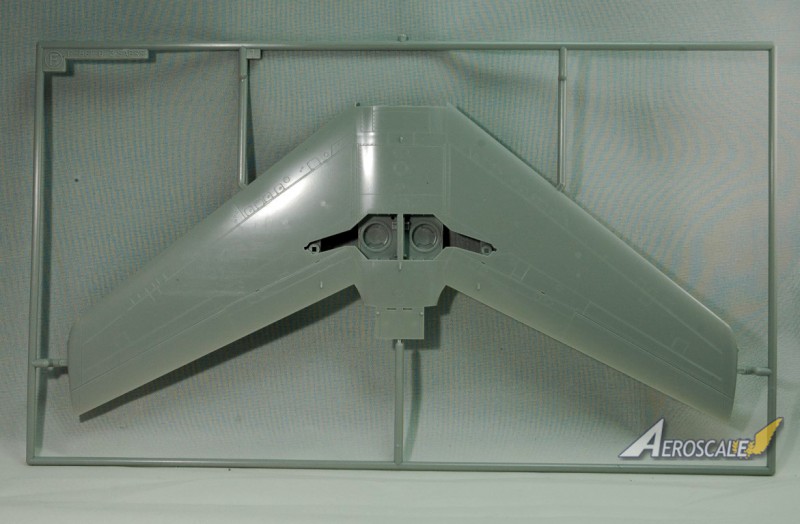
The wings are split into three parts with two upper halves and a one piece lower which has the main landing gear bays moulded into the wing. Detail for the main bays are pretty good with some raised and recessed portions. The main gear doors also sport recessed detail for the internal faces. The main landing gear legs are one piece each, and the wheels are moulded as two halves. Detail for the wheel hubs is pretty good, but Eduard do sell a resin set if you wish to replace them.
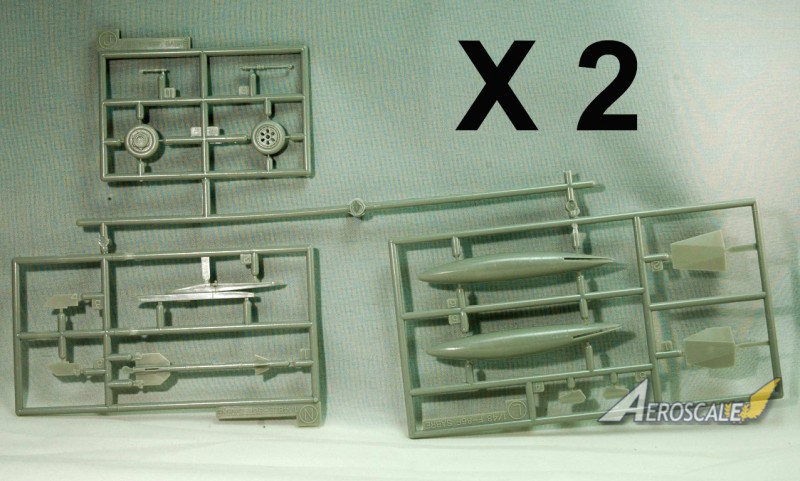
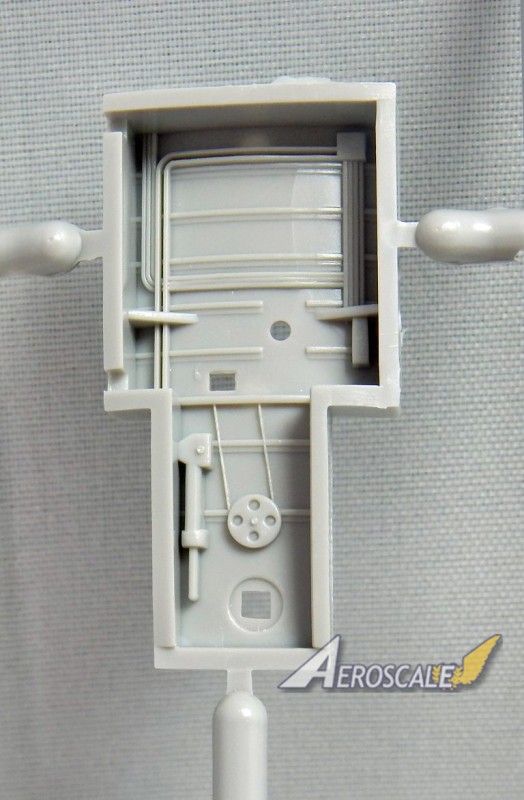
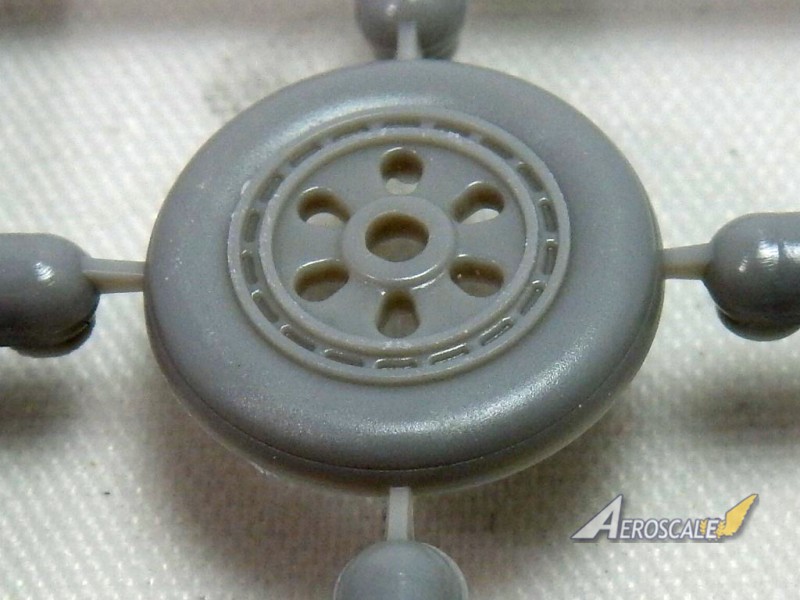
The nose wheel bay is packed with detail and a internal painting guide is given in the instruction booklet. The nose landing gear, like the main gear is one piece, with a quite a good copy of the spoked nose wheel as a separate part.
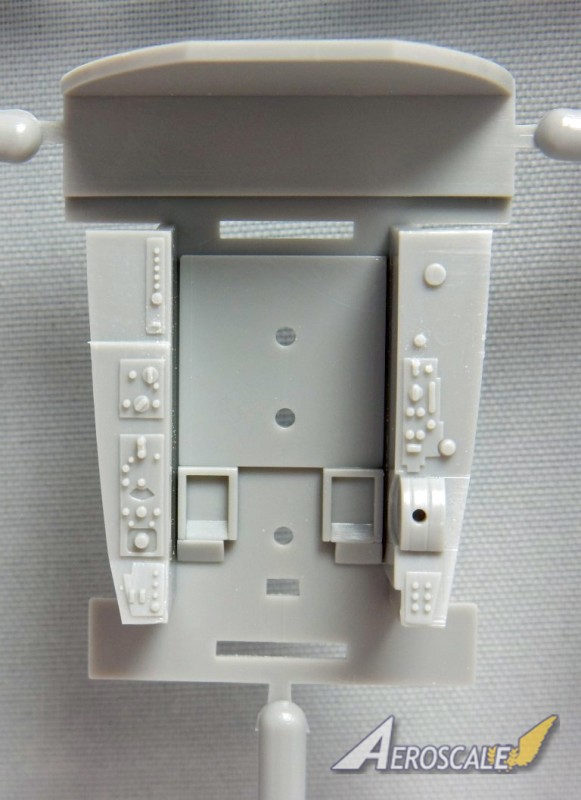
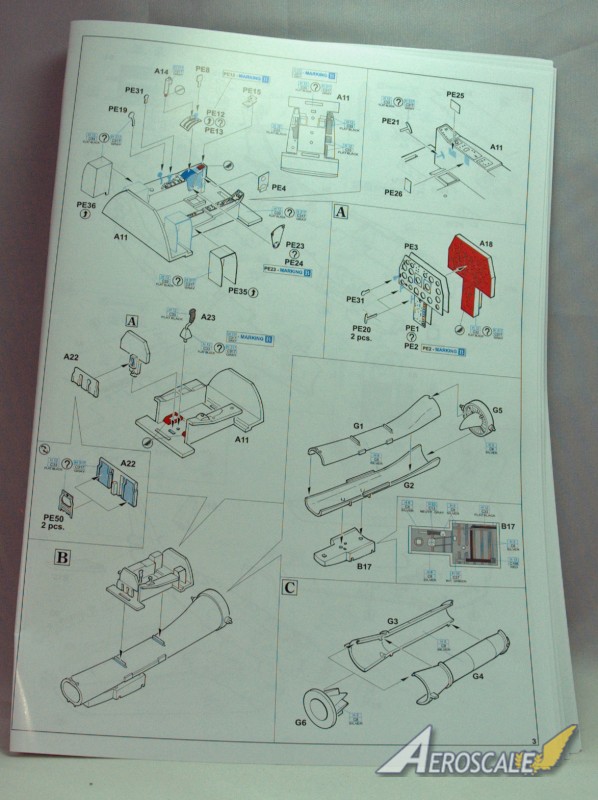
Internal detail for the cockpit is top notch with most of the tub replaced with P.E and resin. The instrument panel and side consoles are replaced with pre-coloured photo etched parts, and in the case of the IP this is a sandwich, with the plastic part needing the raised dials removed for the two part Eduard P.E to attach too. The side consoles also have the throttle levers replaced with some small P.E levers. The P.E rudder pedals are glued straight over the kit part. A number of P.E panels are also supplied for the inside walls of the side consoles.
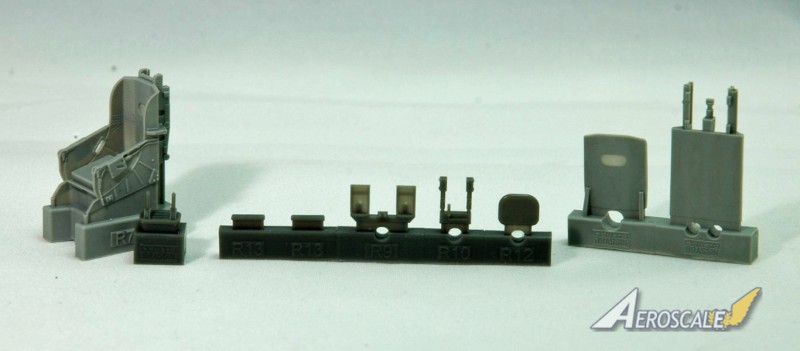
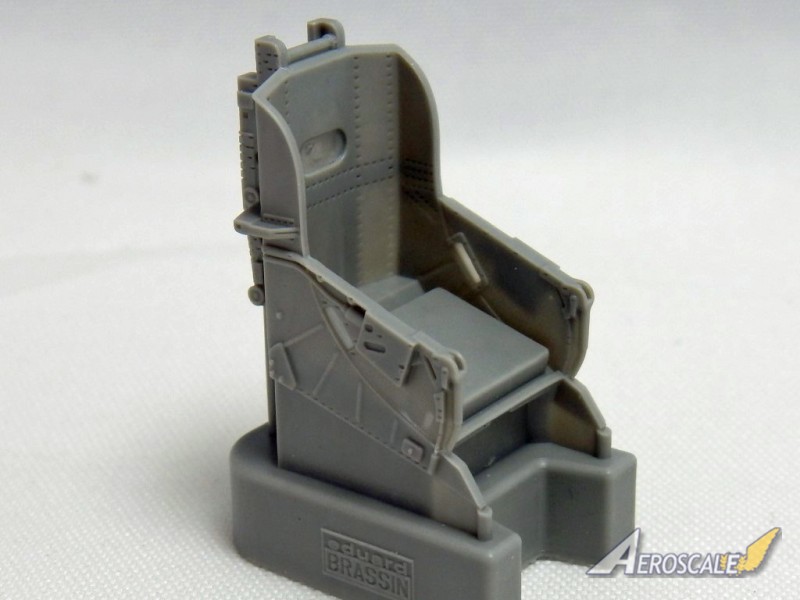
The bang seat is replaced with a resin and P.E affair. The detail is a lot more refined and once installed should look superb.
More P.E is used for the rear shelf under the canopy along with some guide rails. More P.E is used for the main canopy with grab handles and in the case of Marking option B, a spar sits inside two thirds of the way down the canopy.
A new P.E HUD is also supplied.
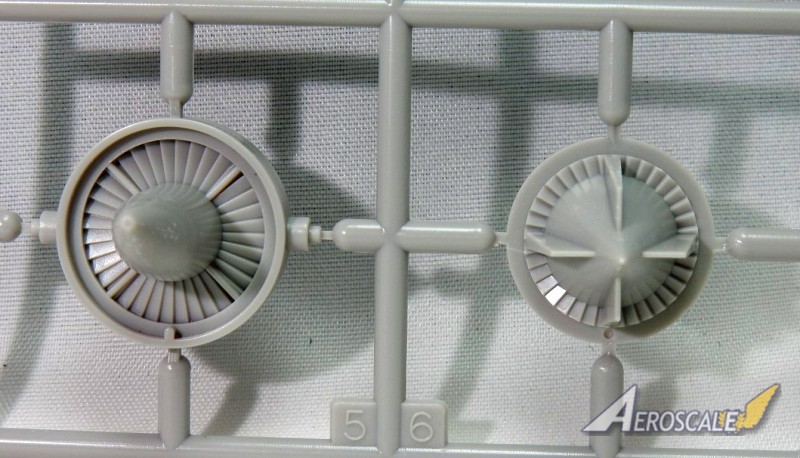
The intake trucking has a compressor face for the rear, which is nicely detailed, and a separate exhaust tube with an exhaust nozzle, which sits at the back of the exhaust tube.
The external weapons supplied with the Sabre are two Sidewinder missiles and two 200 US gallons (760 L) drop tanks . Now as this boxing only have Korean era aircraft markings supplied then you can rule out using the Sidewinder missiles as they were not carried by the Sabre until later in its life.
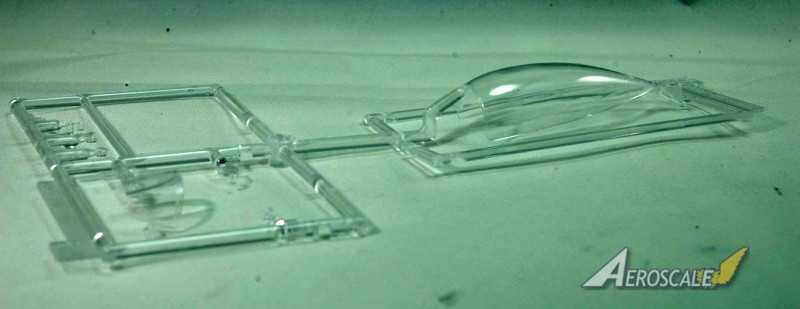
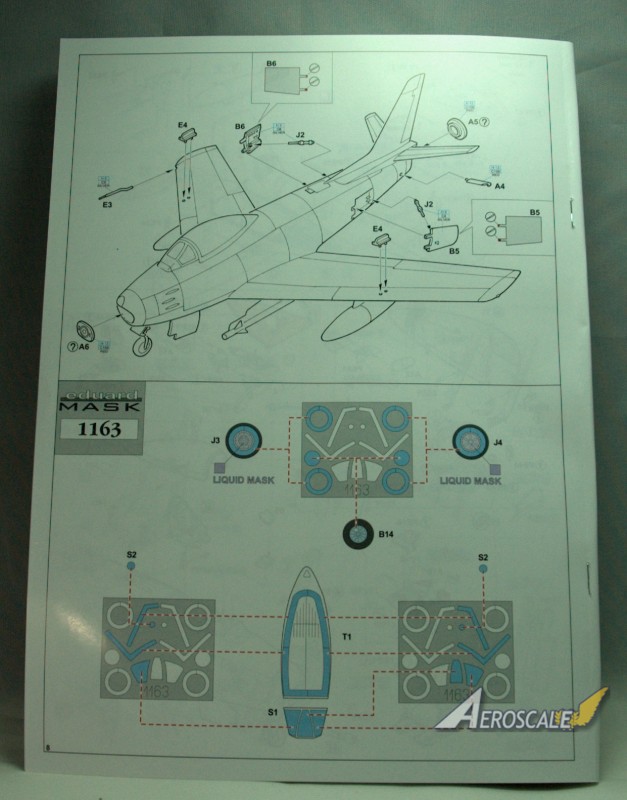
The clear parts are packed into the separate plastic bag, so any scratches should be limited. The canopy is in two parts and can be modelled open or closed, even though the instructions dont show the canopy in the open position.
Eduard have supplied masks for the canopy sections, and the tyres on the wheels. The canopy mask isn't a full mask but does cover the outside edges, a liquid mask or masking tape will need to be used for the rest of the canopy.
Decals and markings
The instruction book follows the usual Eduard standard layout, with internal colours given along the way, along with symbols and blue outlines signalling any steps needing, P.E, resin or optional parts. The build sequence does look a little daunting at first with multiple steps over the six pages, but on closer inspection it does look fairly easy to follow.
The guide for the attaching the masks for the wheels and canopy are at the end of the build.
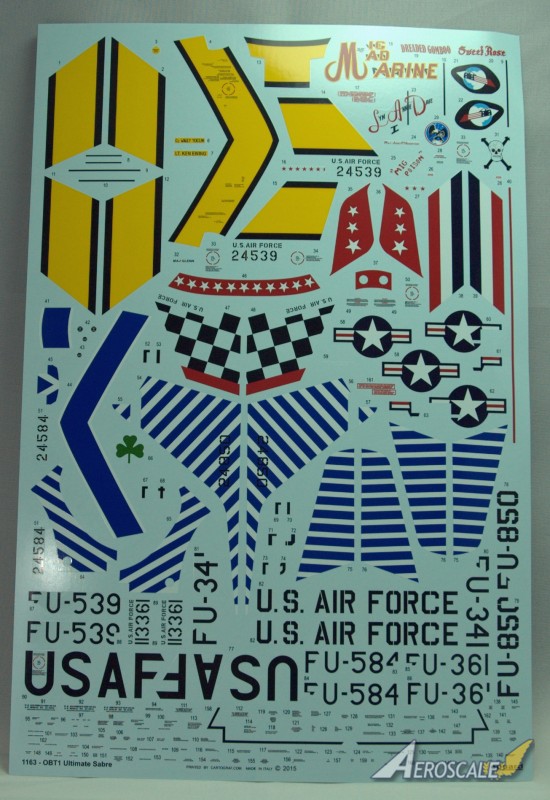
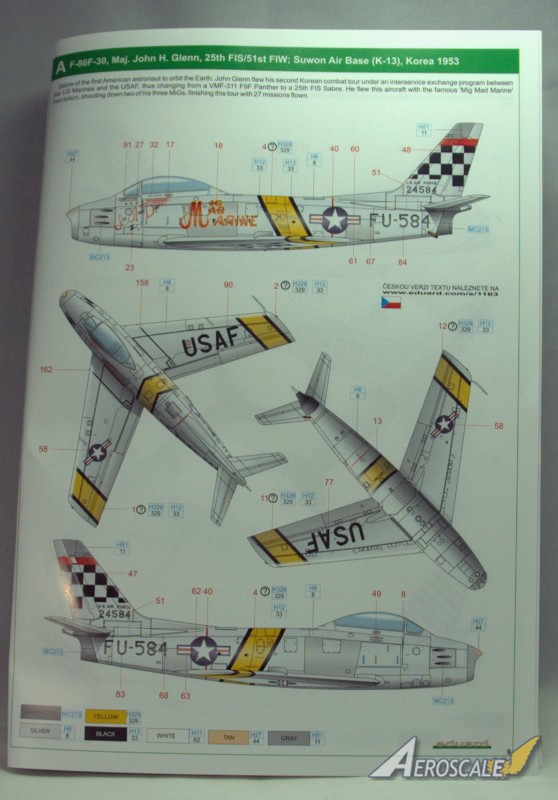
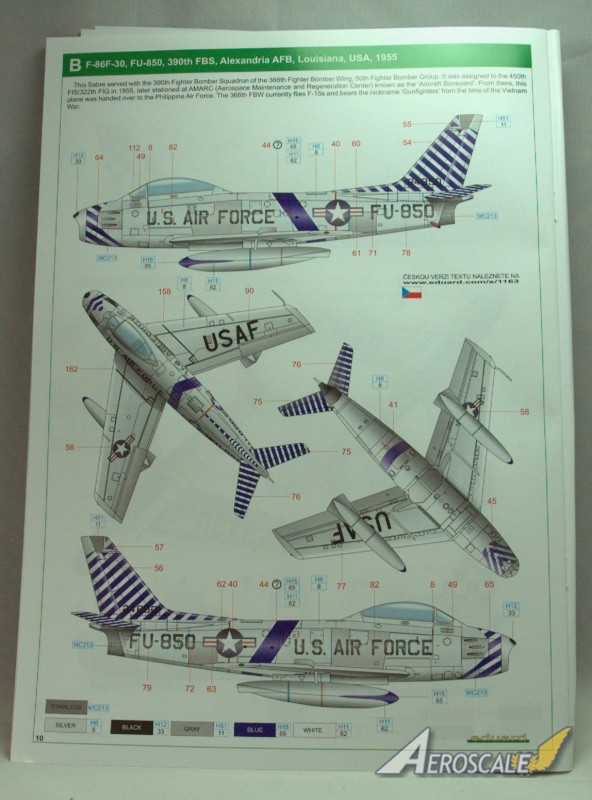
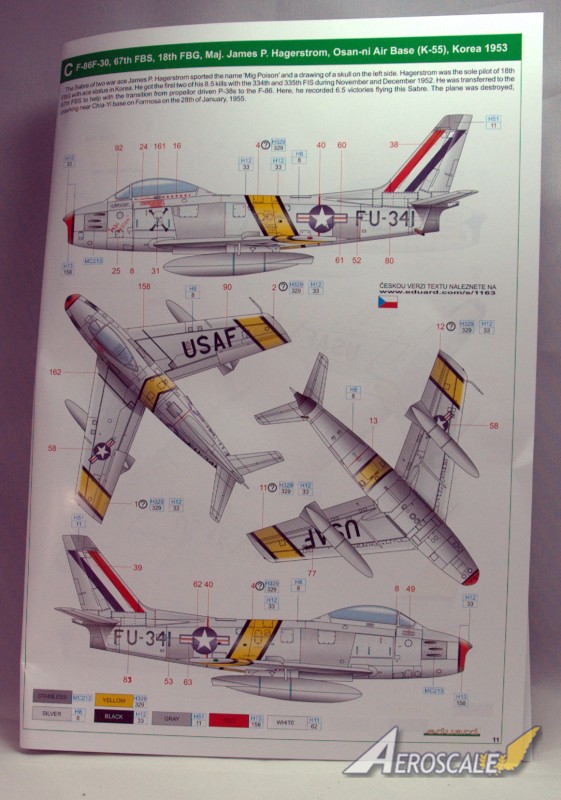
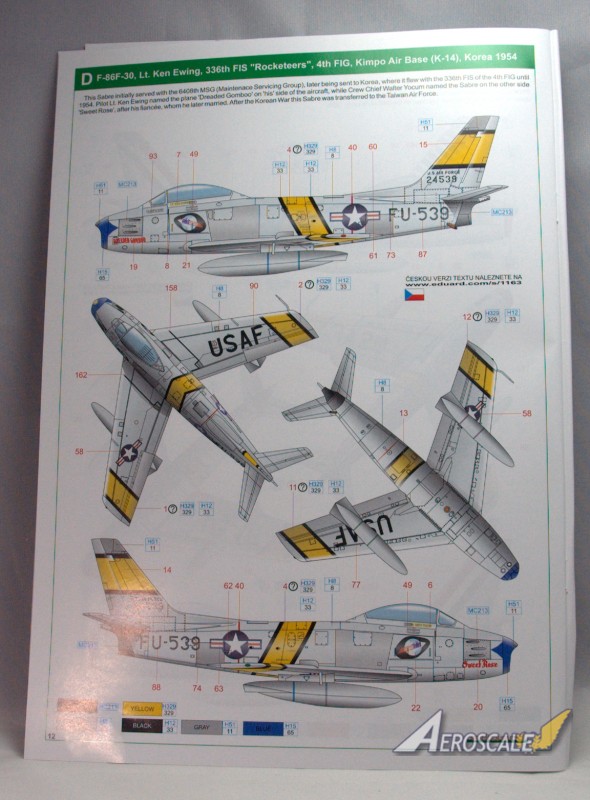
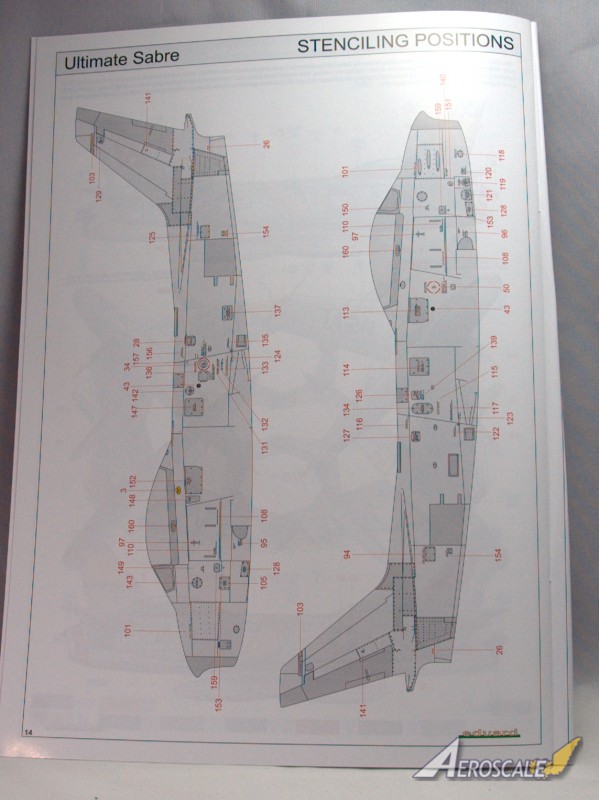
Five full colour profiles are given for the 5 marking options, and a two page stencil positioning guide can be found on the last two pages.
As already stated five marking options are supplied, which are -
1 - F-86F-30-NA, 52-4584, 25 FIS/1 FIW, Suwon AB, Korea, 1953, 'MiG Mad Marine' as flown by Major John Glenn
2 - F-86F-30-NA, 52-4850, 390 FBS, Alexandria AFB, 1955
3 - F-86F-30-NA, 52-4341, 67 FBS/18 FBG, Osan AB, 1953, 'MiG Poison'
4 - F-86F-30-NA, 52-4539, 336 FIS/4 FIG, Kimpo AB, 1954, 'Dreaded Gomboo/Sweet Rose'
5 - F-86F-25-NA, 51-13361, 435 FBS, Detroit AFB, 1952
All the machines are from the Korean war era, so all are natural metal with colourful unit markings.
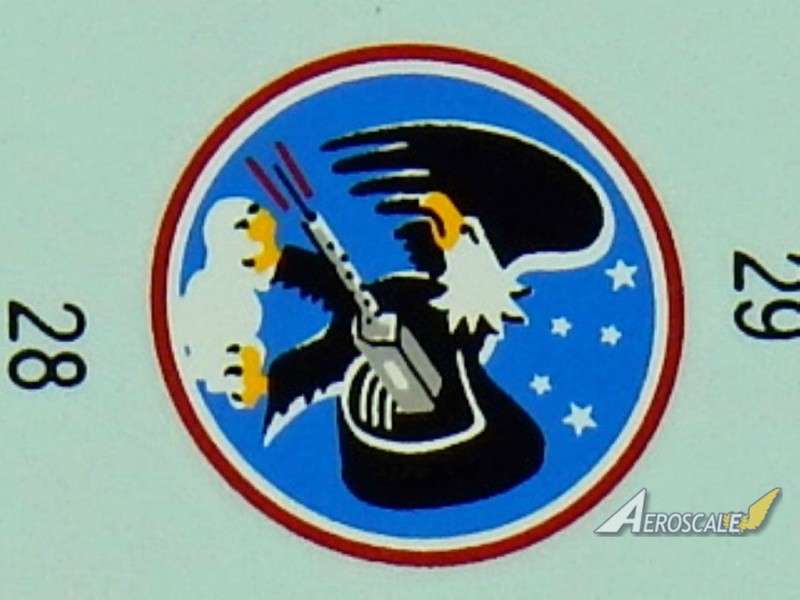
The large decal sheet is printed by Cartograph, and as usual is spot on, with minimal carrier film and a glossy appearance. Stencils are provided and are quite legible (with the help of a magnifying glass).
F-86F-30 Upgrade set
Item No - 48 863 Price - 18,75
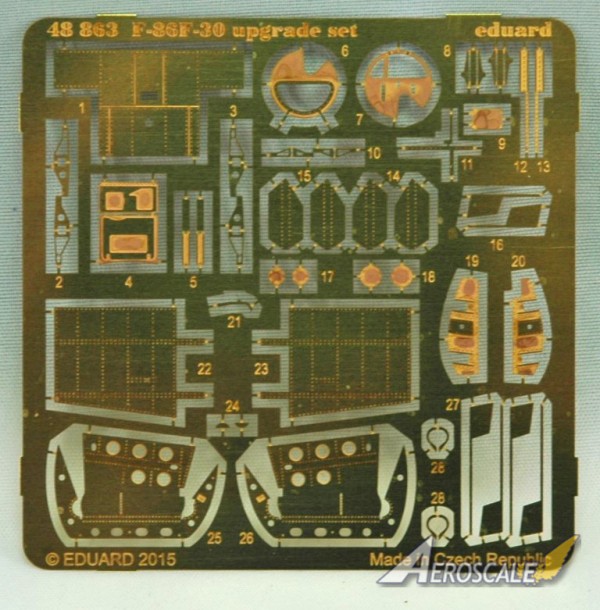
Packed in the normal sealed cardboard packed bag, the set contains one uncoloured photo etch sheet and a small set of instructions.
The set has various parts for the interior and exterior of the Hasegawa based Sabre.
The cockpit has a new P.E floor pan which covers the pretty much devoid of detail floor. A little surgery will be required to attach the part, as the two floor mounted foot rests need to be sanded off.
The nose gear leg gets a P.E oleo, and again the plastic part will need to be removed. The nose gear door is also completely replaced with a P.E door, with P.E actuators. Three small panels are also installed in the nose gear bay.
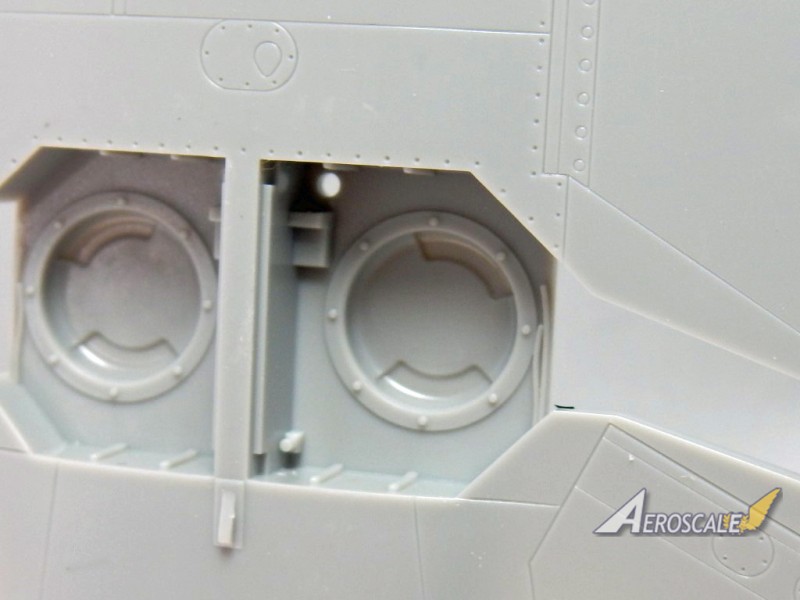
The main undercarriage and bays also benefit from this set with new oleos for the legs, and a couple of small detailed internal panels for the bays.
The main parts of this set is for the two speed brakes. The speed brake doors are completely replaced with photo etch parts. Multiple folds are needed for the internal faces, but once complete should look outstanding. A more detailed panel for the inside of the speed brake bays is also included, but it is only for the front wall.
The last items are new end plate fins for the two drop tanks.
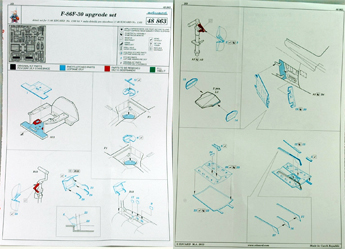
The instructions are printed on a small sheet with black and blue line drawings for the build sequence. The build is pretty east to follow with any parts replaced, bent, or removed highlighted.
All in all this is a nice set, but I fell it would have been nice to include this set in the kit.
Please remember, when contacting retailers or manufacturers, to mention that you saw their products highlighted here - on AEROSCALE.
SUMMARY
Highs: A well detailed kit with a beautiful resin seat, and some nice marking options.Lows: I feel the upgrade set should have been included.Verdict: Even though I feel the upgrade set should have been included, I can understand why Eduard haven't as they want too keep the price of the kit down. But besides all that this is a great kit of the Sabre, and probably the best on the market.
Our Thanks to Eduard! This item was provided by them for the purpose of having it reviewed on this KitMaker Network site. If you would like your kit, book, or product reviewed, please contact us.
About Andy Brazier (betheyn) FROM: ENGLAND - SOUTH EAST, UNITED KINGDOM
I started modelling in the 70's with my Dad building Airfix aircraft kits. The memory of my Dad and I building and painting a Avro Lancaster on the kitchen table will always be with me. I then found a friend who enjoyed building models, and between us I think we built the entire range of 1/72 Airfi...
I have to agree to me Ultimate means that, it's hardly ultimate if you need to buy something to add on especially if its from the same company. A great review of a tempting release Andy thank you
The weakest point of the Hasegawa kit was the plain Jane cockpit. Eduard's PE and Brassin seat is the main reason why I'll be purchasing this kit.
Joel


Comments