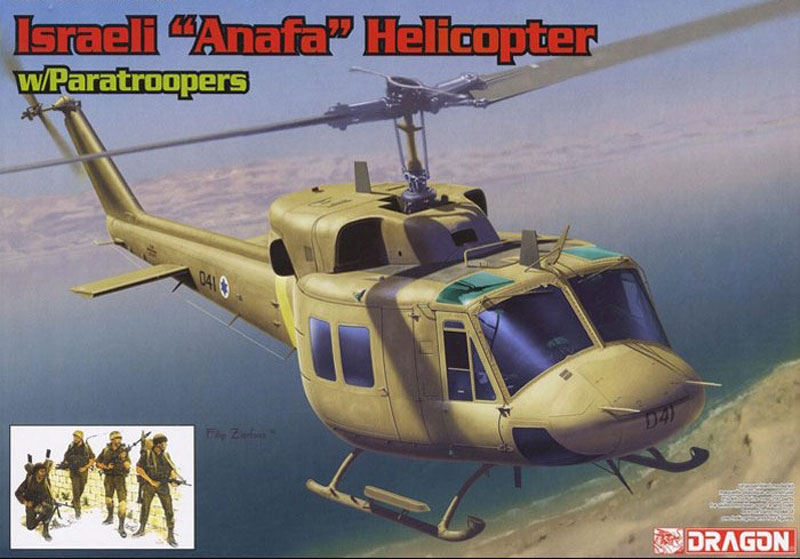
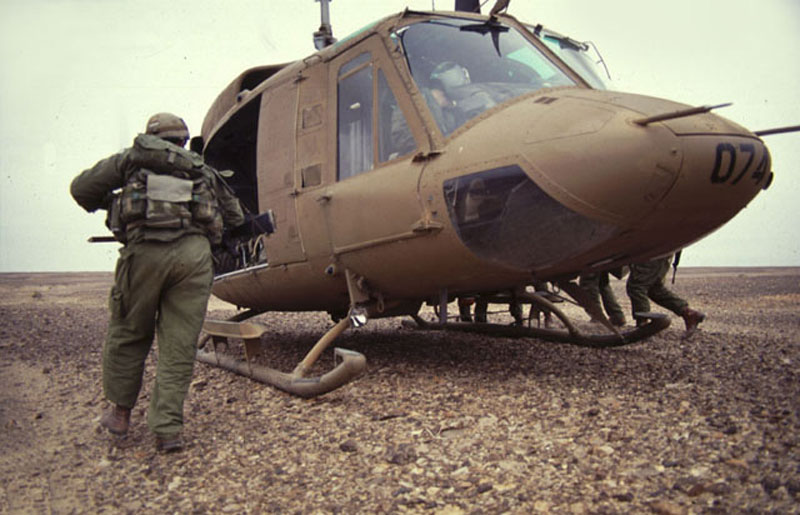
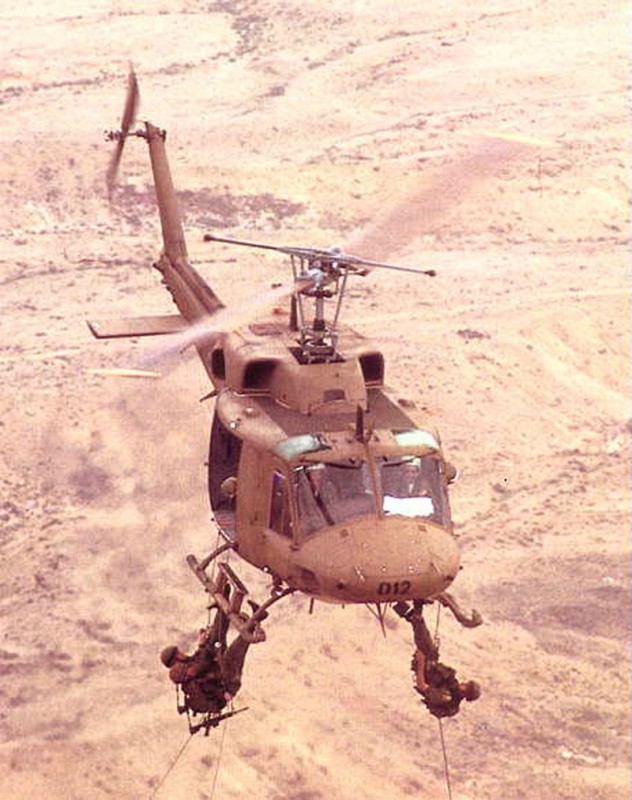
The Bell 212 Twin Huey is a two-blade, twin-engine, medium helicopter that first flew in 1968. The 212 is marketed to civilian operators and has a sixteen-seat configuration, with two pilots and fourteen passengers. In a cargo configuration the 212 has an internal capacity of 220 ft³ (6.23 m³). An external load of up to 5,000 lb (2,268 kg) can be carried. Based on the stretched fuselage Bell 205 (UH-1D), the Bell 212 was originally developed for the Canadian Forces as the CUH-1N and later re-designated as the CH-135. The Canadian Forces took delivery of 50 starting in May 1971. At the same time the United States military services ordered 294 Bell 212s under the designation UH-1N. Israel first took delivery of the Bell 212 Anafa, Hebrew for Heron, in June of 1975. They were assigned to two IAF squadrons. The 124th Rolling Swords Squadron which was originally established in the 1960s with the Bell 47G, the Sikorsky S-55, and the Sikorsky S-58. In 1975, over 50 Bell 212 helicopters were added to the squadron. In the early 1990s, several UH-60 helicopters were added to the 124 squadron while several of the Bell 212s were transferred to squadron 123. The second, the 123d Desert Birds Squadron (former Southern Bells Squadron) which was established in 1972 with several Bell 205 helicopters. In the early 1990s, over two dozen Bell 212 helicopters were added to 123d squadron. The Israeli Air Force operated Bell 212s in the ground support role from the mid-1970s to the present; they have been mostly retired in favor of the UH-60 (S-70) Black Hawks.
The kit
This is Dragons third release in their 1/35 UH-1 series which are actually new boxings of the older Panda UH-1s that were originally released in the early 2000s. The Panda kits owe their lineage back to Italeri 1/48 kits that were upsized to 1/35. As such, some of the details are oversized, such as rivets (the size of golf balls) and panel spacing (as wide as the Grand Canyon), other places are just lacking in details and oversimplified. There are also many options listed in the instructions for different versions of UH-1s, but it is not explained at all which part goes to which version, more on this later.
Whats in the box?
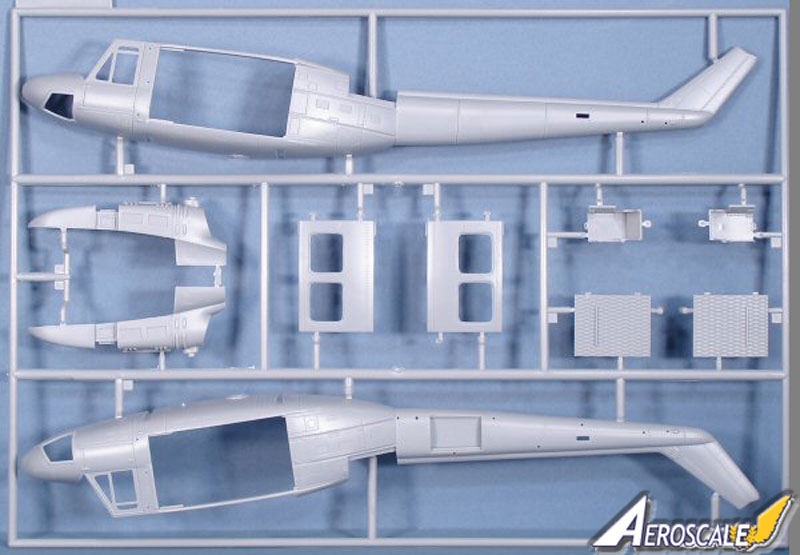
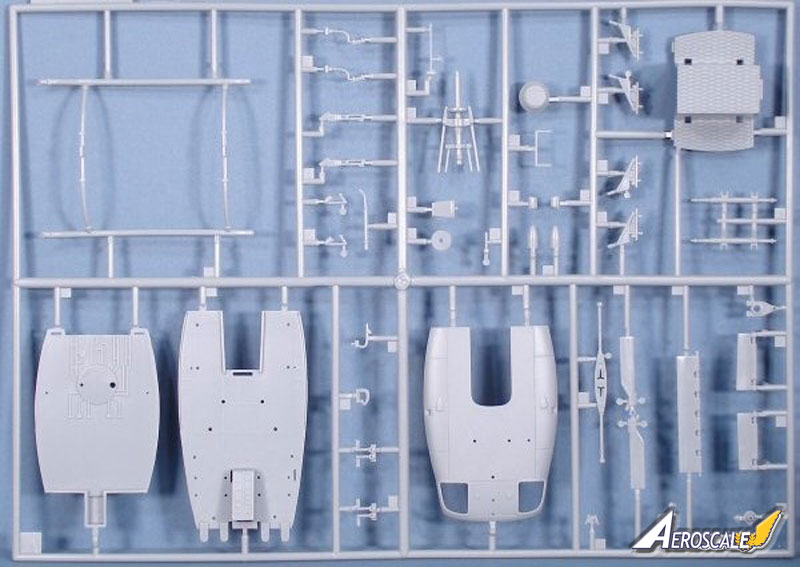
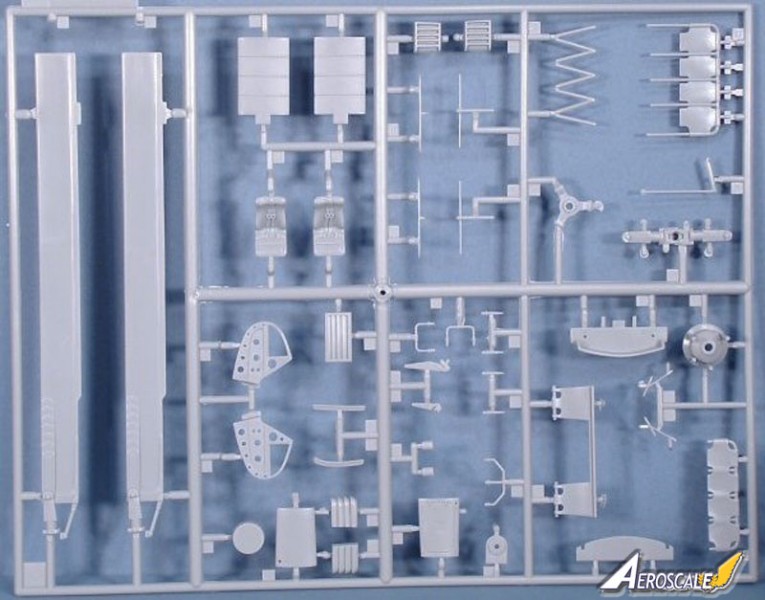
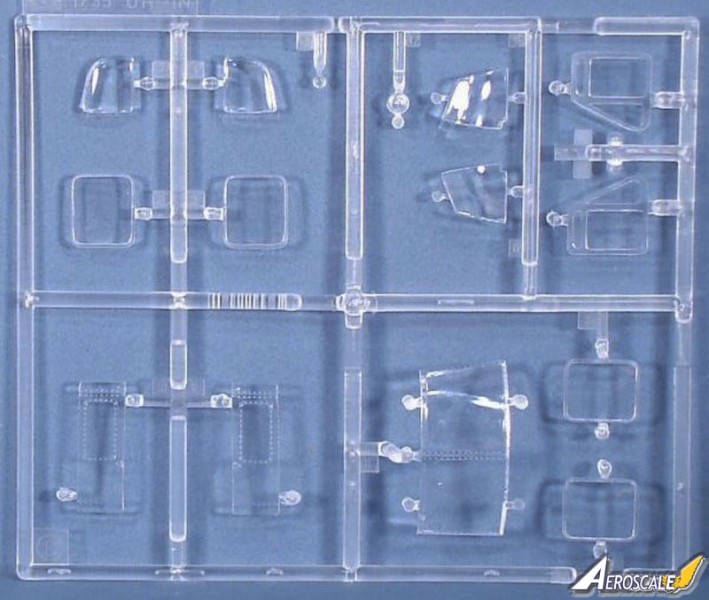
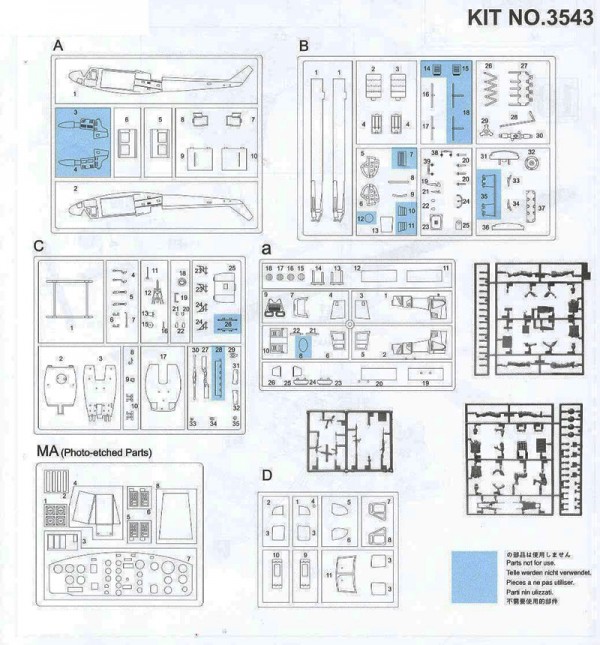
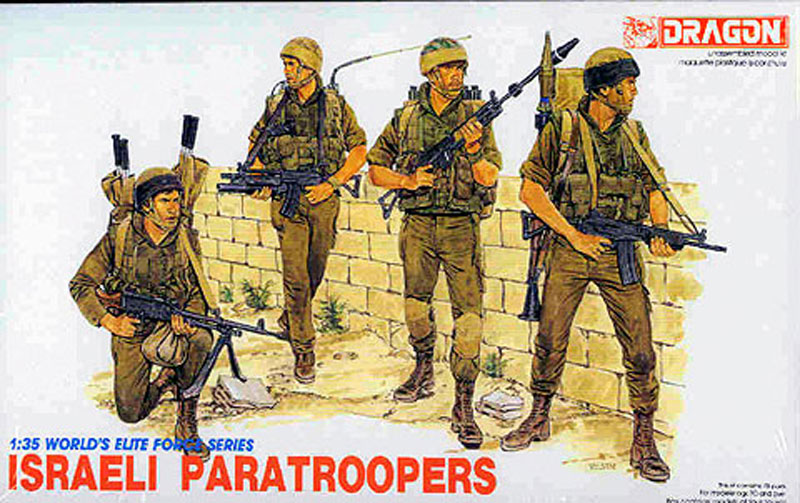
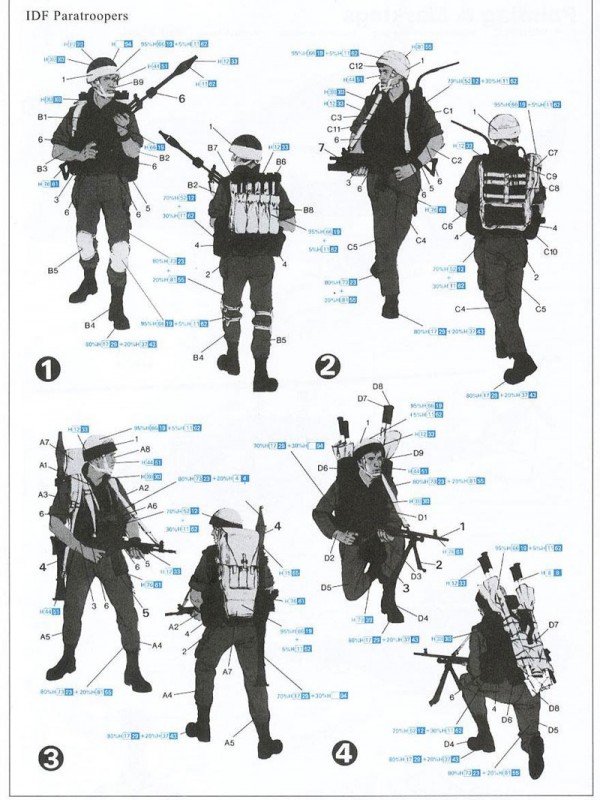
The kit allows you to build a mid 70s to late 90s Bell 212 of the Israeli Air Force (IAF) and four Israeli Defence Force (IDF) paratrooper figures from roughly the same time period. The figures are Dragons World Elite Forces Israeli Paratroopers (kit #3001) originally released in the mid 90s. These figures are very nice and represent IDF Para's from the '80s and '90s well. These all comes in a sturdy cardboard box containing parts for the helicopter which include four sprues in gray plastic, one sprue of clear parts, a small PE fret, and a small sheet of decals. There are also three sprues of gray plastic for the paratroopers. All of the plastic parts are finely moulded and have no flash on them. The PE is also nicely done. The box is wrapped up with a 10 step, fold-out instruction booklet that shows how to build the helicopter and figures, along with calling out paint colors along the way. The paint callouts are for both Mr. Colour Aqueous Hobby Colors and Italeri paints.
The instructions
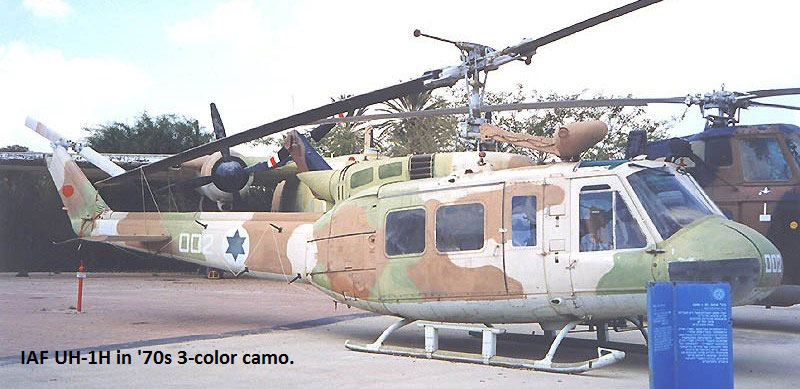
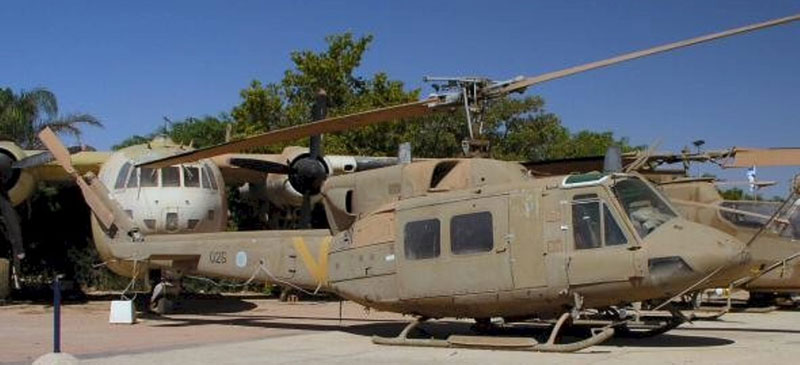
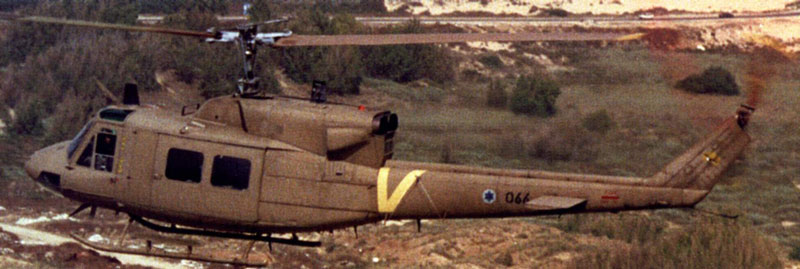
Instructions are well laid out with large assembly diagrams clearly showing where parts attach. They start with the assembly of the cockpit in steps 1 and 2. The entire PE fret goes on here. As we move back to the cabin, the troop seats are attached. For some reason, only the forward (rear facing) seat is shown being attached. The rear (forward facing) seat and its support poles, along with the gunners seats on the sides of the transmission housing are also in the kit, and in my opinion, should be attached as well. Next up, step 3, is the transmission and rotor mast. These go together without apparent issues. In step 4 you close up the fuselage and sandwich the cabin inside it. Be sure to drill out the holes on the nose for the dual pitot tubes. Step 5 has you add the roof and front canopy glass. Step 6 is the construction of the engine cowling. It is here we are given our first option for parts. The engine side cover panels come in two types, with or without screening. From all pics I have seen, the IAF civilian-built Bell 212s had the covers w/out screening (parts a3 and a4). Step 7 has you add the engine cowl, side-mounted 2.75 FFR tubes, and various antennas. Be sure not to drill the hole for the roof pitot (part C8) as civilian Bell 212s dont have it, they have the dual nose-mounted pitots, as noted above. The antennas changed over time, so be sure to check your references for what your helo had on it. From what I have seen, they had all three antennas (B28, C13, and C19). As to the rocket pods, I am not sure IAF 212s carried them. I havent been able to find any pics that show them. I have seen pics of them carrying M23 doorgun mounts w/ 7.62mm FN MAGs (US M240s) mounted on both sides, similar to what US Hueys had. Step 8 adds the skids, elevators, wire cutter, and a few other pieces. One of the bigger pieces is your choice of two options for the right side tail boom. The options are for a smooth side, or one with a luggage bay door. Use part B23 with the door as this was also a feature of civilian 212s. Steps 9 and 10 add the cargo and jump doors, a bunch more antennas (dont use the ones behind the pilots doors, B16 and B17; or the one further back, B24), wire cutters, and roof vents. A note on the jump doors (parts D9 and D10). On all the IAF 212s I have seen pics of; the jump doors do not have the windows. Sand the window frames off and paint the whole piece in the fuselage color. Again, check references for the other antennas. Most of the IAF 212s did have the zig-zag antennas down the tail boom. Step 10 also has you add the main and tail rotor parts. These are straight forward with no apparent issues. After step 10, the helicopter is complete with the exception of painting and adding the decals. The painting instructions only show one paint option, but the aircraft wore three throughout its lifespan in the IAF. Early versions were painted in the 1970s three-color camo of FS33531 sand, FS30219 brown, FS34227 green over an FS35622 light blue under surface. During the 1982 Lebanon War, the colors were changed to FS30095 overall brown with an FS23594 pale yellow identification V applied to the tail boom. In the mid-1980s the FS30095 brown was removed and a lighter brown FS30145 and yellow FS33434 "V" were applied. The final page of the instructions shows the assembly and painting of the four figures.
Some issues
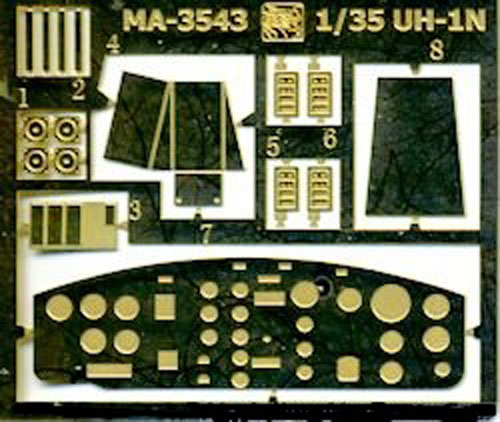
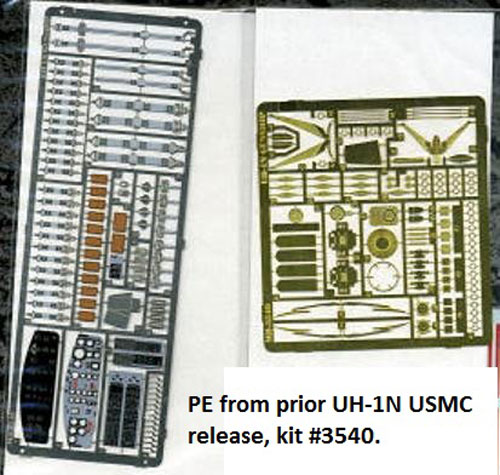
This release leaves some areas to be desired, even to the prior Dragon UH-1 releases. The PE is not up to the standard of the PE in their prior USMC UH-1N and US Army UH-1D/H releases (kits # 3540 and 3538 respectively), which included exterior and interior parts that were also pre-painted in full color. This sheet just has a few pieces for the interior including an instrument panel, with no decals or paper instruments, and a couple other cockpit parts. Furthermore, the instrument panel PE is for a UH-1D/H, not a Bell 212 / UH-1N. This was also a mistake in their UH-1D/H kit, but the opposite. It included a full color, PE UH-1N panel. As stated earlier, the rivets are huge. They can be toned down a bit by lightly sanding the whole fuselage with some fine grit paper to reduce their size. There isnt much you can do about the panel lines.
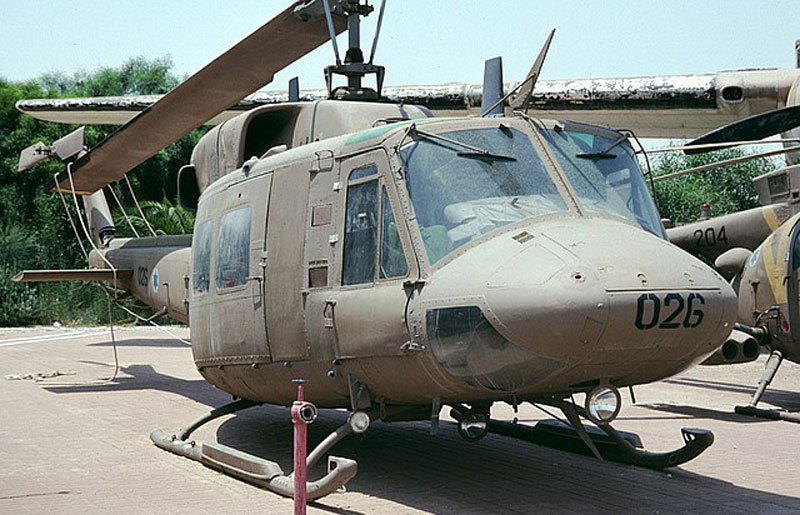
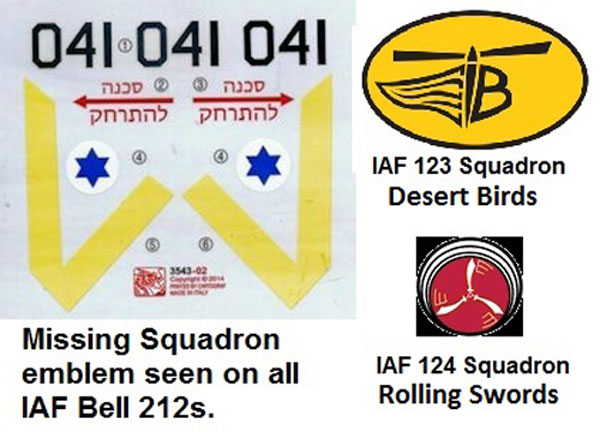
It is also lacking in some of the IAF 212 features. Firstly, the decals are also incomplete. They are missing the IAF Squadron emblem that is present on both sides of the vertical tail. The squadron that the helo in the instructions belongs to is not identified either. Also, all the pictures I can find of IAF 212s have a set on the skids to assist with entering the cargo doors. This is also shown on the drawing on the box top, but no parts for them are included in the kit. They shouldnt be too hard to scratch-up though. The kit includes the upper and lower wire cutters for the nose and roof, but there are also wire guards as part of the wire strike kit that keeps wires from catching on the windshield wipers. These are also shown on the box top drawing, but absent from the kit. They too can be easily added from thin plastic or brass rod, 0.020 inch will do nicely. Lastly IAF civilian 212s had a tube that exited the bottom rear of the fuselage and traveled back horizontally for about 3 feet. This was a fuel dump tube. It too can be added using plastic or metal rod.
Conclusion
Overall this is not a bad kit. It is a good start to get you to a IAF Bell 212, but will need quite a bit of work to build into really nice model. I have built a couple of the prior Dragon UH-1 release and can attest that they can come out beautifully with some TLC and a bit of elbow grease. I recommend this for the experienced modeller if you want an accurate piece at the end, yet it can look decent just out of the box.
I have included some reference photos at the bottom of the review
Please remember, when contacting retailers or manufacturers, to mention that you saw their products highlighted here - on AEROSCALE.
SUMMARY
Highs: A nice representation of an IAF Bell 212. BELL foot pedal PE.Lows: Large rivets and huge seams. Poor details in other areas as well. No explanation of what parts to use for the specific aircraft. Incomplete decals.Verdict: A decent release for Dragon. They could have put a little more effort into it to make it more complete and better.
About Gino P. Quintiliani (HeavyArty) FROM: FLORIDA, UNITED STATES
Retired US Army Artillery Officer, currently a contractor at MacDill AFB in the Tampa, FL area. I have been modelling for the past 40+ years, really seriously on armor and large scale helos (1/32, 1/35) for the last 35 or so.
Matt - Hopefully reviews like this and the other posts here in the Rotary Wing forum will help you out. I find you can really add a whole bunch of details on the larger, 1/35 helos. They are great fun, you should give one a try.
You can get Canadian Markings in scale at Can Mil Air for the UH1N Iroquois including the SAR markings for a yellow and a white bird. I will be building mine as CDN eventually


Comments