

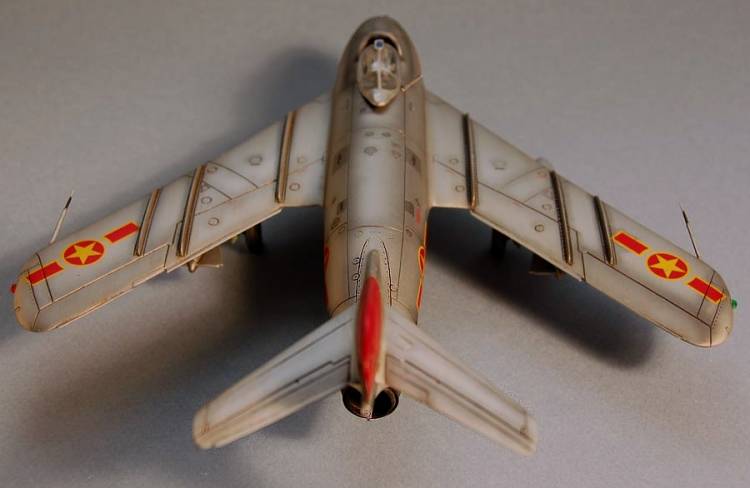
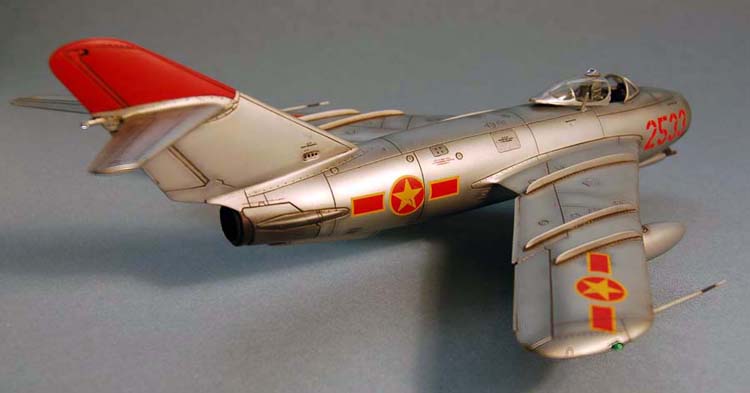
1⁄35North Vietnamese MiG 17F
15
Comments
About the Author


FROM: CALIFORNIA, UNITED STATES
59 years old and my first kit was an Aurora B-25. I am married (to a wonderful Woman who likes that I stay home and build models!) and have two kids, my Son is in the US Navy aboard an aircraft carrier and my boomerang Daughter is 24 and in college ( hopefully she will finish this time!). My model...
Comments
I like this a lot. You see the plane firts, then you gradually notice the shading. It doesn't overwhelm the model like a certain AC-130 on a certain recent magazine cover.
FEB 06, 2006 - 05:21 AM


i saw this in the gallery earlier..it's really a nice build. thanks for sharing...looking forward to see more of your works. oh yes...nice build and presentation...specially the weathering.
FEB 06, 2006 - 07:38 AM

Wingman:
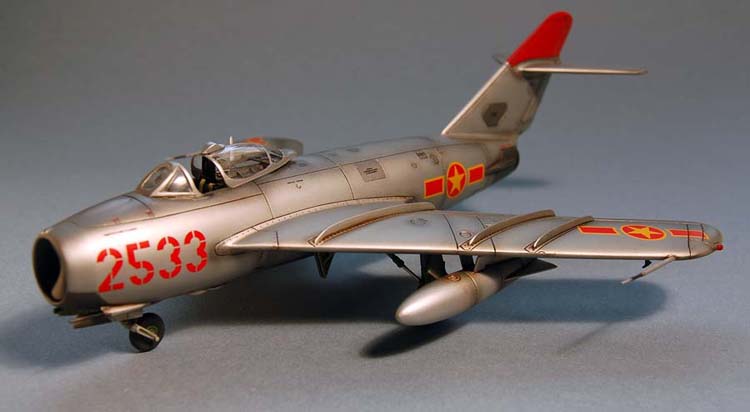
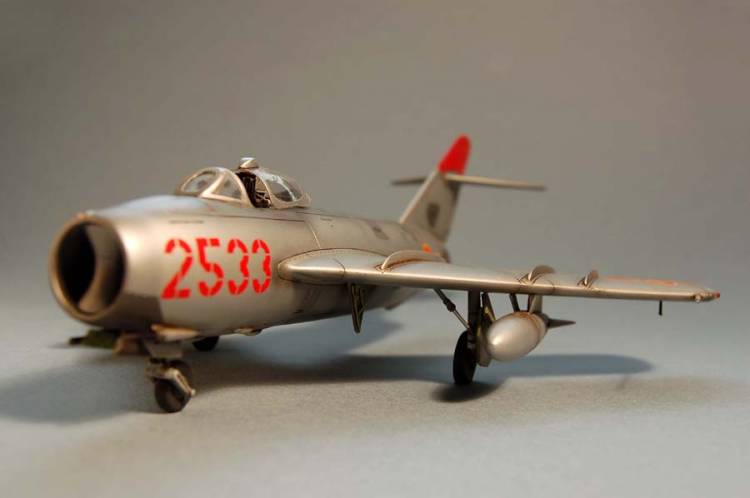
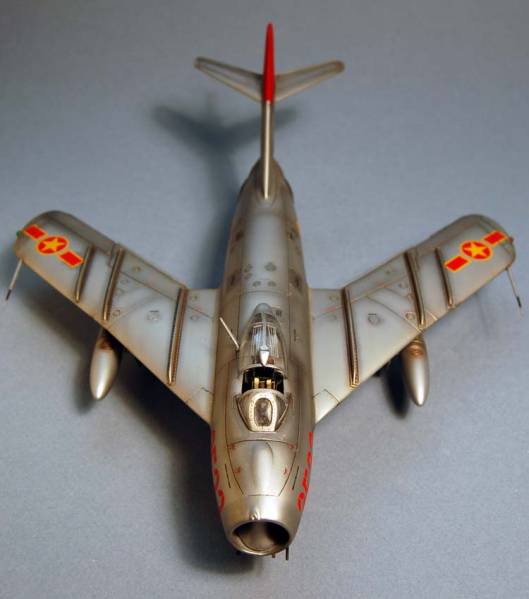
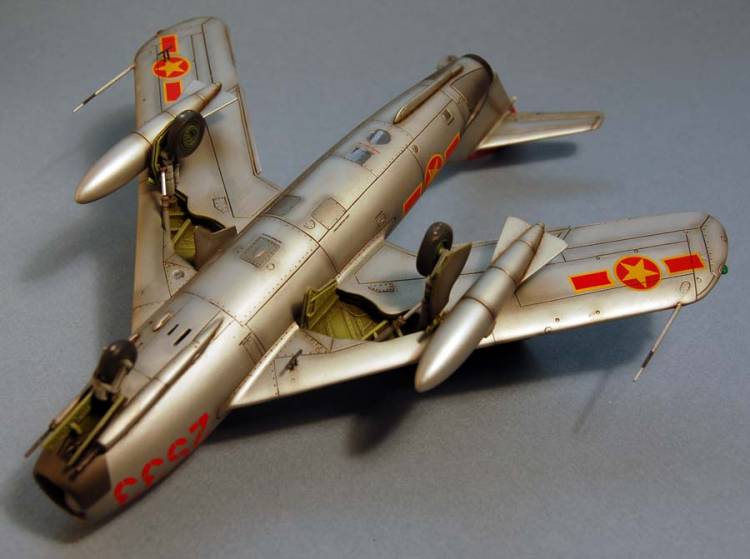
This is the Aeromaster Choice kit of the Mig17 finished a couple of years ago. I scratch- built some of the detail under the rear canopy from the patterns provided in the Eduard 1/32 set for the Trumpeter Kit and a certain amount of gizmology. Gun Barrel and Pitot Tubes are Stainless steel tubing. This was a pretty crude assortment of plastic parts (Originally an ESCI kit?) coupled with some excellent resin and etched parts. Lots of sanding and re-scribing! We really need an up-to-date accurate kit of this very famous warrior.
This was my first attempt with Alclad II . I shot a coat of Alclad over polished floquil primer then pre-shaded panel lines with black acrylic and over-sprayed a glaze coat of Alclad over that to knock back the pre-shading. Various panels were masked and sprayed darker or lighter shades. I do think the total effect is a bit heavy handed and would have sprayed a heavier glaze coat in retrospect. After a coat of future the decals were applied, then another coat of future to seal the decals. After a coat of Testors flat laquer (allowed to dry for a few days) I applied a wash of burnt umber and black oil paint to all recesses and wiped this off with a rag dampened with turpentine in the direction of airflow (Im a graduate of the Verlinden School of Weathering, Go VSW!). Another coat of flat followed that to fix everything and give the duraluminum the look of the oxidation that occurs to natural metal A/C after some time outdoors. Stencils are borrowed from Aeromasters Mig-21 Stencils.
Thanks for looking and the very nice comments
Ron
FEB 06, 2006 - 11:12 PM
Gunnie:
This is the Aeromaster Choice kit of the Mig17 finished a couple of years ago. I scratch- built some of the detail under the rear canopy from the patterns provided in the Eduard 1/32 set for the Trumpeter Kit and a certain amount of gizmology. Gun Barrel and Pitot Tubes are Stainless steel tubing. This was a pretty crude assortment of plastic parts (Originally an ESCI kit?) coupled with some excellent resin and etched parts. Lots of sanding and re-scribing! We really need an up-to-date accurate kit of this very famous warrior.
This was my first attempt with Alclad II . I shot a coat of Alclad over polished floquil primer then pre-shaded panel lines with black acrylic and over-sprayed a glaze coat of Alclad over that to knock back the pre-shading. Various panels were masked and sprayed darker or lighter shades. I do think the total effect is a bit heavy handed and would have sprayed a heavier glaze coat in retrospect. After a coat of future the decals were applied, then another coat of future to seal the decals. After a coat of Testors flat laquer (allowed to dry for a few days) I applied a wash of burnt umber and black oil paint to all recesses and wiped this off with a rag dampened with turpentine in the direction of airflow (Im a graduate of the Verlinden School of Weathering, Go VSW!). Another coat of flat followed that to fix everything and give the duraluminum the look of the oxidation that occurs to natural metal A/C after some time outdoors. Stencils are borrowed from Aeromasters Mig-21 Stencils.
Thanks for looking and the very nice comments
Ron
FEB 06, 2006 - 11:14 PM

Excellent work, i love the shading. I wish i had seen these pic's before i had finished mine. I will definitely be trying your techniques on my next early Mig.
Andy (++)
FEB 06, 2006 - 11:21 PM
Hermon:
This is the Aeromaster Choice kit of the Mig17 finished a couple of years ago. I scratch- built some of the detail under the rear canopy from the patterns provided in the Eduard 1/32 set for the Trumpeter Kit and a certain amount of gizmology. Gun Barrel and Pitot Tubes are Stainless steel tubing. This was a pretty crude assortment of plastic parts (Originally an ESCI kit?) coupled with some excellent resin and etched parts. Lots of sanding and re-scribing! We really need an up-to-date accurate kit of this very famous warrior.
This was my first attempt with Alclad II . I shot a coat of Alclad over polished floquil primer then pre-shaded panel lines with black acrylic and over-sprayed a glaze coat of Alclad over that to knock back the pre-shading. Various panels were masked and sprayed darker or lighter shades. I do think the total effect is a bit heavy handed and would have sprayed a heavier glaze coat in retrospect. After a coat of future the decals were applied, then another coat of future to seal the decals. After a coat of Testors flat laquer (allowed to dry for a few days) I applied a wash of burnt umber and black oil paint to all recesses and wiped this off with a rag dampened with turpentine in the direction of airflow (Im a graduate of the Verlinden School of Weathering, Go VSW!). Another coat of flat followed that to fix everything and give the duraluminum the look of the oxidation that occurs to natural metal A/C after some time outdoors. Stencils are borrowed from Aeromasters Mig-21 Stencils.
Thanks for looking and the very nice comments
Ron
FEB 06, 2006 - 11:25 PM
Very nicely done Ron thanks for sharing both the pictures and your techniques. I hope you have pics of more models to share
Mal
FEB 06, 2006 - 11:36 PM
Copyright ©2021 by Ron Petrosky. Images also by copyright holder unless otherwise noted. The views and opinions expressed herein are solely the views and opinions of the authors and/or contributors to this Web site and do not necessarily represent the views and/or opinions of AeroScale, KitMaker Network, or Silver Star Enterrpises. Images also by copyright holder unless otherwise noted. Opinions expressed are those of the author(s) and not necessarily those of AeroScale. All rights reserved. Originally published on: 2006-02-06 00:00:00. Unique Reads: 9356

WEB HOSTING BY


Copyright ©2021 AeroScale and Kitmaker Network, a subsidiary of Silver Star Enterprises
All Rights Reserved. Please read our Conditions of Use and Privacy Policy.
All Rights Reserved. Please read our Conditions of Use and Privacy Policy.