

1⁄48A Method to Correct Eduard's 109
6
Comments
introduction
Ive been following some of the other forums on line in the knock the new Eduard 109 debate as well as the builds on Aeroscale, by Rowan , Jean Luc & Steffan. Having pre-ordered the kit, falling prey to the manufacturers claims for the kit.On opening the box I was extremely impressed with the contents, a Bf109G in todays standards. Then I began to see the criticisms made of the kit come to light and decided to check them out.
Deciding to standardise on references I used the Kagero 1/48 scale plans and comparison to Hasegawas 109s.
LET ME EMPHASISE HERE THESE REFERENCES WERE A PERSONAL CHOICE FOR MY 109 COLLECTION.
I am not a rivet counter (spent too much time in the 60s & 70s sanding them off!!!) but do like my finished collection to look as they were produced by the original manufacturer i.e. Messerschmitt or one of their sub contractors.
planning the correction
Anyway to begin with I do not believe Eduards 109 to be overscale, yes it is too long in fuselage length and wingspan (this is where Eduards claim turned round and bit them). However compared to the Kagero plans the outlines are accurate in my opinion, wing chord and fuselage height are correct. In comparison the Hasegawa kit is shorter and slightly lacking in height. Comparing the kits together, Hasegawas comes in a little undersize.So I set about modifying Eduards 109G to my references using the Kagero plans and the HT Model Special Bf109G-6.
cutting plastic
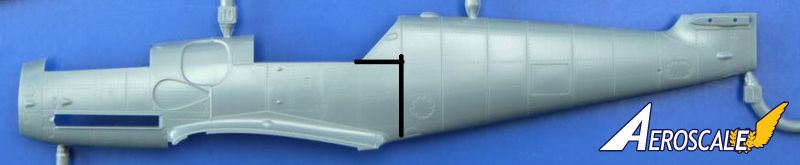
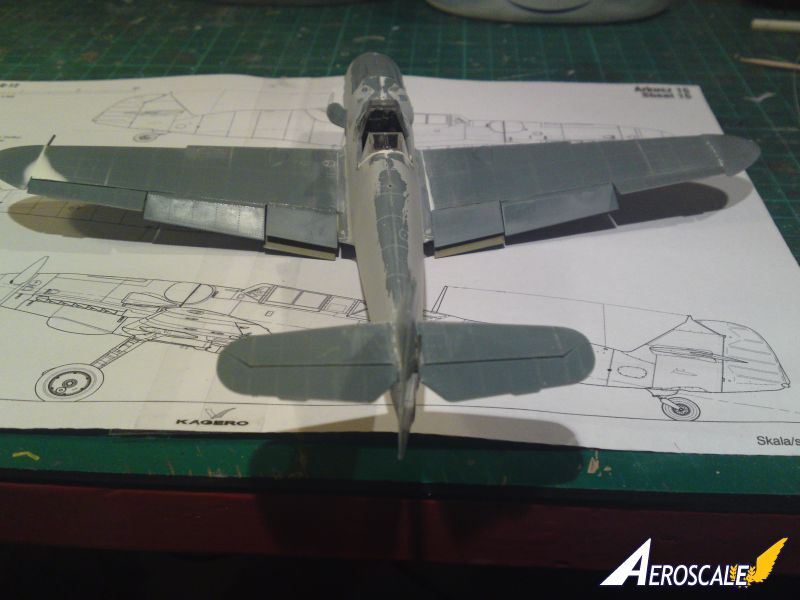
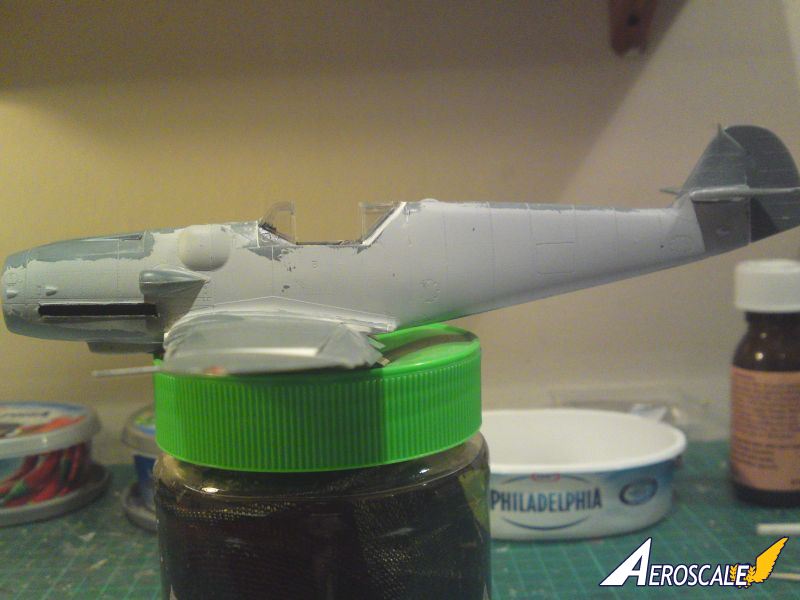
I cut the Eduard fuselage just behind the cockpit, laid the forward part of the fuselage on the plans, which match up really well. Then I carefully sanded the forward part of the rear fuselage, all the time comparing it to the plans. Fuselage length should be 18.79 cm. Eventually the fuselage length matched the plans and wonder of wonders all the panel lines matched the plans!!!! Admittedly I have lost some of the rivet detail but I think under primer and paint most of the rivets will disappear anyway. A couple of plastic tabs joined the fuselage back together and a little bit of filler completed the job.If I try this again I would cut the fuselage, as shown in photo, to shorten it as this would help with the reduction in cockpit length. Which my references and comparison to the Hasegawa kit show this is necessary and this way of cutting the fuselage will make it easier to rejoin after shortening.
I have included a photo showing a comparison of;- top: Hasegawa Bf109G-14 unmodified middle: Hasegawa Bf109G-6 modified bottom: Eduard Bf109G-6 modified You will also note I have added plastic card to the exhaust ports to reduce them by approx.1mm as they are too wide. exhausts will also need to be reduced to fit but are usable.
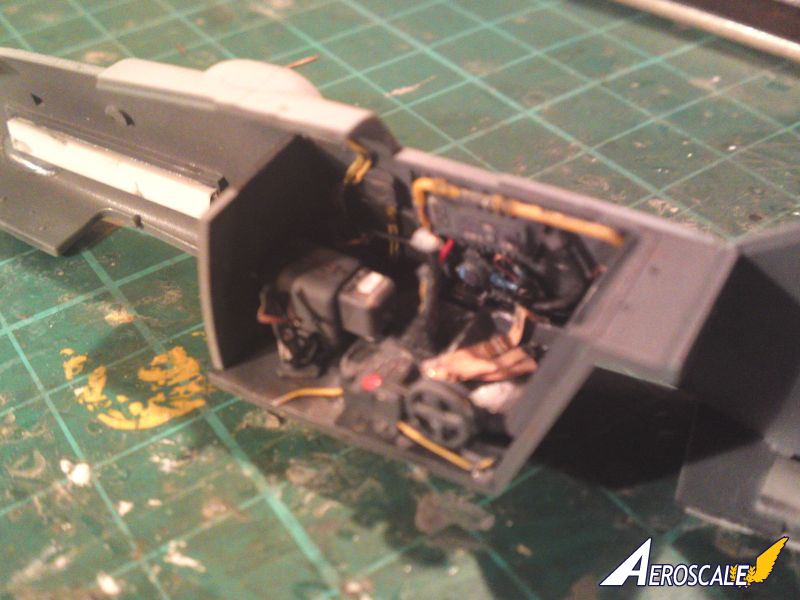
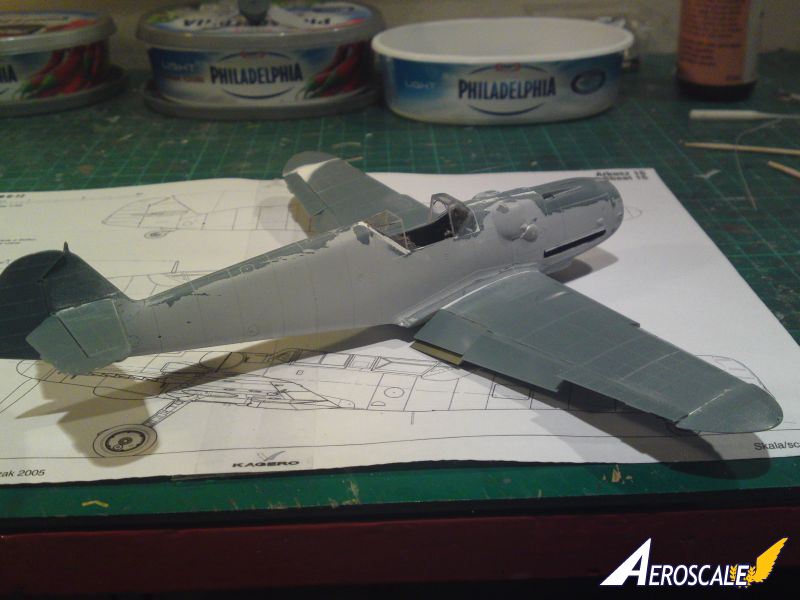
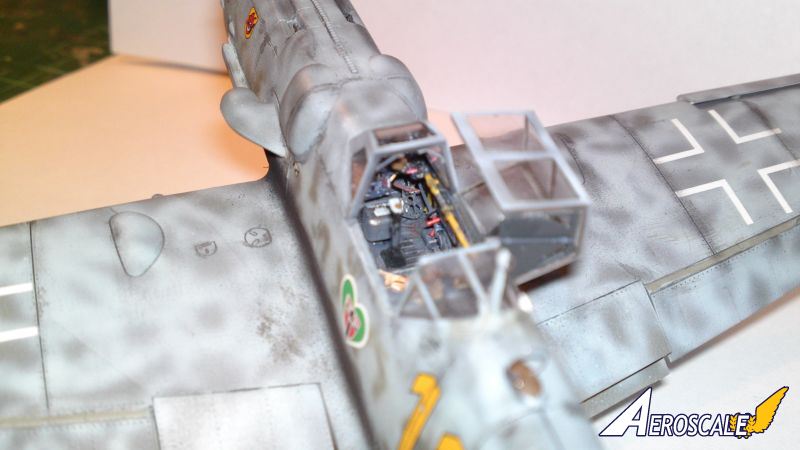
As regards the nose being too bulbous ( it does look like an AS engine cowling!)some sanding down will restore it to the shape required. I added some extra detailing to the cockpit which is fantastic straight out the box, but can always find a few extra details to add.
I continued with modification of wings, control surfaces, slats, undercarriage length and rake. I also needed to reduce the length of the cockpit as compared to the plans.
One does wonder if Eduard have given us a kit of a restored 109G with all the restoration's mistakes!!!!!
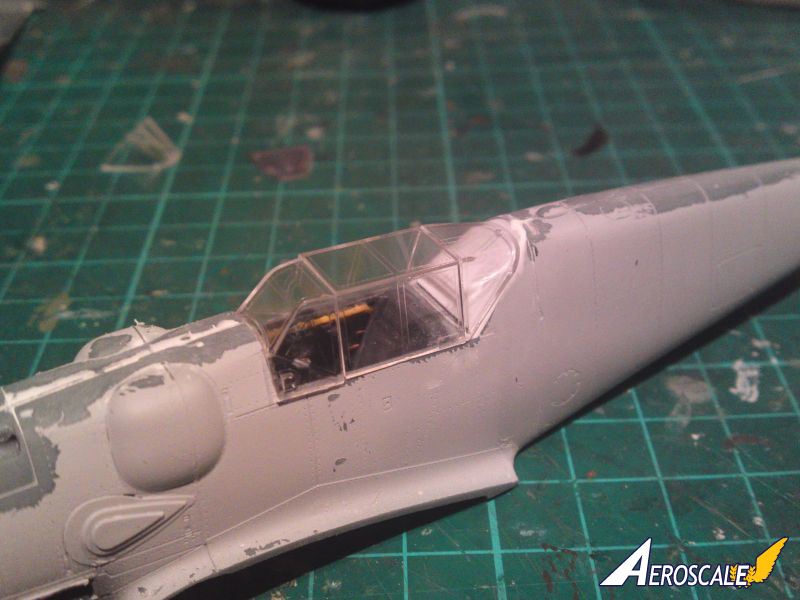
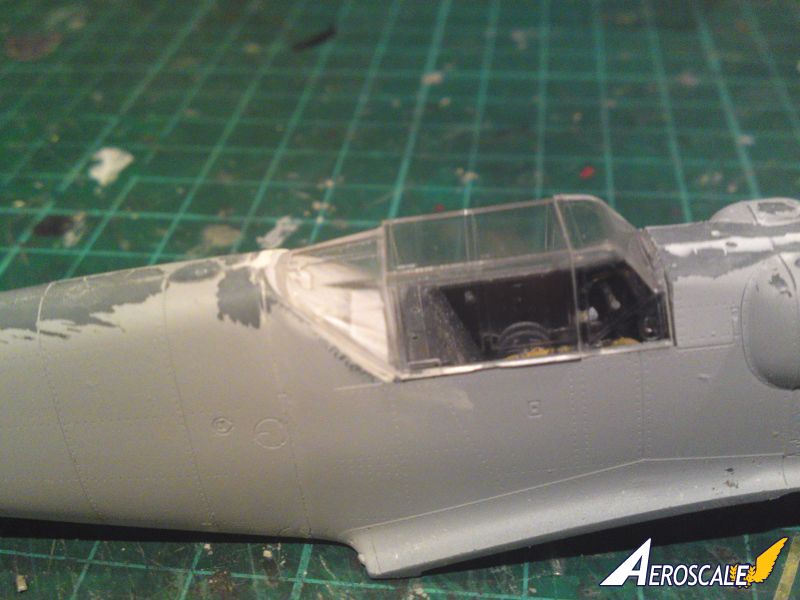
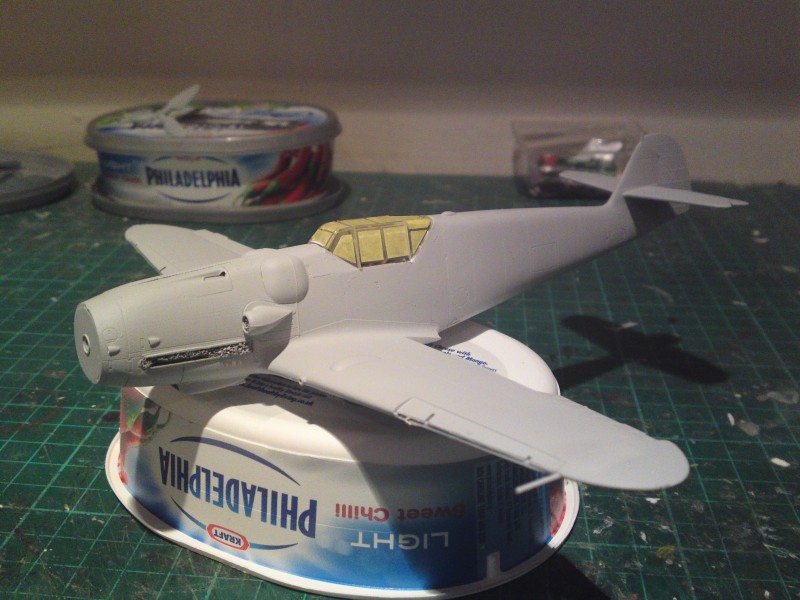
Included are a couple of shots showing the cockpit interior built with kit parts and a few extra bits.
continuing the build
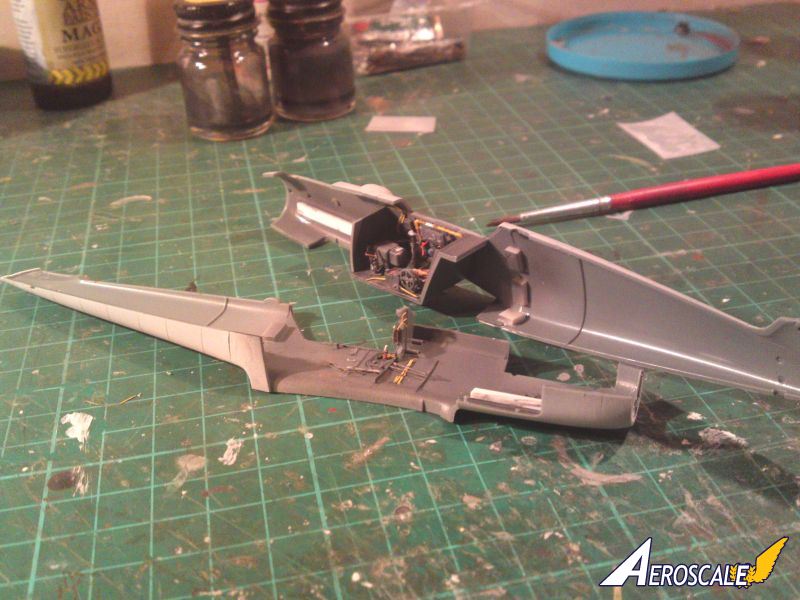
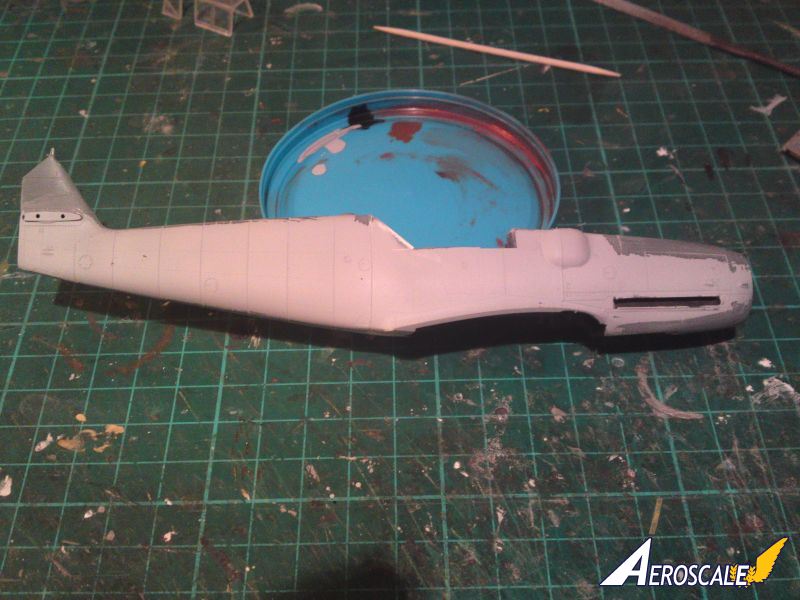
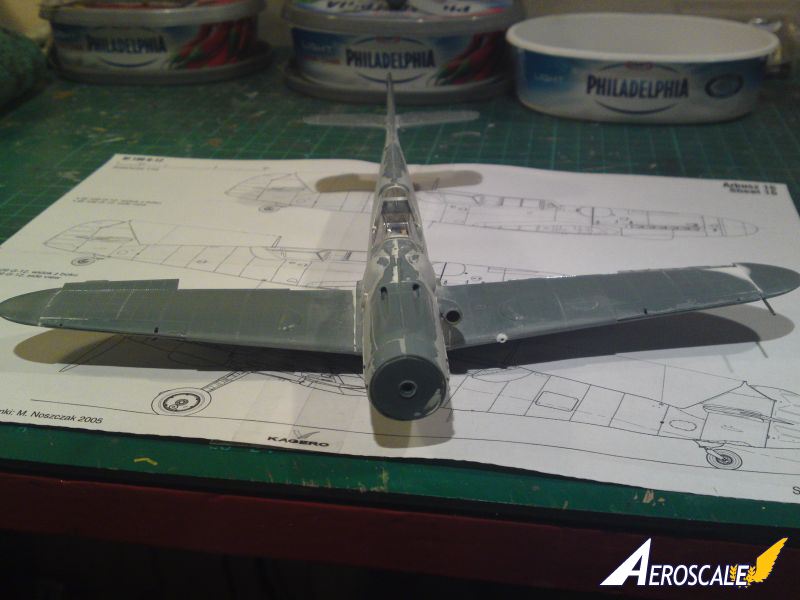
I joined the fuselage halves together and added gun cowl and tail fin top. I have also added a piece of 1mm plasticard at the rear of the cockpit opening to reduce the length of the cockpit, as my refs. and comparison with the Hasegawa kit, show this to be too long.As mentioned previously cutting the fuselage differently would do away with the plasticard addition. This is certainly the way I do it on another kit.
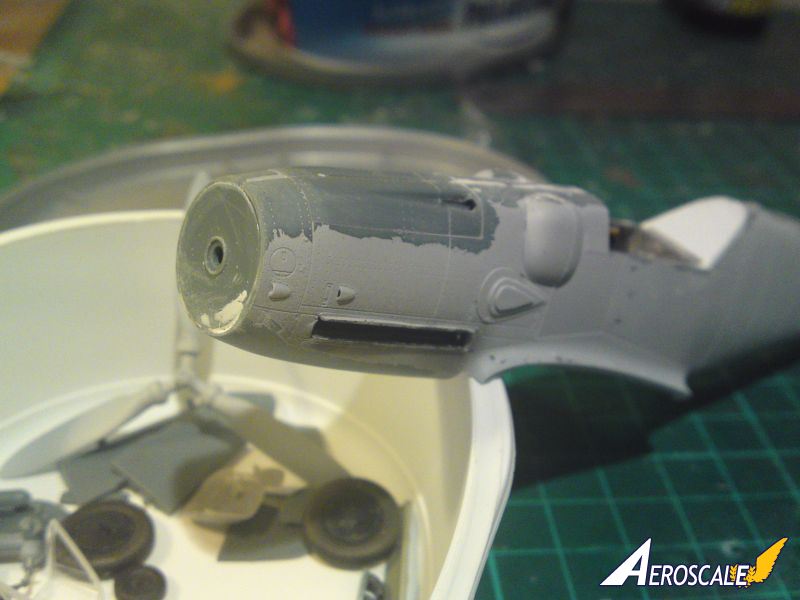
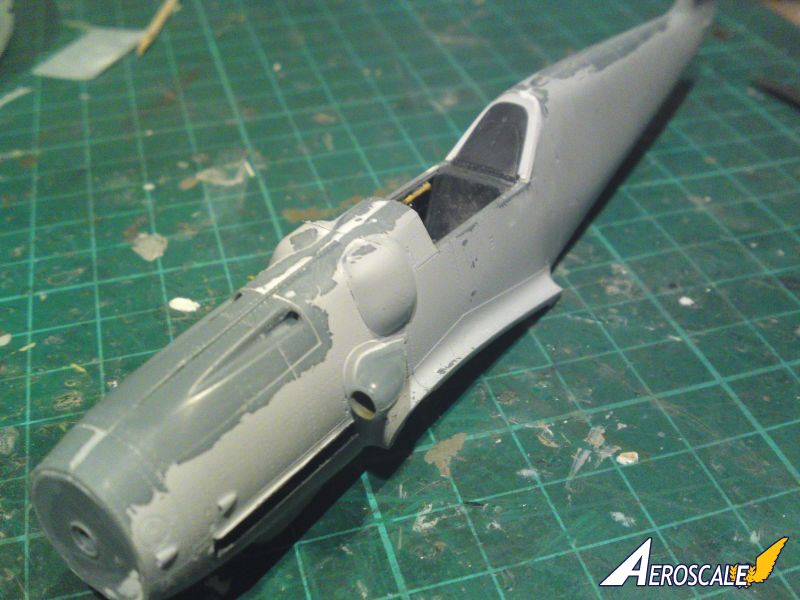
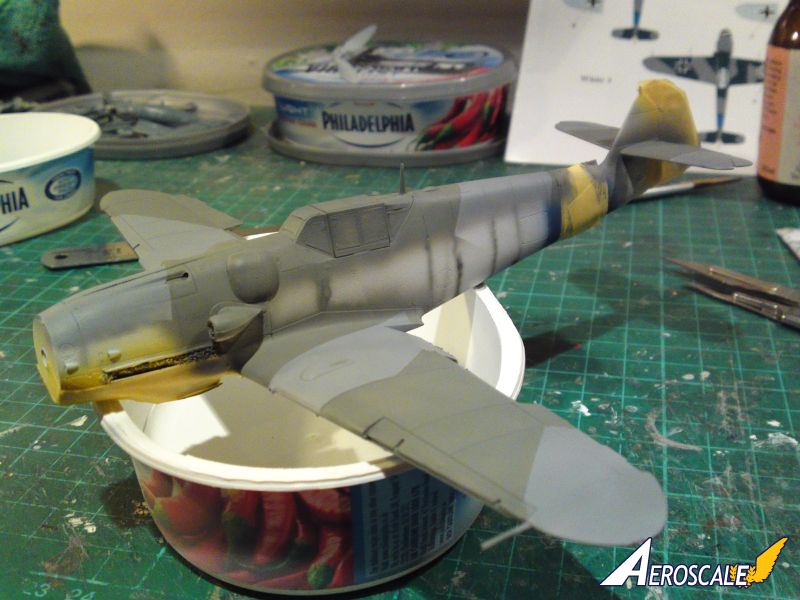
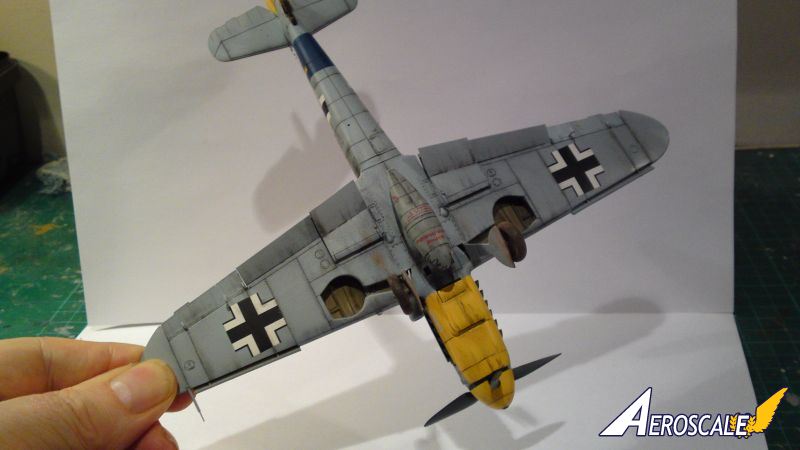
Included are a few more views of the fuselage, which has had the under surface of the nose sanded to reduce the AS engine shape the kit has. I have also backed the exhaust openings with plasticard, I will modify the exhausts later so that they can be inserted after painting.
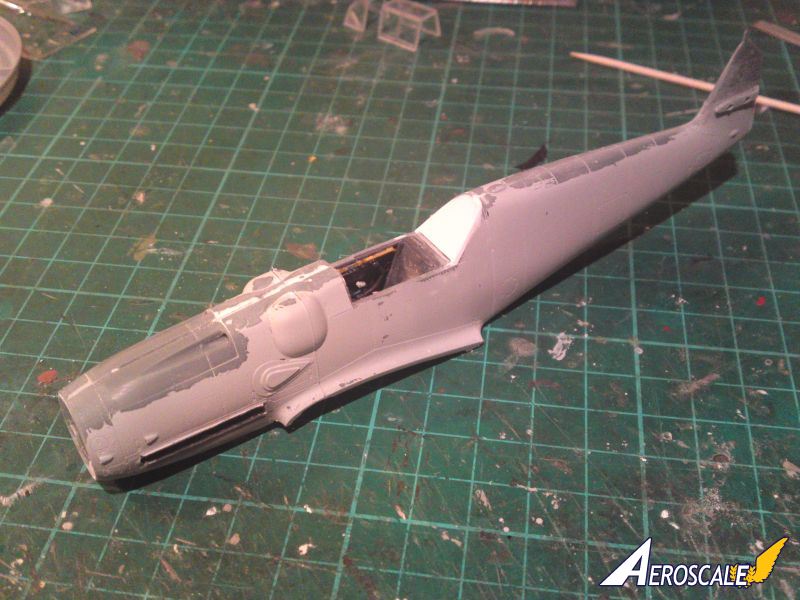
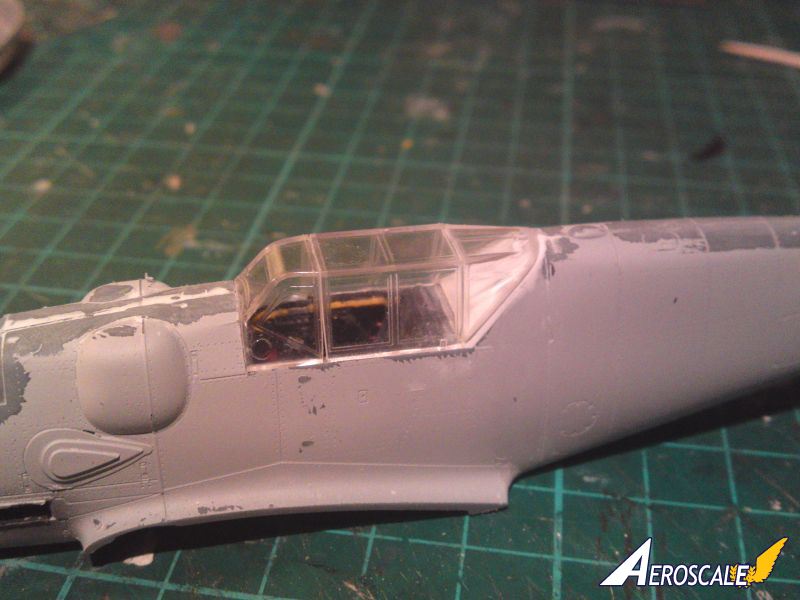
The canopy does need reducing in length, this can be done by gentle sanding and trial fitting as you go along to make sure too much isn't taken off. I concentrated mainly on the rear portion of the canopy, the rear frame is wide enough to allow sanding back without encroaching on clear parts.
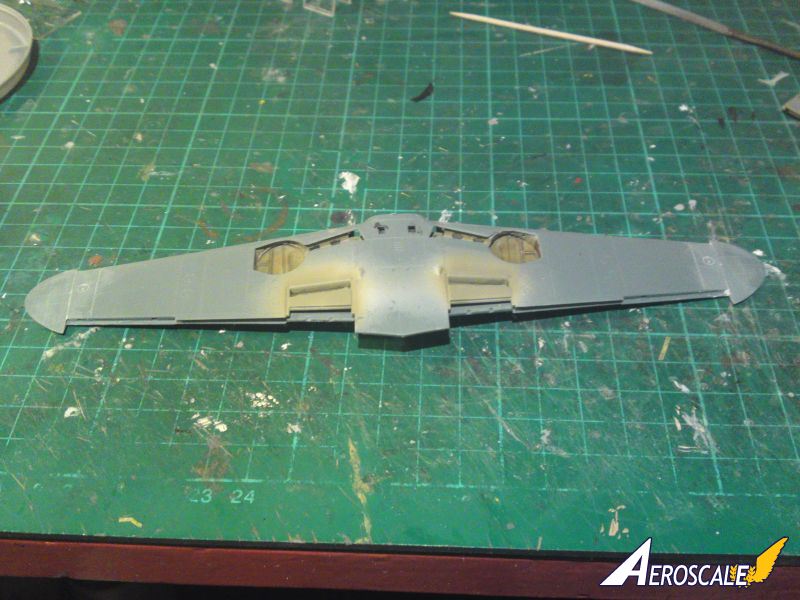
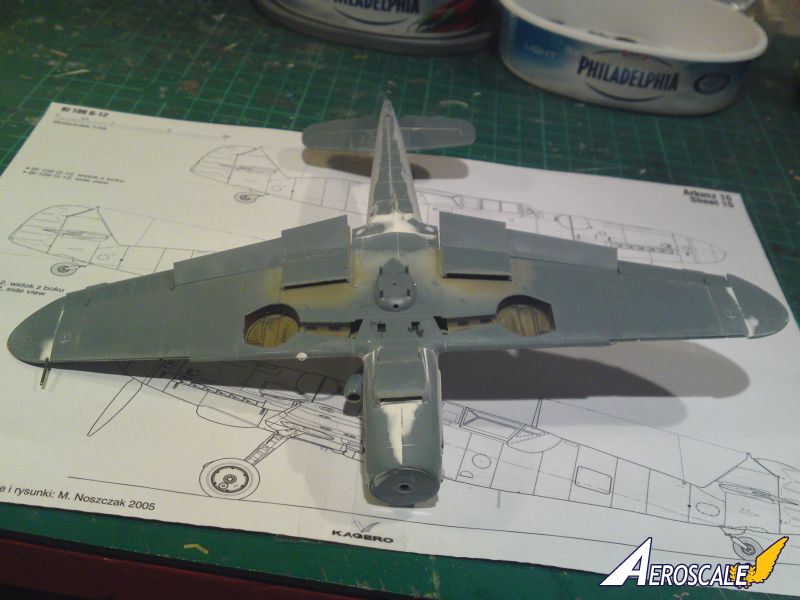
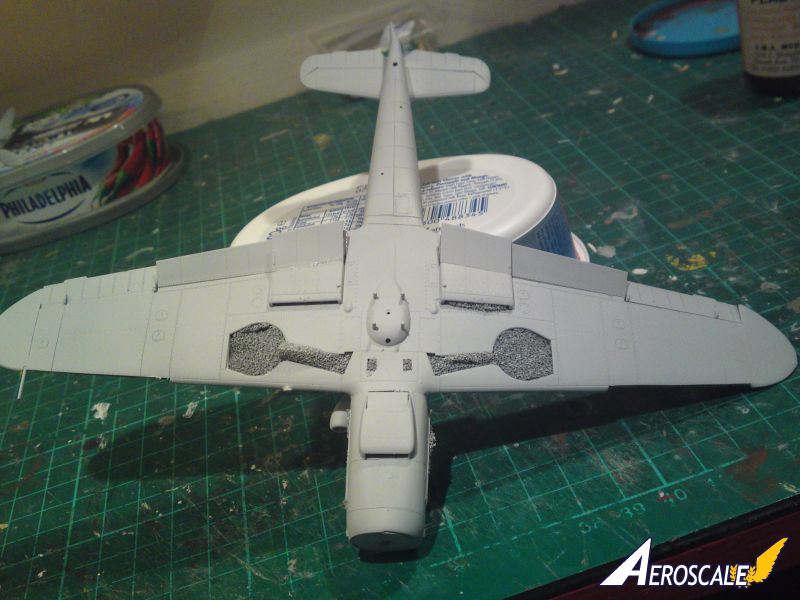
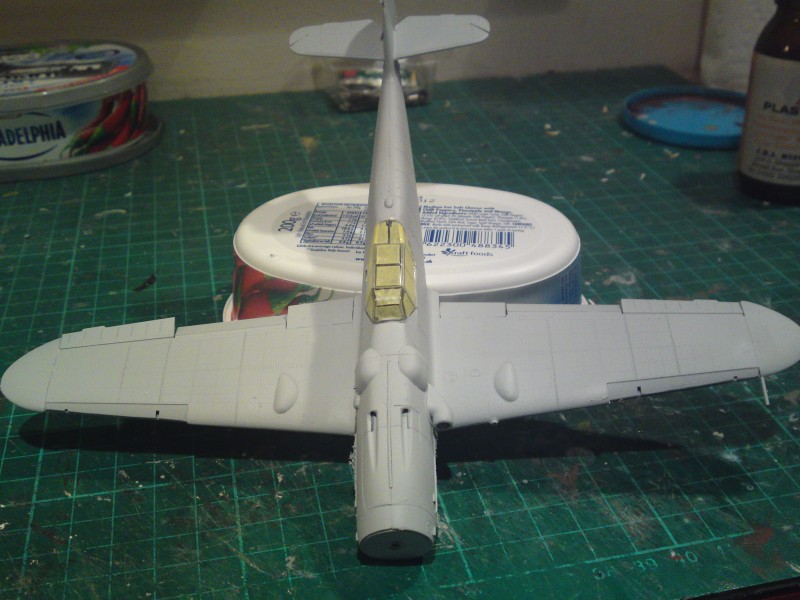
Onto the wings which have too wide a span. Using the Kagero plans I cut off the offending pieces, removed the locating stubs from the separate wing tips then glued it altogether. Wings should measure 20.64cm when reduced. I also blocked off the cartridge ejection ports.
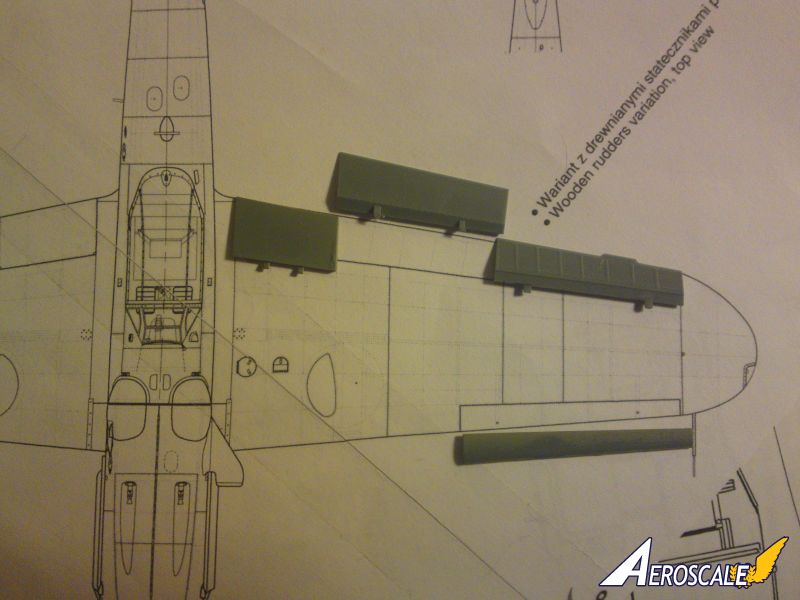
I placed the control surfaces on the plans (scanned from the book and printed thus the sellotape join down the middle!!). This, to my surprise, showed the aileron to be correct in length, as was the radiator flap. The over length item is the flaps, so these will need reducing as will the slats. I compared control surfaces with Hasegawa's sure enough all but the flaps and slats matched in size!
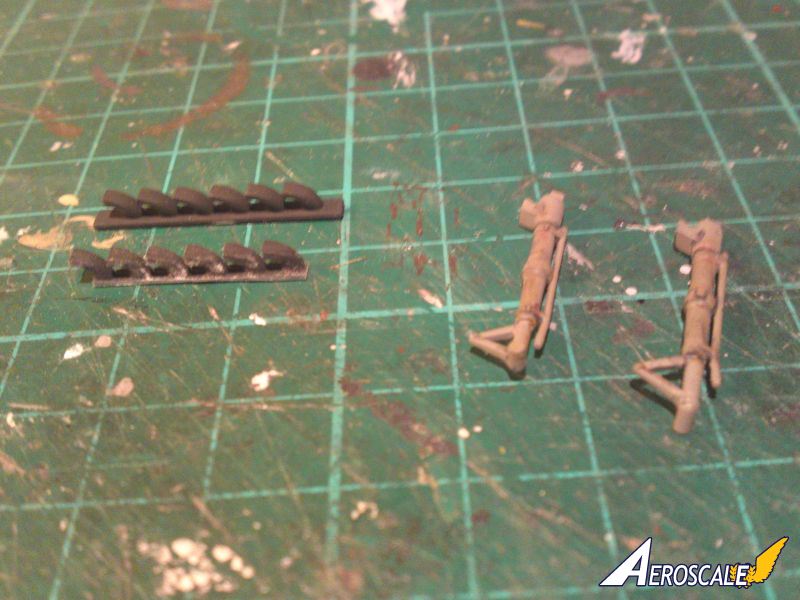
I have included a photo of the exhausts, one modified so I can add them after painting is finished. The partially modified u/c legs, reduced in length but still with the oversize brake lines to be removed.
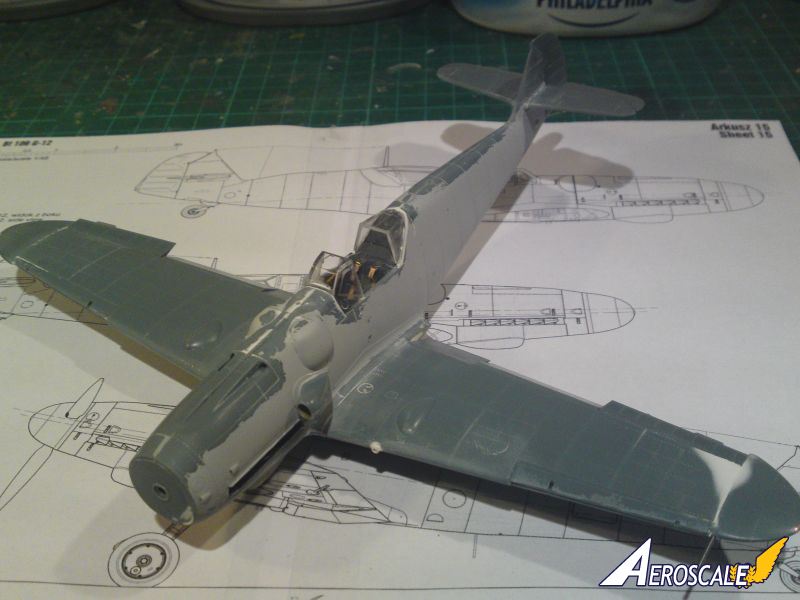
Hopefully when flying surfaces are attached to fuselage with canopy added it will give more idea if this fix is working!
I had added a plasticard 'bulkhead' to the rear of the cockpit to reduce the length. I then sanded down the kit cockpit bulkhead, till it was 'wafer' thin then using the rear canopy as a guide glued it to the plasticard bulkhead.
As an aside I test fitted the Hasegawa Bf109G canopy to the Eduard kit, it fitted fairly well, except for the rear part of the canopy. The Hasegawa kit shows a different cross section of the rear fuselage (one of the errors of Hasegawa's 109 series). See pic.
Eduard's canopy fit is also shown.
Only problem with Eduards canopy is that it is on the thick side but it is very clear! Eduard's canopy needs careful sanding of the rear and middle parts of the canopy with constant test fitting. Eventually you will have a shortened canopy which fits the shortened cockpit! I used, for the first time, the fabric seatbelts made by Eduard, very authentic. Only thing was the swear jar was empty when I started, but I now have enough cash for another kit My next job was to attach wings to fuselage, this ended up with filler being used a fair bit. Some of the joins were not as Eduard intended, but were due, to my surgery on the kit I assume.
As you can see, from the pics., I have added all control surfaces as they were supplied except for the ailerons. I did state previously that I thought the flaps were too wide but rather than cause extra problems decided to shorten the ailerons by approx. 2mm each. this does not detract from the look of the kit. In actual fact they now match the length of the ailerons in the Hasegawa kit!!!! I also measured the slats against the opening in the wing for them, then trimmed to fit.
I did however have to take off the wing tips to re-adjust them to fit the wing with the ailerons added. Thus the use of filler on the wingtip/wing join. Do not forget to remove the bulges on wing fairings.
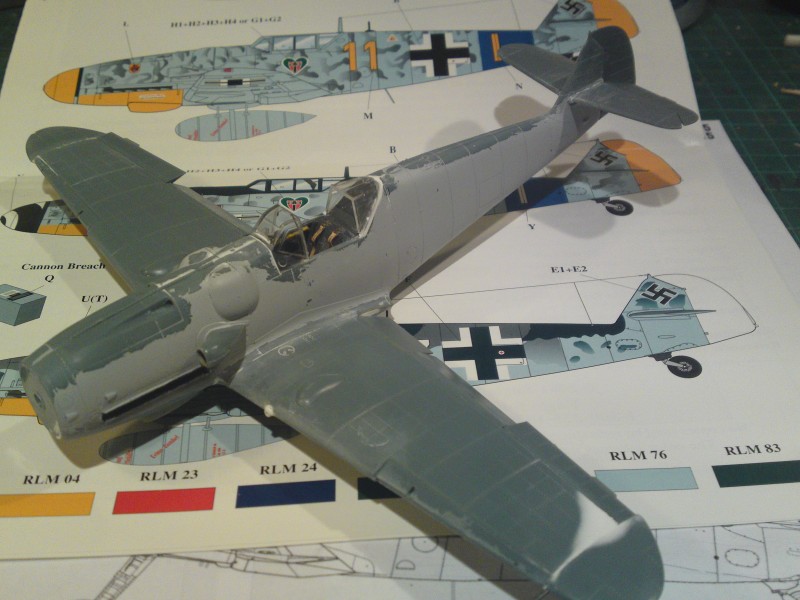
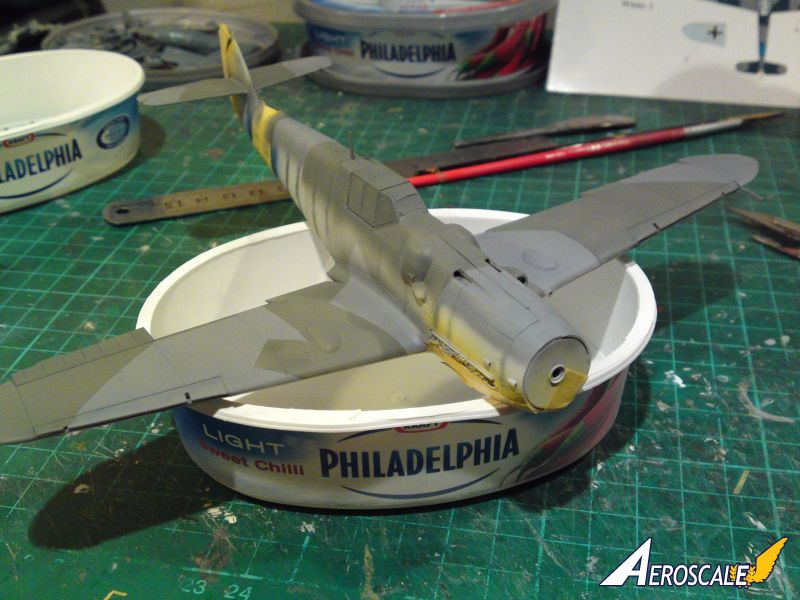
I added the front and rear parts of the canopy, masked them and used filler, then sanded to blend in. I modified the supercharger intake mounting to take into account the curve to clear the 'beule'. Umbrella mountings have been removed, the nose intake has been added, after opening the rear outlet flap. Nose has been given a little more refining to remove the 'AS engine' look to it, fuel drain pipe outlet added underneath fuselage plus mounting for antenna. The supercharger intake has been glued together, but I have left the join visible to imitate the weld line visible on the actual intake.
Just to be awkward I decided to 'convert' my 109G-6 into a G-5, simply because I really liked the look of the G-5 on EagleCals sheet EC83 from 9/JG54 'yellow 11'. To this end I used the oil pump cover from the Hasegawa kit, removing it from the 'beule' and then grafting it onto Eduard kit. The small intake scoop was made from scratch. A hole was drilled in the port wing to take a small piece of tube, as this a/c was fitted to take a gun camera.
painting and finishing
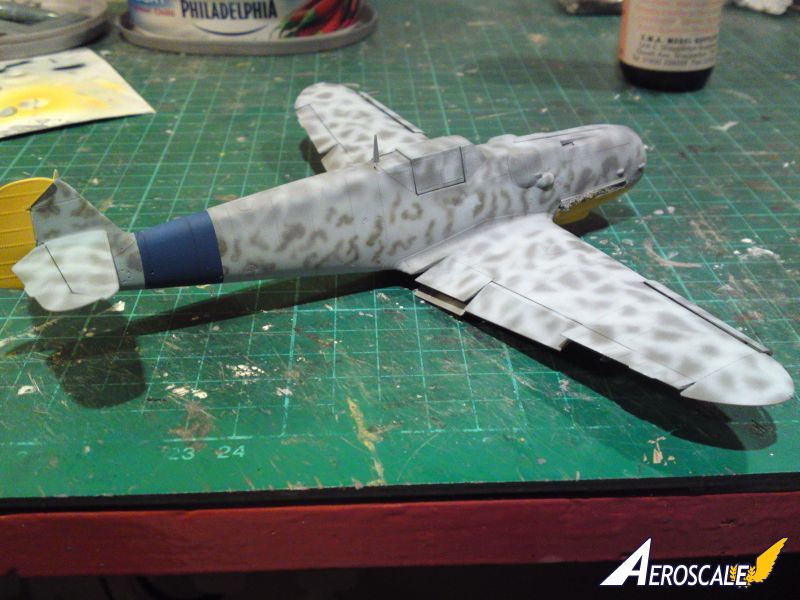
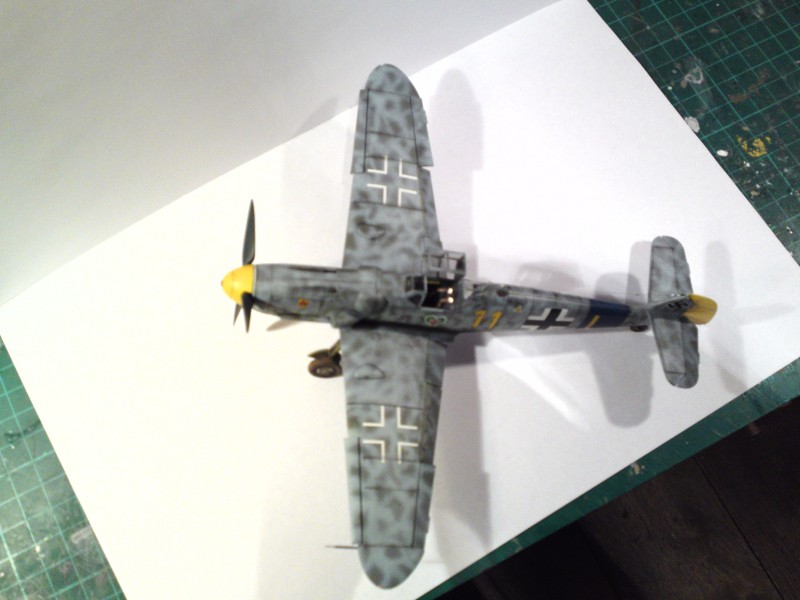
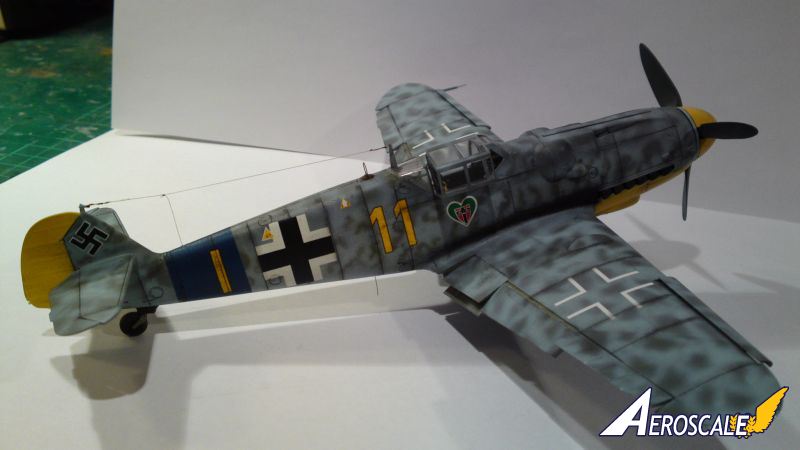
Photos shows the almost completed kit from primer coat to end camouflage.As I stated before the camouflage scheme is Yellow '11' 9./JG54 from the Eaglecals decal sheet. The instructions for the camouflage scheme are a bit vague stating 74/75 uppersurfaces with mottling. After a little research I found the camouflage scheme to be a standard 74/75/76 scheme complete with 74/75 mottle on fuselage sides. The wings, tailplanes and the top of the fuselage was then over sprayed with 76 leaving patches of 74/75 showing through, but with the original mottle left on the fuselage.
I have slightly altered the spinner prop. openings by making the front of the openings slightly wider with a round file then gently filing the sides of the opening to give the original tear drop shape.
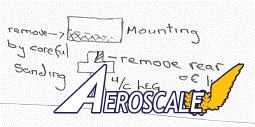
- a widen opening
- b gently sand to meet increased opening.
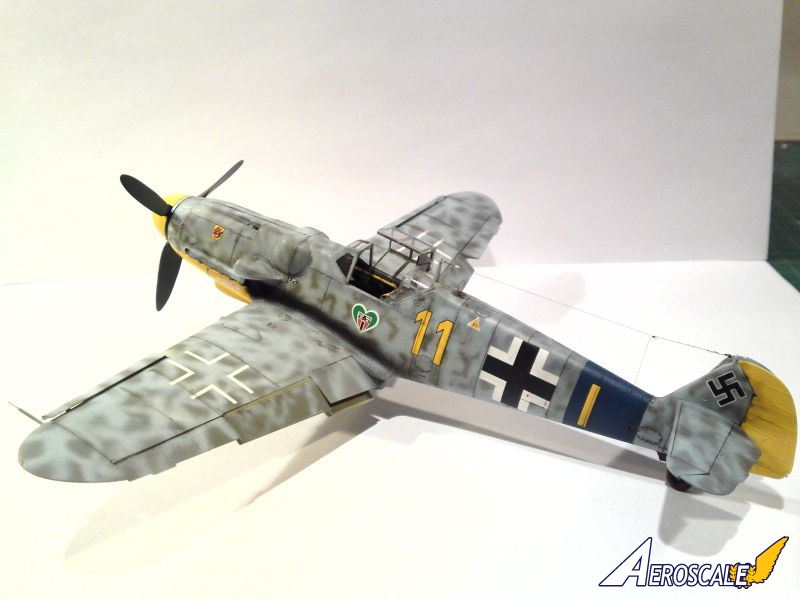
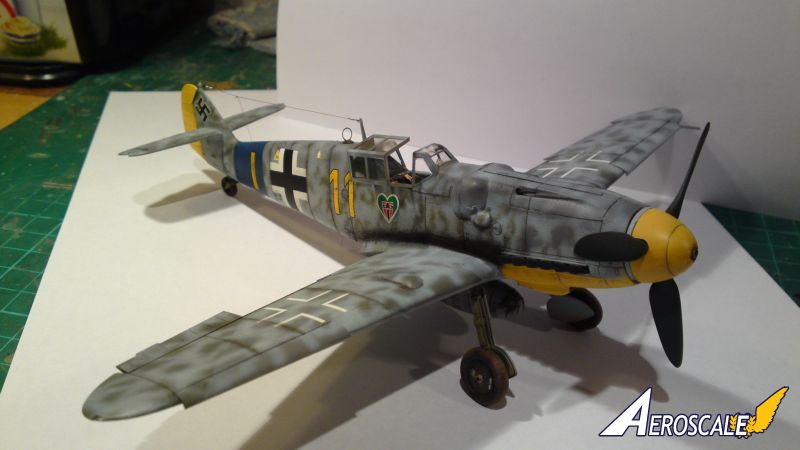
Well at the end of the day it now has the correct dimensions of the prototype and certainly doesn't look out of place with my other 109s (inc Zvezda's accurate 109Fs).
The final assembly was straightforward everything fitting well,I had some problems with the stance of the undercarriage. This was probably caused by my own variation of altering the forward rake. I chose to sand the fitting, in the wing, down at the front. After taking off part of the rear lug at the of the top of the leg this then gave me the forward rake required, well after removing and re-glueing the u/c half a dozen times!!!!
I converted it to a G-5,simply because I had the EagleCal sheet with this great camouflage scheme. I removed the oil pump cover from a Hasegawa kit and simply grafted onto the Eduard fuselage. The small scoop was made from scrap, the only other modification was the head armour made from scrap using the diagrams in the decal instructions.
conclusion
My overall view of this kit is favourable, and with Eduard hopefully correcting the dimensional problems will be a winner in future!! As I've said previously I don't believe the kit to be out of proportion, certainly the aftermarket decals fitted well (they were probably intended for the Hasegawa 109 family).Having just seen photos on Eduards Website for the Royal Edition , of the 109G, of the fuselage for the G-2 /4 it appears that they have, at least, not given this moulding the AS engine bulge. Whether the photos give a true impression we shall see!!!! I noted as well the beule with the oil pump cover is now also supplied.
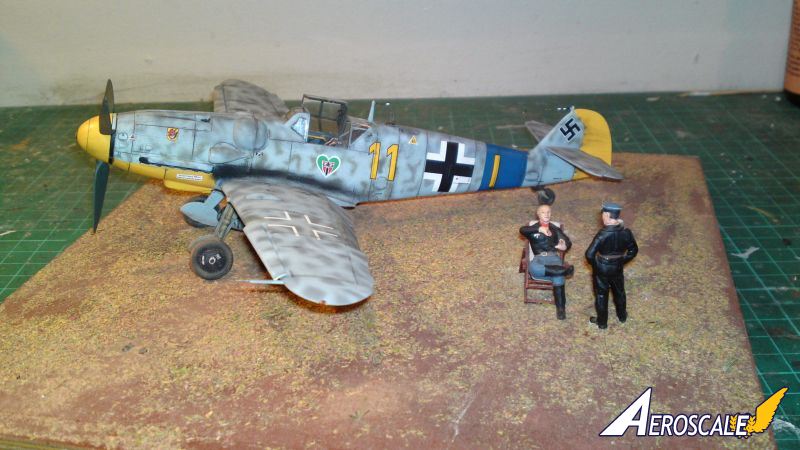
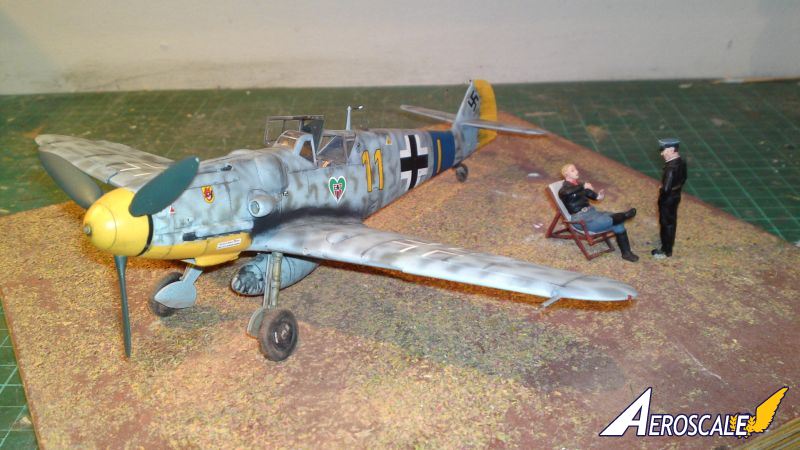
I leave you with a couple more shots of my kit in a temporary vignette.


About the Author


FROM: ENGLAND - WEST MIDLANDS, UNITED KINGDOM
I started modelmaking in 1962 with the Airfix 1/72 Zero. I caught the bug and built all the kits I could lay my hands on. Subject matter was immaterial and I built anything from trains to planes.I eventually settled on aviation and then in the early eighties decided to specialise in the Luftwaffe in...
Comments
Andy,
As I said after following your build blog to it's conclusion, your corrections make it more then feasible for the average skilled model builder to produce a properly shaped and sized Eduard 1/48 Bf 109 G.
Joel
JUL 05, 2014 - 12:26 PM

Hi Joel,
Thanks again for your comments, with the Royal Edition issue of the Bf109G, with the version of the G-6 unchanged, I hope this feature will be of use to anyone building the kit.
Regards Andy
JUL 05, 2014 - 09:27 PM

Excellent work! I have to say I think your mods are a success. Is the cockpit 13 mm wide as it should be? This is where the Hasegawa kit falls apart, being 14 mm (Even worse proportionally than the one foot Eduard wingspan! I found this impossible to correct neatly, cross-section errors being the worst one can imagine)... I also agree with you that the Hasegawa kit is significantly too shallow, even if it is supposedly only by 0.8 mm.
Kudos in rounding off the Eduard's squarish underside nose in such a convincing way. It looked terrible and beyond plastic thickness. Great work!
Gaston
JUL 11, 2014 - 08:30 AM
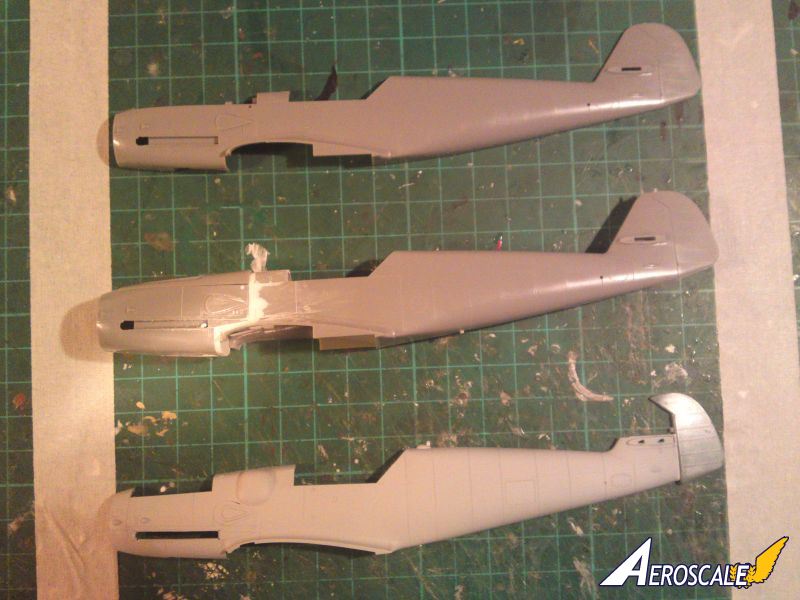
I have recently purchased the Royal Class edition of Eduard's 1/48 Bf109G. So I decided to try my alternative method of reducing the fuselage length. I am happy to report it worked better than my original method see photos & judge for yourselves.
 The 3 stages shown together.
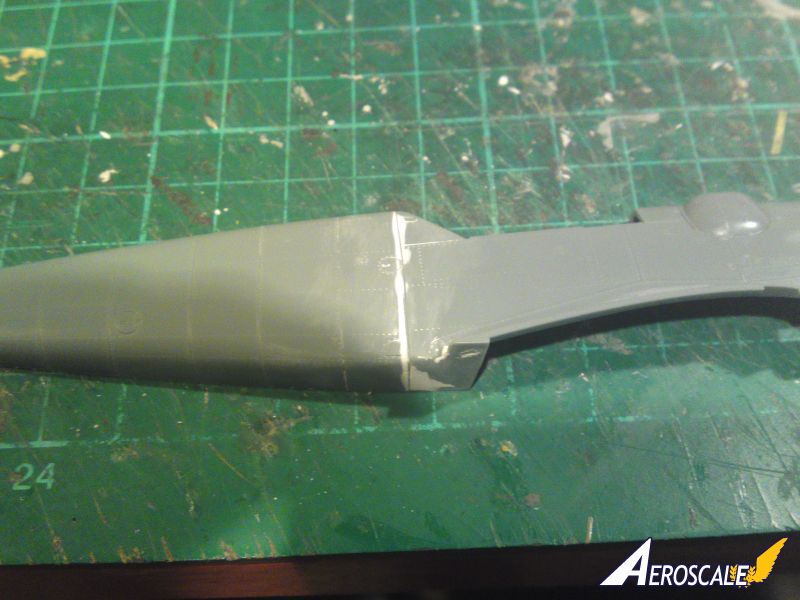
 Lines show cuts to be made. I used a compass set to 1.5mm to scribe a line parallel to the first panel line - the area to be removed.
 The fuselage in 3 parts - cut using RB Productions Pico Saws( a very good product).
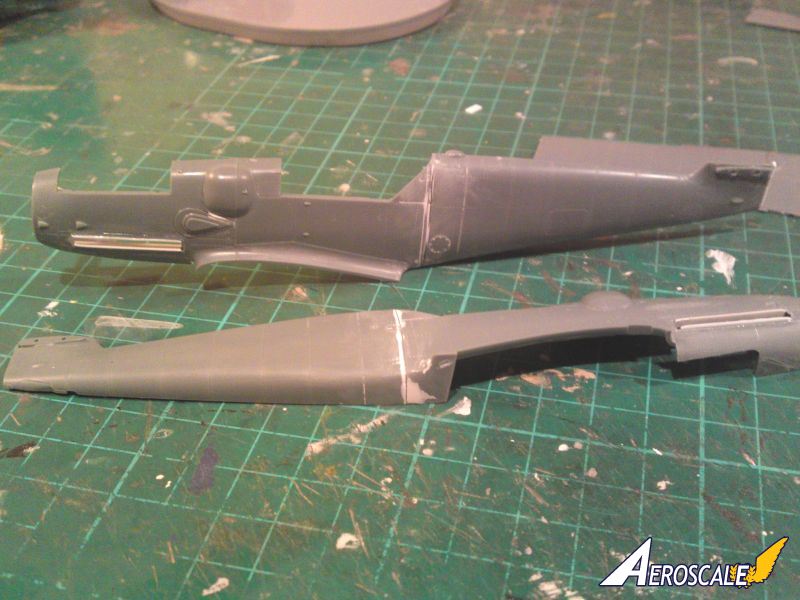
 Fuselage rejoined without using any plasticard strengtheners behind the cut. A little filler required, panel line rescribed & it may be possible to re-instate the rivets, with the appropriate tool.
I hope you find this method a lot easier than just cutting the fuselage into 2 pieces.
Gaston, thank you for your comments and yes the cockpit opening on the Eduard is 13mm.
I will again praise this kit as being the best Bf109 at present available despite the dimensional faults, which it would appear does not concern a lot of modellers.
I now have 2 spare fuselages, thanks to the Royal Class, maybe I'll try grafting them onto a couple of my Hasegawa 109s!!!!!!!
Andy
Fuselage rejoined without using any plasticard strengtheners behind the cut. A little filler required, panel line rescribed & it may be possible to re-instate the rivets, with the appropriate tool.
I hope you find this method a lot easier than just cutting the fuselage into 2 pieces.
Gaston, thank you for your comments and yes the cockpit opening on the Eduard is 13mm.
I will again praise this kit as being the best Bf109 at present available despite the dimensional faults, which it would appear does not concern a lot of modellers.
I now have 2 spare fuselages, thanks to the Royal Class, maybe I'll try grafting them onto a couple of my Hasegawa 109s!!!!!!!
Andy
The 3 stages shown together.
Lines show cuts to be made. I used a compass set to 1.5mm to scribe a line parallel to the first panel line - the area to be removed.
The fuselage in 3 parts - cut using RB Productions Pico Saws( a very good product).
Fuselage rejoined without using any plasticard strengtheners behind the cut. A little filler required, panel line rescribed & it may be possible to re-instate the rivets, with the appropriate tool.
I hope you find this method a lot easier than just cutting the fuselage into 2 pieces.
Gaston, thank you for your comments and yes the cockpit opening on the Eduard is 13mm.
I will again praise this kit as being the best Bf109 at present available despite the dimensional faults, which it would appear does not concern a lot of modellers.
I now have 2 spare fuselages, thanks to the Royal Class, maybe I'll try grafting them onto a couple of my Hasegawa 109s!!!!!!!
Andy JUL 14, 2014 - 04:20 AM


Me thinks I'll use this last mods on my overtree Gustav. Seems much more straightforward than the your first approach to the lenght problem.
JUL 16, 2014 - 11:54 PM
Copyright ©2021 by Andy Herschell. Images also by copyright holder unless otherwise noted. The views and opinions expressed herein are solely the views and opinions of the authors and/or contributors to this Web site and do not necessarily represent the views and/or opinions of AeroScale, KitMaker Network, or Silver Star Enterrpises. Images also by copyright holder unless otherwise noted. Opinions expressed are those of the author(s) and not necessarily those of AeroScale. All rights reserved. Originally published on: 2014-07-05 03:36:59. Unique Reads: 7269

WEB HOSTING BY


Copyright ©2021 AeroScale and Kitmaker Network, a subsidiary of Silver Star Enterprises
All Rights Reserved. Please read our Conditions of Use and Privacy Policy.
All Rights Reserved. Please read our Conditions of Use and Privacy Policy.