

1⁄48J7W1 Shinden
11
Comments

history
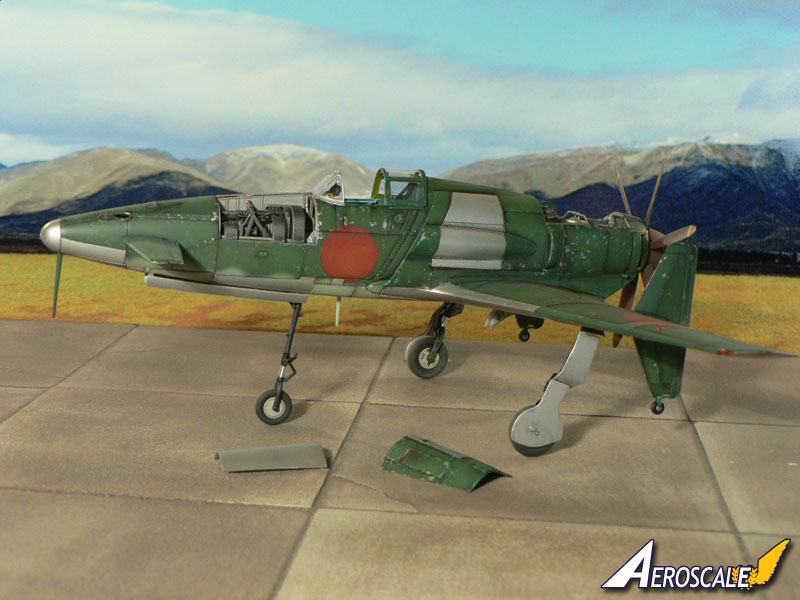
The Kyūshū J7W1 Shinden (震電, "Magnificent Lightning") fighter was a World War II Japanese propeller-driven aircraft prototype that was built in a canard design. The wings were attached to the tail section and stabilizers were on the front. The propeller was also in the rear, in a pusher configuration.Developed by the Imperial Japanese Navy (IJN) as a short-range, land-based interceptor, the J7W was a response to B-29 Superfortress raids on the Japanese home islands. For interception missions, the J7W was to be armed with four forward-firing 30 mm cannons in the nose.
The Shinden was expected to be a highly maneuverable interceptor, but only two prototypes were finished before the end of war. Building a gas turbinepowered version was considered but never even reached the drawing board.
The two prototypes were the only Shinden completed. After the end of the war, one prototype was scrapped; the other J7W1 was claimed by a US Navy Technical Air Intelligence Unit in late 1945, dismantled and shipped to the United States.
The sole remaining J7W1 was reassembled, but has never been flown in the United States; the USN transferred it to the Smithsonian Institution in 1960. It is currently in storage at the National Air and Space Museum in Washington DC. In 1998 it was reported to be located at Building 7 of the U.S. National Air And Space Museum Garber Facility in Suitland, Maryland.
The Kit
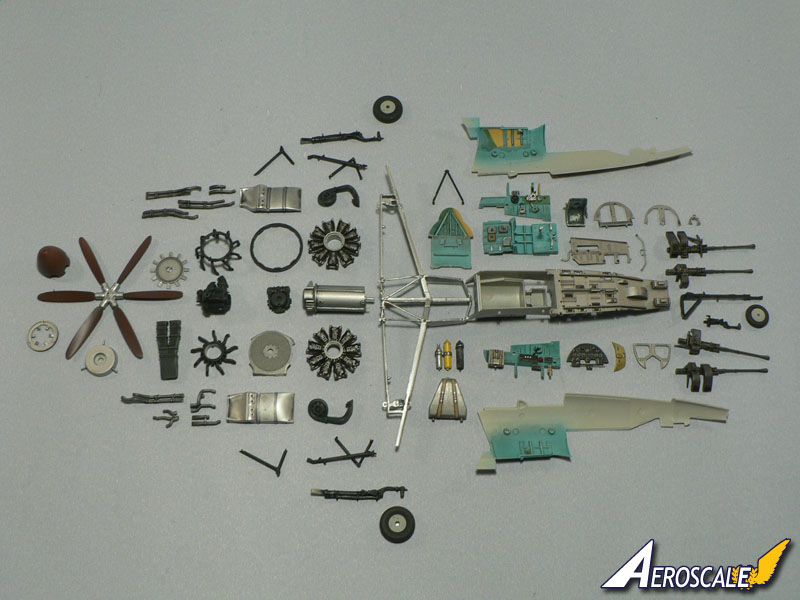
This is Zoukei-Mura's first release in it's new 1/48 scale series of kits. Basically it is a scaled down version of their 1/32 scale J7W1 Shinden kit. Once again the manufacturer provides a complete interior (cockpit, gun-bay, engine, etc ) and as such the philosophy remains the same: replicate the original machine inside and outside in the best possible way. Detailed pictures of the content of the kit (and a video!) can be found here: Unboxing Zoukei-Mura's 1/48 Shinden.Interior construction
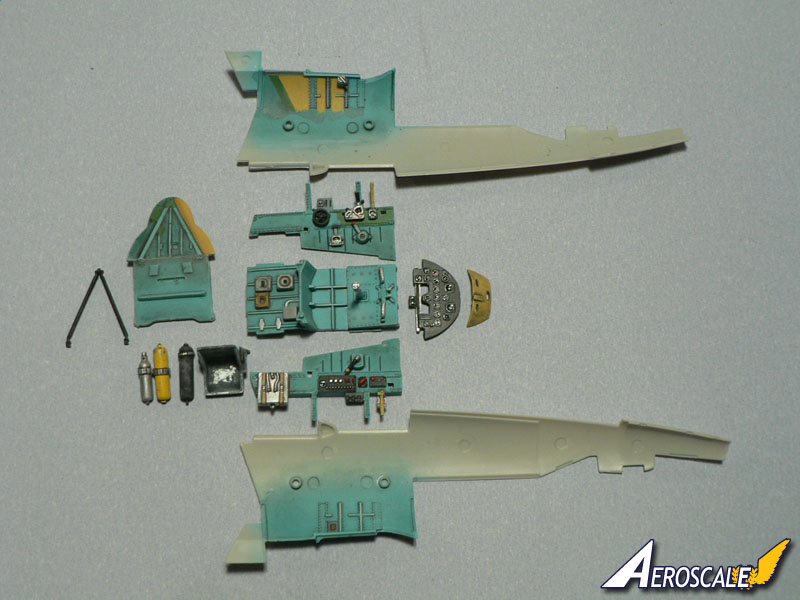
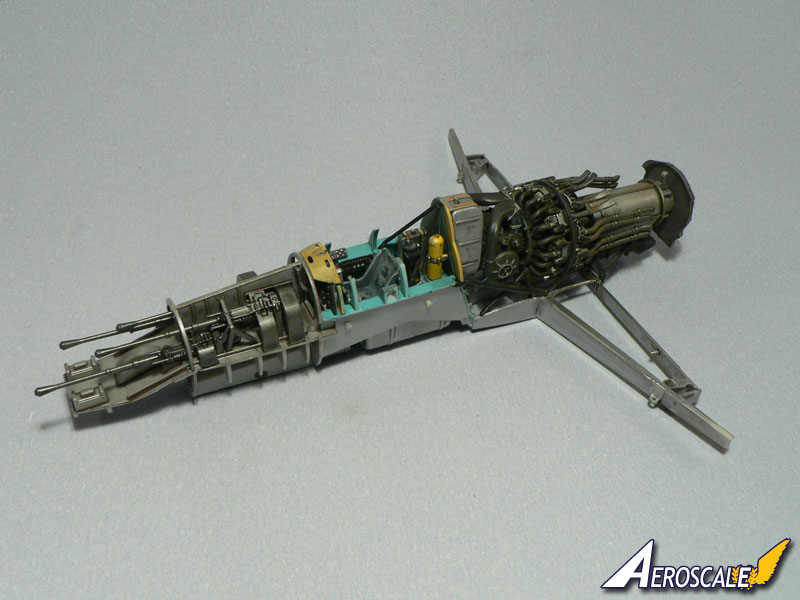
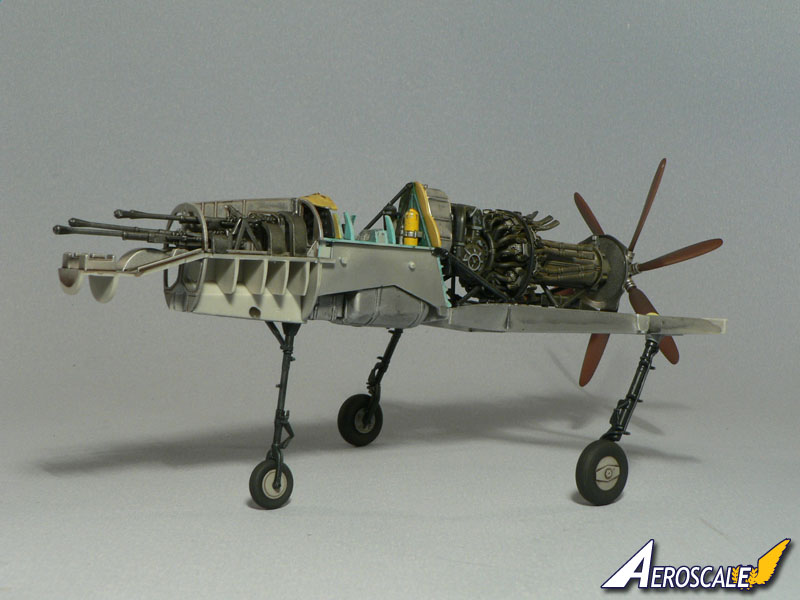
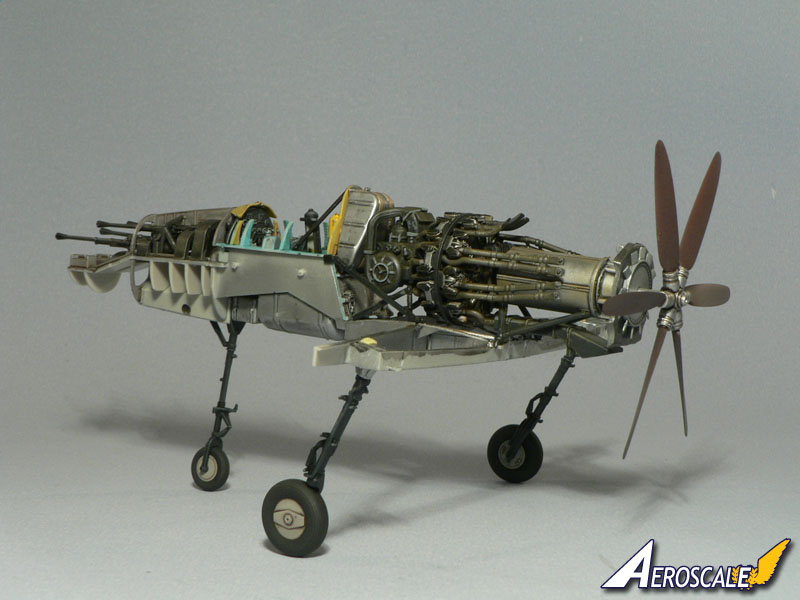
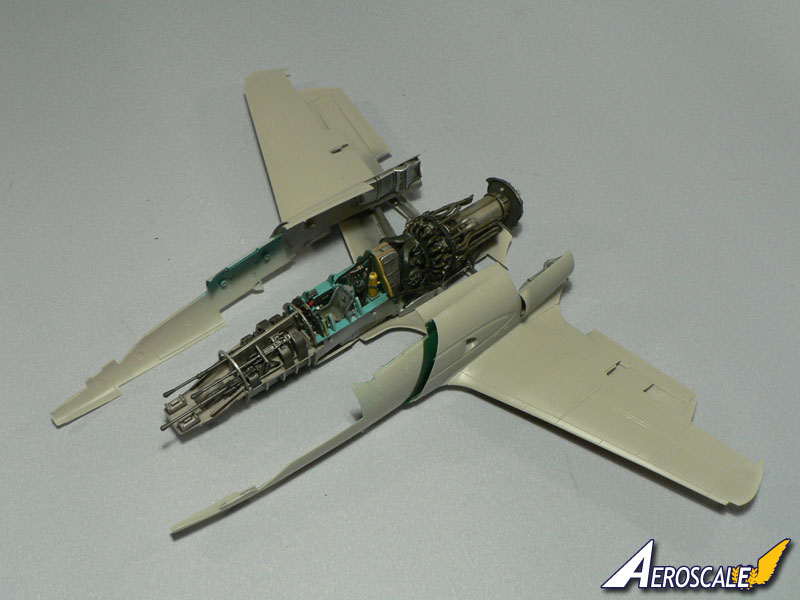
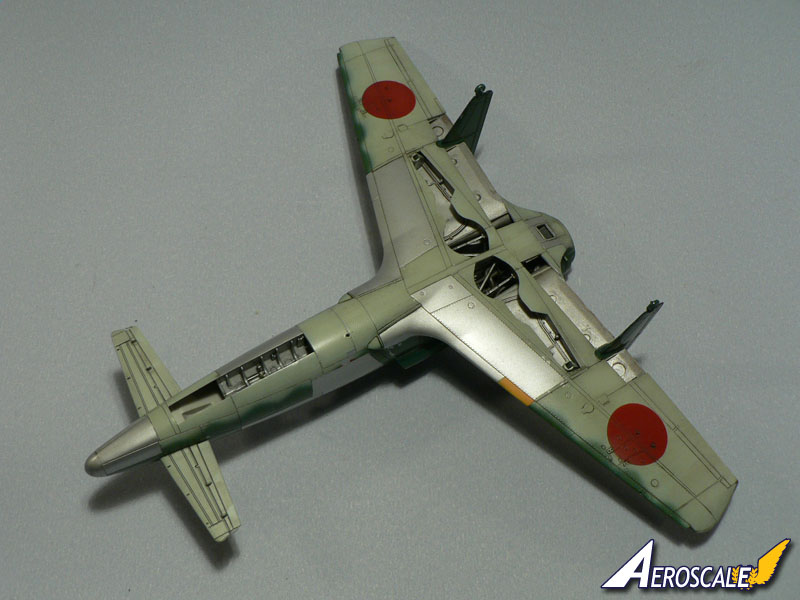
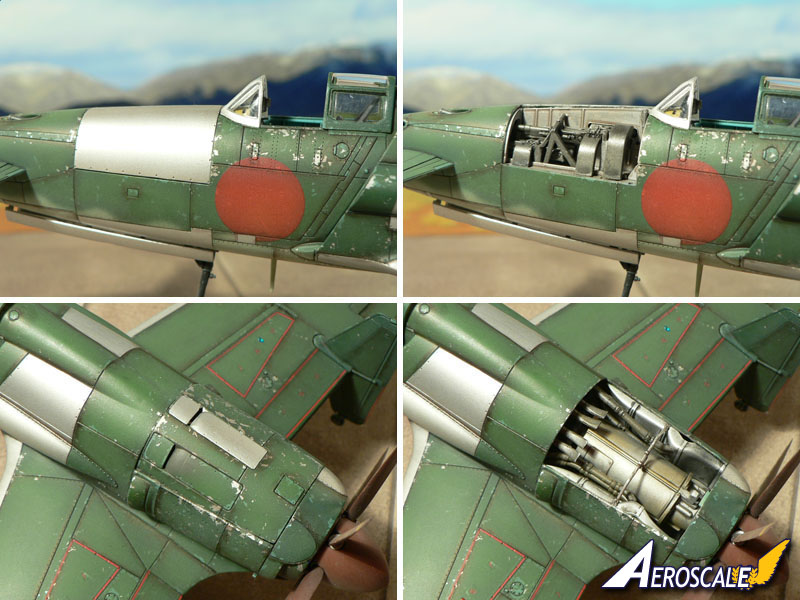
The model was built from the box. This means that nothing has been added which wasn't present in the original kit.Construction started with the interior which can be divided in three sub-assemblies: engine, cockpit and gun-bay. The high level of detail provided is not superfluous and a lot will remain visible on the finished model, especially if some panels are left open. In fact, the only item which I found would be completely hidden in the end was the fuel tank under the cockpit. So don't worry too much about the ejector pin marks present there.
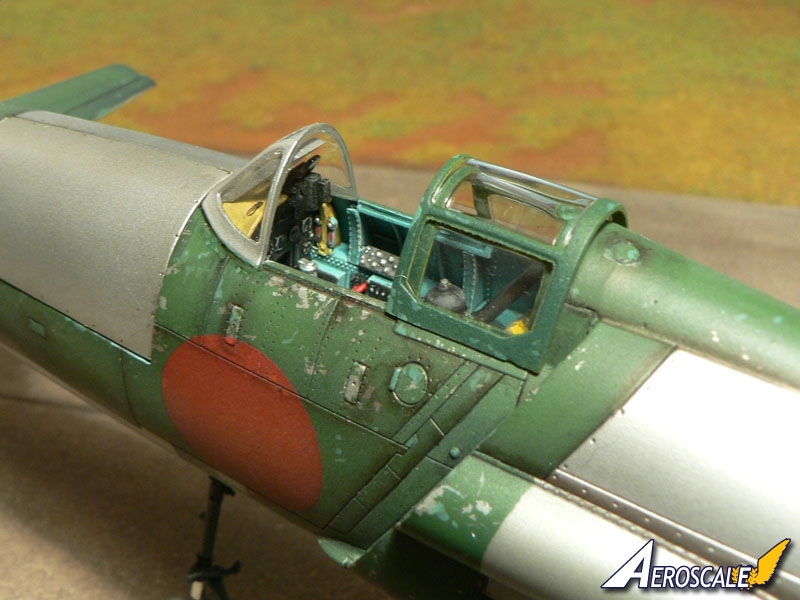
The engine is quite nice and, judging from pictures, builds into a good representation of the original power-plant. Apart from wires and tubing there is nothing more that should be added I think. To paint the radial engine I deviated from the kit's color instructions a little though. The cockpit was painted according to pictures of the Smithsonian Air&Space Museum machine, the sole survivor of the Shinden prototypes. I am aware that many areas of the interior may have been repainted but since I wanted to replicate an aircraft assembled by Japanese workers under the supervision of the U.S. military after the end of the war, I supposed that the patchy appearance of the cockpit was looking just right. The gun-bay is quite easy to assemble and this time I have followed the kit's instructions for the painting.
Covering the airframe
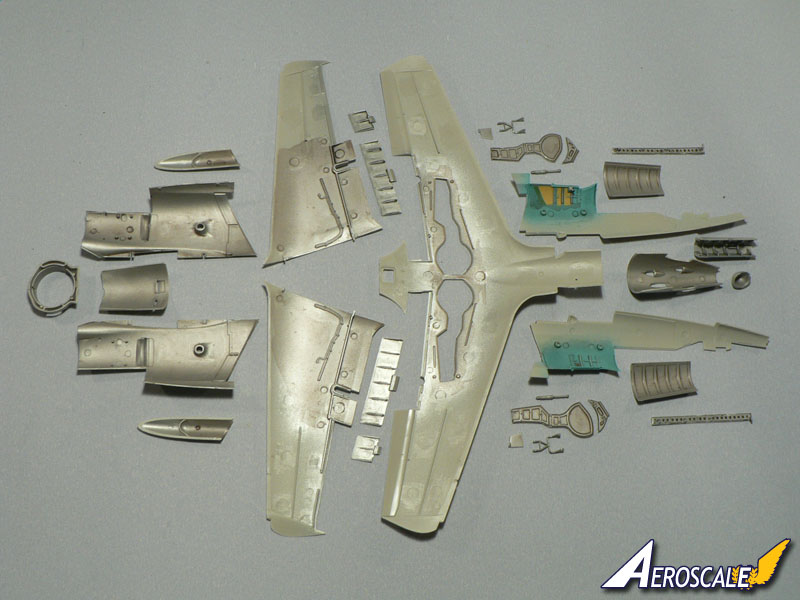
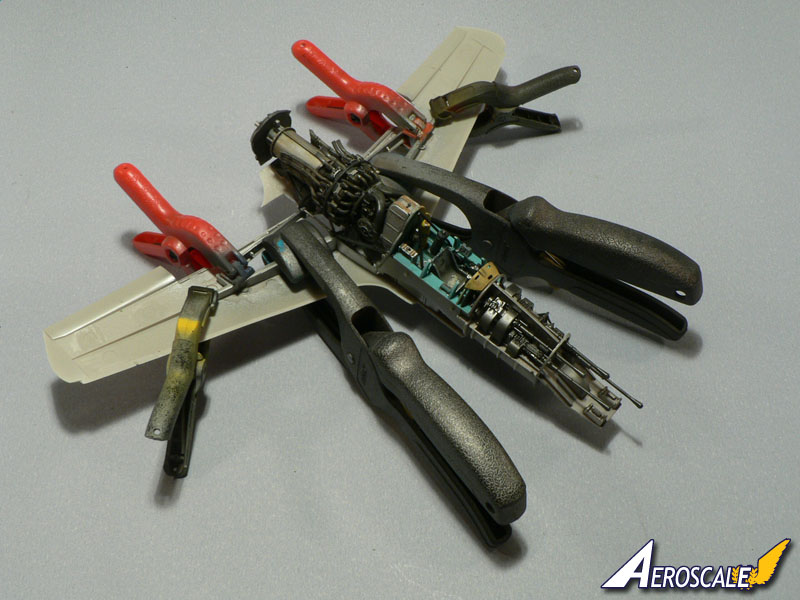
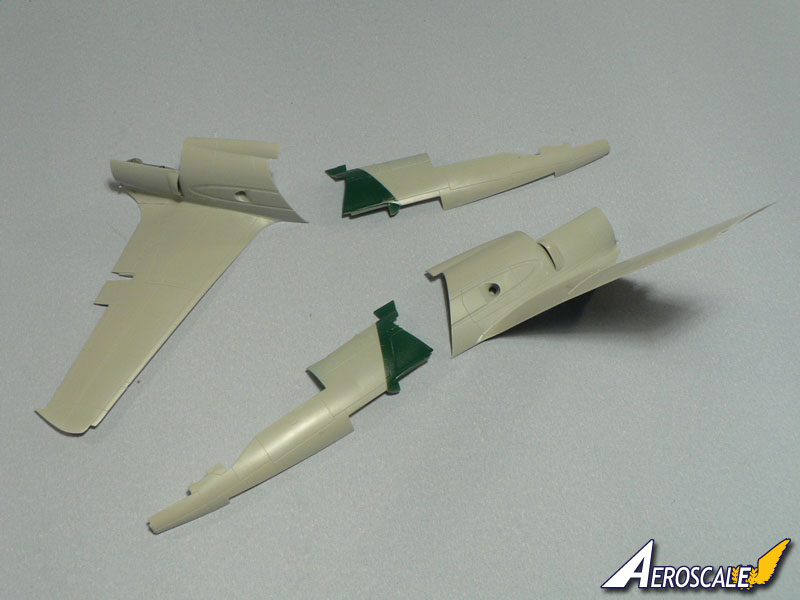
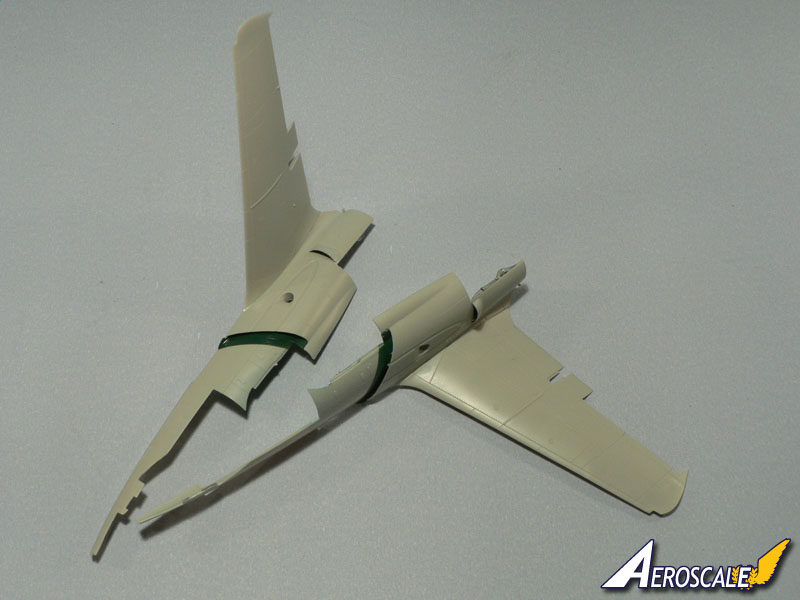
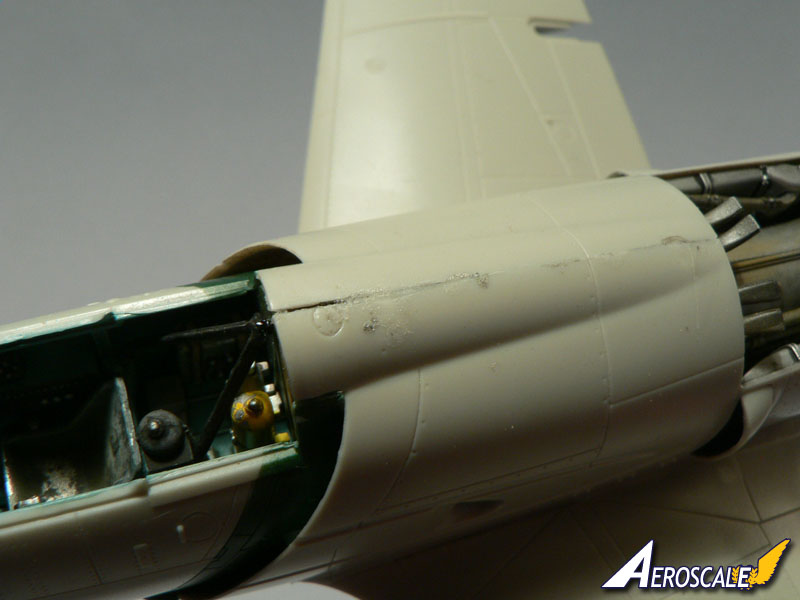
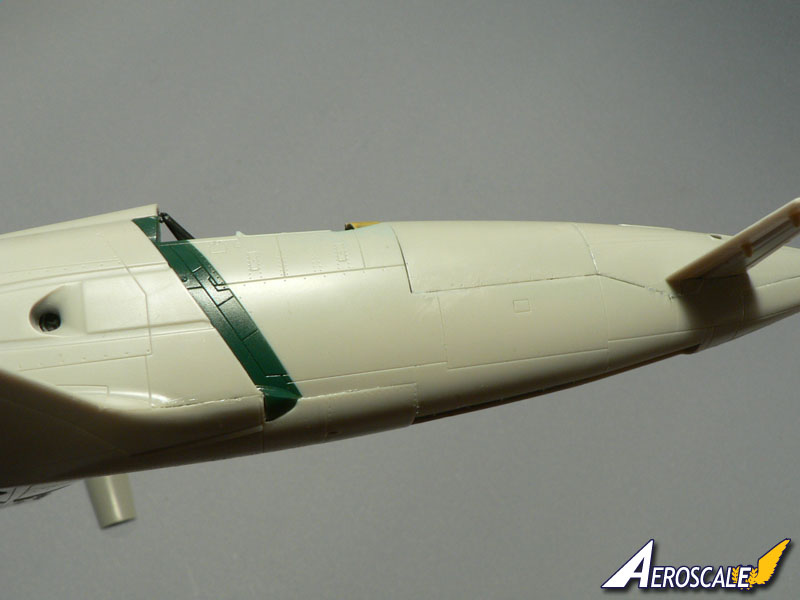
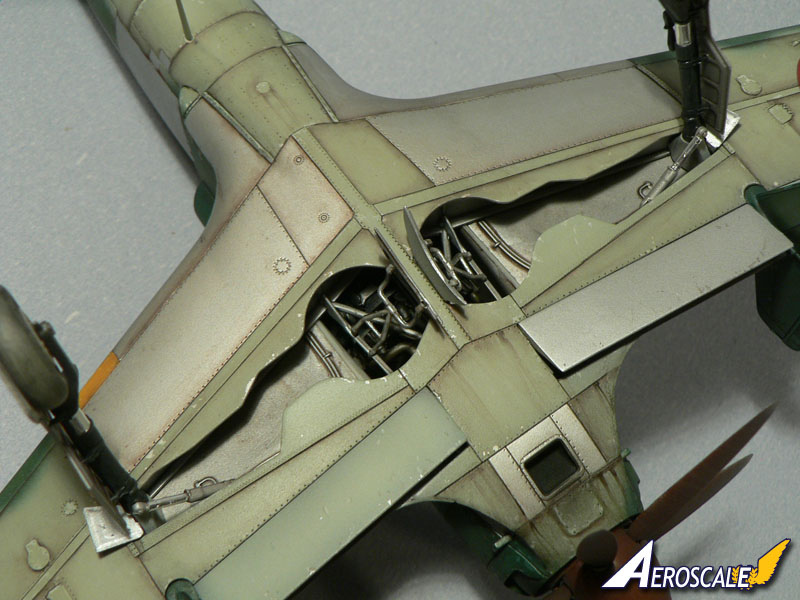
The "skin" of the model is composed of a huge number of parts: wing under side, wing upper sides, forward fuselage halves, rear fuselage halves, front tip parts, rear end part, engine cover, air intakes, gun bay covers, etc As you can imagine, getting all this together wasn't easy. I have scratched my head quite a long time before deciding how I would proceed. Once again, I didn't follow the assembly guide. Here is how what did it: - first, the wing under side was glued to the wing spar. I used clamps to keep the parts together and left the glue to dry for 24 hours. - in the meantime, I have glued the upper wing parts to their respective fuselage halves. This was to prevent a potential gap in the wing root area. - The forward fuselage halves were partially painted in green in areas which would have been difficult to reach afterwards (see pictures) and then glued to the upper wing/rear fuselage sub-assembly. Once again, the glue has been left to dry for 24 hours. - Finally, everything has been assembled and kept in place with tape and rubber band.The end result wasn't too bad except from a gap on the upper fuselage, just behind the cockpit. However, it was easily eliminated with a little amount of filler and I found this to be a very little price to pay to obtain a perfect wing root finish. Other areas which needed some filling and sanding were the fuselage tip (just below the small canard wings) and the gun bay panels, though it was more to obtain a perfect painting surface than to cover real gaps.
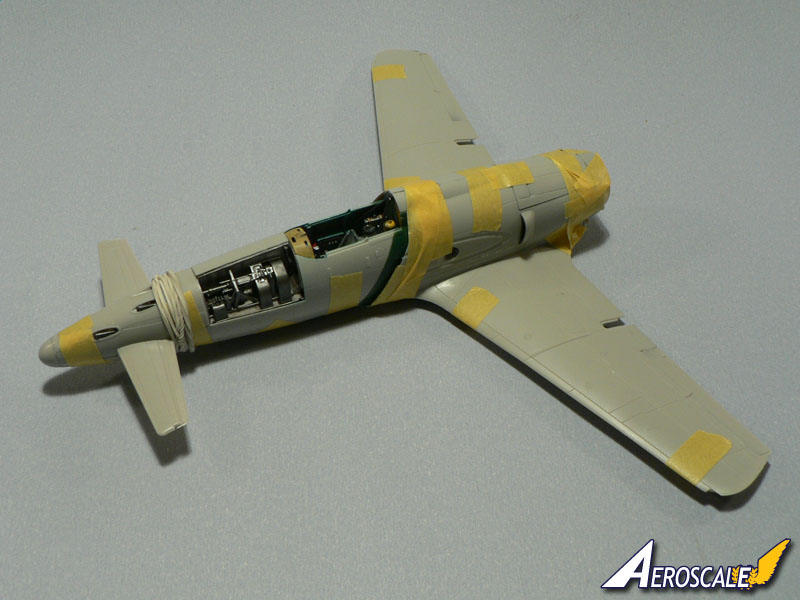
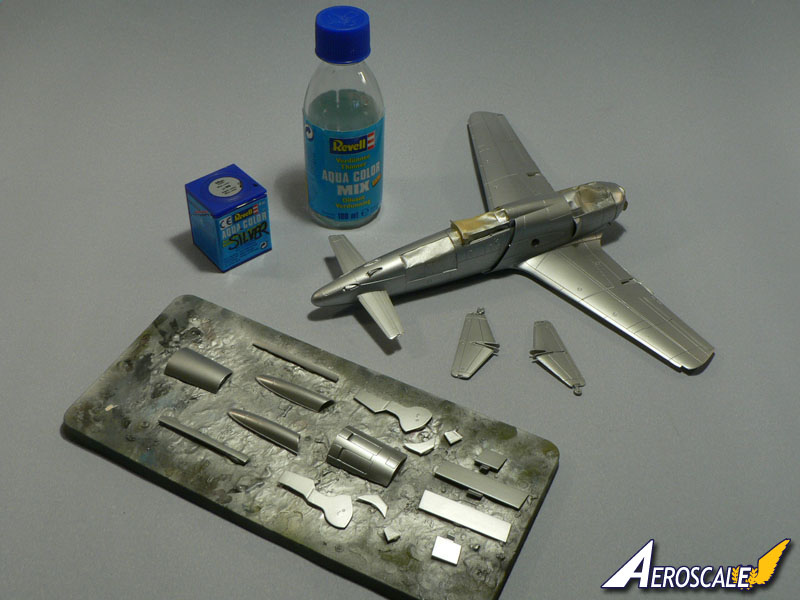
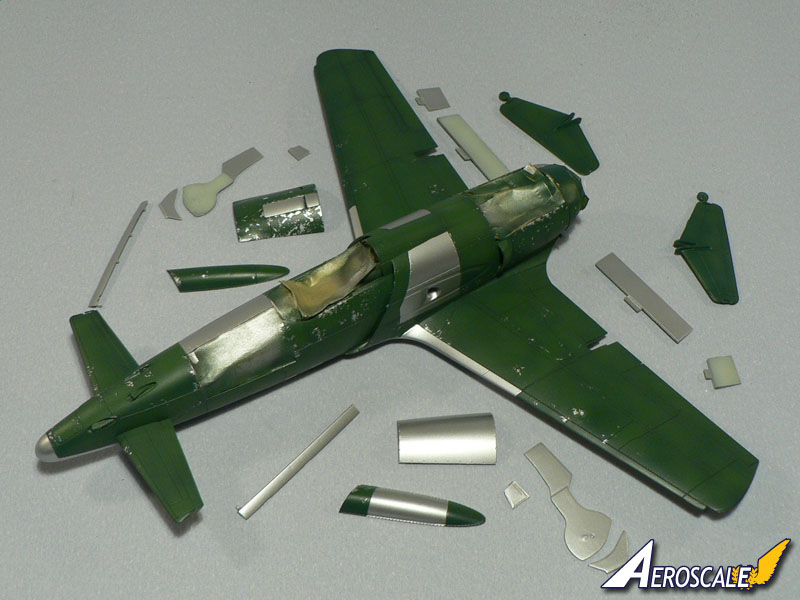
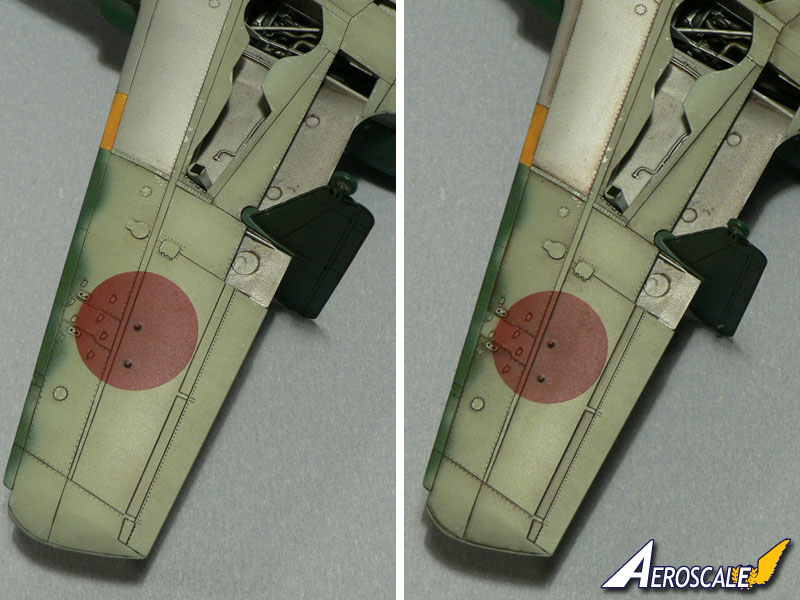
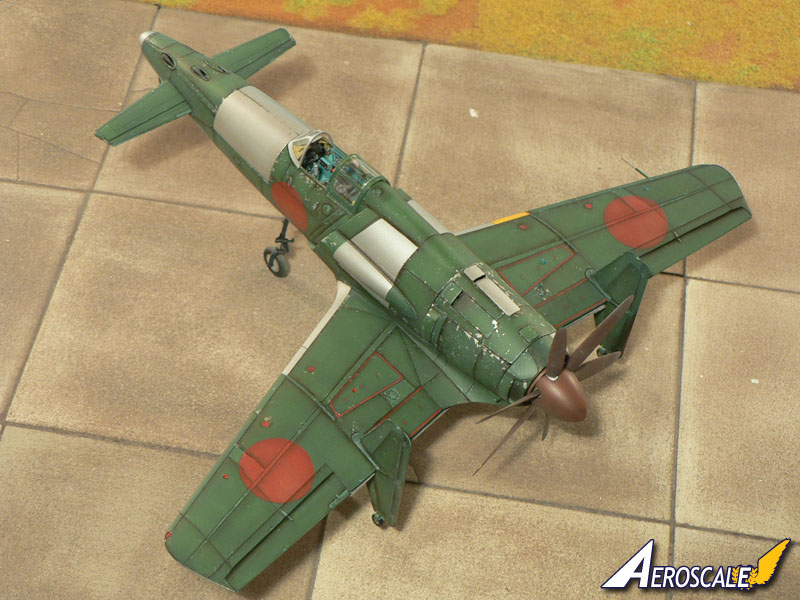
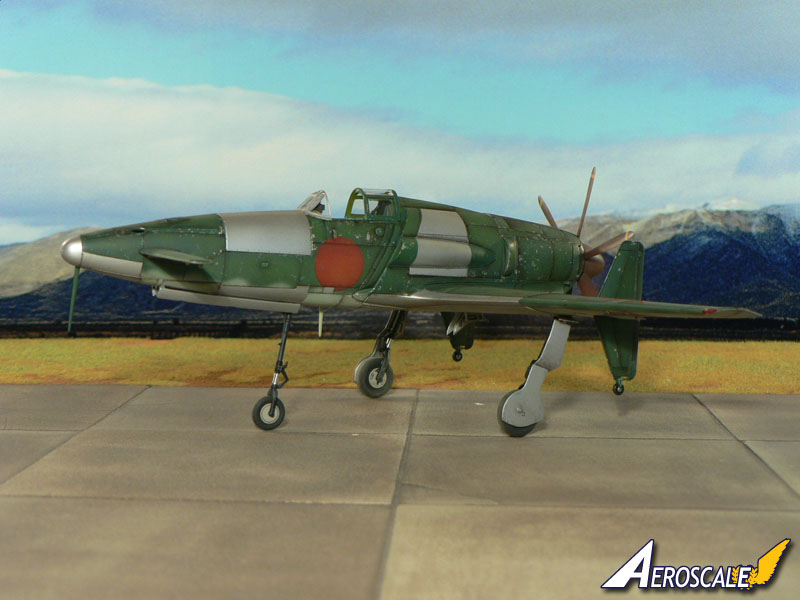
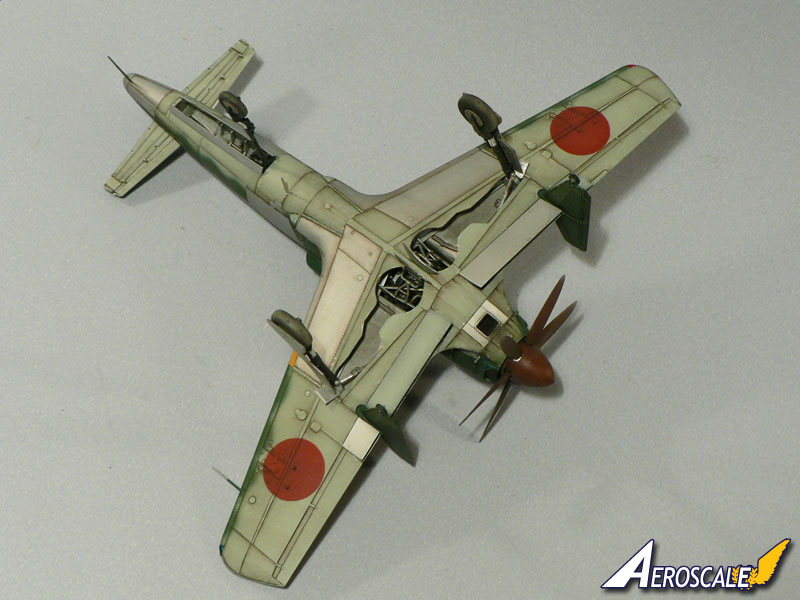
A patchy Shinden
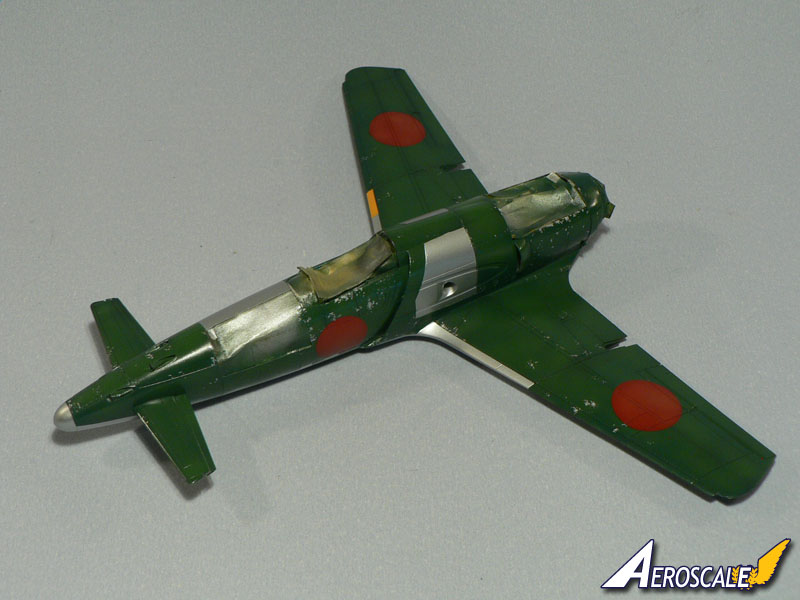
Before painting the aircraft in its camouflage colours, the whole airframe was painted in aluminum color. For this I have used Revell's Aqua Color (90 Silver). This would allow me to represent some paint chipping effects using Masking Sol (rubber mask) and leave some panel in bare metal like seen on some period photos. For the upper camouflage green I have used Tamiya XF-70 Dark Green 2 (IJN) and for the under surfaces XF-12 J.N. Grey. Of course some modulation in the color was done with pre-shading and by including lighter colors in the basic tones.The markings have been painted on with masks (roundels) and the warning stencils of the original aircraft are the kit's decals applied over two coats of Klir (french version of Future). The panel lines wash has been done with the excellent Tamiya Panel Line Accent Colors (Dark Brown and Black). Weathering was achieved with micro-painting (application of lighter green and grey colors with a 00 brush) and washes (Faber-Castell Pitt pen) done over a mat surface (Gunze H20).
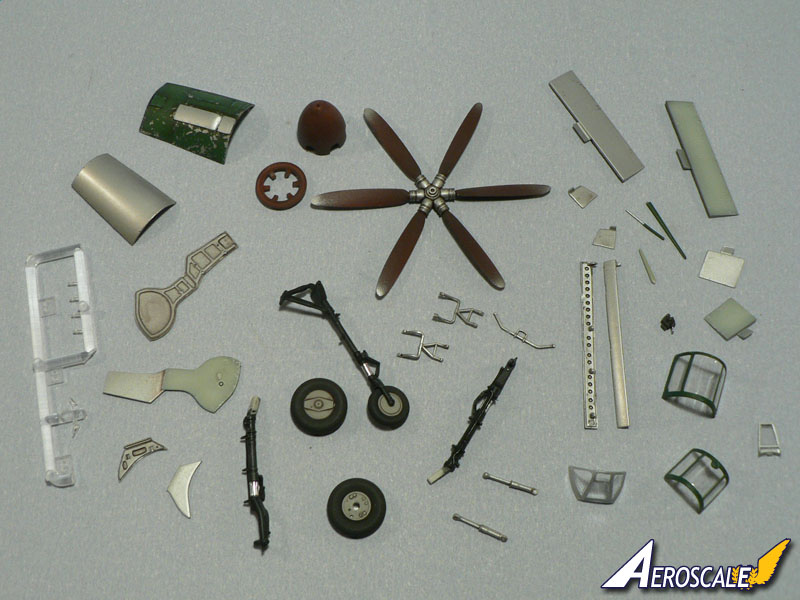
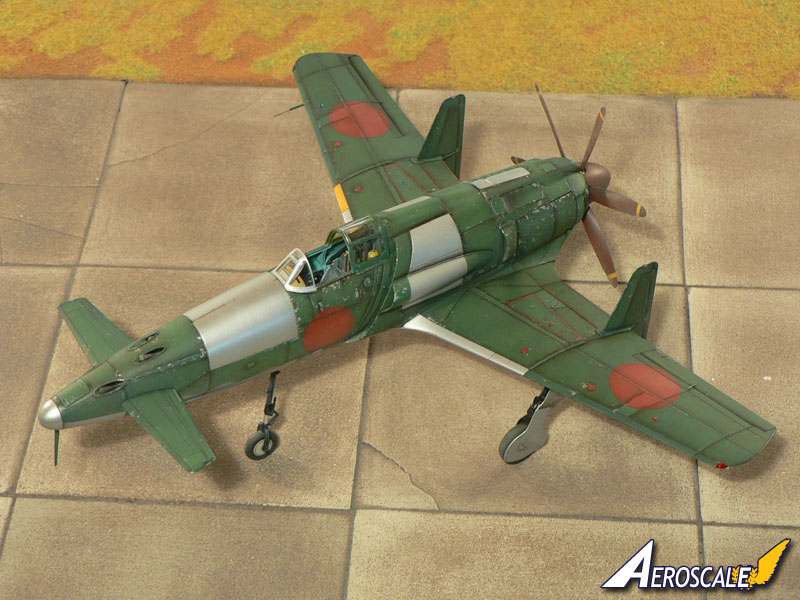
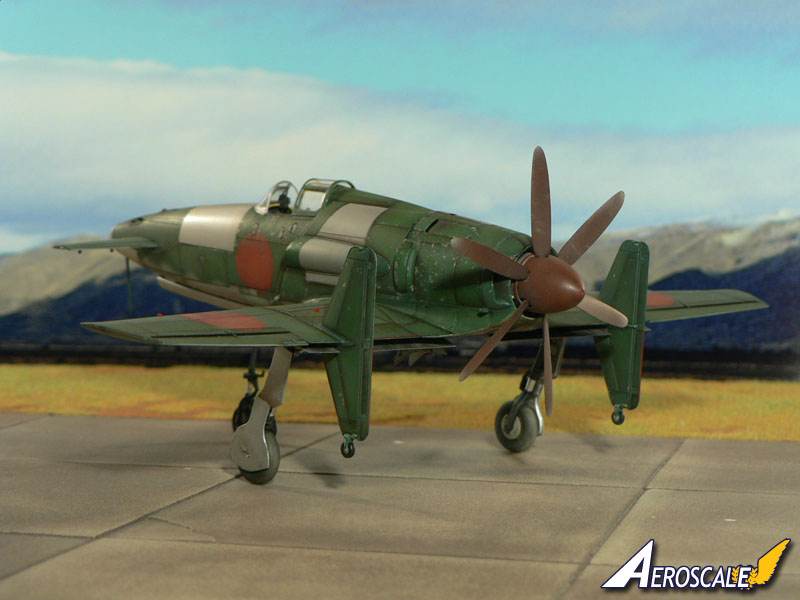
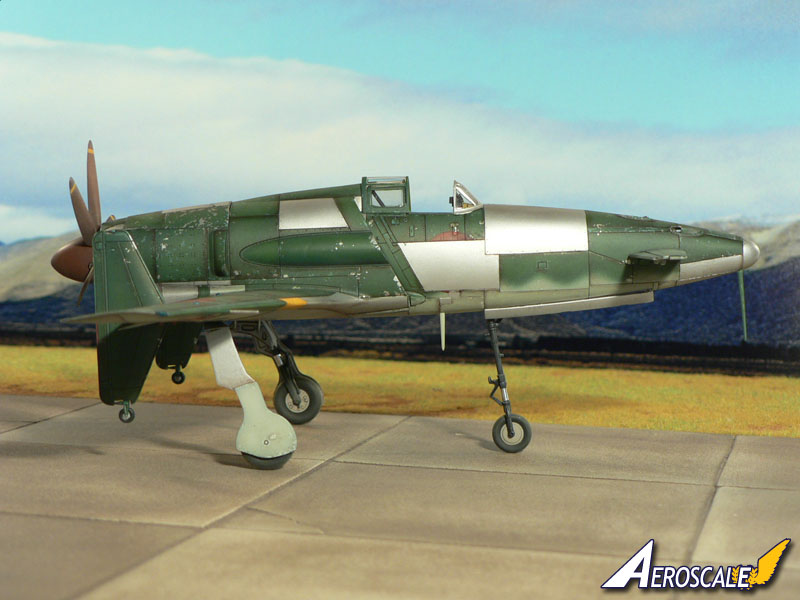
Finishing the model
Once the painting was done, the rest of the work consisted of glueing all the smaller parts on the model: undercarriage, propeller assembly, flaps, clear parts, antennas, etcOverall, I found that building Zoukei-Mura's 1/48 Shinden was a very enjoyable experience. However, because of the relatively complexity of the kit, it is more destined to experienced builders. The fit is good, but one has to be very precise during construction as every little imprecision at the beginning can lead to bigger issues afterwards. It is the best Shinden kit in 1/48 scale and I can't wait to see the Ta152H released in the same scale with the same features.

About the Author


FROM: MOSELLE, FRANCE
I'm mainly interested in WW2 aircraft and I build them in 1/48 scale.
Comments

It is a very impressive build with no wings or skin. The finished scheme is very eye catching.
APR 05, 2014 - 05:23 AM

Very nice looking Shinden! One of these days I'll need to build my 1/32 kit
Doug
APR 05, 2014 - 05:24 AM

Hi Jean-Luc
Lovely job! (Now I just need to find the time to get back to my poor neglected kit before Staff_Jim books a ticket to Blighty to come and strangle me! )
All the best
Rowan
APR 05, 2014 - 07:48 AM
I'm certainly looking forward to more 1/48 scale releases by Zoukei-Mura. This certainly has to be one of the most complex 1/48 scale aircraft kits.
Jean-Luc Formery has once again demonstrated his modeling skills with this model.
Joel
APR 05, 2014 - 08:09 AM

Hi all,
Thank you for the kind words.
Not really because I have used the parts to display the canopy open. The rear clear part is smaller in this configuration and the sliding hood hides this. The windscreen however needed some touch ups with white glue. Getting both fuselage halves closer together would have helped a little here...
Jean-Luc
APR 05, 2014 - 11:14 PM
Absolutely delightful, Jean-Luc- cheers! One of my favorite planes- and this build looks like fun.
APR 06, 2014 - 05:33 AM


Copyright ©2021 by Jean-Luc Formery. Images also by copyright holder unless otherwise noted. The views and opinions expressed herein are solely the views and opinions of the authors and/or contributors to this Web site and do not necessarily represent the views and/or opinions of AeroScale, KitMaker Network, or Silver Star Enterrpises. Images also by copyright holder unless otherwise noted. Opinions expressed are those of the author(s) and not necessarily those of AeroScale. All rights reserved. Originally published on: 2014-04-05 12:56:15. Unique Reads: 9454

WEB HOSTING BY


Copyright ©2021 AeroScale and Kitmaker Network, a subsidiary of Silver Star Enterprises
All Rights Reserved. Please read our Conditions of Use and Privacy Policy.
All Rights Reserved. Please read our Conditions of Use and Privacy Policy.