

1⁄72Franken-Fortress
8
Comments
history
The Flying Fortress is one of the most famous airplanes ever built. The B-17 prototype first flew on July 28, 1935. Although few B-17s were in service on Dec. 7, 1941, production quickly accelerated after the U.S. entry into World War II. The aircraft served in every combat zone, but itis best known for the daylight strategic bombing of German industrial targets. Production ended in May 1945 and totalled 12,726.By the time the definitive B-17G appeared, the number of guns had been increased from seven to 13, the designs of the gun stations were finalized, and other adjustments were completed. The B-17G was the final version of the Flying Fortress, incorporating all changes made to its predecessor, the B-17F, adopting the remotely-operated "chin turret" for forward defence from the YB-40 "gunship" version, and in total 8,680 were built,the last one (by Lockheed) on 28 July 1945.Many B-17Gs were converted for other missions such as cargo hauling, engine testing and reconnaissance.History adapted from Wikipedia.
introduction
Im sure you all have heard, if not read the story Moby Dick. Its a sad tale of one mans obsession with a white whale to the exclusion of everything else. It wrecks his ship, and kills pretty much everyone in the story. One lone survivor lives to tell the tale.Well, this model was my White Whale .
To start at the beginning, it was actually my fault..I was asked what I would like for Christmas by the in-laws, and sent them pictures from the local hobby shop of several models I would be interested in(saying nothing is not an option ). Most were really esoteric subjects I really wanted (that Czech Hetzer with the really cool paint job, for instance). I also snapped a picture of this model, as some day I would like to have one in my collection. Well, in-laws being what they are, this one was by far the cheapest on the list. Guess what I got! Also, I tend to build the models I get from them (My wife and I Skype them every Sunday from the US) as it becomes a good subject of conversation, so leaving it on the pile wasnt an option.
construction
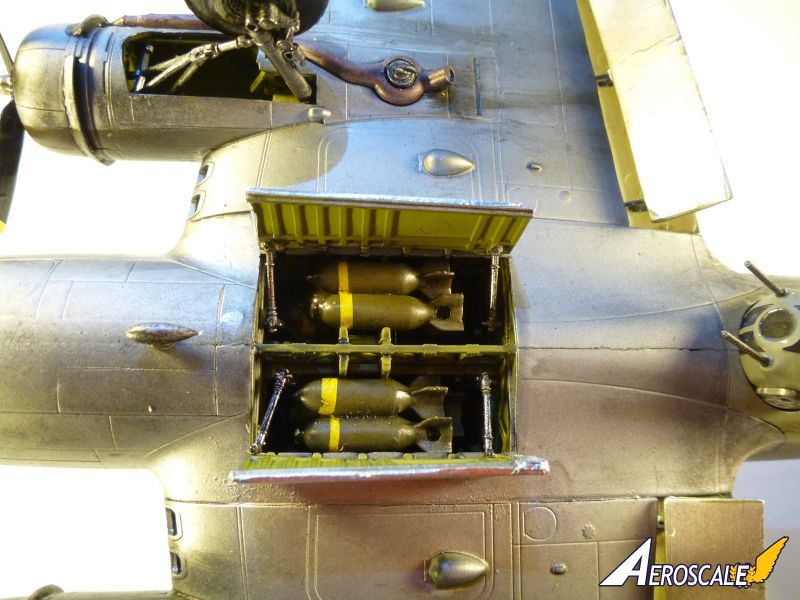
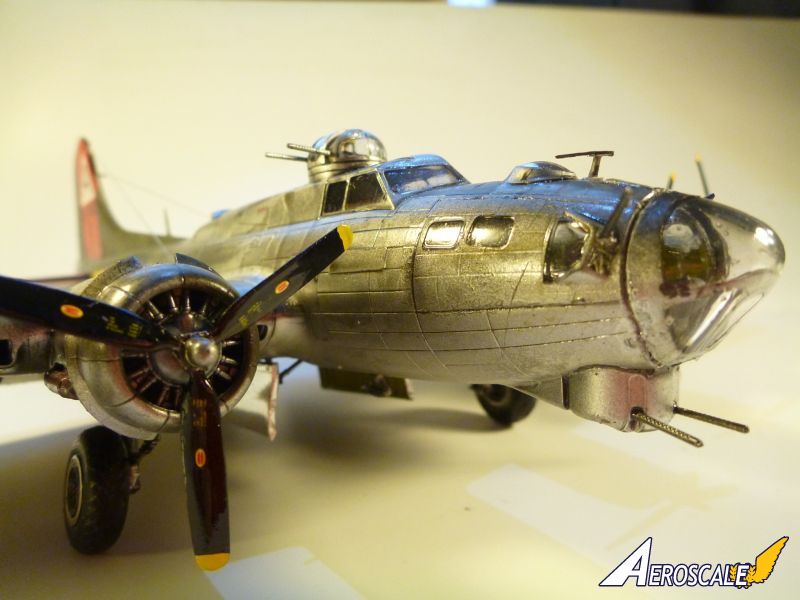
Okay, so I have this kit, Revell's 1:72 B-17G... I open it, and it looks like every part on the actual bomber is in the box. I went on line and looked through a couple of Build Logs, and realized this one was going to be a bear. But I started.The detail level is fantastic, if a bit clunky for the scale. Almost none of it is visible through the thick canopies, but still I went ahead and put everything in. I usually start with the canopies, dipping them in future and putting them aside. For this one I bought a set of masks, mostly for the turrets and nose, and these helped immensely. I painted according to the painting guide, except I used my own concoction of Chromate green, as straight Chromate yellow is a bit too stark for this scale. All the internal components were used, and I painted them with my Chromate mixture, picked out the details in the other colours, and then applied a pin wash using future and very thin acrylic. The bombs went together well, but there are only four of them, two 500lb and two 250lb, which made no sense. Luckily, just about every 1/72 scale kit of anything that flew in WWII has at least two 500lb bombs in it, so I found plenty in my spares. Once everything was inside, I closed it up, added the masked canopies and windows. Again everything on this model is very finicky and the instruction manual is really a small novel with a bad plot and some very unusable illustrations. That being said, the fit is really pretty good overall, no real problems, except you there is no way to paint the model if you actually follow the order of construction. I separated the flaps and put them aside. So up until now, I have spent over 20 hours on this and all I have is a fuselage. The wings are equally finicky, but again everything seem to magically fit okay. I assembled the wings and tails(another 10 Hours),and them started on the paint.
painting
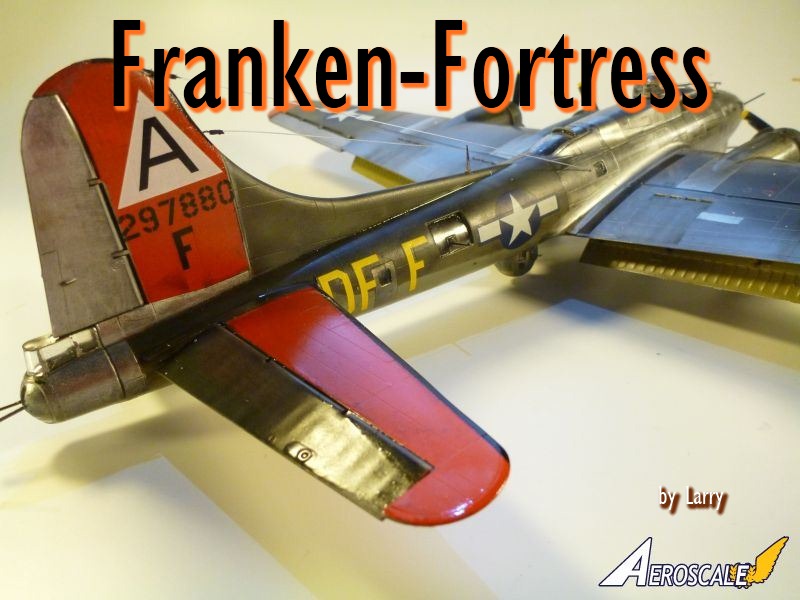
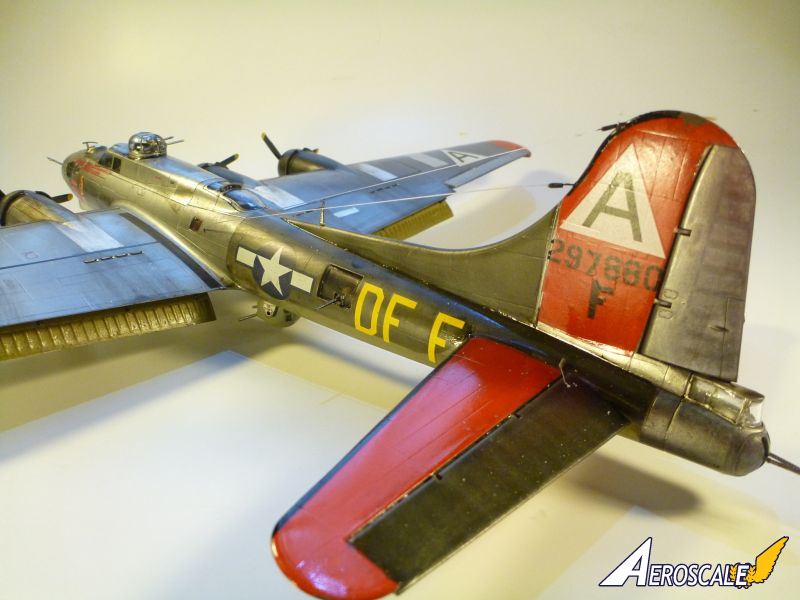
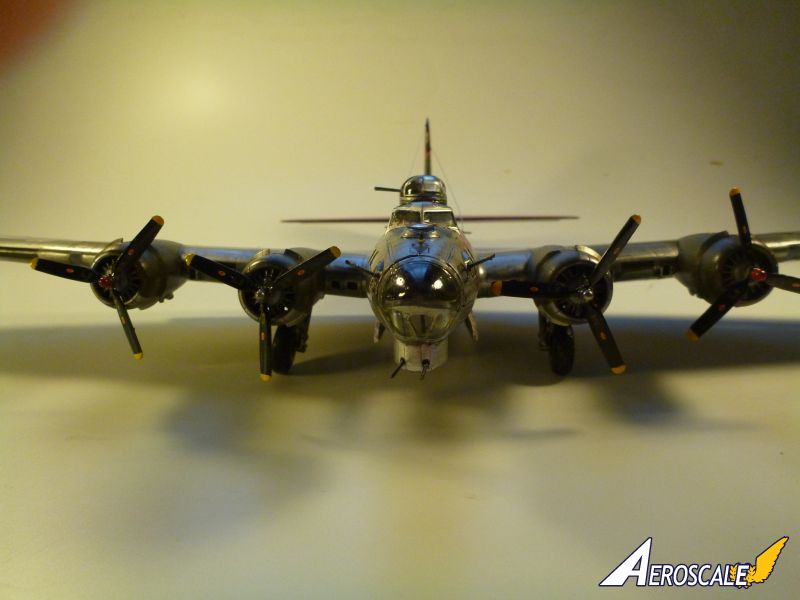
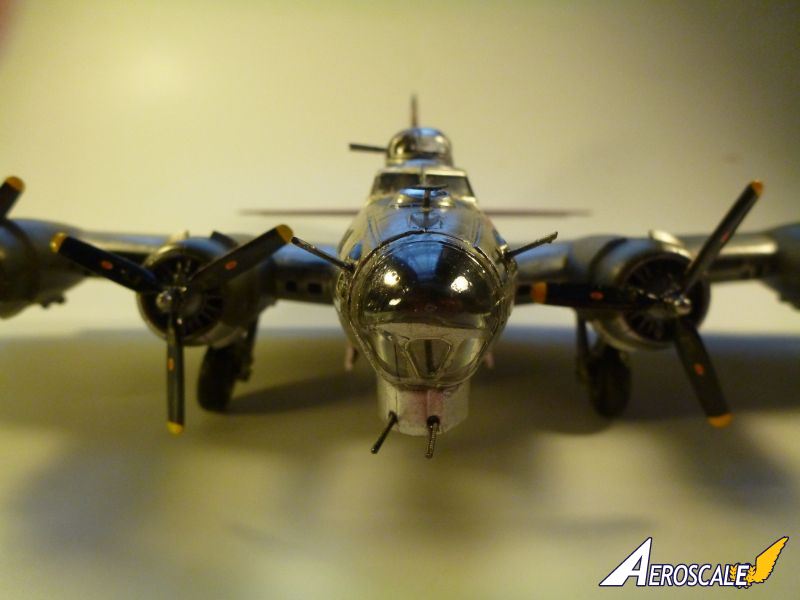
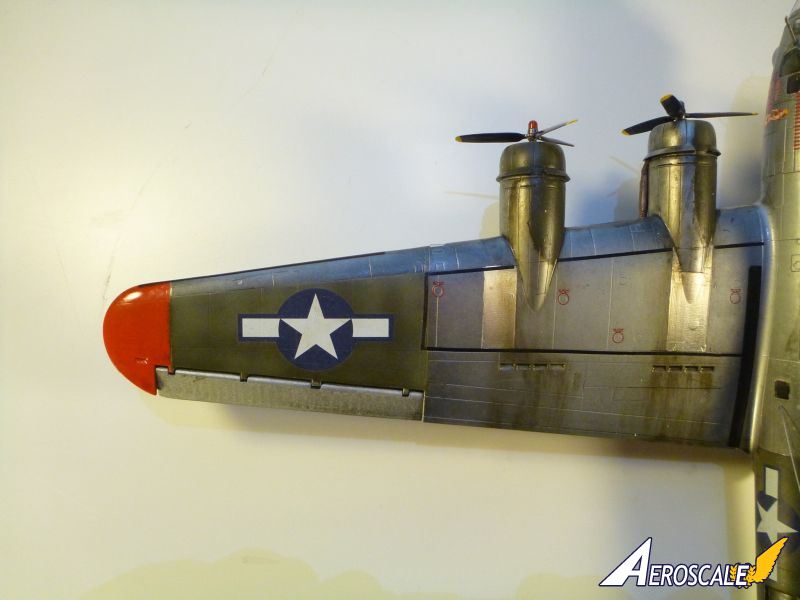
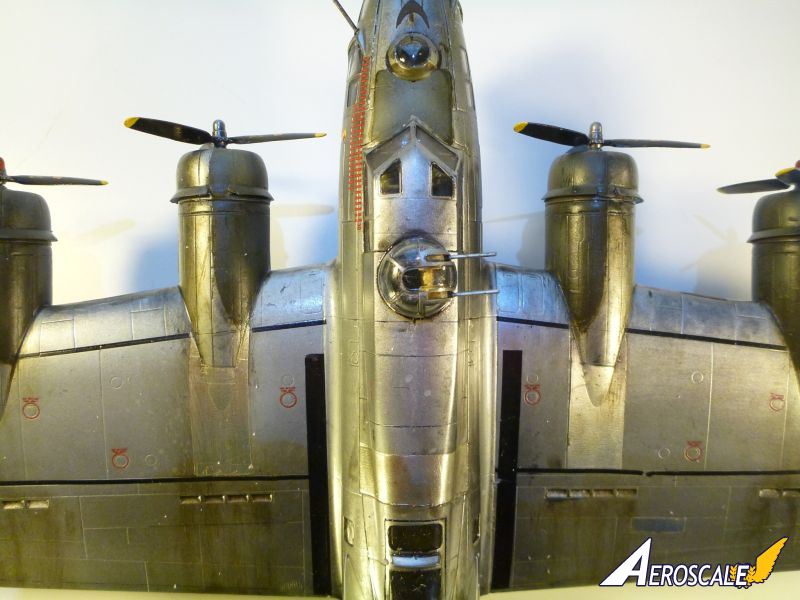
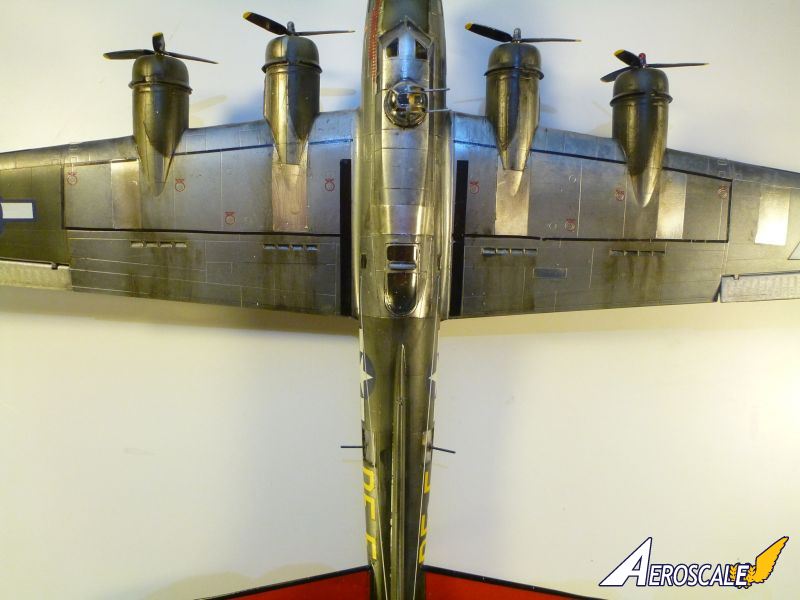
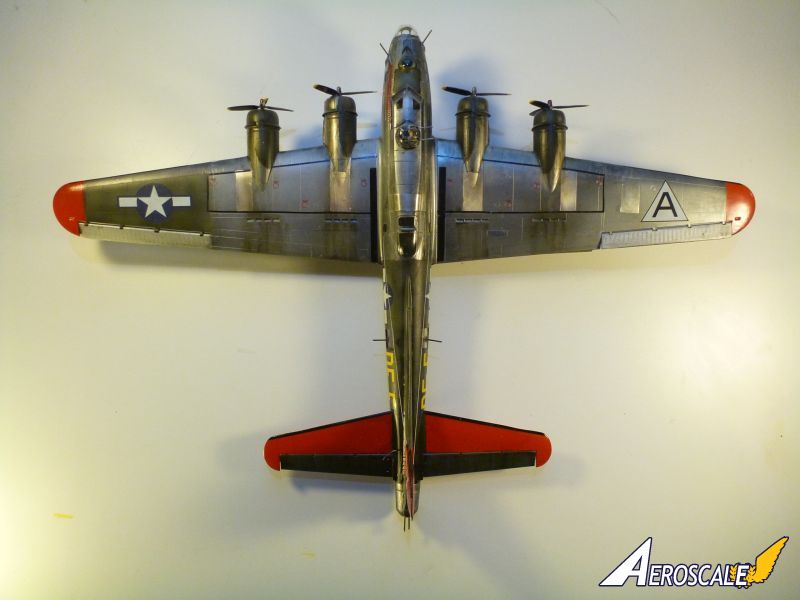
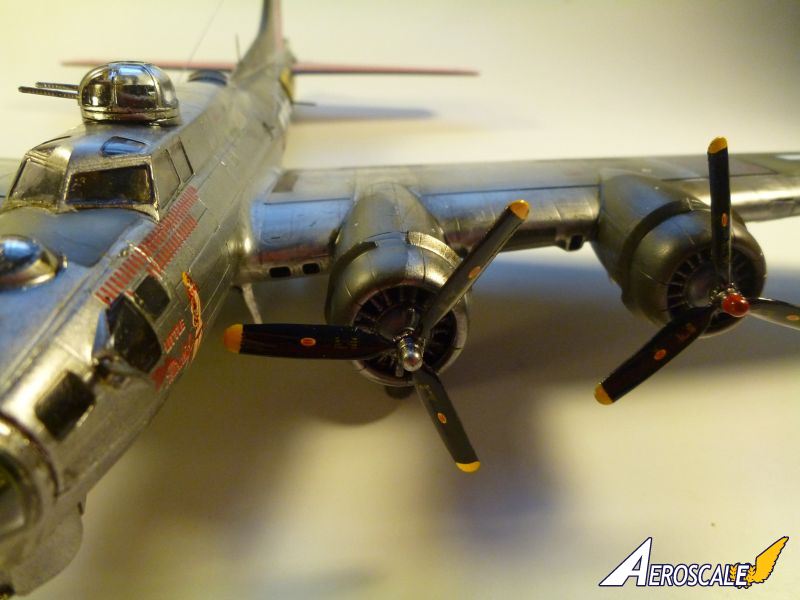
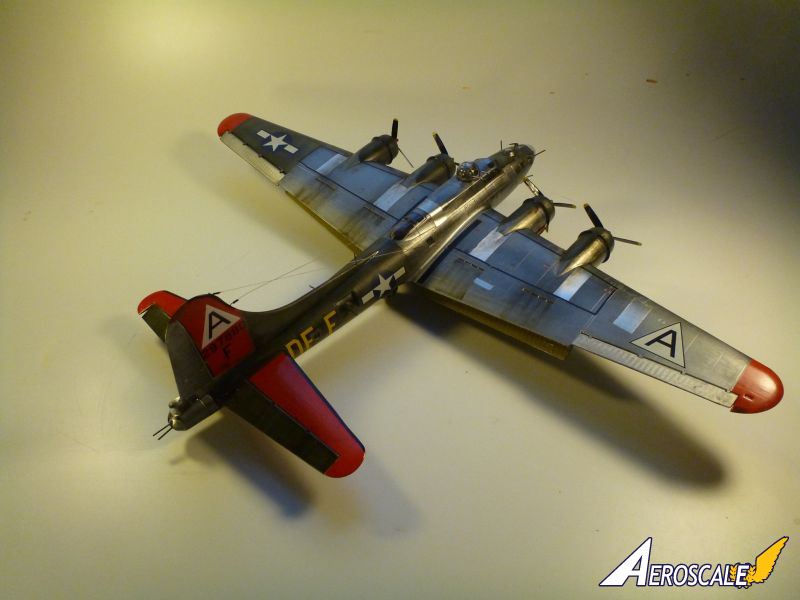
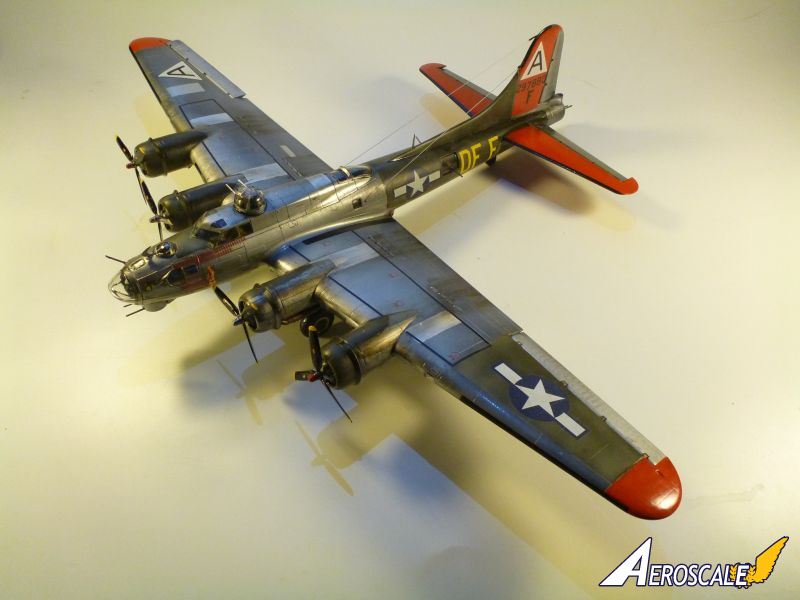
Heres where it get really interesting: there are two schemes included in the instructions, an overall OD green/Grey version, and a Frankenstein version with mismatched panels. Guess which one I chose? The order of the colours for painting took some thought: Grey/green first, followed by Metal, or Metal first followed by Grey/green? Also the tips of the wings and tails are red so what to do? I was using Alcad for the metal, and From experience I know once dried for 24 hours it is a pretty tough finish, so I stated there. I put down a primer coat of gloss black, sanded down any imperfections, resprayed, and then hit it with Alclad Chrome/Aluminium mix. Once dried, the finish was so nice I almost went looking for some aftermarket decals for an all metal version. But I stuck to my guns! Masked and painted the tail and wingtips with antique white, followed by gloss red. All of this took over a week of painting, drying, and masking. I then moved on to the OD green portions.A side note on Olive Drab: I learned from my research long ago that OD is actually a manufacturing shortcut thought up by the US Army Air Corps between the wars. There was a requirement that all military aircraft receive a base coat of Zinc Chromate to prevent corrosion. Someone discovered that if you add black paint to the Chromate, it makes a drab olive colour. No need for two coats! Well, after discovering this, I experimented with yellow and black paints of varying hues and found that you could create any shade of OD green you wanted by changing the ratios. Although there were U.S. standards (OG-107 in WWII, FS-595 today)variation was pretty common based on the amount of black and Chromate you had, and who mixed it. If you use Chromate yellow and flat black and mix then, you technically cant be wrong! Now I buy larger bottles of flat black and yellow, and make my own OD shades. This also works well for artist oils to use in weathering.
After masking off the appropriate sections, I sprayed a darker shade of OD as a base, then went back with a lighter shade and highlighted the panels. After curing for a few days, I oversprayed mix of Future and Simple Green to get a smooth high gloss finish. Over this went the decals, tons of them. Another coat of gloss, curing time, and then remask the OD sections and spray with Flat finish. finishingAfter all of that I still had to add the guns, landing gear, and other bits. Finally, after all that I had this beast finished! It was a real struggle, but worth it at the end. This kit is definitely not for beginner, and will give intermediate modellers fits, but the detail is pretty good, the price is right, and it will keep you busy for long, long time.


About the Author


Comments

What kit is this, it doesn't say in the text? (Make and boxing would be nice.)
MAR 01, 2014 - 04:28 AM


Hi there
Nice work Larry!
It'd be good add the manufacturer etc. into the article's text, because I must admit it had me guessing.
All the best
Rowan
MAR 01, 2014 - 08:43 AM

Thanks for the kind comments. This is the revell 1/72 B17G.
These revell kits are pretty detailed, but really fiddly.
MAR 01, 2014 - 11:13 AM

Copyright ©2021 by AeroScale. Images also by copyright holder unless otherwise noted. The views and opinions expressed herein are solely the views and opinions of the authors and/or contributors to this Web site and do not necessarily represent the views and/or opinions of AeroScale, KitMaker Network, or Silver Star Enterrpises. Images also by copyright holder unless otherwise noted. Opinions expressed are those of the author(s) and not necessarily those of AeroScale. All rights reserved. Originally published on: 2014-03-01 03:00:09. Unique Reads: 6116

WEB HOSTING BY


Copyright ©2021 AeroScale and Kitmaker Network, a subsidiary of Silver Star Enterprises
All Rights Reserved. Please read our Conditions of Use and Privacy Policy.
All Rights Reserved. Please read our Conditions of Use and Privacy Policy.