

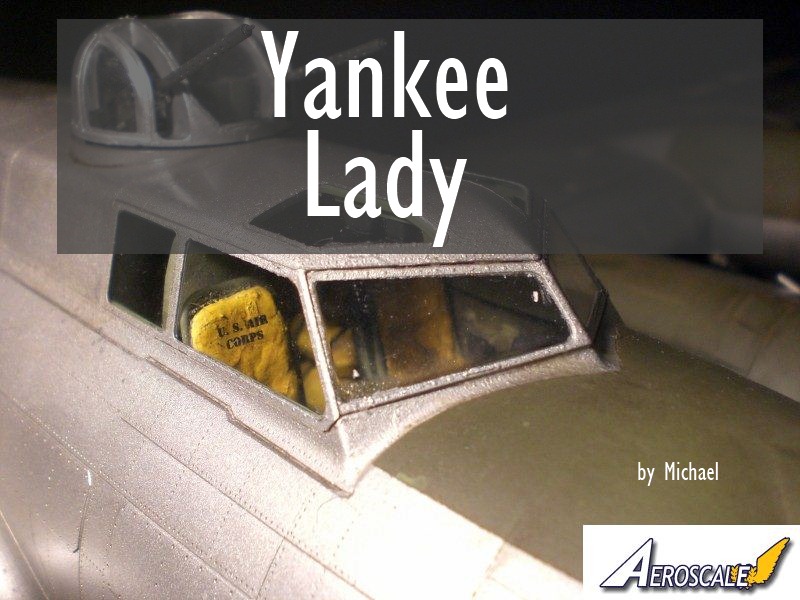
1⁄32Yankee Lady
6
Comments
history
Yankee Lady is a B-17G110VE, bearing USAAF serial number 44-85829. The airplane was built by the Vega Division of Lockheed Aircraft Corporation at Burbank, California and was delivered to the USAAF on July 16, 1945. It went to Dallas, Texas for modifications and in September 1945 was placed in storage at South Plains Field, Texas along with other brand new B-17s. The Yankee Air Museum is certain that this aircraft did not fly combat missions during World War II. After several owners (US Coast Guard until 1958, Fairchild Aerial Survey Company in 1959, Aircraft Specialities Inc. in 1966 to fight forest fires and apply pesticides on crops and trees. During 1969 the aircraft was one of five B-17s flown to Hawaii and used in the filming of the movie Tora, Tora, Tora. In 1985 the airplane was among four other B-17s that were put up for sale at an auction held by Globe Air, the successor company to Aircraft Specialties. The airplane remained unsold until the Yankee Air Force purchased it for $250,000 in June 1986. After several test hops, the aircraft was flown from Mesa, Arizona to Willow Run Airport, Ypsilanti, Michigan on July 2, 1986. It was not to fly again for nine years. In its rebuild process the aircraft has been painted in the markings of a typical B-17G assigned to the 8th Air Force 381st Bomb Squadron flying out of Ridgewell, England. This colour scheme is a memorial to the late Joseph Slavik who flew 35 missions as a pilot with the 381st. Mr. Slavik and his brother Stephen made a significant financial contribution to the Yankee Air Force that helped purchase the plane. The Yankee Lady name and nose art do not replicate that of a known combat veteran B-17, but rather are meant to be representative of the era. The restoration work and much, much more were accomplished almost entirely by dedicated Yankee Air Force volunteers who generously donated time, talents and financial resources to what has truly been a labour of love. The first post restoration flight took place on July 13, 1995.Yankee Lady offers flight experience rides from the middle of May through September for the crew of 3 and an additional 12 people. Proceeds help support the Yankee Lady and the Yankee Air Museum.
The Kit
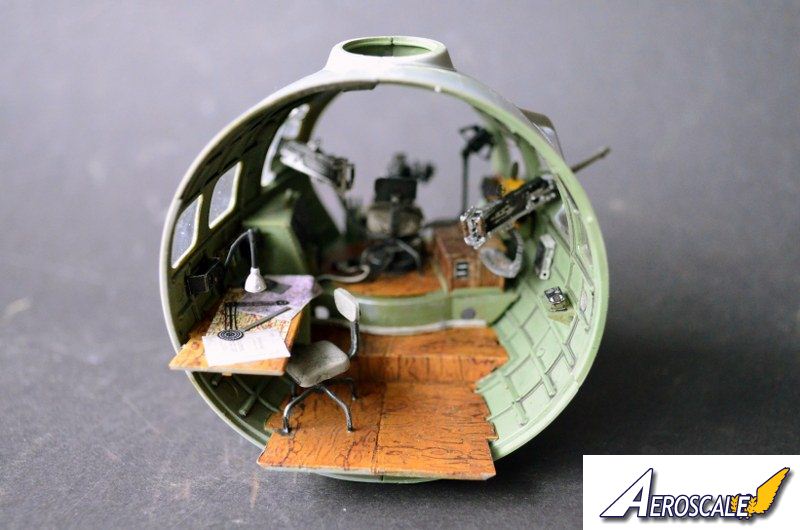
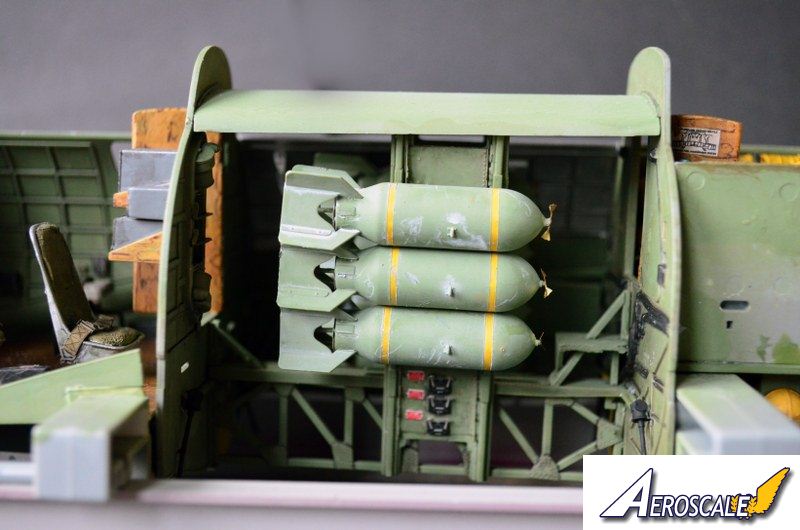
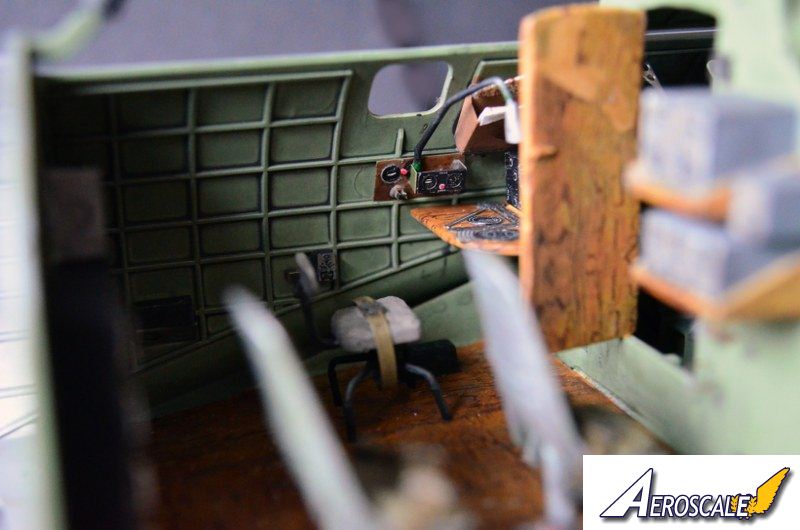
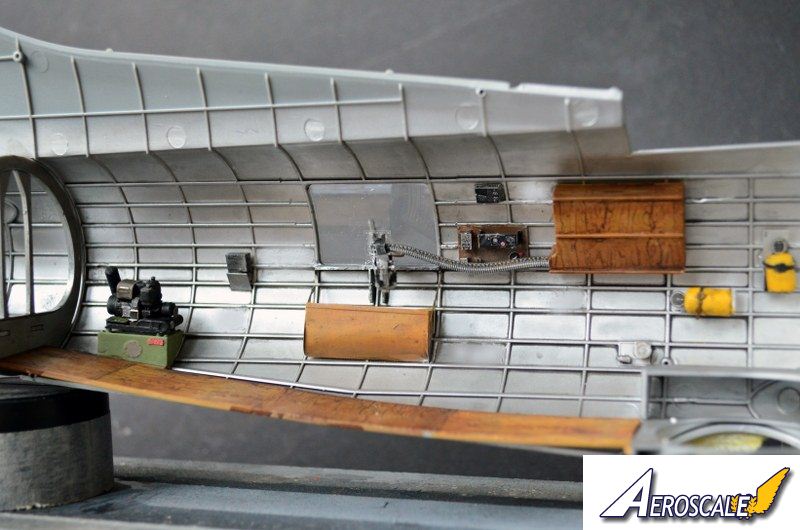
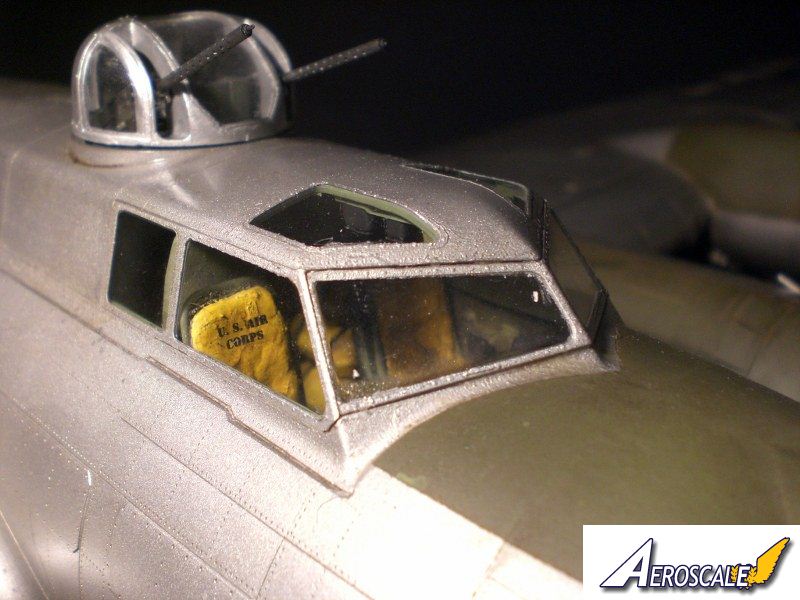
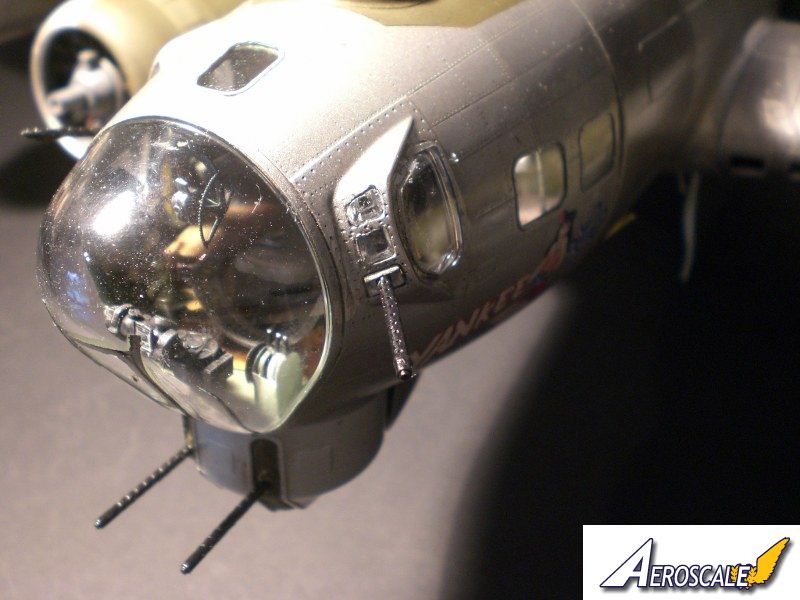
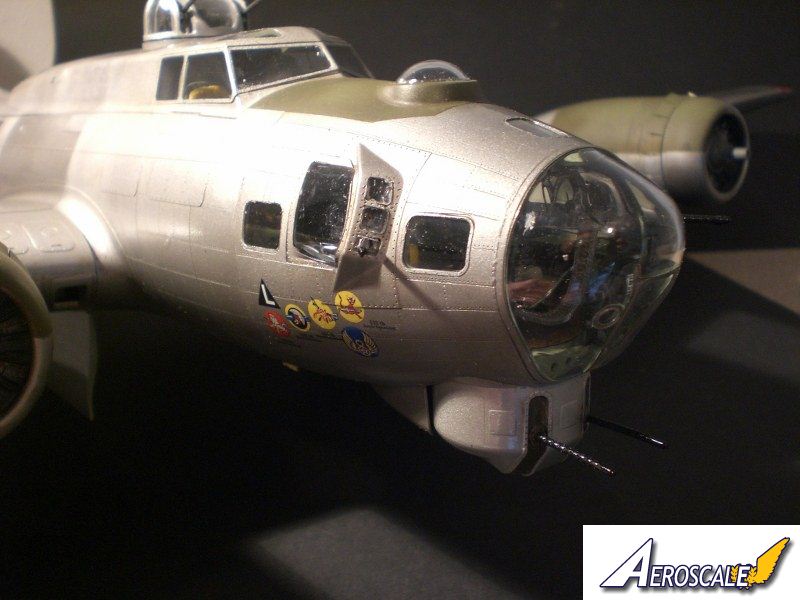
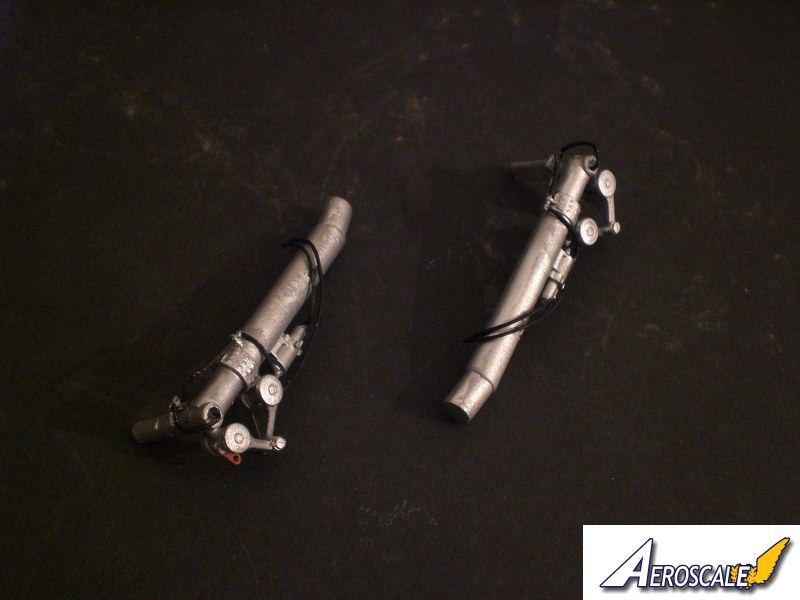
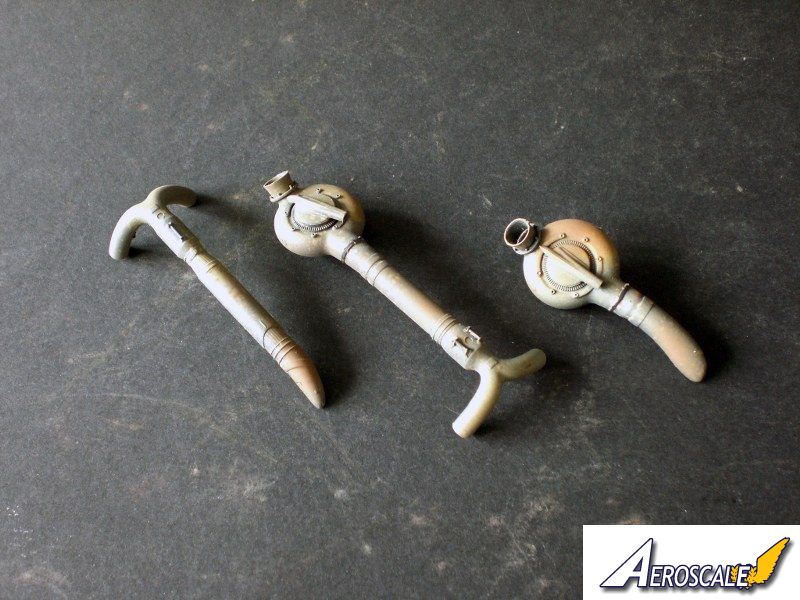
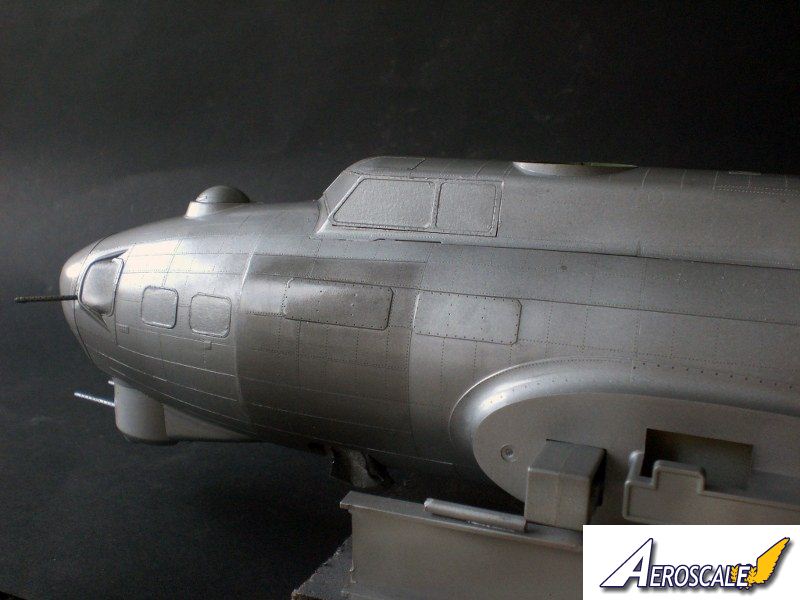
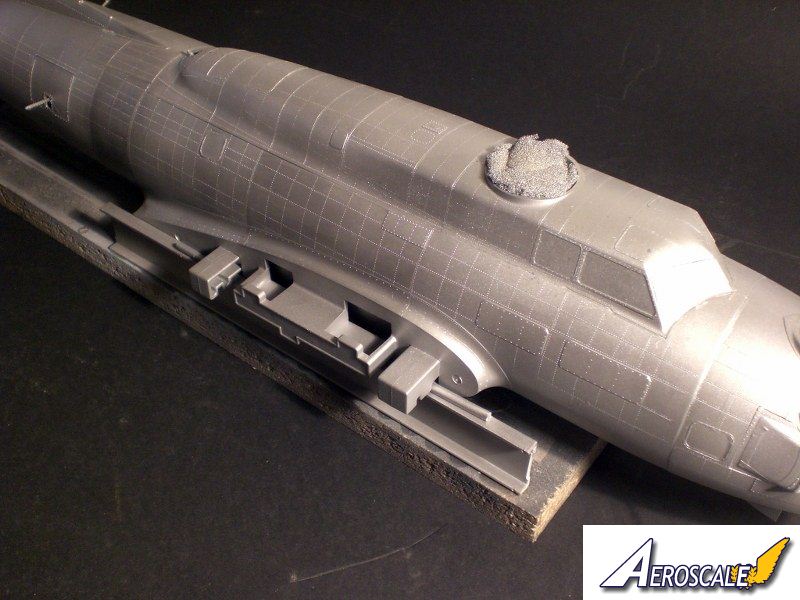
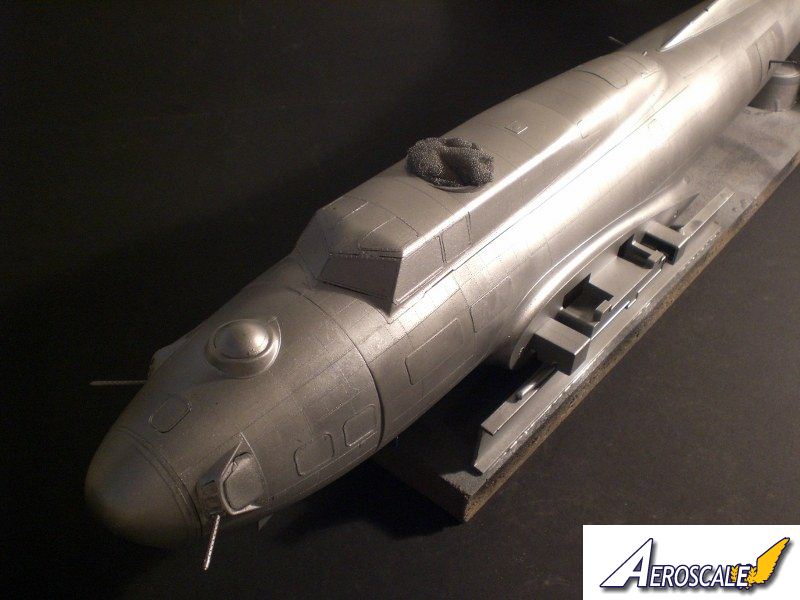
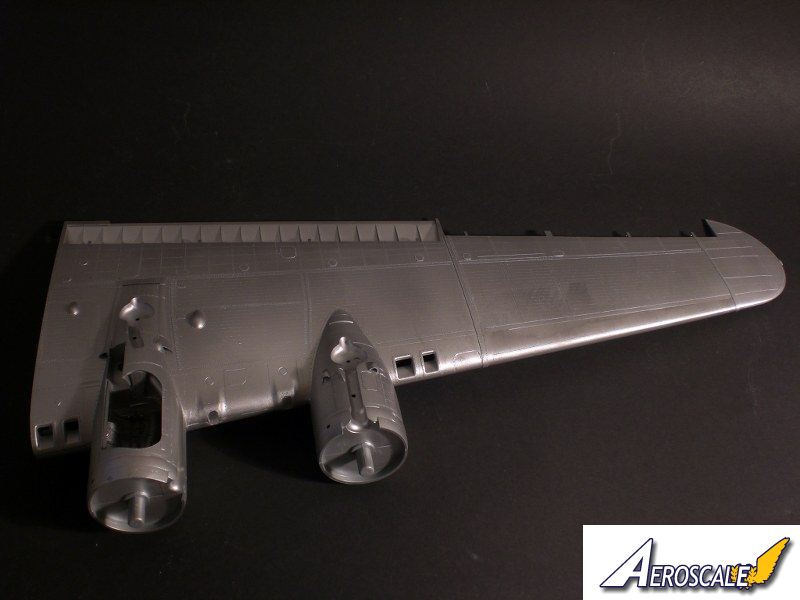
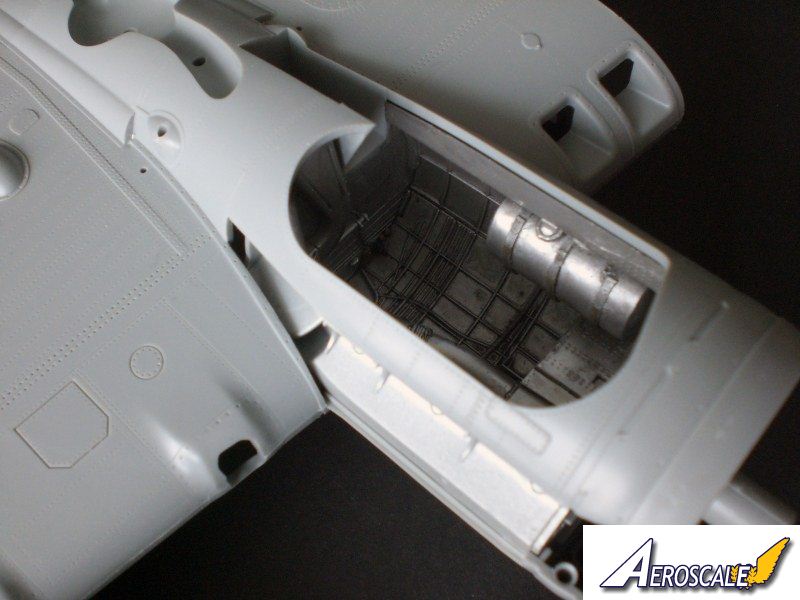
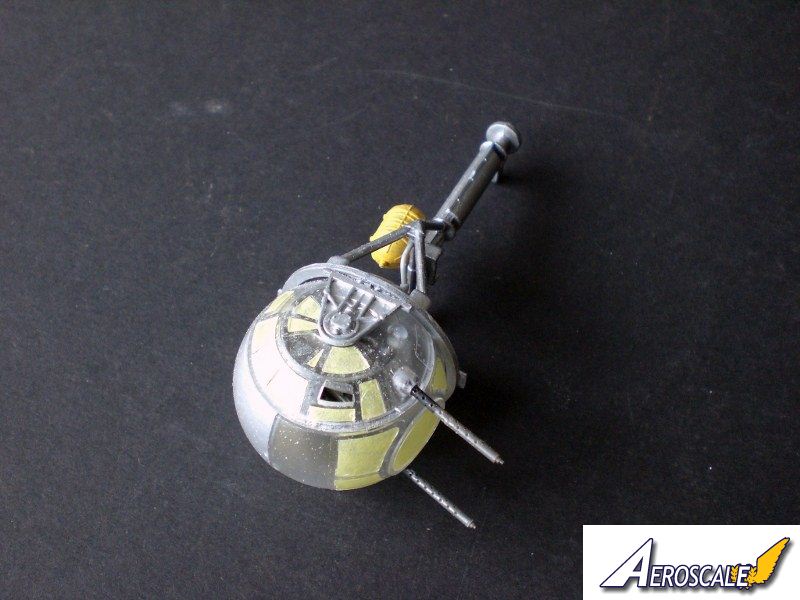
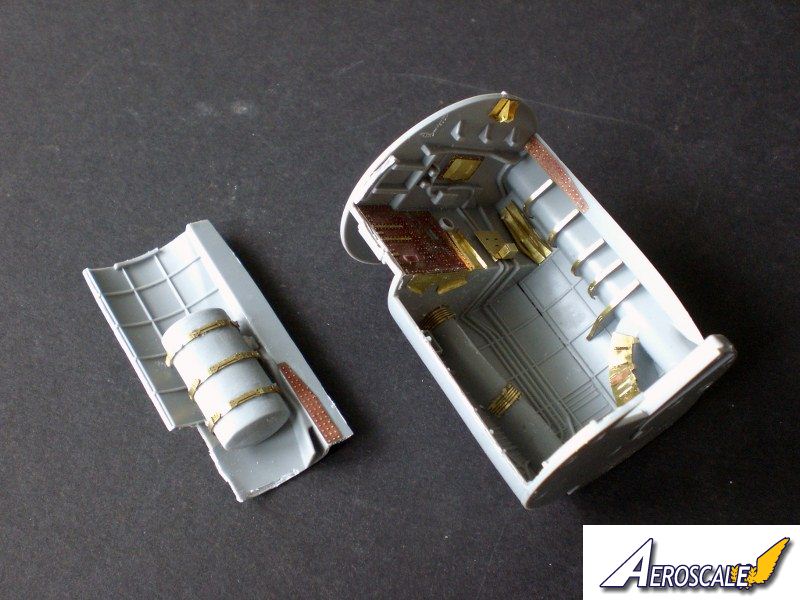
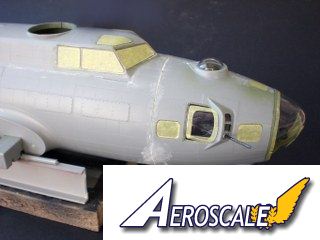
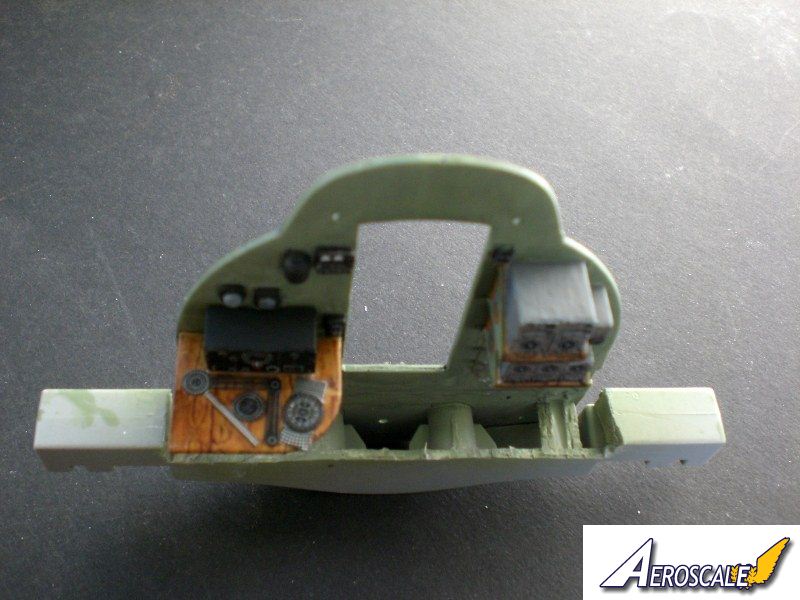
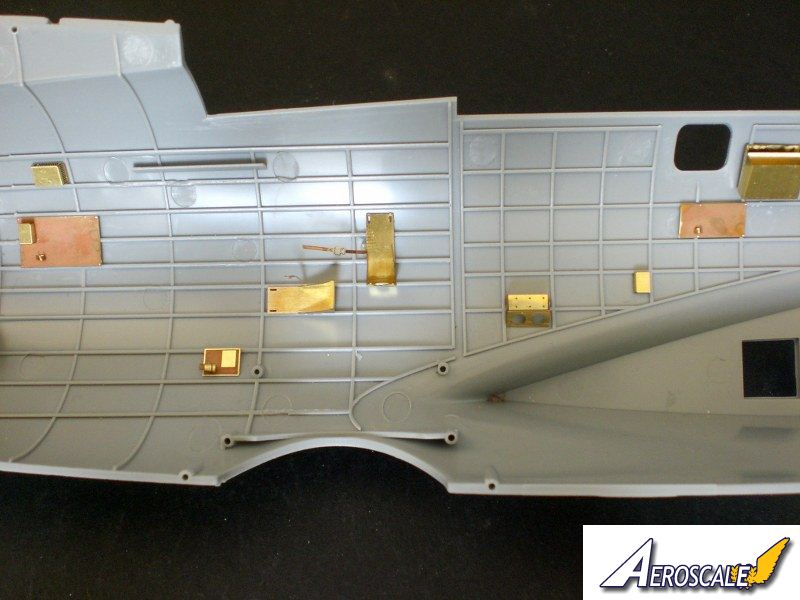
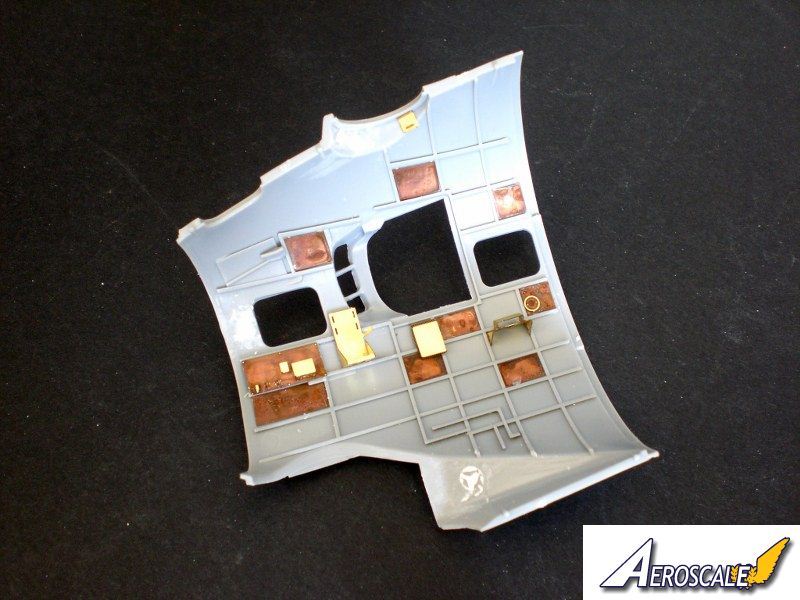
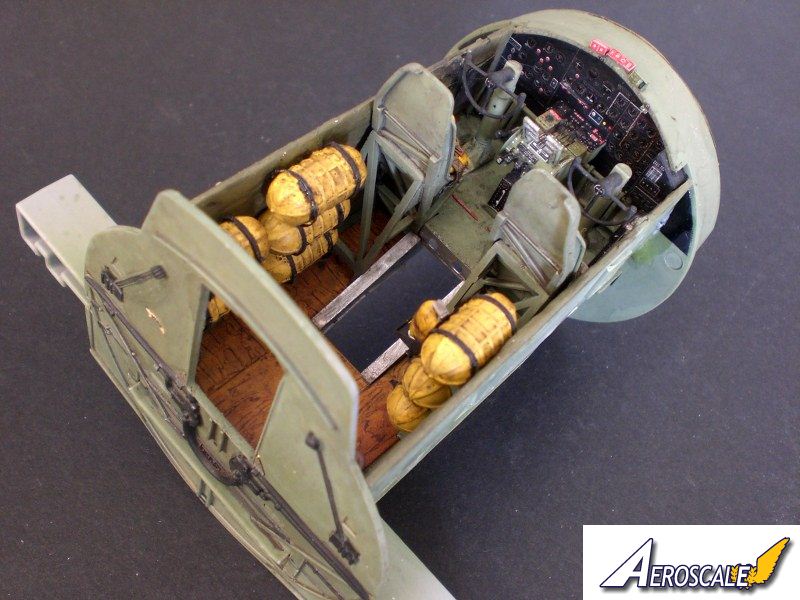
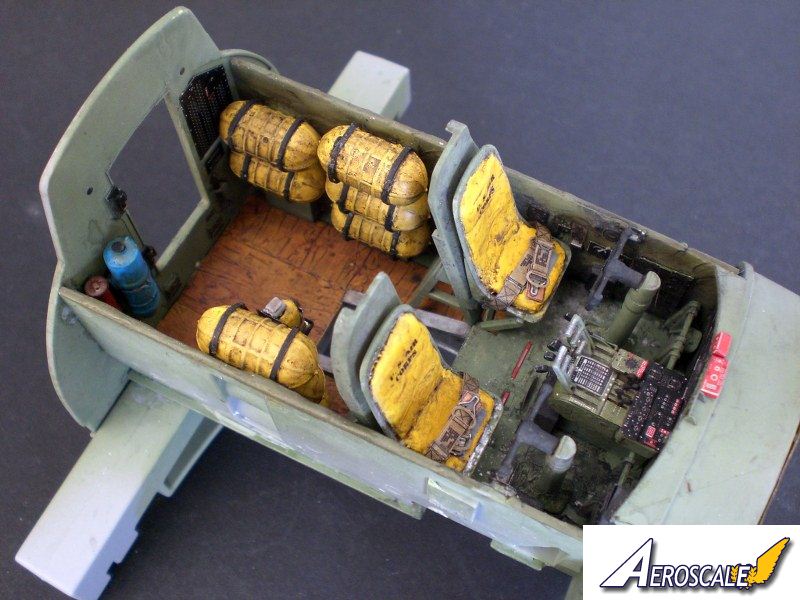
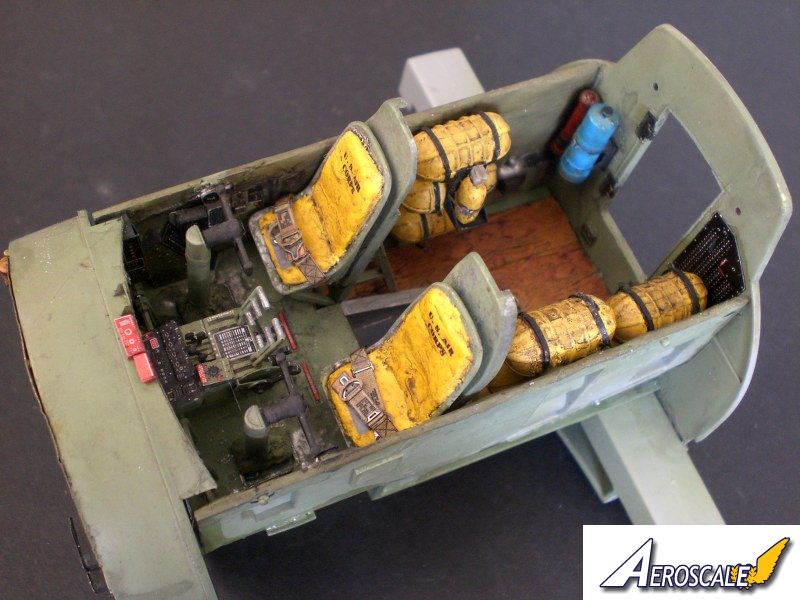
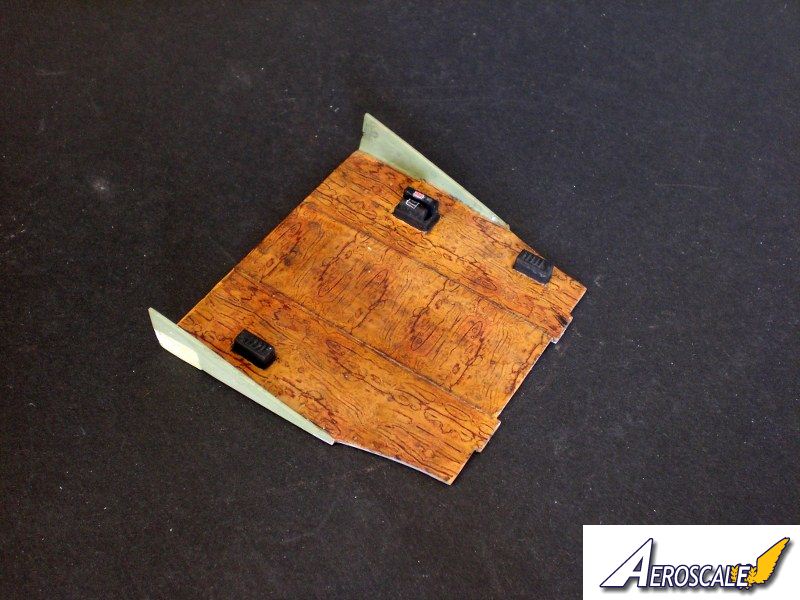
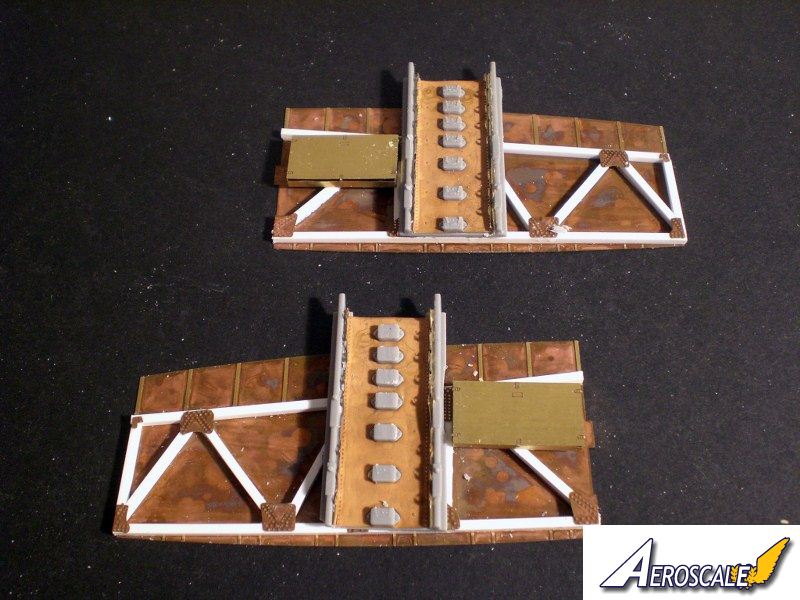
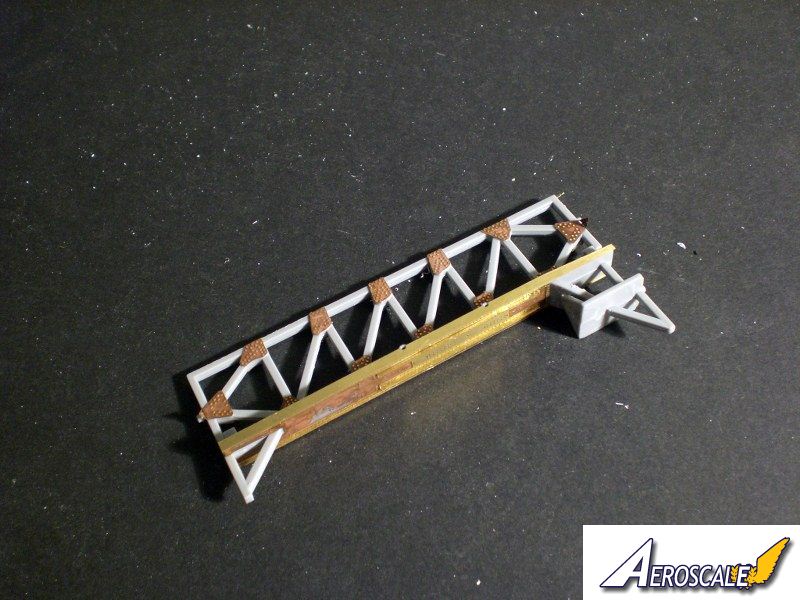
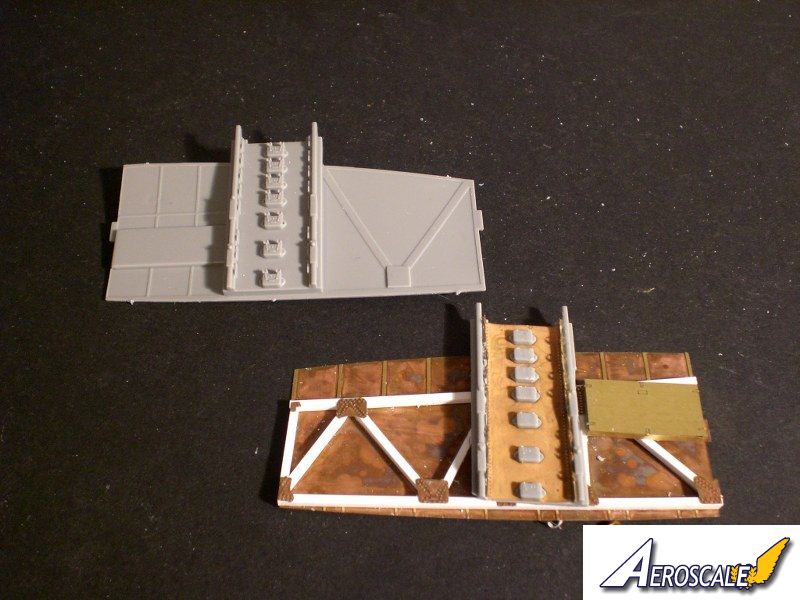
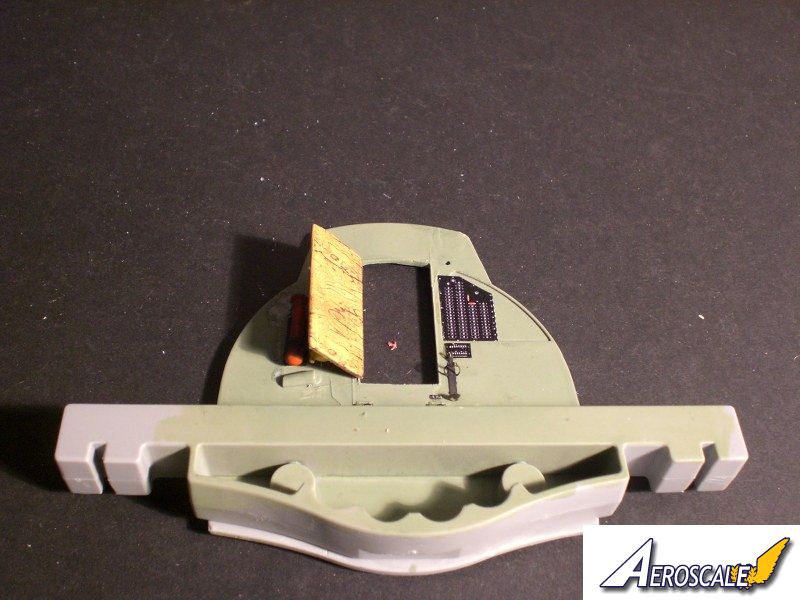
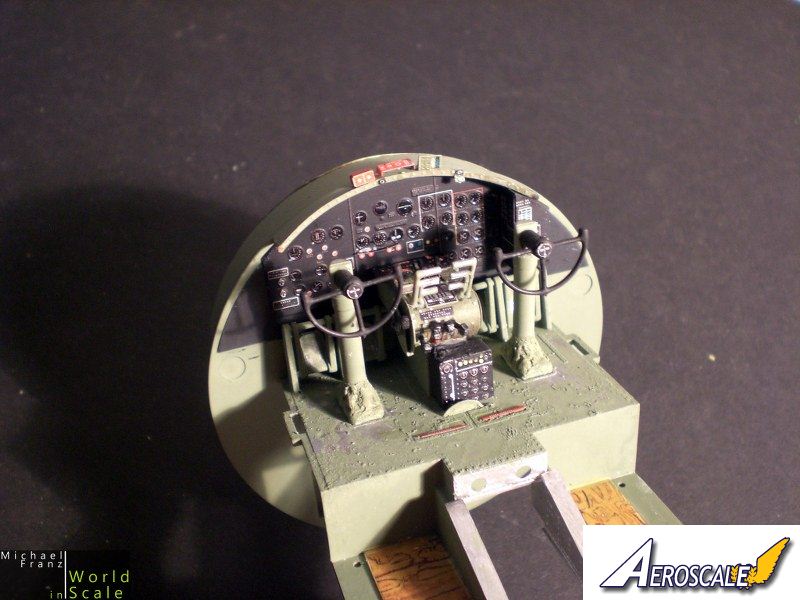
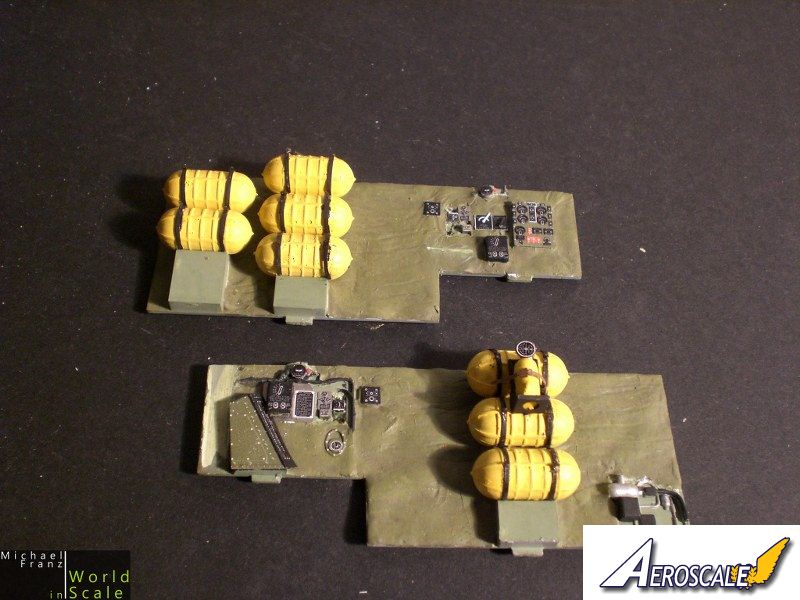
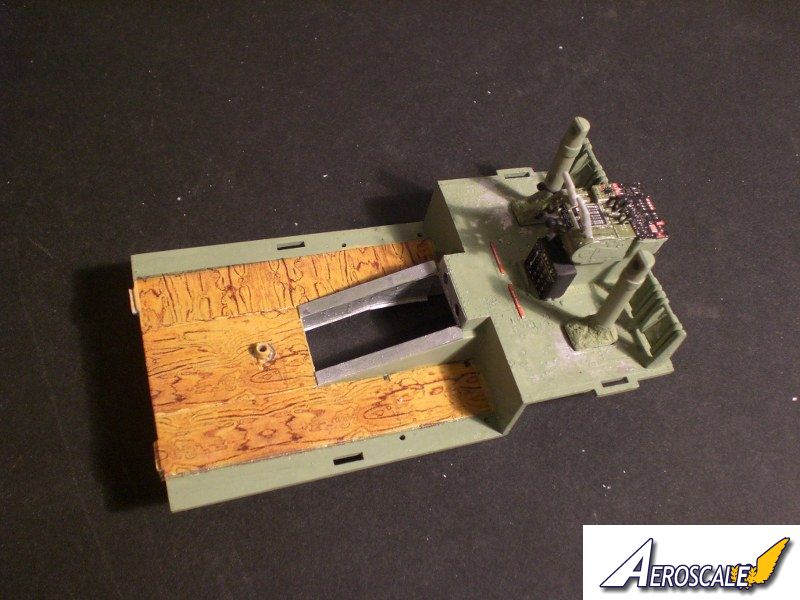
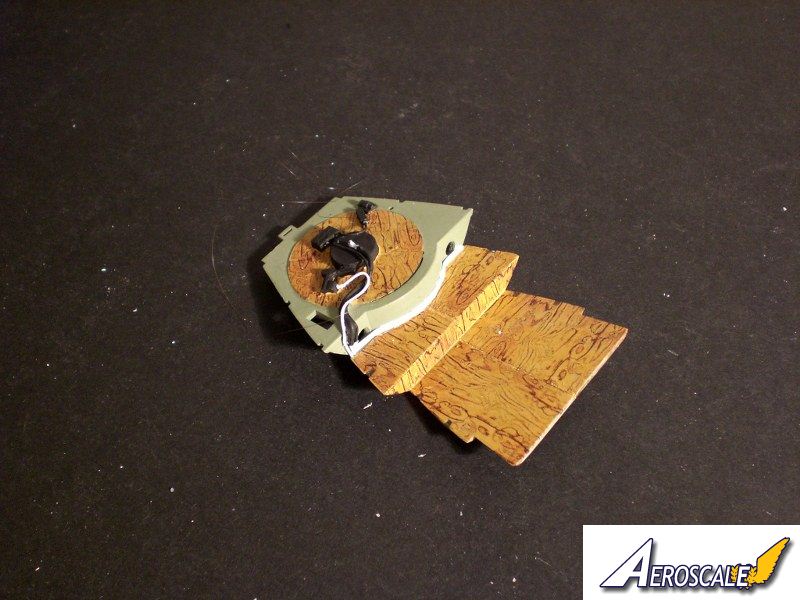
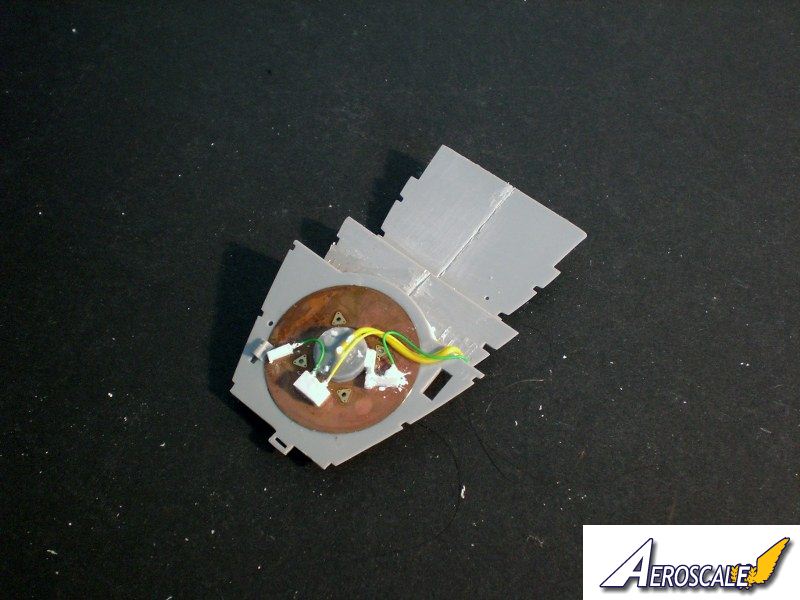
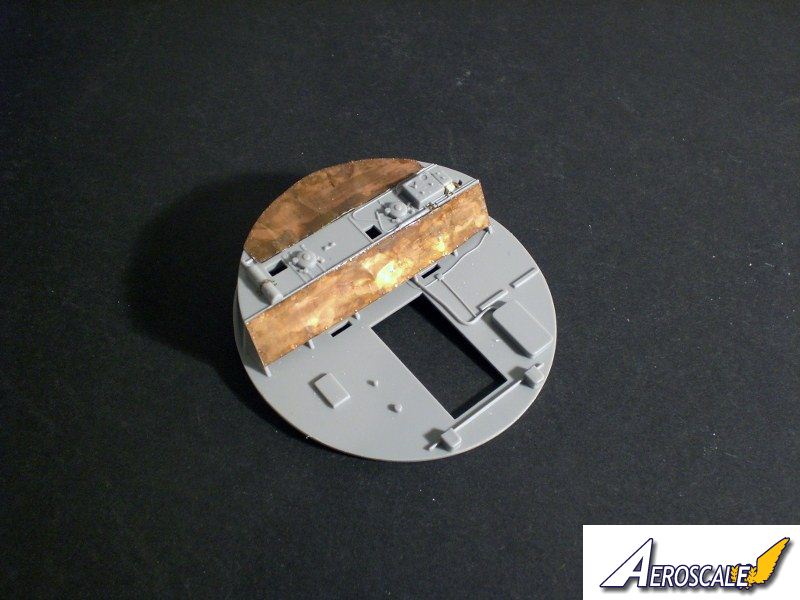
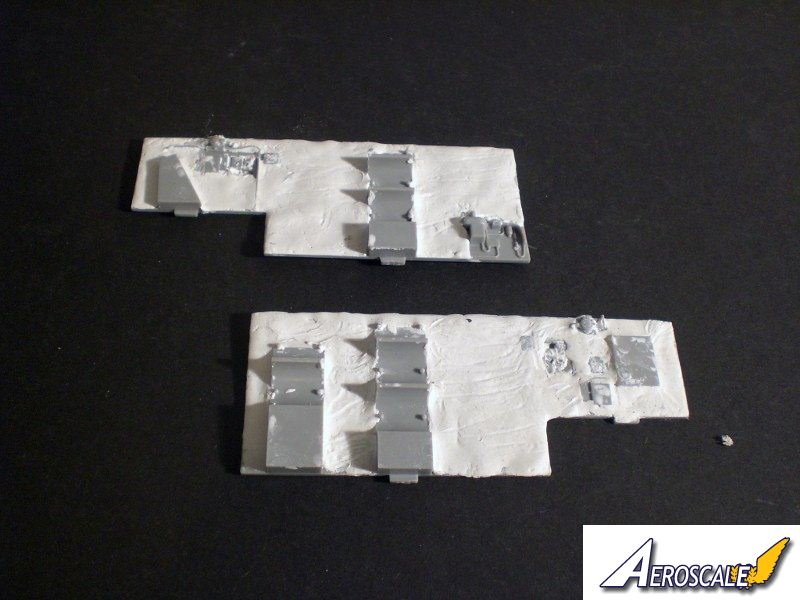
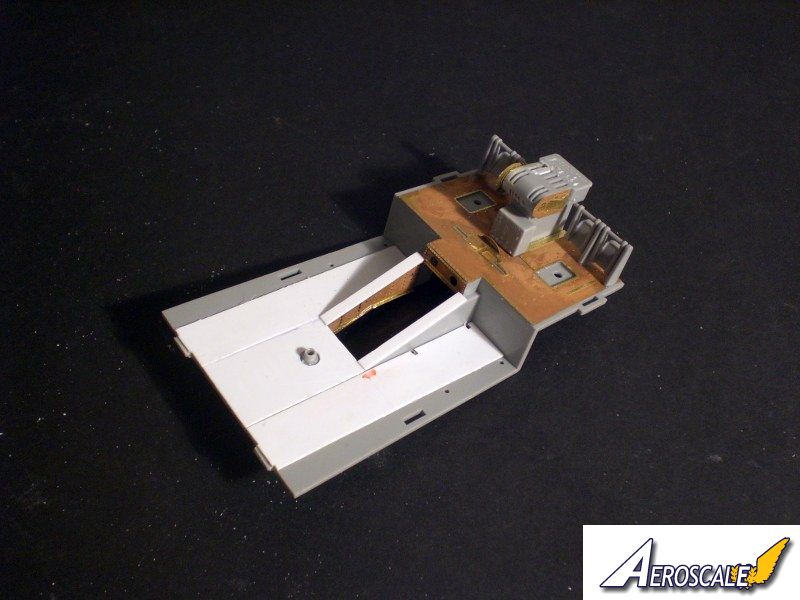
The kit by HK Models consists of nearly 600 plastic parts plus some photo etched parts as well. The quality is absolutely fantastic although there are some ejection marks at the insides of the fuselage.... lot of ejection marks.... The fitting of the kit is also very good; the only fitting problem I had was the mounting of the nose to the fuselage where still a small "step" is visible. Additionally I used nearly all photo etched parts by Eduard (all available sets, only the one for the landing flaps was not used), then also the Eduard Brassin Guns and wheels, the metal landing gear by Scale Aircraft Conversion and the stencils and "Yankee Lady" decals by Kitsworld. For the wooden interior I used some wooden decals from Uschi v.d.Rosten.I have started the building with the cockpit, where I added the upholstery on the seats and the plane on the sides with Magic Sculp before painting. On the floor I have added the wooden panels made of thin plastic card. All the doors inside (and the one at the rear of the fuselage) I have saw out and reinstalled in open position. HK Models made a small mistake in the radio room as the one step on the floor behind the door is not there in original. I think HK made this due to some stability issues. I have cut away this step and made a plain floor which also received some wooden decals on it. In the nose I have added the nose turret mounting on the floor made of plastic parts and also some wire. This is not included in the kit.
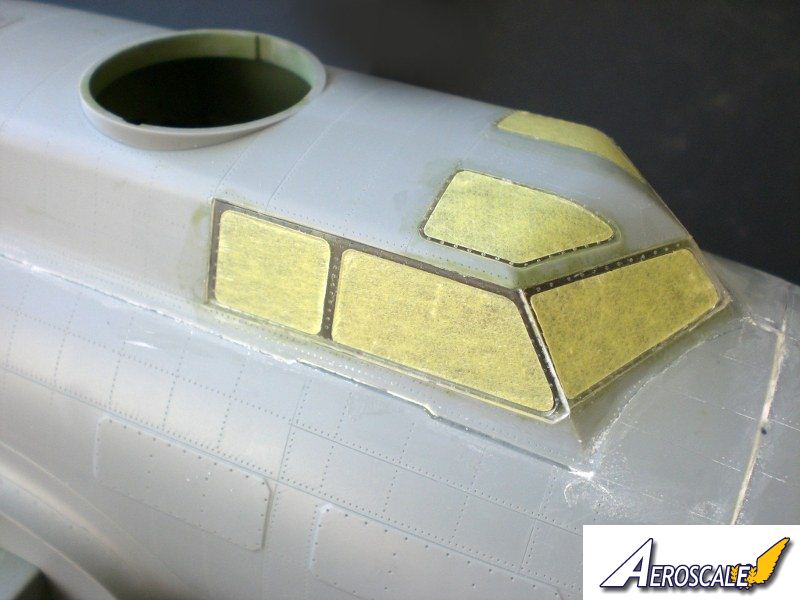
When all the interior was finished, painted and washed with some oil colours I have installed it in the fuselage and closed the two halves and added the nose to it. Then I added the windows and masked them all with the Eduard masks which are 100% recommended for this kit! In the meantime I made the landing bays and landing gear, added some wire to it and installed the bays in the wings before putting the two halves together. The landing lights received some bare metal foil before closing it with the glass part.
painting
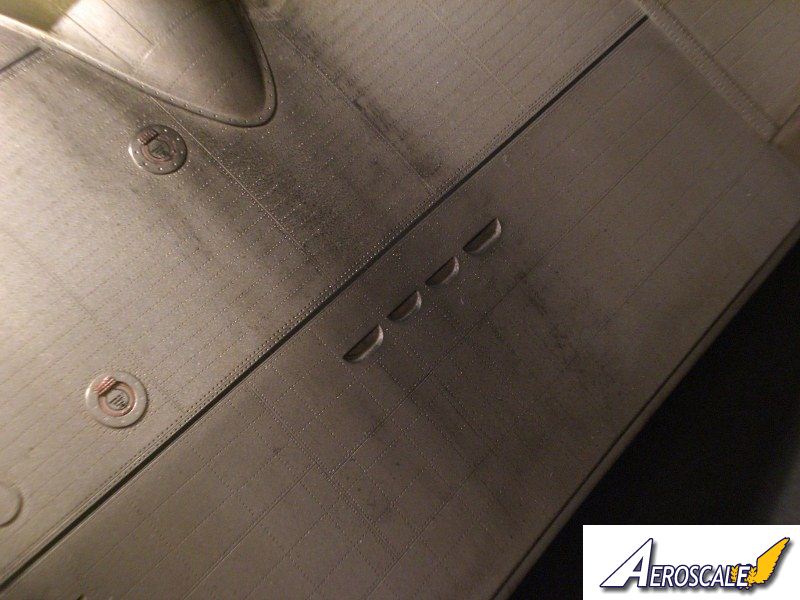
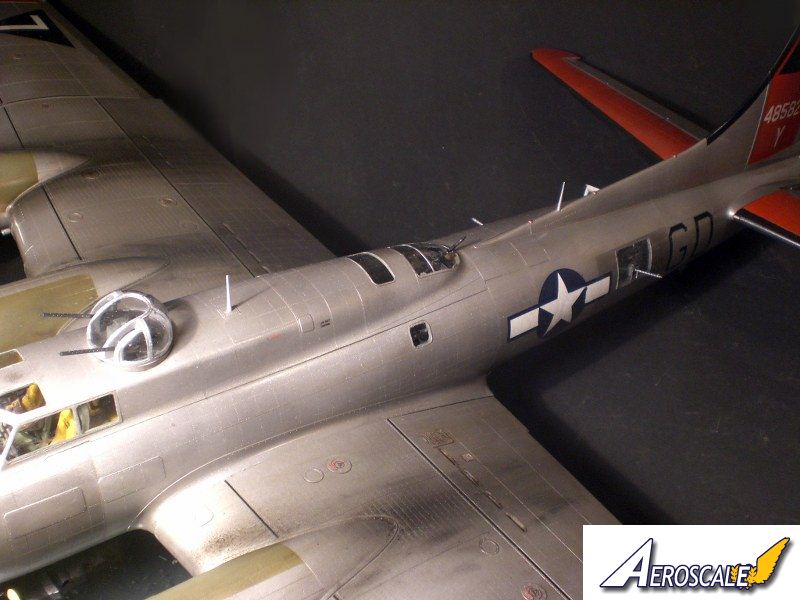
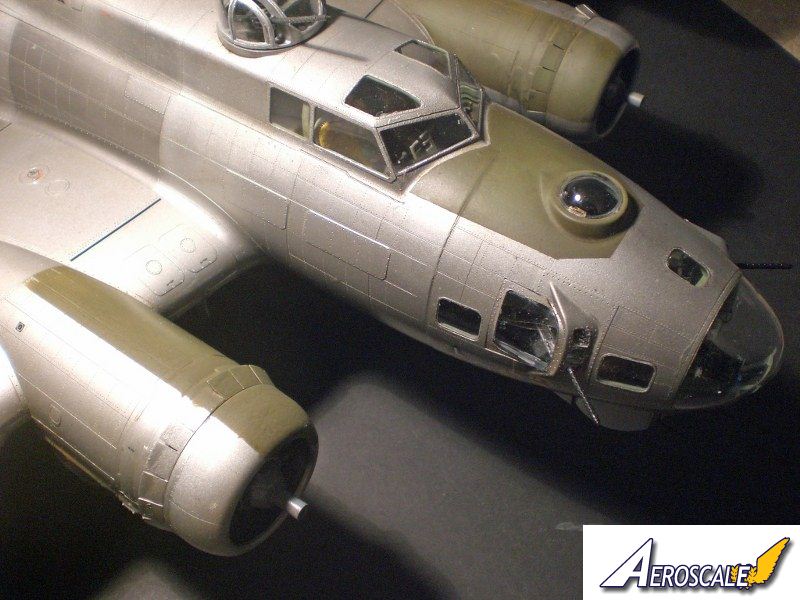
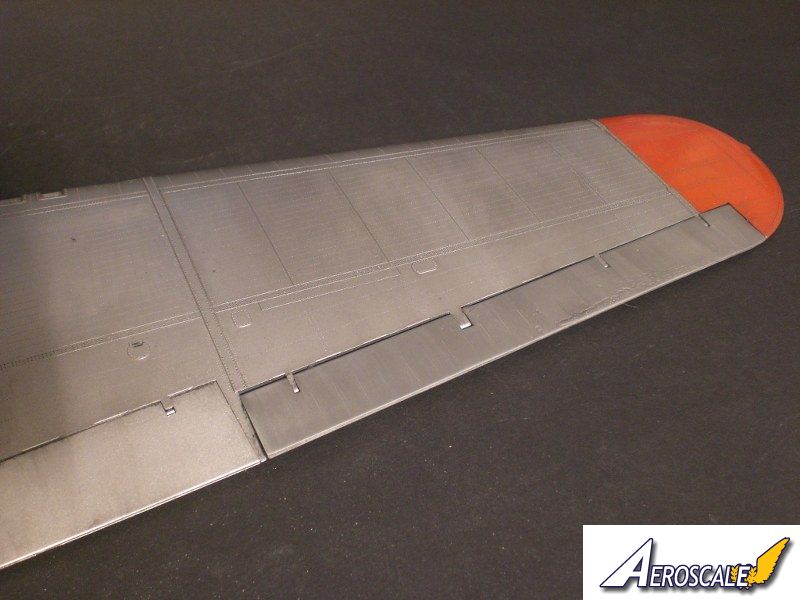
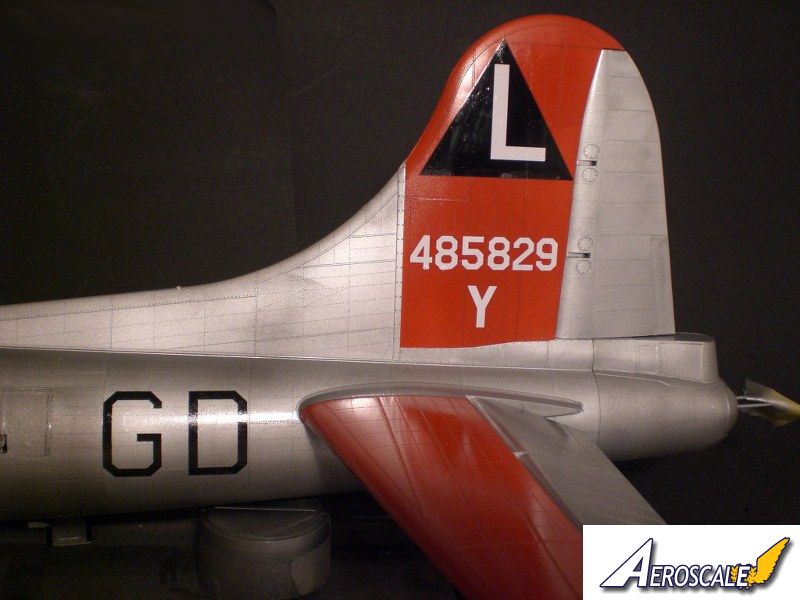
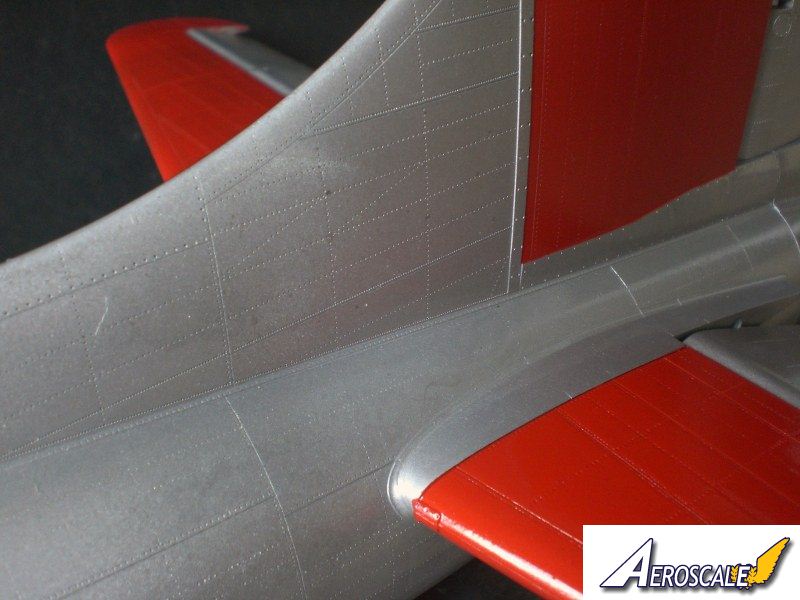
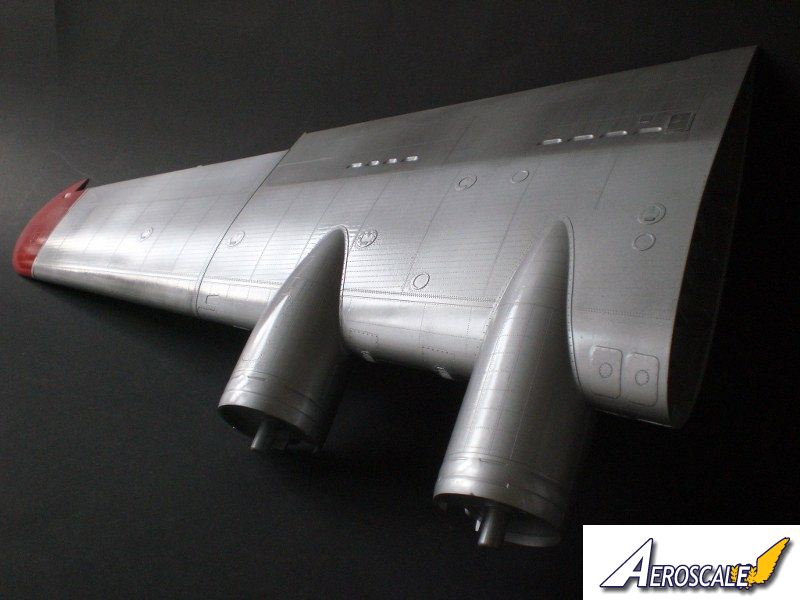
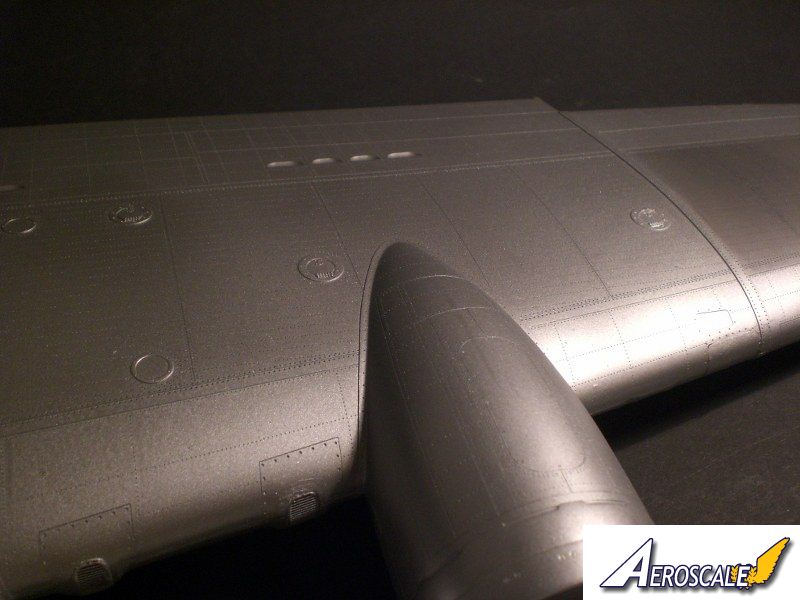
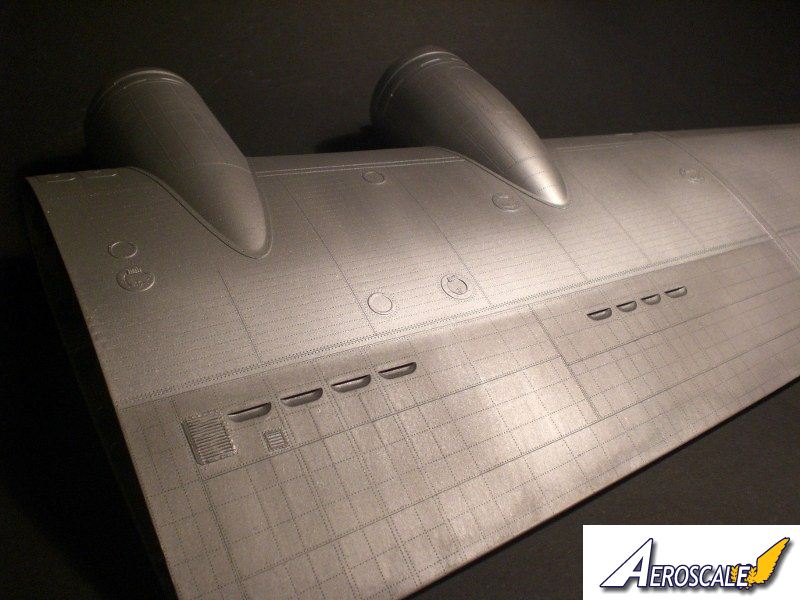
The exterior was painted then in Aluminium. I have chosen the Revell Aqua Colour line for it which is one of my favourites (together with the lifecolors which I used for most of the interior). Firstly I have painted the complete exterior in Aluminium. When the paint was dry I have airbrushed several areas in mixed colours of Aluminium and white, and some others in Aluminium and dark grey. After that dried I brushed the upper part of the fuselage and wings in the lightened aluminium (not covering), and a darker one on the downside - as shadows and light. After that I sprayed the red parts.When everything was dry I used gloss varnish sprayed in several thin layers on the airplane.... I think I sprayed 4 or 5 layers on it finally... Then I applied all the decals and added one more layer of gloss varnish once again.
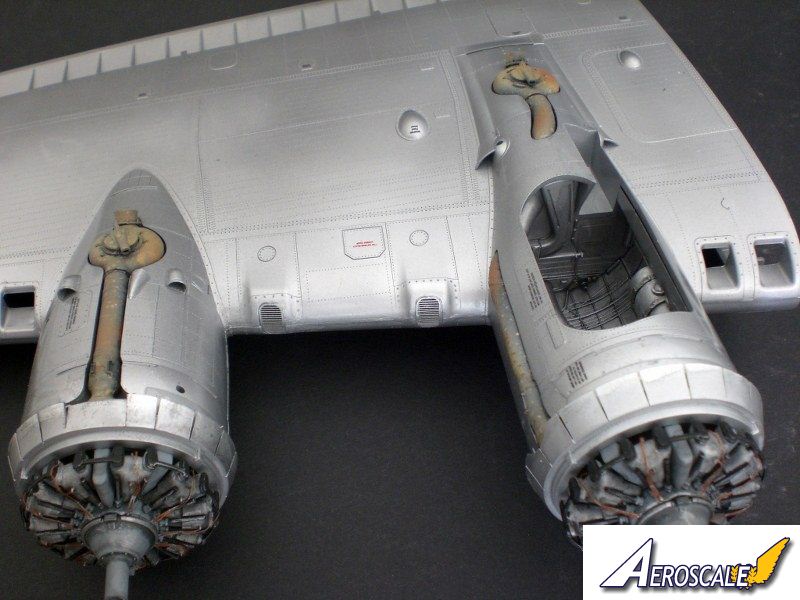
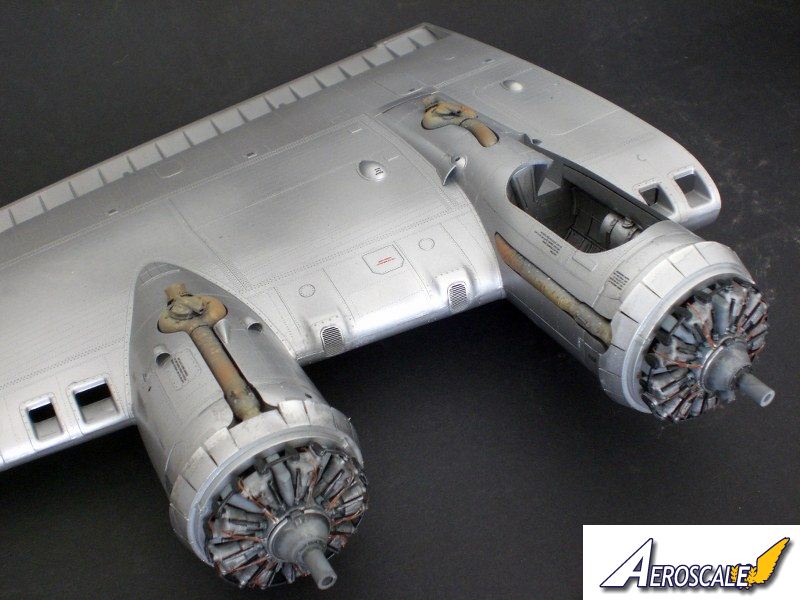
The anti-glare parts on the nose and on the engines was painted in olive drab matte, as well as the black parts on the wings.
After that a washing with dark brown oil colours followed on the complete airplante, followed by one more layer of gloss varnish.
Now the wings were installed to the fuselage - a little bit of force was necessary to put them in place, but then the wings were fixed without necessary of glue. Perfect for the painting - no risk in damaging the finished paint!
final assembly
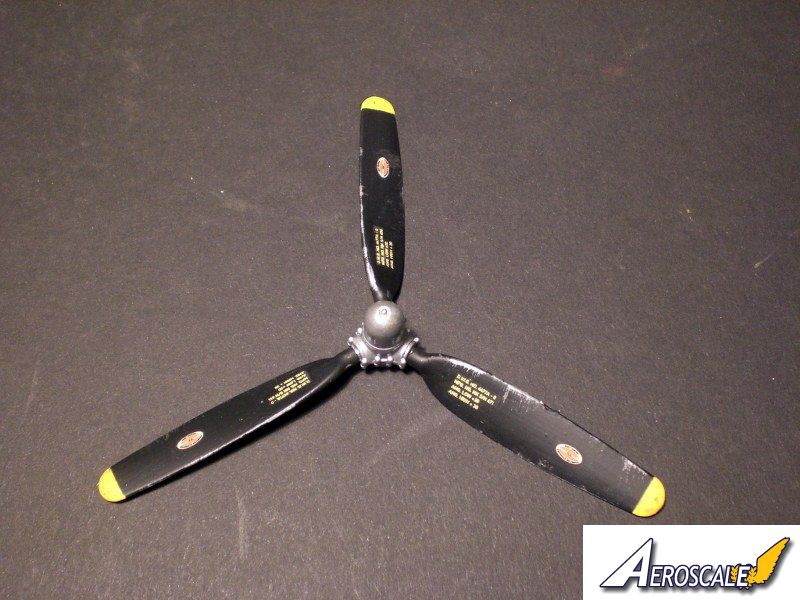
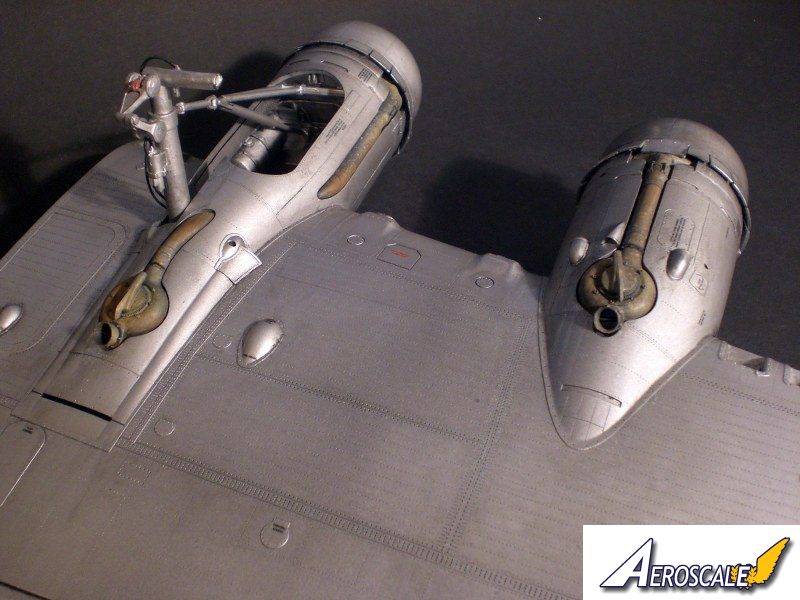
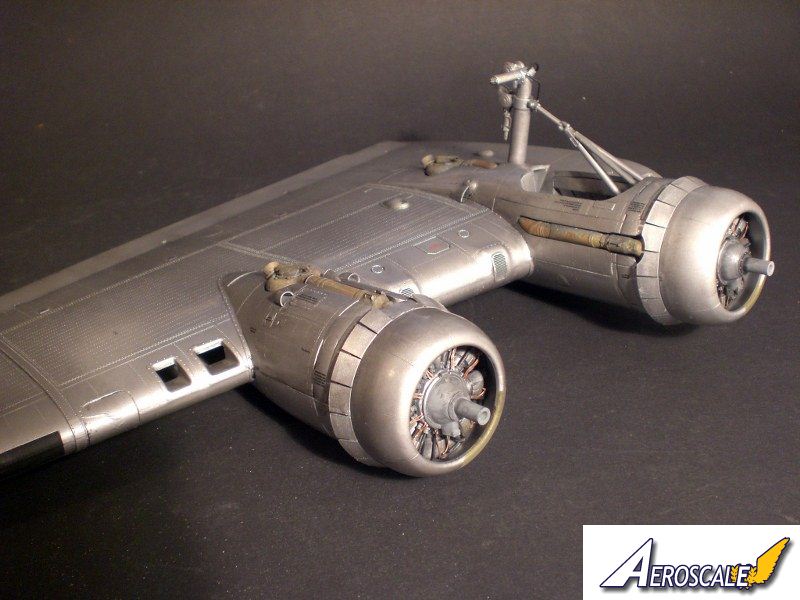
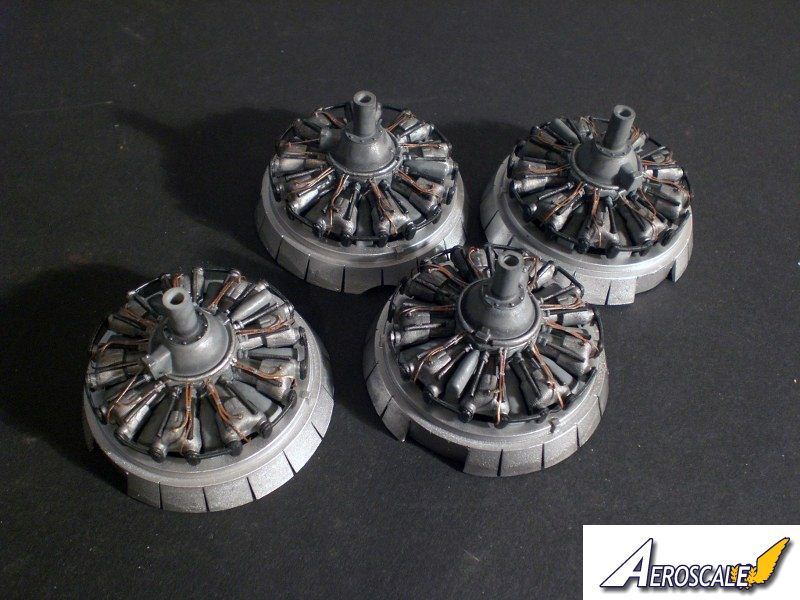
The engines were built and painted, then the wires added and mounted to the wings. Also the landing gear and the wheels. The propellers were painted in silver, gloss varnish over it, then painted in black and yellow. After that I have sanded the propellers to get the silver visible again - looks like damaged black colour now. Then the propellers were also installed.The exhausts were painted in black, added some airbrushed flesh, beige, yellow, grey and brown tones on it (with very low pressure).
Finally - only the antennas, the door and some other small parts were added - and the "Yankee Lady" found her place on the glossy black base... with some mirrors on it to show the downside of her too.
conclusion
The B-17 is a wonderful kit.... it needs some time and lot of free space, but it is a fantastic kit... I loved building it... and the next kits by HK Models are already waiting at home to become built....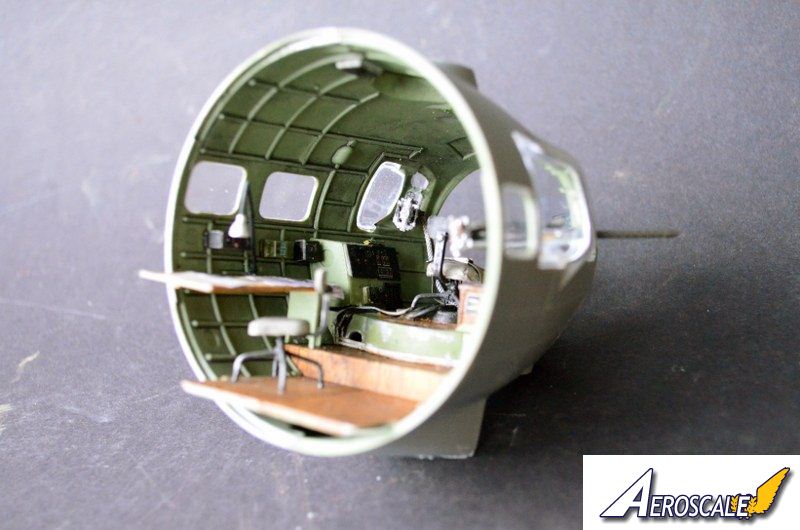


About the Author


FROM: BADEN-WüRTTEMBERG, GERMANY
Modeller with passion since childhood. Living in Germany near Stuttgart with my wife in our house where I have enough space for my hobby, specially for my big scale hobby - I prefer big kits with lot of parts, need lot of space. :) If I am not scale modelling then I like cooking, cinema, mountainbi...
Comments

Very nice indeed!
Thanks for submitting this Michael - here's to many more.
All the best
Rowan
FEB 14, 2014 - 11:14 PM
Michael,
Congratulations on completing this enormous model. Out of curiosity, where and how are you displaying it? Just out of curiosity, how long did it take to complete it?
The level of detail you maintained throughout the build with the addition of PE parts, detail painting, and various degrees of weathering, is truly at an exceptional level. One out of four engine anti-glare panels is worn, the props each show a somewhat different level of wear and tear, the small amounts of oil stains and flows from the engines on to the cowl flaps vary but look so realistic. Attention to details with your air brush is how you reproduced the effects of heat on the engine exhausts and turbo charges. They look as realistic as I've ever seen on a model. I could go on & on, but everywhere I looked, this is the type and level of attention I saw.
Thank you for sharing your work with us. I look forward to your next build blog and feature.
Joel
FEB 16, 2014 - 02:59 AM

Beautiful job. Kudos (Applause) to you. It's a shame the kit maker left that nasty step in the nose. Not much you can do with that other than what you did. I really enjoyed all the pictures of it. The metal finish is very hard to get right on single engine a/c I personally won't even try it on a four engine beast like this. Very nice, Thank you
FEB 17, 2014 - 11:29 AM

Not only a fantastic kit, definitively very nice work as well. Its an inspiring model. Your metal finish seems spot on!
FEB 21, 2014 - 01:05 AM

Superbly done from start to finish Michael, an epic undertaking which you accomplished with knobs on
MAR 12, 2015 - 11:46 AM
Copyright ©2021 by Michael. Images also by copyright holder unless otherwise noted. The views and opinions expressed herein are solely the views and opinions of the authors and/or contributors to this Web site and do not necessarily represent the views and/or opinions of AeroScale, KitMaker Network, or Silver Star Enterrpises. Images also by copyright holder unless otherwise noted. Opinions expressed are those of the author(s) and not necessarily those of AeroScale. All rights reserved. Originally published on: 2014-02-15 00:58:31. Unique Reads: 7863

WEB HOSTING BY


Copyright ©2021 AeroScale and Kitmaker Network, a subsidiary of Silver Star Enterprises
All Rights Reserved. Please read our Conditions of Use and Privacy Policy.
All Rights Reserved. Please read our Conditions of Use and Privacy Policy.