

How to: Homemade Vacuforming box
1
Comment
the black art of vacuum forming
For many years, the only way to add extra details to models was to make them yourself, and one of the best ways to do that was vacuum forming. Vacuum forming is a way to make a sheet of plastic take on the shape of a master form. It's a great way to make small hollow shapes, or to exactly reproduce the same shape numerous times. It's also a perfect way to make thin crystal clear canopies when the kit part rivals a Coke bottle in thickness and clarity.Once thought to be a dark art practised only by model building sorcerers, in actual fact making and using a vacuum former is not all that difficult. Here's how to do it.
bill of materials
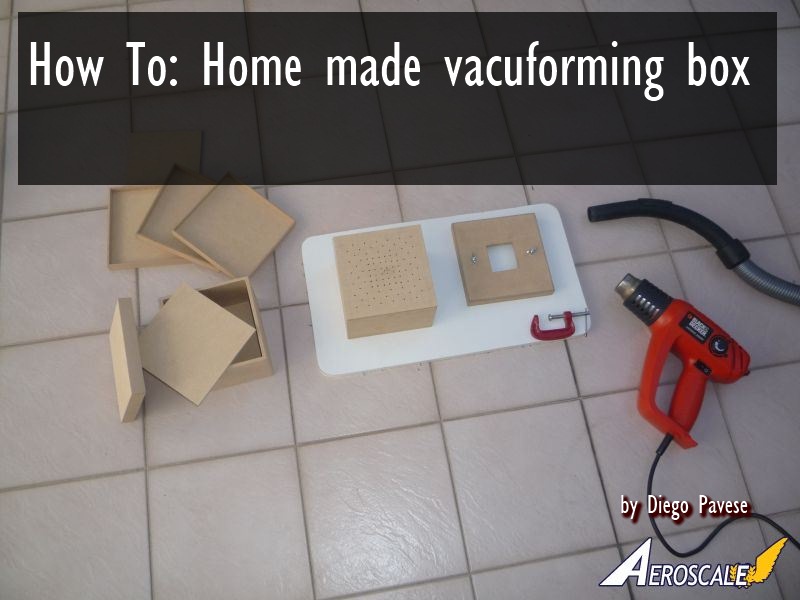
- 1. An 18mm white veneer fibreboard plate, for the support plate(50 x 25 cm);
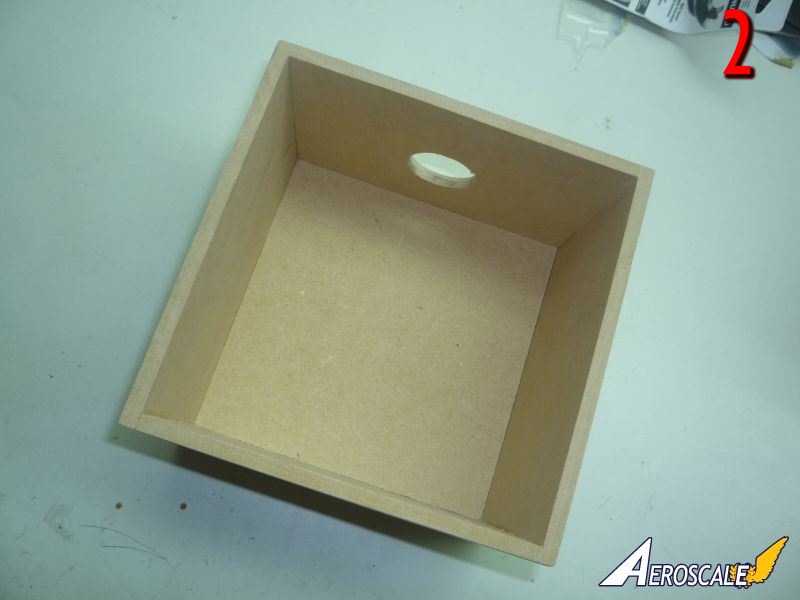
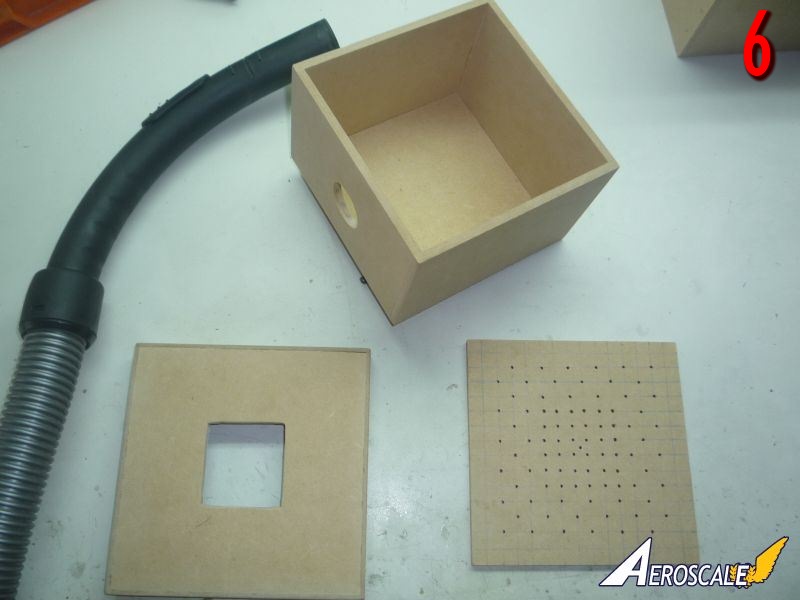
- 2. One 5mm MDF Box (Medium Density fibreboard ) In my case 15 x 15 x 10 cm. (Image 2);
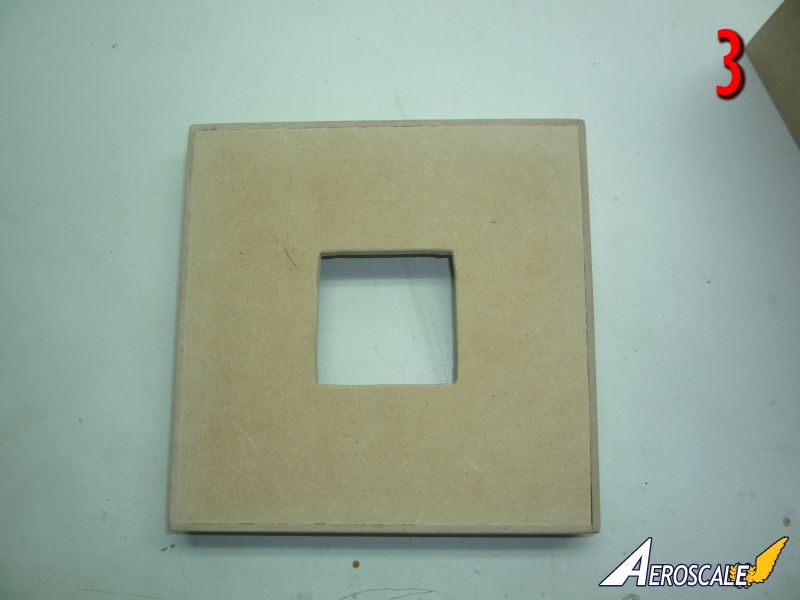
- 3. One 5mm MDF Top-box (lid) with the sides, in my case 16 x 16 x 2 cm. (Image 3);
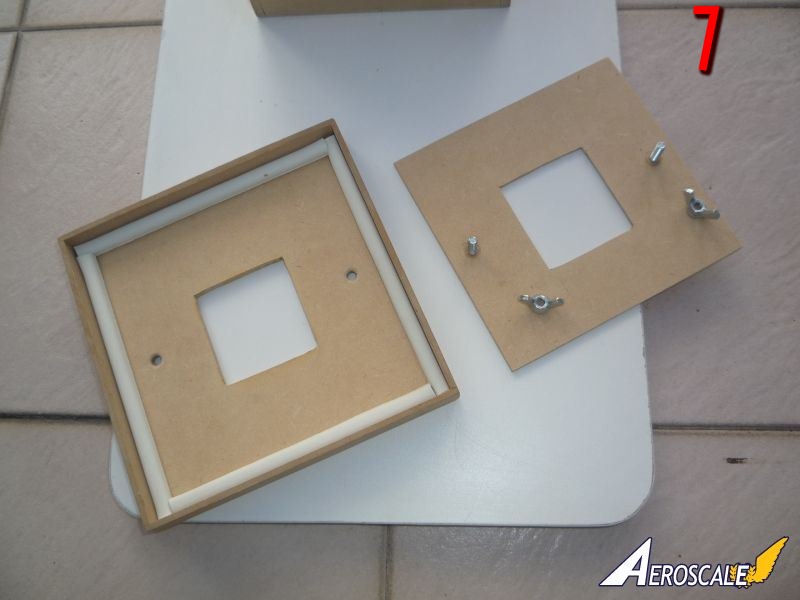
- 4. One 3mm MDF lid insert, with two bolts and wing-nuts. (Image 4);
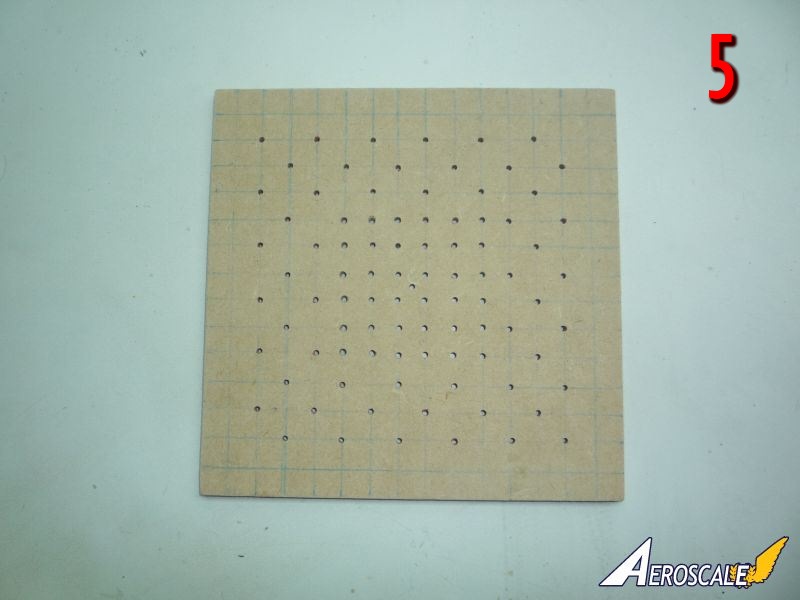
- 5. One 5mm MDF perforated plate, for the suction surface, in my case 15 x 15 cm. and some screws.(Image 5);
- 6. One Hand Vise (C-clamp), to fix all the device on the workbench;
- 7. A Heater Pistol (heat gun in North America), or electric oven;
- 8. A Vacuum Cleaner (be smart and get the permission of your spouse; a certificate document signature will be perfect).
assembly steps
1- Drill the hole in the side of your MDF Box, for the Vacuum Cleaner tube. Be careful; you can use a spade bit, but the size must be the right for the tube. All the Vacuum tubes are a little bit conical, so your tube must fit tight. (I used a small size spade, and a sand paper to fit the tube in place). Alternatively, you can use a hole saw of the correct diameter. (Image 6)
2- Cut the windows in the lid and in the lid insert, with the holes for the bolts All the surfaces and holes must be straight to allow you hold the plastic sheet. ( I used a small bit to mark a lot of holes for the square windows, and a wire fretsaw) Plus, adding a weather strip to seal up the suction in the interior of the lid.- (Image 7)
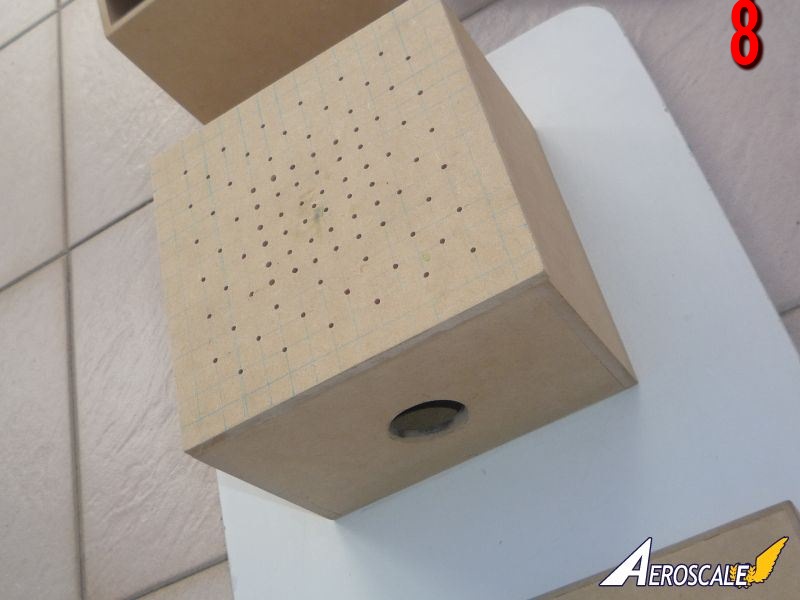
3- Make a cross-sectional grid in the suction surface, and drill a lot of small holes with a 1.5mm bit this will be the roof of your box.- (Image 5)
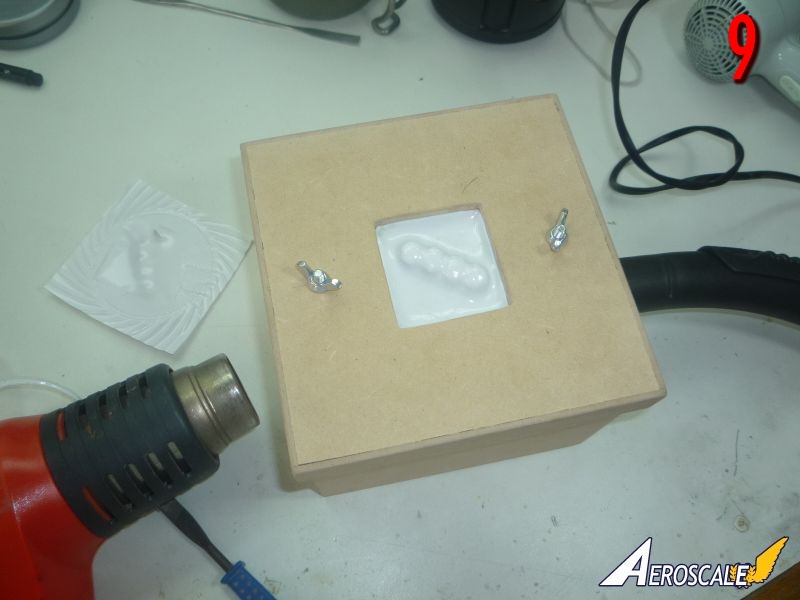
4- Fix with the screws the box to the 18mm fibre board plate, the veneer plate will gives to you stability to the devise; and helps to fix it with the C-clamp to the workbench, because vacuum hose is heavy for the box. After you fix the box with the screws, you can glue the suction surface to the box. (Any adhesive contact glue will work fine, let it dry/cure 24 hours).- (Image 8)
5- Put all the things together and play a lot, enjoy the process; because you will need a little patience and practice. Use any plastic sheet for the first attempts; do not buy expensive ones for the first shots. And make some masters balsa wood and aluminium, this will help too (Image 9)
A few notes
A- If you have an Electric Oven, it can also be used to heat your plastic. Talk with your spouse first... But, everybody says it works far better than the pistol.
B- May be necessary use some type of hand grip, and some "guide" to help a better aim in the moment when you drop the heated device against the suction surface.
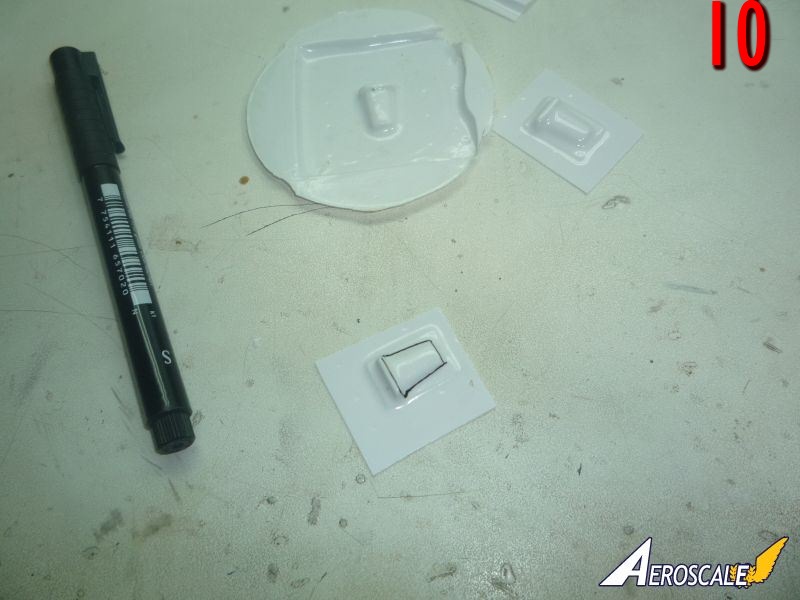
C- If you are doing pieces for your model, make a few ones and choose the better examples; preserve some for spare parts; you never know.- (Image 10)
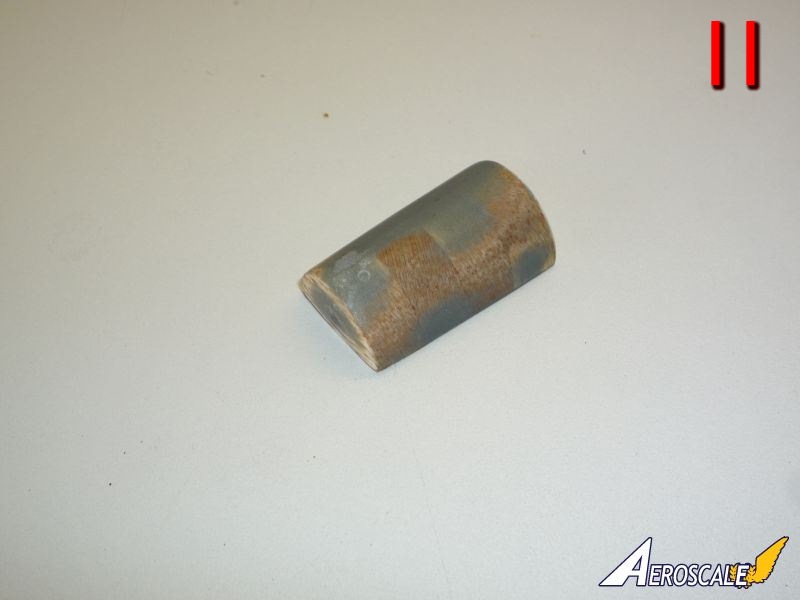
D- To make a master, use a contour gauge to take same profiles on plastic; and fill the space with balsa wood glued with Cyano. After letting it dry, sand the balsa following the profiles. The surface can be hardened with superglue or epoxy glue/putty, dont use modelling putty because it is not resistant to the heat (Chucks idea). (Image 11)
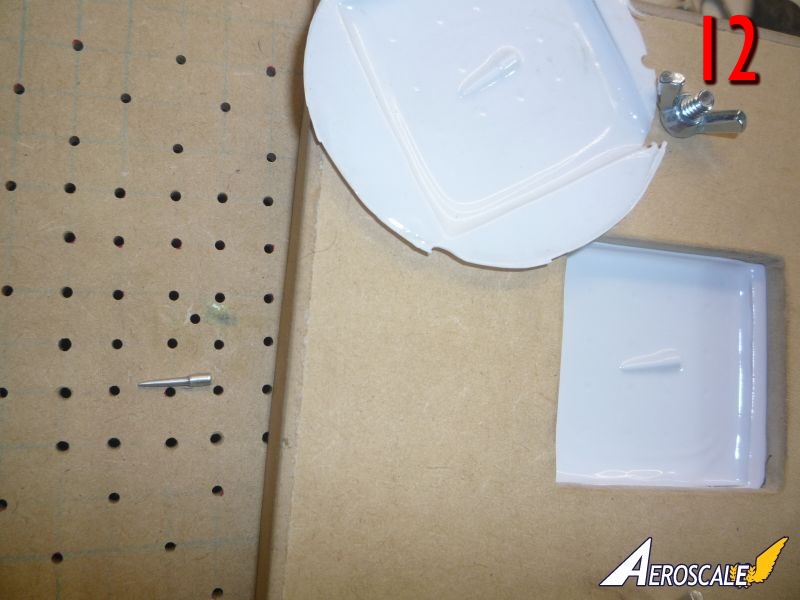
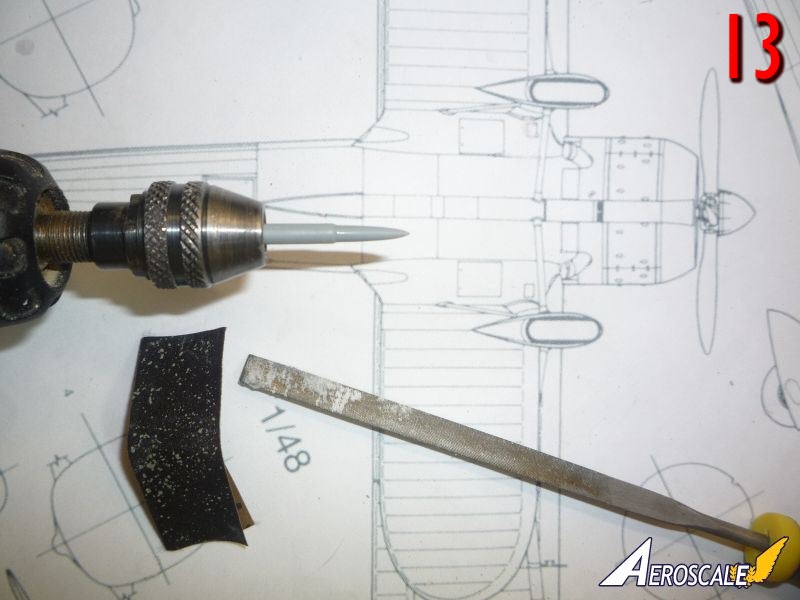
E- For small turned pieces you can use soft aluminium wire, fixed to your rotary tool, and sanded/filed at your needs. Once again, Do not use plastic sprue; because ir doesnt work well with heat. (Images 12 and 13)
F- If you have any idea, any experience vacuforming, please SHARE with us Any comments, any questions, with homemade machines or professional ones; any experience is most welcome !!!

About the Author


Comments

Hi,
Thanks Jessica, the Introduction paragraph is a cool addition...
Thanks...
Diego
NOV 29, 2013 - 01:31 PM
Copyright ©2021 by Diego M. Pavese. Images also by copyright holder unless otherwise noted. The views and opinions expressed herein are solely the views and opinions of the authors and/or contributors to this Web site and do not necessarily represent the views and/or opinions of AeroScale, KitMaker Network, or Silver Star Enterrpises. Images also by copyright holder unless otherwise noted. Opinions expressed are those of the author(s) and not necessarily those of AeroScale. All rights reserved. Originally published on: 2013-11-30 00:30:09. Unique Reads: 7008

WEB HOSTING BY


Copyright ©2021 AeroScale and Kitmaker Network, a subsidiary of Silver Star Enterprises
All Rights Reserved. Please read our Conditions of Use and Privacy Policy.
All Rights Reserved. Please read our Conditions of Use and Privacy Policy.