

Wood Grain Demo
4
Comments
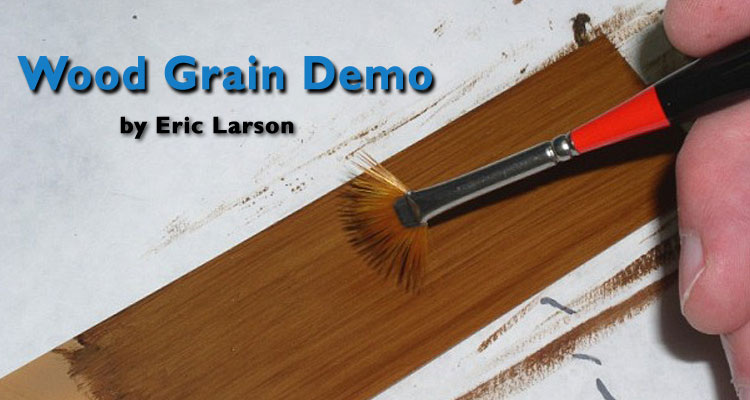
From the various work-in-process posts I made, during the build of my Wingnut Wings 1/32 LVG, I received numerous queries as to how I did the wood grain. I've tried to describe it as best I could in words but have decided that a demo, with more pictures, would be better.
Please note that this little tutorial/demo is in no way meant to be the definitive guide to wood grain painting. It is merely an attempt to share what I managed to achieve on my LVG. To those who are just curious as to how I did it, I hope this answers your questions. To those who want to attempt it themselves, I hope I provide enough information, and encouragement, to help you get started and develop your own technique.
First, a little background. The LVG is only the second WWI model I've built (not counting those as a kid), and the second model in general where I've had to do any significant wood grain effect. The first time I needed to simulate bare wood was when I built Eduard's 1/48 Ki 115 a couple years ago. The cockpit of the real aircraft is primarily plywood so I needed to represent that on the model. I searched for and read as many articles as I could find on simulating wood grain. There are plenty out there in various modeling forums and build articles for WWI aircraft as well as model railroading. The majority of them described the use of artist's oil paints so that is the medium I chose and it worked quite well for the little Ki 115.
Enter, the Wingnut LVG. LOTS of wood grain! The kit instructions include a full page, in color, devoted to painting the wood grain. This info is also available on their web site under the LVG's Hints and Tips section. They also suggest the use of oil paints so with that, combined with my limited previous experience, I was fairly confident that I could pull it off.
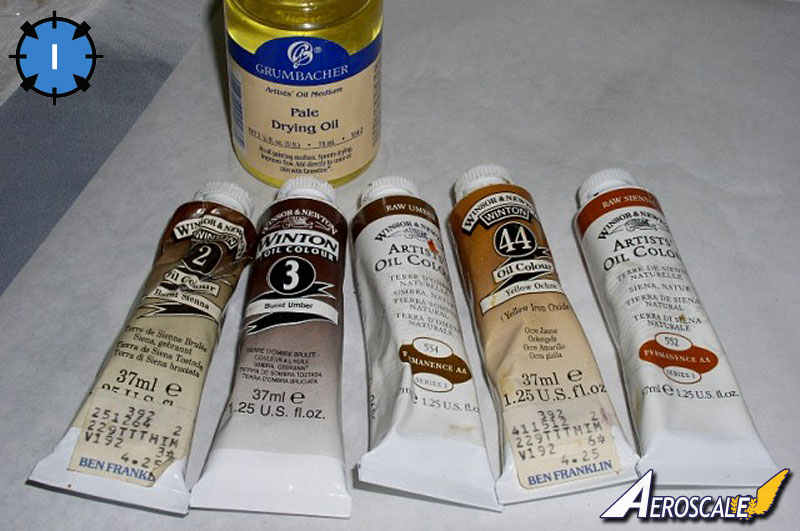
The Wingnut instructions show only Burnt Umber as the color of oil paint to use but based on what I learned from the other articles I've read, I use a combination of five colors: Burnt Umber, Raw Umber, Burnt Sienna, Raw Sienna, and Yellow Ochre. Note also the bottle of Pale Drying Oil. This can be added to the paint to speed up the drying time. Japan Dryer is another additive that will do the same.
See Pic #1
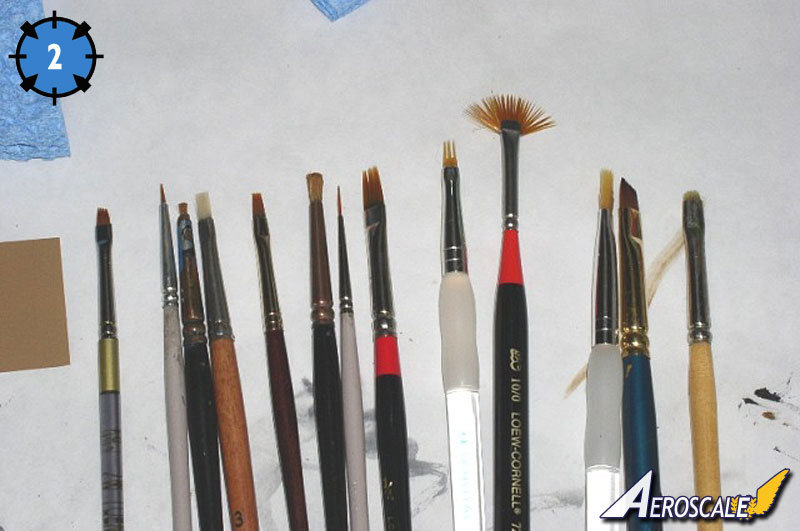
I have accumulated a wide variety of brushes for "wood working". Some are better for wide, flat, areas, such as the fuselage sides, and others for small or narrow areas, such as the cockpit framework and propeller. Seen here is my selection of those bushes. Some are old ones with the bristles trimmed down to nubs while others are ones I found while browsing the local craft and art supply shops.
See Pic #2
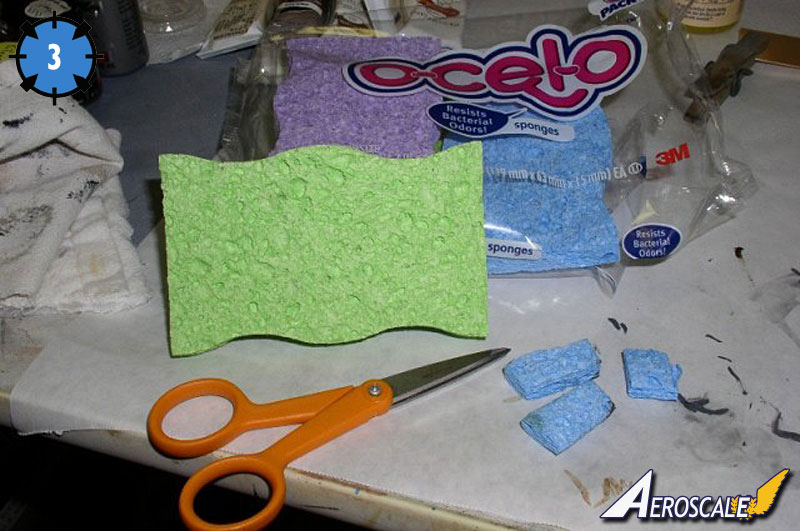
Oh, another thing needed are little chunks of sponge (again, per the Wingnut instructions). Just plain old cleaning sponges (found mine at Walmart) cut into pieces as seen here.
See Pic #3
Please note that this little tutorial/demo is in no way meant to be the definitive guide to wood grain painting. It is merely an attempt to share what I managed to achieve on my LVG. To those who are just curious as to how I did it, I hope this answers your questions. To those who want to attempt it themselves, I hope I provide enough information, and encouragement, to help you get started and develop your own technique.
First, a little background. The LVG is only the second WWI model I've built (not counting those as a kid), and the second model in general where I've had to do any significant wood grain effect. The first time I needed to simulate bare wood was when I built Eduard's 1/48 Ki 115 a couple years ago. The cockpit of the real aircraft is primarily plywood so I needed to represent that on the model. I searched for and read as many articles as I could find on simulating wood grain. There are plenty out there in various modeling forums and build articles for WWI aircraft as well as model railroading. The majority of them described the use of artist's oil paints so that is the medium I chose and it worked quite well for the little Ki 115.
Enter, the Wingnut LVG. LOTS of wood grain! The kit instructions include a full page, in color, devoted to painting the wood grain. This info is also available on their web site under the LVG's Hints and Tips section. They also suggest the use of oil paints so with that, combined with my limited previous experience, I was fairly confident that I could pull it off.
The Wingnut instructions show only Burnt Umber as the color of oil paint to use but based on what I learned from the other articles I've read, I use a combination of five colors: Burnt Umber, Raw Umber, Burnt Sienna, Raw Sienna, and Yellow Ochre. Note also the bottle of Pale Drying Oil. This can be added to the paint to speed up the drying time. Japan Dryer is another additive that will do the same.
See Pic #1
I have accumulated a wide variety of brushes for "wood working". Some are better for wide, flat, areas, such as the fuselage sides, and others for small or narrow areas, such as the cockpit framework and propeller. Seen here is my selection of those bushes. Some are old ones with the bristles trimmed down to nubs while others are ones I found while browsing the local craft and art supply shops.
See Pic #2
Oh, another thing needed are little chunks of sponge (again, per the Wingnut instructions). Just plain old cleaning sponges (found mine at Walmart) cut into pieces as seen here.
See Pic #3
About the Author


FROM: OHIO, UNITED STATES
I'm 58 years old and have been model building since I was 7 or 8. I became involved with IPMS in my late teens when I discovered the world of "serious" modeling. My main interest is aircraft, of all eras, though I have only recently ventured into building WWI planes. I pretty much stick with 1/48 ...
Comments

To simulate wood grain on Wingnuts planes artist oils are recommended. Many posts use Tamiya acrylics. Is there a problem using acrylic burnt umber and the other suggested colors? Thanks.
NOV 03, 2016 - 05:28 AM

No, there shouldn't be any problem, as long as the paints you're using are compatible with the undercoat. The benefit of using oils is that they won't lift off the acrylic undercoat but if you can make it work, then go with what you've got
NOV 03, 2016 - 09:24 PM

Copyright ©2021 by Eric Larson. Images also by copyright holder unless otherwise noted. The views and opinions expressed herein are solely the views and opinions of the authors and/or contributors to this Web site and do not necessarily represent the views and/or opinions of AeroScale, KitMaker Network, or Silver Star Enterrpises. Images also by copyright holder unless otherwise noted. Opinions expressed are those of the author(s) and not necessarily those of AeroScale. All rights reserved. Originally published on: 2010-02-27 00:00:00. Unique Reads: 32489

WEB HOSTING BY


Copyright ©2021 AeroScale and Kitmaker Network, a subsidiary of Silver Star Enterprises
All Rights Reserved. Please read our Conditions of Use and Privacy Policy.
All Rights Reserved. Please read our Conditions of Use and Privacy Policy.