

1⁄72Mitsubishi Ki-21
11
Comments
This Sally is the old Revell-Takara kit from the 1970s. I ran across it by chance at a contest last year when I passed close by a vendors booth and overheard an exceptional modeler that I, along with many of you out there may know, ranting about the exquisite panel lines and riveting, and waxing nostalgic, regarding the kit he held in his hands. I moved in to a polite distance and waited my opportunity to ask a bit more about the kit. He was very gracious and told me their history, and went through the sprues showing high and low points. I asked the big question, and no, he wasnt buying them. (There were 2 kits available). As he already had a couple, plus the MPM offering. I scooped one kit up then and there. Im glad I did, because it was really fun to build!
With no interior to speak of, and no extra money on hand to buy the Maru Mechanic books, I relied on the Internet, and I would like to say that the fellows over at the J-aircraft.com site were incredible in their assistance in the reference of the project.
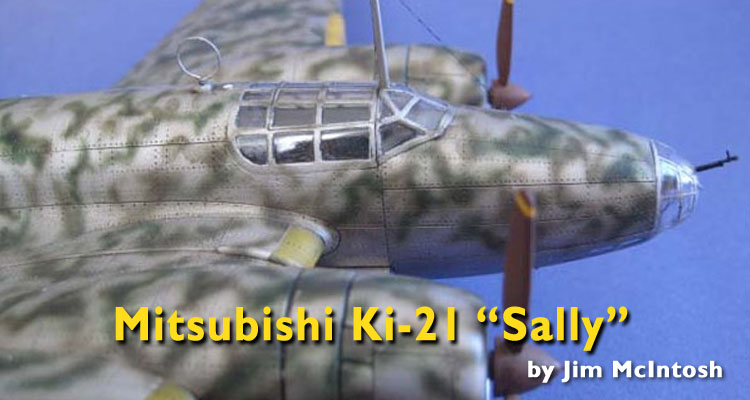
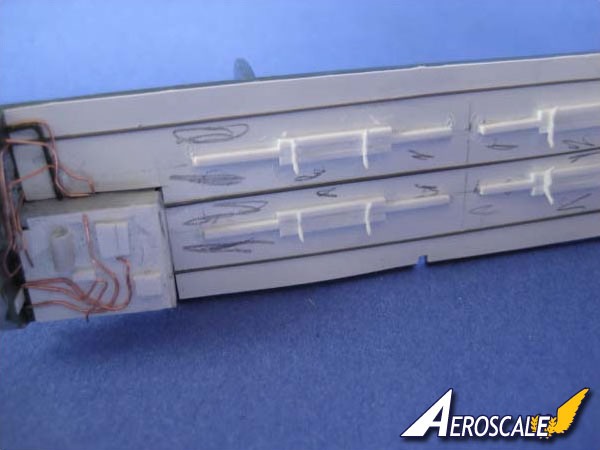
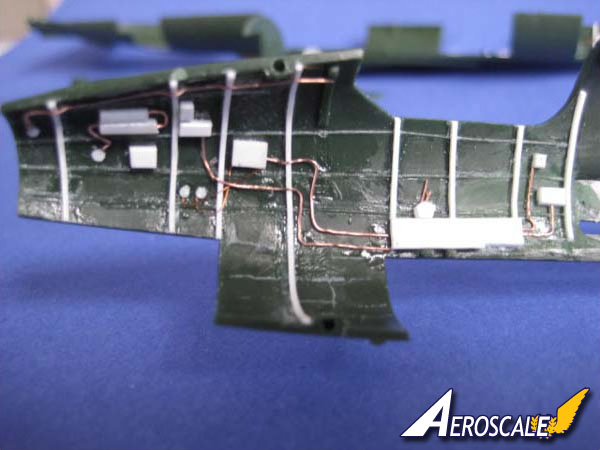
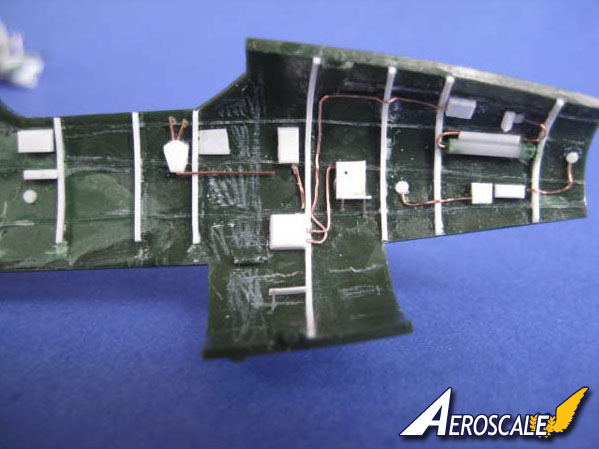
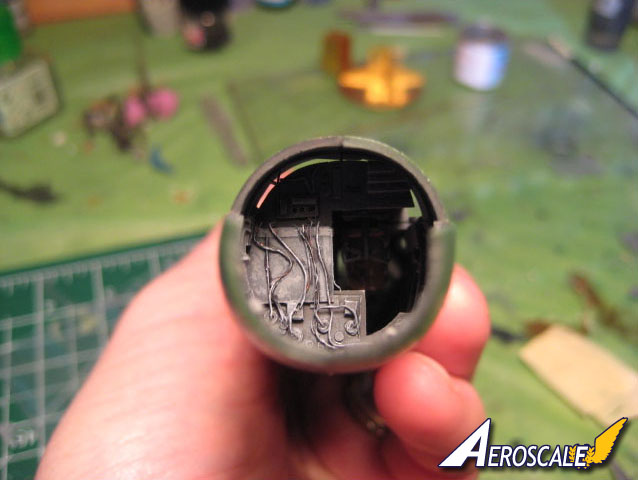
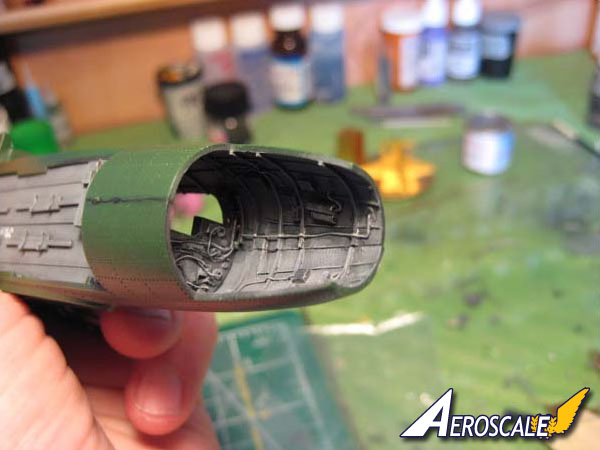
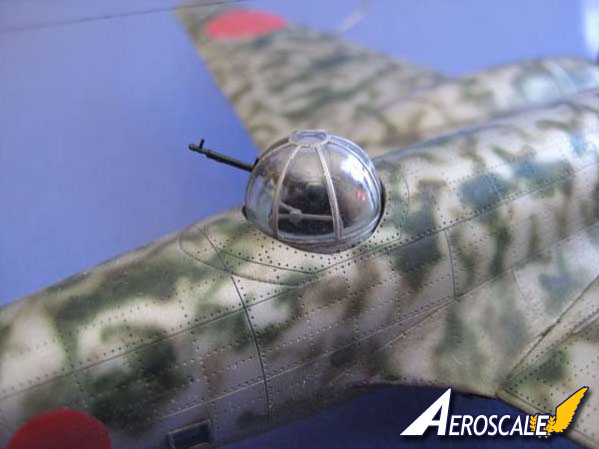
As you can see from the photographs the interior is all scratch built. Ribs, wires, and other greeblies were added. I had extensive conversations with Japanese aircraft fanatics regarding Aotake, and finally decided that art wins in the end, and went with what I liked to look at.
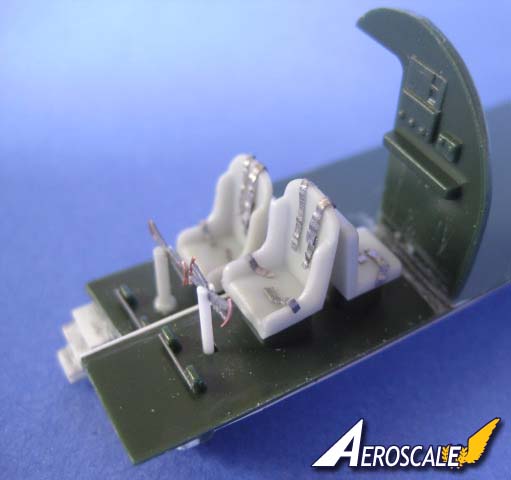
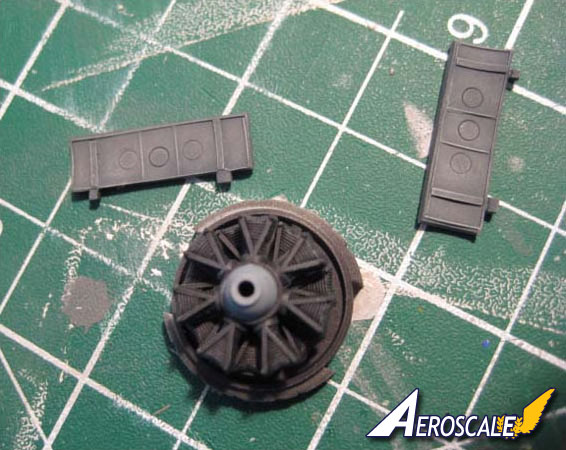
The one thing I am disappointed about is that I must have deleted my pics of the wheel bays. They are made up with struts of 0.30 rod in a triangle patterntheres quite a few of them, along with a breather pipe for the engine. It's unfortunate I cant share those pictures with you.
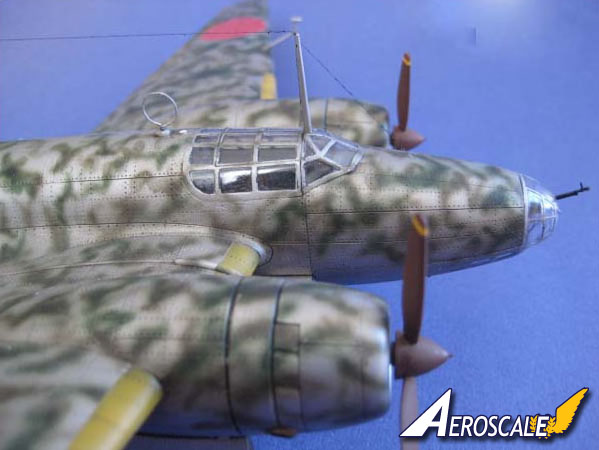
Very little filling was required as the fit was very good for such an old kit. The wing lights are MV lenses, and wingtip lights are clear sprue painted clear red and green.
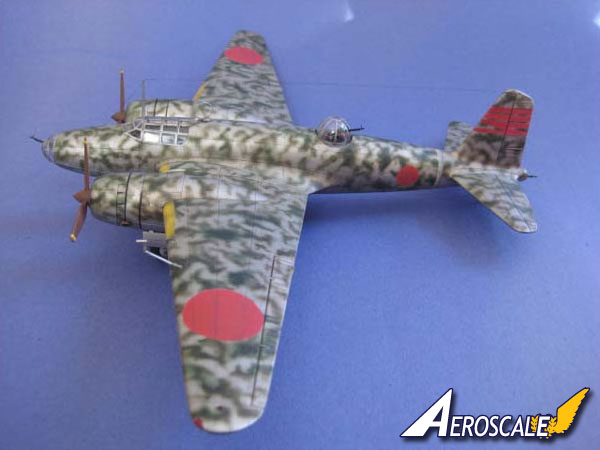
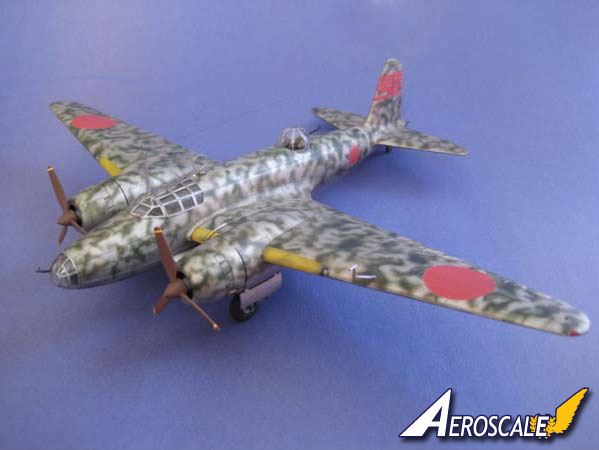
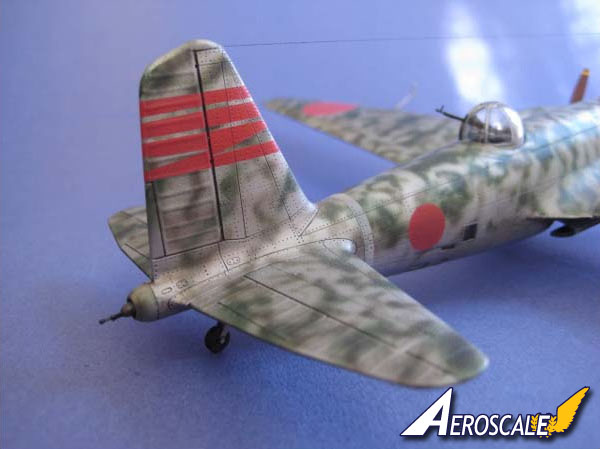
The paintwork started with a gloss black finish, followed by Alclad Aluminum. Camouflage was sprayed using random swirls at the tightest and lightest setting on my Iwata. I built them up from that framework in a random fashion, using Tamiya J.A green, and J.N. Green for contrast. All markings are painted on using an airbrush.
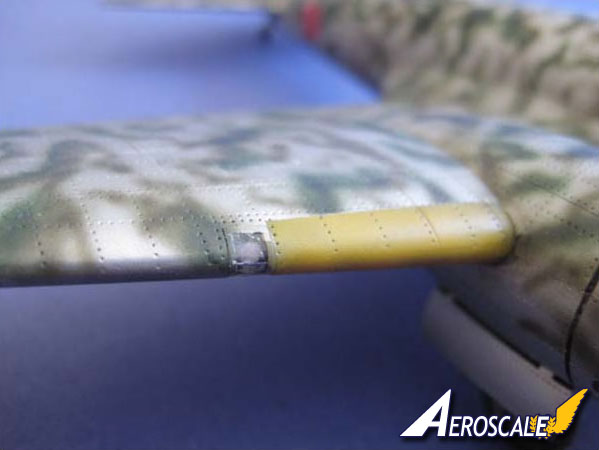
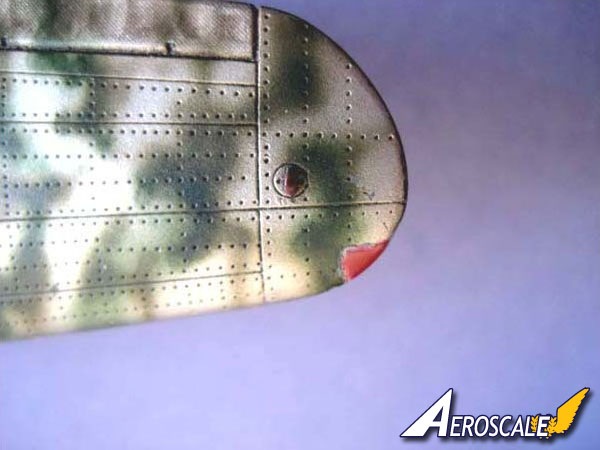
Future floor polish was applied in a heavy coat to prepare for the patina to come. Burnt umber oil paint was painted on with a brush over panel and rivet lines, then wiped away carefully with paper towels along the airflow.
Radio wires were added last using WEM Lycra thread, and painted using India ink.
With no interior to speak of, and no extra money on hand to buy the Maru Mechanic books, I relied on the Internet, and I would like to say that the fellows over at the J-aircraft.com site were incredible in their assistance in the reference of the project.
As you can see from the photographs the interior is all scratch built. Ribs, wires, and other greeblies were added. I had extensive conversations with Japanese aircraft fanatics regarding Aotake, and finally decided that art wins in the end, and went with what I liked to look at.
The one thing I am disappointed about is that I must have deleted my pics of the wheel bays. They are made up with struts of 0.30 rod in a triangle patterntheres quite a few of them, along with a breather pipe for the engine. It's unfortunate I cant share those pictures with you.
Very little filling was required as the fit was very good for such an old kit. The wing lights are MV lenses, and wingtip lights are clear sprue painted clear red and green.
The paintwork started with a gloss black finish, followed by Alclad Aluminum. Camouflage was sprayed using random swirls at the tightest and lightest setting on my Iwata. I built them up from that framework in a random fashion, using Tamiya J.A green, and J.N. Green for contrast. All markings are painted on using an airbrush.
Future floor polish was applied in a heavy coat to prepare for the patina to come. Burnt umber oil paint was painted on with a brush over panel and rivet lines, then wiped away carefully with paper towels along the airflow.
Radio wires were added last using WEM Lycra thread, and painted using India ink.

About the Author

FROM: ONTARIO, CANADA
I live in a small rural town with my wife and 2 dogs in an old farmhouse they say used to have ghosts..seems ok now.I spend my free time fixing up the house(pre-1886) and studying WW2. I model whenever I can,and thank the Lord for all His blessings in my life.
Comments
Beautiful job on the kit and interior, Jim. Also the camouflage is very well done in my opinion.
Thanks for sharing.
FEB 03, 2010 - 11:34 PM

nice work, how did you attach antenna wire to upmost part of cockpit antenna post? trying to figure out how to do that on my eduard lavockin LA-7
FEB 04, 2010 - 11:33 AM

Thanks guys ...the secret is to notch the tip of the antenna with your knife, use crazy glue, and only have ONE cup of coffee before you start work. the antenna is your junction point from all other wire points..if that makes sense..
FEB 04, 2010 - 01:07 PM


Wow! I look at what I do, and call it kit construction. I look at what you do, Jim, and call it modelling! That is a beautiful job, and I thank you for the inspiration. .
Cheers,
Mike
FEB 04, 2010 - 03:36 PM
thanks for the info, makes a very enjoyable hobby even more so.
FEB 04, 2010 - 04:02 PM

Hey Russel Thanks again...and you know ..ive got a wacky Idea for this type of camo...Id like to try fusing the "Salt method" used by the armour guys into this "cloud pattern" camo and see what happens.
FEB 06, 2010 - 02:43 AM

Awesom model and very nice finish
almost better than the real thing?!
FEB 08, 2010 - 12:35 AM
Copyright ©2021 by Jim McIntosh. Images also by copyright holder unless otherwise noted. The views and opinions expressed herein are solely the views and opinions of the authors and/or contributors to this Web site and do not necessarily represent the views and/or opinions of AeroScale, KitMaker Network, or Silver Star Enterrpises. Images also by copyright holder unless otherwise noted. Opinions expressed are those of the author(s) and not necessarily those of AeroScale. All rights reserved. Originally published on: 2010-02-03 00:00:00. Unique Reads: 11203

WEB HOSTING BY


Copyright ©2021 AeroScale and Kitmaker Network, a subsidiary of Silver Star Enterprises
All Rights Reserved. Please read our Conditions of Use and Privacy Policy.
All Rights Reserved. Please read our Conditions of Use and Privacy Policy.