

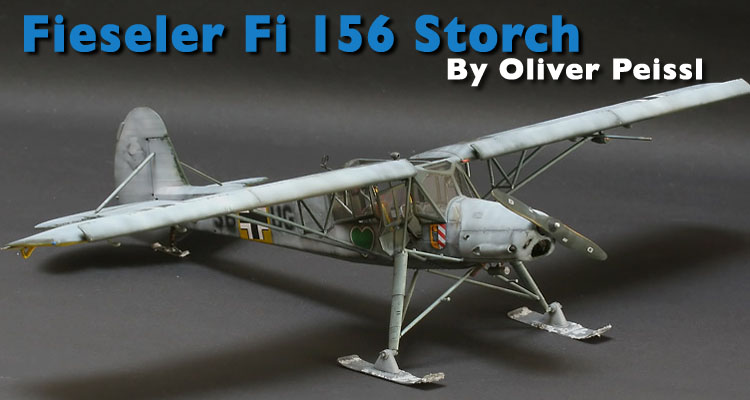
1⁄48Winter Storch
12
Comments
Aftermarket items
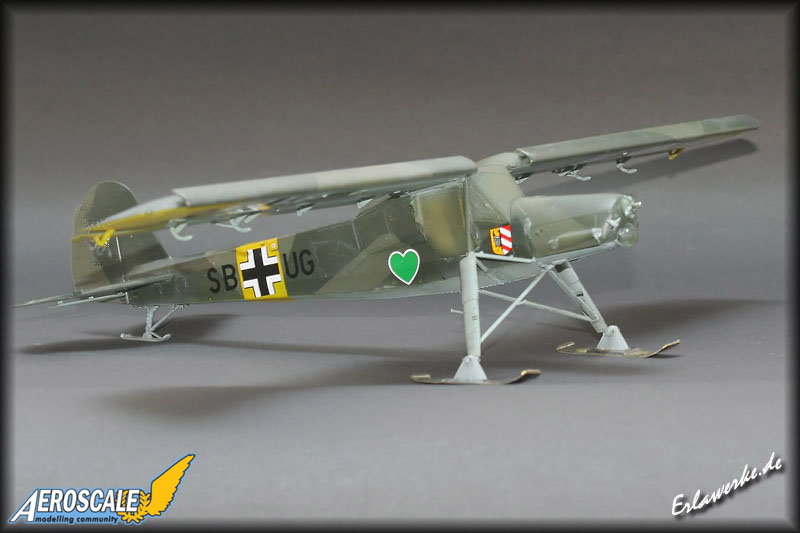
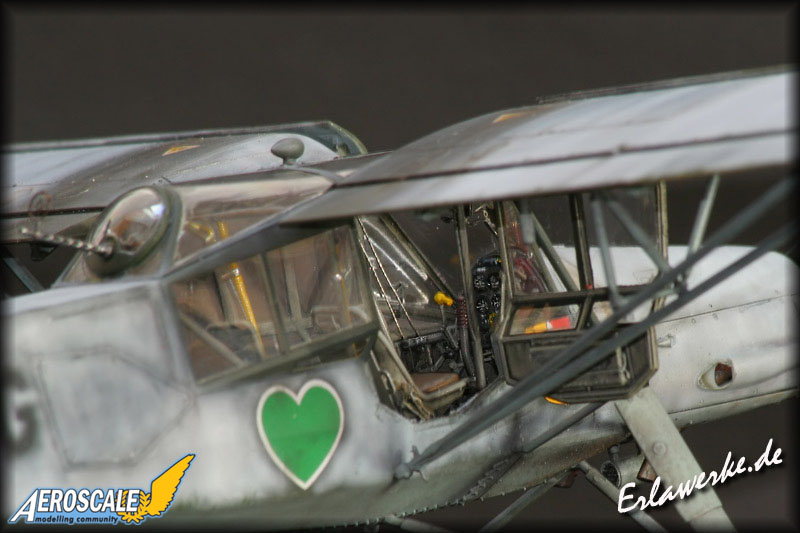
Here is my latest built: Tamiya's 1/48 scale Fieseler Fi 156 Storch (61100). In addition to the parts from the box I also used photo etched parts from Eduard: interior (49404), exterior (48581), the Skis (48582). I also used a MG 15 sight from Aires and exhausts from Quickboost.Doing the interior
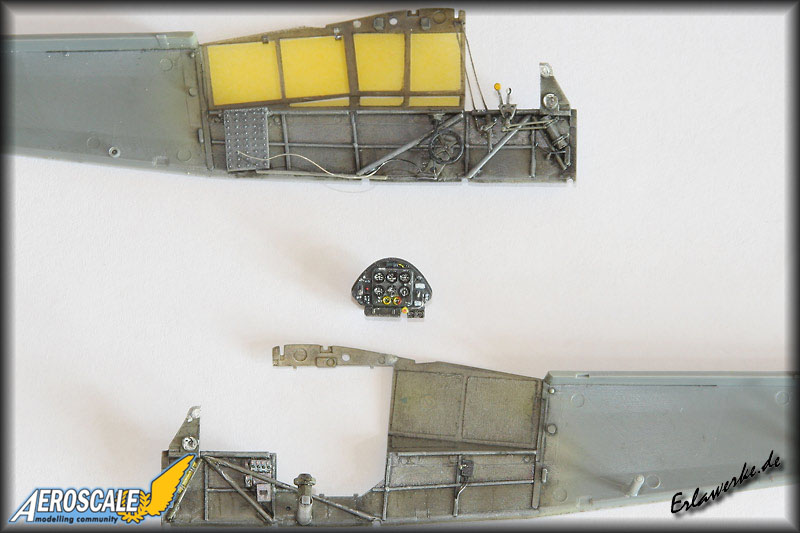
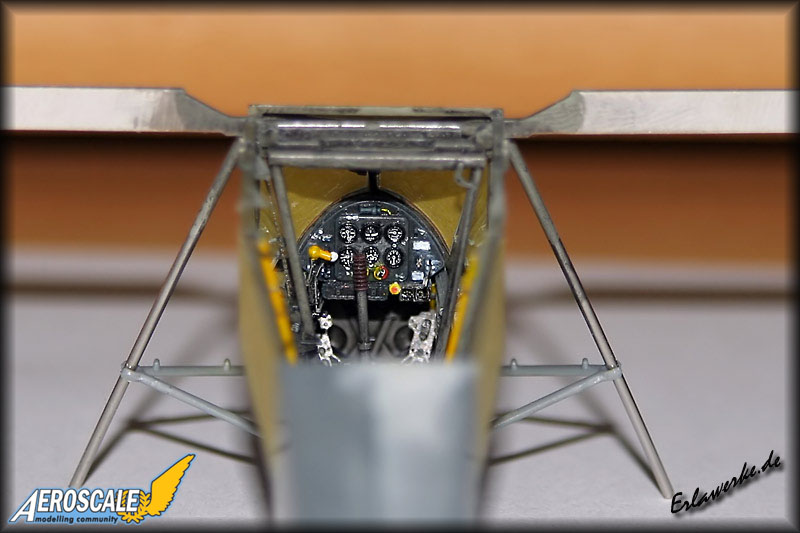
Rather than start with the cockpit I began with the engine. It is composed of 15 parts and decals in the box and the details are wonderfull. I painted the engine with ModellMaster Metalcode colours and polished them with graphite powder.Every interior parts were painted with RLM 02 from Gunze-Sangyo. I expect that the Storch is dirty inside, so I did this with some pigments and a variation of colours. The interior parts are washed with oils in black and brown to get a strong used effect. I also used some pigments to simulate these effects. After dry brushing I coloured the hand gears switches and buttons in the typical colours.
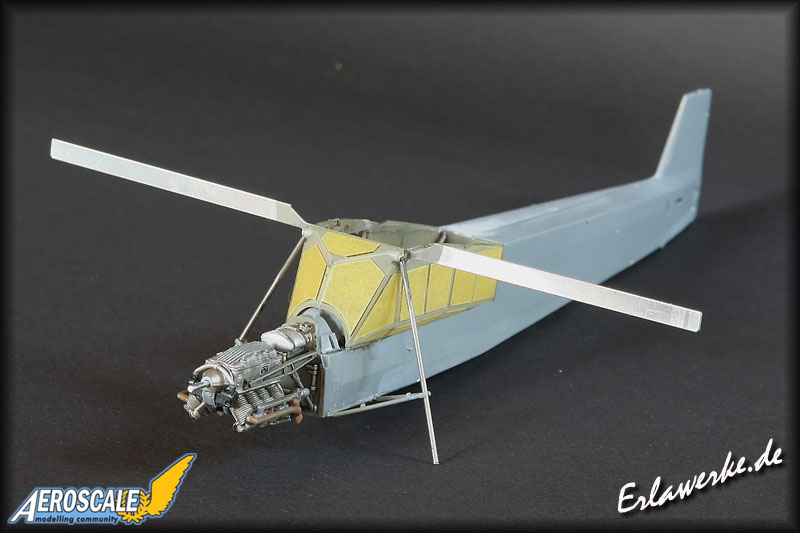
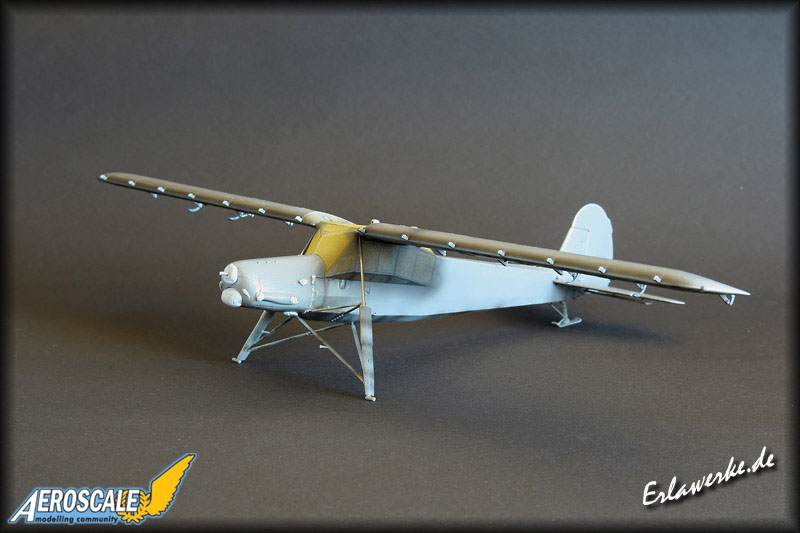
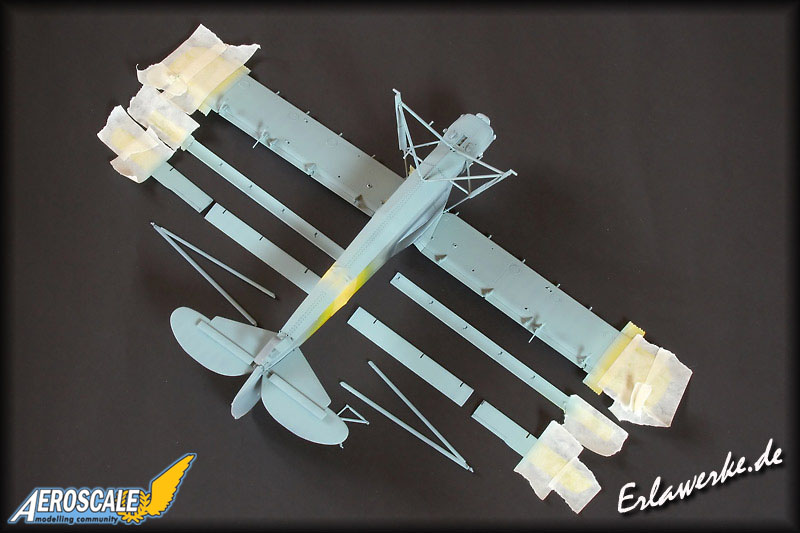
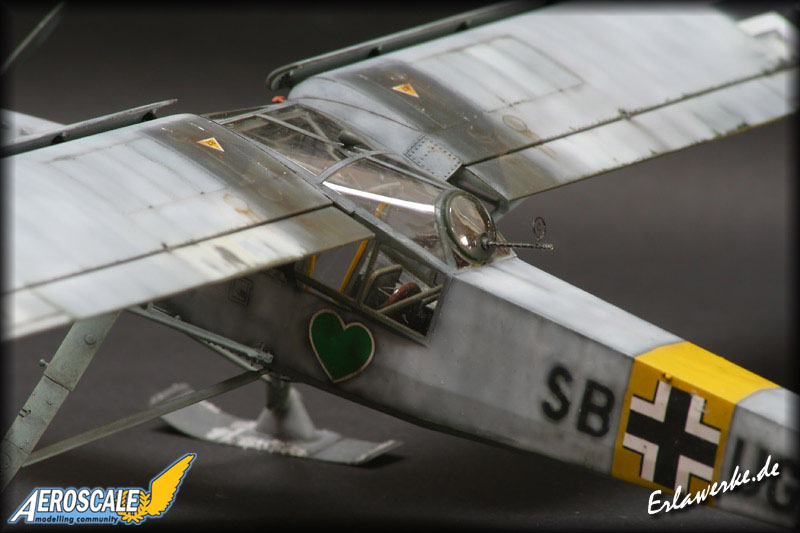
Assembling the fuselage together was very easy, I only had to use some putty at the back. The wings as well got a little bit of putty. After that, fixing the strong wire of the main gear was straightforward. The guide rails are very good to fix the wings to the fuselage and get the right angle. At this stage, I also fixed the Eduard exterior parts on the model.
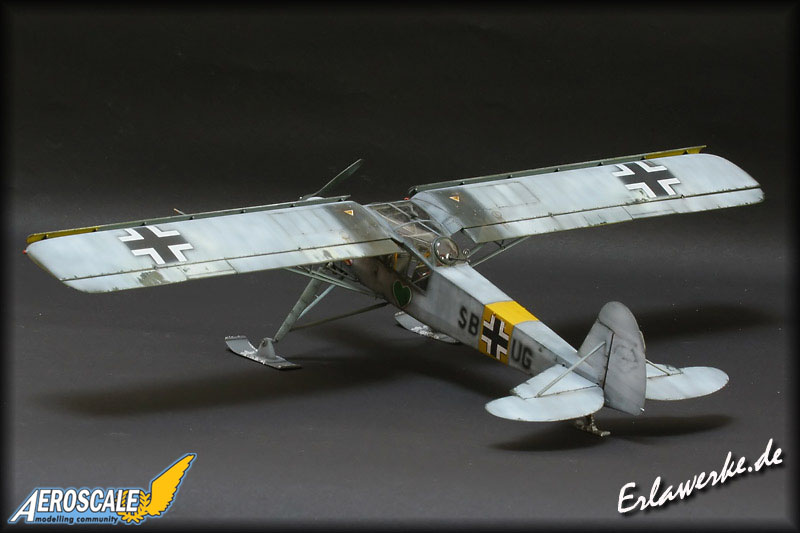
Camouflage and markings
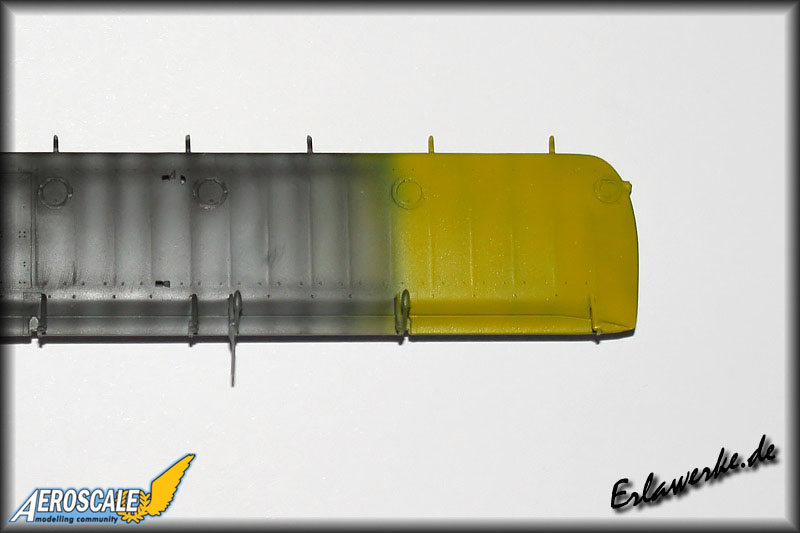
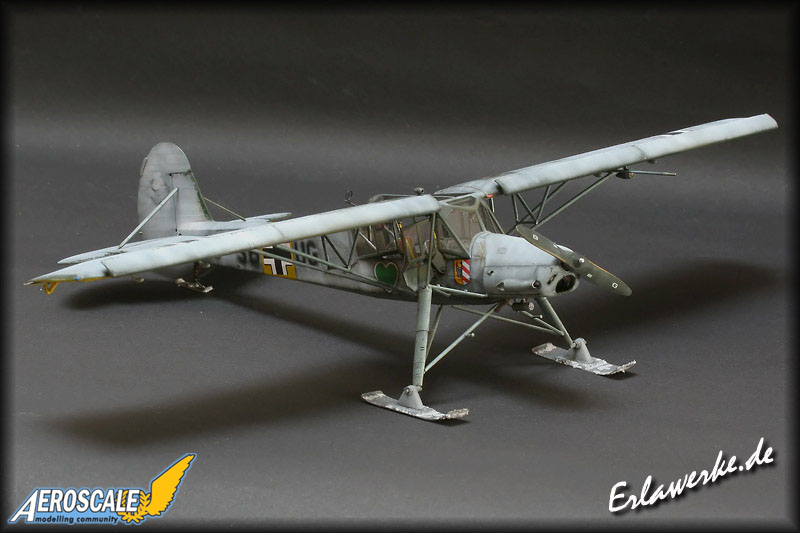
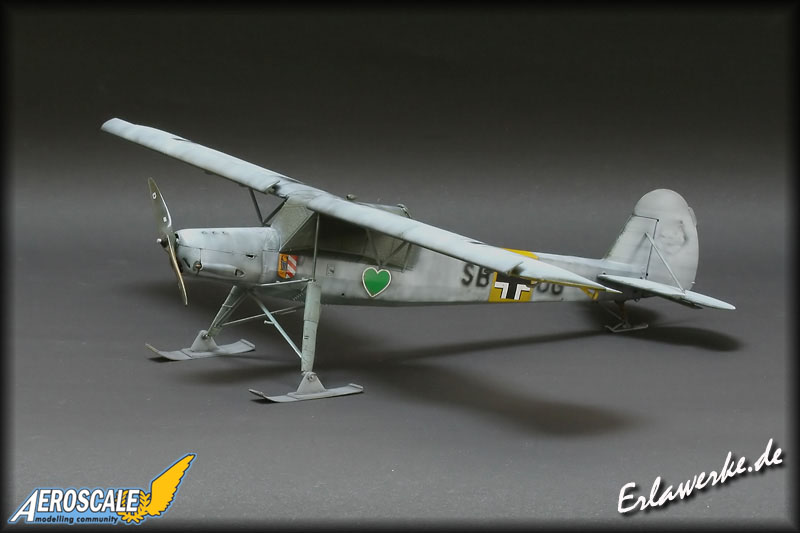
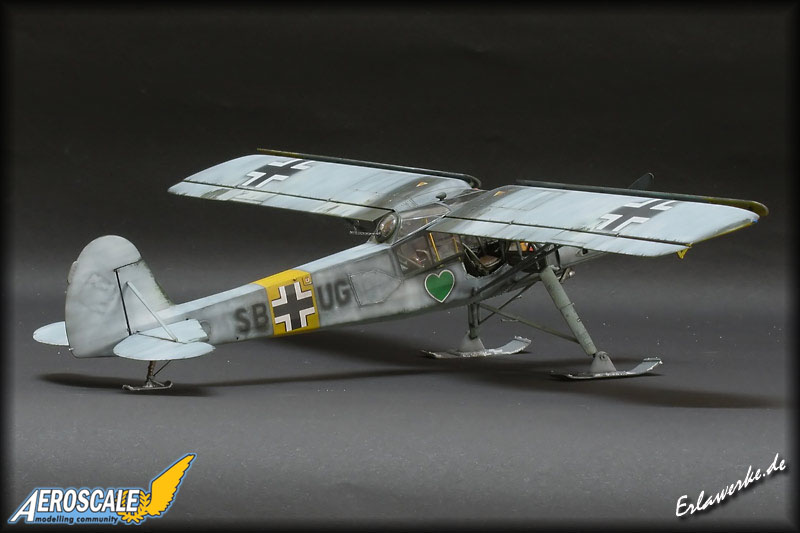
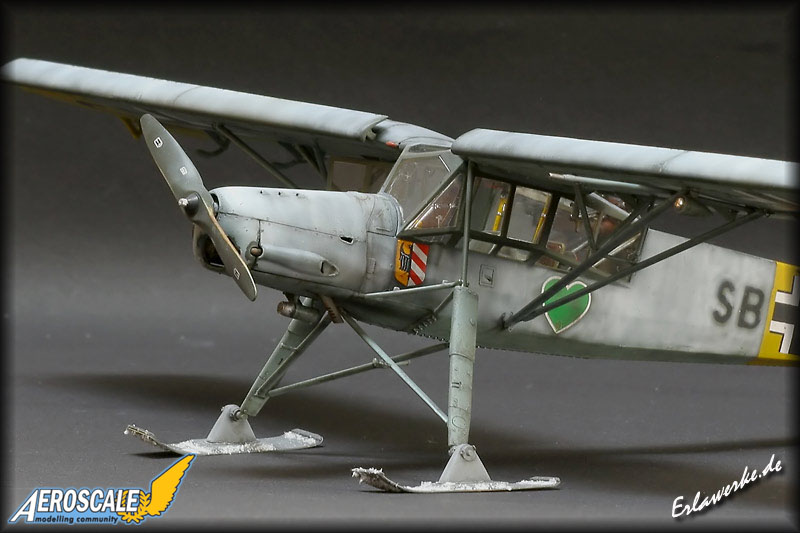
I like exotic colours so I decided to make a Storch from winter 42/43 in the colours of the Grünherzgeschwader JG 54. Also I wanted to do an aircraft with skis. After preshading the whole model I painted the fuselage and wingtips in RLM04. Next, I masked the RLM04 areas before painting the underside in RLM65 and painted the standard RLM70/71 upperside camouflage. Then, I added the decals from EagleCals.Finally, with the airbrush, I've tried to reproduce the winter scheme of the Storch coded SB+UG as close as possible to the real thing, using some photos of the original aircraft as guide. After the colours had dried, I tried to rub of the white with a sponge. Some flaps where over painted with the basic colours to get a weathered effect. I washed some areas of the model with some oil paints to get a realistic effect. The exhausts where handled with some rust colours and pigments.
Final assembly
I assembled the rear gun and gun sight from Aires, the propeller, pitot tube, exhausts, door and the wing struts. The pitot tube was done with an injection needle. Finally, I've added some snow from Railway modelling on the skis and the model was finished.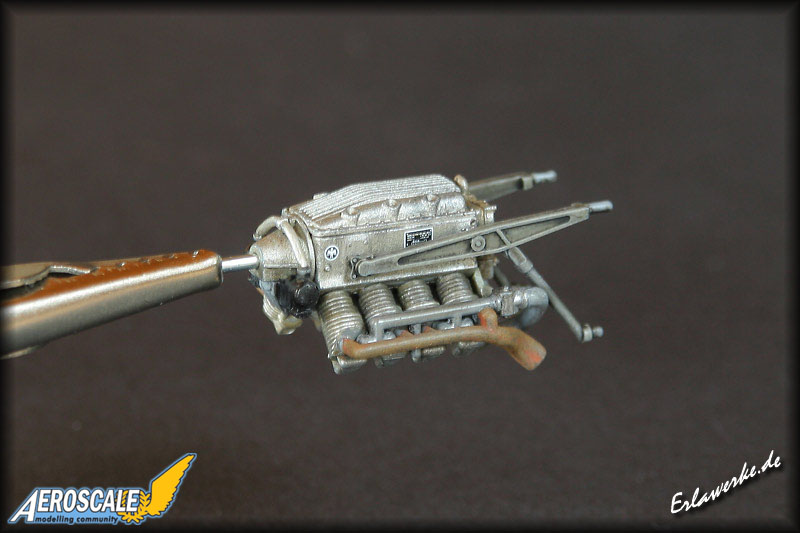
About the Author


Comments


I love youre subtle paintwork , Oliver.......very beutiful and inspiring
APR 25, 2009 - 03:09 AM


SWEET. Very nice Oliver. It would look cool on a snow covered base. Good job, nice photography too, Wingman out.
APR 25, 2009 - 08:08 AM

Hallo Oliver,
is this the bird frm Modellfan?
Excellent work !!
greets
Thomas
VdPM Hannover
APR 25, 2009 - 08:30 PM
Hello Thomas,
correct its the bird from MF!
greets from Saarbruecken
APR 26, 2009 - 08:49 PM
Hi Oliver!
I'm speechless... Great painting, weathering, photography! Congrats!!!
Panos.
APR 27, 2009 - 11:55 AM
Lovely work!
Just a request to the editors, the kit manufacturer and scale isn't apparent in the article itself - could it please be inserted? Would be great for ignorant folks like me
Rudi
APR 29, 2009 - 12:36 PM

Hi Rudi,
Thanks for the heads up! Sometimes one forgets the most obvious things...
Jean-Luc
APR 29, 2009 - 06:56 PM
Copyright ©2021 by Oliver Peissl. Images also by copyright holder unless otherwise noted. The views and opinions expressed herein are solely the views and opinions of the authors and/or contributors to this Web site and do not necessarily represent the views and/or opinions of AeroScale, KitMaker Network, or Silver Star Enterrpises. Images also by copyright holder unless otherwise noted. Opinions expressed are those of the author(s) and not necessarily those of AeroScale. All rights reserved. Originally published on: 2009-04-25 00:00:00. Unique Reads: 8528

WEB HOSTING BY


Copyright ©2021 AeroScale and Kitmaker Network, a subsidiary of Silver Star Enterprises
All Rights Reserved. Please read our Conditions of Use and Privacy Policy.
All Rights Reserved. Please read our Conditions of Use and Privacy Policy.