_GOTOBOTTOM
Air Campaigns
Want to start or join a group build? This is where to start.
OFFICIAL: Siege of Malta WW2 Campaign
d6mst0
#453
_VISITCOMMUNITY
Texas, United States
Joined: August 28, 2016
KitMaker: 1,925 posts
AeroScale: 15 posts
Posted: Wednesday, October 07, 2020 - 07:38 AM UTC
Everyone,

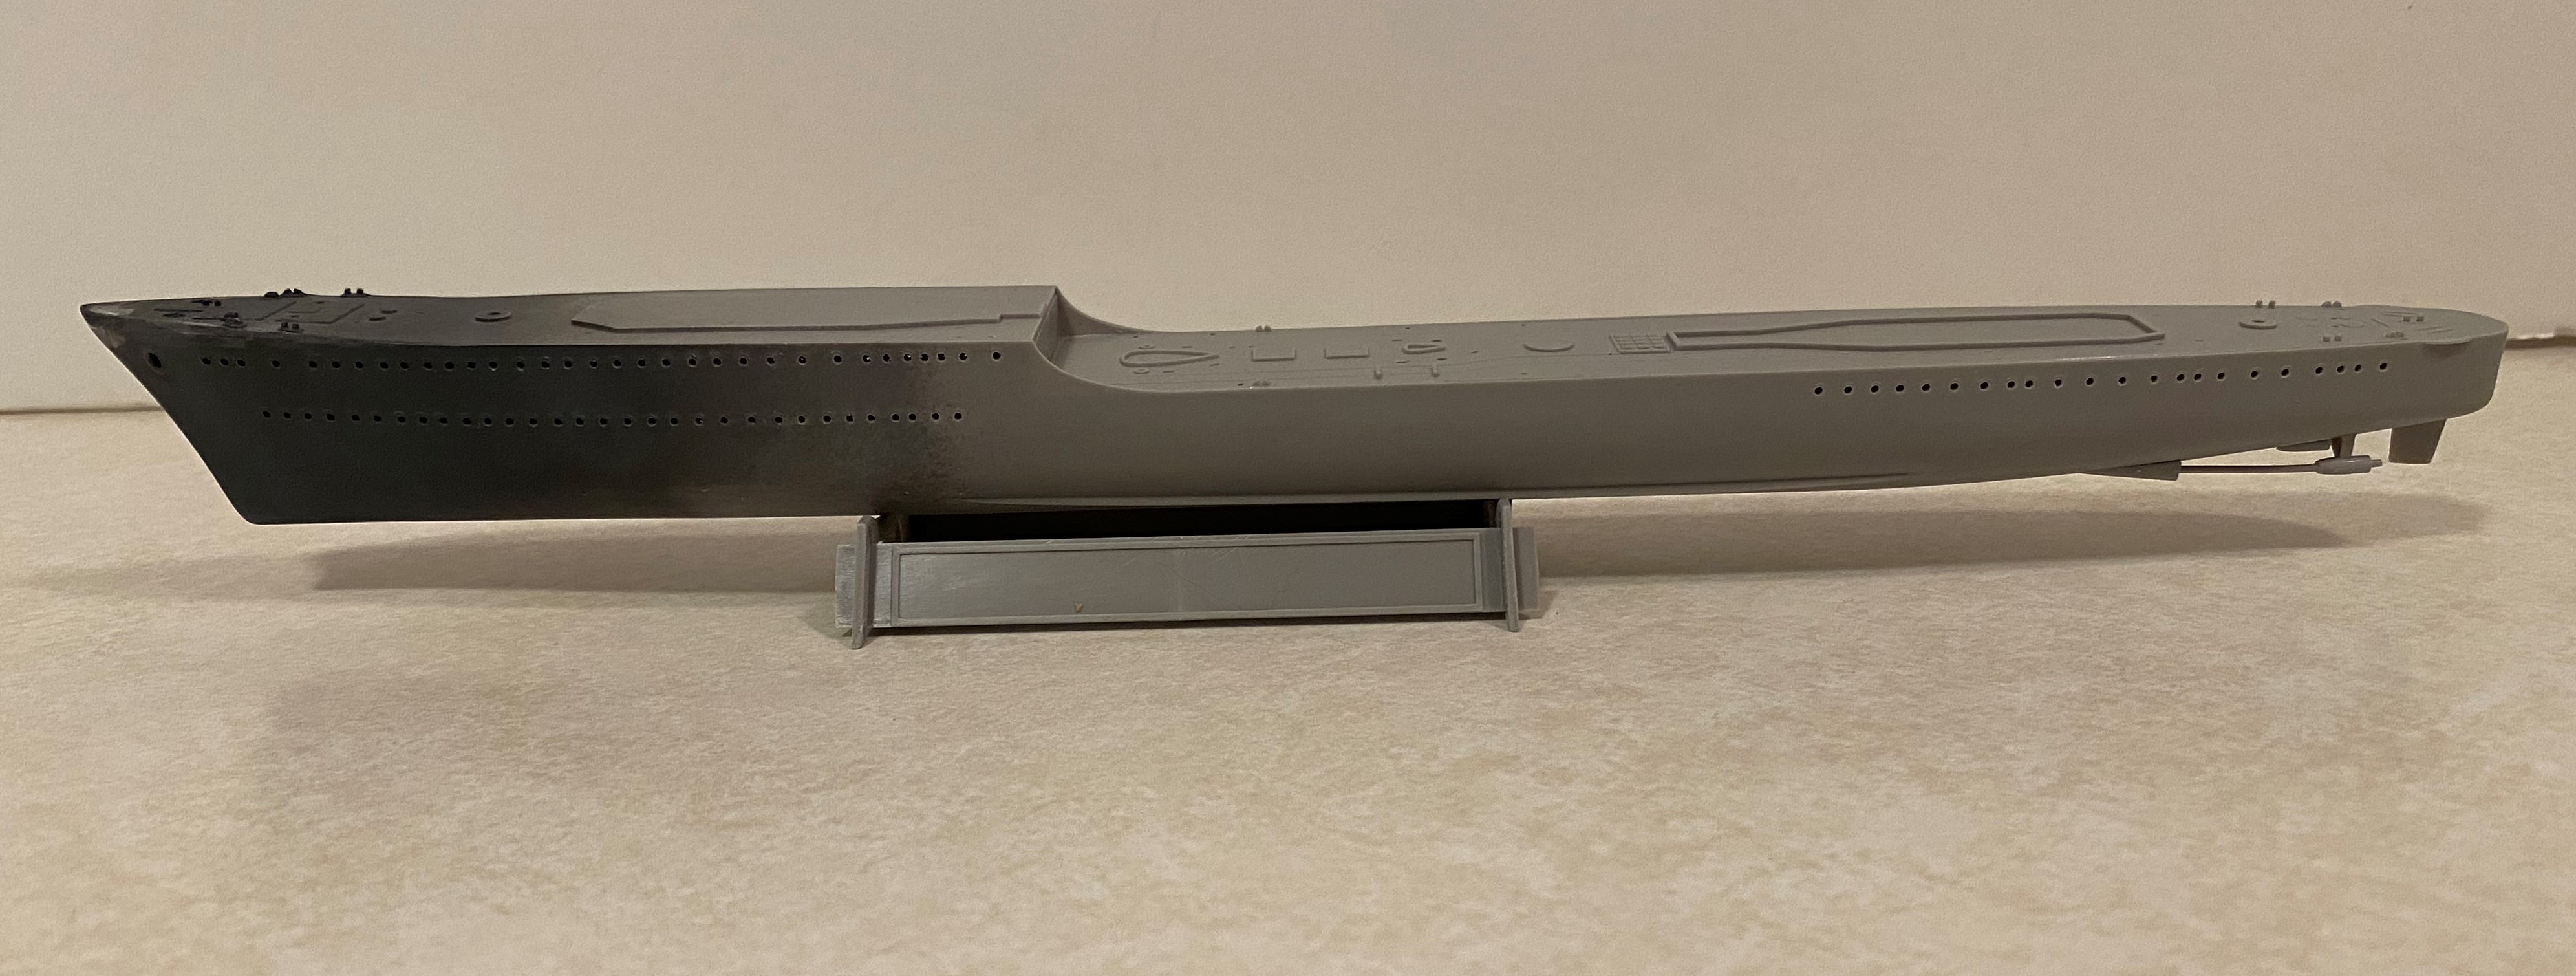
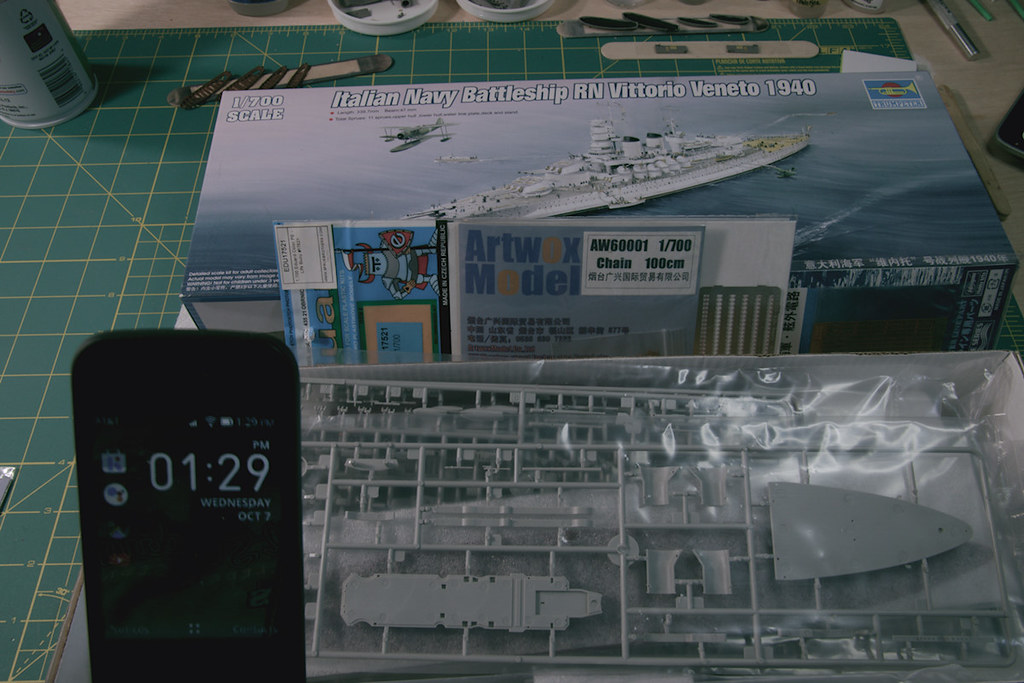
Here is my entry into the group build, the battleship RN Vittorio Veneto 1940. This is a Trumpeter kit, #05779.


Along with the kit I purchase an upgrade from Regia Marina, Kit AF-075. The kit is on-line with a Pontos kit as it comes with resin parts, brass barrels, wood deck, and a whole brunch of PE frets.


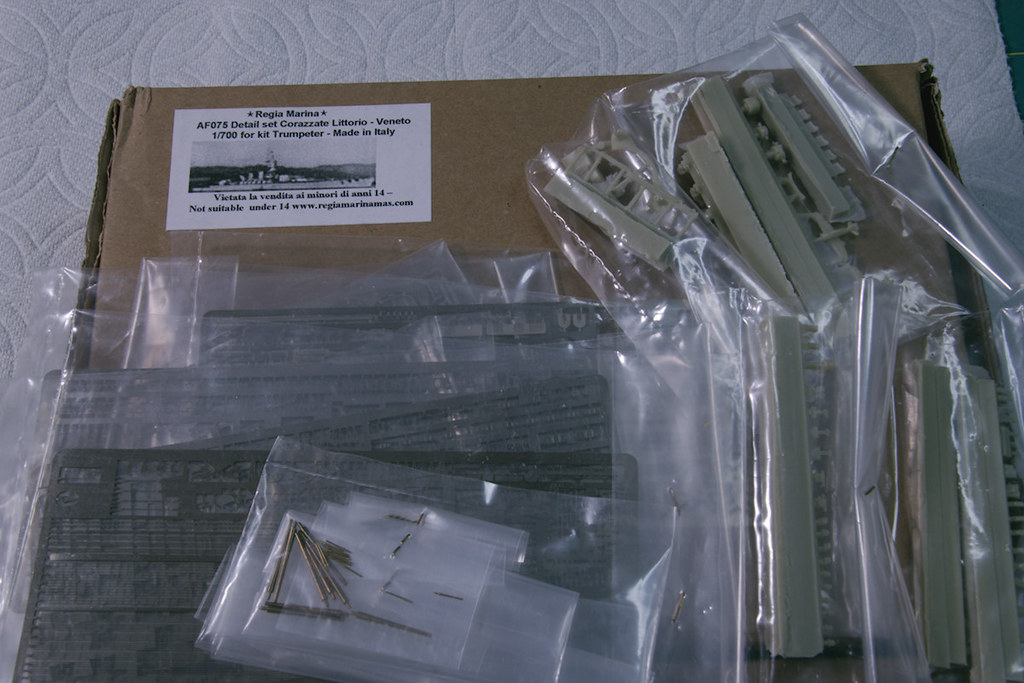
And a 1/700 scale I am sure those resin and PE parts will have me talking like a sailor.

Mark
d6mst0
#453
_VISITCOMMUNITY
Texas, United States
Joined: August 28, 2016
KitMaker: 1,925 posts
AeroScale: 15 posts
Posted: Wednesday, October 07, 2020 - 07:43 AM UTC

Quoted Text

Rory,

Nice start. I wasn't aware of the issue with the bow when I built my HMS Zulu. I did the other mods and added the 4.7cm AA gun and 40mm. I didn't have much references to work with so I missed the bow. I did lower the second funnel and move the depth charge launchers, but I sure I could have done more.

I have to get my entry for this build posted.

Mark


Rory,

I should have say I replaced the X turret 4.7inch gun with a 4 inch AA gun.

Mark
petbat
_VISITCOMMUNITY
Queensland, Australia
Joined: August 06, 2005
KitMaker: 3,353 posts
AeroScale: 93 posts
Posted: Wednesday, October 07, 2020 - 09:02 AM UTC
Nice to see some ship builders join in with the other genre builders. Welcome aboard.
phil2015
_VISITCOMMUNITY
Illinois, United States
Joined: July 27, 2015
KitMaker: 502 posts
AeroScale: 110 posts
Posted: Wednesday, October 07, 2020 - 11:09 AM UTC

My kit has arrived!

OK, I'm not sure this will be my official entry, but it's an easy assembly 1/72 kit so the build shouldn't take much. I mainly want to use it to experiment with painting Italian camo.


PasiAhopelto
_VISITCOMMUNITY
Uusimaa, Finland
Joined: October 01, 2016
KitMaker: 514 posts
AeroScale: 239 posts
Posted: Saturday, October 10, 2020 - 08:55 PM UTC
Here's my entry:


Earliest of the paint schemes is suitable for this campaign. Good: simple to paint. Bad: not one of the iconic Italian camouflage patterns.

The kit looks surprisingly simple. It's Hasegawa's plastic with Eduard PE and resin parts.
McRunty
#491
_VISITCOMMUNITY
Missouri, United States
Joined: April 06, 2016
KitMaker: 602 posts
AeroScale: 43 posts
Posted: Sunday, October 11, 2020 - 02:32 PM UTC
Small update.

Decks are on, as are the screw shafts and rudder.

SteveAndrews
_VISITCOMMUNITY
England - South East, United Kingdom
Joined: August 16, 2010
KitMaker: 693 posts
AeroScale: 551 posts
Posted: Wednesday, October 14, 2020 - 04:27 AM UTC
Hi folks,

I've been adding some detail to the Spit's cockpit. The kit itself provides a good base and there are a few areas I decided to improve - mostly the very noticeable pipes and wires in the cockpit. Spot the extras? :-)


phil2015
_VISITCOMMUNITY
Illinois, United States
Joined: July 27, 2015
KitMaker: 502 posts
AeroScale: 110 posts
Posted: Wednesday, October 14, 2020 - 06:09 AM UTC
Nice detailing Steve. My entry doesn't have anything in the. cockpit besides the seat and the stick. I may have to do something bigger....

Good to see the ships too.

md72
#439
_VISITCOMMUNITY
Washington, United States
Joined: November 05, 2005
KitMaker: 4,950 posts
AeroScale: 3,192 posts
Posted: Wednesday, October 14, 2020 - 06:21 AM UTC
Uff Da. So I pull out my old Frog Martin Baltimore and do a parts inventory. Looks like I'm missing one of the clear parts, the base of the stand, decals and the pilot. The gunner (poor guy lost his legs) survived but the pilot must have bailed out through the missing canopy.
petbat
_VISITCOMMUNITY
Queensland, Australia
Joined: August 06, 2005
KitMaker: 3,353 posts
AeroScale: 93 posts
Posted: Wednesday, October 14, 2020 - 07:31 AM UTC
Rory and Steve, looking good guys.

Mark, is this an option?
https://www.hpmhobbies.com/falcon-clearvax-canopy-set-no-30-us-aircraft-in-foreign-service-accessories-1-72/

The manufacturer's site:
http://www.falconmodels.co.nz/clearvax72.html
Look at the instruction sheet - it shows the nose section is a direct replacement but the canopy and rear gunner transparencies are made to correct the kits undersized ones, so a little work is involved to fit.
md72
#439
_VISITCOMMUNITY
Washington, United States
Joined: November 05, 2005
KitMaker: 4,950 posts
AeroScale: 3,192 posts
Posted: Wednesday, October 14, 2020 - 09:46 AM UTC
Thanks Peter. I actually have the Clear Vax set. Thanks for the link to the instructions, I might have missed the trim notes. Hopefully I have a spare Airfix WWII pilot somewhere. I can just fill the mounting hole and skip the stand problem. I should be able to scare up some RAF roundels, just need to find out what size to use. I think I just need to scare up some grey-yellow squadron letters.
phil2015
_VISITCOMMUNITY
Illinois, United States
Joined: July 27, 2015
KitMaker: 502 posts
AeroScale: 110 posts
Posted: Tuesday, October 20, 2020 - 10:14 AM UTC

This is NOT my campaign entry. It's a hobby boss easy construction kit. It has something like 15 parts. It took me all of 30 minutes to cut it, clean it, glue it, and fill the very minor gaps between the single piece wing assembly and the single piece fuselage. It's actually pretty cool for what it is. There is no cockpit detail to speak of, but it's a nice little 1/72 kit.

I intend to use it to experiment with painting Regia Aeronautica camo. This particular one is green with lots of yellow spots on it. I *think* the way to paint it will be to paint it yellow, then stick dabs of blue tack on to create those spots in reverse and paint green over it. I am definitely open to other suggestions.


phantom_phanatic309
#372
_VISITCOMMUNITY
United Kingdom
Joined: March 10, 2010
KitMaker: 2,568 posts
AeroScale: 1,619 posts
Posted: Tuesday, October 20, 2020 - 11:04 AM UTC

Quoted Text


This is NOT my campaign entry. It's a hobby boss easy construction kit. It has something like 15 parts. It took me all of 30 minutes to cut it, clean it, glue it, and fill the very minor gaps between the single piece wing assembly and the single piece fuselage. It's actually pretty cool for what it is. There is no cockpit detail to speak of, but it's a nice little 1/72 kit.

I intend to use it to experiment with painting Regia Aeronautica camo. This particular one is green with lots of yellow spots on it. I *think* the way to paint it will be to paint it yellow, then stick dabs of blue tack on to create those spots in reverse and paint green over it. I am definitely open to other suggestions.


Looking good Phil. I do like these Hobbyboss kits. Great for experimenting with finishes.
I have both this and the Ye Olde Revell Macchi. It's light years ahead of that one! I think the Revell will be my guinea pig.

Looking forward to seeing how you get on with the cammo. I think you might be on the right tracks with your method. There was a variation of that scheme that had additional red-brown spots in the middle of the yellow. It's almost like the Regia Aeronautica intentionally went out of their way to make life difficult for aircraft modellers!
phil2015
_VISITCOMMUNITY
Illinois, United States
Joined: July 27, 2015
KitMaker: 502 posts
AeroScale: 110 posts
Posted: Friday, October 23, 2020 - 01:40 PM UTC

I seem to find subjects where the original designers were serious sadists. The RA guys certainly were that if they had modelers in mind. I'm not sure that they weren't that when thinking about the ground crews that had to paint them. Maybe with a big airbrush and compressor outdoors it isn't that hard?

OK, I started a thread on the new forums for the Siege of Malta campaign. Feel free to post here are there. I'm not sure what happens with the campaign galleries, awards, etc., in the new format. I guess we'll figure that out eventually.

md72
#439
_VISITCOMMUNITY
Washington, United States
Joined: November 05, 2005
KitMaker: 4,950 posts
AeroScale: 3,192 posts
Posted: Friday, October 23, 2020 - 06:52 PM UTC
Well I finally have enough pieces together to get started. I started out trying to use a kit I picked up at show for ~$5. The box has a handwritten price of 1.39. I've spent close to $50 to get this thing ready to start.
petbat
_VISITCOMMUNITY
Queensland, Australia
Joined: August 06, 2005
KitMaker: 3,353 posts
AeroScale: 93 posts
Posted: Saturday, October 24, 2020 - 06:42 AM UTC

Quoted Text

Well I finally have enough pieces together to get started. I started out trying to use a kit I picked up at show for ~$5. The box has a handwritten price of 1.39. I've spent close to $50 to get this thing ready to start.


Think of it this way Mark. If it was a modern day release, by one of the top selling manufacturers now, you would still probably pay more than that! Glass half full....
 _GOTOTOP