litespeed
 News Reporter
England - North West, United Kingdom
Joined: October 15, 2009
KitMaker: 1,976 posts
AeroScale: 1,789 posts
Posted: Saturday, August 15, 2020 - 01:01 AM UTC
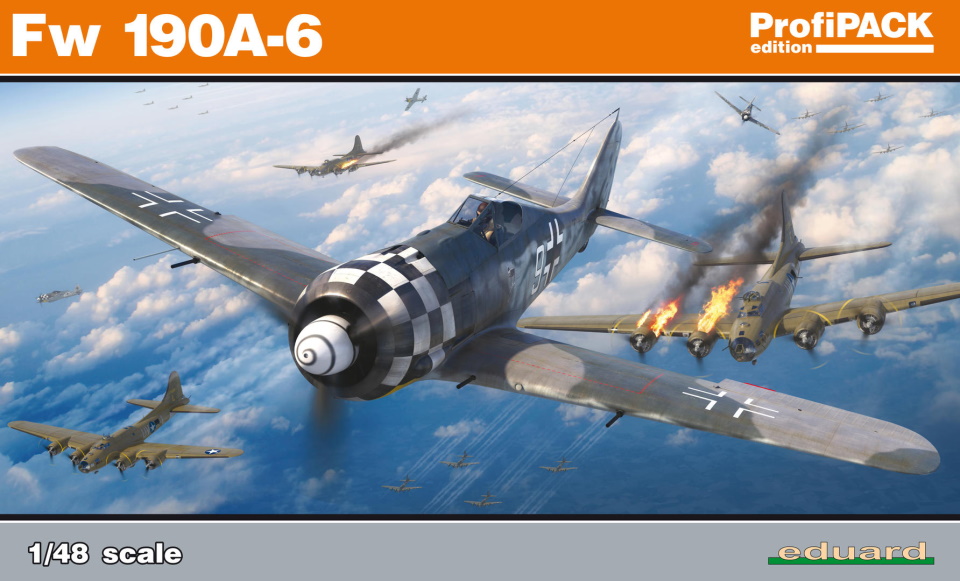
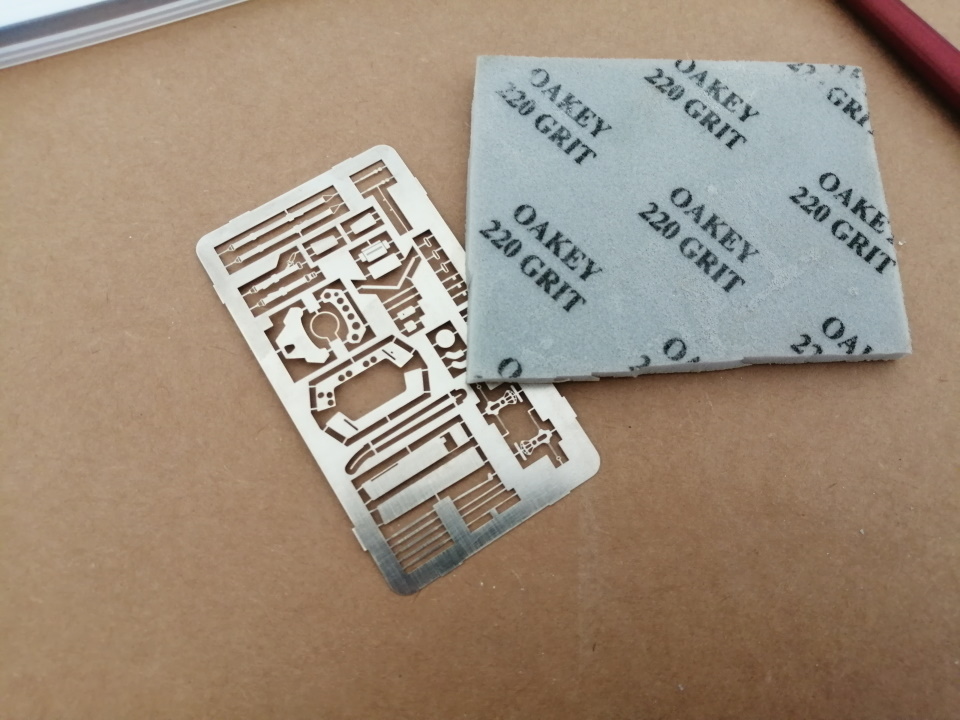
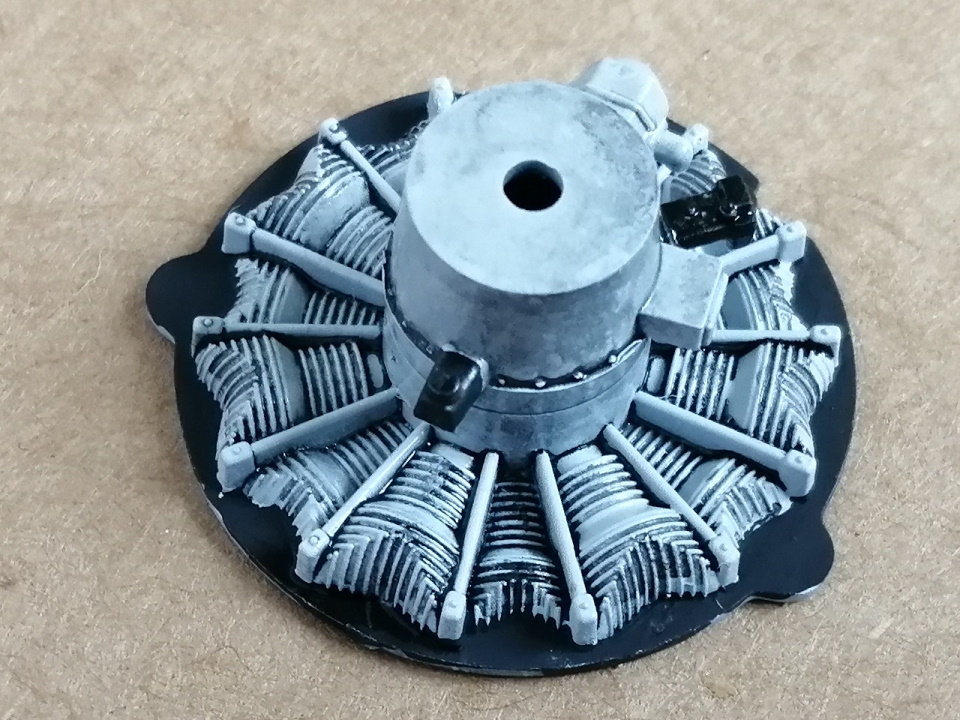
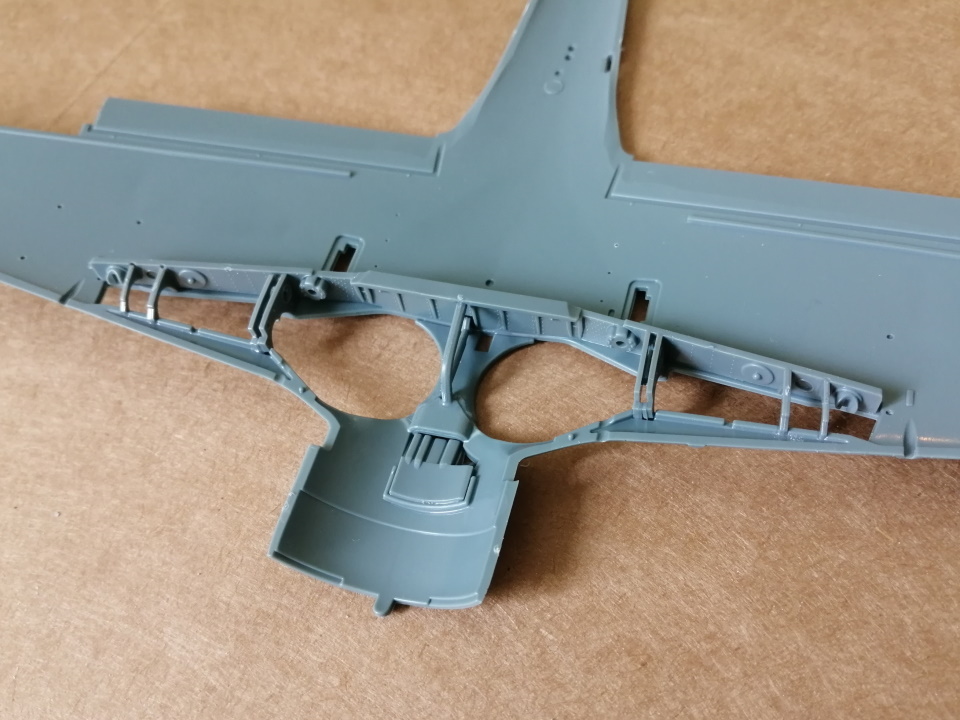
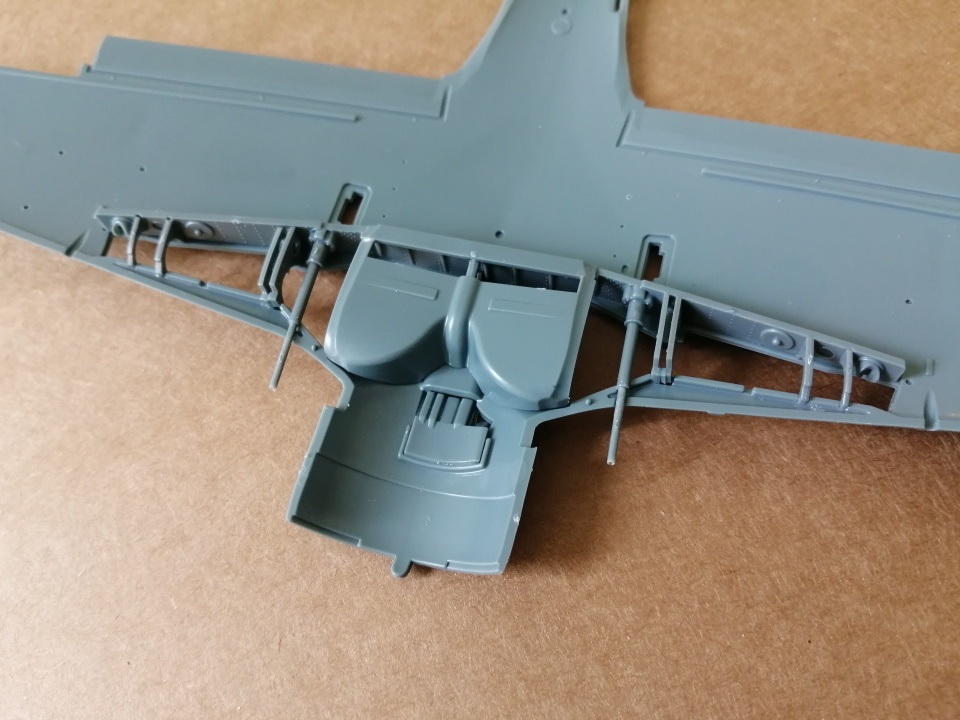
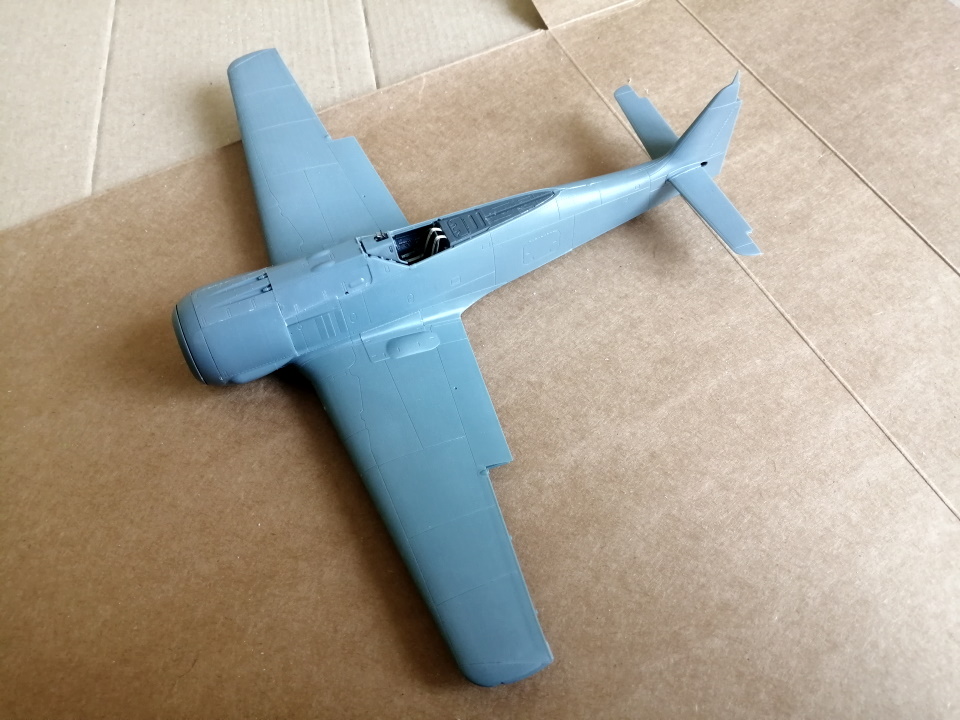
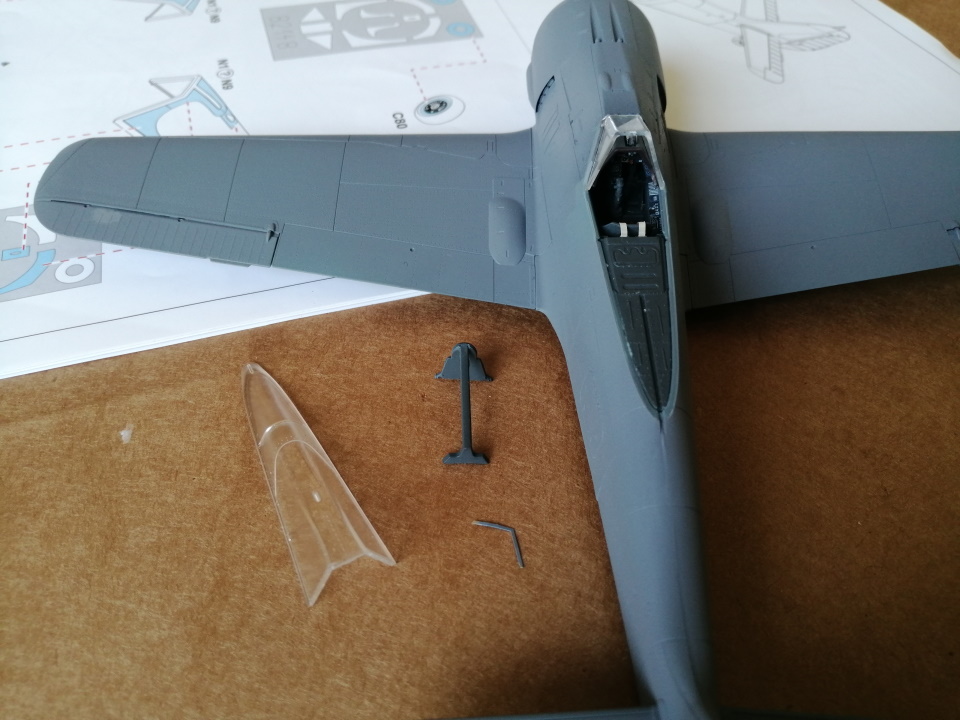
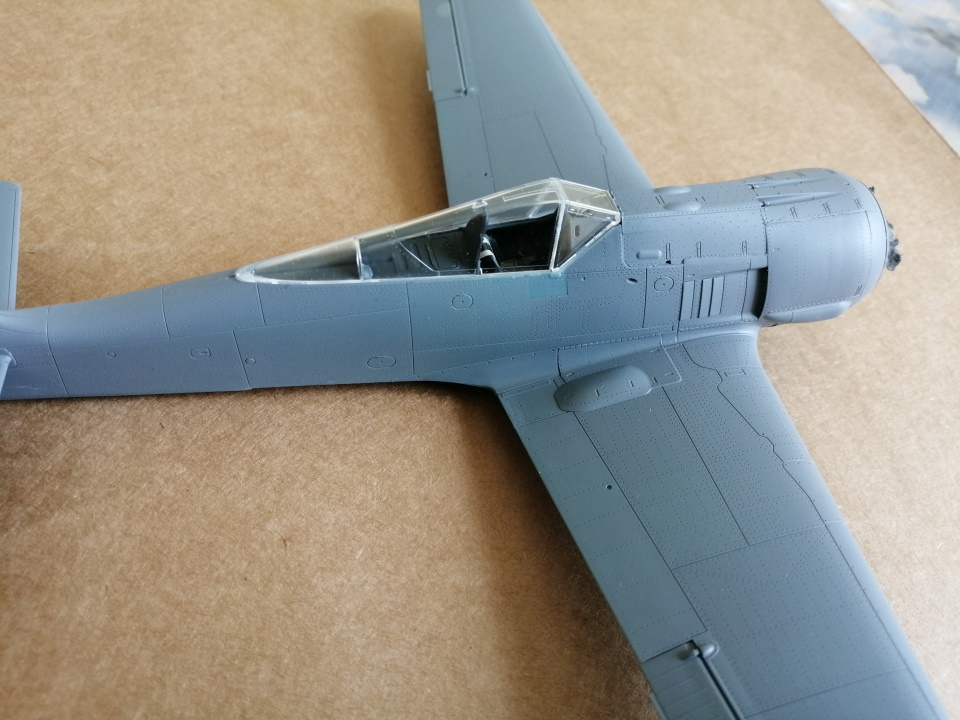
Just reviewed Eduards 1/48 scale
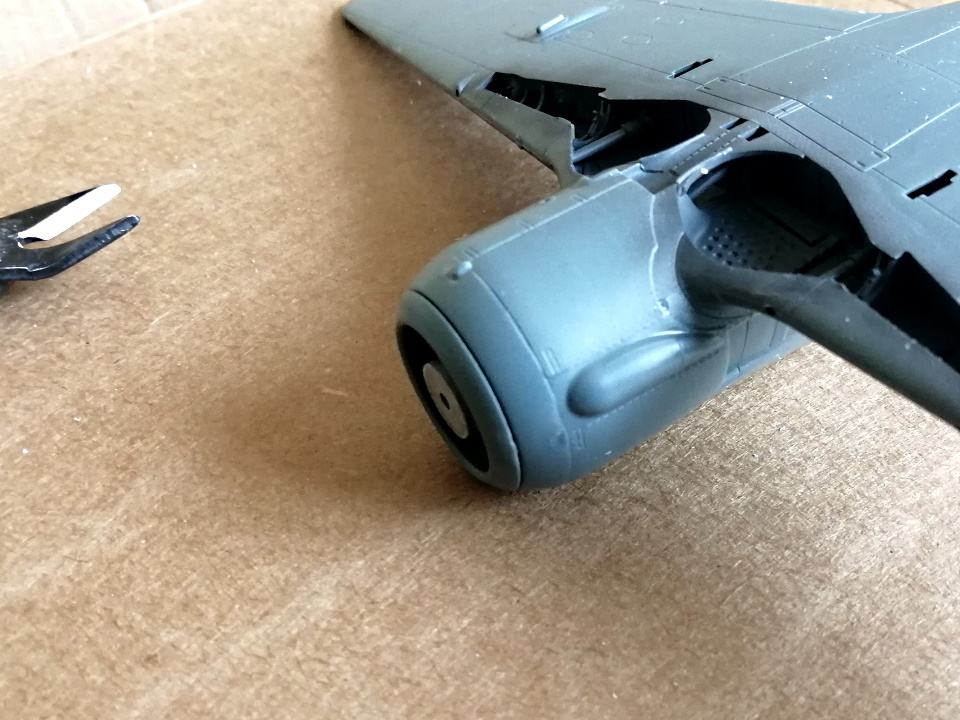
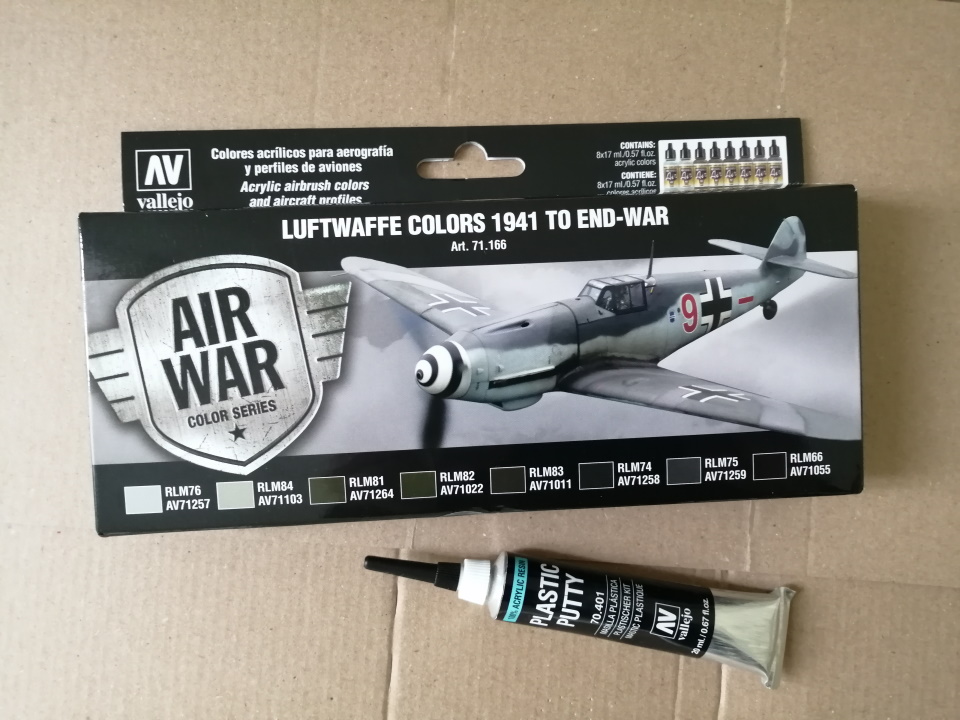
Fw 190 A-6 and as I was looking for another project after completing ICMs Do 215 [I mistakably called it a Do 217!] I thought this would fit the bill. Decided to purchase a late war Luftwaffe paint set from Vallejo and also bought Vallejos filler. I have to admit Im not a great fan of the butcher bird, much preferred the more balanced looking Fw 190 D series. But I feel enthused with the quality of the kit, it just begs to be built. Oh and the marking options are rather tasty....
litespeed
News Reporter England - North West, United Kingdom
Joined: October 15, 2009
KitMaker: 1,976 posts
AeroScale: 1,789 posts
Posted: Saturday, August 15, 2020 - 09:50 PM UTC
litespeed
News Reporter England - North West, United Kingdom
Joined: October 15, 2009
KitMaker: 1,976 posts
AeroScale: 1,789 posts
Posted: Sunday, August 16, 2020 - 05:33 AM UTC
Buenos Aires, Argentina
Joined: May 21, 2012
KitMaker: 765 posts
AeroScale: 316 posts
Posted: Sunday, August 16, 2020 - 06:08 AM UTC
Those Radial Fighters Campaign: 1/72 FW 190 A5
Delta 2 Campaign: 1/48 Hobby Boss Mirage IIIC
Navy Boys on those Postage Stamps 1/72 Airfix Sea Harrier FA2
Working: Trumpeter A-5 Vigilante
Waiting: Phantom 60 Campaign
litespeed
News Reporter England - North West, United Kingdom
Joined: October 15, 2009
KitMaker: 1,976 posts
AeroScale: 1,789 posts
Posted: Sunday, August 16, 2020 - 08:56 AM UTC
litespeed
News Reporter England - North West, United Kingdom
Joined: October 15, 2009
KitMaker: 1,976 posts
AeroScale: 1,789 posts
Posted: Sunday, August 16, 2020 - 09:10 AM UTC
ColinEdm
Associate Editor Alberta, Canada
Joined: October 15, 2013
KitMaker: 1,355 posts
AeroScale: 107 posts
Posted: Sunday, August 16, 2020 - 10:10 AM UTC
Watching closely as I have the same kit. Looking good!
The voices are back.....excellent....
litespeed
News Reporter England - North West, United Kingdom
Joined: October 15, 2009
KitMaker: 1,976 posts
AeroScale: 1,789 posts
Posted: Sunday, August 16, 2020 - 11:53 PM UTC
Early days yet Colin, but I'm hopeful it might not take too long to build

litespeed
News Reporter England - North West, United Kingdom
Joined: October 15, 2009
KitMaker: 1,976 posts
AeroScale: 1,789 posts
Posted: Monday, August 17, 2020 - 05:20 AM UTC
litespeed
News Reporter England - North West, United Kingdom
Joined: October 15, 2009
KitMaker: 1,976 posts
AeroScale: 1,789 posts
Posted: Monday, August 17, 2020 - 10:10 AM UTC
litespeed
News Reporter England - North West, United Kingdom
Joined: October 15, 2009
KitMaker: 1,976 posts
AeroScale: 1,789 posts
Posted: Tuesday, August 18, 2020 - 04:52 AM UTC
England - South East, United Kingdom
Joined: March 07, 2005
KitMaker: 868 posts
AeroScale: 690 posts
Posted: Tuesday, August 18, 2020 - 07:27 PM UTC
..that's going together nice and quickly Tim ..and a 'different' take on the pre-shade that I've not seen before..
litespeed
News Reporter England - North West, United Kingdom
Joined: October 15, 2009
KitMaker: 1,976 posts
AeroScale: 1,789 posts
Posted: Tuesday, August 18, 2020 - 08:04 PM UTC
Quoted Text
..that's going together nice and quickly Tim ..and a 'different' take on the pre-shade that I've not seen before..
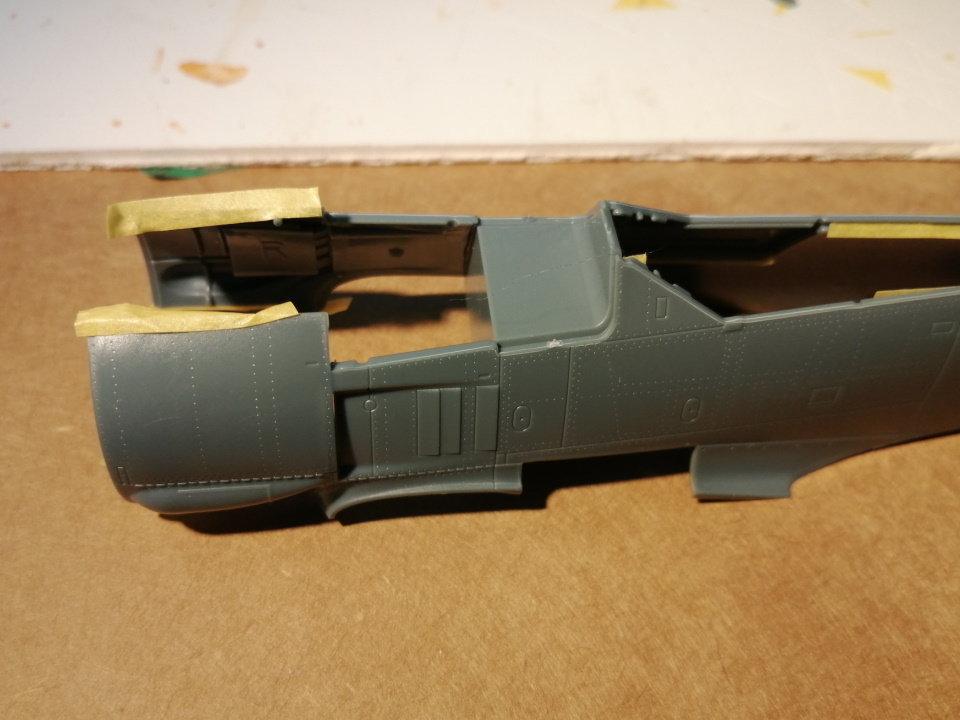
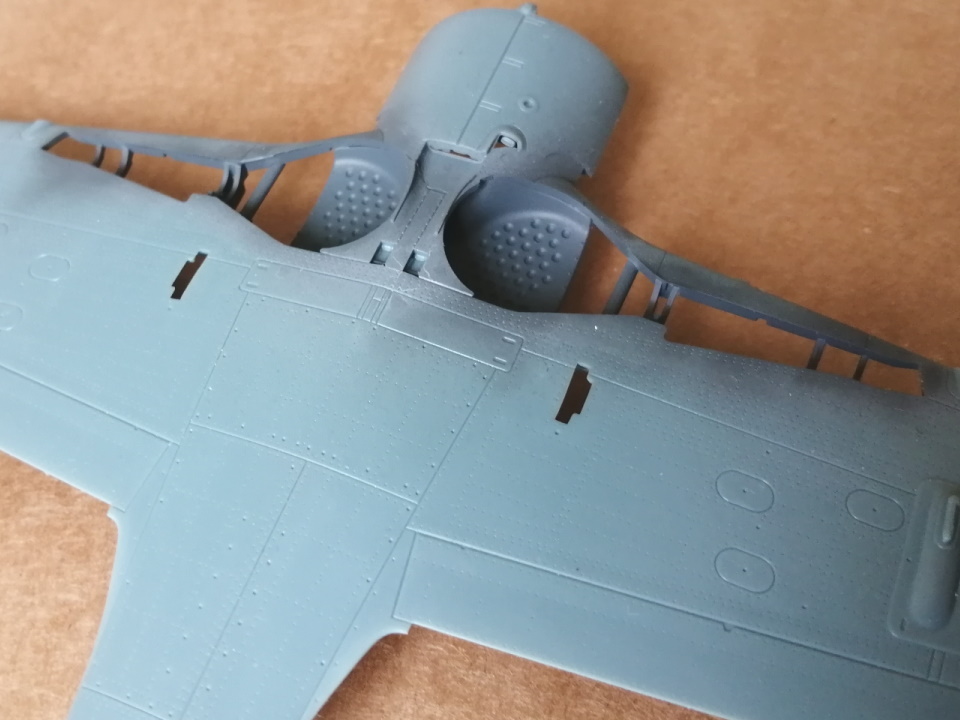
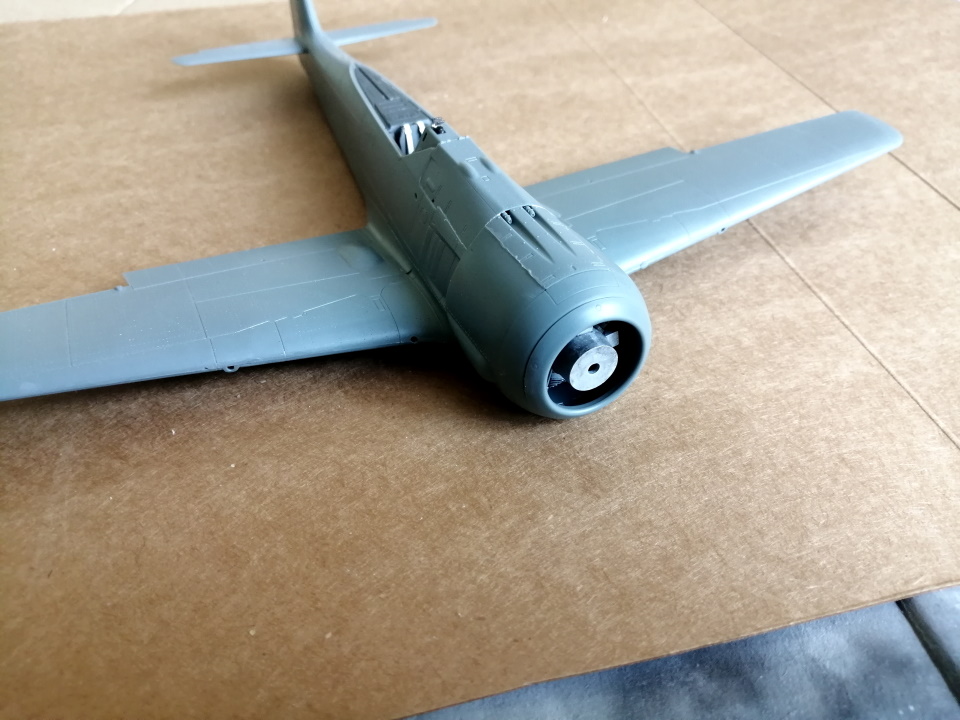
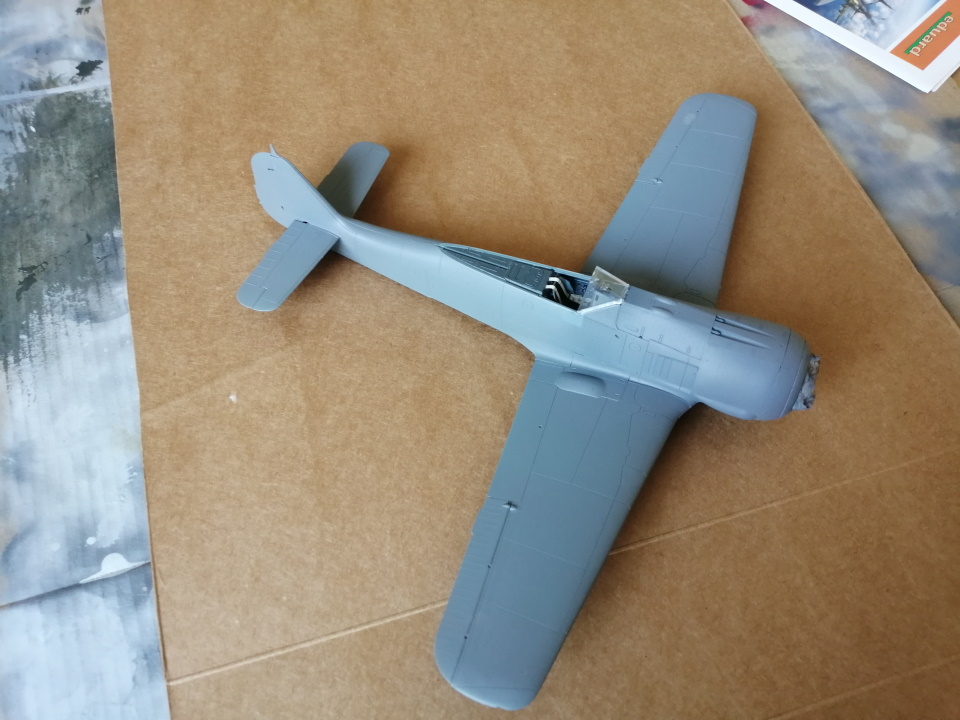
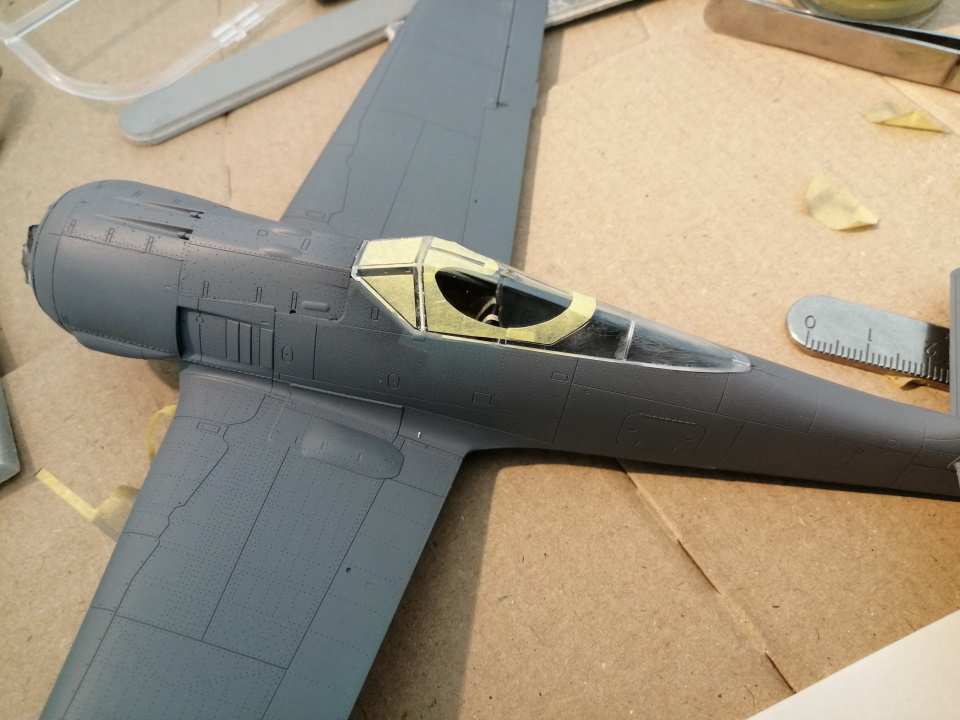
It is going together quickly Neil, I'm normally build at a very pedestrian rate. Its more to do with the quality of the kit and using extra thin glue. The glue particular means you can move from one stage of the build to another very quickly.
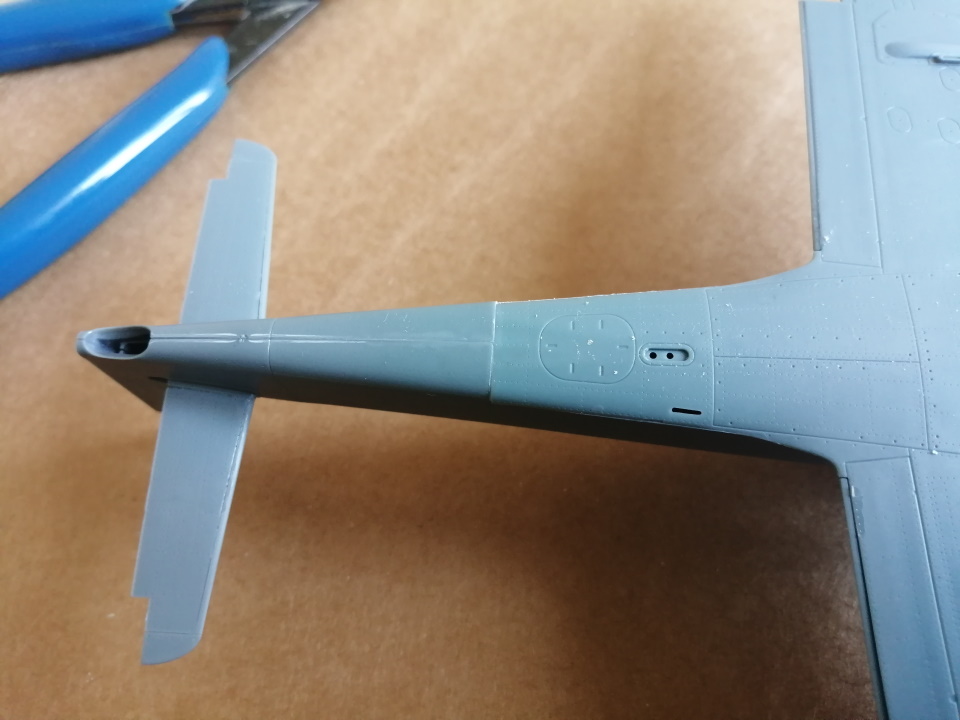
Ive probably seen the idea for this method of pre-shading elsewhere Neil, Im forever searching for new approaches to painting. Seems to make sense if you are using a dark primer to use a paler colour over it. It seems to work well for me, but I do thin my paint a lot, even the ready to spray Vallejo Air. Another benefit is that I seem to be using less paint and also the thinned down paint seems to dry quickly. But then again the warm weather we are experiencing in the UK makes a huge difference in paint drying times...
litespeed
News Reporter England - North West, United Kingdom
Joined: October 15, 2009
KitMaker: 1,976 posts
AeroScale: 1,789 posts
Posted: Wednesday, August 19, 2020 - 09:04 AM UTC

#306
Victoria, Australia
Joined: June 27, 2010
KitMaker: 3,959 posts
AeroScale: 598 posts
Posted: Wednesday, August 19, 2020 - 09:45 AM UTC
brilliant start, Tim! Following with interest

Stay home and build models!
In 1/72
Gloster Gladiator MkII for the Bi-planes Campaign
In 1/350
Airfix 1:350 Type 45 Destroyer
New Jersey, United States
Joined: February 02, 2015
KitMaker: 330 posts
AeroScale: 286 posts
Posted: Wednesday, August 19, 2020 - 09:54 AM UTC
quote
It is going together quickly Neil, I'm normally build at a very pedestrian rate. Its more to do with the quality of the kit and using extra thin glue. The glue particular means you can move from one stage of the build to another very quickly
hi tim. nice work so far. i really like your paint work. did you reprime the whole model white or did you just fill in the panels white leaving the panel lines exposed?
what glue do you use? i use tamiya thin and find i have to hold or clamp parts together for more than 20 minutes at times. nothing quick about that. i did find that if you miss align a part you can re apply glue to the part to re activate/soften the glue and adjust the part.
litespeed
News Reporter England - North West, United Kingdom
Joined: October 15, 2009
KitMaker: 1,976 posts
AeroScale: 1,789 posts
Posted: Wednesday, August 19, 2020 - 11:00 AM UTC
Quoted Text
brilliant start, Tim! Following with interest
Thank Russell, will hopefully have it finished in the next few days
litespeed
News Reporter England - North West, United Kingdom
Joined: October 15, 2009
KitMaker: 1,976 posts
AeroScale: 1,789 posts
Posted: Wednesday, August 19, 2020 - 11:04 AM UTC
Quoted Text
hi tim. nice work so far. i really like your paint work. did you reprime the whole model white or did you just fill in the panels white leaving the panel lines exposed?
Hi Joe thanks for your comments
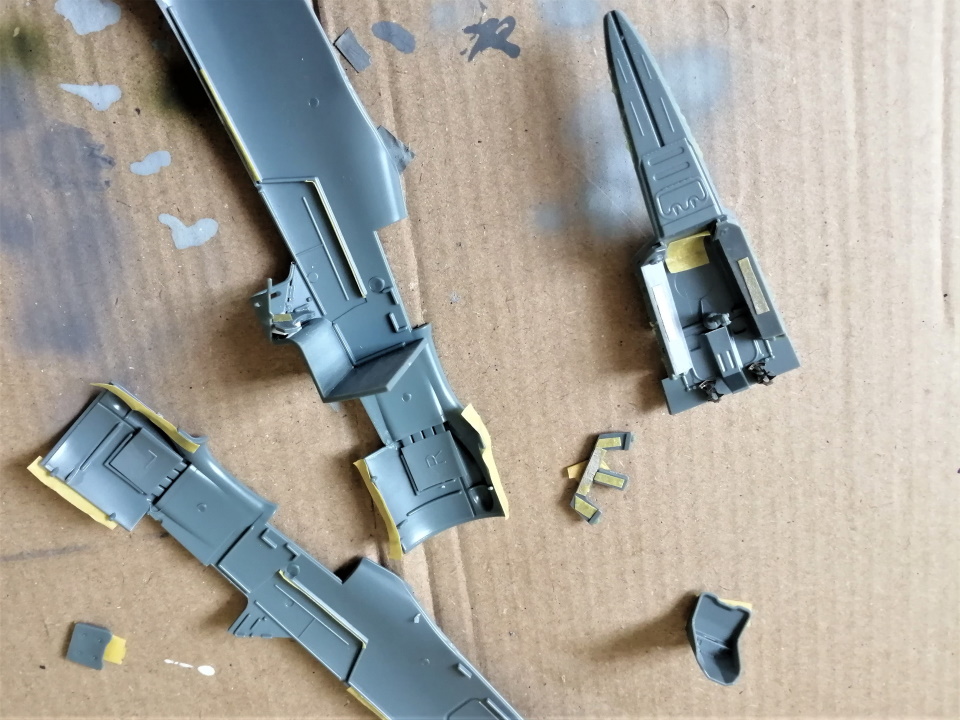
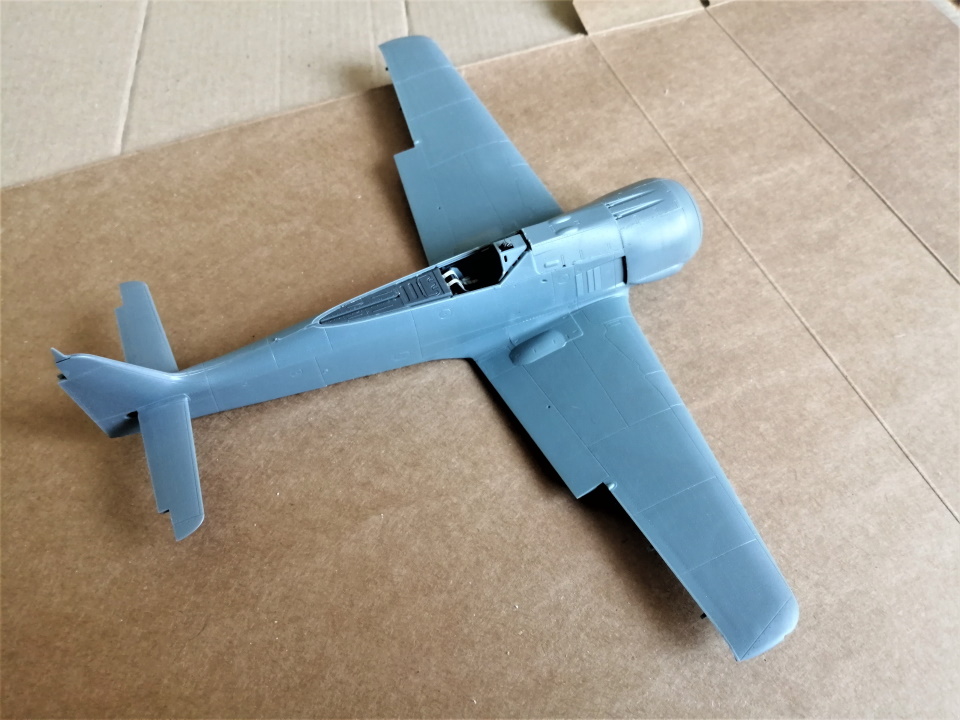
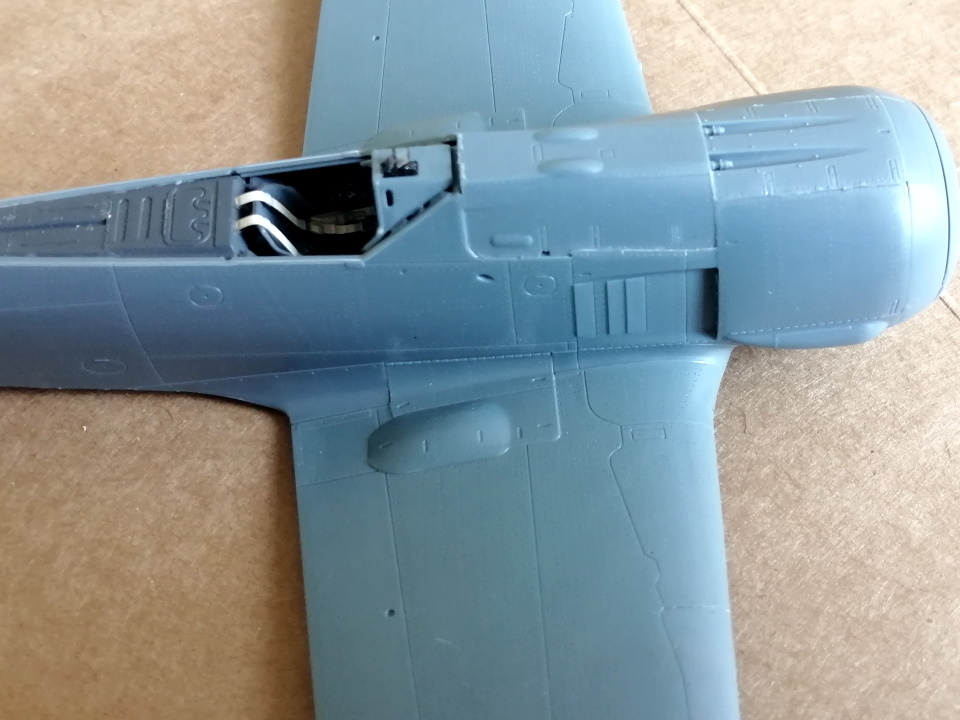
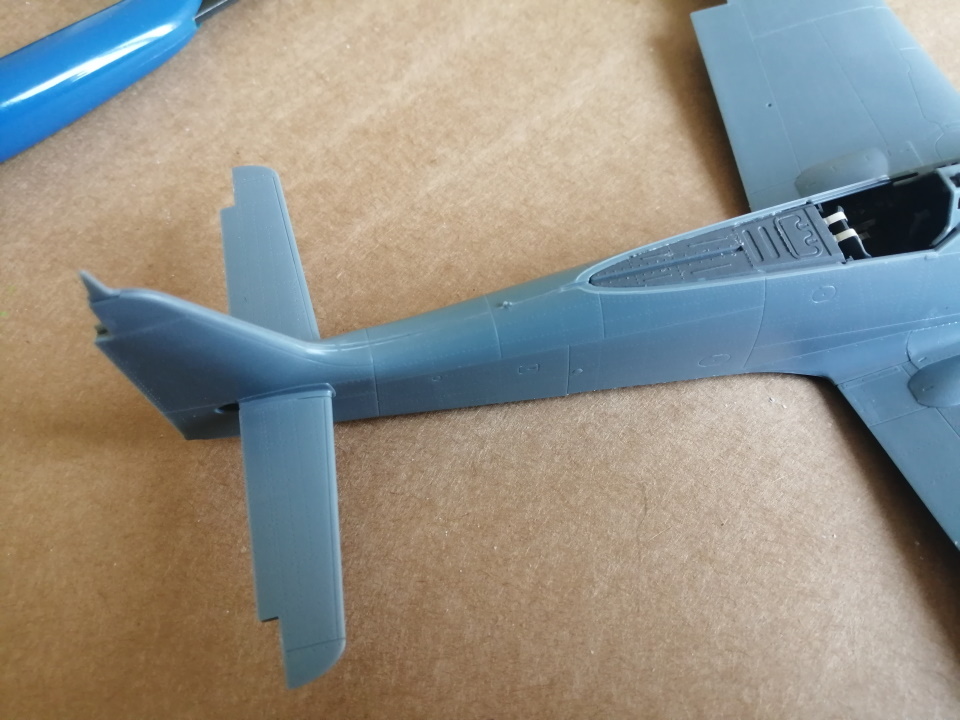
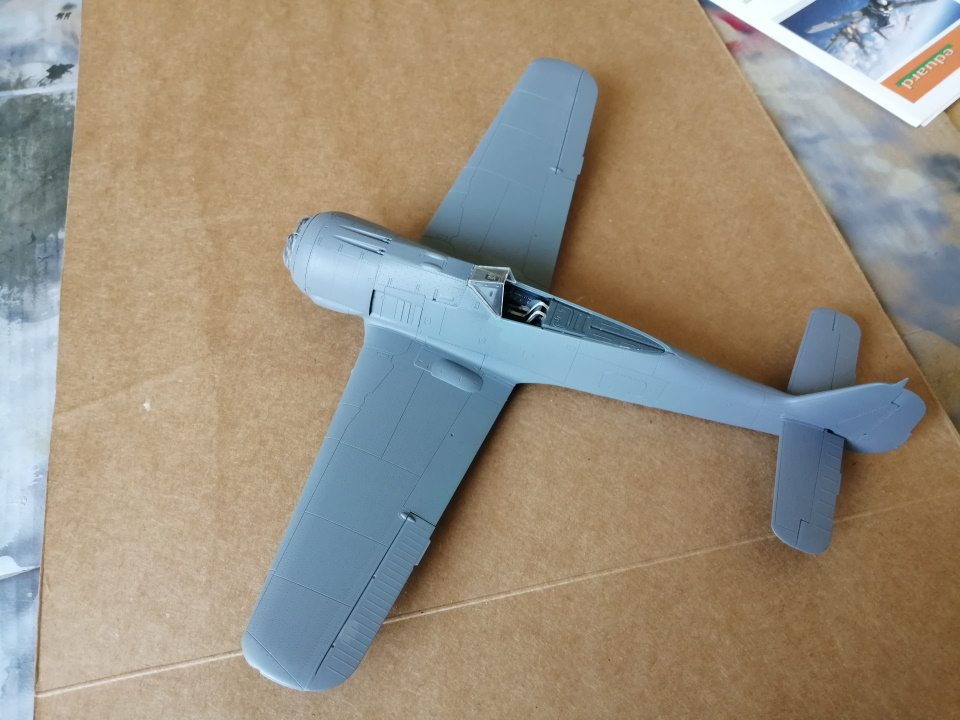
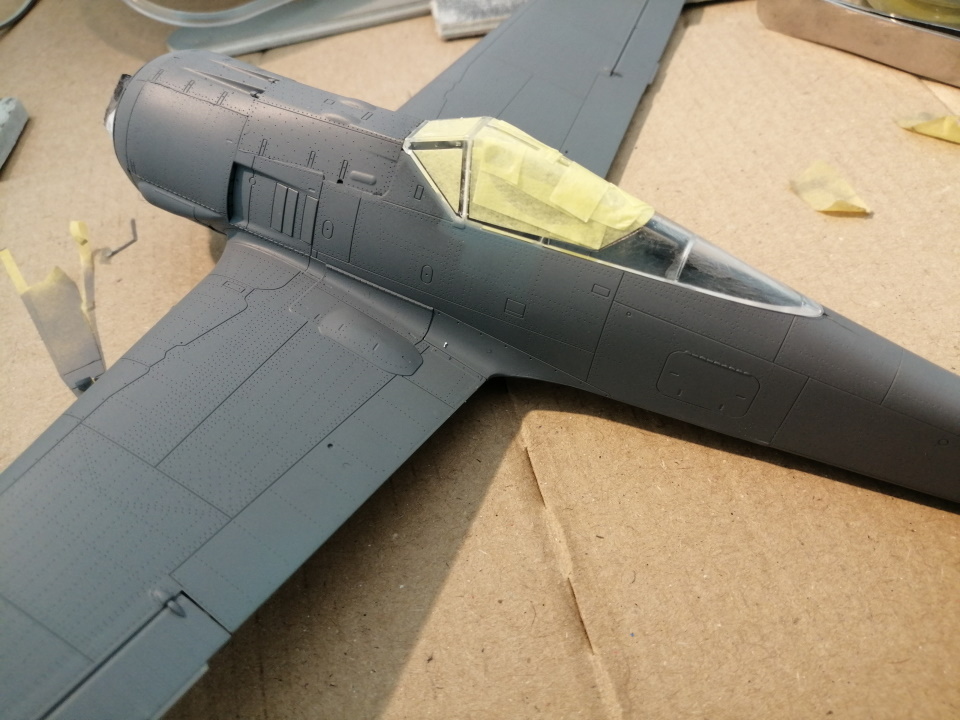
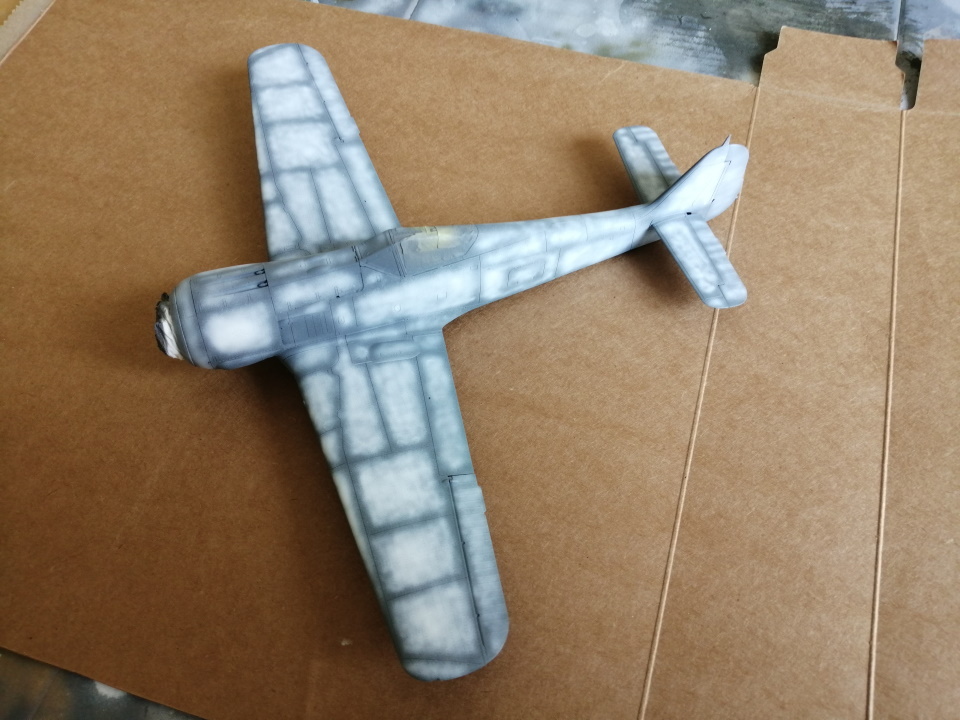
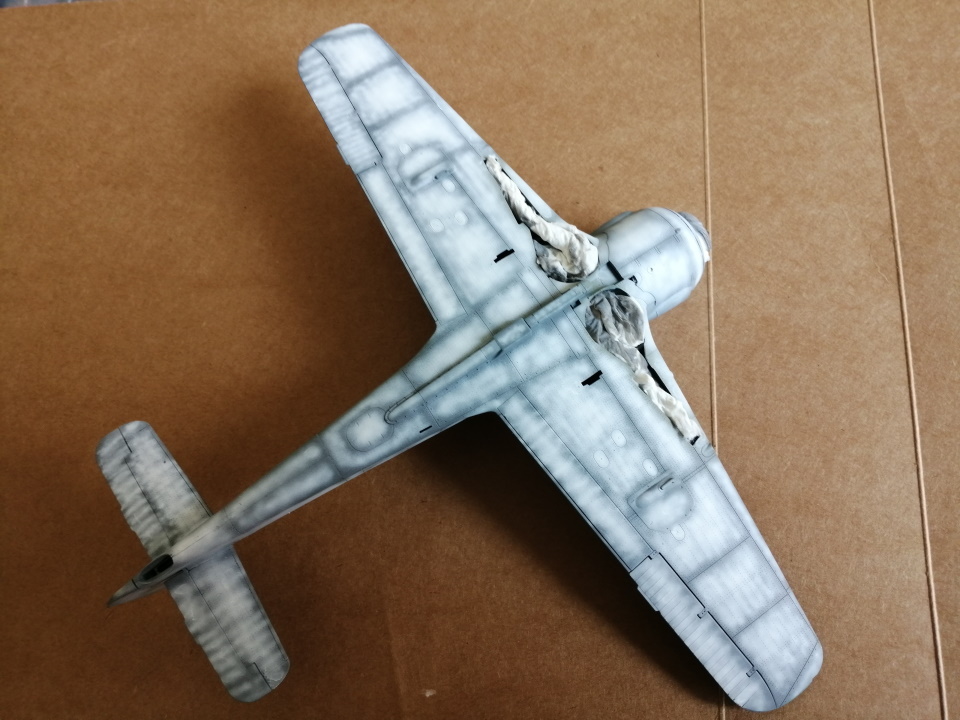
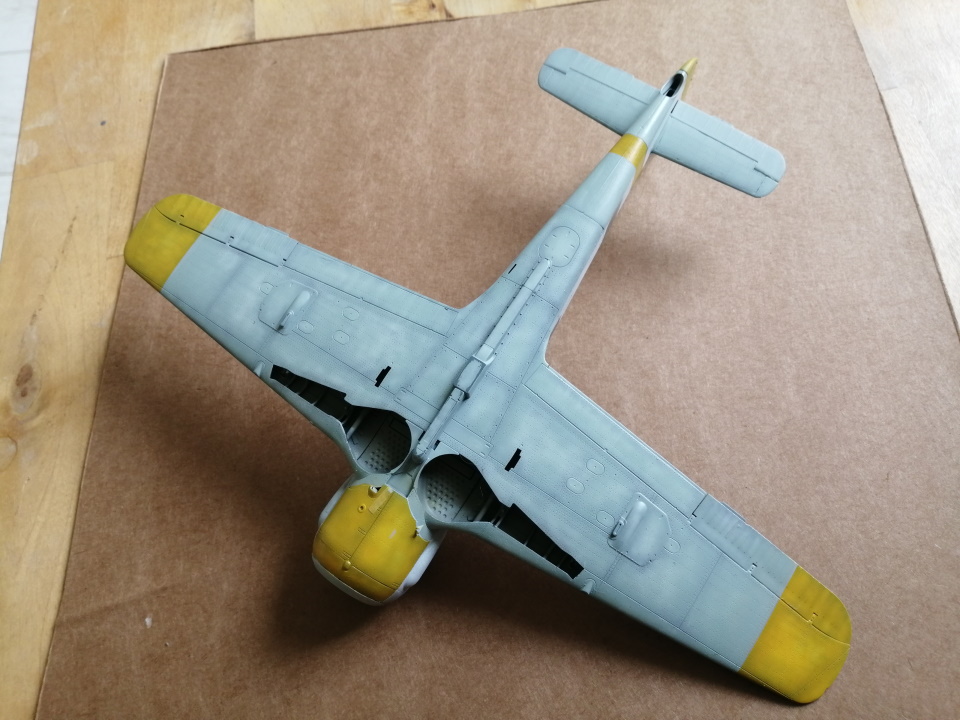
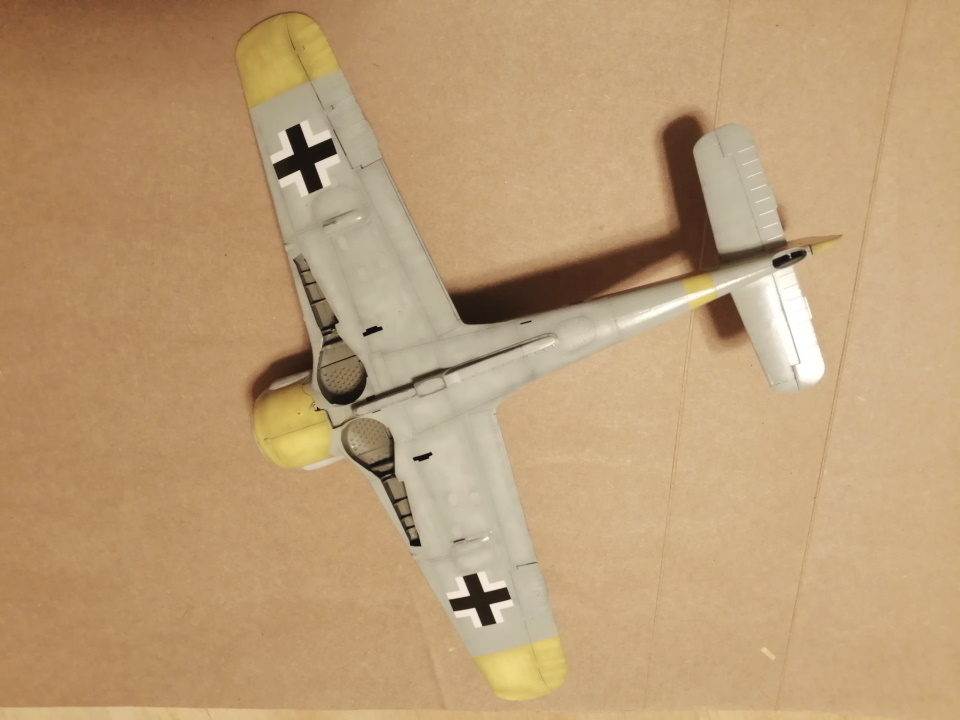
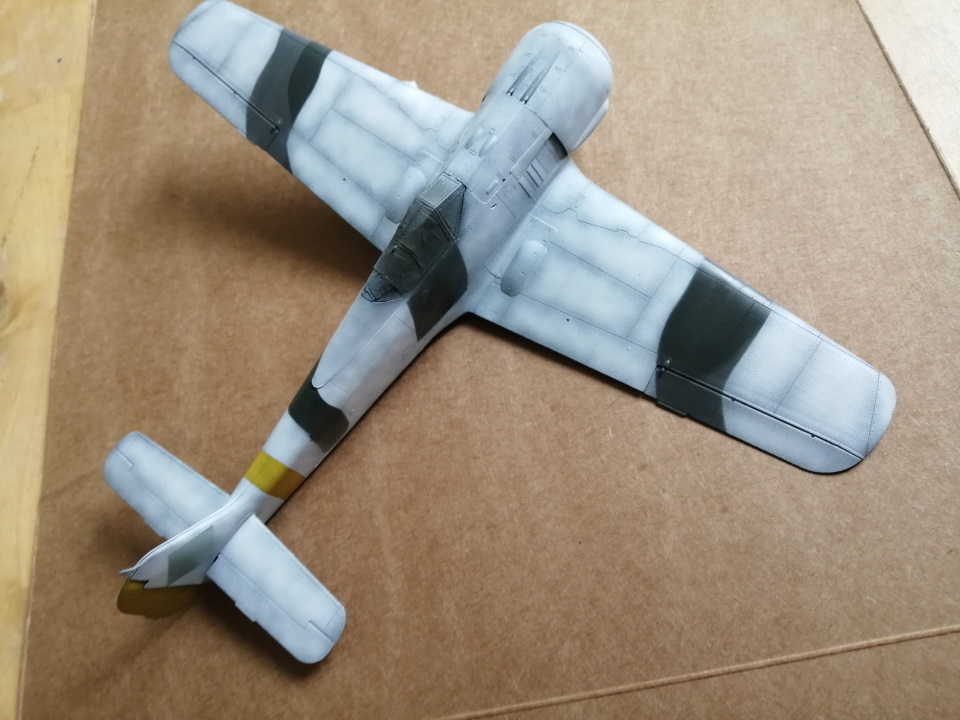
I used Ultimate grey primer to cover the whole kit to start off with, then Vallejo Air white to fill the panels, but leave the panel lines grey. I thin the white paint a little so the colour density needs to be built up.
Quoted Text
what glue do you use? i use tamiya thin and find i have to hold or clamp parts together for more than 20 minutes at times. nothing quick about that. i did find that if you miss align a part you can re apply glue to the part to re activate/soften the glue and adjust the part.
Regarding glues I have just converted to Tamiya Extra Thin glue and havent used anything else on plastic since. You can hold the parts together and spot weld with the glue along the join. Osmosis carries excess glue along the join. I find with Extra thin I can hold the two parts to be glued for 30 seconds then move on to the next stage. I also used it on the clear plastic. I have noticed you have to be a bit careful with some plastics though, if you apply too much it can melt the plastic beyond the joint
litespeed
News Reporter England - North West, United Kingdom
Joined: October 15, 2009
KitMaker: 1,976 posts
AeroScale: 1,789 posts
Posted: Wednesday, August 19, 2020 - 11:09 AM UTC
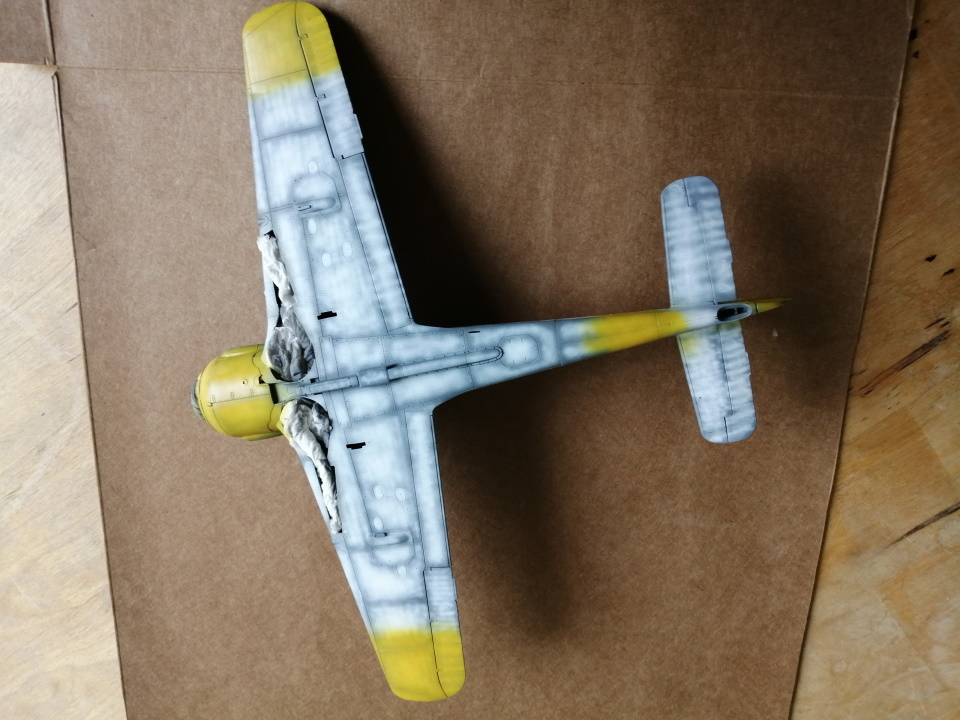
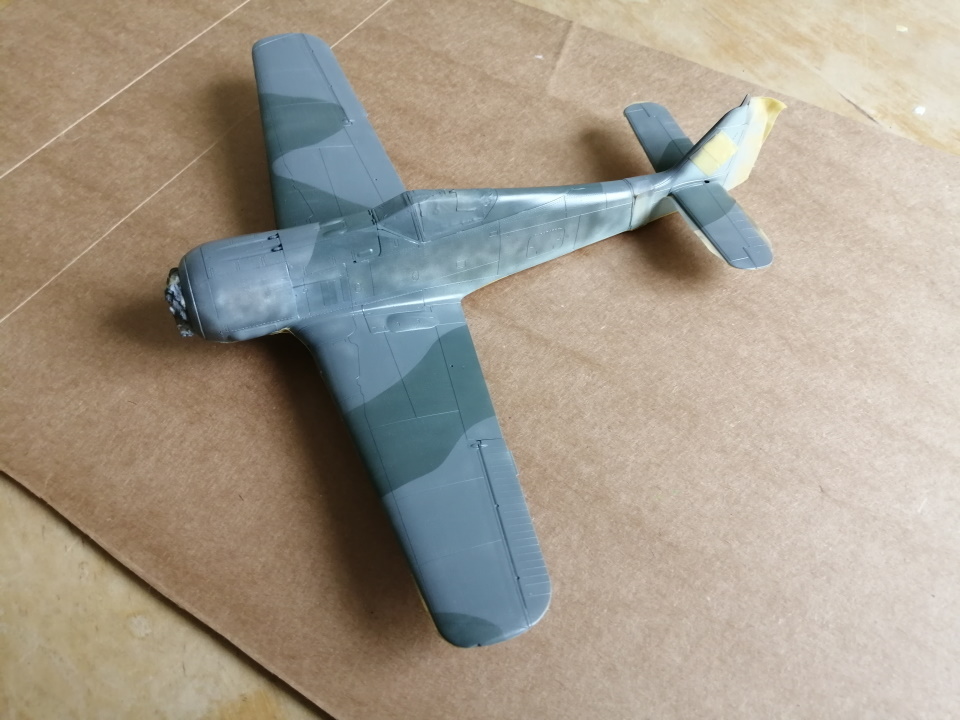
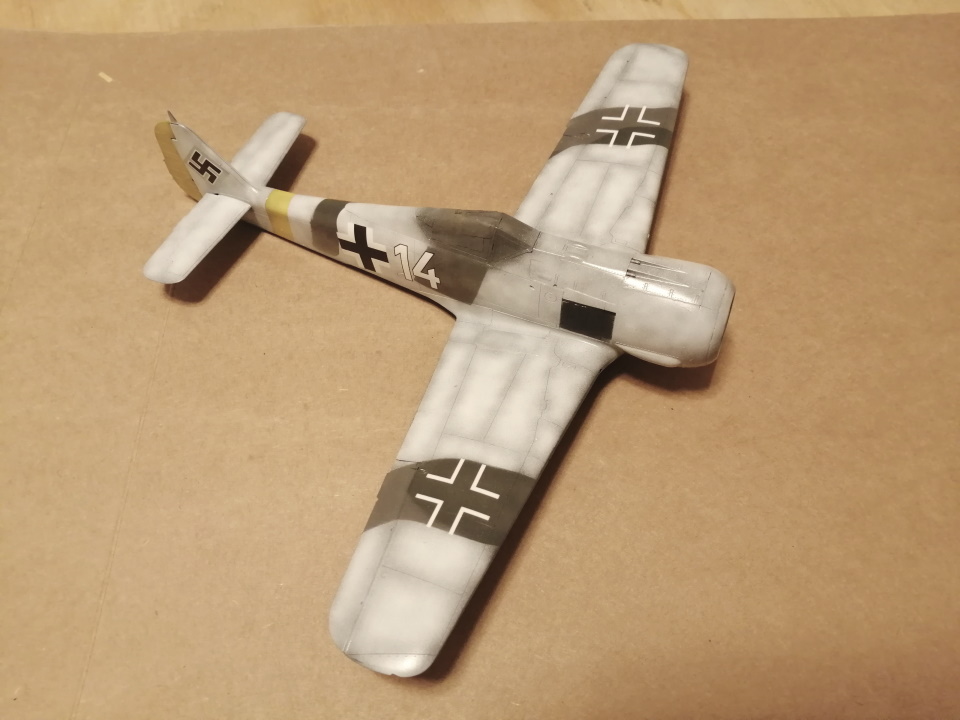
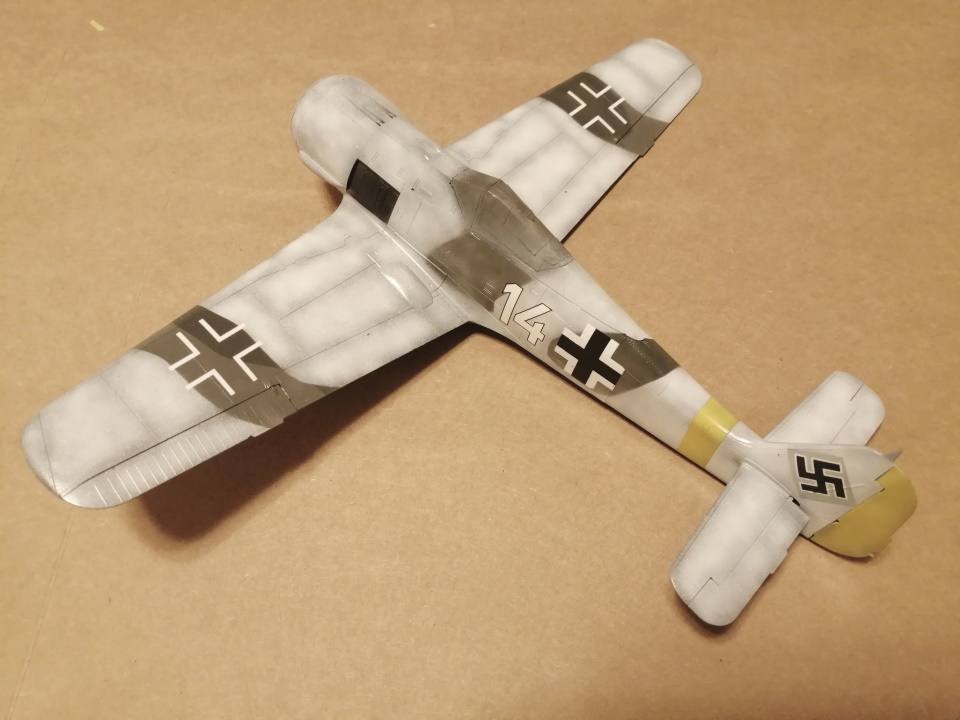
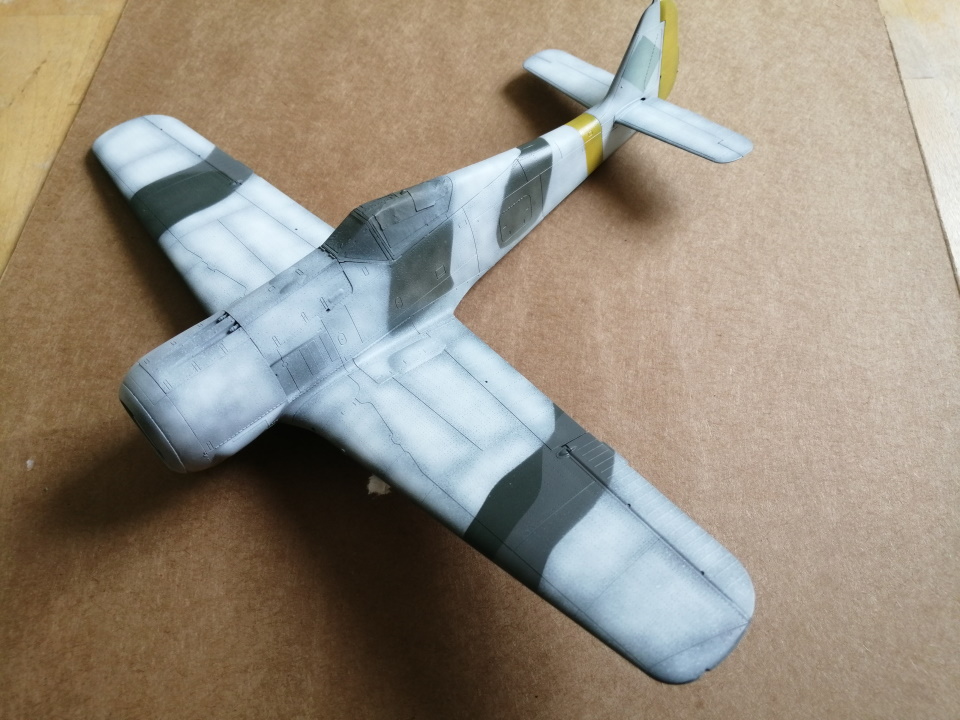
Managed to apply the winter camouflage on this evening, will give it a couple of hours to dry then apply two or three coats of Klear. Then its ready for the decals.
#306
Victoria, Australia
Joined: June 27, 2010
KitMaker: 3,959 posts
AeroScale: 598 posts
Posted: Wednesday, August 19, 2020 - 11:22 PM UTC
Quoted Text
Quoted Text
brilliant start, Tim! Following with interest
Thank Russell, will hopefully have it finished in the next few days
I can see where the "Litespeed" moniker comes from, Tim

Stay home and build models!
In 1/72
Gloster Gladiator MkII for the Bi-planes Campaign
In 1/350
Airfix 1:350 Type 45 Destroyer
litespeed
News Reporter England - North West, United Kingdom
Joined: October 15, 2009
KitMaker: 1,976 posts
AeroScale: 1,789 posts
Posted: Thursday, August 20, 2020 - 08:23 AM UTC
litespeed
News Reporter England - North West, United Kingdom
Joined: October 15, 2009
KitMaker: 1,976 posts
AeroScale: 1,789 posts
Posted: Thursday, August 20, 2020 - 09:12 AM UTC
#306
Victoria, Australia
Joined: June 27, 2010
KitMaker: 3,959 posts
AeroScale: 598 posts
Posted: Thursday, August 20, 2020 - 08:36 PM UTC
I think the quickest I've ever built a model since taking up the hobby again is 3 months...

Meanwhile this looks amazing

Stay home and build models!
In 1/72
Gloster Gladiator MkII for the Bi-planes Campaign
In 1/350
Airfix 1:350 Type 45 Destroyer
Buenos Aires, Argentina
Joined: May 21, 2012
KitMaker: 765 posts
AeroScale: 316 posts
Posted: Thursday, August 20, 2020 - 11:57 PM UTC
Beautiful painting work!!!
Those Radial Fighters Campaign: 1/72 FW 190 A5
Delta 2 Campaign: 1/48 Hobby Boss Mirage IIIC
Navy Boys on those Postage Stamps 1/72 Airfix Sea Harrier FA2
Working: Trumpeter A-5 Vigilante
Waiting: Phantom 60 Campaign
Nordrhein-Westfalen, Germany
Joined: March 22, 2015
KitMaker: 671 posts
AeroScale: 614 posts
Posted: Friday, August 21, 2020 - 01:18 AM UTC
Quoted Text
Beautiful painting work!!!
Paint work is really great! Outstanding!
Oliver
On the desk: Probably a Panzer III.