_GOTOBOTTOM
Early Aviation
Discuss World War I and the early years of aviation thru 1934.
WNW Rumpler C.IV build
phantom_phanatic309
#372
_VISITCOMMUNITY
United Kingdom
Joined: March 10, 2010
KitMaker: 2,568 posts
AeroScale: 1,619 posts
Posted: Sunday, April 19, 2020 - 05:45 AM UTC
Hello,

With lockdown still happening and my reduced work load I thought it was a good opportunity to finally get this one finished. It's been hogging the workbench untouched for far too long. I need the space back and it's far too nice (and expensive!) a kit to leave untouched. Besides which, it'll keep me occupied until work reopens. I originally started it during a Knights of the Sky campaign. I decided very early on to finish it in the lozenge scheme.
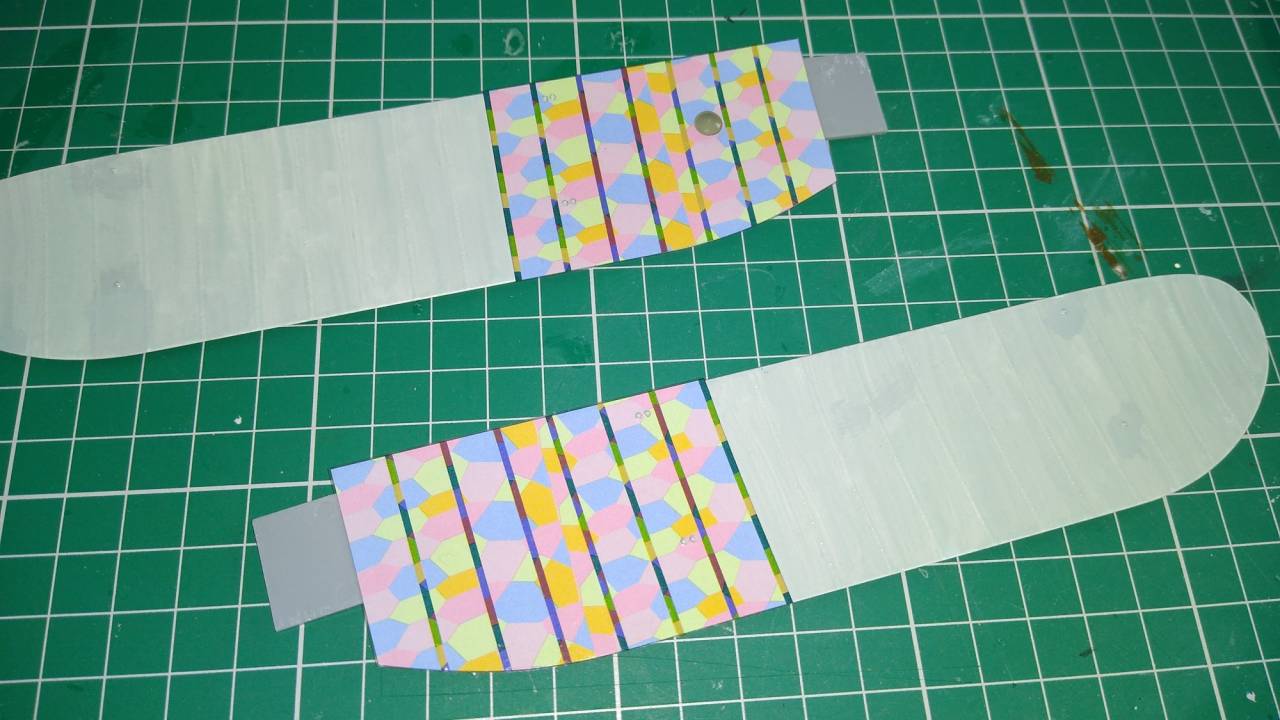
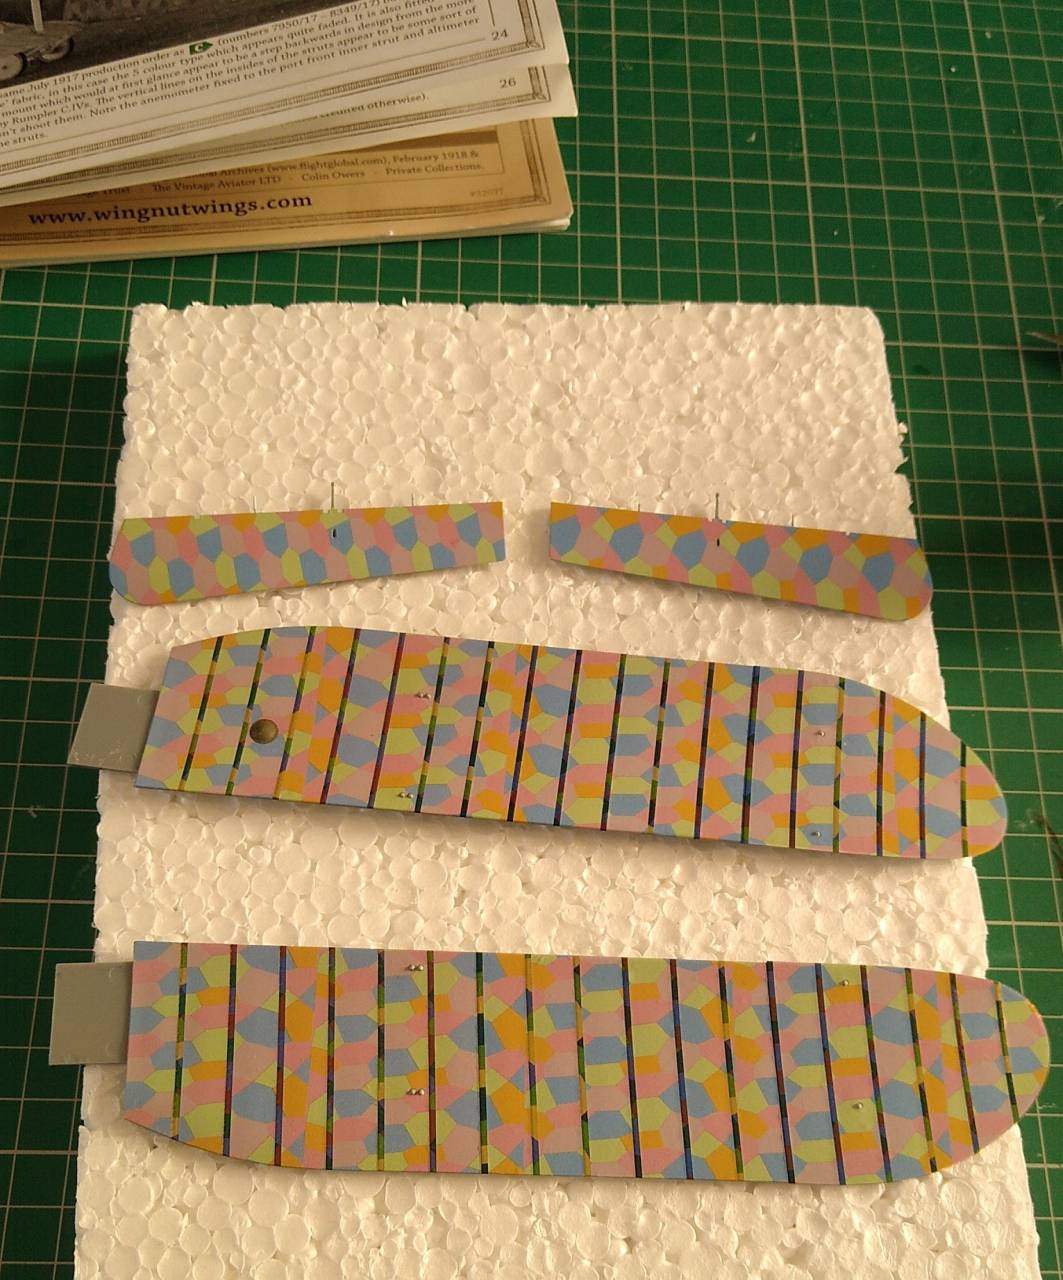
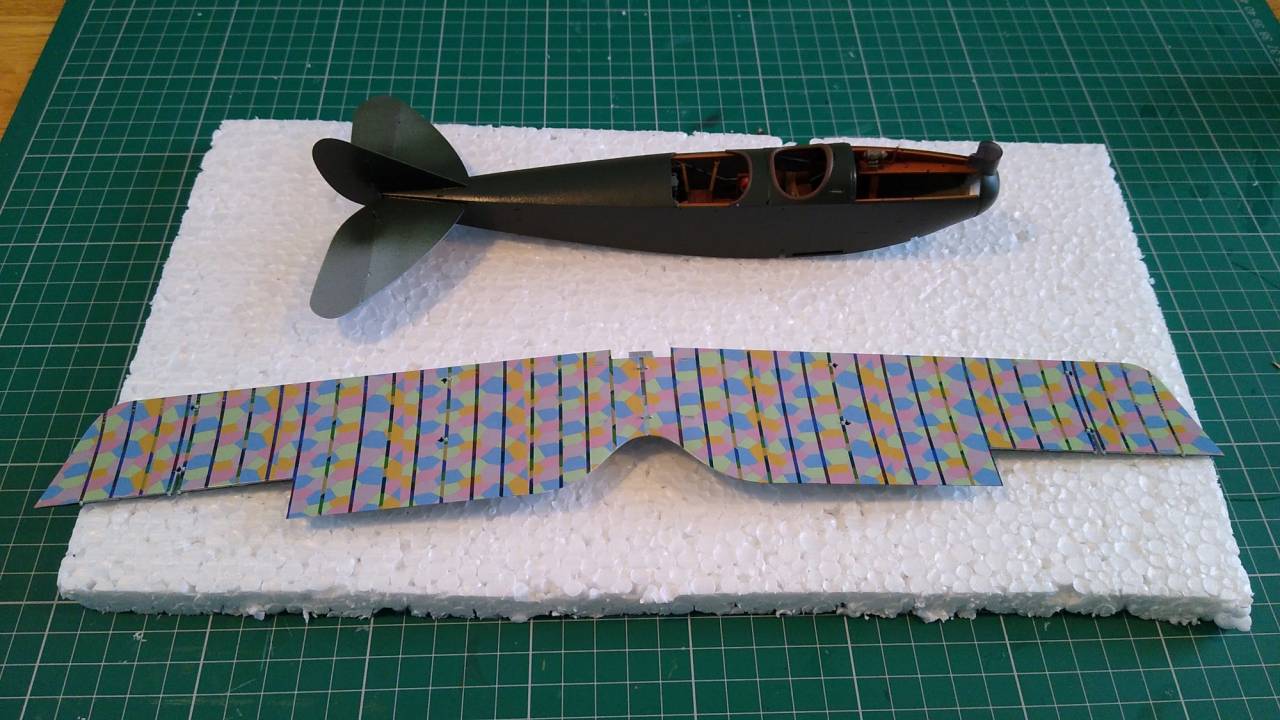
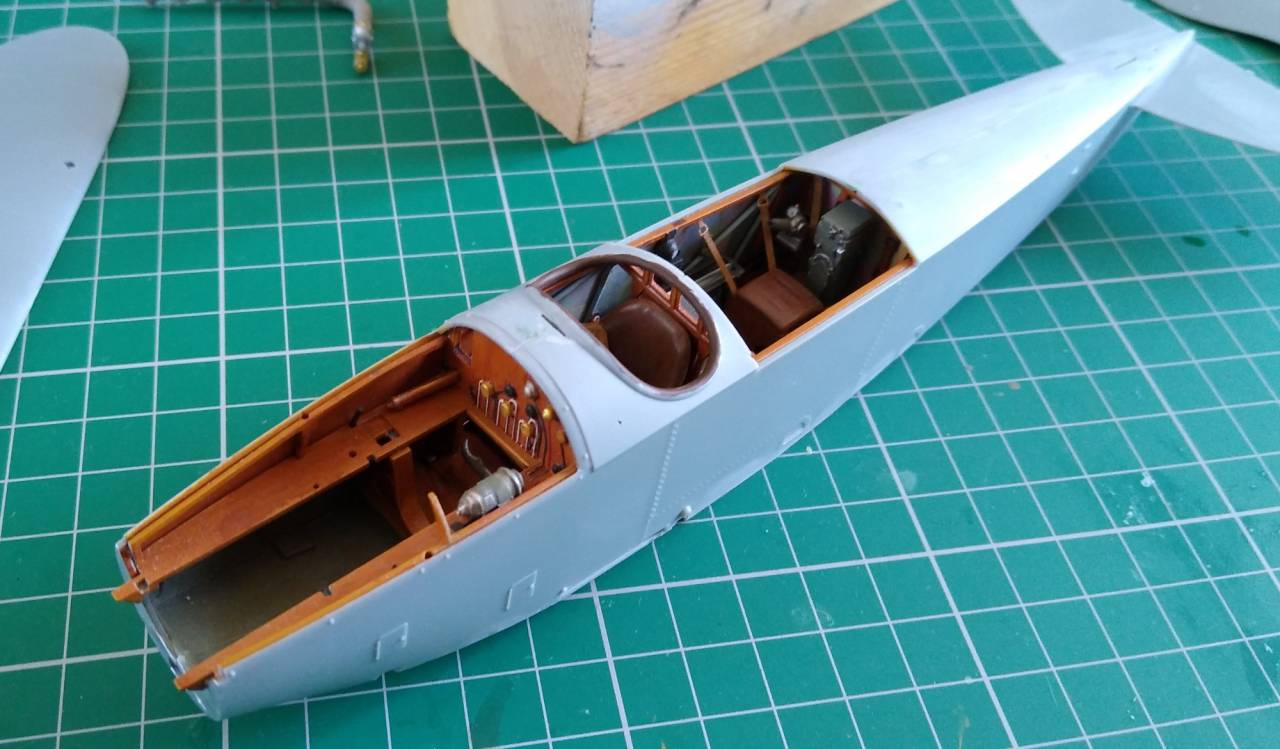
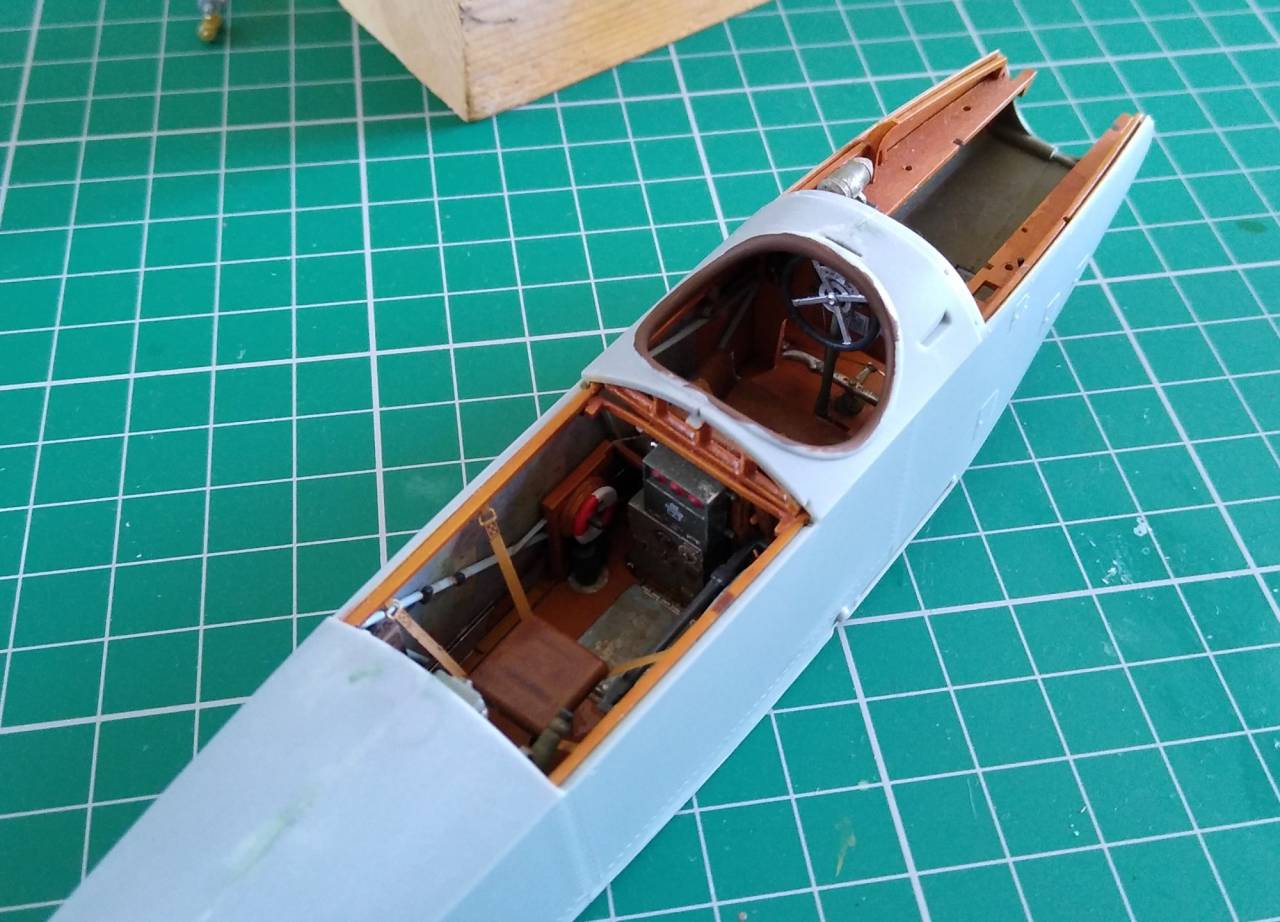
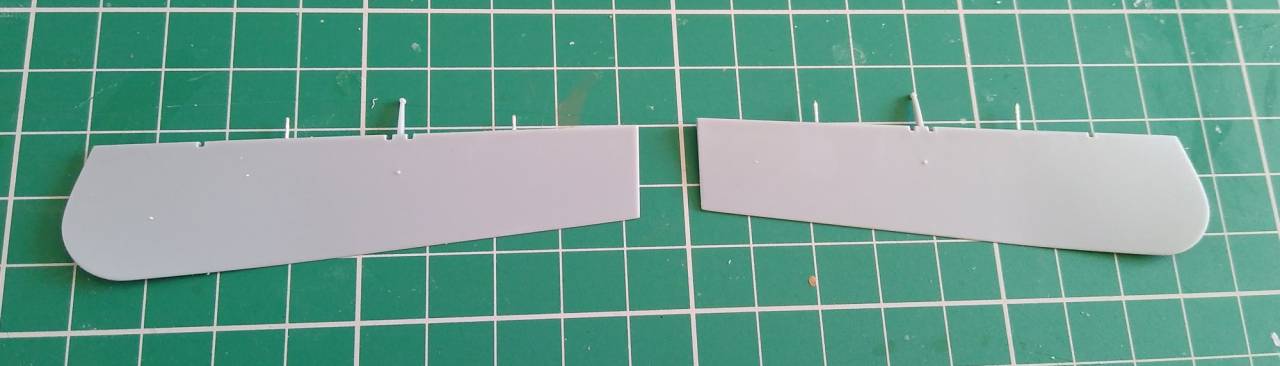
Here's how she currently is. Interior is done, fuselage is together and wings are ready for some paint.


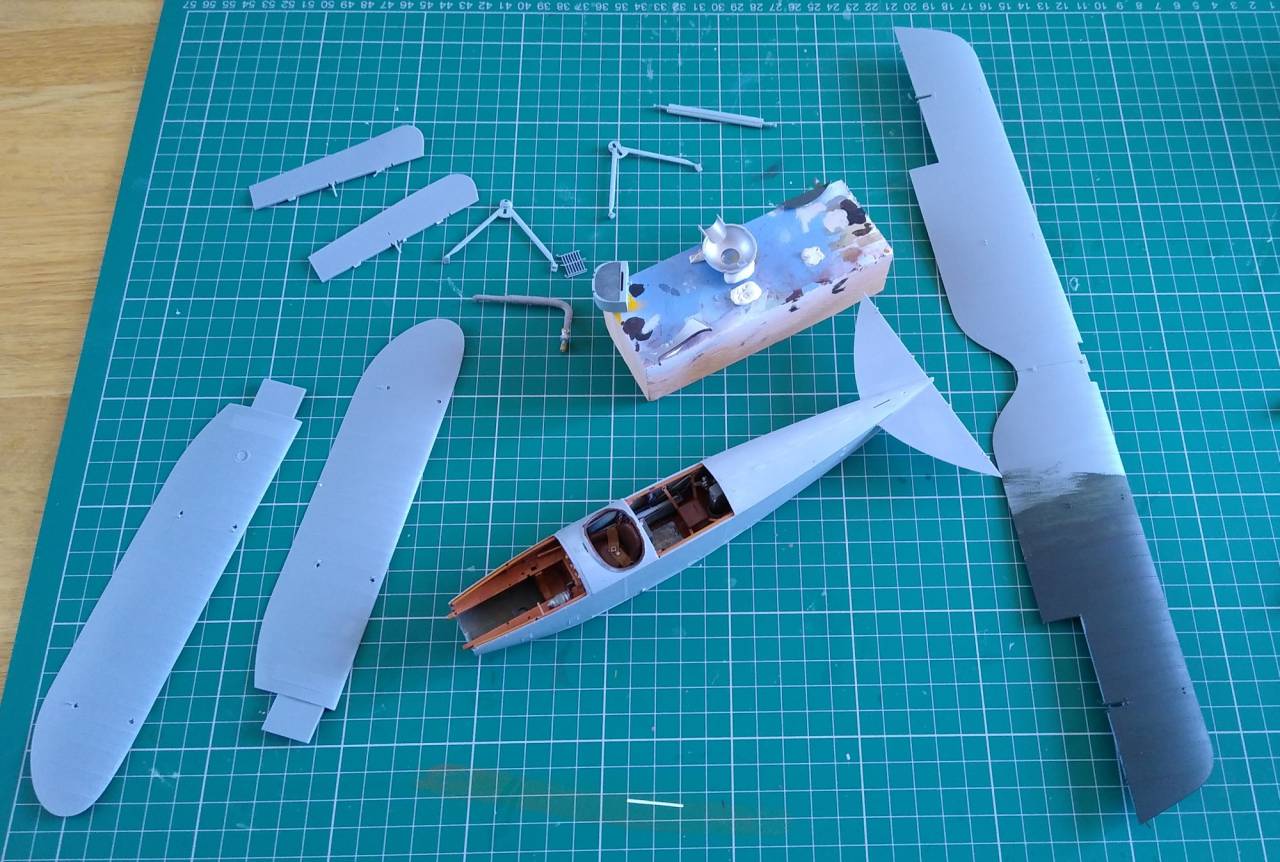
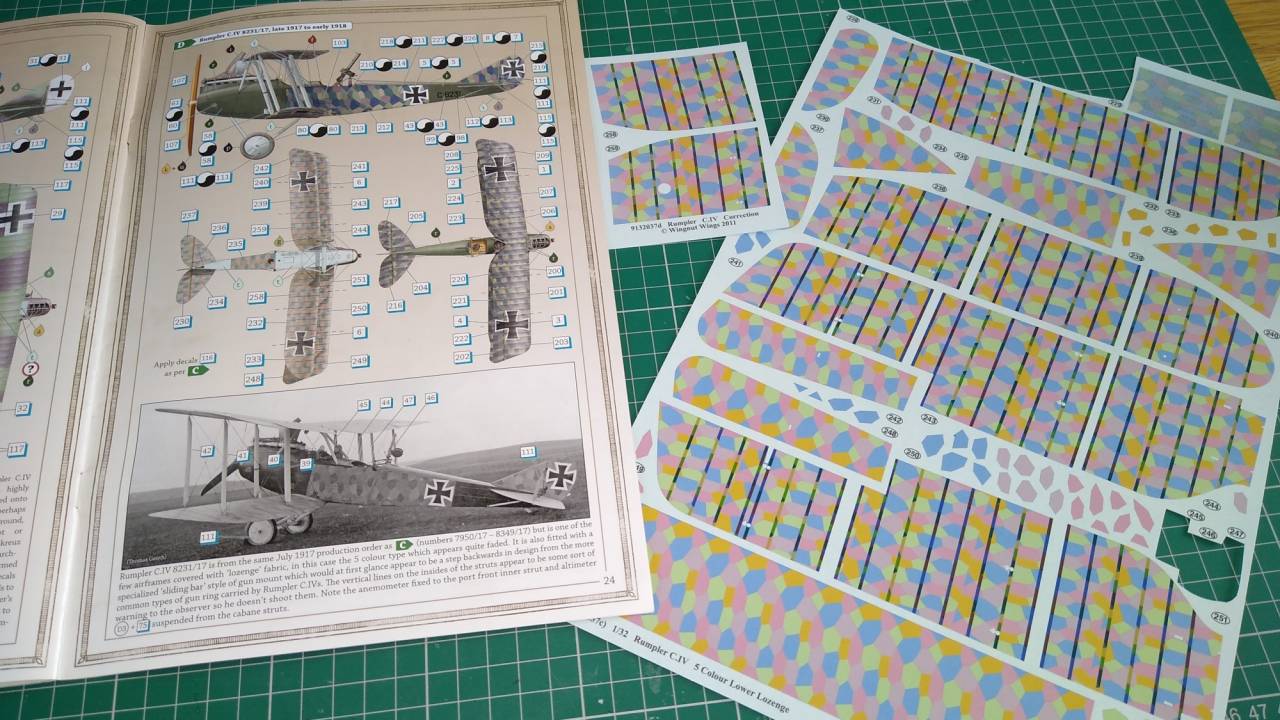
Looking at the instructions, most of the major assembly is done. Just some little fiddly jobs to do then paint and decals.

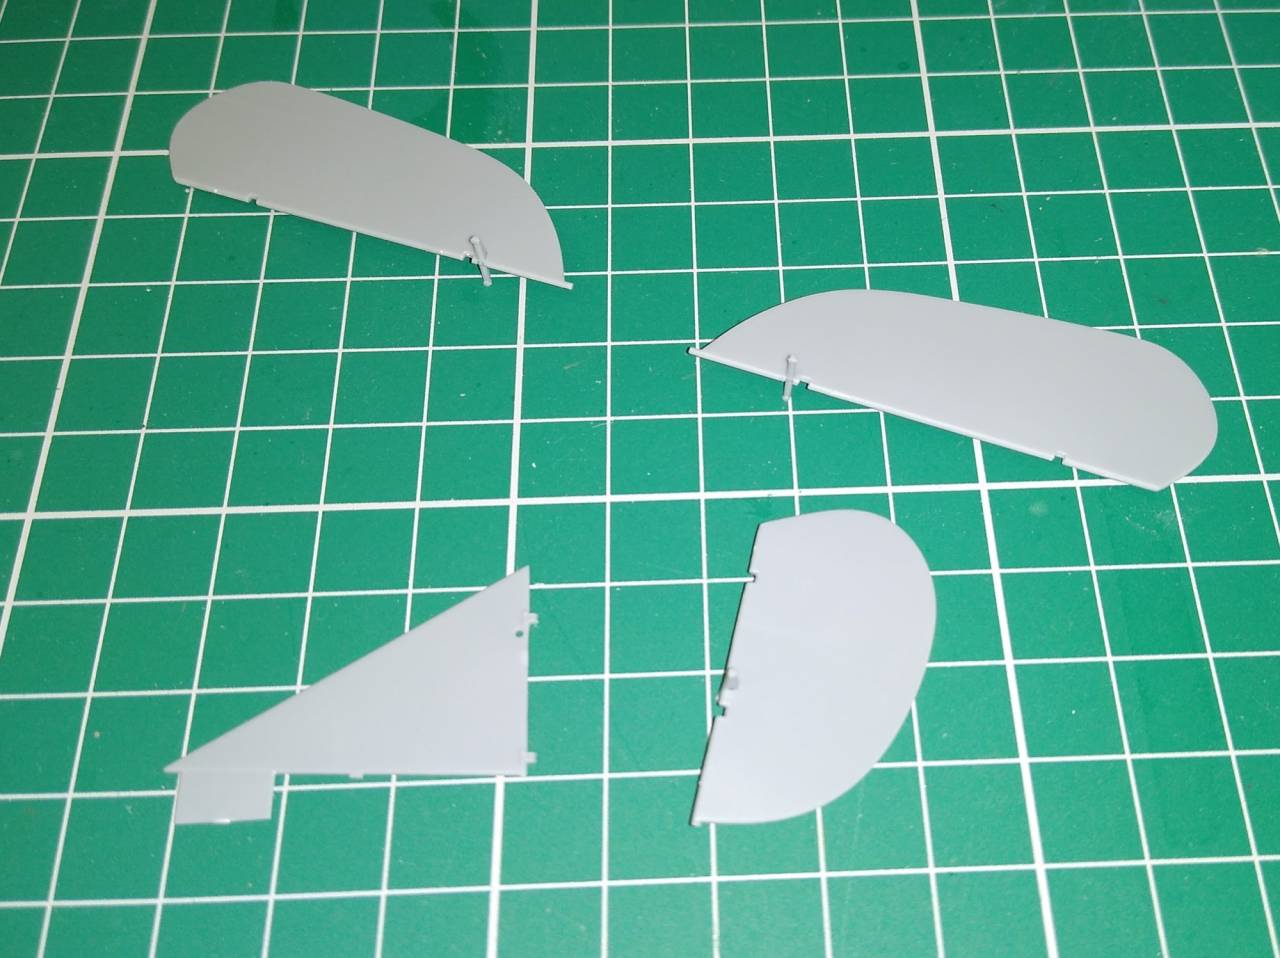
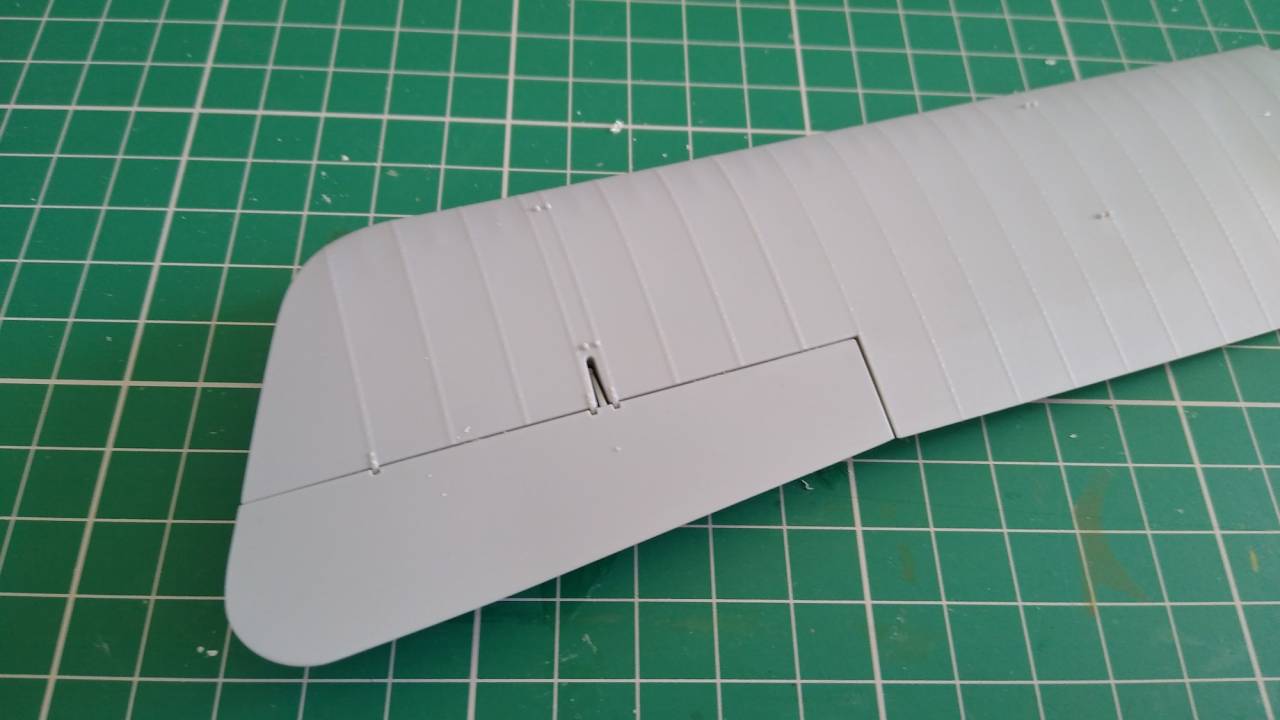
First job I did was to drill and pin the ailerons. A 0.5mm drill and wire did the job. These will be attached permanently after decalling.


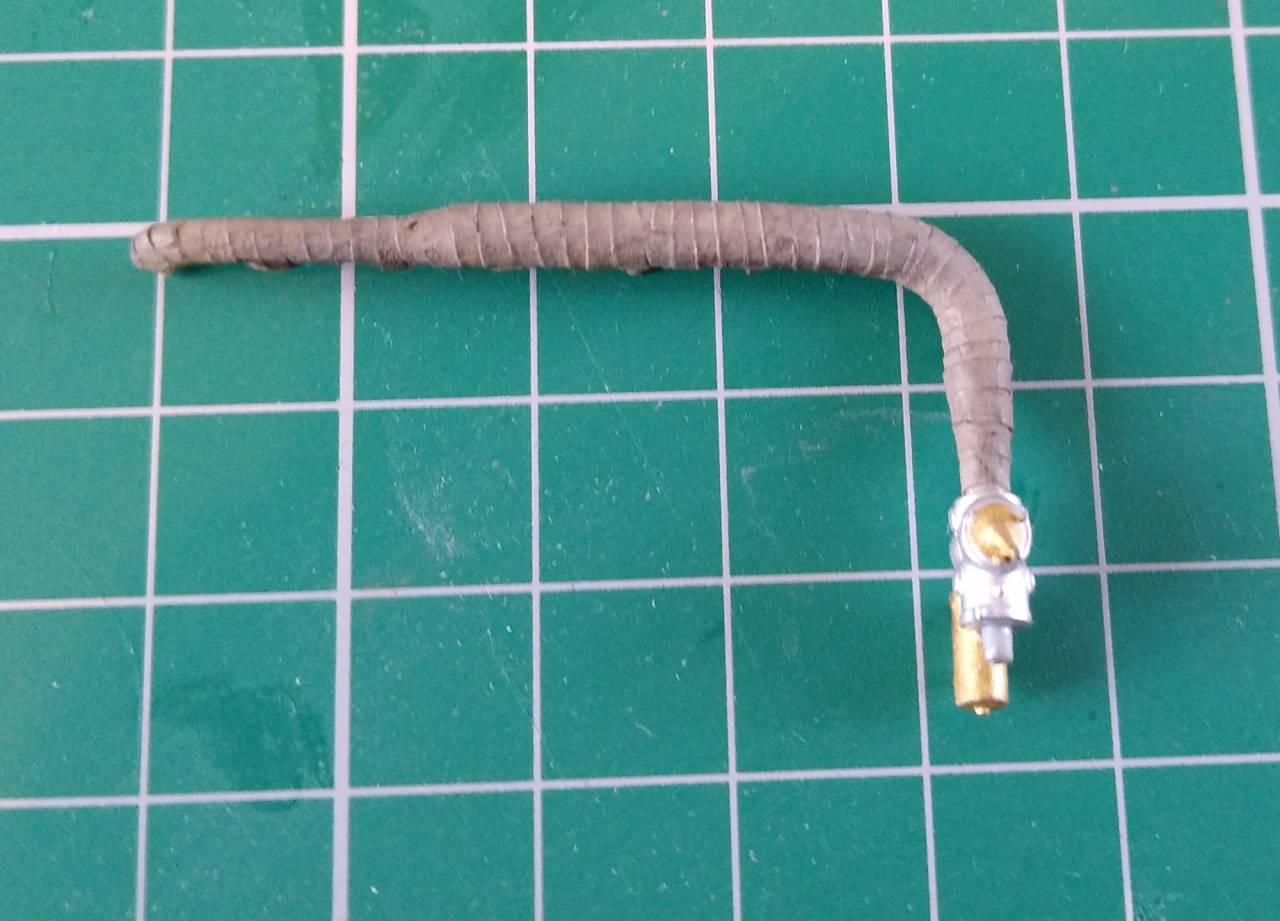
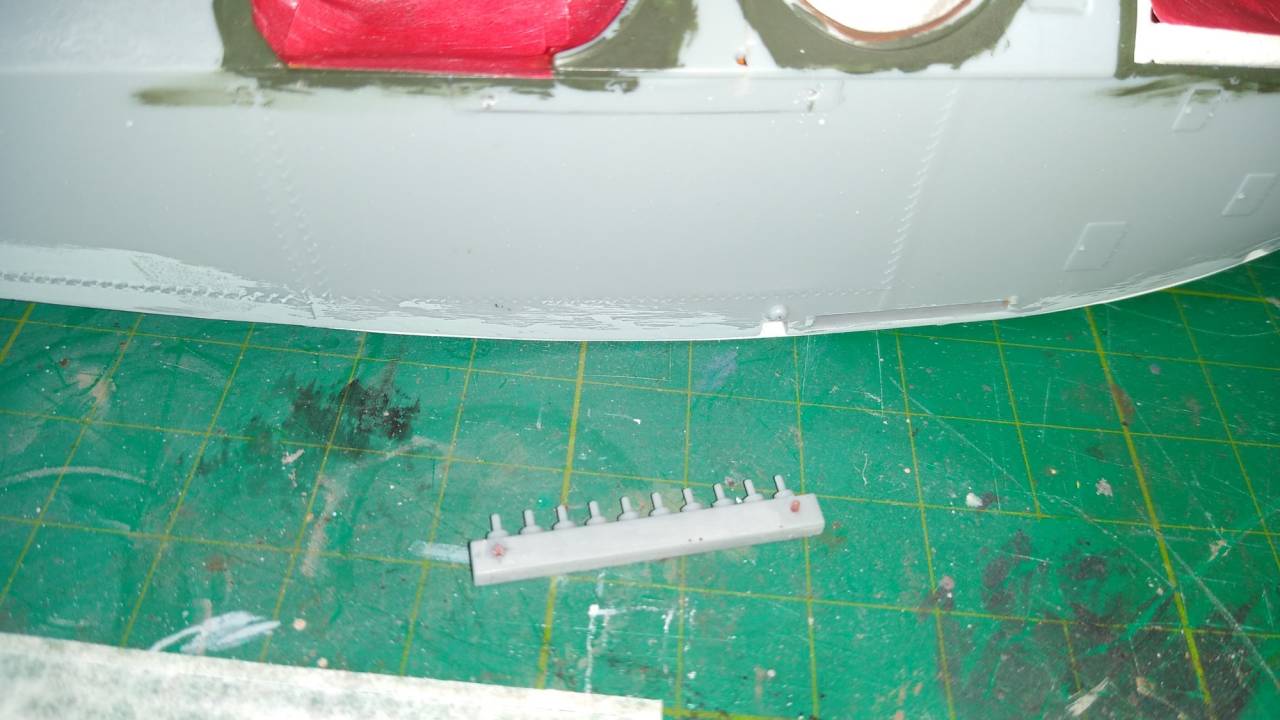
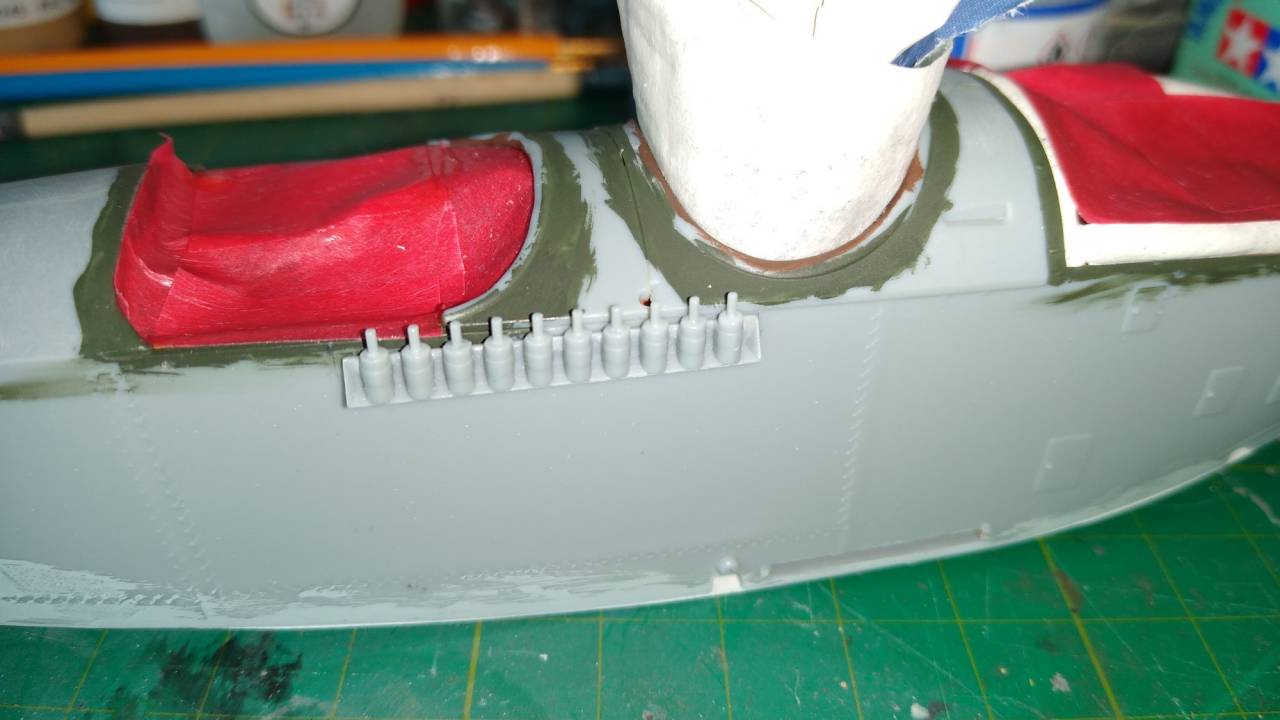
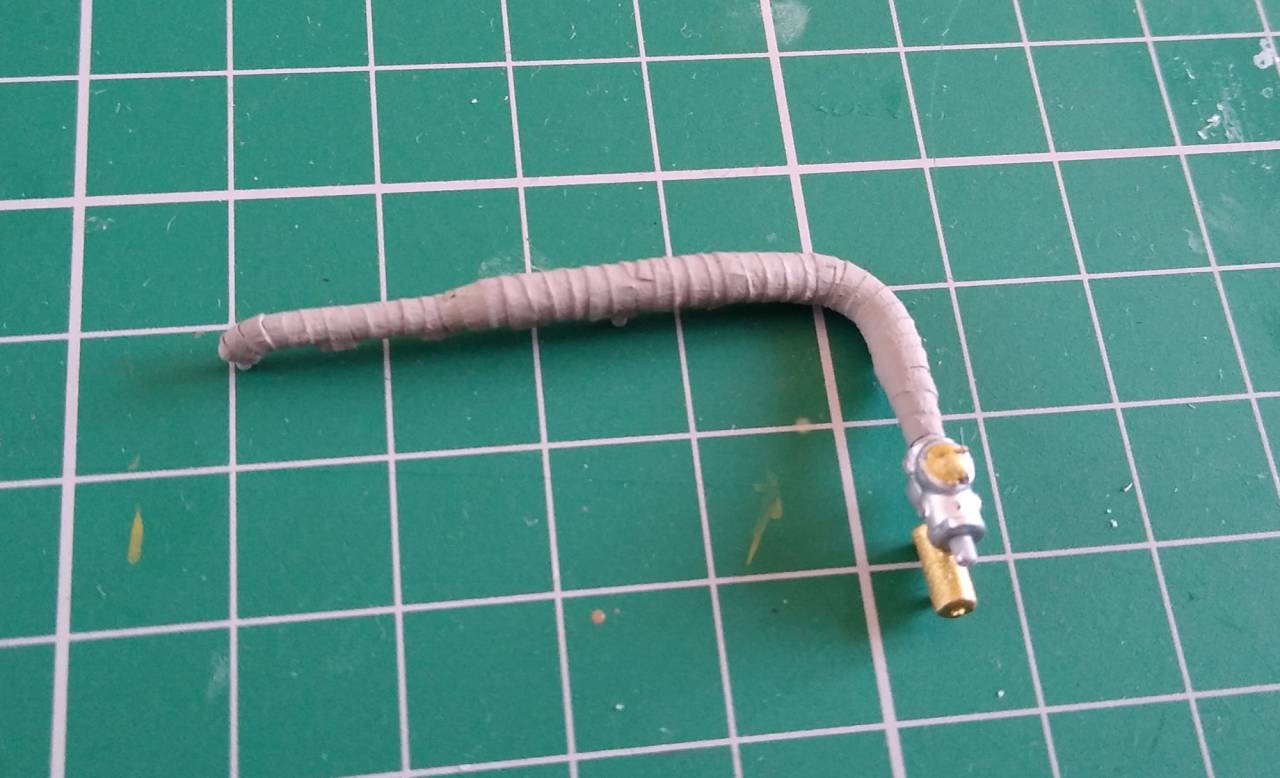
Another thing I noticed looking at the reference photo's in the instructions and any others I could get my hands on, was that the air intake tube (I don't know the proper technical name for it) was covered in some sort of fabric lagging. I assume this was to keep the air insulated at altitude. I replicated this with some thin strips of masking tape wrapped around the part. I painted it in a dirty grey acrylic which I'll weather with some pigments when it's thoroughly dry.


Thanks for looking. Hope everyone else is taking the chance to get unfinished projects completed.

Stephen
litespeed
Staff MemberNews Reporter
AEROSCALE
_VISITCOMMUNITY
England - North West, United Kingdom
Joined: October 15, 2009
KitMaker: 1,976 posts
AeroScale: 1,789 posts
Posted: Sunday, April 19, 2020 - 06:04 AM UTC
looking good stephen, I like the look of the 'air intake tube'. Nice touch wrapping that insulation on
phantom_phanatic309
#372
_VISITCOMMUNITY
United Kingdom
Joined: March 10, 2010
KitMaker: 2,568 posts
AeroScale: 1,619 posts
Posted: Sunday, April 19, 2020 - 07:22 AM UTC

Quoted Text

looking good stephen, I like the look of the 'air intake tube'. Nice touch wrapping that insulation on


Thanks Tim. It turned out better than I thought it would after I painted it.
I'm sure it's got a proper technical name.
As a Trekkie I do have a habit of calling unrecognisable bits 'self-sealing stem bolts' sometimes.

phantom_phanatic309
#372
_VISITCOMMUNITY
United Kingdom
Joined: March 10, 2010
KitMaker: 2,568 posts
AeroScale: 1,619 posts
Posted: Monday, April 20, 2020 - 08:37 AM UTC
Got it! It's the intake manifold.

Anyway, dirtied it up this afternoon with some Mig Pigments powders. Looks quite good. Will get some pics up tomorrow.

I also did some other prep jobs.
I stripped the acrylic green I had painted on the upper wing tip and cleaned it up, before spraying a coat of Tamiya white primer on upper and lower wings.

Not sure if I should apply a coat of colour or just gloss the primer before putting the lozenge decals on. If I do paint, probably thinking of a pale blue? Never attempted a decal job so big before!
amegan
#243
_VISITCOMMUNITY
England - North East, United Kingdom
Joined: March 21, 2008
KitMaker: 996 posts
AeroScale: 915 posts
Posted: Monday, April 20, 2020 - 12:19 PM UTC
Nice work so far, did lozenge on my DVII, worked OK. I was either a complete heretic and decalled straight onto plastic or I may have used white primer, no topcoat
phantom_phanatic309
#372
_VISITCOMMUNITY
United Kingdom
Joined: March 10, 2010
KitMaker: 2,568 posts
AeroScale: 1,619 posts
Posted: Monday, April 20, 2020 - 09:50 PM UTC

Quoted Text

Nice work so far, did lozenge on my DVII, worked OK. I was either a complete heretic and decalled straight onto plastic or I may have used white primer, no topcoat


Thanks. How did it turn out and did you use any setting solutions? I see on WNW hints and tips they recommend not using them.

Looking at the wings and decals there are a couple of things that I will need to paint first. Compass, walkway, rigging anchor points etc. So I might give it a light coat first
phantom_phanatic309
#372
_VISITCOMMUNITY
United Kingdom
Joined: March 10, 2010
KitMaker: 2,568 posts
AeroScale: 1,619 posts
Posted: Wednesday, April 22, 2020 - 09:41 AM UTC
Bit of weathering on the manifold and it's starting to look suitably grubby.


I decided today to deal with a job I was putting off. The machine guns. I particular the etch jackets. It's not a job I like and I made a right hash of the kit supplied jackets back when I first started. Instead I got some pre-rolled jackets made by Karaya from Poland. One pack of each provides enough for this build and the DFW in the stash.


Needed a little gentle rolling to close up the gap and a little bit trimming off to make it fit around the interupter mechanism.


And doesn't look too bad! Certainly better than my attempt at rolling.

Tomorrows job list - get the Parabellum done, clean up the elevators and struts, paint the fuselage and gloss ready for decals.
RussellE
#306
_VISITCOMMUNITY
Victoria, Australia
Joined: June 27, 2010
KitMaker: 3,959 posts
AeroScale: 598 posts
Posted: Wednesday, April 22, 2020 - 11:27 PM UTC
Great work so far Stephen! Following with interest!
phantom_phanatic309
#372
_VISITCOMMUNITY
United Kingdom
Joined: March 10, 2010
KitMaker: 2,568 posts
AeroScale: 1,619 posts
Posted: Thursday, April 23, 2020 - 07:13 AM UTC

Quoted Text

Great work so far Stephen! Following with interest!


Thanks for following Russell.

Today wasn't as productive as I'd planned.
The Parrabellum was a much more fiddly job than I expected. Awkward seam to clean up around the grips and sites. Had to be careful not to take off too much. Etch jacket needed a bit of persuading, but got it fitted with little fuss.
And then to top it all, I couldn't get the end cap to stay on. Not even superglue and accelerator would stuck it permanently. It was also tricky to keep the foresight lined up. Slightest touch and it would shift either side.
After an hour of this I decided to scrape off the dried glue and call it a day.
Might try tomorrow with some PVA. Will give me time to line things up properly before it sets.

You can tell I really, really enjoy working with etch.
phantom_phanatic309
#372
_VISITCOMMUNITY
United Kingdom
Joined: March 10, 2010
KitMaker: 2,568 posts
AeroScale: 1,619 posts
Posted: Friday, April 24, 2020 - 05:30 AM UTC
Came at it fresh today and with a new tube of super glue.
And result!


Photos a little blurry but it looks quite good.

Also got the tail control surfaces done and control horns fitted.


Not sure how I'm going to attach these to the fuselage.
I'm a bit hesitant to fit them last with superglue in case to tension of the control lines pulls them off and tears the lozenge decals. Just wondering if it's worth attaching them now with a bit of Tamiya superthin. The lozenge decals don't look like they overlap much and if they do, should be easy to trim if that's the case.
Jessie_C
_VISITCOMMUNITY
British Columbia, Canada
Joined: September 03, 2009
KitMaker: 6,965 posts
AeroScale: 6,247 posts
Posted: Friday, April 24, 2020 - 06:03 AM UTC
Perhaps Gator Glue?
phantom_phanatic309
#372
_VISITCOMMUNITY
United Kingdom
Joined: March 10, 2010
KitMaker: 2,568 posts
AeroScale: 1,619 posts
Posted: Friday, April 24, 2020 - 06:26 AM UTC

Quoted Text

Perhaps Gator Glue?


Thanks Jessie.
I'll see if I can get some over here.
I did think about drilling and pinning, like I did with the ailerons. But they're way too thin to safely drill even with the thinnest bit I have!
Kevlar06
_VISITCOMMUNITY
Washington, United States
Joined: March 15, 2009
KitMaker: 3,670 posts
AeroScale: 833 posts
Posted: Friday, April 24, 2020 - 06:40 AM UTC

Quoted Text


Quoted Text

Perhaps Gator Glue?


Thanks Jessie.
I'll see if I can get some over here.
I did think about drilling and pinning, like I did with the ailerons. But they're way too thin to safely drill even with the thinnest bit I have!


I’d go ahead and hit them with the Tamiya super thin. I thin Gator glue will just make a mess of things, as it’s too thick for those very thin (scale thin) surfaces. I don’t think it will hold well either. You should be OK with the super thin, as WnW plastic seems to bond very well with just a little thin cement. I’d glue it up before paint and decals too. My experience with WnW lozenge decals is they are exactly cut to fit the flying surfaces closely. Can’t speak to the aftermarket, but I’ve always had good success with the kit decals.
VR, Russ
phantom_phanatic309
#372
_VISITCOMMUNITY
United Kingdom
Joined: March 10, 2010
KitMaker: 2,568 posts
AeroScale: 1,619 posts
Posted: Friday, April 24, 2020 - 08:07 AM UTC

Quoted Text


Quoted Text


Quoted Text

Perhaps Gator Glue?


Thanks Jessie.
I'll see if I can get some over here.
I did think about drilling and pinning, like I did with the ailerons. But they're way too thin to safely drill even with the thinnest bit I have!


I’d go ahead and hit them with the Tamiya super thin. I thin Gator glue will just make a mess of things, as it’s too thick for those very thin (scale thin) surfaces. I don’t think it will hold well either. You should be OK with the super thin, as WnW plastic seems to bond very well with just a little thin cement. I’d glue it up before paint and decals too. My experience with WnW lozenge decals is they are exactly cut to fit the flying surfaces closely. Can’t speak to the aftermarket, but I’ve always had good success with the kit decals.
VR, Russ


Thanks Russ.
I'll take your advice and fit them.
I'm using the kits lozenge decals. Did you have to use any setting solutions when you used them?
I have Microsol and Set and a bottle of Gunze Mr Mark Softener, so what would you recommend?
I know the Micro stuff can be a little aggressive. Seemed to work fine with the smaller instruments decals, bit how will it work with larger I wonder?
Kevlar06
_VISITCOMMUNITY
Washington, United States
Joined: March 15, 2009
KitMaker: 3,670 posts
AeroScale: 833 posts
Posted: Friday, April 24, 2020 - 09:59 AM UTC
Stephen,
In full disclosure, I have this Rumpler in my stash, but haven’t started work on it yet. But I have built the WnW Fokker DVII and the Hannover. I found the WnW decals very compliant “as is” and where I needed a little help with conformance around wingtips and in tight places, I used Solvaset. Solvaset is a lot “hotter” than Microscale products. Having said that, Solvaset has always been my “go to” decal solution—I figure if I need a decal solution at all, I might as use the one that gets me the “go big or go home” kick! But I also don’t knock others use of Microscale products which I think are good products, I just don’t need them with Solvaset. Long story short, I think you’ll find the WnW decals are exceptional without a lot of decal solution, and Microscale products will do what you need, if you need anything at all. But, as in all things WnW, follow the decal instructions to the letter— which is to apply them over a gloss surface.
VR, Russ
RussellE
#306
_VISITCOMMUNITY
Victoria, Australia
Joined: June 27, 2010
KitMaker: 3,959 posts
AeroScale: 598 posts
Posted: Saturday, April 25, 2020 - 09:39 PM UTC
nice work on the mg's Stephen
redcap
_VISITCOMMUNITY
England - East Midlands, United Kingdom
Joined: November 06, 2005
KitMaker: 753 posts
AeroScale: 311 posts
Posted: Sunday, April 26, 2020 - 12:03 AM UTC
Really nice work so far Stephen and yours is one of the few Rumplers I have actually seen built; which is odd because I understand from those who have built lots in the range that it is one of the very best fitting and detailed WNW kits (which is saying something!) in their lineup.

Look forward to seeing this to completion.
Gary
phantom_phanatic309
#372
_VISITCOMMUNITY
United Kingdom
Joined: March 10, 2010
KitMaker: 2,568 posts
AeroScale: 1,619 posts
Posted: Sunday, April 26, 2020 - 09:09 AM UTC
Thanks Russell. I'm really happy with how the guns have turned out. For the small cost of the Karaya jackets, they were well worth it. I bought a a couple at the same time to use on a few others. So will definitely try again the WNW jackets as these make a great backup.

Welcome aboard Gary. This one really is a great kit and it is strange there aren't more builds of it. I found one on here of the early C.IV, can't remember by who, that I used as reference when I first started.

Russ, I took all your advice and bit the bullet with the decals today. Everything nicely glossed. I put on a coat of Tamiya primer and a thin coat of Vallejo pale blue before hand. The next lozenge covered aircraft I might just prime and gloss next time and save myself the time. They worked really well, better than expected in fact. I had to use some hot water and Microset to get them to wrap around the edges of the wing. I did manage to make a small tear on the edge of one near the wing tip, but I think the leading edge tape of the upper decals will cover that up.
A small correction decal sheet is included for the inboard section which has the cutout for the bottom of the compass.


Looking good so far.

Yesterday I decided to add a little bit of customisation and fit the flare rack on the fuselage side. Thought it would be a good idea to pin it rather than glue it directly to the side after the paint and decals, just in case it got knocked off and ruined the finish.


After I was done with that I airbrushed the fuselage with Vallejo Dark German Army green, from their WW2 Panzer colours but it looked right for this.

phantom_phanatic309
#372
_VISITCOMMUNITY
United Kingdom
Joined: March 10, 2010
KitMaker: 2,568 posts
AeroScale: 1,619 posts
Posted: Monday, April 27, 2020 - 07:39 AM UTC
Decided to put on my favourite TV show, Babylon 5, in the dvd this afternoon and crack on.

Got the upper wing lozenge done and painted in the padding around the cockpits. The wingtip decals needed a little persuading to settle down, hot water and gentle pressure did the trick.

gastec
_VISITCOMMUNITY
Auckland, New Zealand
Joined: February 03, 2014
KitMaker: 1,042 posts
AeroScale: 136 posts
Posted: Monday, April 27, 2020 - 07:52 AM UTC
Nice work.
If you're havi g trouble getting the decals to settle down on curved edges, use a little decal setting solution and a hairdryer.

Gary
phantom_phanatic309
#372
_VISITCOMMUNITY
United Kingdom
Joined: March 10, 2010
KitMaker: 2,568 posts
AeroScale: 1,619 posts
Posted: Monday, April 27, 2020 - 09:09 AM UTC

Quoted Text

Nice work.
If you're havi g trouble getting the decals to settle down on curved edges, use a little decal setting solution and a hairdryer.

Gary


Thanks Gary, I've been using Microset which is doing the trick. I think the upper decals will need more persuasion, they do wrap around a lot more so I'll try the hairdryer on them.
Cheers

RussellE
#306
_VISITCOMMUNITY
Victoria, Australia
Joined: June 27, 2010
KitMaker: 3,959 posts
AeroScale: 598 posts
Posted: Monday, April 27, 2020 - 11:01 PM UTC

Quoted Text

Decided to put on my favourite TV show, Babylon 5, in the dvd this afternoon and crack on.

Got the upper wing lozenge done and painted in the padding around the cockpits. The wingtip decals needed a little persuading to settle down, hot water and gentle pressure did the trick


No way!!! Babylon was my all time favourite show back in the day too! 🙂 Only surpassed by Farscape when they came out, but only by a very narrow margin!

Ground breaking shows both, and could still teach the newbies a thing or two these days!

Now, if only they'd digitally remaster both for Blu Ray!!! 🤔

And the lozenge decals are looking good, Stephen
phantom_phanatic309
#372
_VISITCOMMUNITY
United Kingdom
Joined: March 10, 2010
KitMaker: 2,568 posts
AeroScale: 1,619 posts
Posted: Tuesday, April 28, 2020 - 03:50 AM UTC
Thanks Russell. They turned out much better than I expected. Very colourful though, I hope a final coat of matt or satin will tone it down a little.

It would be amazing to get B5 on a remastered Blu-ray. Unfortunately there are a lot of factors that are preventing it. Mostly technical, but the main one being Warner Brothers lack of interest in the show.
The biggest challenge would be re-doing all of the effects shots. To do a true remaster requires the originals both digital CGI and film. Unfortunately, they've since been lost after the effects company dissolved and their computers sold off (amazingly the shows CGI was done on old Commodore Amiga 2000's). Rumour has it that even the original film negatives are also missing. When the dvd release was made, WB cheaped out and ripped the episodes from VHS tapes. Hence the fuzziness of those editions.
It's a shame, as I'm sure it would sell and would be great lasting legacy to the many cast members who have died in recent years.

I really must get around to my parents and find the Revell-Monogram kits of the station and Starfury fighters I bought back when they were first released. A pity they never got around to doing more kits, like AMT did with their Star Trek range. Would have loved a Whitestar and Earth Force Destroyer.


RussellE
#306
_VISITCOMMUNITY
Victoria, Australia
Joined: June 27, 2010
KitMaker: 3,959 posts
AeroScale: 598 posts
Posted: Tuesday, April 28, 2020 - 12:51 PM UTC

Quoted Text

Thanks Russell. They turned out much better than I expected. Very colourful though, I hope a final coat of matt or satin will tone it down a little.


Agreed, I usually head for the satin coat these days for a/c as I find that it's a lot closer to the real thing


Quoted Text

It would be amazing to get B5 on a remastered Blu-ray. Unfortunately there are a lot of factors that are preventing it. Mostly technical, but the main one being Warner Brothers lack of interest in the show.
The biggest challenge would be re-doing all of the effects shots. To do a true remaster requires the originals both digital CGI and film. Unfortunately, they've since been lost after the effects company dissolved and their computers sold off (amazingly the shows CGI was done on old Commodore Amiga 2000's). Rumour has it that even the original film negatives are also missing. When the dvd release was made, WB cheaped out and ripped the episodes from VHS tapes. Hence the fuzziness of those editions.
It's a shame, as I'm sure it would sell and would be great lasting legacy to the many cast members who have died in recent years.


I've heard much the same thing about the possibility of a remastered version for Blu-Ray. I think the main impediment for it is WB's reluctance to cough up the coin as they're worried it may not have the return on investment that say something like Star Trek Original series did (which by the way looks really good remastered).

Hopefully one day, WB do do it though, as the Producers had the foresight to shoot on 35mm film even though TV was still 4:3 at that time and as effects get cheaper it will prompt them to re-visit it.

It's a shame how many of the cast have passed away so young!

Unfortunately in the case of Farscape I don't think it will ever happen, unless a miracle occurs as the original film has gone missing and is suspected to be in a landfill somewhere on the outskirts of Sydney


Quoted Text

I really must get around to my parents and find the Revell-Monogram kits of the station and Starfury fighters I bought back when they were first released. A pity they never got around to doing more kits, like AMT did with their Star Trek range. Would have loved a Whitestar and Earth Force Destroyer.


If you have the Star Fury in your stash, unbuilt, then you're rich! Have a look at the prices they're going for on ebay etc!

Would be great to see you build it!

I'd love to get my hands on a new kit and build another, with the skills I have now. Here's the one I built around 20plus years ago. Not bad at the time, but I'm sure I could do better now, Lol!


Maybe Revell will re-issue for the 30th anniversary!
JackFlash
_VISITCOMMUNITY
Colorado, United States
Joined: January 25, 2004
KitMaker: 11,669 posts
AeroScale: 11,011 posts
Posted: Tuesday, April 28, 2020 - 04:39 PM UTC
Nice work Stephen. What will you use for rigging? If you are concerned about tension don't let it bother you. The whole affair is rather stout when completed. I have always used invisible (smoke colored) sewing thread. But recently I have used E-Z line in some of my 1/32 builds just to try it and am very pleased with the results. It is available in Railroad hobby shops. Here are a couple of shots using E-Z line.


 _GOTOTOP