World War II
Discuss WWII and the era directly before and after the war from 1935-1949.
Hosted by Rowan Baylis
Eduard P-51D Triple-Build
Merlin
Staff MemberSenior Editor
AEROSCALE
#017
_VISITCOMMUNITY
United Kingdom
Joined: June 11, 2003
KitMaker: 17,582 posts
AeroScale: 12,795 posts
Posted: Saturday, March 21, 2020 - 06:07 AM UTC
Hi again

Well, the silver lining to having to spend a few days locked in doors is that I've finally started to make some progress on the build!

Admittedly, it's just basic painting at the moment, but progress is progress.

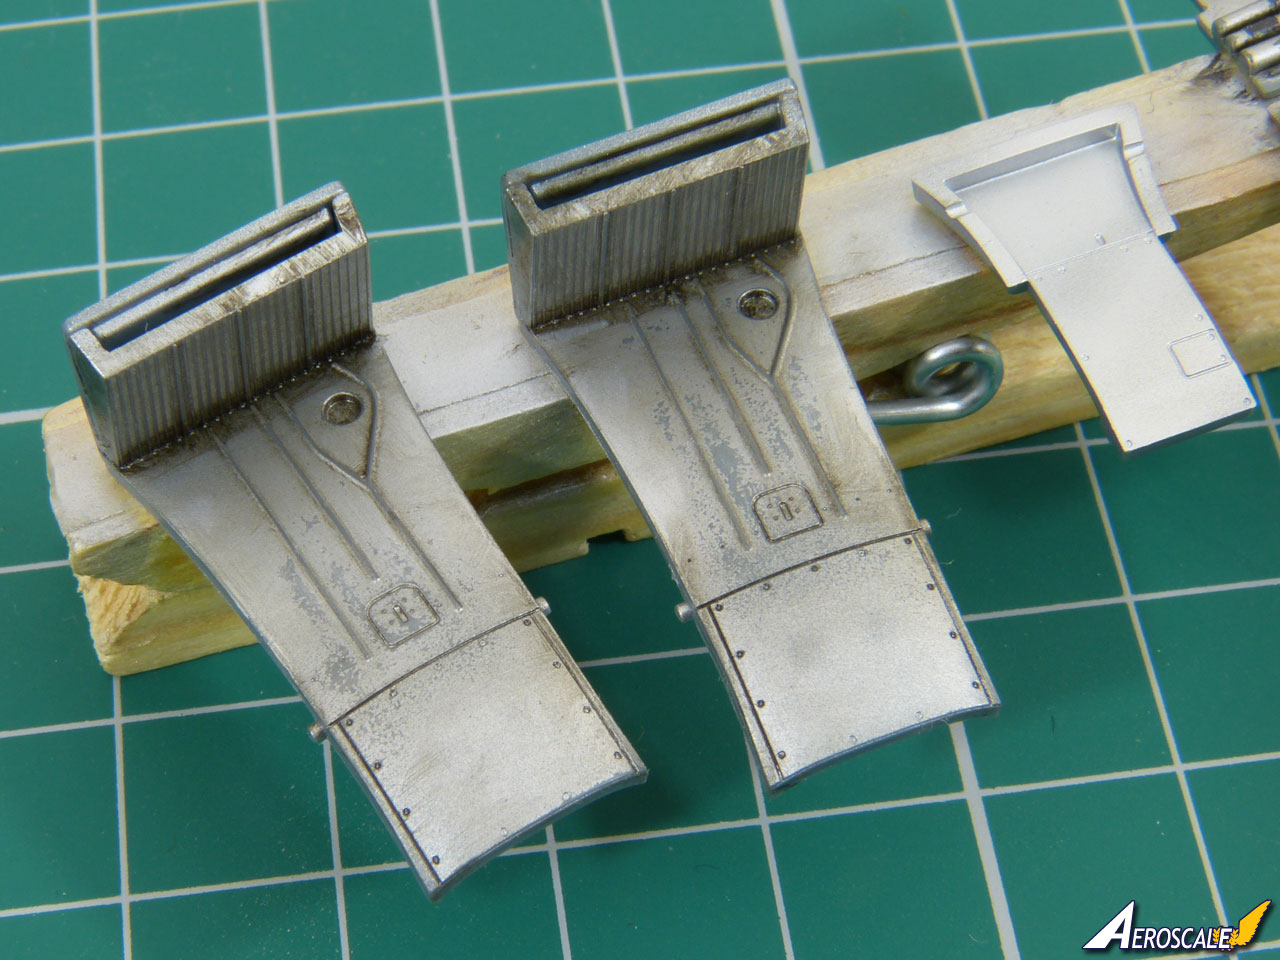
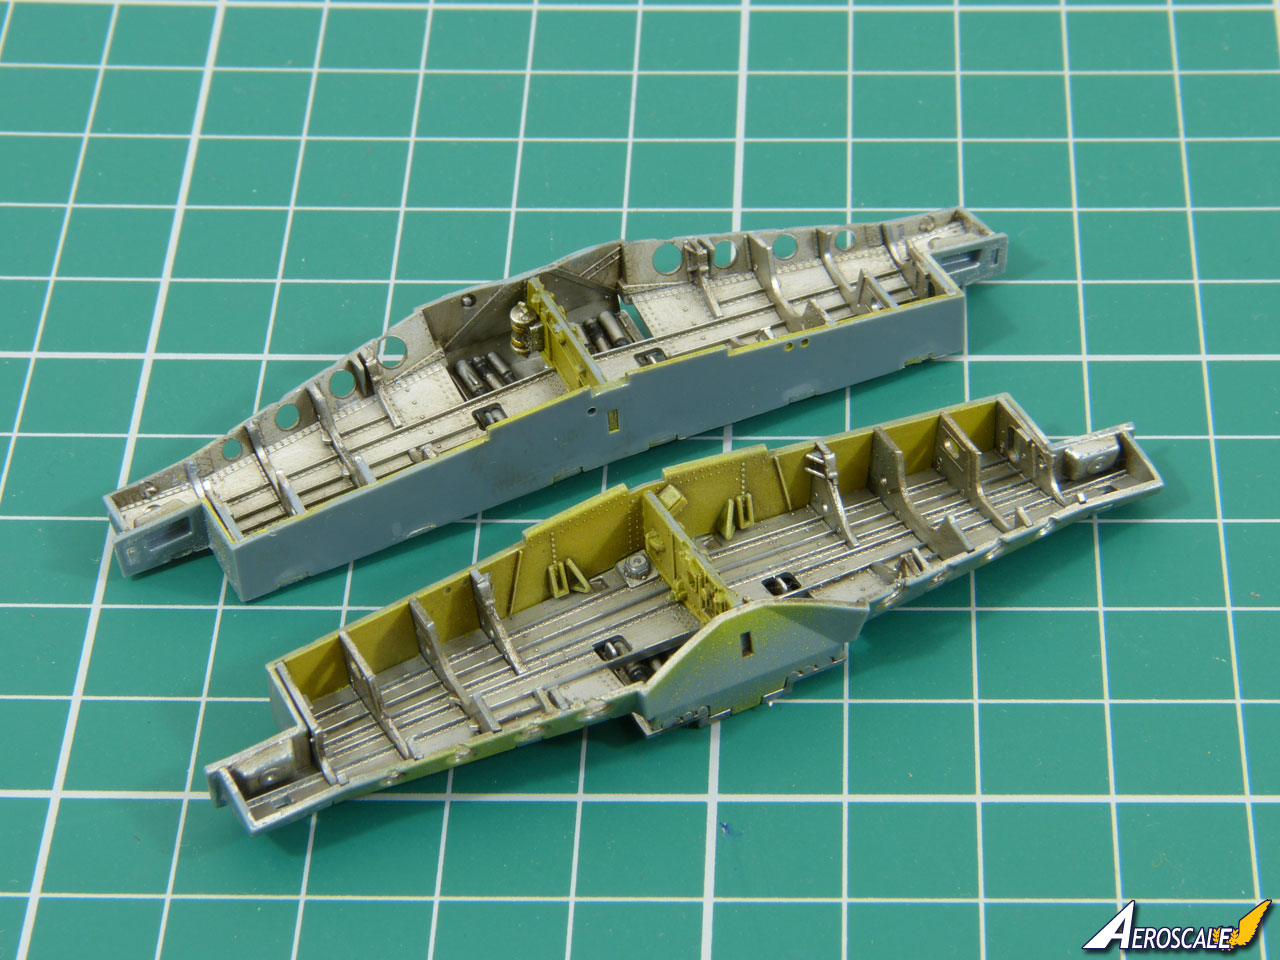
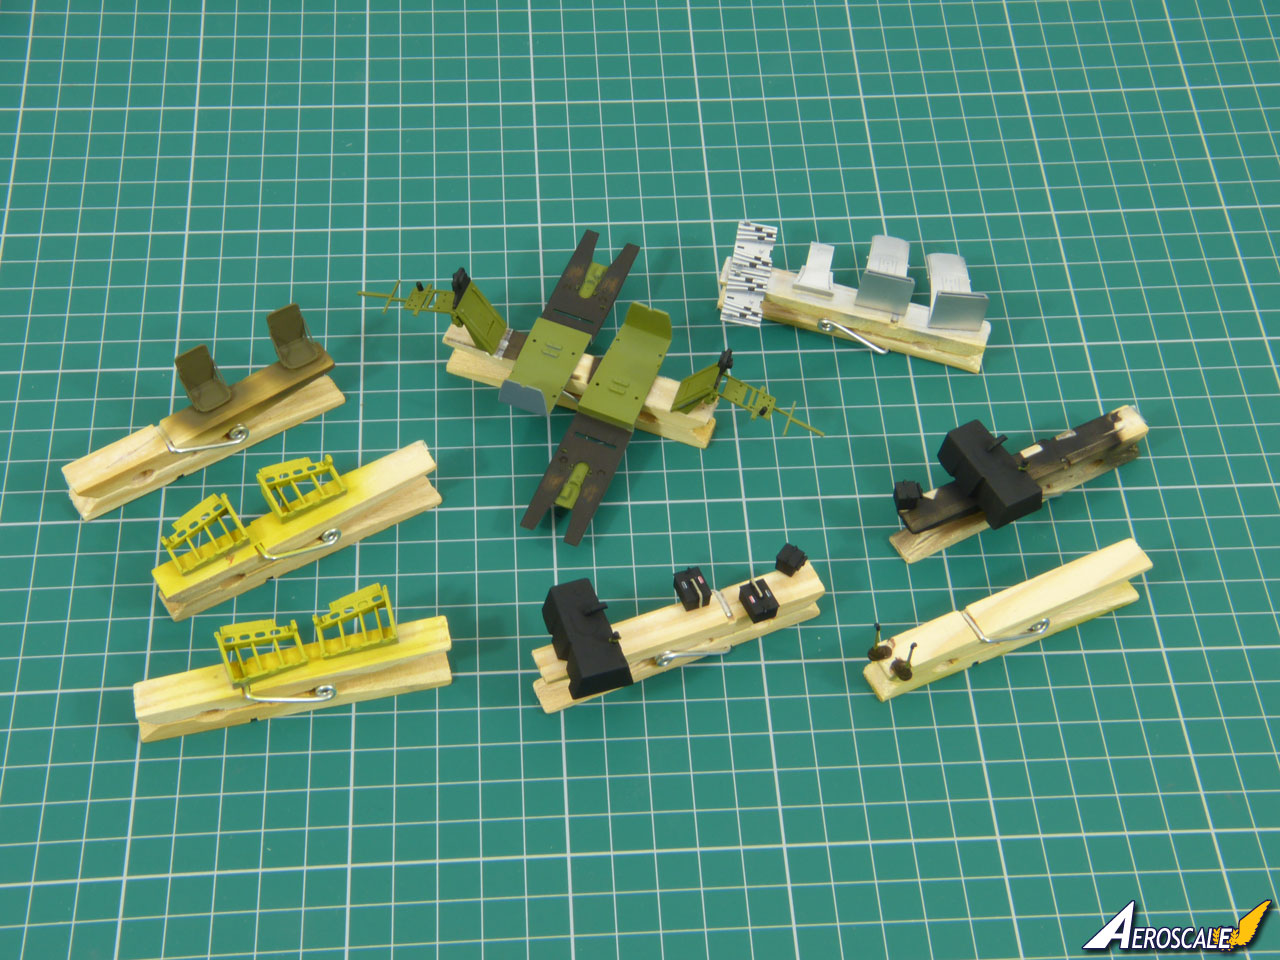
I did a quick and dirty wood finish on the cockpit floors with poster paint and sealed it with Klear prior to applying some AK "Worn Effects" fluid and a top coat of black acrylic:


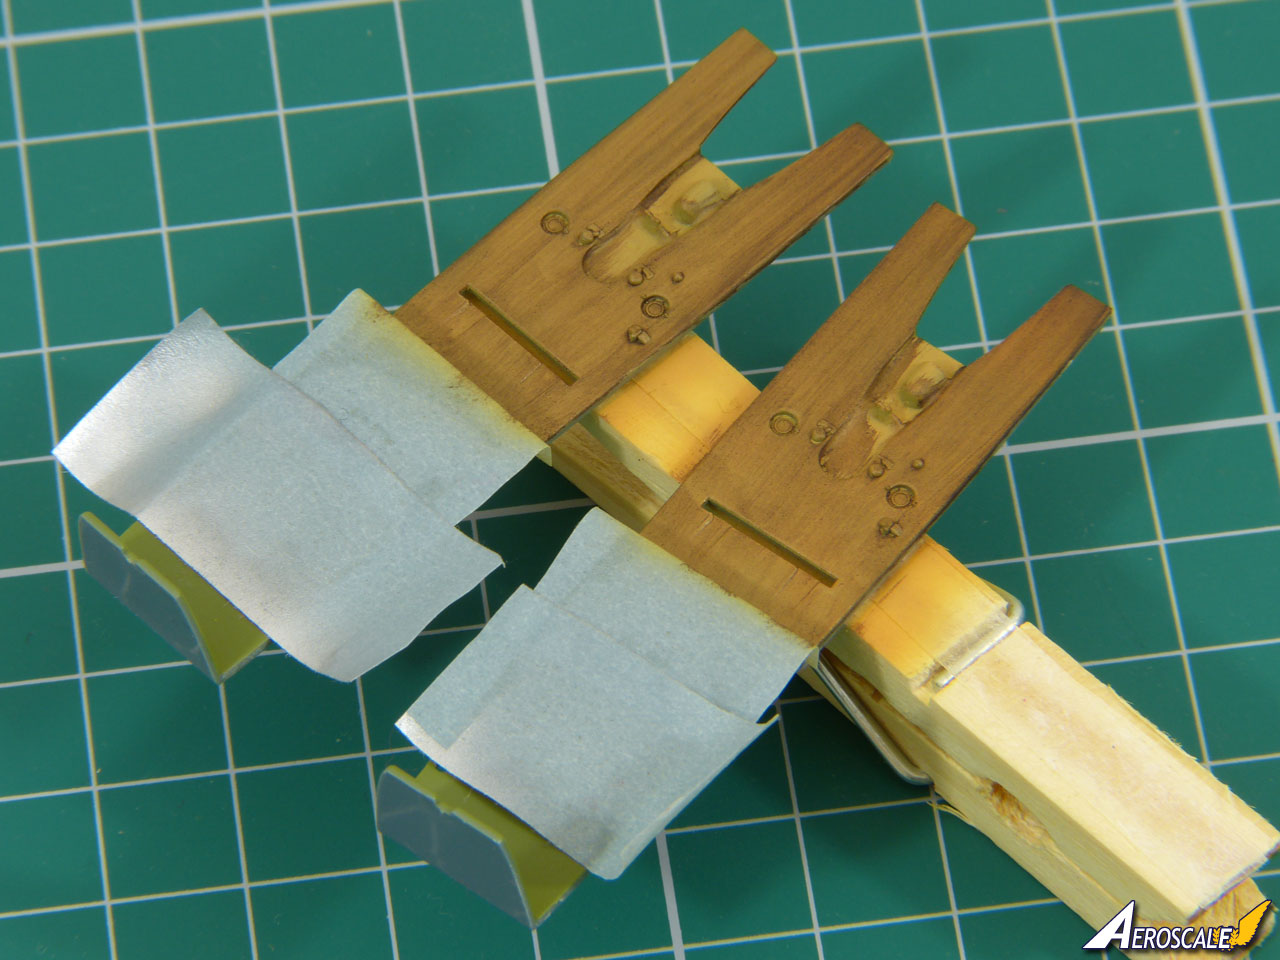
Scrubbing it gently revealed the "wood" as though the black non-slip paint had been worn through by the pilot's heels (I'll show the result later). Was it worth the hassle? To be honest, for the small amount of scuffing I depicted, probably not - dry-brushing with tan would have looked pretty much the same. But the "Worn Effects" worked perfectly and is definitely useful to have.

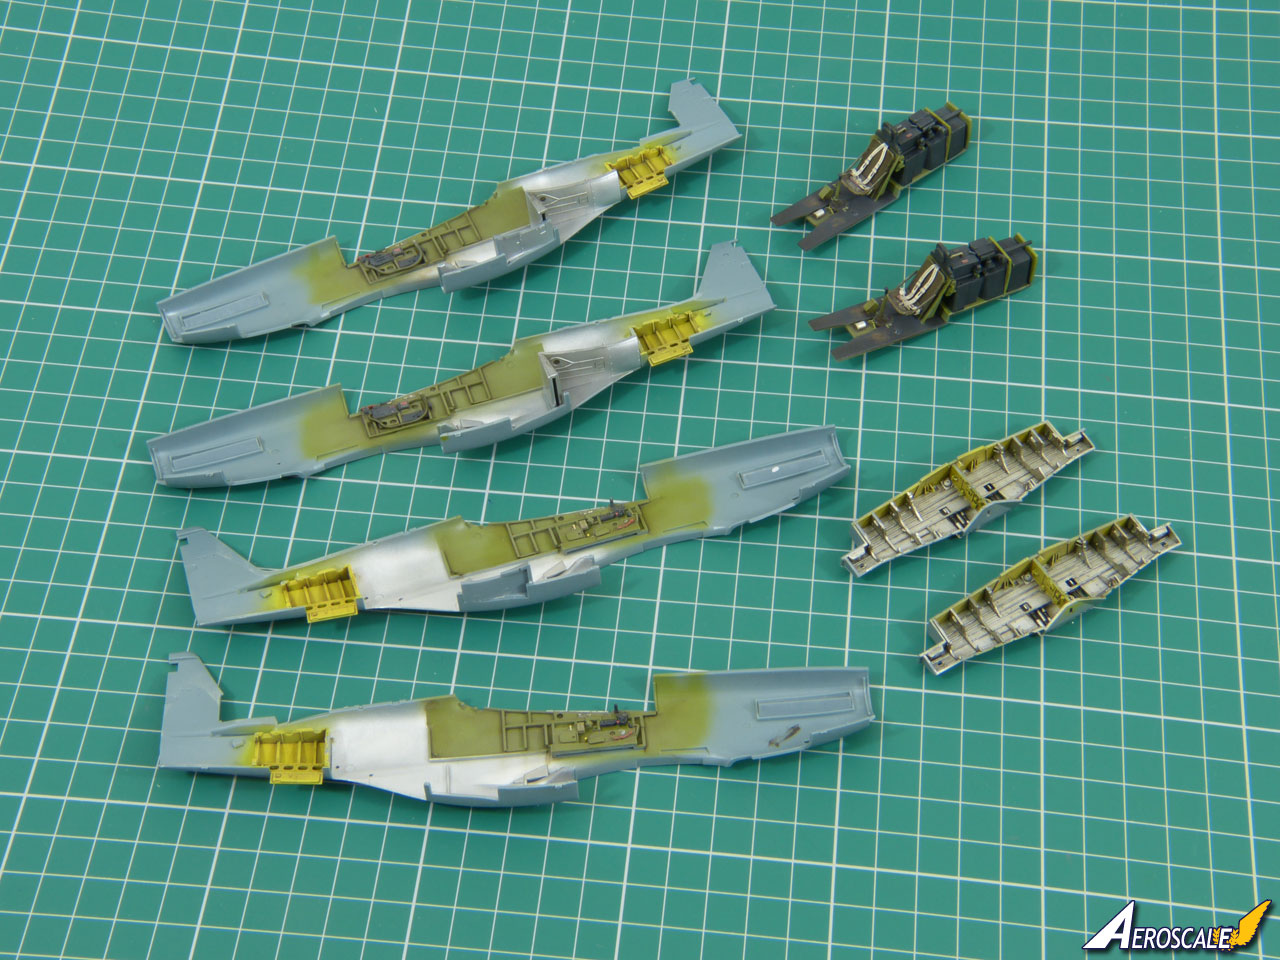
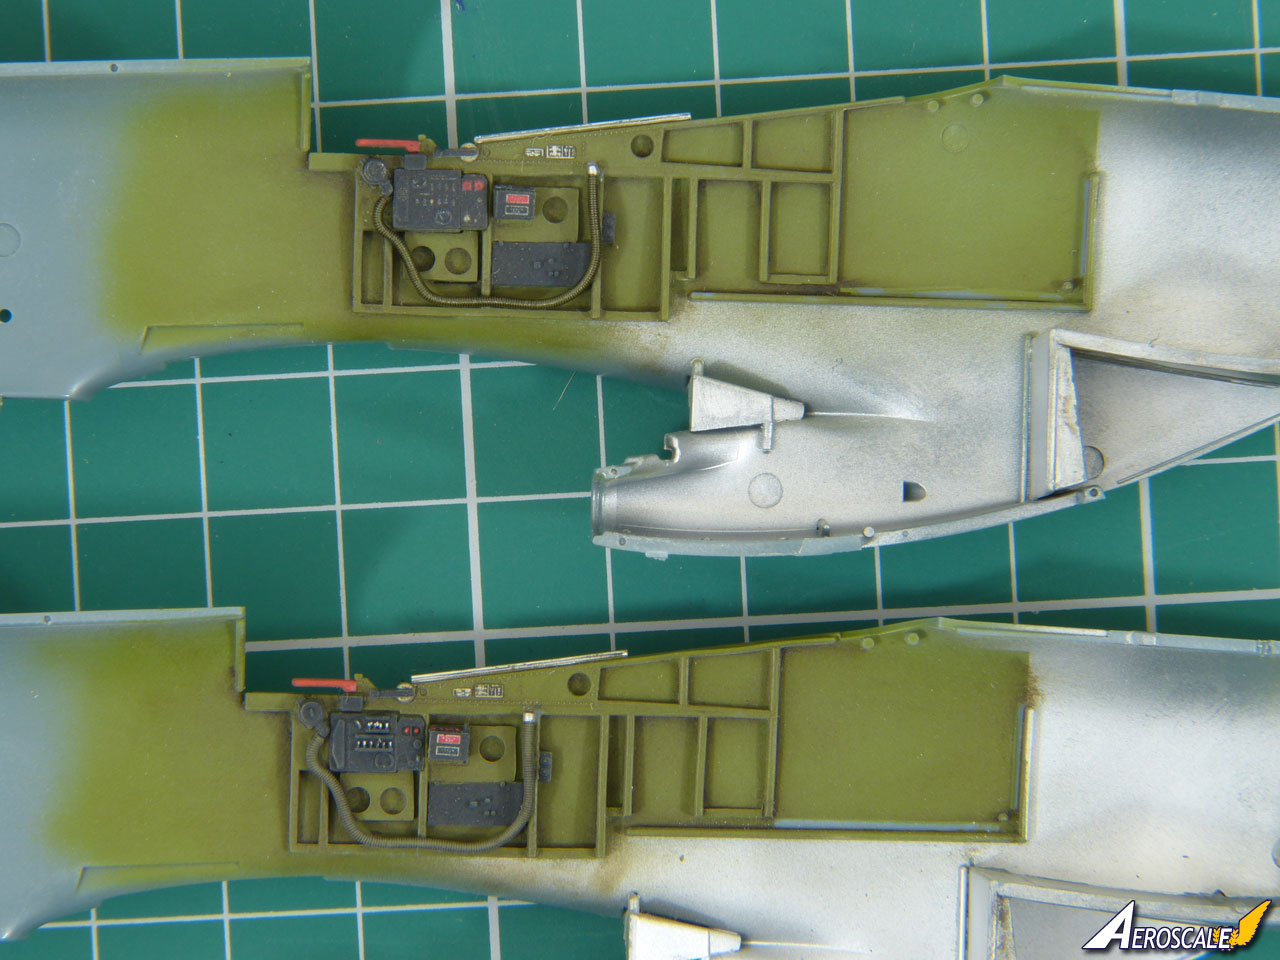
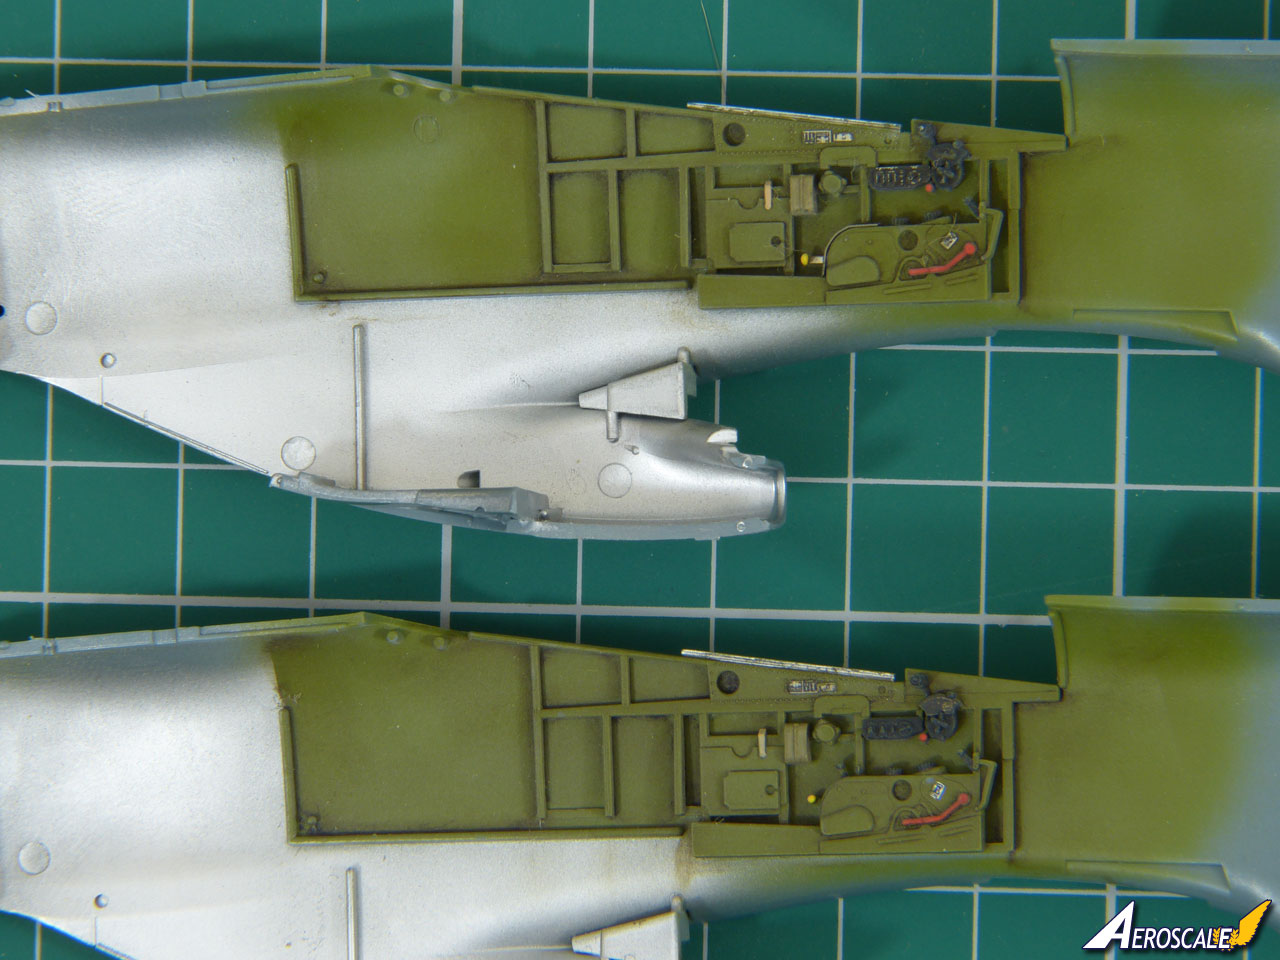
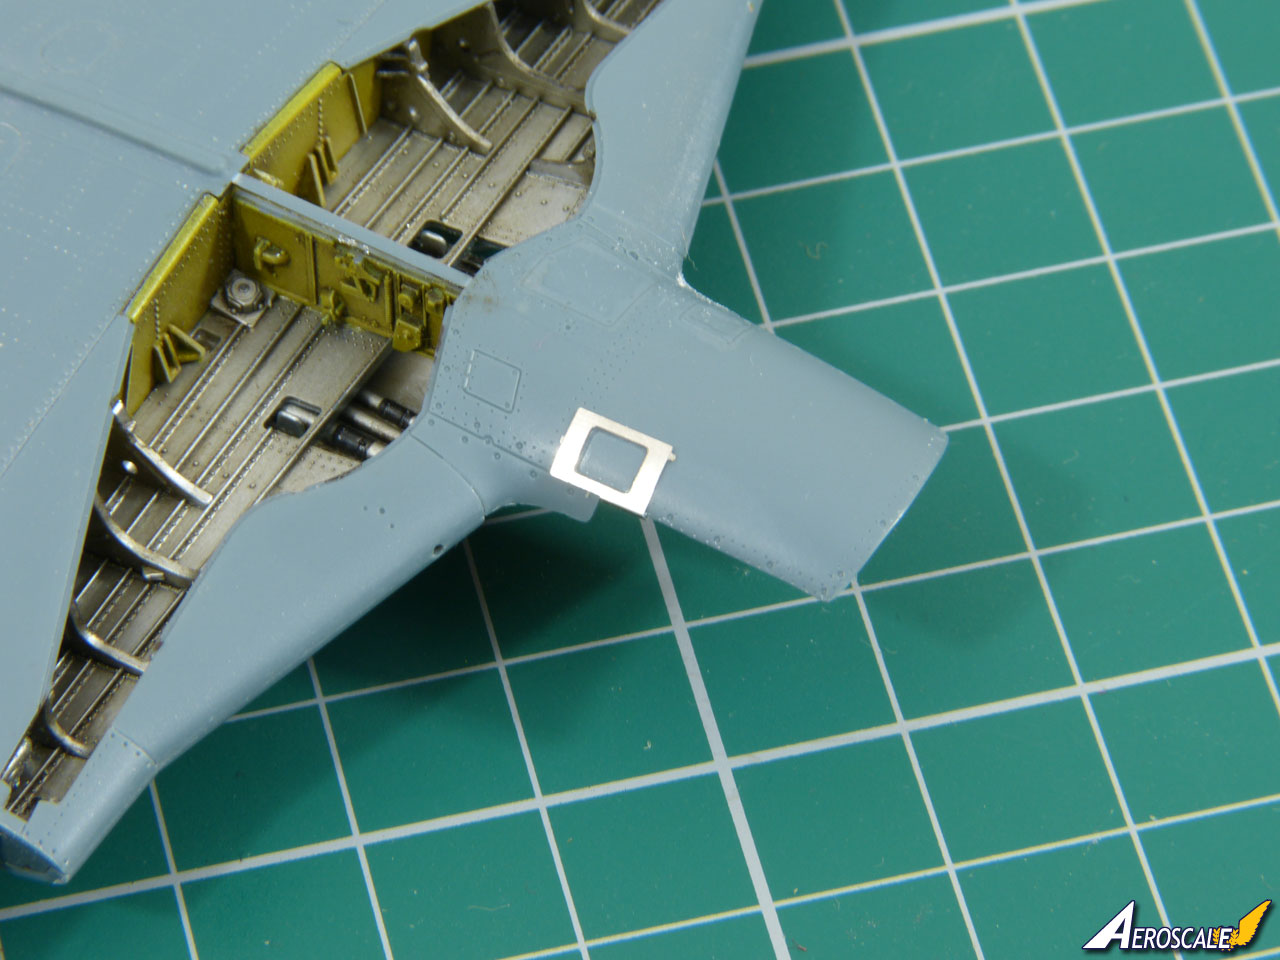
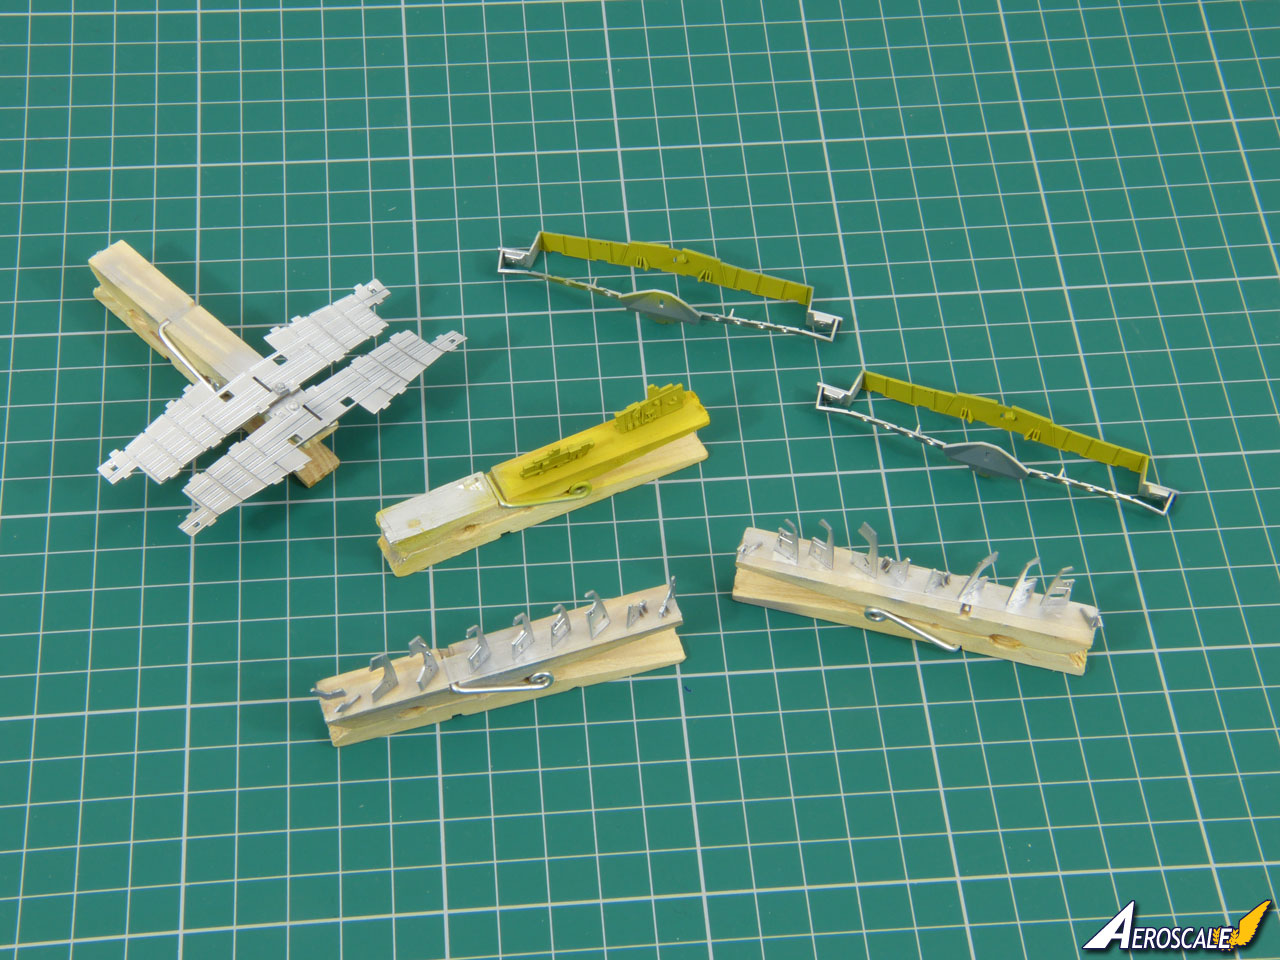
So - the current state of play is that the basic interior colours for the fuselage and wheel wells are sprayed on, and I've given everything a coat of Klear that I'll let dry overnight before starting weathering and shading with oil paint tomorrow and doing some more detail painting:


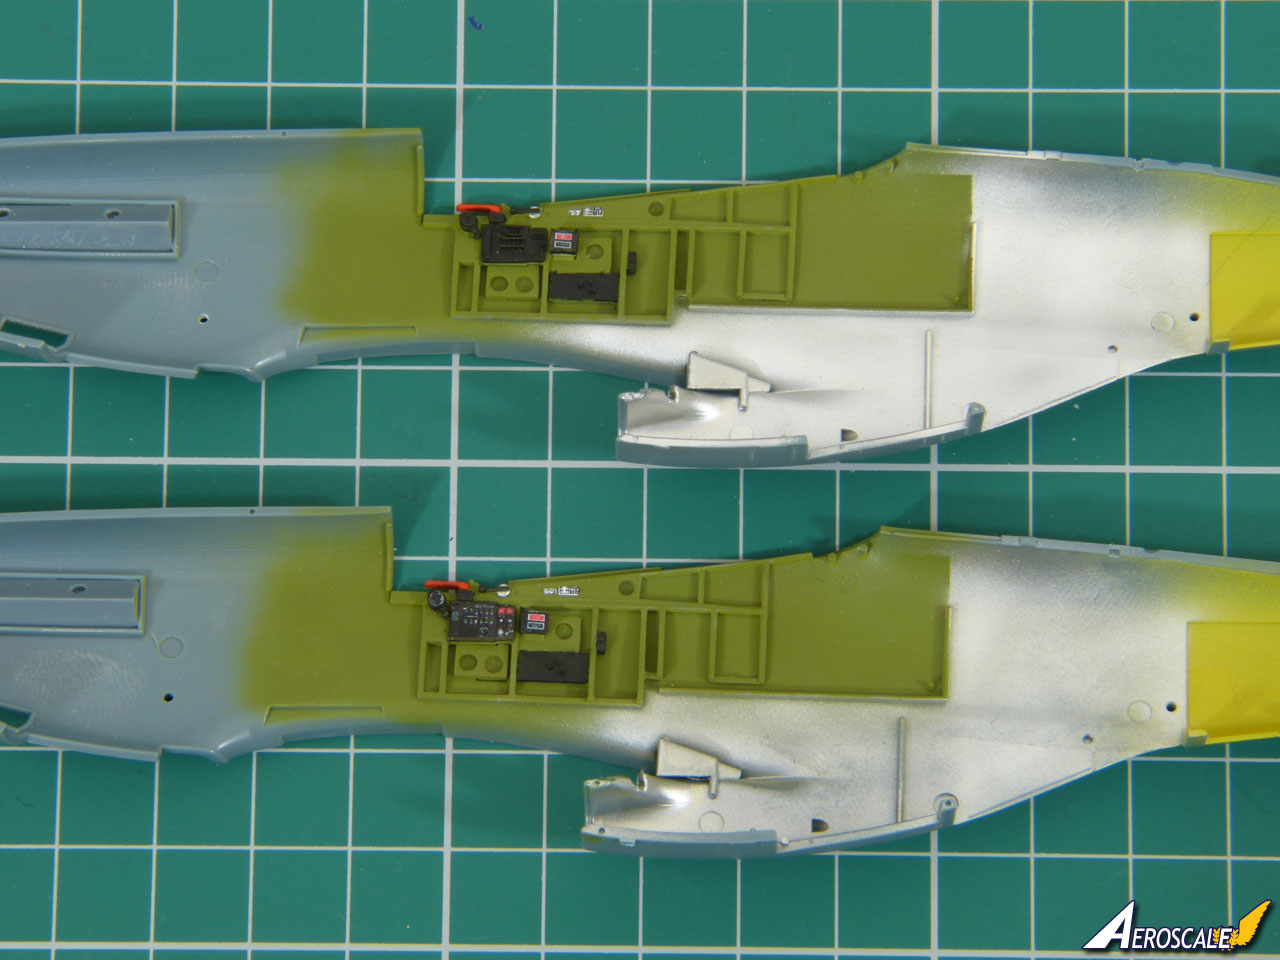
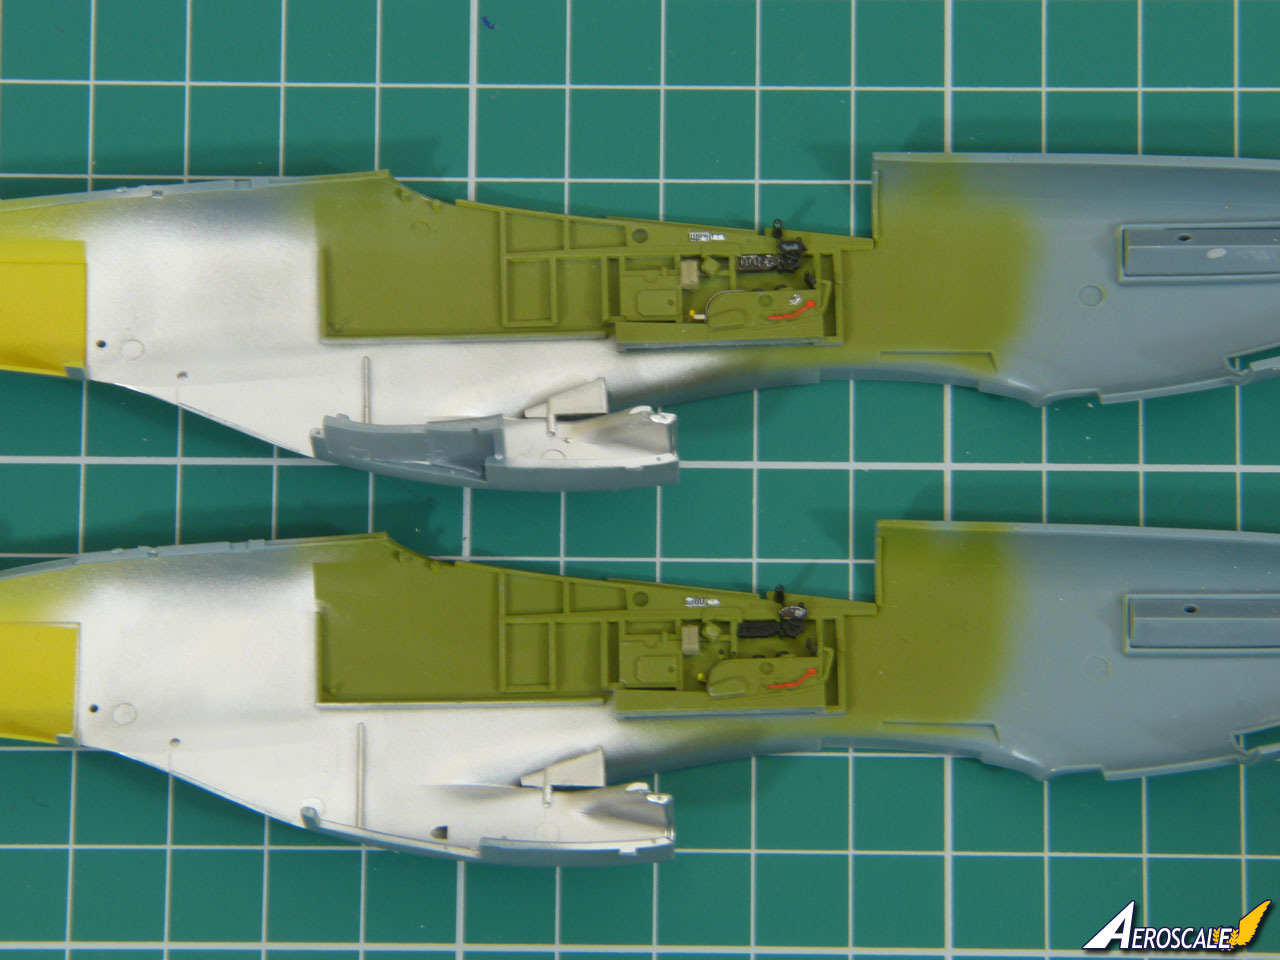
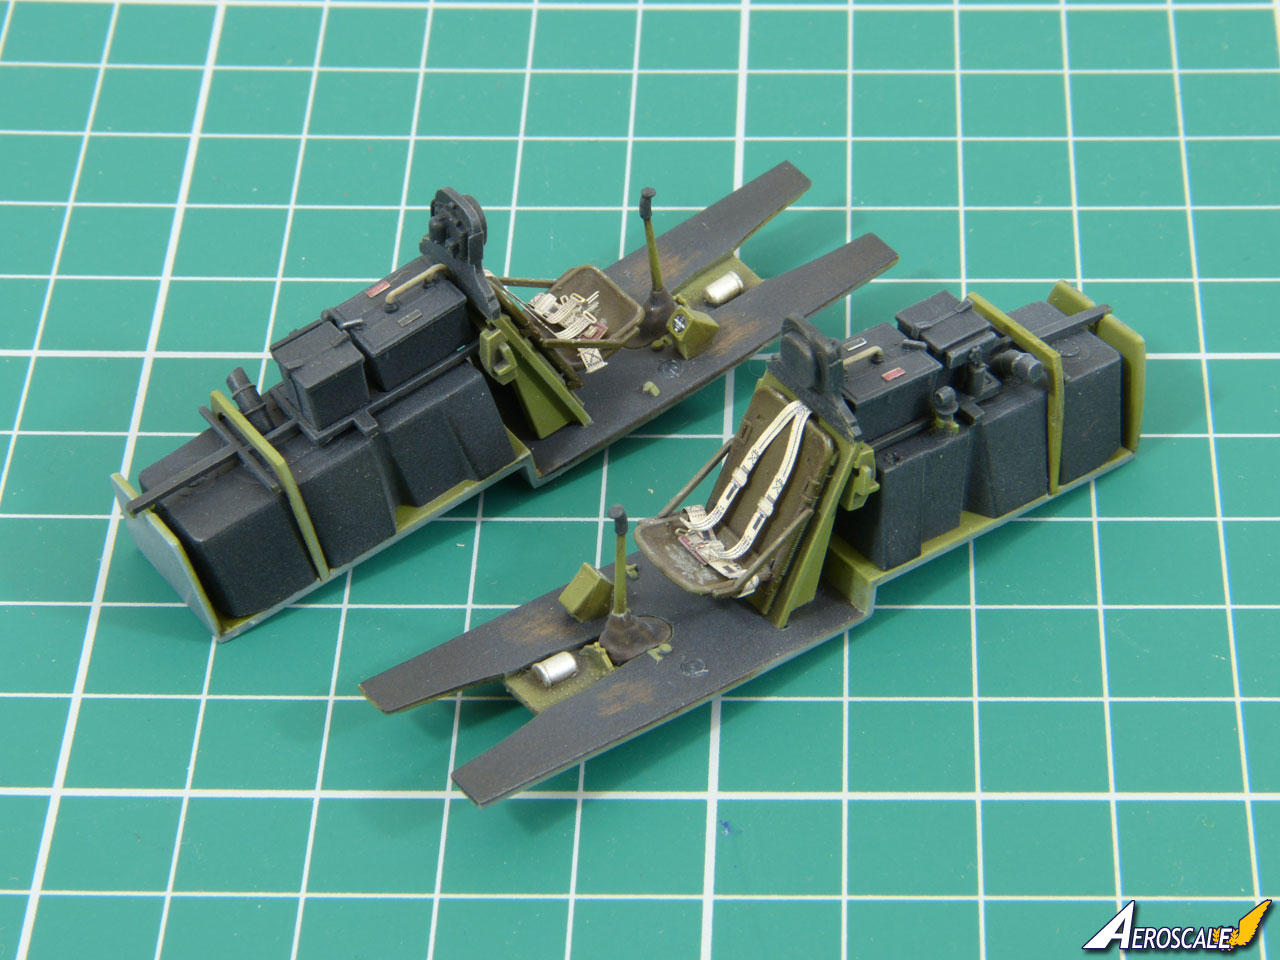
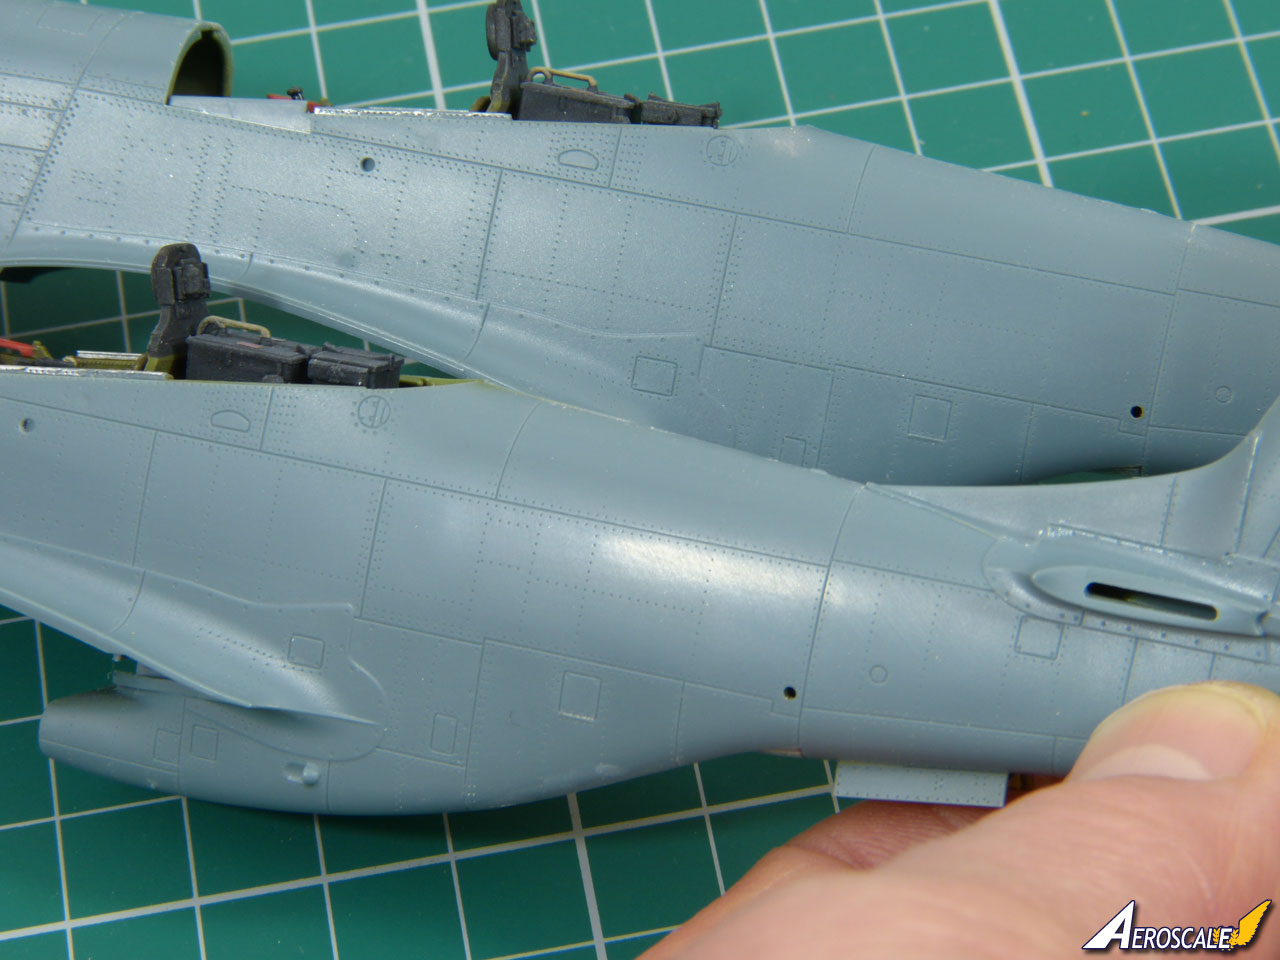
As you can see in the cockpits, I've used Eduard's pre-coloured placards in both, but I've left the moulded detail in one of them and used the etched fascias in the other for comparison.

More soon.

All the best

Rowan
chrispap
_VISITCOMMUNITY
Thessaloniki, Greece / Ελλάδα
Joined: August 30, 2016
KitMaker: 62 posts
AeroScale: 60 posts
Posted: Saturday, March 21, 2020 - 11:47 PM UTC
Hi Rowan.Nice details in both Mustangs.The best is yet to come. Thank you.
Joel_W
Staff MemberAssociate Editor
AUTOMODELER
_VISITCOMMUNITY
New York, United States
Joined: December 04, 2010
KitMaker: 11,666 posts
AeroScale: 7,410 posts
Posted: Sunday, March 22, 2020 - 01:14 AM UTC
Rowan,
Now that's some excellent progress on two of the cockpits. Looking forward to your next update.

Joel
Merlin
Staff MemberSenior Editor
AEROSCALE
#017
_VISITCOMMUNITY
United Kingdom
Joined: June 11, 2003
KitMaker: 17,582 posts
AeroScale: 12,795 posts
Posted: Sunday, March 22, 2020 - 04:46 AM UTC
Cheers guys

After such a slow start, it's nice just to be underway! There's obviously a lot still to do - and everything's still at that stage where it all looks a bit dull - but at least I can begin to see how the cockpits should come to life if I don't mess up...

All the best

Rowan
BlackWidow
_VISITCOMMUNITY
European Union
Joined: August 09, 2009
KitMaker: 1,732 posts
AeroScale: 1,336 posts
Posted: Sunday, March 22, 2020 - 07:59 AM UTC
Lovely work on the Stangs, Rowan! Staying at home because of Covid 19 gives us more bench time. I notice that also while working on my Mersus. We model builders never get bored staying inside, don't we? That's a least one positive effect of this disaster.

Take care!
Torsten
Merlin
Staff MemberSenior Editor
AEROSCALE
#017
_VISITCOMMUNITY
United Kingdom
Joined: June 11, 2003
KitMaker: 17,582 posts
AeroScale: 12,795 posts
Posted: Sunday, March 22, 2020 - 09:42 AM UTC
Hi Torsten

I agree... to an extent. I won't try to pretend I haven't welcomed an enforced week off work (I hadn't had a day off in the previous two weeks!), but I don't think we've all really taken on board how long this crisis is likely to last and how deep it will bite.

I'm getting daily reports from manufacturers facing problems in production and shipping - so this "golden opportunity" to get to the workbench might prove to be short-lived as supplies dry up. Newly announced kits and accessories could well be delayed - and, to be honest, some smaller companies might not make it through the crisis.

Whenever the "all clear" is finally signalled, we could all be facing quite a different modelling scene to that predicted at the start of this year.

So, I'll just say to everyone, follow the advice your governments are putting out and do everything you can to stay safe and healthy. We want to see all of you back on Aeroscale when this is all over!

Take care and all the best to you all

Rowan
AussieReg
Staff MemberAssociate Editor
AUTOMODELER
#007
_VISITCOMMUNITY
Victoria, Australia
Joined: June 09, 2009
KitMaker: 8,156 posts
AeroScale: 3,756 posts
Posted: Sunday, March 22, 2020 - 11:09 AM UTC

Quoted Text

So, I'll just say to everyone, follow the advice your governments are putting out and do everything you can to stay safe and healthy. We want to see all of you back on Aeroscale when this is all over!

Take care and all the best to you all

Rowan


Wise words Rowan, I really hope that everybody adheres to the advice of the health experts and authorities, and in the meantime there should be plenty of progress reports coming in to the Kitmaker forums!

Great to see some progress on these builds, the detailing is coming together nicely.

Cheers, D
Joel_W
Staff MemberAssociate Editor
AUTOMODELER
_VISITCOMMUNITY
New York, United States
Joined: December 04, 2010
KitMaker: 11,666 posts
AeroScale: 7,410 posts
Posted: Monday, March 23, 2020 - 01:46 AM UTC
Rowan,
Well said.

Everyday here in the USA the morning news is worse then the day before. Way to many young people not heeding the stay at home, no social interacting, and the spread is basically out of control for now. Long term est is 1 year to 18 months for a usable vaccine. Hopefully a lot sooner.

As for modeling, well, you focused on the real issues facing our hobby. Almost all of the car kits now come out of China at least for molding, decals, instructions, and boxing. And China has been basically shut down for nearly two months. As they slowly turn on their economy, no one really knows what the effect will be.

For us in the Northeast USA, I live 45 min from the highest concentration of the virus, and it's spread to every part of Long Island now. Food no matter what the Gov't says is in very short supply as hording is also out of control. All stores are shut down except food stores and pharmacies. I'm almost out of Lacquer Thinner for cleaning my air brushes, and there's no hardware store open. The stores don't have any Iso, Ethel, or Methel alcohol and don't expect any. Worse, no toilet paper or paper towels. One person on the news said that he's got more then 100 rolls of each!!

I buy my models from Spot located in Spain, as well as my paints. Both companies are up and running via the internet as long as the deliveries companies are doing the same. Spot Models is already experiencing major delays of deliveries from China. So as their stocks dry up, no new kits. Gravity and Zero paints are also in Spain and are also still shipping. With that said, be prepared to pay major increases for shipping as Postal shipping is worse then ever.

Joel
M4A1Sherman
_VISITCOMMUNITY
New York, United States
Joined: May 02, 2013
KitMaker: 4,403 posts
AeroScale: 254 posts
Posted: Monday, March 23, 2020 - 07:41 AM UTC
Hello, EVERYONE!

It is my fervent desire to convey to you all and your families, my best wishes, hopes and prayers for your continued good health! As for myself, I've been hibernating; only going out to buy the barest of necessities and my required medications. I've only been buying a few selected items here and there, as far as my model-building interests are concerned. Got to hold on to any and all money that I possibly can, as we don't know how this "thing" is going to last...

Take Care, All Of You!
Merlin
Staff MemberSenior Editor
AEROSCALE
#017
_VISITCOMMUNITY
United Kingdom
Joined: June 11, 2003
KitMaker: 17,582 posts
AeroScale: 12,795 posts
Posted: Monday, March 23, 2020 - 09:54 AM UTC
Hi again

The next update illustrates the perils of trying to do too much at once! I've been so keen to press ahead, I slipped up.

Let me explain; I seldom use weathering washes when I weather things, instead preferring to apply neat oil paints. This doesn't risk "tide marks" and I love the subtle colour shifts it creates.

But the absolutely crucial thing is to apply a clear acrylic coat first (I use good old-fashioned Klear, which I still have a good stock of). And, guess what - I missed one of my sets of sets of parts in the photo above.

So, when I began working on the oil paint, this happened:


It started to take the paint underneath off.

Luckily, it was easy to strip the parts and repaint them - and make sure I applied Klear this time! - so I should be back underway tomorrow.

Ironically, done intentionally, the way the paint's come off could be the basis of a really useful technique.The linseed oil in the oil paints is attacking the underlying Gunze Sangyo coat in a really subtle way that could create a great weathering effect - it's just totally not what I want in this instance!

Hopefully I'll have another update tomorrow - with some actual progress to show.

All the best

Rowan
AussieReg
Staff MemberAssociate Editor
AUTOMODELER
#007
_VISITCOMMUNITY
Victoria, Australia
Joined: June 09, 2009
KitMaker: 8,156 posts
AeroScale: 3,756 posts
Posted: Monday, March 23, 2020 - 10:23 AM UTC
A happy accident! That is definitely a nice weathering effect, just in the wrong spot as you said.

Cheers, D
Merlin
Staff MemberSenior Editor
AEROSCALE
#017
_VISITCOMMUNITY
United Kingdom
Joined: June 11, 2003
KitMaker: 17,582 posts
AeroScale: 12,795 posts
Posted: Wednesday, March 25, 2020 - 09:02 AM UTC
Hi again

OK - today was a write-off! I had a DHL dispatch booked for this morning, so I didn't risk heading off to my workroom where I might miss the doorbell. After wasting the day (well, not really wasting, because I did do a load of housework that I normally find an excuse not to tackle! ) the courier arrived at tea-time.

So... tomorrow sees the start of my real lockdown regime: a daily diet of modelling, reviewing and guitar-practice - plus, you've guessed it, housework! LOL! Whenever we finally surface from this mess, I want to be a better modeller and guitarist - and have got the house straight.

Take care and keep safe everyone.

All the best

Rowan
AussieReg
Staff MemberAssociate Editor
AUTOMODELER
#007
_VISITCOMMUNITY
Victoria, Australia
Joined: June 09, 2009
KitMaker: 8,156 posts
AeroScale: 3,756 posts
Posted: Wednesday, March 25, 2020 - 11:02 AM UTC
A solid plan and definitely a great outcome if you can follow it!

Take care and stay safe.

Cheers, D
Joel_W
Staff MemberAssociate Editor
AUTOMODELER
_VISITCOMMUNITY
New York, United States
Joined: December 04, 2010
KitMaker: 11,666 posts
AeroScale: 7,410 posts
Posted: Thursday, March 26, 2020 - 01:49 AM UTC
Rowan,
I must be missing something here. That mistake in weathering really looks super realistic for a weather beaten aircraft. But I guess that's not the look you're going for.

Staying at home isn't so bad, as we've been in lock down for 10 days. I've gone out wearing a mask but no gloves as you just can't get them to the food store, pharmacy, and hardware store. The numbers here on Long Island are staggering, and daily are getting worse.

Stay safe and all be well. Hopefully by late Spring we'll have a handle on this.

Joel
Merlin
Staff MemberSenior Editor
AEROSCALE
#017
_VISITCOMMUNITY
United Kingdom
Joined: June 11, 2003
KitMaker: 17,582 posts
AeroScale: 12,795 posts
Posted: Thursday, March 26, 2020 - 08:34 AM UTC

Quoted Text

Rowan,
I must be missing something here. That mistake in weathering really looks super realistic for a weather beaten aircraft. But I guess that's not the look you're going for...

Joel


Hi Joel

No - you're not missing something. I agree with you, and I'm quite excited by the accidental discovery. I'll definitely try to replicate it so that I've got the effect as part of my arsenal of techniques.

But, in this instance, the photo maybe makes the result look better than it actually is; where the paint's been removed has revealed bare plastic, so it doesn't really look appropriate for any kind of weathering on a n/m finish. (If it was meant to represent an area of paint over bare metal (with the bottom metal coat sealed against the linseed oil), that would be different.)

I think I got the last of the interruptions out of way today as we took part in management conference calls etc. for work to organise the full lockdown, so I hope to crack on with the build tomorrow. Famous last words, but I think it's on the cusp of building up momentum.

All the best

Rowan
Merlin
Staff MemberSenior Editor
AEROSCALE
#017
_VISITCOMMUNITY
United Kingdom
Joined: June 11, 2003
KitMaker: 17,582 posts
AeroScale: 12,795 posts
Posted: Sunday, April 05, 2020 - 01:42 AM UTC
Hi again

Sorry for the delay in posting any progress. I have been tinkering with the build, but spent a lot of time last week organising having my Oxfam shop closed for two months, checking how my volunteers were coping in the lockdown and keeping them all informed as to what's happening.

But I think I'm getting into the routine of things now, and hope to devote some time every day to modelling.

So, the state of play at the moment is that the interiors are basically done (the trim wheels still need to be added). I still want to paint a few extra details (and, as you can see in the photos, there's dust to remove!), but things are nearing the point where I can close up the fuselage and wings:


So, this is probably the last time the sets of parts will sit together. From this point on, I'll start dividing them into builds 1 and 2.

All the best

Rowan
Merlin
Staff MemberSenior Editor
AEROSCALE
#017
_VISITCOMMUNITY
United Kingdom
Joined: June 11, 2003
KitMaker: 17,582 posts
AeroScale: 12,795 posts
Posted: Sunday, April 05, 2020 - 06:40 AM UTC
Hi again

One little change I've made before assembling the wings concerns the recognition lamps. Eduard have moulded them really nicely with frames and little "bulbs", but the instructions show the clear red, green and yellow applied on the inside - behind the lamps, so to speak.

Instead of doing that, I've added a piece of aluminium tape so serve as a reflector:


I'll add the colours on the outside after painting. Eduard include die-cut washi tape masks in the ProfiPack boxings of the kit, but drops of liquid mask or latex will do the job just as well for the Weekend Edition versions that must be coming.

All the best

Rowan
chrispap
_VISITCOMMUNITY
Thessaloniki, Greece / Ελλάδα
Joined: August 30, 2016
KitMaker: 62 posts
AeroScale: 60 posts
Posted: Tuesday, April 07, 2020 - 05:04 AM UTC
Very cool Rowan,love the details.Looking forward.Take care.Christos
Merlin
Staff MemberSenior Editor
AEROSCALE
#017
_VISITCOMMUNITY
United Kingdom
Joined: June 11, 2003
KitMaker: 17,582 posts
AeroScale: 12,795 posts
Posted: Tuesday, April 07, 2020 - 06:12 AM UTC
Cheers Christos

Thanks for looking in and your kind words.

I made quite a bit of progress today, basically cleaning up the seams on the fuselage and wings, so I hope to get them joined together tomorrow.

One thing that did strike me as slightly odd is that Eduard include a scribing template to add a panel under the nose:


Don't get me wrong - it works fine. But, seeing as you have to fill the engraved panels on the other side (I've used CA + Talc, which is easy to apply precisely and dries quickly), wouldn't it have been simply to mould all the panels? Then you could just fill whichever you don't need for a specific version instead of doing scribing and filling...

But, having got that minor whinge out of my system, I've got to say I'm loving this build! The overall design is fantastic and Eduard's Mustang is really impressing me in its standard (ProfiPack) form.

I should have more to show soon, with the first two kits in the triple-build starting to look Mustang-shaped.

All the best

Rowan
Joel_W
Staff MemberAssociate Editor
AUTOMODELER
_VISITCOMMUNITY
New York, United States
Joined: December 04, 2010
KitMaker: 11,666 posts
AeroScale: 7,410 posts
Posted: Tuesday, April 07, 2020 - 06:53 AM UTC
Rowan,
Your progress on both P-51s is beyond what I thought you'd accomplish so quickly. The cockpits looks perfect as does those wheel wells. The amount of detail that's included in these kits is just amazing.

As for the ID lights. What a fantastic idea with the Aluminum tape. Going to have to borrow that idea from you, as it applies very nicely to some race car applications.

Sure does seem that a little R&R does you very well.

Joel
Jessie_C
_VISITCOMMUNITY
British Columbia, Canada
Joined: September 03, 2009
KitMaker: 6,965 posts
AeroScale: 6,247 posts
Posted: Tuesday, April 07, 2020 - 07:55 AM UTC

Quoted Text

One thing that did strike me as slightly odd is that Eduard include a scribing template to add a panel under the nose:


Don't get me wrong - it works fine. But, seeing as you have to fill the engraved panels on the other side (I've used CA + Talc, which is easy to apply precisely and dries quickly), wouldn't it have been simply to mould all the panels? Then you could just fill whichever you don't need for a specific version instead of doing scribing and filling...


Perhaps they thought that it would be too close to the other panel lines and as a result get obliterated when you filled those?
Merlin
Staff MemberSenior Editor
AEROSCALE
#017
_VISITCOMMUNITY
United Kingdom
Joined: June 11, 2003
KitMaker: 17,582 posts
AeroScale: 12,795 posts
Posted: Wednesday, April 08, 2020 - 07:24 AM UTC
Hi Joel and Jessie

Many thanks for taking a look at my progress.

@ Joel - I really appreciate your comments. You know how highly I rate your own work.

@ Jessie - that was my first thought too. But the panels you have to fill are equally close to surrounding detail (hence why I used CA + talc applied with a toothpick). The way it is, the panel you scribe lacks the surrounding embossed depiction of strengthening rivets (which I imagine the original would have had) that Eduard have done for the others. Maybe the answer is that it was a "last-minute" addition in the design of the kit?

Anyway... onward and downward into the build!

One thing I do think is worth doing if you're going for a n/m finish is an overall polish of the exterior. Eduard's surface detailing is exceptional, but - as with most modern kits - the finish is "satin". However, a quick pass with a buffer brings up a shine:


So - the current state of play? The basic airframes are assembled and waiting for a bit of clean-up - and definitely starting to look like Mustangs:


Having reached this point, I'm going to call a time-out for a few days to switch attention to a sorely neglected build that I've been promising to get back to over on Auto Modeler for longer than I'd like to remember!

But I will be back with more progress very soon.

Thanks to everyone looking in. Take care and keep safe.

All the best

Rowan
Jessie_C
_VISITCOMMUNITY
British Columbia, Canada
Joined: September 03, 2009
KitMaker: 6,965 posts
AeroScale: 6,247 posts
Posted: Wednesday, April 08, 2020 - 09:01 AM UTC
Are you planning on being authentic and puttying over the wing panel lines?
Merlin
Staff MemberSenior Editor
AEROSCALE
#017
_VISITCOMMUNITY
United Kingdom
Joined: June 11, 2003
KitMaker: 17,582 posts
AeroScale: 12,795 posts
Posted: Wednesday, April 08, 2020 - 09:37 AM UTC

Quoted Text

Are you planning on being authentic and puttying over the wing panel lines?


Hi Jessie

I'm glad someone's on the ball. I haven't decided which, yet, but one of the victims is due for puttying. I want to show choices as much as I can throughout this part of the build.

Part 3 - with a bundle of Brassin extras will get so out of touch, I think it'll be best serve as a re-cap further down the line. Plus - I just want to see how the standard kit builds before butchering it!

All the best

Rowan
AussieReg
Staff MemberAssociate Editor
AUTOMODELER
#007
_VISITCOMMUNITY
Victoria, Australia
Joined: June 09, 2009
KitMaker: 8,156 posts
AeroScale: 3,756 posts
Posted: Wednesday, April 08, 2020 - 11:09 AM UTC
Great progress Rowan, these kits really do look nice, and great to hear that they are going together with no major issues.

I'm with you in suspecting that the missing panel detail might have been an oversight, and the scribing template a last-minute addition to satisfy the "detail conscious" amongst us.

Cheers, D