Air Campaigns
Want to start or join a group build? This is where to start.
OFFICIAL: Learning to Fly Campaign
tread_geek
_VISITCOMMUNITY
Ontario, Canada
Joined: March 23, 2008
KitMaker: 2,847 posts
AeroScale: 144 posts
Posted: Friday, April 12, 2019 - 02:53 AM UTC

Quoted Text

Nicceeee Jan this is great stuff as I'm building the RNZAF version at some point when I unearth it from the stash LOL.


@Chris( c4willy ),

Glad you like how my Vampire is turning out. My builds start about midway on page two of this thread and progress to obviously this point. 
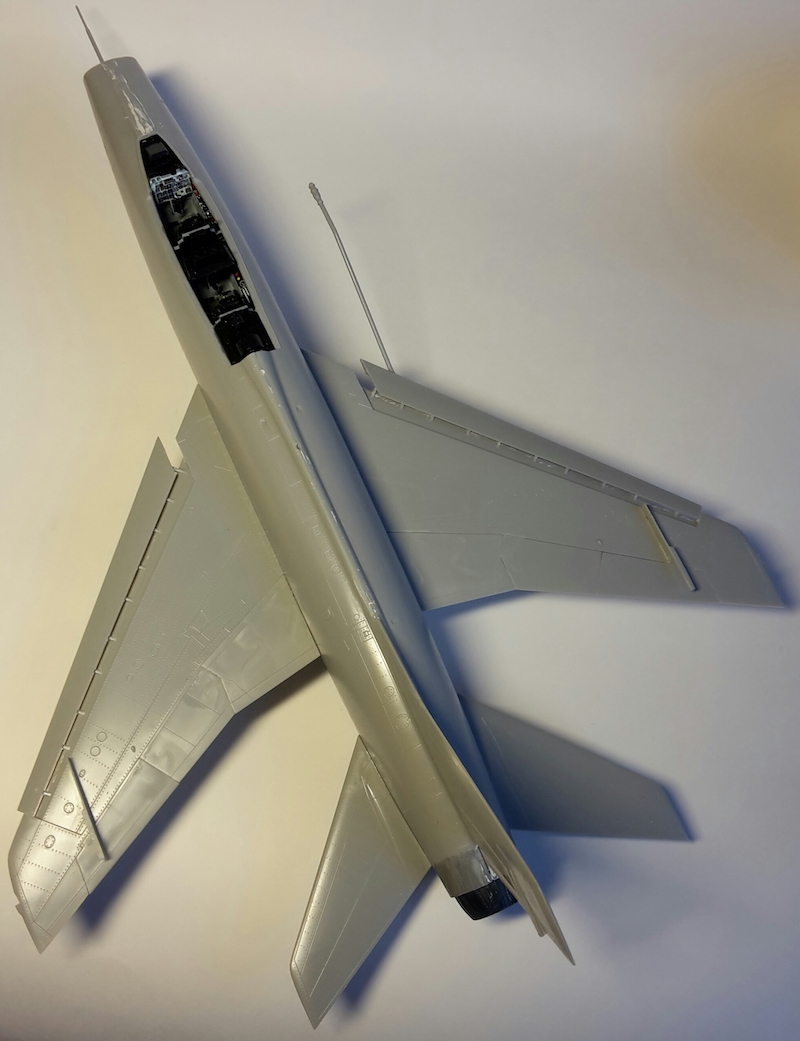
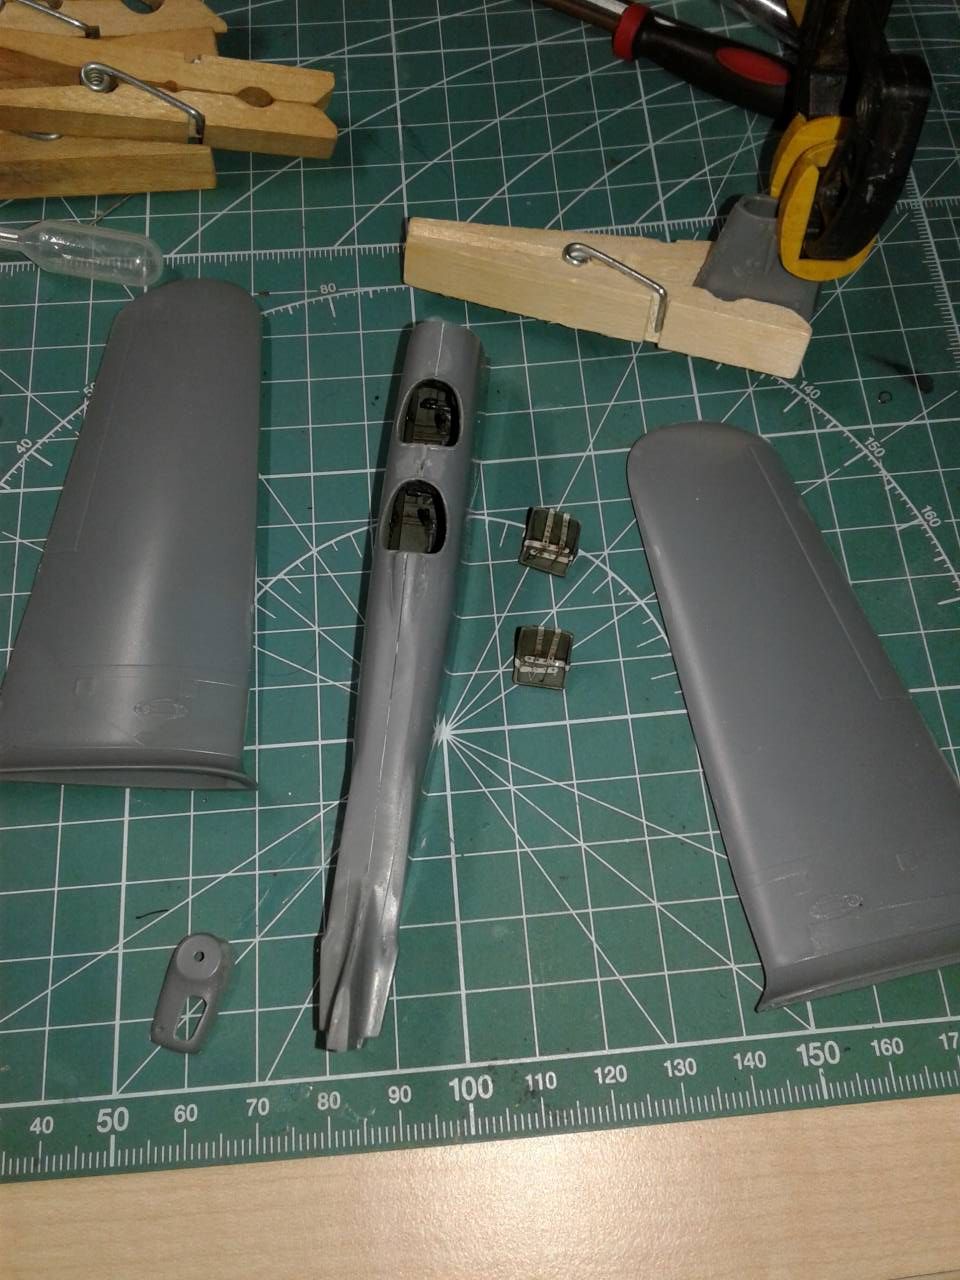
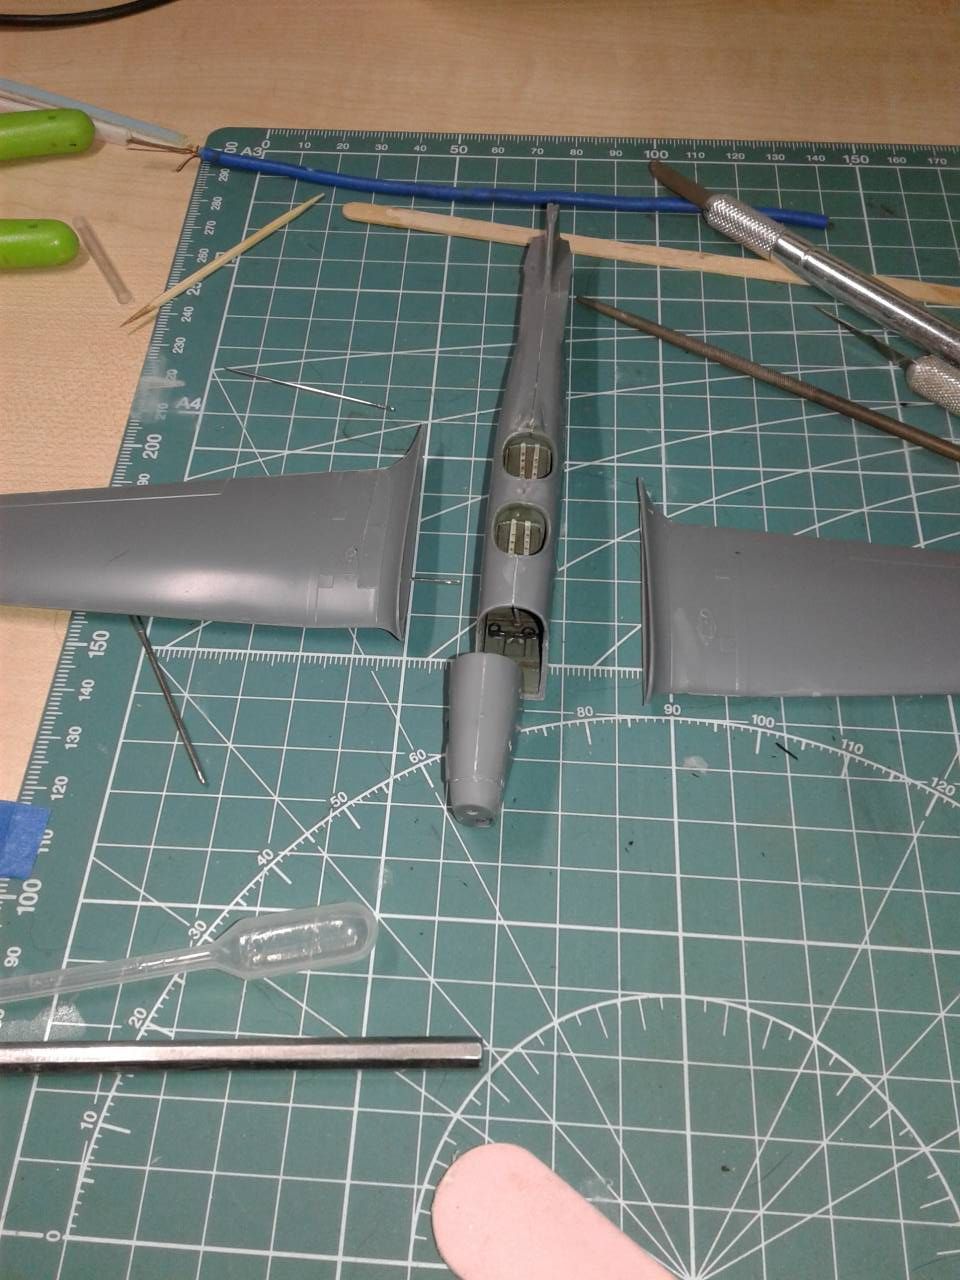
This kit looks simple and has some interesting engineering but as all kits, there are a few points to watch out for. I mention some of these things in my posts here and hope they prove useful when you build your version. A couple of things to watch out for are the placement of the front wing air intakes B8 and B10 that are glued on in Step 9. I might wait to glue them until later when you have fit the main upper wing. Also something to watch out for is the assembly order of the entire tail section. I thought about this procedure quite a bit because the way they suggest in Step 11 didn't seem like the best way to do things. It's a nice little kit but may I suggest you study the instructions to determine what might be the best was to do things.

Good luck and cheers,
--Jan
b17-peter
#392
_VISITCOMMUNITY
Hessen, Germany
Joined: January 09, 2013
KitMaker: 696 posts
AeroScale: 608 posts
Posted: Saturday, April 20, 2019 - 12:48 AM UTC
Hello mates ,

started my entry last night, I think it won't take much longer than the Easter weekend, but we'll see...

I got me instrument panels from Yahu, because the kit doesn't provide any. But I'm looking forward to the attractive decals :-)
tread_geek
_VISITCOMMUNITY
Ontario, Canada
Joined: March 23, 2008
KitMaker: 2,847 posts
AeroScale: 144 posts
Posted: Saturday, April 20, 2019 - 02:24 AM UTC
Welcome Peter, nice to see some action in this thread! An interesting subject that you have picked. The Canadian Warplane Heritage Museum which is about 50 kilometres (30 miles) from me has a flying example of the PT-27 model (the Canadian version of a PT-17). Good luck on your build.

Cheers,
--Jan
md72
#439
_VISITCOMMUNITY
Washington, United States
Joined: November 05, 2005
KitMaker: 4,950 posts
AeroScale: 3,192 posts
Posted: Saturday, April 20, 2019 - 02:15 PM UTC
Peter, I hope it goes well, that's my plan for this build, once I get a couple of other builds off of the bench.
b17-peter
#392
_VISITCOMMUNITY
Hessen, Germany
Joined: January 09, 2013
KitMaker: 696 posts
AeroScale: 608 posts
Posted: Monday, April 22, 2019 - 08:35 AM UTC
Some progress over the weekend...

tread_geek
_VISITCOMMUNITY
Ontario, Canada
Joined: March 23, 2008
KitMaker: 2,847 posts
AeroScale: 144 posts
Posted: Friday, April 26, 2019 - 07:40 AM UTC
Still plugging away and things are progressing in their normal slow motion. I've added by dry fitting the drop tanks and the rear portion of the canopy and have been thinking of how to start painting the Vampire after adding a few more small pieces. I'm also checking out a new method of hosting images with Dropbox. We'll see if/how it works just below.


https://www.dropbox.com/s/2gzlchf4fg1x51h/DSC00639.jpg?dl=0

Cheers,
--Jan

EDIT- Obviously it doesn't work as I had hoped, back to the drawing board?
b17-peter
#392
_VISITCOMMUNITY
Hessen, Germany
Joined: January 09, 2013
KitMaker: 696 posts
AeroScale: 608 posts
Posted: Sunday, April 28, 2019 - 02:45 AM UTC
...waiting for the decals now...

PasiAhopelto
_VISITCOMMUNITY
Uusimaa, Finland
Joined: October 01, 2016
KitMaker: 514 posts
AeroScale: 239 posts
Posted: Monday, April 29, 2019 - 05:55 AM UTC
Assembly pretty much done, paint (NMF) next:

b17-peter
#392
_VISITCOMMUNITY
Hessen, Germany
Joined: January 09, 2013
KitMaker: 696 posts
AeroScale: 608 posts
Posted: Monday, April 29, 2019 - 08:44 PM UTC
Finished!


Well, I left out the rigging, of course....
b17-peter
#392
_VISITCOMMUNITY
Hessen, Germany
Joined: January 09, 2013
KitMaker: 696 posts
AeroScale: 608 posts
Posted: Wednesday, May 01, 2019 - 01:27 AM UTC

tread_geek
_VISITCOMMUNITY
Ontario, Canada
Joined: March 23, 2008
KitMaker: 2,847 posts
AeroScale: 144 posts
Posted: Wednesday, May 01, 2019 - 01:59 AM UTC
Congratulations Peter!!! Your are the first to complete and the Kaydet turned out very nicely. Hopefully your success may urge many of us more tardy and less productive folks to get moving on our builds?

Cheers,
--Jan
Sleepwalker71
_VISITCOMMUNITY
Singapore / 新加坡
Joined: August 30, 2012
KitMaker: 265 posts
AeroScale: 72 posts
Posted: Wednesday, May 01, 2019 - 02:41 AM UTC
Here is my entry - M-346, Kinetic 1/48. You may note that the start photo has been done some time back, but I have found top fuselage part with badly twisted wings. Thanks to Kinetic's customer service within two weeks I had a replacement part at no costs. Now it's time to hit a road. Ah, the last thing, the model will carry Singaporean markings.

md72
#439
_VISITCOMMUNITY
Washington, United States
Joined: November 05, 2005
KitMaker: 4,950 posts
AeroScale: 3,192 posts
Posted: Wednesday, May 01, 2019 - 03:52 AM UTC
Well, crap Peter, you've set the bar too high. Now I have to try and figure out how to rig my Stearman. Any trouble spots to look out for? With any luck, I'll get started tonight.
md72
#439
_VISITCOMMUNITY
Washington, United States
Joined: November 05, 2005
KitMaker: 4,950 posts
AeroScale: 3,192 posts
Posted: Wednesday, May 01, 2019 - 04:27 PM UTC
Well here's my start picture.

Turns out it's my 5th start of the year, but I've managed to actually finish one yesterday.

Wish me luck!
john41492
#442
_VISITCOMMUNITY
Malacca, Malaysia
Joined: July 20, 2015
KitMaker: 363 posts
AeroScale: 335 posts
Posted: Wednesday, May 01, 2019 - 06:48 PM UTC
Hey all,

Jan, great progress on the Vampire! Looking forward to seeing it with it's skin on.

Pasi, I really like the progress you've made on the F-100, a most interesting variant.

Peter, another good, clean build! So, you going to add the rigging?

Damian, I'm looking forward to seeing a Singapore bird, since we're practically neighbors, it's always nice to see something off the beaten path!

John
b17-peter
#392
_VISITCOMMUNITY
Hessen, Germany
Joined: January 09, 2013
KitMaker: 696 posts
AeroScale: 608 posts
Posted: Wednesday, May 01, 2019 - 08:37 PM UTC
Jan and Mark, thank you for your appreciation

John, I chickened out again with the rigging (again)...
But it looked not so dreadful in the assembly instructions....

So I'll leave it like that and move on to the next campaign "Foreign Fighters"
Good luck to you
c4willy
#305
_VISITCOMMUNITY
Christchurch, New Zealand
Joined: February 01, 2006
KitMaker: 1,673 posts
AeroScale: 1,517 posts
Posted: Wednesday, May 01, 2019 - 08:58 PM UTC
Suddenly realised I wasn't enlisted for this campaign and I was about to start my build so thought I better rectify that oversight!
I'm in with Revell's (Monogram) T-6 the RNZAFs primary trainer for many years. But I'm not to sure as to whose livery I'm going to be doing it in.

IMG_2219 by Chris WIlson, on Flickr
b17-peter
#392
_VISITCOMMUNITY
Hessen, Germany
Joined: January 09, 2013
KitMaker: 696 posts
AeroScale: 608 posts
Posted: Wednesday, May 01, 2019 - 11:29 PM UTC
Good choice, Chris, will follow your build
c4willy
#305
_VISITCOMMUNITY
Christchurch, New Zealand
Joined: February 01, 2006
KitMaker: 1,673 posts
AeroScale: 1,517 posts
Posted: Thursday, May 02, 2019 - 08:56 AM UTC
Hi Peter in that case I better make it interesting huh? I've robbed decals from an Italeri kit as the kit didn't have any when I got it (hence the great price LOL) and I have a set of RNZAF decals for the Italeri kit.

It has 6 different marking options two of them however are French attack versions from Algeria I think? The other four are American, Italian, German and Belgian (I think). I'm leaning towards the Luftwaffe version as I quite like the colour scheme.
john41492
#442
_VISITCOMMUNITY
Malacca, Malaysia
Joined: July 20, 2015
KitMaker: 363 posts
AeroScale: 335 posts
Posted: Wednesday, May 08, 2019 - 09:00 PM UTC
Hi all!

Chris, that is a great little kit, aside from the masking of the canopy, it's a breeze and looks cool!

A little update on my Maggie.

I used Airscale instrument decals to do the instruments, as I have somehow misplaced the film that came with the kit. These were placed onto the plastic kit part, and then sandwiched between the photoetched parts. Turned out nice, though tough to see unless you're looking for them. Same goes for the nice little rudder pedals. The seats were straight forward, and the belts went on without any issues.

I closed up the fuselage and was following along the directions when I realized that the seats were so low that the pilot and instructors heads would be below the combing! Fortunately, I used superglue for some reason to attach them, so they came off easily.


I reattached the seats in their proper location, and all was sort of well. Turns out they are a little high, as the control columns are right at crotch level. Oh well. This is after all a short run kit. Though I must admit it is the best one regarding fit that I've done in a very long time!


I'm now filling the few gaps that are present, and hope to have the wings on tonight! Should be painting the airframe this weekend! Yay me!!

Just three weeks left, so we'd best get these birds hatched and out of the nest!

John
vanize
_VISITCOMMUNITY
Texas, United States
Joined: January 30, 2006
KitMaker: 1,954 posts
AeroScale: 1,163 posts
Posted: Friday, May 10, 2019 - 07:48 AM UTC
I'm behind with my FT-6 thanks to illness, but I'll try to get it done anyway. Here is my update pic:


I decided to add more depth the the main wheel wells by attaching them to the upper wing instead of the lower and adding plastic strip to fill the gap (gained a few mm, which makes a fair difference in appearance).

I have since put the wings together and am trying to figure out how to make the interior of the intake look nice. Hopefully paining the cockpit and getting the fuselage together this weekend. Once that is done, I'll be able to progress rapidly to painting.
c4willy
#305
_VISITCOMMUNITY
Christchurch, New Zealand
Joined: February 01, 2006
KitMaker: 1,673 posts
AeroScale: 1,517 posts
Posted: Saturday, May 11, 2019 - 02:25 PM UTC
Hi guys and gals I've been busy building the kit and it's going together quite well. The fuselage joining surfaces weren't exactly flat and needed some attention with a file to clean them up. Once cleaned they needed a little more work in a few areas to get a reasonable fit. The wing jointing surfaces were similar but after cleaning up went together quite well. The kit over all just needs a little care around the joints and you'll be rewarded with a kit that fits together well. With all this work cleaning up joining surfaces I must admit that I've not taken pics of the construction as I went.

The cockpit is nicey detailed and I've compared the Revell kit and the Italeri kit (Occidental mmoulds) and the Italeri copies some of the kit construction with Revell only the interior details (panels levers etc) differ.

The cockpit builds and attachs pretty much the same. The interior framework is replicated but the Revell kit gives you detail on the inside walls of the kit and the Italeri doesn't. Italeri has recessed panel lines and separates the exhaust, exhaust shroud and engine from the fuselage while in the Revell kit the exhaust shroud etc are part of the fuselage. Mine was short shot on one side so I built it up with some Evergreen square stock rounded on on side to match the profile of fuselage (more or less).

I then managed to spill liquid plastic cement over one of the canopy parts (yes that now makes 2 canopies I've messed up in a similar fashion!). I've since ordered replacement canopies for both kits from a local supplier who has Squadron canopies in stock at excellent prices. I then robbed part of the Italeri canopy to replace the damaged part, however the framework is different but I'll just mask it and paint in the missing frame details. So here is where I am currently about to mask off the canopy and finish painting the kit in Luftwaffe colours.

IMG_2226 by Chris WIlson, on Flickr

IMG_2225 by Chris WIlson, on Flickr

IMG_2224 by Chris WIlson, on Flickr

IMG_2223 by Chris WIlson, on Flickr

IMG_2222 by Chris WIlson, on Flickr

IMG_2221 by Chris WIlson, on Flickr

IMG_2220 by Chris WIlson, on Flickr
eMan
#298
_VISITCOMMUNITY
Hong Kong S.A.R. / 繁體
Joined: August 08, 2002
KitMaker: 1,182 posts
AeroScale: 351 posts
Posted: Monday, May 13, 2019 - 05:17 PM UTC
Progress update, MPM 1/48 Fw190 S5/S8.


md72
#439
_VISITCOMMUNITY
Washington, United States
Joined: November 05, 2005
KitMaker: 4,950 posts
AeroScale: 3,192 posts
Posted: Tuesday, May 14, 2019 - 04:46 AM UTC
Ah Crud. My update didn't take last night. I'll never be that eloquent again.
Got some of the clean up work done, and started painting the interior bits. Hoping to hint at doped linen in the cockpit, below unpainted aluminum for the cowling top.

Trying several new things on this build, besides the rigging. Usually I just heat up a straight pin and stick it into the pilot's butt to use as a handle for painting. This time I'm trying a bit of scrap shape super glued instead.

RhinoSpit
_VISITCOMMUNITY
Bas-Rhin, France
Joined: September 22, 2016
KitMaker: 224 posts
AeroScale: 191 posts
Posted: Tuesday, May 14, 2019 - 08:50 AM UTC
Finished !