Texas, United States
Joined: February 22, 2008
KitMaker: 5,026 posts
AeroScale: 2,811 posts
Posted: Wednesday, May 02, 2018 - 07:43 AM UTC
I have tried to scribe panel lines several times in the past where needed with various success and failure.
Ive ordered templates and some good scribing tools (such as from Tamiya, and Trumpeter)
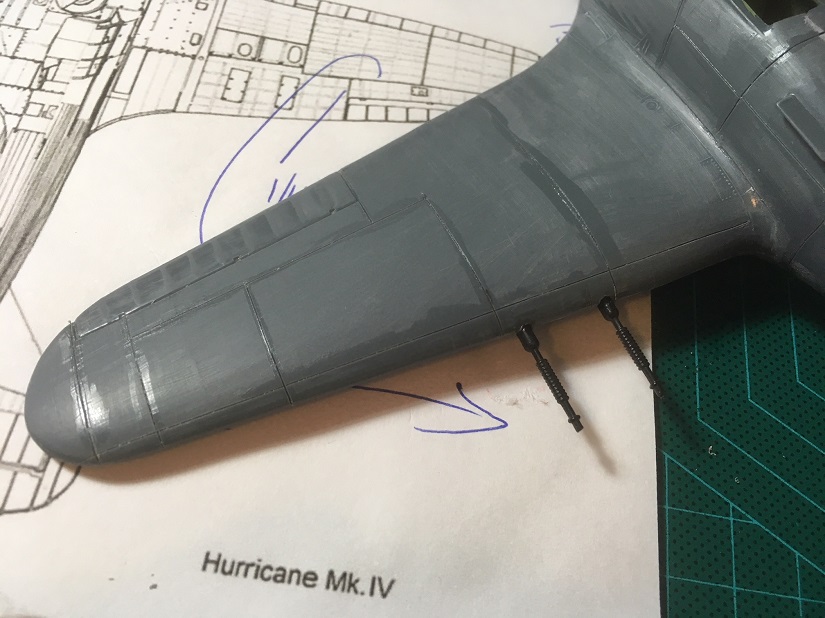
I dug out a couple of old Monogram airplanes (Hawker Hurricane, Bf109) started long ago to use as test subjects.
If anyone wants to join in with their tips and or tutorials I would love to try them out.
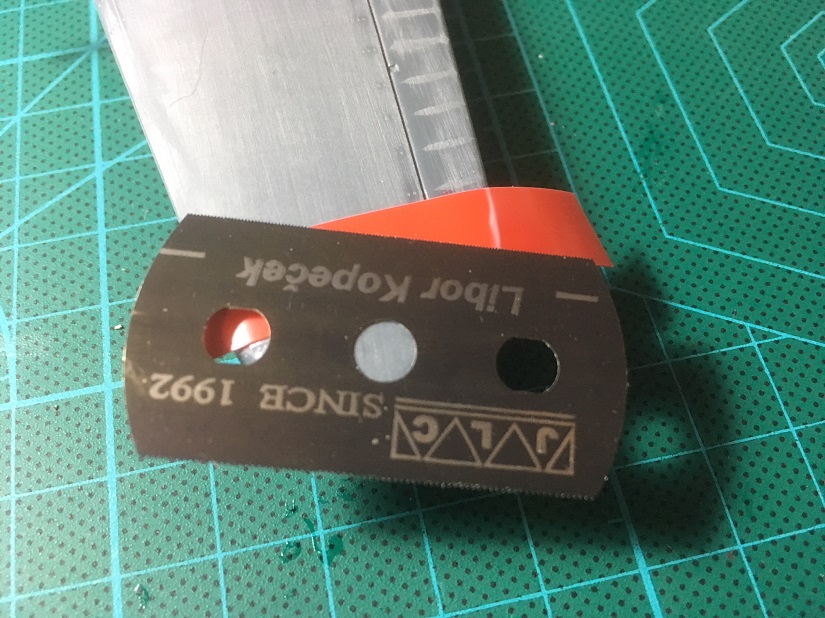
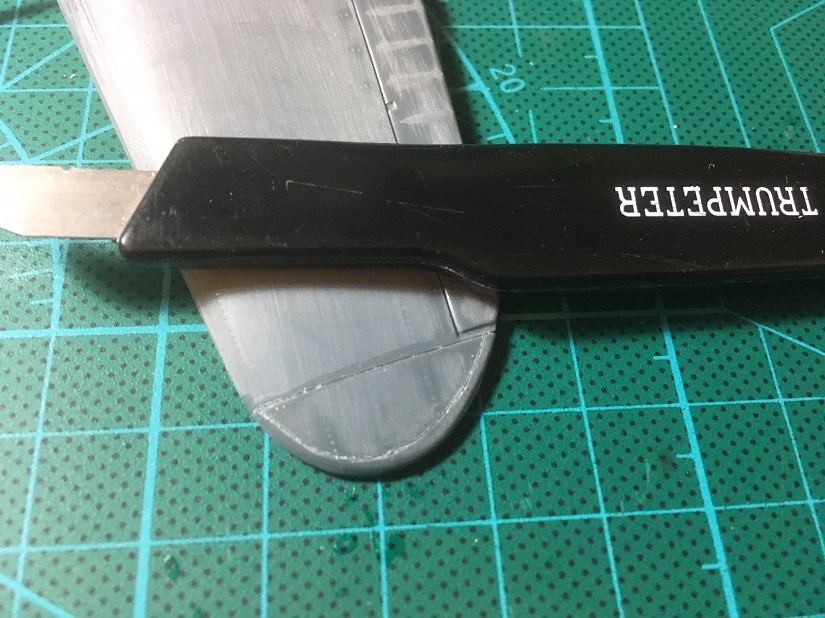
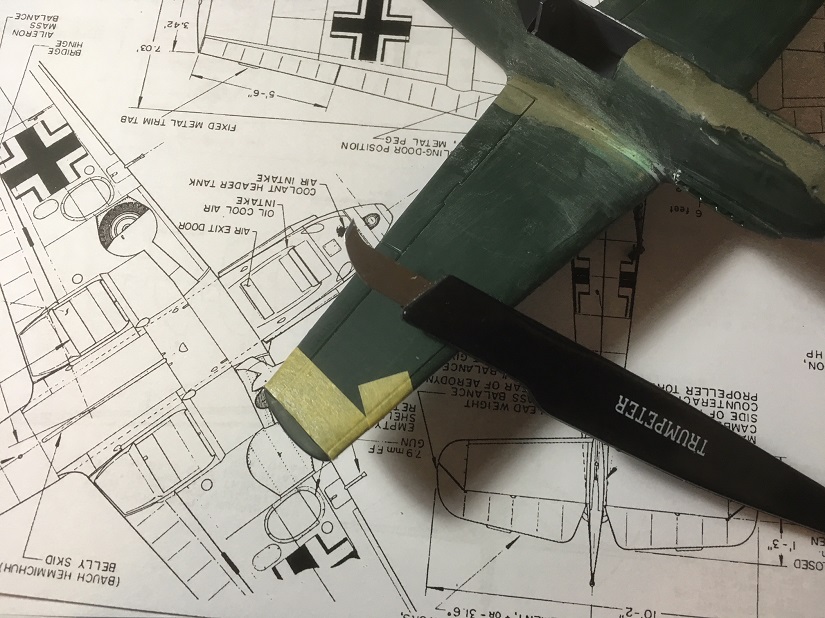
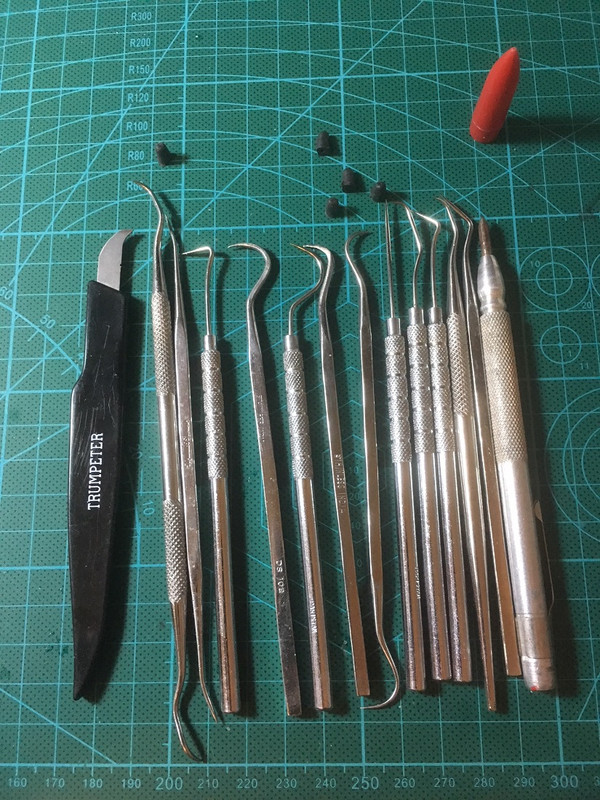
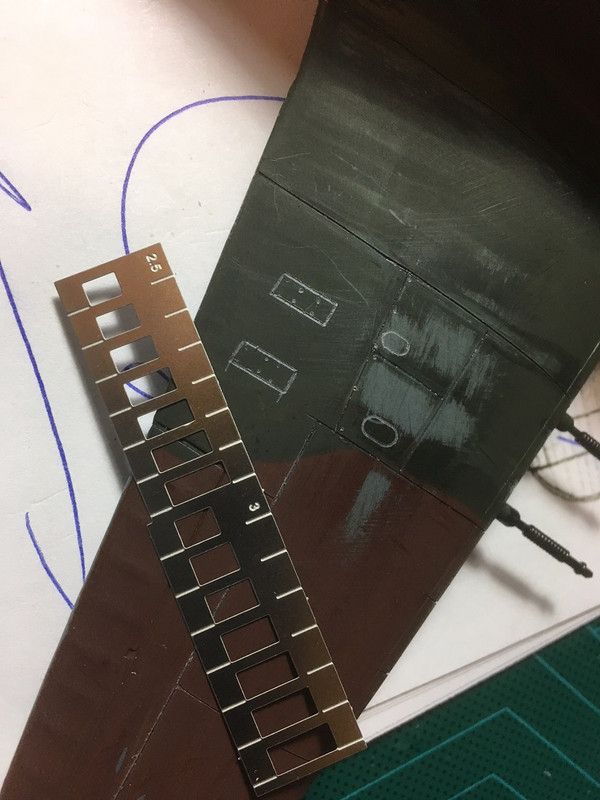
My selection of Dental picks and the Trumpeter scribing tool.
Saw blades Ive seen are also great to use, here are some of mine. Plus a roll of Dymo tape for guiding the scribe tool.
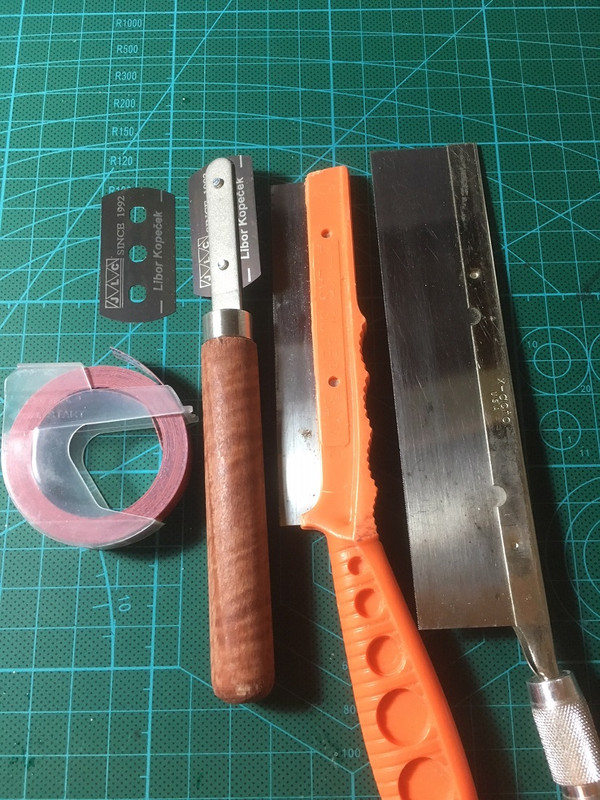
My templates have not arrived yet, along with the Tamiya scribe tool. I want to test all of the different tools to see what works for me so to make a better build and expand my building techniques. Also to get your advice in this area.
Bob
If it aint broke dont fix it.
United Kingdom
Joined: September 06, 2013
KitMaker: 1,112 posts
AeroScale: 21 posts
Posted: Wednesday, May 02, 2018 - 09:37 AM UTC
Self-adhesive labelling tape (Dymo etc.) works for me. You can cut it into thinner strips to make it go further but a piece can usually be reused a few times before losing adhesive properties.

#305
Christchurch, New Zealand
Joined: February 01, 2006
KitMaker: 1,673 posts
AeroScale: 1,517 posts
Posted: Wednesday, May 02, 2018 - 09:48 AM UTC
A scriber works best in templates I've found. Once I've scribed the required shape I then flow Tamiya extra thin cement into it to smooth out the lines. I find using a straight point doesn't so much cut the plastic like the Trumpeter tool will it gouges it and leaves a rough edge to the line.
Ontario, Canada
Joined: July 06, 2014
KitMaker: 63 posts
AeroScale: 10 posts
Posted: Wednesday, May 02, 2018 - 10:11 AM UTC
You have all the good tools. Check out Paul Budzig's tutorials on his Scale Model Workshop Channel. He has great tips on scribing as well as other valuable information...
Ontario, Canada
Joined: July 06, 2014
KitMaker: 63 posts
AeroScale: 10 posts
Posted: Wednesday, May 02, 2018 - 10:18 AM UTC
Holdfast
 President
#056
England - South West, United Kingdom
Joined: September 30, 2002
KitMaker: 8,581 posts
AeroScale: 4,913 posts
Posted: Wednesday, May 02, 2018 - 11:59 AM UTC
I apply a primer that is a contrast to the plastic. You can then scrape off the panel lines, with a rounded scalpel. You may be surprised that done carefully you can scrape away the raised panel lines without removing any of the surrounding primer, or at least only a small amount.
What this leaves you with is a very good map of where the panel lines were and it is the a simple case of scribing along these paint free areas.
Before scribing I would suggest using a pointed tool to make an indent at the junction of each line, that will prevent you from scribing too far.
Remember that although panel lines are strait going around the fuselage the compound curvature of the fuselage makes it impossible to actually follow them when using Dymo tape, because it is so stiff. So if you sand off the panel lines first you will probably end up scribing lines on the fuselage that are in the wrong place. Cutting Dymo tape into thin strips will help to get it to conform to the proper position but I have, very successfully, used Thin strips of Tamiya tape to scribe against, which is very easy to lay against where the lines should be. Using Tamiya tape requires that you make the first few passes very light but it does work and it is monumentally quicker than using Dymo tape. I re-scribed a Monogram 1/48 B-26 Marauder in under 3 hours, many moons a go. I may even have done an article on it, which will be in the archives?
Try laying a piece of Dymo tape along side a panel line?
I avoid scribing where ever possible but I have just bought the Airfix 1/72 scale B-26B Marauder and I am contemplating scribing that!
MAL the MASK
BULLDOG # 6 (President)
BEWARE OF THE FEW
Sappers: First in, last out. (UBIQUE)
It's not the same, better, but not the same.
Holdfast
President #056
England - South West, United Kingdom
Joined: September 30, 2002
KitMaker: 8,581 posts
AeroScale: 4,913 posts
Posted: Wednesday, May 02, 2018 - 12:03 PM UTC
MAL the MASK
BULLDOG # 6 (President)
BEWARE OF THE FEW
Sappers: First in, last out. (UBIQUE)
It's not the same, better, but not the same.
Texas, United States
Joined: February 22, 2008
KitMaker: 5,026 posts
AeroScale: 2,811 posts
Posted: Wednesday, May 02, 2018 - 11:45 PM UTC
If it aint broke dont fix it.
European Union
Joined: September 28, 2004
KitMaker: 2,186 posts
AeroScale: 1,587 posts
Posted: Thursday, May 03, 2018 - 01:55 AM UTC
Yes, it is time consuming. What i learned is that some panel lines are in impossible places fr a scribing point of view. It is sometimes better to omit a line than to screw it up completely
The mission: Beat the stash.
Almost conquered: MIG-29, Blackhawk, Skyray, Skyraider, fouga
Main battle:Demon, Skyhawk, F-14, CH-53
Stash reserve:Blackhawk, CH-46, 47 en 53; SU-7, Eurofighter, mohawk, hellcat, F-16D, 6x Fouga Magister, Voodoo
Washington, United States
Joined: March 15, 2009
KitMaker: 3,670 posts
AeroScale: 833 posts
Posted: Thursday, May 03, 2018 - 02:21 AM UTC
Bob,
I'd like to refer you to this article on cleaning out scribed panel lines with a homemade "slotting file" by Richard Brumm over at Large Scale Planes. Using liquid cement to clean the panel lines wears down the sharp edges of the panel line, and will fill them unevenly, which can damage your hard work. The "slotting file" technique solves that problem. It works great. Also, the reference above to Paul Budzik's website is a good one. Paul is a recognized scratchbuilder and accomplished modeler, even mentioned in the book "The Scratchbuilders". Here's the slotting file article:
http://www.largescaleplanes.com/articles/article.php?aid=2751Here's Paul's website:
http://paulbudzik.comWhen doing curved lines, it's always best to use a curved guide or template. I use cut Dymo tape, or a circle cut out of .07mm brass sheet. To cut the sheet, I just use a pair of tin snips to get the basic shape, then I fhammer it flat and sand Tom shape. There are some commercial curved templates available, but I find them awkward to use.
VR, Russ
Texas, United States
Joined: February 22, 2008
KitMaker: 5,026 posts
AeroScale: 2,811 posts
Posted: Thursday, May 03, 2018 - 02:55 AM UTC
Drab, I agree with you on those difficult lines that would be almost impossible to obtain.
Russ, thanks for the links they were really good to view and gain the perspective of what am I really going for.
The two a/c that I am using are for the test of scribing and to gain your input to help me out with future builds where I need to do a little scribing and to have a little experience to back my up.
I like that Paul used tape more often than Dymo which Ive so far come to not like very much.
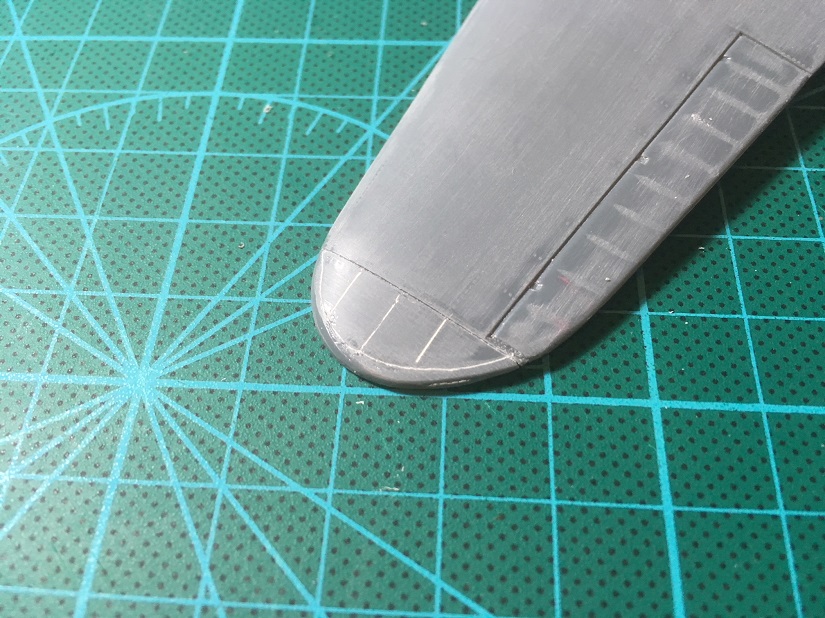
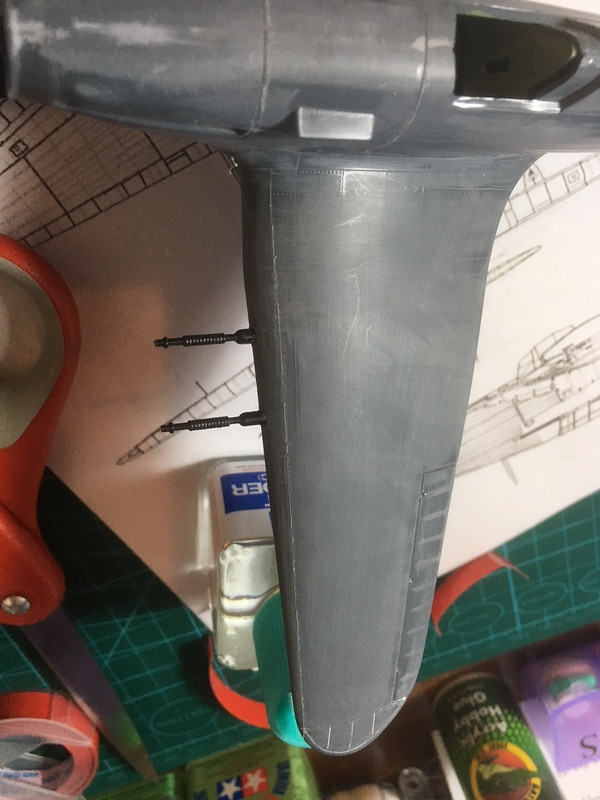
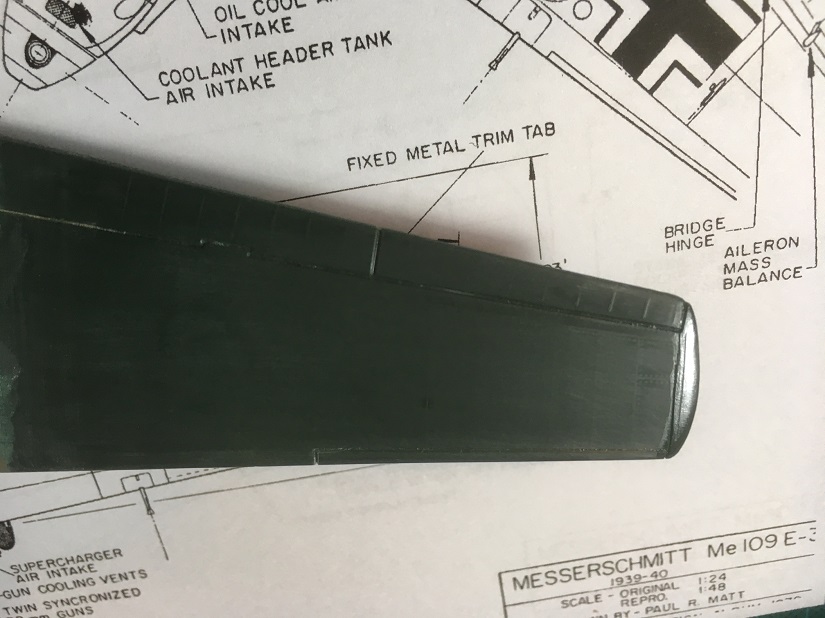
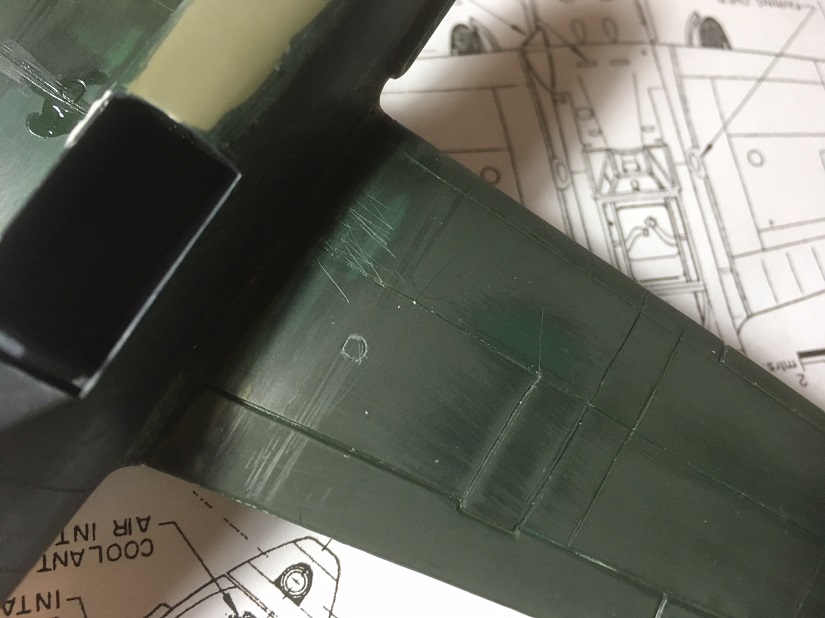
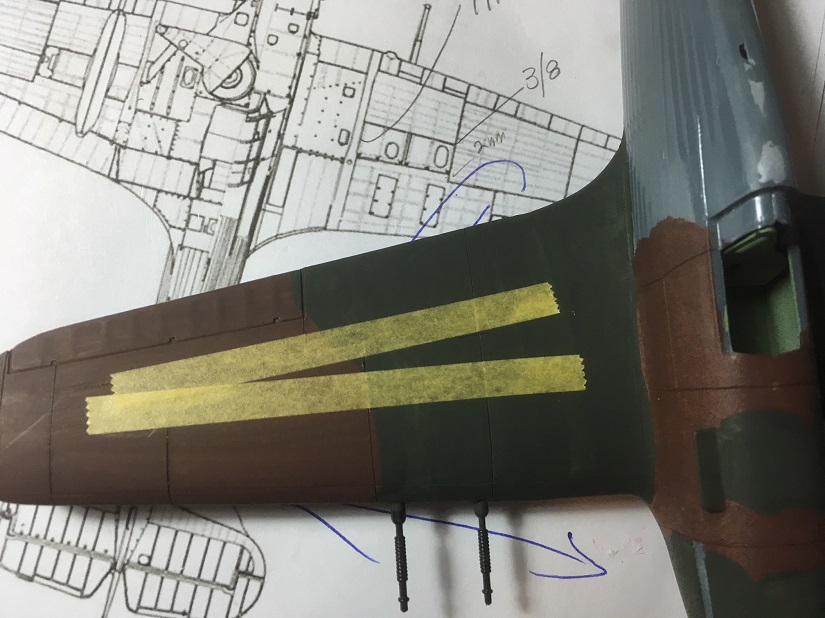
The following lines were done with both Dymo and Tamiya tape. I like the Tamiya tape method, it does not take as long to apply and sticks to the model better. And makes me slow down the scribing knowing that the edge is not as rigid.
If it aint broke dont fix it.
Texas, United States
Joined: February 22, 2008
KitMaker: 5,026 posts
AeroScale: 2,811 posts
Posted: Thursday, May 03, 2018 - 07:50 AM UTC
If it aint broke dont fix it.
California, United States
Joined: November 28, 2007
KitMaker: 817 posts
AeroScale: 729 posts
Posted: Thursday, May 03, 2018 - 10:05 PM UTC
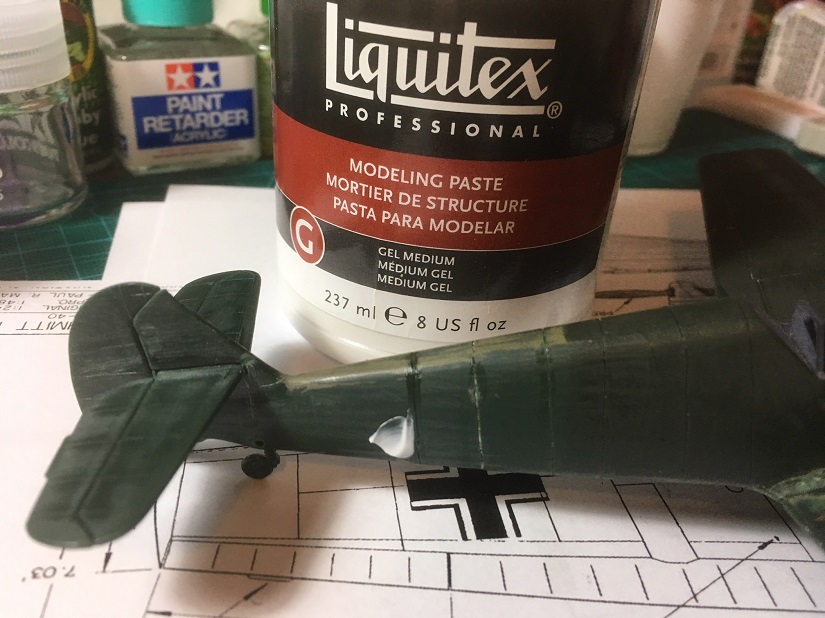
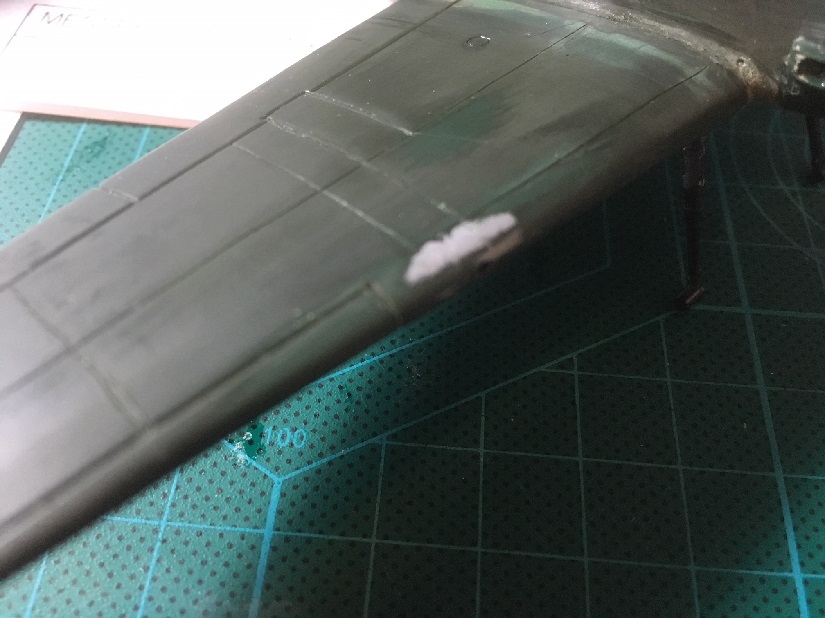
My new best modeling friend is Mr Dissolved Putty- it's simply the best for filling scribing boo-boos.
[url]http://chukw.blogspot.com/[/url]
Texas, United States
Joined: February 22, 2008
KitMaker: 5,026 posts
AeroScale: 2,811 posts
Posted: Thursday, May 03, 2018 - 10:38 PM UTC
If it aint broke dont fix it.
#323
Arizona, United States
Joined: February 13, 2013
KitMaker: 791 posts
AeroScale: 213 posts
Posted: Friday, May 04, 2018 - 12:49 AM UTC
Great topic. I sux at this even with a drawer full of scribing/scraping tools.
Cheers


Robbie: "Would 60 Gallons be sufficient ?"
Forbidden Planet - 1956
Texas, United States
Joined: February 22, 2008
KitMaker: 5,026 posts
AeroScale: 2,811 posts
Posted: Friday, May 04, 2018 - 01:40 AM UTC
Robbie, this was to see if I could successfully accomplish lines. And to get everyone's input to help.
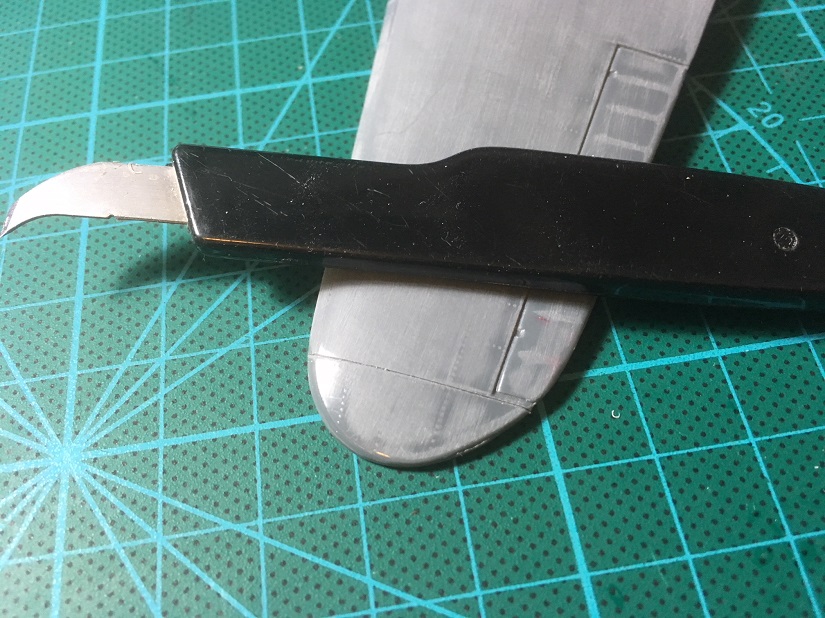
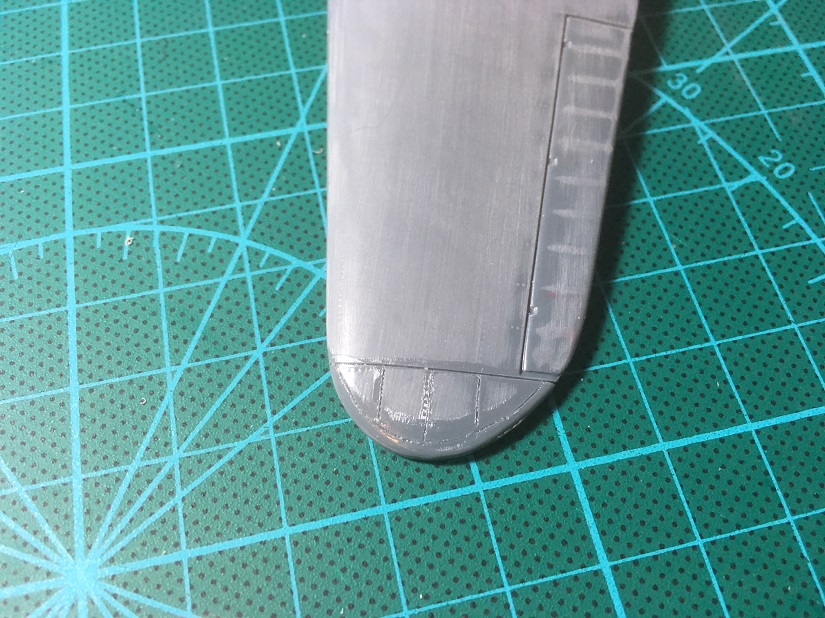
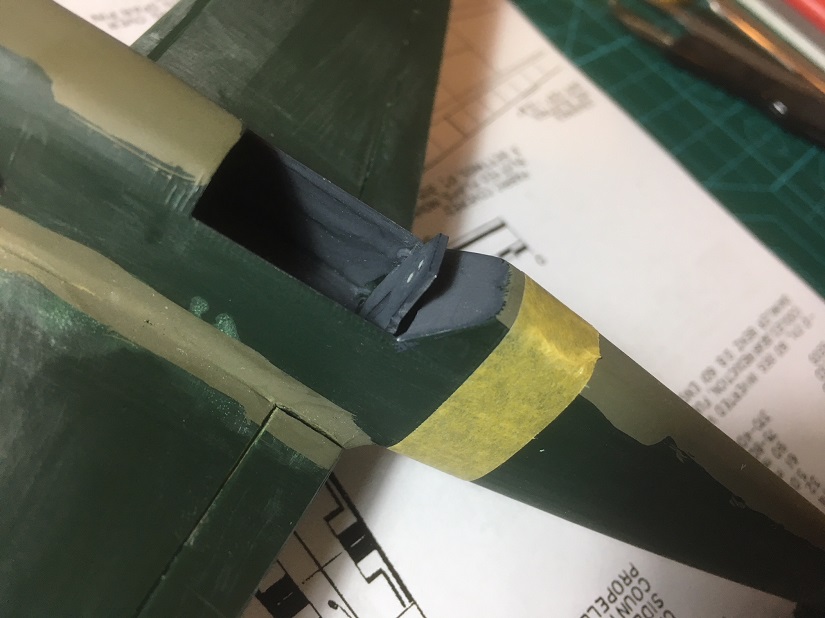
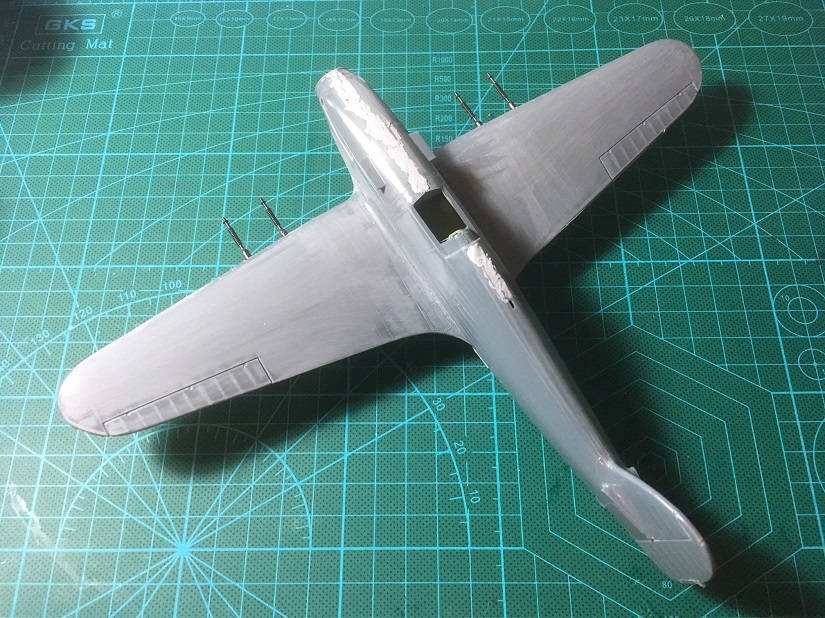
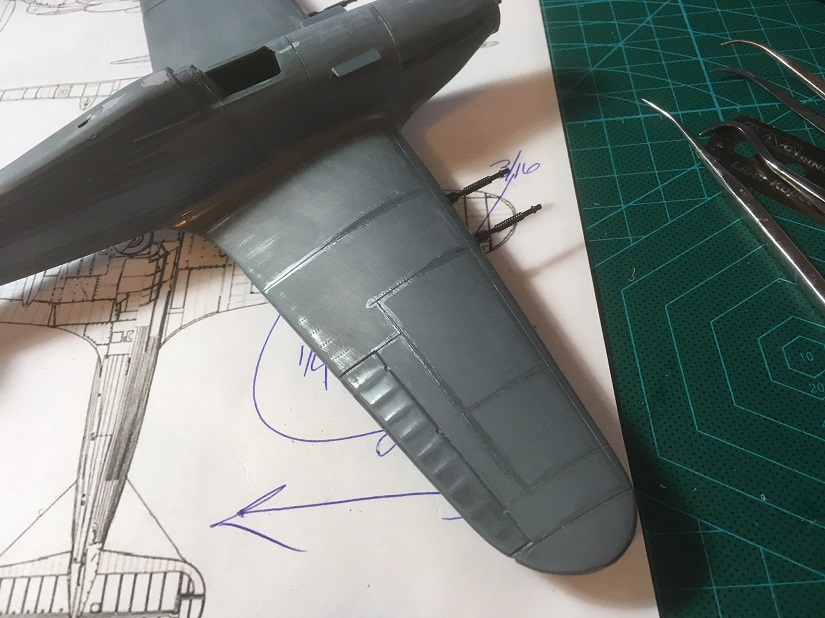
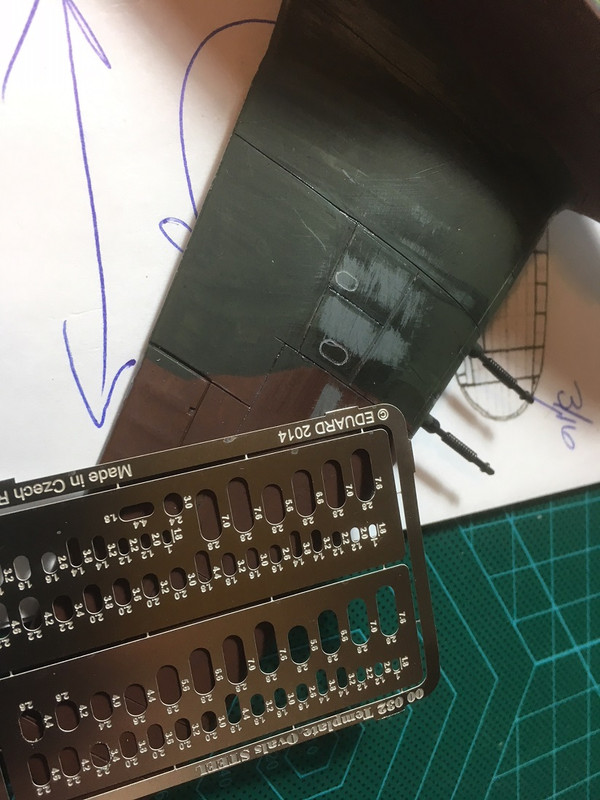
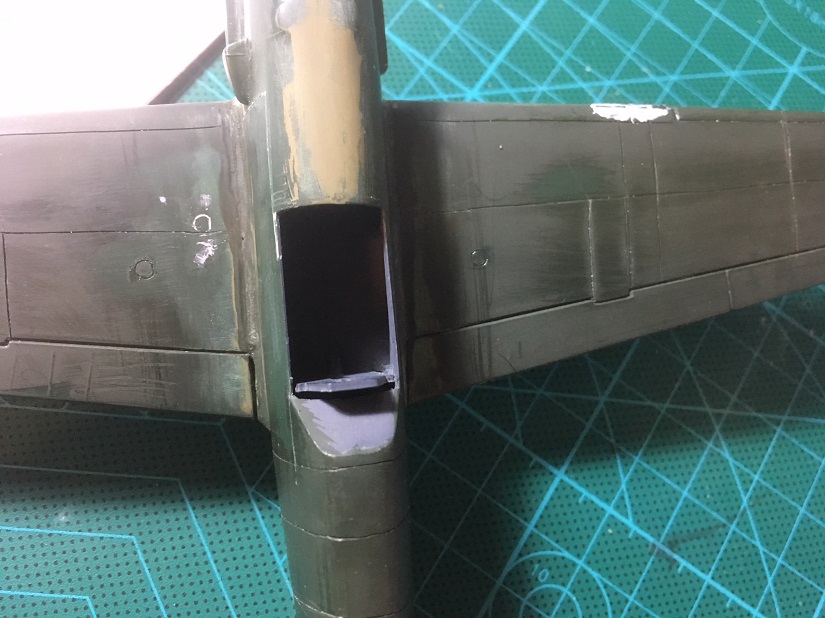
My templates just arrived and work great with the straight pick that Chris suggested. Ive filed the wing fillet of the Bf109 and it turned out good.
If it aint broke dont fix it.
#323
Arizona, United States
Joined: February 13, 2013
KitMaker: 791 posts
AeroScale: 213 posts
Posted: Friday, May 04, 2018 - 05:12 AM UTC
Quoted Text
Robbie, this was to see if I could successfully accomplish lines. And to get everyone's input to help.
And I am lurking and watching to try any neat tricks. I have in my large 'work in progress' stash (a stash within the stash) a Arii D4Y2 Judy and a Condor A4/V2 Rocket that I need to re-scribe some lines that have been filled/sanded over. Keeping a straight line is a challenge and the V2 - can we say curve... Egads I am totally scaring that poor thing...
Cheers
Robbie: "Would 60 Gallons be sufficient ?"
Forbidden Planet - 1956
Joel_W
Associate Editor New York, United States
Joined: December 04, 2010
KitMaker: 11,666 posts
AeroScale: 7,410 posts
Posted: Friday, May 04, 2018 - 05:14 AM UTC
I've mentioned this usually once or twice per build of late, that scribing is my least favorite modeling job.
I've tried Dymo tape and it's really to thick for anything but a flat surface. So I've adopted two layers of plain old masking tape that I cut thin strips out of. works great on all but the tightest compound curves. I have a small collection of templates that I use from time to time.
As for scribers, I have 3: the Tamiya one that has a pretty thick blade, so it's rarely used. I much prefer the UMM-USA scriber as it has the usual curved blade at one end and straight cutter at the other end that does long straight lines extremely well. My 3rd cutter is a large size sewing needle in a hand held drill.
As others have mentioned scribers don't cut but rather gouge a channel with raised lips that require sanding, cleaning, and finally Extra Thin and then polished out as a final step.
I've also run across the issue that each pass of a scriber not only deepens the groove, but widens it as well. So you need to be consistent with the number of passes.
Paul Budzik's video on Scribing offers you three different methods: Scribing the plastic, scribing the primer coat, and finally for the very brave at heart, scribing the color coats. I've also seen guys replacing scribing with a very fine pencil, and it does look good.
Joel
On my Workbench:
Monogram 1/24 scale 427 Shelby Cobra
Just Completed:
Beemax 1/24 scale BMW M3 E30 1992 Evolution II
Texas, United States
Joined: February 22, 2008
KitMaker: 5,026 posts
AeroScale: 2,811 posts
Posted: Friday, May 04, 2018 - 08:34 AM UTC
If it aint broke dont fix it.
#226
British Columbia, Canada
Joined: February 20, 2012
KitMaker: 1,909 posts
AeroScale: 508 posts
Posted: Friday, May 04, 2018 - 11:32 AM UTC
I am just about to start scribing for the first time myself

I have a couple of 1/48 scale U-2's and a C-130 to do.

I just came across this stuff in a video
 https://www.usagundamstore.com/products/hiq-parts-cgt-6mm-carving-guide-tape-size-width-6-0mm-x-30m-1pc
It is thinner than Dymo tape an also comes in 3mm.
Cheers Rob.
Anything without guns is a target!
27 completed campaigns and counting :)
Texas, United States
Joined: February 22, 2008
KitMaker: 5,026 posts
AeroScale: 2,811 posts
Posted: Friday, May 04, 2018 - 11:27 PM UTC
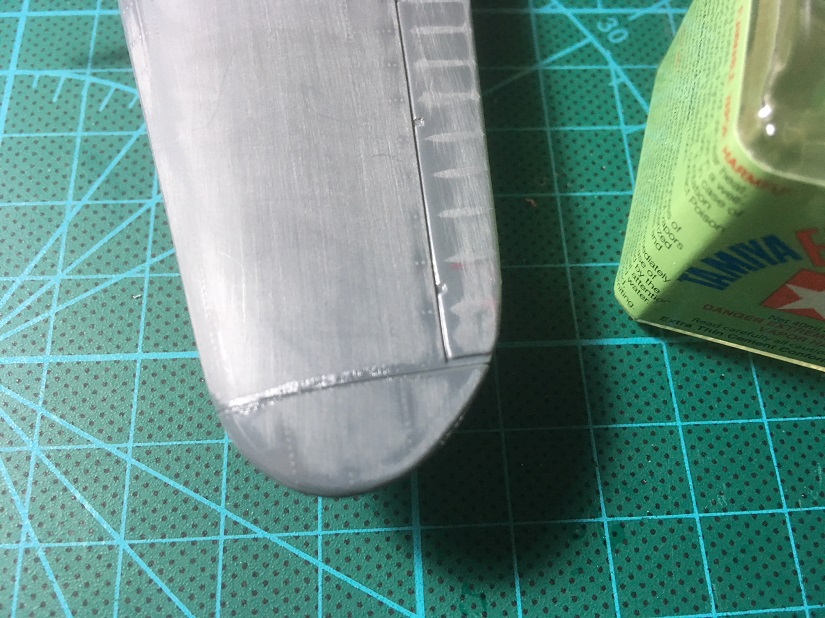
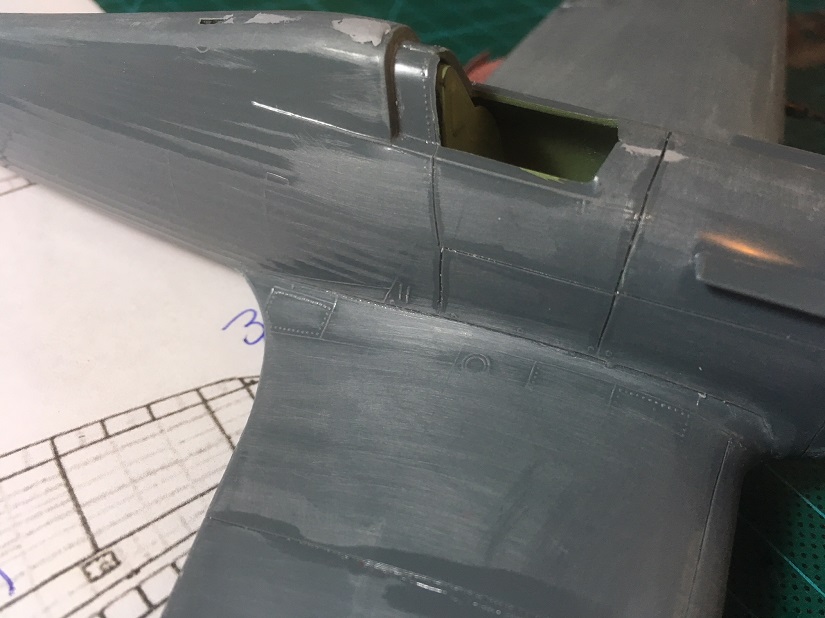
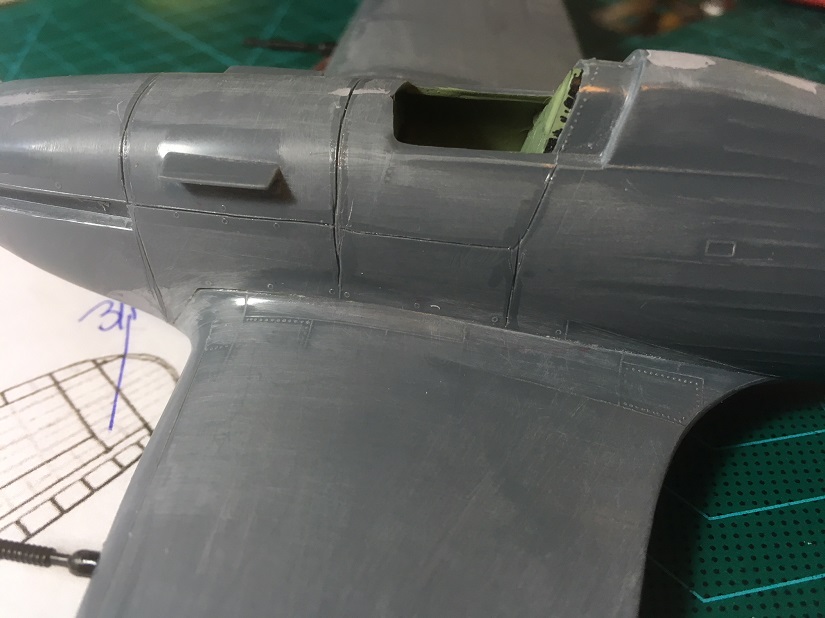
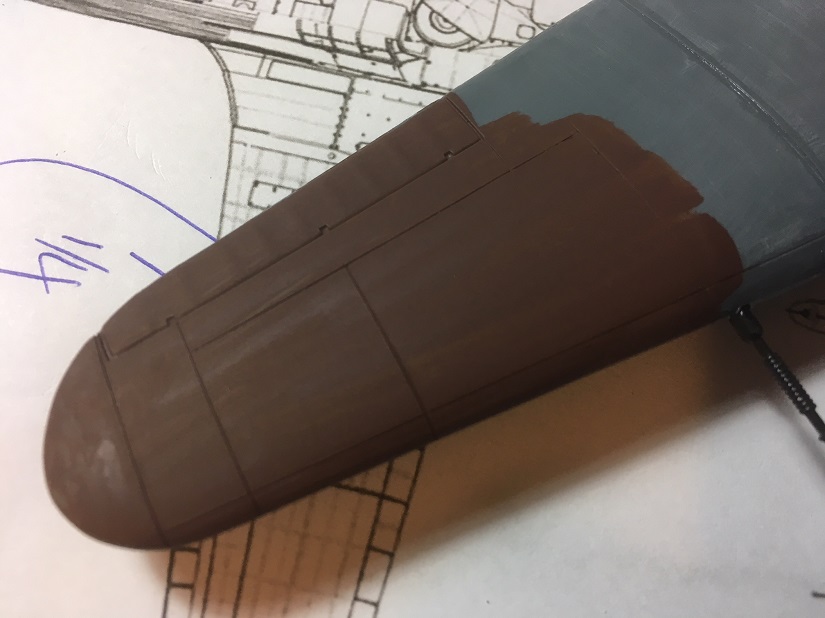
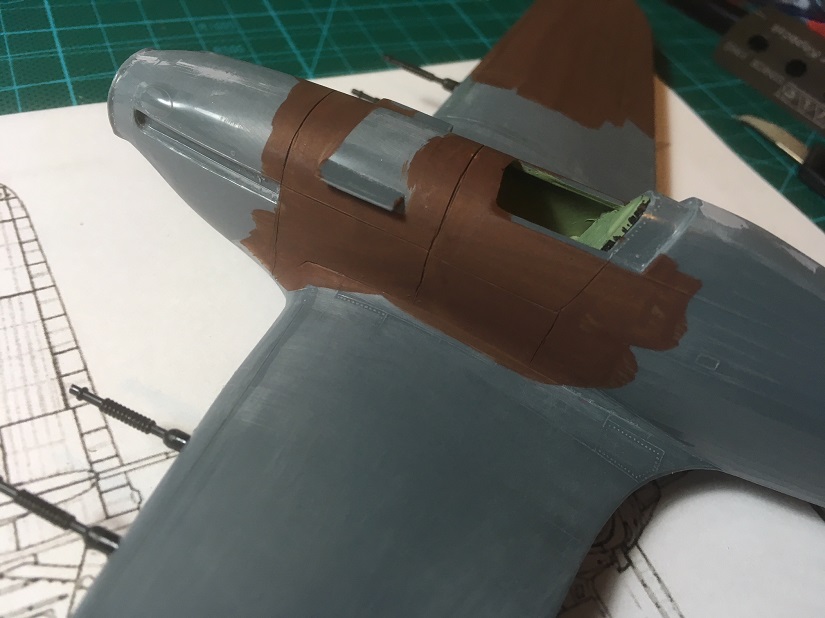
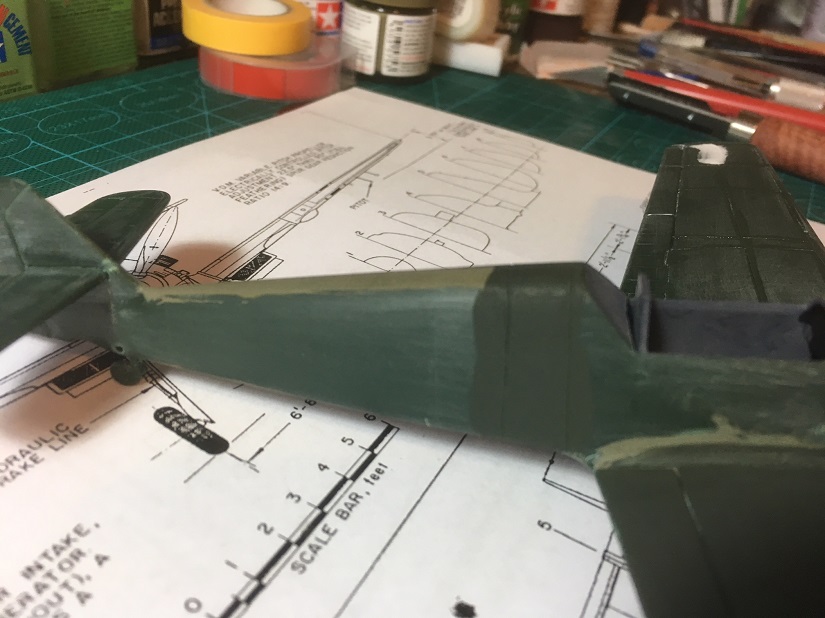
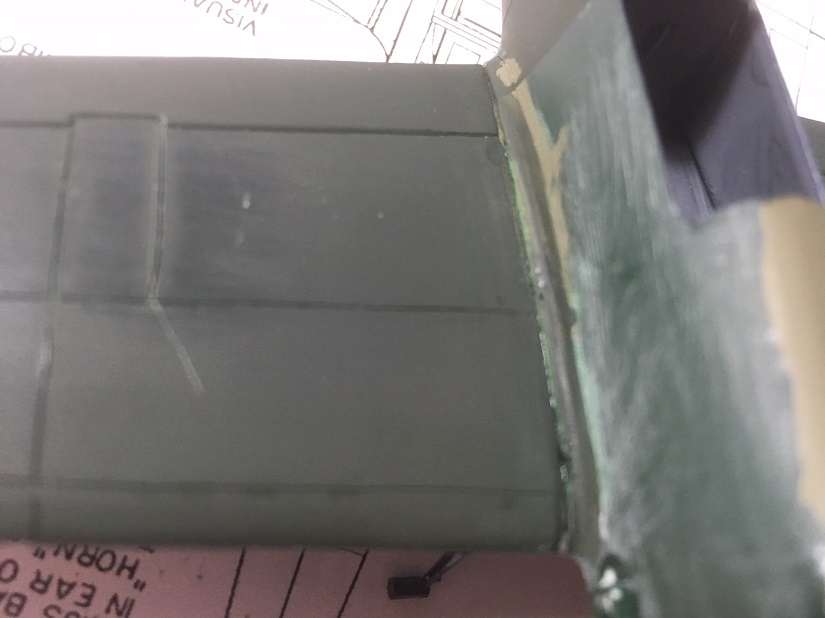
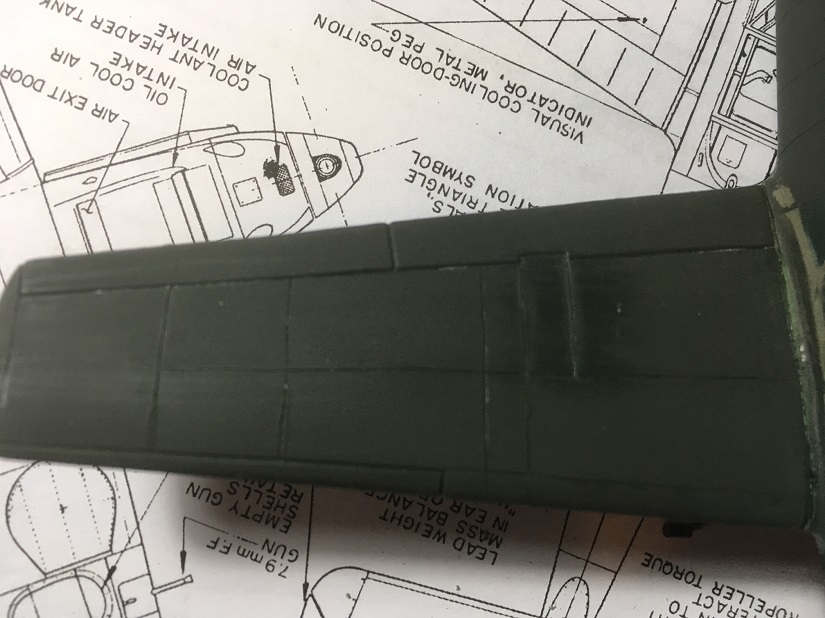
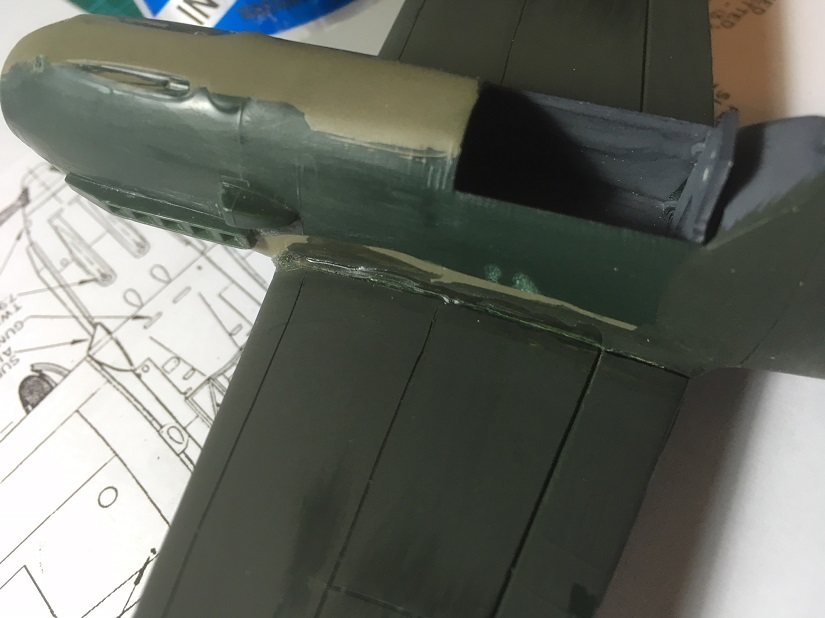
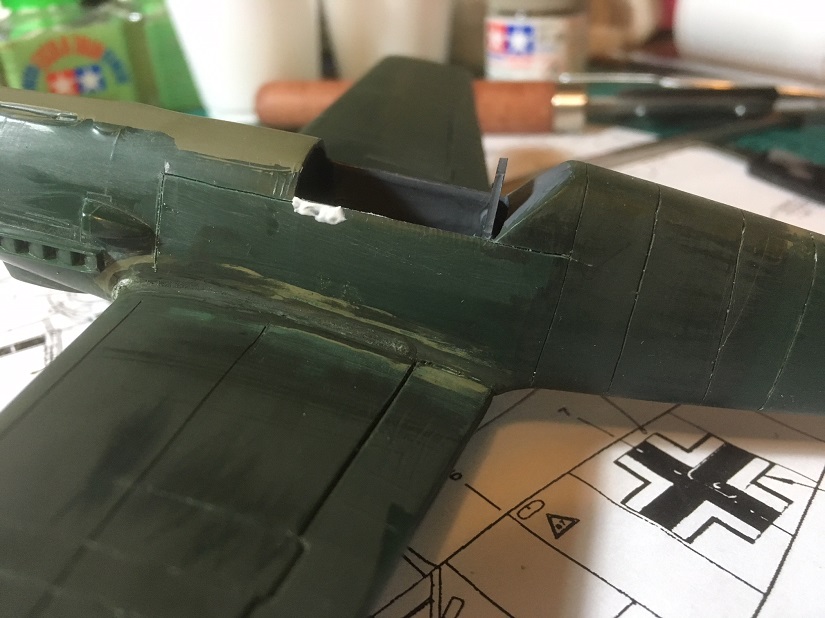
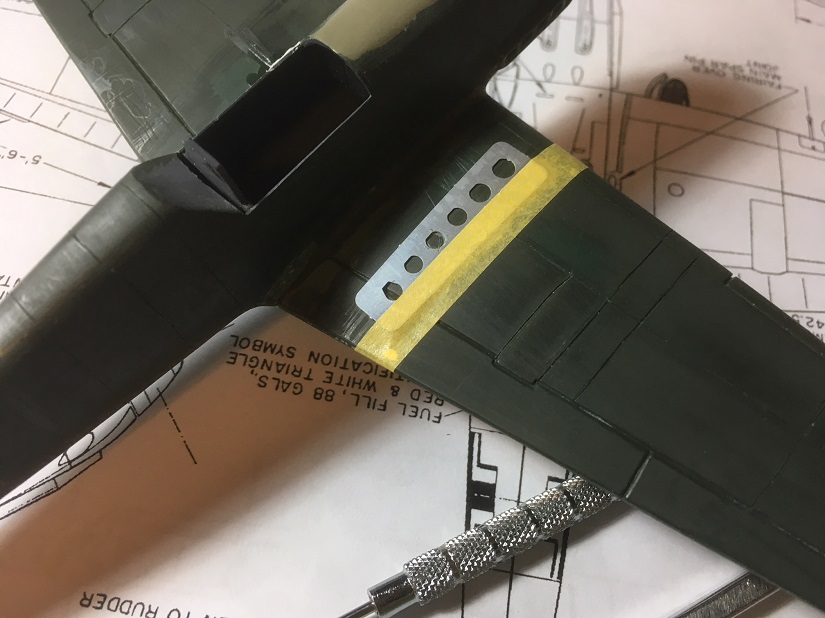
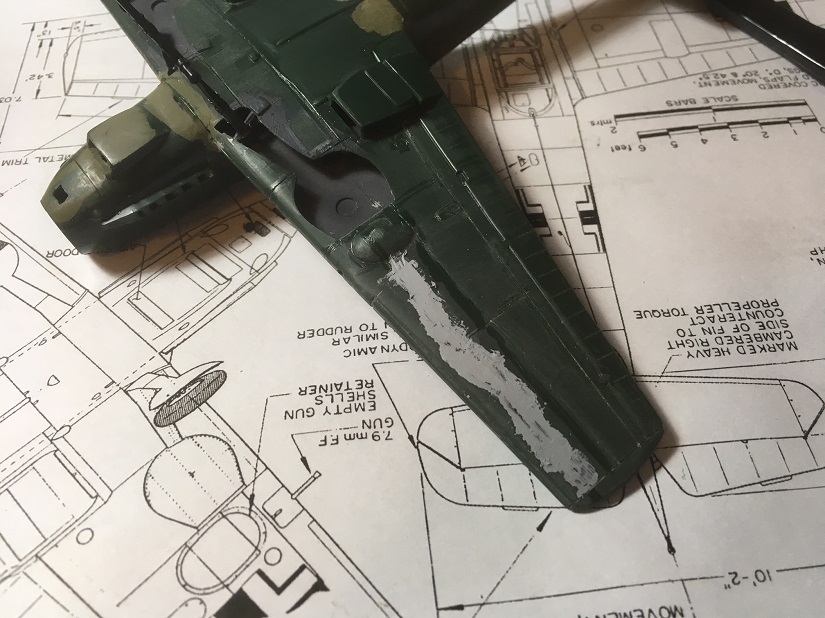
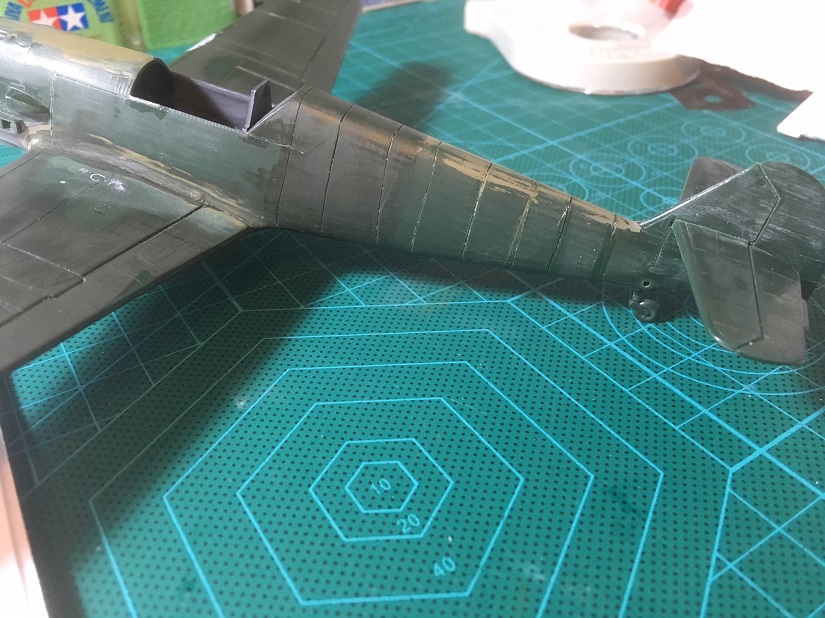
Rob, thanks for the link, I will check it out. Ive now added some wing fuel filler doors to the top of both wings using the circle template and the straight dental pick with some success. The fuselage is now complete and I am happy with my attempt at this using tape, razor saw, and the Trumpeter panel line scribing tool.
This Monogram Bf109 may look good enough to paint after I am finished with the panel and access lines.
If it aint broke dont fix it.
Stockholm, Sweden
Joined: May 02, 2006
KitMaker: 1,953 posts
AeroScale: 1,902 posts
Posted: Saturday, May 05, 2018 - 01:58 AM UTC
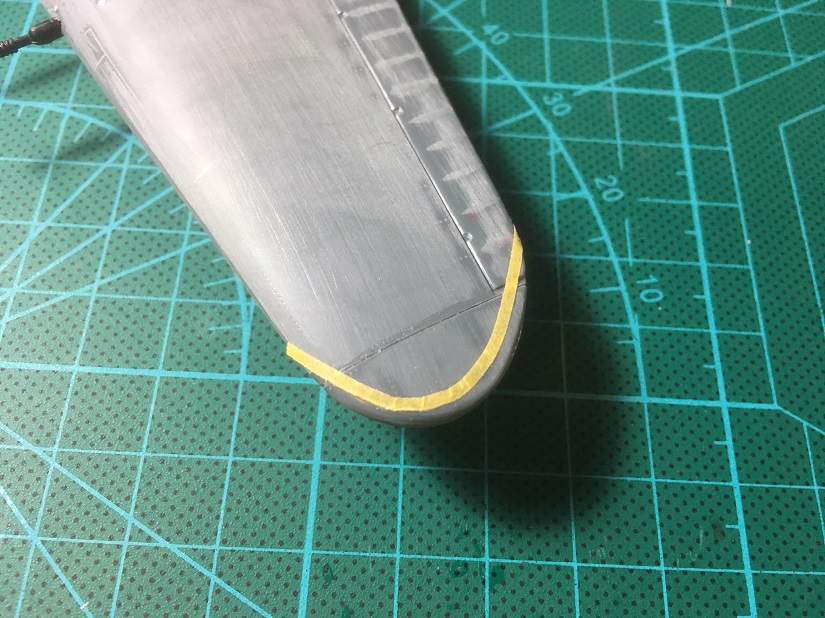
Bob! For that curved wingtip line, the below trick could be of some use (snipped from an earlier
build blog of mine and trick (as stated below as well) picked up from one of Chukw's builds!
Stealing ideas shamelessly from Chukw... The slightly complex rear end of the engine cover would have been a pain to scribe without a template...

...I made this one by attaching a length of tape to the fuselage, then drawing the panel line curve with a pencil. The tape was then transferred to a thin sheet of plasticard where the contour was cut out and sanded smooth. The template was then attached to the fuselage and the panel line scribed using a needle in a pin vise.

Magnus
Press banner to the right to follow my trail to the new forums!
Texas, United States
Joined: February 22, 2008
KitMaker: 5,026 posts
AeroScale: 2,811 posts
Posted: Saturday, May 05, 2018 - 02:22 AM UTC
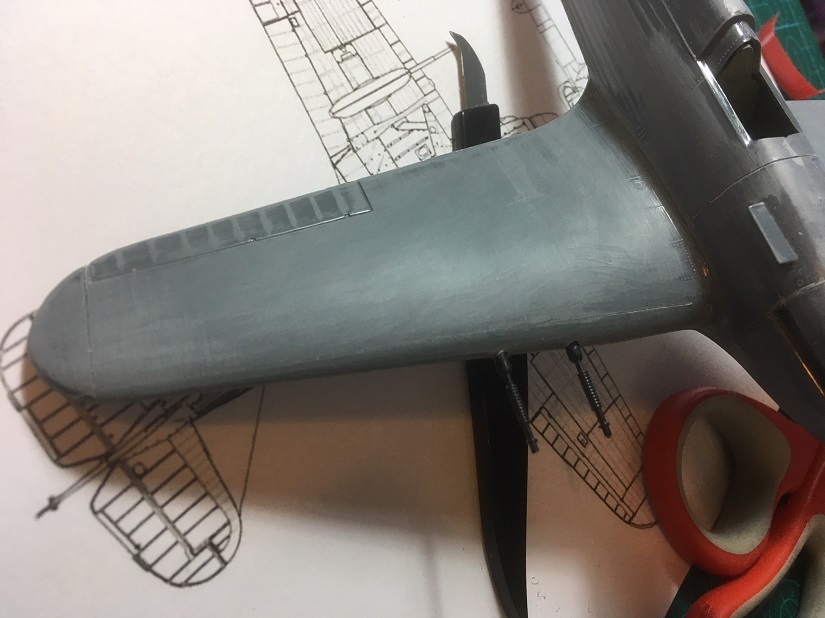
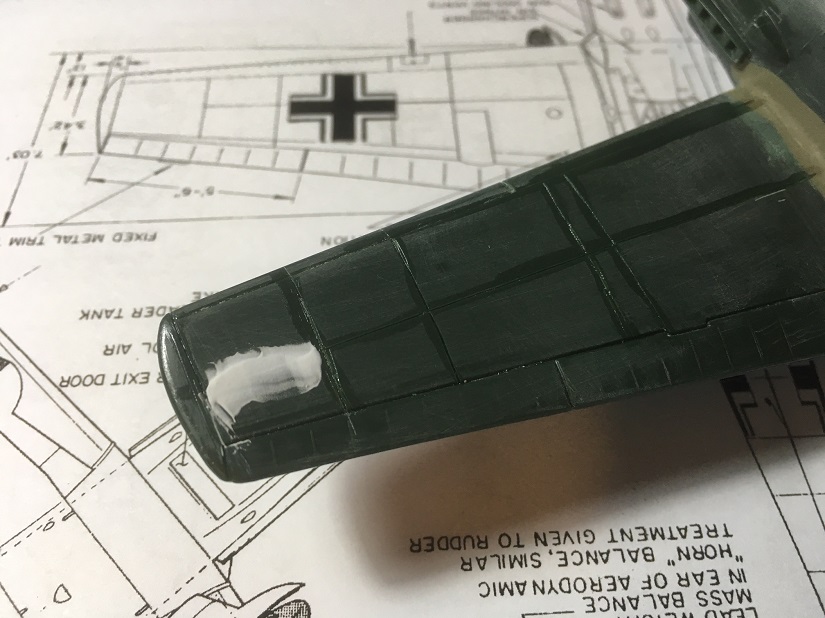
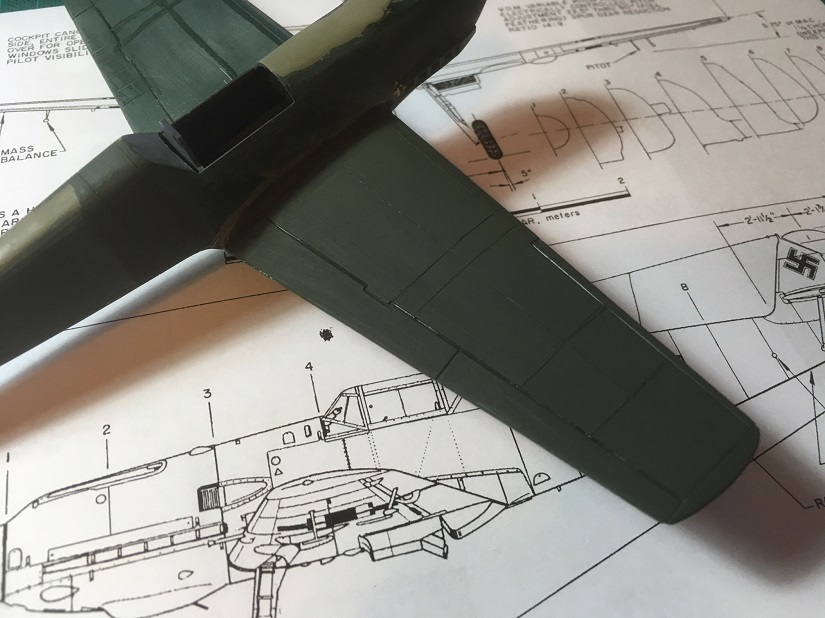
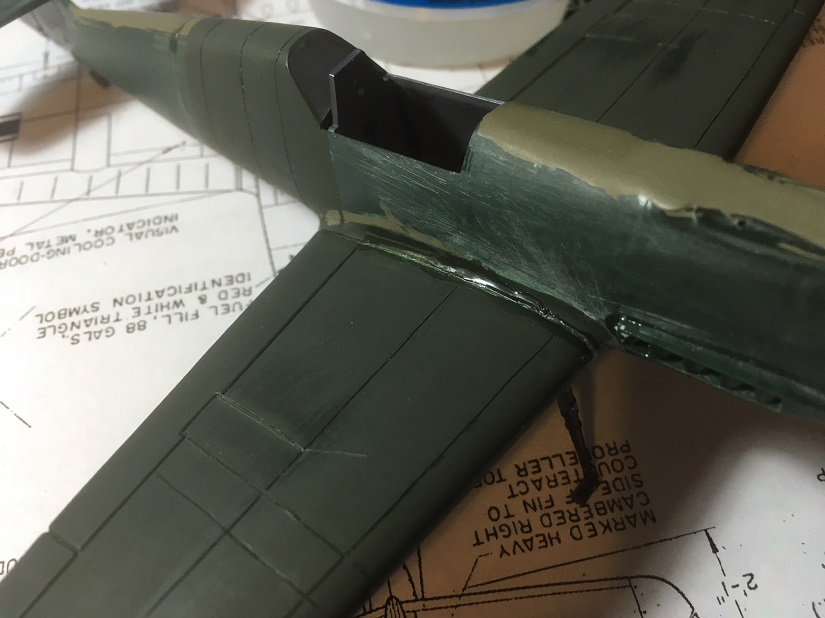
Magnus, thanks for that Chukw TIP it will be helpful in the future especially when I attempt to finish the Hurricanes wing tips.
Bob
If it aint broke dont fix it.
Washington, United States
Joined: March 15, 2009
KitMaker: 3,670 posts
AeroScale: 833 posts
Posted: Saturday, May 05, 2018 - 05:59 AM UTC
Quoted Text
Bob! For that curved wingtip line, the below trick could be of some use....I made this one by attaching a length of tape to the fuselage, then drawing the panel line curve with a pencil. The tape was then transferred to a thin sheet of plasticard where the contour was cut out and sanded smooth. The template was then attached to the fuselage and the panel line scribed using a needle in a pin vise.
Magnus
Just one other tip-- instead of using tape, I frequently use wax paper to trace panels to make templates for scribing and for decals (as in making panel decals to fit over the panels). You can see through wax paper, it takes a sharp #2 pencil lead very well, and you can cut out an almost perfect shape to use for making a template out of styrene. this is particularly useful in bare metal finishes. I frequently use the wax paper template method for making "panels" out of painted decal paper to highlight certain panels, sometimes eliminating scribing altogether for small scale projects. Didn't mean to hijack the thread here-- but this is another way to get a "panel line".
VR, Russ
Texas, United States
Joined: February 22, 2008
KitMaker: 5,026 posts
AeroScale: 2,811 posts
Posted: Sunday, May 06, 2018 - 12:48 AM UTC
If it aint broke dont fix it.