Overijssel, Netherlands
Joined: September 13, 2003
KitMaker: 339 posts
AeroScale: 244 posts
Posted: Sunday, April 01, 2018 - 05:20 PM UTC
Hey guys,
I started with the Fw night fighter. First try for a mottle sheme, so lets go.
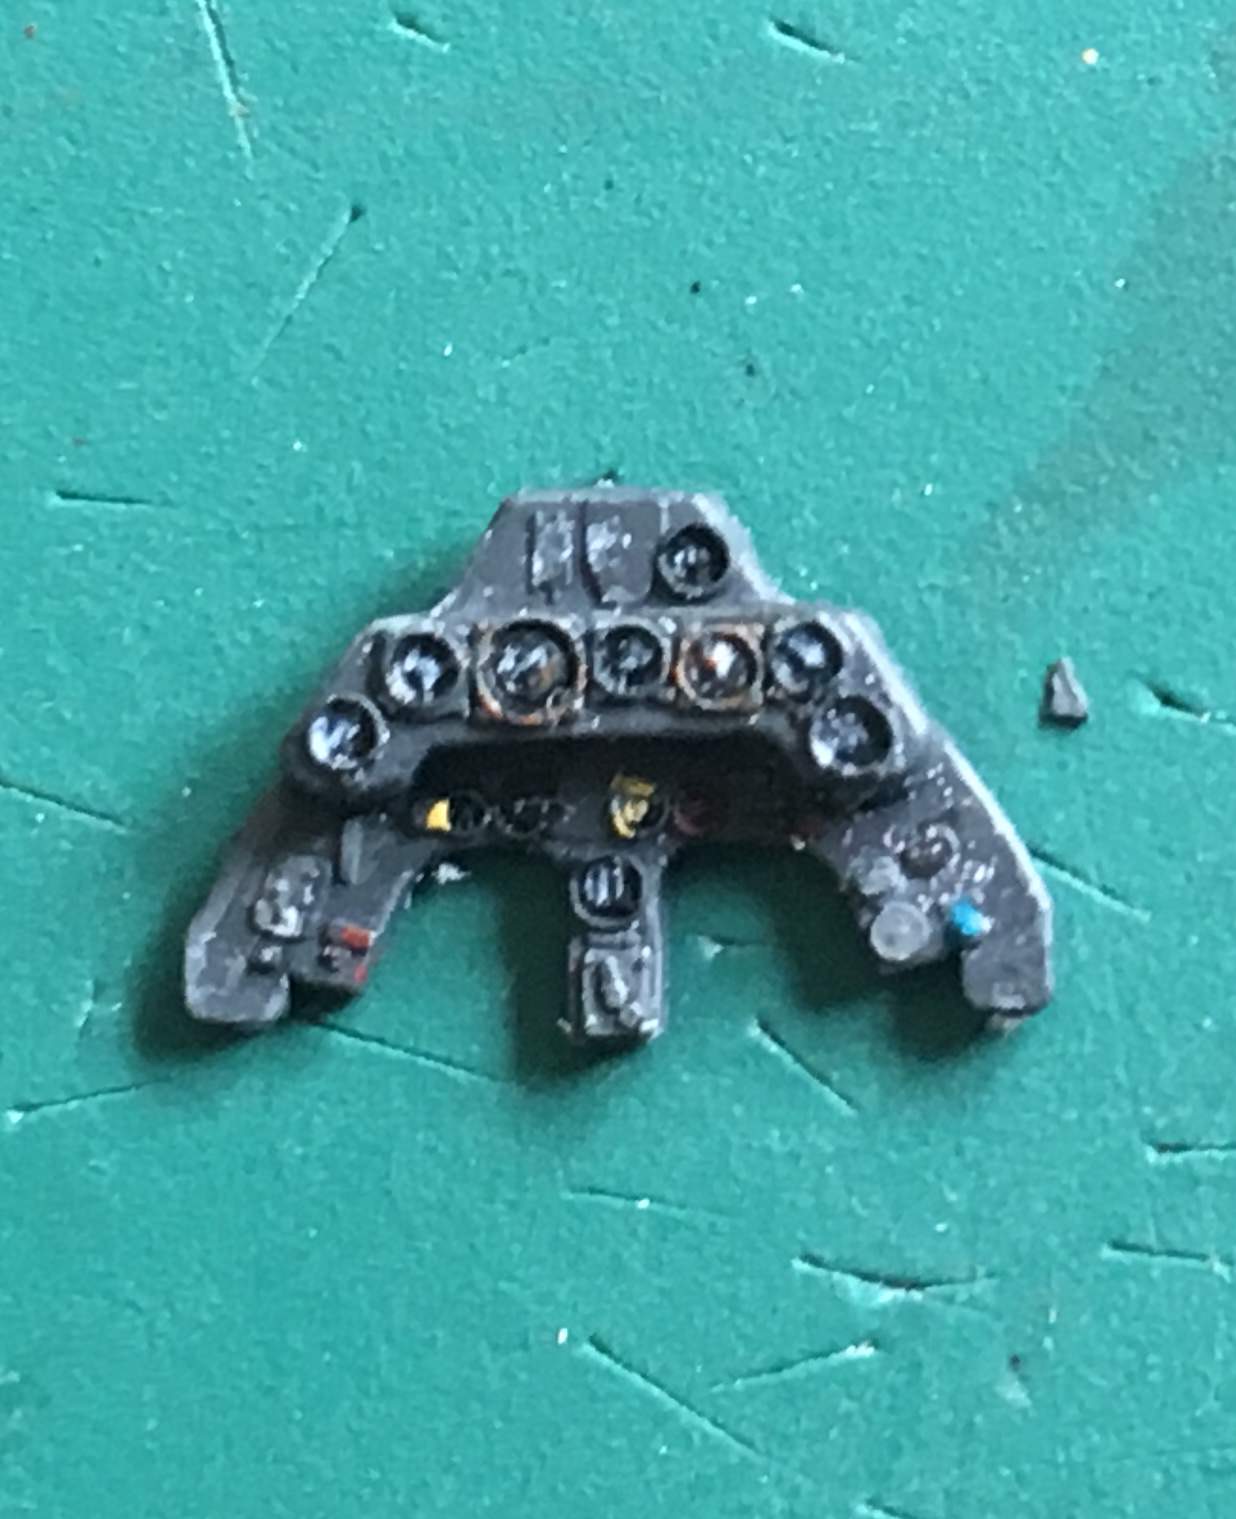
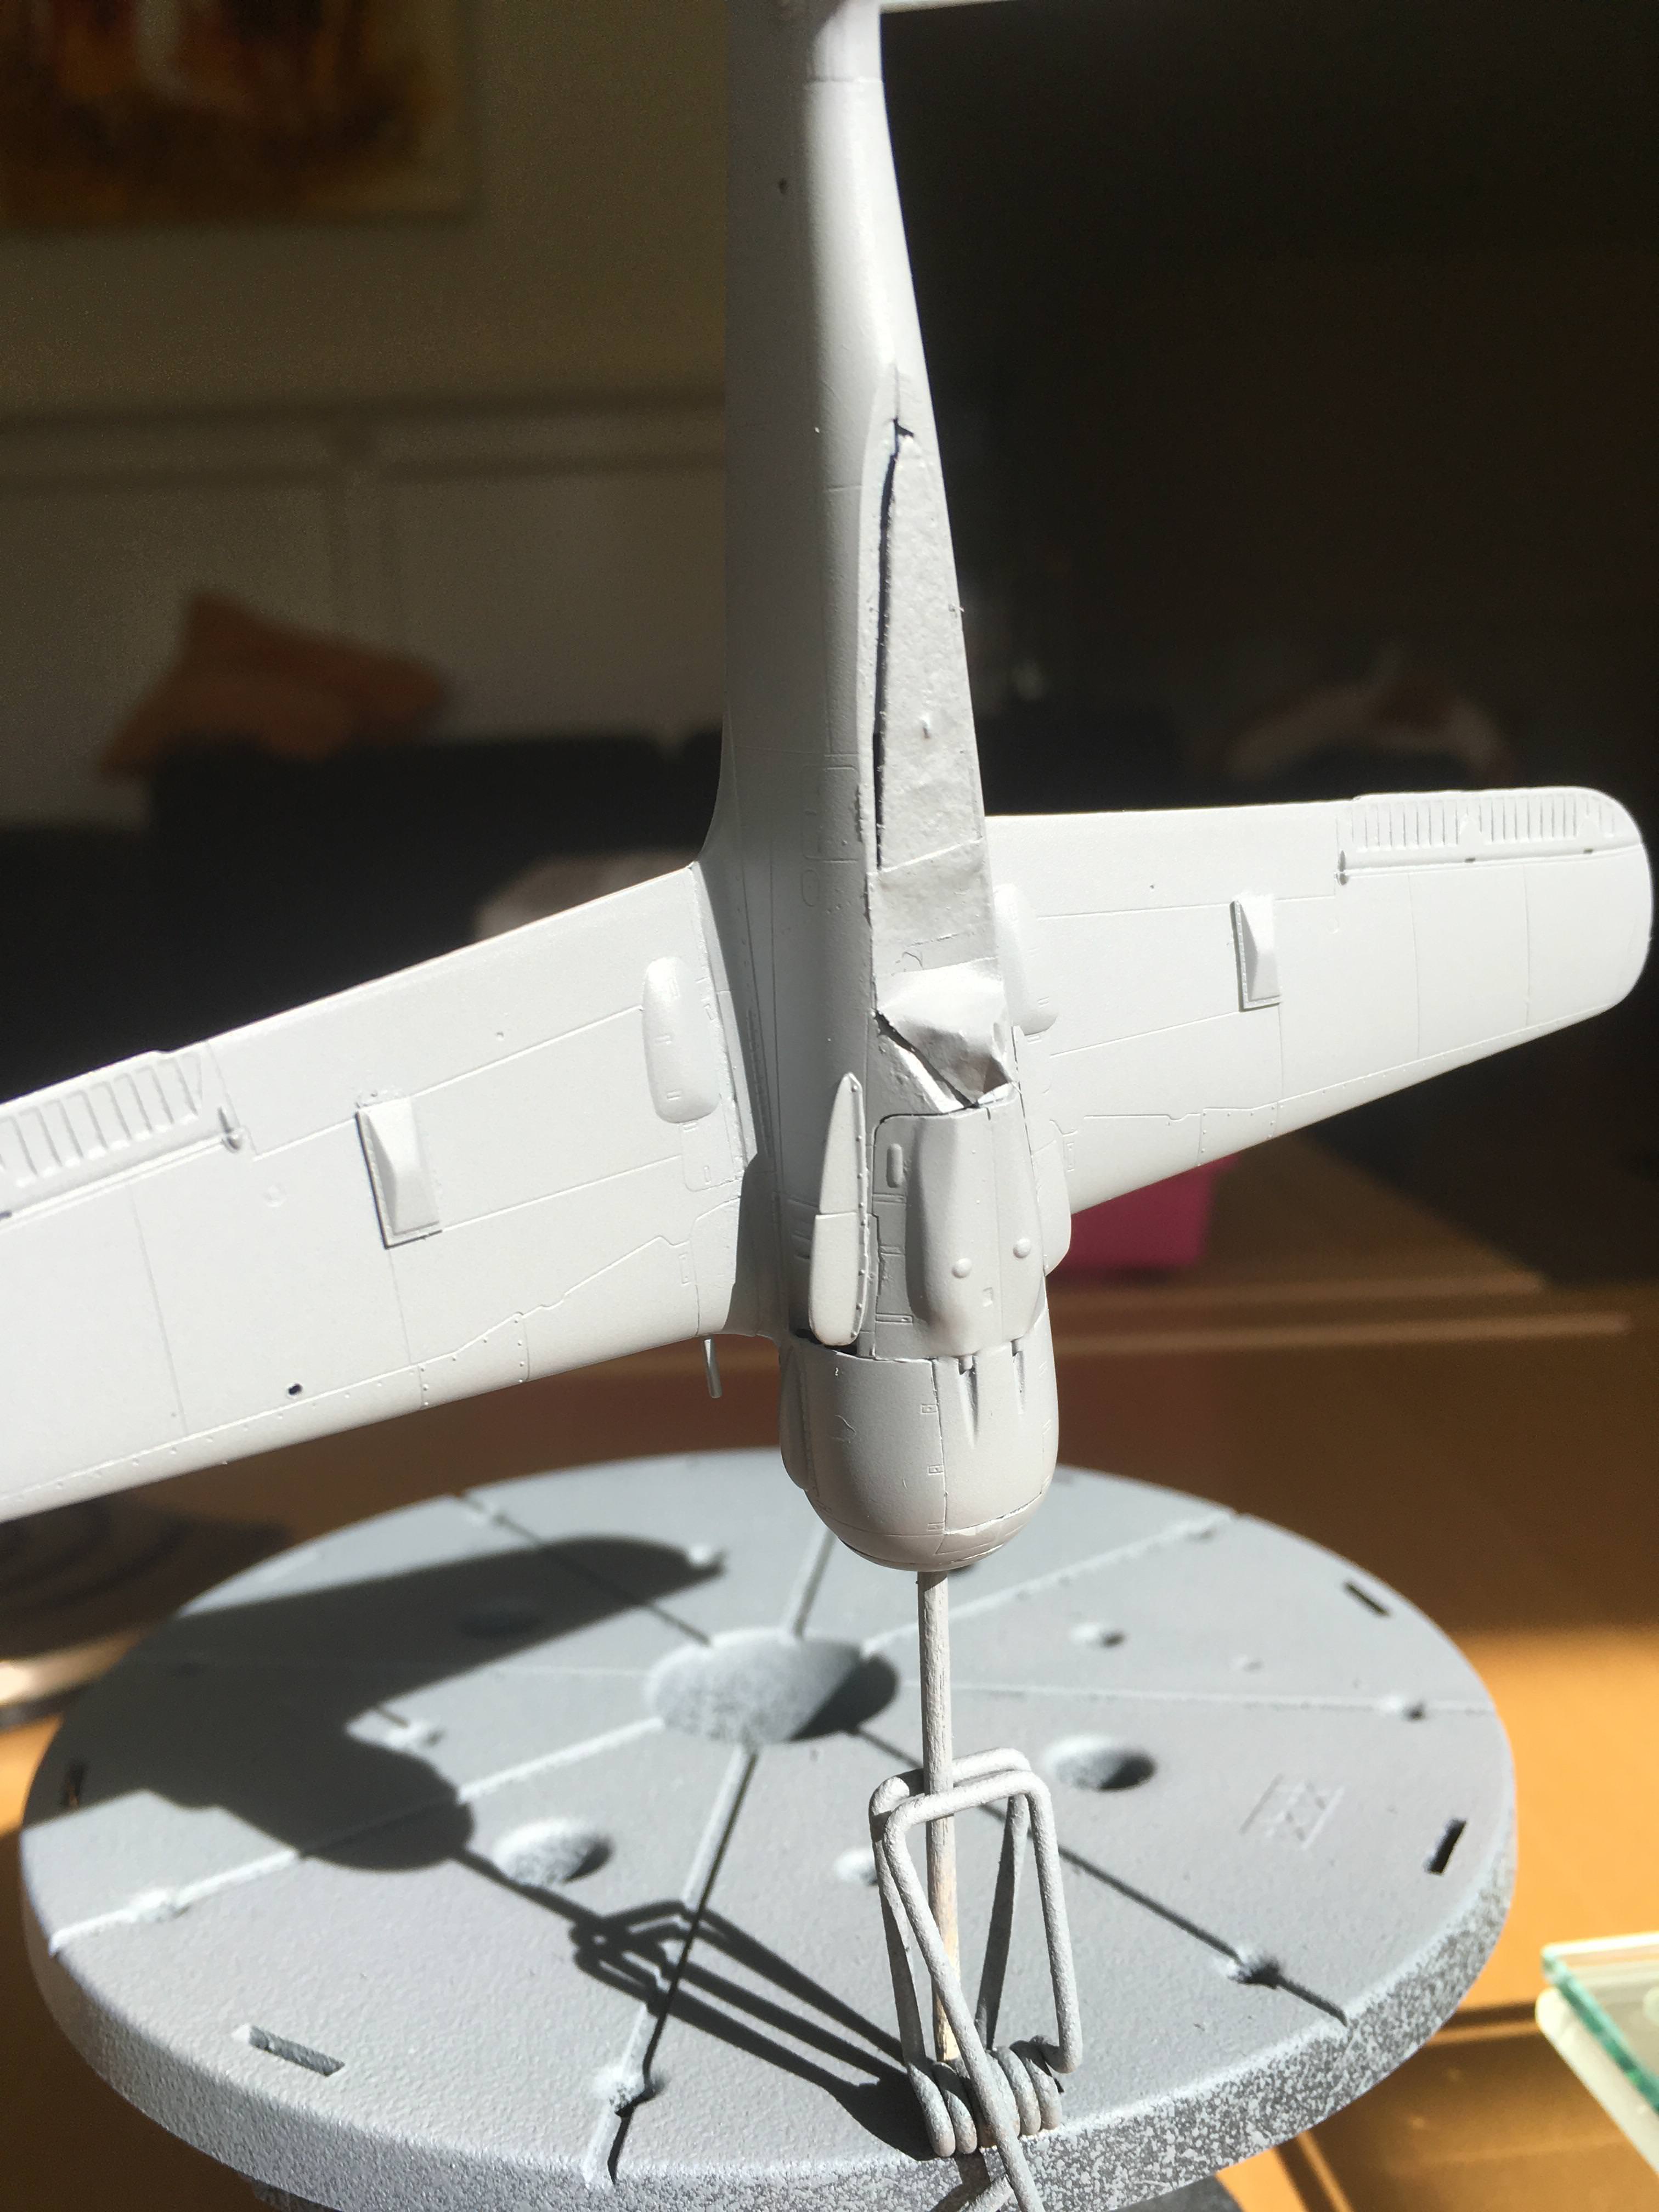
Started with painting the interior. Revell provides nice detail here and I think it looks pretty nice.
Gr TC
Bayern, Germany
Joined: January 17, 2006
KitMaker: 673 posts
AeroScale: 492 posts
Posted: Thursday, April 05, 2018 - 10:52 AM UTC
Overijssel, Netherlands
Joined: September 13, 2003
KitMaker: 339 posts
AeroScale: 244 posts
Posted: Thursday, April 05, 2018 - 03:19 PM UTC
Thx Ernest but...
So this one is done, failed

.
Tried to put on pirimer from a spray can. Last time I try that!
With this the model is done. I consider stealing the cockpit out and build it into a new frame. Not sure yet.
Gr Tc
Overijssel, Netherlands
Joined: September 13, 2003
KitMaker: 339 posts
AeroScale: 244 posts
Posted: Thursday, April 05, 2018 - 04:03 PM UTC
So I really didnt want it to have it end here. I went for the ultimate gamble and took a big brush and Revell airbrush cleaner....stripped the plane from this paint and I am off for a retry
Stockholm, Sweden
Joined: May 02, 2006
KitMaker: 1,953 posts
AeroScale: 1,902 posts
Posted: Friday, April 06, 2018 - 02:08 AM UTC
Lars! It's perfectly possible to use primer from the spray can - I do it all the time! I mainly use Tamiya and Games Workshop primers, the trick is to heat the can in hot tap water (NOT boiling water from the kettle). Dunk the can in the water for five minutes and the paint will flow a lot better and settle nicely on the model.
Good luck with your next try, and well done cleaning off the mess from the model

!

Magnus
Press banner to the right to follow my trail to the new forums!
Overijssel, Netherlands
Joined: September 13, 2003
KitMaker: 339 posts
AeroScale: 244 posts
Posted: Friday, April 06, 2018 - 02:03 PM UTC
I got so many tips and tricks I had to try again. Put the can into hot water for 5 minutes. Tested first on the sprue then on the model... So many thanks guys! I think this went very well and is workable.
Gr Tc

#305
Christchurch, New Zealand
Joined: February 01, 2006
KitMaker: 1,673 posts
AeroScale: 1,517 posts
Posted: Friday, April 06, 2018 - 04:36 PM UTC
Nice save Lars! I was about to suggest the use of oven cleaner which is my go to for stripping paint. It attacks the paint but not the plastic, but your method seems to have worked really well. I look forward to seeing her painted.
I agree with you the revell 1/72 scale Fw190 family are all very nice, I built the one with the Bv246 hagelkorn glider bomb and fell in love with the kit. I've built several since and I have one of the night fighters in the stash still to be built.
Overijssel, Netherlands
Joined: September 13, 2003
KitMaker: 339 posts
AeroScale: 244 posts
Posted: Monday, April 23, 2018 - 10:53 PM UTC
So guys finally an update. It was crazy busy privatly but there is progress.
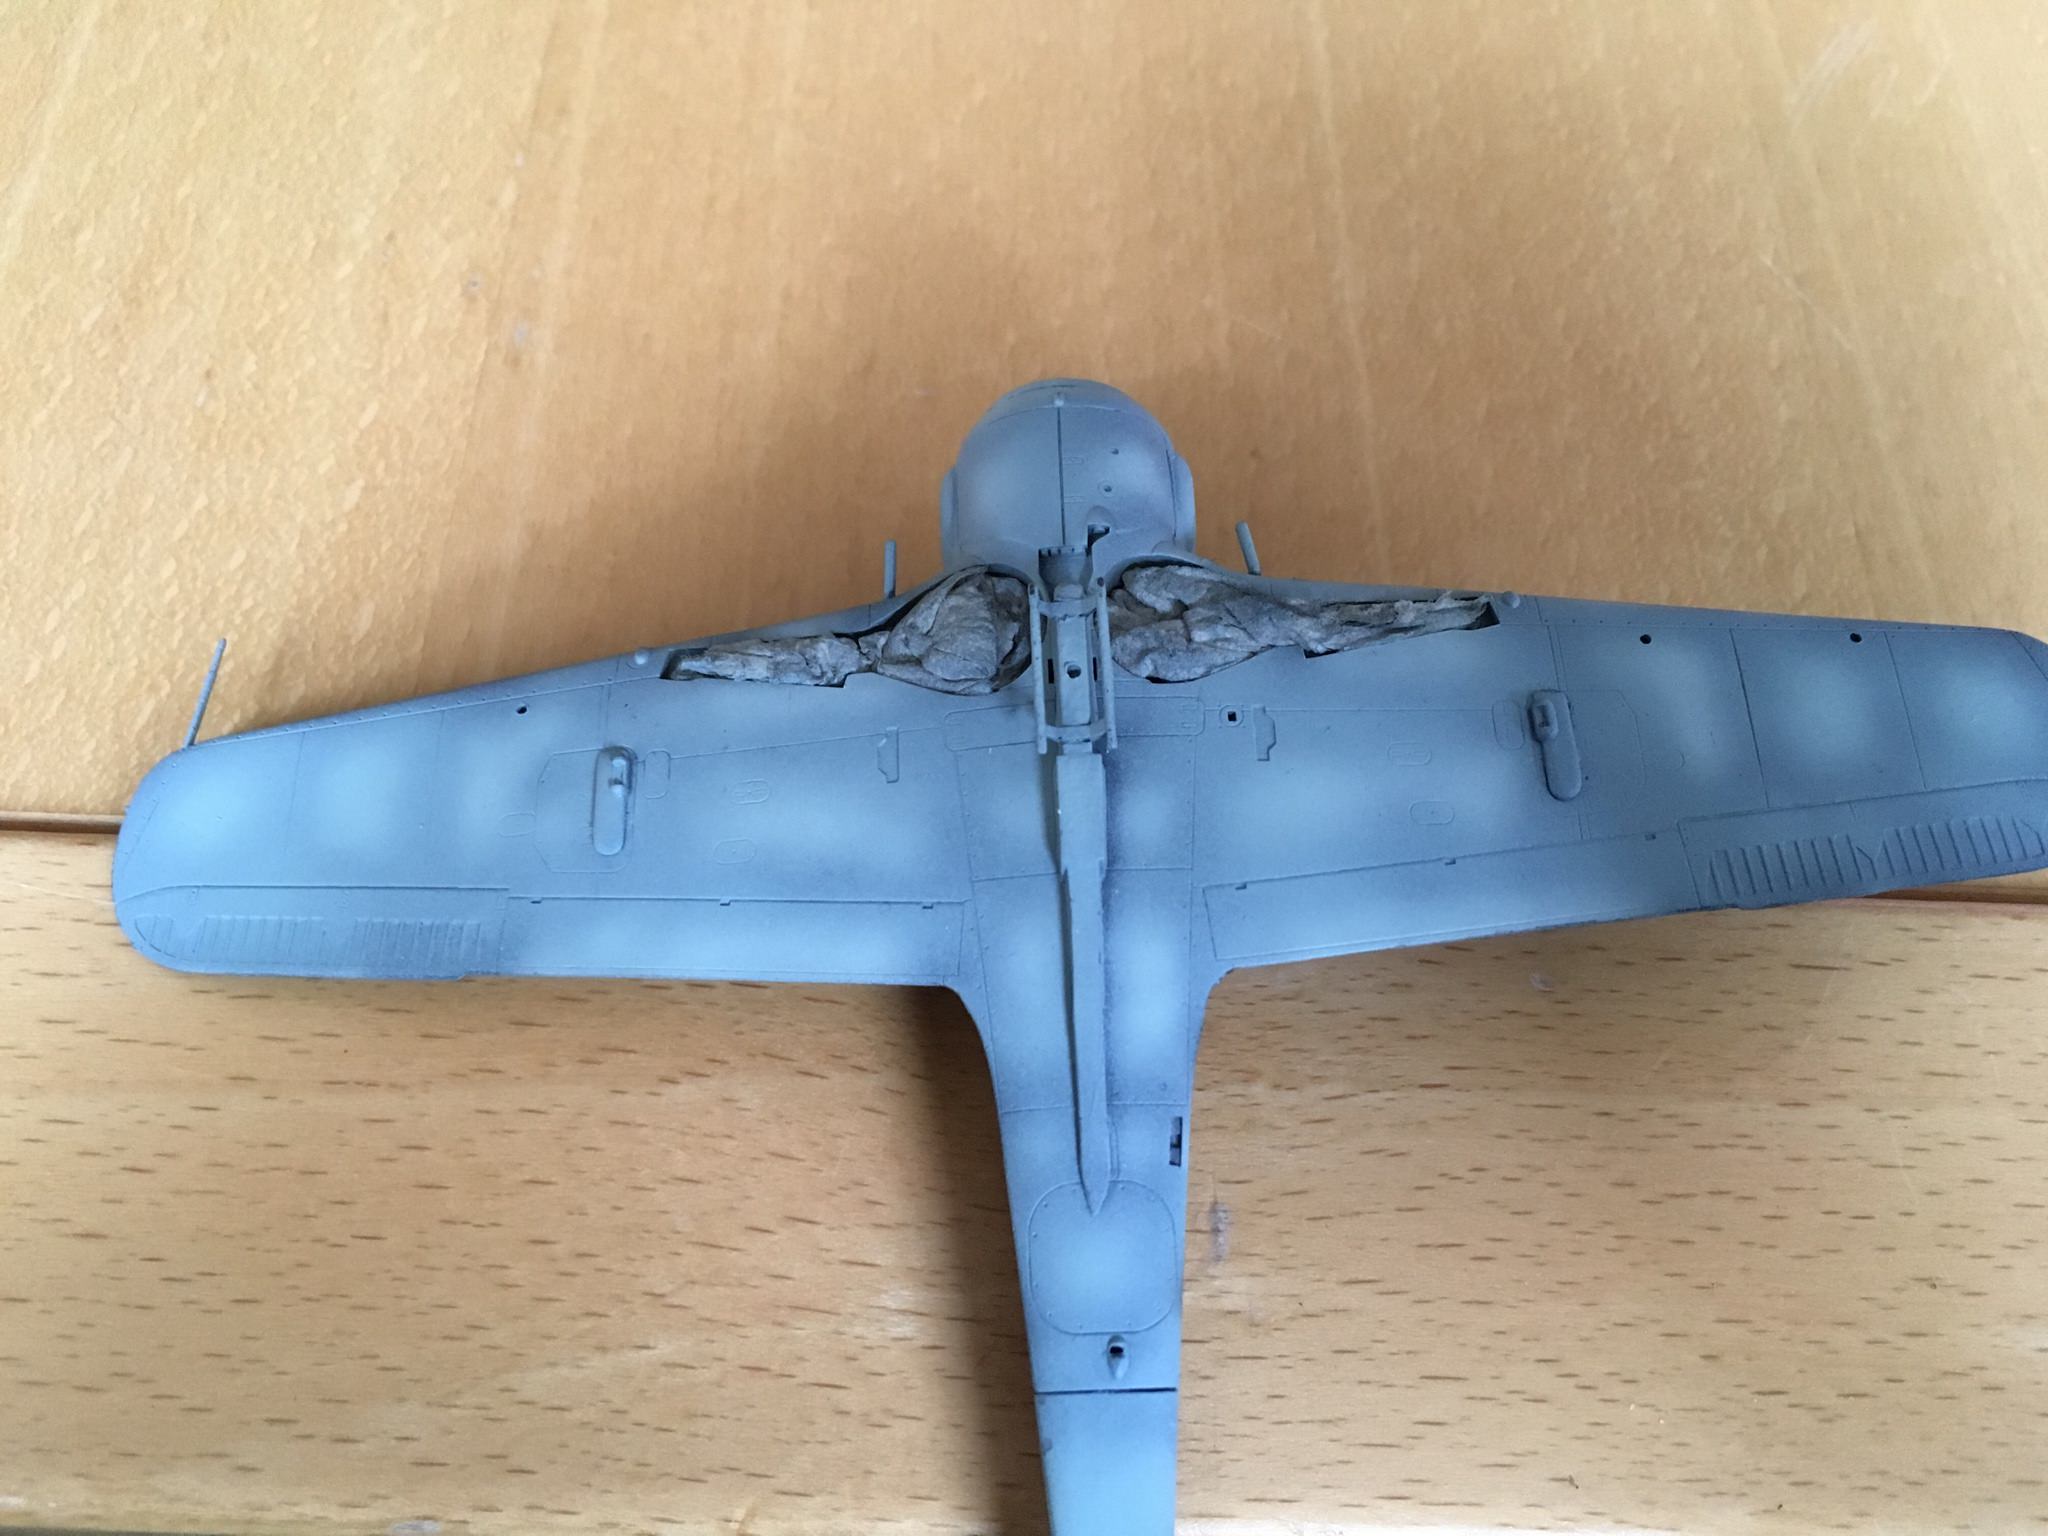
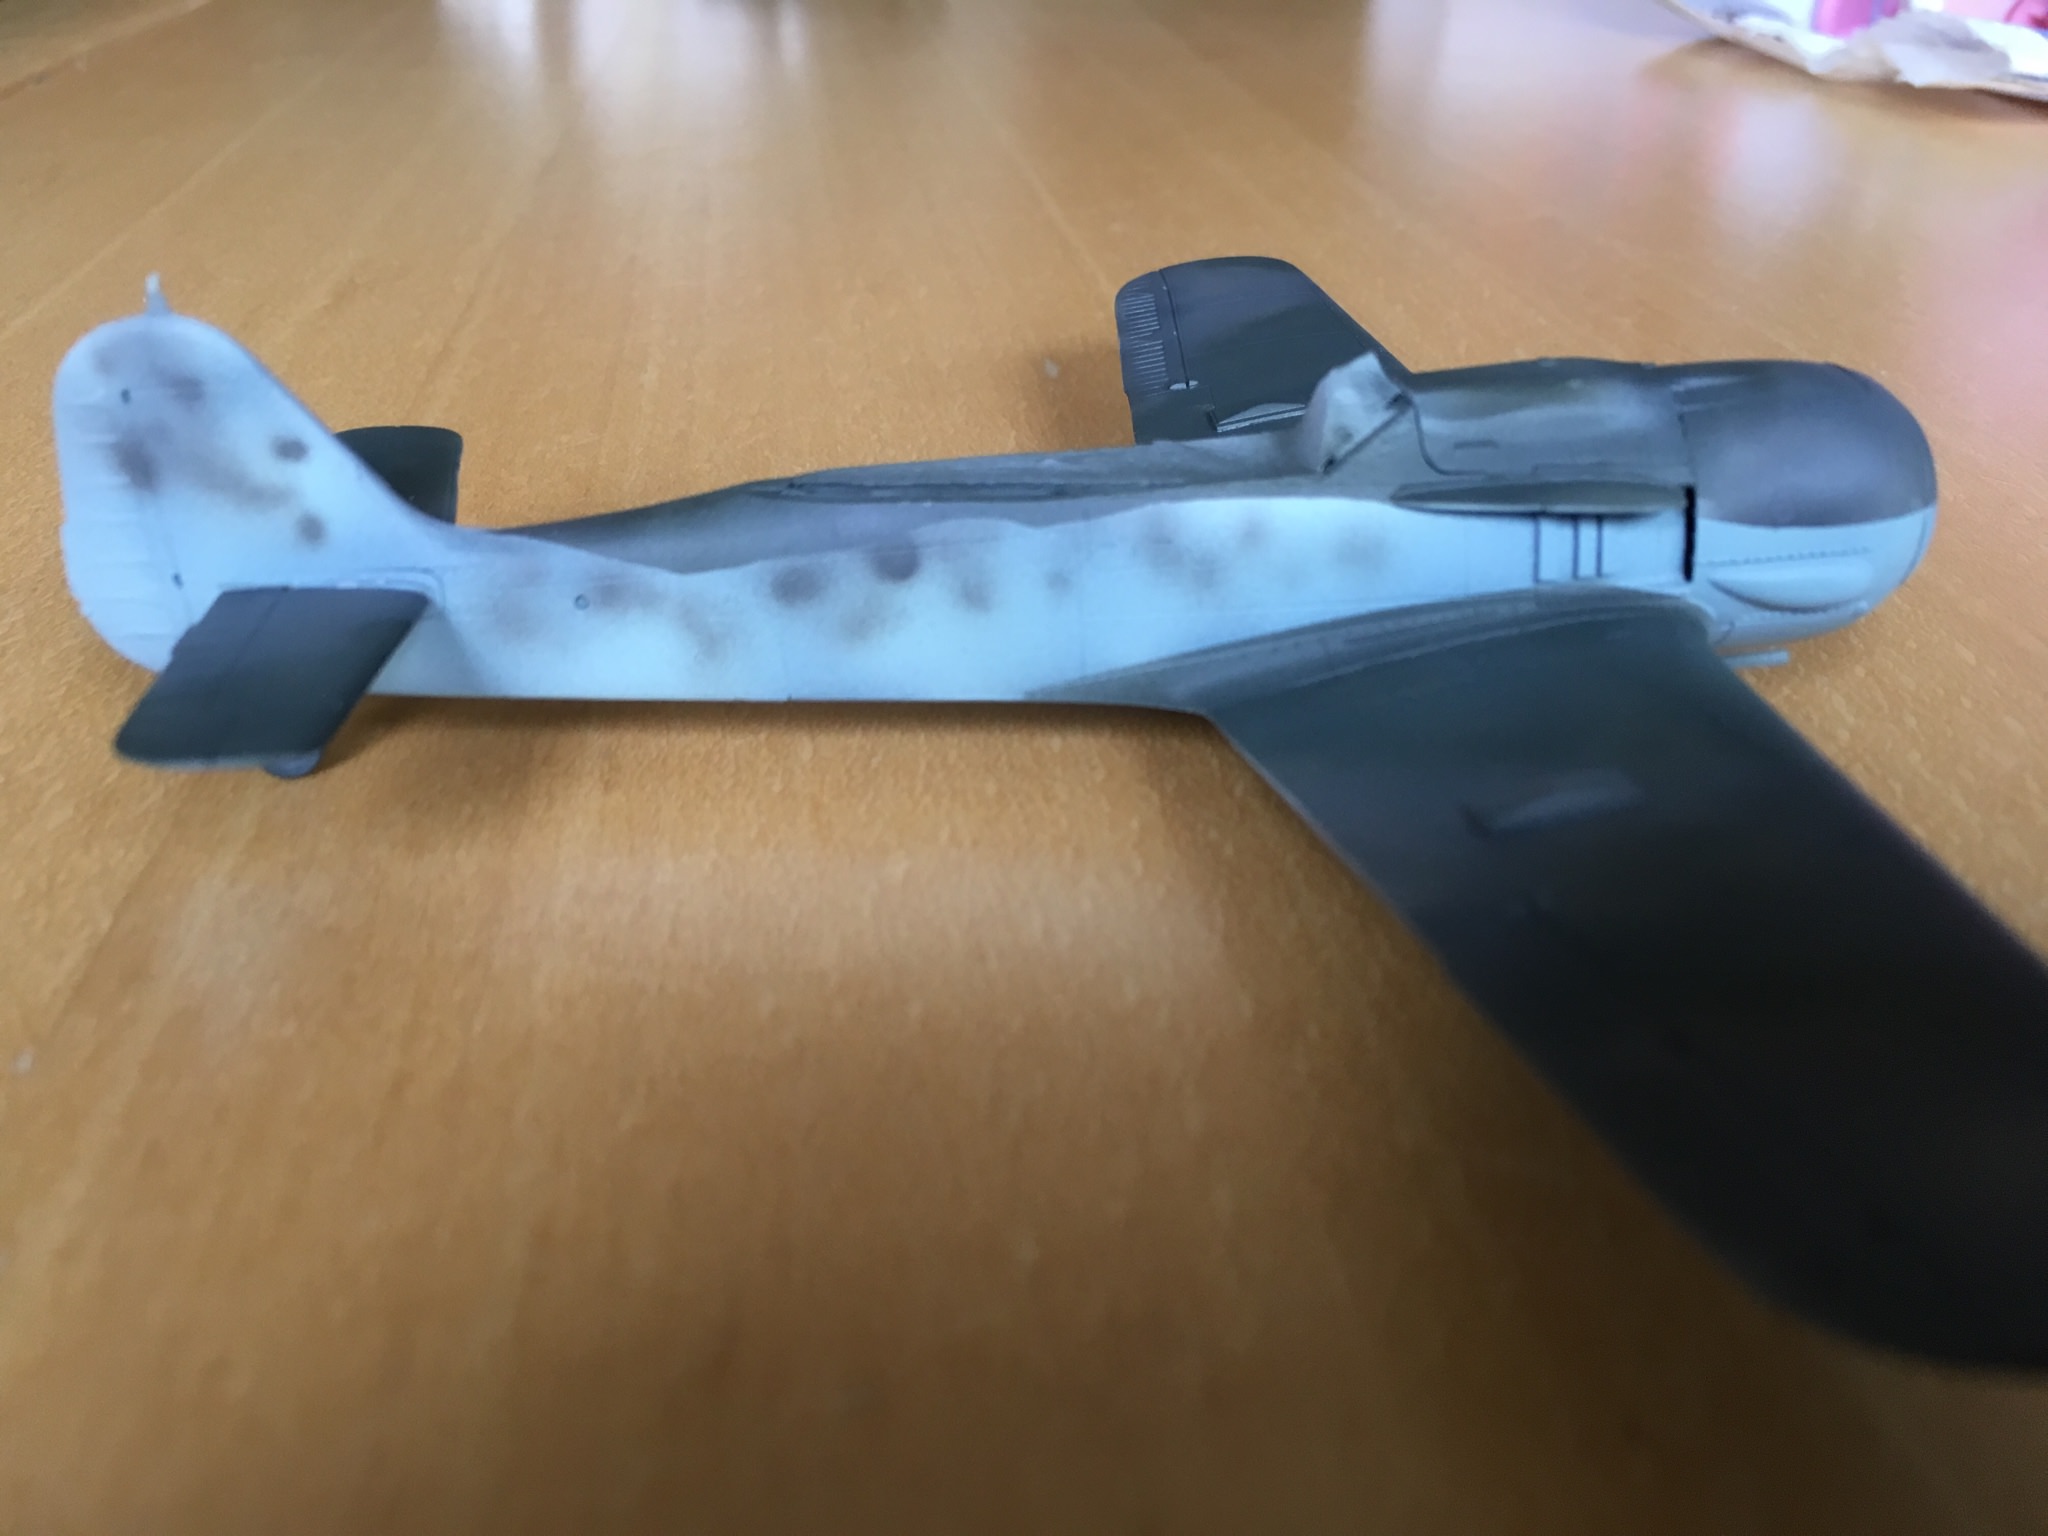
So first the pre shading and filled the centers with white.
Then the blue grey. I used Vallejo and mixed 50/50 with white because I felt the basic colour was to blue.
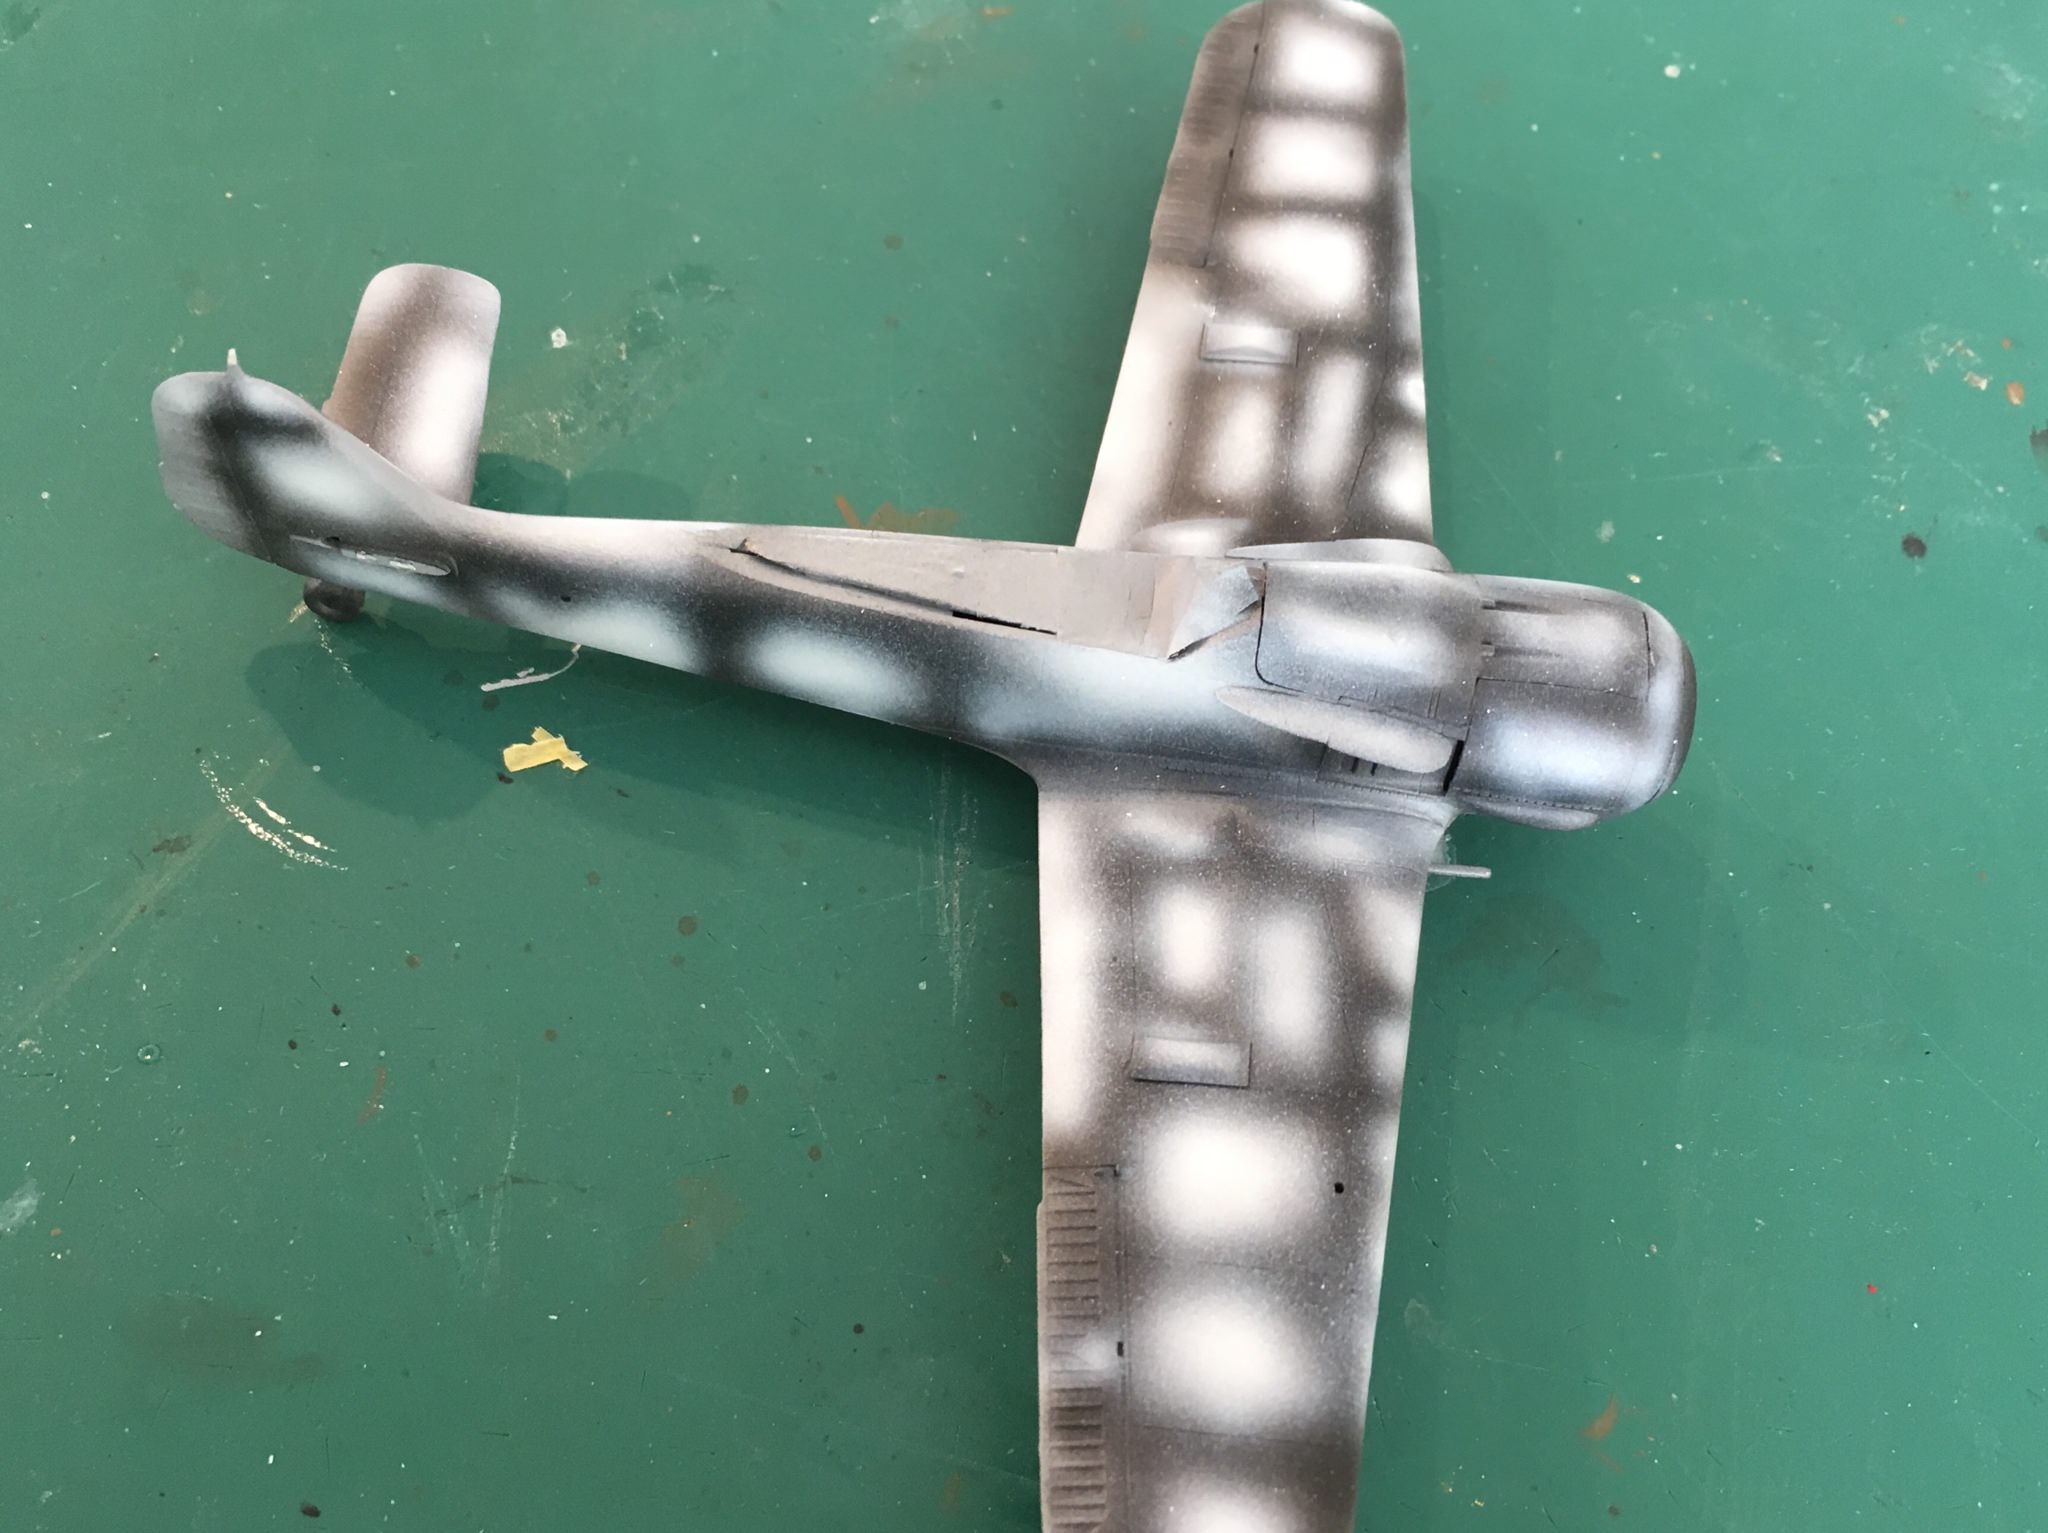
So then came on the camo

So then I tried the mottling. So I think I figured it out a bit now. Maybe not the best but I want to see how it looks after decalling and some fading so I will go for this...
Greetings TC
Joel_W
 Associate Editor
New York, United States
Joined: December 04, 2010
KitMaker: 11,666 posts
AeroScale: 7,410 posts
Posted: Tuesday, April 24, 2018 - 07:23 PM UTC
Lars,
Great save for sure.
I also use Tamiya fine gray primer from a rattle can for certain applications. Besides a hot water bath, lite coats work much better then a few heavier coats as the rattle cans put out an enormous amount of primer/paint at an extremely high psi.
your camo paint scheme is really coming along quite nicely. Once you've added the markings, it will make a huge difference as well.
Looking forward to your next update.
Joel
On my Workbench:
Monogram 1/24 scale 427 Shelby Cobra
Just Completed:
Beemax 1/24 scale BMW M3 E30 1992 Evolution II
Netherlands Antilles
Joined: September 02, 2014
KitMaker: 1,977 posts
AeroScale: 295 posts
Posted: Tuesday, April 24, 2018 - 07:32 PM UTC
Lars, as Joel said: great save! And your mottling doesn't look bad either. Some weathering, markings and clear coating will deal with the "cheeky" looks from now.
Keep plodding!
Cheers!
Gabriel
Gabriel
Many of my builds can be seen on YT in video format. Please check 'Panzergrau Models' Channel.
Overijssel, Netherlands
Joined: September 13, 2003
KitMaker: 339 posts
AeroScale: 244 posts
Posted: Tuesday, April 24, 2018 - 09:23 PM UTC
Hey guys, thx for the feedback. Thus I will spray the gloss and continue on this. Hope to post another update in the weekend!
Gr TC
Overijssel, Netherlands
Joined: September 13, 2003
KitMaker: 339 posts
AeroScale: 244 posts
Posted: Friday, April 27, 2018 - 02:48 PM UTC
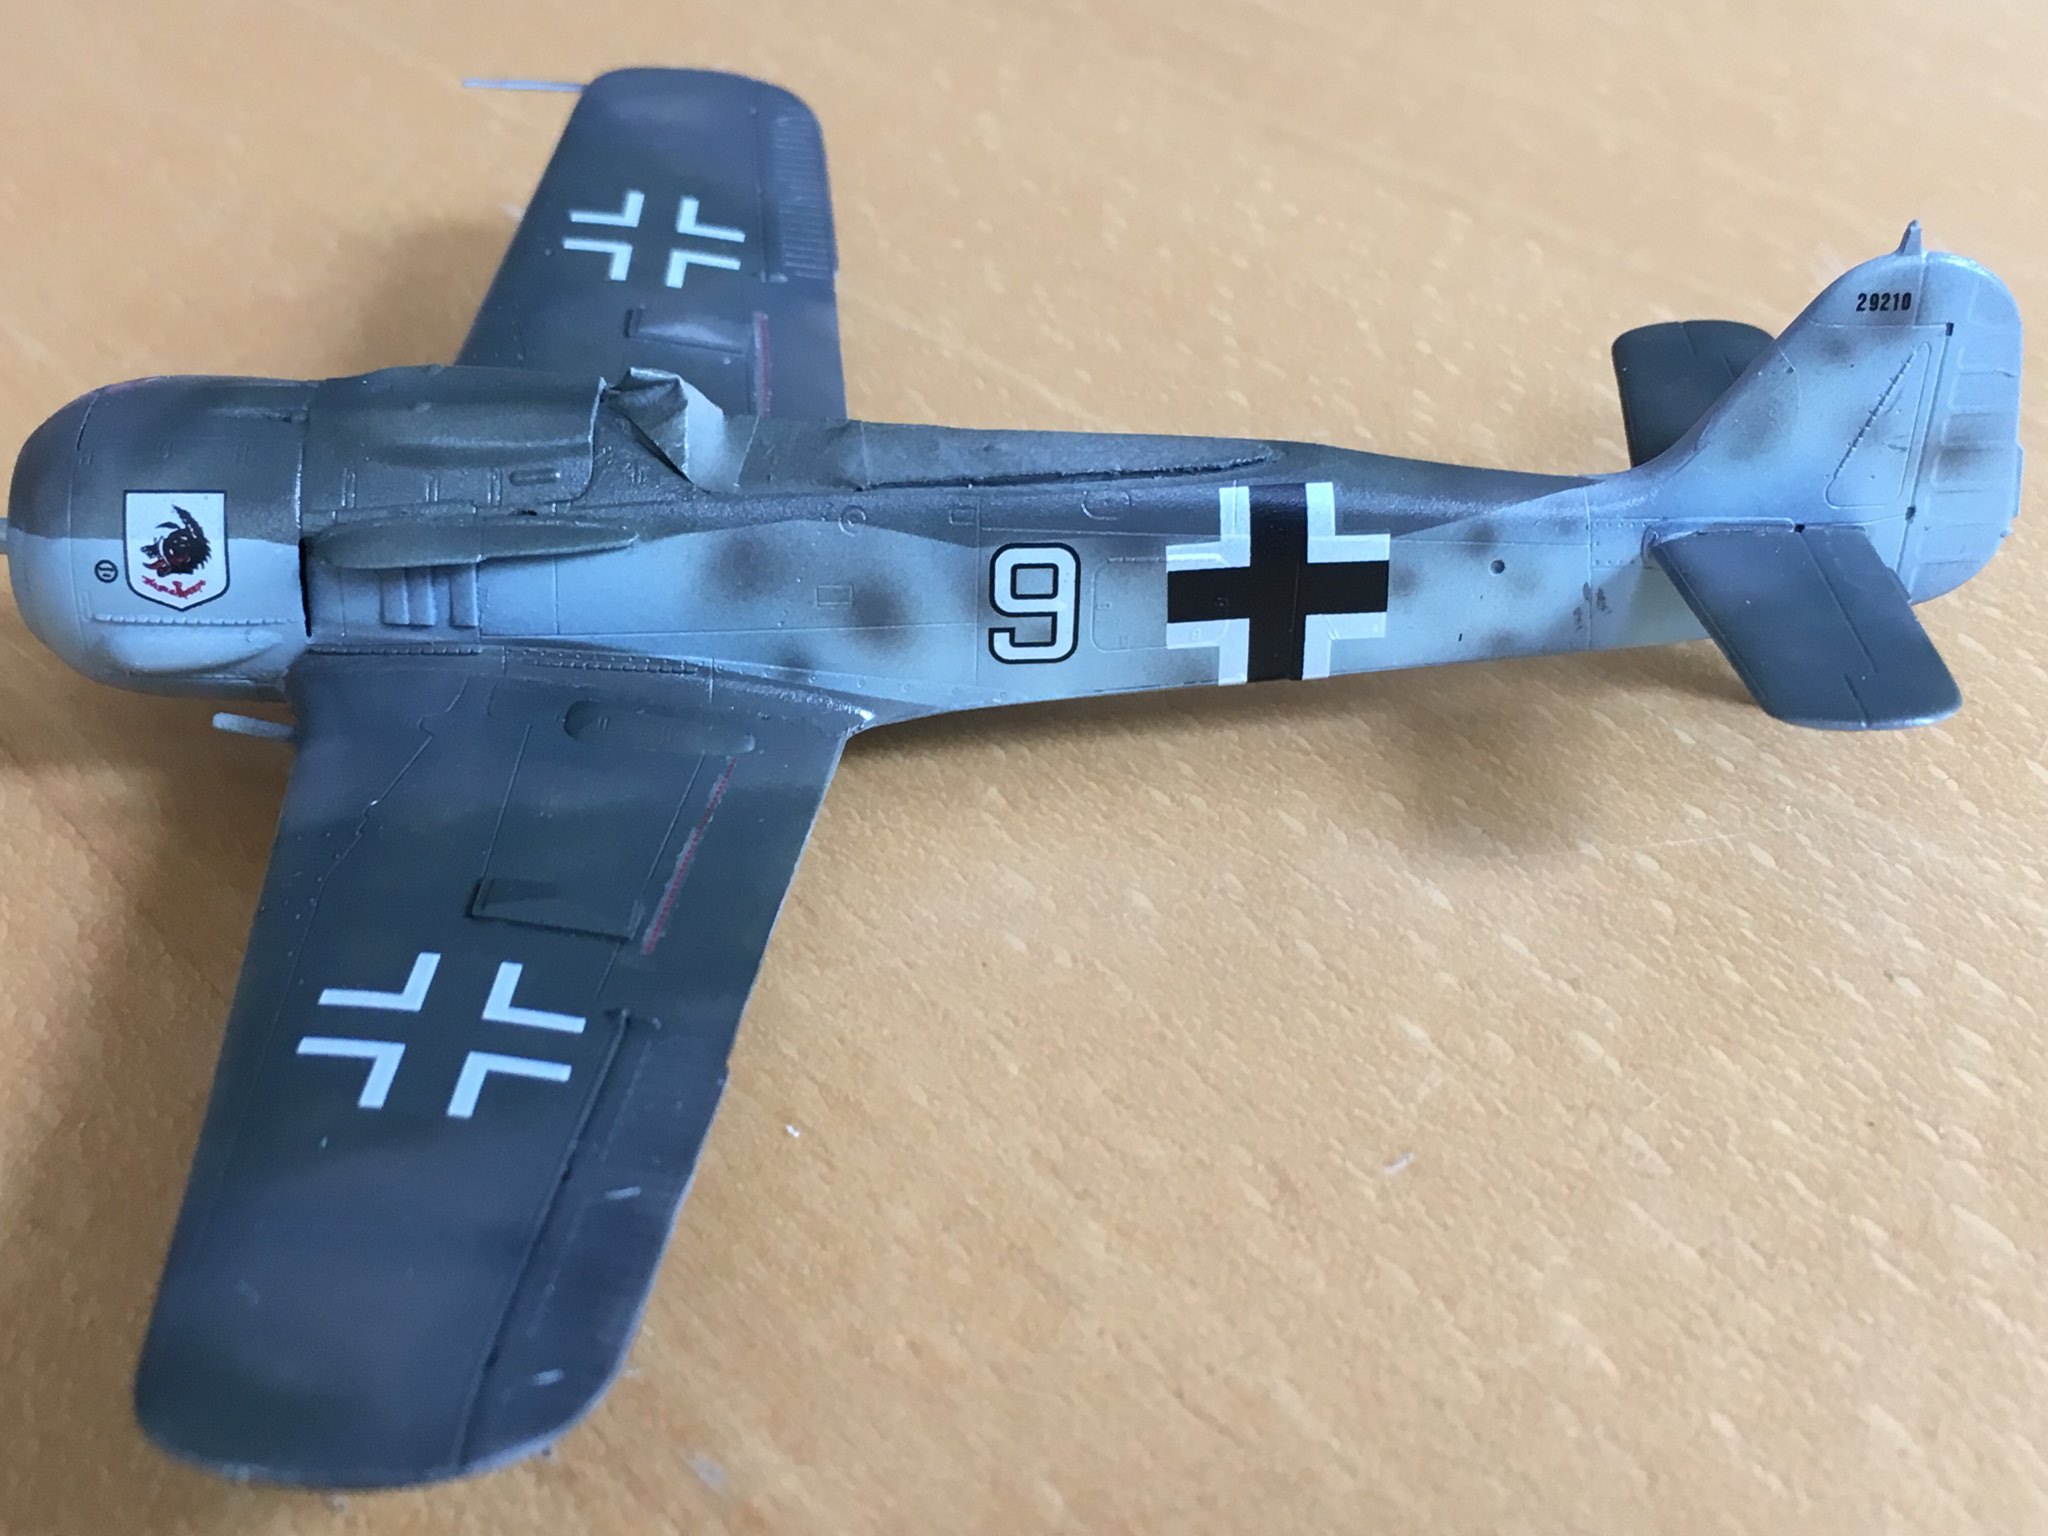
Hi, a quick update. Basic decals are applied. Will put on the smaller ones today let it cure and put on a wash tommorrow.
Already with the decals on the mottling looks less bad.
Joel_W
Associate Editor New York, United States
Joined: December 04, 2010
KitMaker: 11,666 posts
AeroScale: 7,410 posts
Posted: Sunday, April 29, 2018 - 09:56 PM UTC
Lars,
Lookkin' real good. Just don't forget to gloss the decals before weathering. I once made that mistake and is was a true disaster.
I was watching a WWII tv documentary the other night, and when I saw film of German aircraft it once again rang my bell that we as modelers tend to make or want to make everything perfect, while the reality is that in real life most of the field camo efforts were far less then perfect.
My point is that you've done a realistic representation and that's the important thing.
Joel
On my Workbench:
Monogram 1/24 scale 427 Shelby Cobra
Just Completed:
Beemax 1/24 scale BMW M3 E30 1992 Evolution II
Overijssel, Netherlands
Joined: September 13, 2003
KitMaker: 339 posts
AeroScale: 244 posts
Posted: Wednesday, May 02, 2018 - 01:50 AM UTC
Quoted Text
Lars,
Lookkin' real good. Just don't forget to gloss the decals before weathering. I once made that mistake and is was a true disaster.
I was watching a WWII tv documentary the other night, and when I saw film of German aircraft it once again rang my bell that we as modelers tend to make or want to make everything perfect, while the reality is that in real life most of the field camo efforts were far less then perfect.
My point is that you've done a realistic representation and that's the important thing.
Joel
Hi Joel, thx for the feedback. I did make that mistake. And ruind a number by scrating a part off
. This build give me some stuff to learn on the other hahd that is what I was trying to do before building my next 1/48....
I already have giving it a wash and starting the fading. In my opinion it is starting to get really nice. I hope to finish it this weekend
.
Gr Lars
Overijssel, Netherlands
Joined: September 13, 2003
KitMaker: 339 posts
AeroScale: 244 posts
Posted: Tuesday, May 08, 2018 - 06:46 PM UTC
So guys and girls,
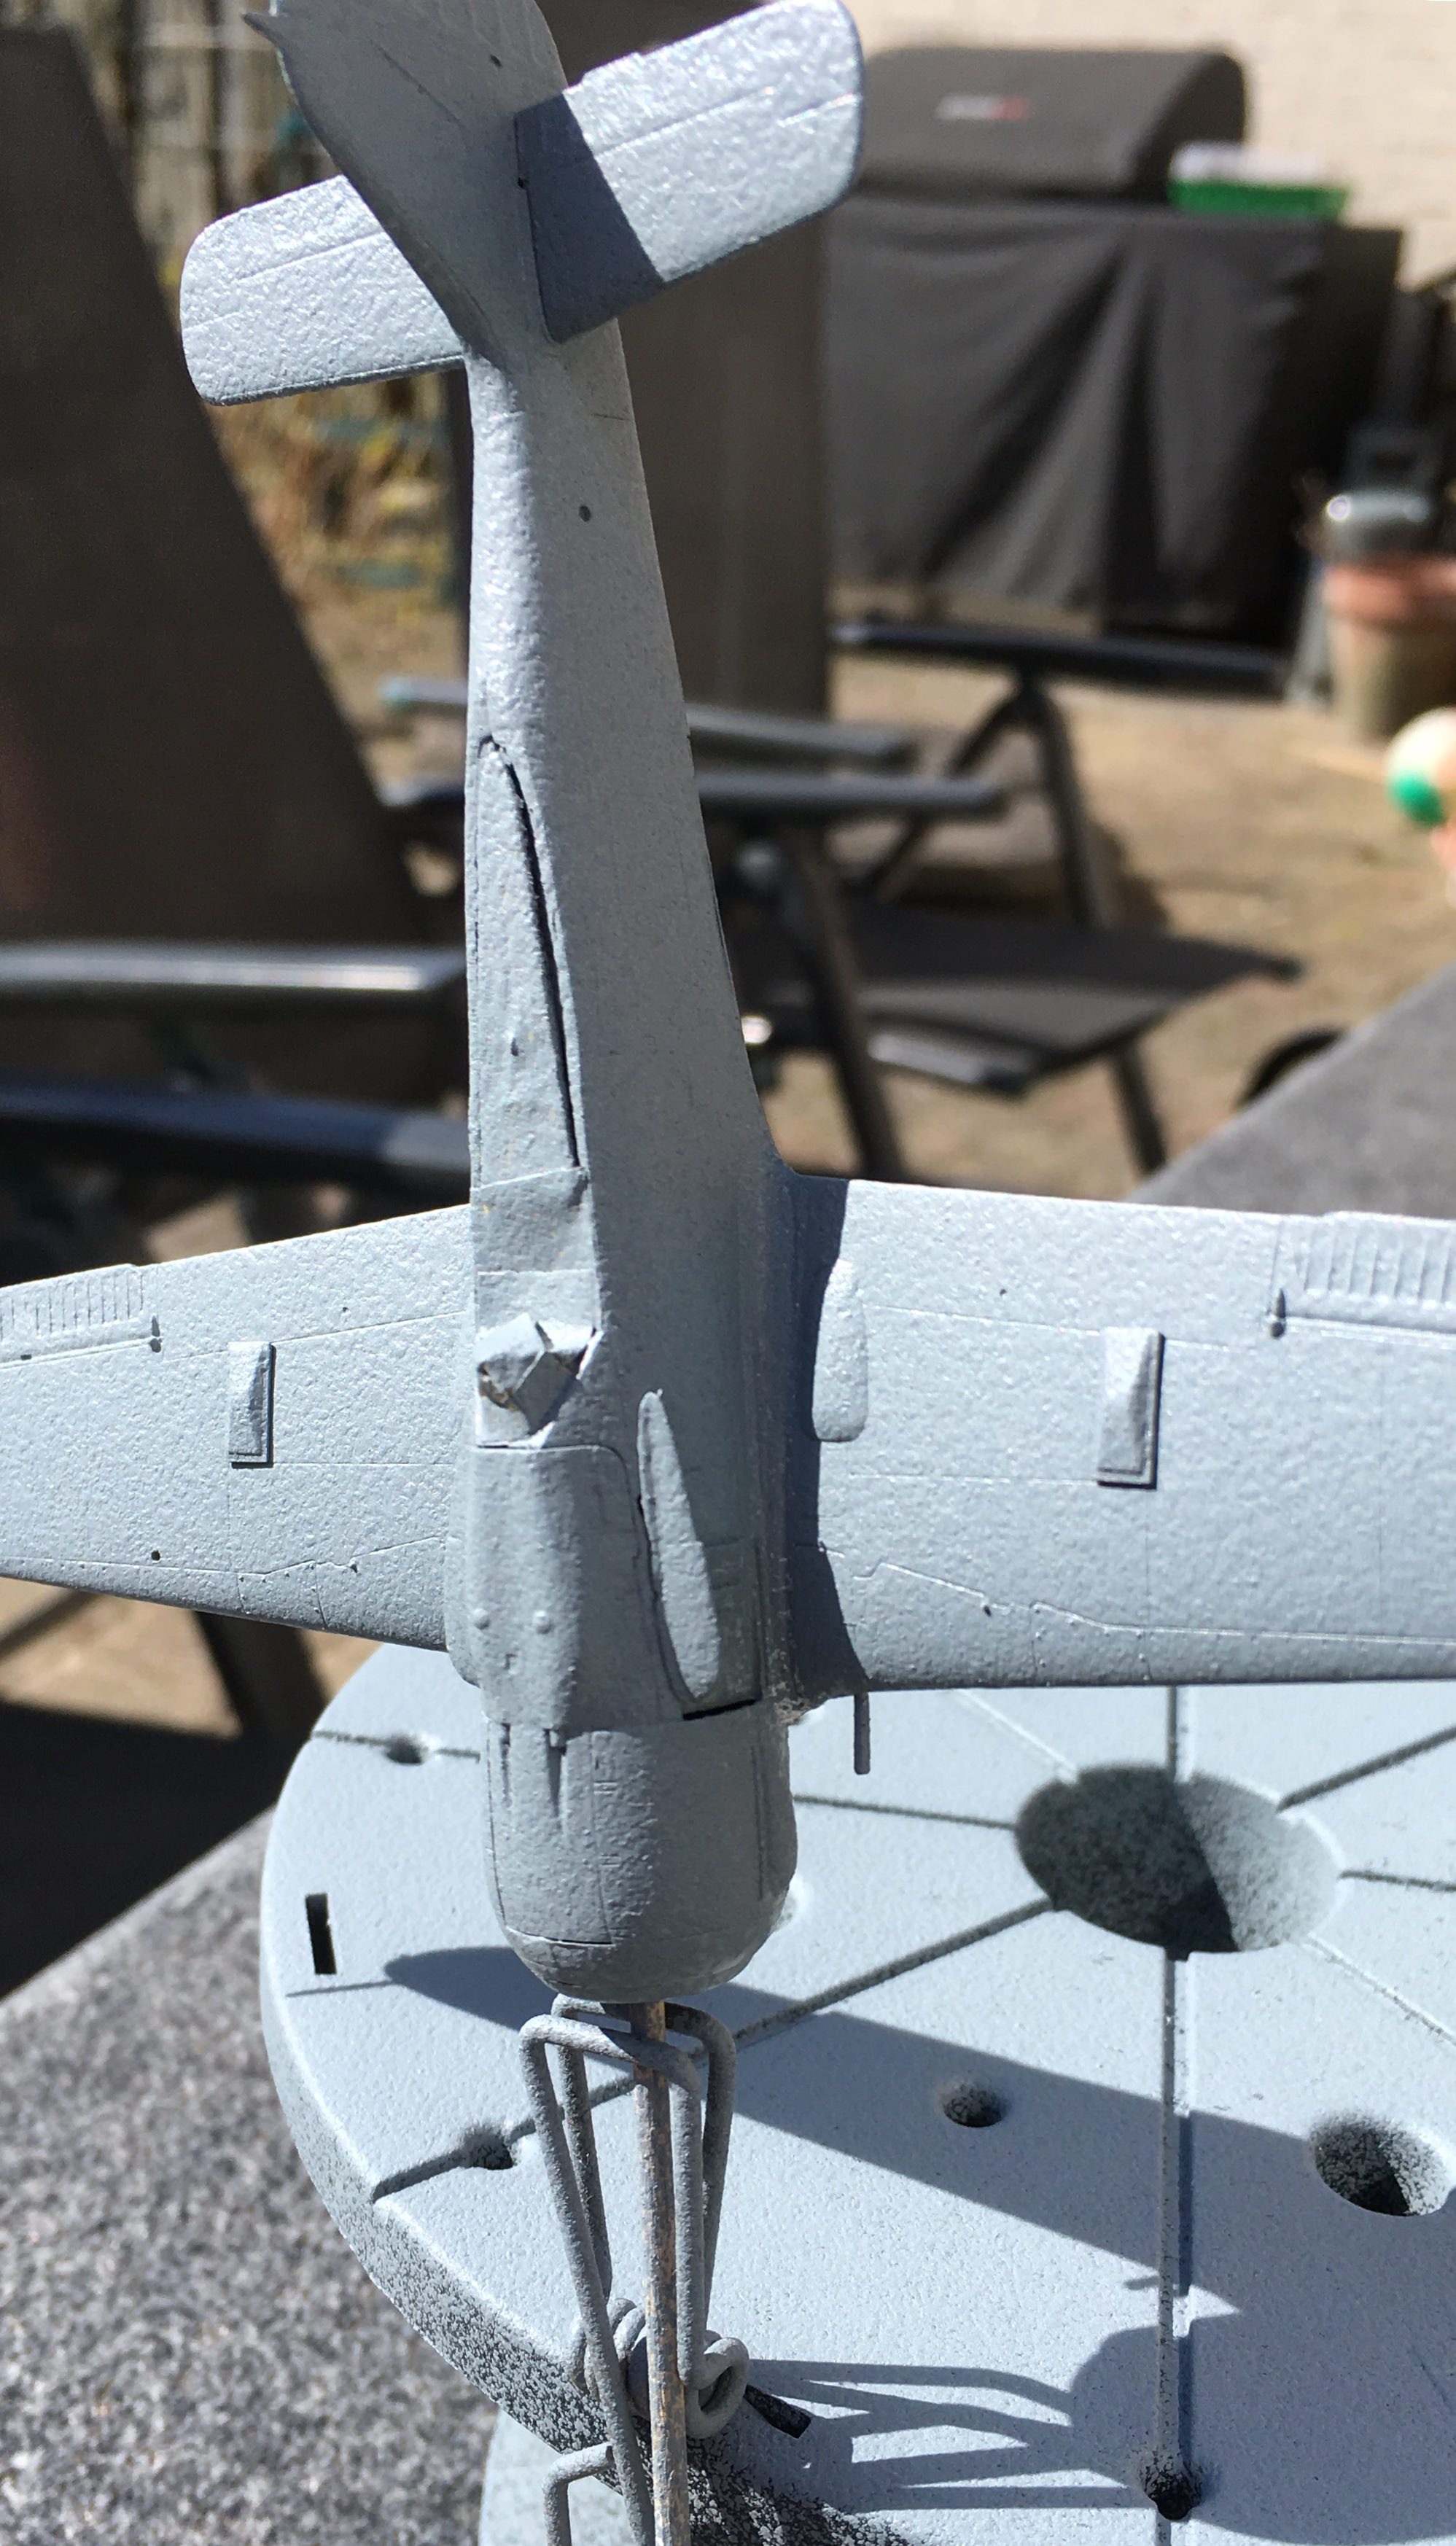
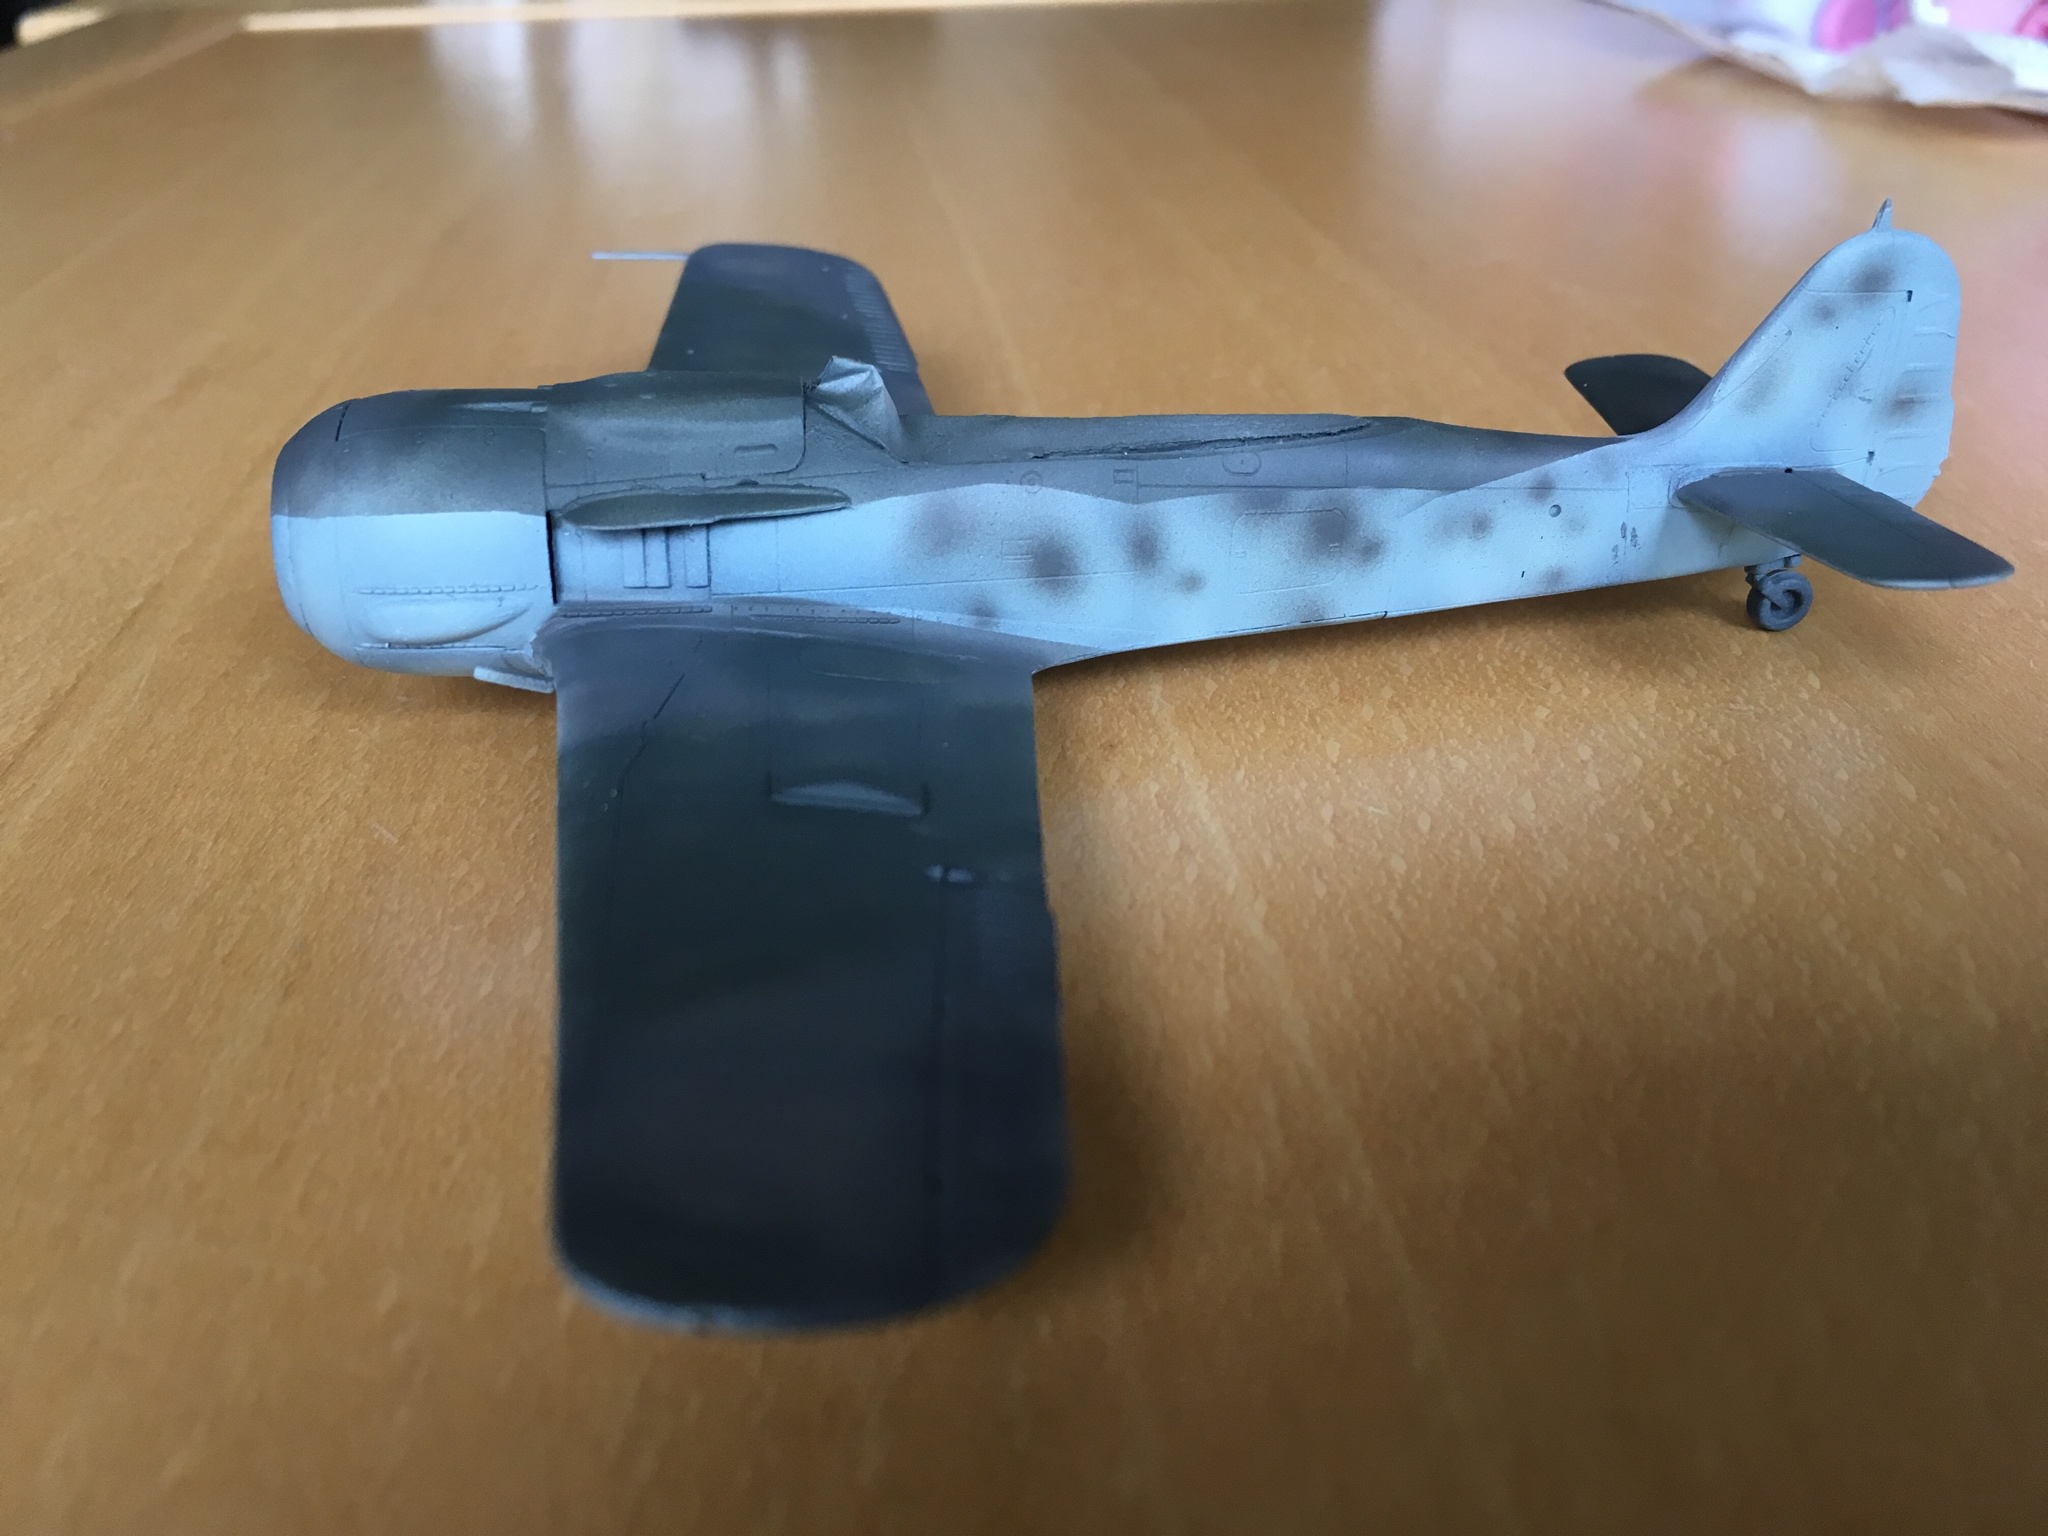
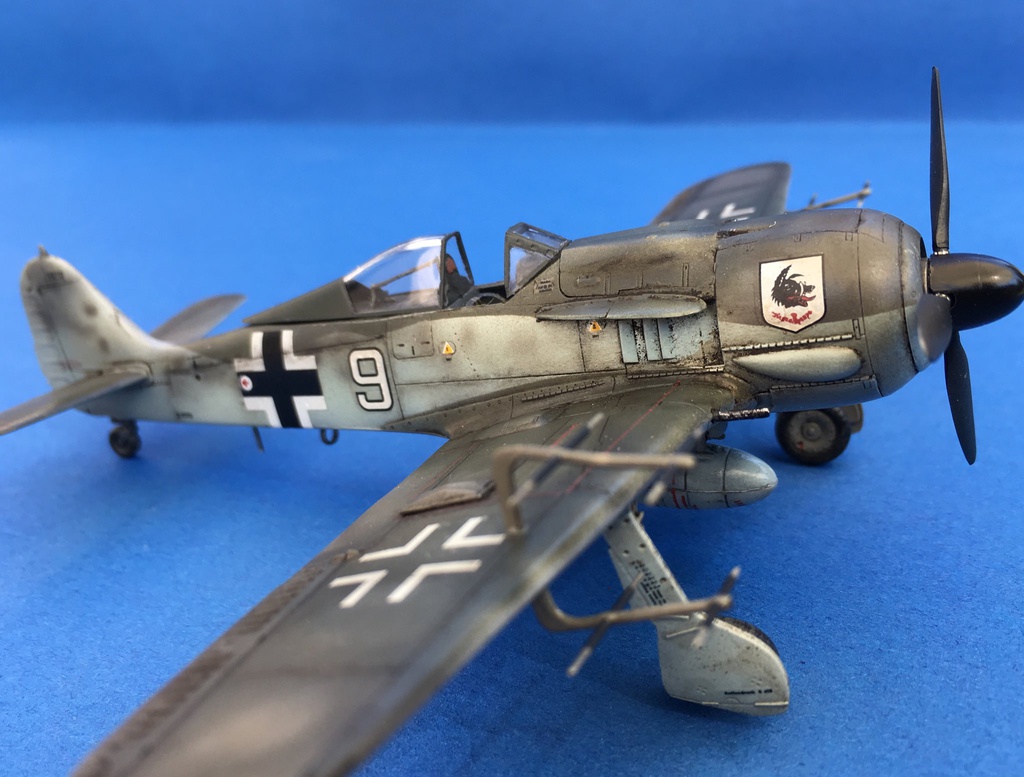
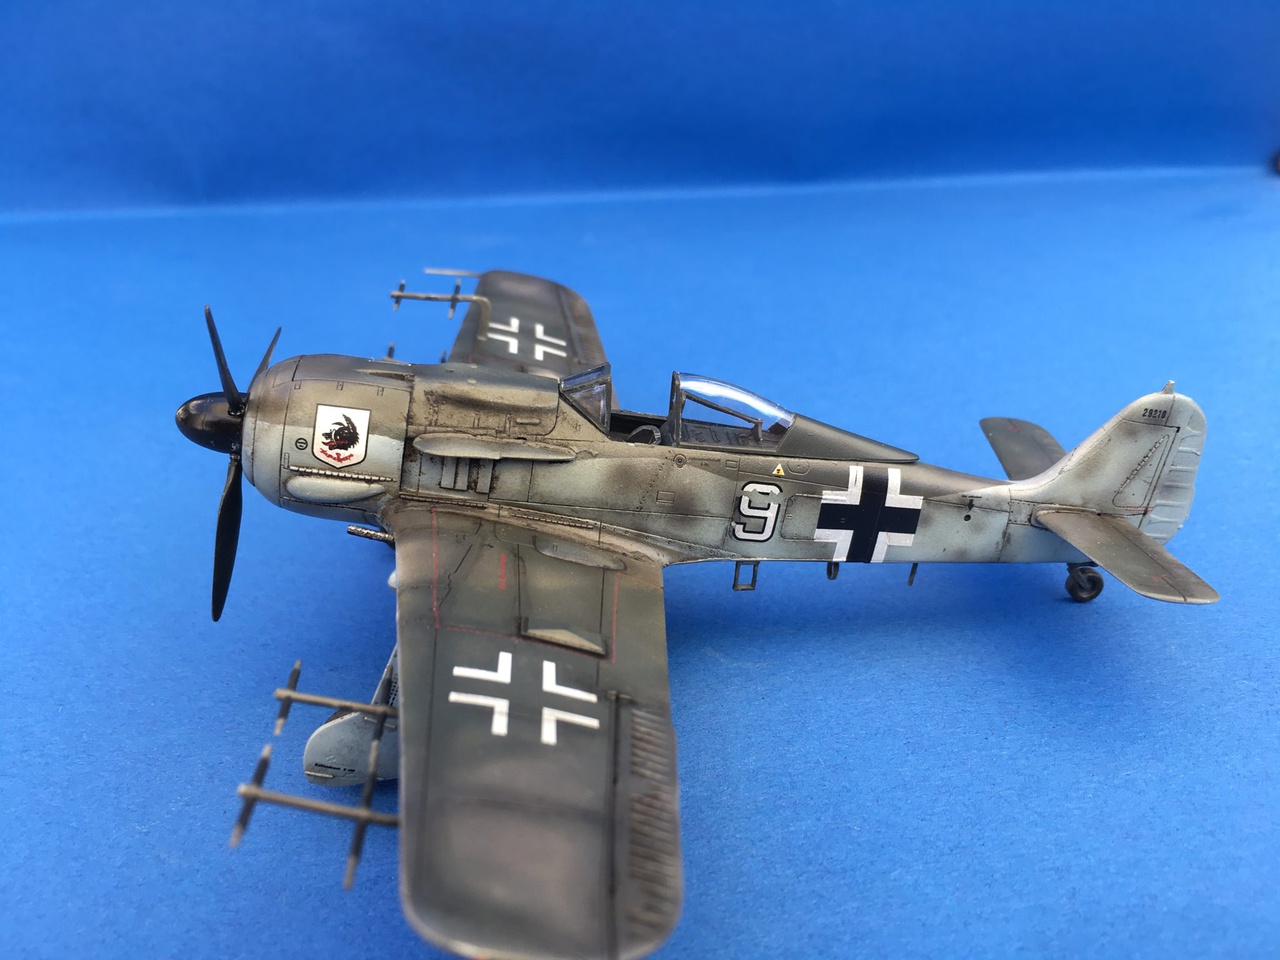
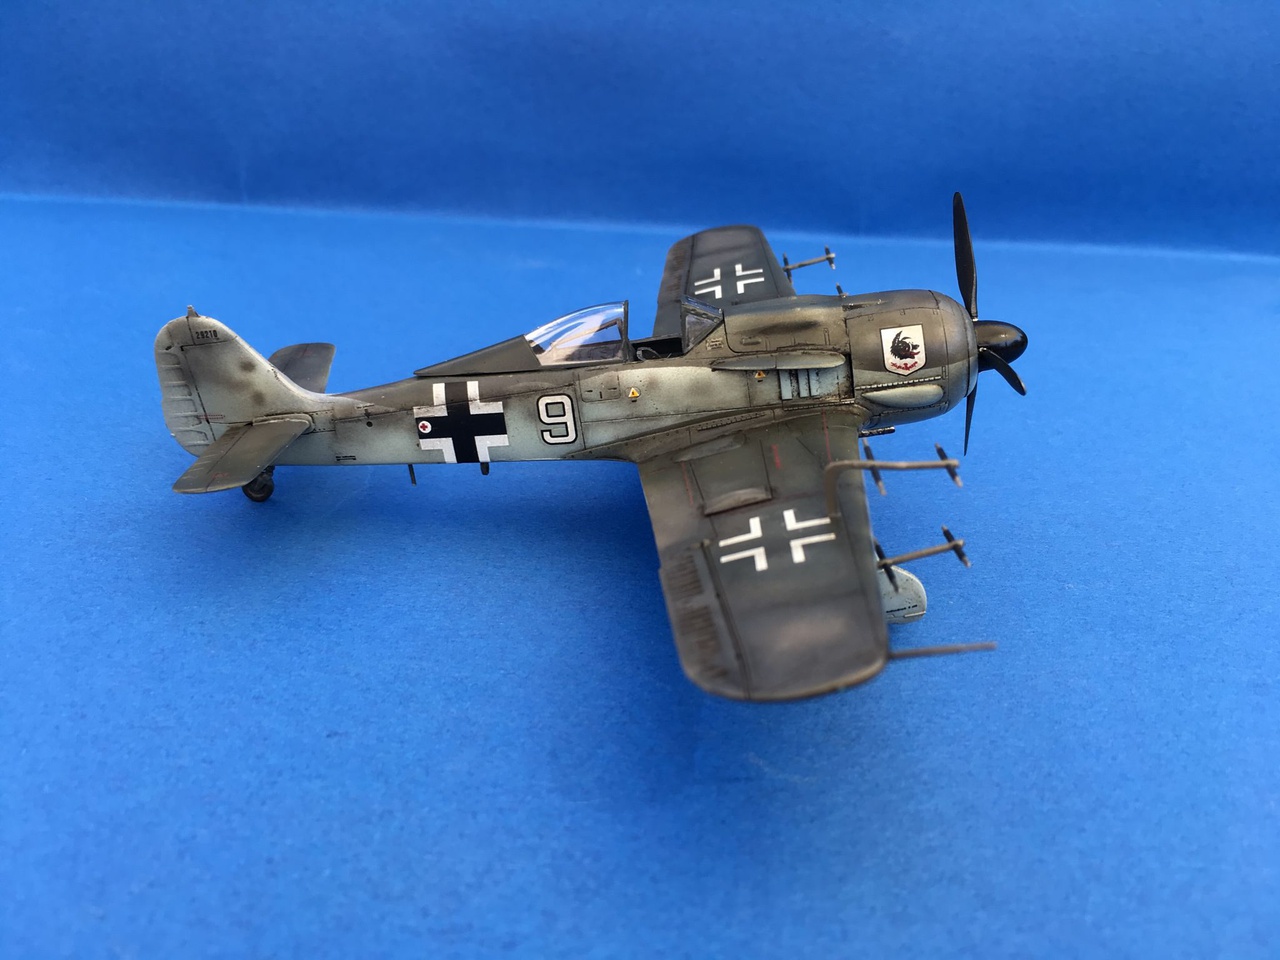
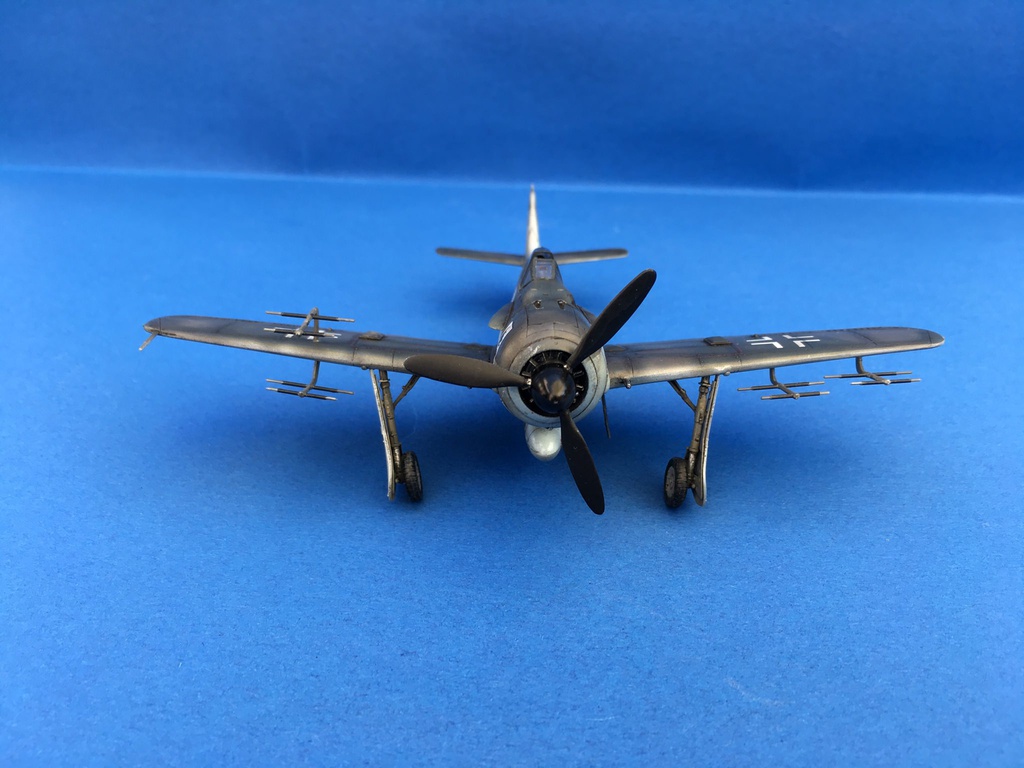
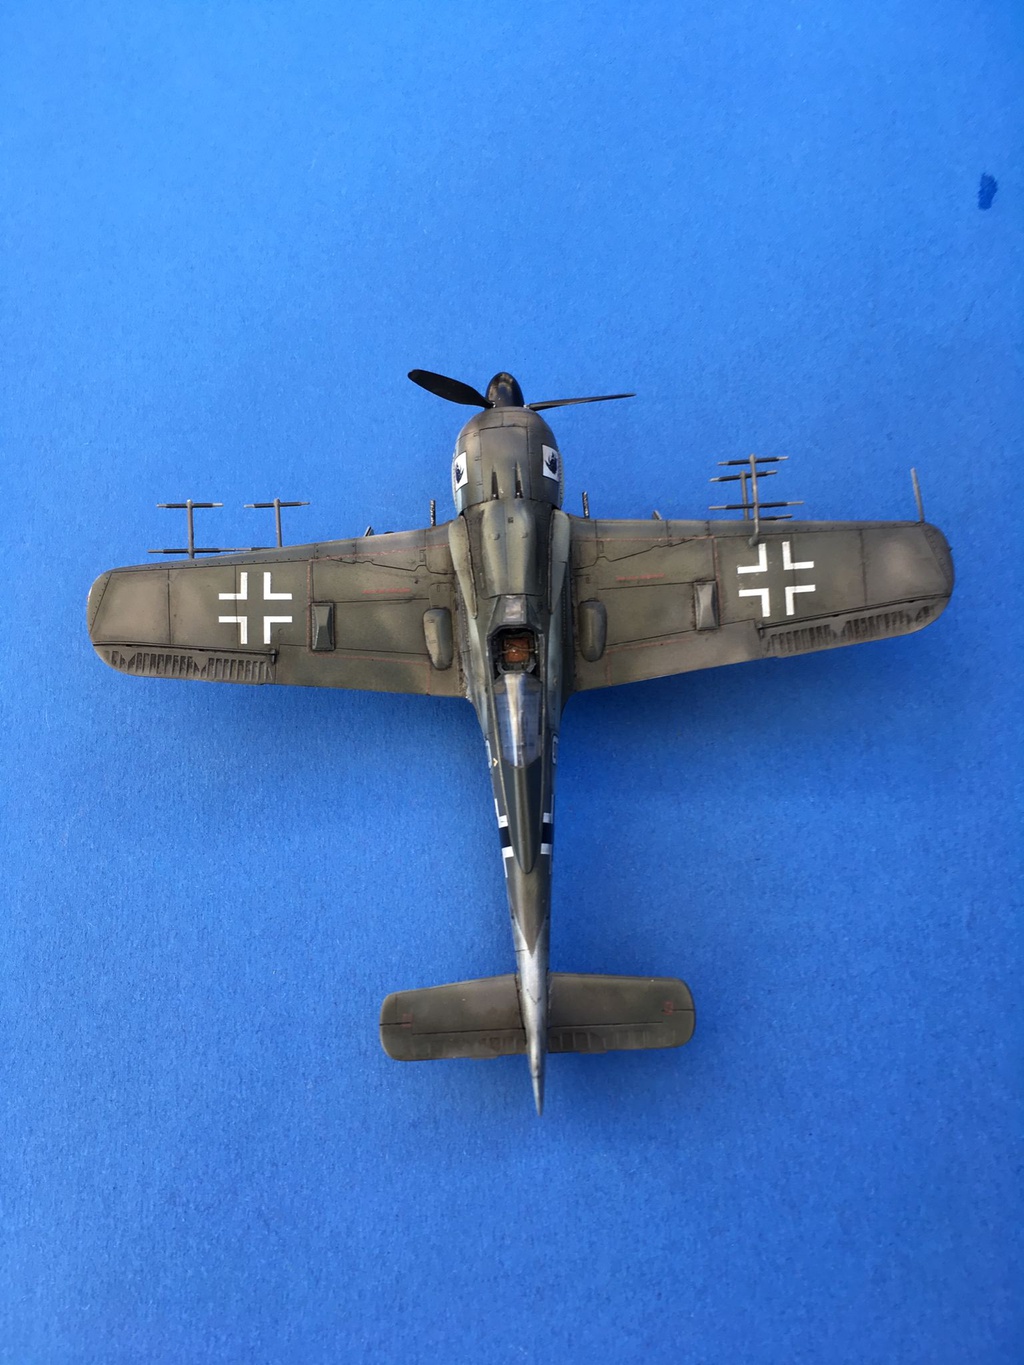
Here she is. After almost seeing the darkness of the round archive (aka dustbin), she made it.
So I learned some stuff here. First how to prime with a spray can, secondly I will cut the decals following recesses next time and gloss coat them. Third I use an accryllic gloss and it is possible gluing parts after that coat with standard glue.I feel my painting skills have improved a bit and I like the highlighted effects like on the machinegun cover.
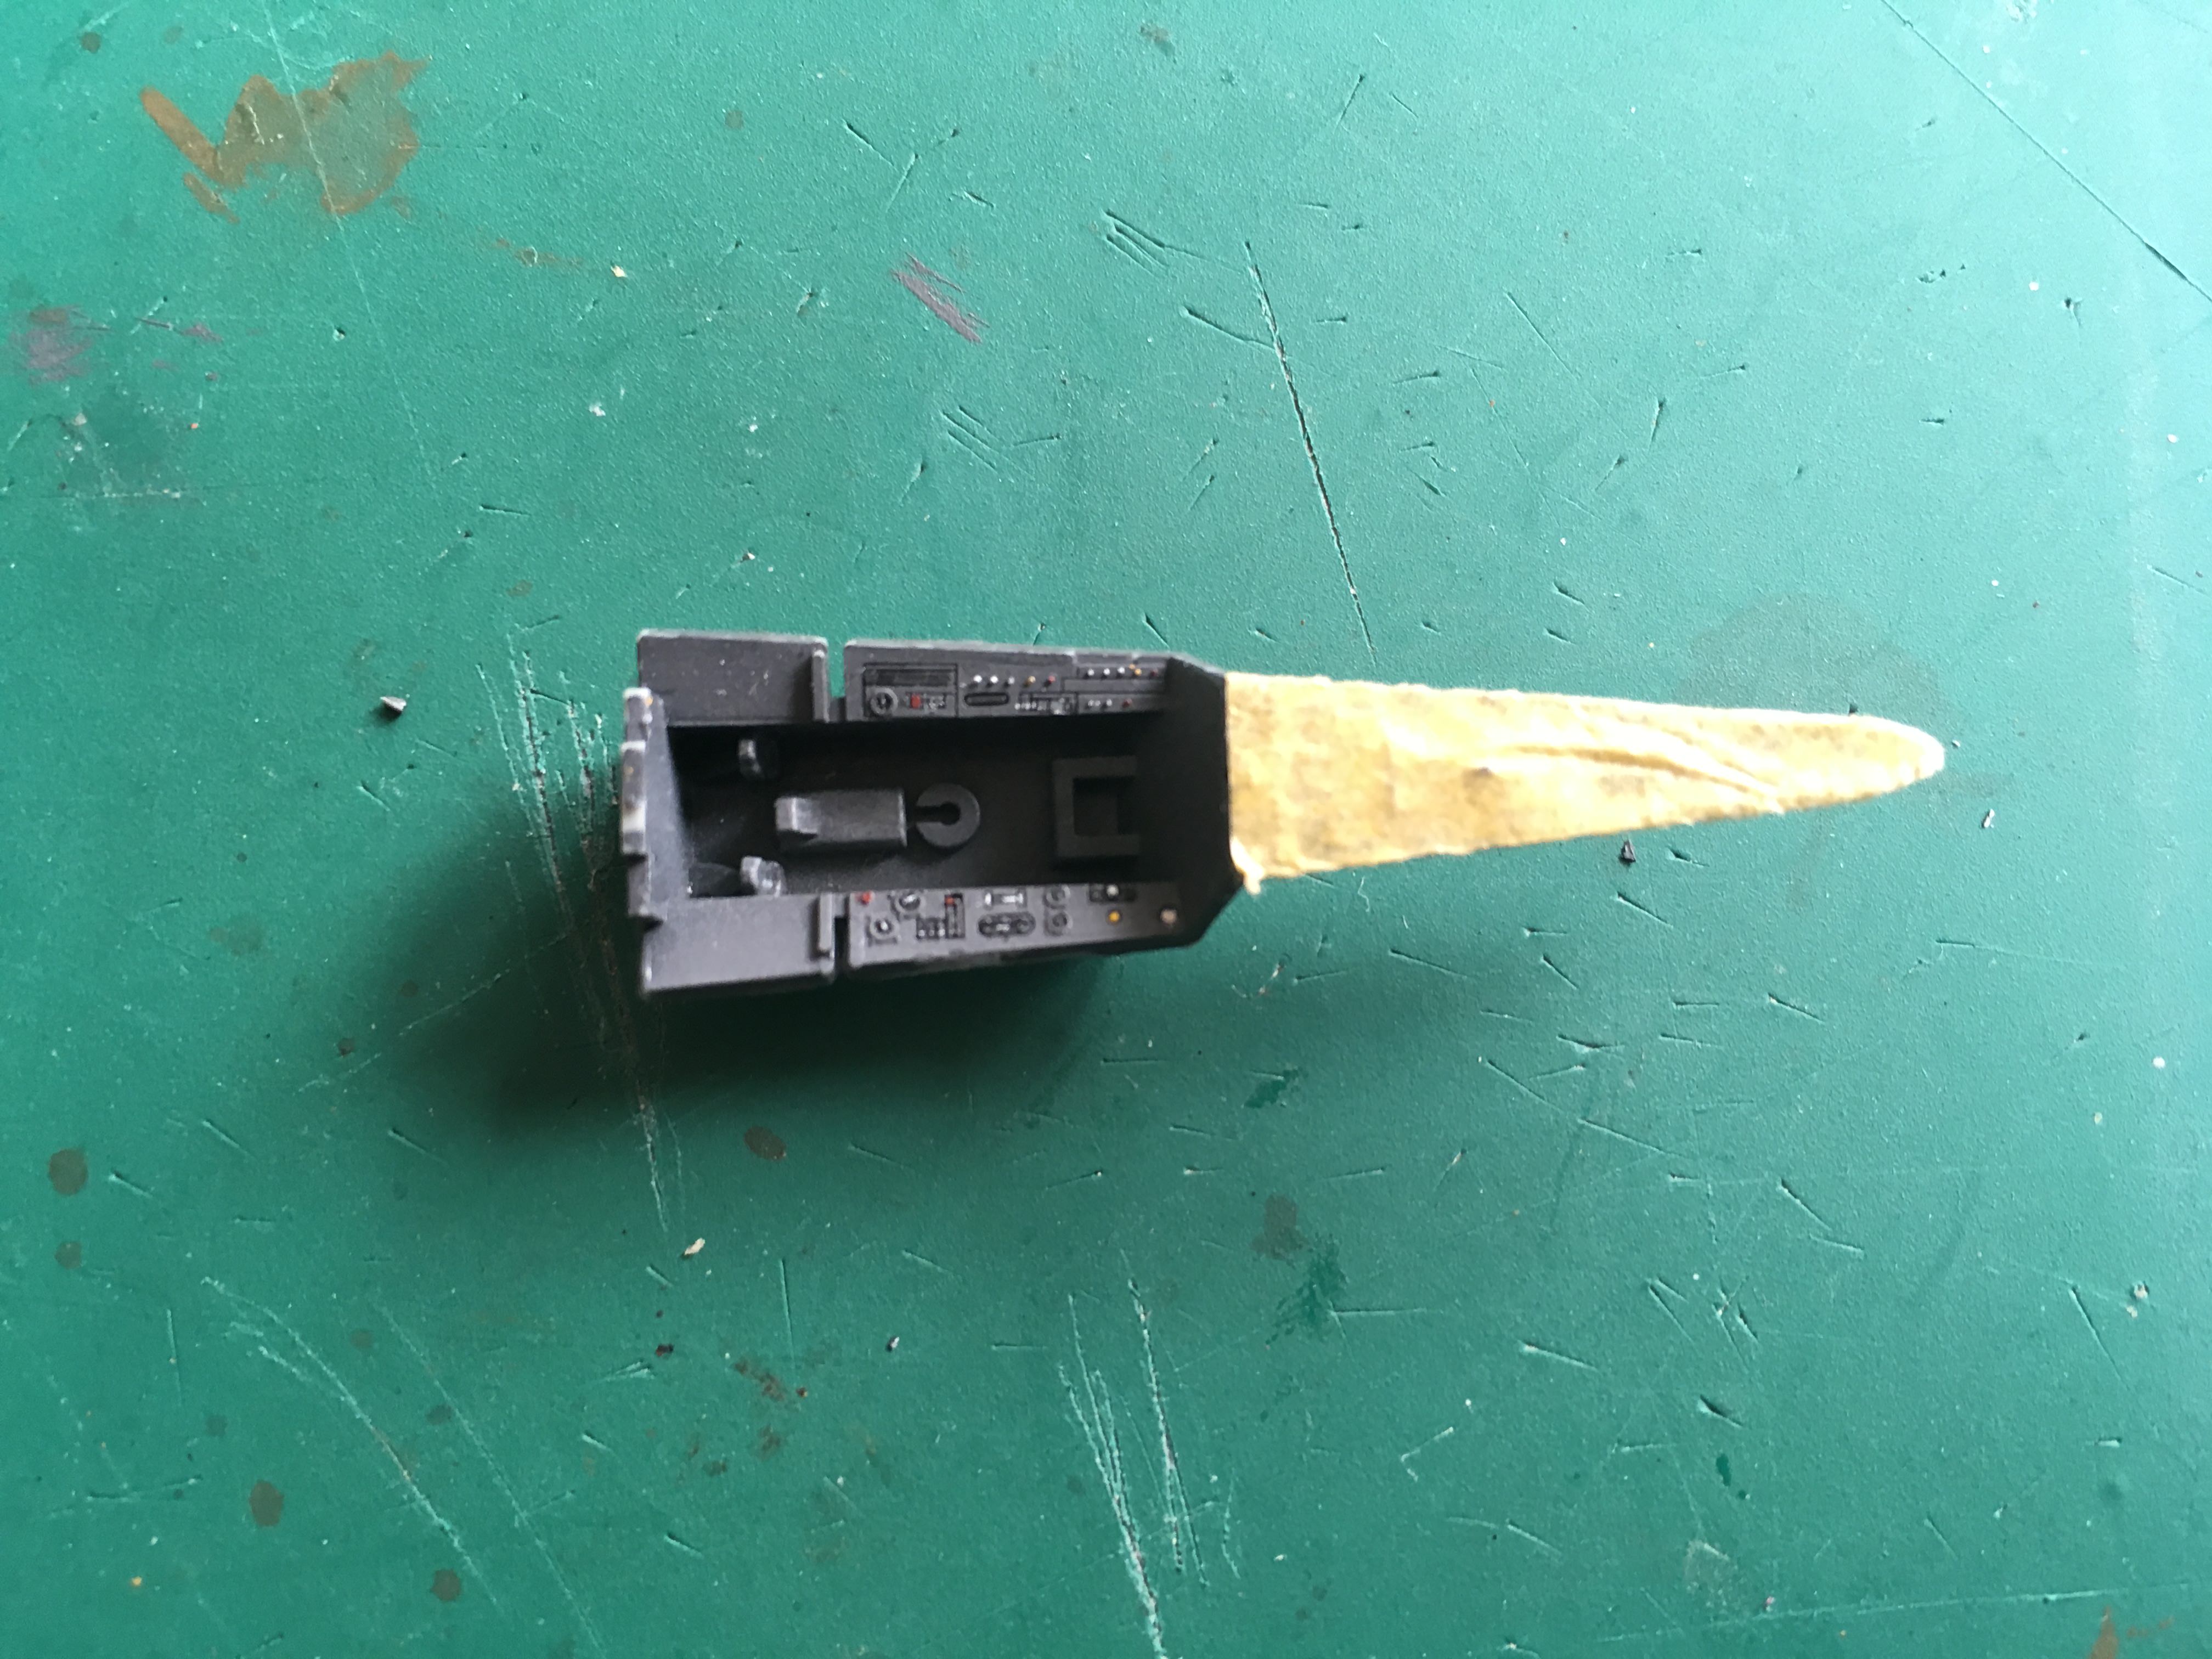
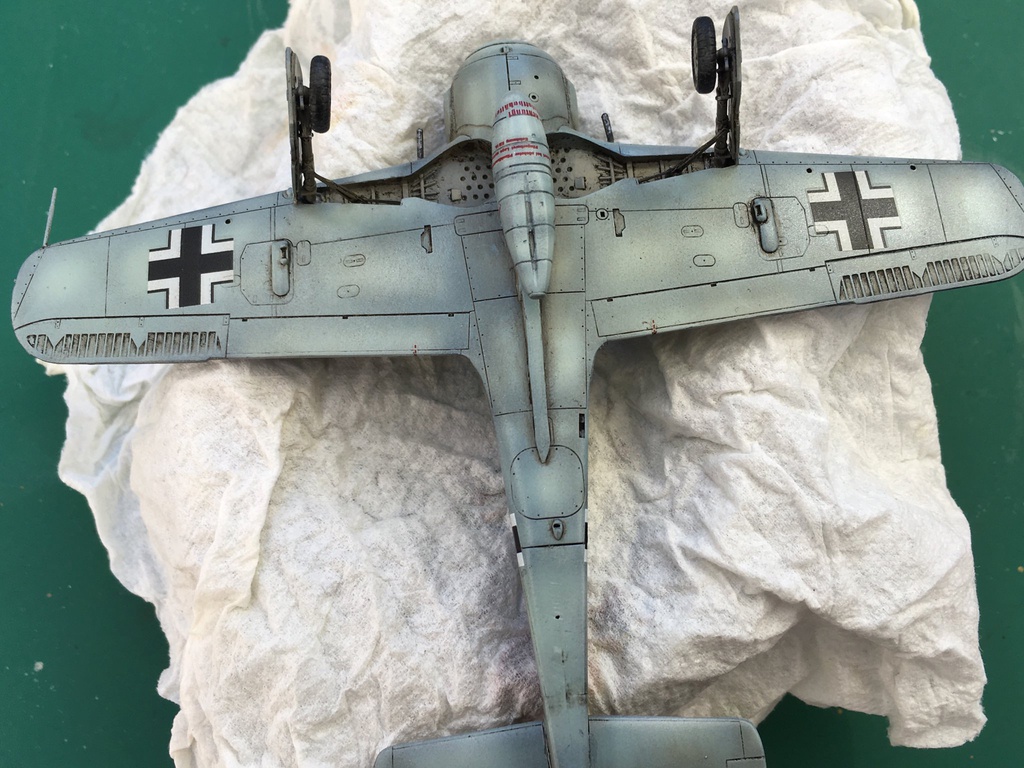
The Revell kit is nice with good detail and looks good to me. I leave the accurency issues to those interested. It just has the gap at the wingroots as fault. The rest what is wrong is what I have done. The model only comes in a closed canopy variant and I took a spare from an Airfix kit. When I see what detail of the cockpit still is visible I will not do that again in this scale. Also I havent attached the extra machine guns. Though I needed to drill quite some holes, the holes for those guns arent specified. Carefull reading of the instructions could have saved me but when I noticed it was too late. Also I didnt attach the antenna wire because I couldnt find an attacment point on the copula. Experimenting on the spare copula made conclude that I will mess up the copula so I didnt try. It seems I have trouble with installing the legs of the plane also this time it was troublesome at least, dont look into the wheel wells!
For the rest enjoy and feel free to comment.
Greetings TC
Netherlands Antilles
Joined: September 02, 2014
KitMaker: 1,977 posts
AeroScale: 295 posts
Posted: Tuesday, May 08, 2018 - 07:00 PM UTC
Hi, TC! I'm glad you made it after all! I agree with you, the Revell kit isn't that bad. Well, you ran in normal aircraft building problems - business as usual. FW 190 does not have an attachment point on the canopy for antenna wire - it passes thru canopy with a pre-loaded spring mechanism. Very ingenious design from the brilliant Kurt Tank.
Congrats on finishing the model and I hope is one of the firsts for you
Cheers!
Gabriel
Gabriel
Many of my builds can be seen on YT in video format. Please check 'Panzergrau Models' Channel.
Joel_W
Associate Editor New York, United States
Joined: December 04, 2010
KitMaker: 11,666 posts
AeroScale: 7,410 posts
Posted: Wednesday, May 09, 2018 - 02:54 AM UTC
Lars,
Congrats on crossing the finish line. Your Fw190R-11 really came out looking quite good as a well used operational aircraft.
Joel
On my Workbench:
Monogram 1/24 scale 427 Shelby Cobra
Just Completed:
Beemax 1/24 scale BMW M3 E30 1992 Evolution II
Overijssel, Netherlands
Joined: September 13, 2003
KitMaker: 339 posts
AeroScale: 244 posts
Posted: Wednesday, May 09, 2018 - 07:06 PM UTC
Overijssel, Netherlands
Joined: September 13, 2003
KitMaker: 339 posts
AeroScale: 244 posts
Posted: Wednesday, May 09, 2018 - 07:08 PM UTC
Quoted Text
Lars,
Congrats on crossing the finish line. Your Fw190R-11 really came out looking quite good as a well used operational aircraft.
Joel
Thx Joel wanted to create a decent weathered aircraft without going all bungus with scratches which some how seem to much for in most parts.
Gr TC
Nordrhein-Westfalen, Germany
Joined: March 22, 2015
KitMaker: 671 posts
AeroScale: 614 posts
Posted: Friday, May 11, 2018 - 02:59 PM UTC
Lars: Congrats on rescueing and building of Your model! I really like the weathering of Your Focke-Wulf!
Oliver
On the desk: Probably a Panzer III.
Overijssel, Netherlands
Joined: September 13, 2003
KitMaker: 339 posts
AeroScale: 244 posts
Posted: Friday, May 11, 2018 - 08:16 PM UTC
Thx Oliver,
Part of my persistance was because I liked the paintwork on my cockpit and didnt want that to be !ost. Sadly not much is still to be seen with the finished model lol
Gr TC


