

I received the Hasegawa A6M7 for review, both as an in-box and a build. I am trying out villiage.photo so hopefully the images will come across properly.
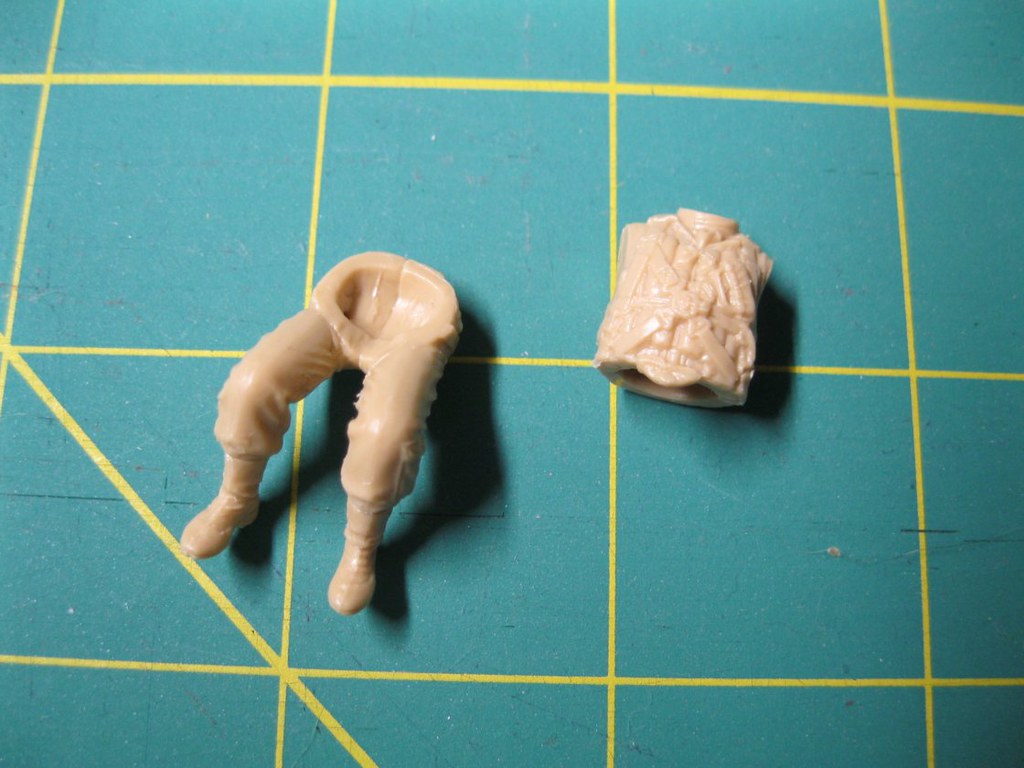
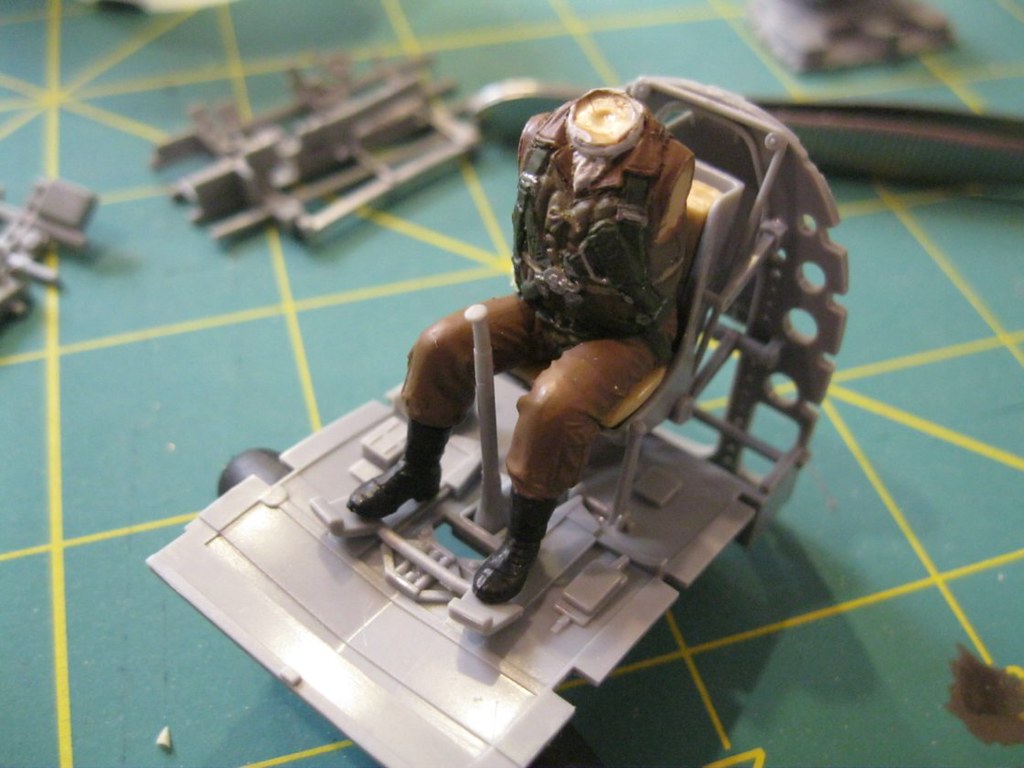
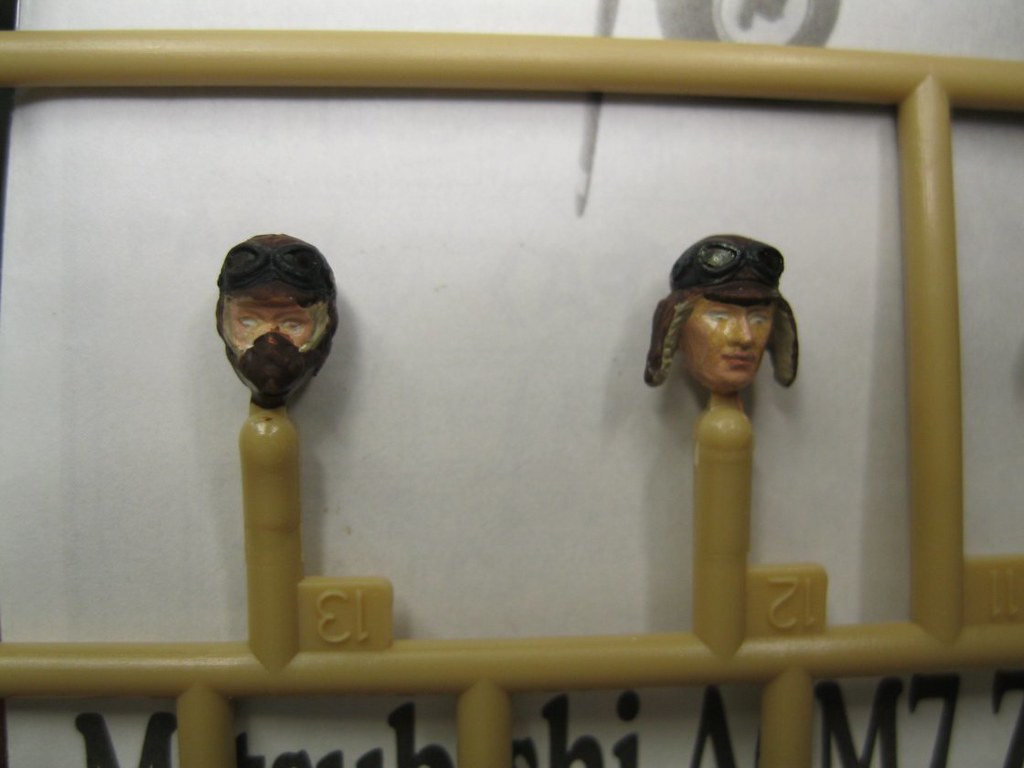
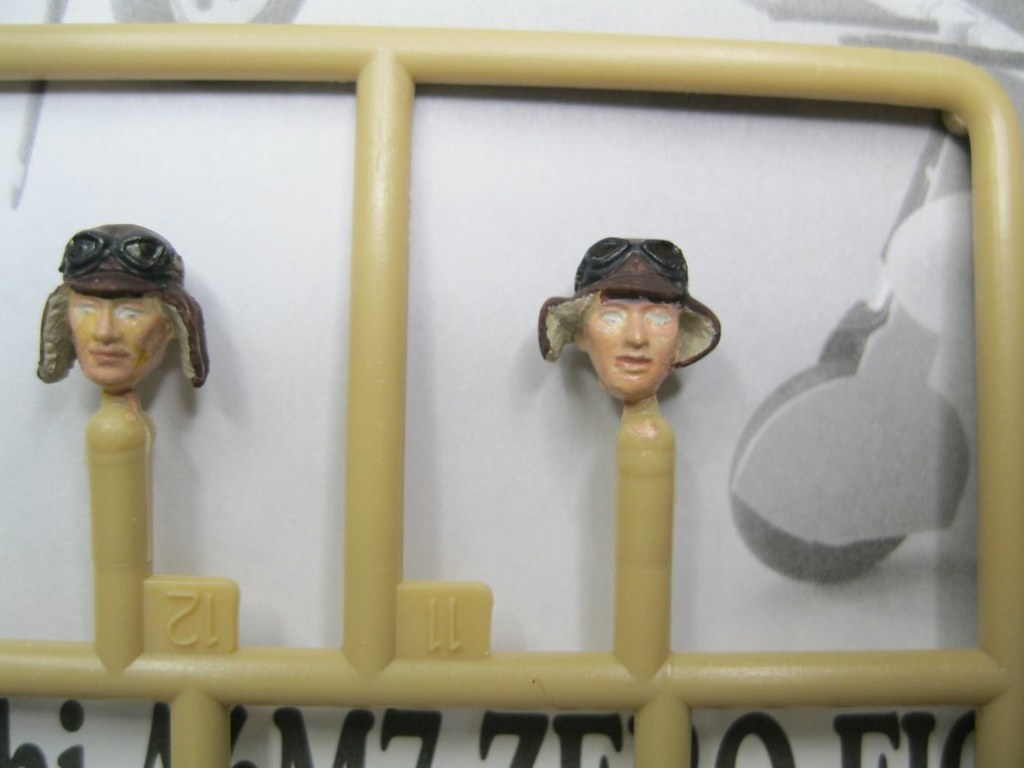
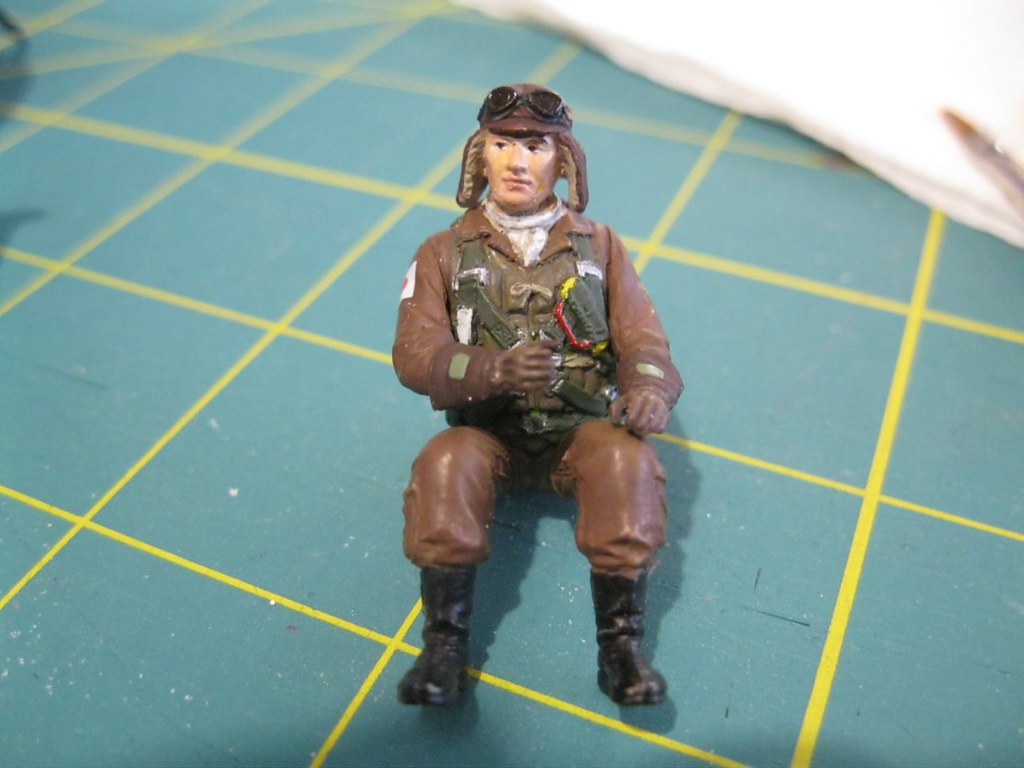
The build starts with the pilot. Assembly is straight forward and with the same parts breakdown found in typical figure sets-torso front and back, with separate arms and legs. The neck is cut straight so any of the three heads can be placed looking forward or to the side. Fit of the parts is decent but does need a little work. As he will be seated in a tight cockpit I am not too worried about the fit in the hips.
http://village.photos/images/user/c599f800-f010-4d65-b2e4-2ab6bc88139c/e8c5bfda-39de-484a-9aad-ae4cffafa780.jpg
http://village.photos/images/user/c599f800-f010-4d65-b2e4-2ab6bc88139c/516b09b0-dcf4-40b7-9713-6c6978b6a3e7.JPG
http://village.photos/images/user/c599f800-f010-4d65-b2e4-2ab6bc88139c/89da583f-a24d-4092-a73f-c66189b3c769.JPG
Hosted by Rowan Baylis
Hasegawa A6M7

russamotto

Joined: December 14, 2007
KitMaker: 3,389 posts
AeroScale: 375 posts

Posted: Friday, December 22, 2017 - 03:42 AM UTC
Removed by original poster on 12/22/17 - 22:46:08 (GMT).
russamotto
Joined: December 14, 2007
KitMaker: 3,389 posts
AeroScale: 375 posts
Posted: Friday, December 22, 2017 - 04:27 AM UTC
 IMG_9334 by russell amott, on Flickr
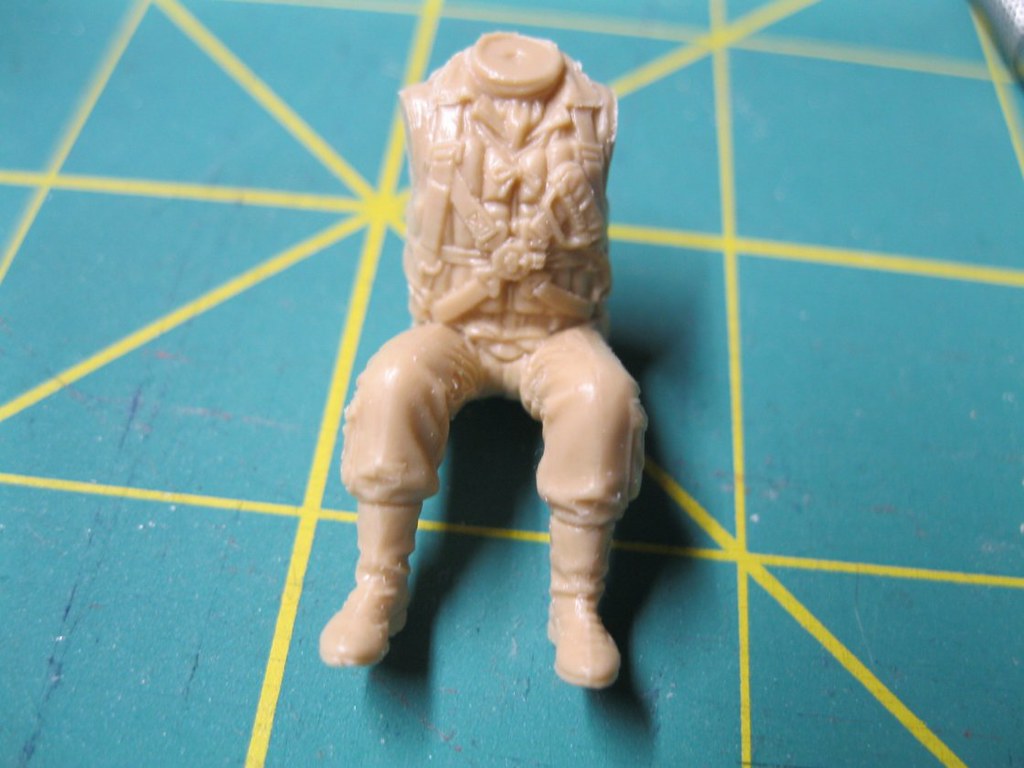 IMG_9335 by russell amott, on Flickr
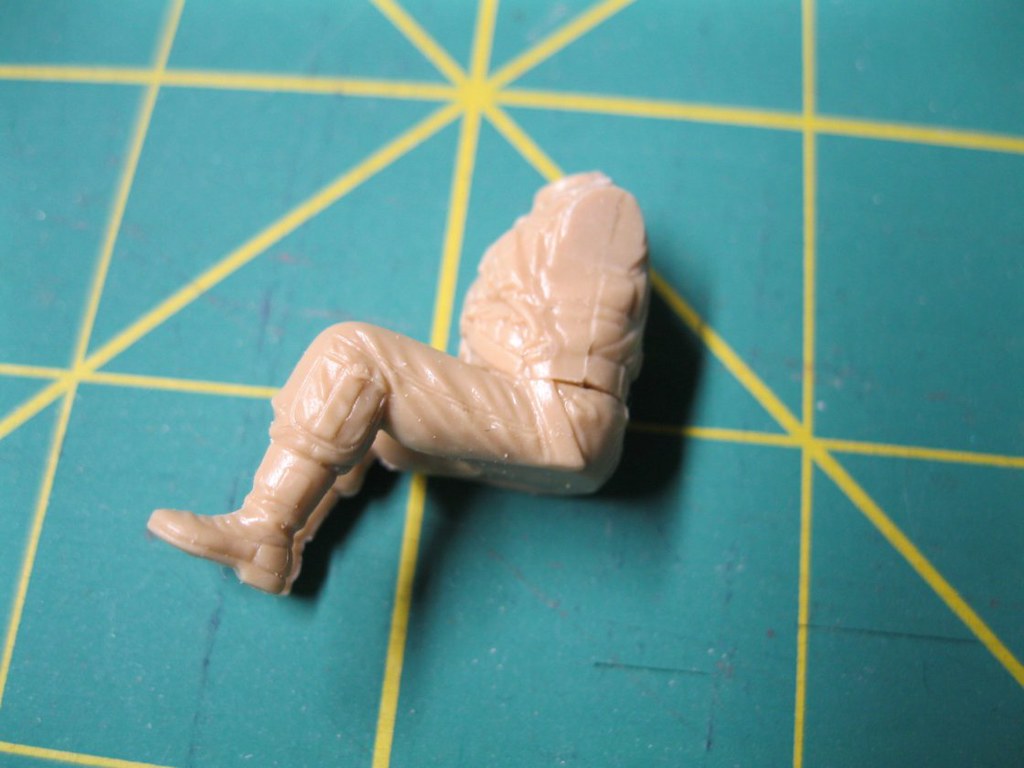 IMG_9336 by russell amott, on Flickr
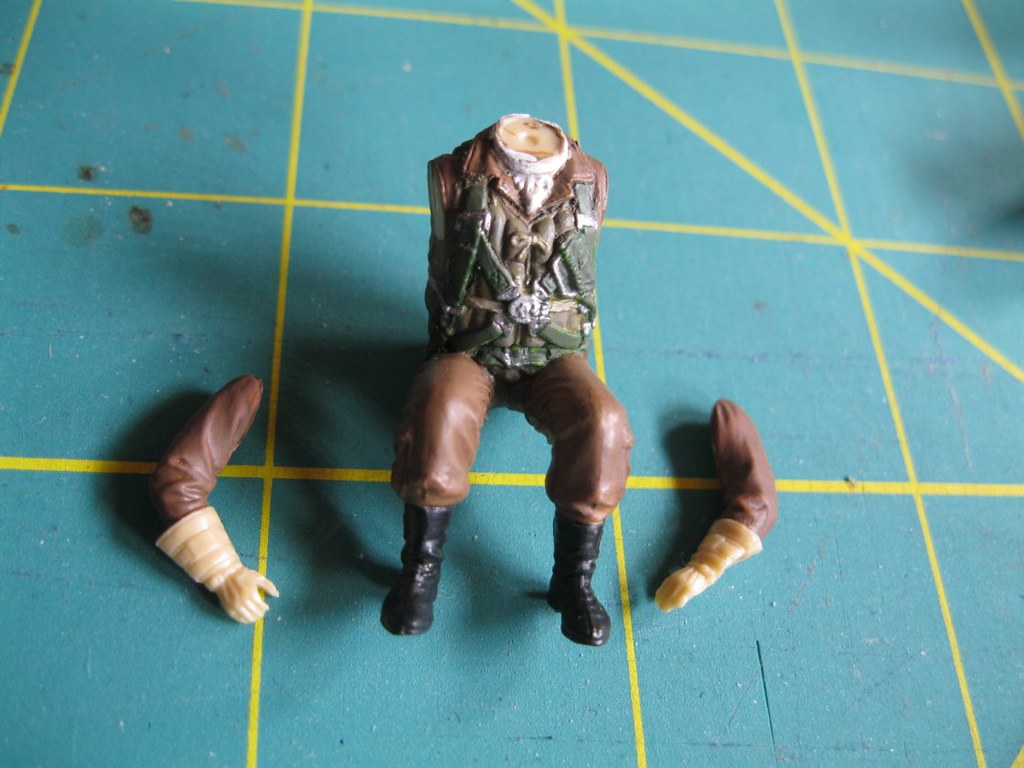 IMG_9337 by russell amott, on Flickr
russamotto
Joined: December 14, 2007
KitMaker: 3,389 posts
AeroScale: 375 posts
Posted: Friday, December 22, 2017 - 04:35 AM UTC
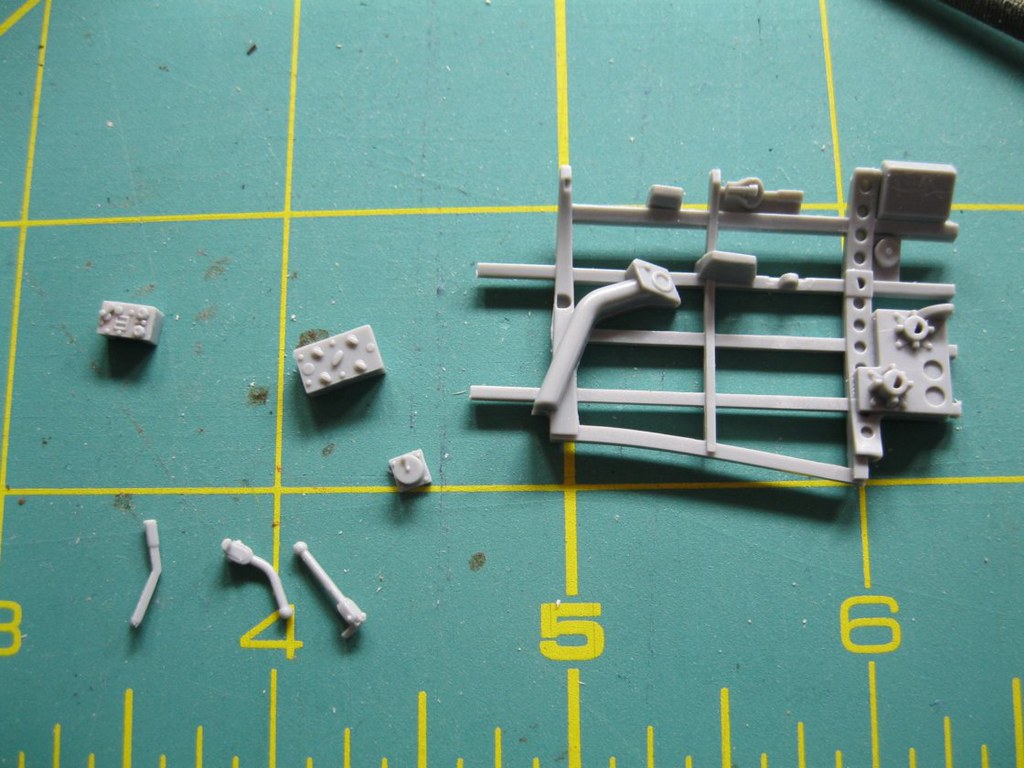
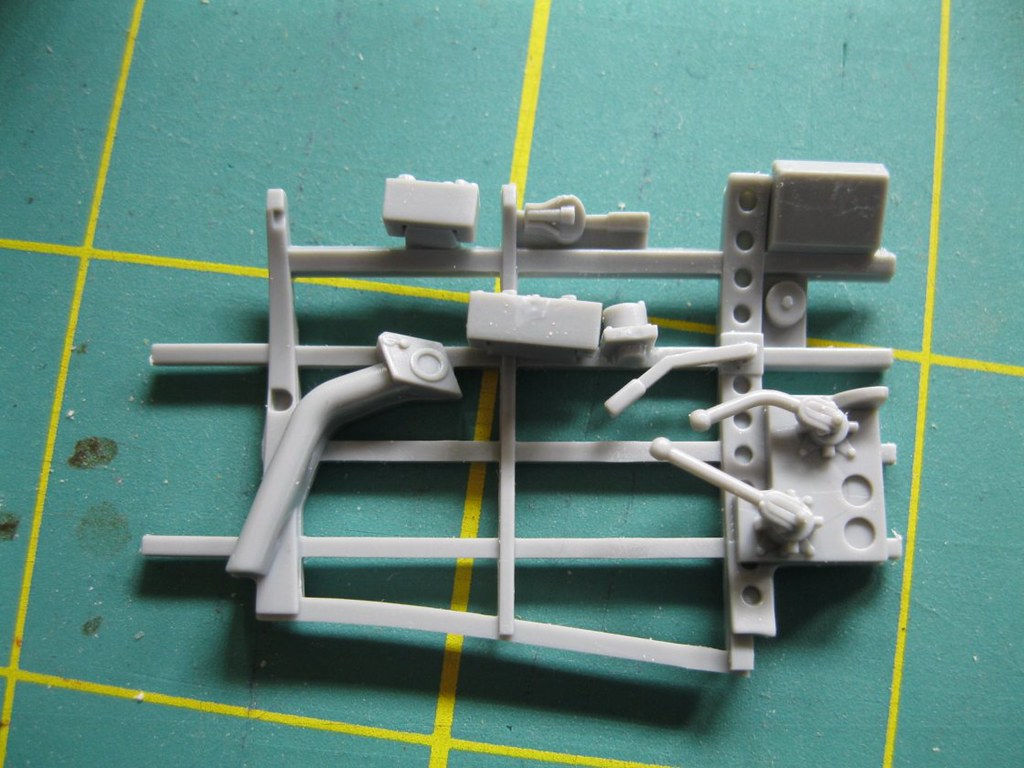
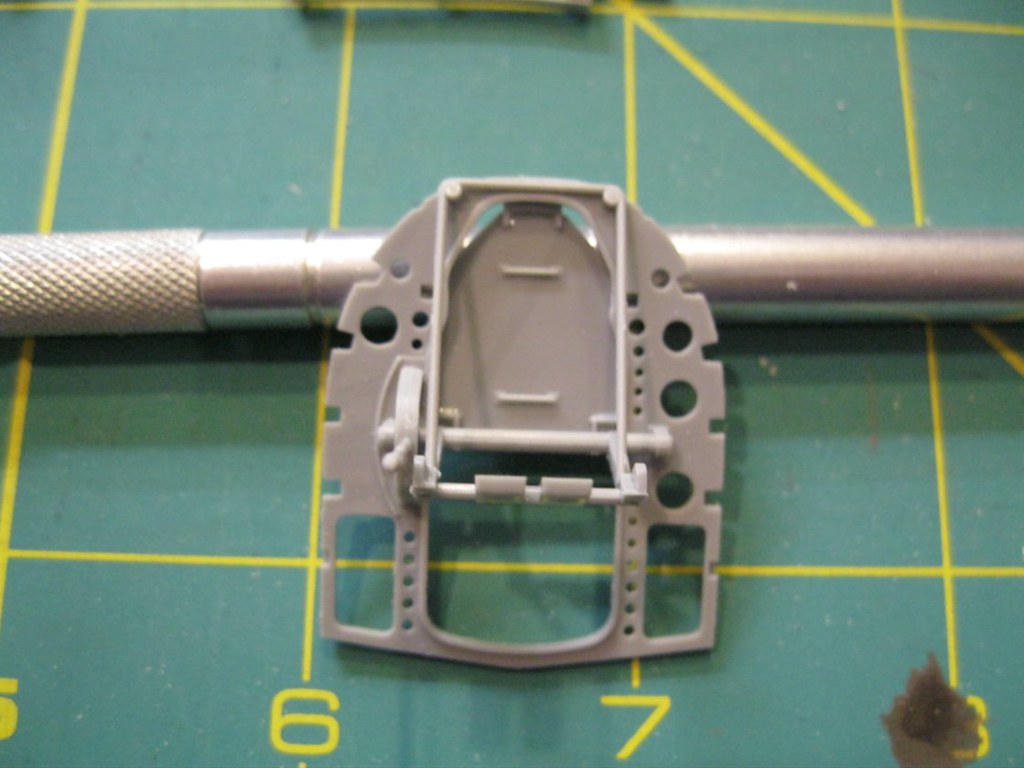
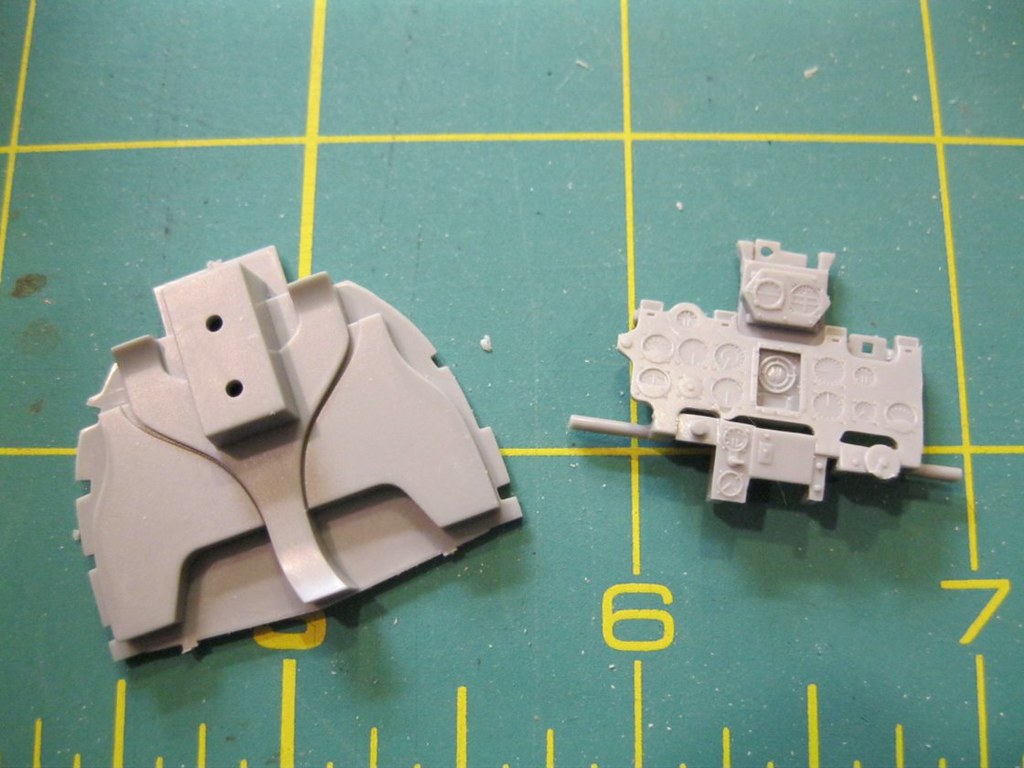
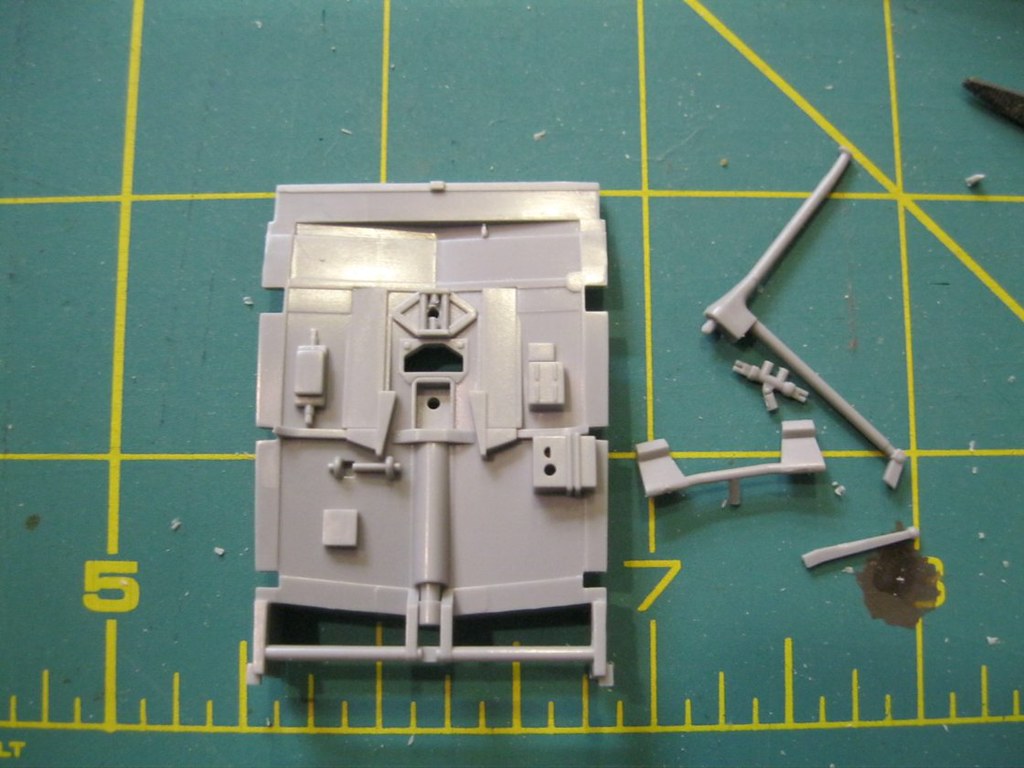
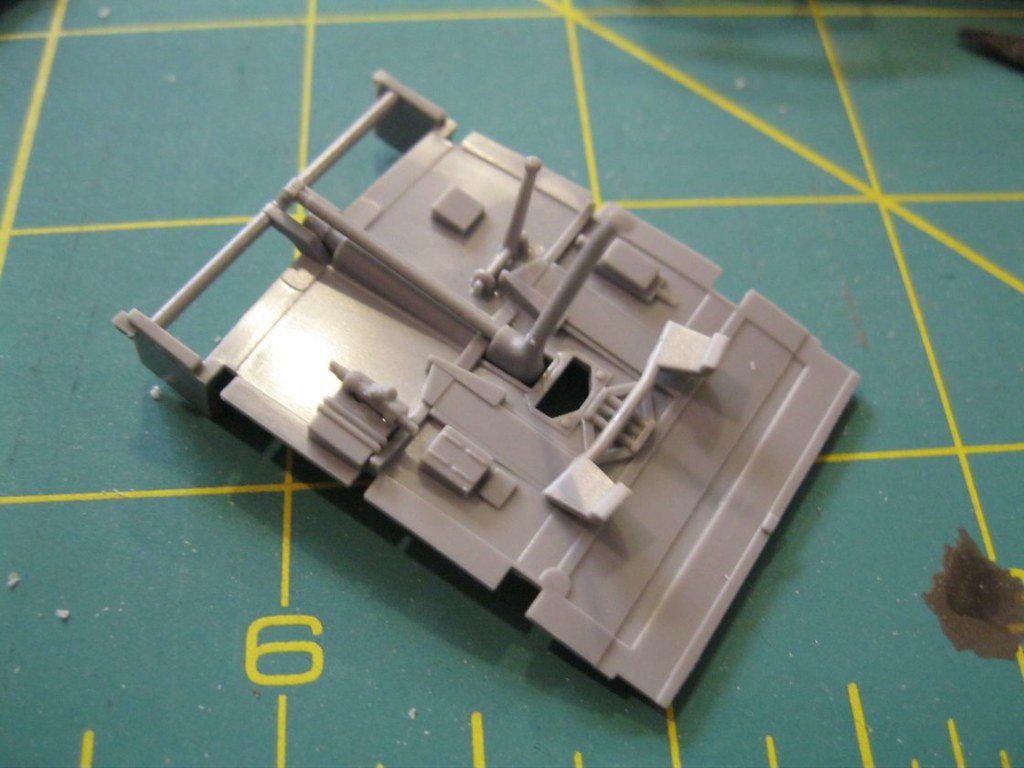
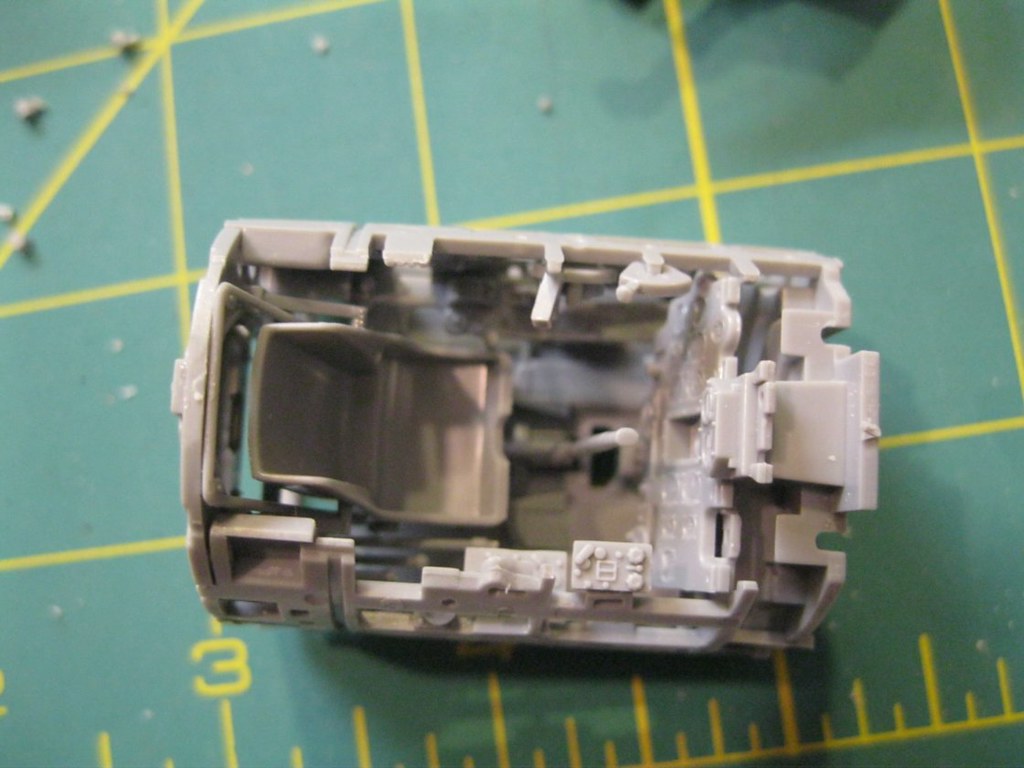
Cockpit is simple. Left and right side walls and rear wall have nice details.
 IMG_9339 by russell amott, on Flickr
 IMG_9340 by russell amott, on Flickr
 IMG_9341 by russell amott, on Flickr
 IMG_9342 by russell amott, on Flickr
 IMG_9343 by russell amott, on Flickr
 IMG_9347 by russell amott, on Flickr
So far no issues.
IMG_9339 by russell amott, on FlickrIMG_9340 by russell amott, on FlickrIMG_9341 by russell amott, on FlickrIMG_9342 by russell amott, on FlickrIMG_9343 by russell amott, on FlickrIMG_9347 by russell amott, on FlickrSo far no issues.
russamotto
Joined: December 14, 2007
KitMaker: 3,389 posts
AeroScale: 375 posts
Posted: Friday, December 22, 2017 - 04:45 AM UTC
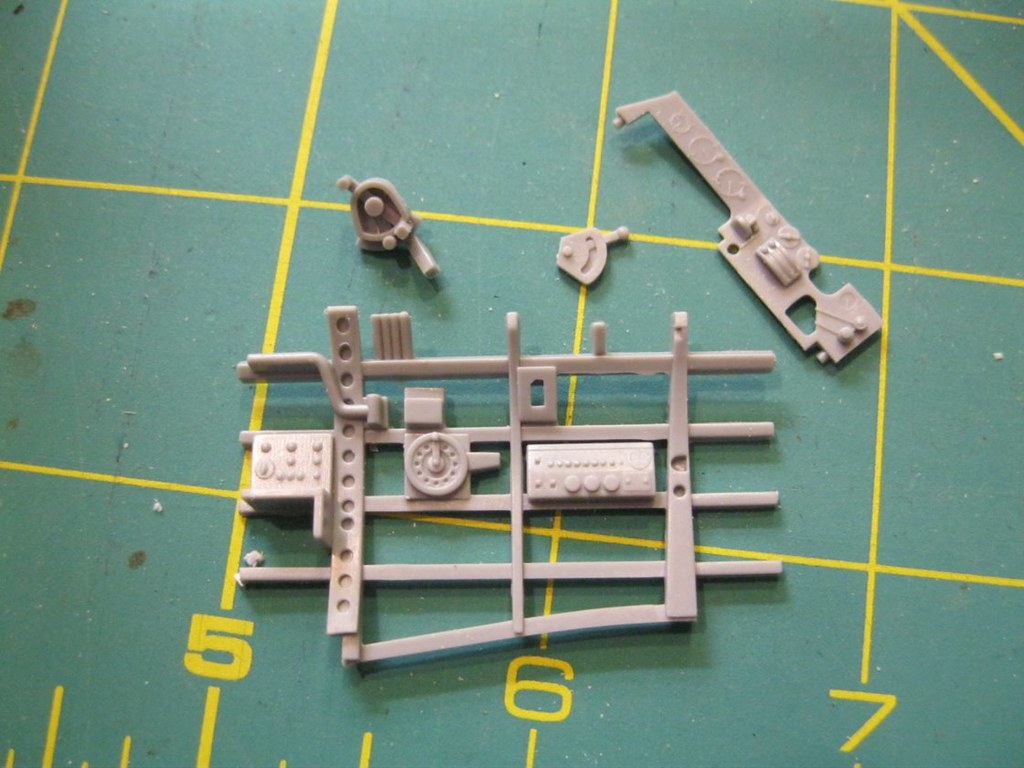
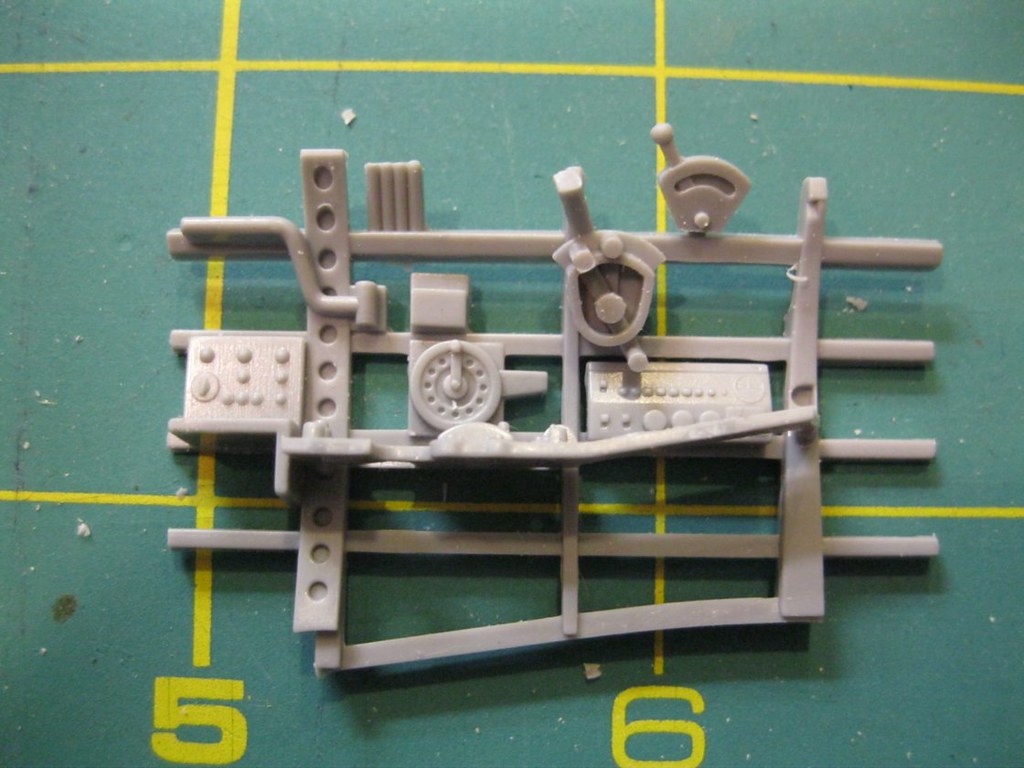
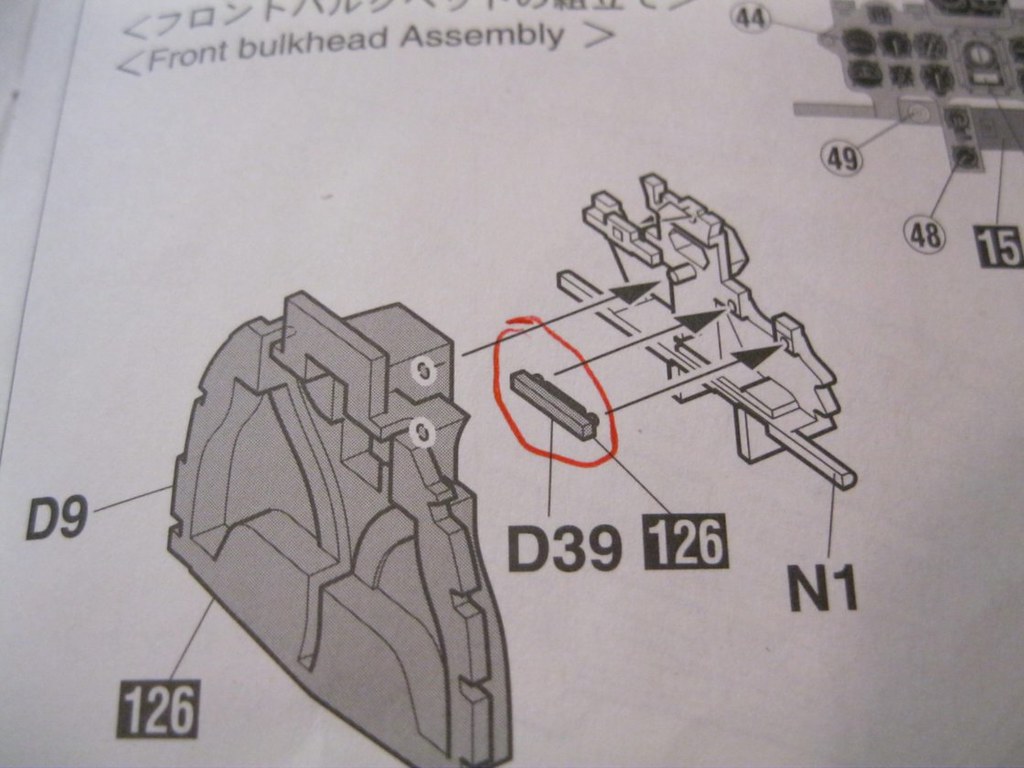
The instrument panel calls out for a small part to be attached to one side. Problem is it goes on the panel for the A6M5c and not the new panel for the A6M7. The cockpit photo for the A6M7 on display in San Diego has the panel shown for the A6M5c. Which is correct? I read over a fairly heated argument in which it was claimed that the restoration crew at San Diego worked with what parts they could find, including those from other aircraft. I went with the panel for the A6M7.
 IMG_9344 by russell amott, on Flickr
 IMG_9345 by russell amott, on Flickr
 IMG_9346 by russell amott, on Flickr
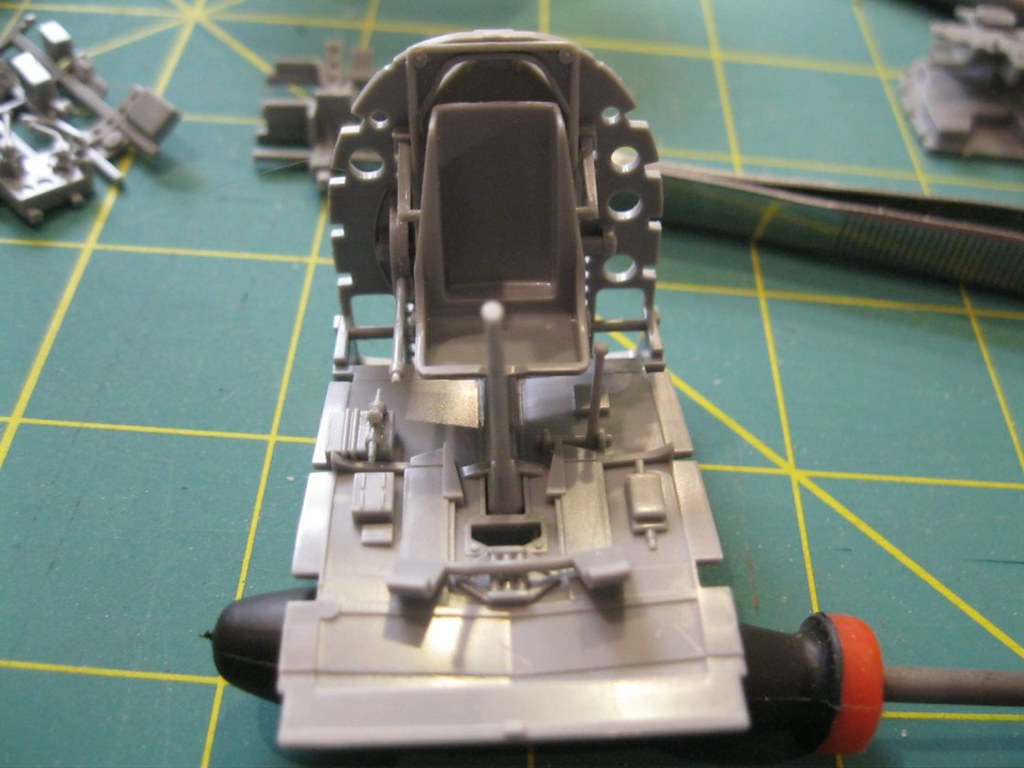
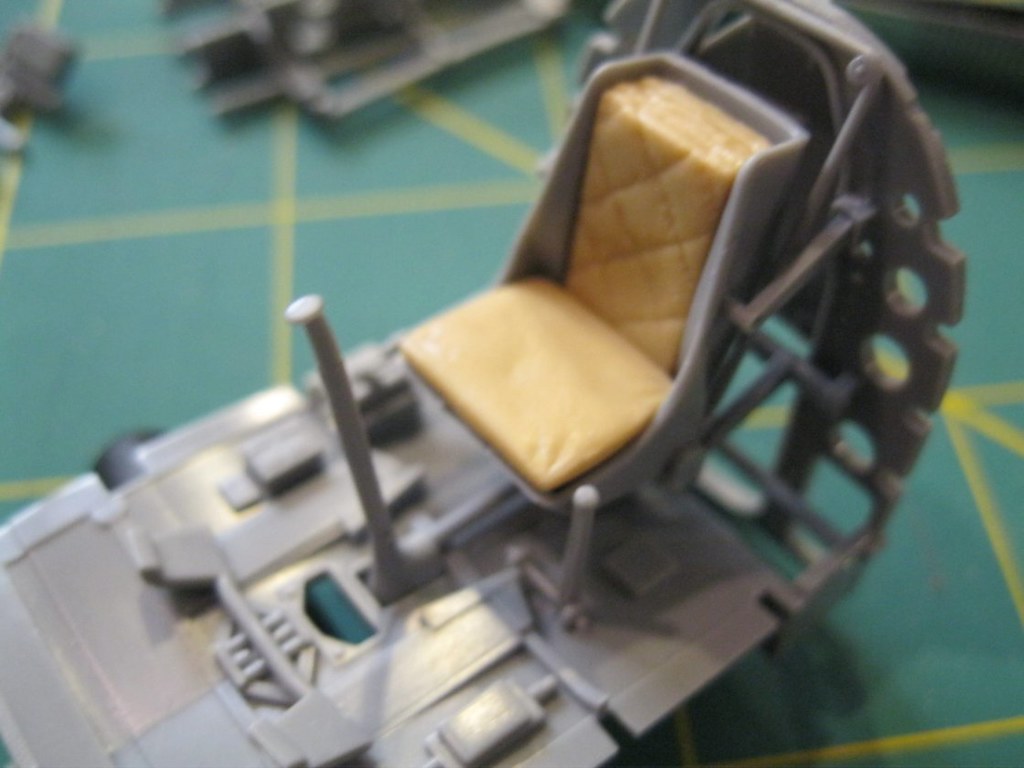
I then assembled the cockpit floor and fixed the seat in place.
 IMG_9348 by russell amott, on Flickr
 IMG_9349 by russell amott, on Flickr
 IMG_9350 by russell amott, on Flickr
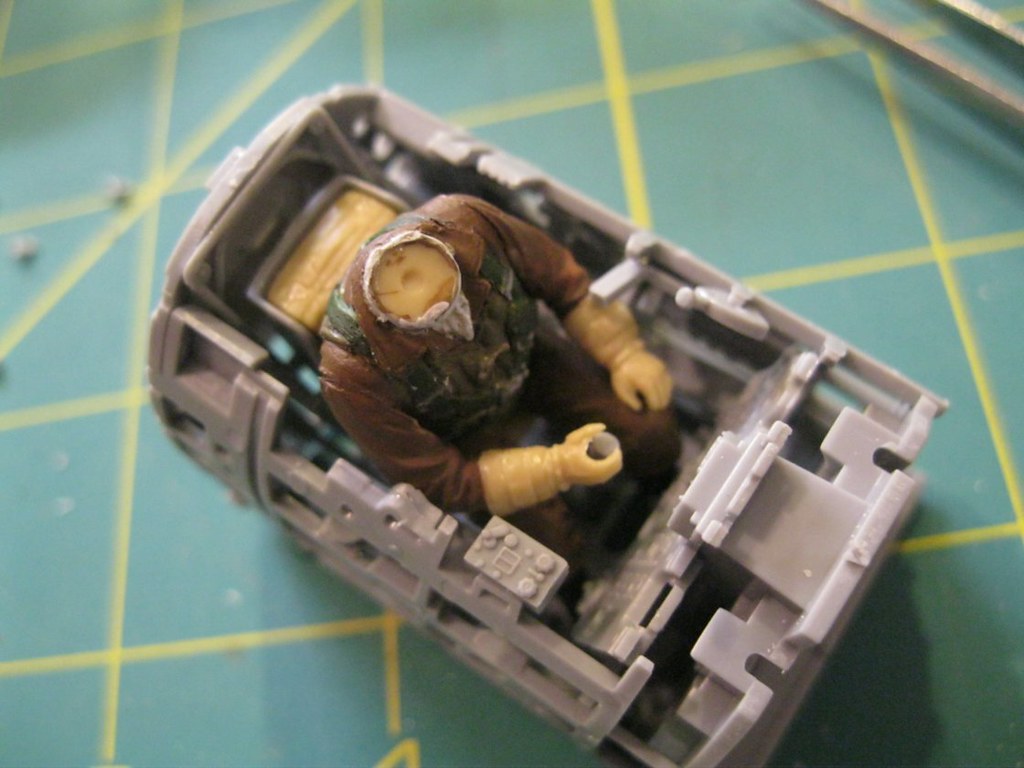
Dry fit of the seat cushion and life raft, and pilot.
 IMG_9351 by russell amott, on Flickr
 IMG_9352 by russell amott, on Flickr
 IMG_9353 by russell amott, on Flickr
 IMG_9354 by russell amott, on Flickr
 IMG_9355 by russell amott, on Flickr
I'll figure out what wiring I want to add and then paint. I picked up the Tamiya XF-71 interior green which is supposed to be good for Nakajima interior green. The fuselage comes next. I'm going with a wheels up display so I have to figure out how I am going to set that up. So far, everything has gone together very well.
IMG_9344 by russell amott, on FlickrIMG_9345 by russell amott, on FlickrIMG_9346 by russell amott, on FlickrI then assembled the cockpit floor and fixed the seat in place.
IMG_9348 by russell amott, on FlickrIMG_9349 by russell amott, on FlickrIMG_9350 by russell amott, on FlickrDry fit of the seat cushion and life raft, and pilot.
IMG_9351 by russell amott, on FlickrIMG_9352 by russell amott, on FlickrIMG_9353 by russell amott, on FlickrIMG_9354 by russell amott, on FlickrIMG_9355 by russell amott, on FlickrI'll figure out what wiring I want to add and then paint. I picked up the Tamiya XF-71 interior green which is supposed to be good for Nakajima interior green. The fuselage comes next. I'm going with a wheels up display so I have to figure out how I am going to set that up. So far, everything has gone together very well.

mrockhill
Joined: June 17, 2009
KitMaker: 566 posts
AeroScale: 507 posts

Posted: Friday, December 22, 2017 - 07:56 AM UTC
More Zeroes!?! Now we're talking!!  Im definitely going to keep an eye on this one. Your pilot is outstanding Russ, the colors look spot on.
These nice Hasegawa pilots are a far cry from their old front and back half pilots. The Japanese kit makers have blessed us lately with some really nice injection molded aircrew figures.The best efforts seem to be spent on japanese subjects too. Tamiya should sell its 1/48 IJN 4 pilot sprue separately.
Im definitely going to keep an eye on this one. Your pilot is outstanding Russ, the colors look spot on. These nice Hasegawa pilots are a far cry from their old front and back half pilots. The Japanese kit makers have blessed us lately with some really nice injection molded aircrew figures.The best efforts seem to be spent on japanese subjects too. Tamiya should sell its 1/48 IJN 4 pilot sprue separately.

rdt1953
Joined: February 06, 2015
KitMaker: 1,098 posts
AeroScale: 900 posts
Posted: Friday, December 22, 2017 - 05:59 PM UTC
Quoted Text
More Zeroes!?! Now we're talking!!
These nice Hasegawa pilots are a far cry from their old front and back half pilots. The Japanese kit makers have blessed us lately with some really nice injection molded aircrew figures.The best efforts seem to be spent on japanese subjects too. Tamiya should sell its 1/48 IJN 4 pilot sprue separately.
I concur sir !

bomber14
Joined: February 02, 2015
KitMaker: 330 posts
AeroScale: 286 posts
Posted: Friday, December 22, 2017 - 08:33 PM UTC
russell is it true that the seat could be raised for takeoff? i notice in many video that the pilot is sitting high up in the cockpit as to almost to interfere with the canopy closing. and i also see in your photos of the built cockpit arms connected to the seat on each side that look to be able to pivot.
joe
joe
rdt1953
Joined: February 06, 2015
KitMaker: 1,098 posts
AeroScale: 900 posts
Posted: Friday, December 22, 2017 - 09:38 PM UTC
Quoted Text
russell is it true that the seat could be raised for takeoff? i notice in many video that the pilot is sitting high up in the cockpit as to almost to interfere with the canopy closing. and i also see in your photos of the built cockpit arms connected to the seat on each side that look to be able to pivot.
joe
Indeed it could - the piece you see on the bulkhead behind the seat passing over two sheaves and down to the seat pan is a bungee that provides the force to help raise the pilot/seat -
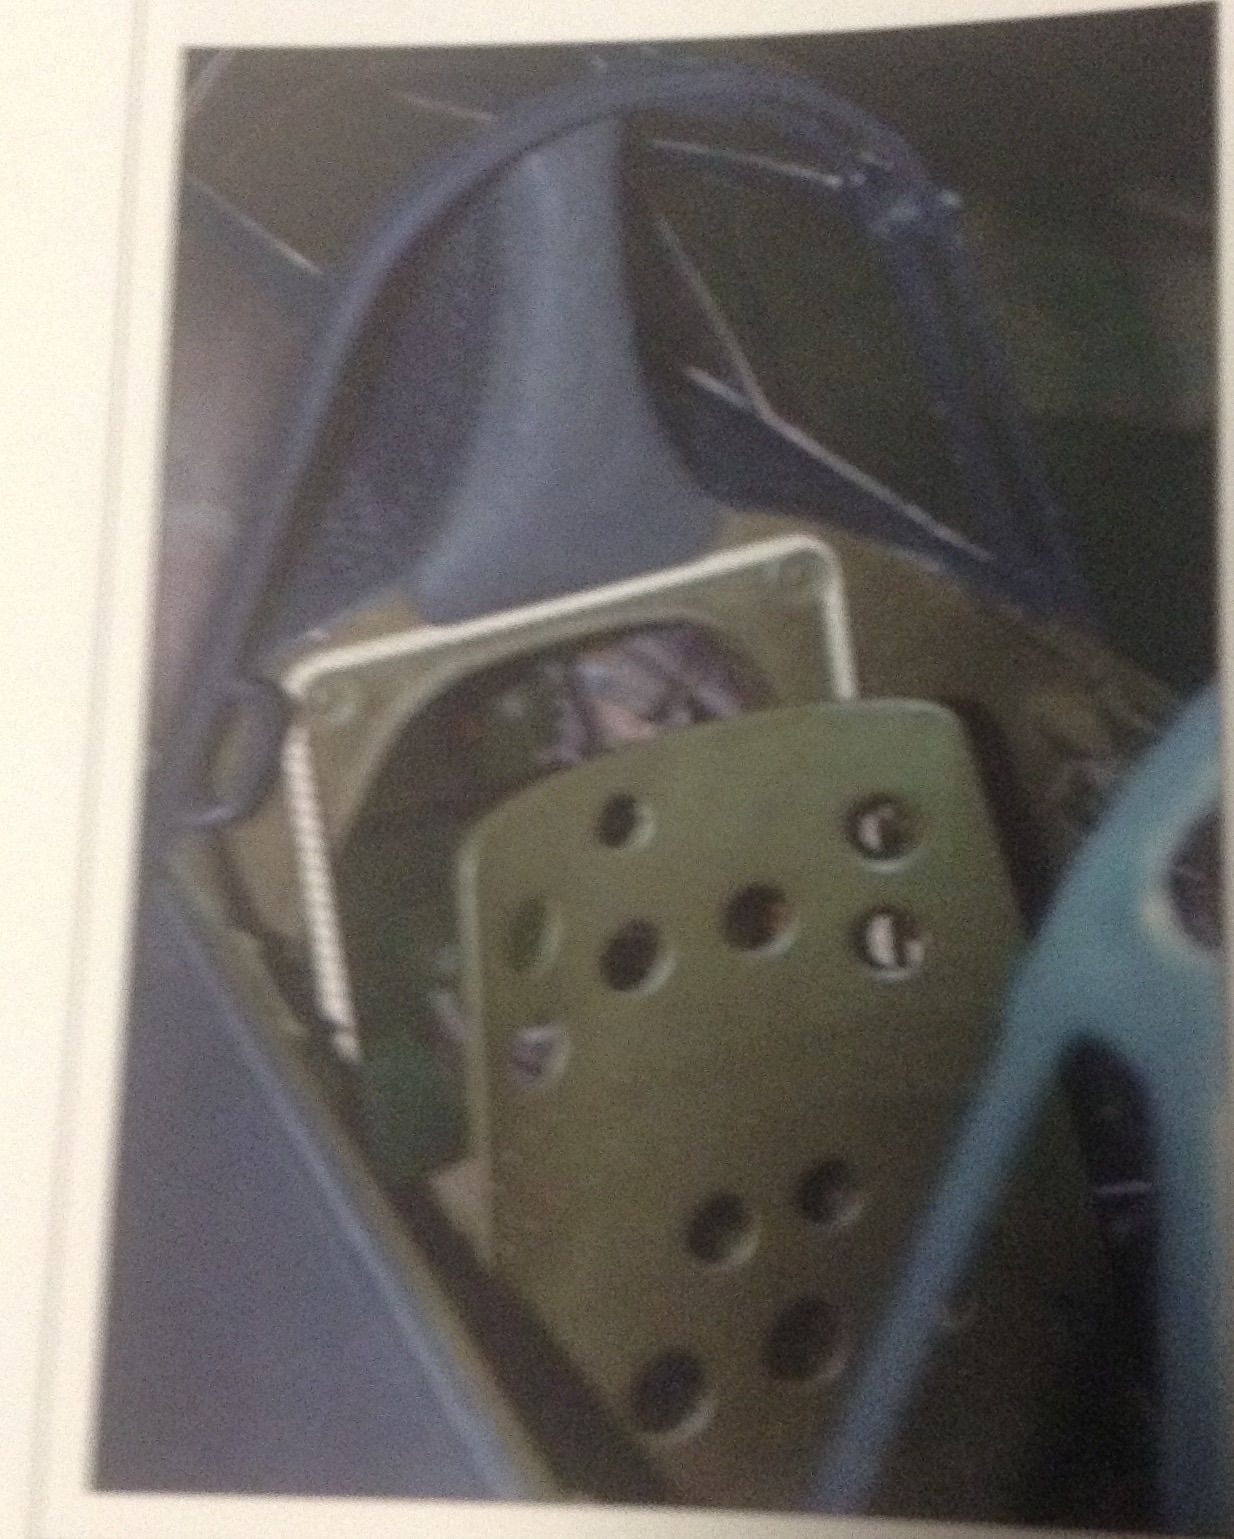
photo credit Robert Mikesh - " Japanese Aircraft Interiors " - for illustration purposes only-
Russ - I'm delighted to be following this ! - Richard
russamotto
Joined: December 14, 2007
KitMaker: 3,389 posts
AeroScale: 375 posts
Posted: Tuesday, December 26, 2017 - 04:18 AM UTC
Thank you all for the comments and interest. They are much appreciated.
I didn't get a lot done. My daughter decided to sprinkle glitter all over my workbench and it took several hours to get it off of everything. She said she wanted to see what it looked like and the gold flashes were pretty. On top of that I had to work the holidays and there were some unpleasant situations. But now I hope to get quite a bit done.
The fuselage comes with large inserts to hold the two halves together firmly. I did a test fit of all parts before I applied any glue and the fit was quite good. I placed the tail wheel in the up position and then carefully worked my way around the airframe, carefully holding the halves together. I have since sanded down the seam line and things look quite good, except along the upper surface just before the tail, where there is a slight indentation. I thought I got a shot of the cockpit placed in the fuselage but I missed it.
 IMG_9356 by russell amott, on Flickr
 IMG_9357 by russell amott, on Flickr
 IMG_9358 by russell amott, on Flickr
Tonight I hope to get the cockpit painted and put some primer on the fuselage.
I didn't get a lot done. My daughter decided to sprinkle glitter all over my workbench and it took several hours to get it off of everything. She said she wanted to see what it looked like and the gold flashes were pretty. On top of that I had to work the holidays and there were some unpleasant situations. But now I hope to get quite a bit done.
The fuselage comes with large inserts to hold the two halves together firmly. I did a test fit of all parts before I applied any glue and the fit was quite good. I placed the tail wheel in the up position and then carefully worked my way around the airframe, carefully holding the halves together. I have since sanded down the seam line and things look quite good, except along the upper surface just before the tail, where there is a slight indentation. I thought I got a shot of the cockpit placed in the fuselage but I missed it.
IMG_9356 by russell amott, on FlickrIMG_9357 by russell amott, on FlickrIMG_9358 by russell amott, on FlickrTonight I hope to get the cockpit painted and put some primer on the fuselage.
rdt1953
Joined: February 06, 2015
KitMaker: 1,098 posts
AeroScale: 900 posts
Posted: Tuesday, December 26, 2017 - 04:36 AM UTC
Russ - I can empathize - laughing with you I hope - gotta love little girls . I raised two of them . Keep smiling !
Richard
Richard

greif8

Joined: January 17, 2006
KitMaker: 673 posts
AeroScale: 492 posts
Posted: Tuesday, December 26, 2017 - 01:51 PM UTC
Hi Russ, this looks like a very nice kit. I concur with the other comments concerning the pilot figure, it looks very good and you have gotten the colors spot on.
Ernest
Ernest

Merlin

#017


Joined: June 11, 2003
KitMaker: 17,582 posts
AeroScale: 12,795 posts

Posted: Tuesday, December 26, 2017 - 09:40 PM UTC
Hi Russ
Great work so far. This is going to be a real beauty!
All the best
Rowan
Great work so far. This is going to be a real beauty!
All the best
Rowan

russamotto
Joined: December 14, 2007
KitMaker: 3,389 posts
AeroScale: 375 posts
Posted: Tuesday, January 02, 2018 - 05:13 AM UTC
Sorry for the long delay in updates, and thank you again for the comments.
Assembly has gone forward slowly. I painted up the cockpit parts with the Tamiya XF-71 interior color and put the decals on for the instruments. Somehow I don't have the photos I was sure I took. Decals took a while to settle in using Microsol and Microset, but they did snuggle down. I detail painted the handles and knobs and added some wiring to the different boxes. When it was closed up nothing was visible.
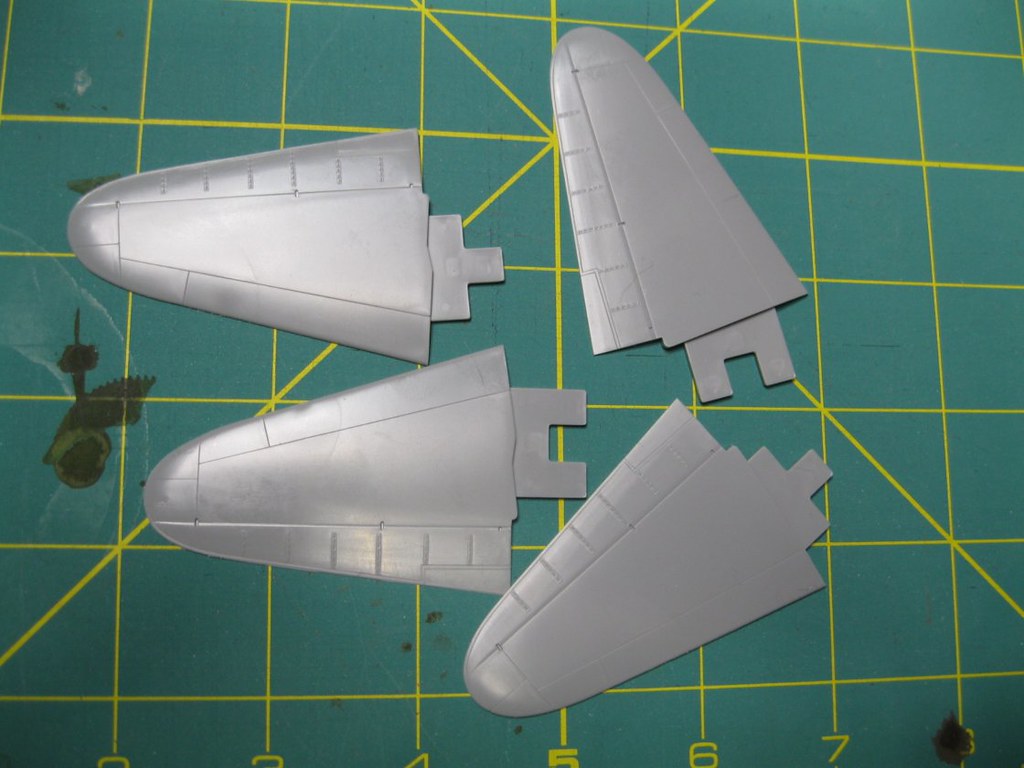
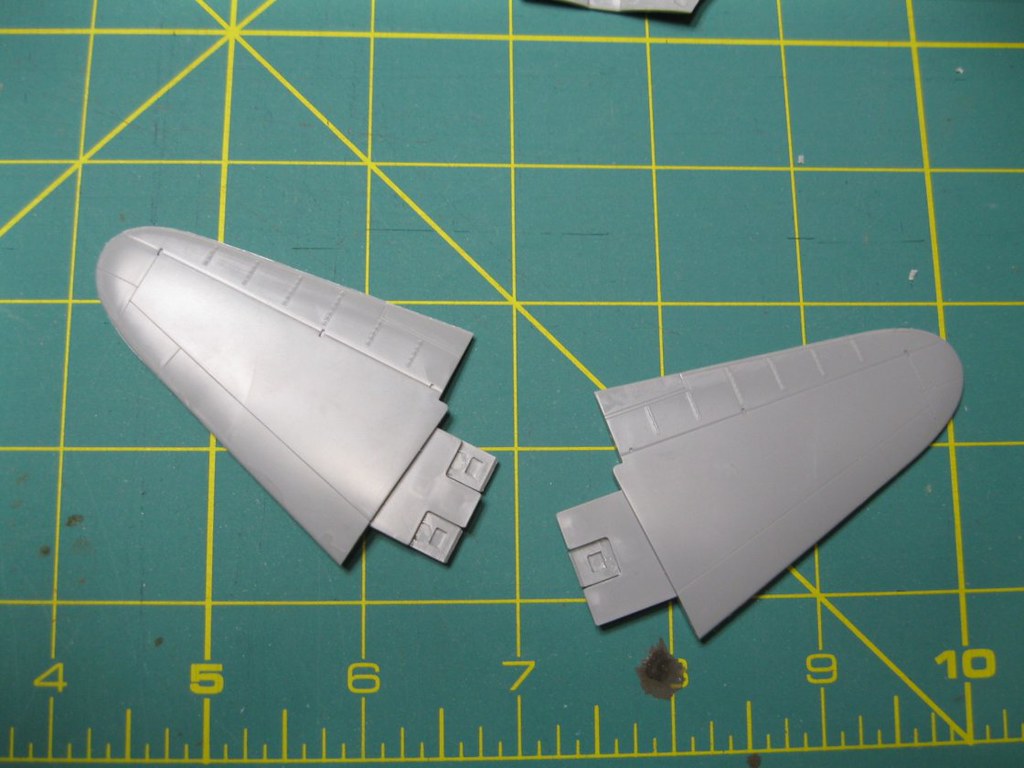
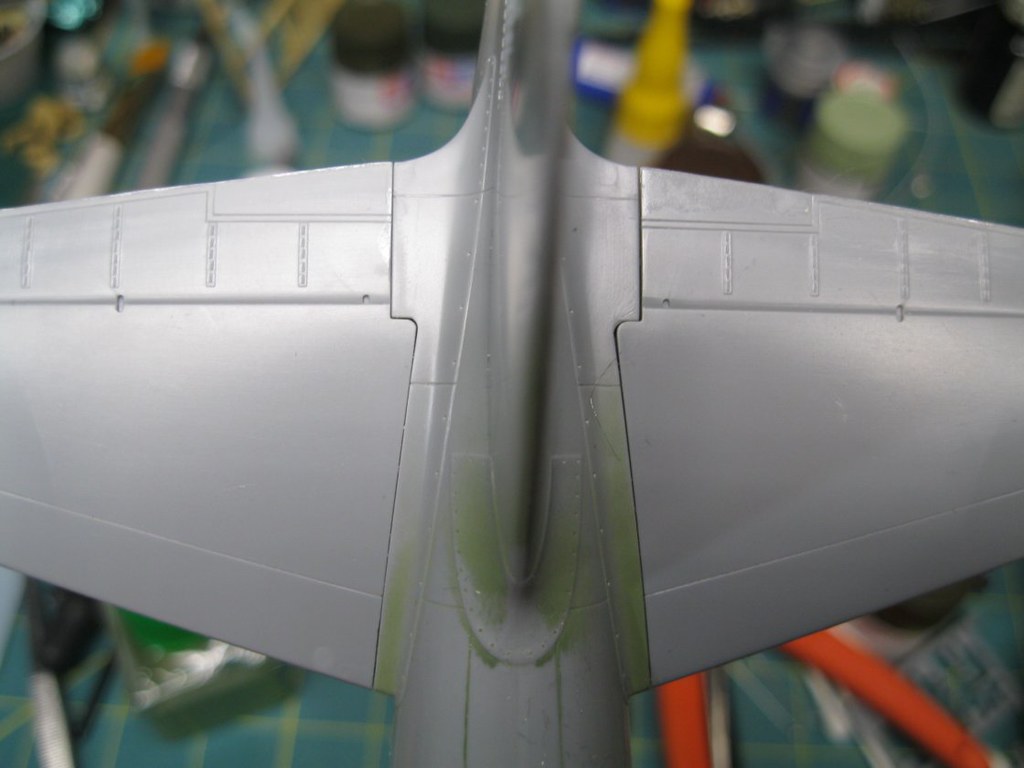
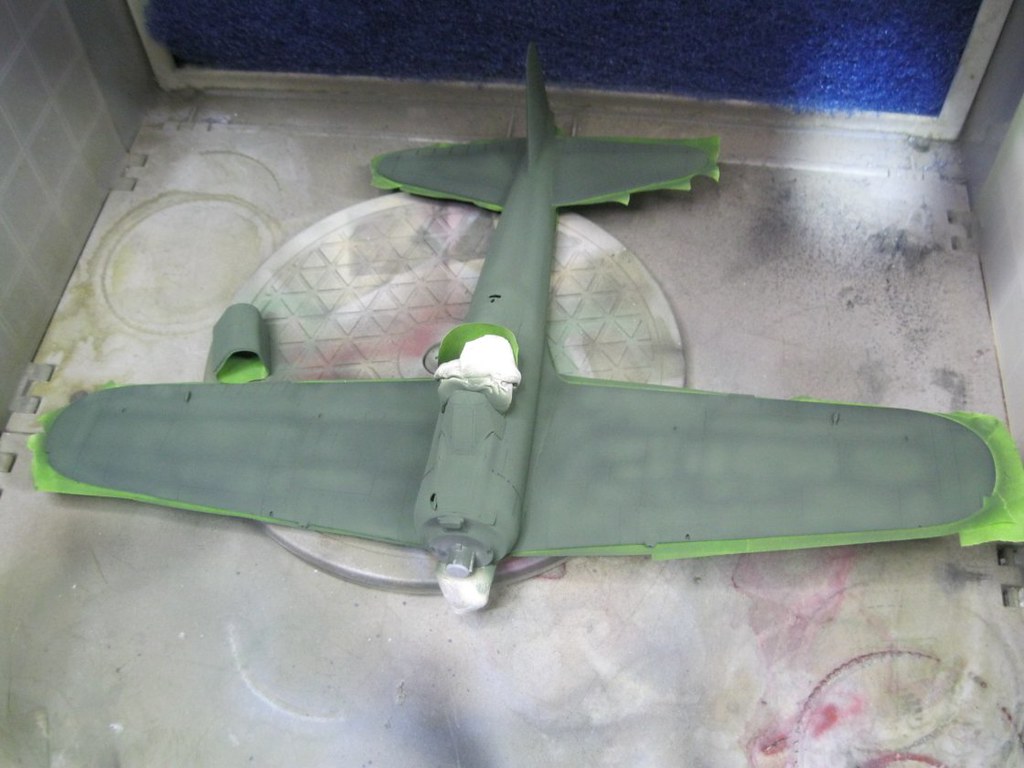
The horizontal stabilizers come in top and bottom sections that matched up quite well but had ejector pin marks that had to be trimmed down to get a good fit. There was also some flash on the tips. The main wing section has separate pieces for the wheel wells that also offer some internal strength to the wing. The upper and lower sections again mated up quite well with only a slight overhang on the leading edge that I carefully sanded away with a flexible nail file and then smoothed over with some steel wool. I will need to touch up the panel lines.
 IMG_9360 by russell amott, on Flickr
 IMG_9361 by russell amott, on Flickr
 IMG_9362 by russell amott, on Flickr
 IMG_9363 by russell amott, on Flickr
 IMG_9364 by russell amott, on Flickr
 IMG_9365 by russell amott, on Flickr
 IMG_9366 by russell amott, on Flickr
 IMG_9367 by russell amott, on Flickr
The main wing had some ejector pin marks that needed to be trimmed down for fit as well. I dry fit the wings to the fuselage and there is a gap that will need some attention. The tail will fit much better.
Assembly has gone forward slowly. I painted up the cockpit parts with the Tamiya XF-71 interior color and put the decals on for the instruments. Somehow I don't have the photos I was sure I took. Decals took a while to settle in using Microsol and Microset, but they did snuggle down. I detail painted the handles and knobs and added some wiring to the different boxes. When it was closed up nothing was visible.
The horizontal stabilizers come in top and bottom sections that matched up quite well but had ejector pin marks that had to be trimmed down to get a good fit. There was also some flash on the tips. The main wing section has separate pieces for the wheel wells that also offer some internal strength to the wing. The upper and lower sections again mated up quite well with only a slight overhang on the leading edge that I carefully sanded away with a flexible nail file and then smoothed over with some steel wool. I will need to touch up the panel lines.
IMG_9360 by russell amott, on FlickrIMG_9361 by russell amott, on FlickrIMG_9362 by russell amott, on FlickrIMG_9363 by russell amott, on FlickrIMG_9364 by russell amott, on FlickrIMG_9365 by russell amott, on FlickrIMG_9366 by russell amott, on FlickrIMG_9367 by russell amott, on FlickrThe main wing had some ejector pin marks that needed to be trimmed down for fit as well. I dry fit the wings to the fuselage and there is a gap that will need some attention. The tail will fit much better.
russamotto
Joined: December 14, 2007
KitMaker: 3,389 posts
AeroScale: 375 posts
Posted: Tuesday, January 02, 2018 - 05:24 AM UTC
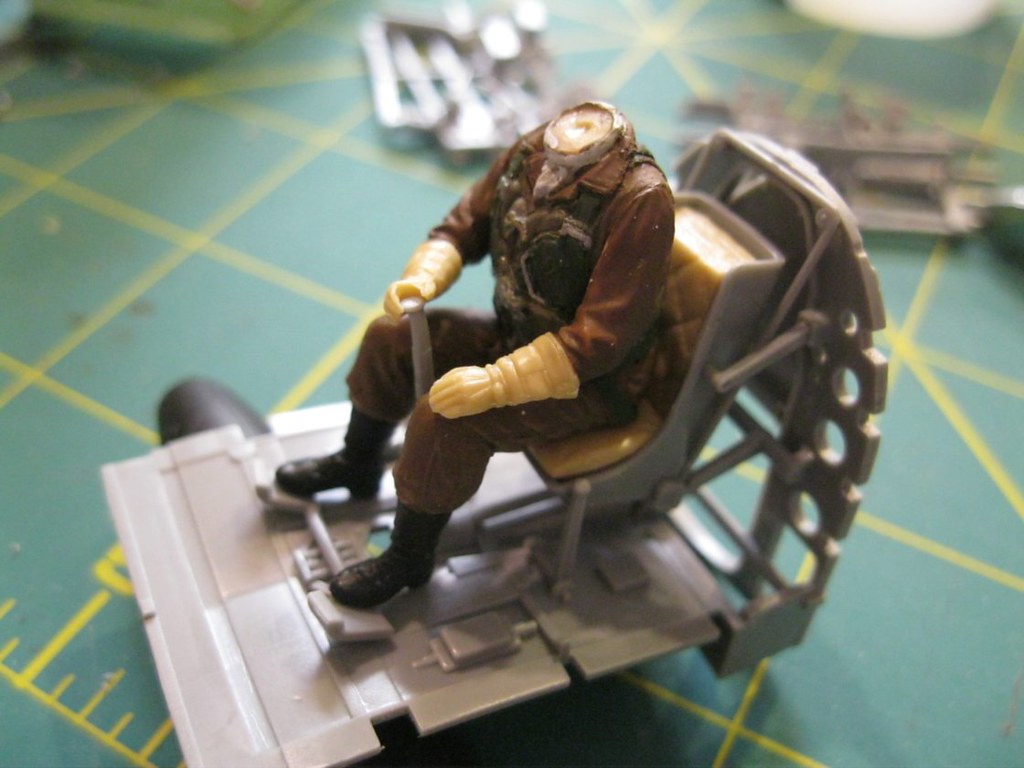
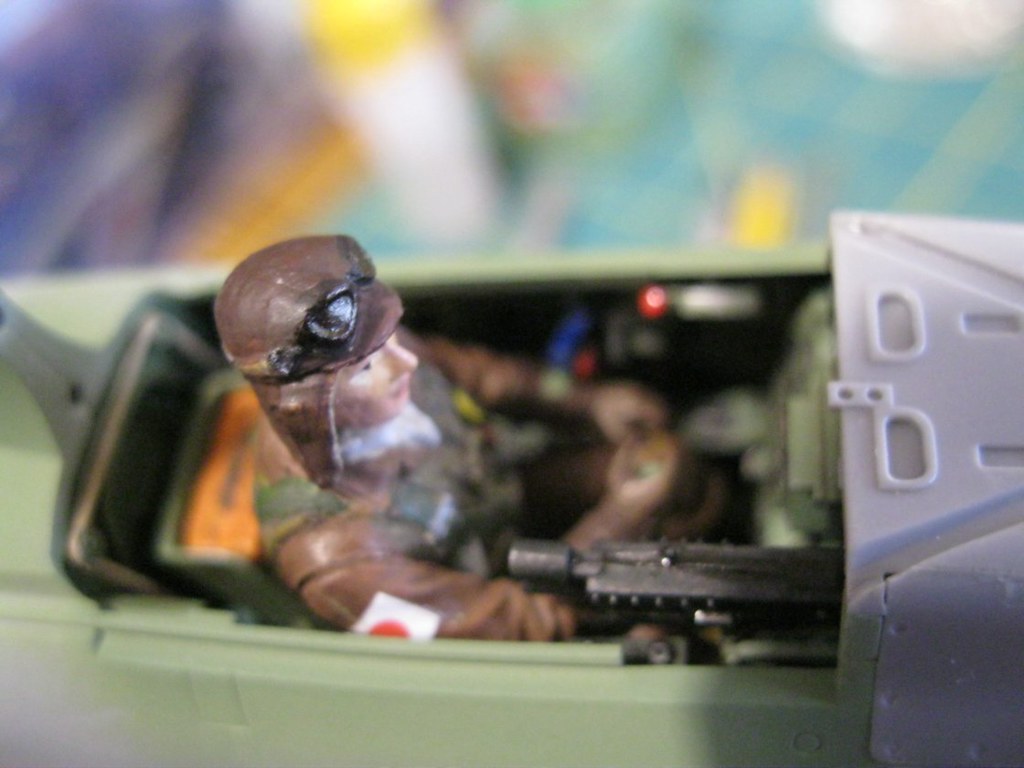
I worked on the three heads, trying to decide which to use. I have seen several builds of the A6M5c kit that has the same figure, and one of this kit. All used head number 3 with the helmet flaps curled up and the pilot looking to the left. After painting all three I opted for head number 2. I touched up the details on the figure and added the decals to the sleeves and then set him in his seat.
 IMG_9368 by russell amott, on Flickr
 IMG_9369 by russell amott, on Flickr
 IMG_9371 by russell amott, on Flickr
 IMG_9372 by russell amott, on Flickr
 IMG_9373 by russell amott, on Flickr
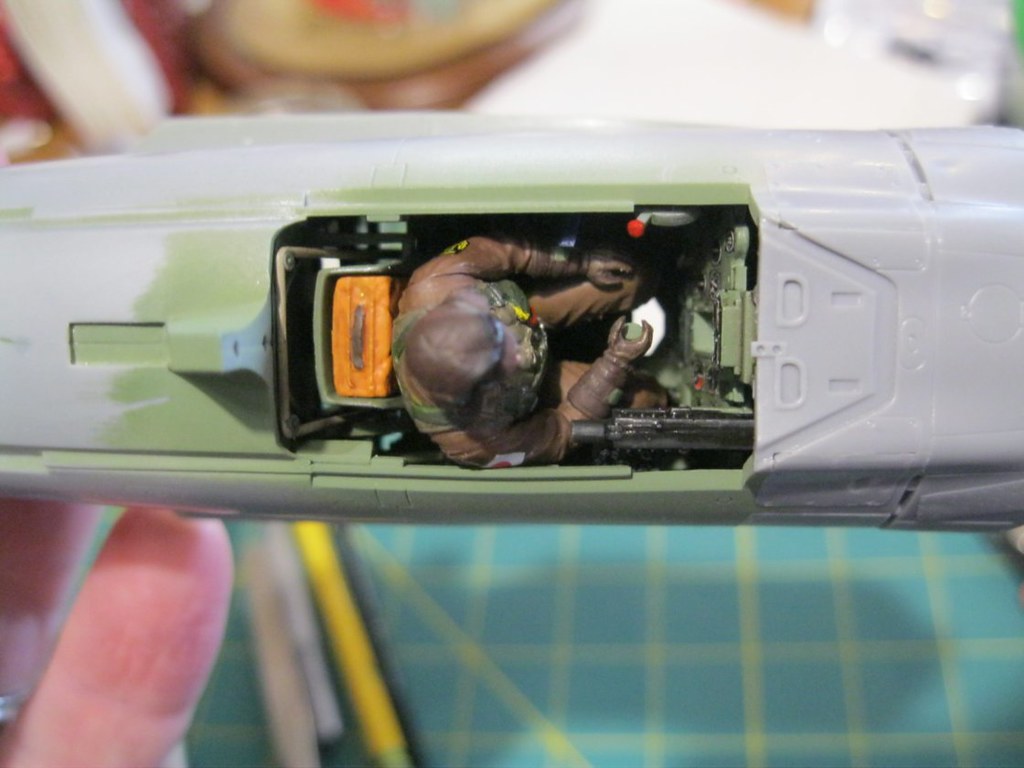
The cowl gun was assembled from instructions I found for the A6M5c kit online. The cockpit isn't glued yet as I still need to fill the small divot on the tail. The fuselage halves come in slightly towards the tail leaving a slight v along the seam line.
IMG_9368 by russell amott, on FlickrIMG_9369 by russell amott, on FlickrIMG_9371 by russell amott, on FlickrIMG_9372 by russell amott, on FlickrIMG_9373 by russell amott, on FlickrThe cowl gun was assembled from instructions I found for the A6M5c kit online. The cockpit isn't glued yet as I still need to fill the small divot on the tail. The fuselage halves come in slightly towards the tail leaving a slight v along the seam line.
russamotto
Joined: December 14, 2007
KitMaker: 3,389 posts
AeroScale: 375 posts
Posted: Thursday, January 04, 2018 - 04:33 AM UTC
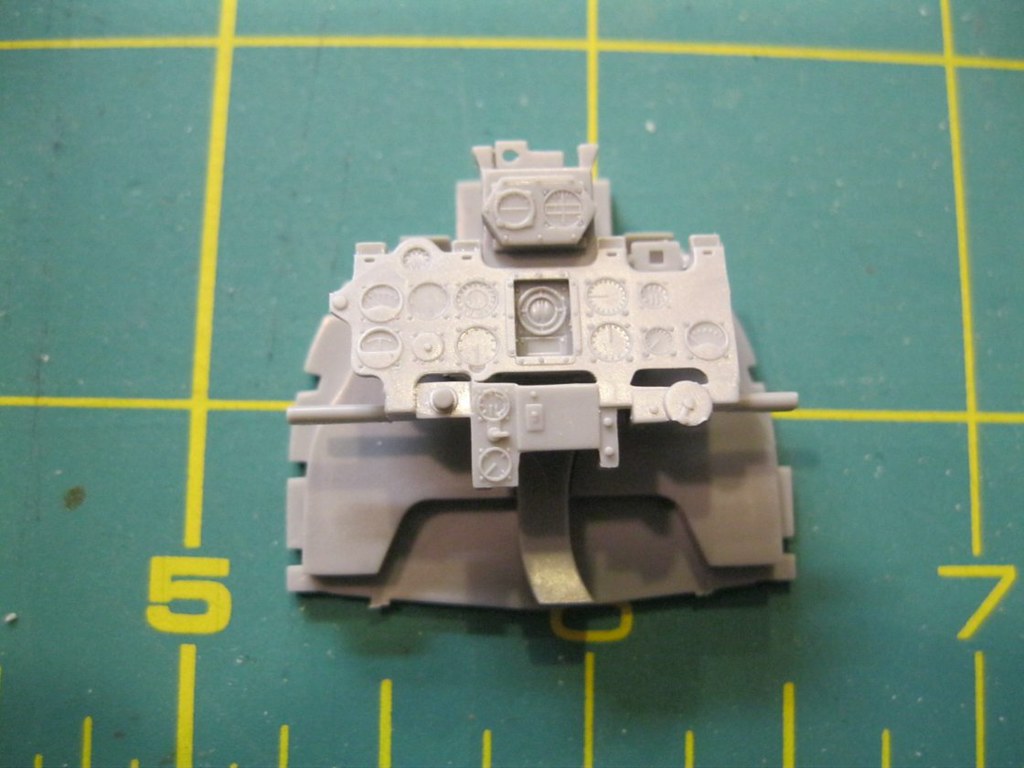
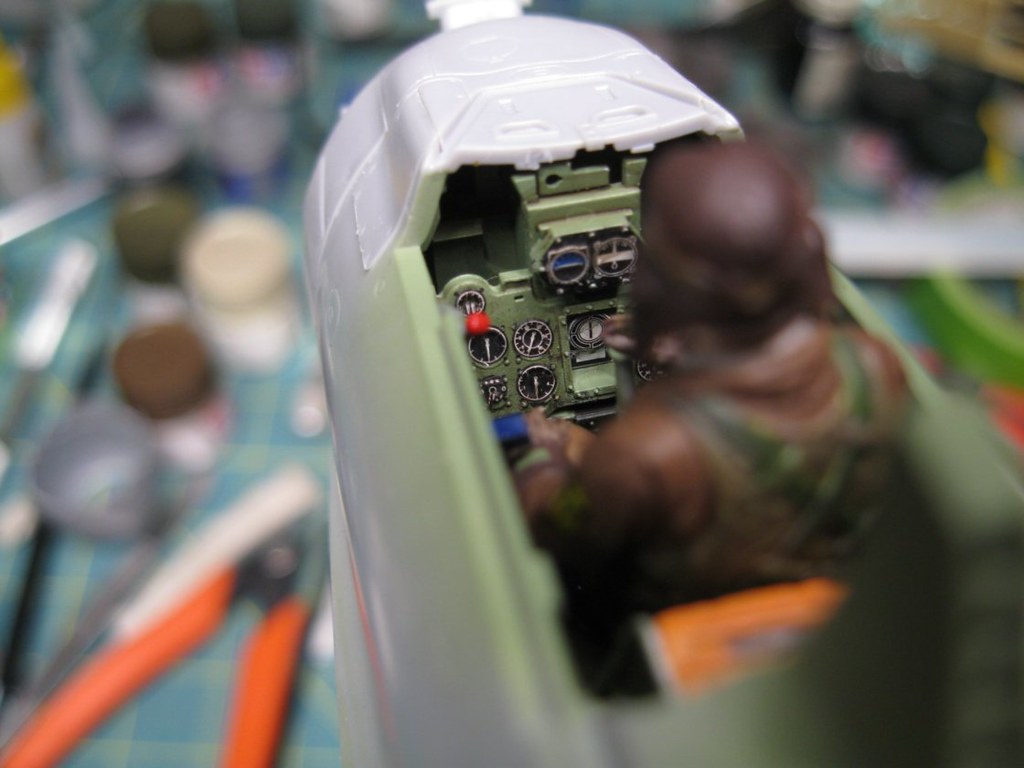
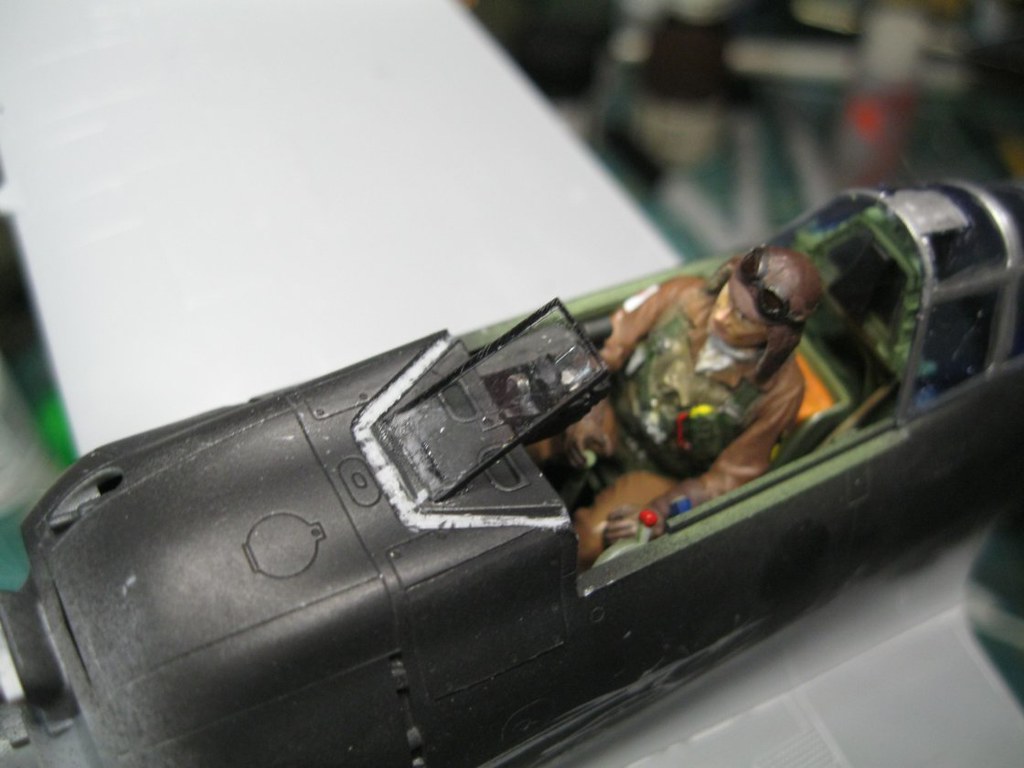
Just a small update today. I have been working on some of the smaller details and having some camera issues. Photos I have taken of the build aren't being saved for some reason. For starts, here is a look at the instrument panel in the cockpit, again showing the tight fit. I don't know about the seatbelt arrangement for this aircraft. Normally there is something molded to the pilot but in this case all the straps appear to be for the parachute. I haven't added the gun sight yet, but my dry fitting of the cockpit is fairly fixed in place and I doubt I can get it out without risking damage, so it will stay there.
 IMG_9382 by russell amott, on Flickr
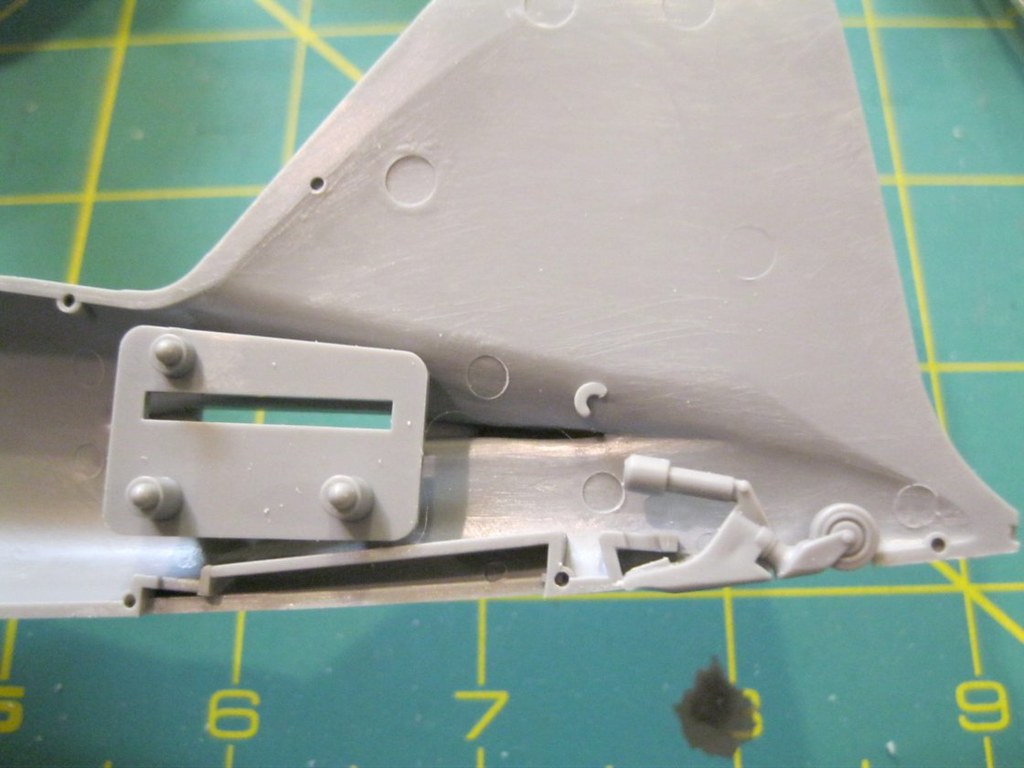
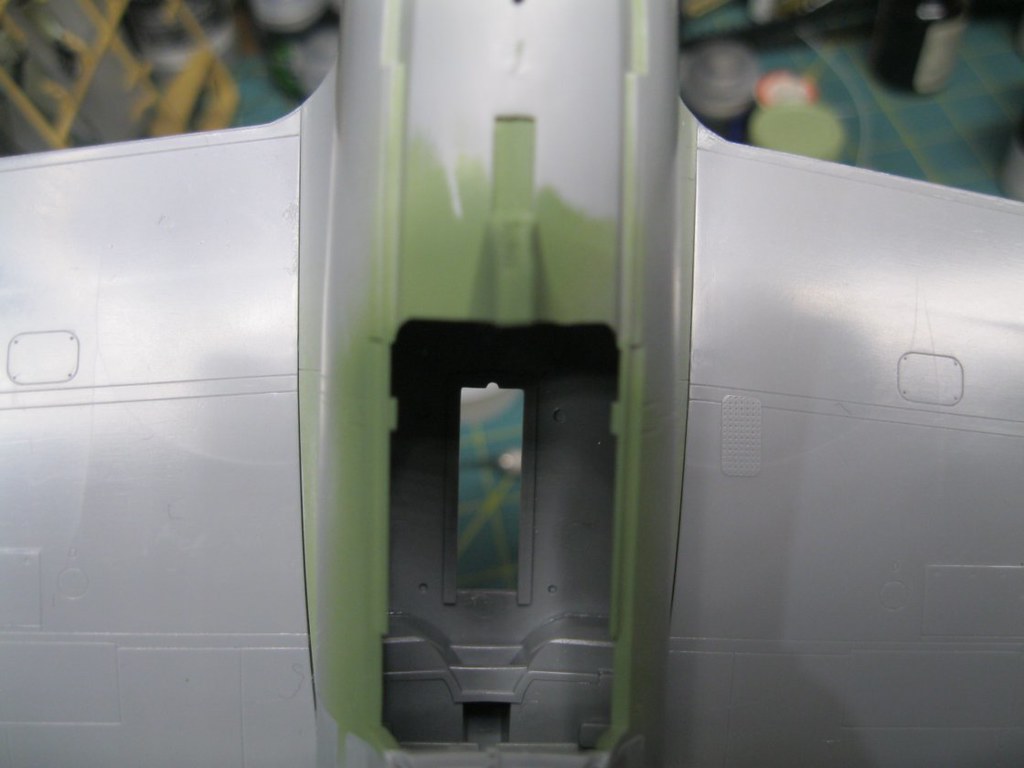
There is a small clear piece that goes into the fuselage side. I installed it per the instructions but having to drill out the hole on my own left the opening a little ragged. This was done earlier in the build. I used some perfect plastic putty around the insert as it is easy to work with and remove without damaging the part. I also installed the gear doors in the up position and the cover for the tail hook. It looks to be sitting proud of the surface but has been pressed down and looks much better now.
 IMG_9389 by russell amott, on Flickr
 IMG_9390 by russell amott, on Flickr
 IMG_9385 by russell amott, on Flickr
 IMG_9386 by russell amott, on Flickr
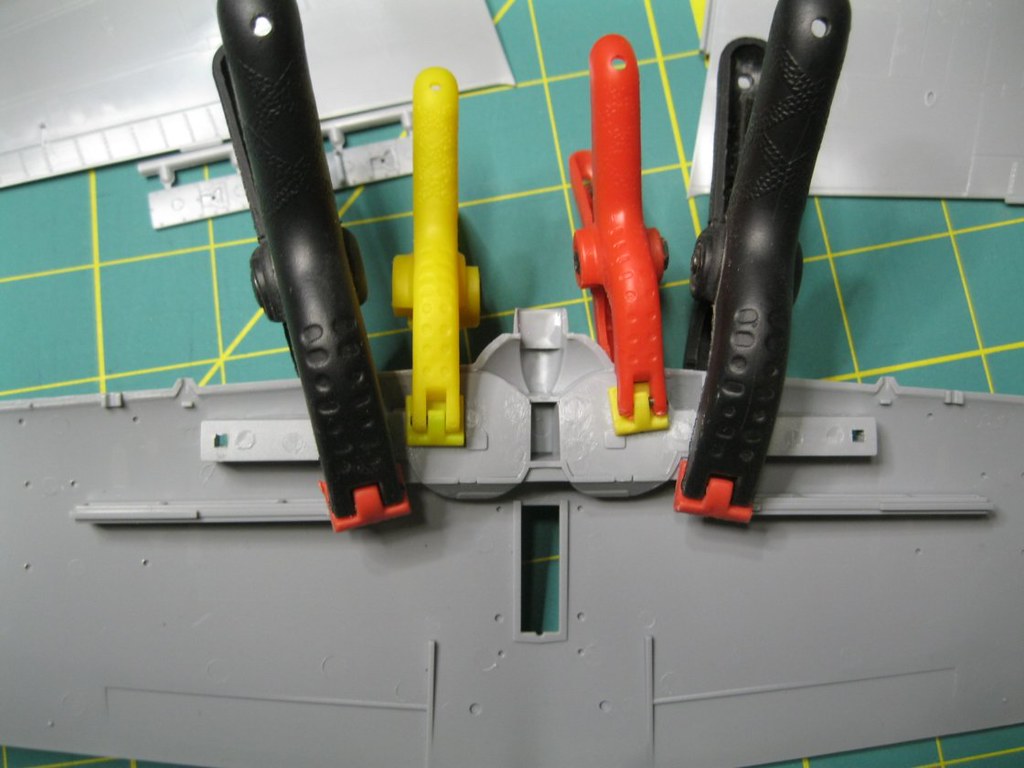
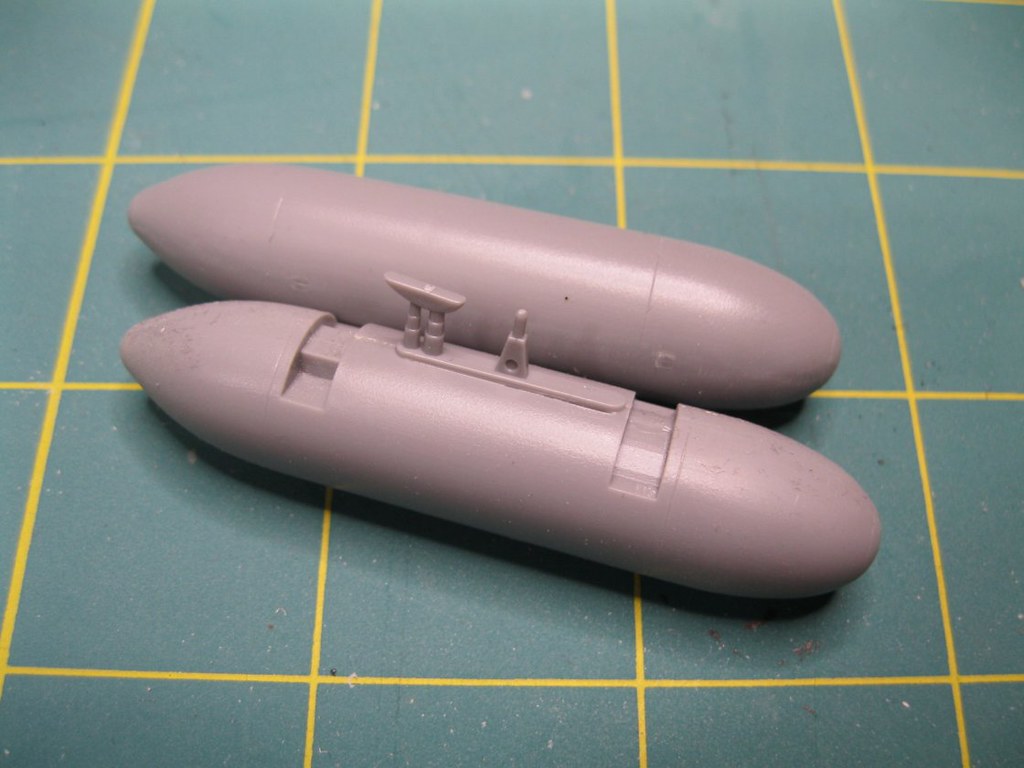
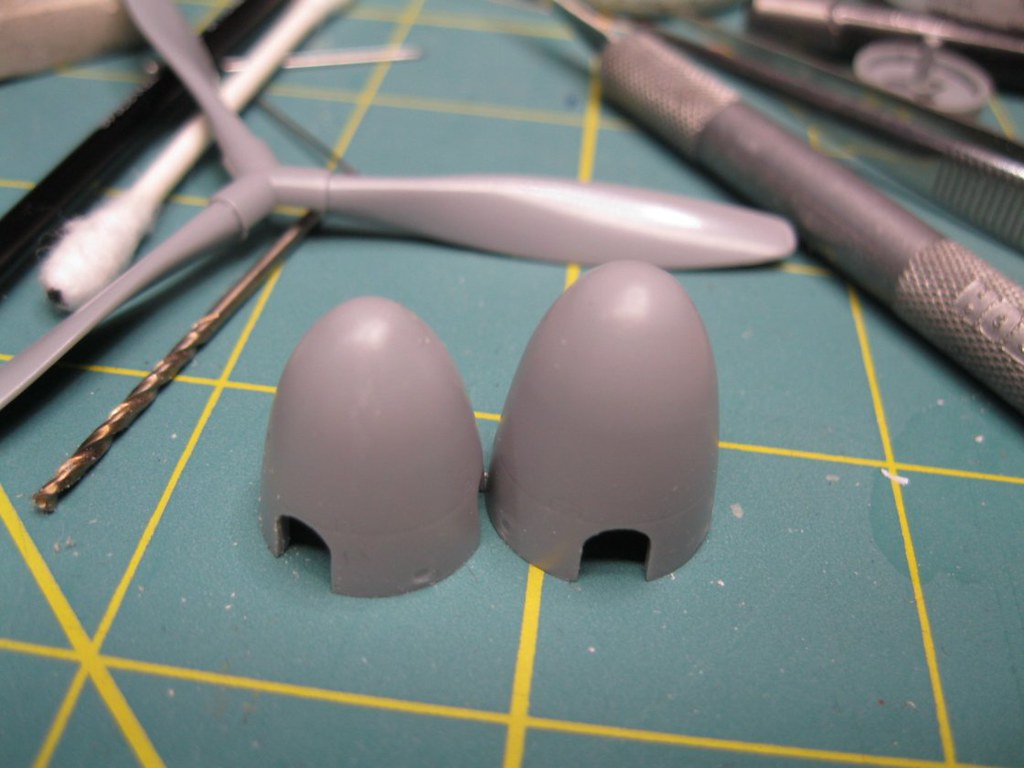
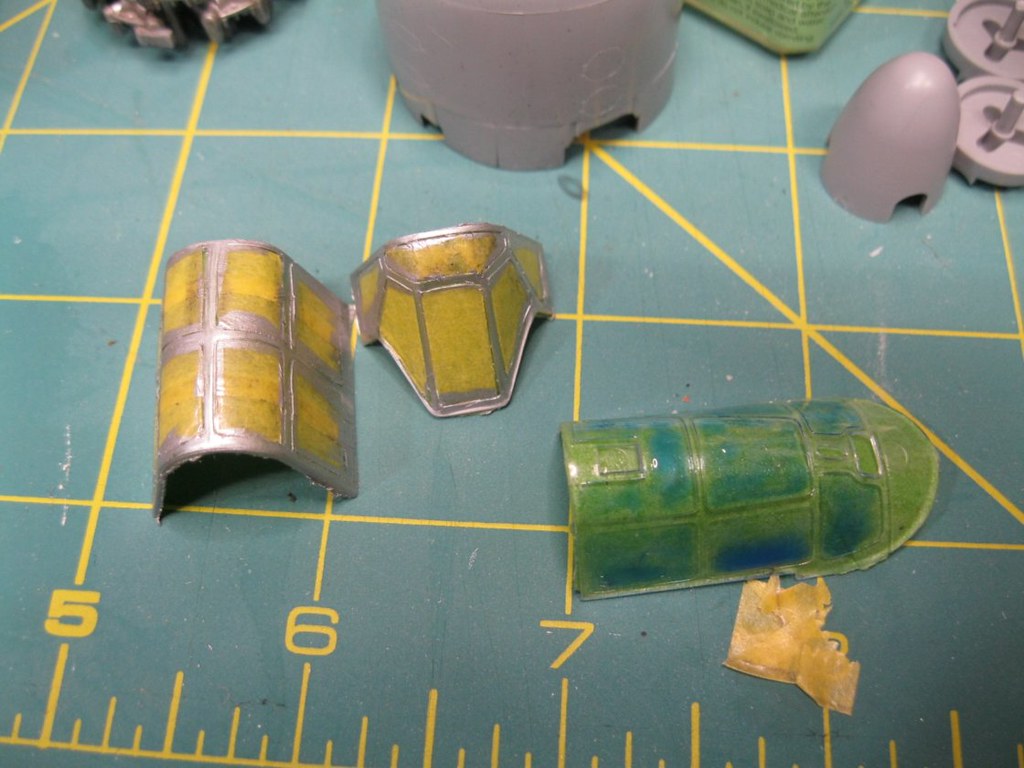
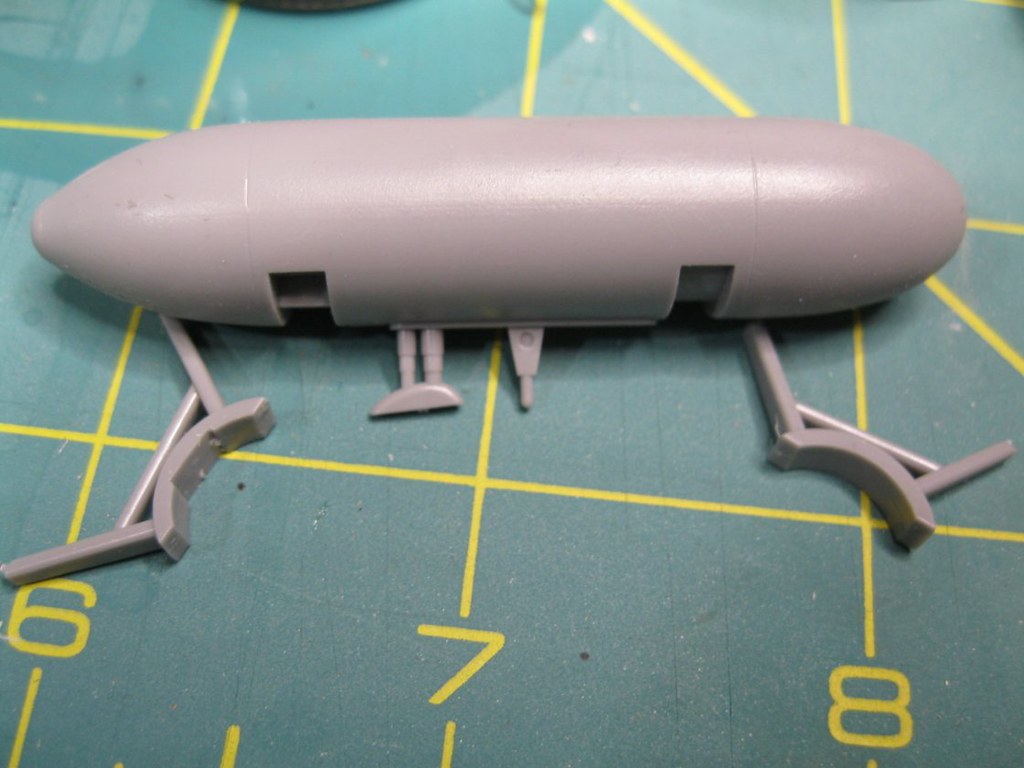
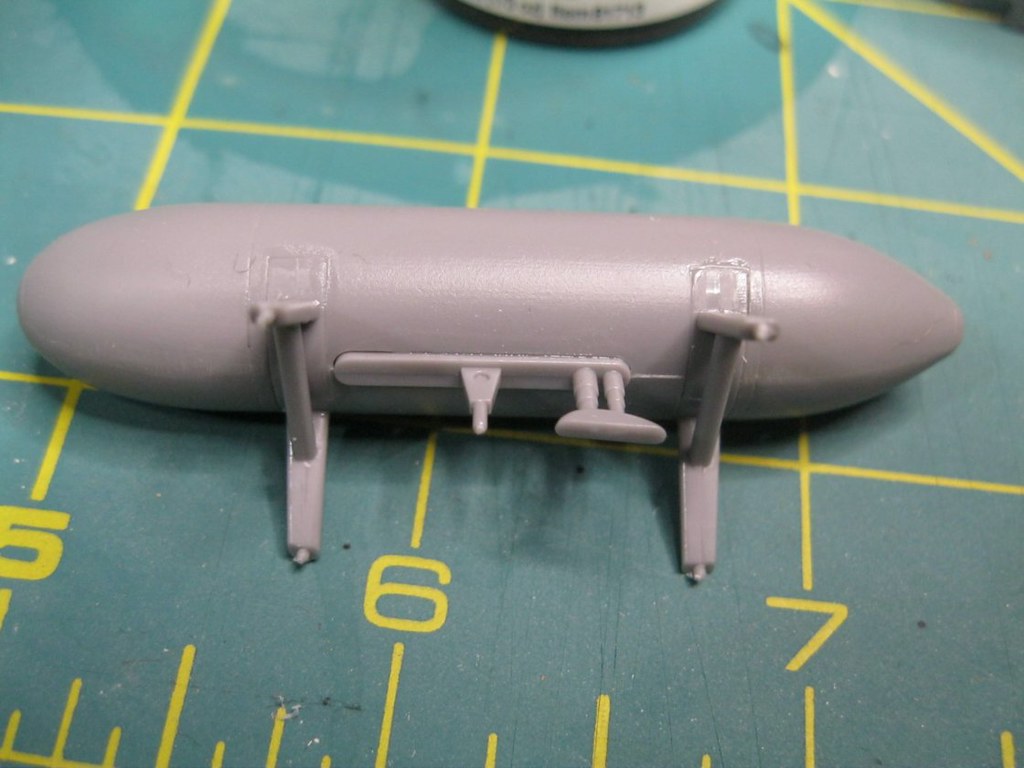
There are two different head rests included. One has armored glass which I think would have been more correct for the later versions for pilot protection. I am going with that piece. I also assembled the drop tanks. Two half sections and a third insert for the top connecting point. Two braces will be installed at final assembly.
 IMG_9387 by russell amott, on Flickr
 IMG_9388 by russell amott, on Flickr
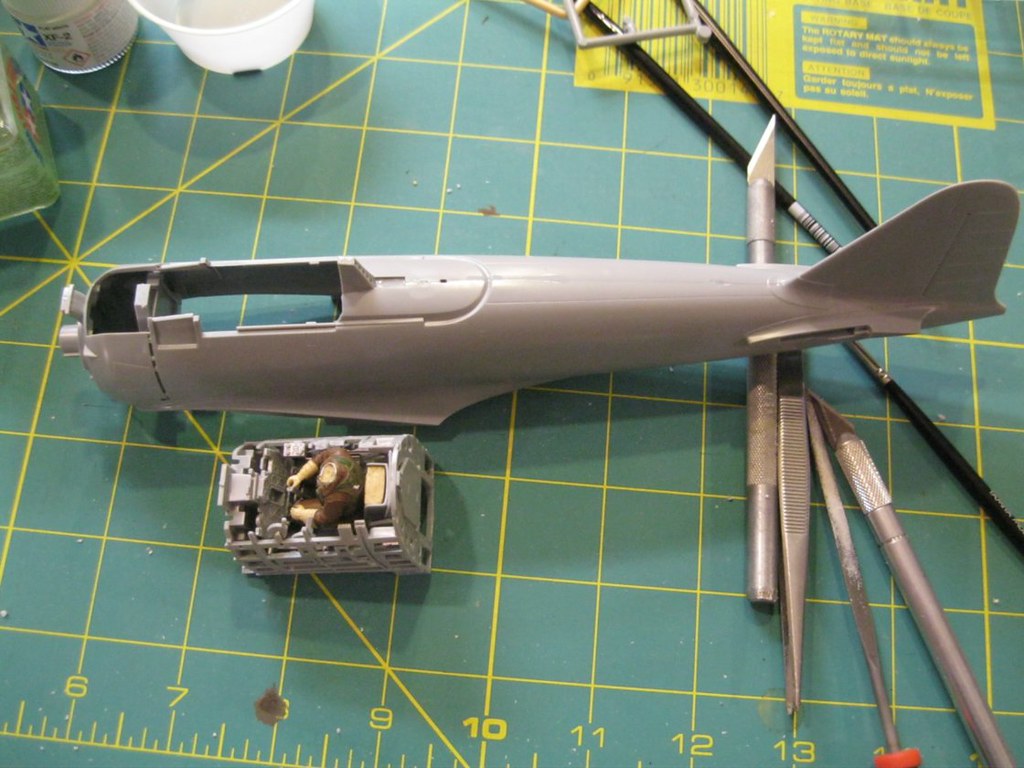
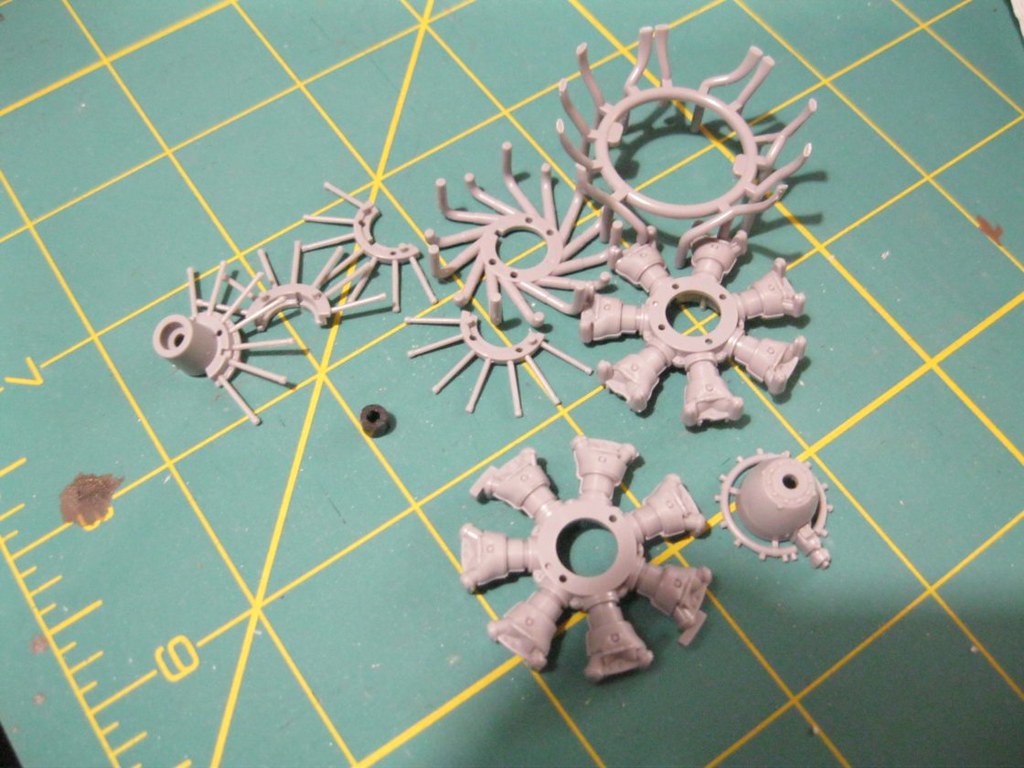
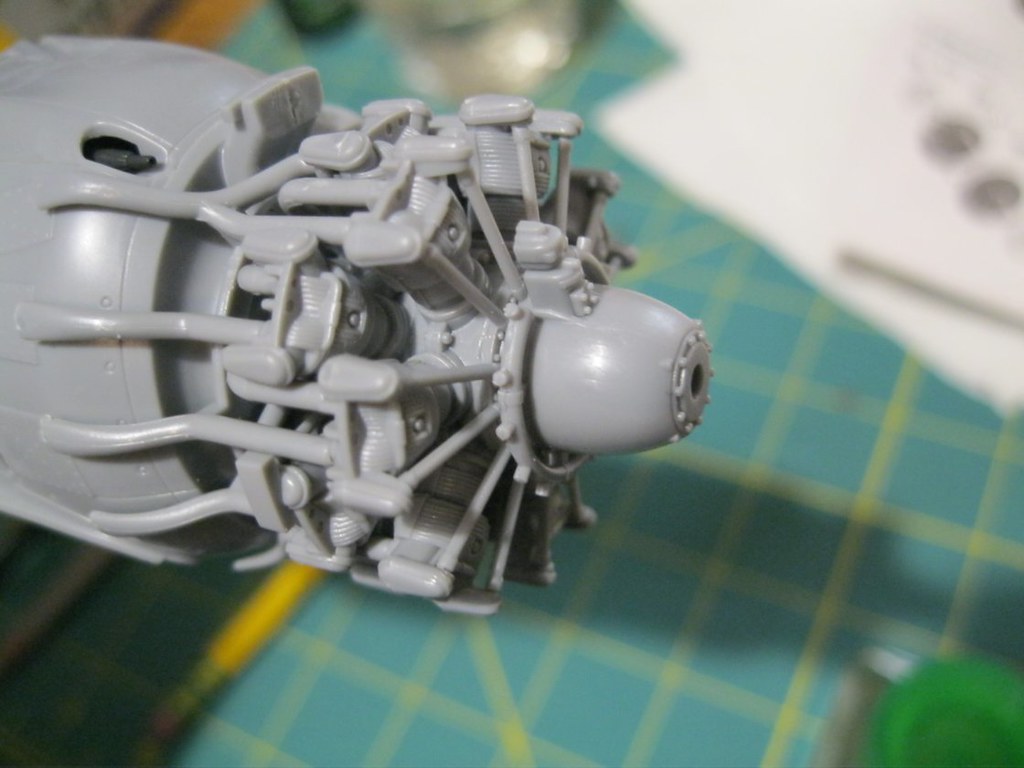
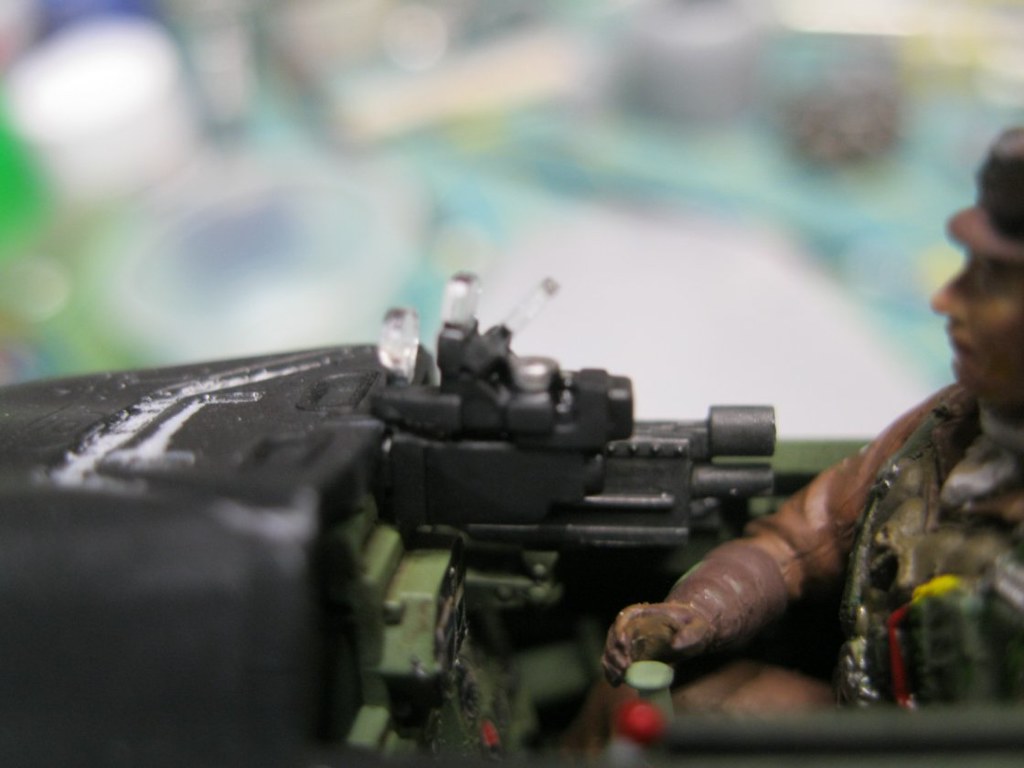
Next up is the assembly of the engine. Two cylinder banks, separate push rods and a locator pin on the parts to make sure things are put in the proper position.
 IMG_9375 by russell amott, on Flickr
 IMG_9376 by russell amott, on Flickr
 IMG_9378 by russell amott, on Flickr
 IMG_9379 by russell amott, on Flickr
 IMG_9380 by russell amott, on Flickr
 IMG_9381 by russell amott, on Flickr
 IMG_9383 by russell amott, on Flickr
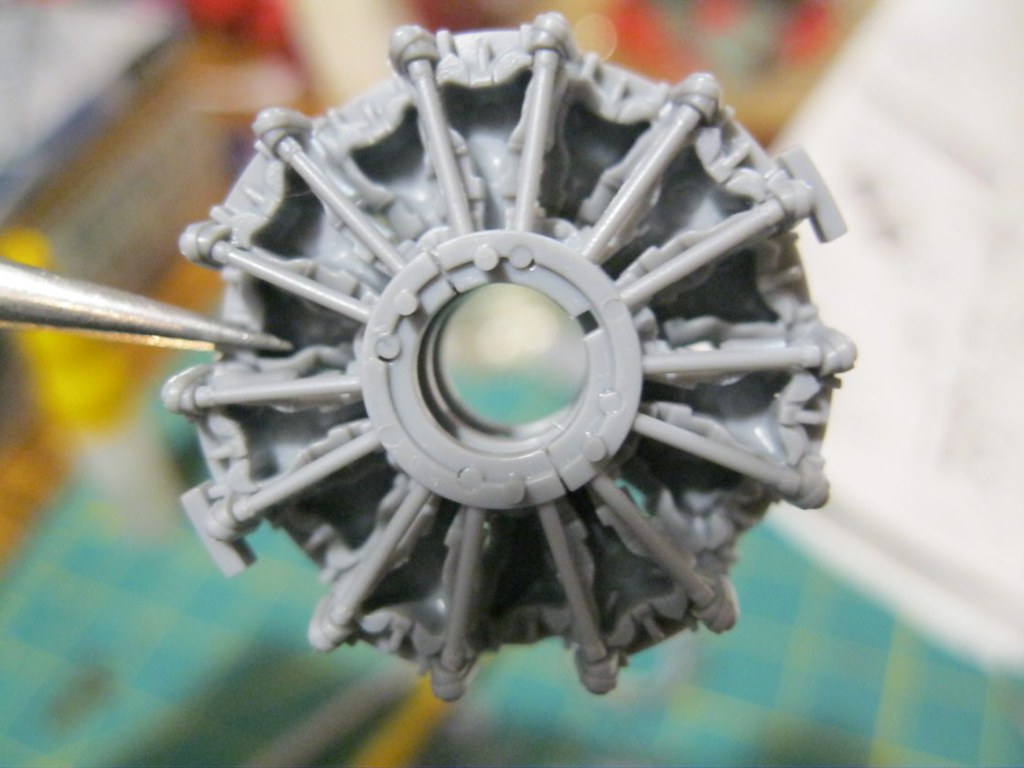
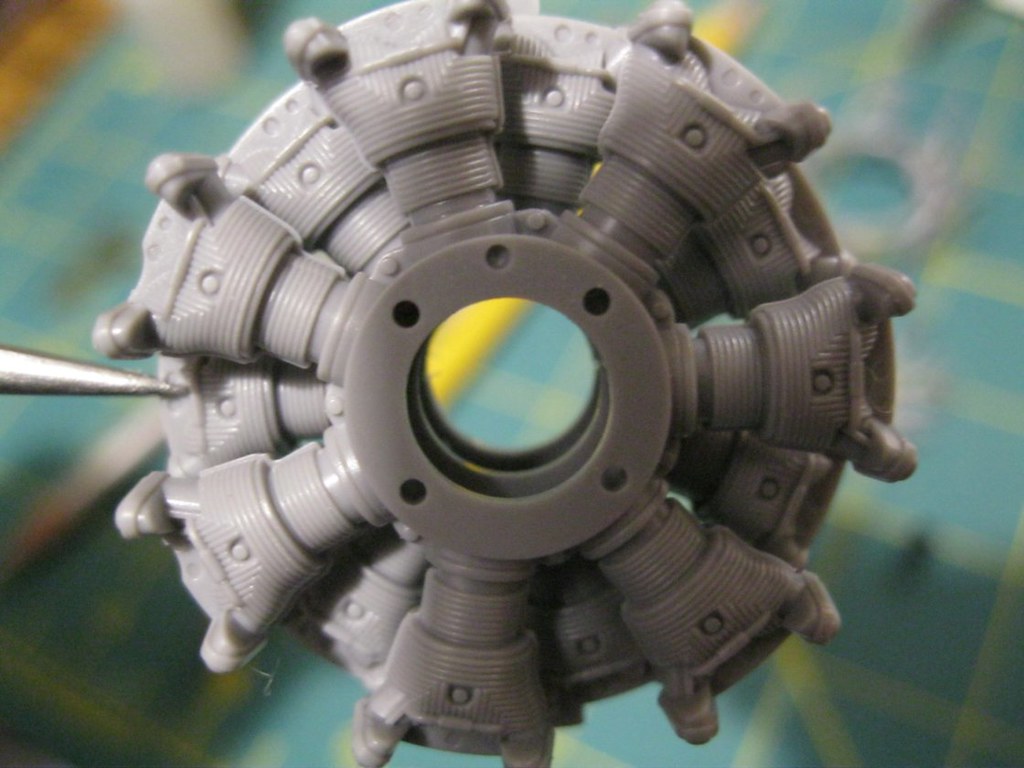
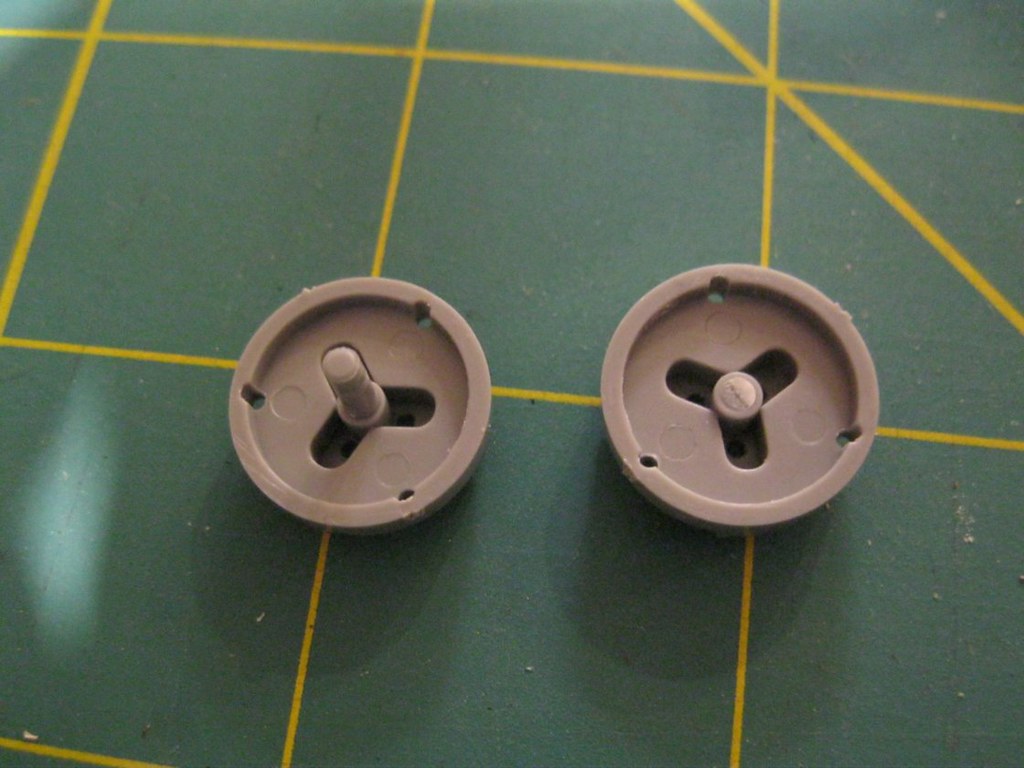
There is a bit of touch up to do on the engine, and the photos make it look far darker than it really is. I debated trying to do the ignition wires but the opening is small and the larger nose cone hides most of what is in there. As far as the propeller assembly is concerned, there are two bases in the kit. The one marked for use is the broken one. It goes with the much larger late version nose cone.
 IMG_9374 by russell amott, on Flickr
 IMG_9384 by russell amott, on Flickr
I have a bit more touch up to do on the fuselage. I will attach the wings and fill the gaps and it will be ready for painting. I have read sources that state that Nakajima produced aircraft used the same underside color for the wheel wells, which doesn't apply here as they are closed. I am checking for the cowling interior to see what would be used as one source claimed that same color was used for other interior areas. The instructions state flat black.
IMG_9382 by russell amott, on FlickrThere is a small clear piece that goes into the fuselage side. I installed it per the instructions but having to drill out the hole on my own left the opening a little ragged. This was done earlier in the build. I used some perfect plastic putty around the insert as it is easy to work with and remove without damaging the part. I also installed the gear doors in the up position and the cover for the tail hook. It looks to be sitting proud of the surface but has been pressed down and looks much better now.
IMG_9389 by russell amott, on FlickrIMG_9390 by russell amott, on FlickrIMG_9385 by russell amott, on FlickrIMG_9386 by russell amott, on FlickrThere are two different head rests included. One has armored glass which I think would have been more correct for the later versions for pilot protection. I am going with that piece. I also assembled the drop tanks. Two half sections and a third insert for the top connecting point. Two braces will be installed at final assembly.
IMG_9387 by russell amott, on FlickrIMG_9388 by russell amott, on FlickrNext up is the assembly of the engine. Two cylinder banks, separate push rods and a locator pin on the parts to make sure things are put in the proper position.
IMG_9375 by russell amott, on FlickrIMG_9376 by russell amott, on FlickrIMG_9378 by russell amott, on FlickrIMG_9379 by russell amott, on FlickrIMG_9380 by russell amott, on FlickrIMG_9381 by russell amott, on FlickrIMG_9383 by russell amott, on FlickrThere is a bit of touch up to do on the engine, and the photos make it look far darker than it really is. I debated trying to do the ignition wires but the opening is small and the larger nose cone hides most of what is in there. As far as the propeller assembly is concerned, there are two bases in the kit. The one marked for use is the broken one. It goes with the much larger late version nose cone.
IMG_9374 by russell amott, on FlickrIMG_9384 by russell amott, on FlickrI have a bit more touch up to do on the fuselage. I will attach the wings and fill the gaps and it will be ready for painting. I have read sources that state that Nakajima produced aircraft used the same underside color for the wheel wells, which doesn't apply here as they are closed. I am checking for the cowling interior to see what would be used as one source claimed that same color was used for other interior areas. The instructions state flat black.

thegirl

Joined: January 19, 2008
KitMaker: 6,743 posts
AeroScale: 6,151 posts
Posted: Thursday, January 04, 2018 - 05:04 AM UTC
For 72 scale , it's got really nice detail to it . Doing a fine job so far Russ and I do like how the figure turned out as well as the different heads , very nice 
Terri
Terri
russamotto
Joined: December 14, 2007
KitMaker: 3,389 posts
AeroScale: 375 posts
Posted: Thursday, January 04, 2018 - 07:04 AM UTC
Thank you, Terri! My daughter said the pilot is smirking. Maybe he was just caught in a moment of fun while he was flying and forgot about everything else.
I searched LSP and J-aircraft and found the information I was looking for. I have it backwards. Mitsubishi painted the wheel wells gray. Nakajima in Aotake. Cowling should be black inside.
I searched LSP and J-aircraft and found the information I was looking for. I have it backwards. Mitsubishi painted the wheel wells gray. Nakajima in Aotake. Cowling should be black inside.
russamotto
Joined: December 14, 2007
KitMaker: 3,389 posts
AeroScale: 375 posts
Posted: Wednesday, January 10, 2018 - 11:37 PM UTC
Small update for today. I started masking the canopy, using Tamiya tape. The canopies are molded quite thin and as I was working with them I kept worrying that I would end up breaking one, so for the third section I used micro mask fluid, which was promptly knocked to the floor by the cat I never wanted. Remasking with the fluid was still faster than trimming tape to fit each panel so it worked out. I used a silver sharpie to give the canopy frame a base coat.
 IMG_9391 by russell amott, on Flickr
I then assembled the gun sight. There are three tiny clear pieces that go in specific positions-I think I put the forward sight in the wrong spot, and it gets a tiny decal that can't be seen. The armored glass goes in front of that. I had held off placing the part until I was ready to protect it under the canopy.
 IMG_9392 by russell amott, on Flickr
 IMG_9393 by russell amott, on Flickr
 IMG_9394 by russell amott, on Flickr
I assembled the frame supports for the external fuel tanks. They are handed and the rear support has a notch cut out so you don't confuse them in assembly. From the instructions it appears that the short side goes towards the fuselage.
 IMG_9396 by russell amott, on Flickr
 IMG_9397 by russell amott, on Flickr
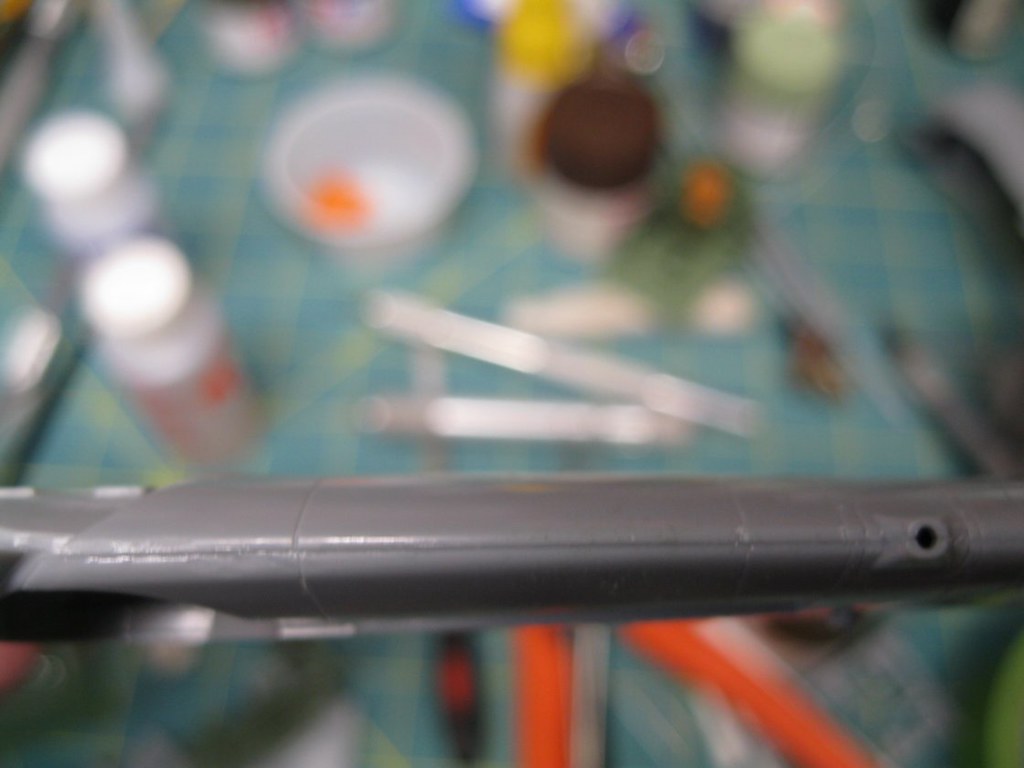
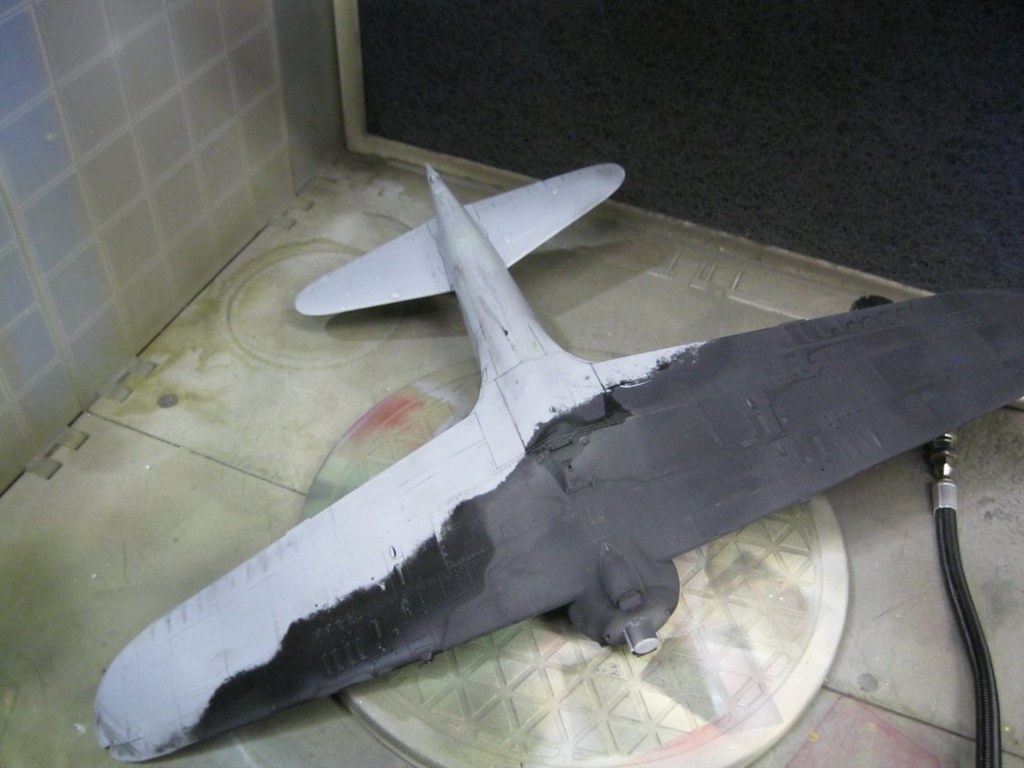
I primed the model with flat black and started to apply the underside color. The paint had some issues, blocking the airbrush and then suddenly splattering all over. It bubbled on the surface. There wasn't much left and when I rinsed out the bottle it was grainy inside, so I don't know what was going on. It was my only bottle of Tamiya JN gray, so I will need to shop for more or mix my own. I stripped the paint mess of the model so here is how things sit for now.
 IMG_9398 by russell amott, on Flickr
IMG_9391 by russell amott, on FlickrI then assembled the gun sight. There are three tiny clear pieces that go in specific positions-I think I put the forward sight in the wrong spot, and it gets a tiny decal that can't be seen. The armored glass goes in front of that. I had held off placing the part until I was ready to protect it under the canopy.
IMG_9392 by russell amott, on FlickrIMG_9393 by russell amott, on FlickrIMG_9394 by russell amott, on FlickrI assembled the frame supports for the external fuel tanks. They are handed and the rear support has a notch cut out so you don't confuse them in assembly. From the instructions it appears that the short side goes towards the fuselage.
IMG_9396 by russell amott, on FlickrIMG_9397 by russell amott, on FlickrI primed the model with flat black and started to apply the underside color. The paint had some issues, blocking the airbrush and then suddenly splattering all over. It bubbled on the surface. There wasn't much left and when I rinsed out the bottle it was grainy inside, so I don't know what was going on. It was my only bottle of Tamiya JN gray, so I will need to shop for more or mix my own. I stripped the paint mess of the model so here is how things sit for now.
IMG_9398 by russell amott, on Flickrrussamotto
Joined: December 14, 2007
KitMaker: 3,389 posts
AeroScale: 375 posts
Posted: Saturday, January 13, 2018 - 05:30 AM UTC
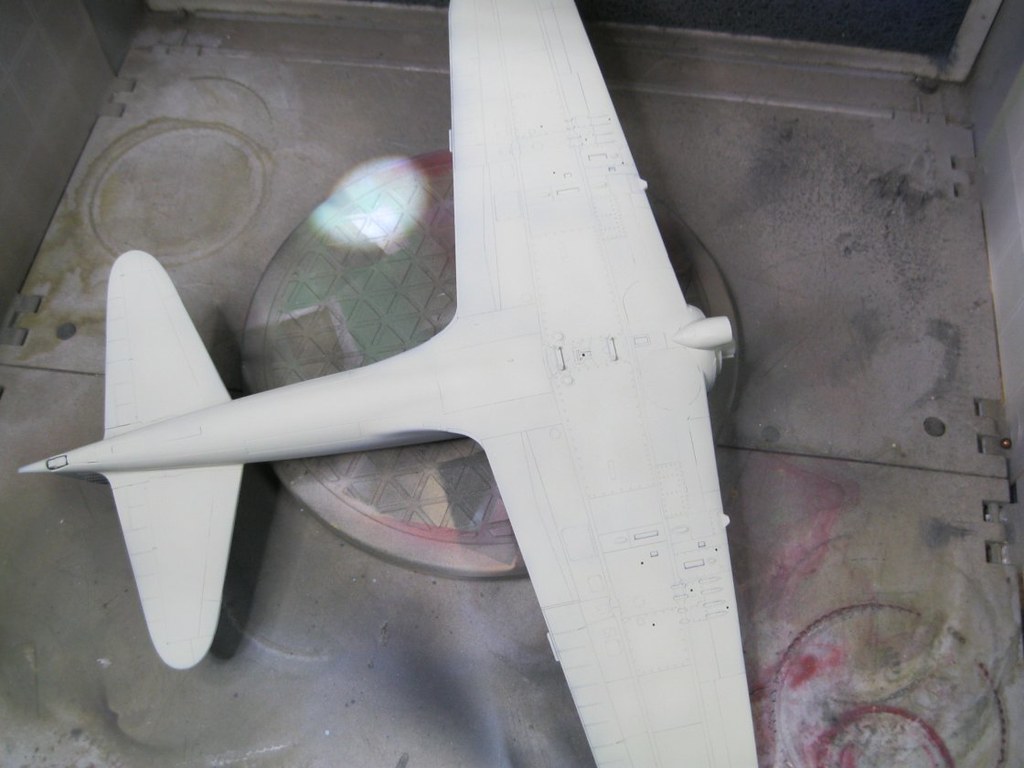
Just a quick update. I redid the primer coat, using semi-gloss black, which gave a much better base, and now I have added the color.
 IMG_9399 by russell amott, on Flickr
 IMG_9402 by russell amott, on Flickr
I will go over the model with future to give it a gloss finish and then do some light weathering. I don't expect the real aircraft would have seen a lot of use and wouldn't have weathered all that much in two or three months.
IMG_9399 by russell amott, on FlickrIMG_9402 by russell amott, on FlickrI will go over the model with future to give it a gloss finish and then do some light weathering. I don't expect the real aircraft would have seen a lot of use and wouldn't have weathered all that much in two or three months.

rochaped

Joined: August 27, 2010
KitMaker: 679 posts
AeroScale: 669 posts

Posted: Saturday, January 13, 2018 - 06:04 AM UTC
Good work Russ, Your zero is coming alone very nicely, it will be a great looking model for sure. 1/72 ?
Cheers
Pedro
Cheers
Pedro
russamotto
Joined: December 14, 2007
KitMaker: 3,389 posts
AeroScale: 375 posts
Posted: Saturday, January 13, 2018 - 06:52 AM UTC
Thank you, Pedro. 1/32.
greif8
Joined: January 17, 2006
KitMaker: 673 posts
AeroScale: 492 posts
Posted: Saturday, January 13, 2018 - 03:31 PM UTC
Very nice cockpit, pilot and engine Russ.
Ernest
Ernest
russamotto
Joined: December 14, 2007
KitMaker: 3,389 posts
AeroScale: 375 posts
Posted: Wednesday, January 24, 2018 - 08:47 PM UTC
Sorry for the long delay. Ernest, thank you.
I have been held up with paint issues. I can't get a smooth coat with the XF-13 and think there is an issue with the bottle-when I mix it the paint looks a little chalky. I have another bottle that doesn't so I will work with that. The other is the Future I used for a gloss coat left odd bumps here and there, and ruined the paint job. I stripped everything, started over, did the underside, taped carefully (frog brand yellow painters tape from the local Lowe's home center, never had a problem with it before), painted the upper surface and I again got the odd grains here and there while I was using the old paint jar. I had mixed the future into the paint which may have contributed. I used 2000 grit wet/dry paper to sand down the bumps, went over the surface with fine steel wool and I will now hit it again with the new paint jar. I pulled the tape off the underside and there is a glittery effect all over the surface. I have no idea where it came from. I tested the tape on several other painted surfaces with no residue. Carefully sanded the surface and it doesn't buff out. On top of it all I have a kidney stone slowly grinding it's way through. So at this point, things have to get better, right? I'll work with the new jar of paint today and see if that helps. No future as that seems to be contributing, or at least not from that bottle, either.
I have been held up with paint issues. I can't get a smooth coat with the XF-13 and think there is an issue with the bottle-when I mix it the paint looks a little chalky. I have another bottle that doesn't so I will work with that. The other is the Future I used for a gloss coat left odd bumps here and there, and ruined the paint job. I stripped everything, started over, did the underside, taped carefully (frog brand yellow painters tape from the local Lowe's home center, never had a problem with it before), painted the upper surface and I again got the odd grains here and there while I was using the old paint jar. I had mixed the future into the paint which may have contributed. I used 2000 grit wet/dry paper to sand down the bumps, went over the surface with fine steel wool and I will now hit it again with the new paint jar. I pulled the tape off the underside and there is a glittery effect all over the surface. I have no idea where it came from. I tested the tape on several other painted surfaces with no residue. Carefully sanded the surface and it doesn't buff out. On top of it all I have a kidney stone slowly grinding it's way through. So at this point, things have to get better, right? I'll work with the new jar of paint today and see if that helps. No future as that seems to be contributing, or at least not from that bottle, either.
russamotto
Joined: December 14, 2007
KitMaker: 3,389 posts
AeroScale: 375 posts
Posted: Wednesday, February 07, 2018 - 05:32 AM UTC
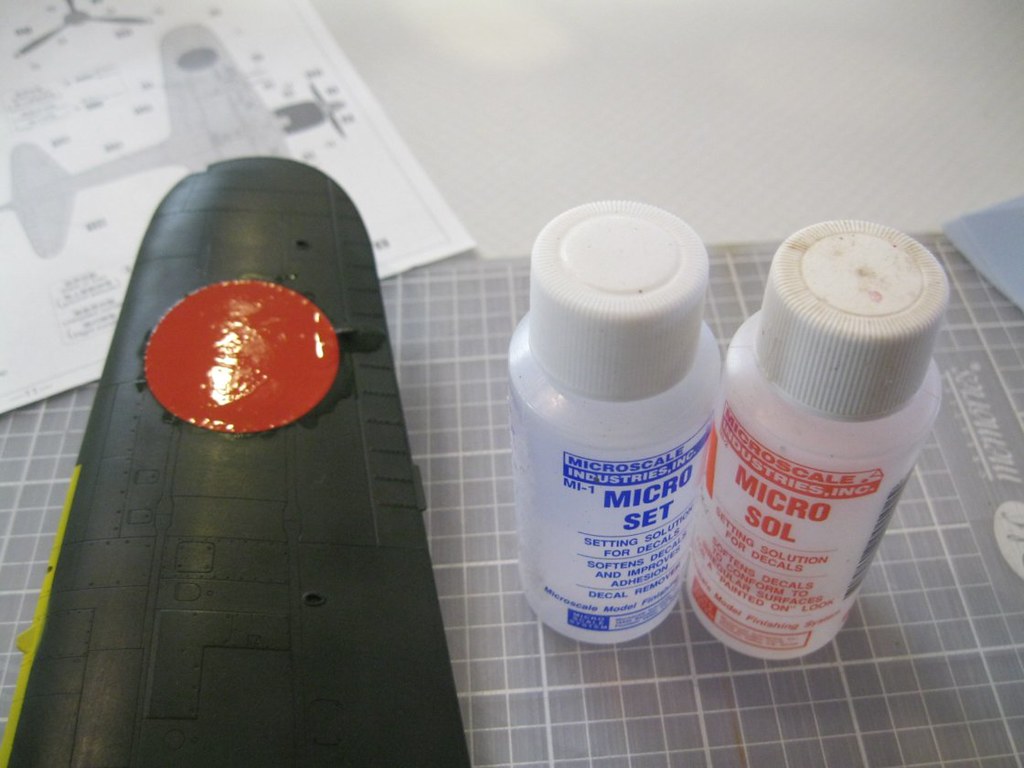
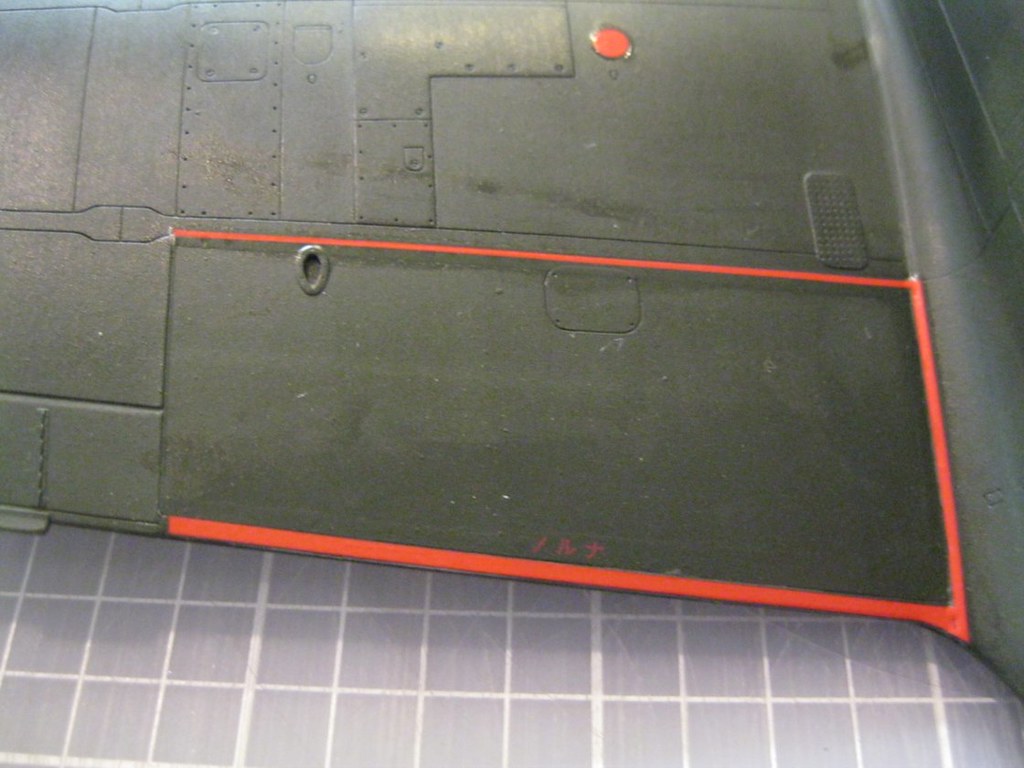
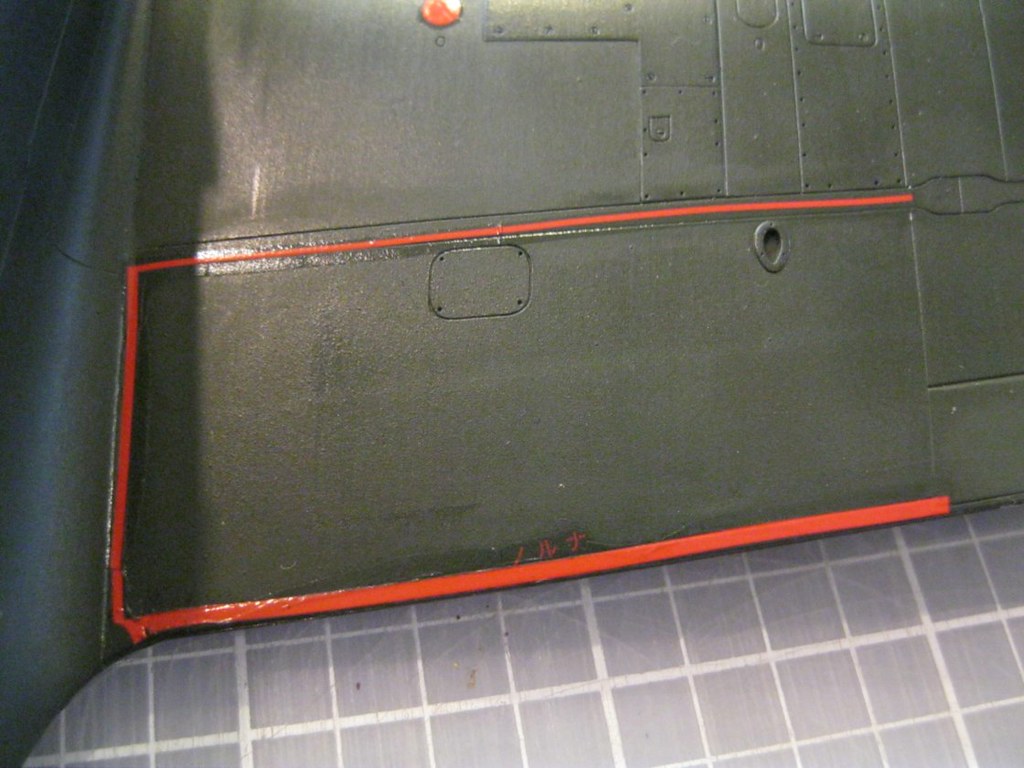
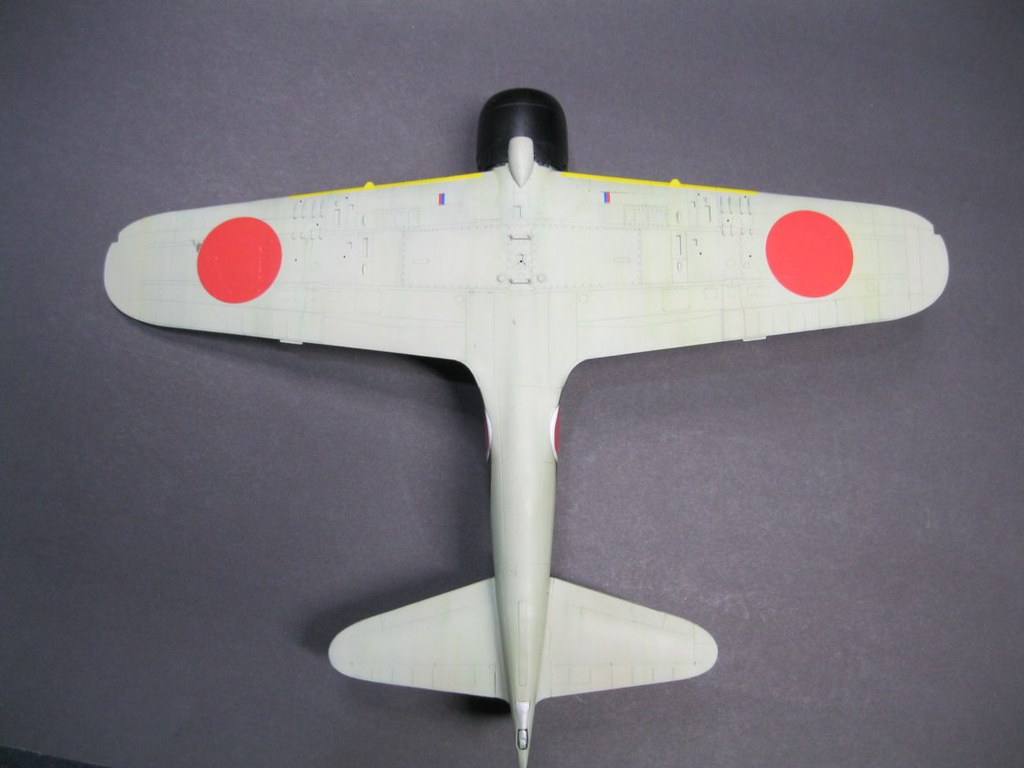
Finally have some updates to post. I redid the paint and carefully buffed everything down. Then did a basic oil dot blending to vary the surface, followed by decals. I used the kit decals and they went down well for the most part, though they are on the thick side. The red outline for the no walk zone is a single piece and very tricky to place. I should have cut it into sections but got lucky with the first side and it all went into place. On the second decal things came apart, literally, and it is crooked as a result. With micro sol and micro set in several applications the decals snuggled down into all the recesses and detail.
 IMG_9403 by russell amott, on Flickr
 IMG_9404 by russell amott, on Flickr
 IMG_9405 by russell amott, on Flickr
 IMG_9406 by russell amott, on Flickr
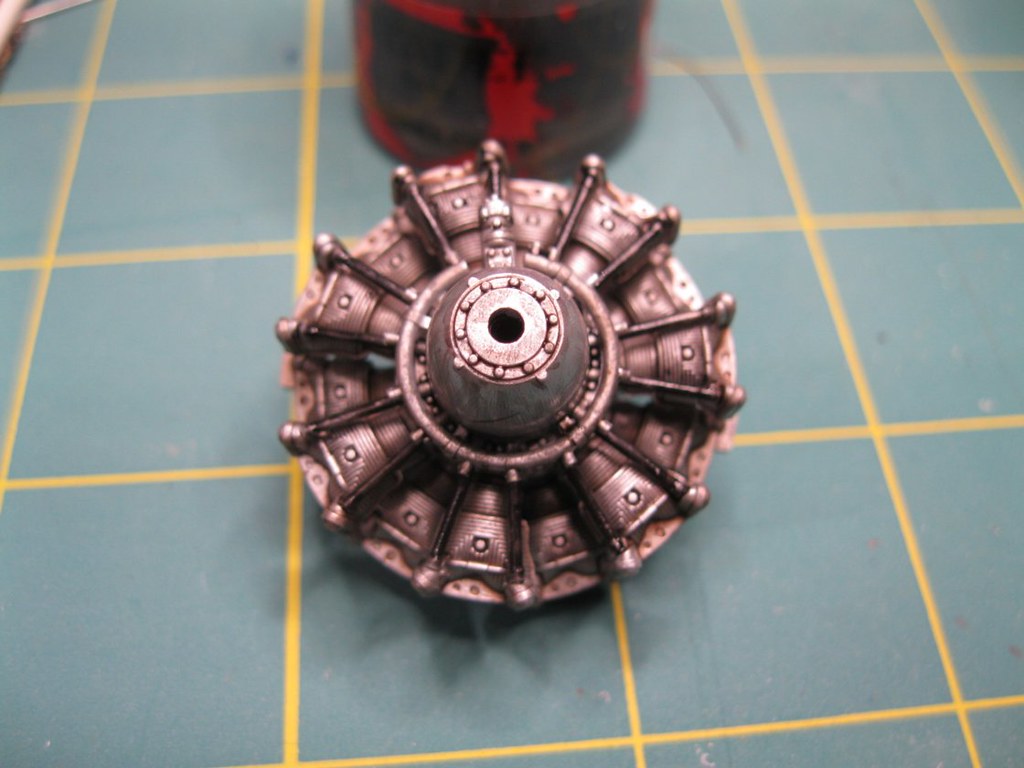
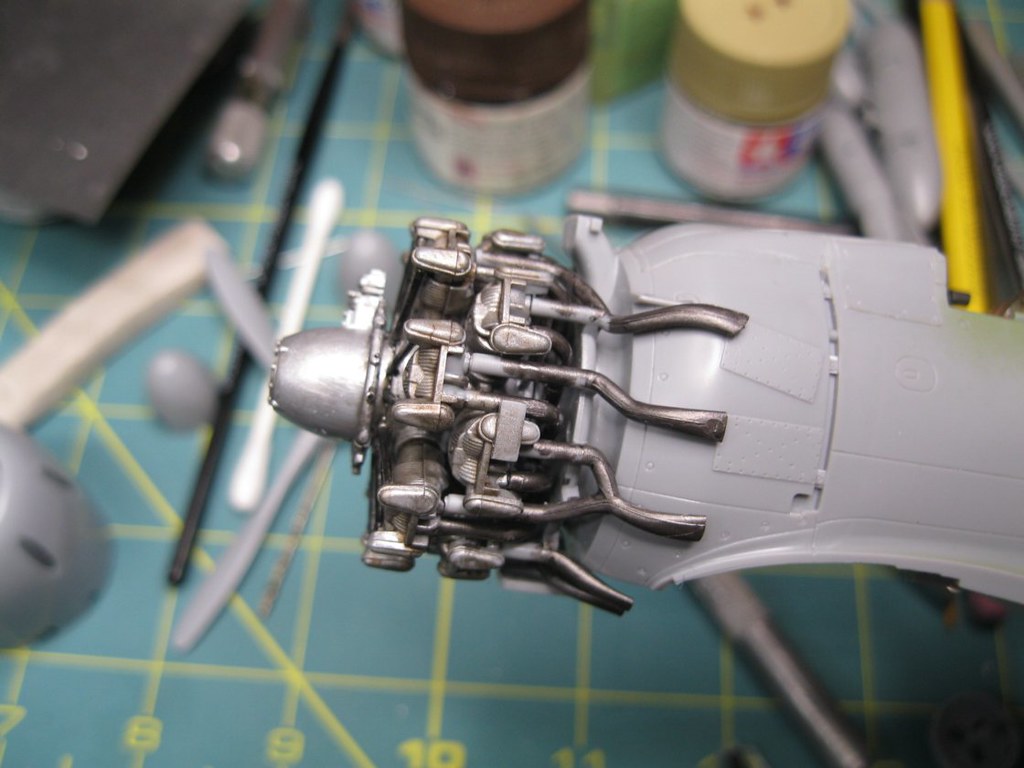
I had painted the yellow identification band across the leading wing edge and added the engine. I used the Vallejo metallic acrylic paint, burnt iron, which went on very well, and then added the cowling.
 IMG_9407 by russell amott, on Flickr
 IMG_9410 by russell amott, on Flickr
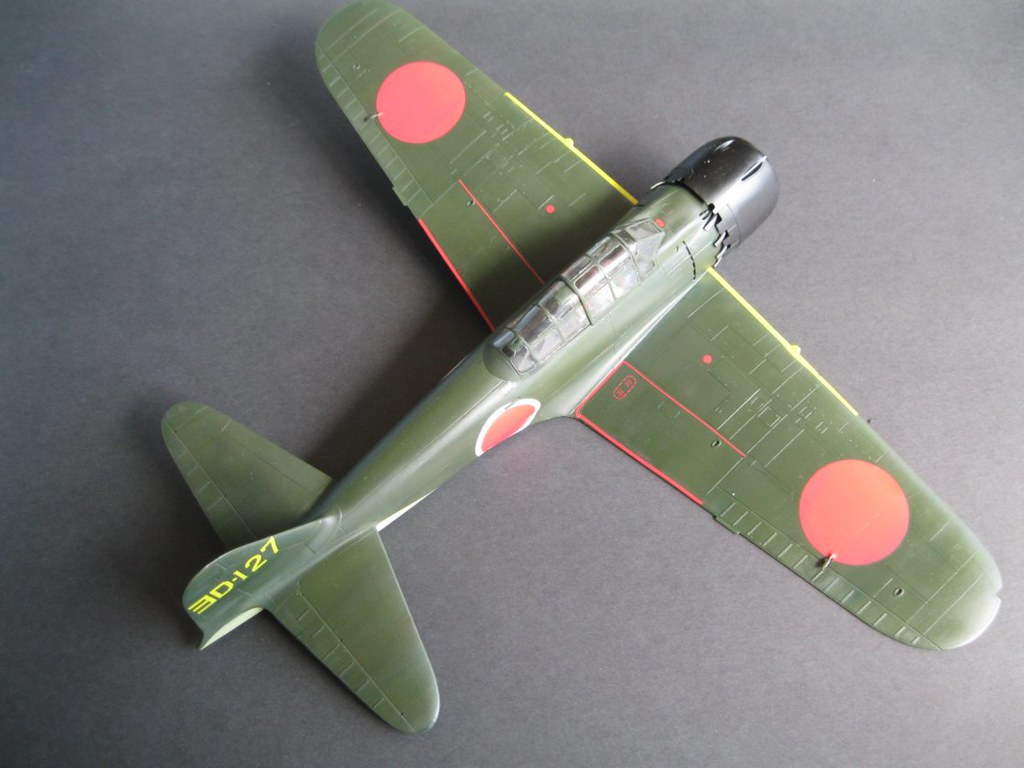
How she looks now with decals on.
 IMG_9412 by russell amott, on Flickr
 IMG_9413 by russell amott, on Flickr
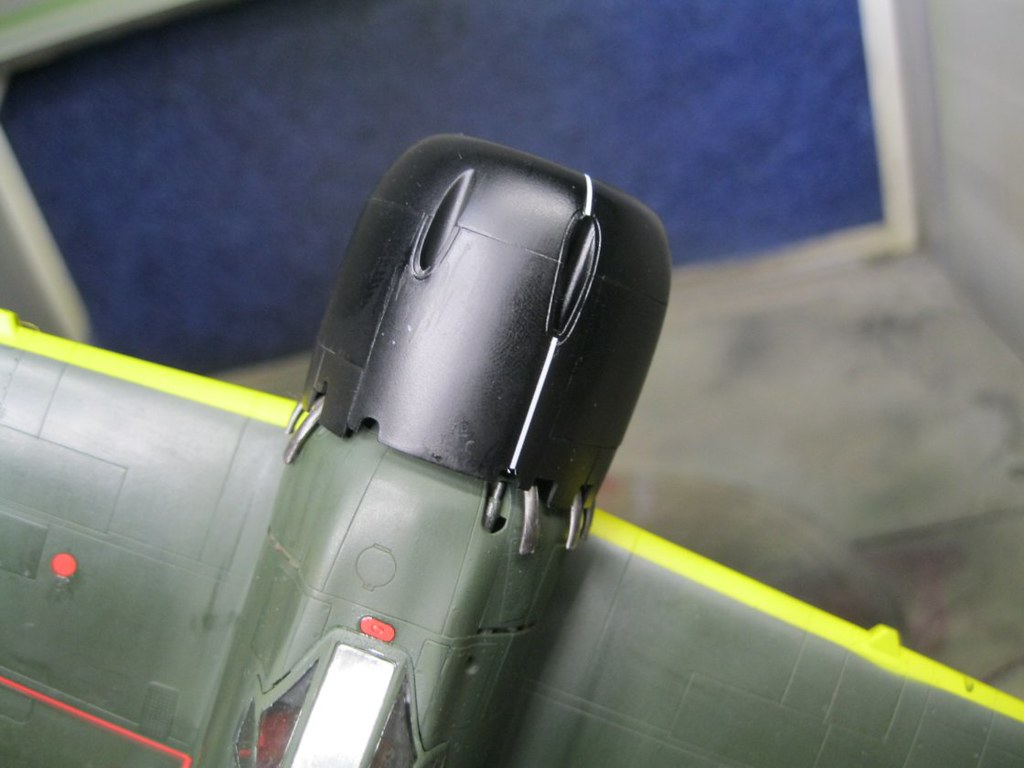
I have placed the canopy and removed the masking. Much of the paint came off as I did so. It doesn't adhere well to the silver base coat. What seemed like a good idea at the time hasn't worked so well. I need to do some detail painting and add the lights and prop. I also need to do a protective glosscoat, and then decide how to display the kit-whether to hang it or place it on a dowel and base. If I missed anything let me know. The kit portion of the build has been great but thinner decals or painting with masks would be better. Aside from my painting issues, this has been a really nice build.
IMG_9403 by russell amott, on FlickrIMG_9404 by russell amott, on FlickrIMG_9405 by russell amott, on FlickrIMG_9406 by russell amott, on FlickrI had painted the yellow identification band across the leading wing edge and added the engine. I used the Vallejo metallic acrylic paint, burnt iron, which went on very well, and then added the cowling.
IMG_9407 by russell amott, on FlickrIMG_9410 by russell amott, on FlickrHow she looks now with decals on.
IMG_9412 by russell amott, on FlickrIMG_9413 by russell amott, on FlickrI have placed the canopy and removed the masking. Much of the paint came off as I did so. It doesn't adhere well to the silver base coat. What seemed like a good idea at the time hasn't worked so well. I need to do some detail painting and add the lights and prop. I also need to do a protective glosscoat, and then decide how to display the kit-whether to hang it or place it on a dowel and base. If I missed anything let me know. The kit portion of the build has been great but thinner decals or painting with masks would be better. Aside from my painting issues, this has been a really nice build.
 |

WEB HOSTING BY


Copyright ©2021 AeroScale and Kitmaker Network, a subsidiary of Silver Star Enterprises
All Rights Reserved. Please read our Conditions of Use and Privacy Policy.
All Rights Reserved. Please read our Conditions of Use and Privacy Policy.