

G'day folks.
It has been a tough year for me, I lost my father on September 11 (cancer finally got the better of him), home life and work pressures have meant that it has been almost 12 months since I picked up a kit, let alone raised the Xacto in anger! I have been stalking Kitmaker frequently, but not contributing as much as I would like.
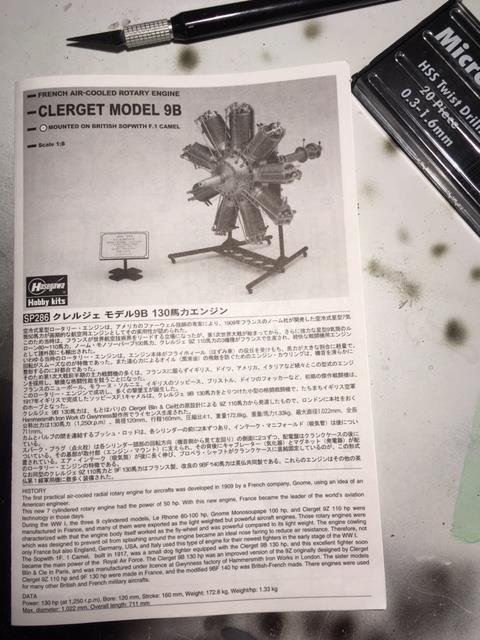
Last night I dragged out a kit that has been in the stash for quite a few years and has some personal significance to me. My review and sprue shots can be seen HERE.
My grandfather brought the prop hub from a Sopwith Camel (130 Clerget variant) back from WWI so I want to build an enclosed display with the hub, a 1/8th scale model of the Clerget 130 engine, and a model of the F1 Camel. I have an old 1/28th Revell Camel kit that I started many years ago (see KoTS 2011) so I will have to drag it out and see what state it is in after several moves. I am also eyeing off the WNW 1/32nd Clerget Camel at the LHS as it has an Aussie marking option.
With humble apologies for my lengthy absence, and for the lengthy intro, let the fun begin.
As always, any feedback, constructive criticism and advice is most welcome.
Early Aviation
Discuss World War I and the early years of aviation thru 1934.
Discuss World War I and the early years of aviation thru 1934.
Hosted by Jim Starkweather
Sopwith Camel Clerget Project

AussieReg

#007

Joined: June 09, 2009
KitMaker: 8,156 posts
AeroScale: 3,756 posts
Posted: Saturday, November 04, 2017 - 06:32 PM UTC

AussieReg
#007
Joined: June 09, 2009
KitMaker: 8,156 posts
AeroScale: 3,756 posts
Posted: Saturday, November 04, 2017 - 06:37 PM UTC
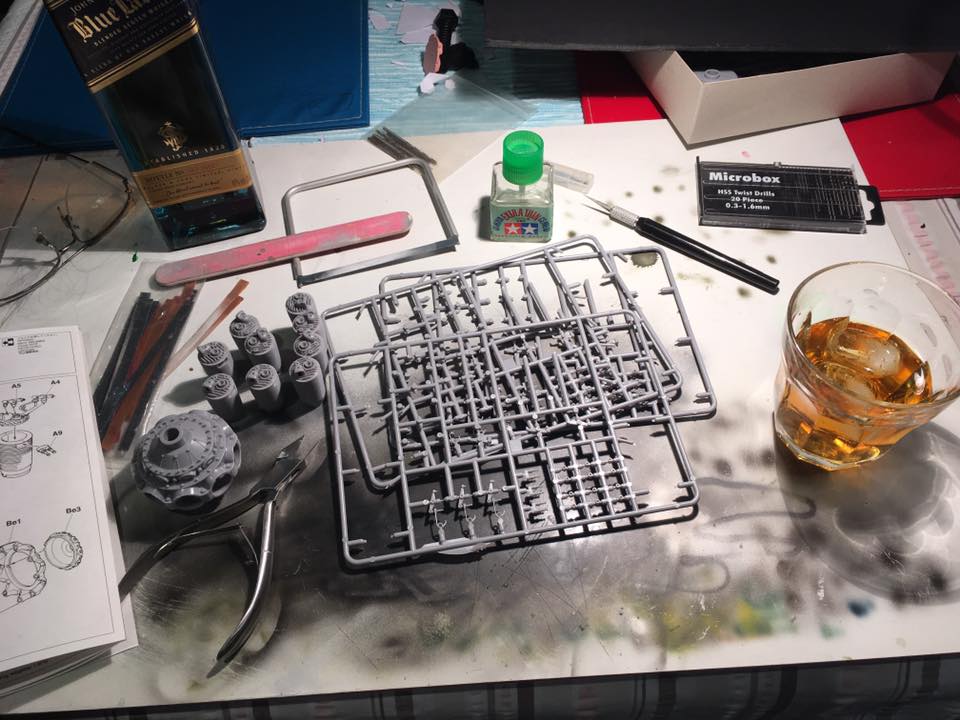
Step 1, open bottle of Johnny Walker Blue Label and pour over ice.
Step 2, reacquaint myself with tool kit.
Step 3, read instructions and fondle sprues.
Step 4, get amongst the styrene!
Step 2, reacquaint myself with tool kit.
Step 3, read instructions and fondle sprues.
Step 4, get amongst the styrene!
AussieReg
#007
Joined: June 09, 2009
KitMaker: 8,156 posts
AeroScale: 3,756 posts
Posted: Saturday, November 04, 2017 - 06:45 PM UTC
Stages 1 and 2 completed:
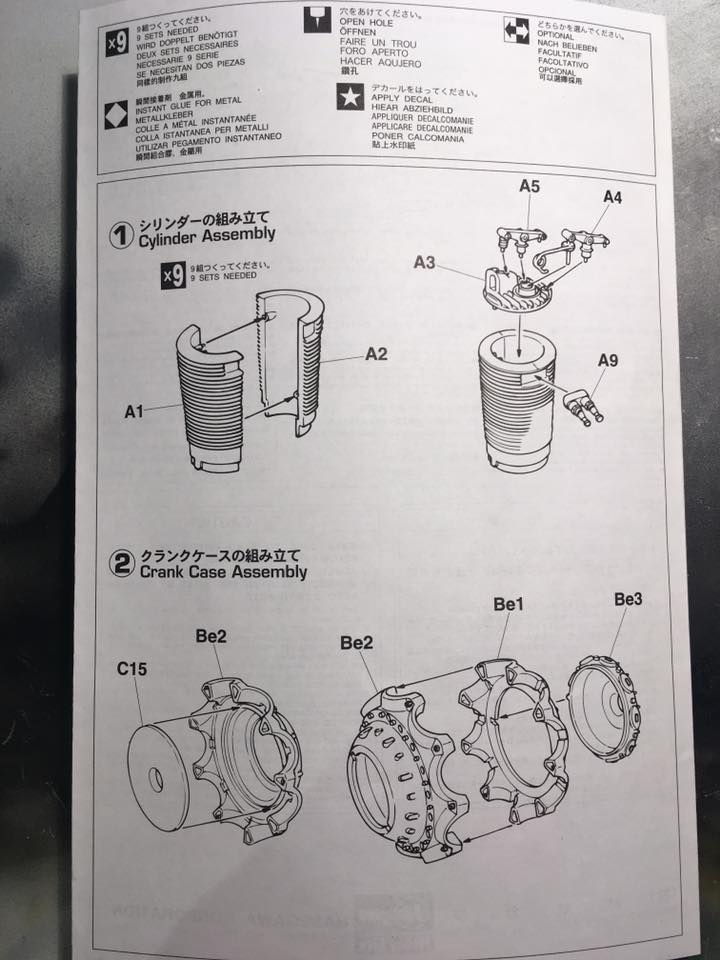
Part number A4 is very fragile. I managed to break 3 of the 9 pieces while removing them from the sprues, but the fix was quite easy.
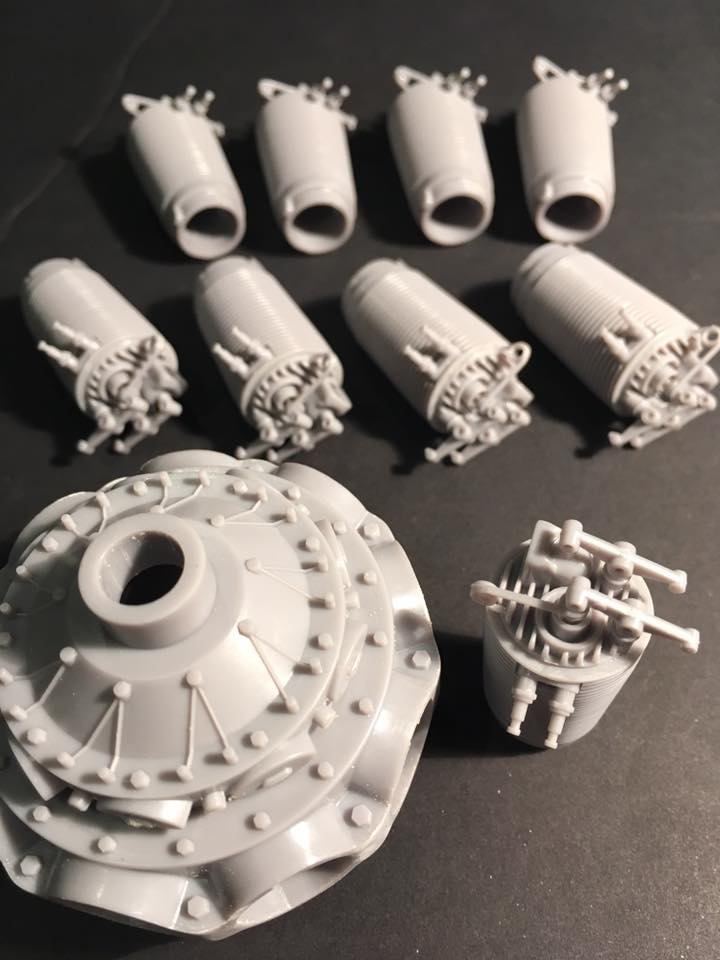
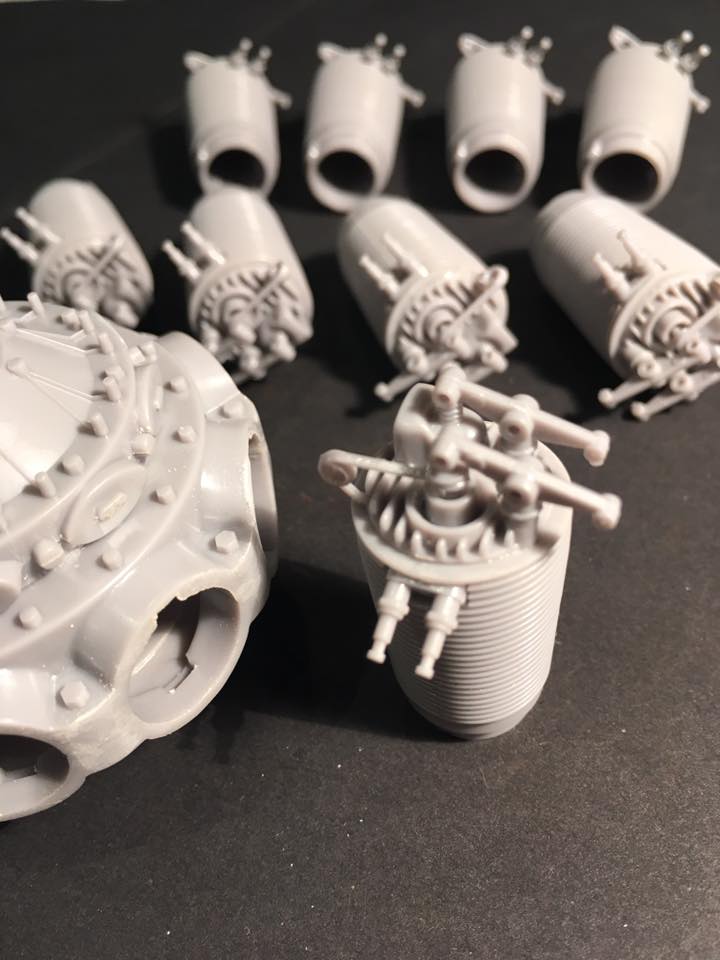
The detail is very crisp, virtually no flash, and the fit is excellent. Very little cleanup or sanding so far.
Part number A4 is very fragile. I managed to break 3 of the 9 pieces while removing them from the sprues, but the fix was quite easy.
The detail is very crisp, virtually no flash, and the fit is excellent. Very little cleanup or sanding so far.
AussieReg
#007
Joined: June 09, 2009
KitMaker: 8,156 posts
AeroScale: 3,756 posts
Posted: Saturday, November 04, 2017 - 06:53 PM UTC
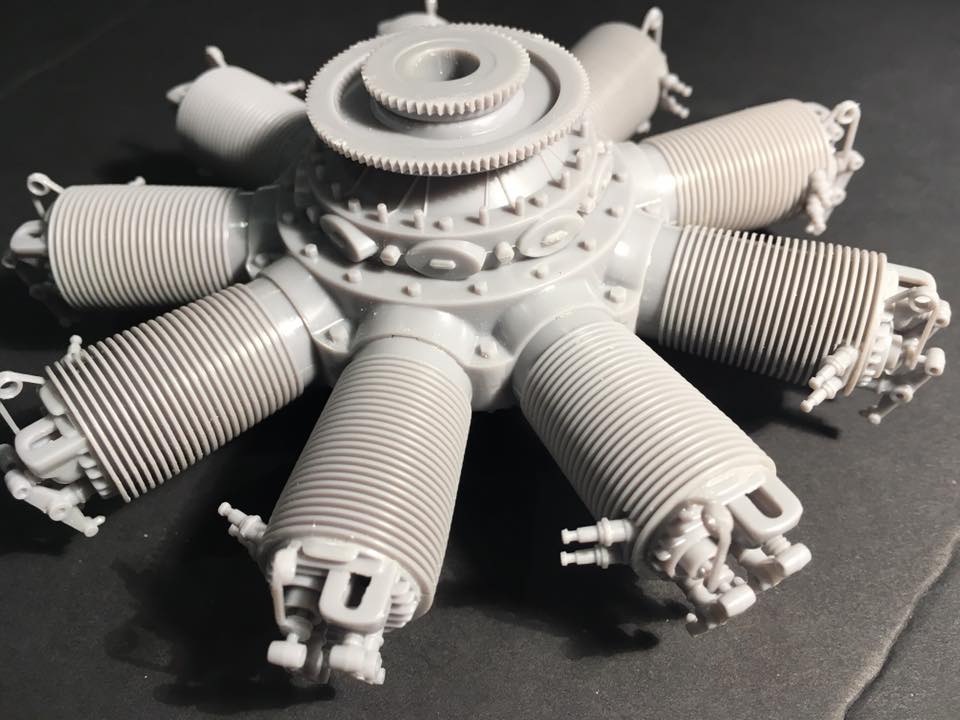
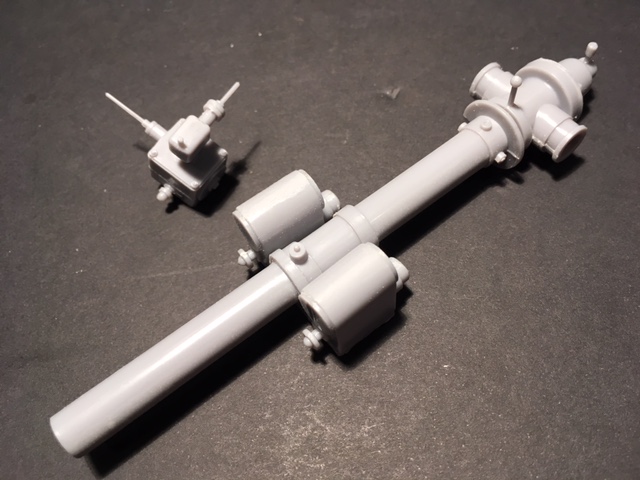
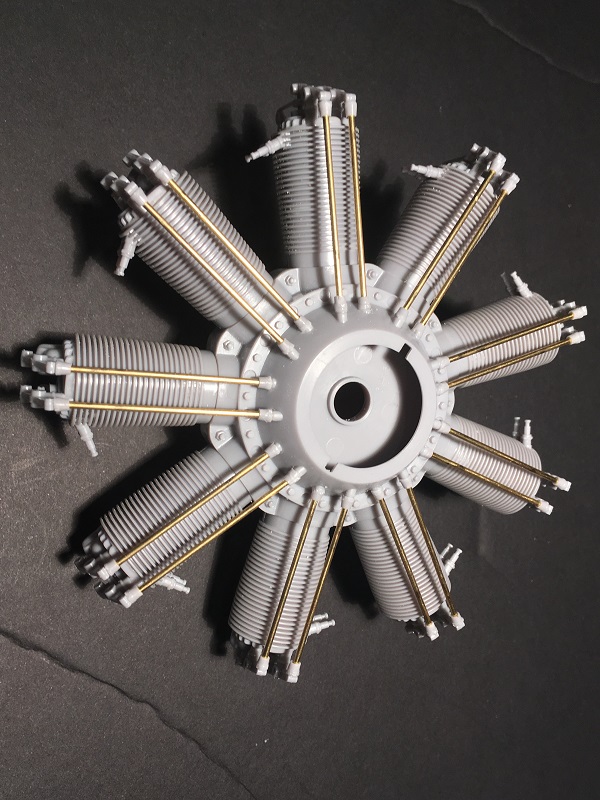
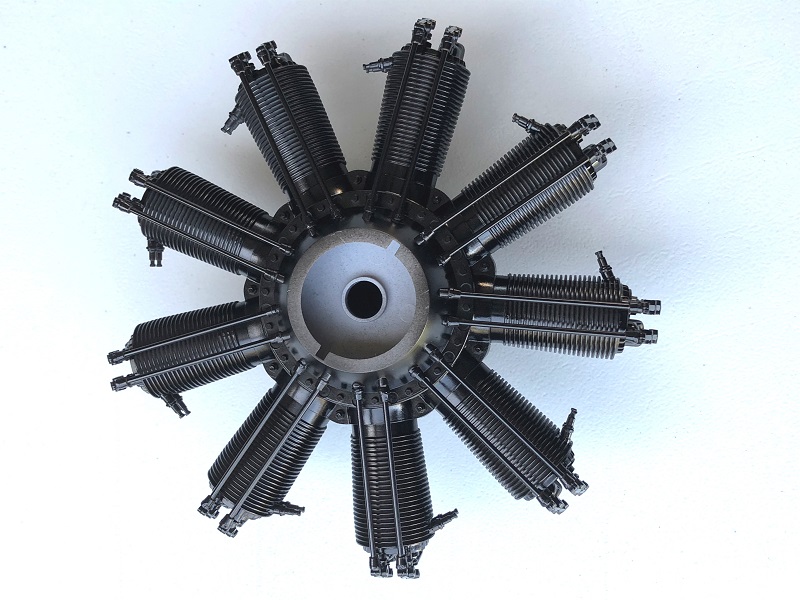
First part of Stage 3 completed, Cylinders assembled to Crank Case. I will paint this stage before I attach the Intake Pipes (to be pre-painted separately).

And for a sense of scale:
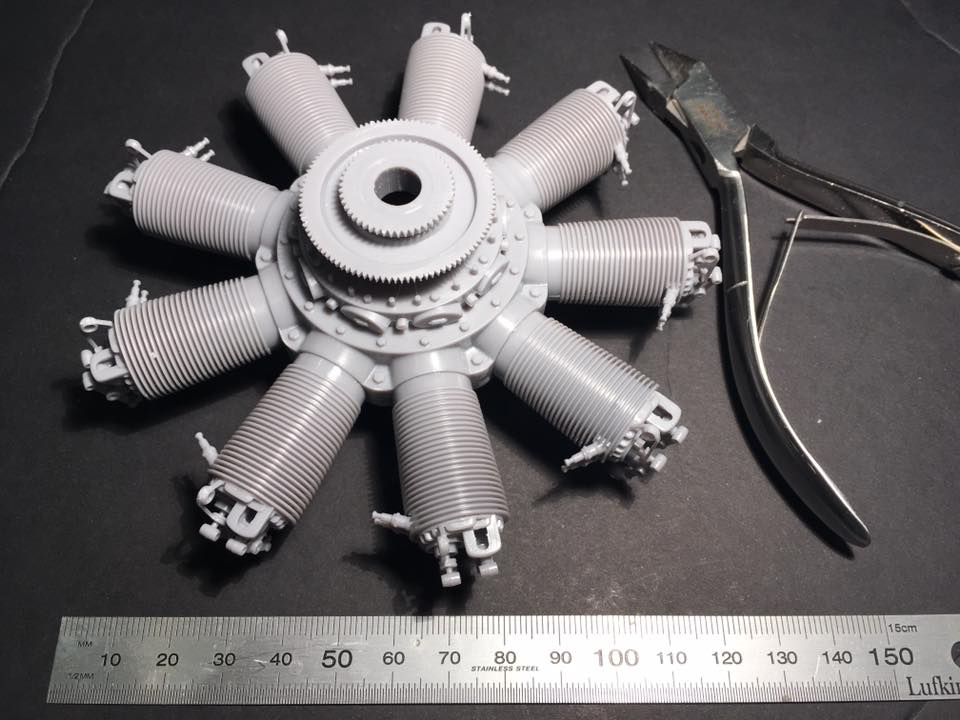
And for a sense of scale:
Cosimodo

#335

Joined: September 03, 2013
KitMaker: 1,808 posts
AeroScale: 195 posts

Posted: Sunday, November 05, 2017 - 04:06 AM UTC
I hope there was some water in that whiskey Damien otherwise I'm not sure you should be operating an Xacto 
Great idea for a project and the detail on the Clerget engine looks pretty good. Looking forward to see how this goes.
cheers
Michael
Great idea for a project and the detail on the Clerget engine looks pretty good. Looking forward to see how this goes.
cheers
Michael

GazzaS
#424
Joined: April 23, 2015
KitMaker: 4,648 posts
AeroScale: 1,938 posts

Posted: Sunday, November 05, 2017 - 04:44 AM UTC
Damian,
Great to see you back at modeling again. I didn't know Johnny Walker has a blue label. My old man liked the red label, but I'm not a big drinker so I was always buying for him.
Gaz
Great to see you back at modeling again. I didn't know Johnny Walker has a blue label. My old man liked the red label, but I'm not a big drinker so I was always buying for him.
Gaz

Merlin
#017


Joined: June 11, 2003
KitMaker: 17,582 posts
AeroScale: 12,795 posts

Posted: Sunday, November 05, 2017 - 04:04 PM UTC
Hi Damian
Really interesting build - I've never seen this engine kit as a Blog.
All the best
Rowan
Really interesting build - I've never seen this engine kit as a Blog.
All the best
Rowan


goodn8

Joined: October 12, 2008
KitMaker: 709 posts
AeroScale: 651 posts
Posted: Sunday, November 05, 2017 - 10:28 PM UTC
Cool project, Damian!
And nice to see you back after a long time. As always I will follow your build.
Thomas
And nice to see you back after a long time. As always I will follow your build.
Thomas


rdt1953

Joined: February 06, 2015
KitMaker: 1,098 posts
AeroScale: 900 posts
Posted: Monday, November 06, 2017 - 03:32 AM UTC
Hi D - glad to see you back ! If the budget will allow it I heartily recommend the WNW Camel- I don't think you will regret it - looking forward to following along!
Cheers - Richard
Cheers - Richard
AussieReg
#007
Joined: June 09, 2009
KitMaker: 8,156 posts
AeroScale: 3,756 posts
Posted: Monday, November 06, 2017 - 12:09 PM UTC
Many thanks for the support guys, much appreciated. It really is good to get back to building even though I started something new rather than completing one of the dozen(s?) or more hangar and garage queens. Oh well, what's one more?
Richard, it's not a question of "if the budget will allow" but more a negotiation with the Minister for War and Finance

Cheers, D
Richard, it's not a question of "if the budget will allow" but more a negotiation with the Minister for War and Finance
Cheers, D
AussieReg
#007
Joined: June 09, 2009
KitMaker: 8,156 posts
AeroScale: 3,756 posts
Posted: Friday, November 10, 2017 - 07:55 PM UTC
A little more progress tonight. Some filling and sanding to do once the cement sets up properly, but no major issues.
Cheers, D
Cheers, D
AussieReg
#007
Joined: June 09, 2009
KitMaker: 8,156 posts
AeroScale: 3,756 posts
Posted: Saturday, November 18, 2017 - 07:52 PM UTC
Hi folks. Some progress tonight, approaching paint stage now!
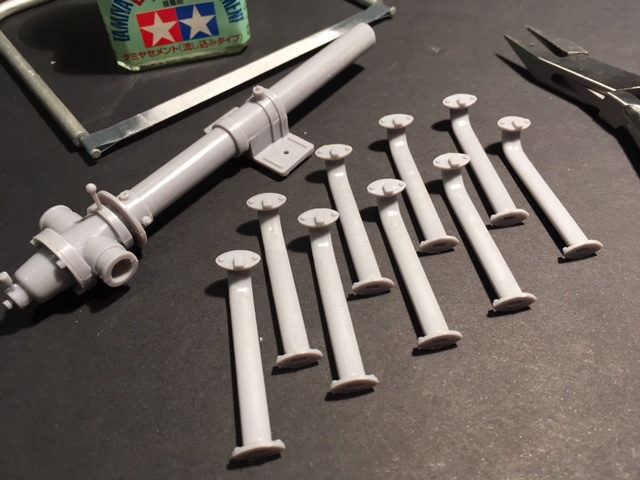
18 brass rods and 36 collars
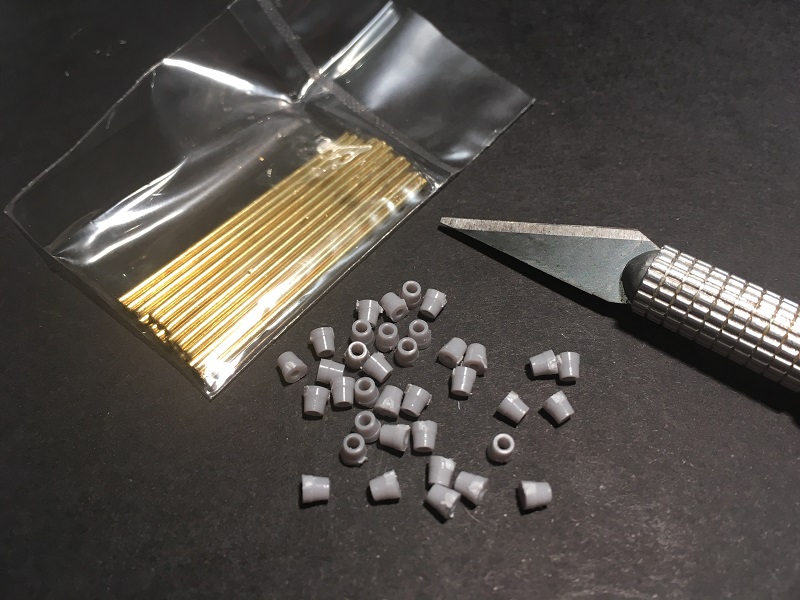
Add some CA and we have 18 push rods
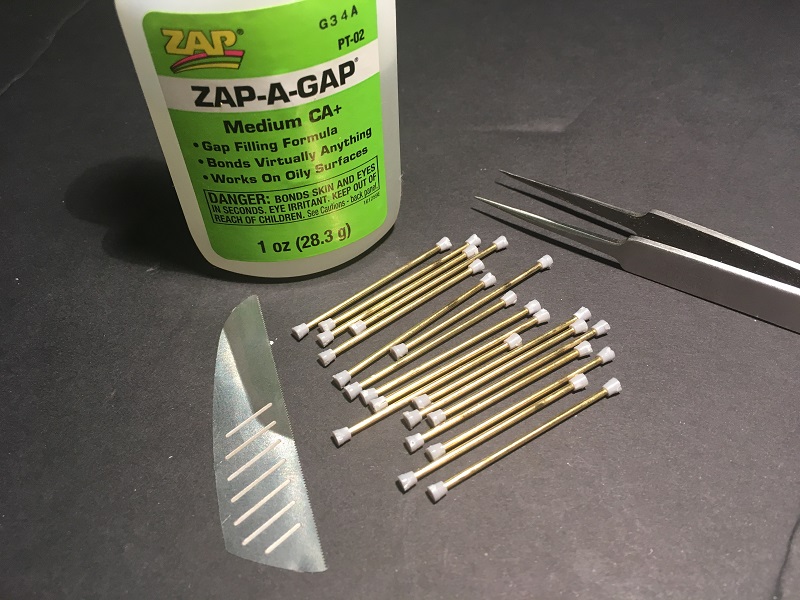
Collars will be cleaned up once the CA is cured fully.
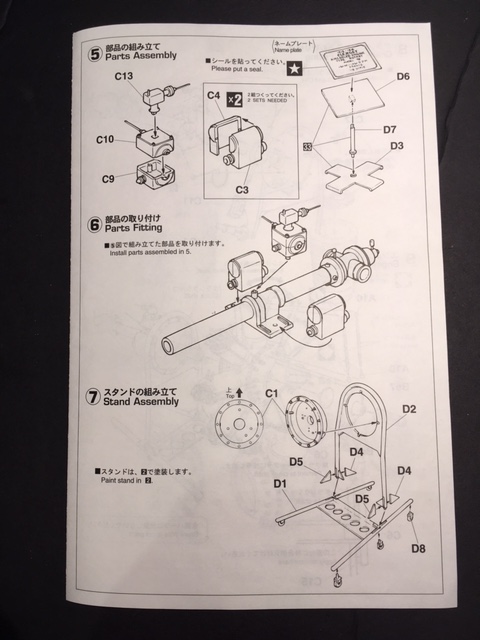
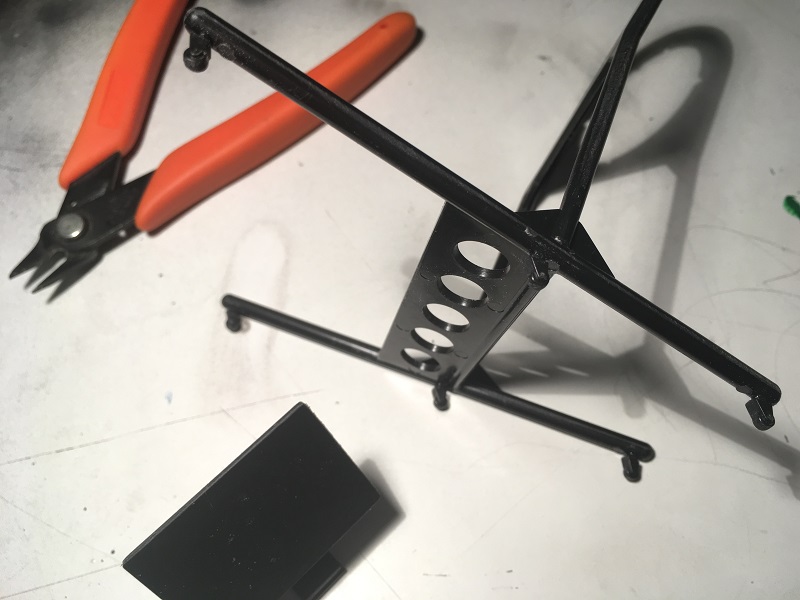
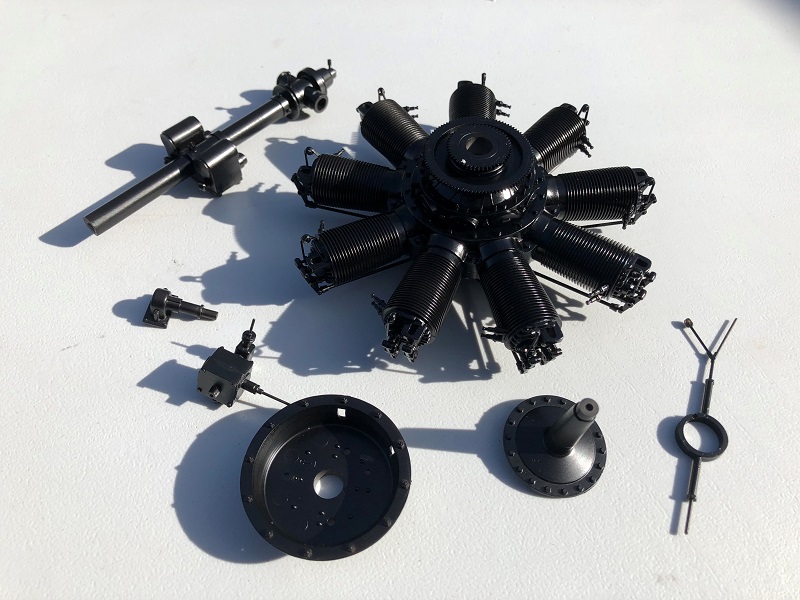
Engine and Label stands assembled
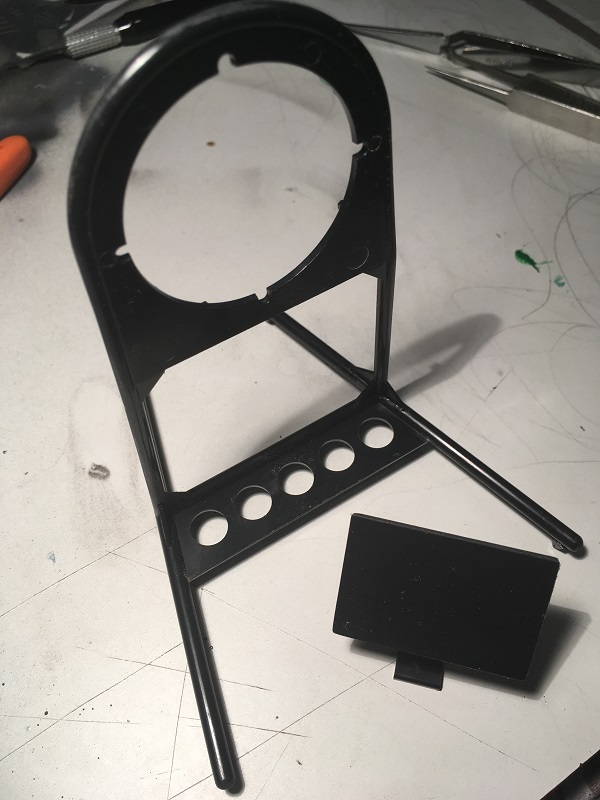
Detail on the engine stand right down to the casters is great!
Found a small error in the instructions, in step 7 parts D4 and D5 need to be reversed, they are slightly different sizes and the channel in the frame base is a very neat fit specific to the correct part.
Cheers, D
18 brass rods and 36 collars
Add some CA and we have 18 push rods
Collars will be cleaned up once the CA is cured fully.
Engine and Label stands assembled
Detail on the engine stand right down to the casters is great!
Found a small error in the instructions, in step 7 parts D4 and D5 need to be reversed, they are slightly different sizes and the channel in the frame base is a very neat fit specific to the correct part.
Cheers, D
AussieReg
#007
Joined: June 09, 2009
KitMaker: 8,156 posts
AeroScale: 3,756 posts
Posted: Tuesday, November 21, 2017 - 07:43 PM UTC
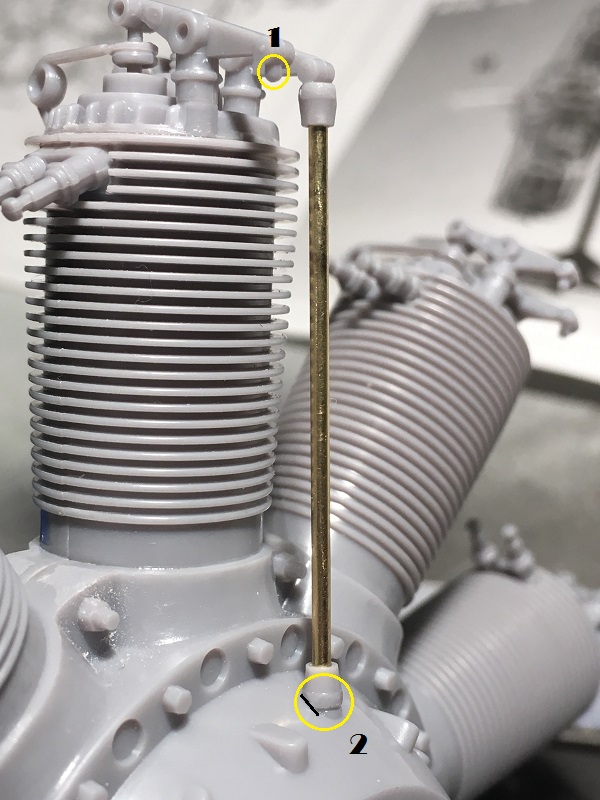
Time to fit the push rods. Some points to note, a bit of trimming work is required here.
As the brass rod pushes most of the way through the collar, I found it necessary to cut off half of the length of the locating pins on the rocker arms (circled 1), I used my sprue cutters.
Each cylinder has an inner and an outer push rod, and in order to get a neat fit of the bottom collar on the inner push rod I had to chamfer the bottom of the collar (circled 2).
In most cases the push rod is slightly too long so I trimmed the length by sanding the ends to prevent too much stress on the rocker arms.

Cheers, D
As the brass rod pushes most of the way through the collar, I found it necessary to cut off half of the length of the locating pins on the rocker arms (circled 1), I used my sprue cutters.
Each cylinder has an inner and an outer push rod, and in order to get a neat fit of the bottom collar on the inner push rod I had to chamfer the bottom of the collar (circled 2).
In most cases the push rod is slightly too long so I trimmed the length by sanding the ends to prevent too much stress on the rocker arms.
Cheers, D

rochaped

Joined: August 27, 2010
KitMaker: 679 posts
AeroScale: 669 posts

Posted: Tuesday, November 21, 2017 - 10:33 PM UTC
Nice work Damian!
Glad to see you on the bench again
Glad to see you on the bench again
AussieReg
#007
Joined: June 09, 2009
KitMaker: 8,156 posts
AeroScale: 3,756 posts
Posted: Wednesday, November 22, 2017 - 08:02 AM UTC
Thanks Pedro, I appreciate you checking in.
I am enjoying getting started again after a lengthy break. I could have carried on with one of the dozen or so in-progress builds currently boxed up in the garage, but after thinking on it I decided that a relatively simple kit with a small part count would be the better option.
Cheers, D
I am enjoying getting started again after a lengthy break. I could have carried on with one of the dozen or so in-progress builds currently boxed up in the garage, but after thinking on it I decided that a relatively simple kit with a small part count would be the better option.
Cheers, D
Cosimodo
#335
Joined: September 03, 2013
KitMaker: 1,808 posts
AeroScale: 195 posts
Posted: Wednesday, November 22, 2017 - 02:07 PM UTC
Close up the detail looks pretty good on this. Nice work on getting the fit just right. I would guess at this scale it becomes fairly obvious if doesn't sit right.
cheers
Michael
cheers
Michael
AussieReg
#007
Joined: June 09, 2009
KitMaker: 8,156 posts
AeroScale: 3,756 posts
Posted: Wednesday, November 22, 2017 - 03:42 PM UTC
Thanks Michael.
You are completely correct. If I located the bottom collar of the inner push rod without the small chamfer, it barely sat on the locating point and just looked out of place. An extra few minutes work on each push rod for a much better result, an extra few minutes enjoying this great kit.
Cheers, D
You are completely correct. If I located the bottom collar of the inner push rod without the small chamfer, it barely sat on the locating point and just looked out of place. An extra few minutes work on each push rod for a much better result, an extra few minutes enjoying this great kit.
Cheers, D
AussieReg
#007
Joined: June 09, 2009
KitMaker: 8,156 posts
AeroScale: 3,756 posts
Posted: Friday, November 24, 2017 - 05:17 AM UTC
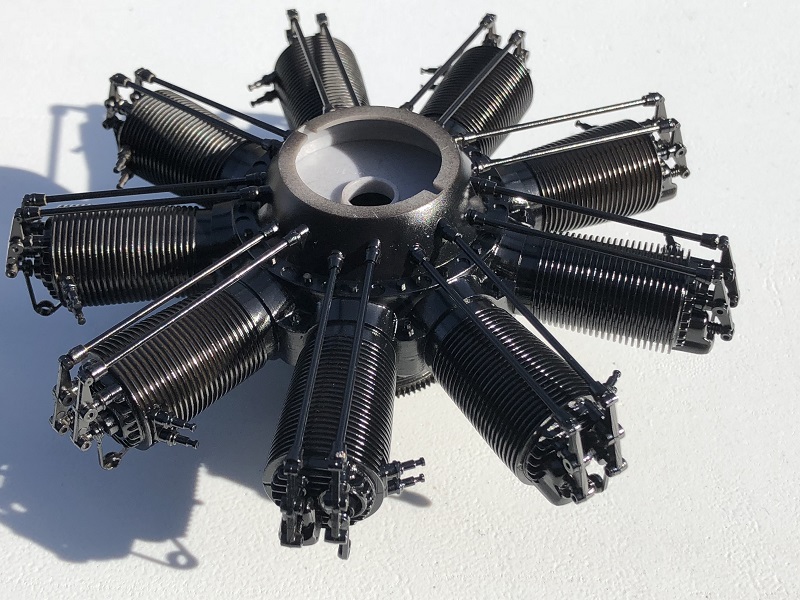
Push rods all fitted last night.
Time to get the rat-tail files out and do some clean up of mould lines and seams, then time for paint.
Cheers, D
Time to get the rat-tail files out and do some clean up of mould lines and seams, then time for paint.
Cheers, D

JackFlash
Joined: January 25, 2004
KitMaker: 11,669 posts
AeroScale: 11,011 posts
Posted: Tuesday, January 09, 2018 - 11:30 AM UTC
Very Nice indeed!

RussellE
#306
Joined: June 27, 2010
KitMaker: 3,959 posts
AeroScale: 598 posts
Posted: Tuesday, January 23, 2018 - 02:00 AM UTC
Great to see you back on the tools Damian: I too know how troublesome "life" can be when it gets in the way of "more important stuff" 
This is looking great and I'm watching with interest
This is looking great and I'm watching with interest

AussieReg
#007
Joined: June 09, 2009
KitMaker: 8,156 posts
AeroScale: 3,756 posts
Posted: Sunday, February 18, 2018 - 06:46 PM UTC
Stephen, Russell, many thanks for checking in. Your feedback is much appreciated.
Tidying up of seams and sprue points completed, I gave the components a coat of Tamiya Semi-Gloss Black acrylic, thinned about 50:50 with Mr Levelling Thinner. First time I've used this thinner, must say I'm very impressed. Very smooth finish, absolutely no tip clogging on my old Paasche H, easy cleanup after.
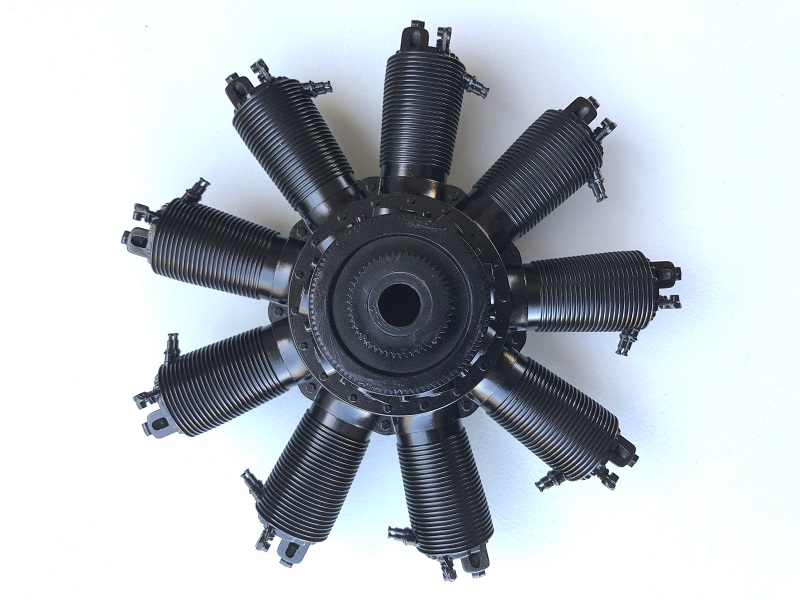
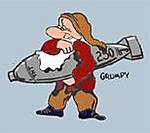
Alclad next for the main NMF, then some weathering to try to achieve a used look, something like this-

Cheers, D
Tidying up of seams and sprue points completed, I gave the components a coat of Tamiya Semi-Gloss Black acrylic, thinned about 50:50 with Mr Levelling Thinner. First time I've used this thinner, must say I'm very impressed. Very smooth finish, absolutely no tip clogging on my old Paasche H, easy cleanup after.
Alclad next for the main NMF, then some weathering to try to achieve a used look, something like this-
Cheers, D
Joel_W
Joined: December 04, 2010
KitMaker: 11,666 posts
AeroScale: 7,410 posts
Posted: Sunday, February 18, 2018 - 09:02 PM UTC
Damian,
Just found your build. And here I thought you were building every so often a car model. (Going to finally start one from my small stash of race cars).
I'm more then impressed both with your skills, and the kit itself which I've never seen before. I'm pulling up my chair, and will be following along to completion.
Joel


Scrodes

Joined: July 22, 2012
KitMaker: 771 posts
AeroScale: 763 posts
Posted: Monday, February 19, 2018 - 12:33 AM UTC
Quoted Text
Cheers, D
Wow Damian, this is looking great!
I know you've cleaned up the seams and stuff already, but I know how easy it is to miss some - I wanted to make sure you caught the ones on the spark plugs!

AussieReg
#007
Joined: June 09, 2009
KitMaker: 8,156 posts
AeroScale: 3,756 posts
Posted: Monday, February 19, 2018 - 12:46 PM UTC
Quoted Text
Wow Damian, this is looking great!
I know you've cleaned up the seams and stuff already, but I know how easy it is to miss some - I wanted to make sure you caught the ones on the spark plugs!
Thanks Matt, good to have you on board. I filed and scraped at those little plug mould lines and cleaned them up a fair bit. There isn't much material there to play with and I didn't want to lose the detail in the profile of the plugs, so they are still slightly visible

AussieReg
#007
Joined: June 09, 2009
KitMaker: 8,156 posts
AeroScale: 3,756 posts
Posted: Monday, February 19, 2018 - 12:48 PM UTC
Quoted Text
Damian,
Just found your build. And here I thought you were building every so often a car model. (Going to finally start one from my small stash of race cars).
I'm more then impressed both with your skills, and the kit itself which I've never seen before. I'm pulling up my chair, and will be following along to completion.
Joel
G'day Joel, thanks for joining me here. It is a very nice kit, from what I understand was part of a 1/8 scale Sopwith Camel complete kit many years ago. I would love to stumble across one of those in a yard sale!
Glad you guys are enjoying the build so far.
Cheers, D
 |

WEB HOSTING BY


Copyright ©2021 AeroScale and Kitmaker Network, a subsidiary of Silver Star Enterprises
All Rights Reserved. Please read our Conditions of Use and Privacy Policy.
All Rights Reserved. Please read our Conditions of Use and Privacy Policy.