OFFICIAL: The Lost Art Campaign

#305
Christchurch, New Zealand
Joined: February 01, 2006
KitMaker: 1,673 posts
AeroScale: 1,517 posts
Posted: Monday, December 04, 2017 - 11:47 AM UTC
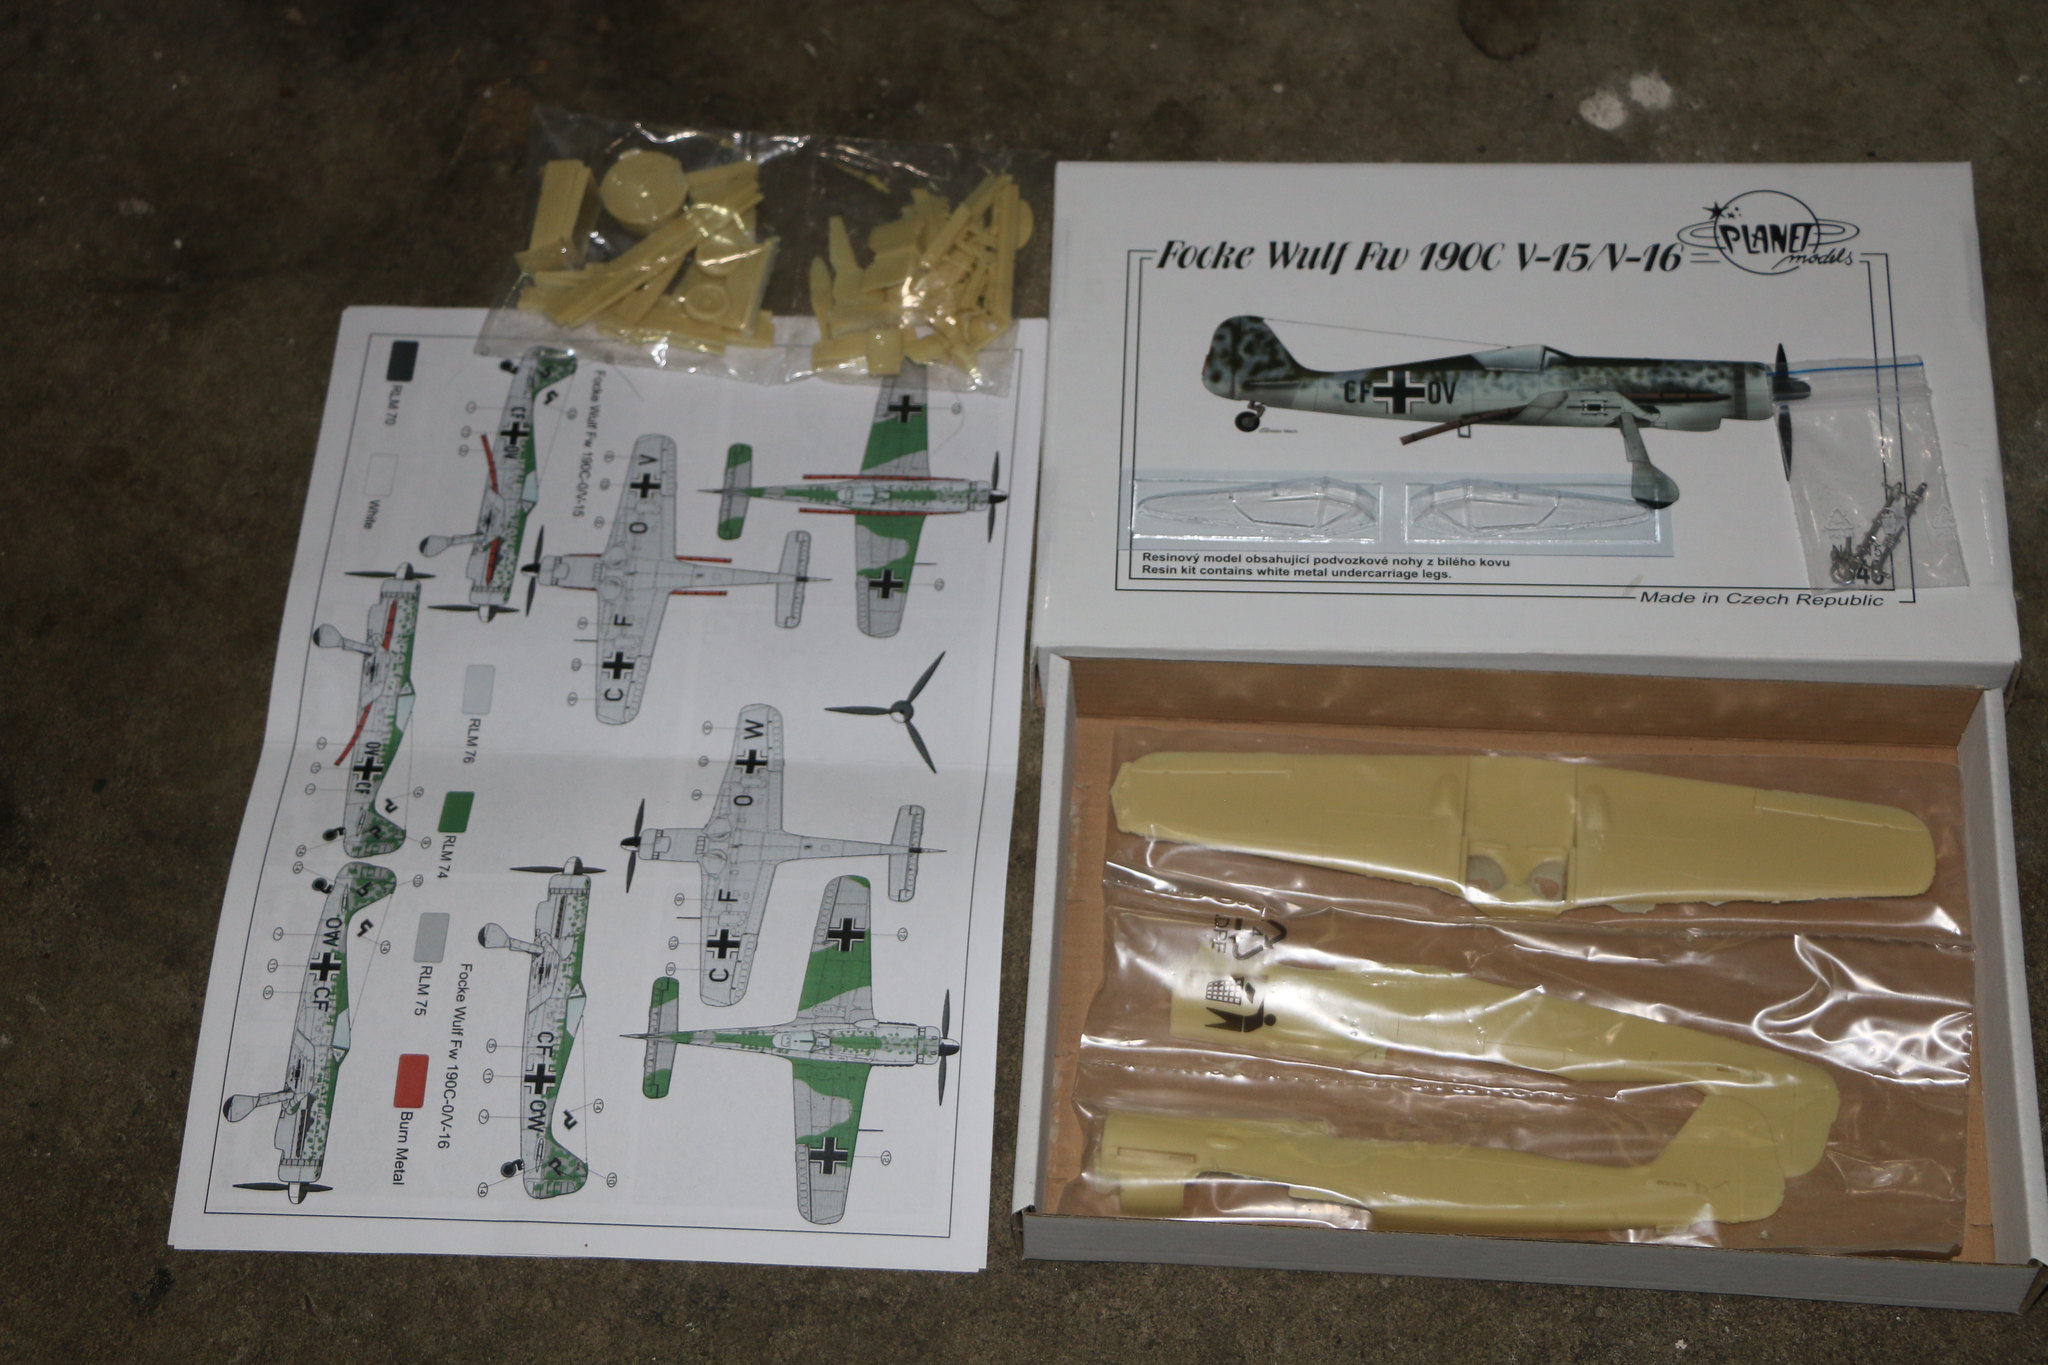
Well my entry arrived in the mail yesterday and I'm thrilled to get it. Something a little different A Fw 190C V15/V16. The C variant of the Fw 190 was fitted with a DB603 engine pressurized cabin and on the final prototype a turbo supercharger. The project was ultimately abandoned due to problems with both the pressurized cabin and turbo supercharge. But the ground work with this variant laid the foundation for the Fw 190D and Ta152 series.
It's a great kit not too many parts but some really great details. However my kit was missing the decals and it was a sealed box too. I've got a message into the seller lets see what happens next?
 IMG_1848
 by
Chris WIlson, on Flickr
Texas, United States
Joined: February 22, 2008
KitMaker: 5,026 posts
AeroScale: 2,811 posts
Posted: Monday, December 04, 2017 - 12:07 PM UTC
Chris, nice looking FW. Is that 1/72 or 1/48?
Bob
If it aint broke dont fix it.
#259
Massachusetts, United States
Joined: October 23, 2011
KitMaker: 2,265 posts
AeroScale: 1,715 posts
Posted: Monday, December 04, 2017 - 01:12 PM UTC
vacu-formed cockpit canopy

#305
Christchurch, New Zealand
Joined: February 01, 2006
KitMaker: 1,673 posts
AeroScale: 1,517 posts
Posted: Monday, December 04, 2017 - 11:47 PM UTC
Hi Bob yes she's in 1/48 gorgeous isn't she? I'm not doing the one with the exhausts as that spoils her lines in my humble opinion.
Jonathon yup vac formed canopy I've had some success with them and they've proided a spare just in case. Here's hoping I get it right first time!
Joined: December 23, 2007
KitMaker: 1,596 posts
AeroScale: 1,275 posts
Posted: Friday, December 15, 2017 - 06:16 PM UTC
Hi again,
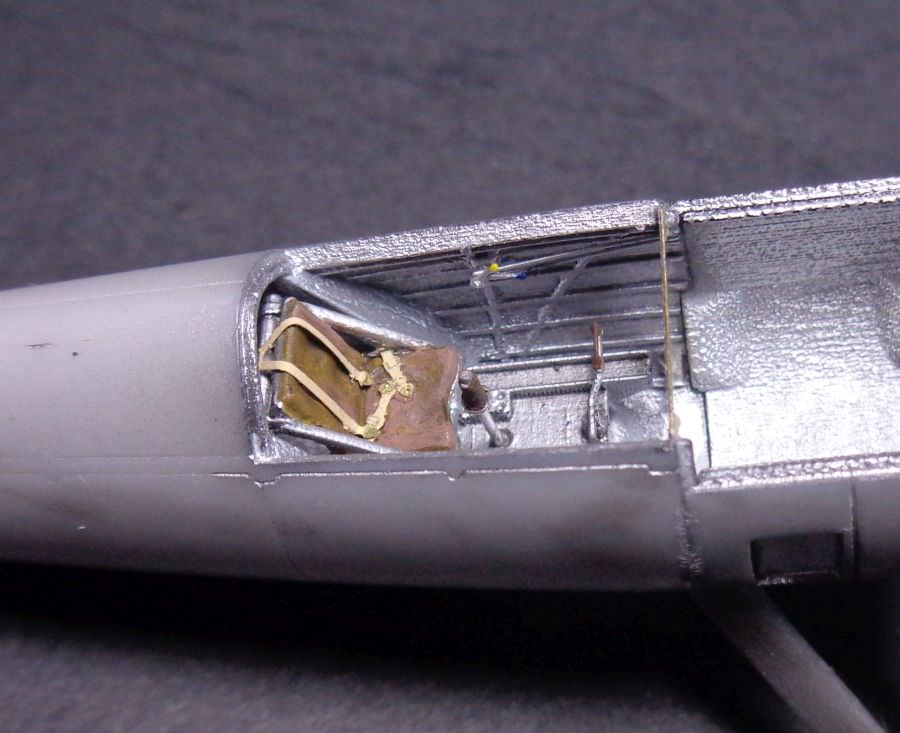
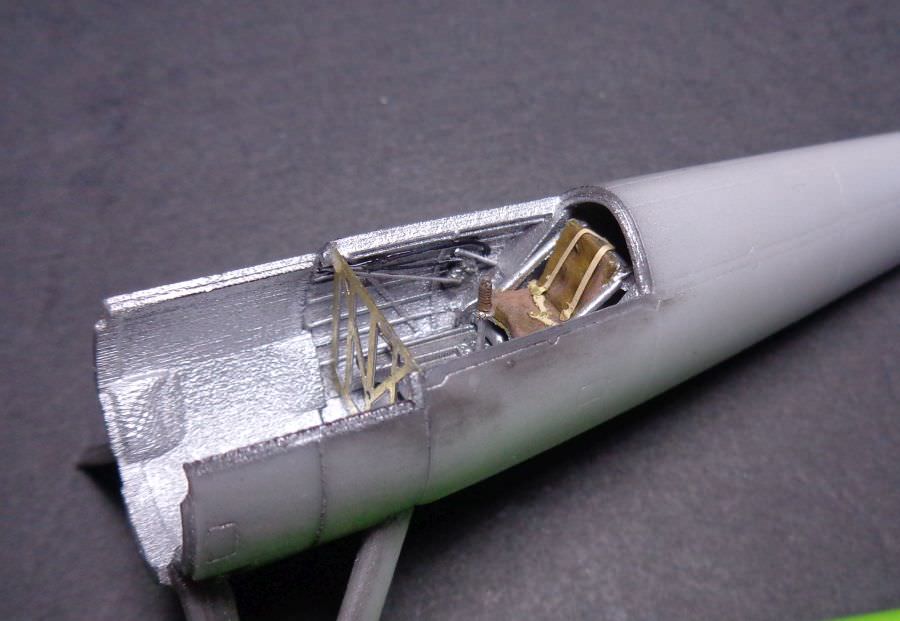
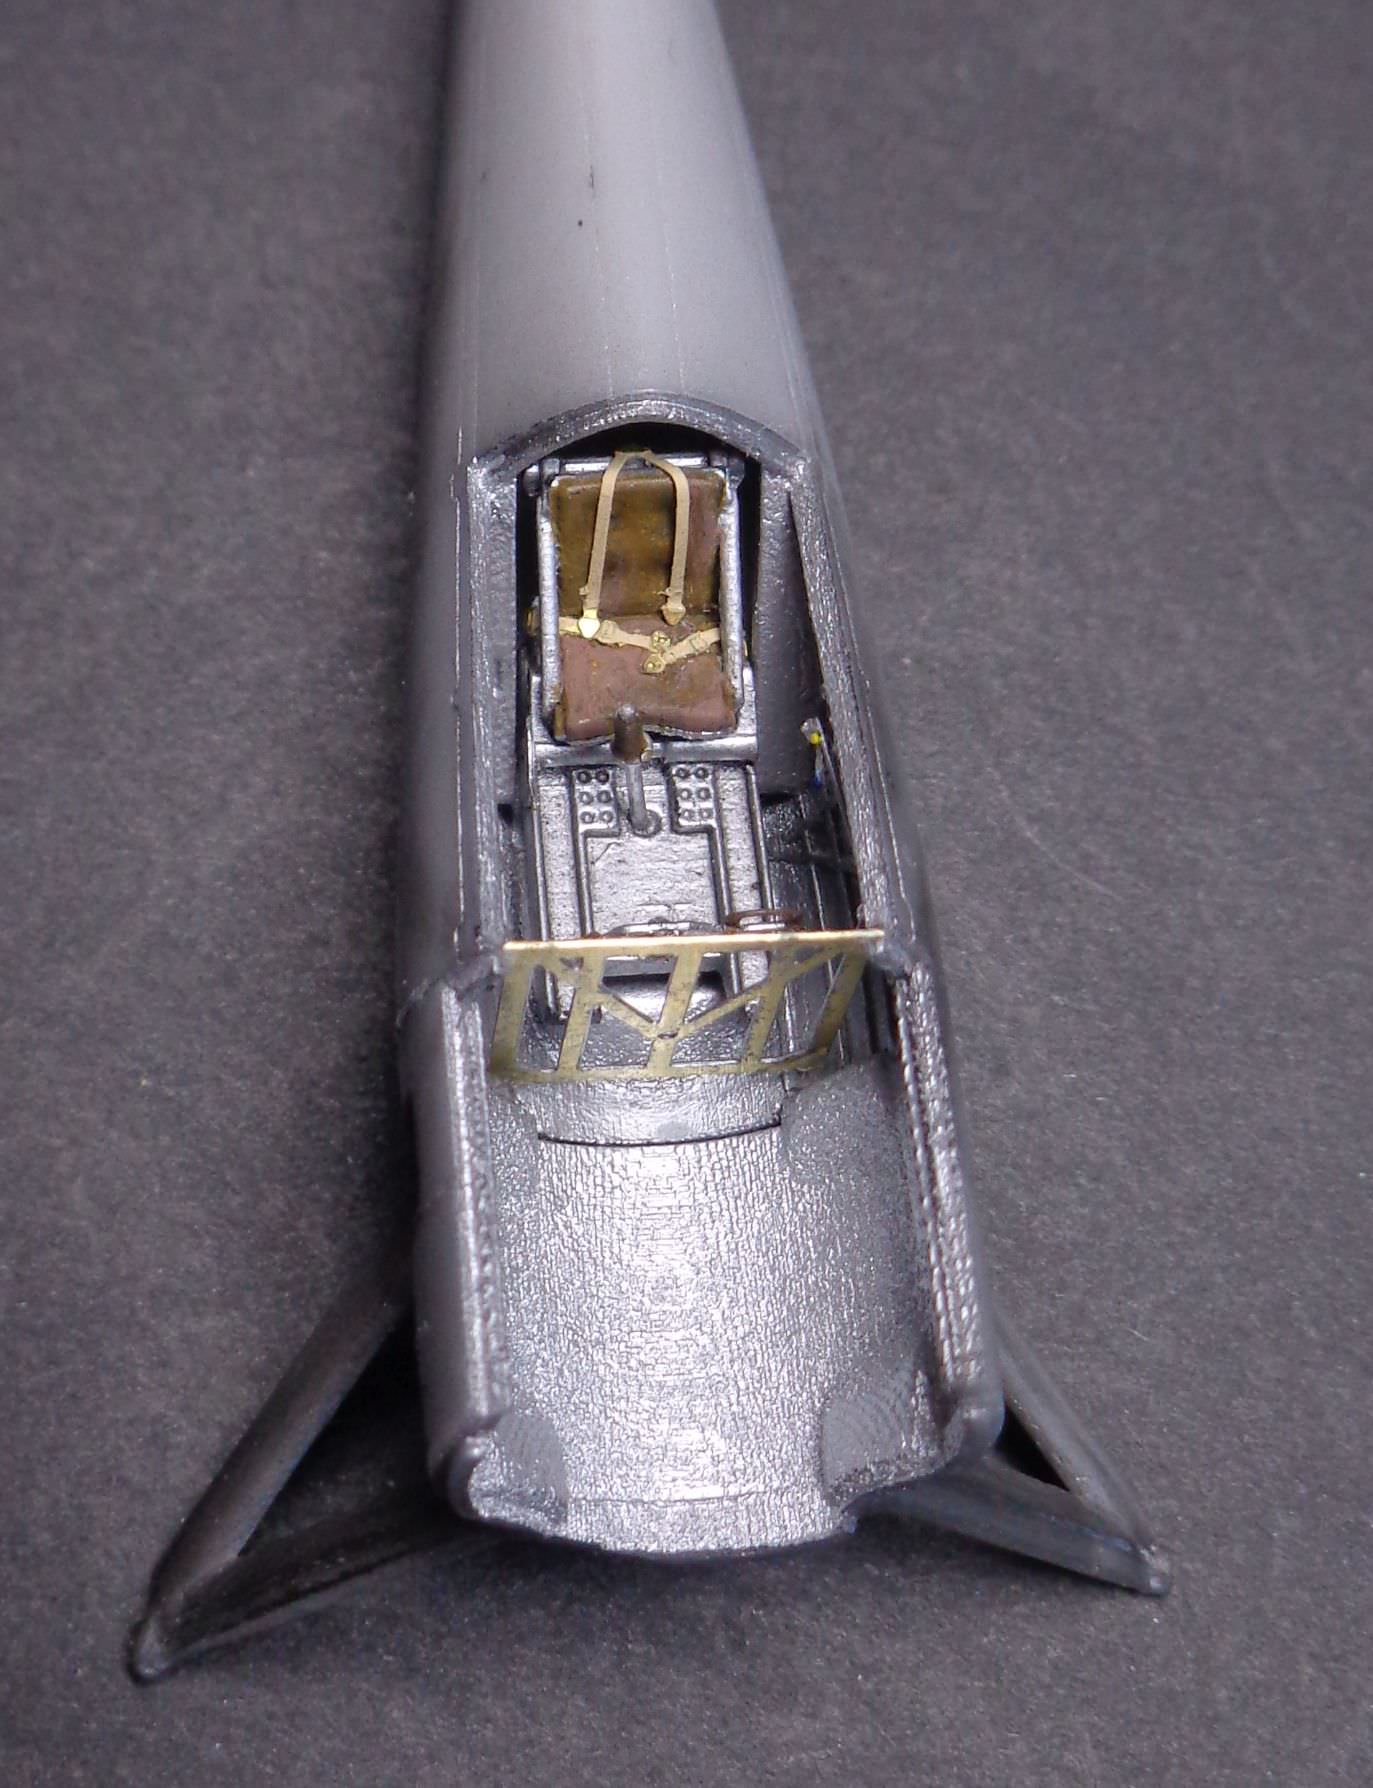
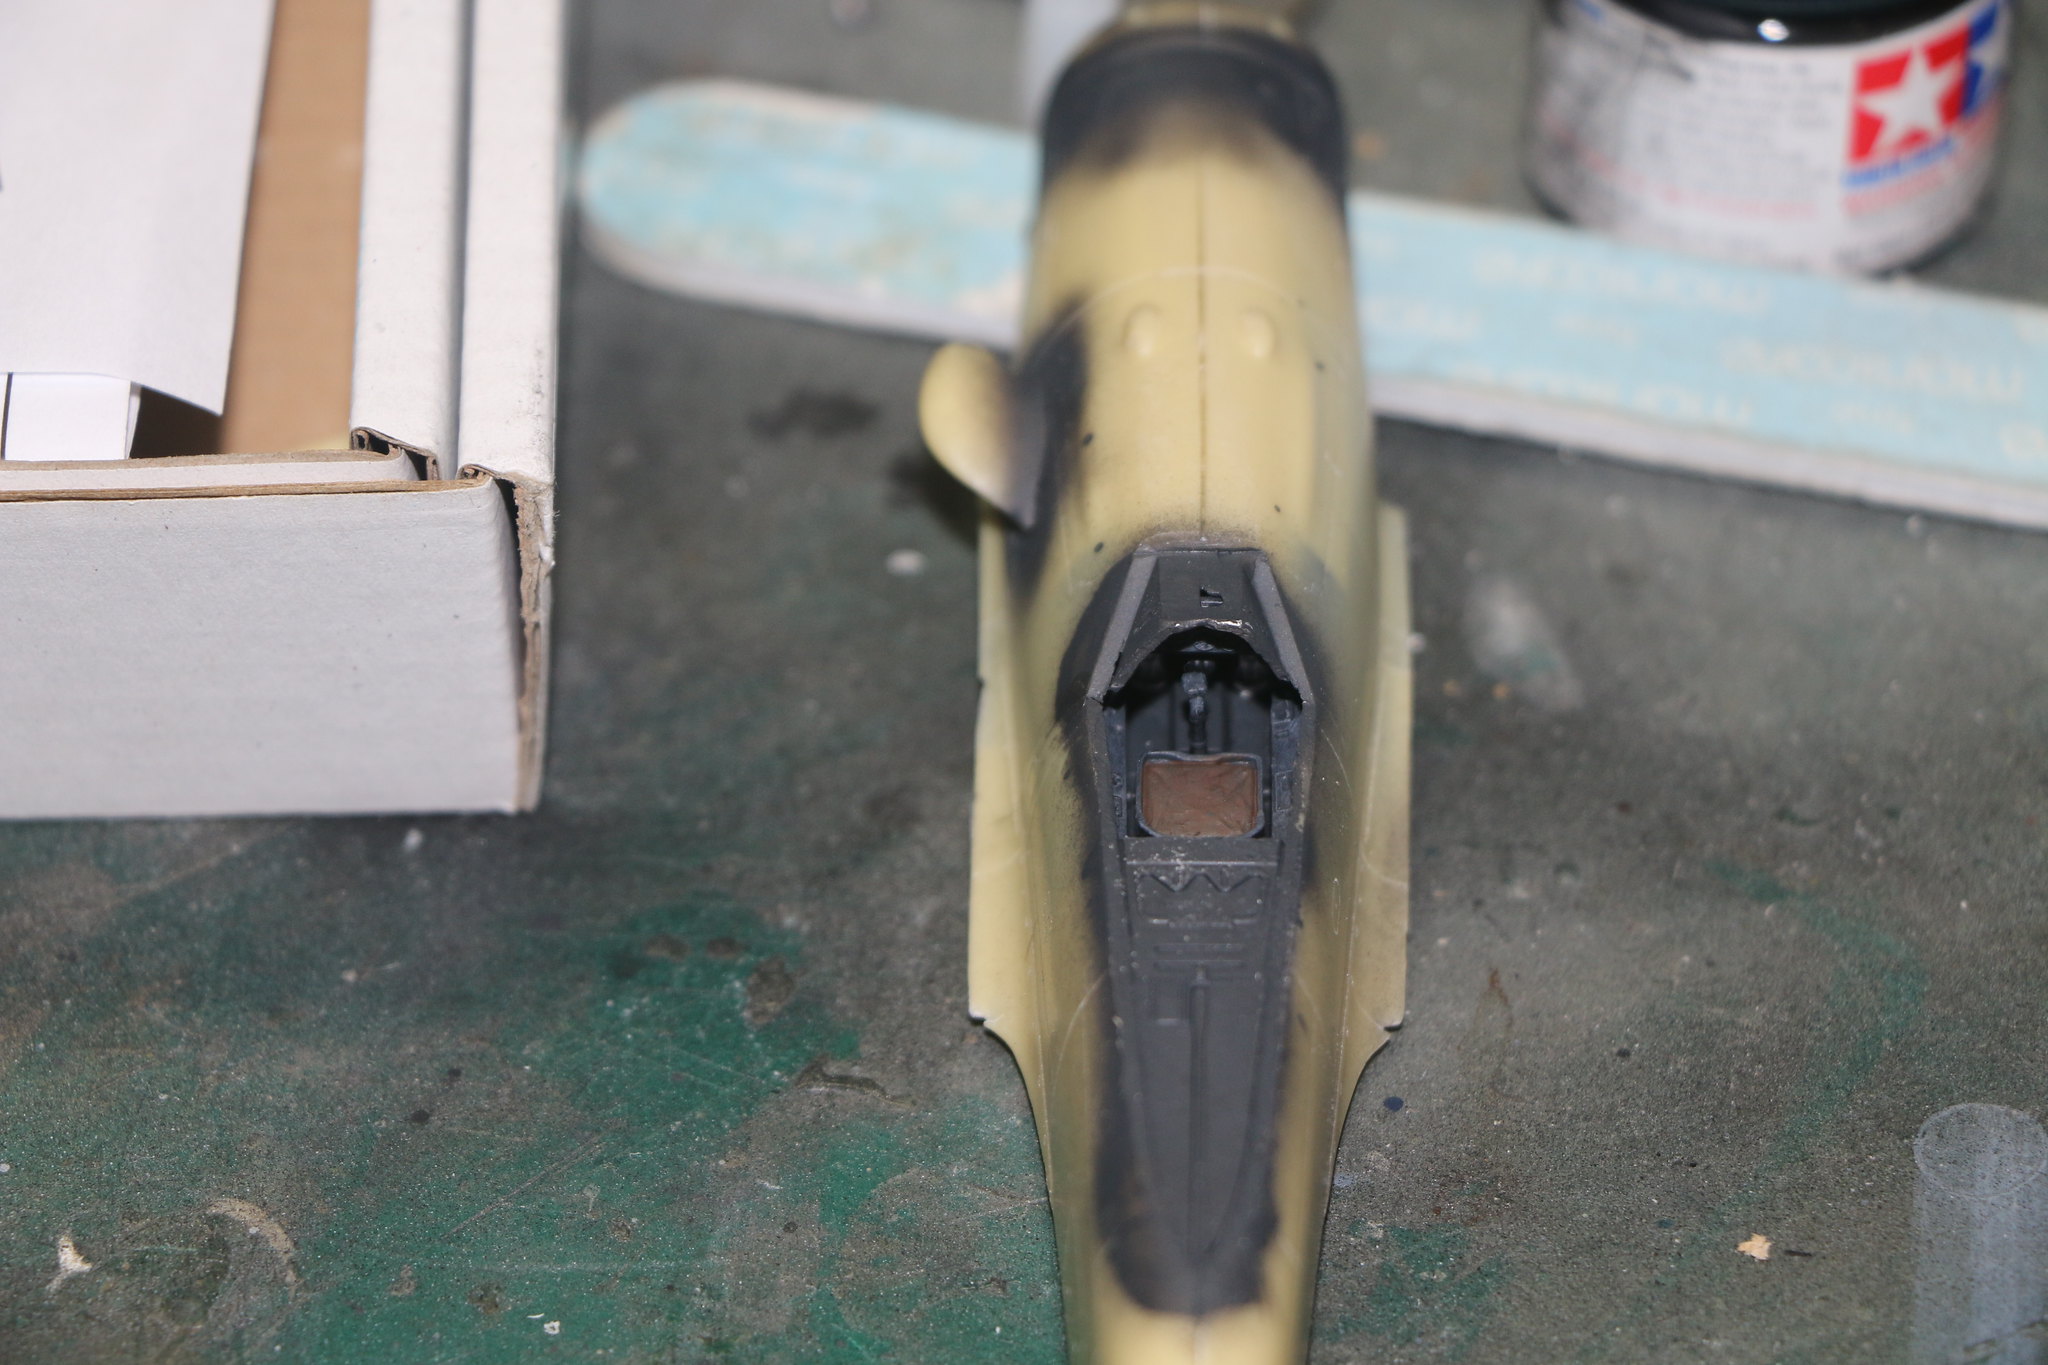
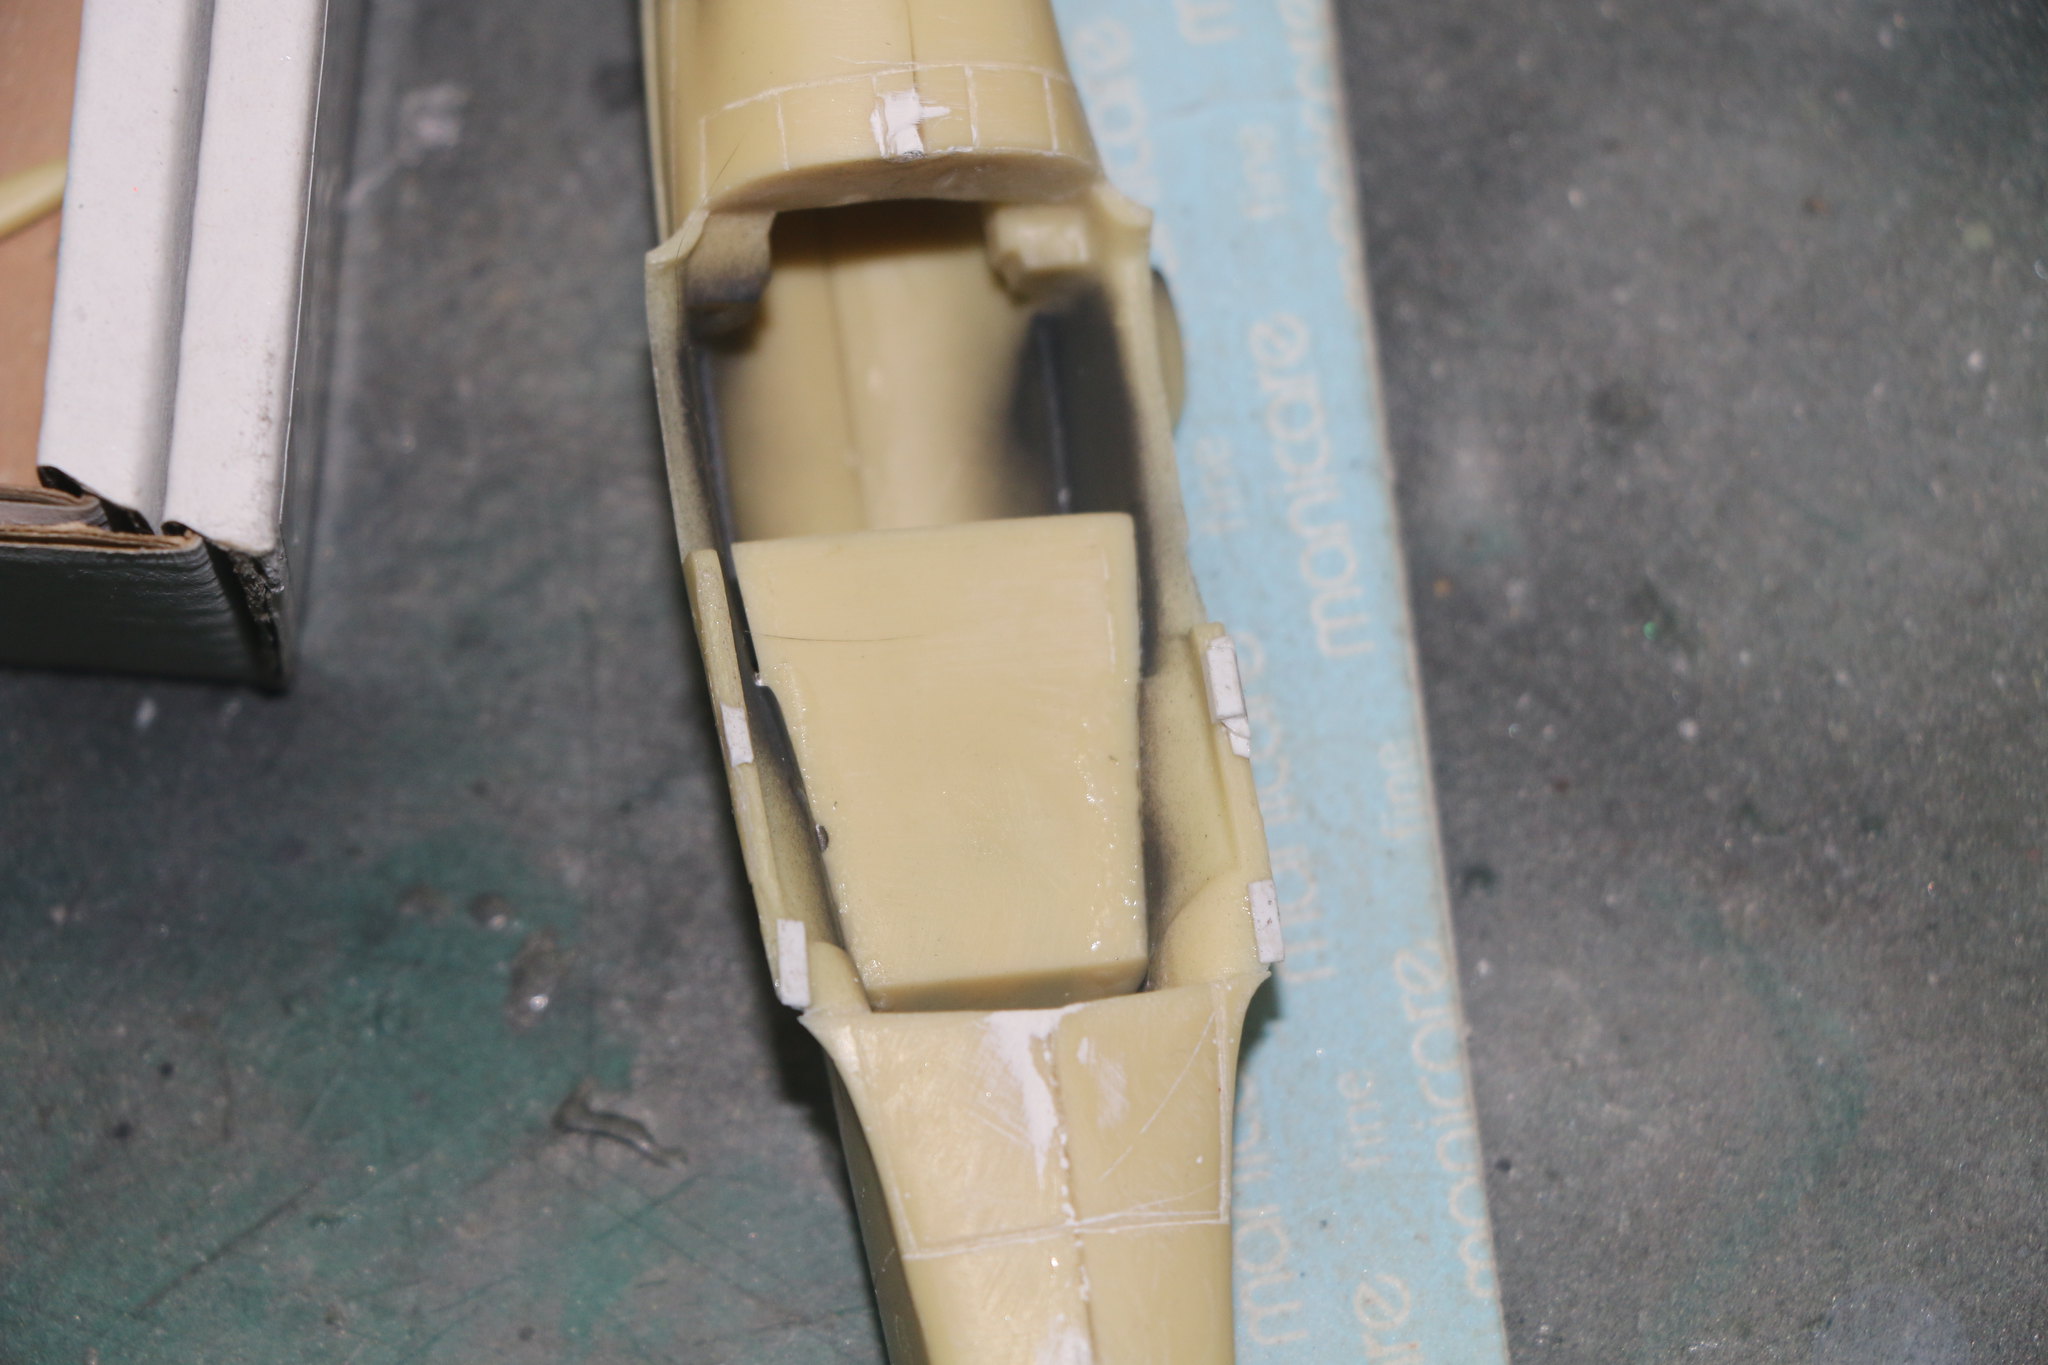
slowly but steady I'm preparing to close the fuselage. Pilot's office is actually finished, except few last touch-ups here and there but no major refurbishment. I'm working on the instuments panel right now and trying to fit the engine and wings to the fuselage.
Here's the interior before closing.
Uusimaa, Finland
Joined: October 01, 2016
KitMaker: 514 posts
AeroScale: 239 posts
Posted: Friday, December 15, 2017 - 11:00 PM UTC
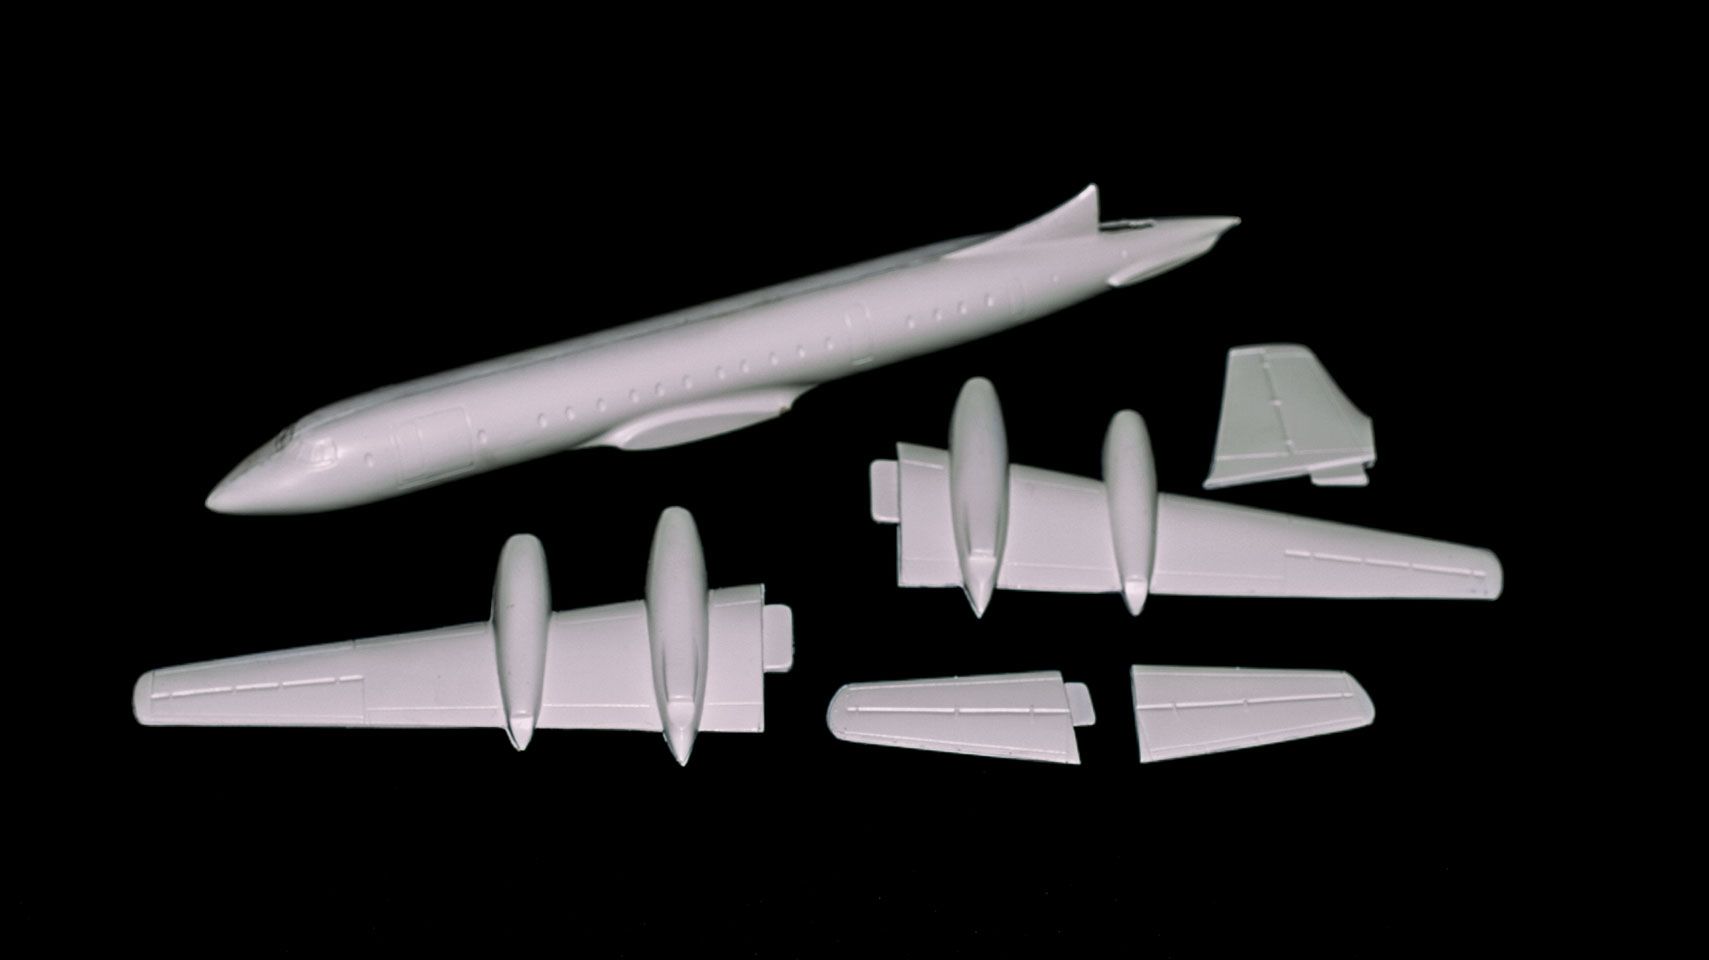
And a step ahead with Farman:
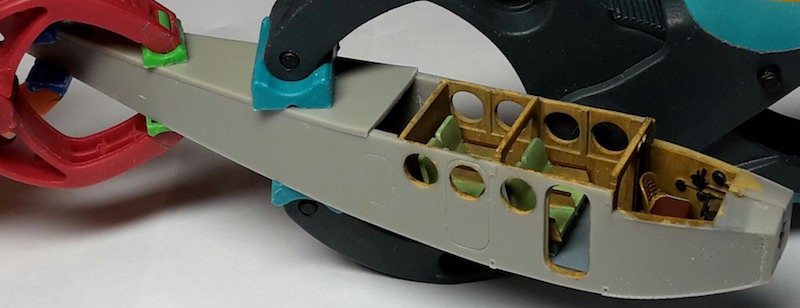
Not entirely happy with interior paint job, but luckily it won't be very visible through windows. One pilot and four passangers, so the model is also quite tiny.
Texas, United States
Joined: February 22, 2008
KitMaker: 5,026 posts
AeroScale: 2,811 posts
Posted: Saturday, December 16, 2017 - 12:41 AM UTC
Mecenas, the cockpit looks great and you progress is what it is. I have been working on my cockpit also.
Pasi, looks like your work on the resin fuselage is way better than my resin job from the Seaplane campaign.
Bob
If it aint broke dont fix it.
Merlin
 Senior Editor
#017
United Kingdom
Joined: June 11, 2003
KitMaker: 17,582 posts
AeroScale: 12,795 posts
Posted: Saturday, December 16, 2017 - 03:52 AM UTC
Hi again
Nice work guys!

OK - I've been using my new-tool Eduard Fw 190 build as an excuse for not starting my "Lost Art" Weihe, but I really do expect to get that finished tomorrow. So... I'll get underway next week for sure. I've shot pics for the Review and the text is half-written - but it'd be much more fun to just build the beast and do a Review or Feature later!

All the best
Rowan
BEWARE OF THE FEW...
As I grow older, I regret to say that a detestable habit of thinking seems to be getting a hold of me. - H. Rider Haggard
European Union
Joined: September 28, 2004
KitMaker: 2,186 posts
AeroScale: 1,587 posts
Posted: Saturday, December 16, 2017 - 09:36 PM UTC
Nice work everybody.
I am still struggling with the Sanger B-52. As soon as I have chosen a direction on where to put pictures, I will upload my latest endeavours and show where I am.

The mission: Beat the stash.
Almost conquered: MIG-29, Blackhawk, Skyray, Skyraider, fouga
Main battle:Demon, Skyhawk, F-14, CH-53
Stash reserve:Blackhawk, CH-46, 47 en 53; SU-7, Eurofighter, mohawk, hellcat, F-16D, 6x Fouga Magister, Voodoo
Merlin
Senior Editor #017
United Kingdom
Joined: June 11, 2003
KitMaker: 17,582 posts
AeroScale: 12,795 posts
Posted: Wednesday, December 20, 2017 - 02:07 AM UTC
Hi again
I have (at last!) made a start!

Admittedly, not a very dramatic start - but I've sprayed primer on my Weihe ahead of separating the vacuformed parts.

Even though it's crazy time and all hands on deck at my Oxfam shop with the run-up to Christmas, I think I'm due a day off on Friday (we'll see on that one...
) - and I've booked leave for Christmas week, so I hope to get the build properly underway before New Year.
All the best
Rowan
BEWARE OF THE FEW...
As I grow older, I regret to say that a detestable habit of thinking seems to be getting a hold of me. - H. Rider Haggard
#259
Massachusetts, United States
Joined: October 23, 2011
KitMaker: 2,265 posts
AeroScale: 1,715 posts
Posted: Wednesday, December 20, 2017 - 04:50 AM UTC
Very good to hear from you gentlemen.
I also will have all of next week free, so hope to work on model building.
Texas, United States
Joined: February 22, 2008
KitMaker: 5,026 posts
AeroScale: 2,811 posts
Posted: Wednesday, December 20, 2017 - 06:56 AM UTC
I plan on buying stock in MILIPUT Company. Ill need quite a bit of putty to help my Yak 3.
Photo: 1 shows the gap left by my trying to make the wing fit the fuselage plus the nose had damage caused by shipping possibly.
Photo: 2 here I cut out the intakes at the root of the wing with success and you can see the gap at the bottom front where the wing meets the fuselage.
Photo: 3 again the bottom of fuselage and wing gap.
Photos: 4 & 5 left side shot.


If it aint broke dont fix it.
Ontario, Canada
Joined: February 04, 2008
KitMaker: 2,507 posts
AeroScale: 1,814 posts
Posted: Thursday, December 21, 2017 - 09:51 PM UTC
" The Die Hards"
43rd MIDDLESEX REGIMENT
MACHINE GUN CORPS
XXX CORP
The most effective way to do it, is to do it.
- Amelia Earhart
Texas, United States
Joined: February 22, 2008
KitMaker: 5,026 posts
AeroScale: 2,811 posts
Posted: Thursday, December 21, 2017 - 11:53 PM UTC
Hello! Richard, I see that your kits engines are one piece with the wing. Hopefully that will make assembly easier.
Bob
If it aint broke dont fix it.
Ontario, Canada
Joined: February 04, 2008
KitMaker: 2,507 posts
AeroScale: 1,814 posts
Posted: Friday, December 22, 2017 - 12:13 AM UTC
Quoted Text
Hello! Richard, I see that your kits engines are one piece with the wing. Hopefully that will make assembly easier.
Bob
Hi Bob
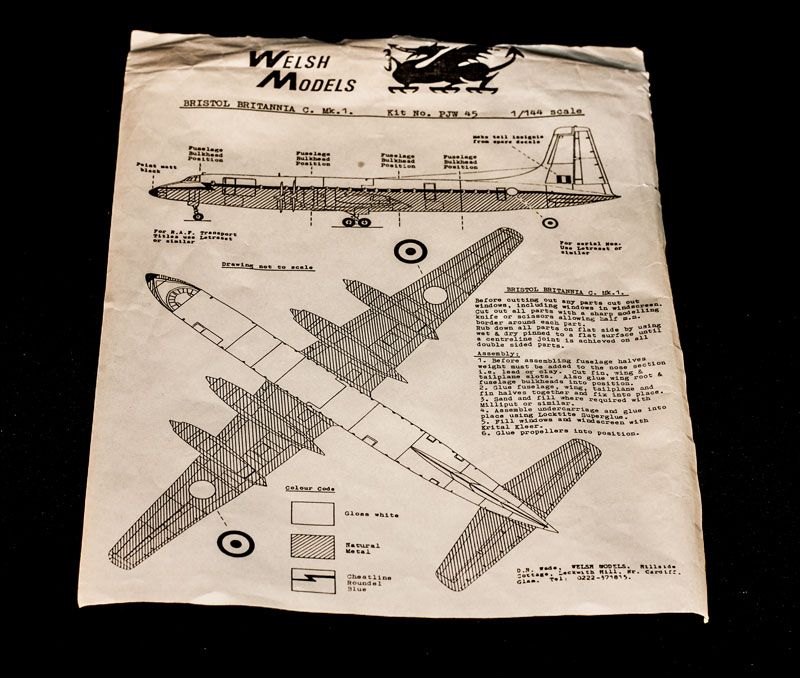
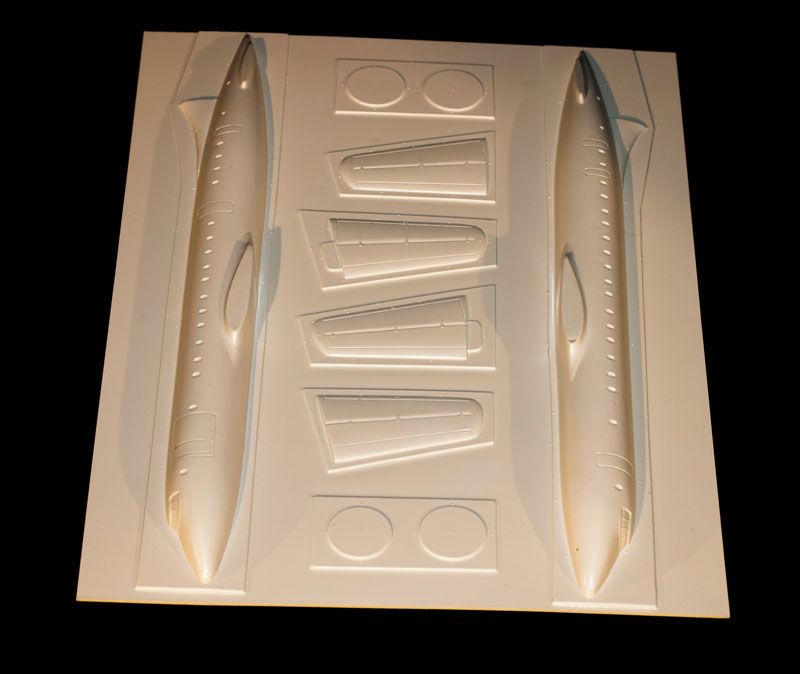
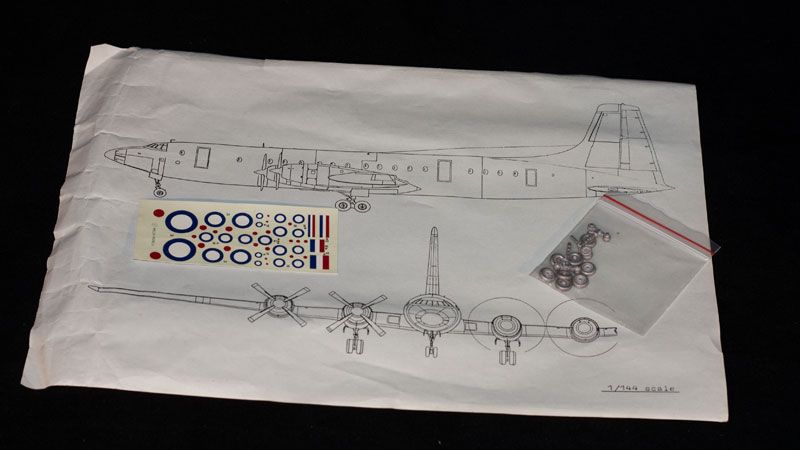
I think that the hardest part of this build will be the windows.
Instructions call for cutting them out before cutting the fuselage of the sheet.
" The Die Hards"
43rd MIDDLESEX REGIMENT
MACHINE GUN CORPS
XXX CORP
The most effective way to do it, is to do it.
- Amelia Earhart
#259
Massachusetts, United States
Joined: October 23, 2011
KitMaker: 2,265 posts
AeroScale: 1,715 posts
Posted: Friday, December 22, 2017 - 03:49 AM UTC
Good to see another vac kit started!
drilling out the windows will not be hard, followed by careful finishing with an elliptical jeweler's file. I'm sure you will make a nice job of it.
Ontario, Canada
Joined: February 04, 2008
KitMaker: 2,507 posts
AeroScale: 1,814 posts
Posted: Thursday, December 28, 2017 - 03:44 AM UTC
Hi!
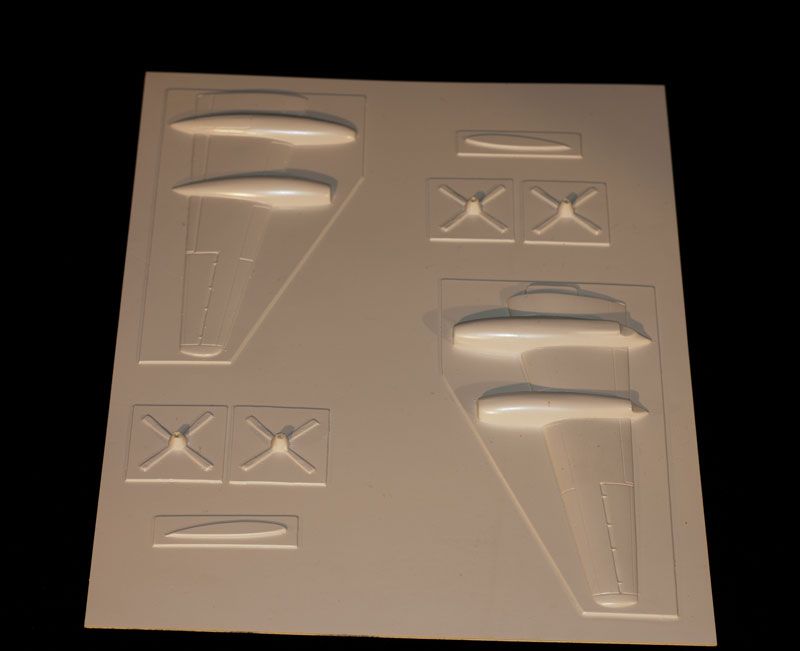
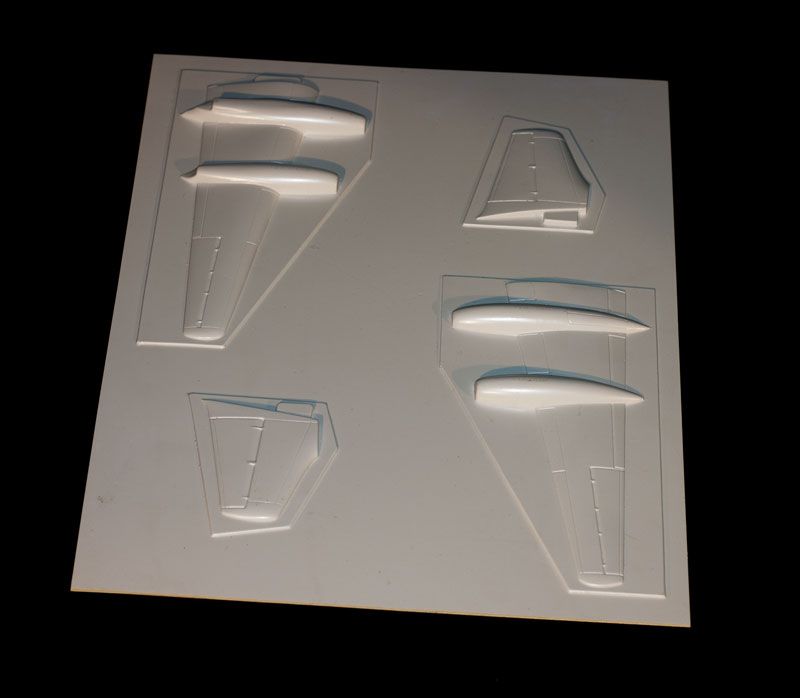
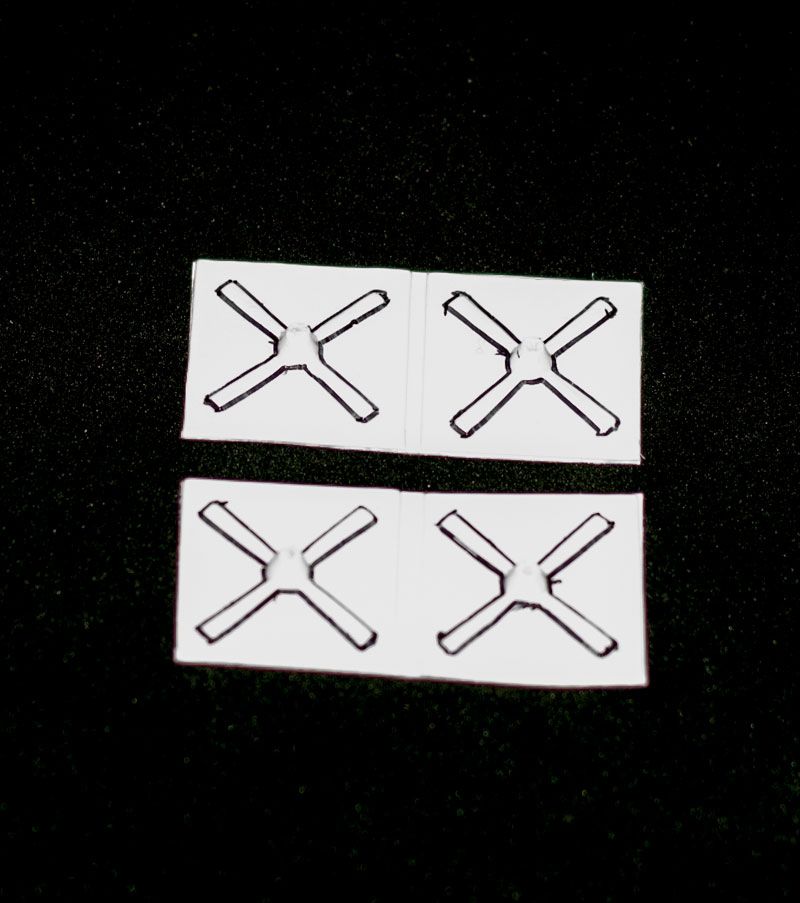
Cut out all the parts from their sheets:-
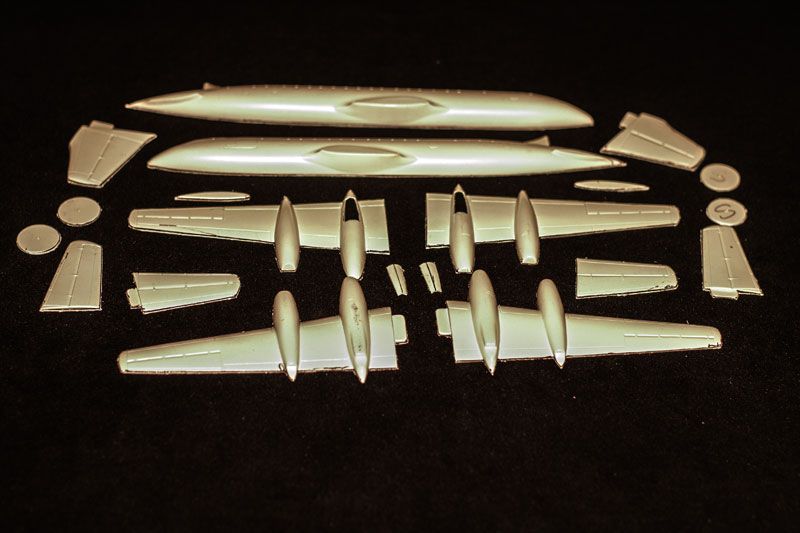
Next up sanding.
I will have to buy after market props because these are old time bad!:-
" The Die Hards"
43rd MIDDLESEX REGIMENT
MACHINE GUN CORPS
XXX CORP
The most effective way to do it, is to do it.
- Amelia Earhart
#305
Christchurch, New Zealand
Joined: February 01, 2006
KitMaker: 1,673 posts
AeroScale: 1,517 posts
Posted: Monday, January 01, 2018 - 07:05 AM UTC
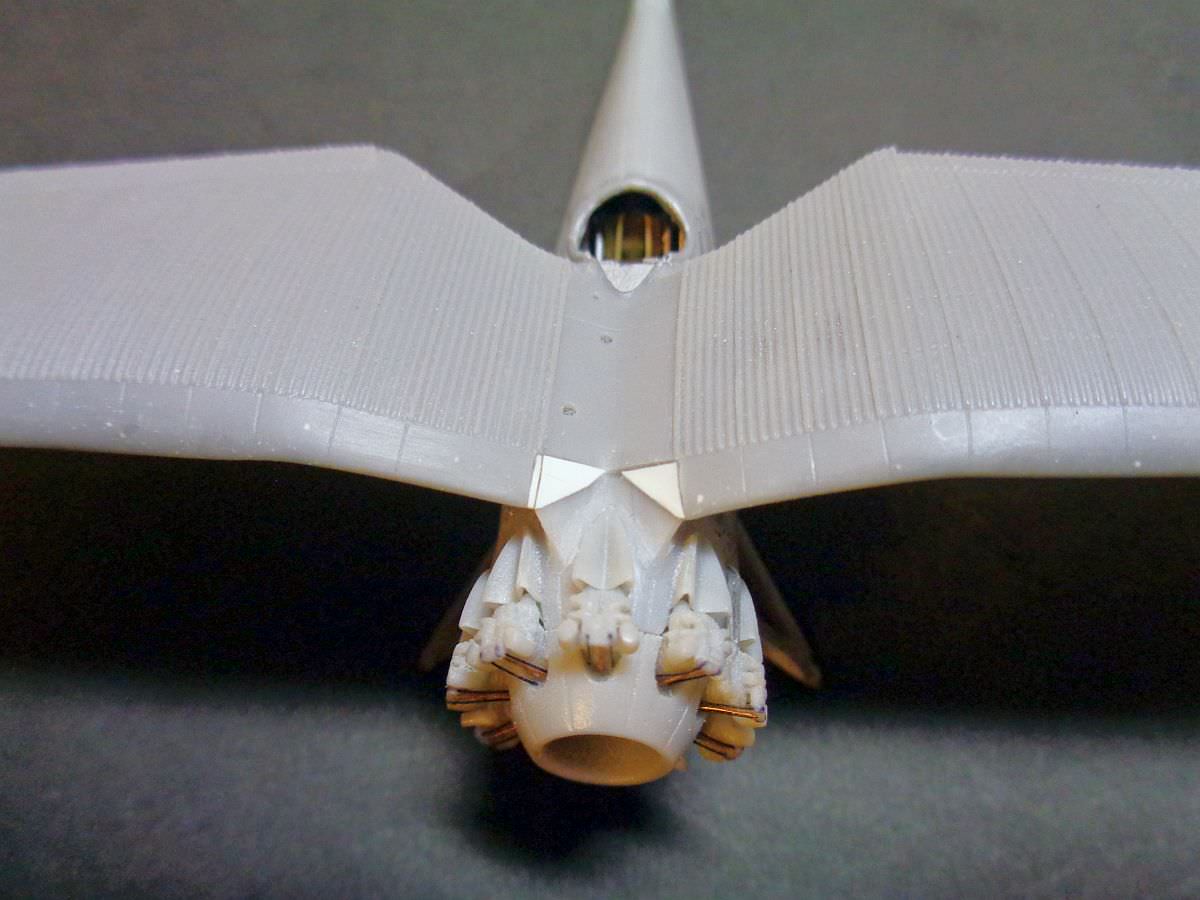
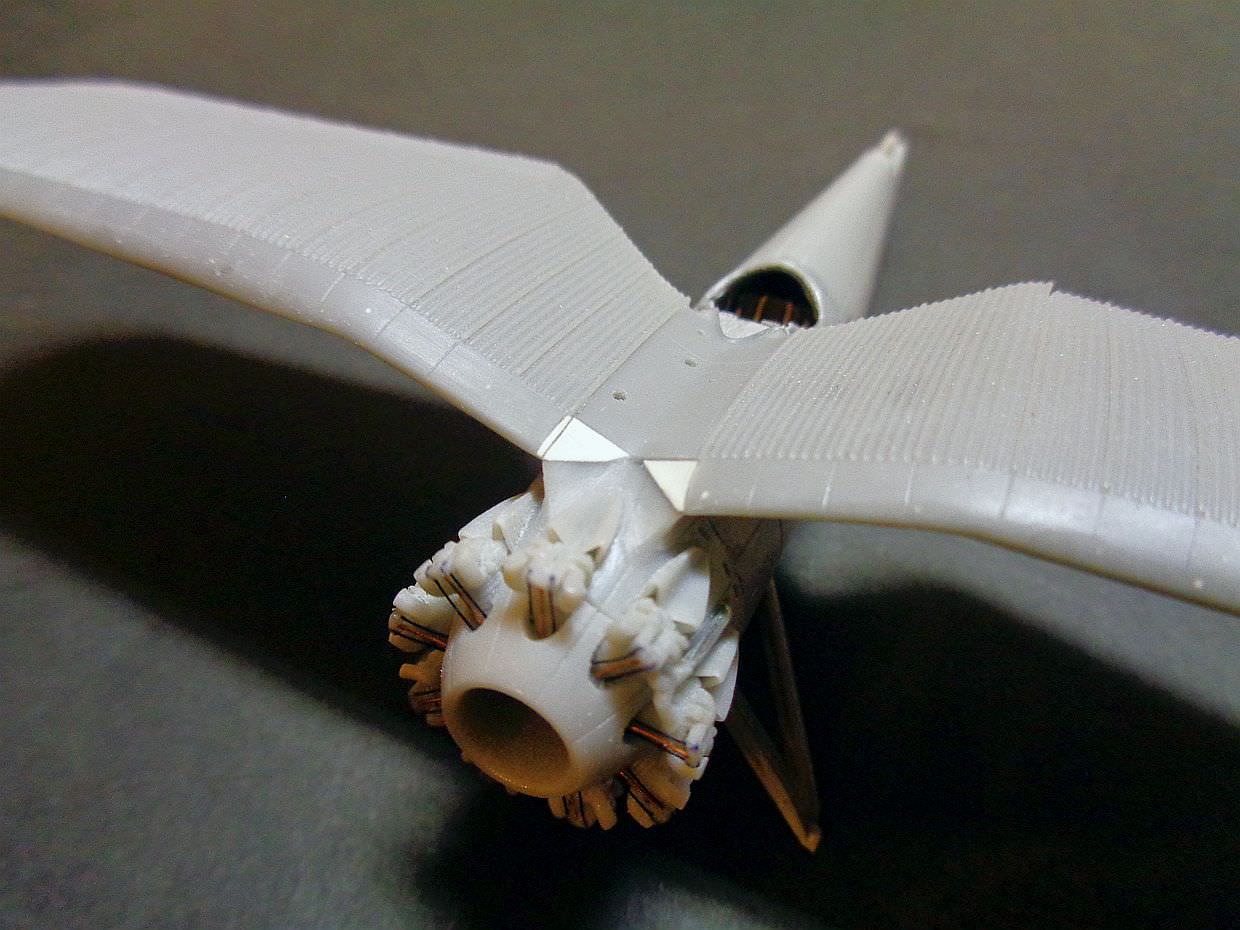
While the kit is low in parts count the major parts aren't very easy to fit together. There is a major amount of warping of the fuselage and wings.
The wings were rather warped but when fitting the wheel well I noticed that there were rather large gaps at the edges but little dihedral in the wings. By pulling the wing tips up the gaps closed so I took advantage of this and used masking tape to set the dihedral and then super glued the well in place. The fuselage halves were also badly warped and it was a matter of gluing the front together then slowly and carefully gluing the rest of the fuselage together.
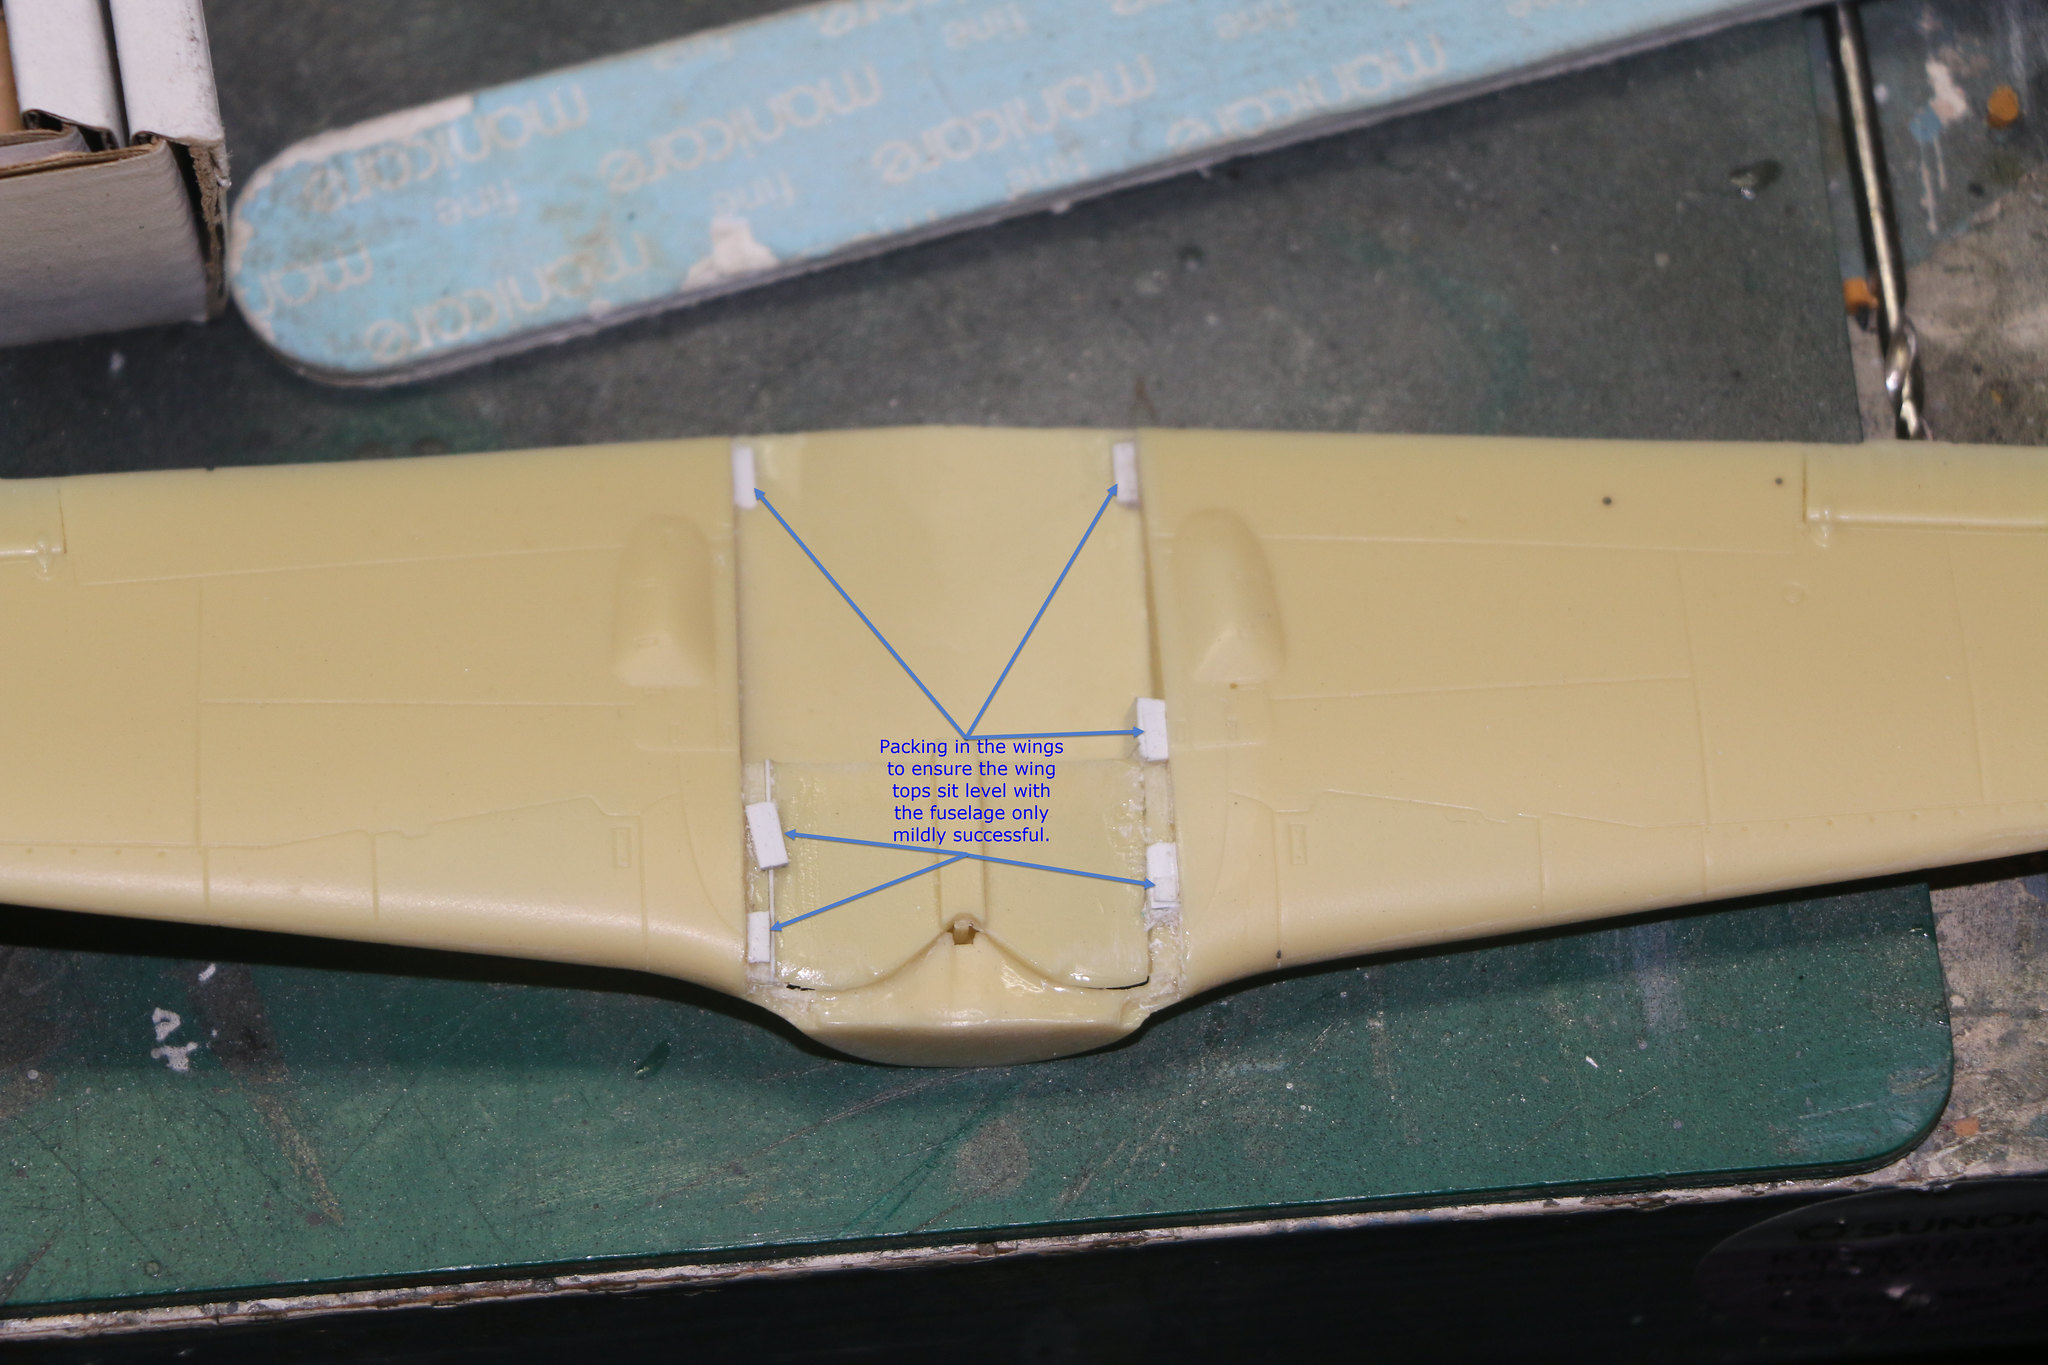
There were also numerous short shots in the casting requiring either filling or fabrication. I found the cockpit could be built and then installed later before adding the wings so went that route. The cockpit is a multipart affair and very nicely detailed. Which looked great after some detail painting and dry brushing. Once complete I added it to the fuselage glued it in place and then added the wings. As you can see from the pics I needed to pack out the wings so the fuselage sat as close to flush with the wings as I could get it. Even so there is some filling and sanding to be done. (Ain't there always with resin kits?)
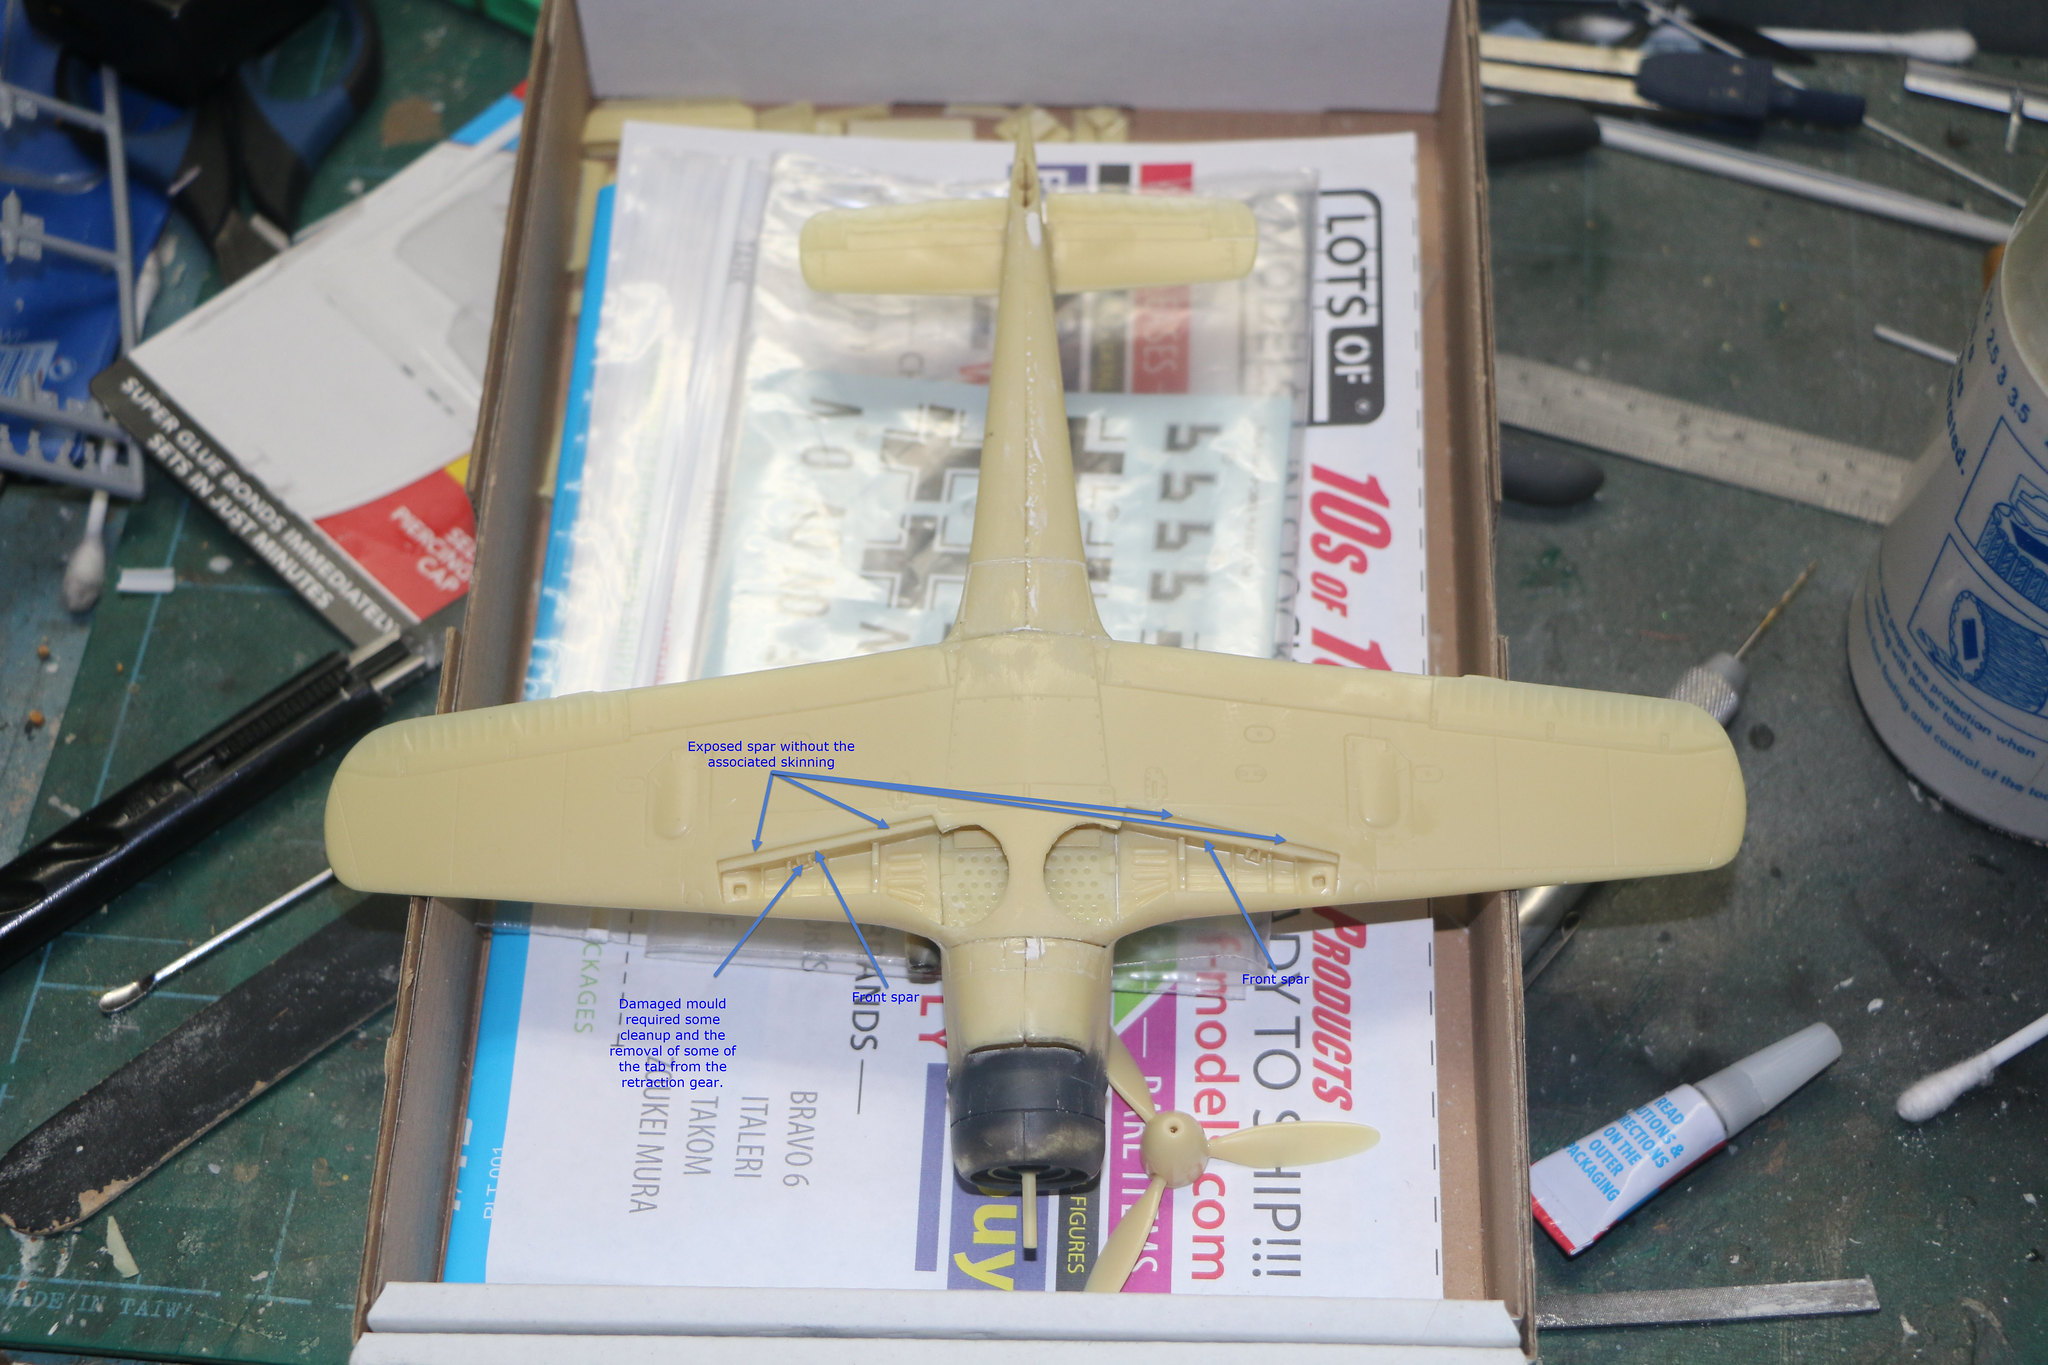
One thing I have noticed is that the main spars had been cast uncovered and there is no mention of a resin piece or construction of a scratch built part. So I'll have to construct something to fit. I did wonder if the prototype had the spars exposed but from the pictures and drawings I can find it would appear not. A rather glaring omission if that is the case. But should be a relatively simple fix.
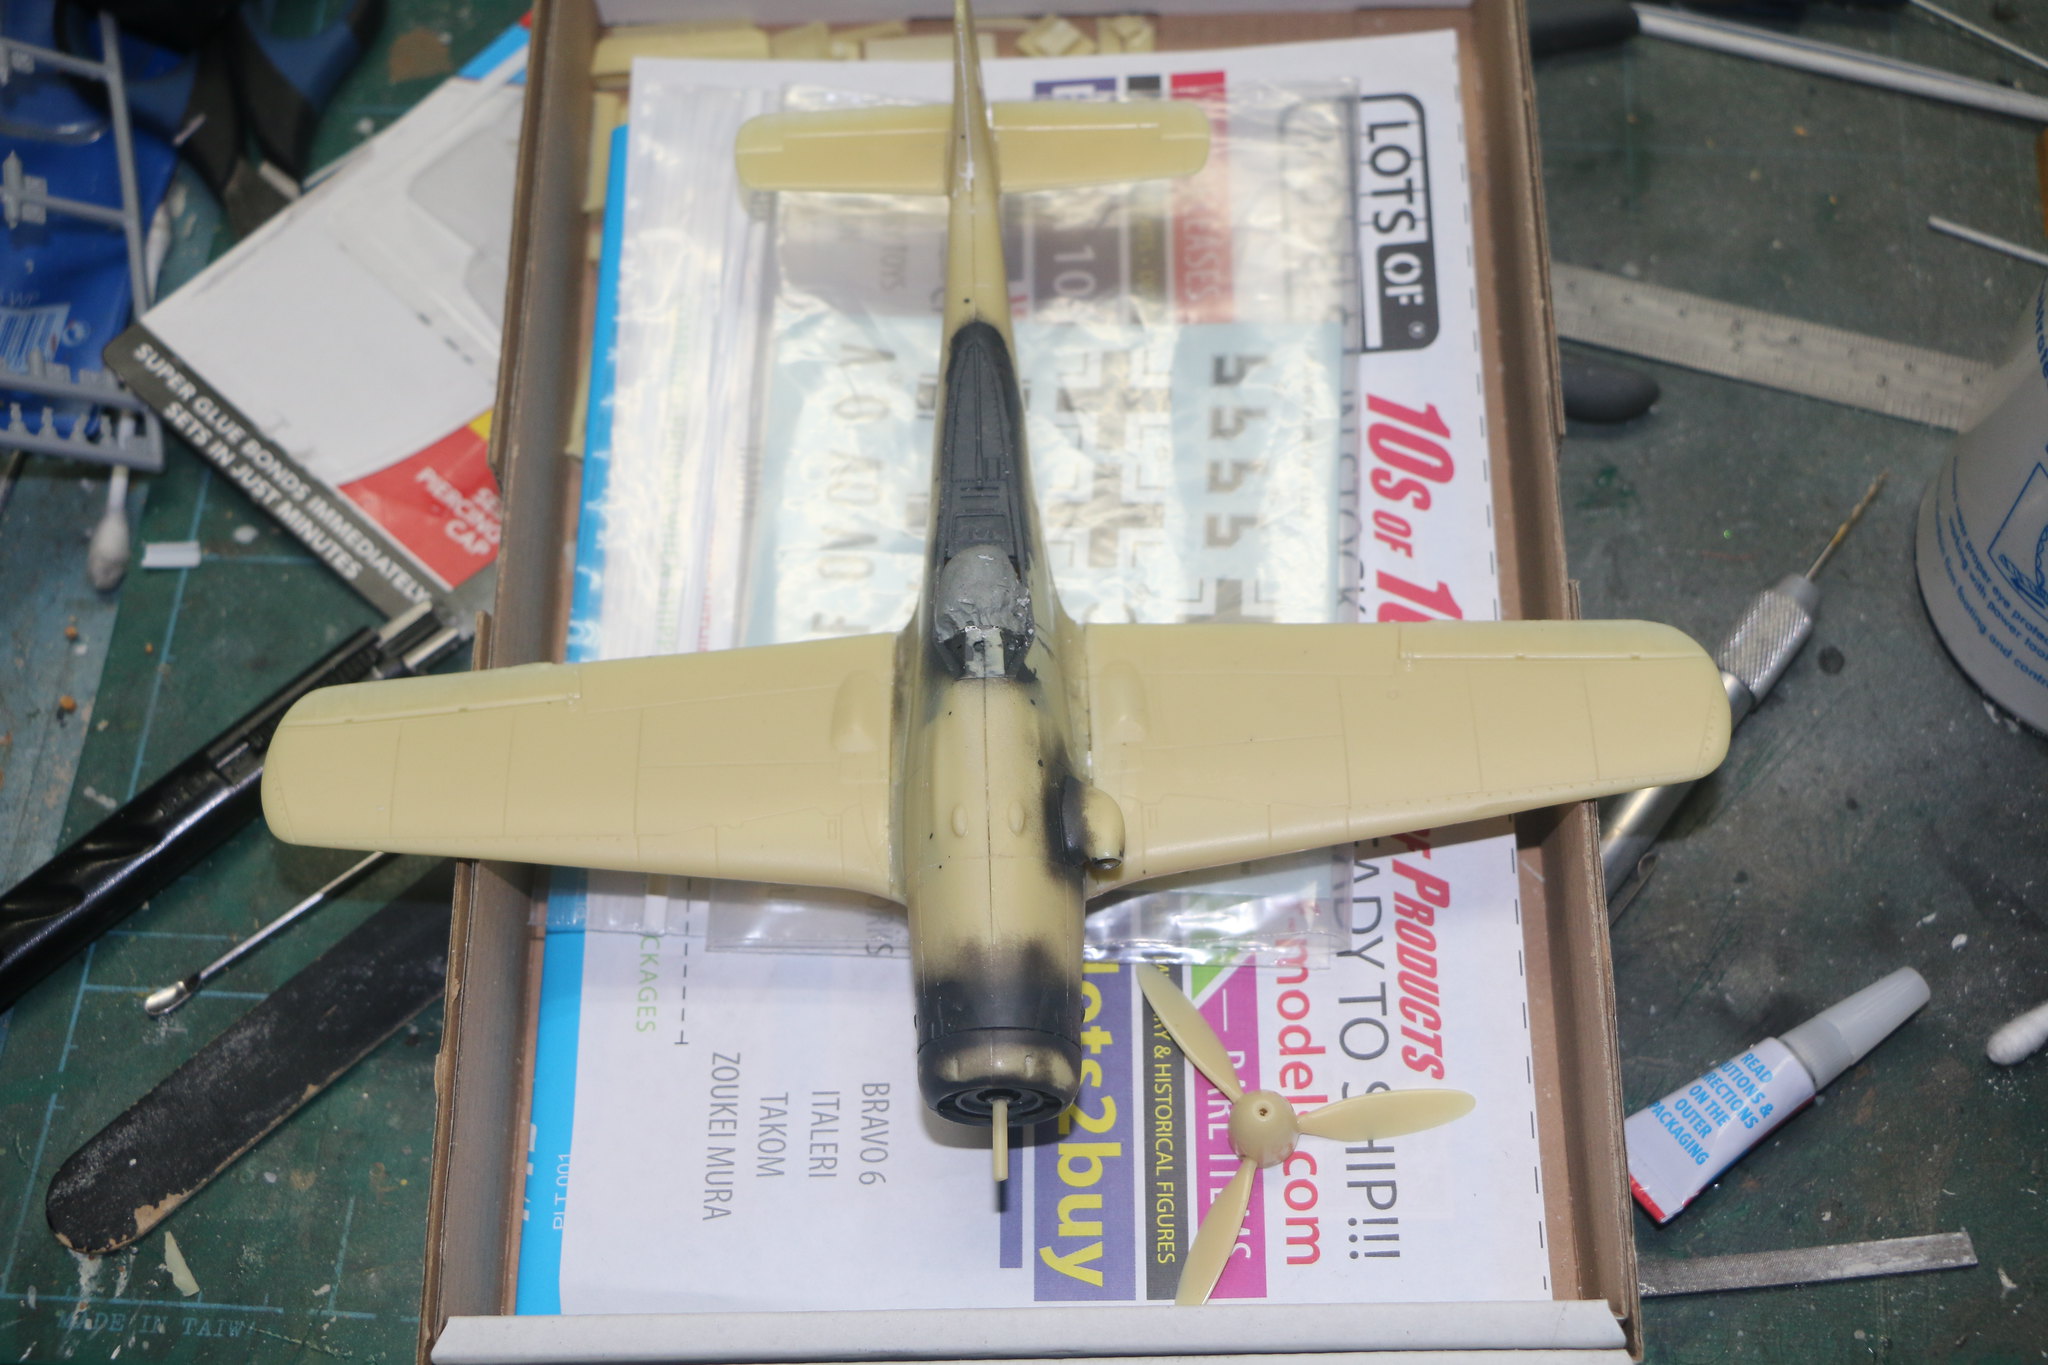
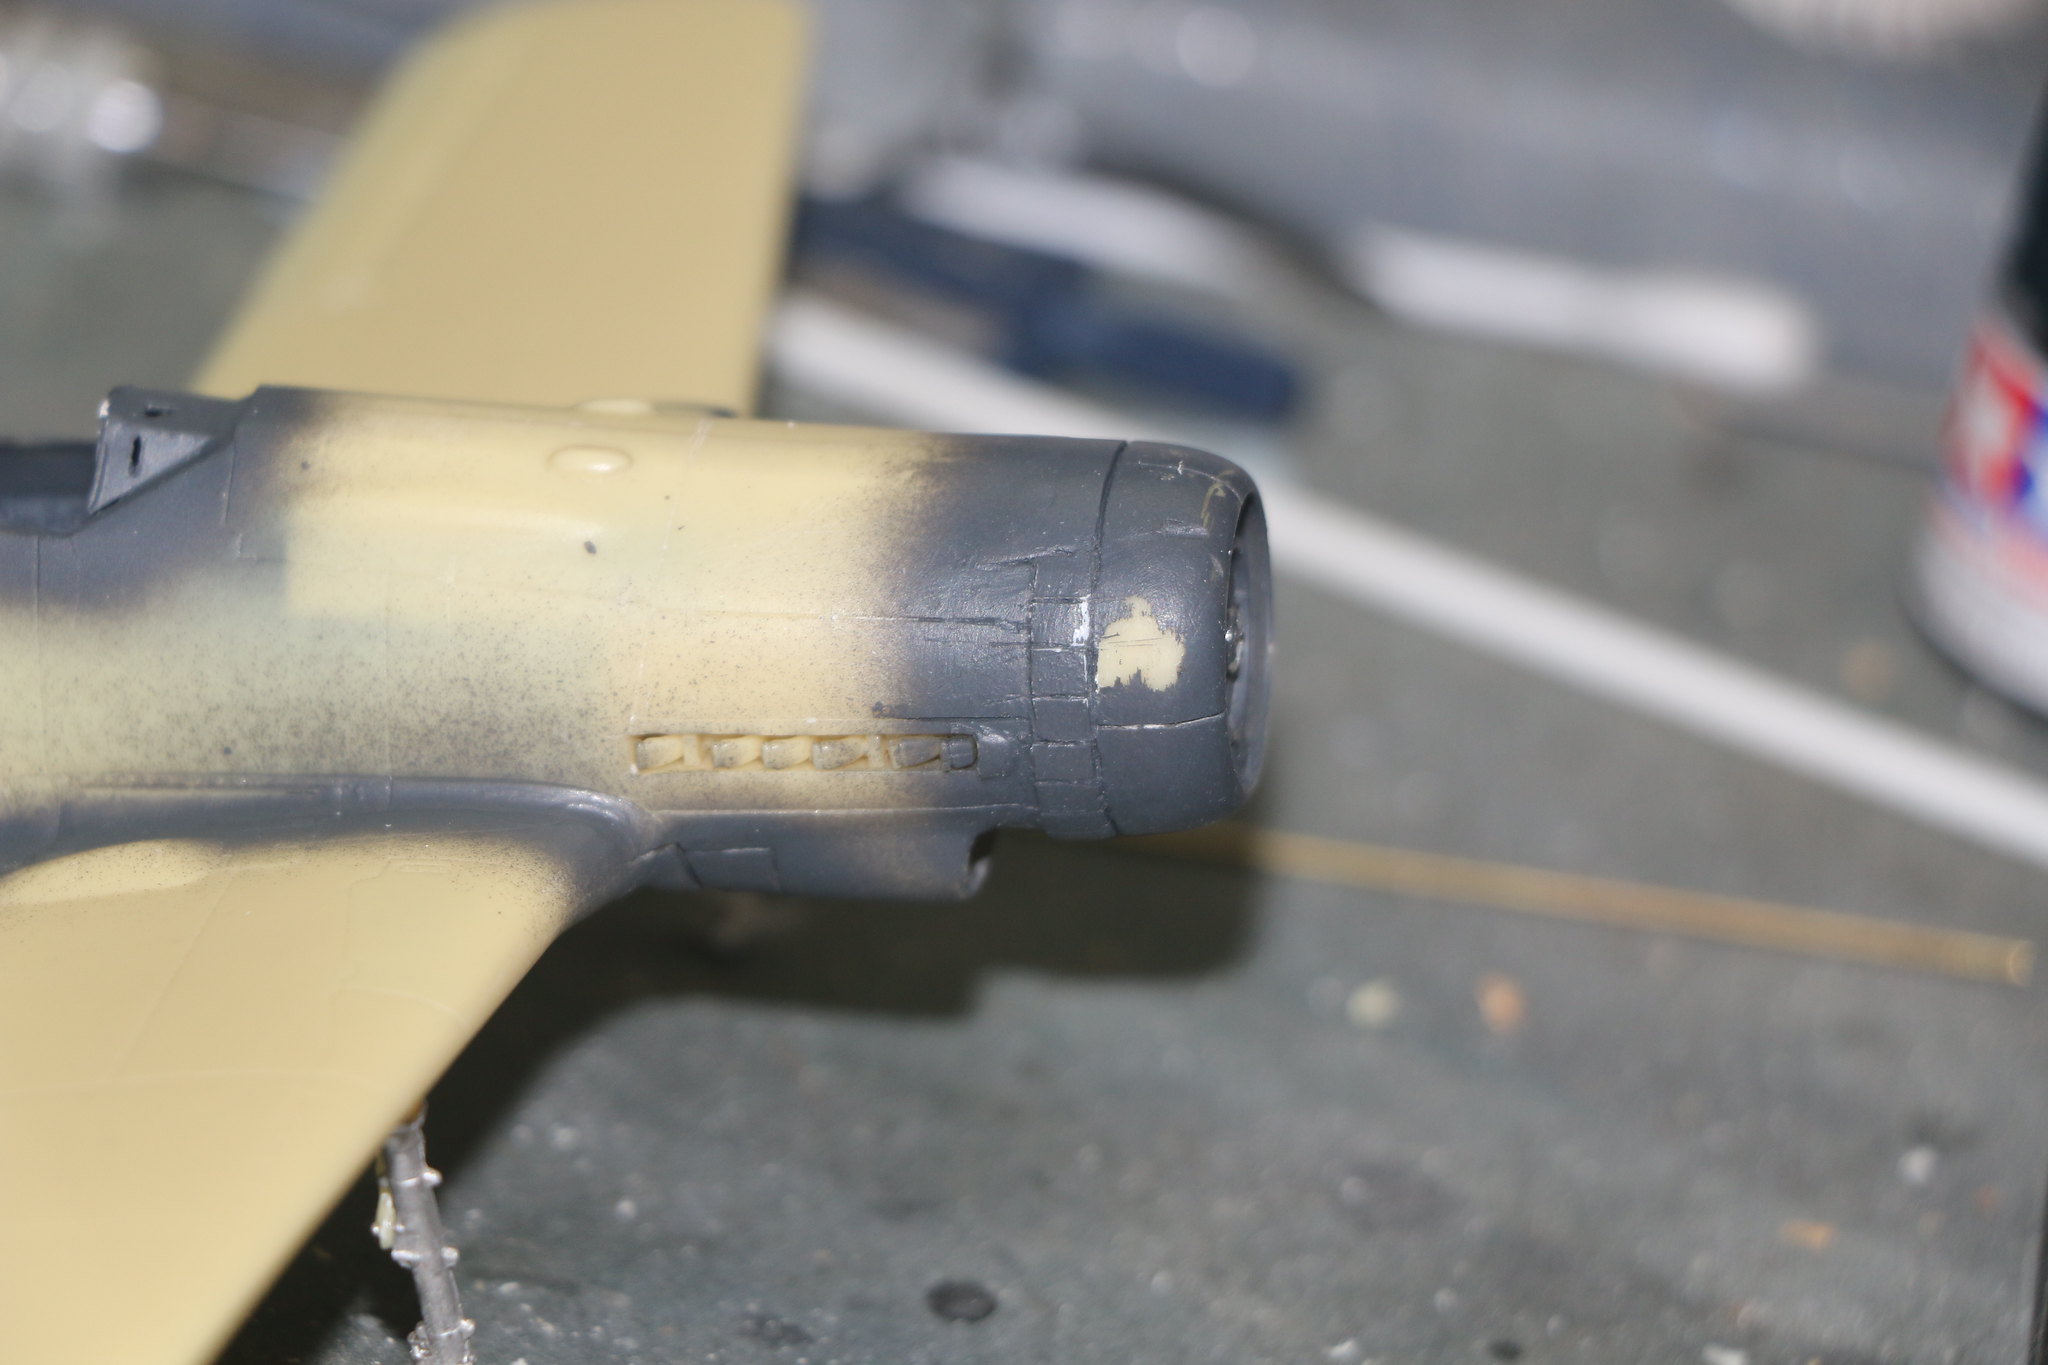
Painted the cockpit and back deck and used the excess paint as an undercoat to look at the cowl and seams. Screwed up the mounting of the cowl ring but later kits of other prototypes seem to have made it a little more foolproof. It also required me fabricating some cowl flaps from strips of thin plasticard that actually worked out quite well. Planet Models make a resin conversion kit of the Fw190C V18 for the Hasegawa kit which I find strongly tempting for some reason, especially as the "Kanguru" just looks weirdly fast and agile.
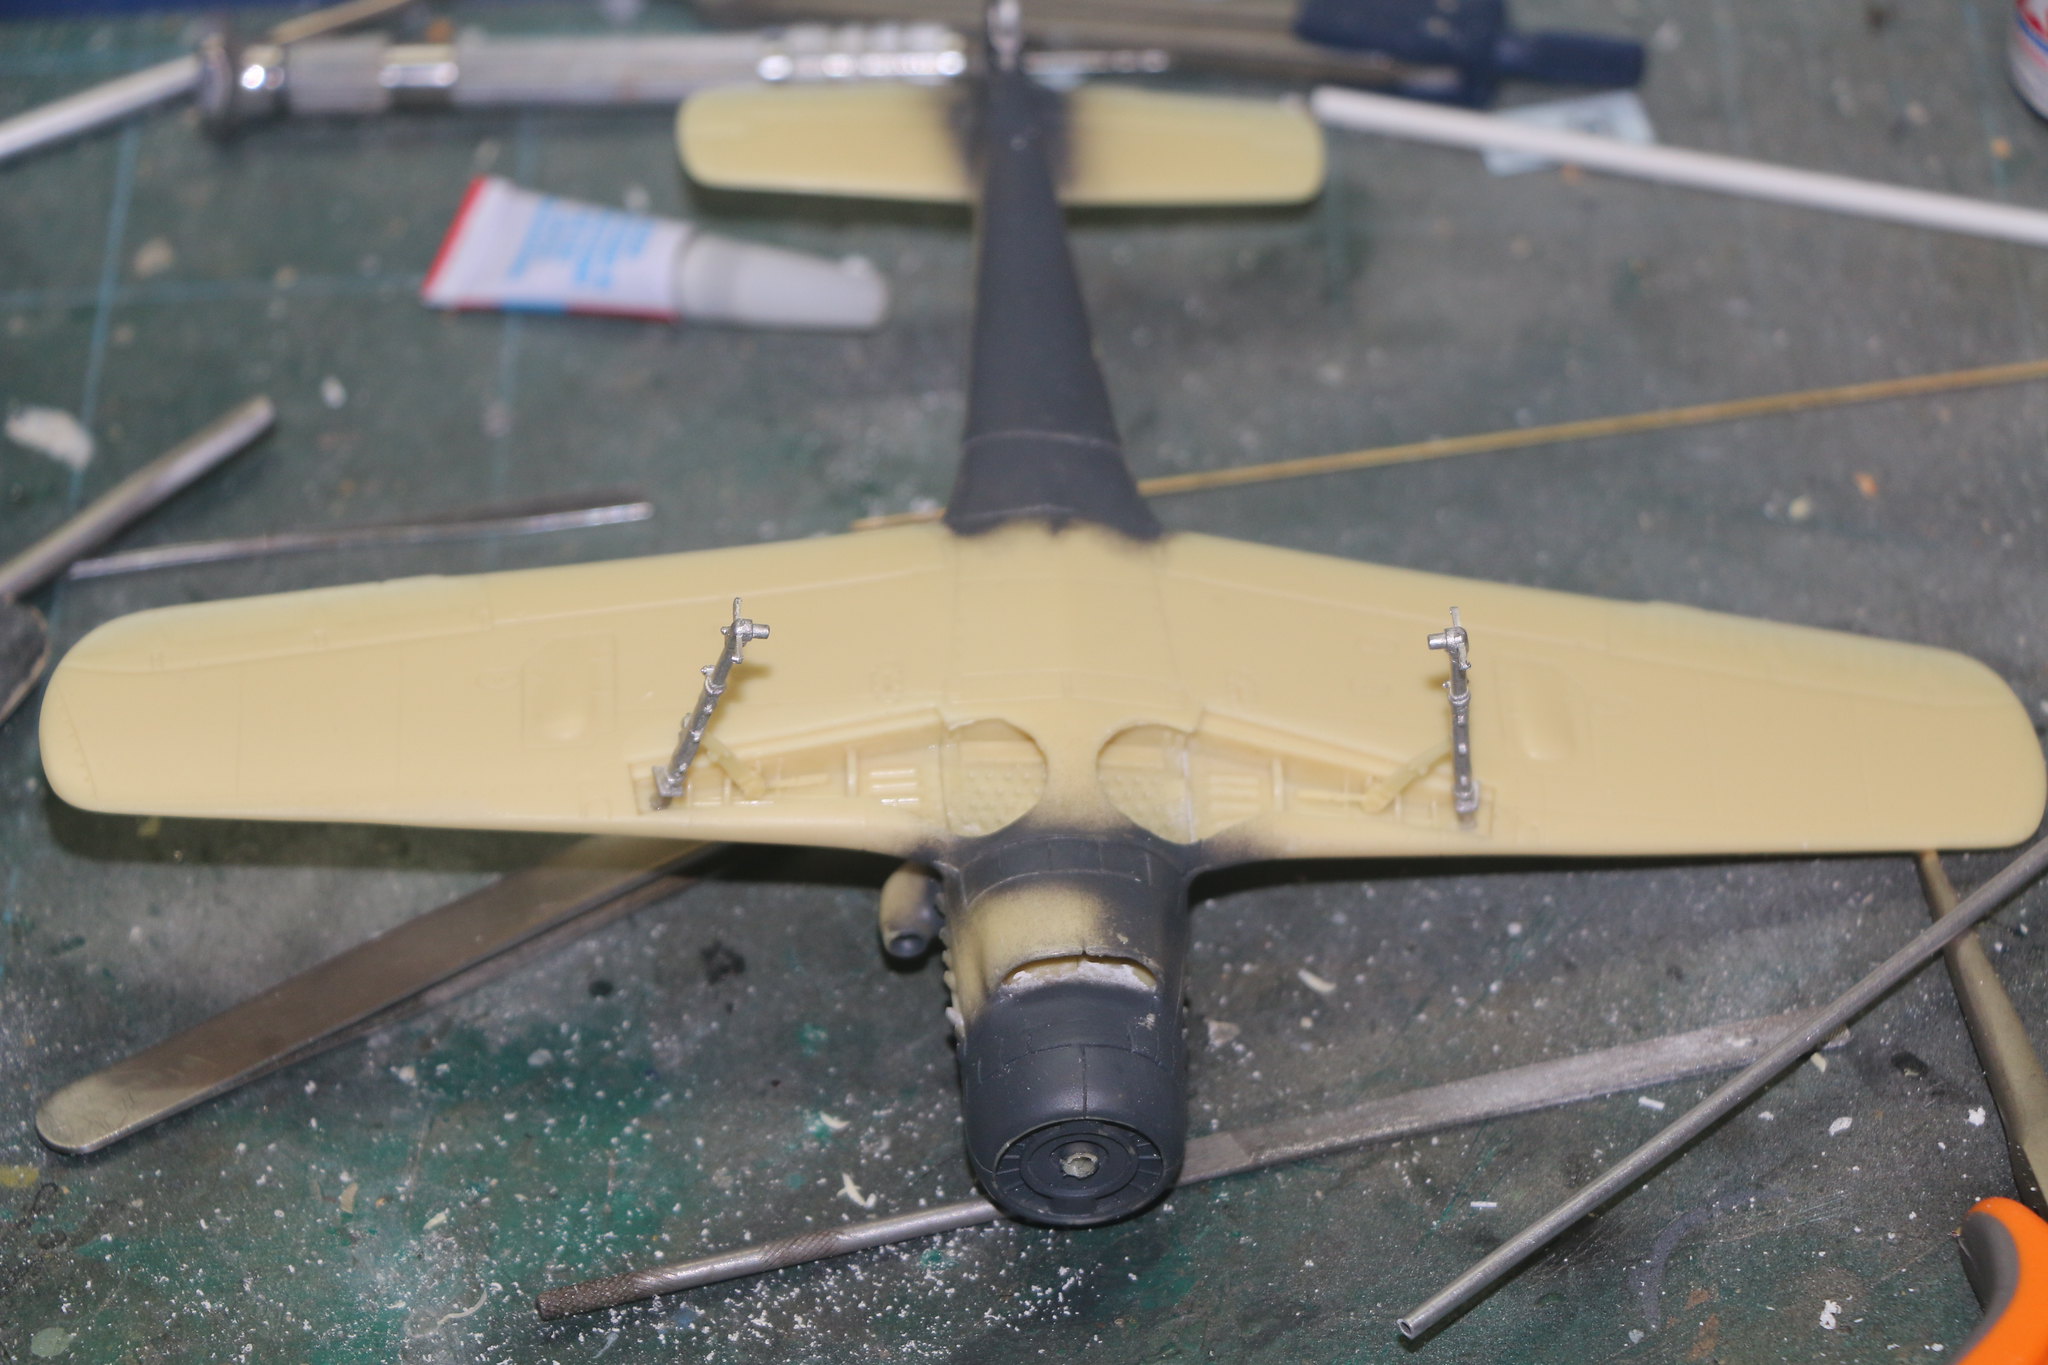
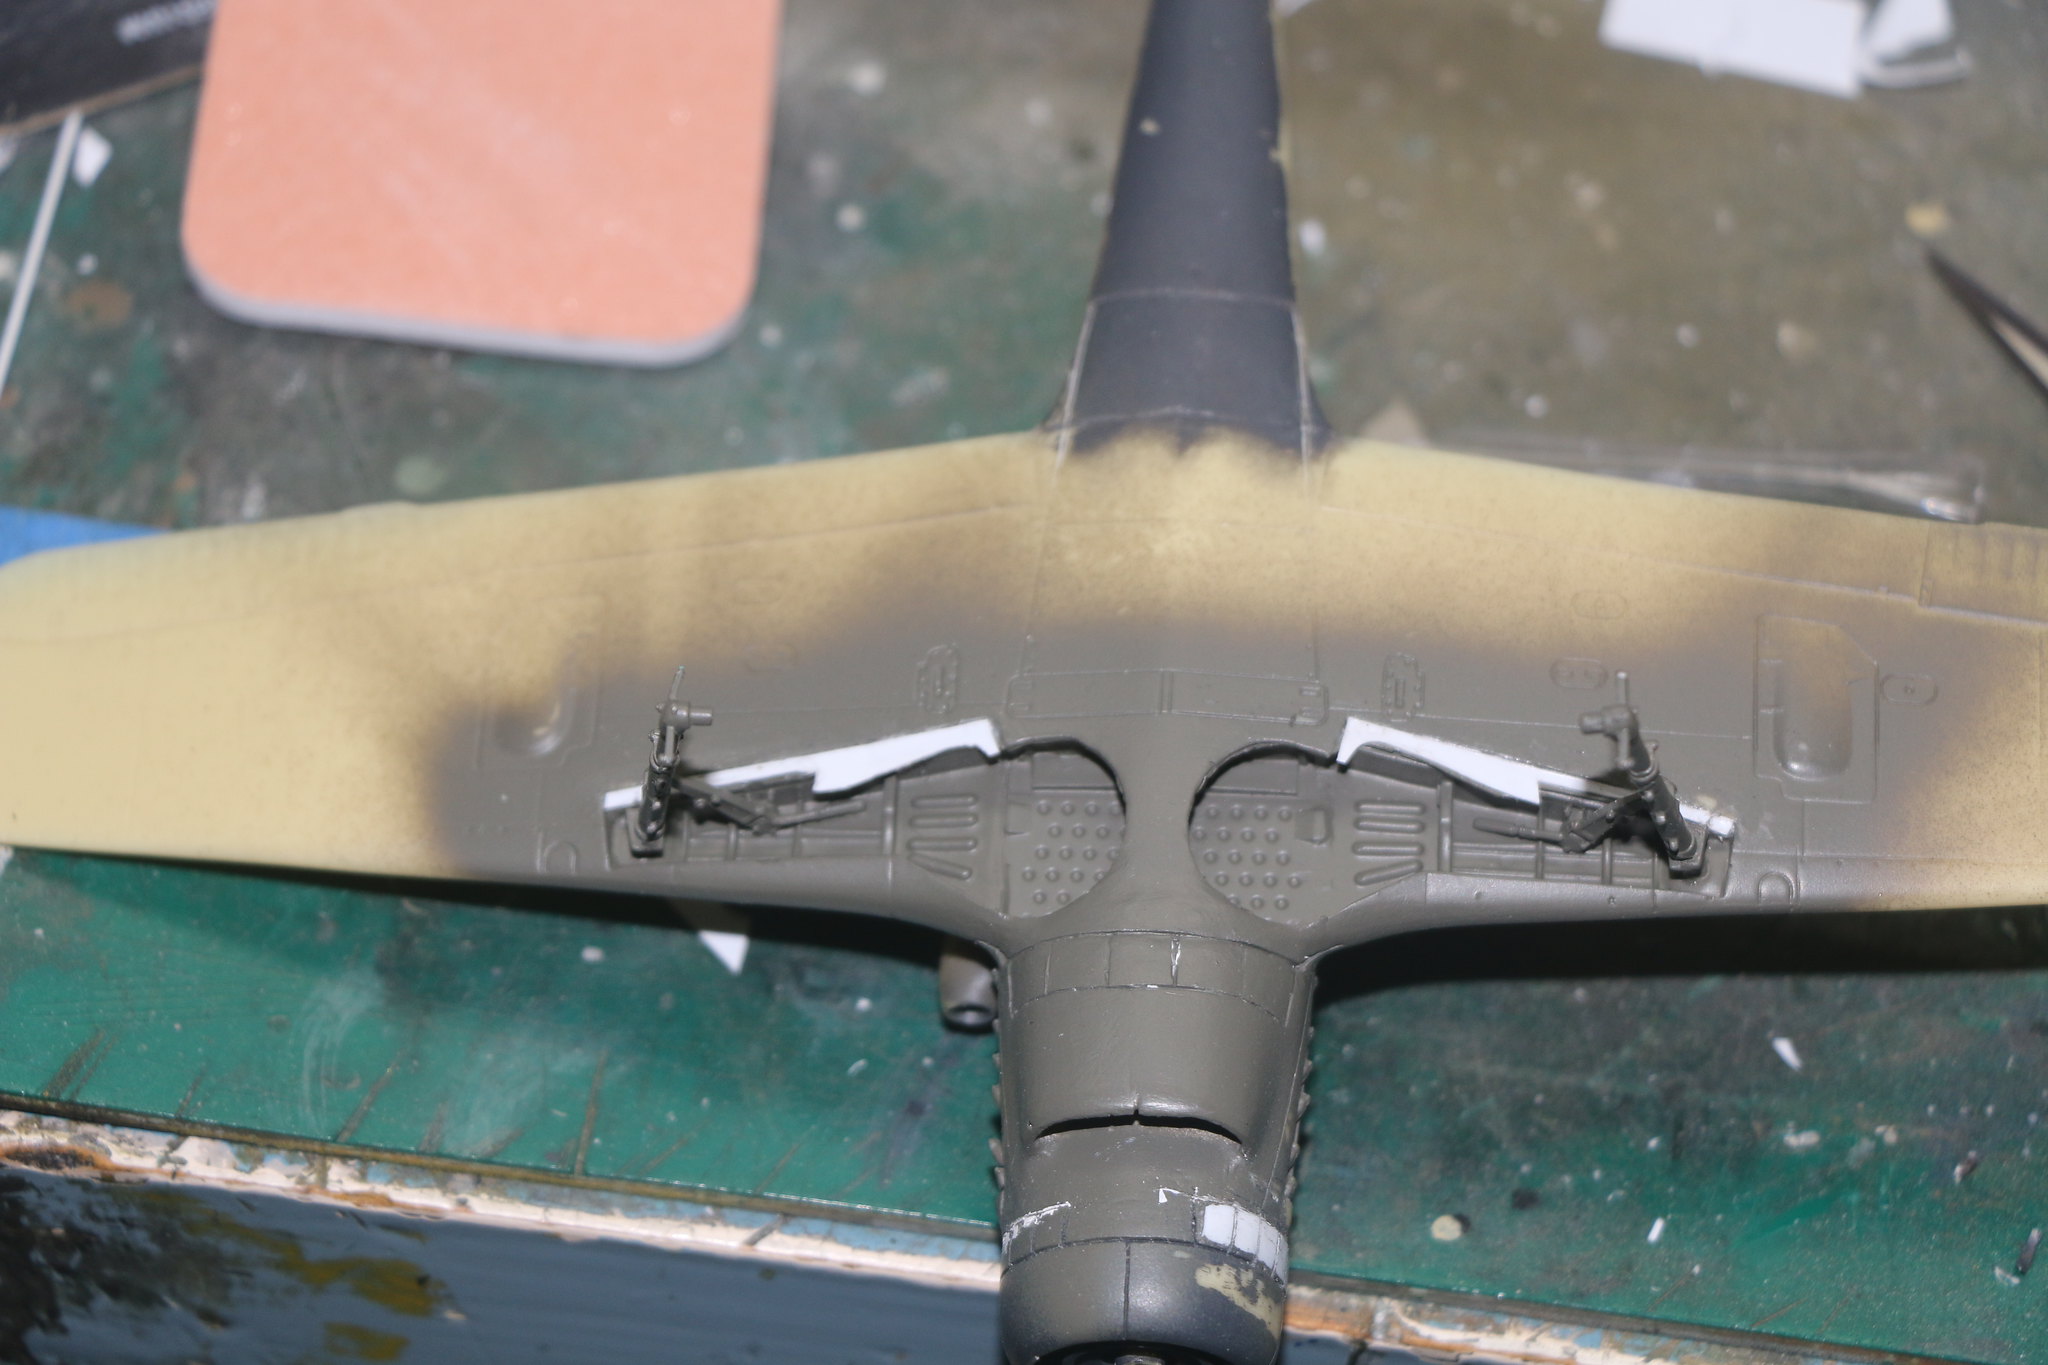
I've got the landing gear on which indexed nicely and are quite rigid with the retracting gear in place, which set up the correct angles nicely. I've left the covers off for painting and scratching the missing wing parts. There was a problem with the moulds here one side showed some mould damage and the retraction gear needed to be adjusted accordingly by shortening the fitting tab. Still indexed nicely and set the lading gear at the correct angle just not as solid a fit as the other side.
 IMG_1953
 by
Chris WIlson, on Flickr
 IMG_1954
 by
Chris WIlson, on Flickr
 IMG_1955
 by
Chris WIlson, on Flickr
 IMG_1952
 by
Chris WIlson, on Flickr
 IMG_1956
 by
Chris WIlson, on Flickr
 IMG_1957
 by
Chris WIlson, on Flickr
 IMG_1958
 by
Chris WIlson, on Flickr
 IMG_1959
 by
Chris WIlson, on Flickr
 IMG_1960
 by
Chris WIlson, on Flickr
Ontario, Canada
Joined: February 04, 2008
KitMaker: 2,507 posts
AeroScale: 1,814 posts
Posted: Sunday, January 14, 2018 - 03:48 AM UTC
I have sanded down all the parts and glued them:-
Next up some filler and sanding.
" The Die Hards"
43rd MIDDLESEX REGIMENT
MACHINE GUN CORPS
XXX CORP
The most effective way to do it, is to do it.
- Amelia Earhart
#259
Massachusetts, United States
Joined: October 23, 2011
KitMaker: 2,265 posts
AeroScale: 1,715 posts
Posted: Sunday, January 14, 2018 - 05:14 PM UTC
That'll make an airplane
#305
Christchurch, New Zealand
Joined: February 01, 2006
KitMaker: 1,673 posts
AeroScale: 1,517 posts
Posted: Tuesday, January 16, 2018 - 03:16 PM UTC
In amongst all the other projects going I'm slowly working on this one as well. I solved the missing wing panels by simply drawing around the gear covers and cutting it out. I found that the plasticard I was using was a tad to thin and had to pack it out and even then I didn't pack it out far enough and had to add another layer of plasticard which actually proved to be for the best. I've got the wheel wells sorted painted and just need to add a wash to add shadows and dirty it up a bit.
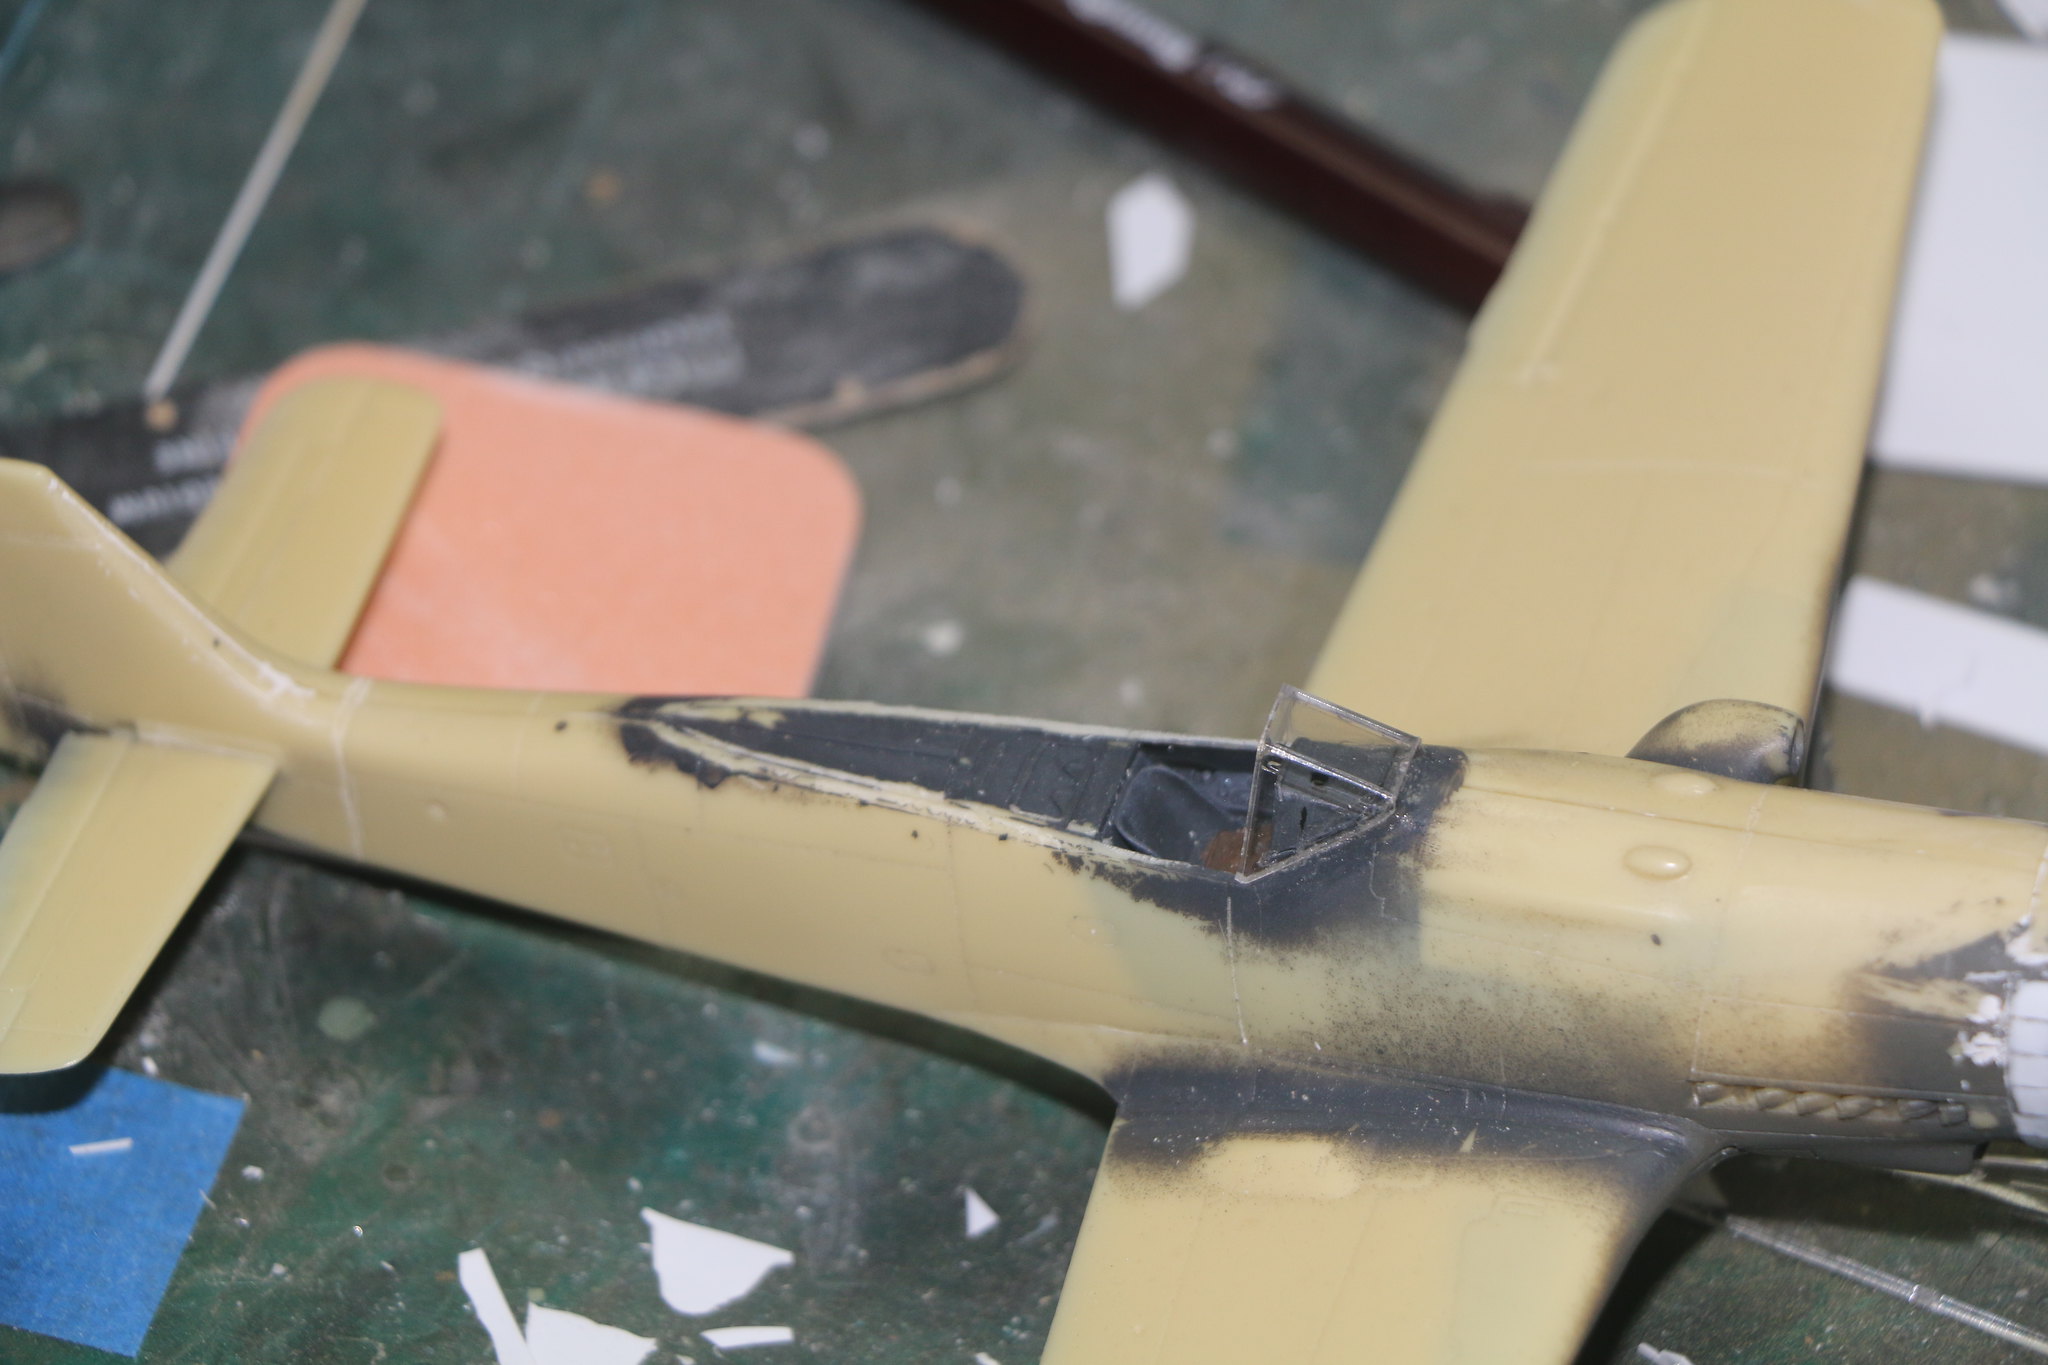
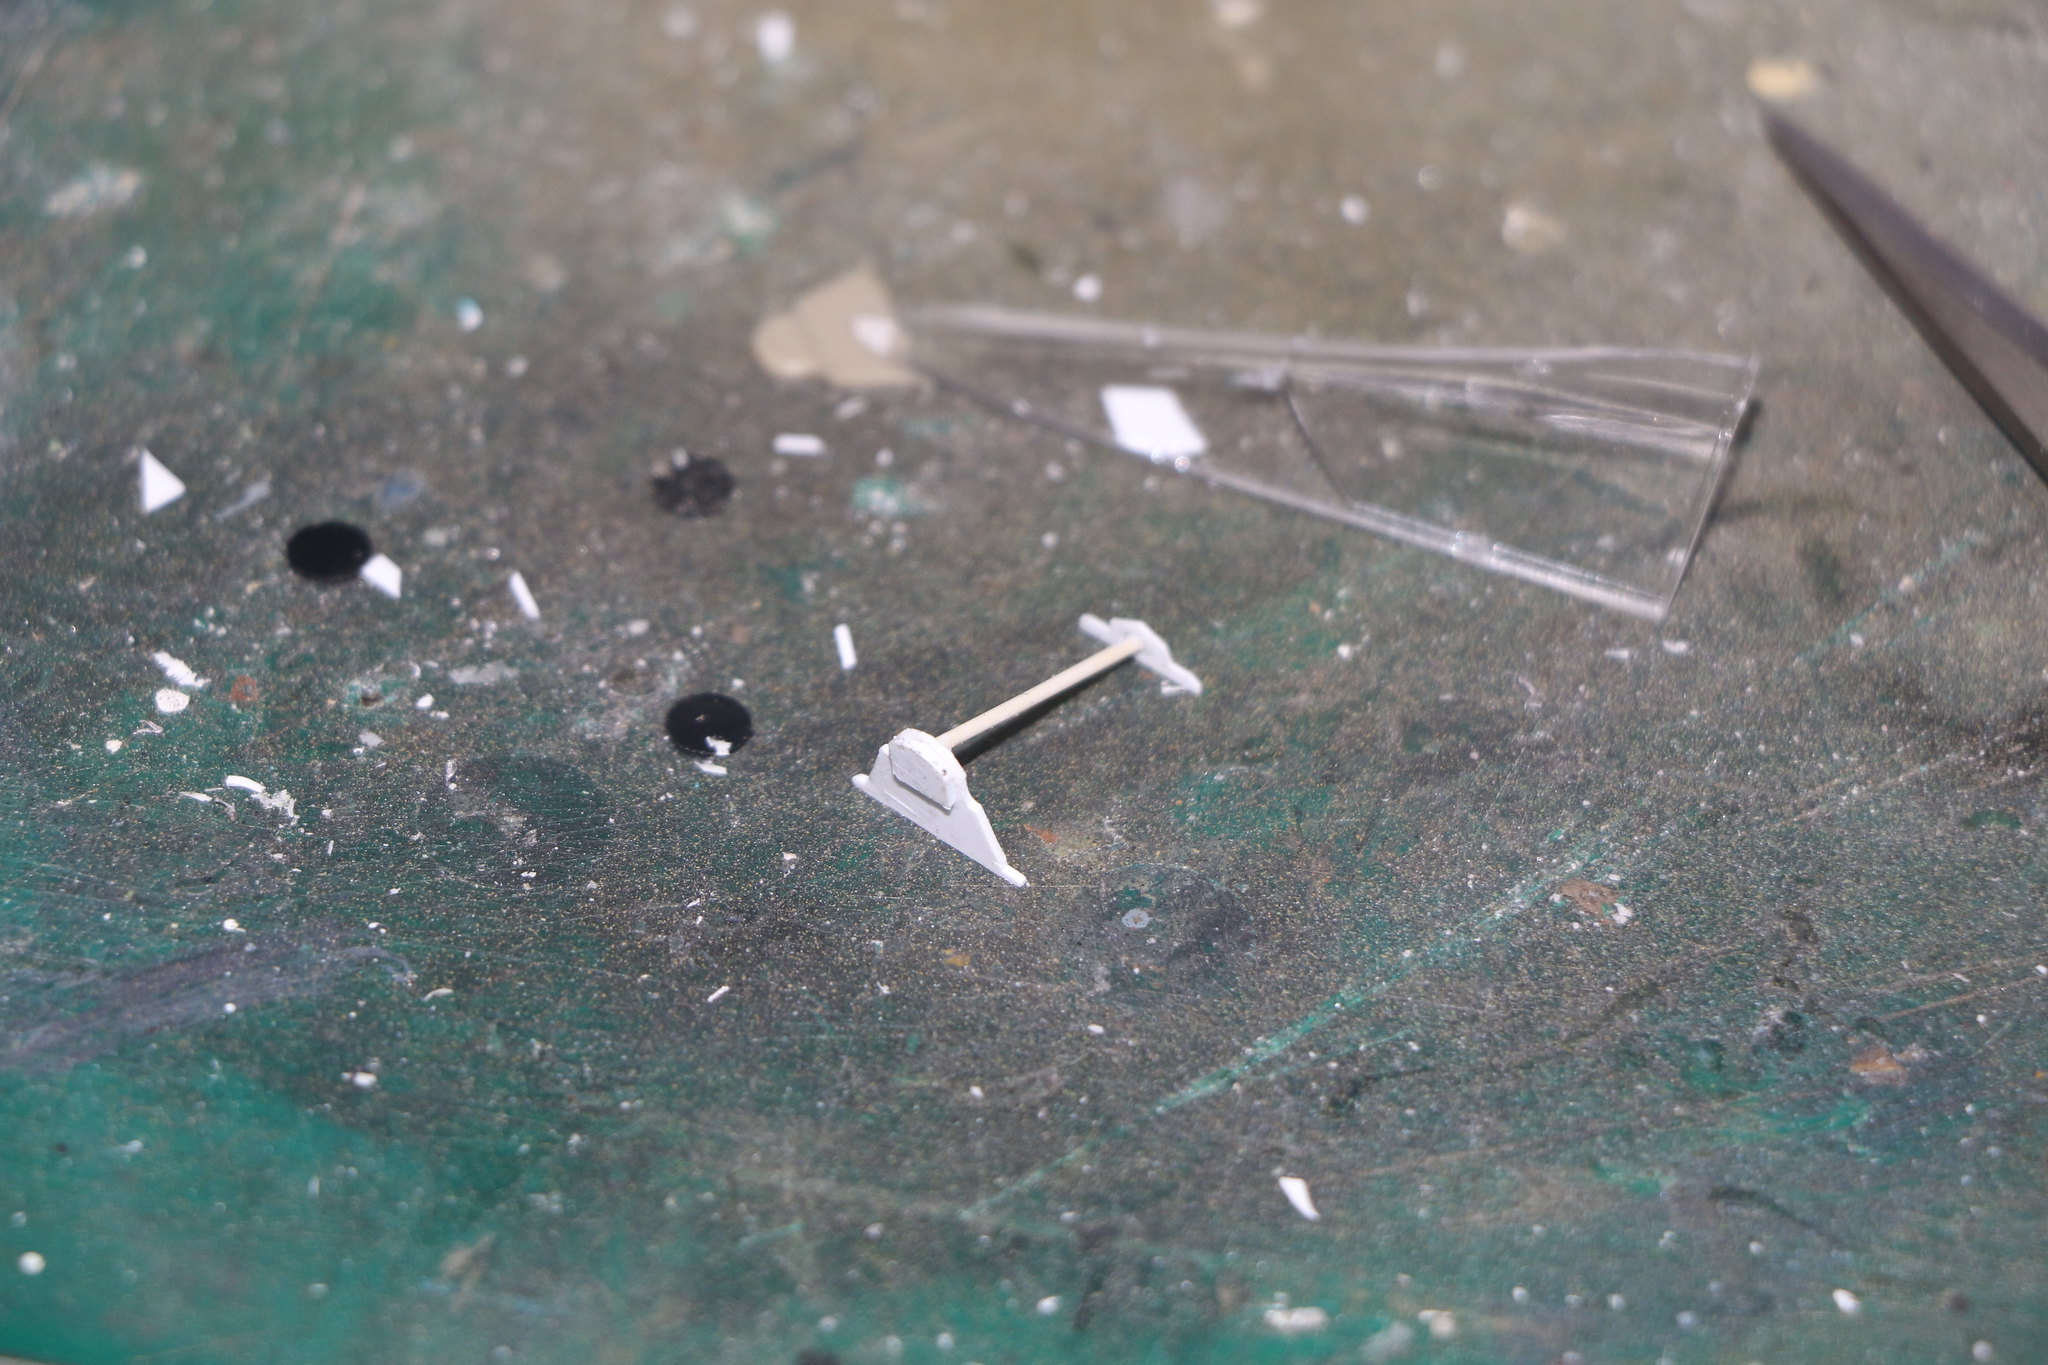
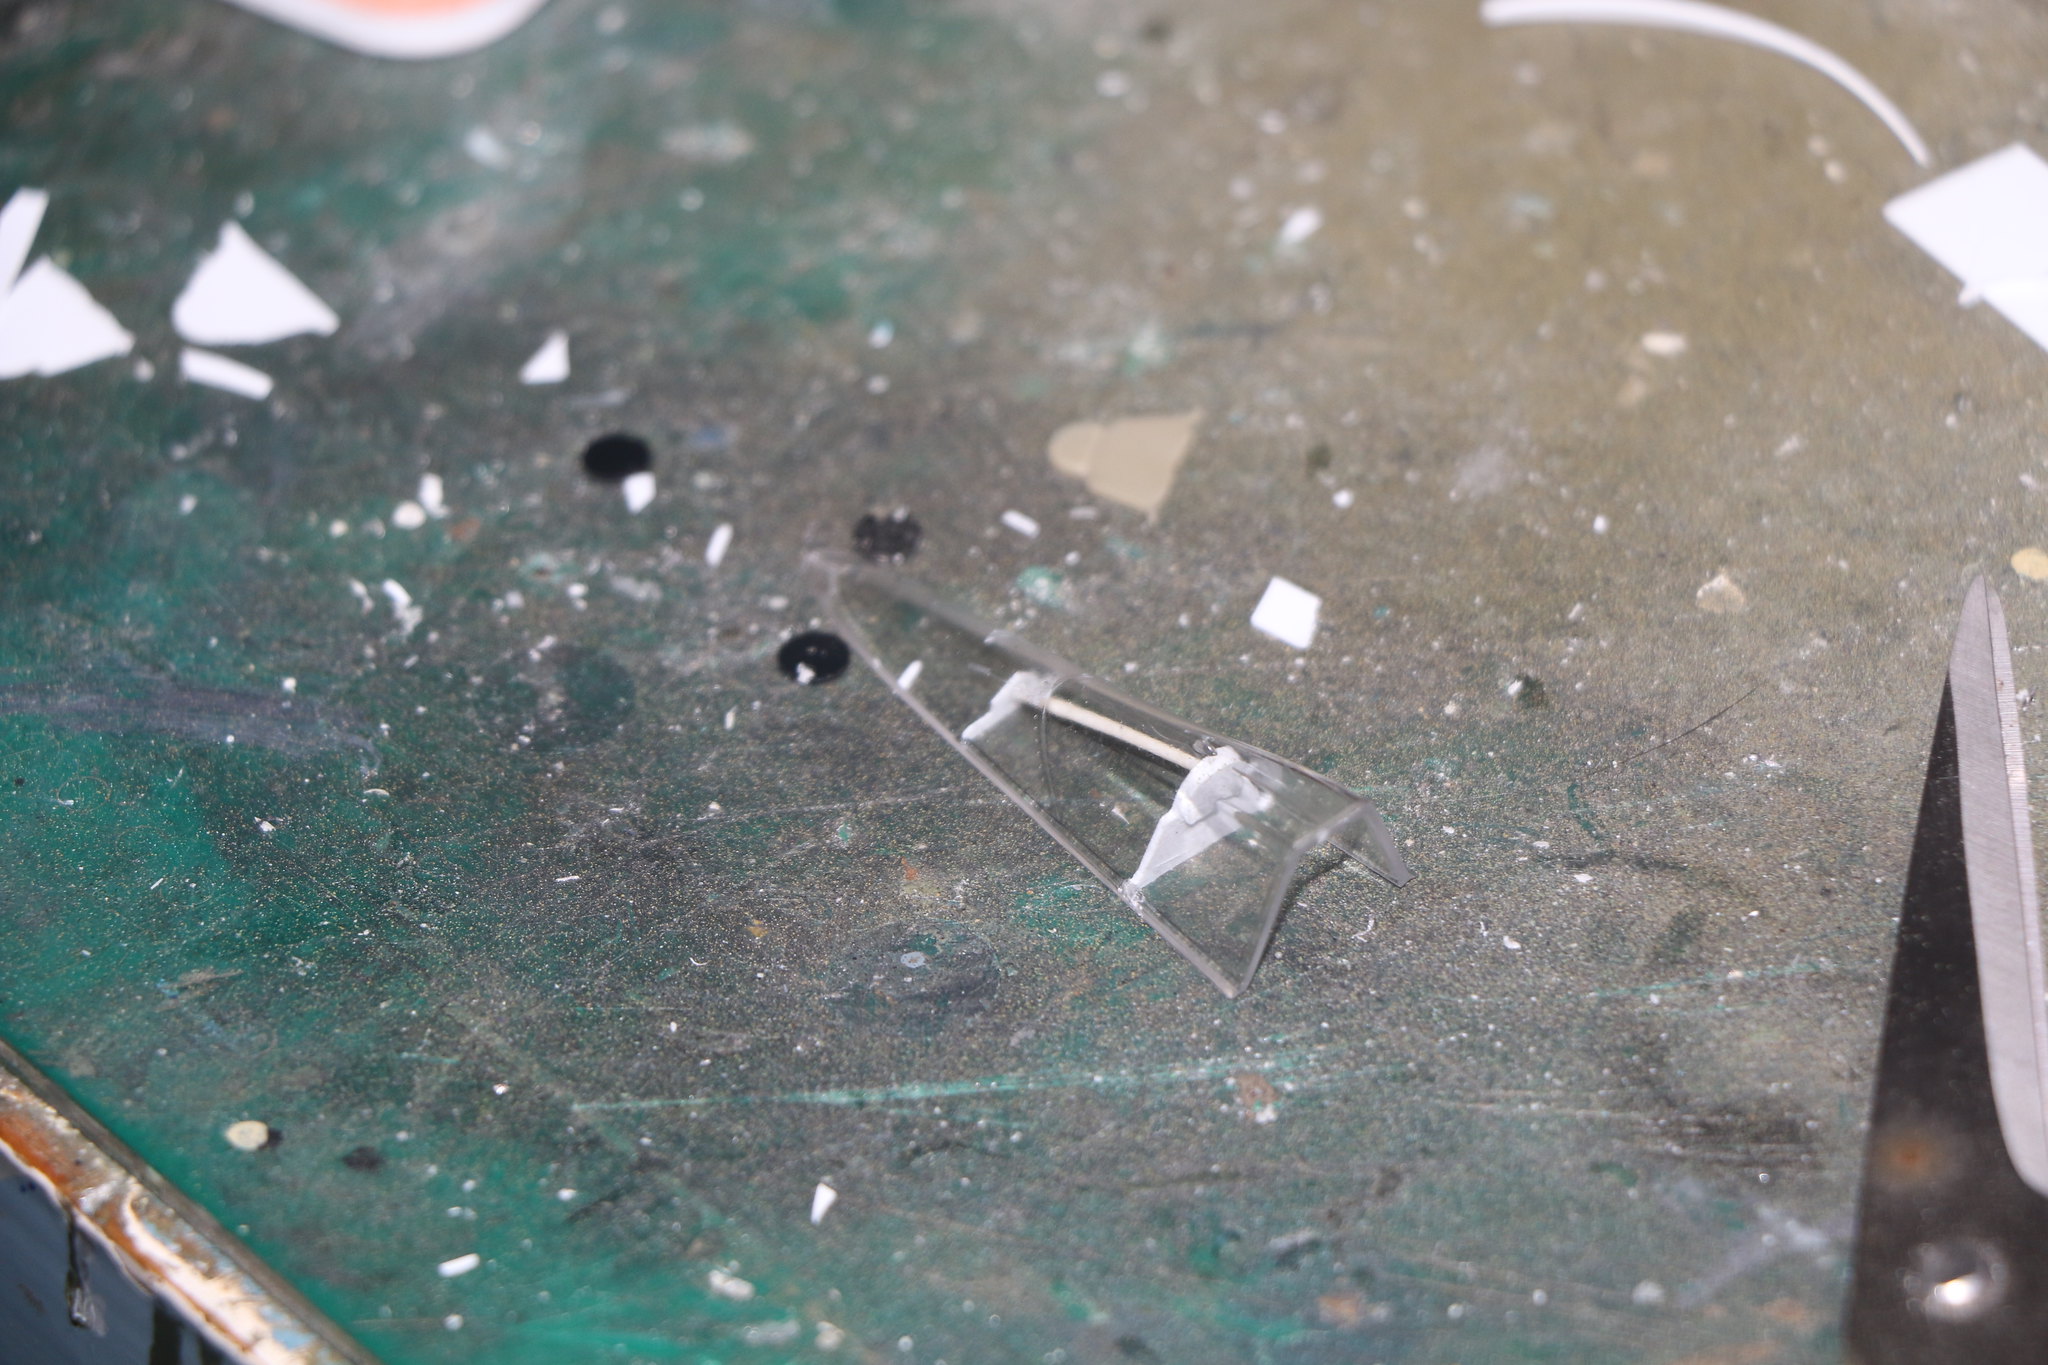
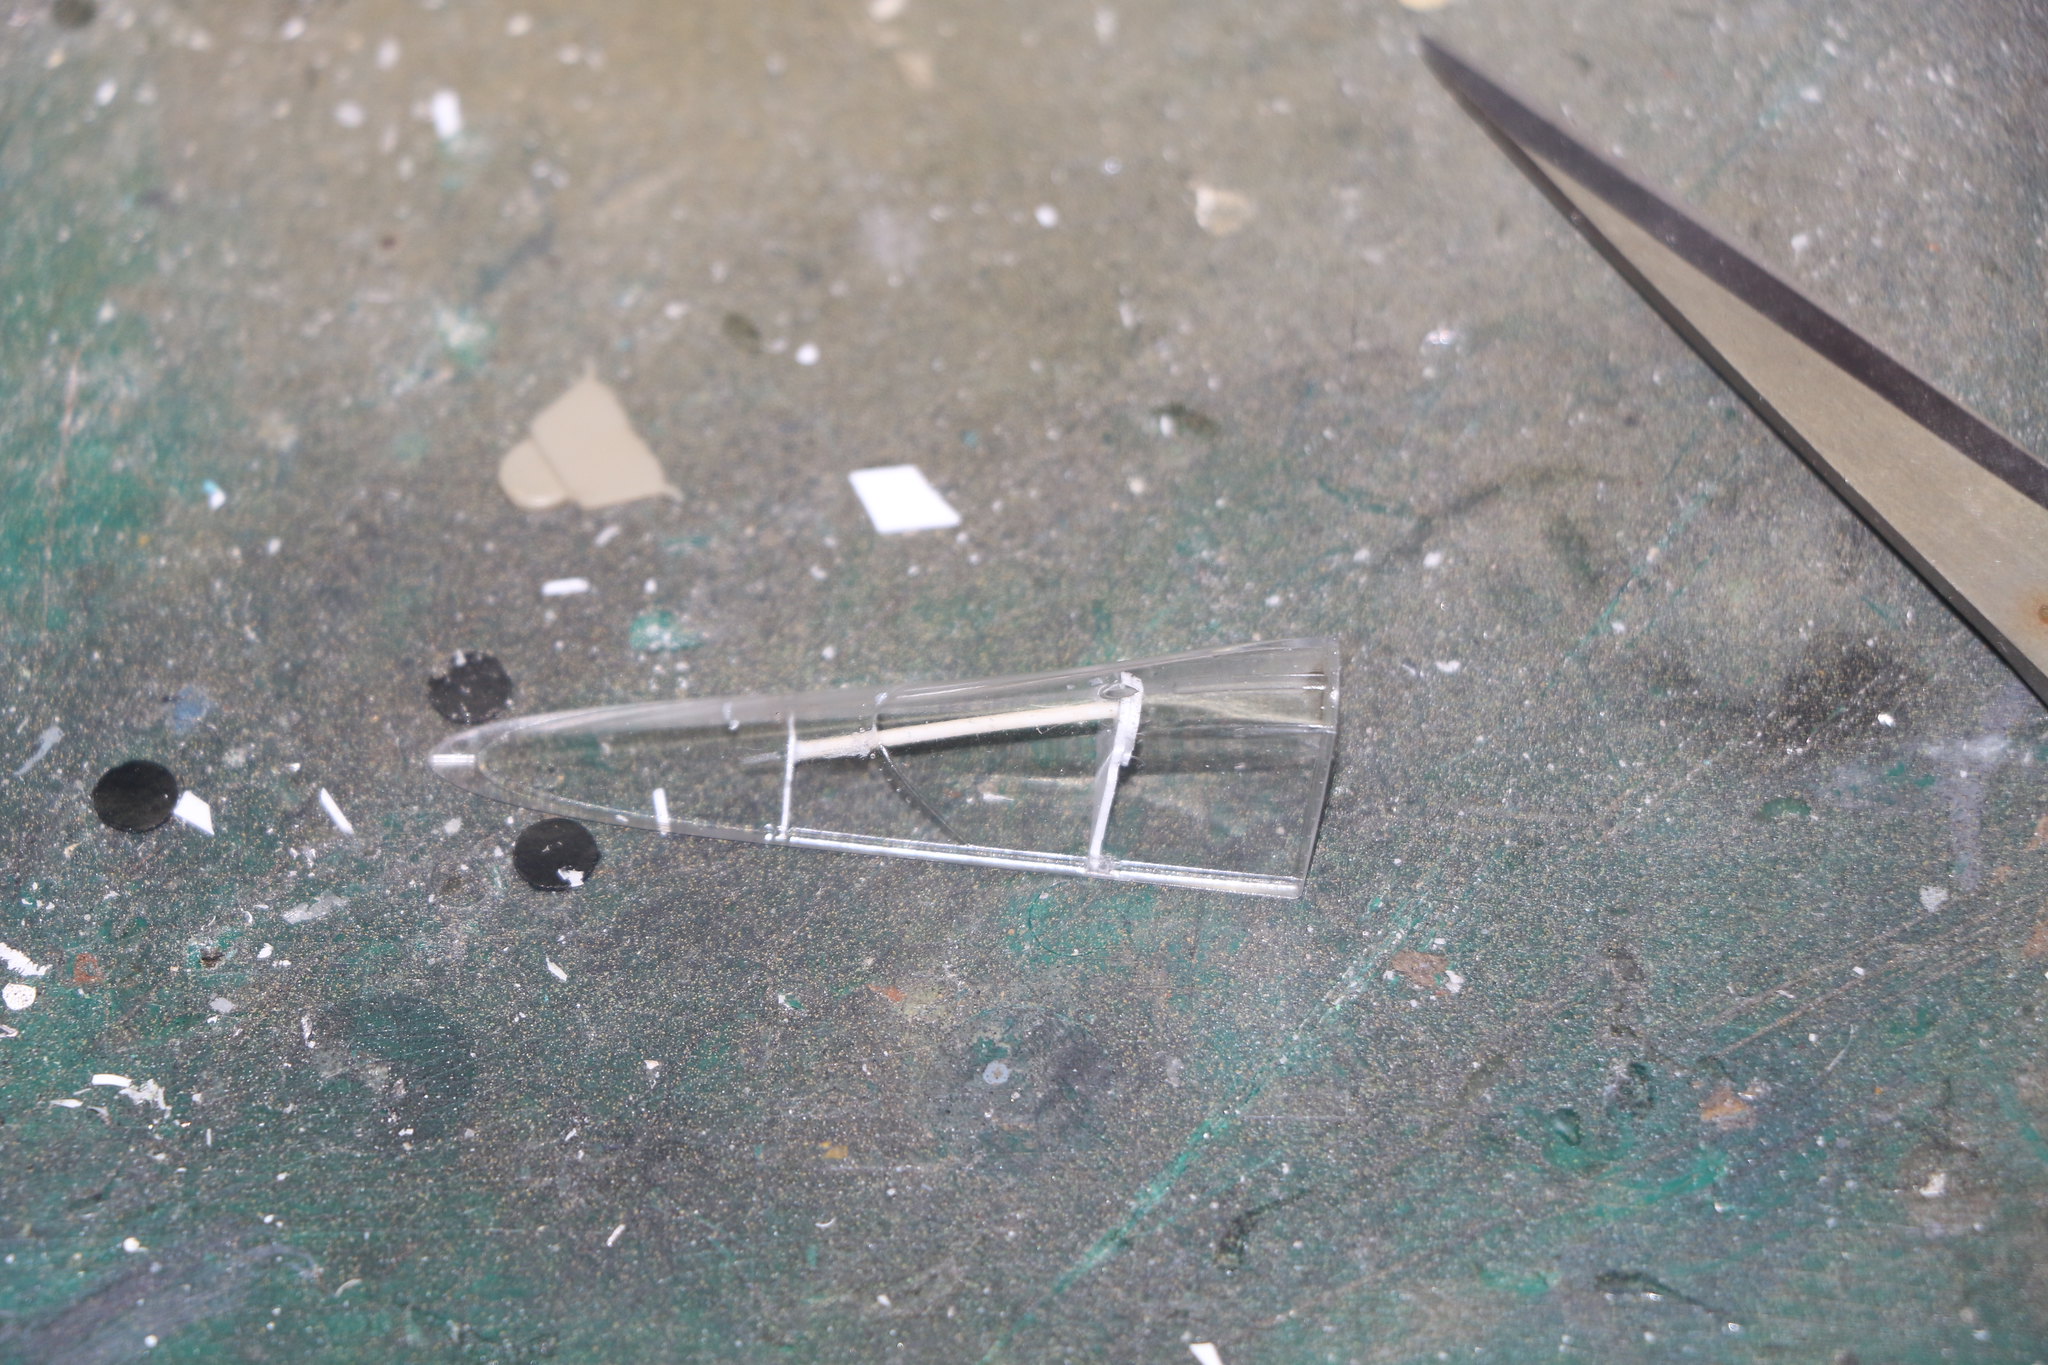
While cutting out the vac form canopy I realised that the kit has no armour headrest, support bracket and brace. So I delved into my kits and realised Eduard provides more canopies than can be used for one model and I snaffled one for this kit.
I firstly needed to get the front of the canopy to fit which wasn't that hard just needed to remove some material. I realised shortly after cutting away the excess resin that my Humbrol Clearfix was of no practical use and needed to buy more. I sorted that last weekend and have been slowly working away on the problem of the headrest. I decided in the end to simply take the Eduard part and trace round it and create the support bracket simply as it won't be seen. It actually took a couple of tries and a change to a thicker plasticard to get it sorted. But I've got a decent facsimile that will look okay under a coat of paint and an oil wash. I just need to paint it attach it to the canopy and then attach the canopy to the kit. A little masking and then it's on with the RLM66 then the camo. Getting closer people looking forward to getting the camo on I really do like the late war Luftwaffe schemes.
 IMG_1997
 by
Chris WIlson, on Flickr
 IMG_1995
 by
Chris WIlson, on Flickr
 IMG_1994
 by
Chris WIlson, on Flickr
 IMG_1993
 by
Chris WIlson, on Flickr
 IMG_1992
 by
Chris WIlson, on Flickr
Ontario, Canada
Joined: February 04, 2008
KitMaker: 2,507 posts
AeroScale: 1,814 posts
Posted: Sunday, January 21, 2018 - 01:15 AM UTC
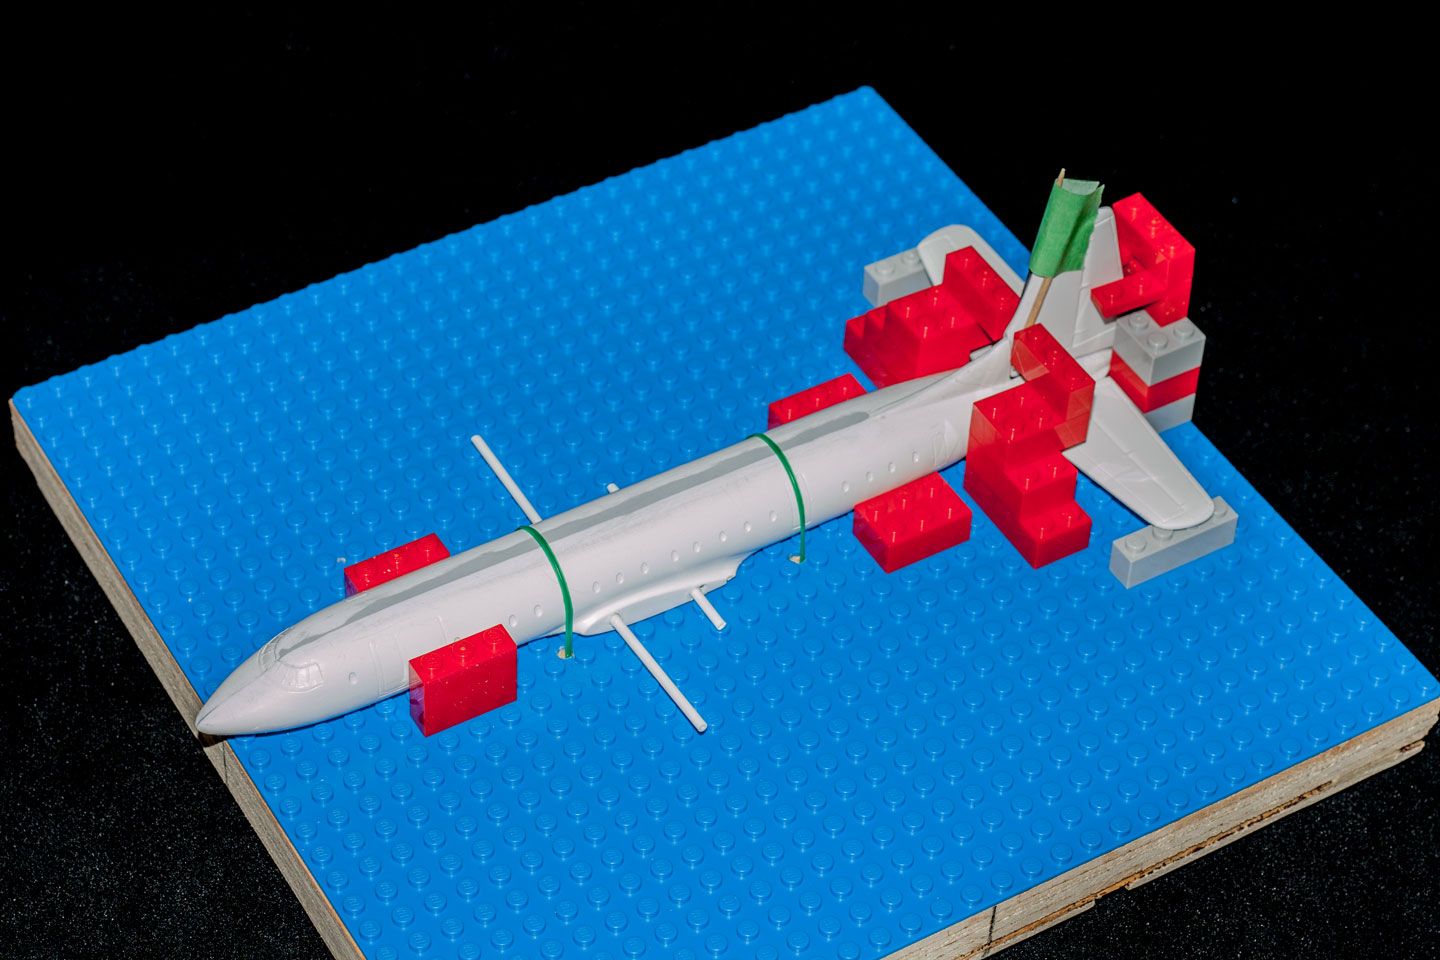
I have setup and glued tail assemblys on my trusty Lego jig:-
" The Die Hards"
43rd MIDDLESEX REGIMENT
MACHINE GUN CORPS
XXX CORP
The most effective way to do it, is to do it.
- Amelia Earhart
Merlin
Senior Editor #017
United Kingdom
Joined: June 11, 2003
KitMaker: 17,582 posts
AeroScale: 12,795 posts
Posted: Tuesday, January 23, 2018 - 02:03 AM UTC
Hi again
Excellent progress, everyone!
I'm afraid my Fw 58 will have to be a bit more of a back-burner project than I'd intended. I've got the parts cut out, but I need to concentrate on a couple of review-builds for a while. Plus, at some point in the next few weeks, I'm set to start what may be the first of a series of commissions for a manufacturer (which won't appear on Aeroscale until after they've published them themselves).
Fear not, though, I'll push ahead as and when I get a chance.
All the best
Rowan
BEWARE OF THE FEW...
As I grow older, I regret to say that a detestable habit of thinking seems to be getting a hold of me. - H. Rider Haggard
#259
Massachusetts, United States
Joined: October 23, 2011
KitMaker: 2,265 posts
AeroScale: 1,715 posts
Posted: Tuesday, January 23, 2018 - 04:00 AM UTC
We gave it a whole year because of the "special challenges".
I think I will be able to paint this weekend, so i might be back in with my Electras.
Joined: December 23, 2007
KitMaker: 1,596 posts
AeroScale: 1,275 posts
Posted: Friday, February 02, 2018 - 12:40 AM UTC
I'm back with another update. Not a big step but important: I managed to fill the step at the joint of the fuselage and wing. There was also a bit of sanding around the engine and wing so I will have to work on rescribing the panel lines of the fuselage, what I hate.