OFFICIAL: The Night Shift Campaign
Texas, United States
Joined: February 22, 2008
KitMaker: 5,026 posts
AeroScale: 2,811 posts
Posted: Thursday, September 21, 2017 - 08:55 PM UTC
Quoted Text
Cool story, seems someone went for a joyride and the mountain got in their way 
Four persons on the a/c and one hurt due to a fall. WOW! It looks like some weaponry was retrieved also. OH! and the nurses

Bob
If it aint broke dont fix it.
Oklahoma, United States
Joined: February 11, 2013
KitMaker: 294 posts
AeroScale: 74 posts
Posted: Sunday, October 01, 2017 - 06:03 AM UTC
I'm almost ready for some paint. I need to go over all the seams and joints and clean everything up. The canopy replacement should be here later this week so I should be masking in a few days.
On the bench:
The Night Shift Campaign: GWH P-61 "The Last Shoot Down". 1/48
Spanish Civil War Campaign: Dragon Pz I Ausf B 1/35
Revell B-17 1/48 with lots of add ons.
Complete rehab and repaint of Dragon Pz III J. 1/35
Texas, United States
Joined: February 22, 2008
KitMaker: 5,026 posts
AeroScale: 2,811 posts
Posted: Wednesday, October 04, 2017 - 02:37 AM UTC
I need some help with the F6F-5N wheel well and wing fold areas. I have been searching for any information as to the color of those areas after the little info that I have been able to find shows white, chromate, and Navy blue.
Bob
If it aint broke dont fix it.
Oklahoma, United States
Joined: February 11, 2013
KitMaker: 294 posts
AeroScale: 74 posts
Posted: Wednesday, October 04, 2017 - 03:05 AM UTC
Quoted Text
I need some help with the F6F-5N wheel well and wing fold areas. I have been searching for any information as to the color of those areas after the little info that I have been able to find shows white, chromate, and Navy blue.
Bob
This might help.
http://www.ipmsstockholm.org/magazine/2004/05/stuff_eng_interior_colours_us_part3.htm I quoted the F6F portion
Quoted Text
By the time Hellcat entered mass production, Grumman had made the decision to adopt Interior Green in place of Bronze Green for cockpits, and possibly also to adopt Zinc Chromate primer in place of its own Grumman Grey. However, older paints were to be used as long as their stocks were available.
Thus the first hundred or so F6F-3 airframes produced almost certainly had their cockpits finished with the remaining stock of Bronze Green. Subsequent aircraft had their cockpits finished in Interior Green. Starting with F6F-5, cockpit area above and including the side consoles was finished in flat black with the remaining surfaces in Interior Green.
An enlarged portion of a well-known photo of newly produced F6F-3s on Grumman publicity flight. The factory-applied red surrounds to the national insignia should indicate a June - September 1943 time frame. What is interesting is the colour of the headrest inside the cockpit, which looks markedly unlike Interior Green. The actual colour could have been Bronze Green, but this statement is non-conclusive.
The inside of the engine cowling varied throughout the Hellcat production, being Grumman Grey, Interior Green or Zinc Chromate Yellow. Later F6F-5 and had flat black cowling interiors. Other enclosed areas of the fuselage were either Grumman Grey (on early production machines) or Zinc Chromate Yellow.
In common with the general Navy practice the wheel bays and undercarriage legs were finished in the lower surface colour. However, the area ahead of the main spar in the wheel well was left in Interior Green. Also, some photos of operational Hellcats show wheel hubs and legs in Aluminium finish, possibly applied during overhauls at field maintenance depots.

On the bench:
The Night Shift Campaign: GWH P-61 "The Last Shoot Down". 1/48
Spanish Civil War Campaign: Dragon Pz I Ausf B 1/35
Revell B-17 1/48 with lots of add ons.
Complete rehab and repaint of Dragon Pz III J. 1/35
Texas, United States
Joined: February 22, 2008
KitMaker: 5,026 posts
AeroScale: 2,811 posts
Posted: Wednesday, October 04, 2017 - 10:19 AM UTC
Robert, thanks for the information it helps a lot.
Bob
If it aint broke dont fix it.
Oklahoma, United States
Joined: February 11, 2013
KitMaker: 294 posts
AeroScale: 74 posts
Posted: Saturday, October 07, 2017 - 02:51 AM UTC
Well a got the canopy replaced and got all the interior colors sprayed. Now I can prime and start the paint job.
On the bench:
The Night Shift Campaign: GWH P-61 "The Last Shoot Down". 1/48
Spanish Civil War Campaign: Dragon Pz I Ausf B 1/35
Revell B-17 1/48 with lots of add ons.
Complete rehab and repaint of Dragon Pz III J. 1/35
Oklahoma, United States
Joined: February 11, 2013
KitMaker: 294 posts
AeroScale: 74 posts
Posted: Saturday, October 07, 2017 - 06:40 AM UTC
Well the first coat of paint/primer is on.
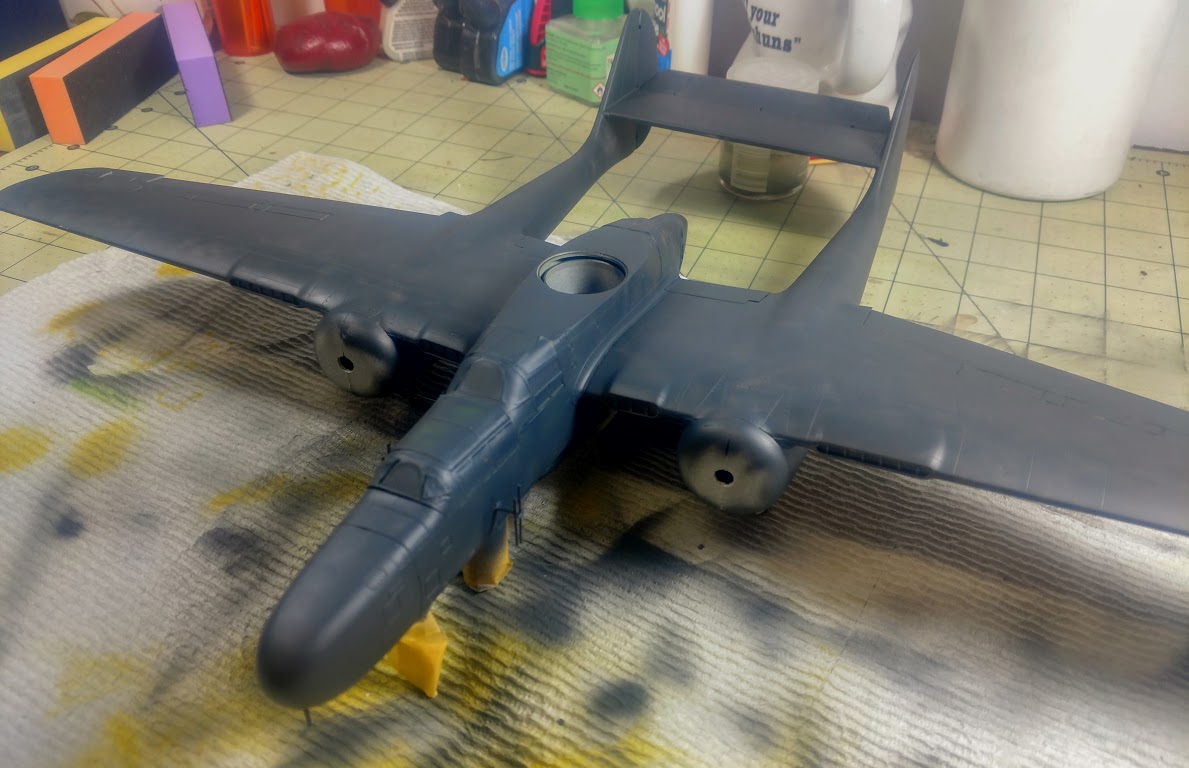

I used Vallejo Dunkelgrau primer purposely sprayed a little thin and mottled to give it a worn look. I will be adding black and as needed other grays to get it just the right look.
On the bench:
The Night Shift Campaign: GWH P-61 "The Last Shoot Down". 1/48
Spanish Civil War Campaign: Dragon Pz I Ausf B 1/35
Revell B-17 1/48 with lots of add ons.
Complete rehab and repaint of Dragon Pz III J. 1/35
Lisboa, Portugal
Joined: August 27, 2010
KitMaker: 679 posts
AeroScale: 669 posts
Posted: Saturday, October 07, 2017 - 08:04 PM UTC
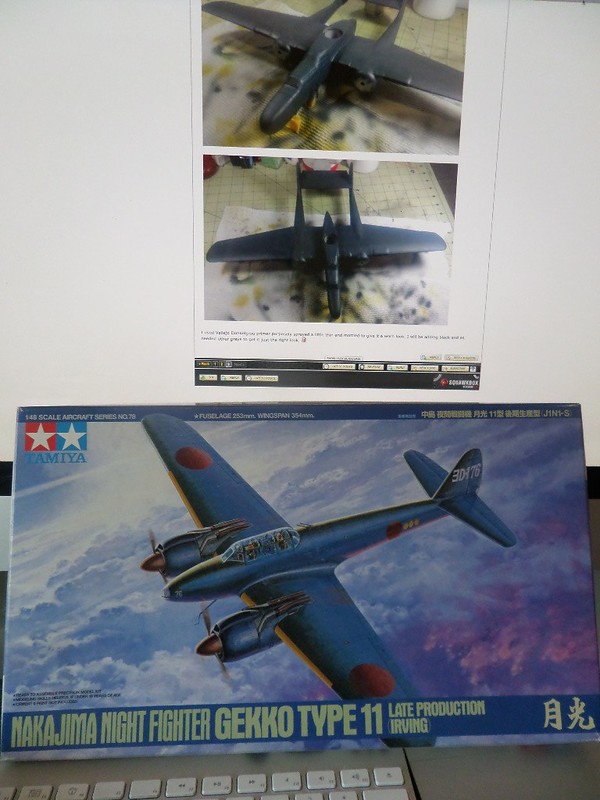
Time for me to jump aboard the night shift!
My entry is the venerable but outstanding Gekko late production from Tamiya in the quarter scale.
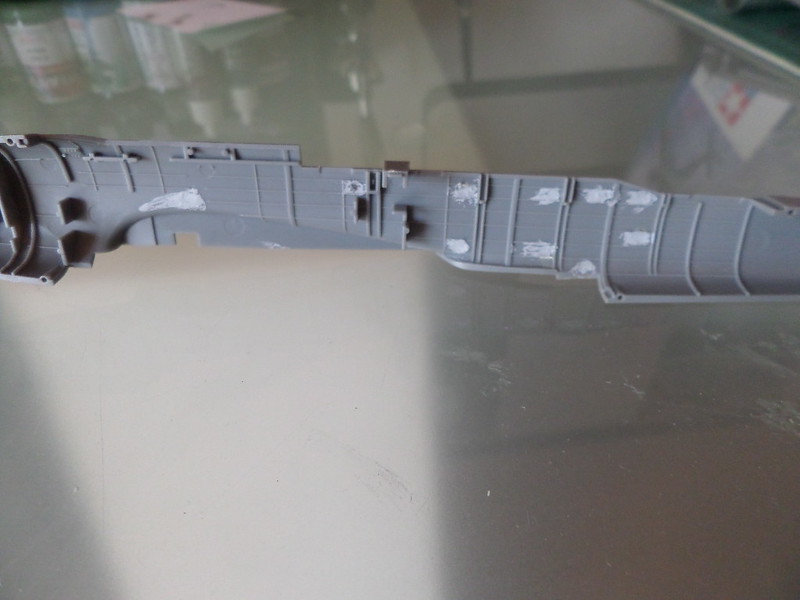
The kit has some few itens already glued, the top and bottom wing and one of the stabilizers. Also placed are the masks (wonder if the glue is still ok after 8 years or so...) and some putty on the inner fuselage holes. These will be a pain to smooth to surface.

will post ongoing photos during these next few months.
Cheers,
Pedro
Lisboa, Portugal
Joined: August 27, 2010
KitMaker: 679 posts
AeroScale: 669 posts
Posted: Sunday, October 15, 2017 - 02:00 AM UTC
No photos, all bench time going to a lot of PE parts in the wheel bays and cockpit.
Guess this part will be long and tedious, but worthy in the end im sure.
Btw, this campaign needs more bumps, I mean with so many good modelers enlisted and some great subjects chosen, it should be more active.
Cheers
Pedro
Uusimaa, Finland
Joined: October 01, 2016
KitMaker: 514 posts
AeroScale: 239 posts
Posted: Friday, October 27, 2017 - 09:19 PM UTC
I'm in with Tamiya's Mosquito NF Mk.II:
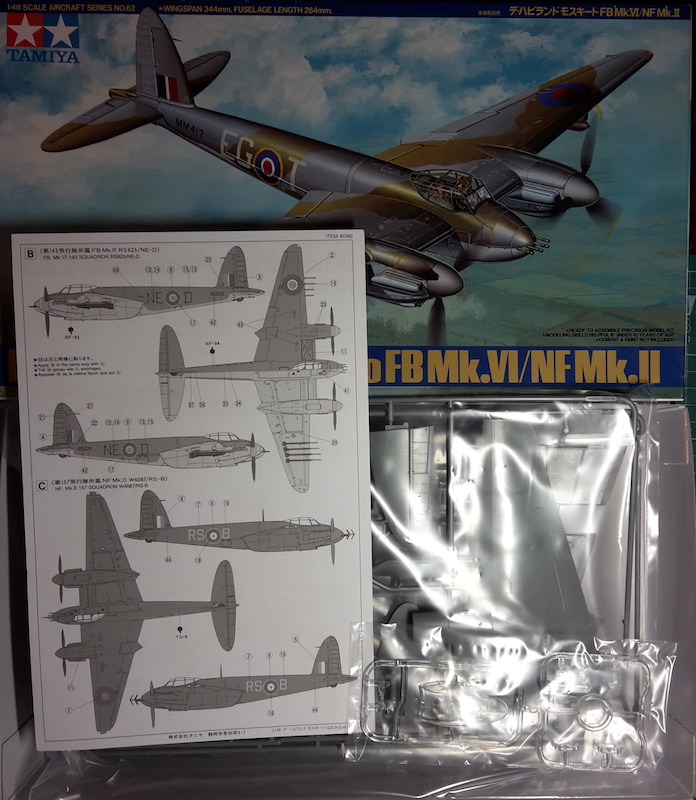
It's the radar equipped all black RS*B.

#439
Washington, United States
Joined: November 05, 2005
KitMaker: 4,950 posts
AeroScale: 3,192 posts
Posted: Friday, November 03, 2017 - 10:30 AM UTC
Hanger Queens in Waiting:
Monogram 1/72 F8F-1
Corsair the Sky Pirate - 1/72 Ace A-7D
Century Series - Airfix 1/72 F-105G
Anti Shipping - Academy 1/72 PBJ-1D
Academy 1/72 F-84E
Illinois, United States
Joined: January 25, 2010
KitMaker: 110 posts
AeroScale: 88 posts
Posted: Tuesday, November 14, 2017 - 02:00 AM UTC
and i will join the campaign with a 1/48 P-70. I hope that i will be able to finish on time... at least one of all of them i am trying to finish..

#305
Christchurch, New Zealand
Joined: February 01, 2006
KitMaker: 1,673 posts
AeroScale: 1,517 posts
Posted: Thursday, November 16, 2017 - 12:53 PM UTC
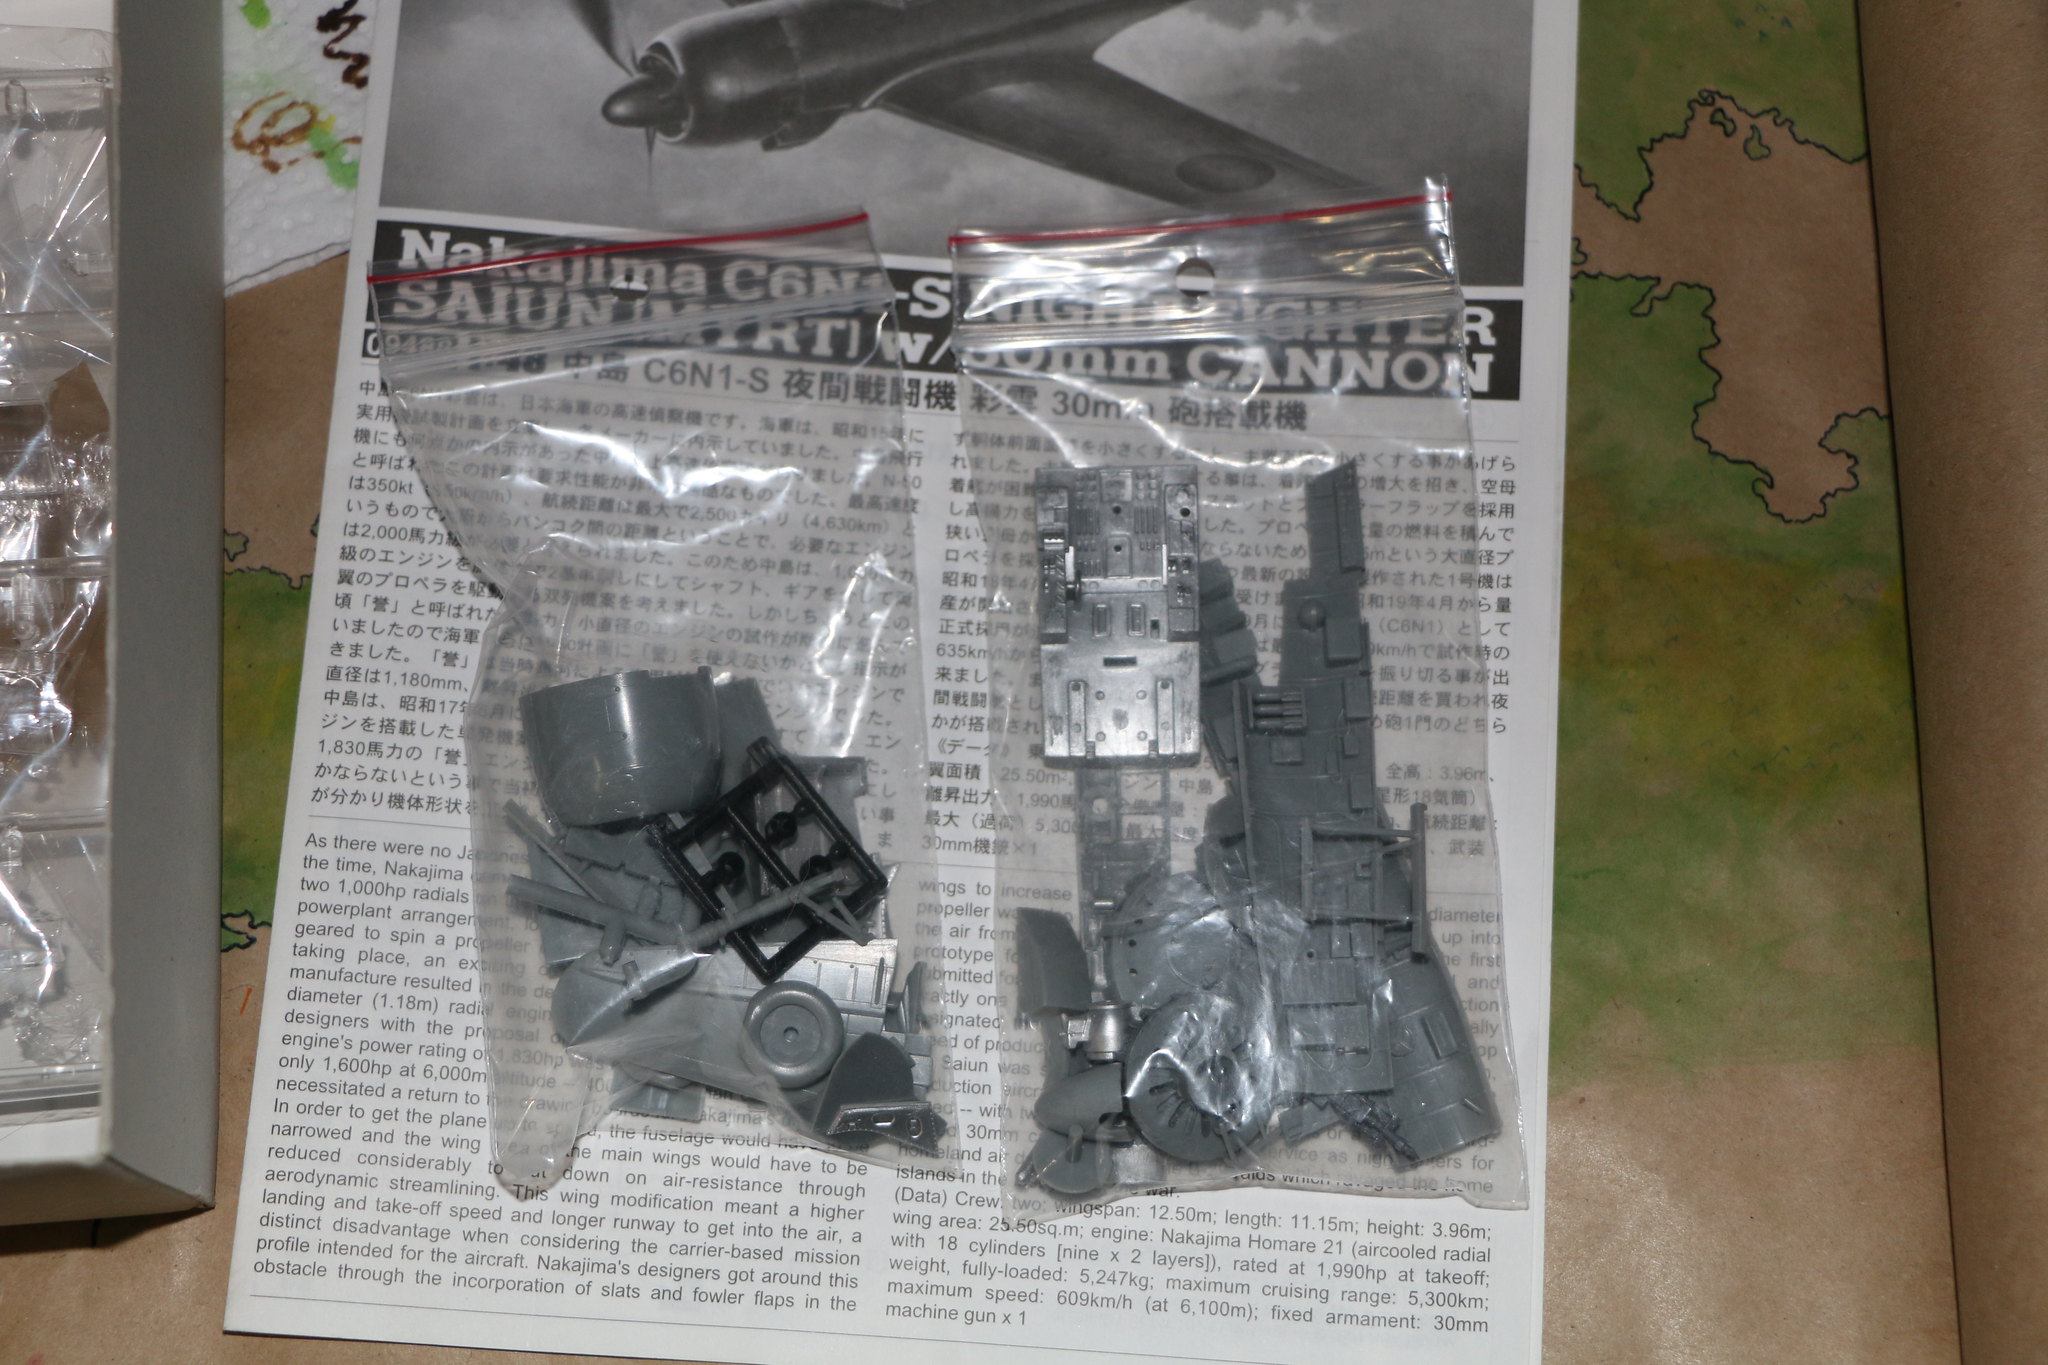
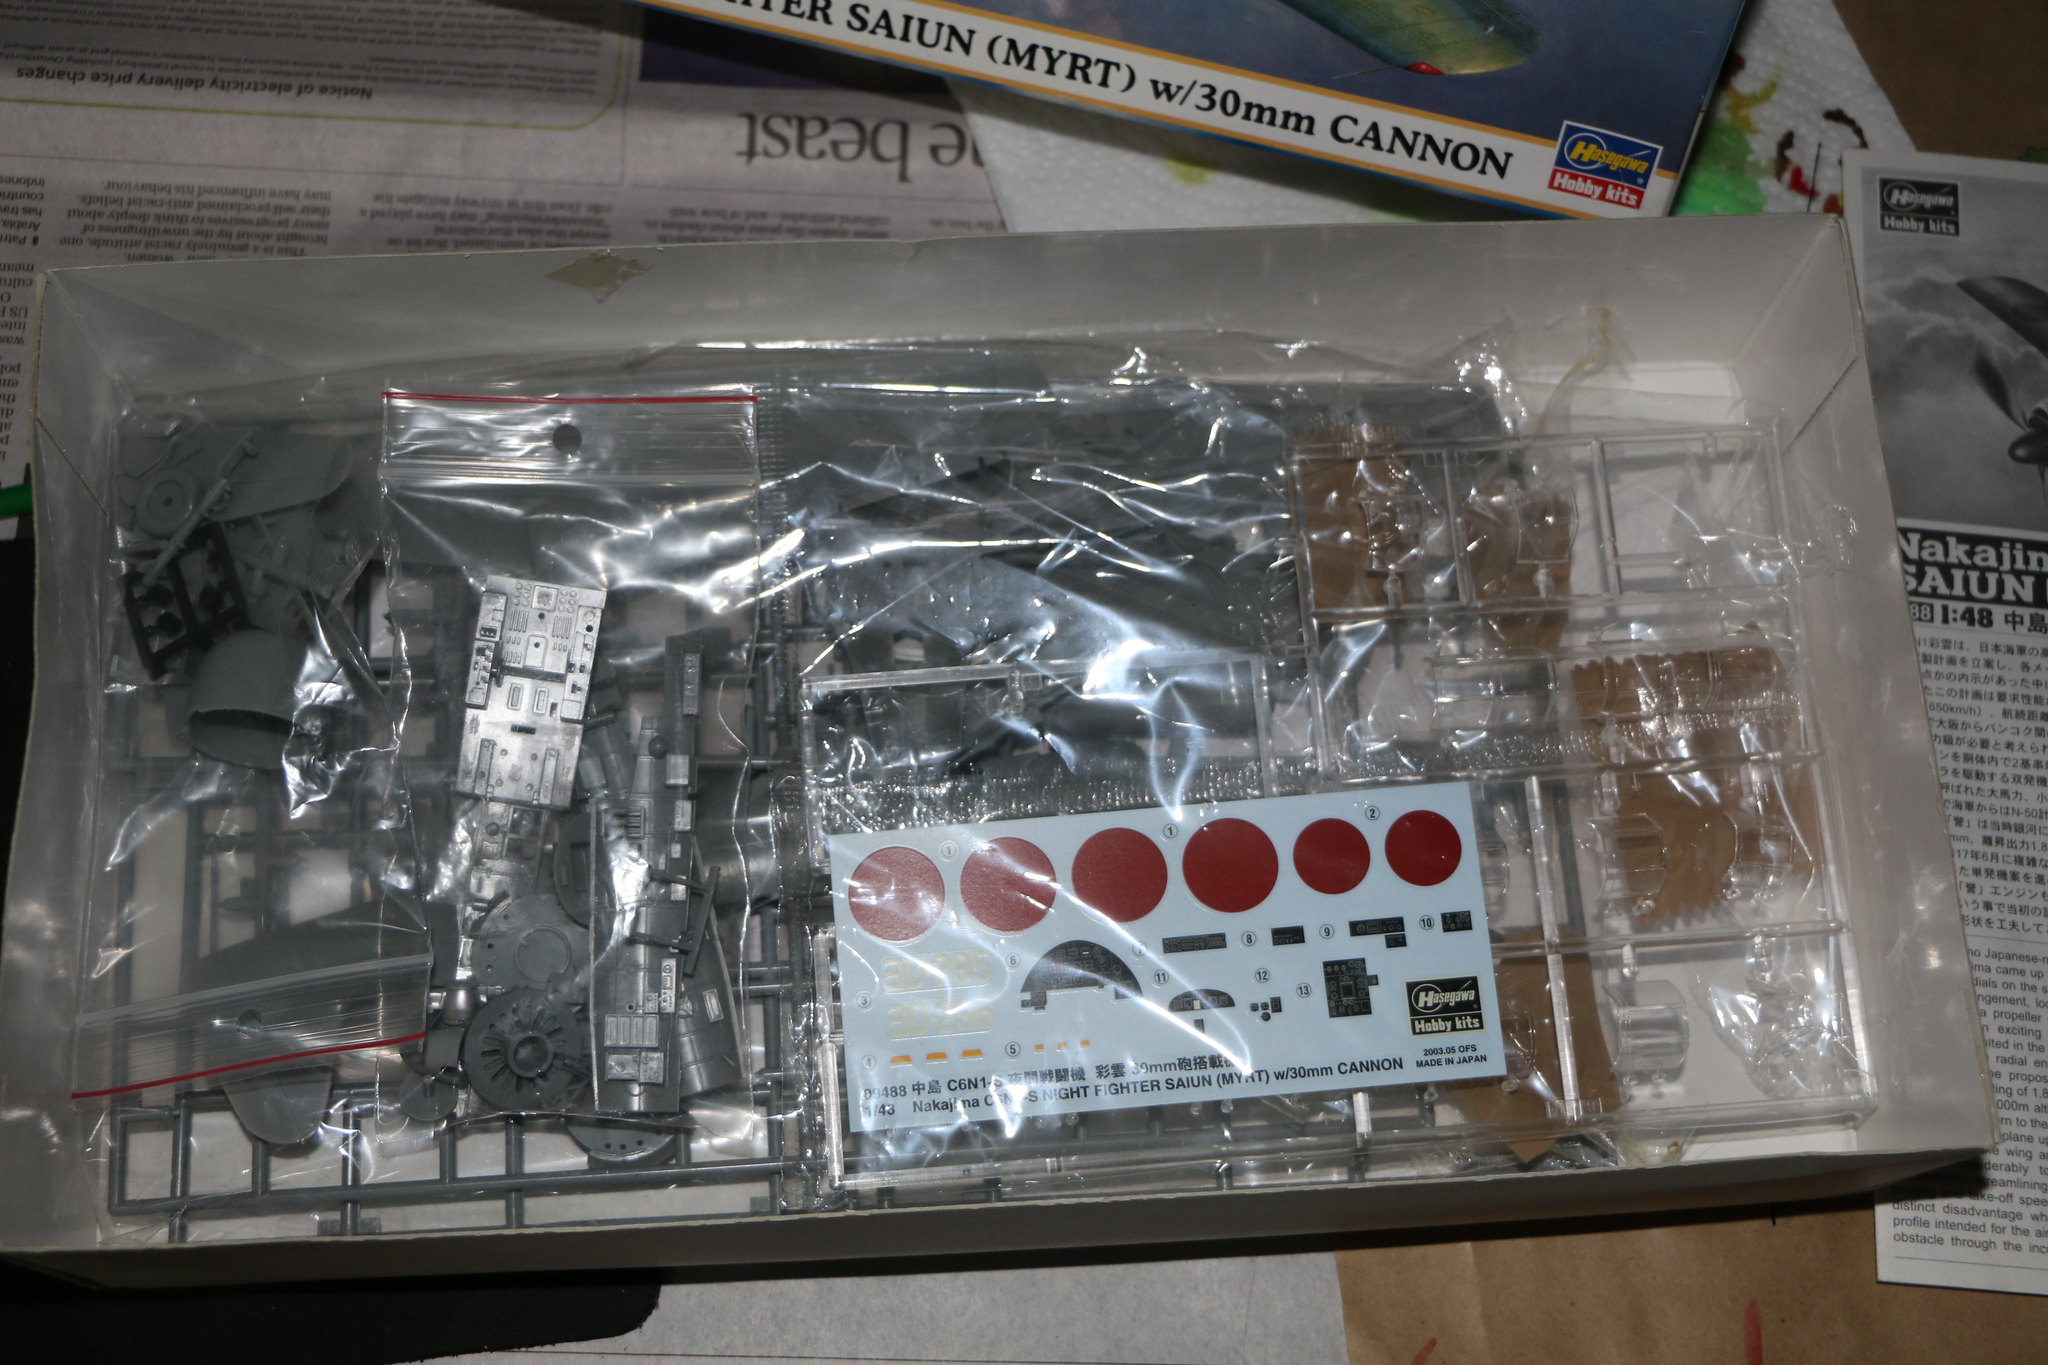
Okay I decided on the Hasegawa kit of the Nakajima C6N1-S in 1/48 scale. It's a nice simple kit with some good details which should build quite quickly. (Famous last words!) Parts have been removed from the sprues and painted in some cases but no assembly ... yet.
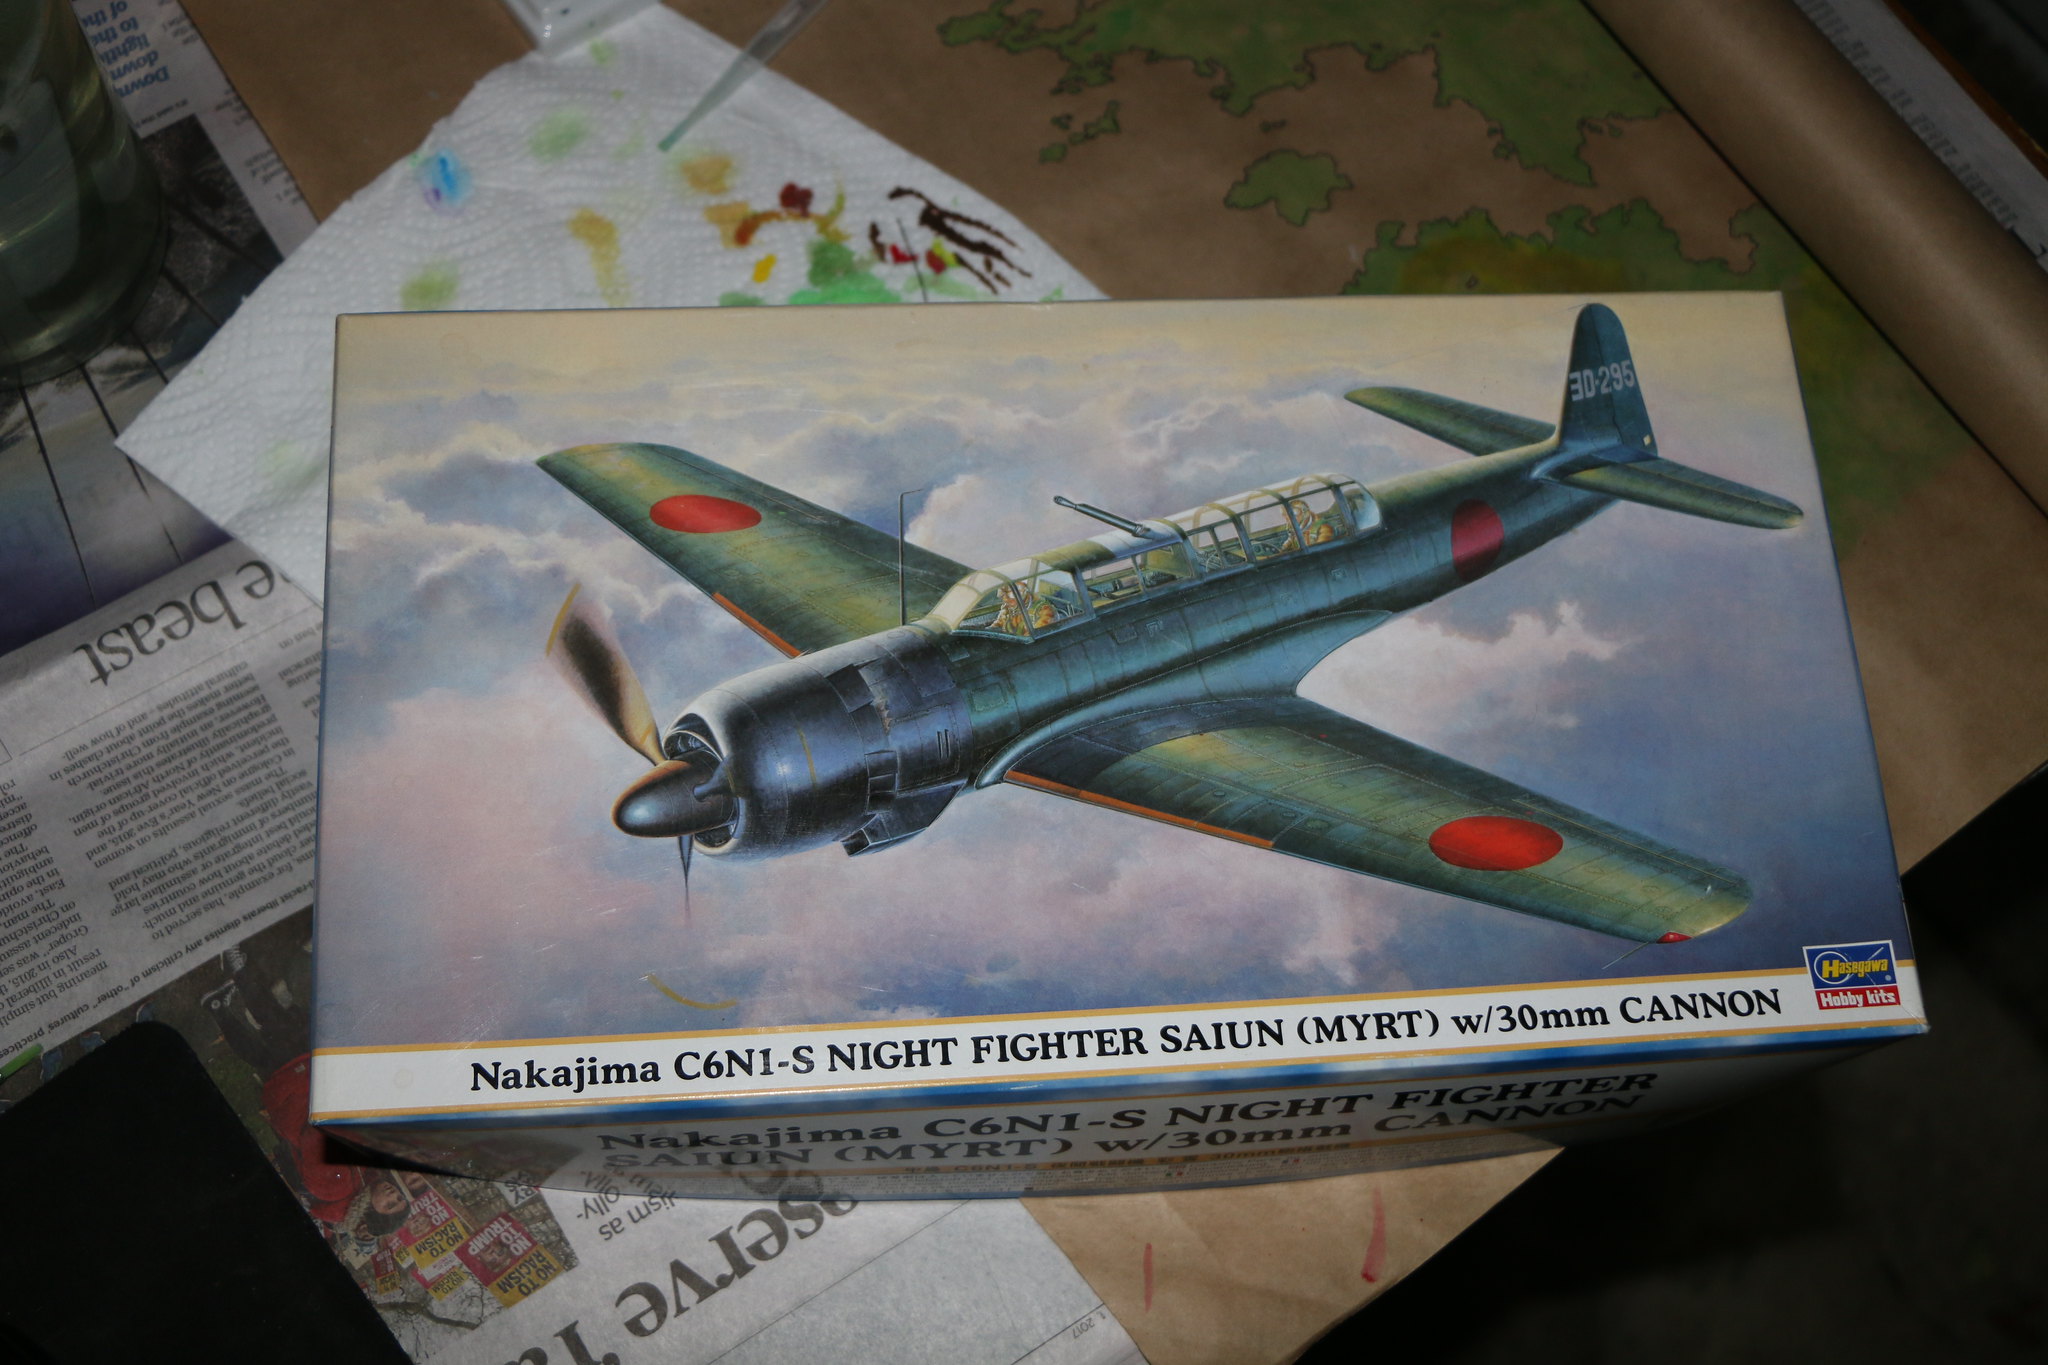 IMG_1548
 by
Chris WIlson, on Flickr
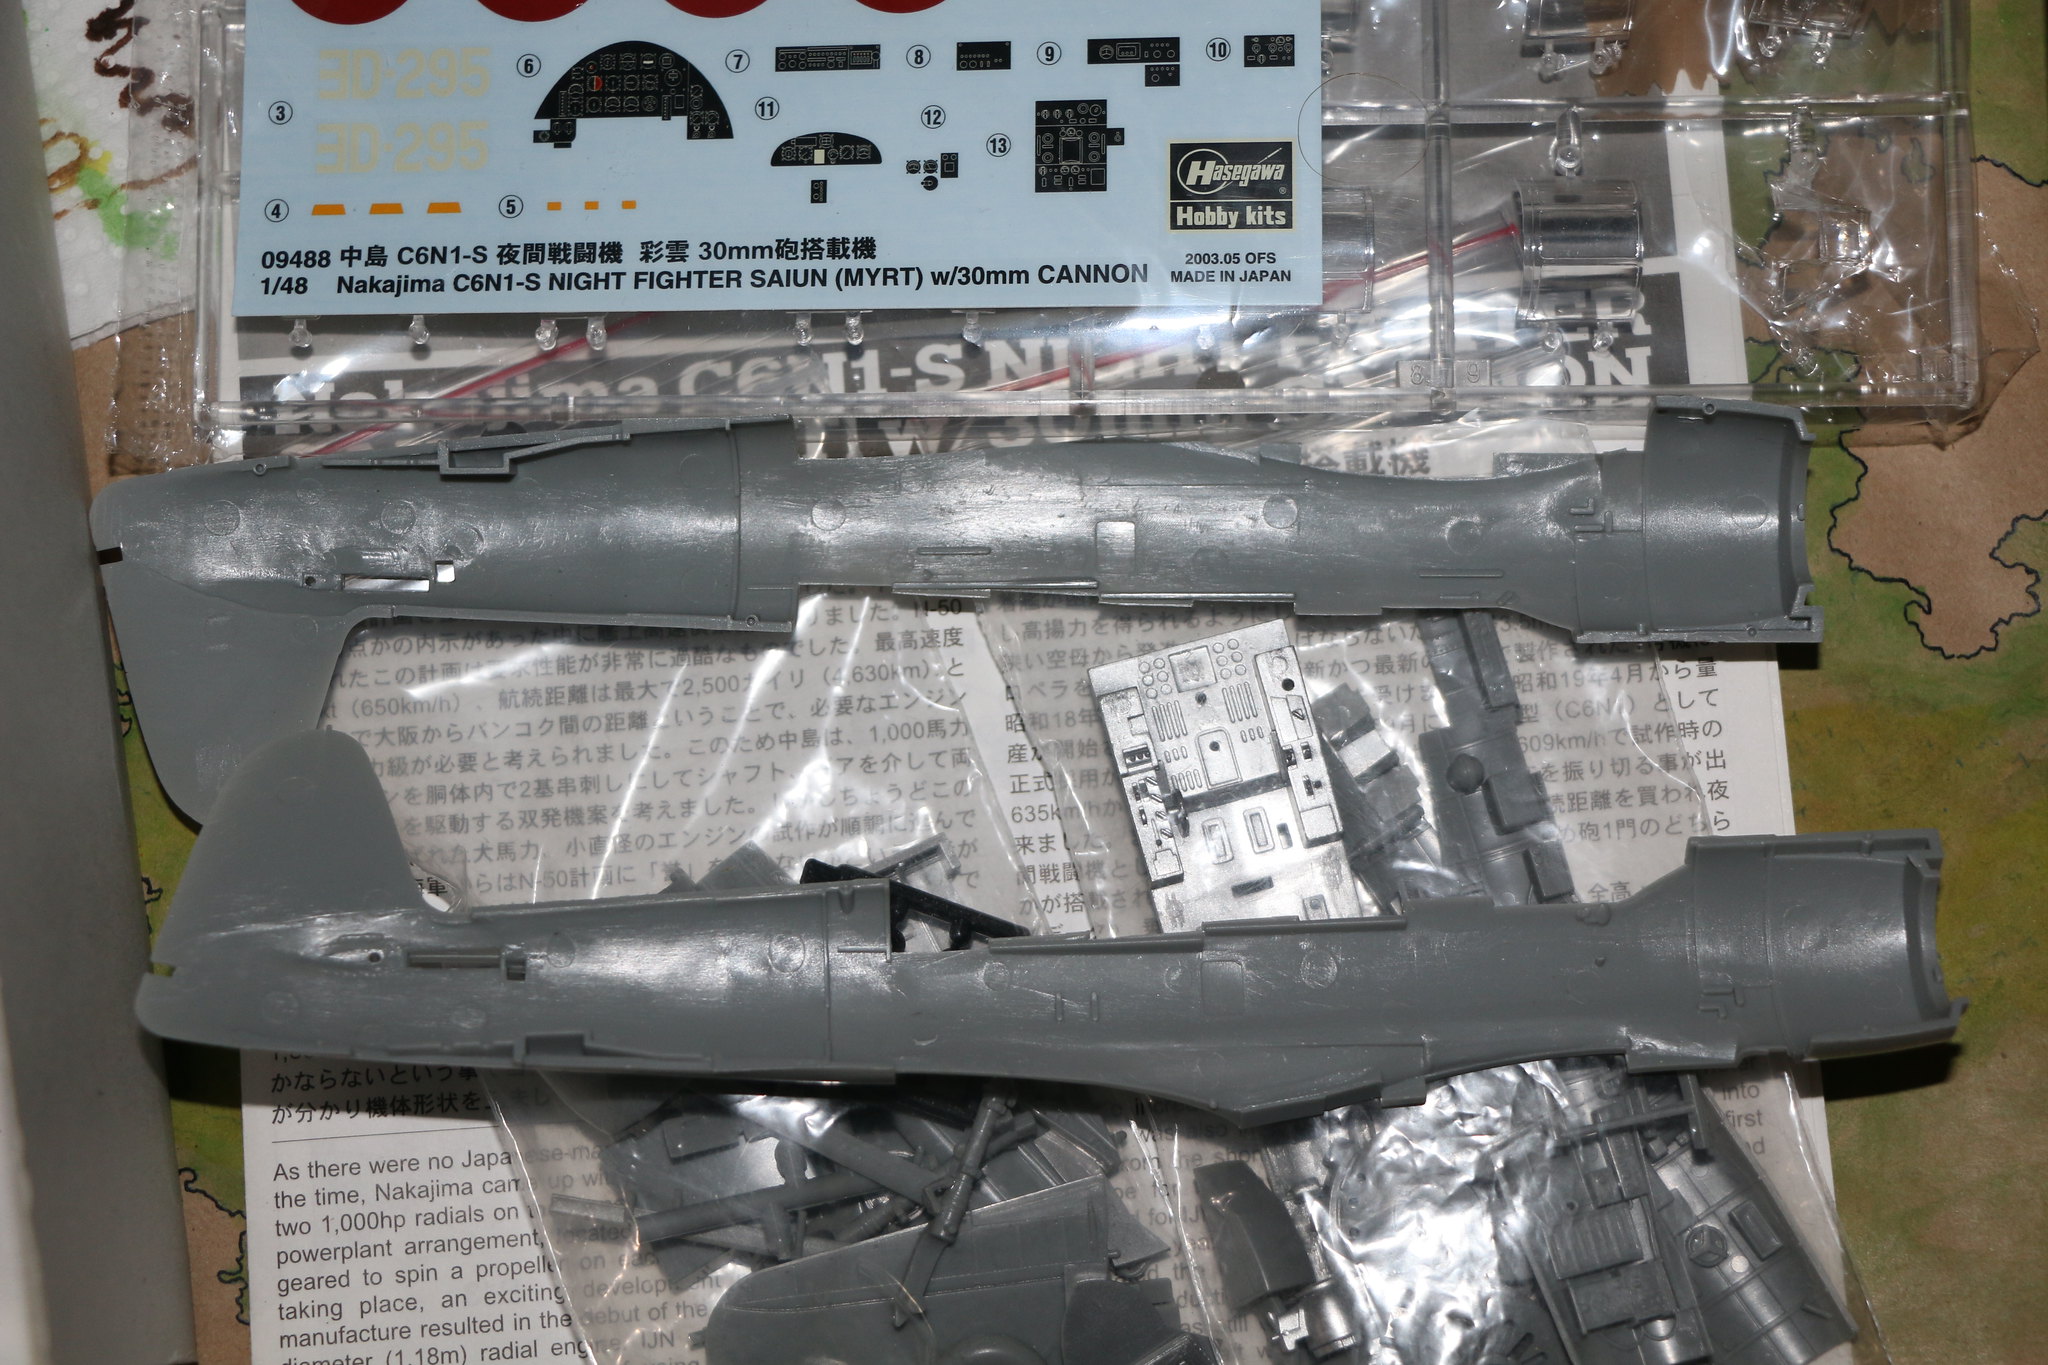 IMG_1547
 by
Chris WIlson, on Flickr
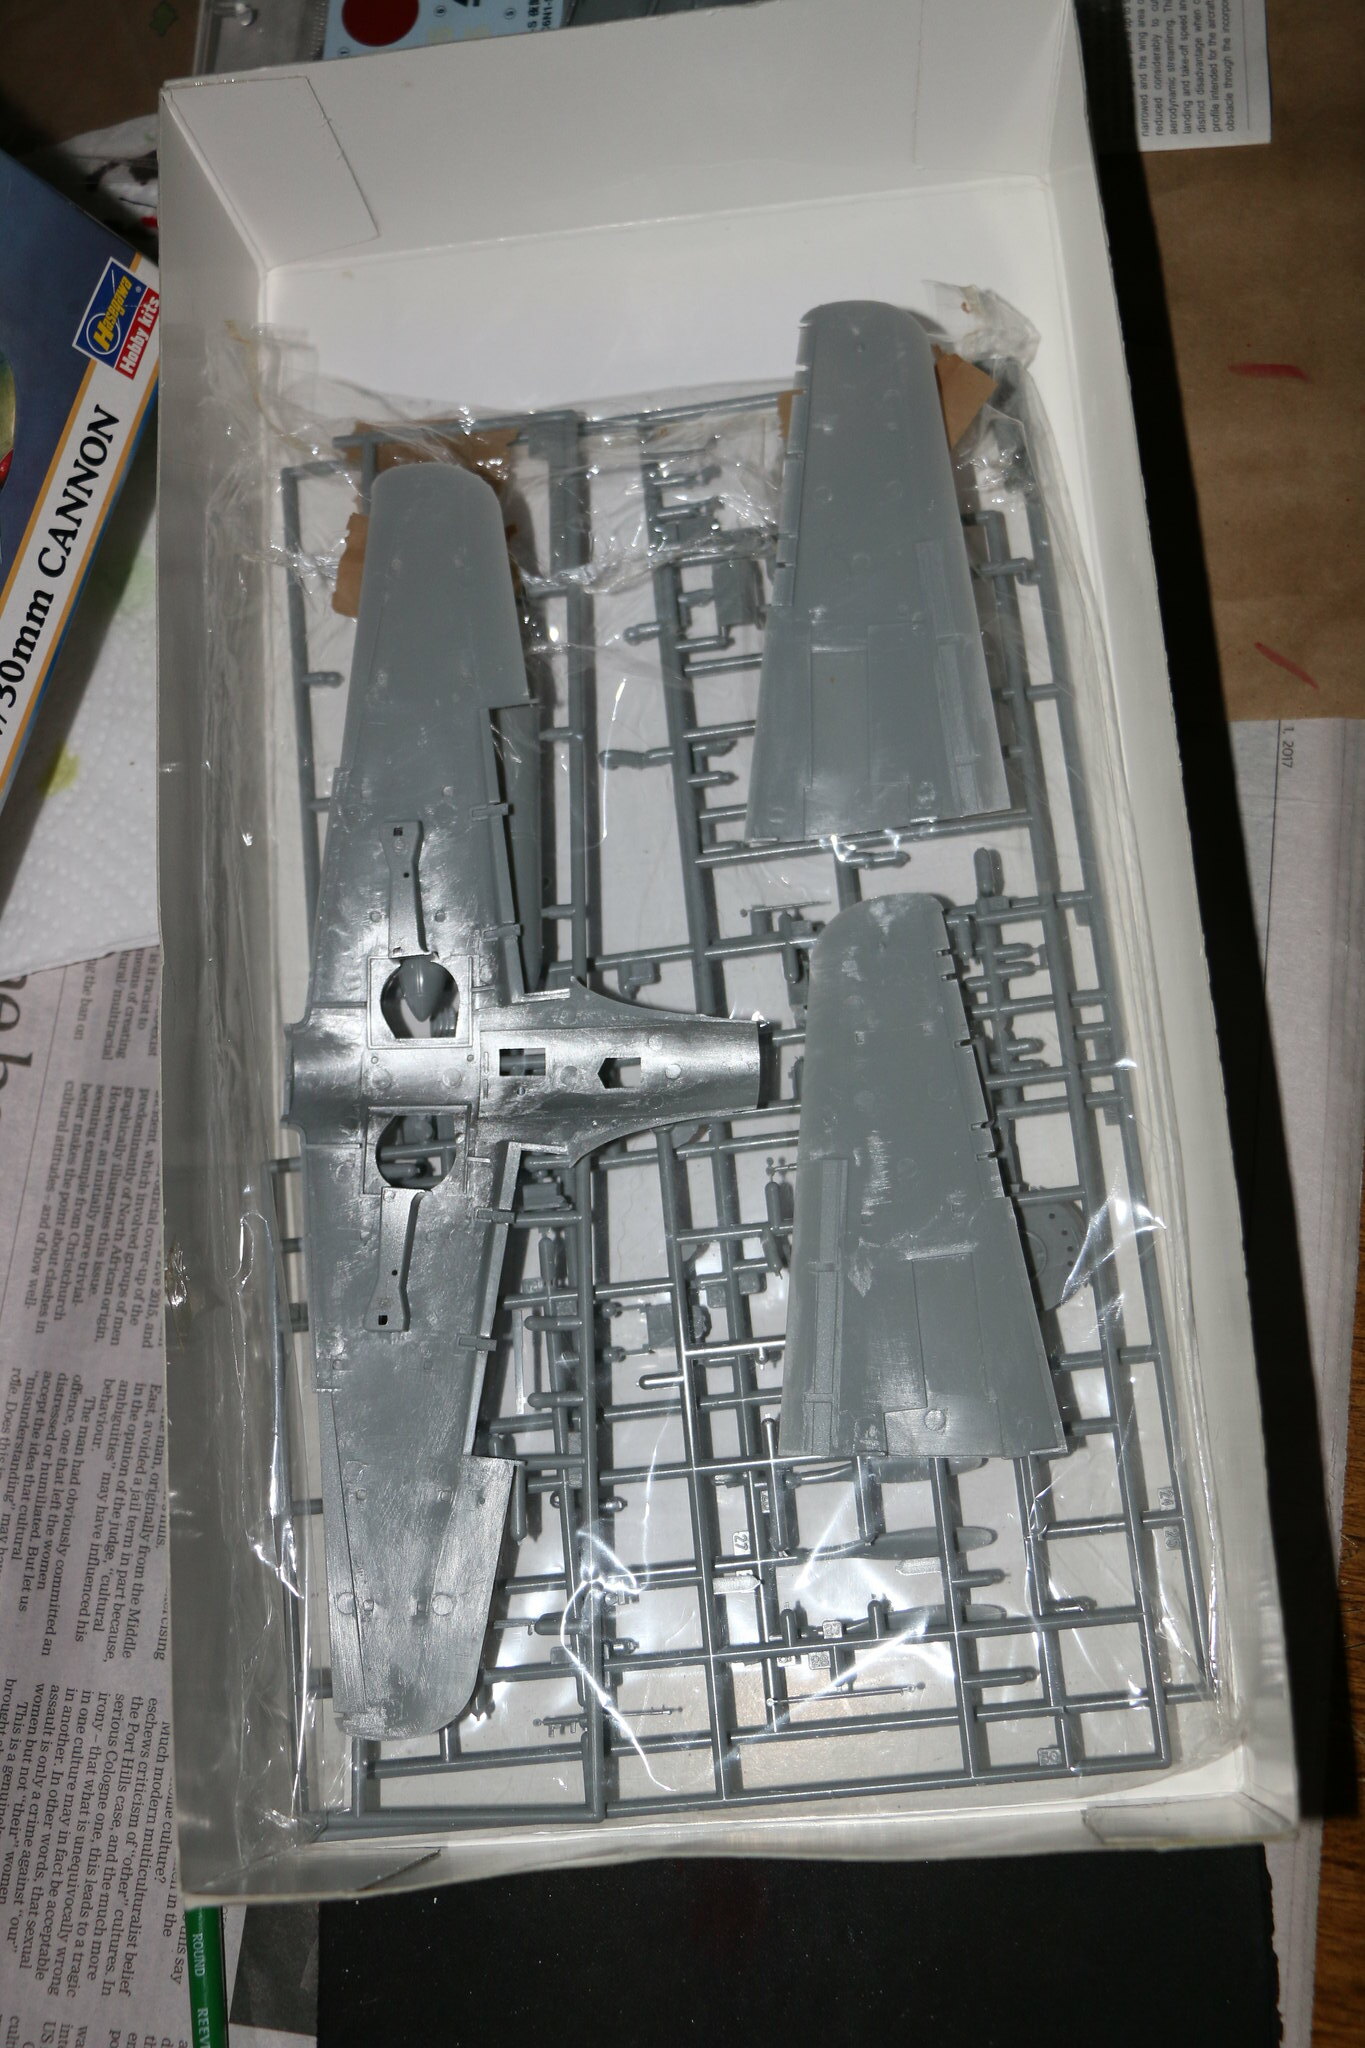 IMG_1546
 by
Chris WIlson, on Flickr
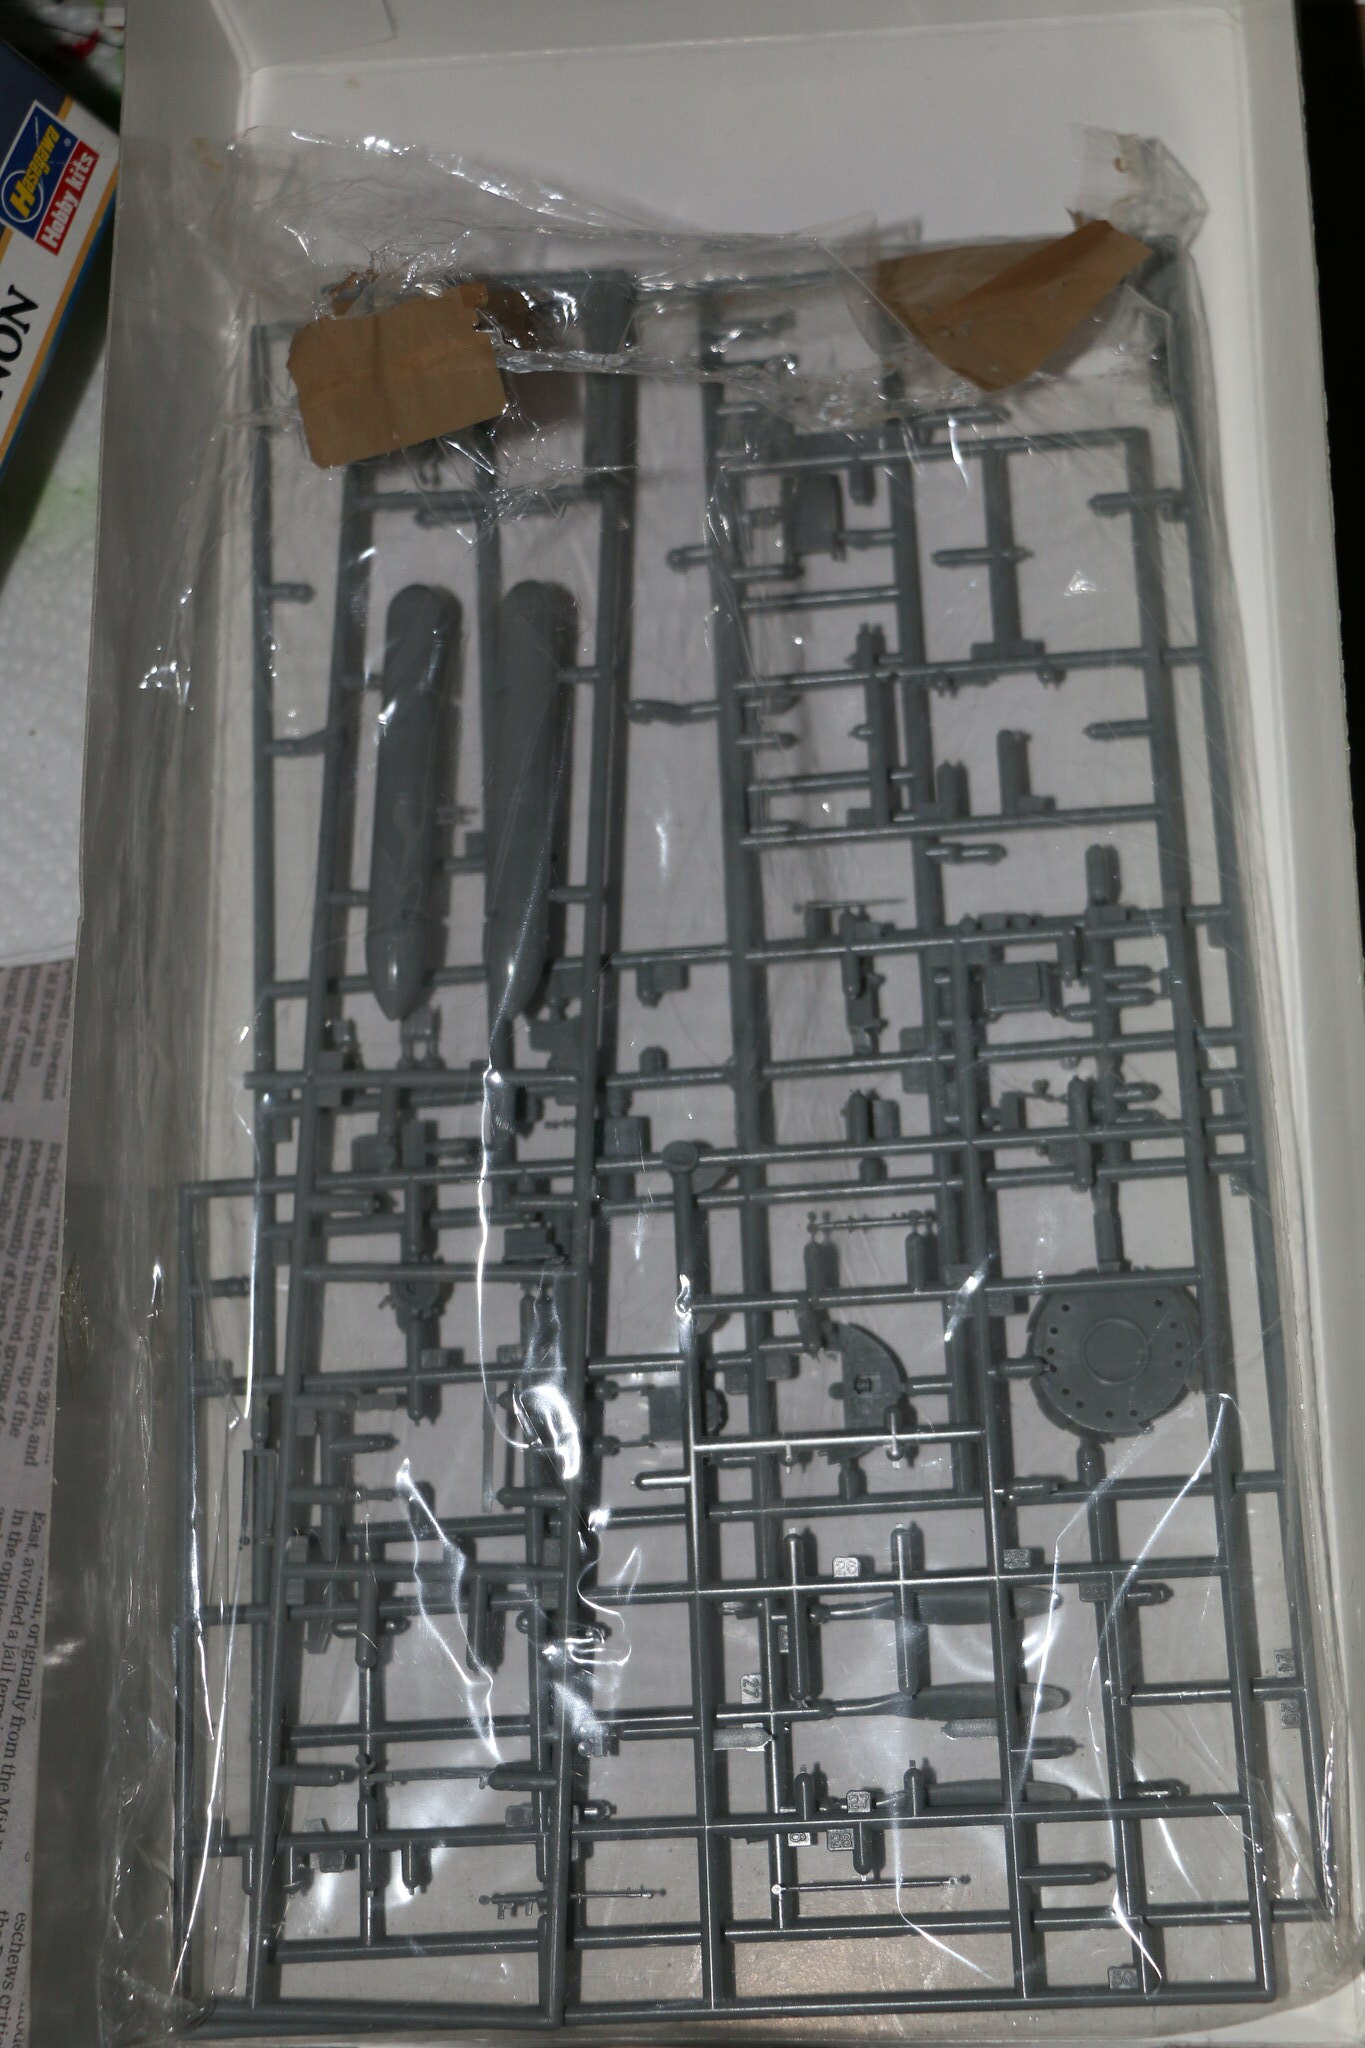 IMG_1544
 by
Chris WIlson, on Flickr
 IMG_1541
 by
Chris WIlson, on Flickr
 IMG_1540
 by
Chris WIlson, on Flickr
 IMG_1539
 by
Chris WIlson, on Flickr
Lisboa, Portugal
Joined: August 27, 2010
KitMaker: 679 posts
AeroScale: 669 posts
Posted: Friday, December 08, 2017 - 11:01 PM UTC
Hi all,
Nice to see a few projects underway and a couple new additions... I find the Havoc Night Fighter a very cool project indeed. Been years trying to find the A-20 1/48 in any of its several box/maker incarnations but never found one that was a fair deal...always too expensive.
By the way, that Myrt looks promising Chris.
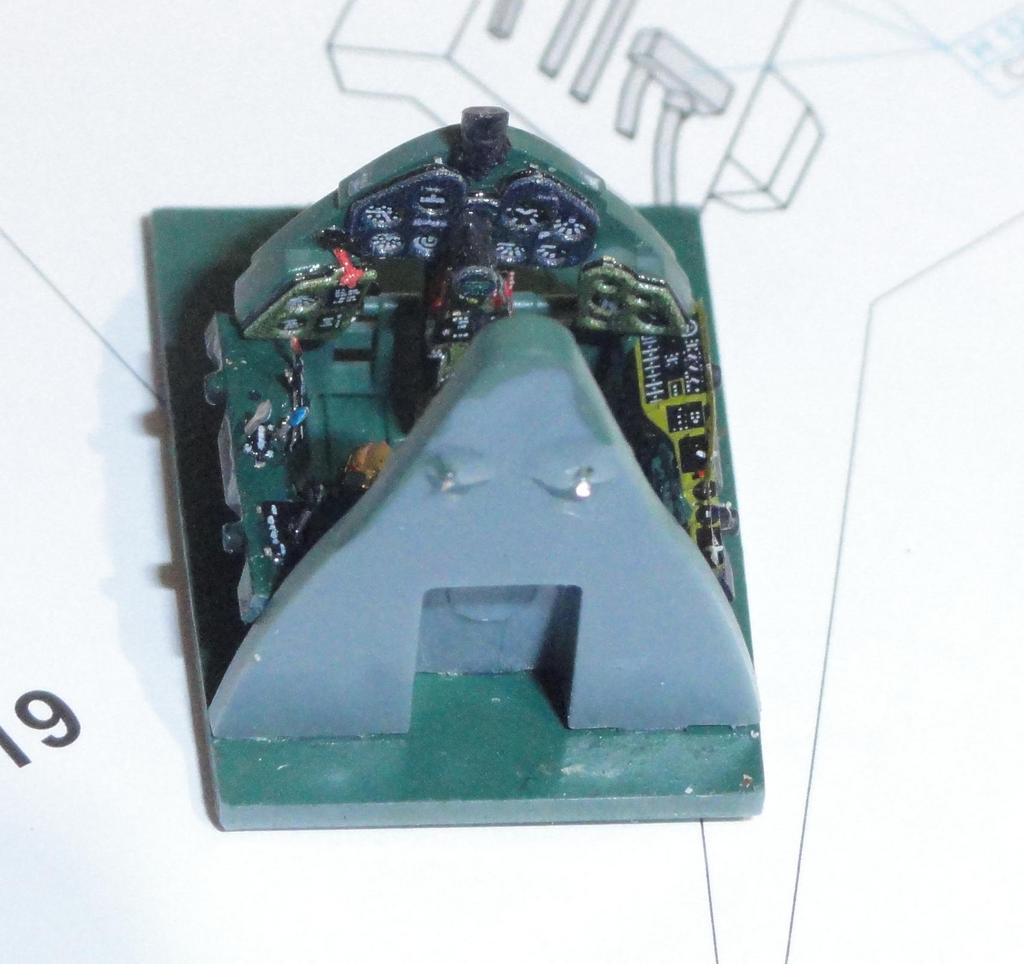
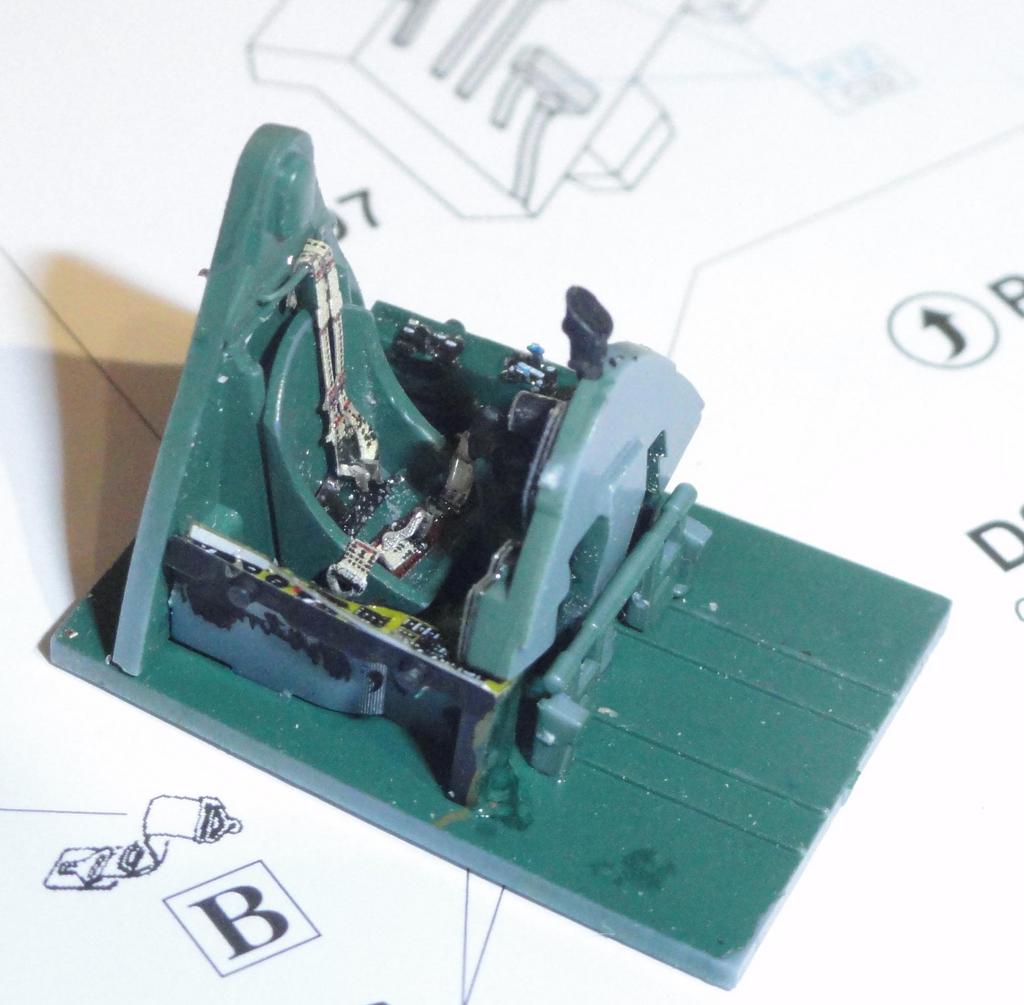
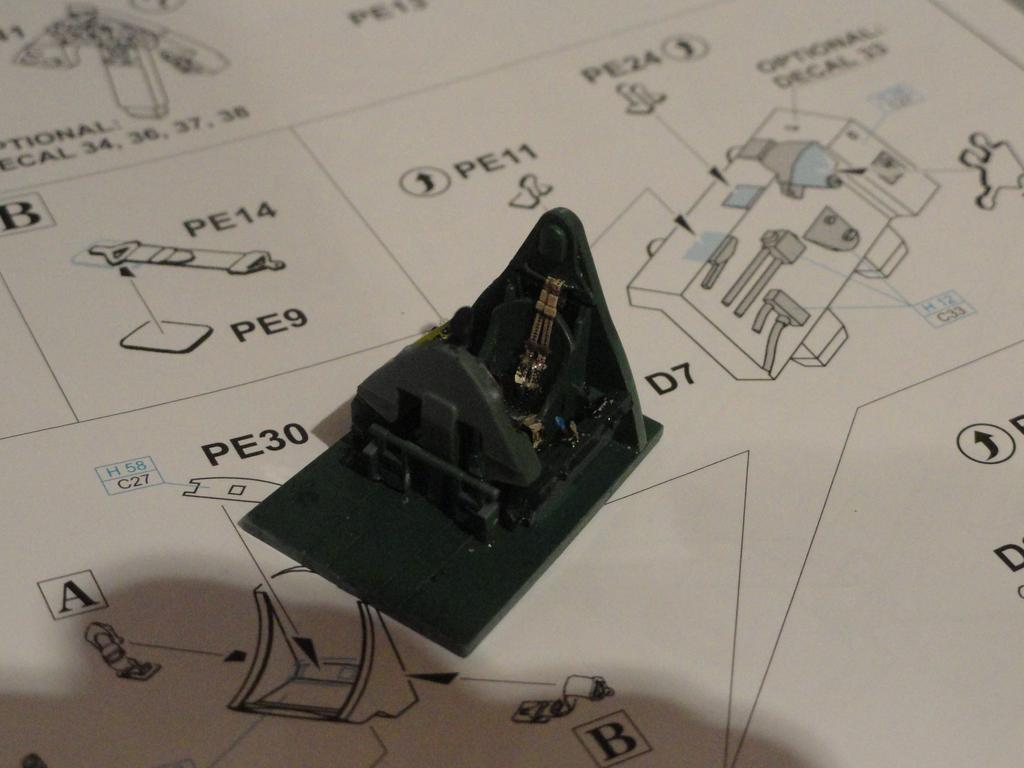
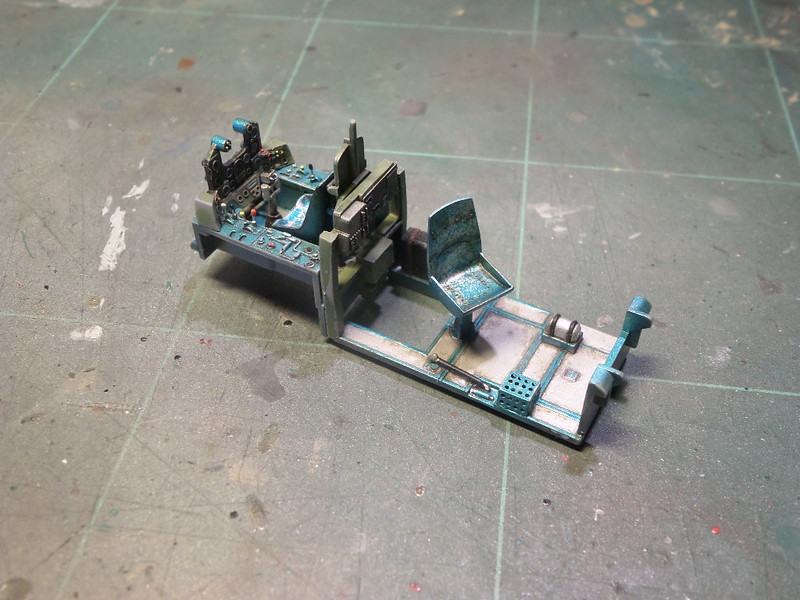
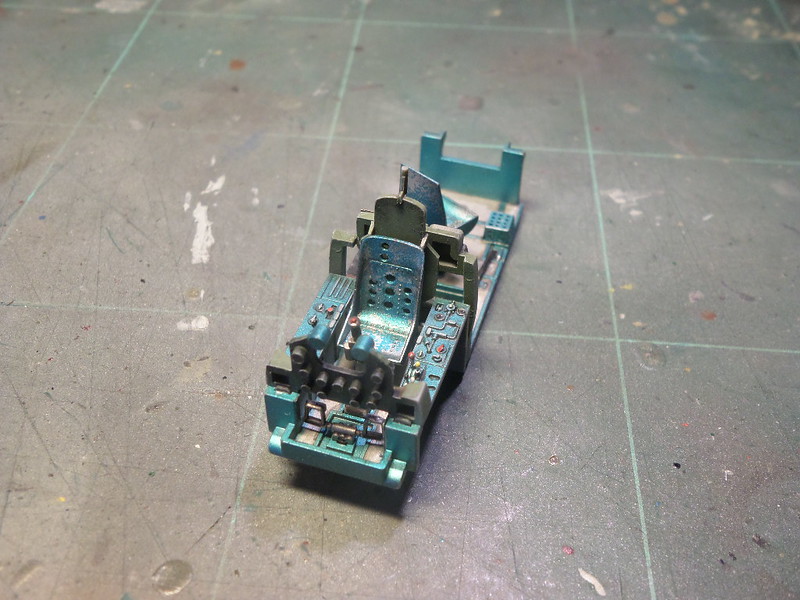
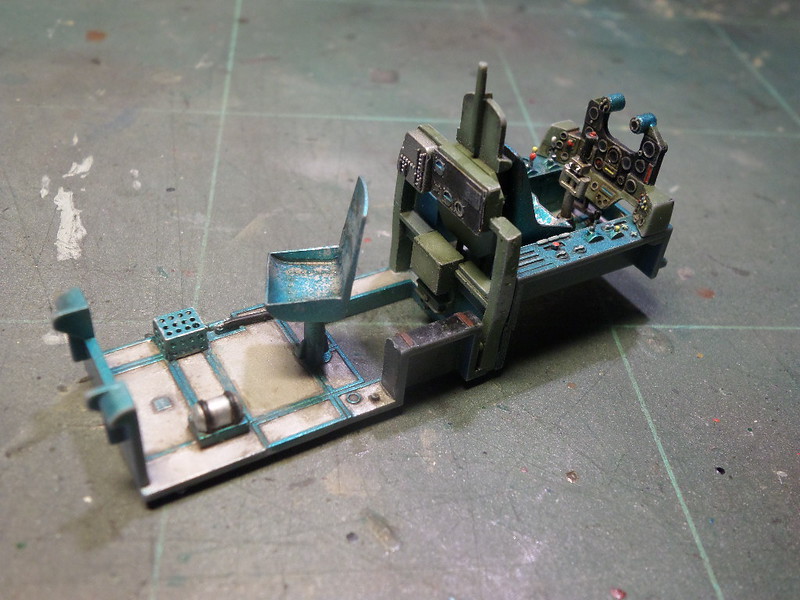
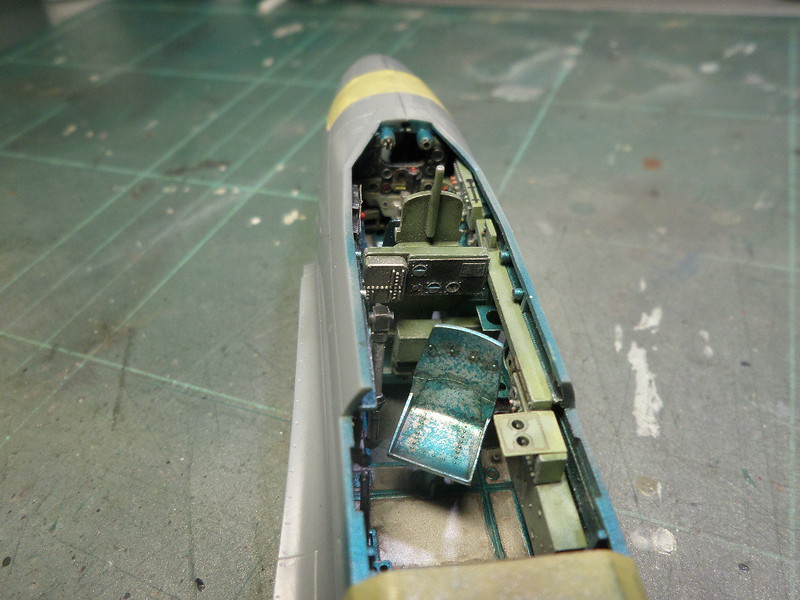
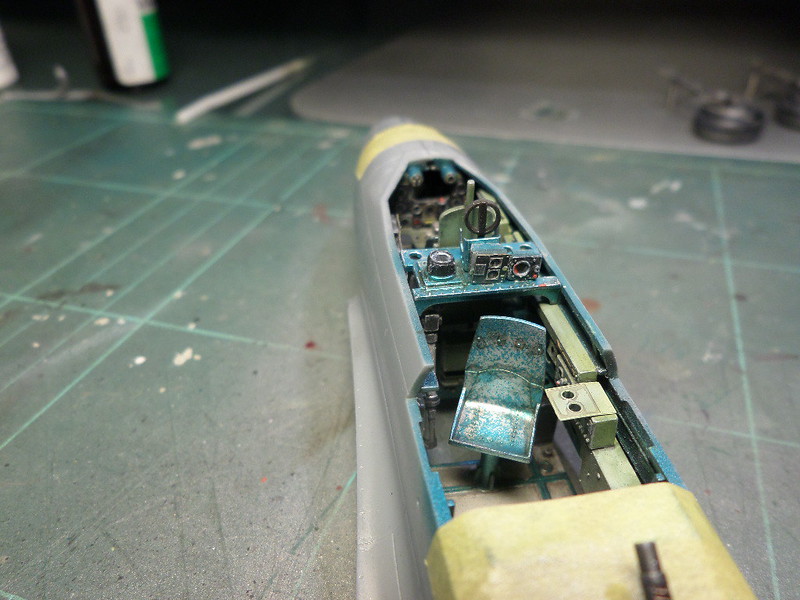
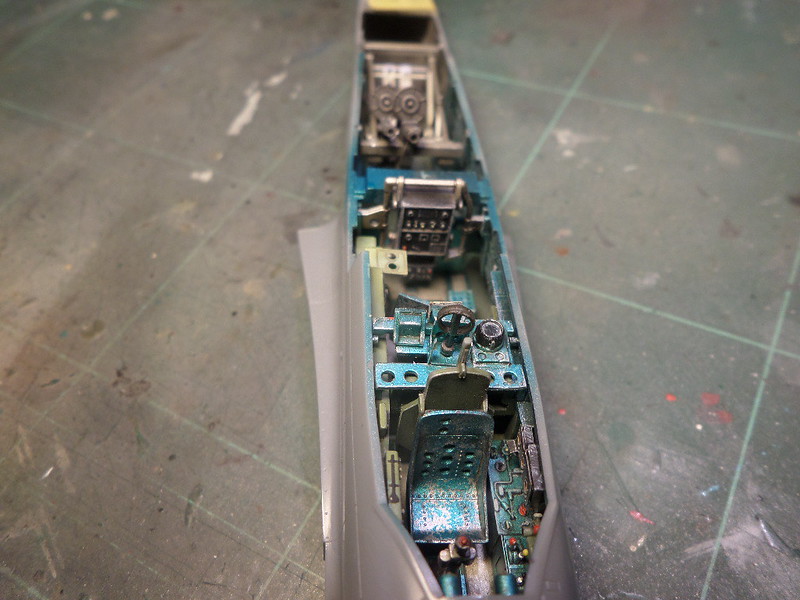
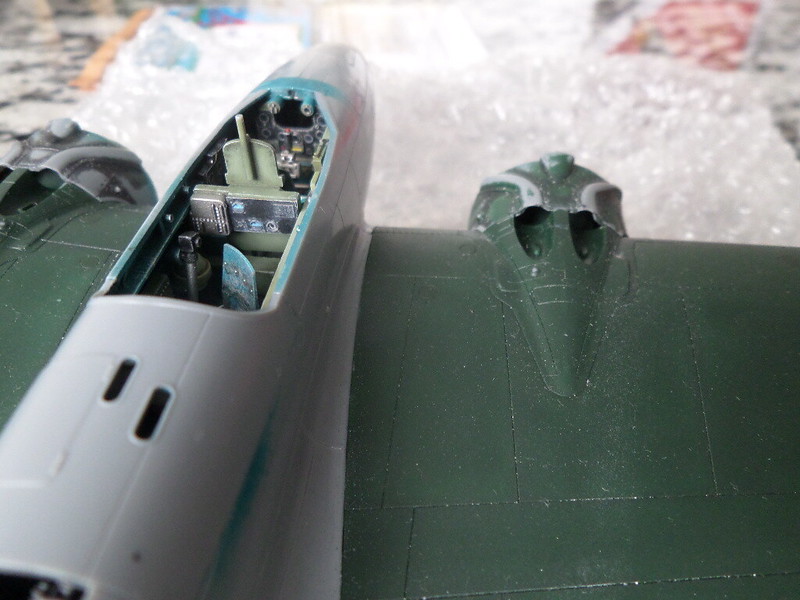
Here goes a few photos of my Gekko as it is right now over my bench
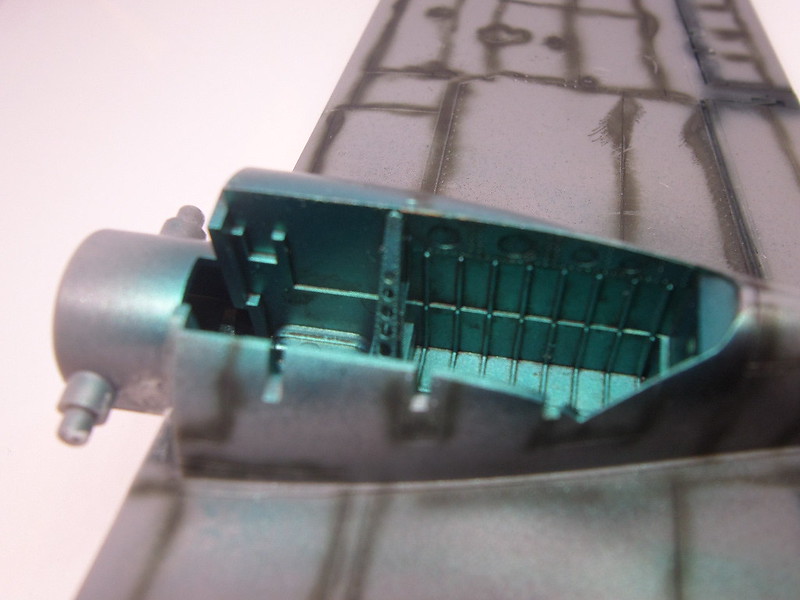
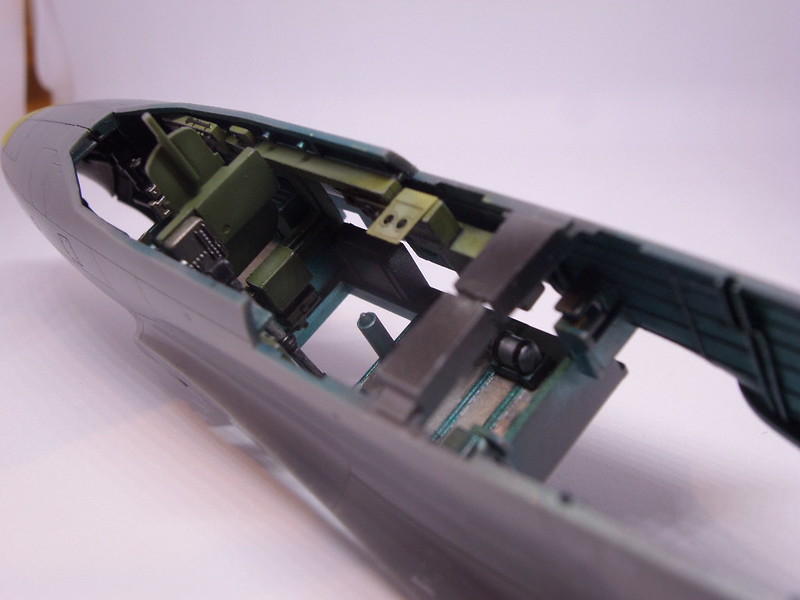
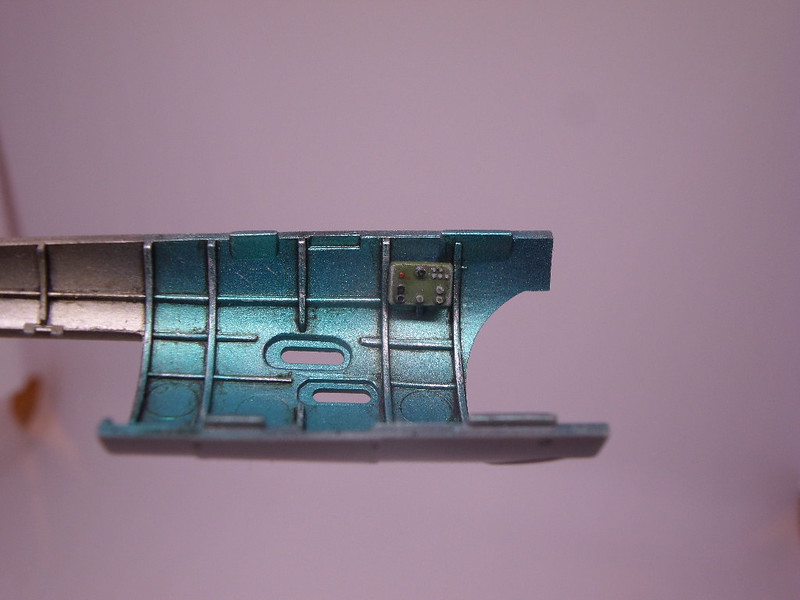
Other small parts are also painted but I just forgot to include them when I decided to get the camera.
It's the first time I use the "Aotake" hue, and found it the hardest shade to weather or to do some blending/degrades. The reason is because it is essentially a metallic color, and using it straight from the bottle makes the cockpit look to toy like to my taste.
Cheers
Pedro
Oklahoma, United States
Joined: February 11, 2013
KitMaker: 294 posts
AeroScale: 74 posts
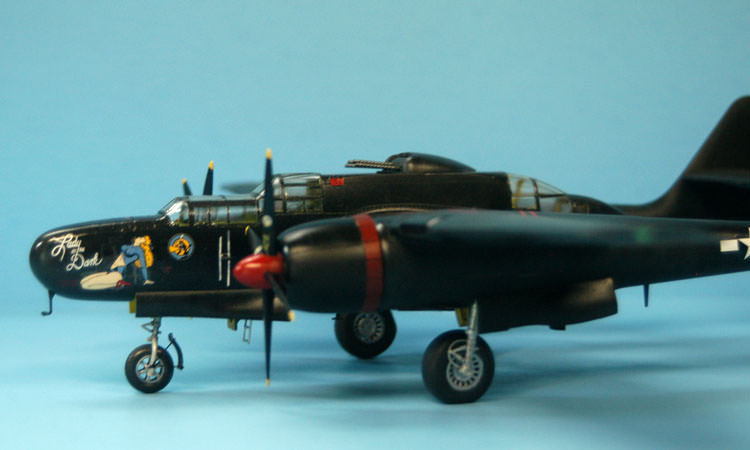
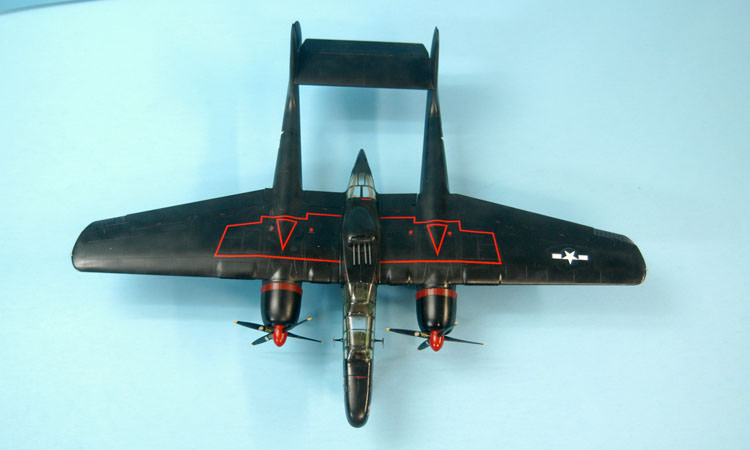
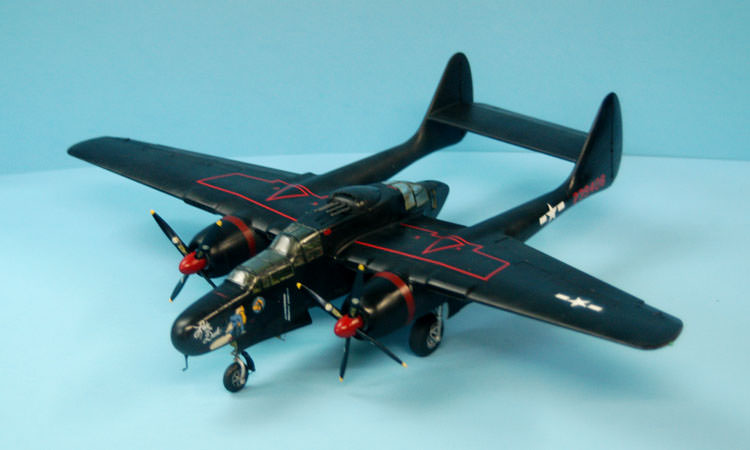
Posted: Saturday, December 16, 2017 - 09:19 PM UTC
On the bench:
The Night Shift Campaign: GWH P-61 "The Last Shoot Down". 1/48
Spanish Civil War Campaign: Dragon Pz I Ausf B 1/35
Revell B-17 1/48 with lots of add ons.
Complete rehab and repaint of Dragon Pz III J. 1/35
Lisboa, Portugal
Joined: August 27, 2010
KitMaker: 679 posts
AeroScale: 669 posts
Posted: Sunday, December 17, 2017 - 04:34 AM UTC
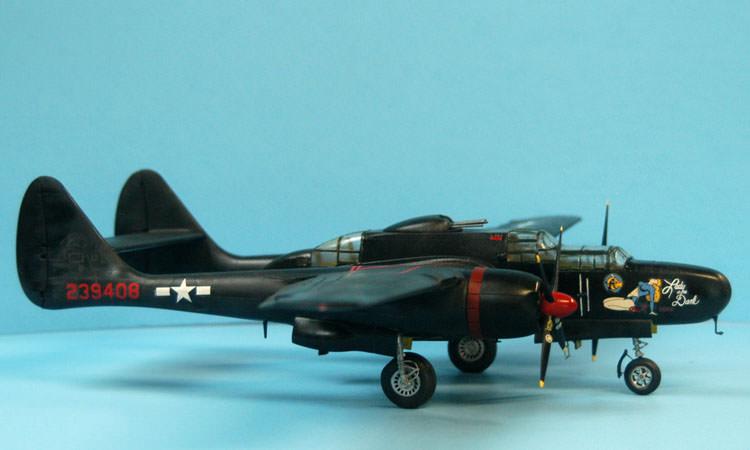
Thats an excellent black widow Totem !
Congratulations on a fine work
#439
Washington, United States
Joined: November 05, 2005
KitMaker: 4,950 posts
AeroScale: 3,192 posts
Posted: Sunday, December 17, 2017 - 10:45 AM UTC
Wow, I haven't commented since Nov 3, and the site has kicked this thread off of my "My Posts" list. I finished up my TBM and F-16C for a couple of other campaigns, so I can work on this, my ANZAC and maybe even finish up my hanger queen in the next 2 weeks.

Hanger Queens in Waiting:
Monogram 1/72 F8F-1
Corsair the Sky Pirate - 1/72 Ace A-7D
Century Series - Airfix 1/72 F-105G
Anti Shipping - Academy 1/72 PBJ-1D
Academy 1/72 F-84E
Lisboa, Portugal
Joined: August 27, 2010
KitMaker: 679 posts
AeroScale: 669 posts
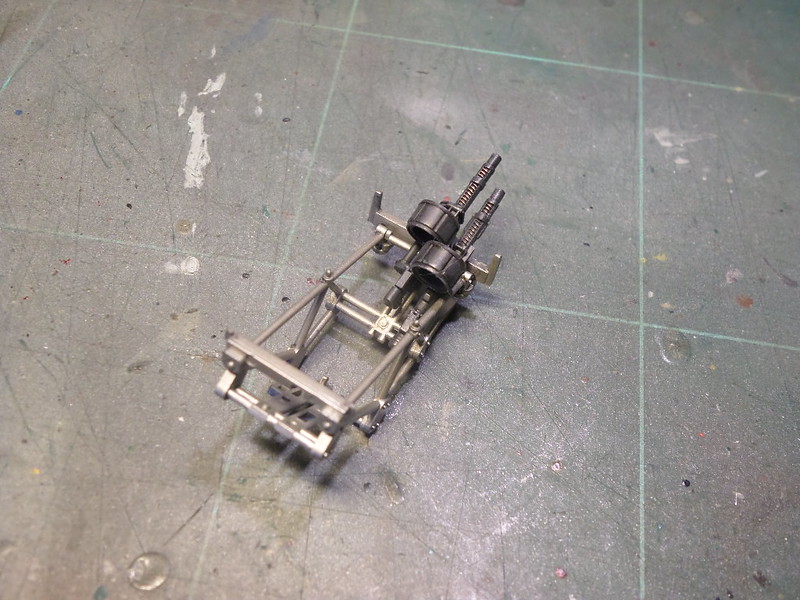
Posted: Tuesday, December 19, 2017 - 01:37 AM UTC
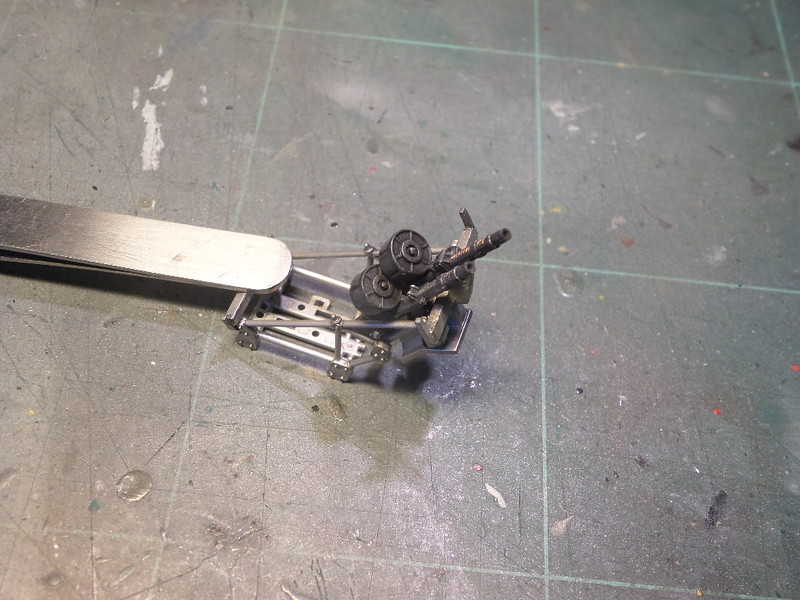
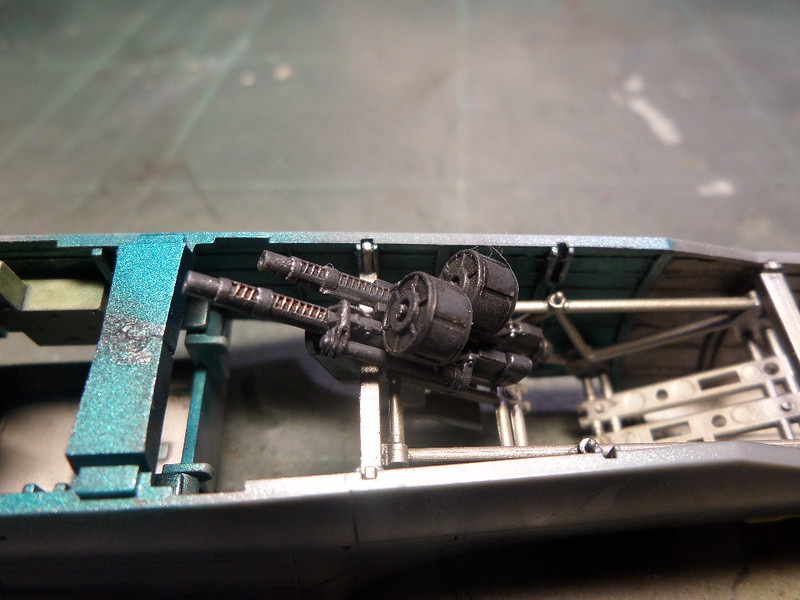
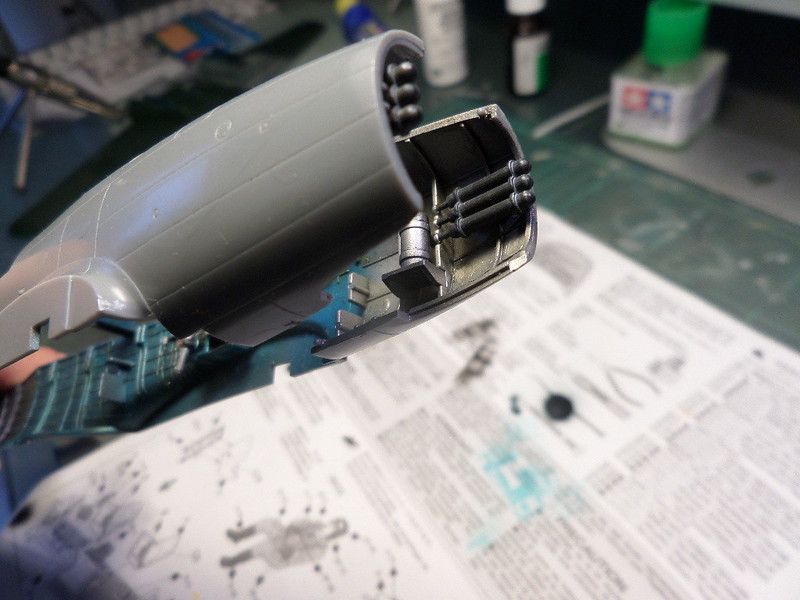
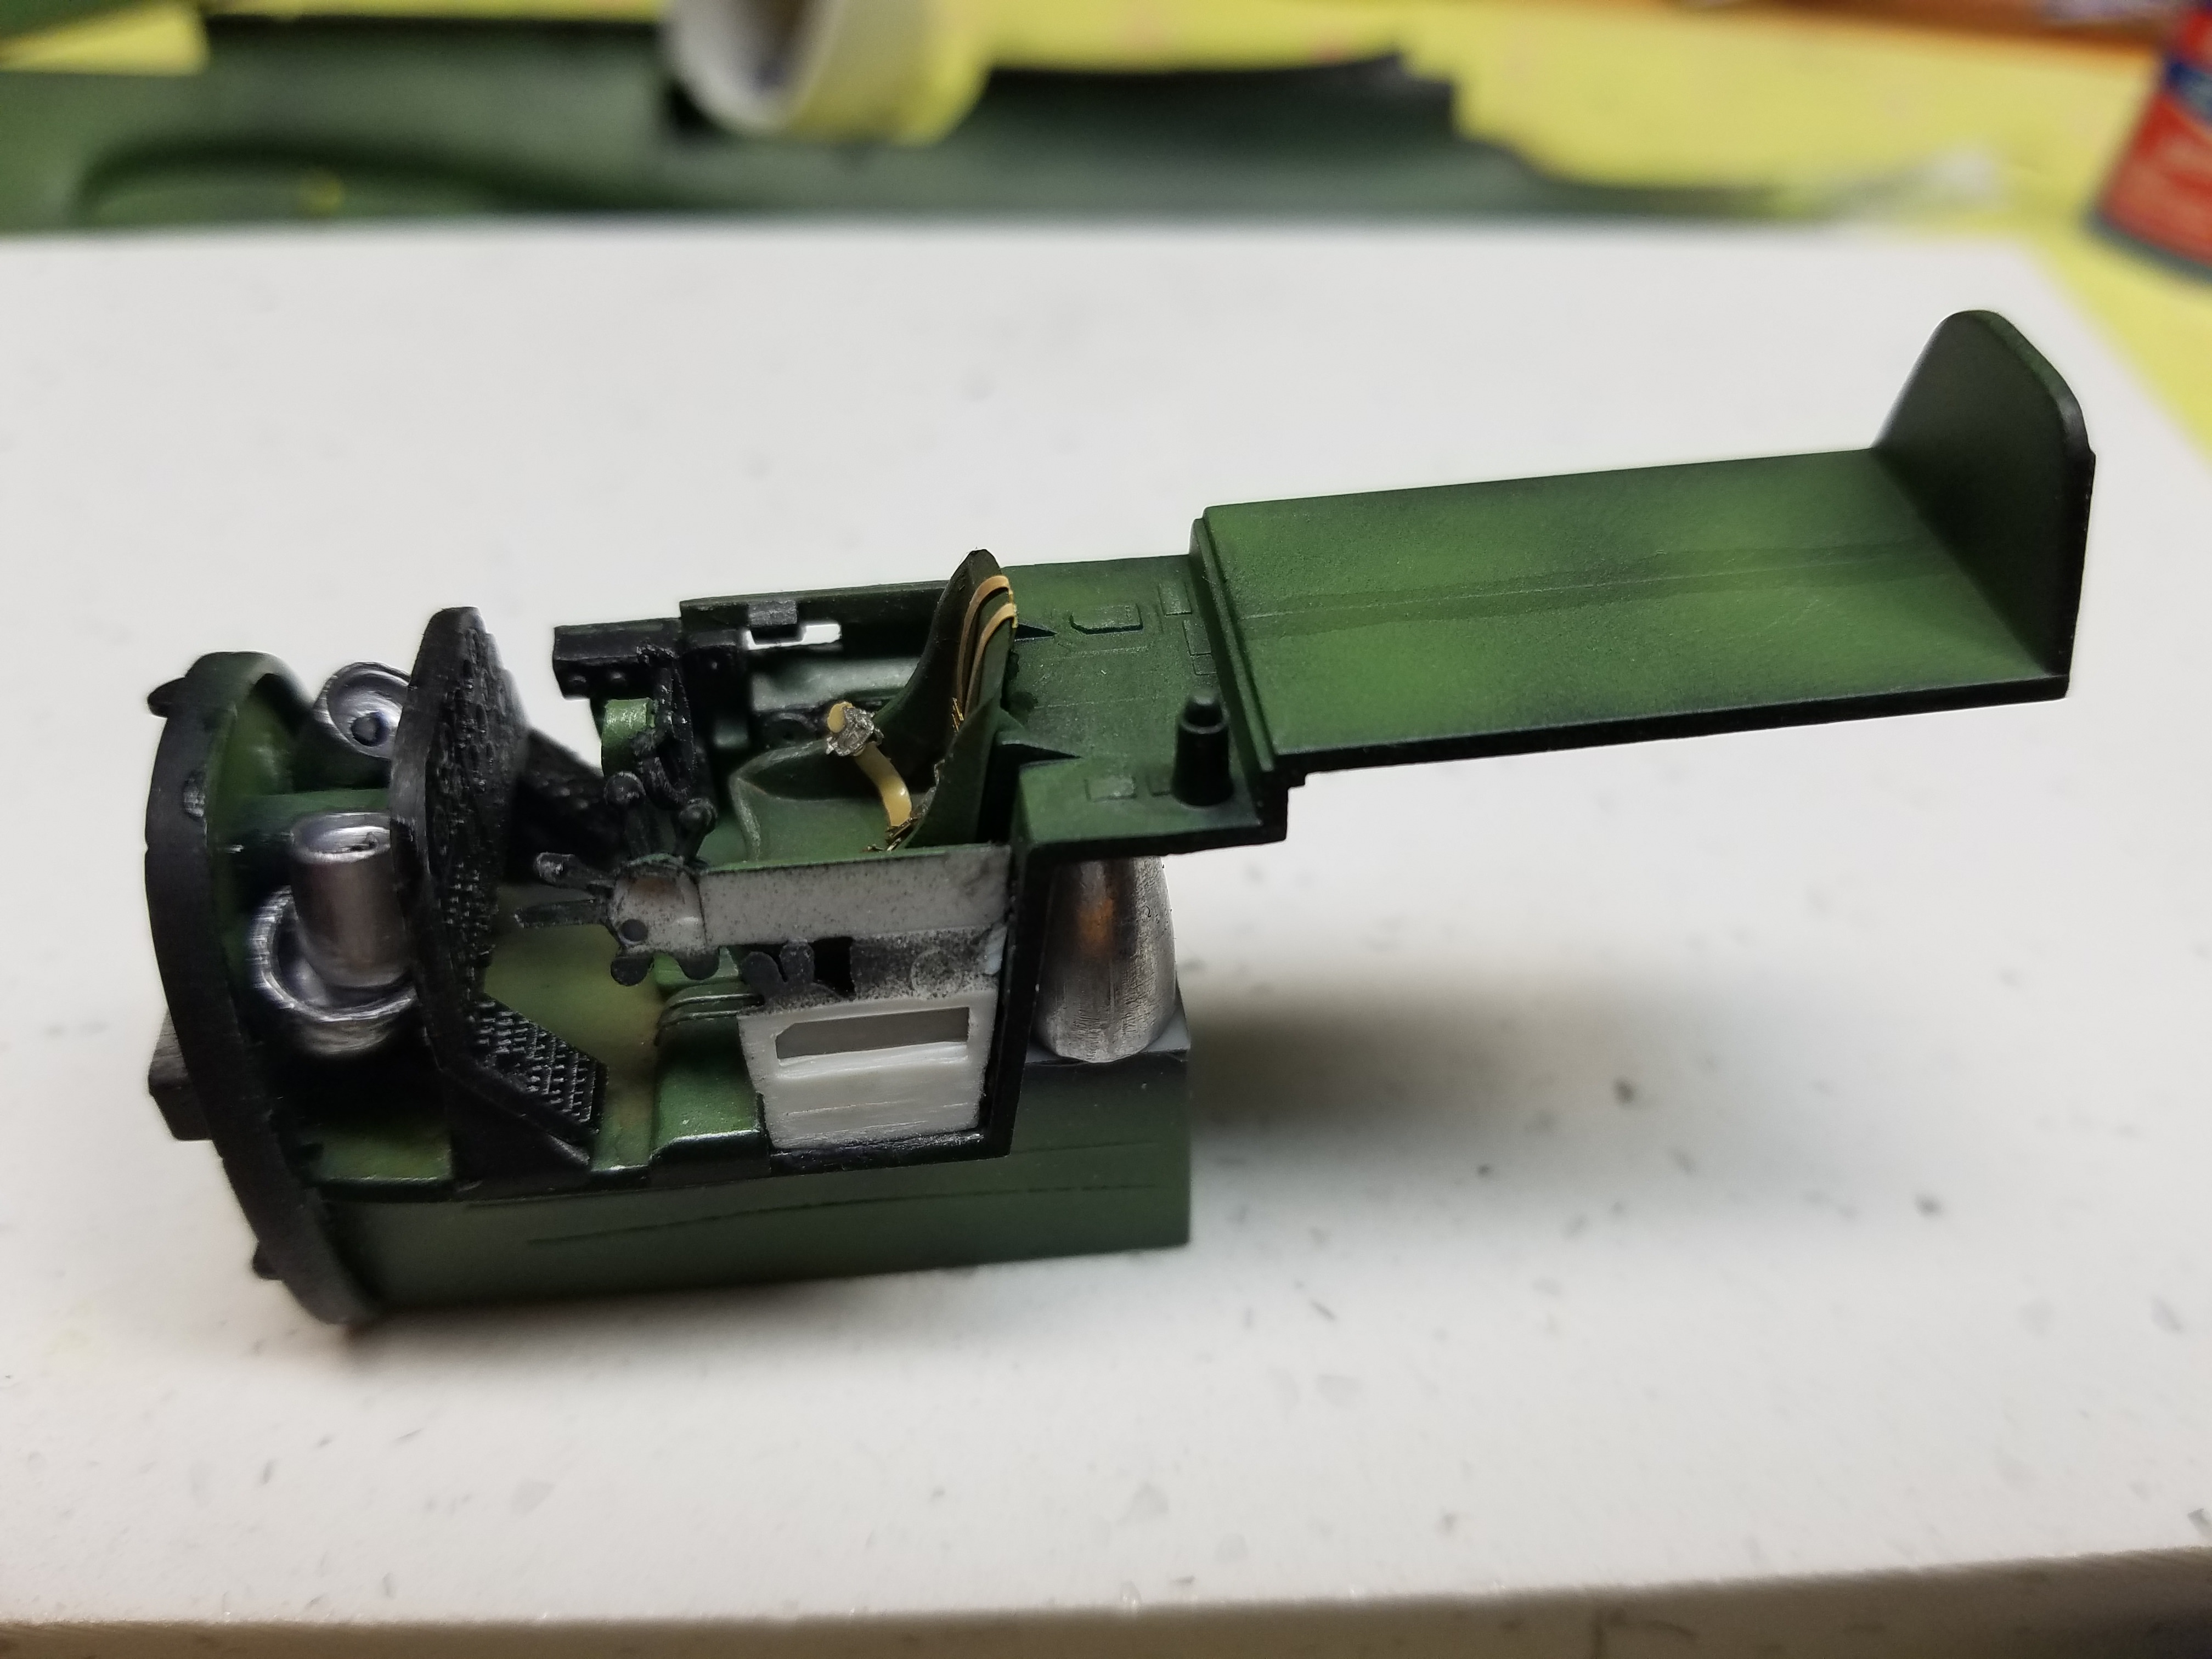
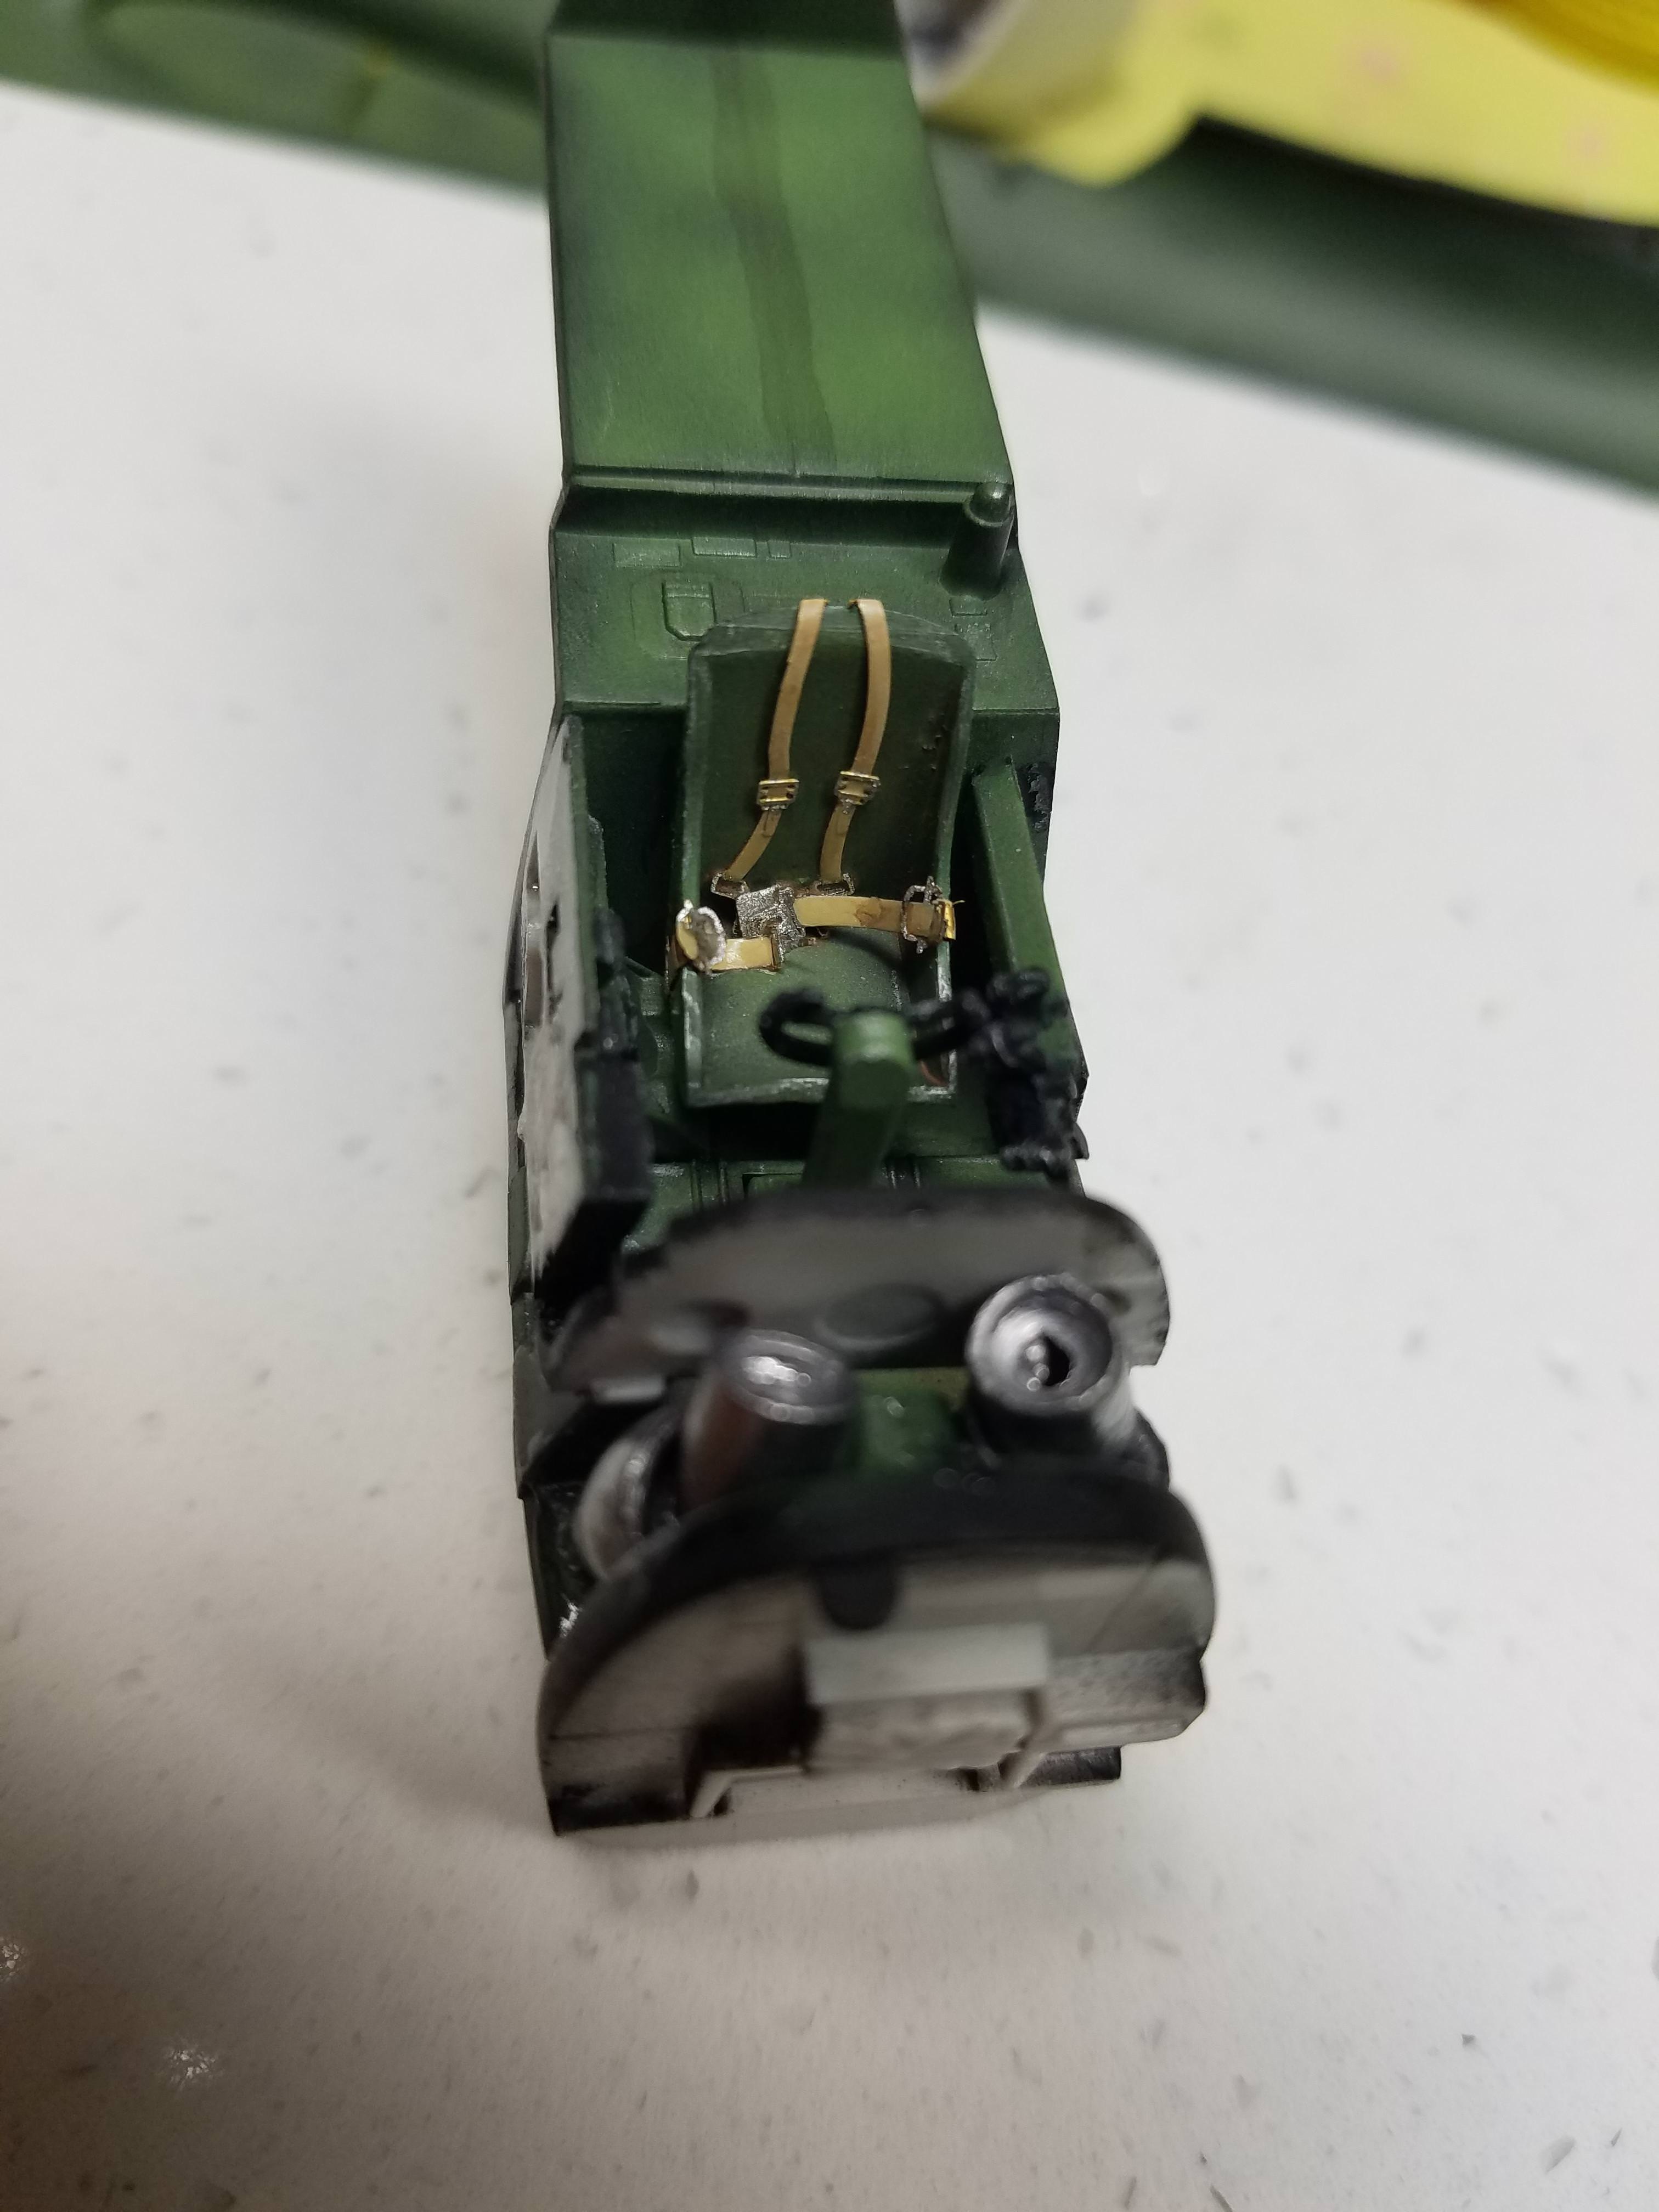
Just a quick post of a few engine photos from my Gekko build
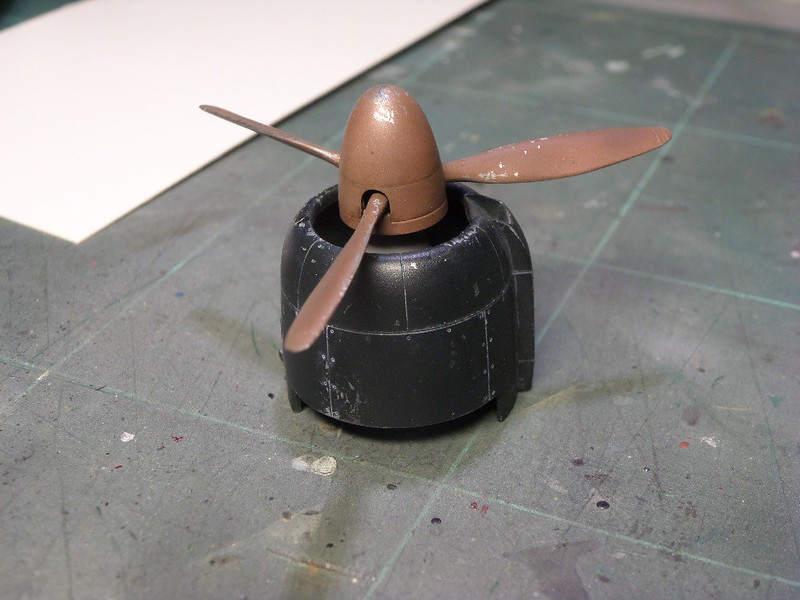
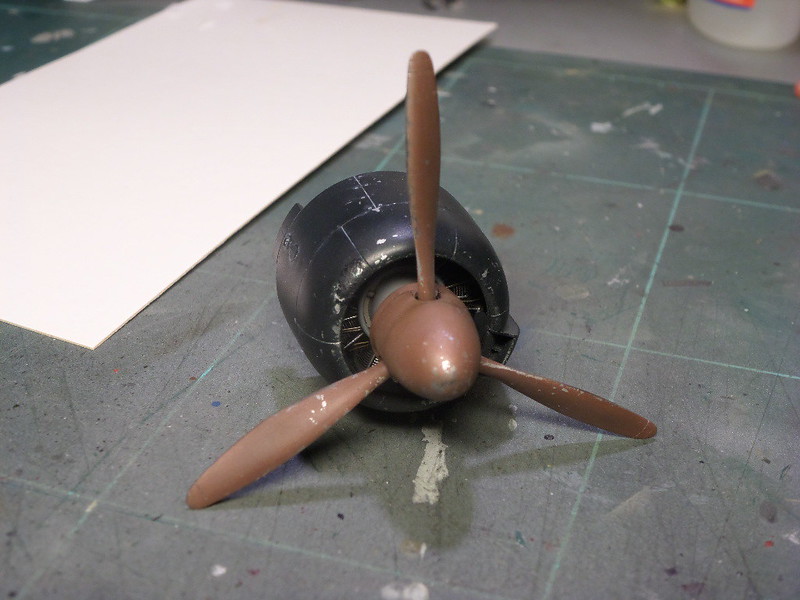

Waiting for some PE seat belts to arrive so I can complete the cockpit and interiors. Will post progress then.
Cheers
Pedro
Texas, United States
Joined: February 22, 2008
KitMaker: 5,026 posts
AeroScale: 2,811 posts
Posted: Friday, December 22, 2017 - 08:07 AM UTC
I am back in swing on my F6F-5N finally.


If it aint broke dont fix it.
Lisboa, Portugal
Joined: August 27, 2010
KitMaker: 679 posts
AeroScale: 669 posts
Posted: Friday, December 22, 2017 - 11:07 PM UTC
Ahah Bob, better late than never so get that beauty going!
Cheers
Pedro
Lisboa, Portugal
Joined: August 27, 2010
KitMaker: 679 posts
AeroScale: 669 posts
Posted: Wednesday, December 27, 2017 - 10:18 PM UTC
Lisboa, Portugal
Joined: August 27, 2010
KitMaker: 679 posts
AeroScale: 669 posts
Posted: Tuesday, January 02, 2018 - 07:59 PM UTC
Hi Everyone,
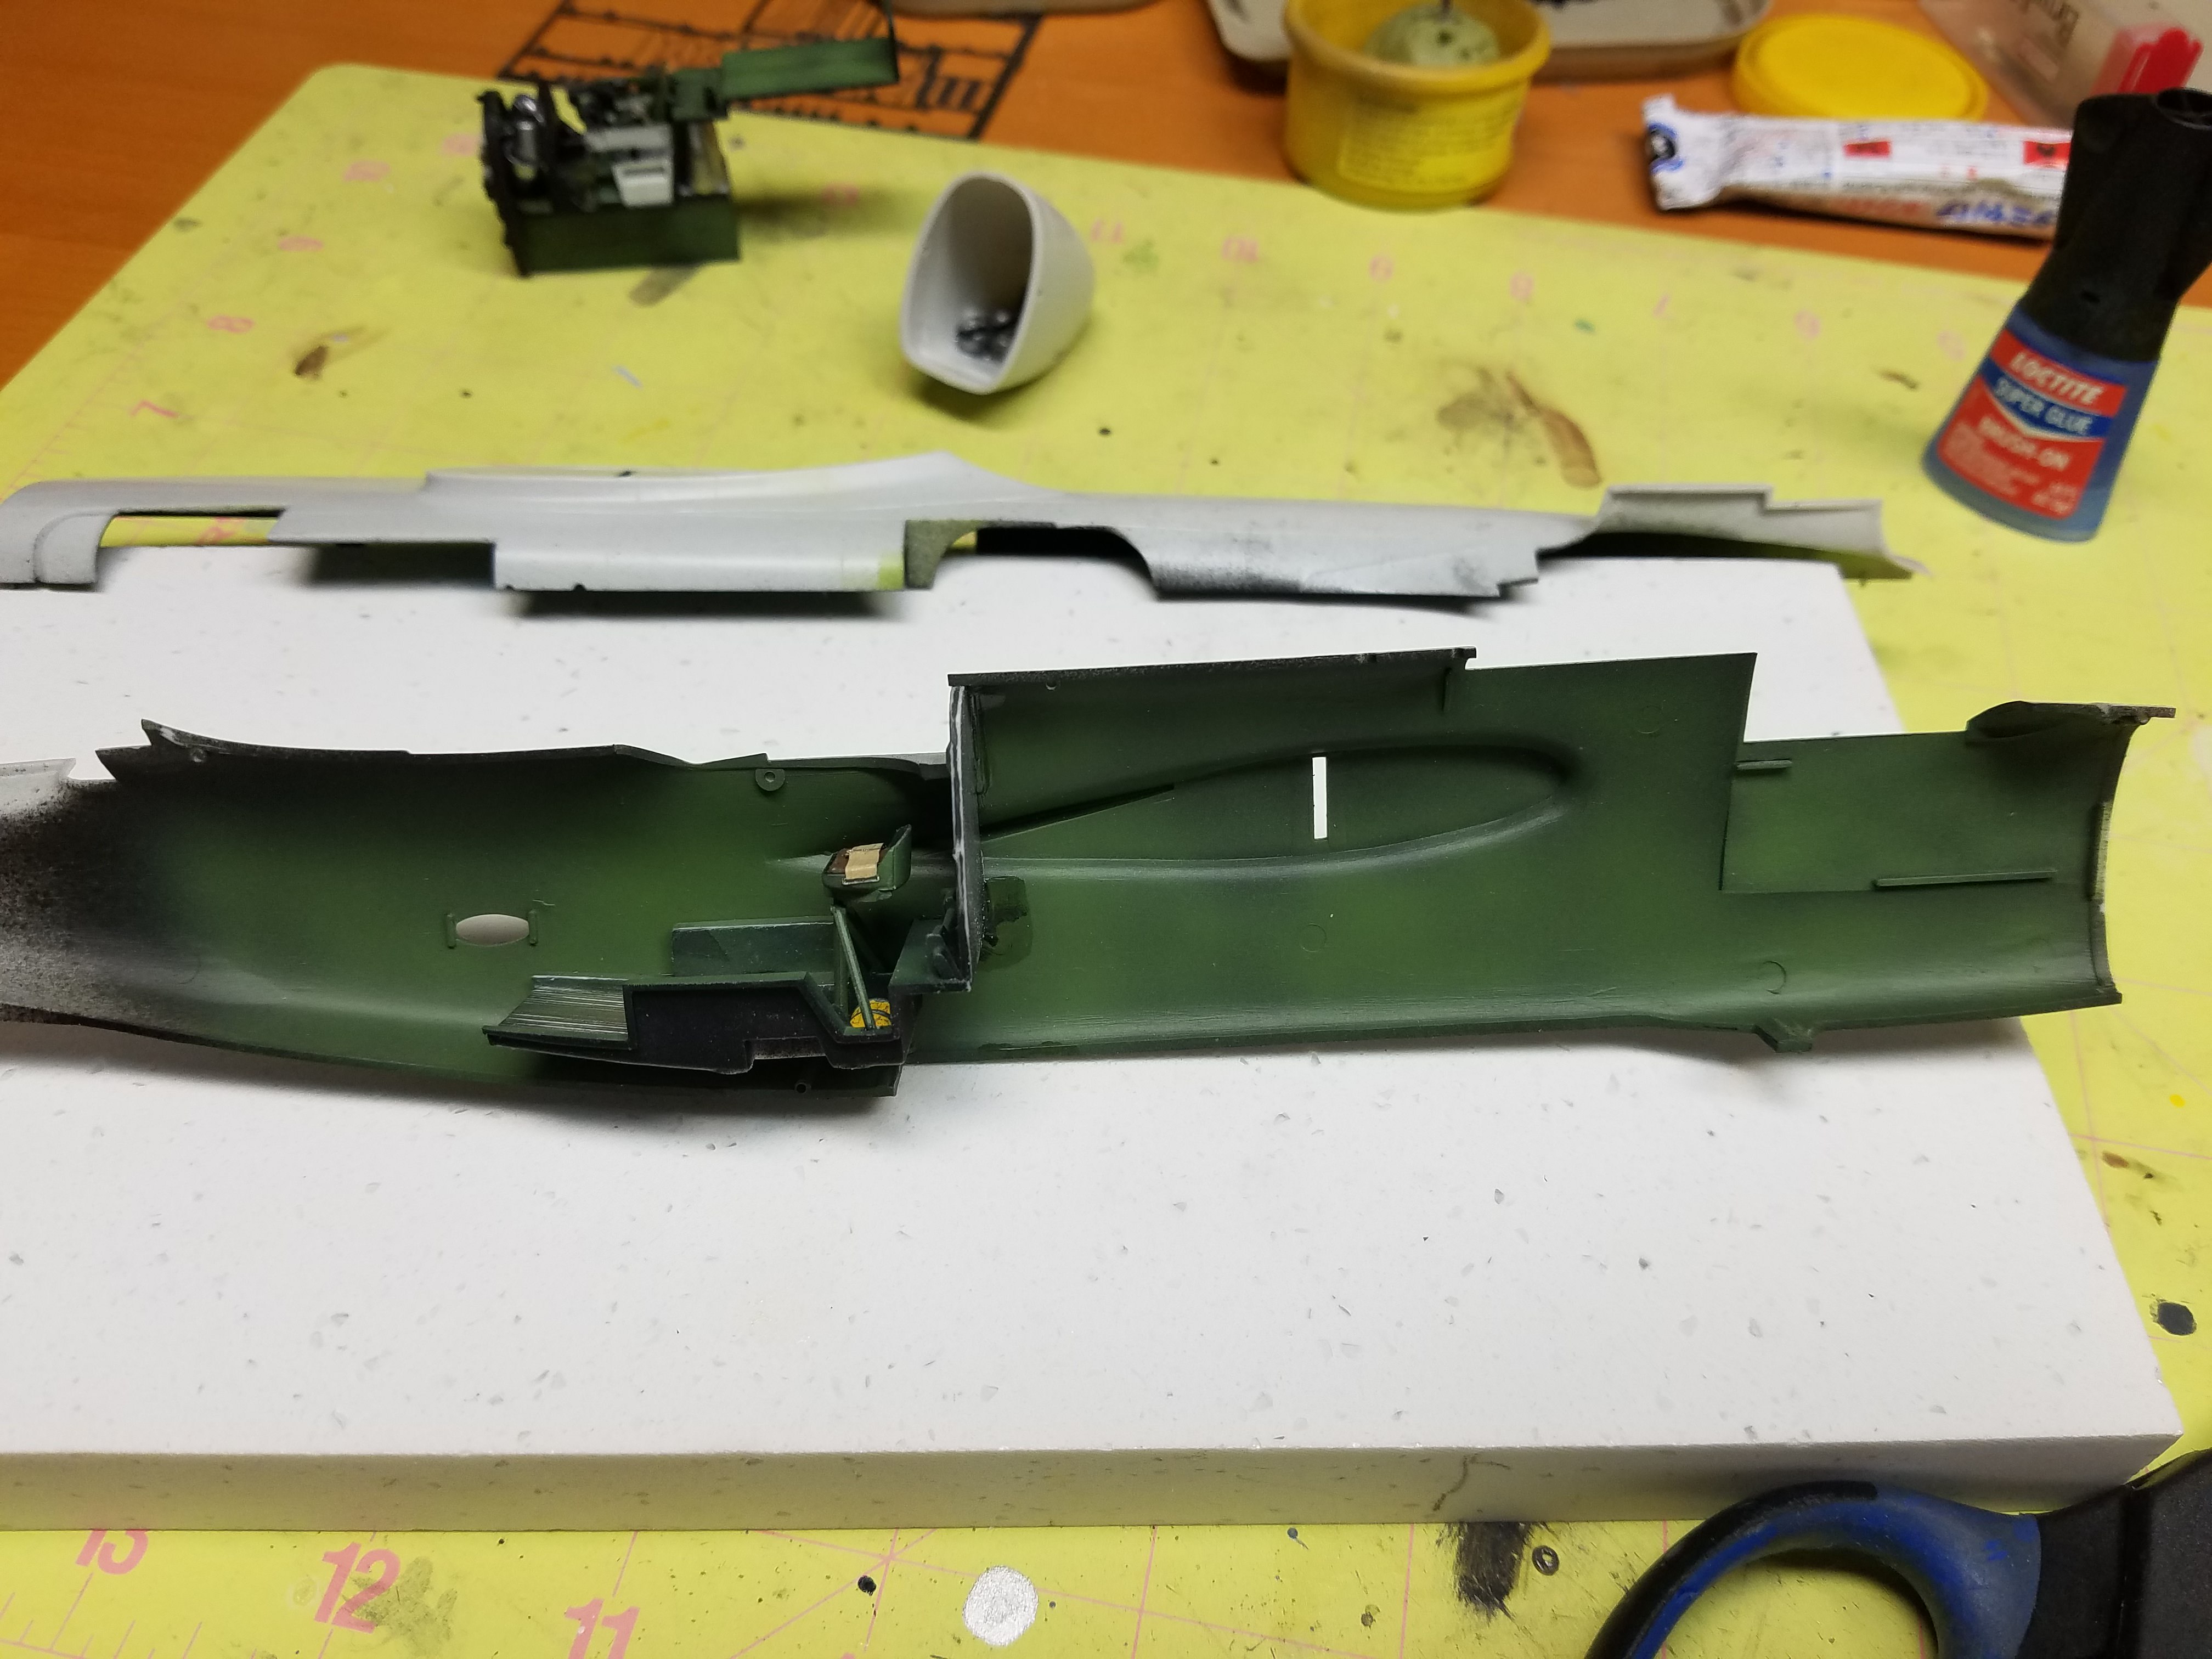
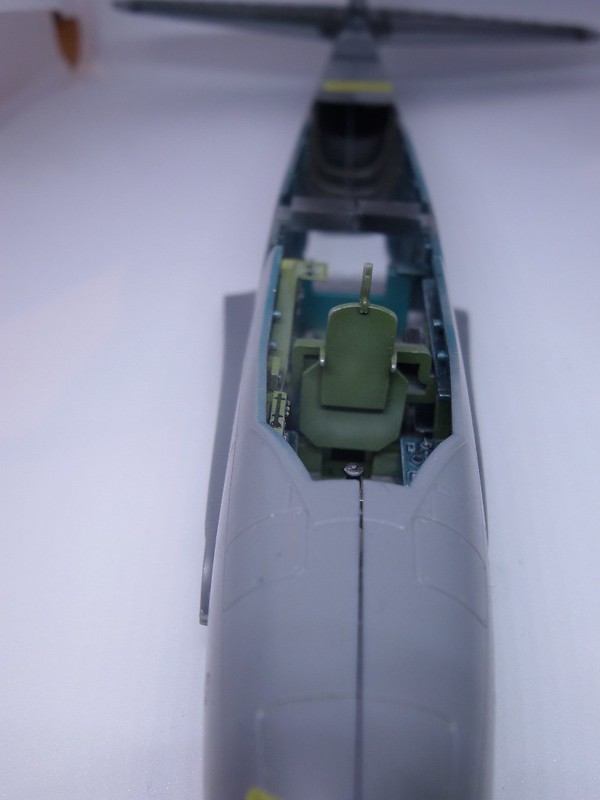
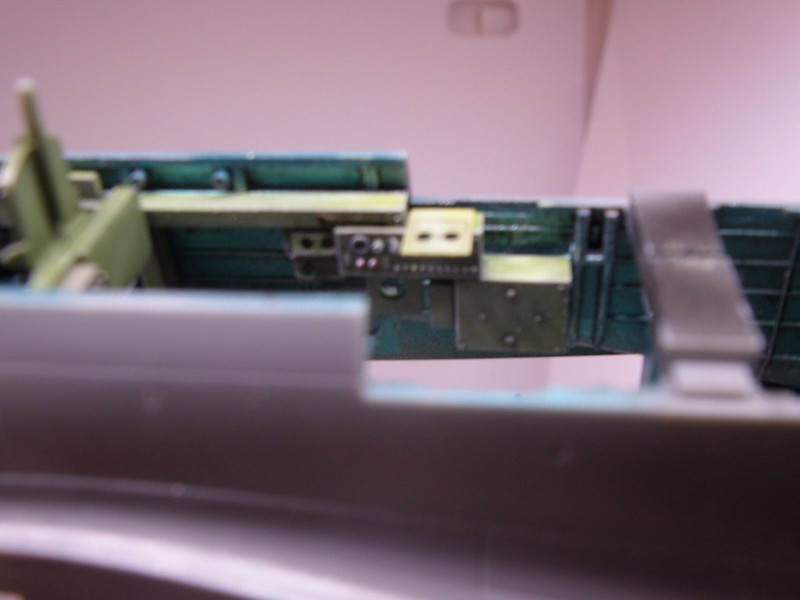
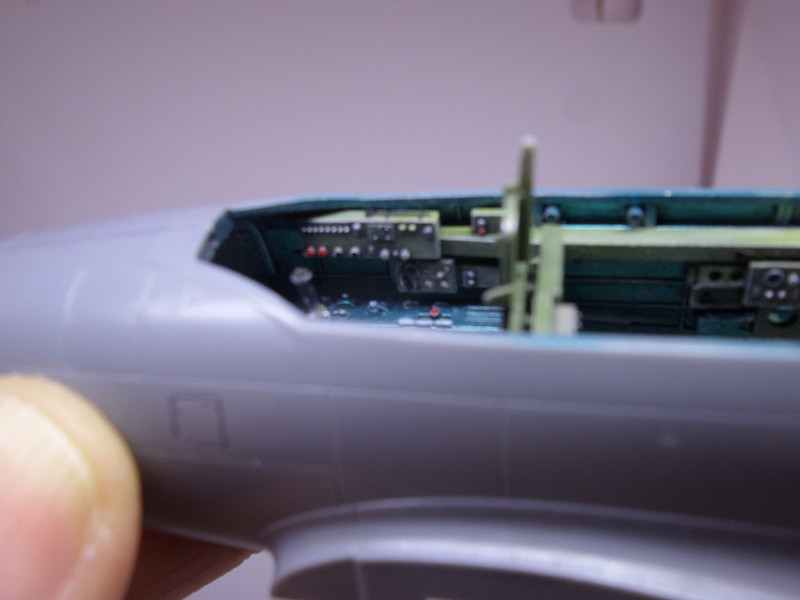
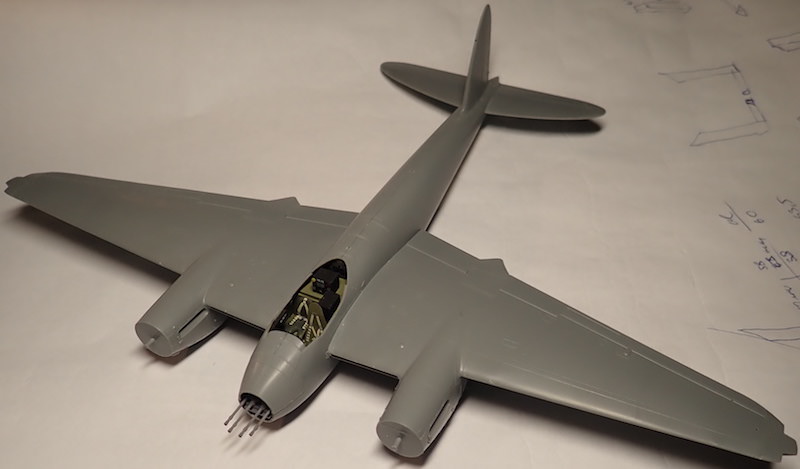
a last update before painting the overall green...
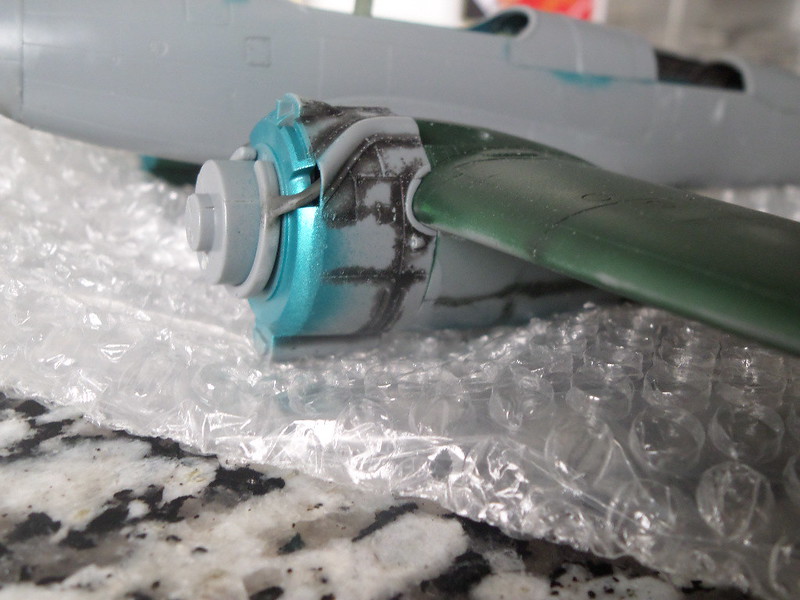
glued the back on the engine nacelles to the wings so that the camouflage painting goes easier, and to do so i had to reorder the exhaust pipes construction steps.
Therefore removed the pipes and sanded the contours to a more in scale depth.
The pipes are glued to the buffers that will only be applied last
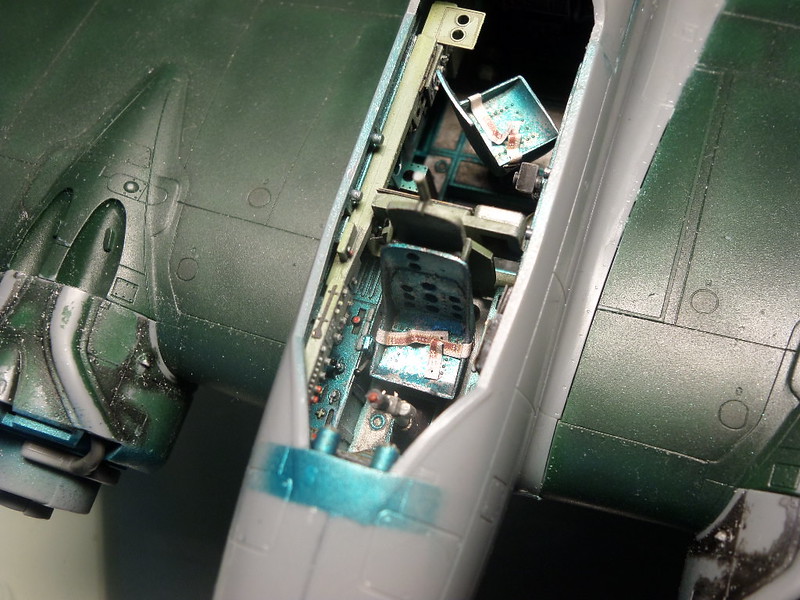
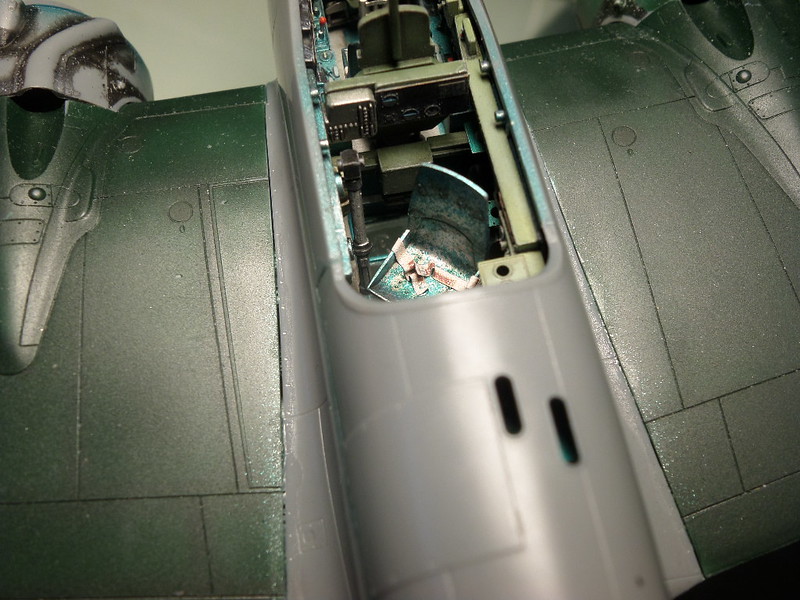
Seatbealts put in place (at last!).
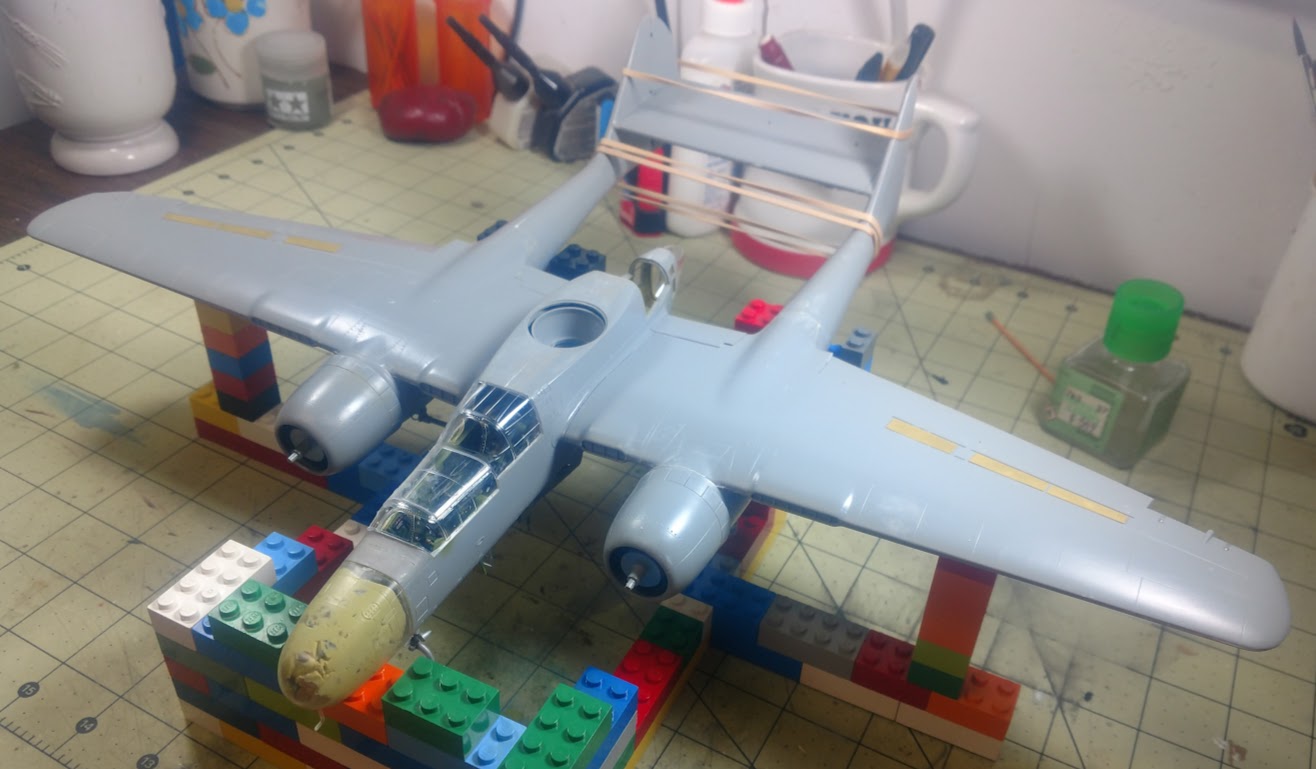
The fuselage-wing joining was trouble free and almost no putty is required in all construction... very much what we expect from Tamiya engineering.
Next update will the the completed model.
Cheers
Pedro
Uusimaa, Finland
Joined: October 01, 2016
KitMaker: 514 posts
AeroScale: 239 posts
Posted: Sunday, January 07, 2018 - 12:13 AM UTC
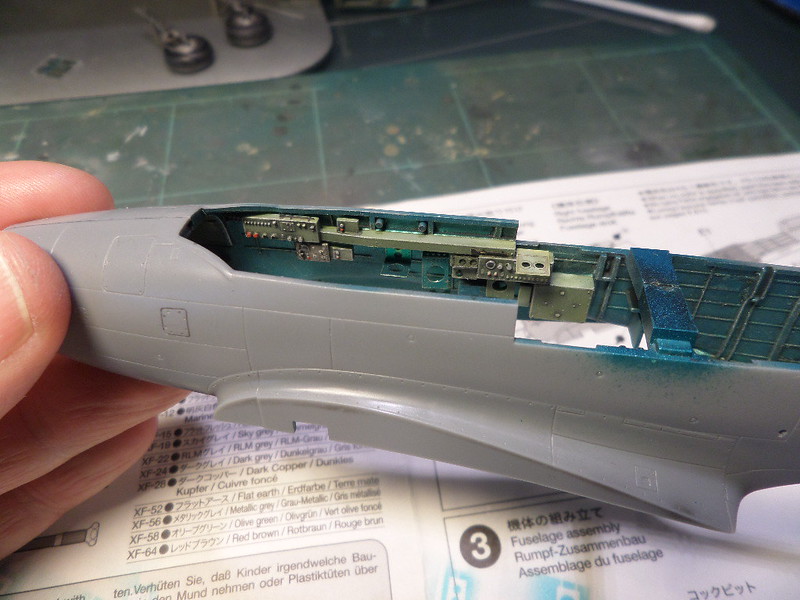
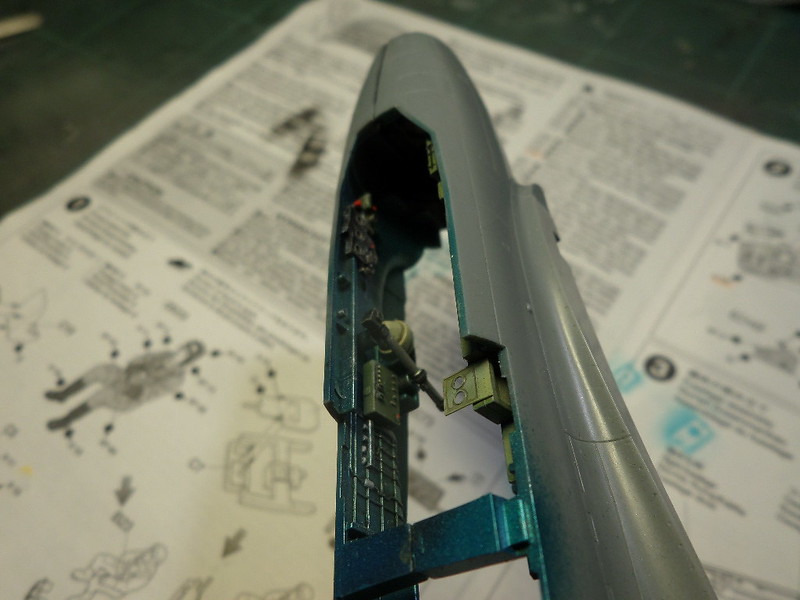
Pedro, great looking cockpit.
Meanwhile continuing with Mosquito. It's quite typical 1990's Tamiya: everything fall together nicely, but there are some design decisions I don't really like. Mainly decal seatbelts look quite bad. I hope canopy will restrict visibility (I'm doing this OOB)

Pennsylvania, United States
Joined: June 17, 2009
KitMaker: 566 posts
AeroScale: 507 posts
Posted: Sunday, January 07, 2018 - 02:32 AM UTC
I guess it's time to roll up the sleeves and get to work on this campaign. With such a wide variety of builds going on I dodont feel to bad bringing another F6F-5N into the fray, my selection being Eduard's 1/72 weekend edition. Most likely I will build as the 20mm cannon equipped box art subject of VMF(N)-542 on Okinawa may 1945. It will look nice on the shelf next to the 1/72 Zeroes I've been working on!
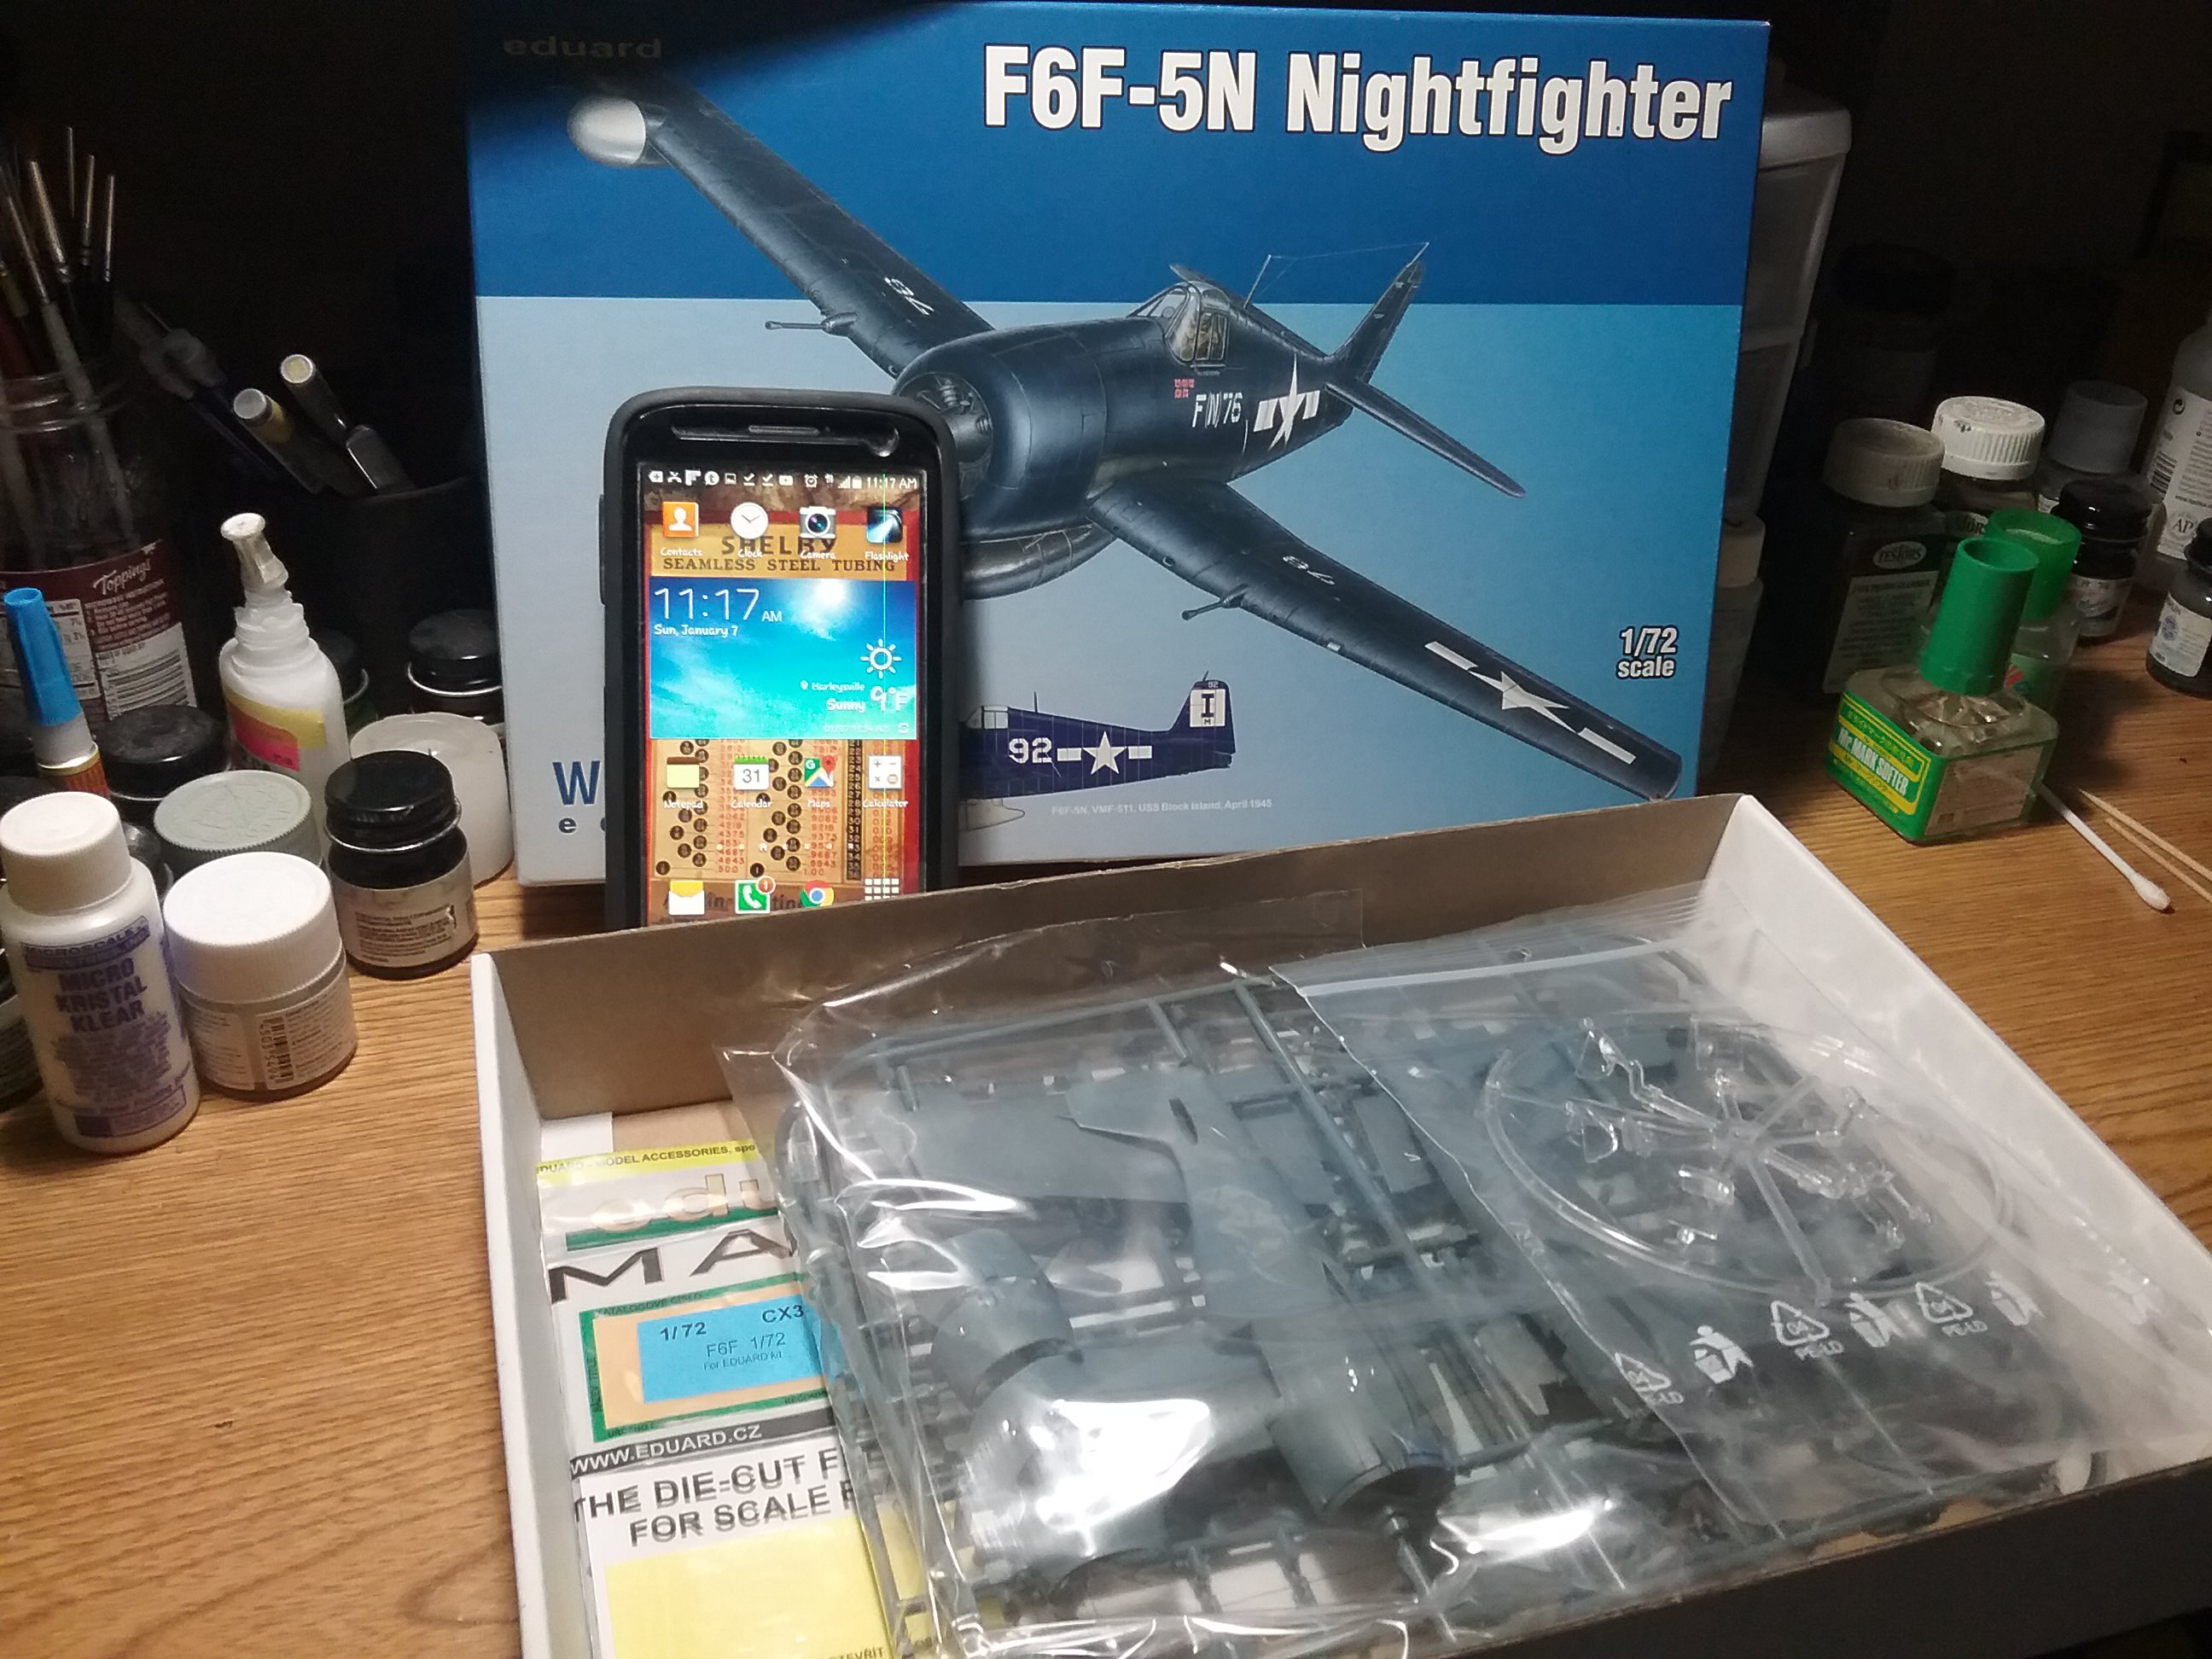
I have a couple quickboost goodies coming to spruce up the engine and the droptank. Also some seatbelts for the cockpit, which otherwise needs little improvment.
The sharp eyed will notice my phone says it's a balmy 9 degrees F (-13C) so there will be model building today and not much else!!!
"...Fat, drunk, and stupid is no way to go through life son"
Illinois, United States
Joined: January 25, 2010
KitMaker: 110 posts
AeroScale: 88 posts
Posted: Monday, January 08, 2018 - 09:53 PM UTC