Air Campaigns
Want to start or join a group build? This is where to start.
OFFICIAL: ANZAC Campaign 2017
Willard79
_VISITCOMMUNITY
Wellington, New Zealand
Joined: June 01, 2014
KitMaker: 189 posts
AeroScale: 179 posts
Posted: Saturday, August 26, 2017 - 10:57 AM UTC
Clamps!


The IP panel. I had a clever idea about drilling out the dials and applying the decal to some plasticard behind. Half way through I realized it was more effort than the reward, so the middle IP dials have been punched and applied while the outside ones are drilled.
The original part was thinned down to reduce the depth to the dial, but still looks very deep.
.
Anyway, you can't see much of the IP anyway once it's closed up.

regards.
Vicious
_VISITCOMMUNITY
Queensland, Australia
Joined: September 04, 2015
KitMaker: 1,517 posts
AeroScale: 75 posts
Posted: Sunday, August 27, 2017 - 04:12 AM UTC
Small question ... do you know for "sure" what color were the bikes of the Japanese army? ... looking for picture I have seen black and gray,but you never know if they have been repainted postwar or not, black/white picture are always very difficult to understand, there are also 2 or 3 different models probably depending on the manufacturer, at that time most civilian bikes were black, like the Ford Model T “Any customer can have a car painted any color that he wants,so long as it is black.”, my initial idea was to give the gray primer and then Black and after some chipping,to break the color i was thinking of making light gray tyres as I saw in some original pictures.

I was thinking of black on a gray primer just because my great-grandfather used an old 40s bike for all is long life and was painted like that

Any ideas or advice? .... I do not know what to do...
phantom_phanatic309
#372
_VISITCOMMUNITY
United Kingdom
Joined: March 10, 2010
KitMaker: 2,568 posts
AeroScale: 1,619 posts
Posted: Sunday, August 27, 2017 - 04:42 AM UTC
Great to see everyone's builds coming along.
Got back from my holiday in Malta earlier last week (with mild sunburn and plenty of ideas for building some aircraft from the Malta campaign) but have managed to start to put together my figures.
Pictures to come soon.
Willard79
_VISITCOMMUNITY
Wellington, New Zealand
Joined: June 01, 2014
KitMaker: 189 posts
AeroScale: 179 posts
Posted: Sunday, August 27, 2017 - 05:14 AM UTC
Vicious,
I'm no Japanese bicycle expert, but from the wiki extract below, you may have some licence as to the color. Who's to say these didn't end up in other theaters (pure speculation).


from wiki:
'Although the Japanese were under orders not to embark for Malaya with bicycles, for fear of slowing up amphibious landings, they knew from intelligence that bicycles were plentiful in Malaya and moved to systematically confiscate bicycles from civilians and retailers as soon as they landed.'

Just a thought.

regards.
Vicious
_VISITCOMMUNITY
Queensland, Australia
Joined: September 04, 2015
KitMaker: 1,517 posts
AeroScale: 75 posts
Posted: Sunday, August 27, 2017 - 05:36 AM UTC

Quoted Text

Vicious,
I'm no Japanese bicycle expert, but from the wiki extract below, you may have some licence as to the color. Who's to say these didn't end up in other theaters (pure speculation).


from wiki:
'Although the Japanese were under orders not to embark for Malaya with bicycles, for fear of slowing up amphibious landings, they knew from intelligence that bicycles were plentiful in Malaya and moved to systematically confiscate bicycles from civilians and retailers as soon as they landed.'

Just a thought.

regards.


Mmmmm....Very well I did not read that part or maybe in the Italian version it was not mentioned, however much more freedom for both color and model, probably some of the Malaya used bikes were the same ones used in Papua...I will do some research, also because I strongly doubt that they have found many bicycles to be confiscated in New Guinea

Thanks so much Mate!...
LinusB
_VISITCOMMUNITY
Western Australia, Australia
Joined: March 21, 2016
KitMaker: 247 posts
AeroScale: 105 posts
Posted: Sunday, August 27, 2017 - 07:22 AM UTC
Hi all

Been on a bit of a forced hiatus due to ongoing life stuff. I am back into it now though. Will be starting on Special Hobby's 1/32 Hawker Tempest in the markings of 486 Squadron RNZAF, the machine flown by Squadron Leader Warren "Smokey" Schrader.


RhinoSpit
_VISITCOMMUNITY
Bas-Rhin, France
Joined: September 22, 2016
KitMaker: 224 posts
AeroScale: 191 posts
Posted: Sunday, August 27, 2017 - 12:31 PM UTC
I was not very active on my builds these last weeks. The preparation of my next volcano climbing monopolized a lot of time.

And after the disaster of the boomerang build, this week-end i've looked in my stash and finally i'll build an australian spitfire mk.VIII and the RNZAF Typhoon.

But, next week Rwanda, Congo, i'm coming !

See you in mid september !
phantom_phanatic309
#372
_VISITCOMMUNITY
United Kingdom
Joined: March 10, 2010
KitMaker: 2,568 posts
AeroScale: 1,619 posts
Posted: Monday, August 28, 2017 - 01:03 AM UTC
Linus, looking forward to seeing your Tempest. That's one high on my wish list.

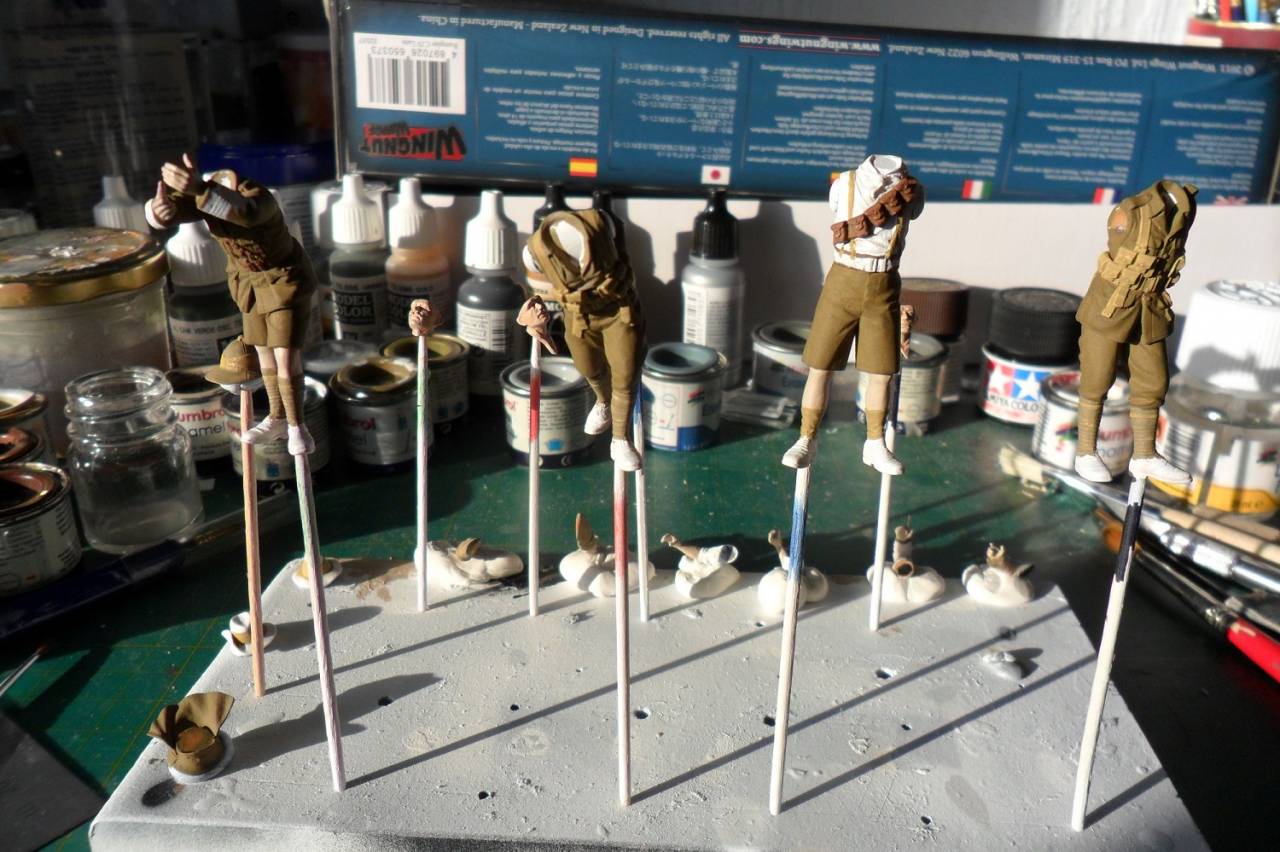
Update on my build so far. And a little lesson in reading the instructions!

So, while putting together the four figures I was amazed at how easy and flawless the fit was. They really are great. And then I came to the officer and found what I believed to be a serious flaw. His legs were narrower than the torso and he looked ridiculous. So I set about correcting it with some milliput. I glued the legs to the torso at the correct width and filled the gap in with milliput and sculpted in the creases.


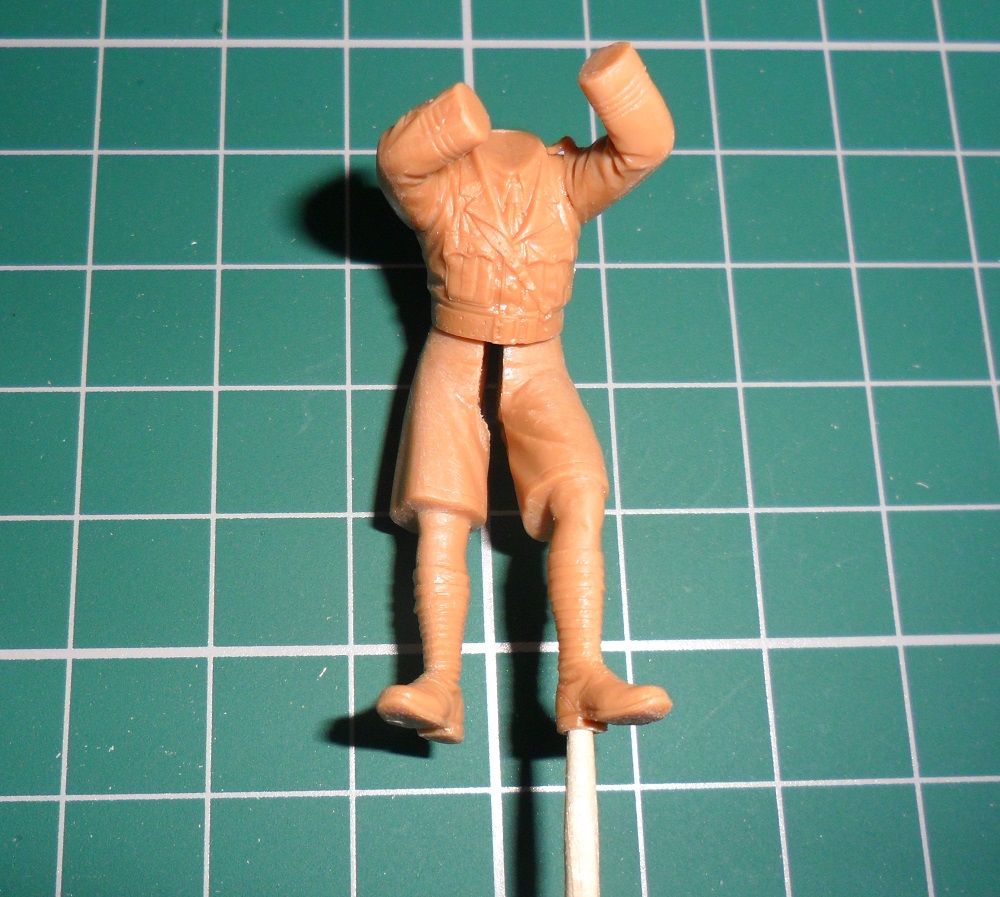
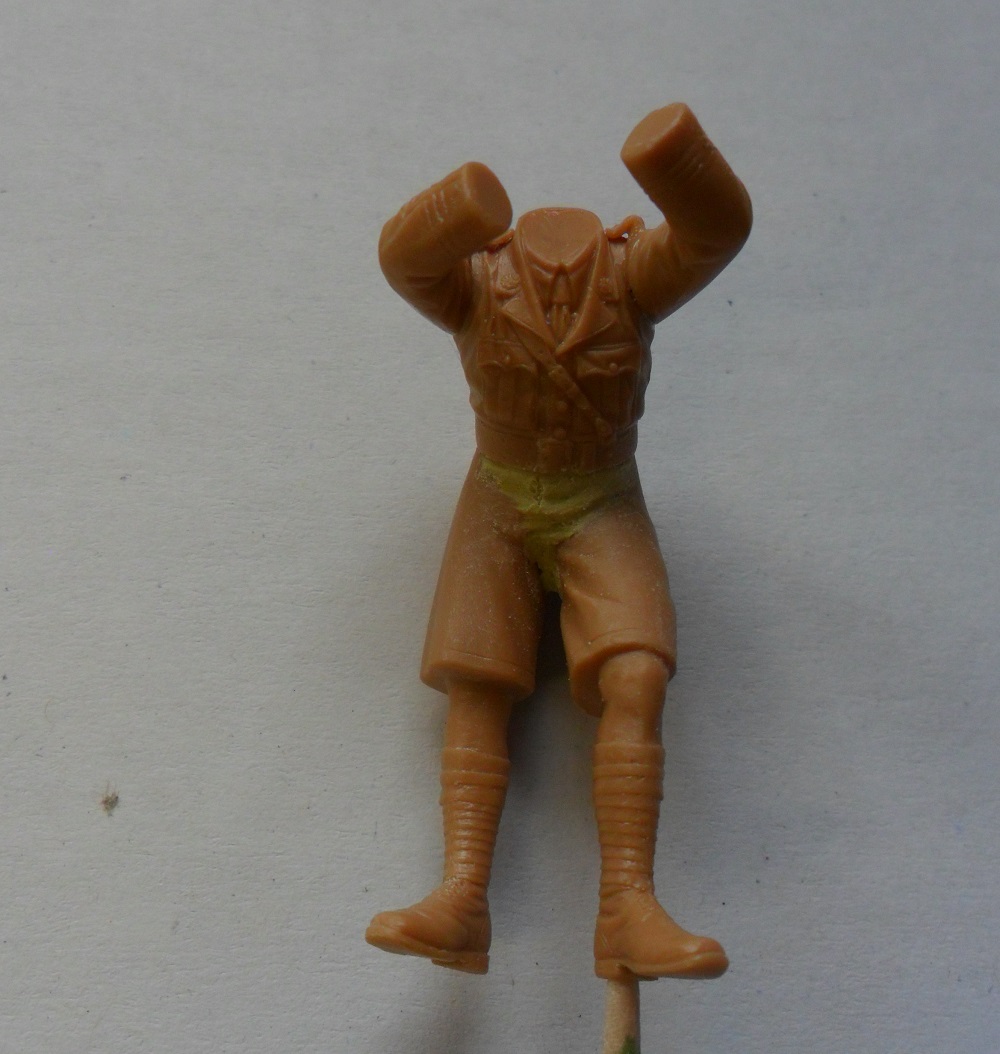
I was feeling pretty pleased with myself at this. It turned out rather well.
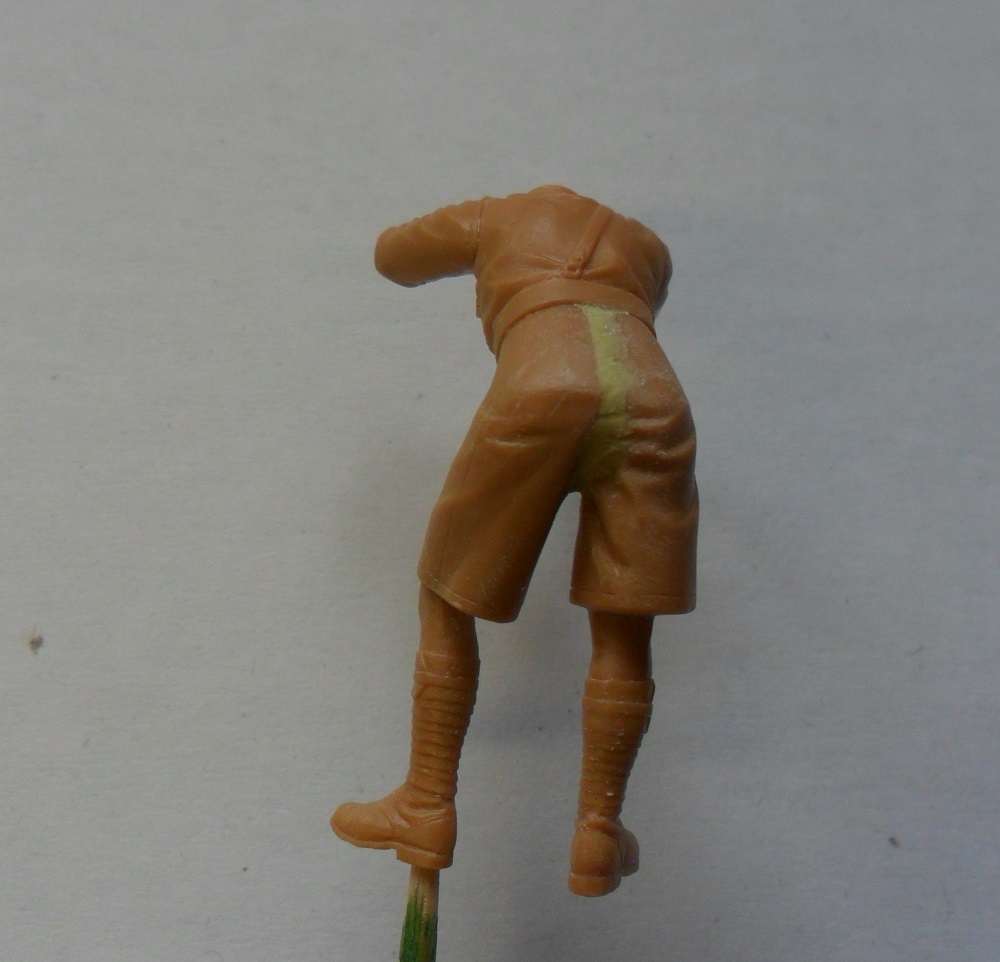
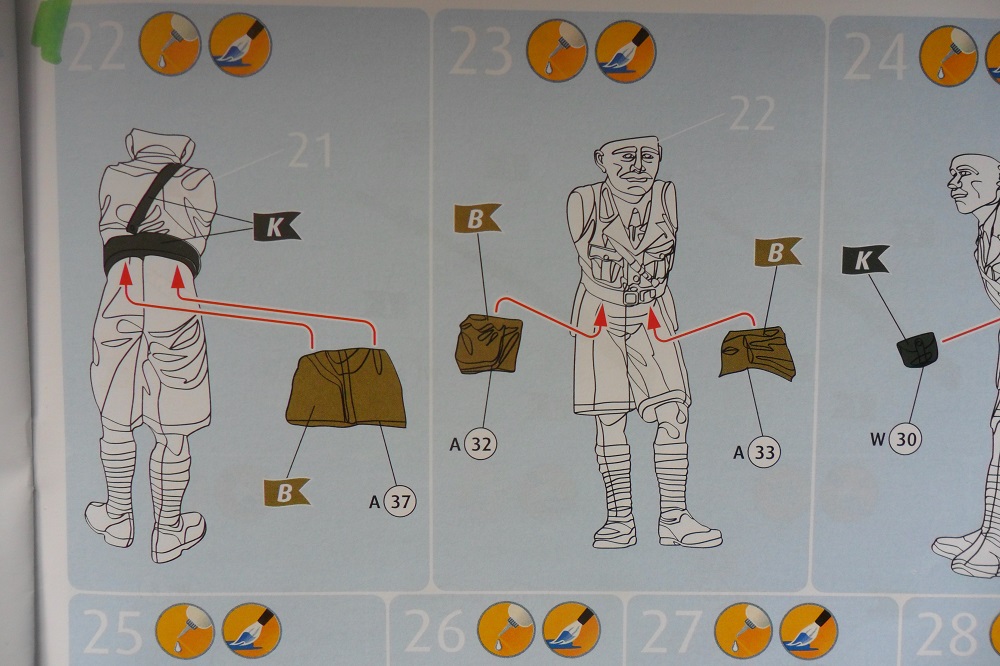
And then when looking at the instructions, I realised WHY his hips were so narrow. It's because the bottom parts of his jacket fit over.


Luckily, the milliput was still quite soft and had not fully set so I was able to pick it all out and reassemble him correctly.
So, I've made a mental note to read instructions properly in the future.

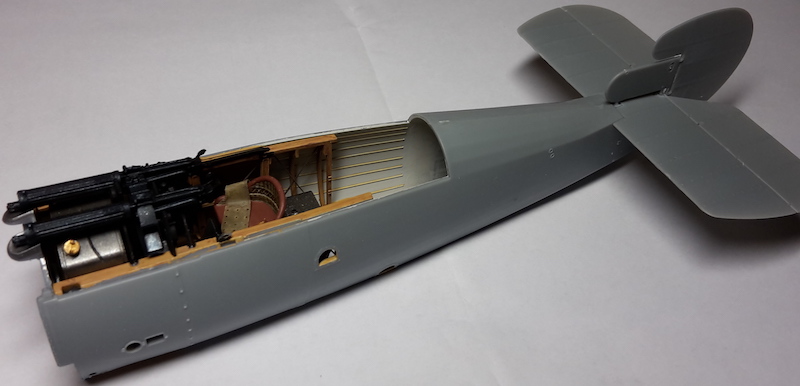
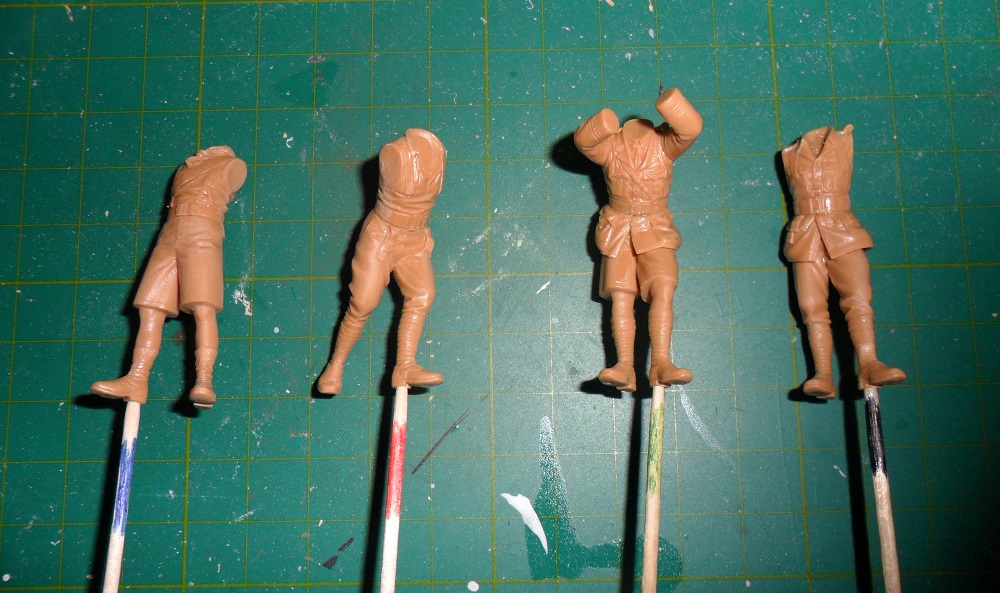
Here's where I'm currently at.


The only minor annoyance with this kit I'm finding is with the weapons. Don't get me wrong there is nothing at fault with the moulding, detail or HUGE selection. But with the fact that all but one of the Enfields has fixed bayonets. Ok for soldiers advancing, but not when at ease as in this set. Should be easy to trim off, but would be nice to have at least another one without.
May have to raid the spares. I know have some No.4's but not sure about SMLE's.

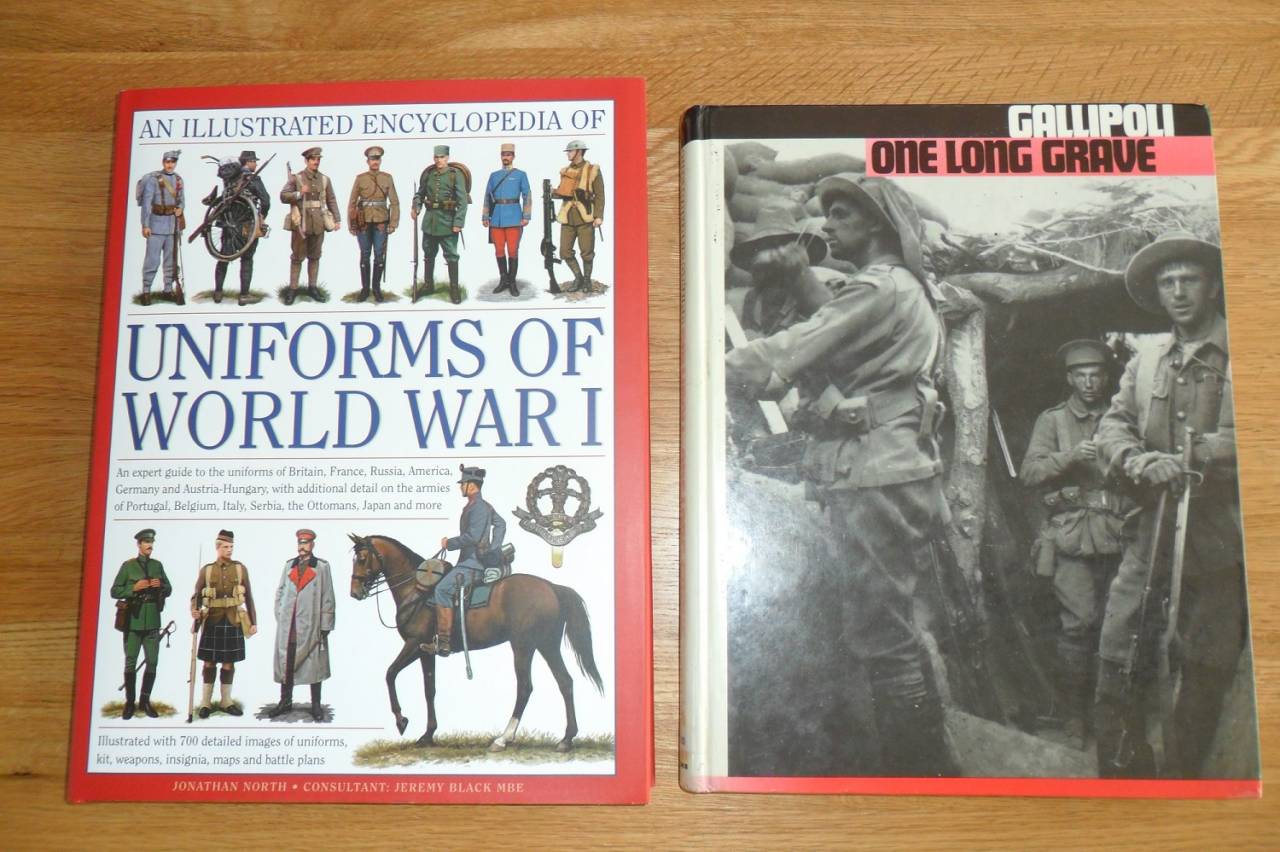
Based on this set I have ordered myself the full range of ICM's WW1 figures. Especially looking forward to the Turkish Infantry release later in the year.
phantom_phanatic309
#372
_VISITCOMMUNITY
United Kingdom
Joined: March 10, 2010
KitMaker: 2,568 posts
AeroScale: 1,619 posts
Posted: Tuesday, September 19, 2017 - 12:23 AM UTC
Started to get some colour on the figures. I'm using a mix of Humbrol and Revell enamels.


My main references.


Uniforms of WW1 is a recently published book and is invaluable as a single reference. Gallipoli One Long Grave is an old one I found in my local library. Lots of great photo's to refer to in here.


I might need to repaint some of the webbing leather as it was preferred by Australian troops, but photo's do show a mix of leather and canvas.
PasiAhopelto
_VISITCOMMUNITY
Uusimaa, Finland
Joined: October 01, 2016
KitMaker: 514 posts
AeroScale: 239 posts
Posted: Friday, September 22, 2017 - 10:21 AM UTC
After this, I'll hide the interior:


Easy build so far, close to perfect fit (knowing that the tolerances are tight I removed paint from contact surfaces before glueing fuselage halves).
BlackWidow
_VISITCOMMUNITY
European Union
Joined: August 09, 2009
KitMaker: 1,732 posts
AeroScale: 1,336 posts
Posted: Saturday, September 23, 2017 - 03:13 PM UTC
Nice progress here everyone!
Stephen, your "Diggers" turn out really well. They will look great when fínished.

Now that my Hurricanes are finished and the first is already online, I'll soon join the party here with my build.
It's a Lockheed Ventura Mk. II from No. 464 Sqn RAAF, based in Methwold/England, 1943. I guess this build qualifies for the campaign.


Kit comes from Revell Germany in 1/48, decals are from Xtradecal (Hannants). I'll start this build as soon as I return from the expo in Augsburg next weekend.

Happy modelling everyone and good luck for all your projects!
Torsten
165thspc
#521
_VISITCOMMUNITY
Kentucky, United States
Joined: April 13, 2011
KitMaker: 9,465 posts
AeroScale: 375 posts
Posted: Saturday, September 23, 2017 - 08:24 PM UTC
Pasi, Spud - amazing work both of you!
ClaytonFromEllijay
#454
_VISITCOMMUNITY
Georgia, United States
Joined: July 10, 2016
KitMaker: 1,273 posts
AeroScale: 63 posts
Posted: Saturday, September 23, 2017 - 11:16 PM UTC
OK, I have a shotgun build here- two Chevrolet 30cwt LRDG trucks-a kiwi one for this campaign, and the other as a desert derelict for the Battle Damage campaign...
c4willy
#305
_VISITCOMMUNITY
Christchurch, New Zealand
Joined: February 01, 2006
KitMaker: 1,673 posts
AeroScale: 1,517 posts
Posted: Saturday, September 30, 2017 - 01:37 AM UTC
Torsten buddy! Glad to see you here! Kit looks good, I've got a couple of PV-2's to build as RNZAF in the pacific.

Clayton pleased to see your goodself as well. Two builds eh? Good luck my friend!

Spud Hurricane is coming along nicely! Mine are all pretty much stalled just lost interest in models for the moment. However I hope to get some paint on a couple of my builds today. Yeah sometimes it seems like a great idea till you start and actually realise just how much work you're getting yourself into for something that will likely not be seen.

Linus now there's a man after my own heart a 1/32 scale Tempest. I've wanted to add that kit to the stash when I first saw it released. Just can't afford it yet... yet! I'm looking forward to your build with great anticipation!

Franck rather you than me buddy climbing volcano's sounds like dangerous fun! I'm assuming it's dormant? Be safe and I look forward to your return.

Stephen your figures look great! I like what your doing with them. I tend to avoid them as I'm seven shades of useless when it comes to making them look realistic. Look forward to seeing how you paint their faces.

Pasi outstanding work so far my friend! I can't wait to see it go together. Will you rig it? And what will you do for turn buckles if you do?

I've yet to cut plastic on my Strikemaster but I've also yet to get the decals for her so I might change tack and build something else just not too sure what yet.

md72
#439
_VISITCOMMUNITY
Washington, United States
Joined: November 05, 2005
KitMaker: 4,950 posts
AeroScale: 3,192 posts
Posted: Saturday, September 30, 2017 - 09:00 AM UTC
Well, I thought I forgot to post a start picture. So I uploaded this one just after I did the interior. Then I see I did post a start pic....

BoiseBlade
#523
_VISITCOMMUNITY
Idaho, United States
Joined: February 28, 2014
KitMaker: 342 posts
AeroScale: 250 posts
Posted: Saturday, September 30, 2017 - 11:26 AM UTC
OK, I'm in.
I will be doing an NZ M41 Bulldog.

c4willy
#305
_VISITCOMMUNITY
Christchurch, New Zealand
Joined: February 01, 2006
KitMaker: 1,673 posts
AeroScale: 1,517 posts
Posted: Sunday, October 01, 2017 - 03:09 PM UTC
Welcome Jeff! Pleased to see you building this kit I have a couple of examples in the stash for just this purpose. Do you need any info on the mods made to Kiwi M41's?

If so check out this link.
BlackWidow
_VISITCOMMUNITY
European Union
Joined: August 09, 2009
KitMaker: 1,732 posts
AeroScale: 1,336 posts
Posted: Saturday, October 07, 2017 - 04:27 PM UTC
Thanks Chris! I've built a Ventura as a "Flyin' Kiwi" some years ago. You might remember.

Anyway, some first progress on my "Flyin' Kangaroo". Pilot's office is more or less done. I've painted the interior with Revell Aqua No. 360.


.... first work on the wings. This kit offers the possiblity to finish wings and fuselage seperatly and put them together at the end of assembly. Very nice!

.... this is just a test and shows already a troublefree fitting ....


Have a nice Sunday!
Torsten
md72
#439
_VISITCOMMUNITY
Washington, United States
Joined: November 05, 2005
KitMaker: 4,950 posts
AeroScale: 3,192 posts
Posted: Friday, October 13, 2017 - 12:45 AM UTC
Looking good T-man. My P-40N build is dragging along. Managed to misplace the instructions so I'm having to guess from some tiny internet photos and a P-40E sheet. Anyone happen to have a Academy P-40M/N instructions sheet they could scan/share?
PasiAhopelto
_VISITCOMMUNITY
Uusimaa, Finland
Joined: October 01, 2016
KitMaker: 514 posts
AeroScale: 239 posts
Posted: Friday, October 13, 2017 - 09:41 AM UTC
Is it 72nd scale P-40? There are instructions scanned at https://www.scalemates.com/kits/103703-academy-1668-p-40m-n-warhawk
md72
#439
_VISITCOMMUNITY
Washington, United States
Joined: November 05, 2005
KitMaker: 4,950 posts
AeroScale: 3,192 posts
Posted: Friday, October 13, 2017 - 10:24 AM UTC
Wow, that is fantastic, I did not know they had that feature. Thanks! Now that I've downloaded the sheets, I bet my sheet will come out of hiding!
md72
#439
_VISITCOMMUNITY
Washington, United States
Joined: November 05, 2005
KitMaker: 4,950 posts
AeroScale: 3,192 posts
Posted: Saturday, October 14, 2017 - 03:59 AM UTC
OK, on to the next hurdle. Since it was built in America, would the RAAF P-40 have US style seat belts or RAF belts??
PasiAhopelto
_VISITCOMMUNITY
Uusimaa, Finland
Joined: October 01, 2016
KitMaker: 514 posts
AeroScale: 239 posts
Posted: Sunday, October 15, 2017 - 12:00 AM UTC
Couple of steps forward with Snipe:


and

BlackWidow
_VISITCOMMUNITY
European Union
Joined: August 09, 2009
KitMaker: 1,732 posts
AeroScale: 1,336 posts
Posted: Saturday, October 21, 2017 - 02:29 PM UTC
Nice progress, Pasi!

I've also done a few things on my Flying Kangaroo recently. Fuselage is mostly completed and masked. The use of Eduards EX 538 mask is highly recommended because of all the small windows on the Ventura, especially in the front fuselage and on the top turret.


This Ventura will get no external fuel tanks so I have closed the holes in the wings for them with putty.


There is still some masking left, like on the top turret and the bomb bay, plus covering the wheel wells and the engines but I think I can throw some paint on it next week.

Have a nice Sunday!
Torsten
Sleepwalker71
_VISITCOMMUNITY
Singapore / 新加坡
Joined: August 30, 2012
KitMaker: 265 posts
AeroScale: 72 posts
Posted: Tuesday, October 24, 2017 - 03:20 PM UTC
After some search and considerations finally I have found my model today!
Here is my entry: ASLAV-25 from 2nd/14th Light Horse Regiment (Queensland Mounted Infantry) during Operation Catalyst, Afghanistan 2003.

It is Trumpeter's kit in 1/35 with some drawbacks to be addressed, pointed out in detail in Armorama review. I'm waiting now for some aftermarket PE from Eduard and I will go ahead with this cool vehicle.