OFFICIAL: 2nd Gen. Jet Fighters Campaign
Uusimaa, Finland
Joined: March 30, 2004
KitMaker: 2,845 posts
AeroScale: 1,564 posts
Posted: Tuesday, June 20, 2017 - 07:03 PM UTC
Update time again.
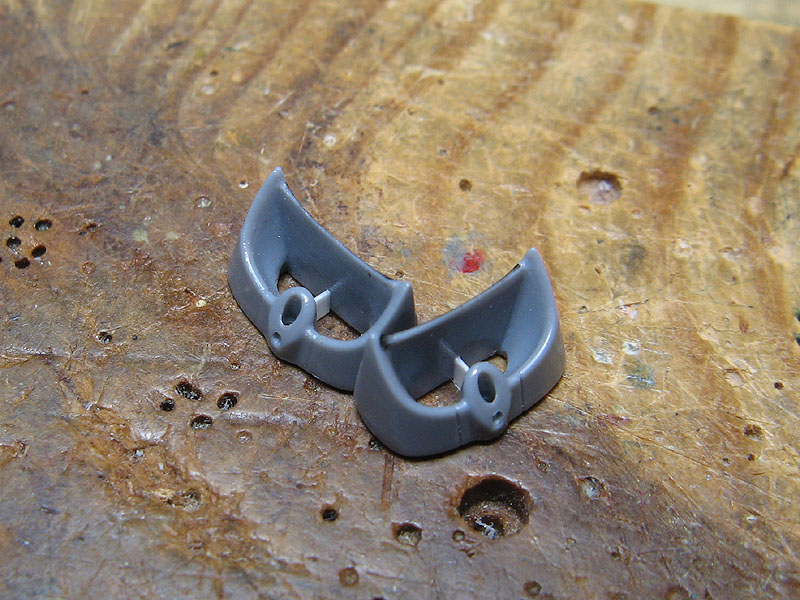
In addition to opening up the intakes a bit and drilling out the cannon ports, I also added guide vanes / supports (someone which ones are they exactly?) made from thing styrene sheet.
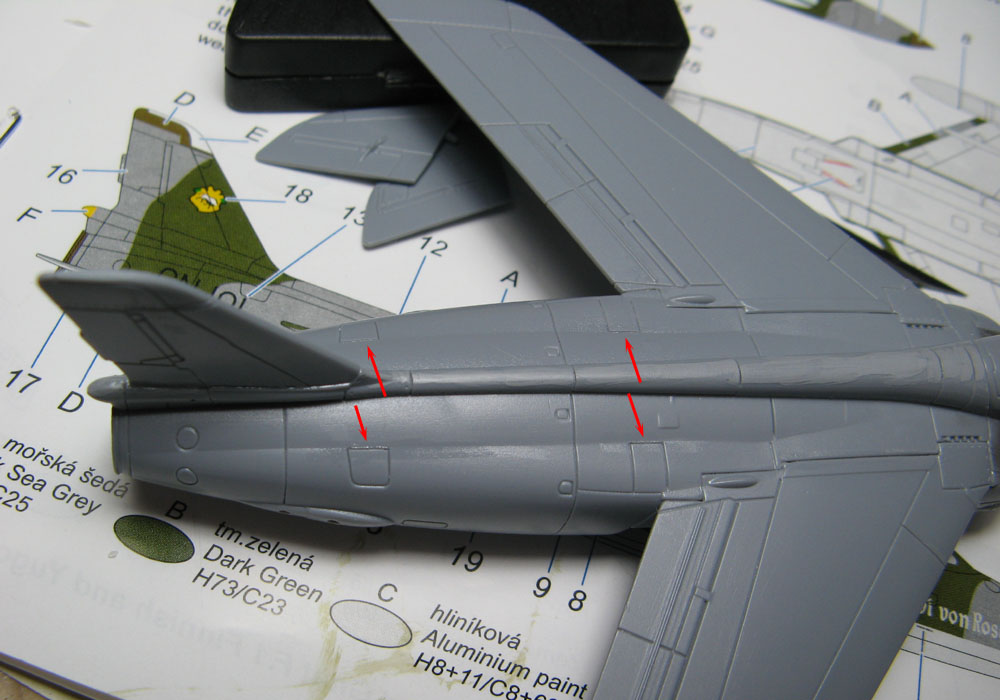
The four maintenance hatches on the upper fuselage lacked the recessed line on that side that face the spine, so those were scribed in to avoid an incomplete look.
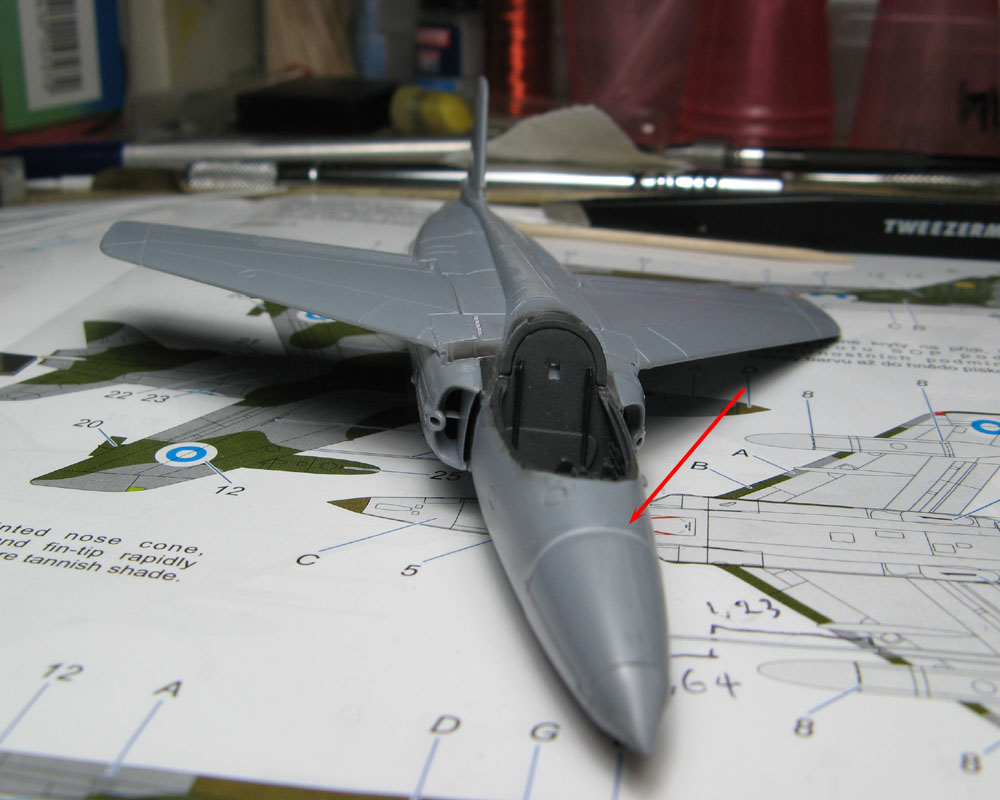
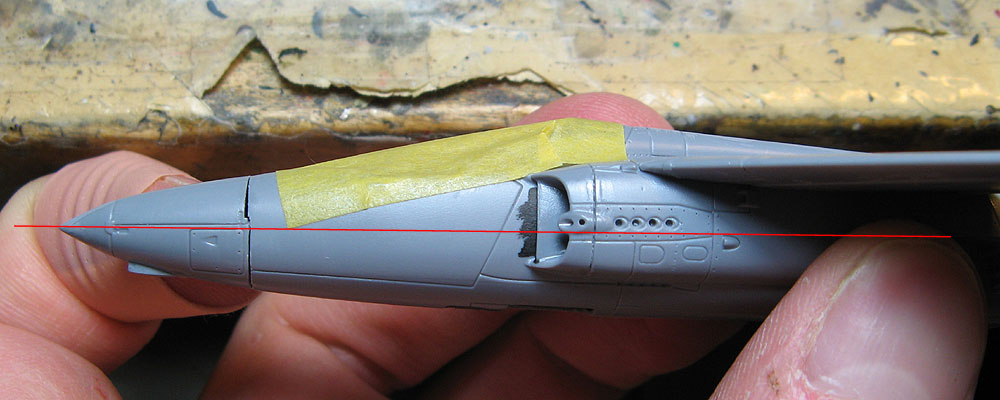
Moving along, engine intakes and nose cone in place. In the process of trying to get the nose cone attached with as little gaps as possible, I glued in a piece of thin styrene sheet to the top half of the nose (pointed by arrow), which made for a gapless joint, but turned out to be a mistake...
...because the added material made the nose point down just a little bit too much.
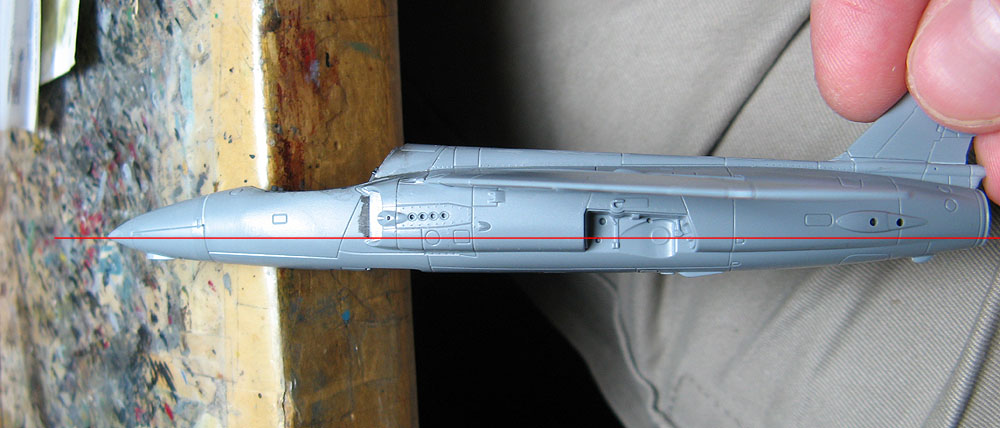
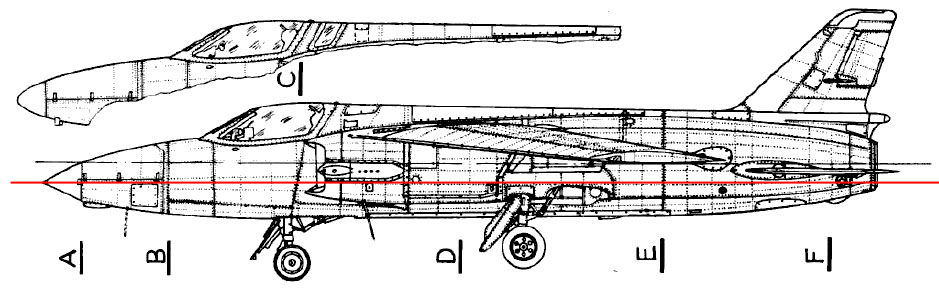
Being dryfitted after being cut off and fit readjusted. Looking much better now! Some gap filling will be needed, though.

Uusimaa, Finland
Joined: October 01, 2016
KitMaker: 514 posts
AeroScale: 239 posts
Posted: Friday, June 23, 2017 - 10:40 AM UTC
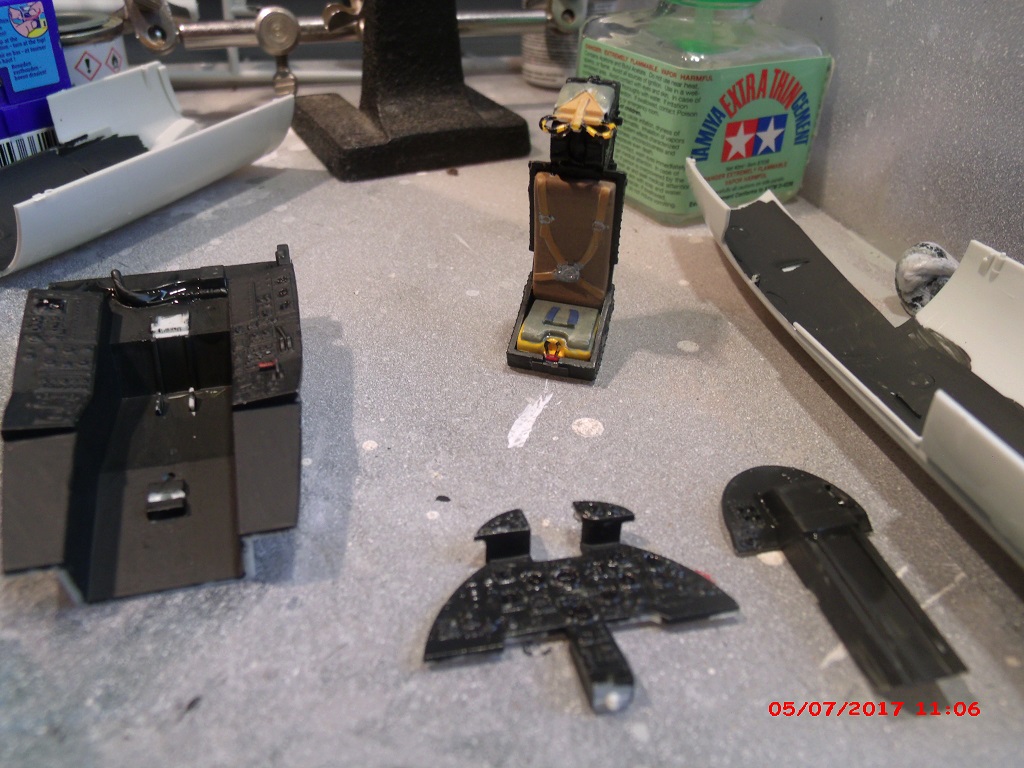
Yak-28P's cockpit done:

So far trouble free build. I think next step (engines) will tell how good the fit is in larger parts.
Vietnam
Joined: May 07, 2006
KitMaker: 416 posts
AeroScale: 89 posts
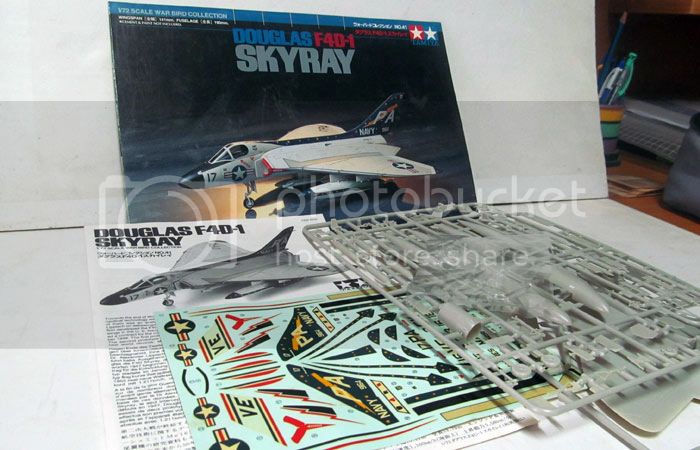
Posted: Friday, June 23, 2017 - 10:35 PM UTC
Hi all,
The second Skyray in this campaign, but in 1/72nd, after Lakota's.
Regards,
K.


#259
Massachusetts, United States
Joined: October 23, 2011
KitMaker: 2,265 posts
AeroScale: 1,715 posts
Posted: Saturday, June 24, 2017 - 12:59 AM UTC
you can pose the wing in the "up" position, and do no filling.
Texas, United States
Joined: February 22, 2008
KitMaker: 5,026 posts
AeroScale: 2,811 posts
Posted: Saturday, June 24, 2017 - 01:04 AM UTC
@ Mr.K, Very nice choice for a build. Every time I try to obtain a kit of the FORD the price scares me off. Cant wait to see your progress and finish photos.
@ Jonathan, I could only hope for an airplane with no putty

Bob
If it aint broke dont fix it.
Uusimaa, Finland
Joined: March 30, 2004
KitMaker: 2,845 posts
AeroScale: 1,564 posts
Posted: Sunday, June 25, 2017 - 01:44 AM UTC
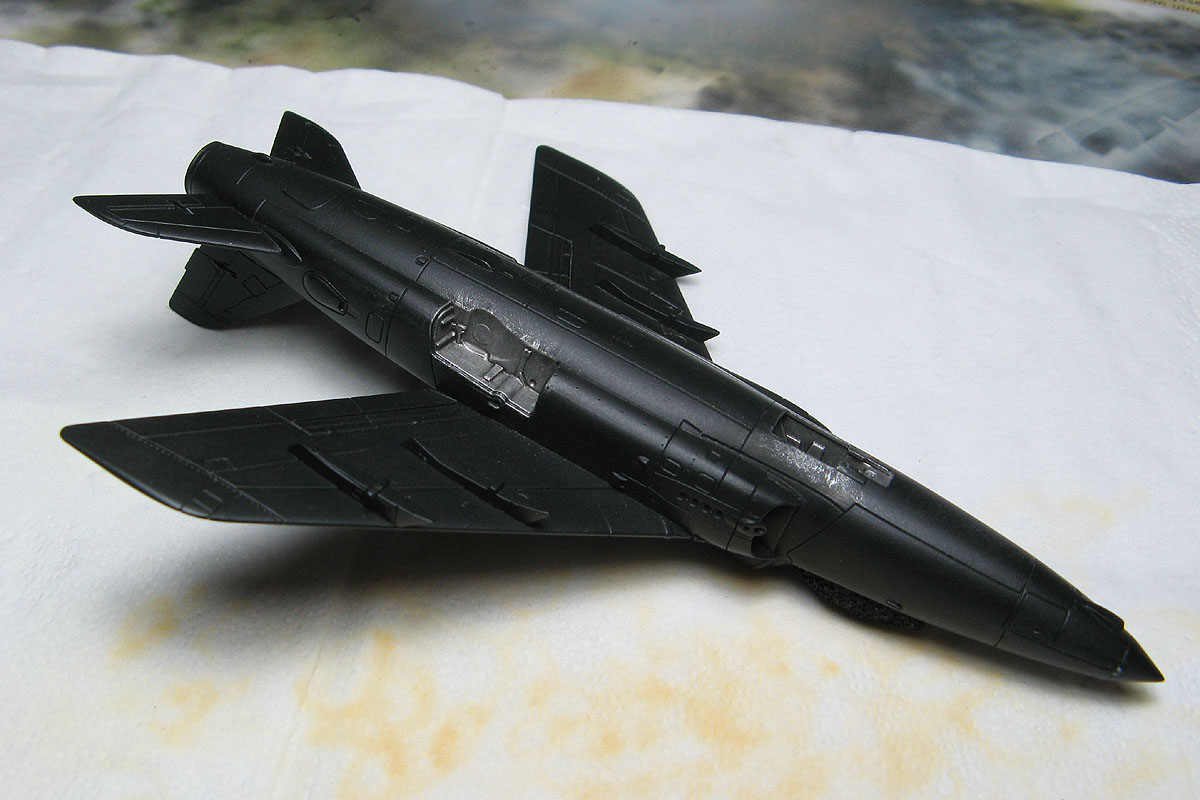
Getting closer to priming stage.
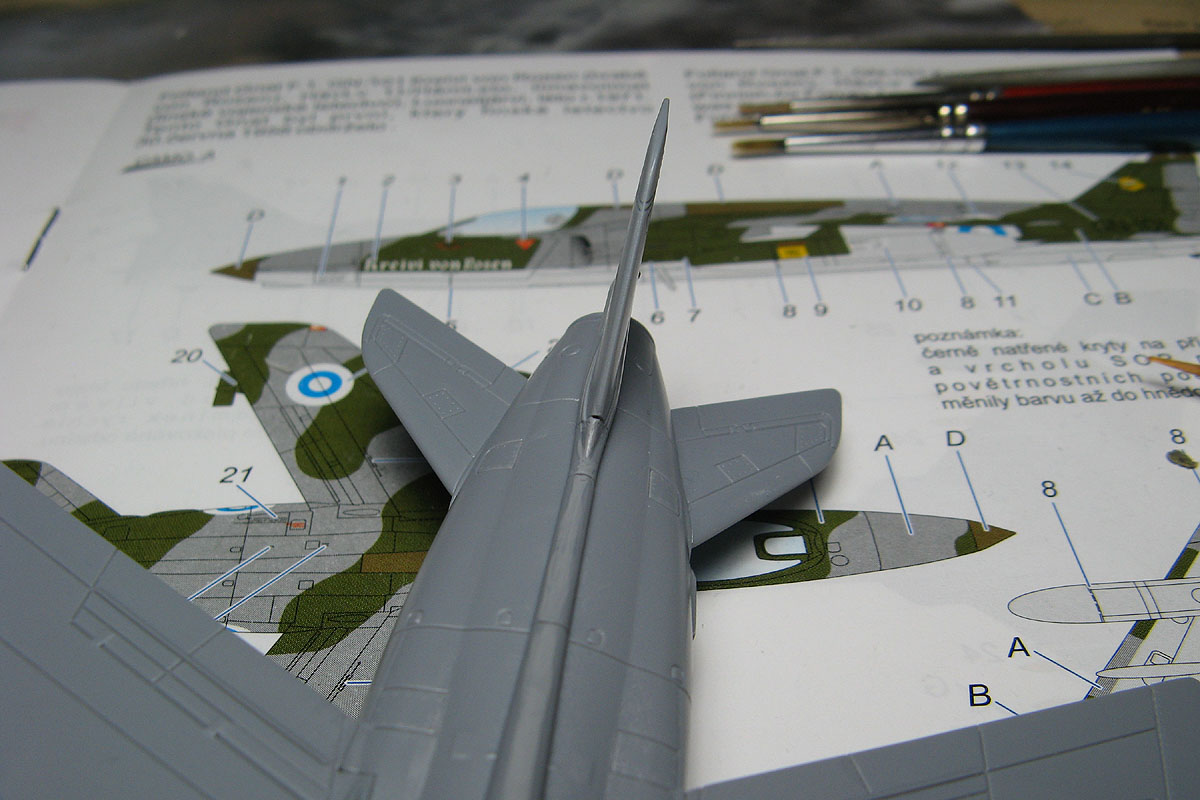
The stabilizers fit quite well on the upper side.
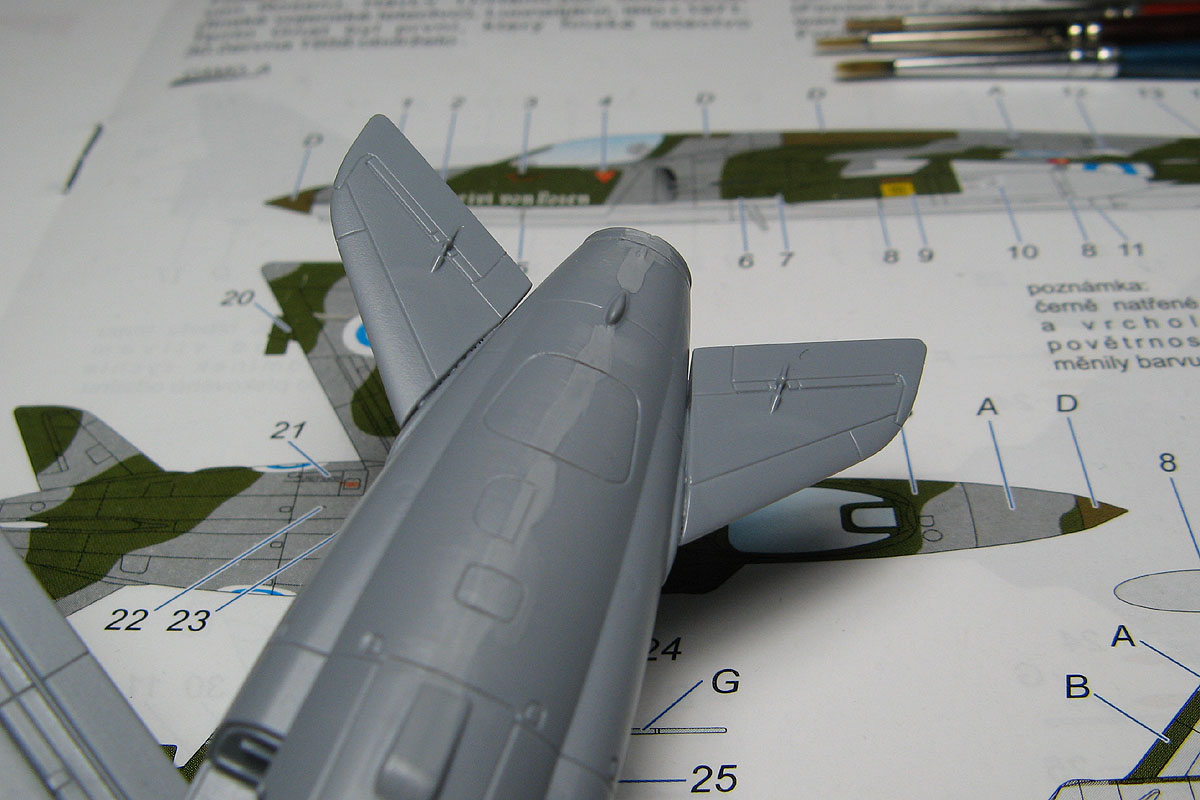
...but less well on the underside. Oh well, nothing a little filling won't fix. Seems like spots where stretched sprue will work nicely.
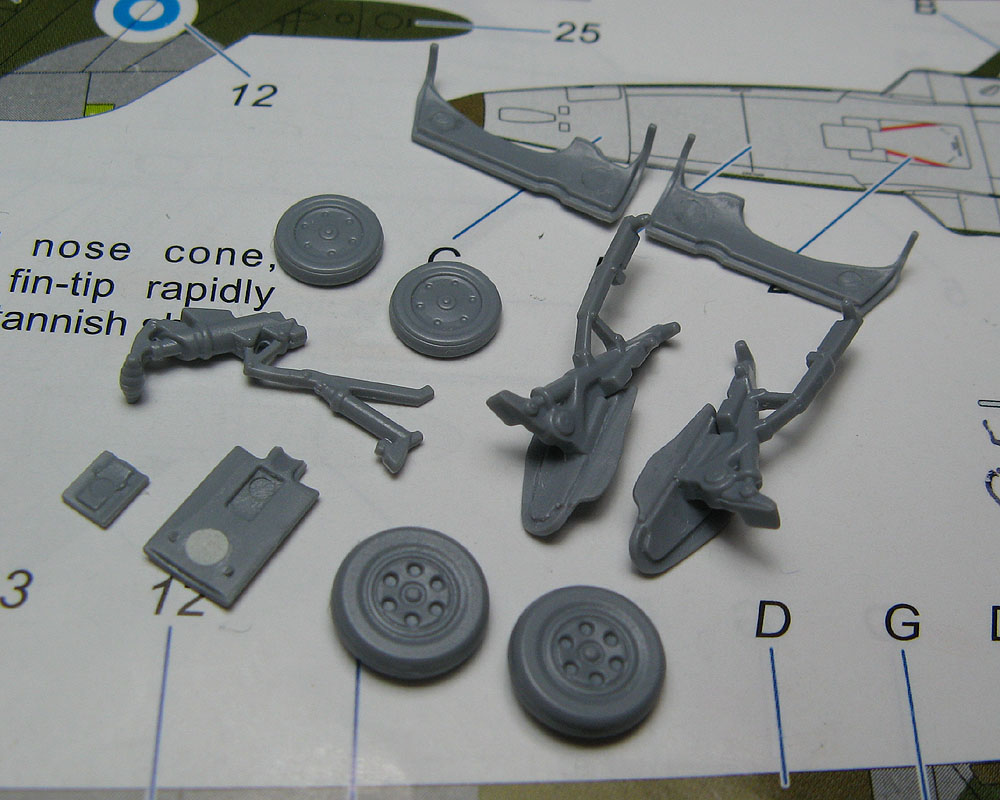
Some of the very few ejector pin marks in need of filling on the landing gear bay doors: one on nose gear door (puttied) and one on each main gear door (sanded). The two on each of the fuselage side main gear bay doors don't need attention since those will be in the closed position when the gear is extended and the inside surfaces won't be visible.
#439
Washington, United States
Joined: November 05, 2005
KitMaker: 4,950 posts
AeroScale: 3,192 posts
Posted: Tuesday, June 27, 2017 - 10:36 AM UTC
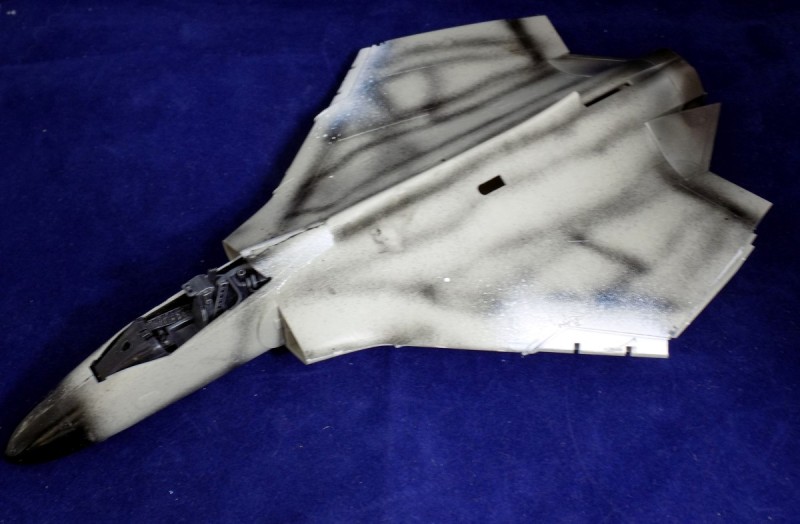
It's starting to look like an F-8.
Hanger Queens in Waiting:
Monogram 1/72 F8F-1
Corsair the Sky Pirate - 1/72 Ace A-7D
Century Series - Airfix 1/72 F-105G
Anti Shipping - Academy 1/72 PBJ-1D
Academy 1/72 F-84E
Uusimaa, Finland
Joined: March 30, 2004
KitMaker: 2,845 posts
AeroScale: 1,564 posts
Posted: Tuesday, June 27, 2017 - 10:37 PM UTC
Looking like an F-8 indeed!

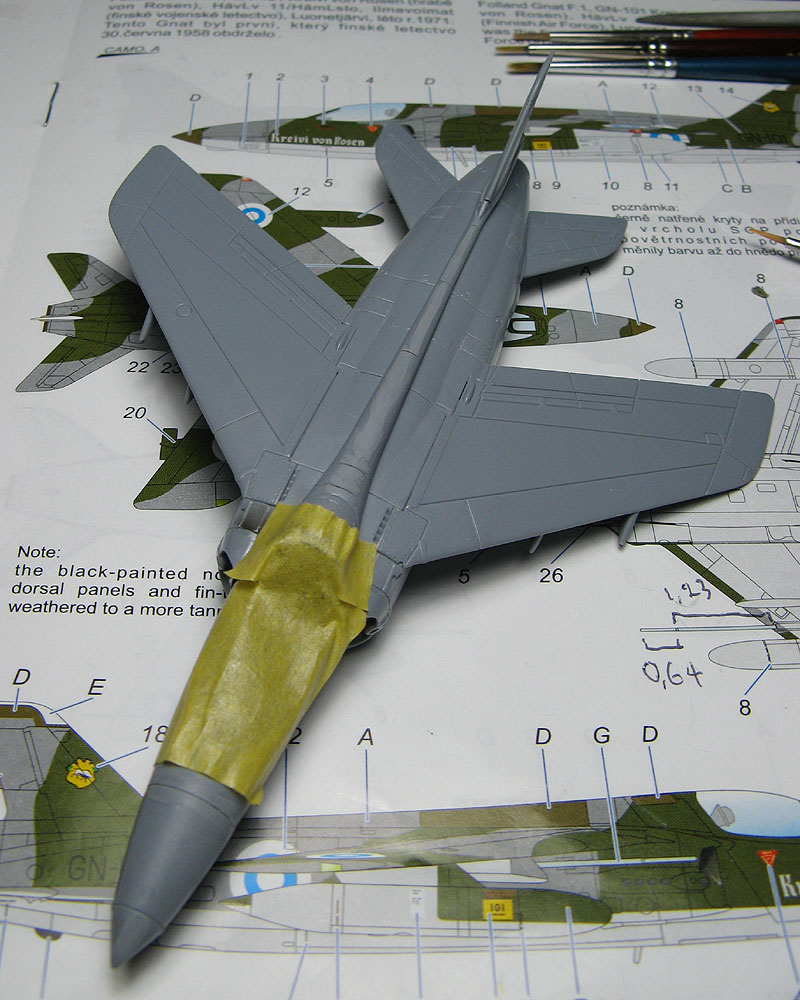
Ready for primer with my Gnat too:
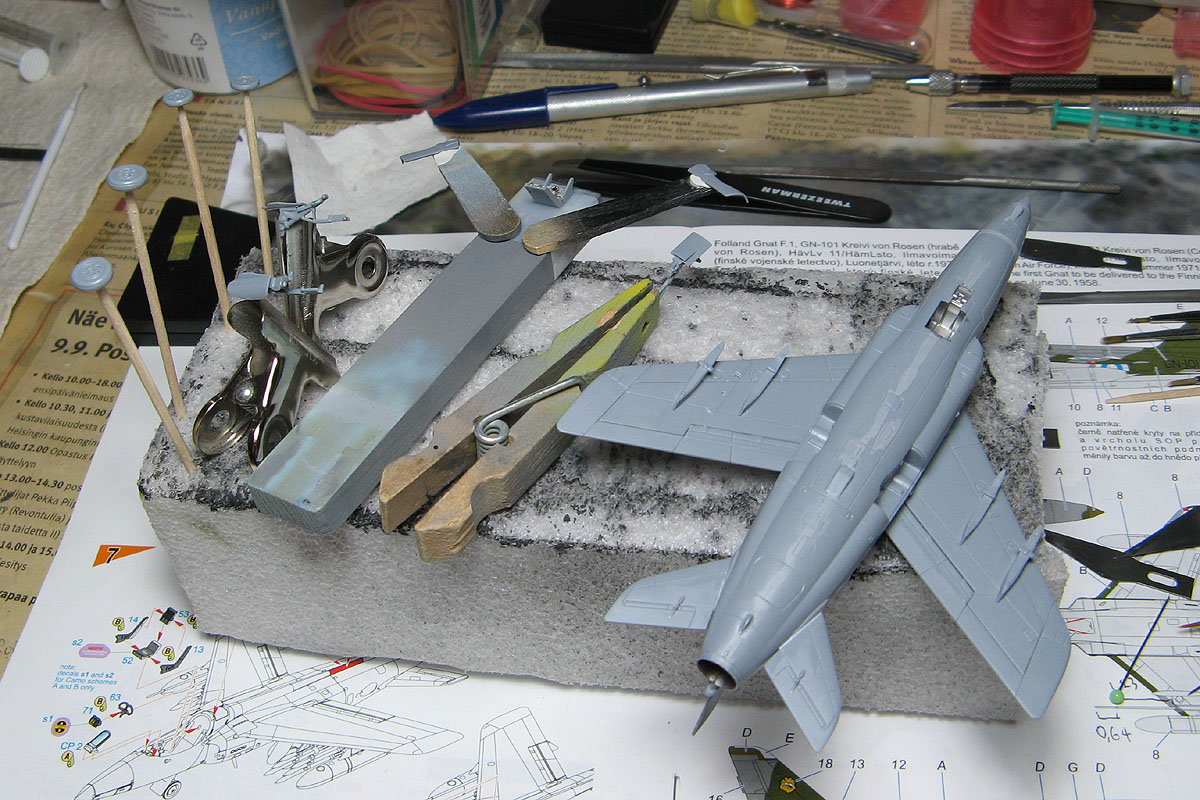
Well, not totally 100%, as I still need to mask up the cockpit openings and gear bays on the airframe. And decide whether to glue the pitot tube in place now or paint it separately, though I'm pretty sure I'll paint that on its own and attach it during final assembly, to ease masking and painting. (as there's already the wing pylons in the way)
Texas, United States
Joined: February 22, 2008
KitMaker: 5,026 posts
AeroScale: 2,811 posts
Posted: Wednesday, June 28, 2017 - 06:04 AM UTC
Mark, it does look line an F8 now. What color scheme are you thinking of?
Eetu , your Gnat is looking real good.
Bob
If it aint broke dont fix it.
#439
Washington, United States
Joined: November 05, 2005
KitMaker: 4,950 posts
AeroScale: 3,192 posts
Posted: Wednesday, June 28, 2017 - 08:43 AM UTC
Plain old gull gray over white.
Hanger Queens in Waiting:
Monogram 1/72 F8F-1
Corsair the Sky Pirate - 1/72 Ace A-7D
Century Series - Airfix 1/72 F-105G
Anti Shipping - Academy 1/72 PBJ-1D
Academy 1/72 F-84E
Berlin, Germany
Joined: October 12, 2008
KitMaker: 709 posts
AeroScale: 651 posts
Posted: Wednesday, June 28, 2017 - 10:32 PM UTC
Beautiful work in this campaign, guys!
Mark: Very good progress on your F-8.
Eetu: great build and engeneering so far - looks very good despite the issues you have.
While my Fw190 for ETO is coming to an end I decided to join here with a well known kit from Heller: Dassault Mirage III/5BA.

Thomas
Sometimes you need to distance yourself to see things clearly - Lao Tzu -
... in scale and in real life -T.
Berlin, Germany
Joined: October 12, 2008
KitMaker: 709 posts
AeroScale: 651 posts
Posted: Wednesday, June 28, 2017 - 11:17 PM UTC
Okay, no more pics!?
Photobucket sucks!!!
Sometimes you need to distance yourself to see things clearly - Lao Tzu -
... in scale and in real life -T.
Uusimaa, Finland
Joined: March 30, 2004
KitMaker: 2,845 posts
AeroScale: 1,564 posts
Posted: Thursday, June 29, 2017 - 04:18 AM UTC
Quoted Text
Eetu: great build and engeneering so far - looks very good despite the issues you have.
Thanks!

And yeah, I feel the nose cone fit issue was more cause by my ham-fisted parts trimming rather than the kit itself.
Quoted Text
Okay, no more pics!?
Photobucket sucks!!!
Oh, Photobucket has sucked for ages already. It's just that now they've seemed to have really exceeded themselves in apparently dropping hotlinking for free accounts and lower tiered paid accounts alike. I have NO idea what they're smoking. And actually, I'm not sure if I even want to know...

And even weirder, your new picture shows that "3rd party hosting temporarily disabled" error message, while my new newest ones don't.

Edit: alright, it appeared they rolled out this change to users' account gradually. Happened for mine eventually too.
Lisboa, Portugal
Joined: March 04, 2008
KitMaker: 5,386 posts
AeroScale: 635 posts
Posted: Thursday, June 29, 2017 - 02:59 PM UTC
Update, sorry for the dark pics,


Still filling and sanding.
This weekend I'm hoping on getting the air scoops and other small details before a 1st Primer Coat.
Some self-inflicted errors during the build.. but it still looks like a ColdWar bird

Active Builds: 0
Active Campaigns: 0
Berlin, Germany
Joined: October 12, 2008
KitMaker: 709 posts
AeroScale: 651 posts
Posted: Thursday, June 29, 2017 - 08:52 PM UTC
What the heck!!
Looks like all my posted pics from f*** Photobucket in all thresds were gone...

Now first try with another host and again the entry pic:

Thomas
Sometimes you need to distance yourself to see things clearly - Lao Tzu -
... in scale and in real life -T.
Texas, United States
Joined: February 22, 2008
KitMaker: 5,026 posts
AeroScale: 2,811 posts
Posted: Thursday, June 29, 2017 - 11:16 PM UTC
If it aint broke dont fix it.
Removed by original poster on 06/30/17 - 18:17:41 (GMT).
Removed by original poster on 06/30/17 - 18:18:59 (GMT).
Removed by original poster on 06/30/17 - 19:07:23 (GMT).
Lisboa, Portugal
Joined: March 04, 2008
KitMaker: 5,386 posts
AeroScale: 635 posts
Posted: Sunday, July 02, 2017 - 03:43 PM UTC
I needed to use some putty, sanding and cleaning..

One wing fitted perfectly, no prblems at all.
The other one needed some work.
Adding all the bits and small pieces to the fuselage,


Fuel tanks, missiles and wheels are next.
Masking canopy and Primer soon. Hopefully
Active Builds: 0
Active Campaigns: 0
Texas, United States
Joined: February 22, 2008
KitMaker: 5,026 posts
AeroScale: 2,811 posts
Posted: Sunday, July 02, 2017 - 06:57 PM UTC
John, nice touch on the sanding of the putty. I usually need to repair the detail afterwards. I also tried to obtain a kit for this a/c here, but they were out of the price range I wanted to spend. Cant wait to see the finished product.
Bob
If it aint broke dont fix it.
Lisboa, Portugal
Joined: March 04, 2008
KitMaker: 5,386 posts
AeroScale: 635 posts
Posted: Sunday, July 02, 2017 - 07:36 PM UTC
Bob, I usually use some Tamyia masking tape on both sides of the gap before applying the putty, leaving the details intact.
For the Su-9, I only found Trumpeter's with this scale and A-Model for 1:72 .
Active Builds: 0
Active Campaigns: 0
betheyn
 Senior Editor
#019
England - South East, United Kingdom
Joined: October 14, 2004
KitMaker: 4,560 posts
AeroScale: 2,225 posts
Posted: Wednesday, July 05, 2017 - 01:01 AM UTC
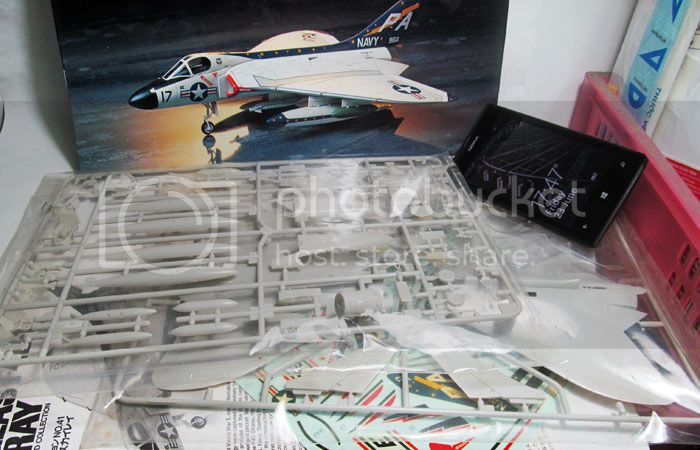
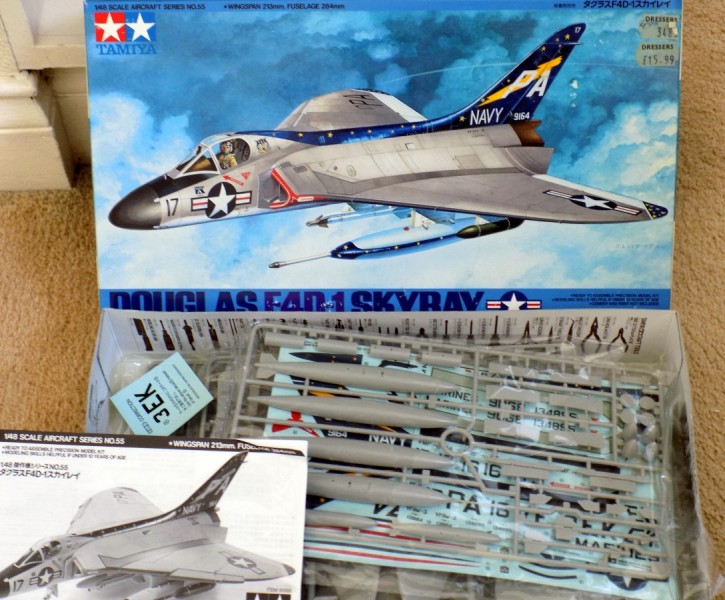
Well I had planned on playing WoT all day, but as that's down I thought I would start my 1/48th Tamiya Skyray build.
Boy am I glad I did, I had forgotten what a joy putting together a Tamiya kit is.
Obligatory start pic
Got carried away and before I knew it, I had got this far.
Ordered some different decals and some masks, so there wont be any more updates for a couple of days until they arrive.
Andy
It's not the same, better, but not the same...
Uusimaa, Finland
Joined: March 30, 2004
KitMaker: 2,845 posts
AeroScale: 1,564 posts
Posted: Wednesday, July 05, 2017 - 01:23 AM UTC
Landing gear bays painted, now it's just masking them up and I'm ready for the exterior colors.

England - North West, United Kingdom
Joined: March 21, 2010
KitMaker: 13 posts
AeroScale: 9 posts
Posted: Wednesday, July 05, 2017 - 07:05 PM UTC
I've made a start on this. Revell have you start (surprise, surprise) with the cockpit(!)so that's what I've done. A little inspiration from the late Ted Taylor's build of a different boxing of this kit (
http://tedtaylor.hobbyvista.com/89-revell-hunter-mk-6/page-89.html)led to a 'pit like this:
More has been done, but I haven't photographed it yet, so that will follow shortly!
On the Bench:
Paint stains, puddle of glue!
1/72 Revell F-101B Voodoo
1/32 Revell Hawker Hunter FGA.9
1/24 VW Samba Bus