_GOTOBOTTOM
World War II: USA
Aircraft of the United States in WWII.
Hosted by Rowan Baylis
An Old Friend...1/48 P-40B
fightnjoe
_VISITCOMMUNITY
Washington, United States
Joined: August 16, 2004
KitMaker: 603 posts
AeroScale: 565 posts
Posted: Thursday, May 18, 2017 - 09:59 AM UTC
I have been lost in many things as of late. Not much time really to post, even to really go online for more than a few minutes every now and then. It is time to go back to basics. Time to bring out an old friend.


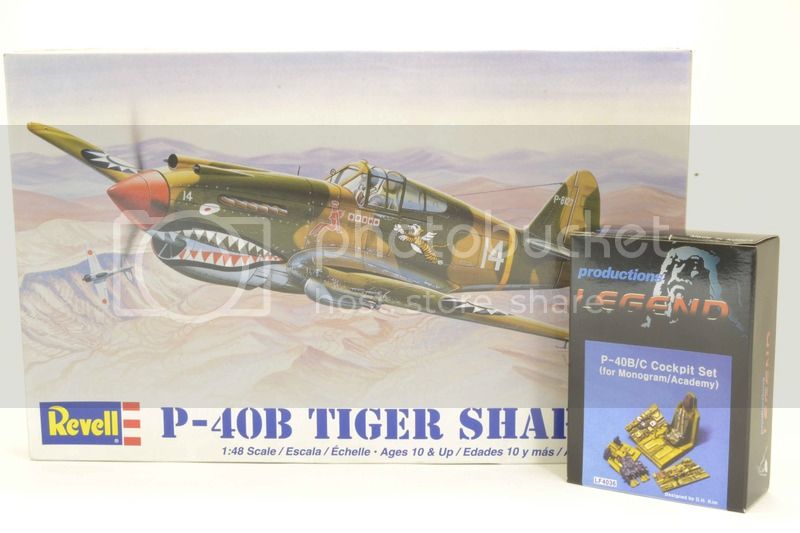
It seems that everytime I want to try something new I turn to this kit. i believe I have built this kit at least ten times in its different boxings.

My first attempt at scratchbuilding was with this kit.
My first attempt at resin aftermarket was with this kit.
My first attempt at photoetch was with this kit.
My first attempt at color modulation was with this kit.
My first attempt at real weathering was with this kit.

You get my point.

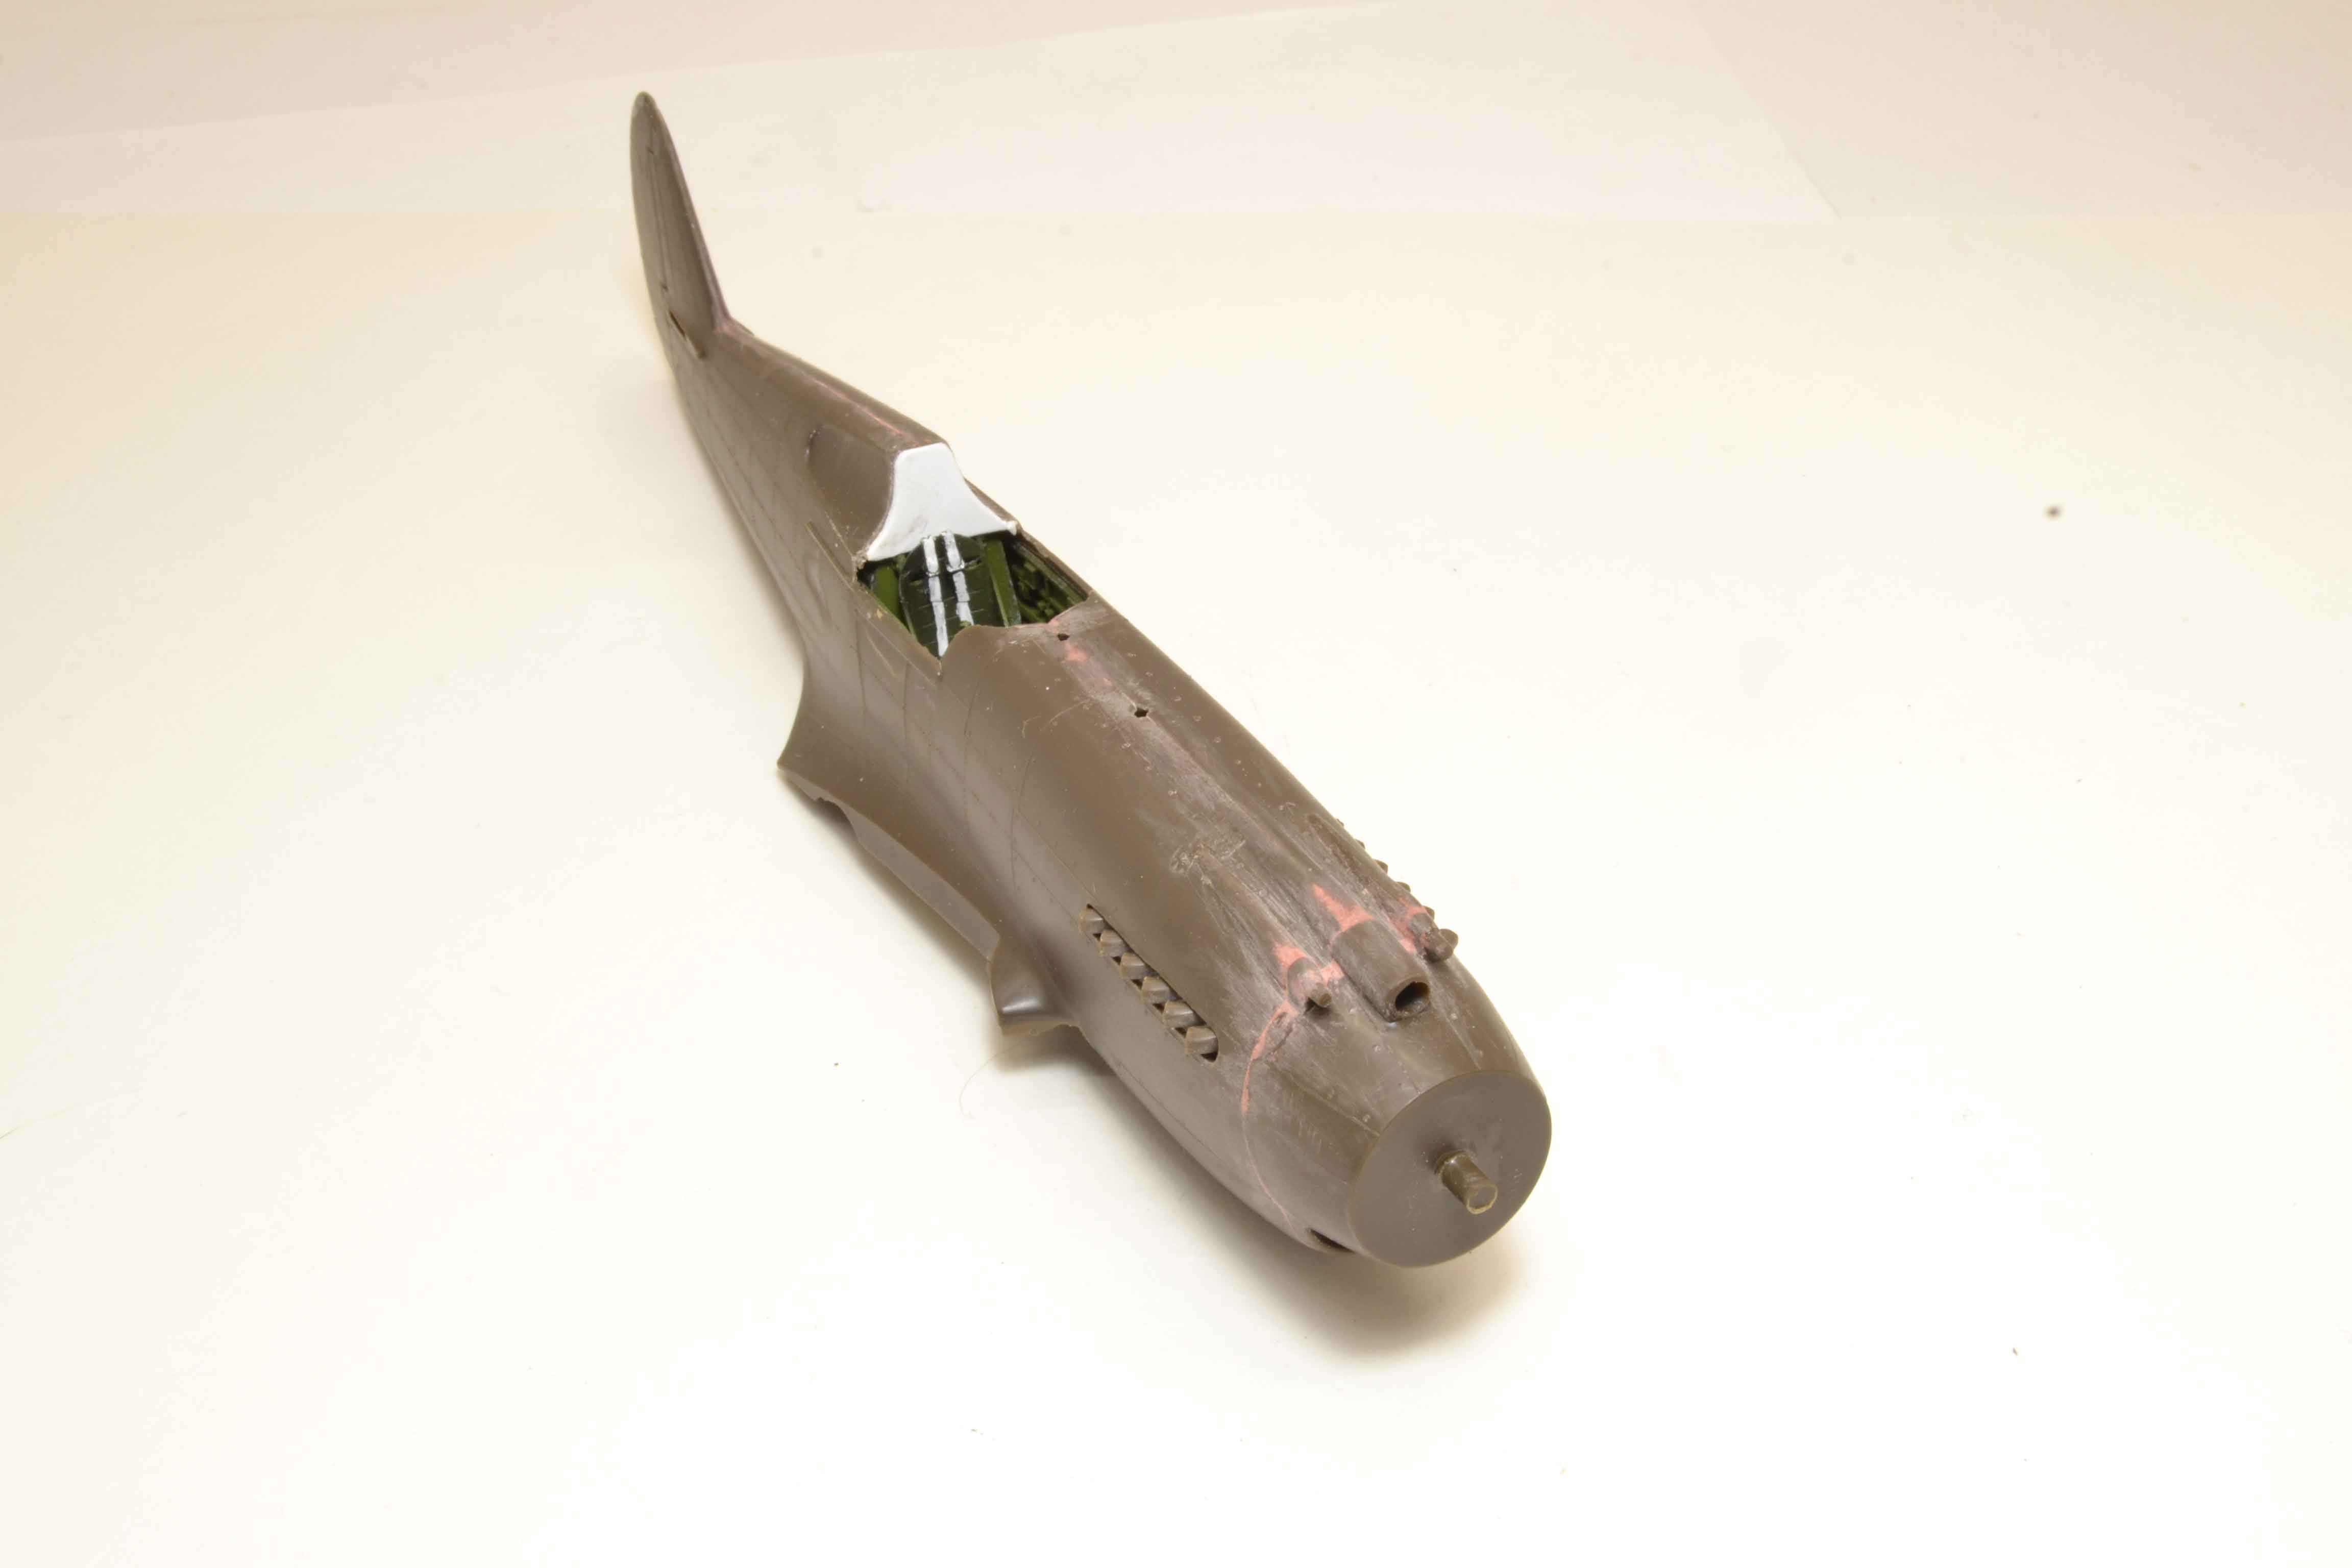
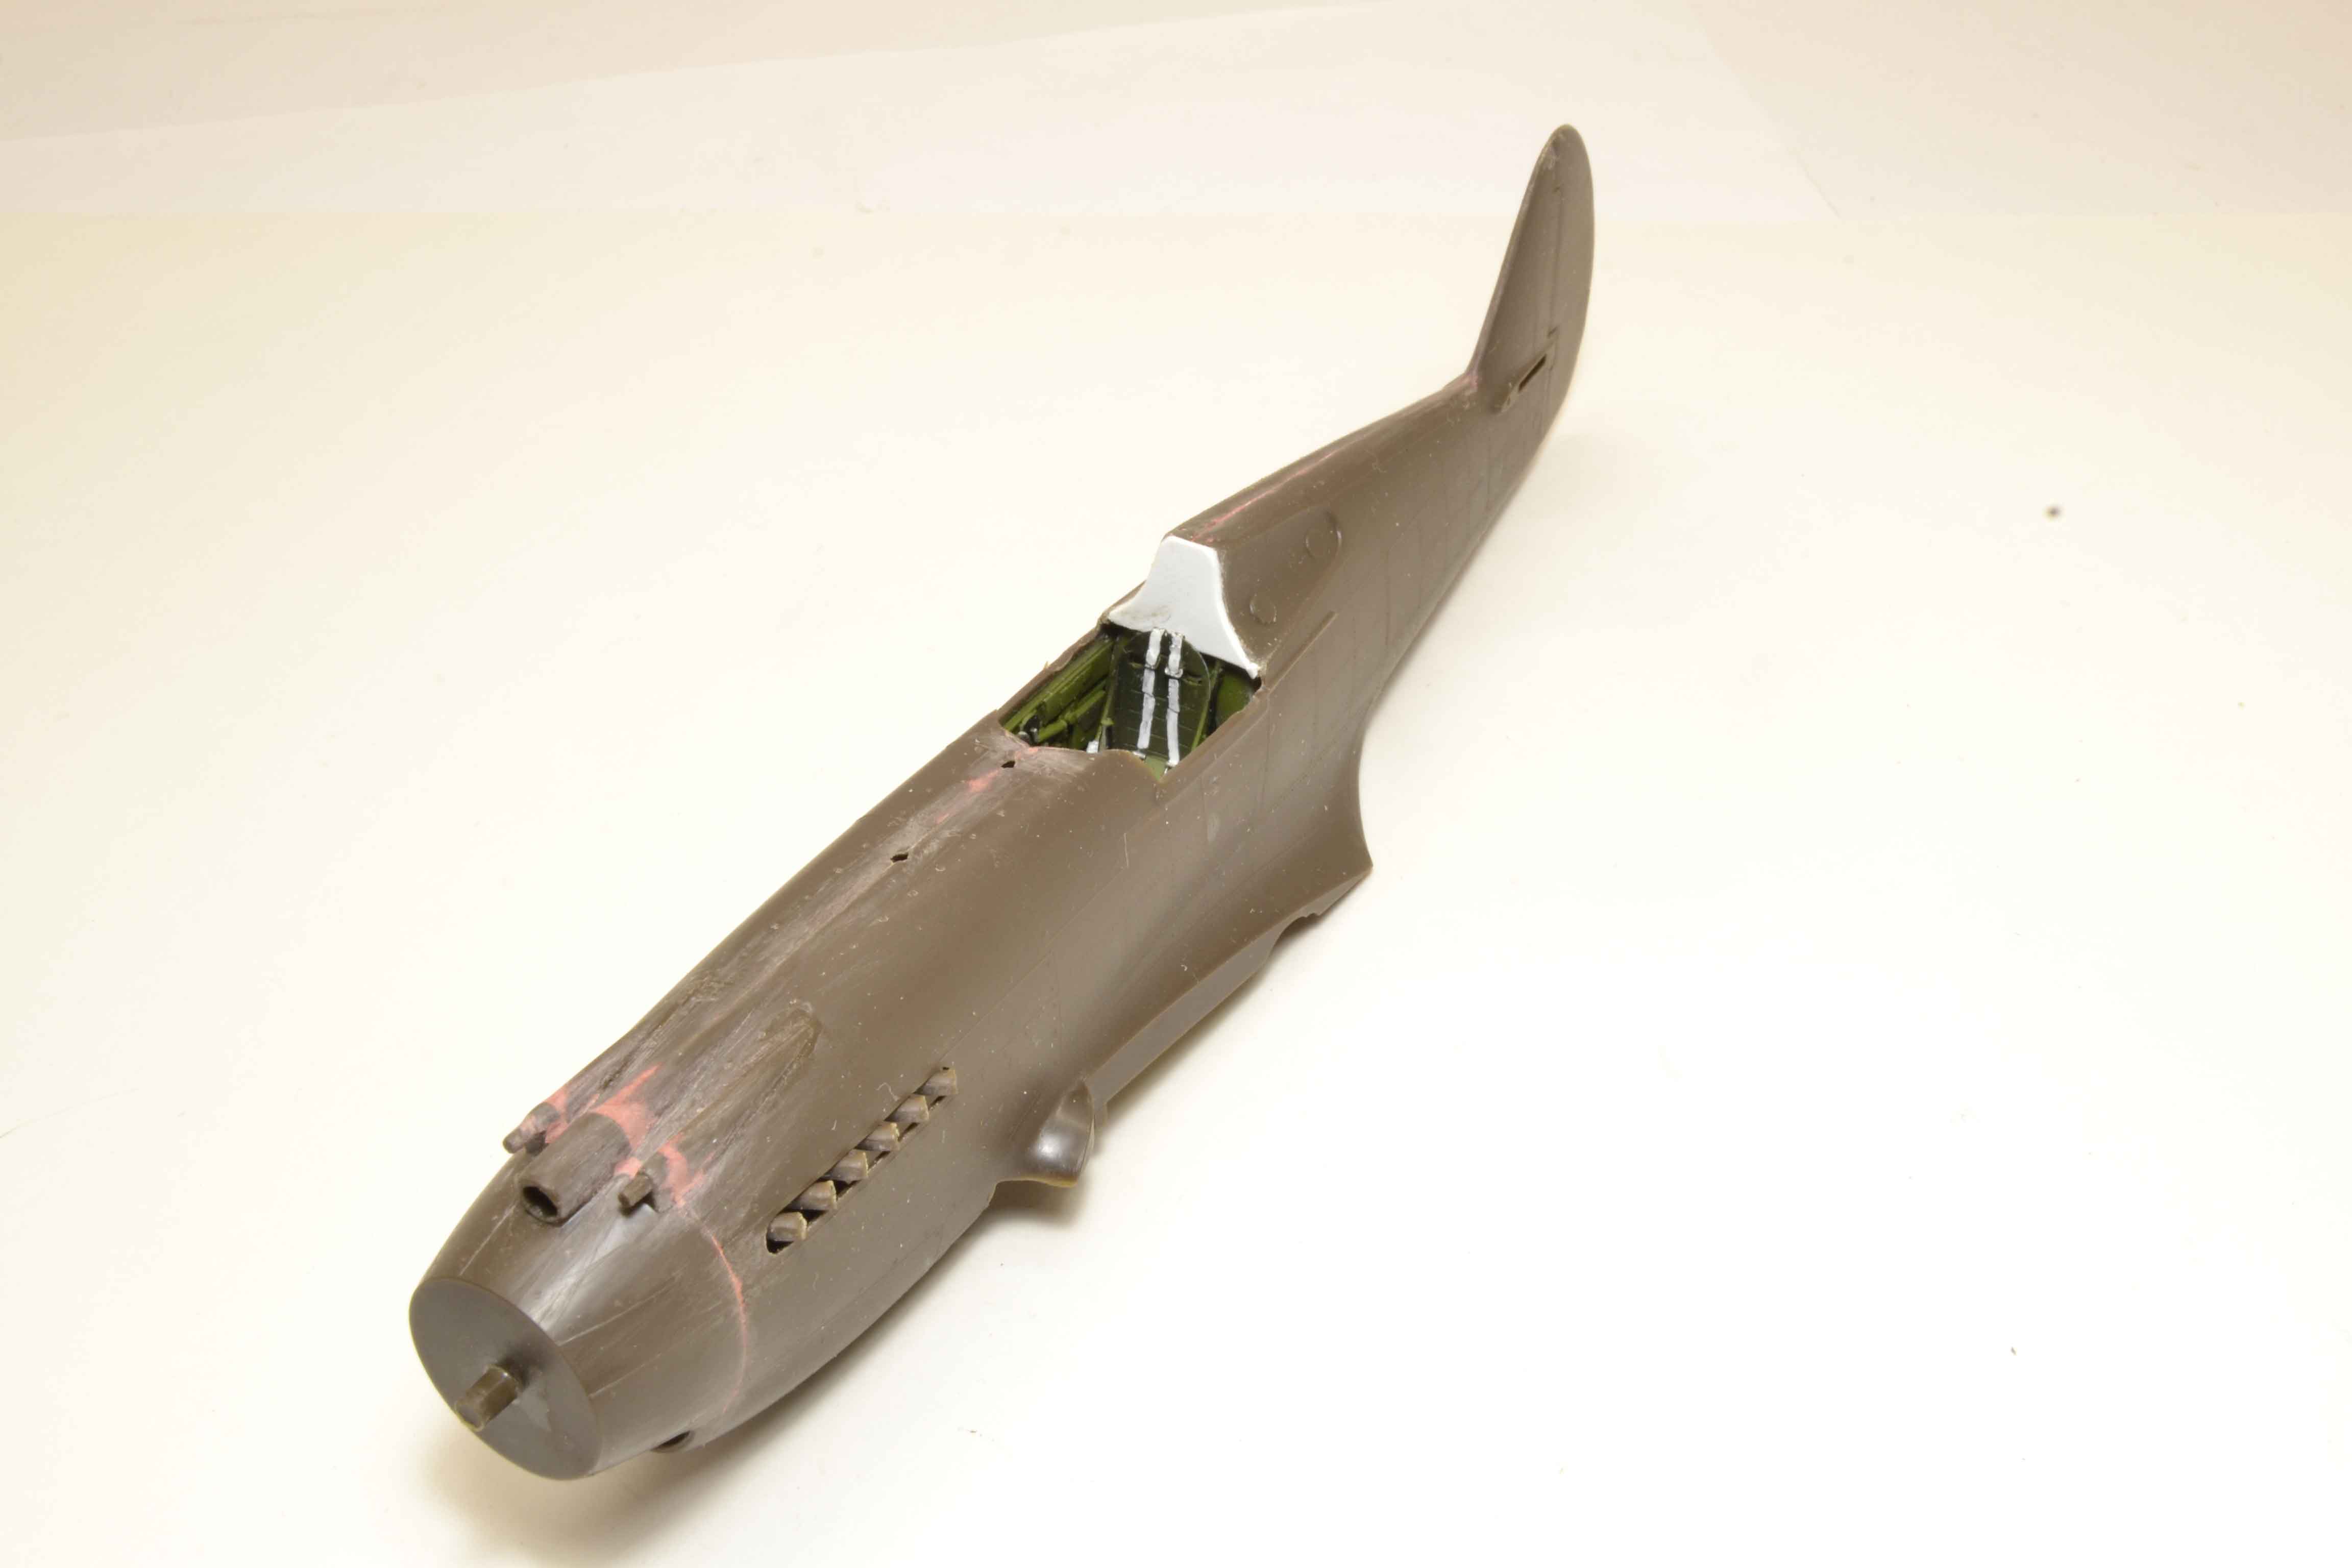
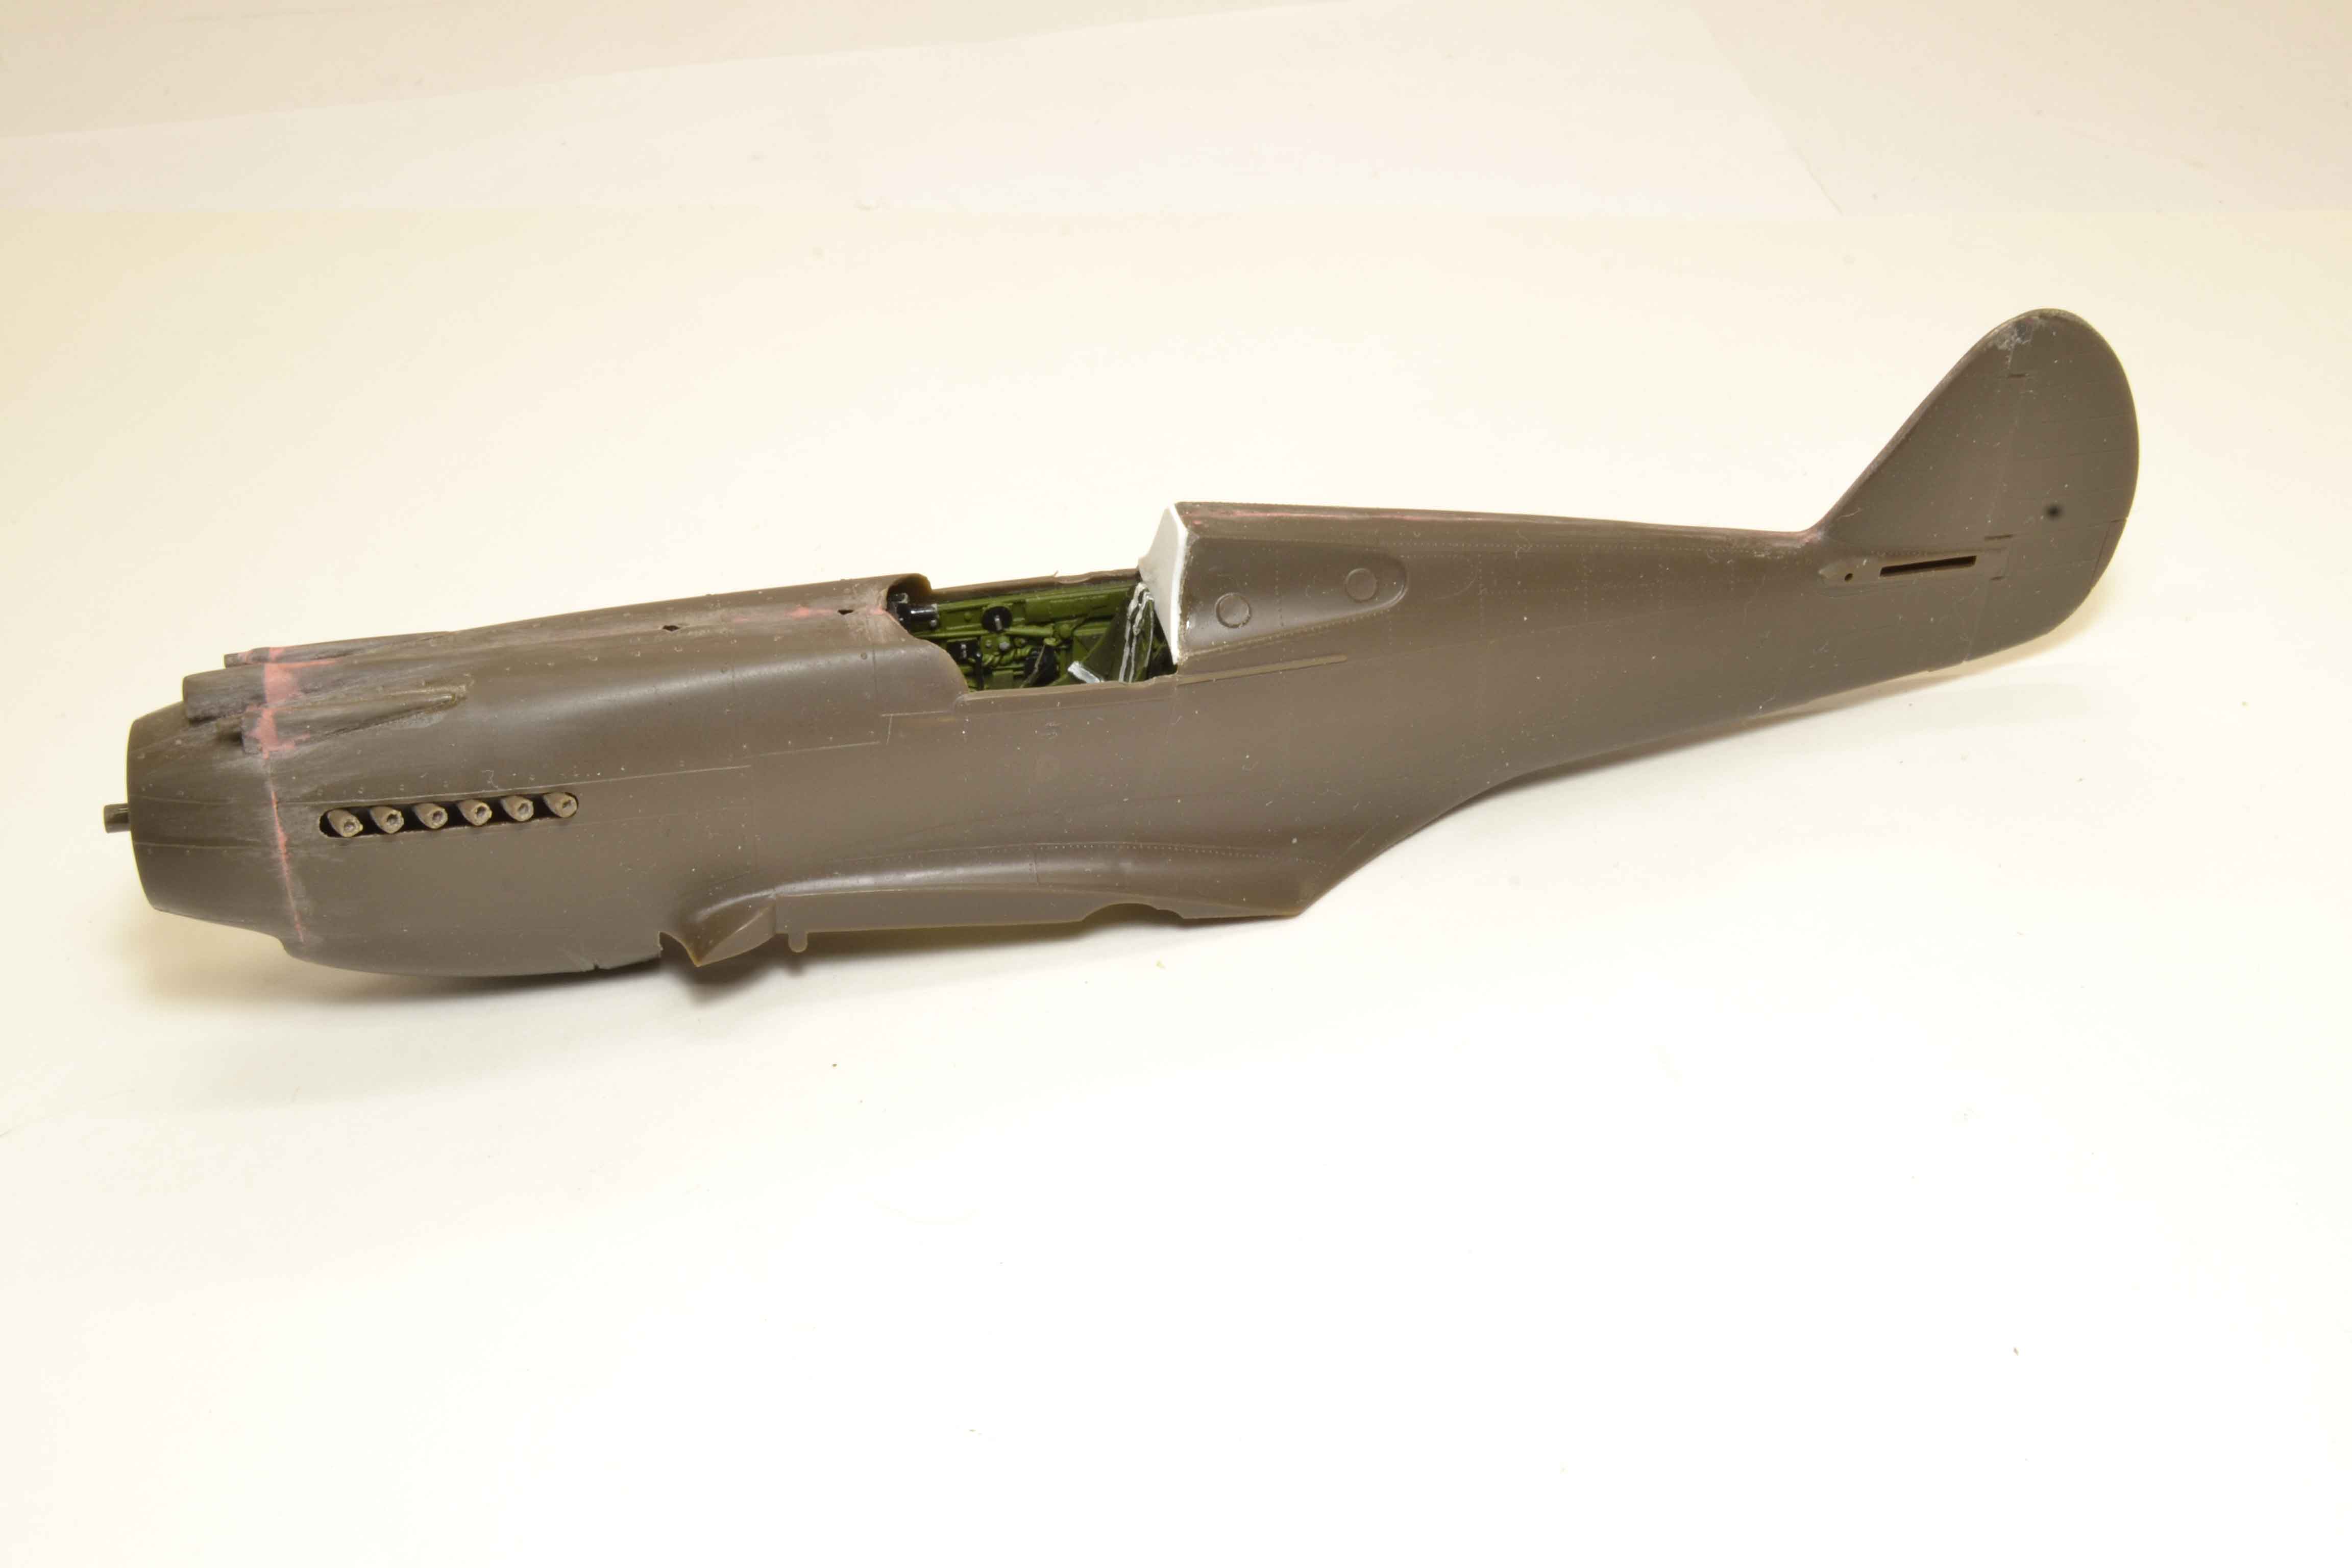
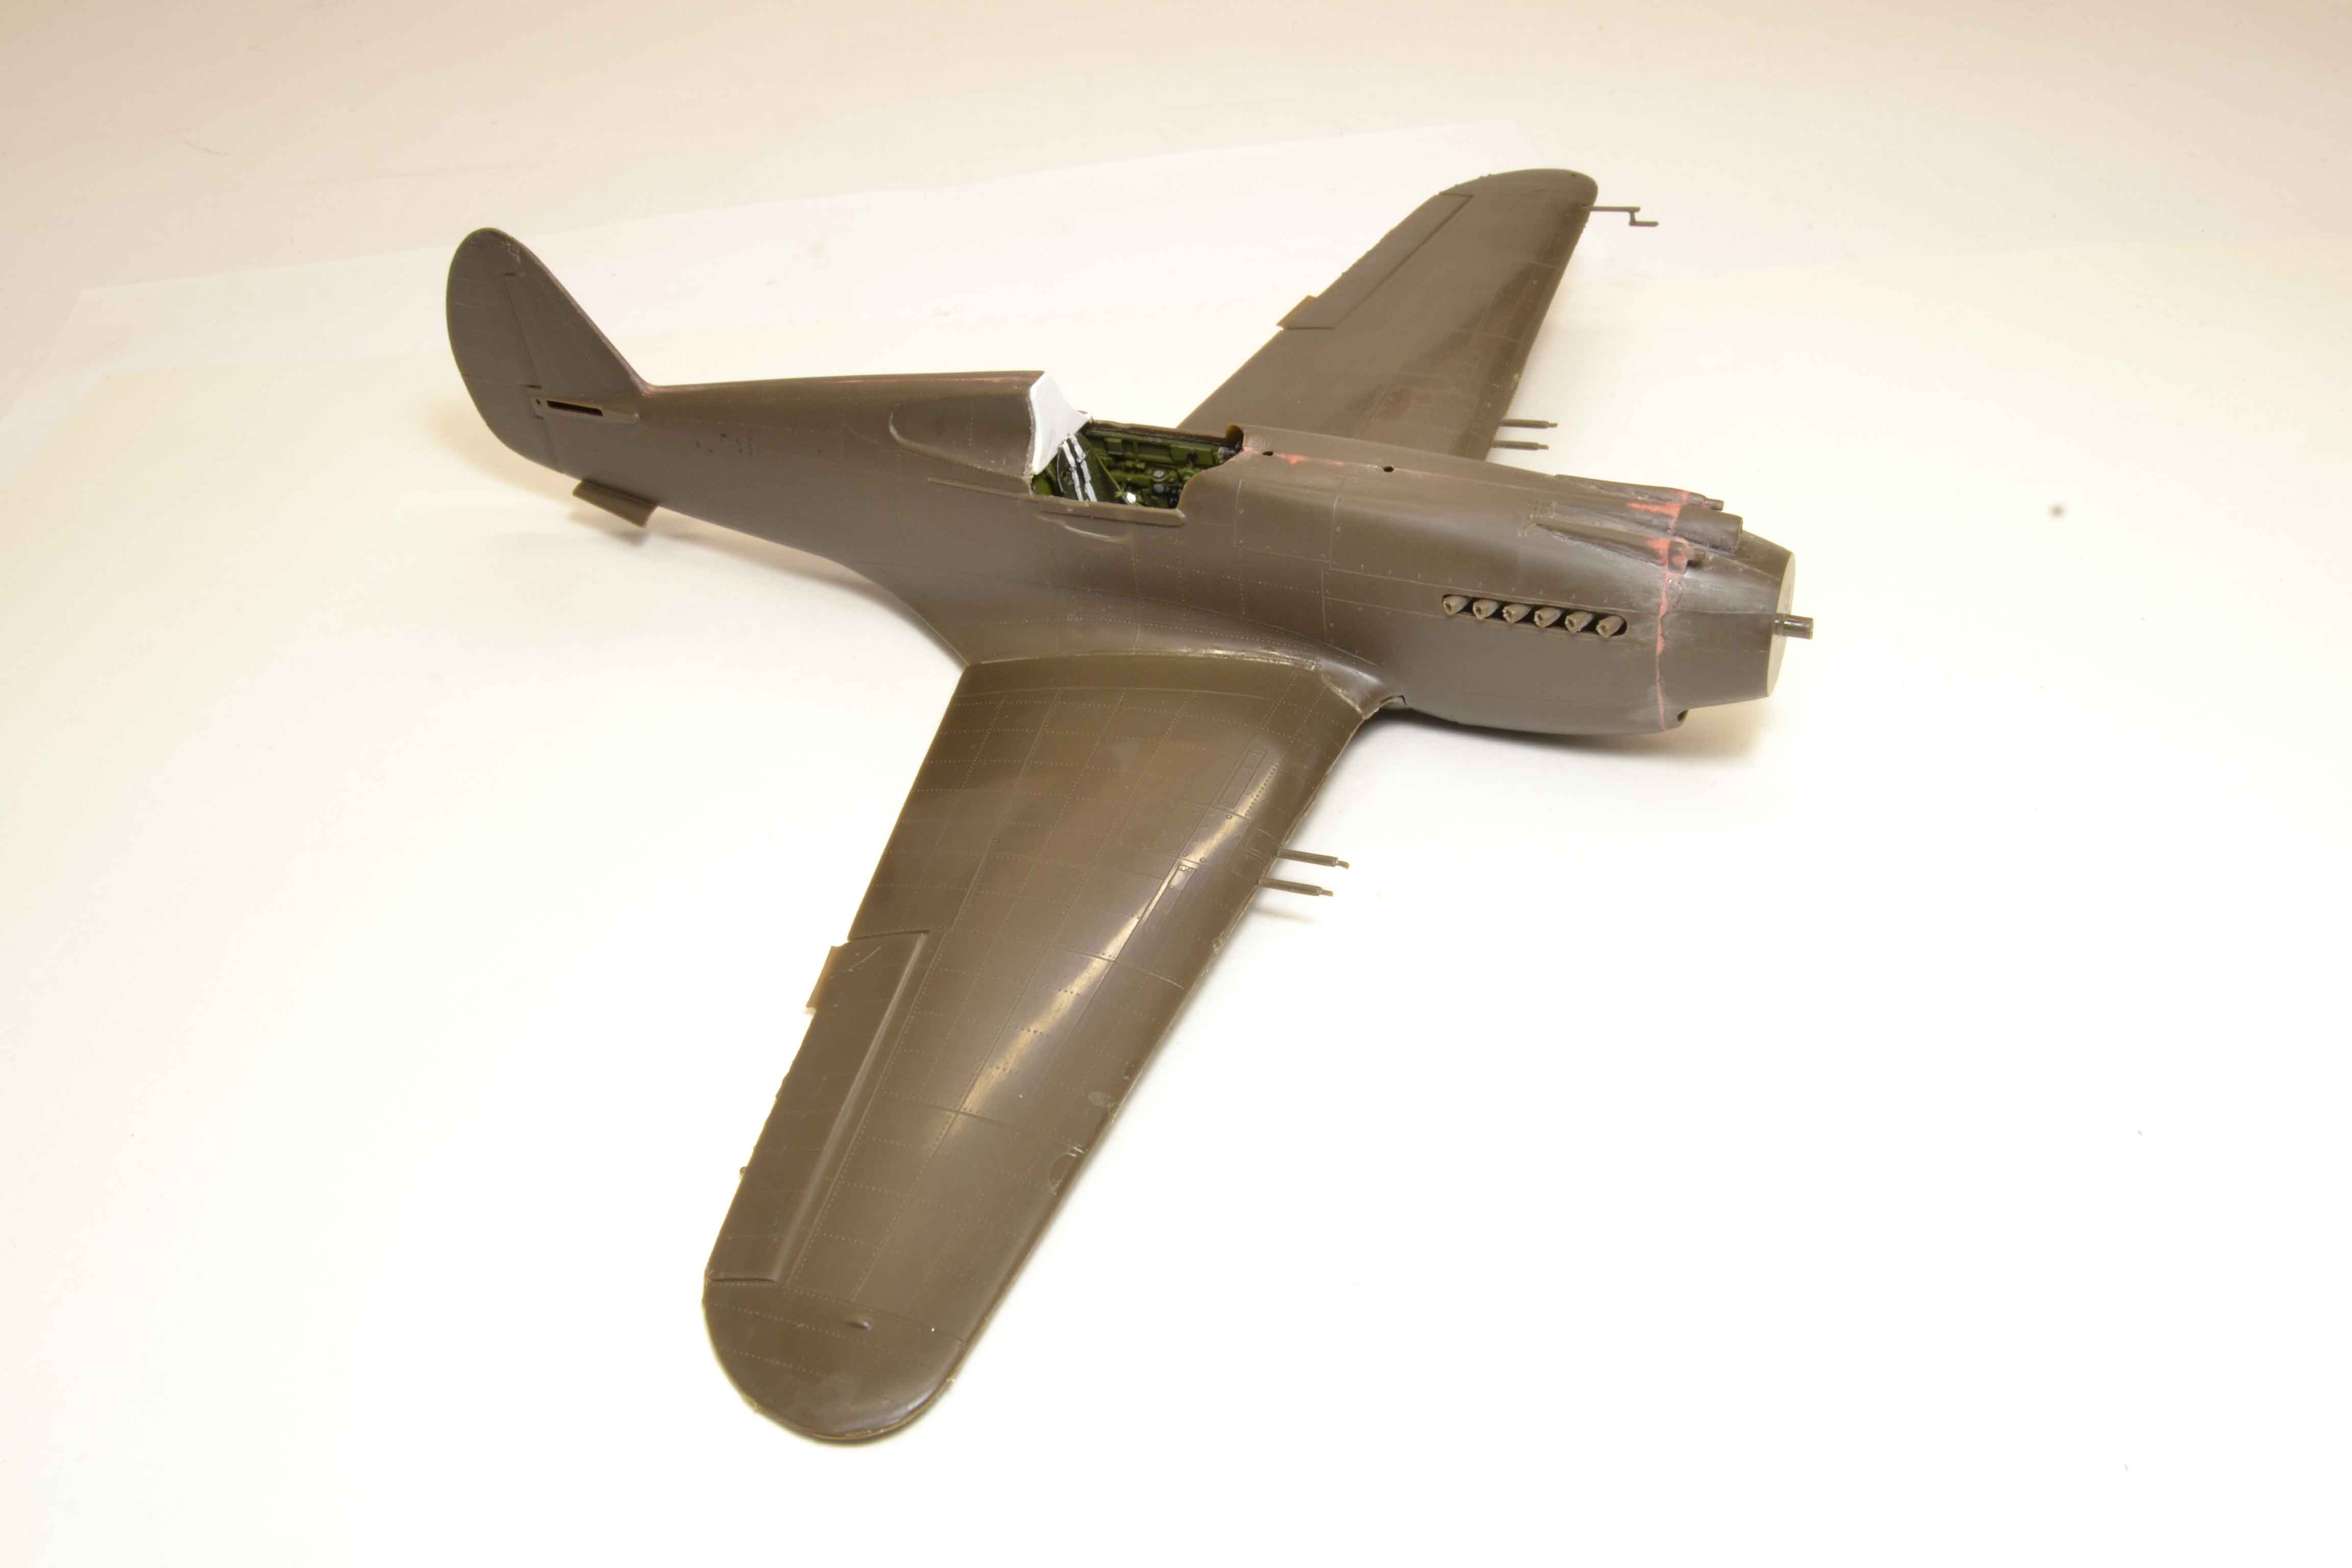
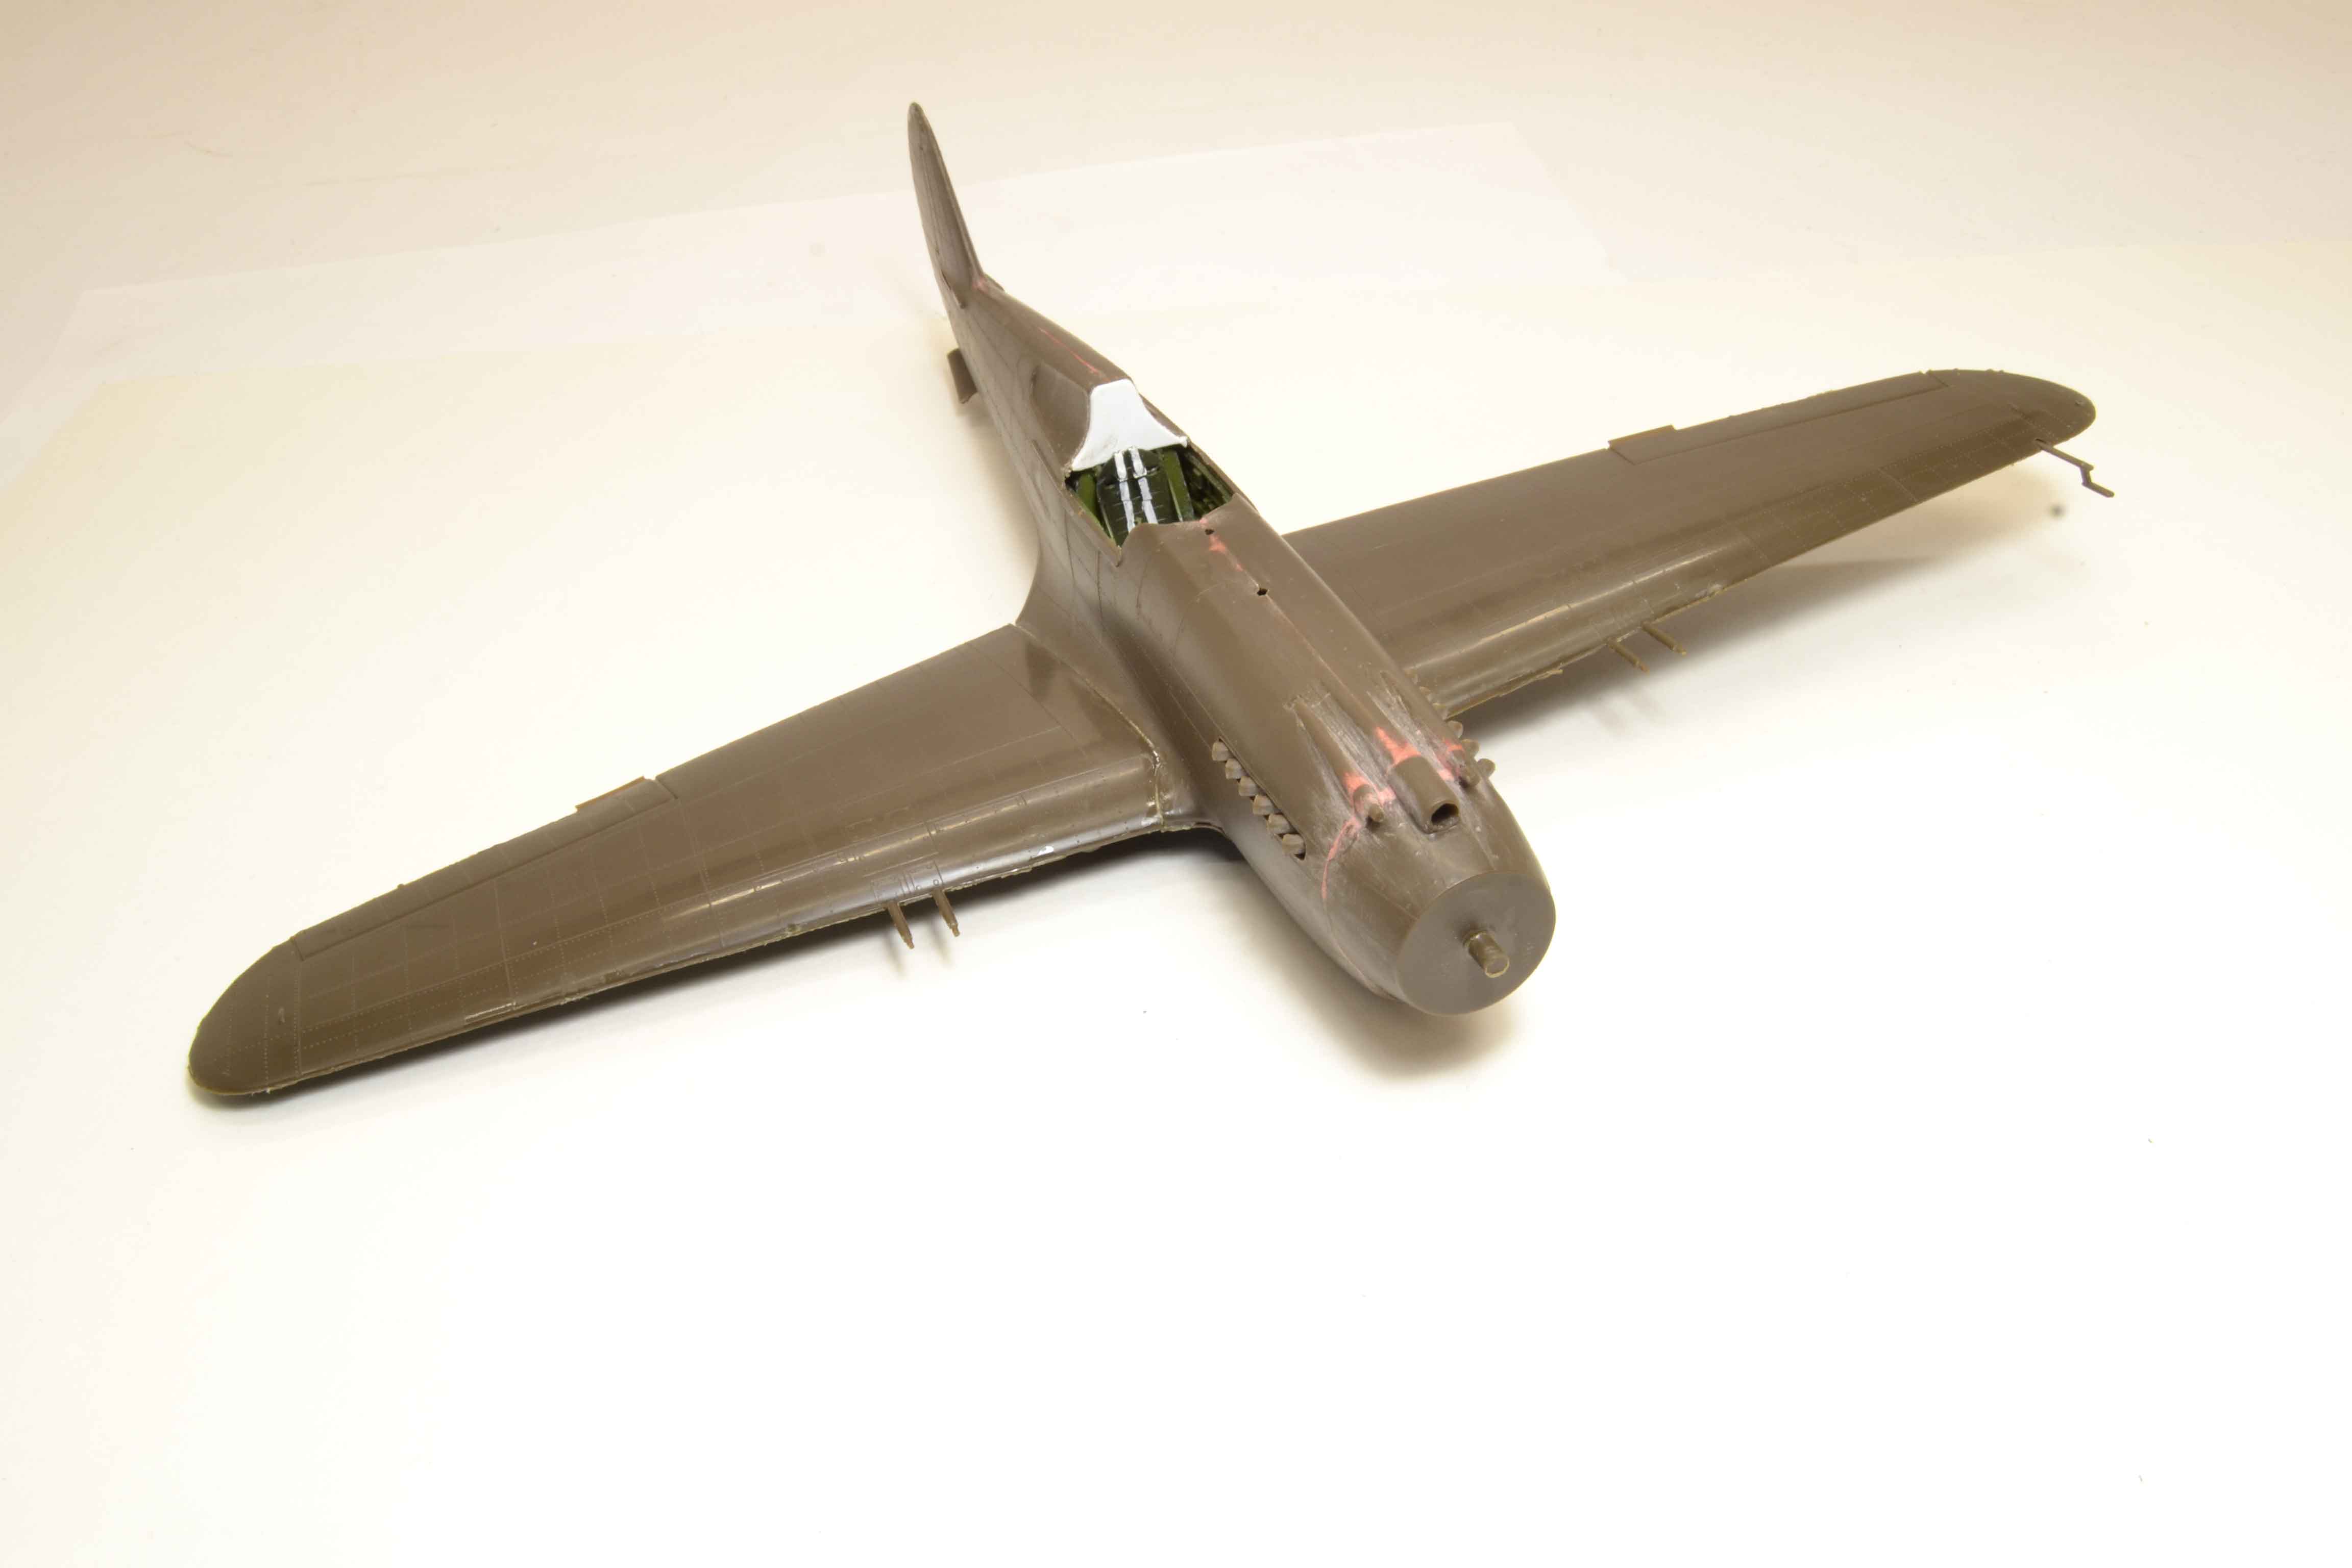
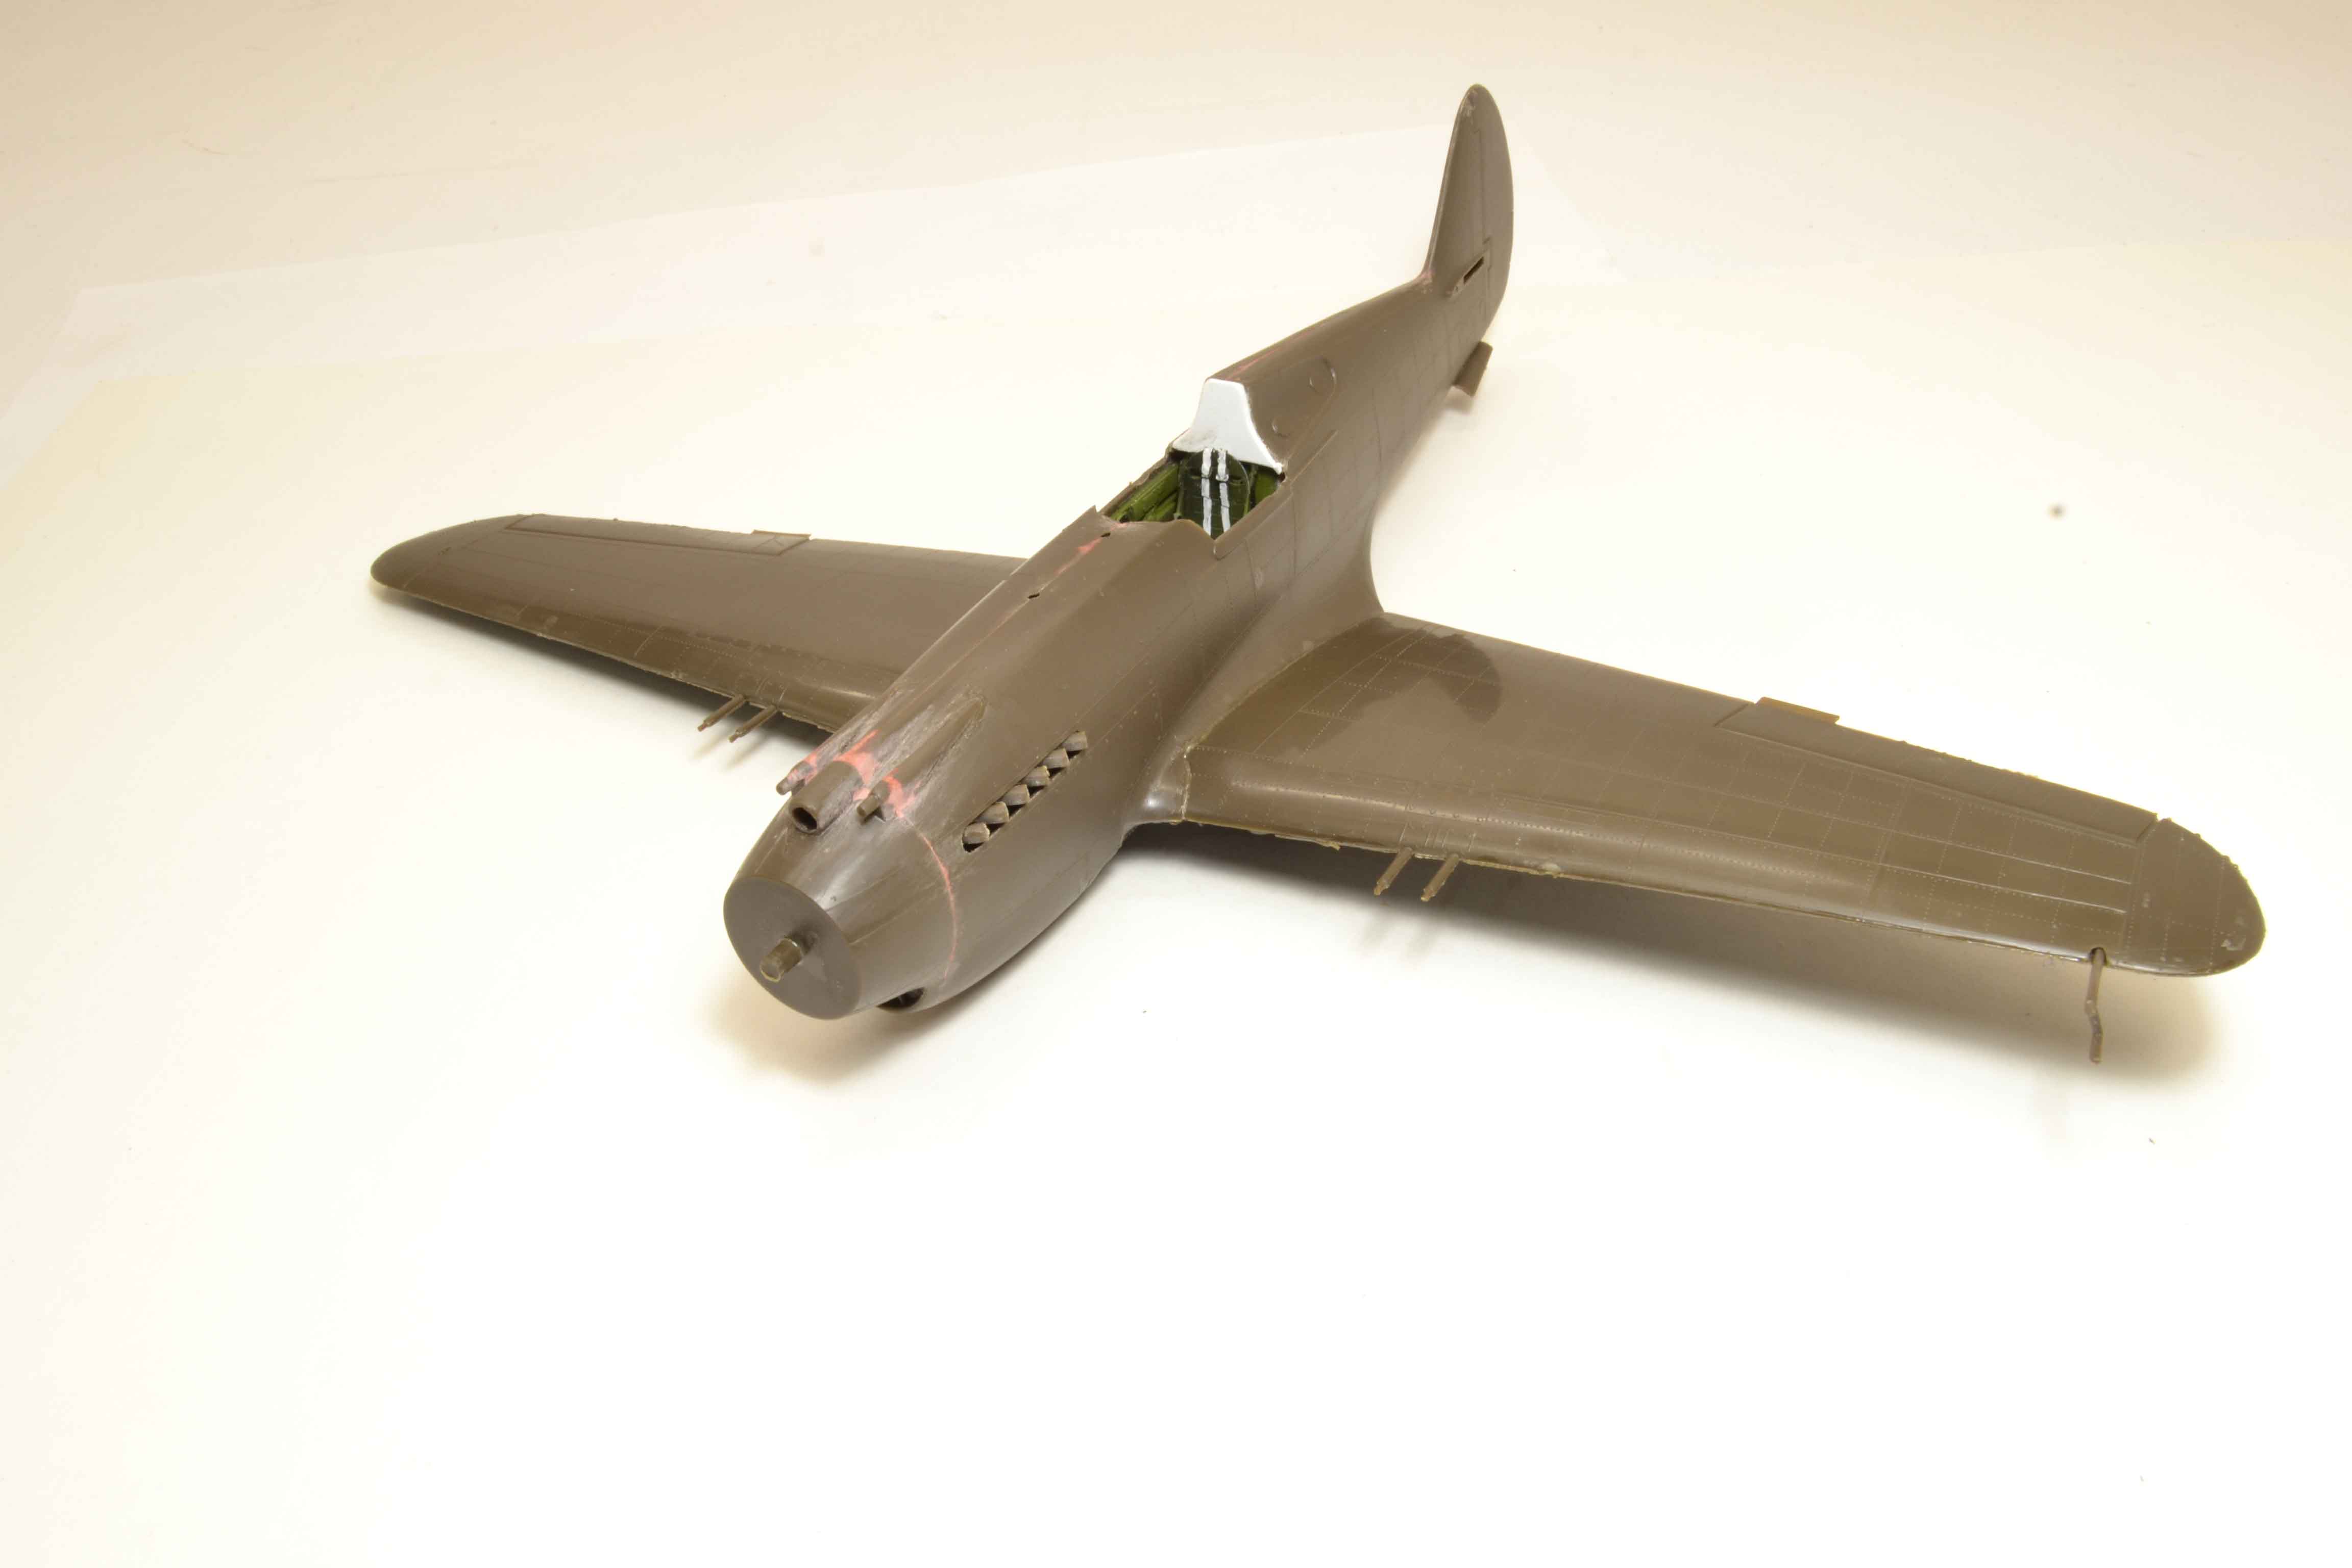
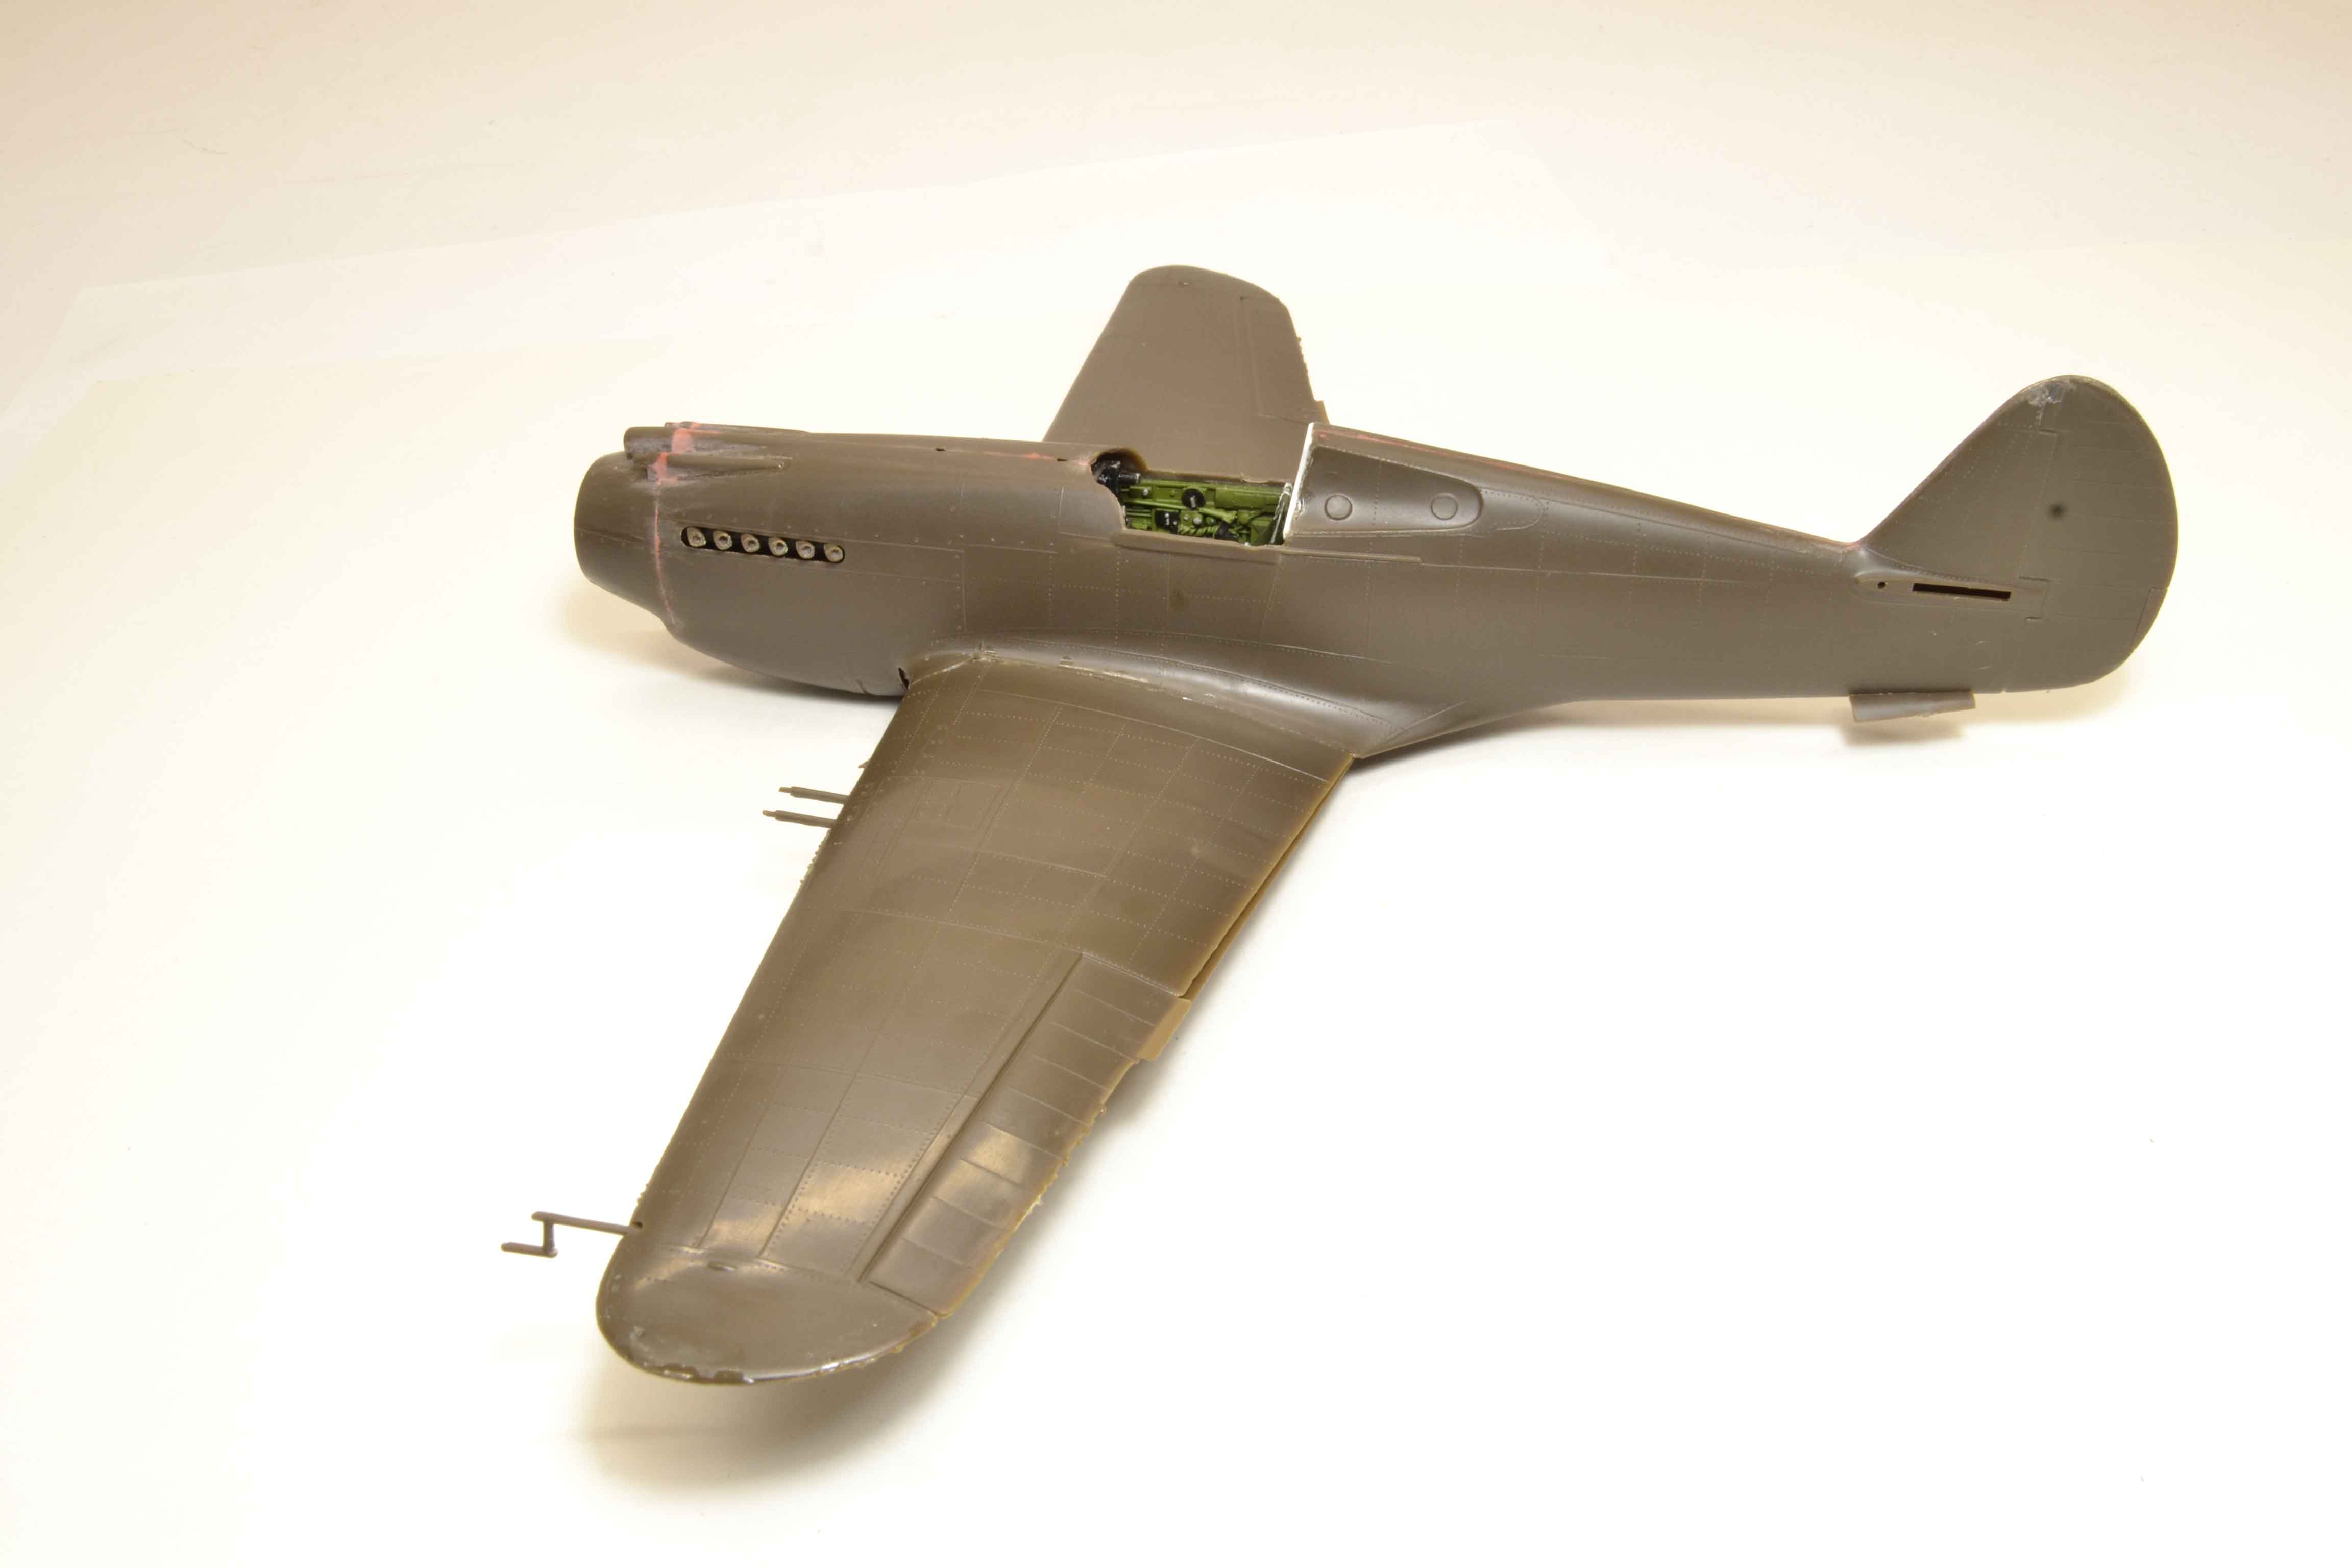
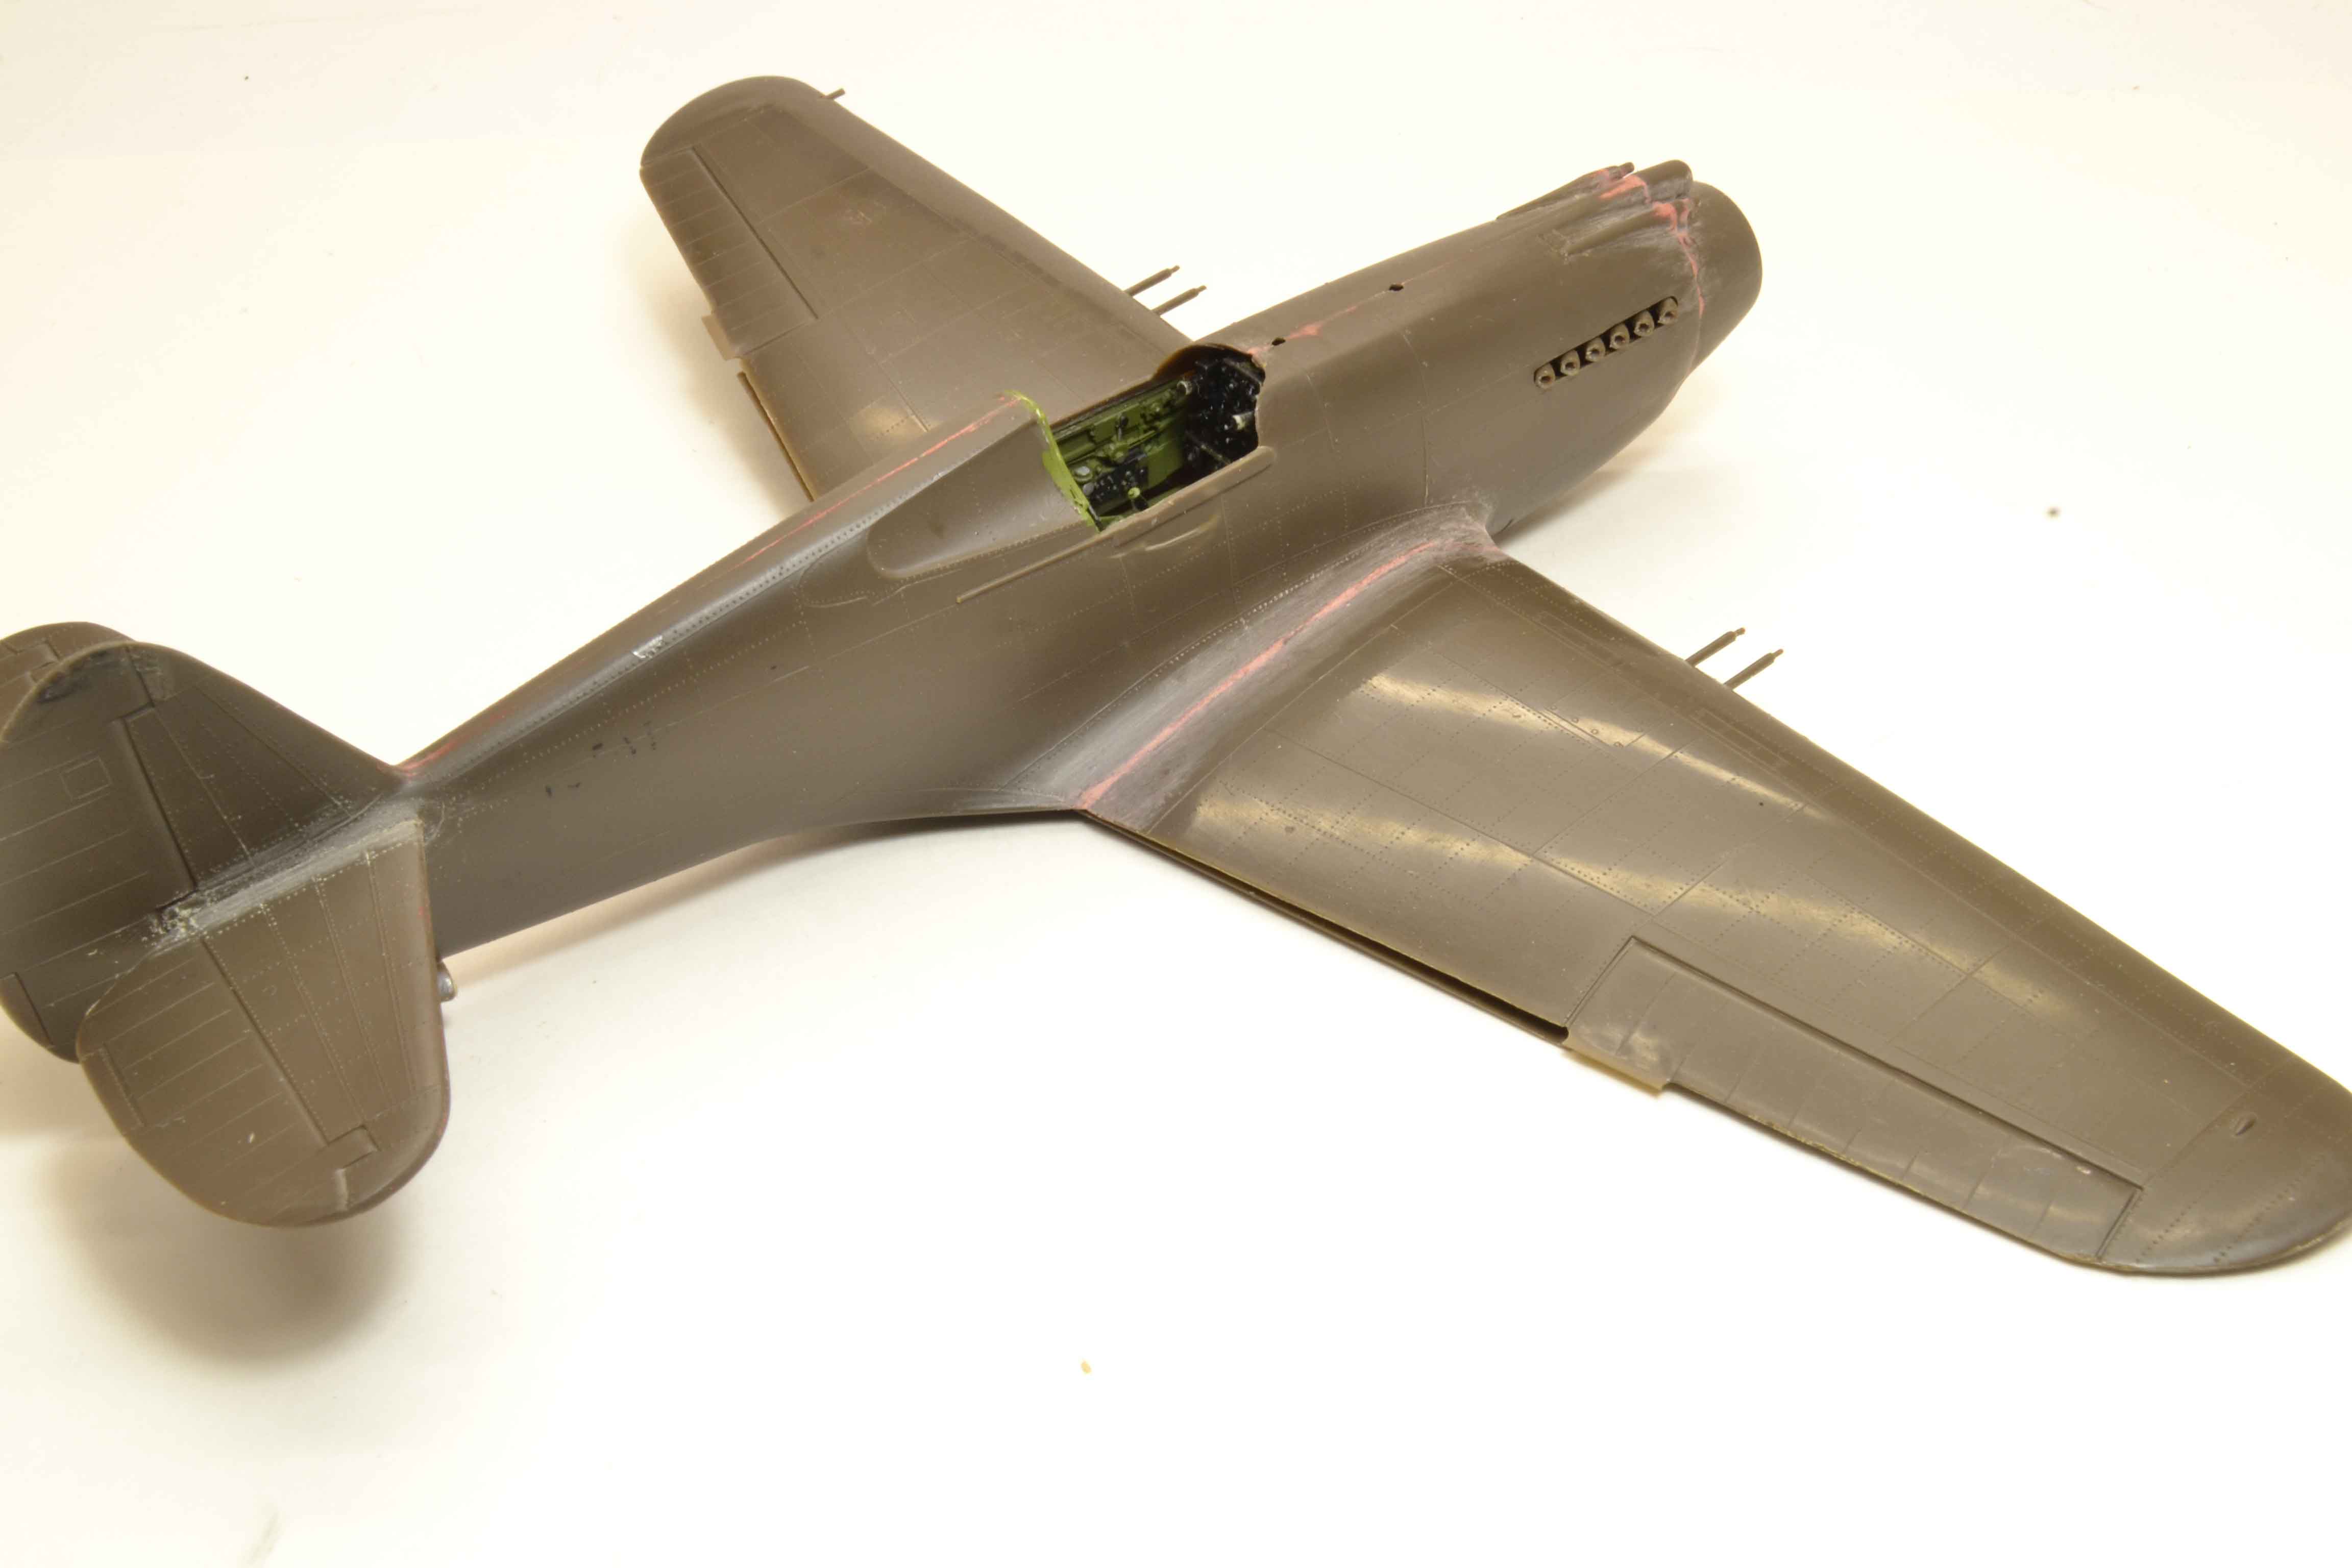
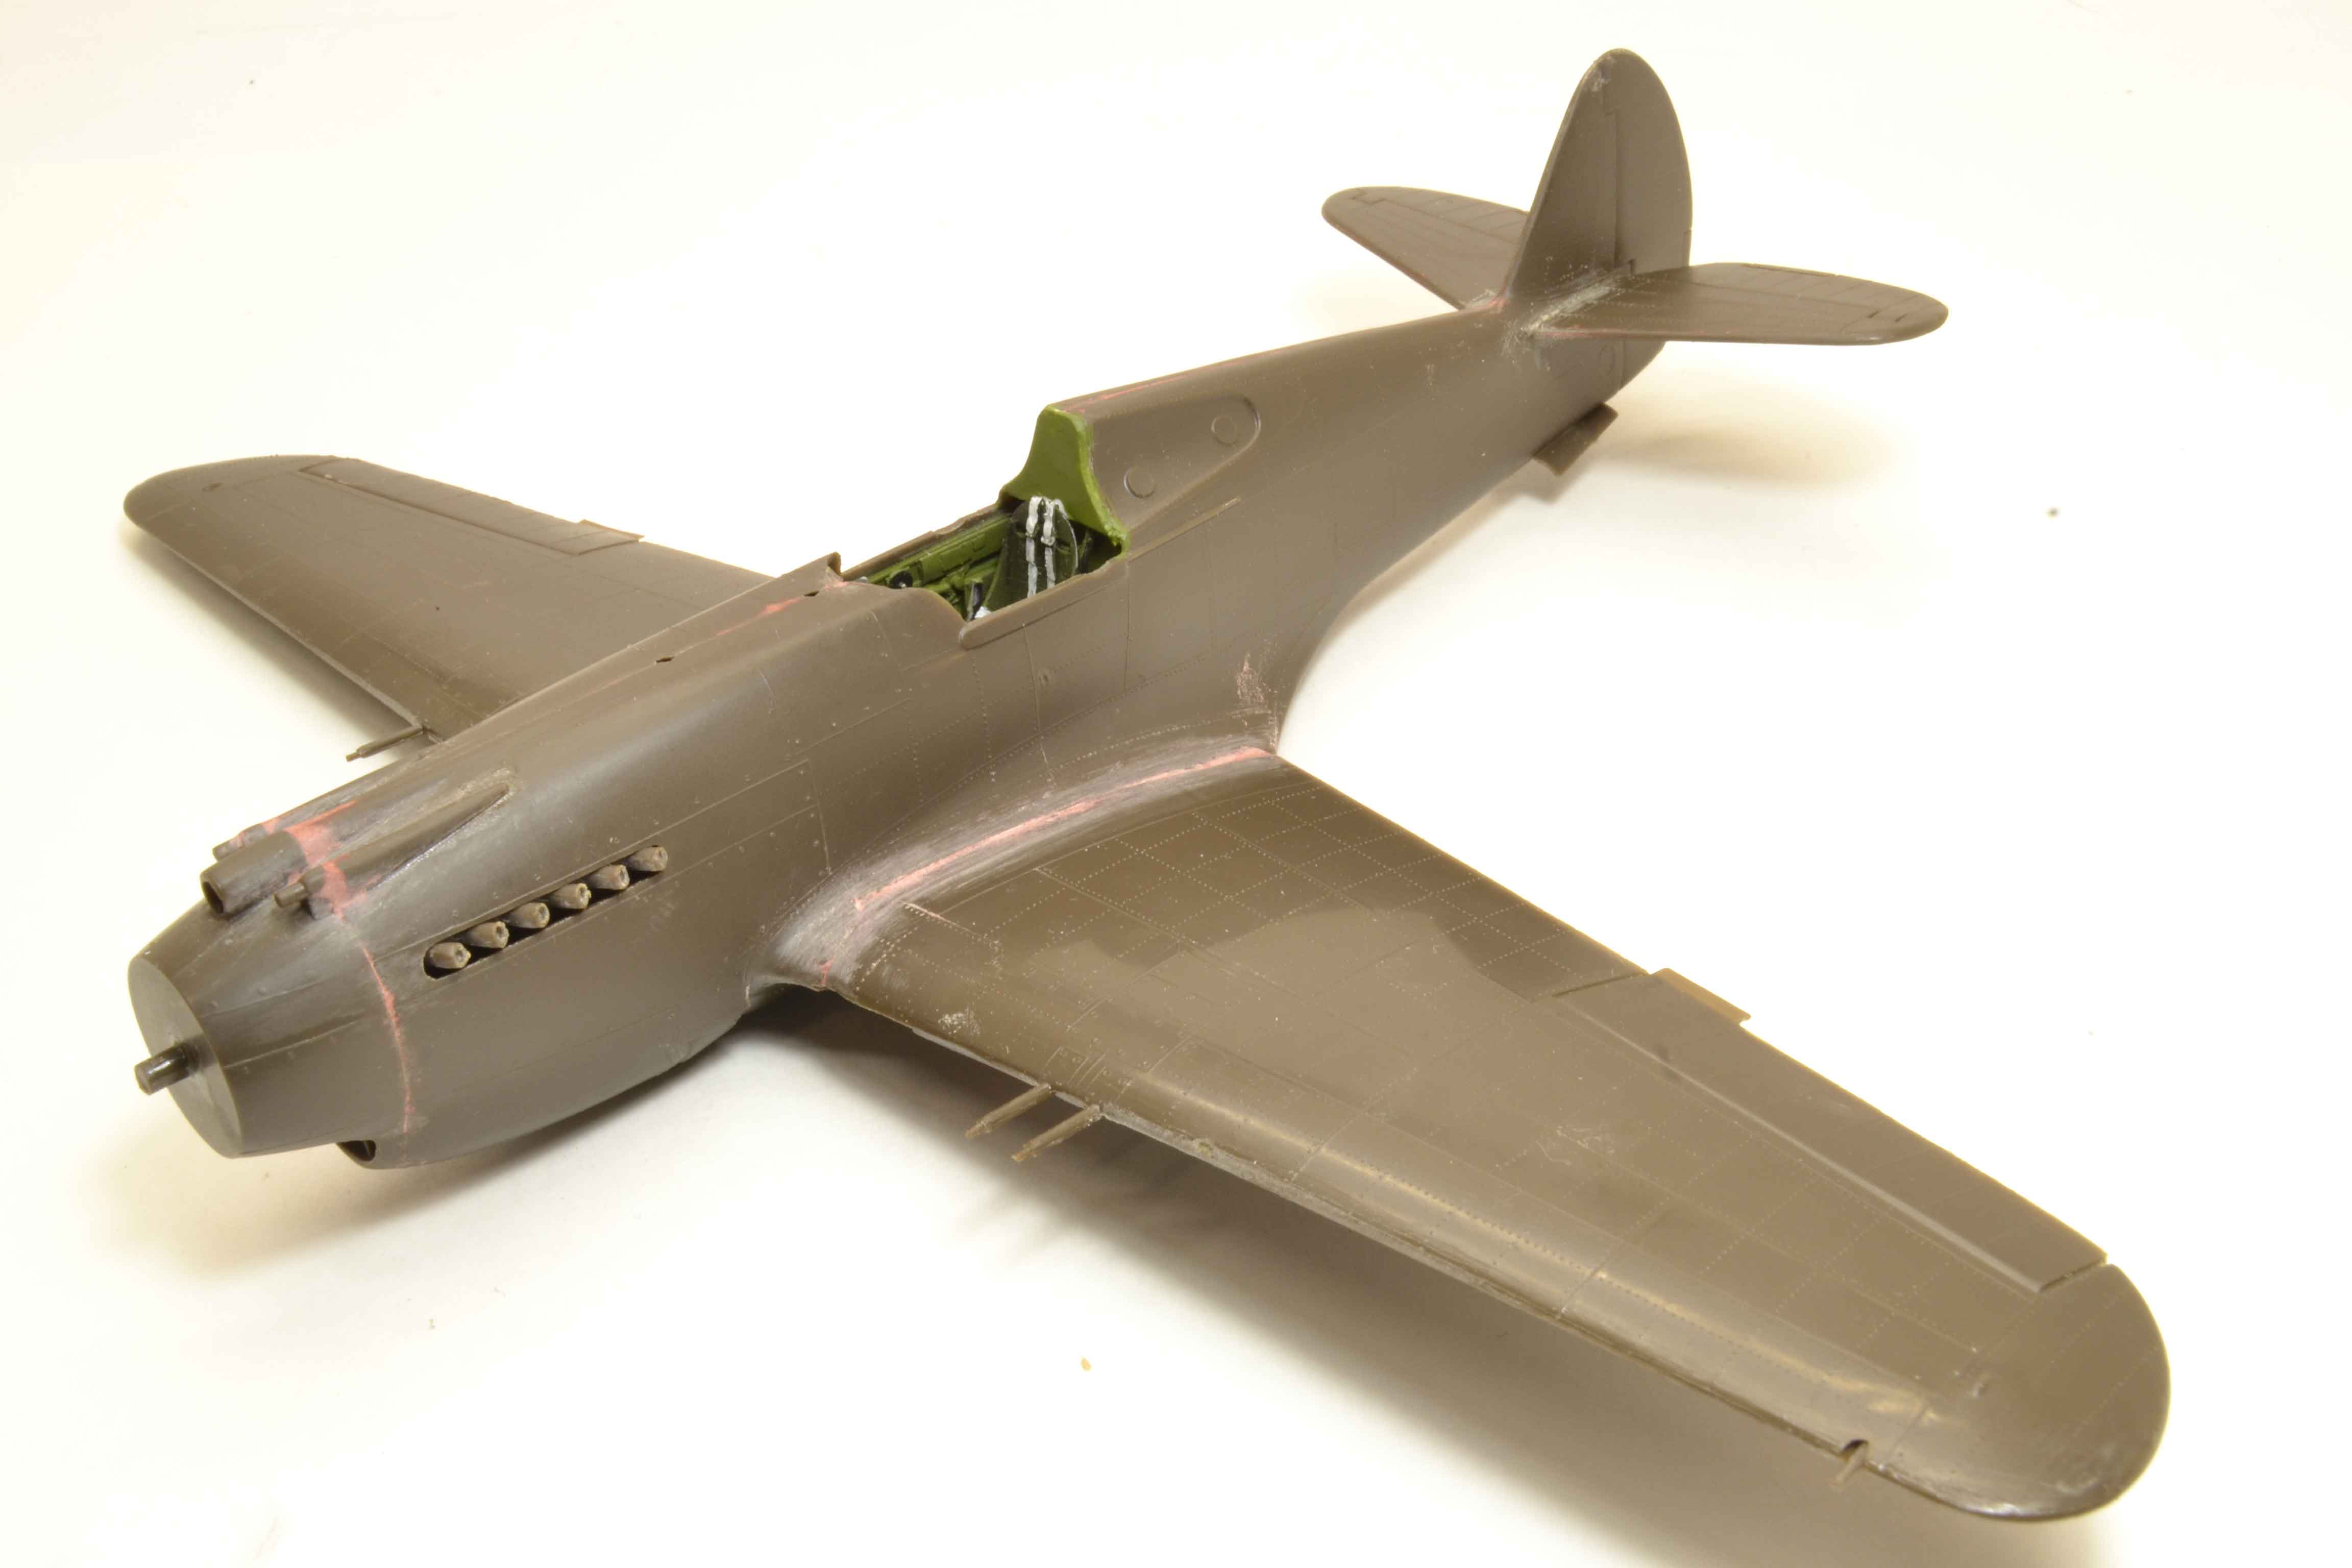
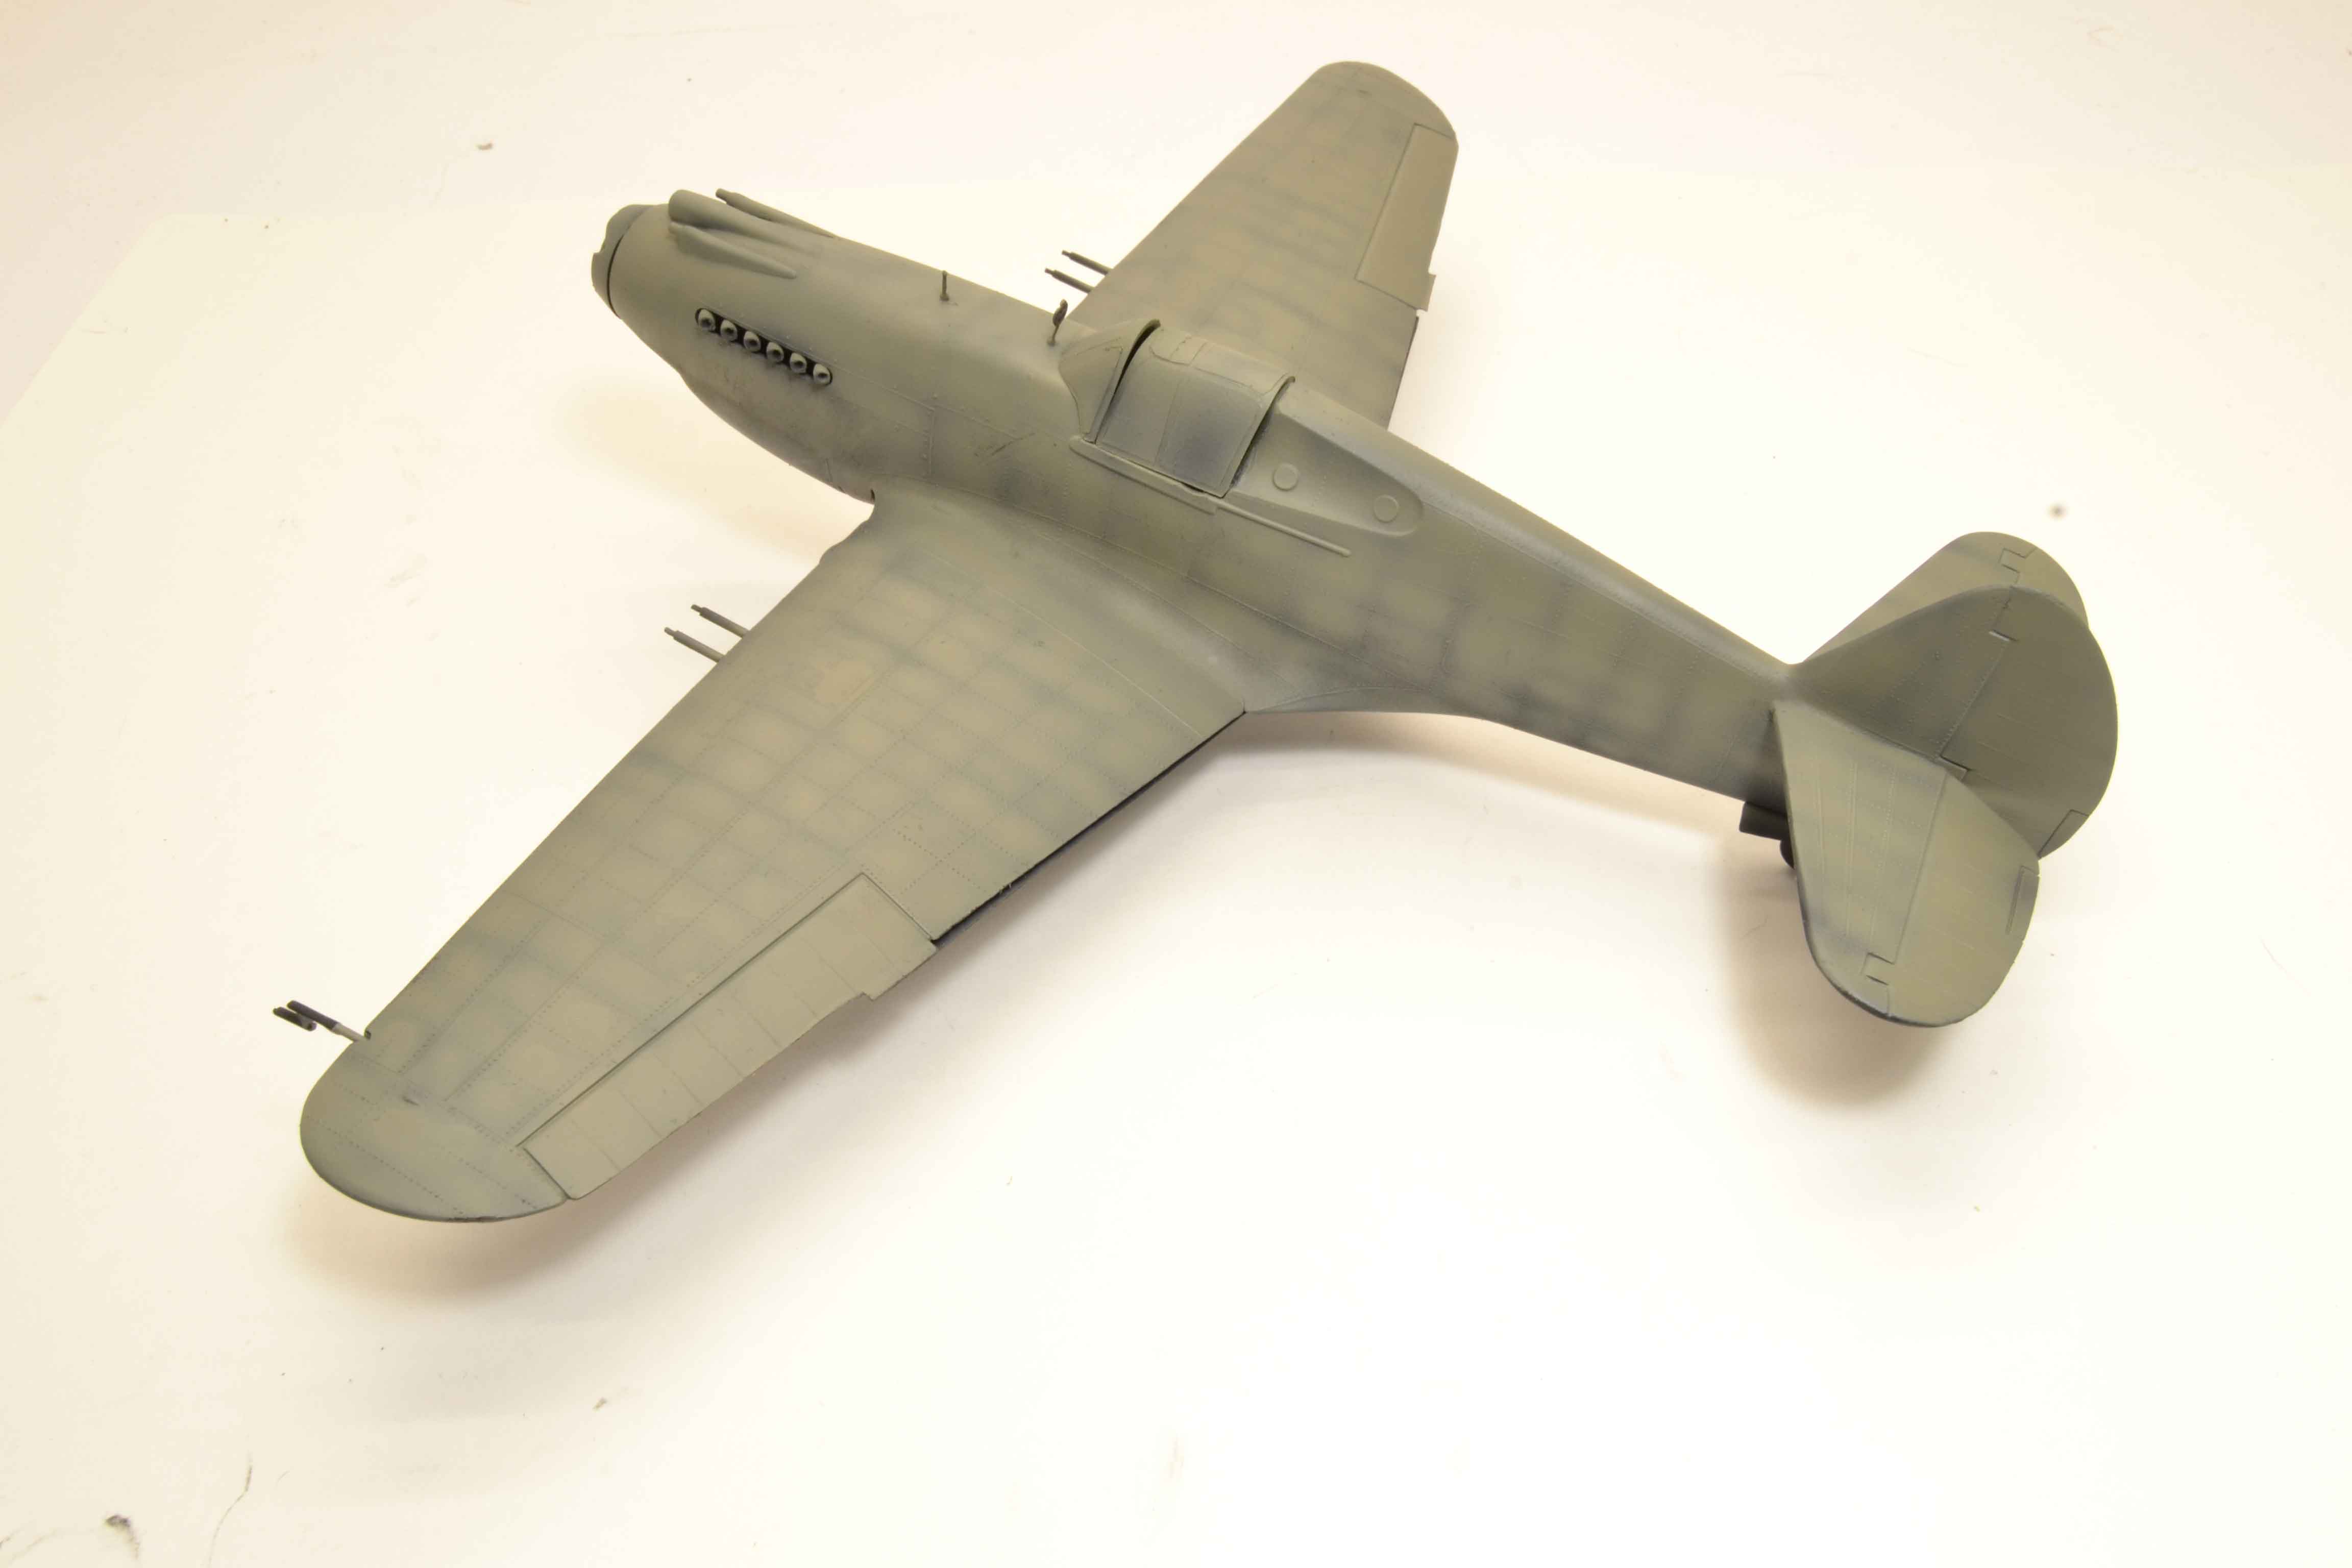
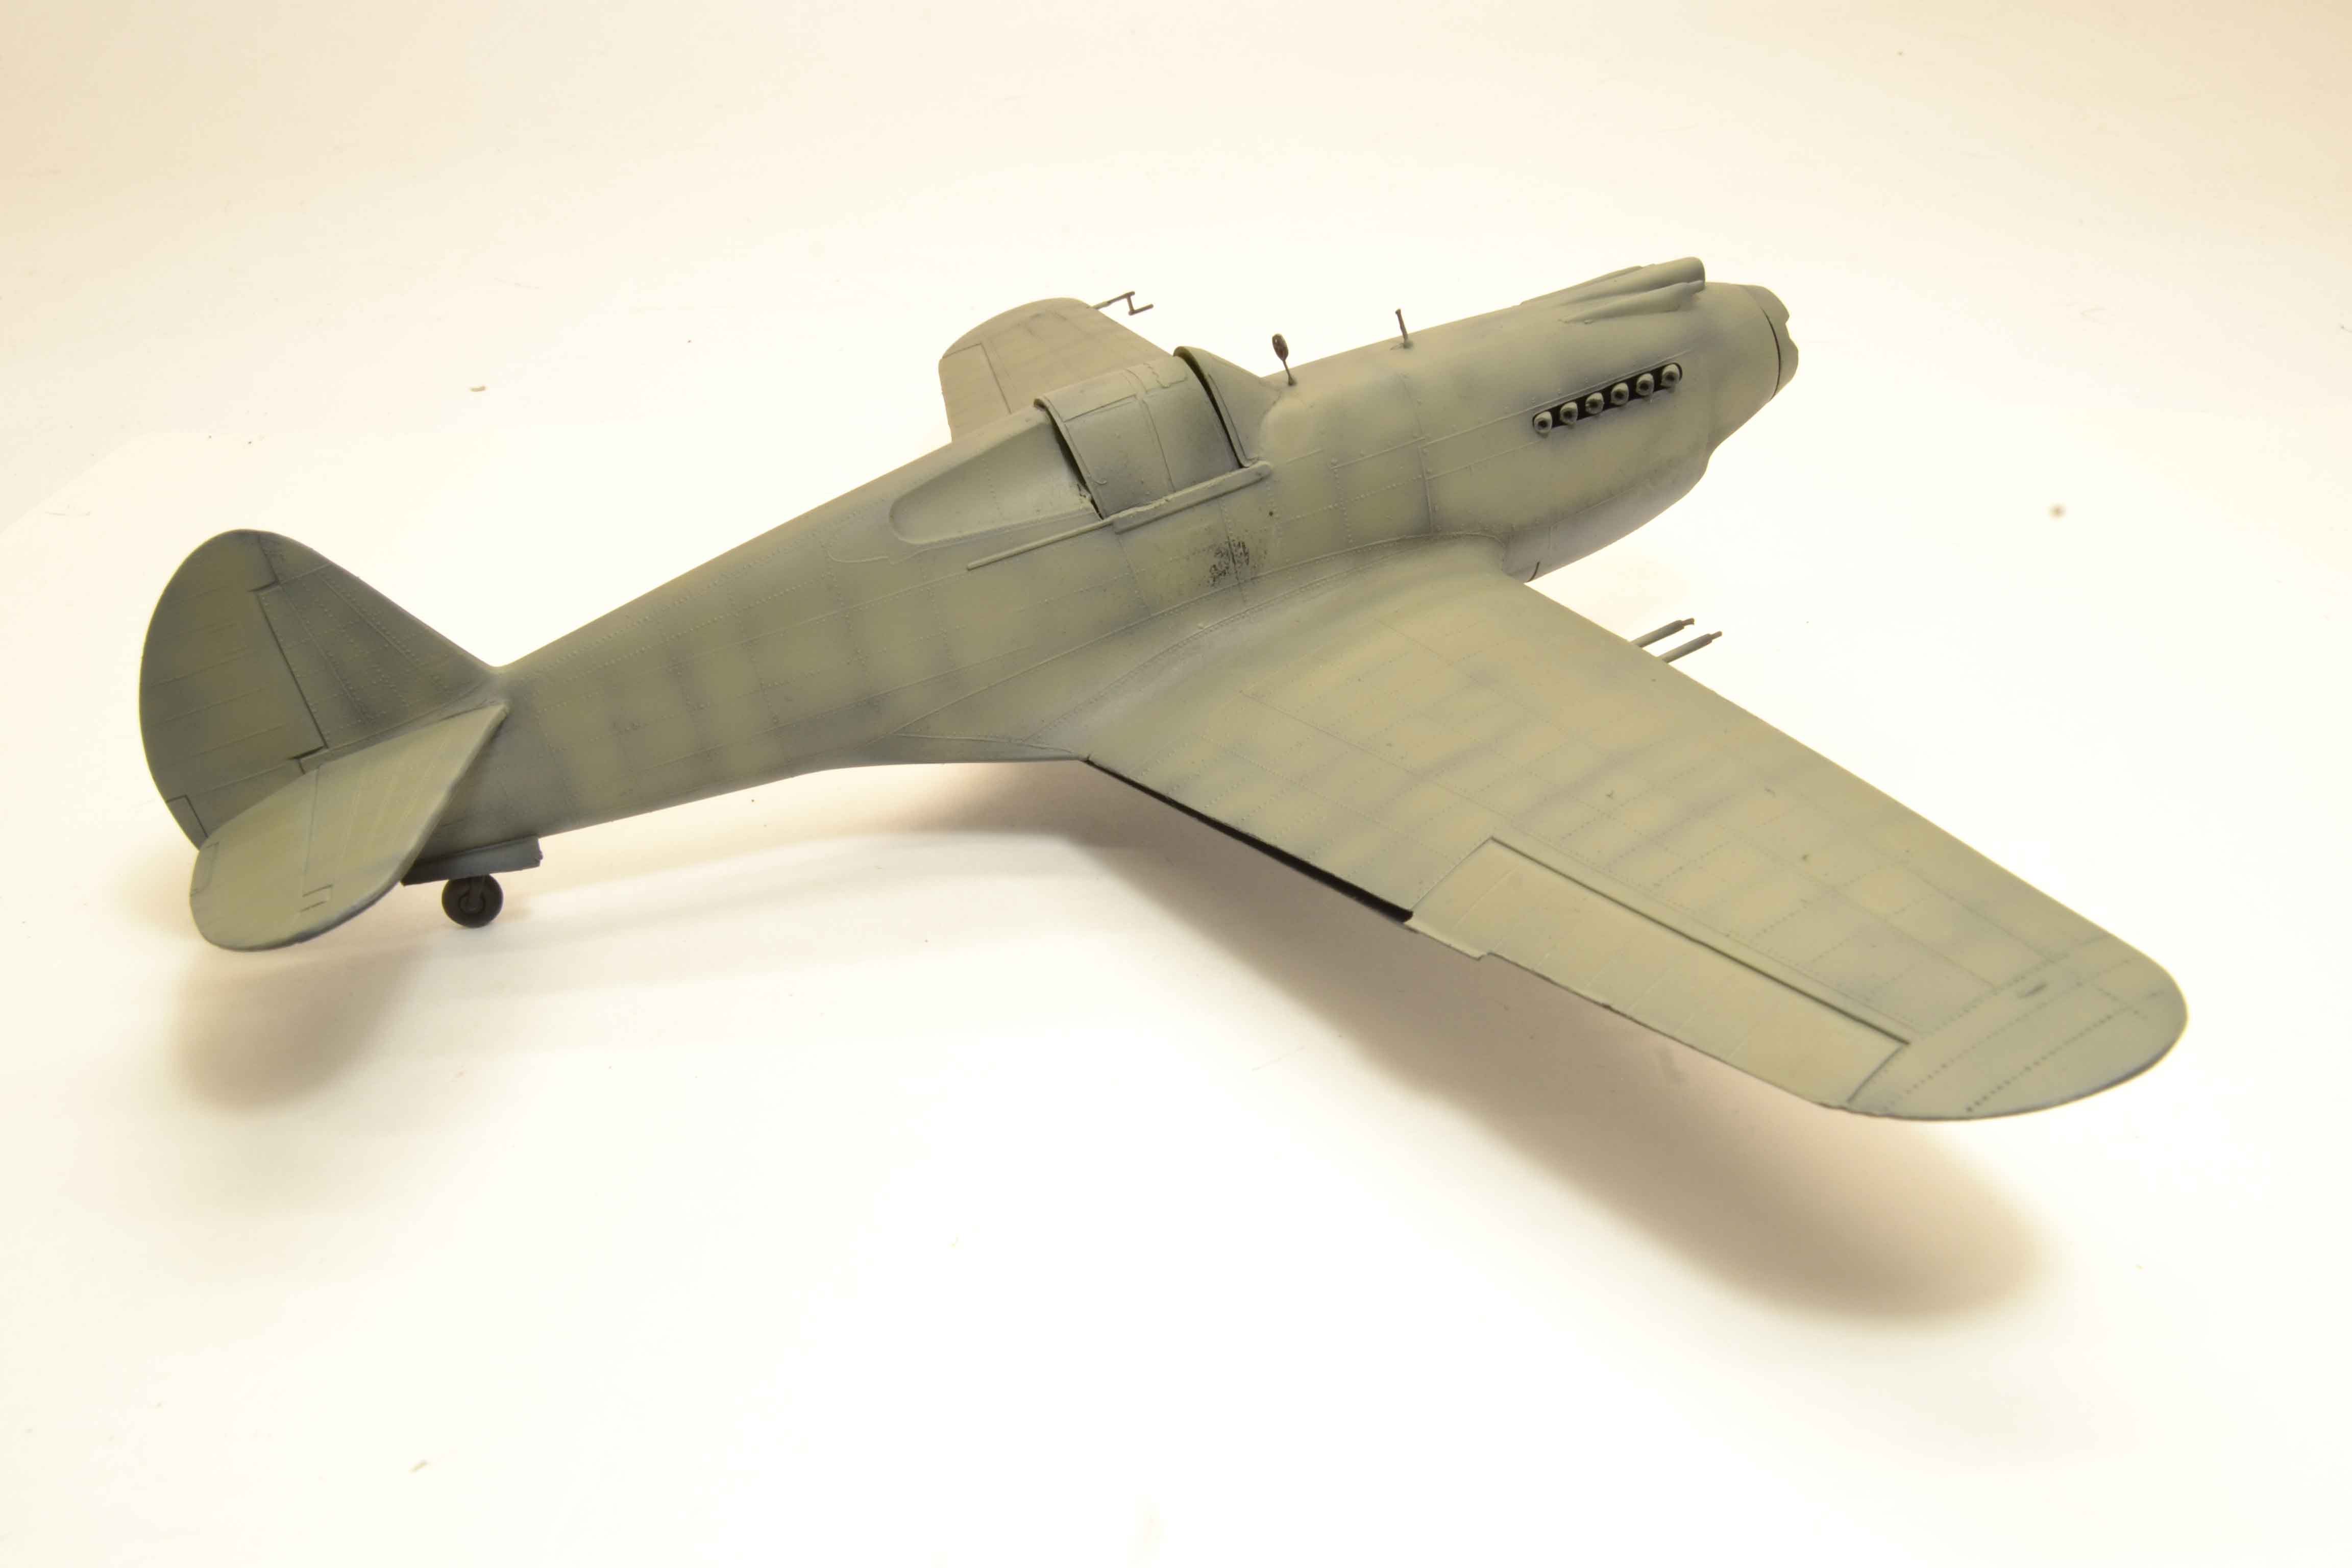
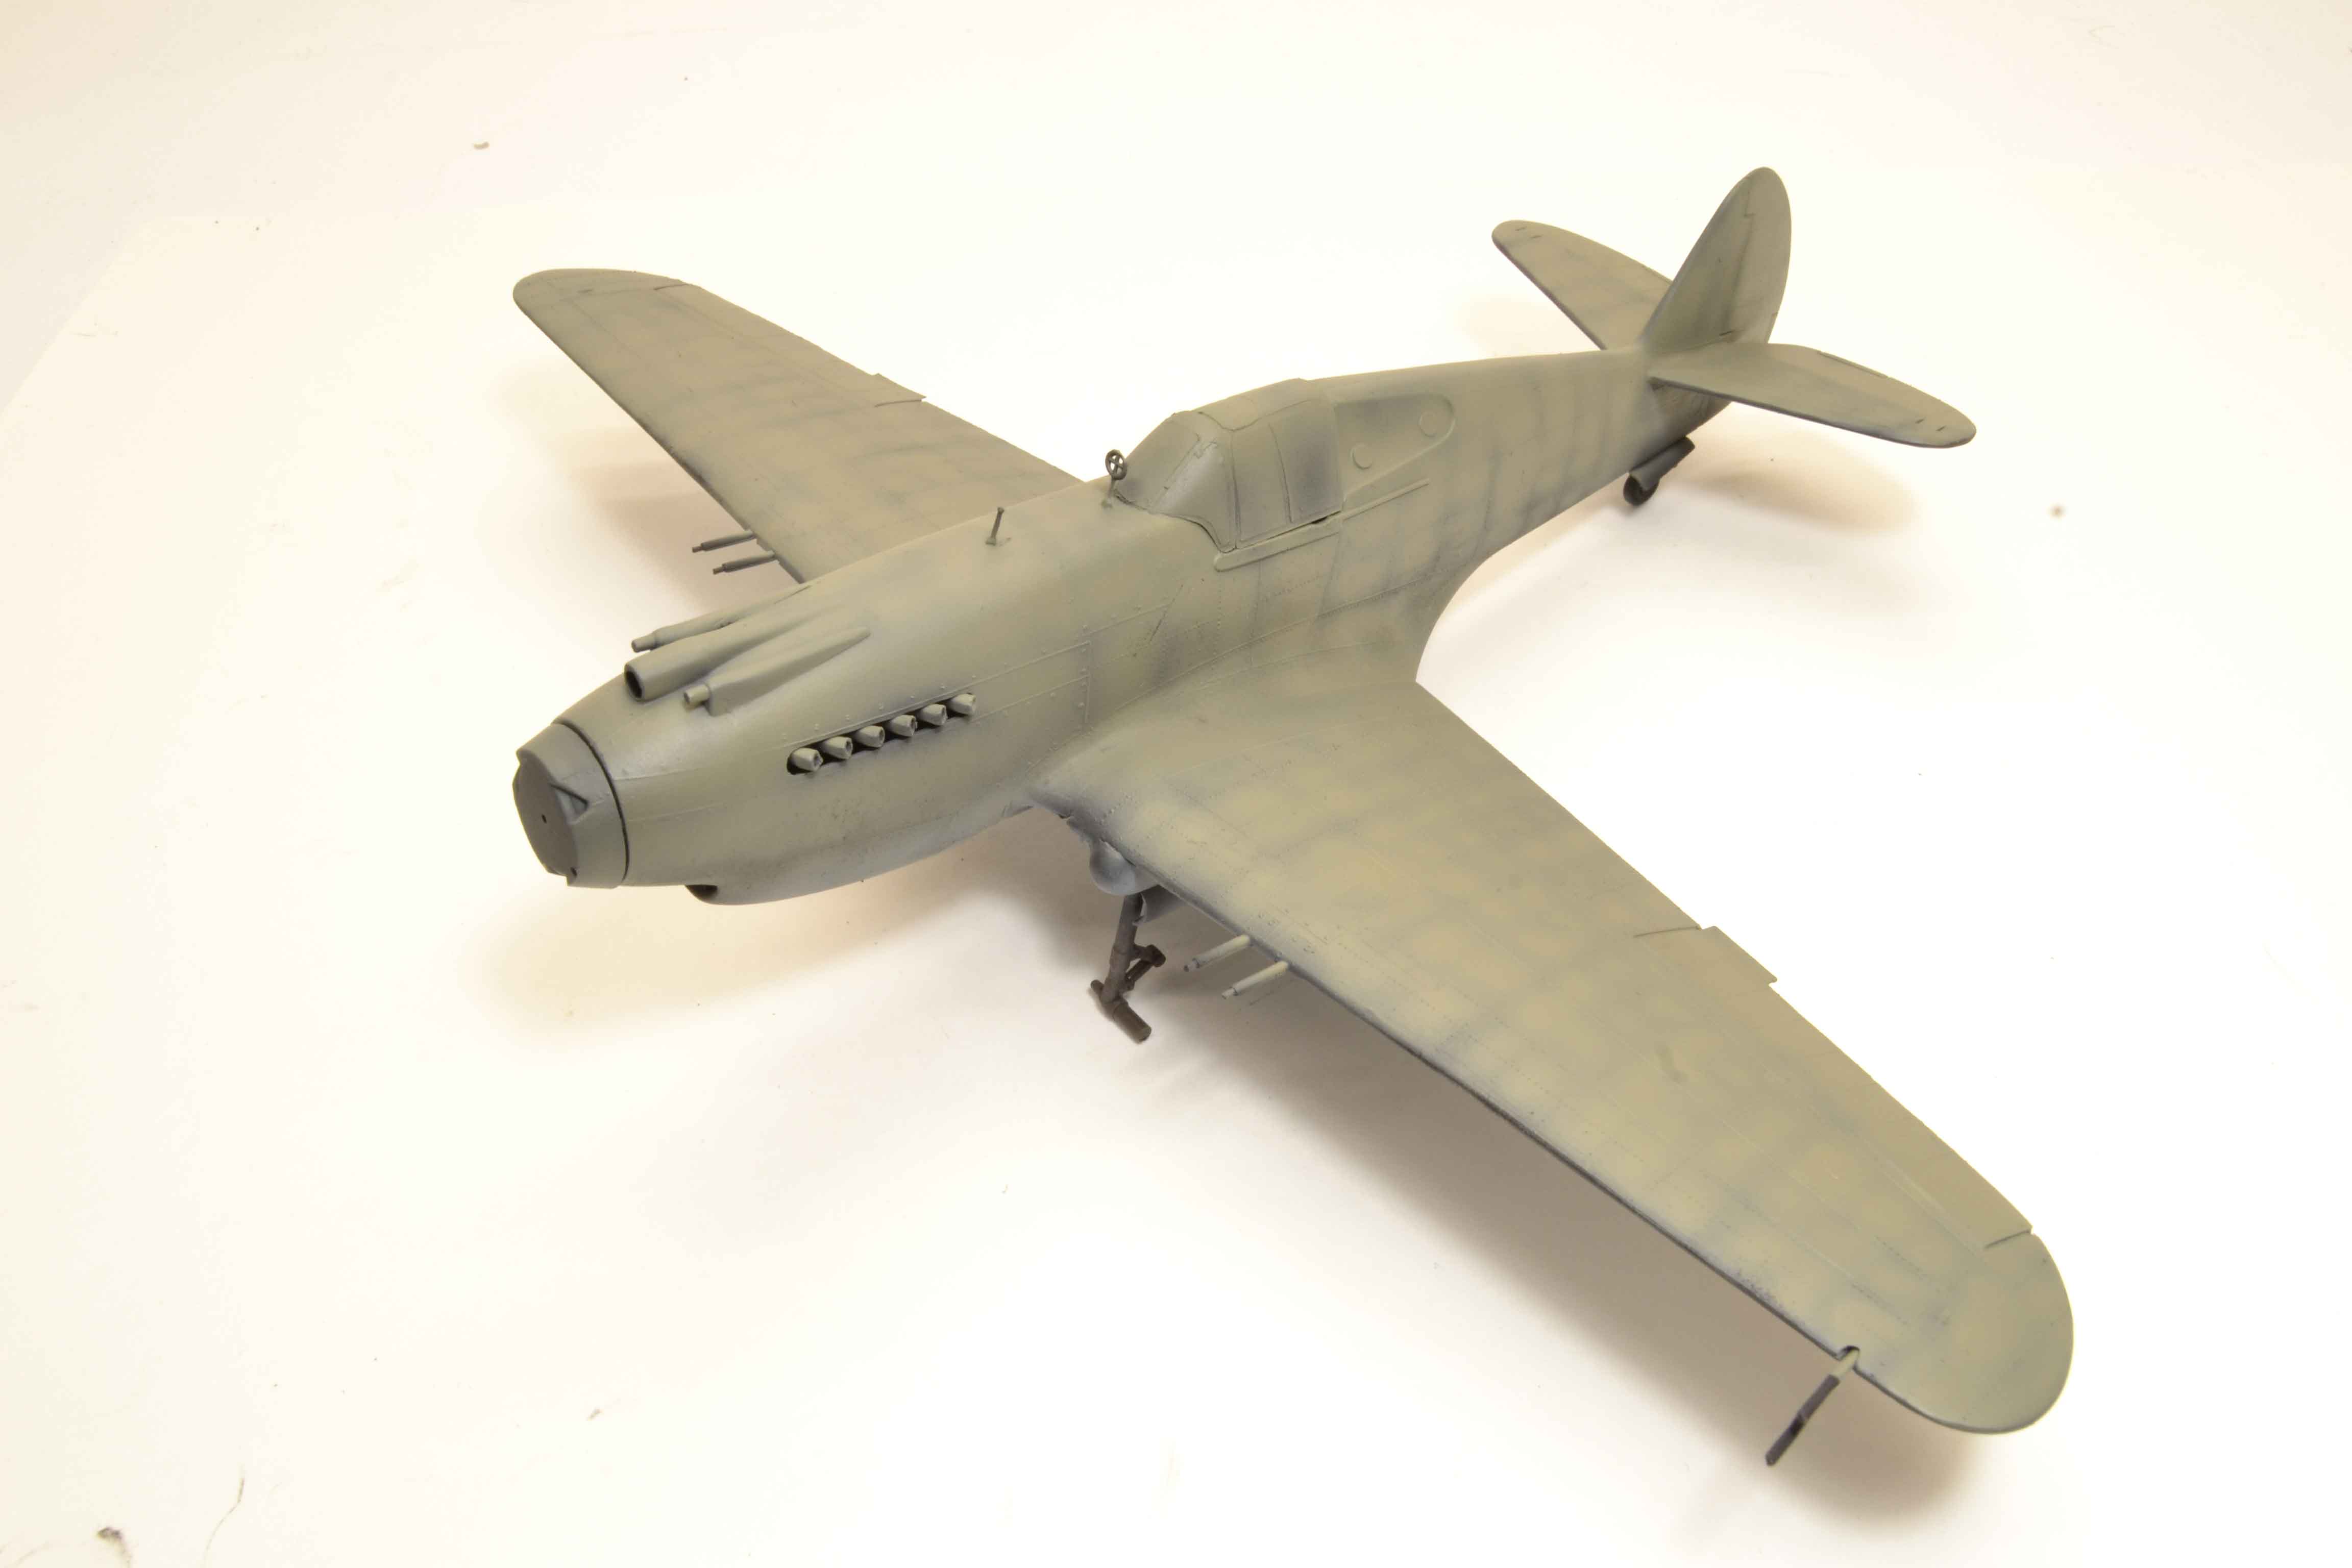
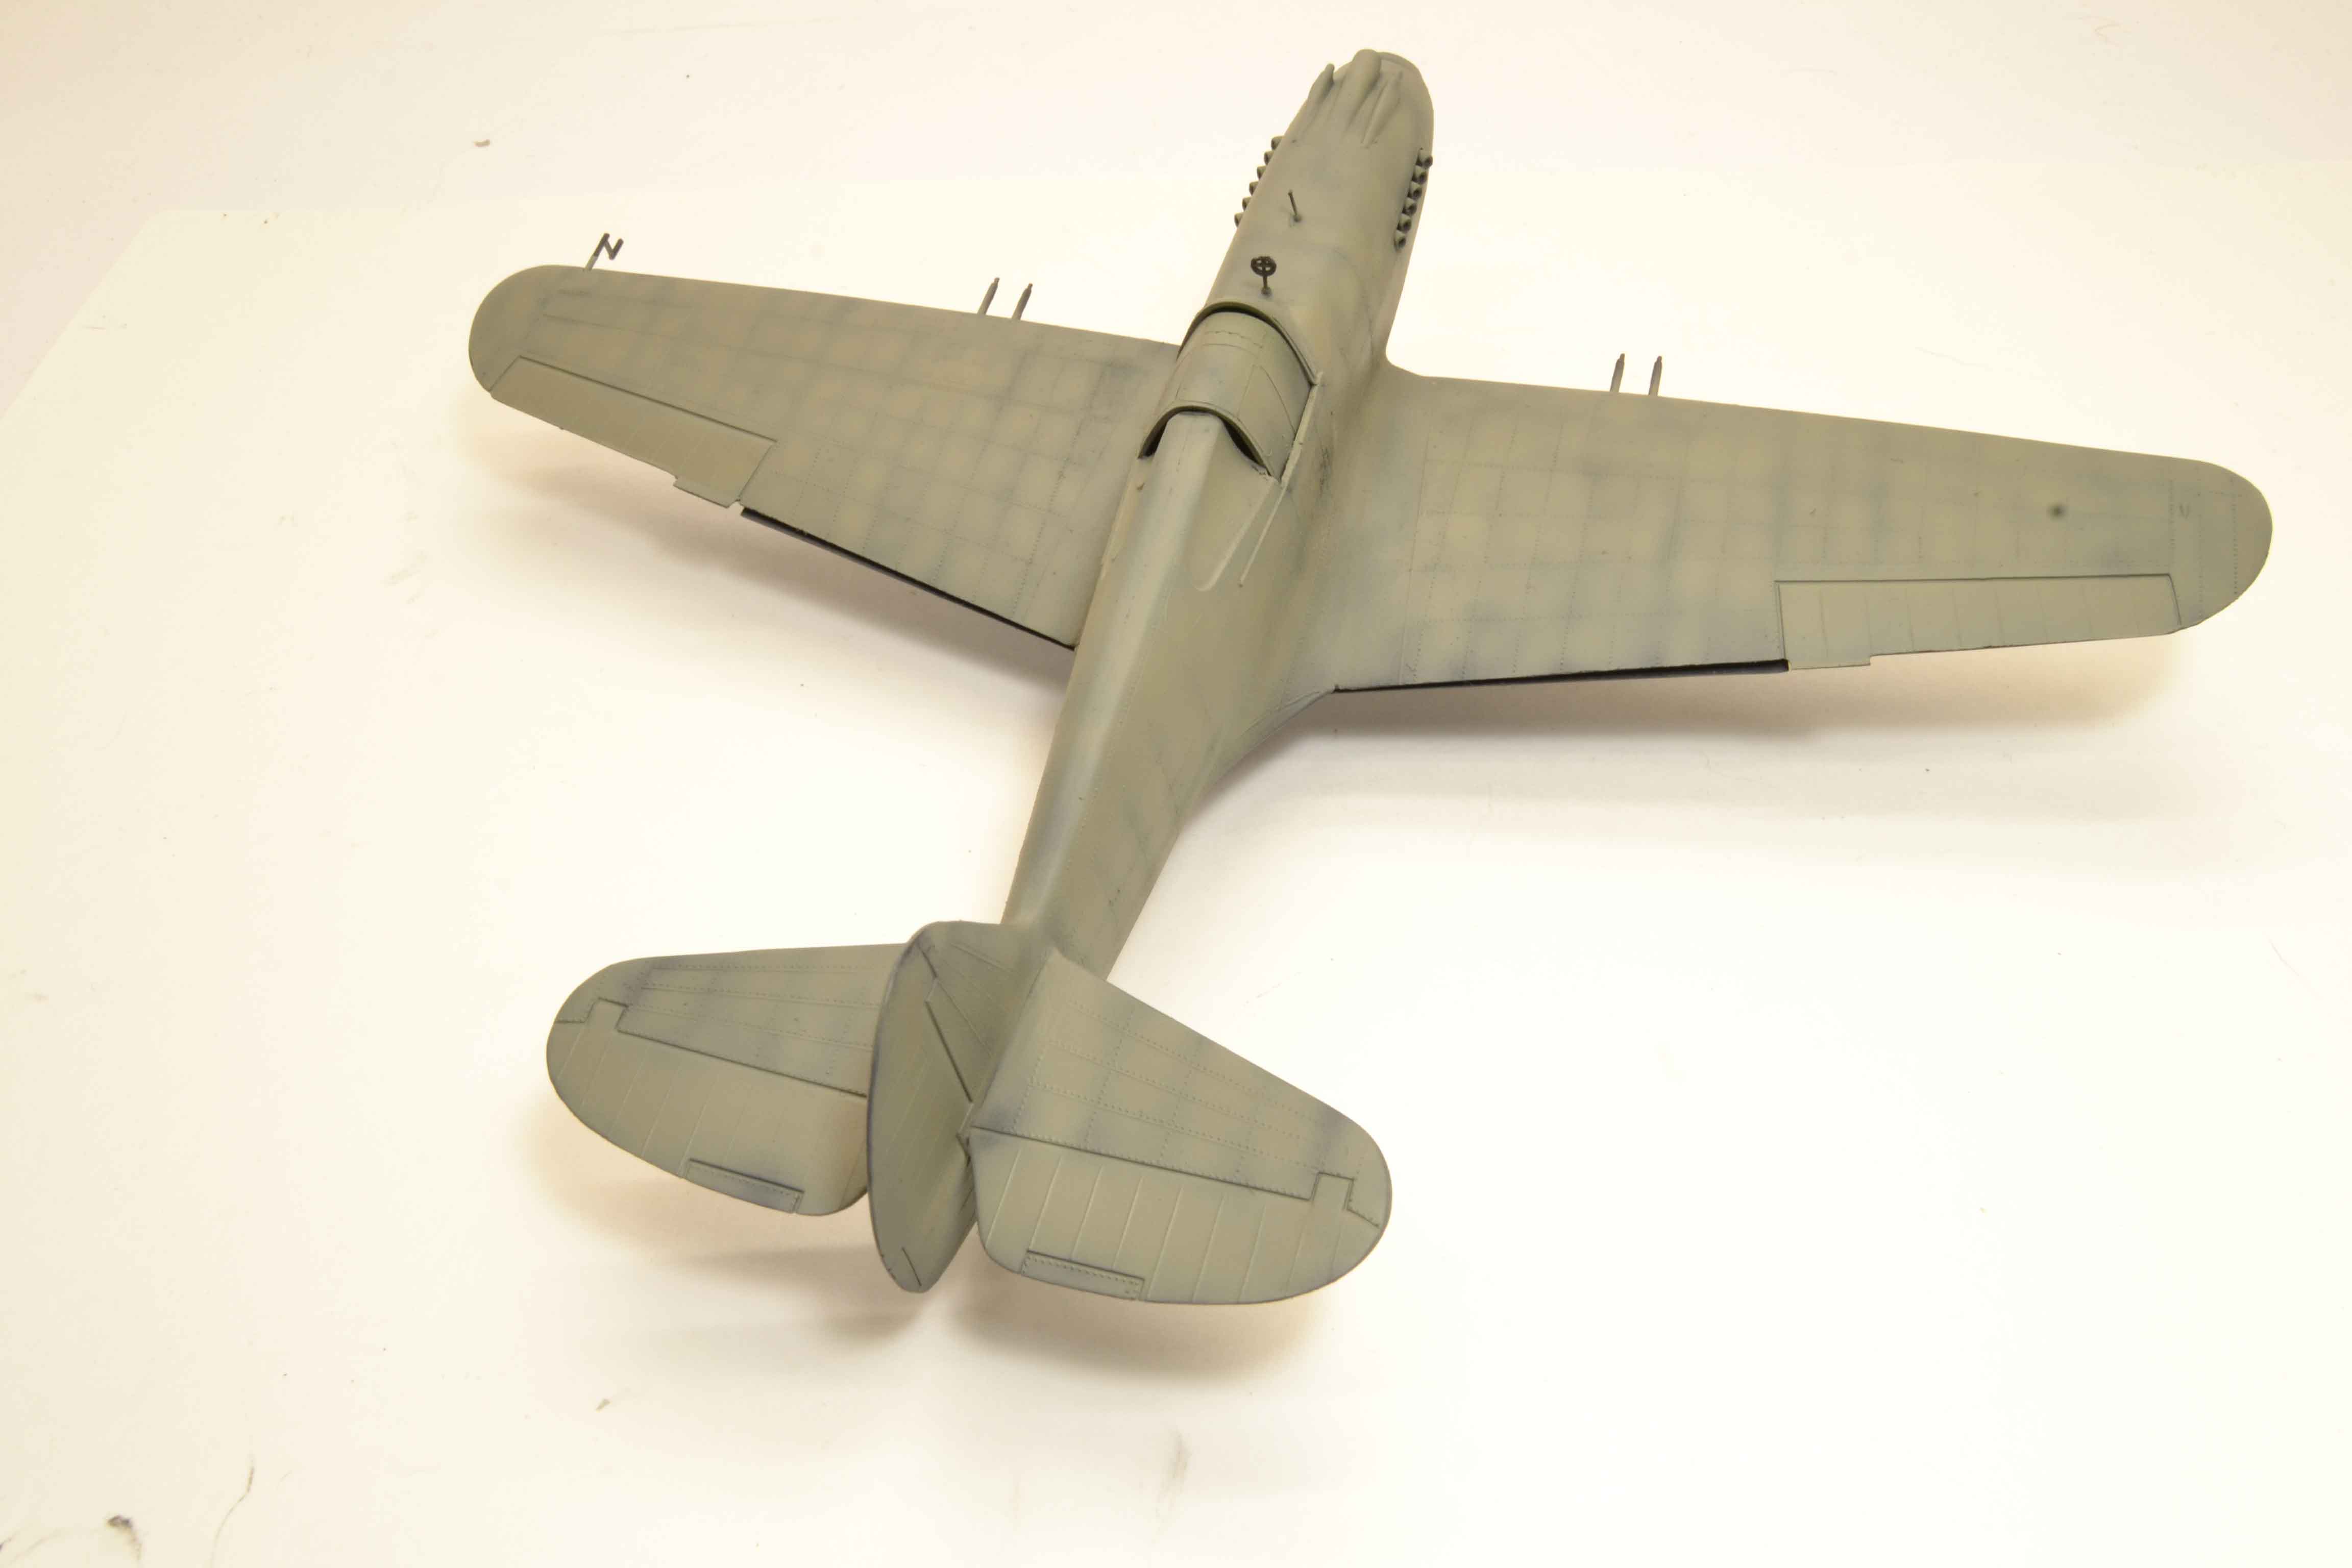
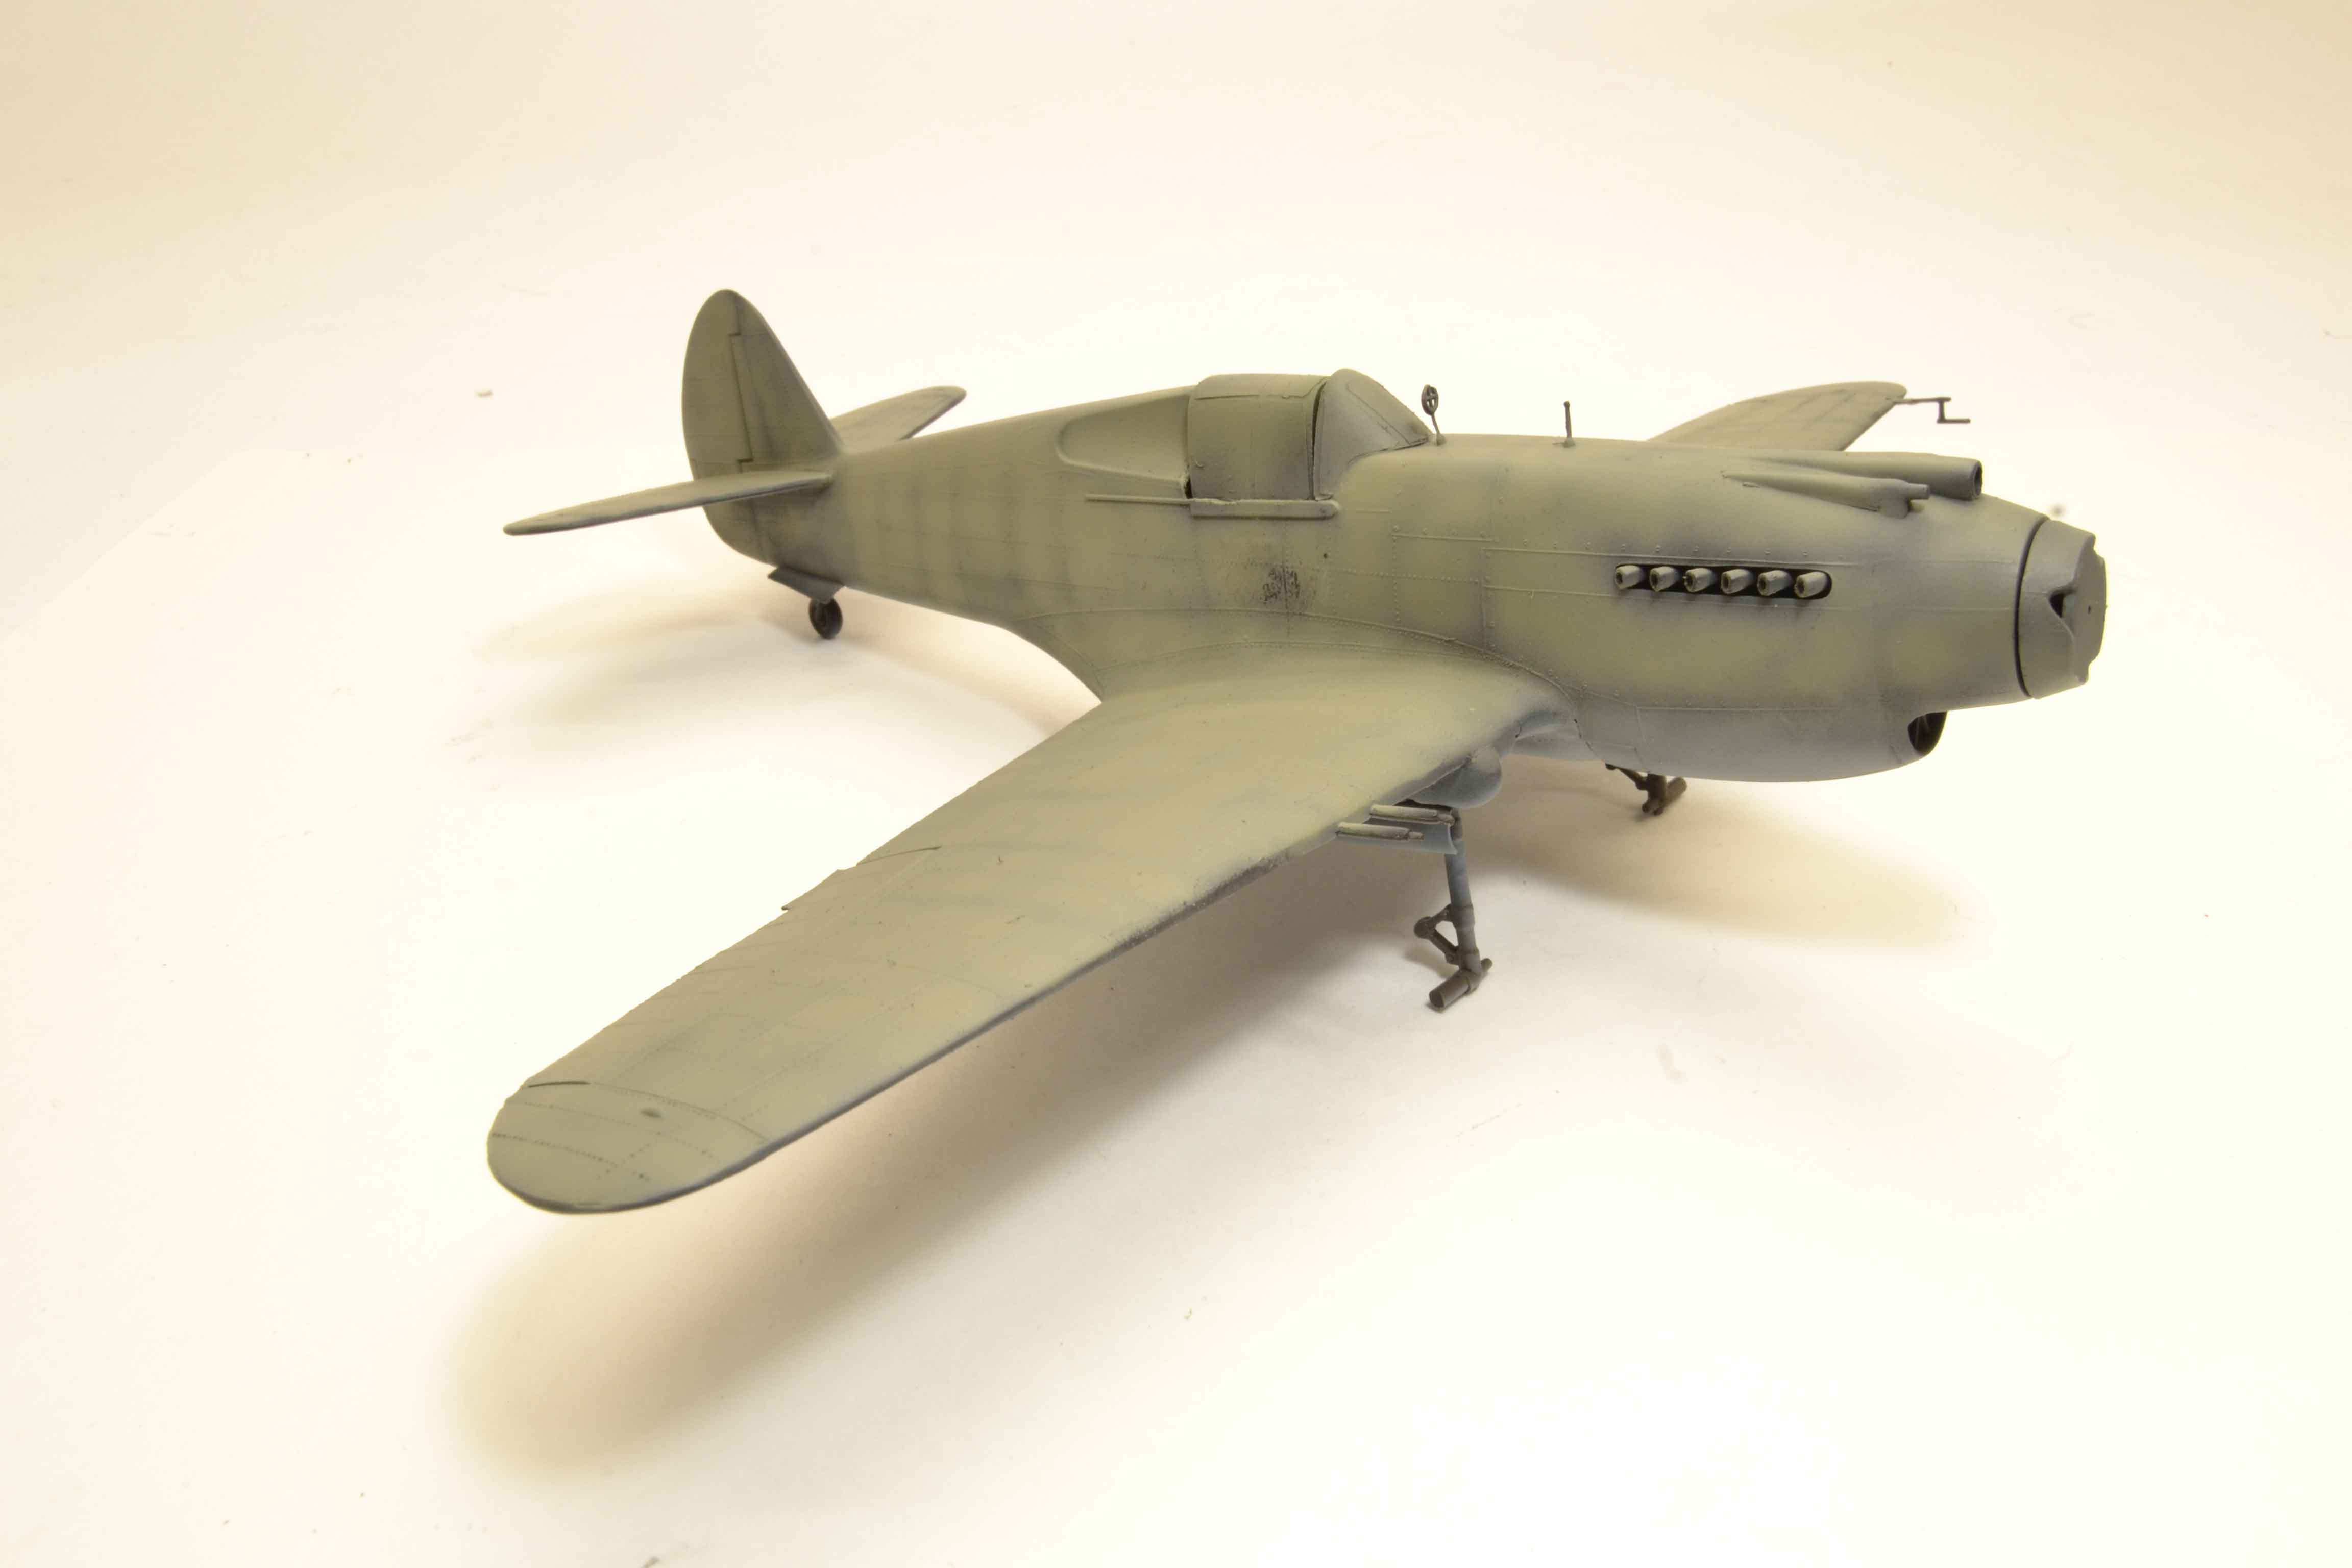
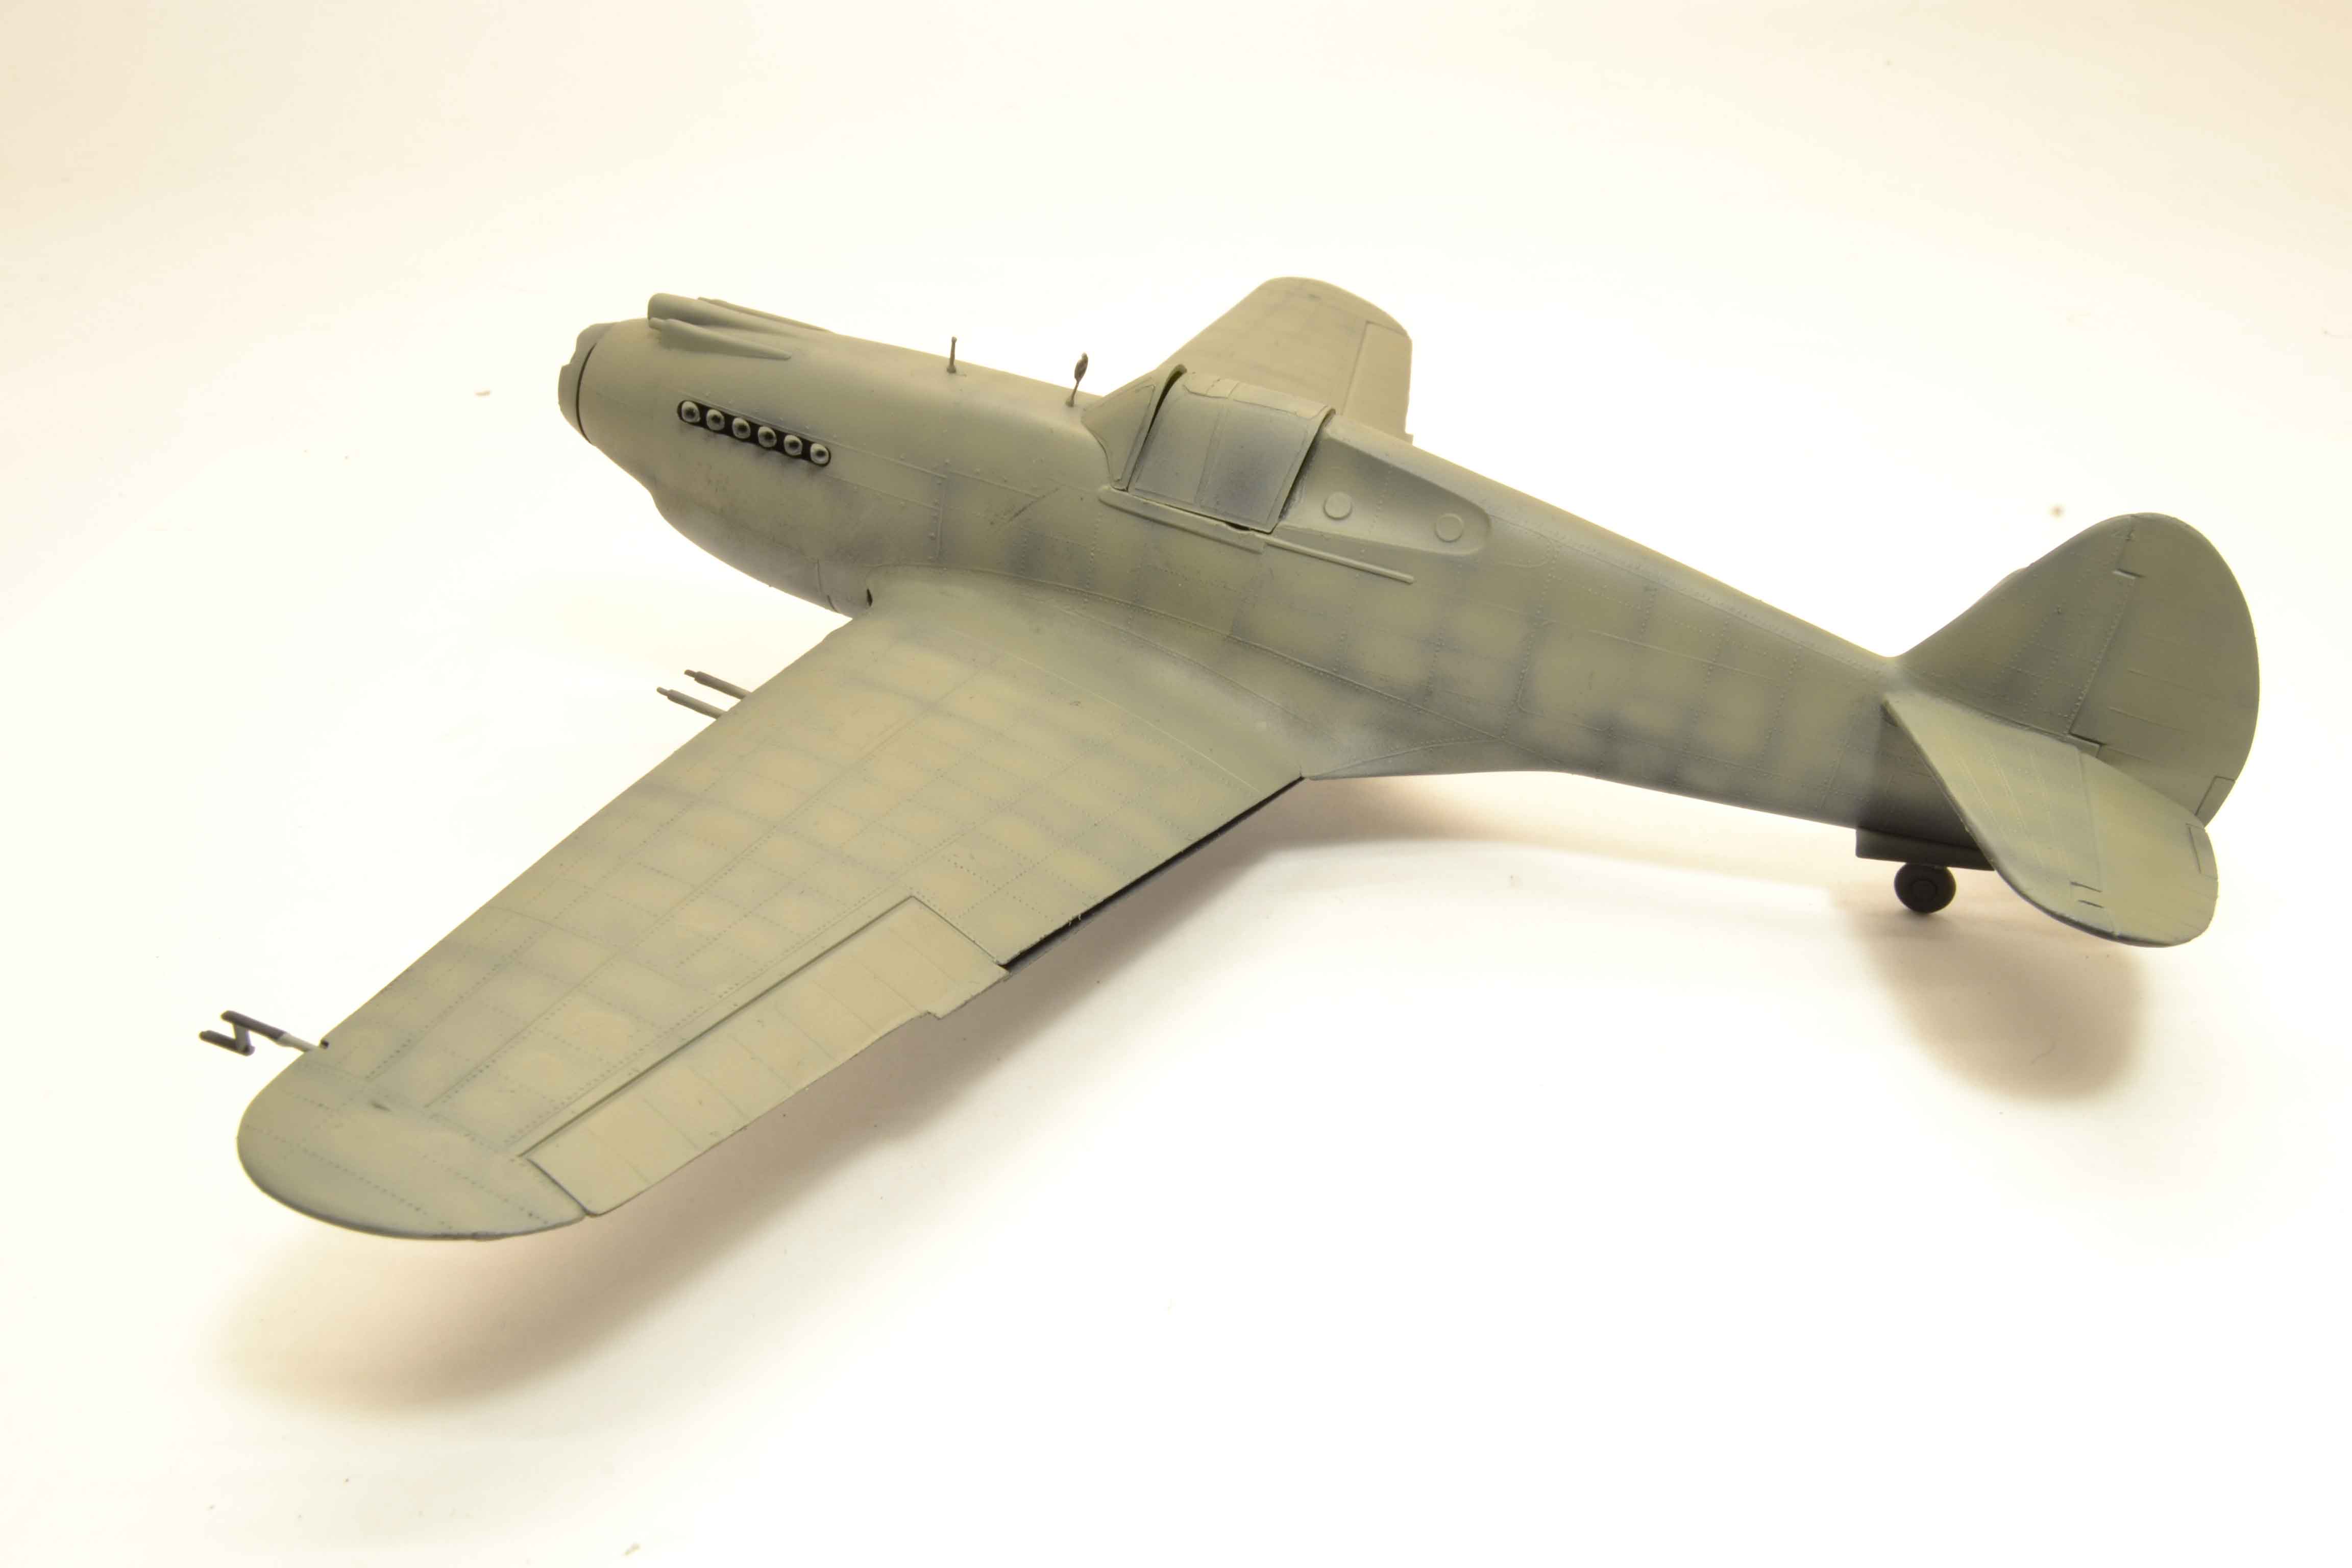
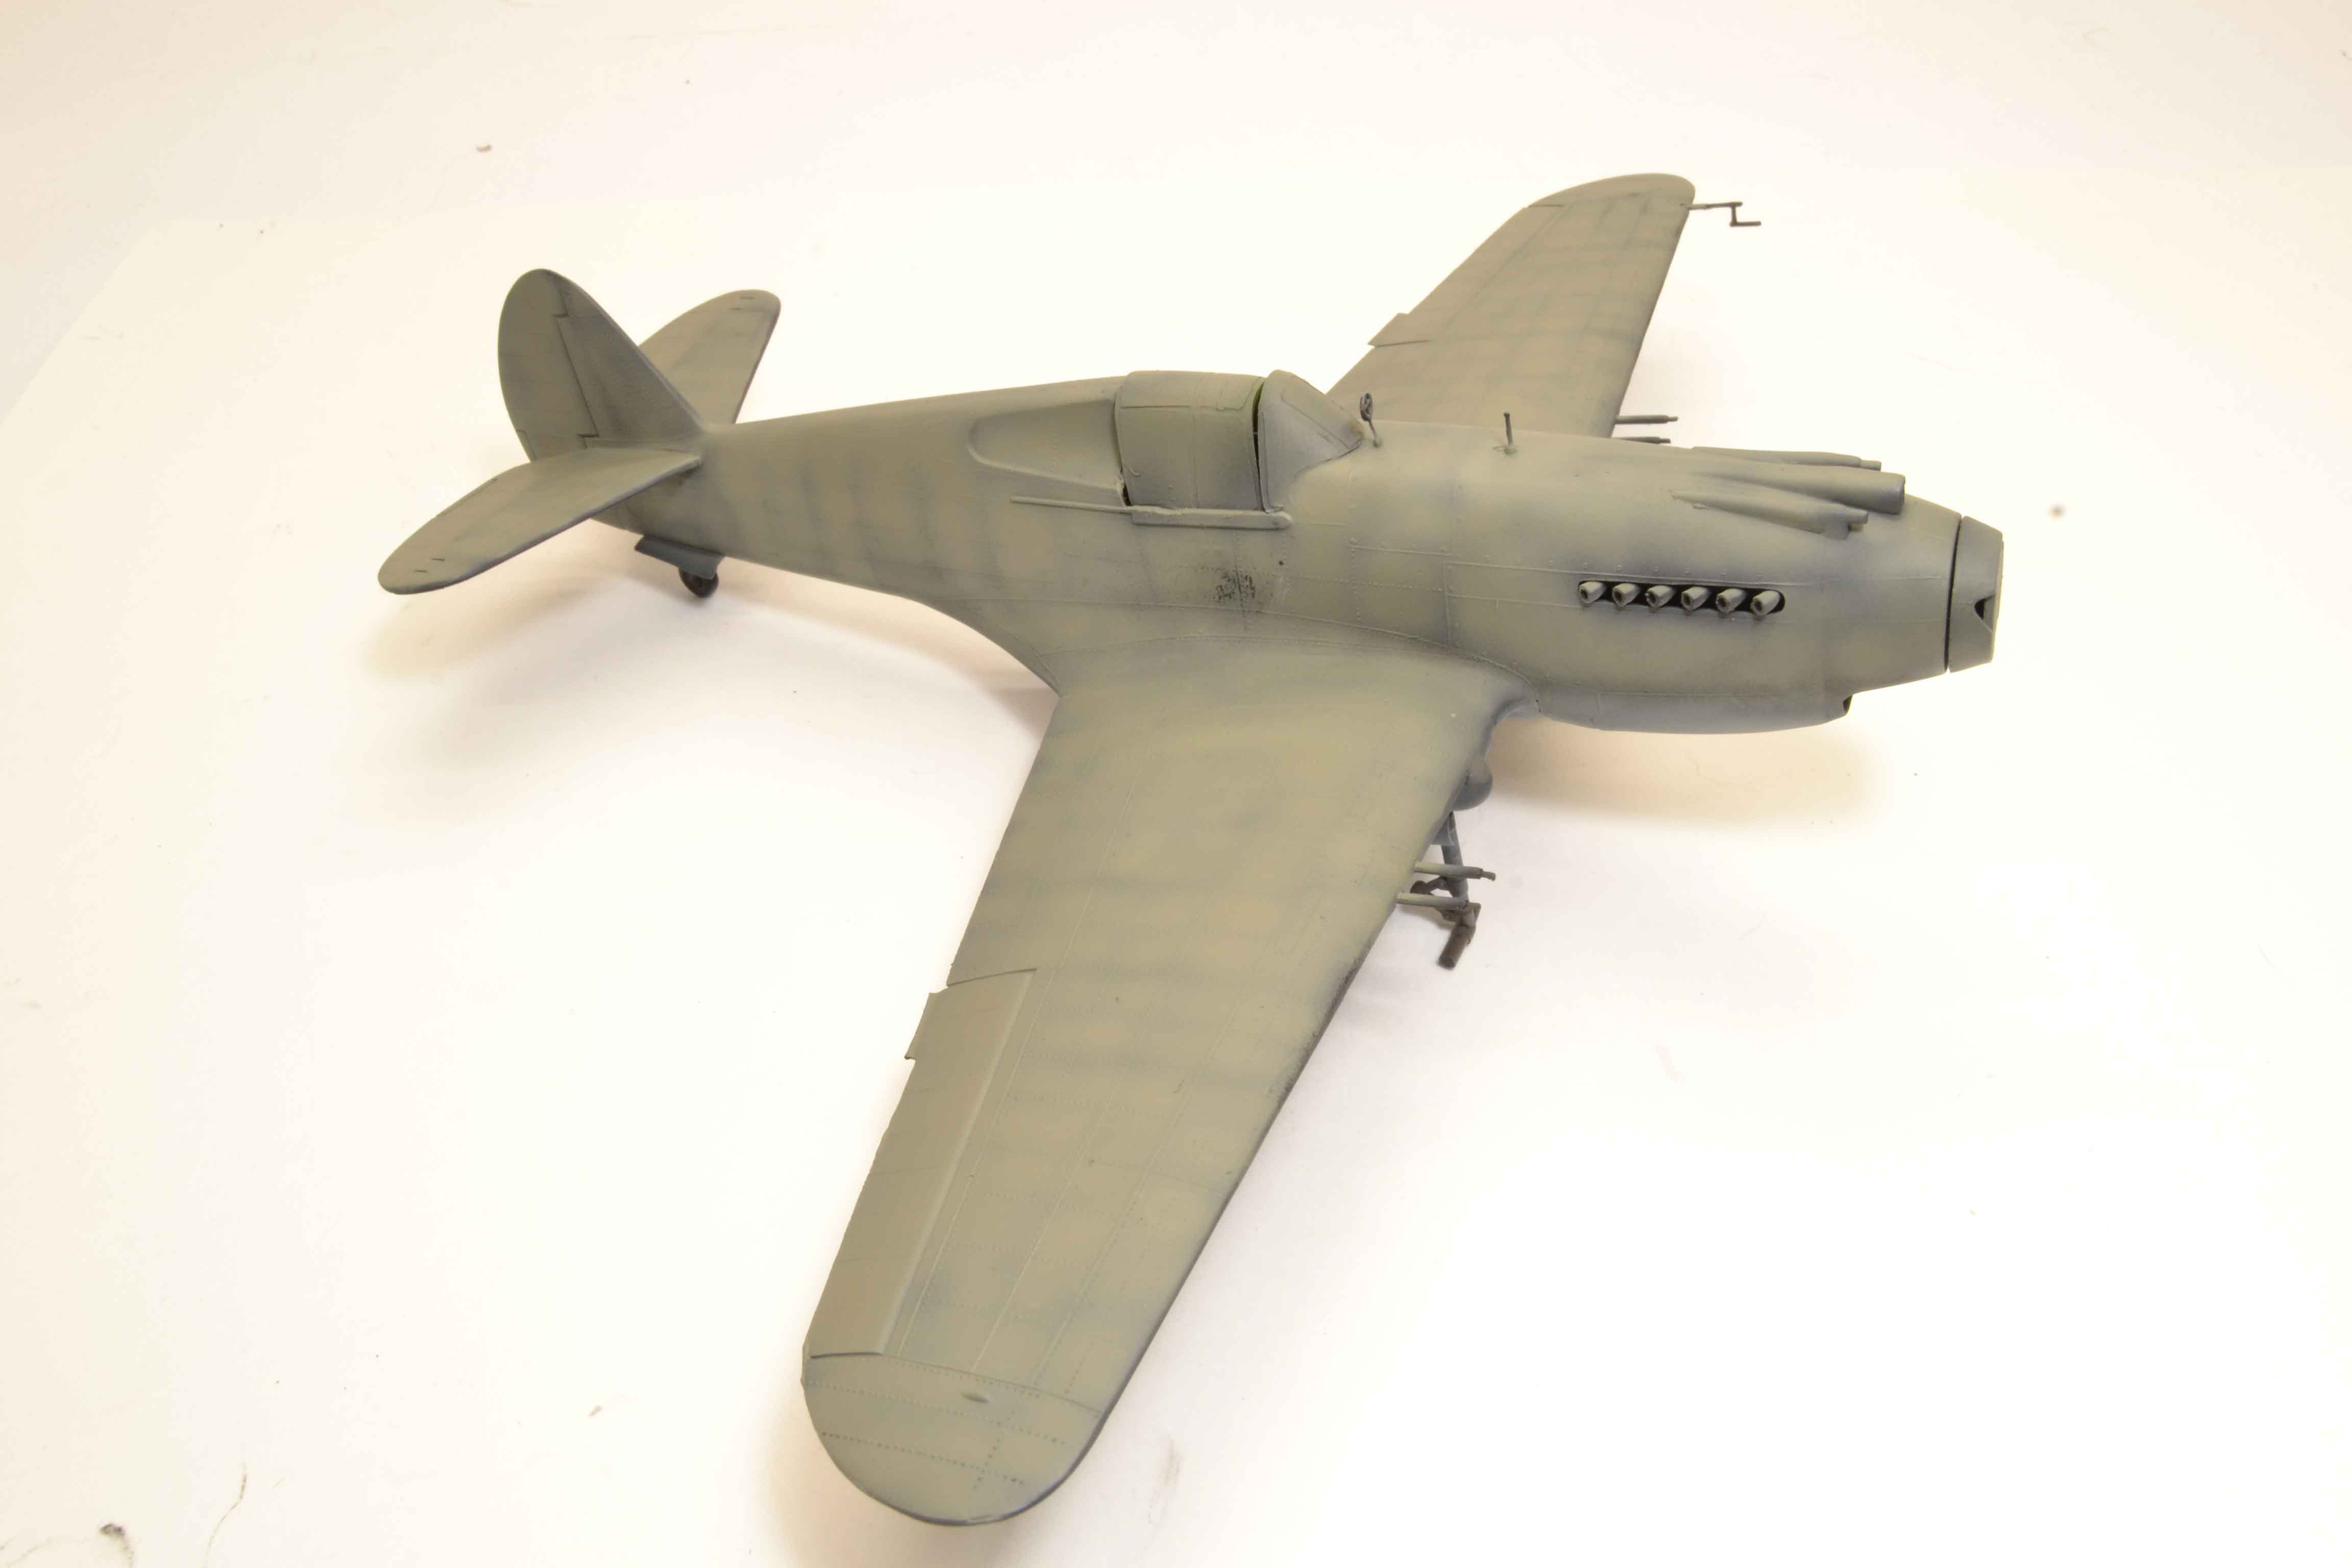
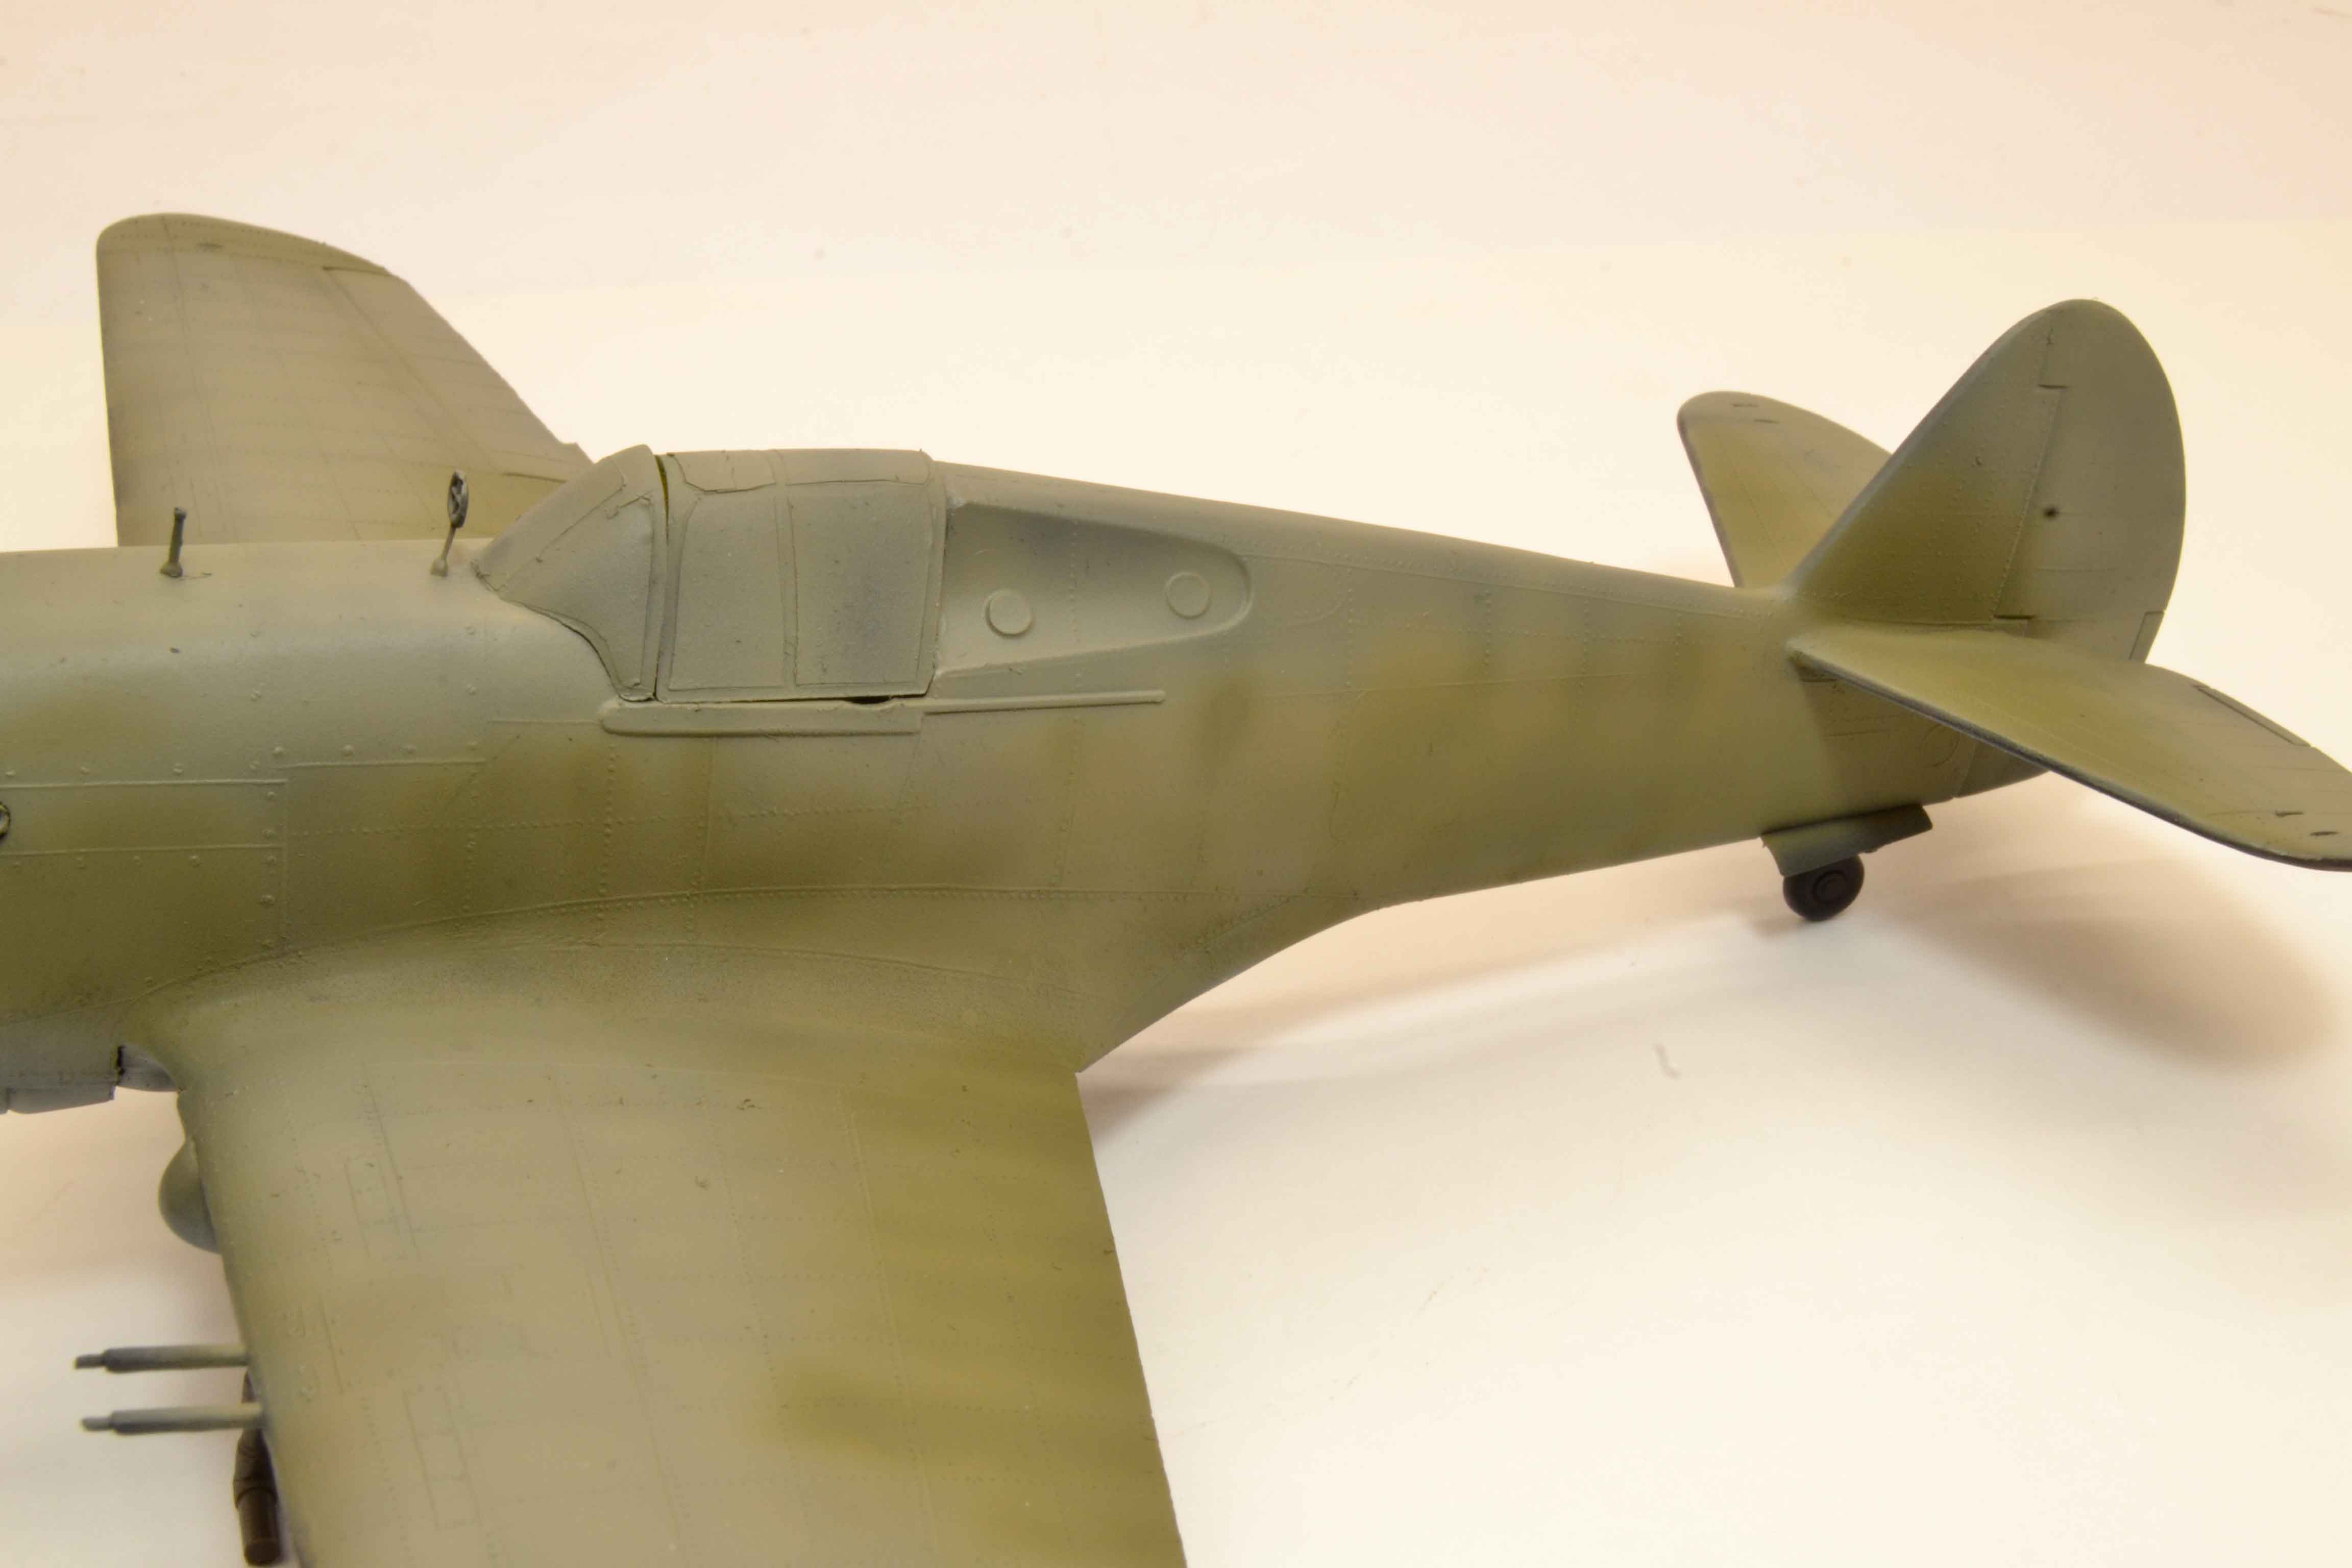
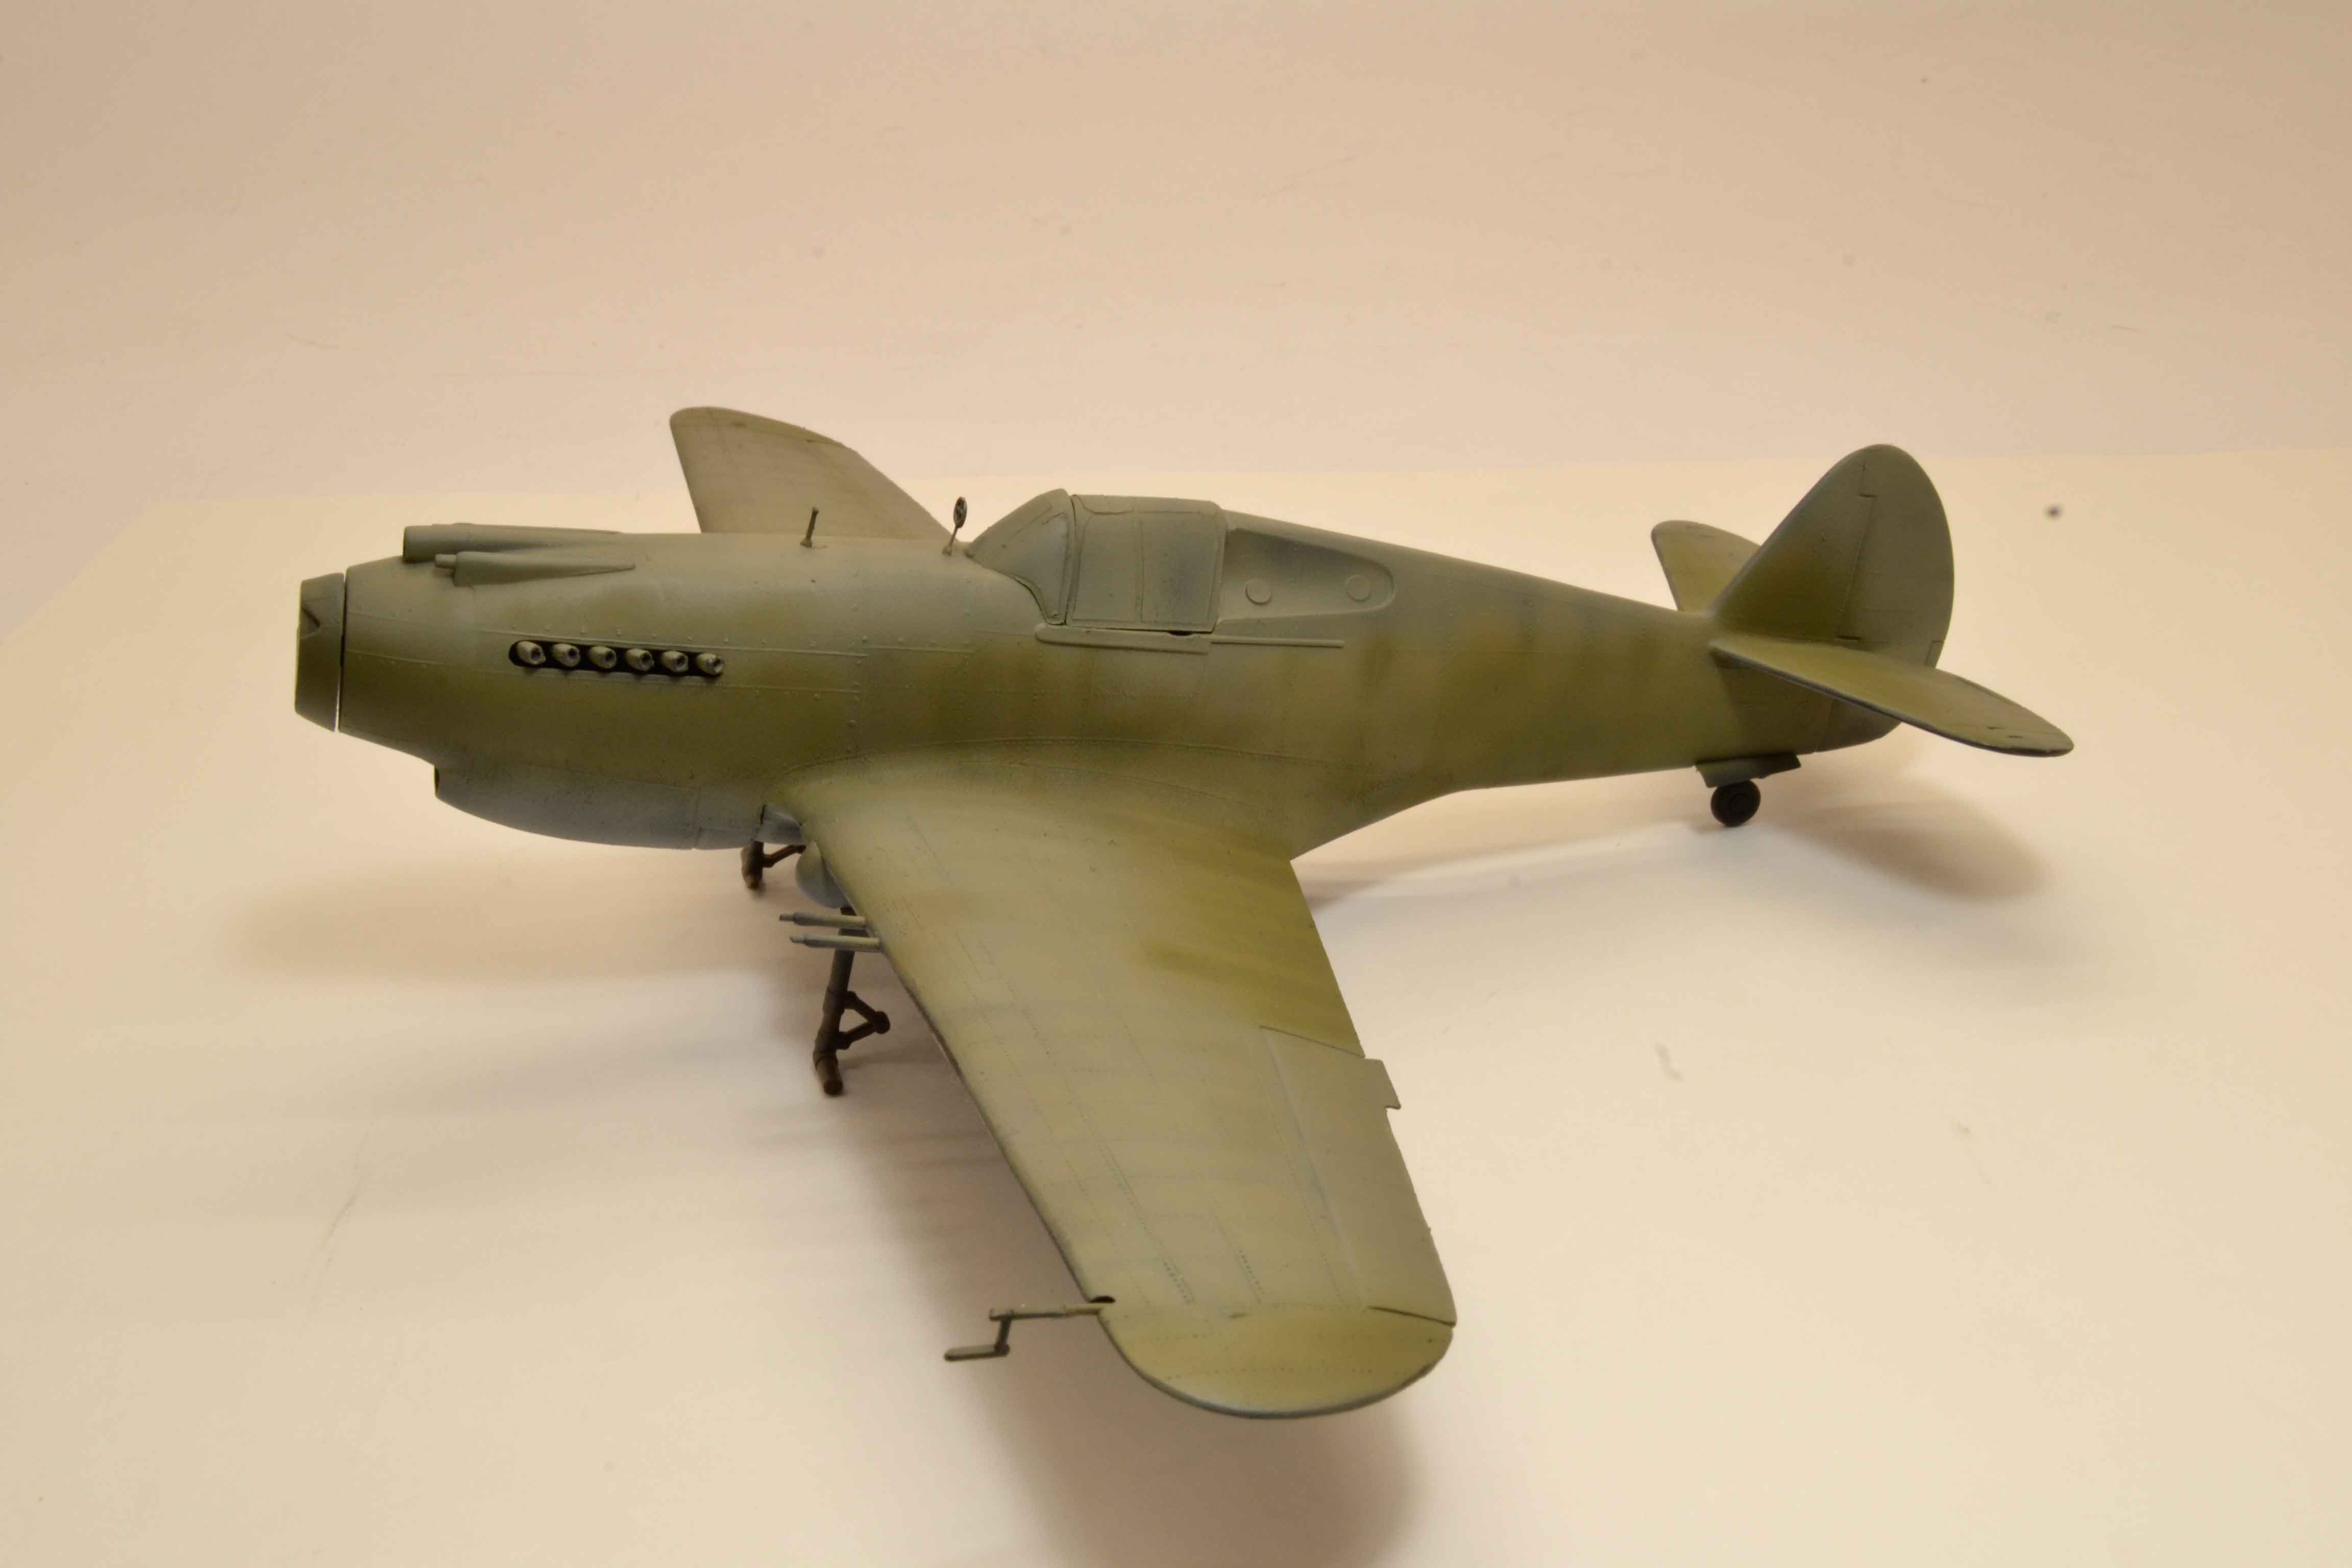
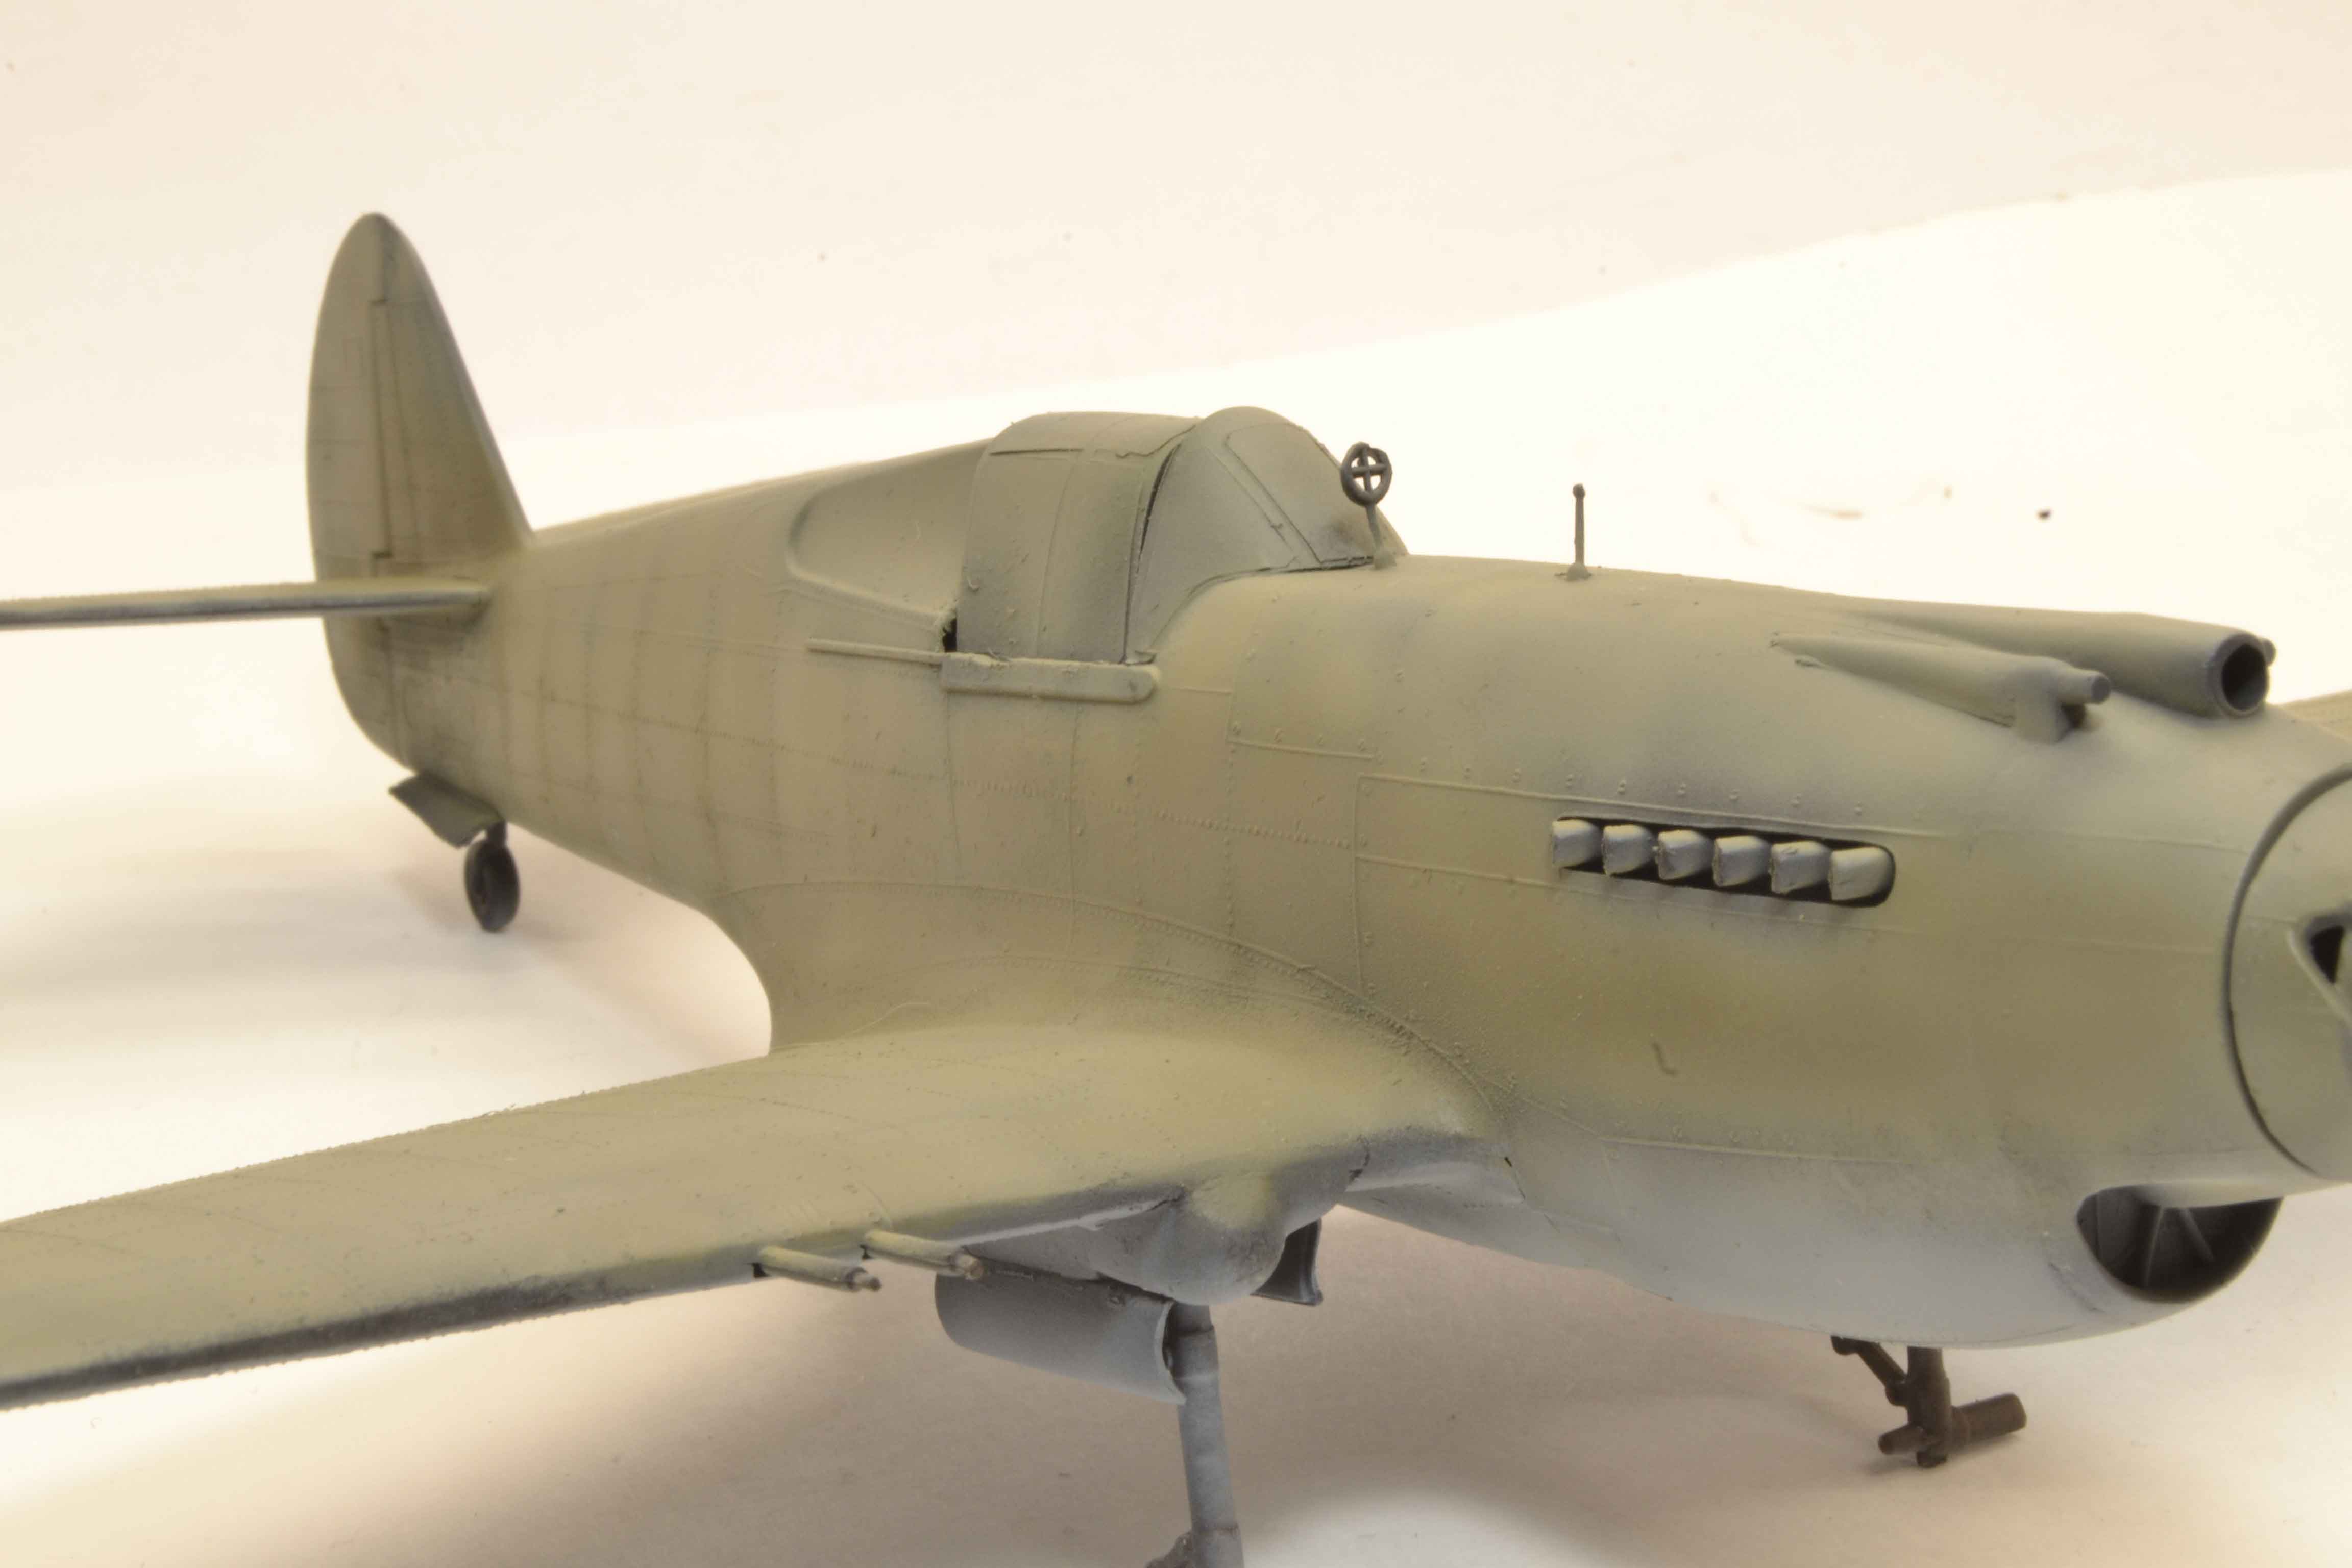
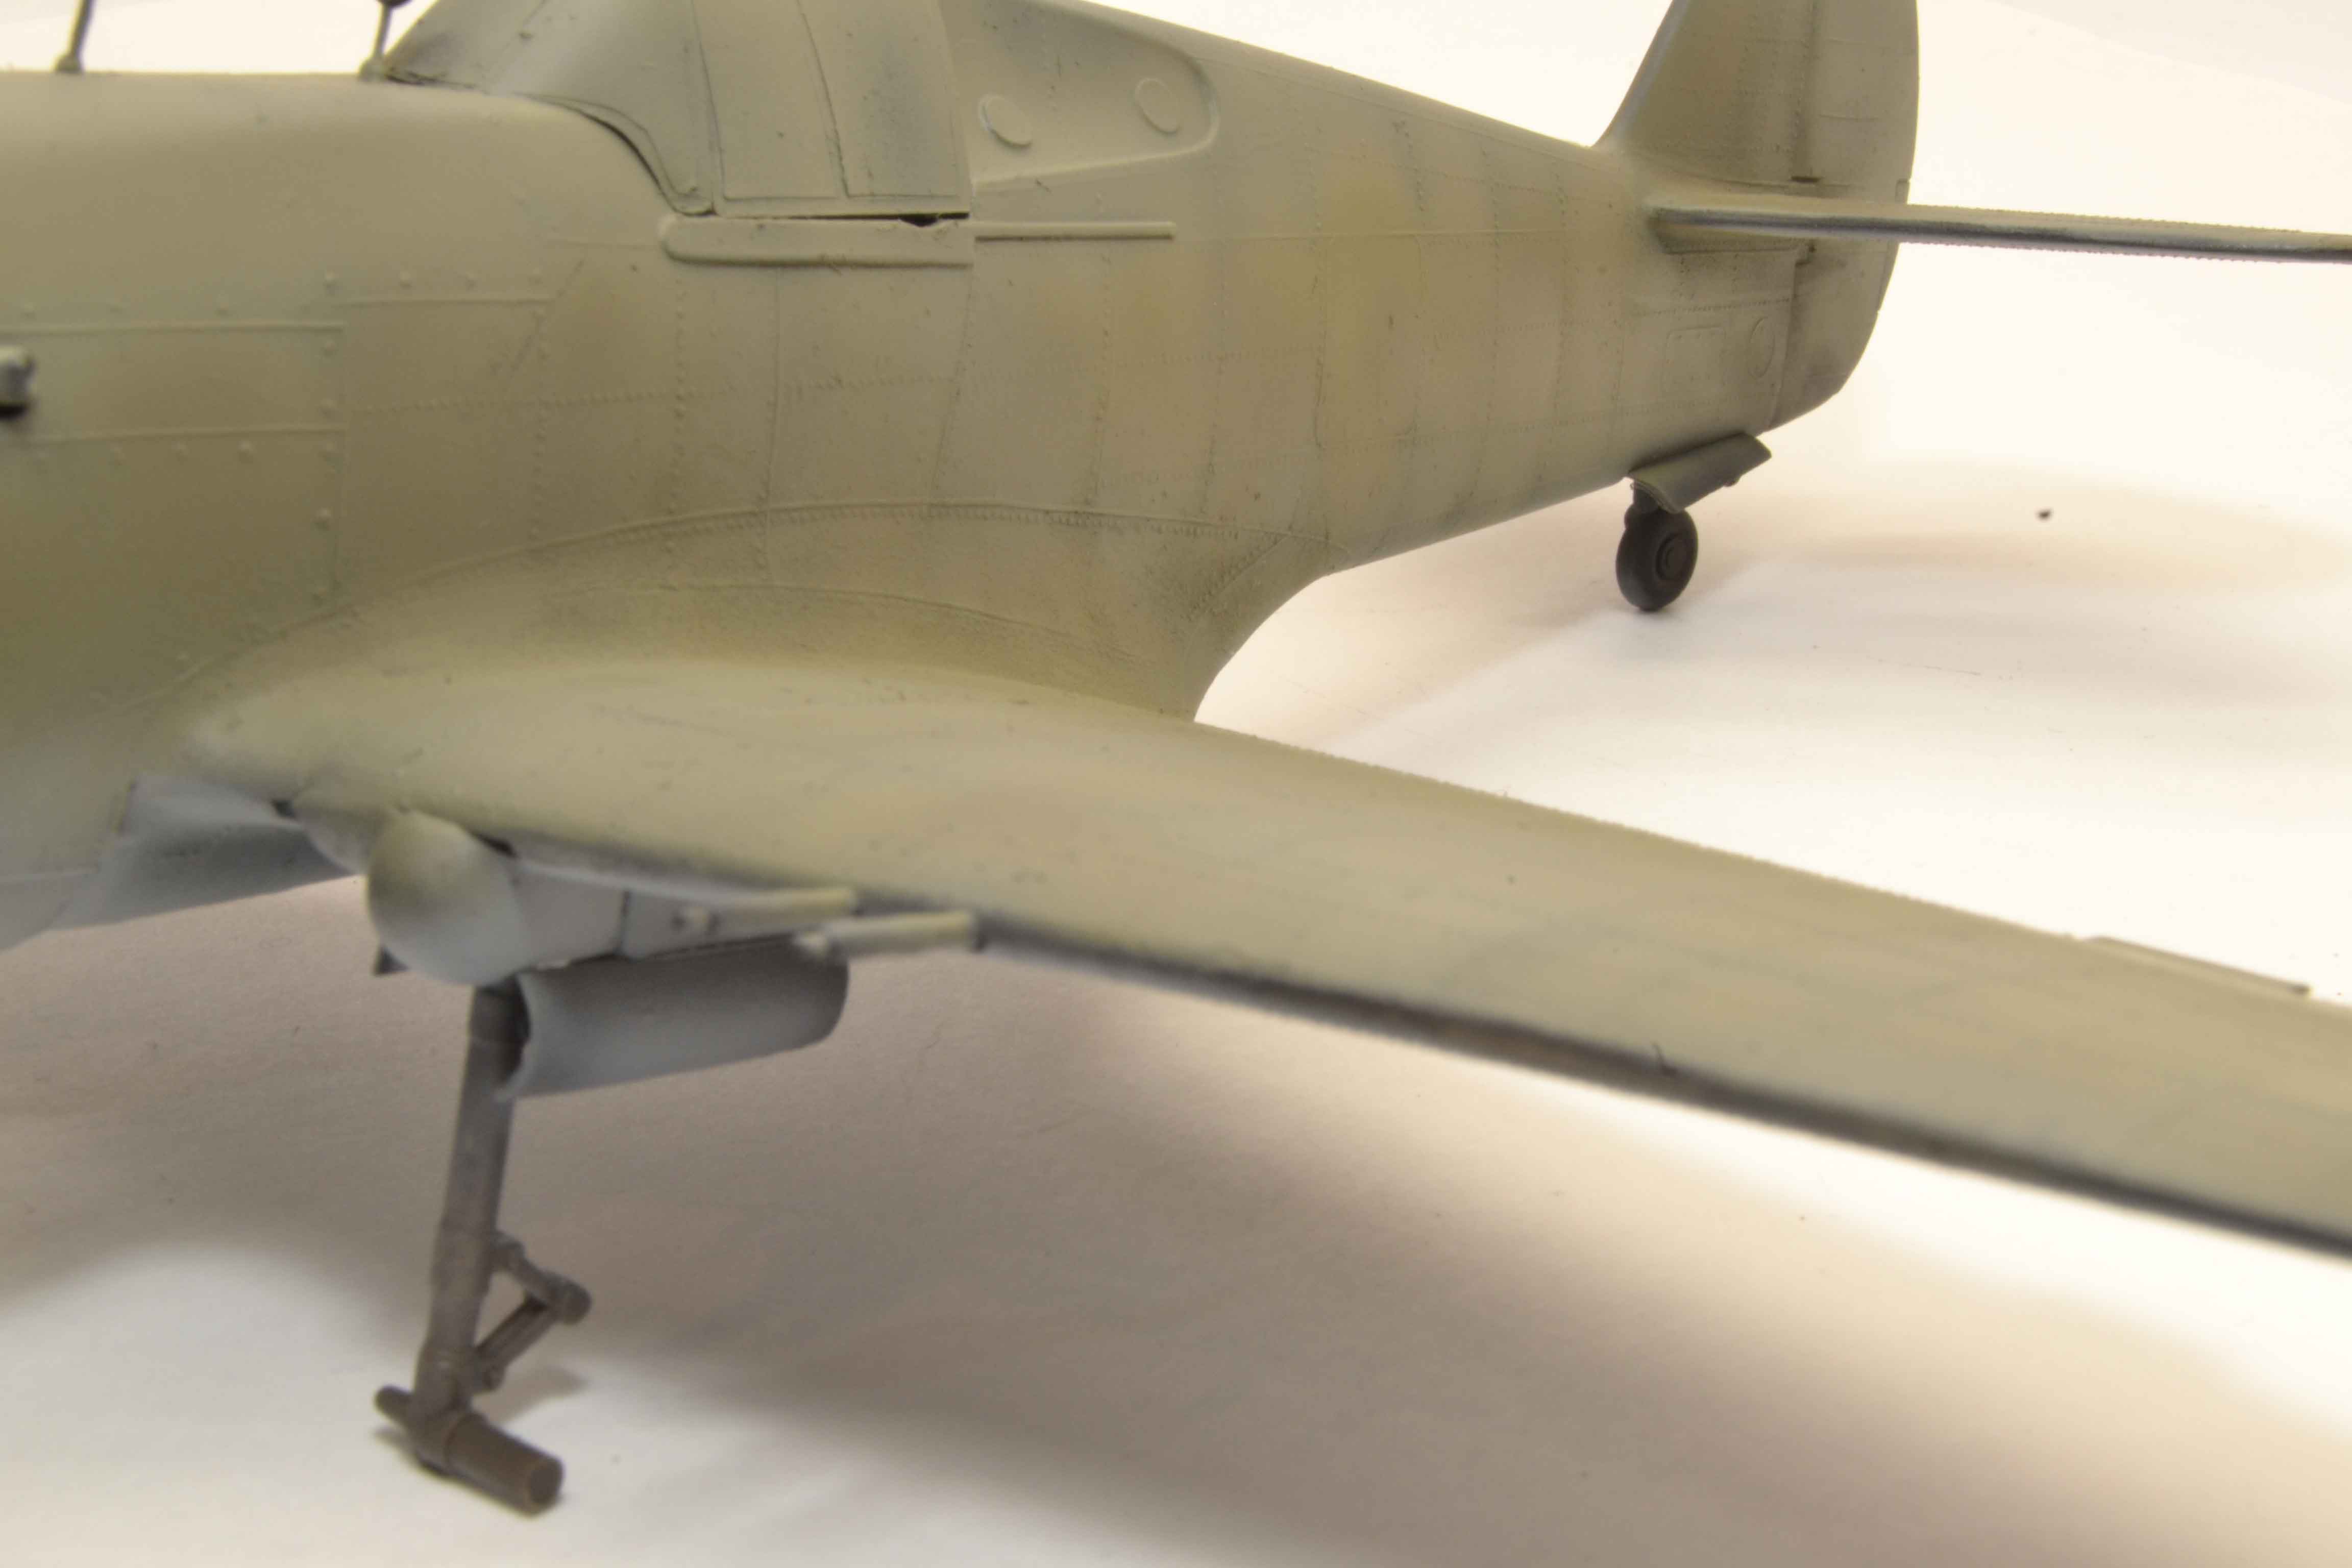
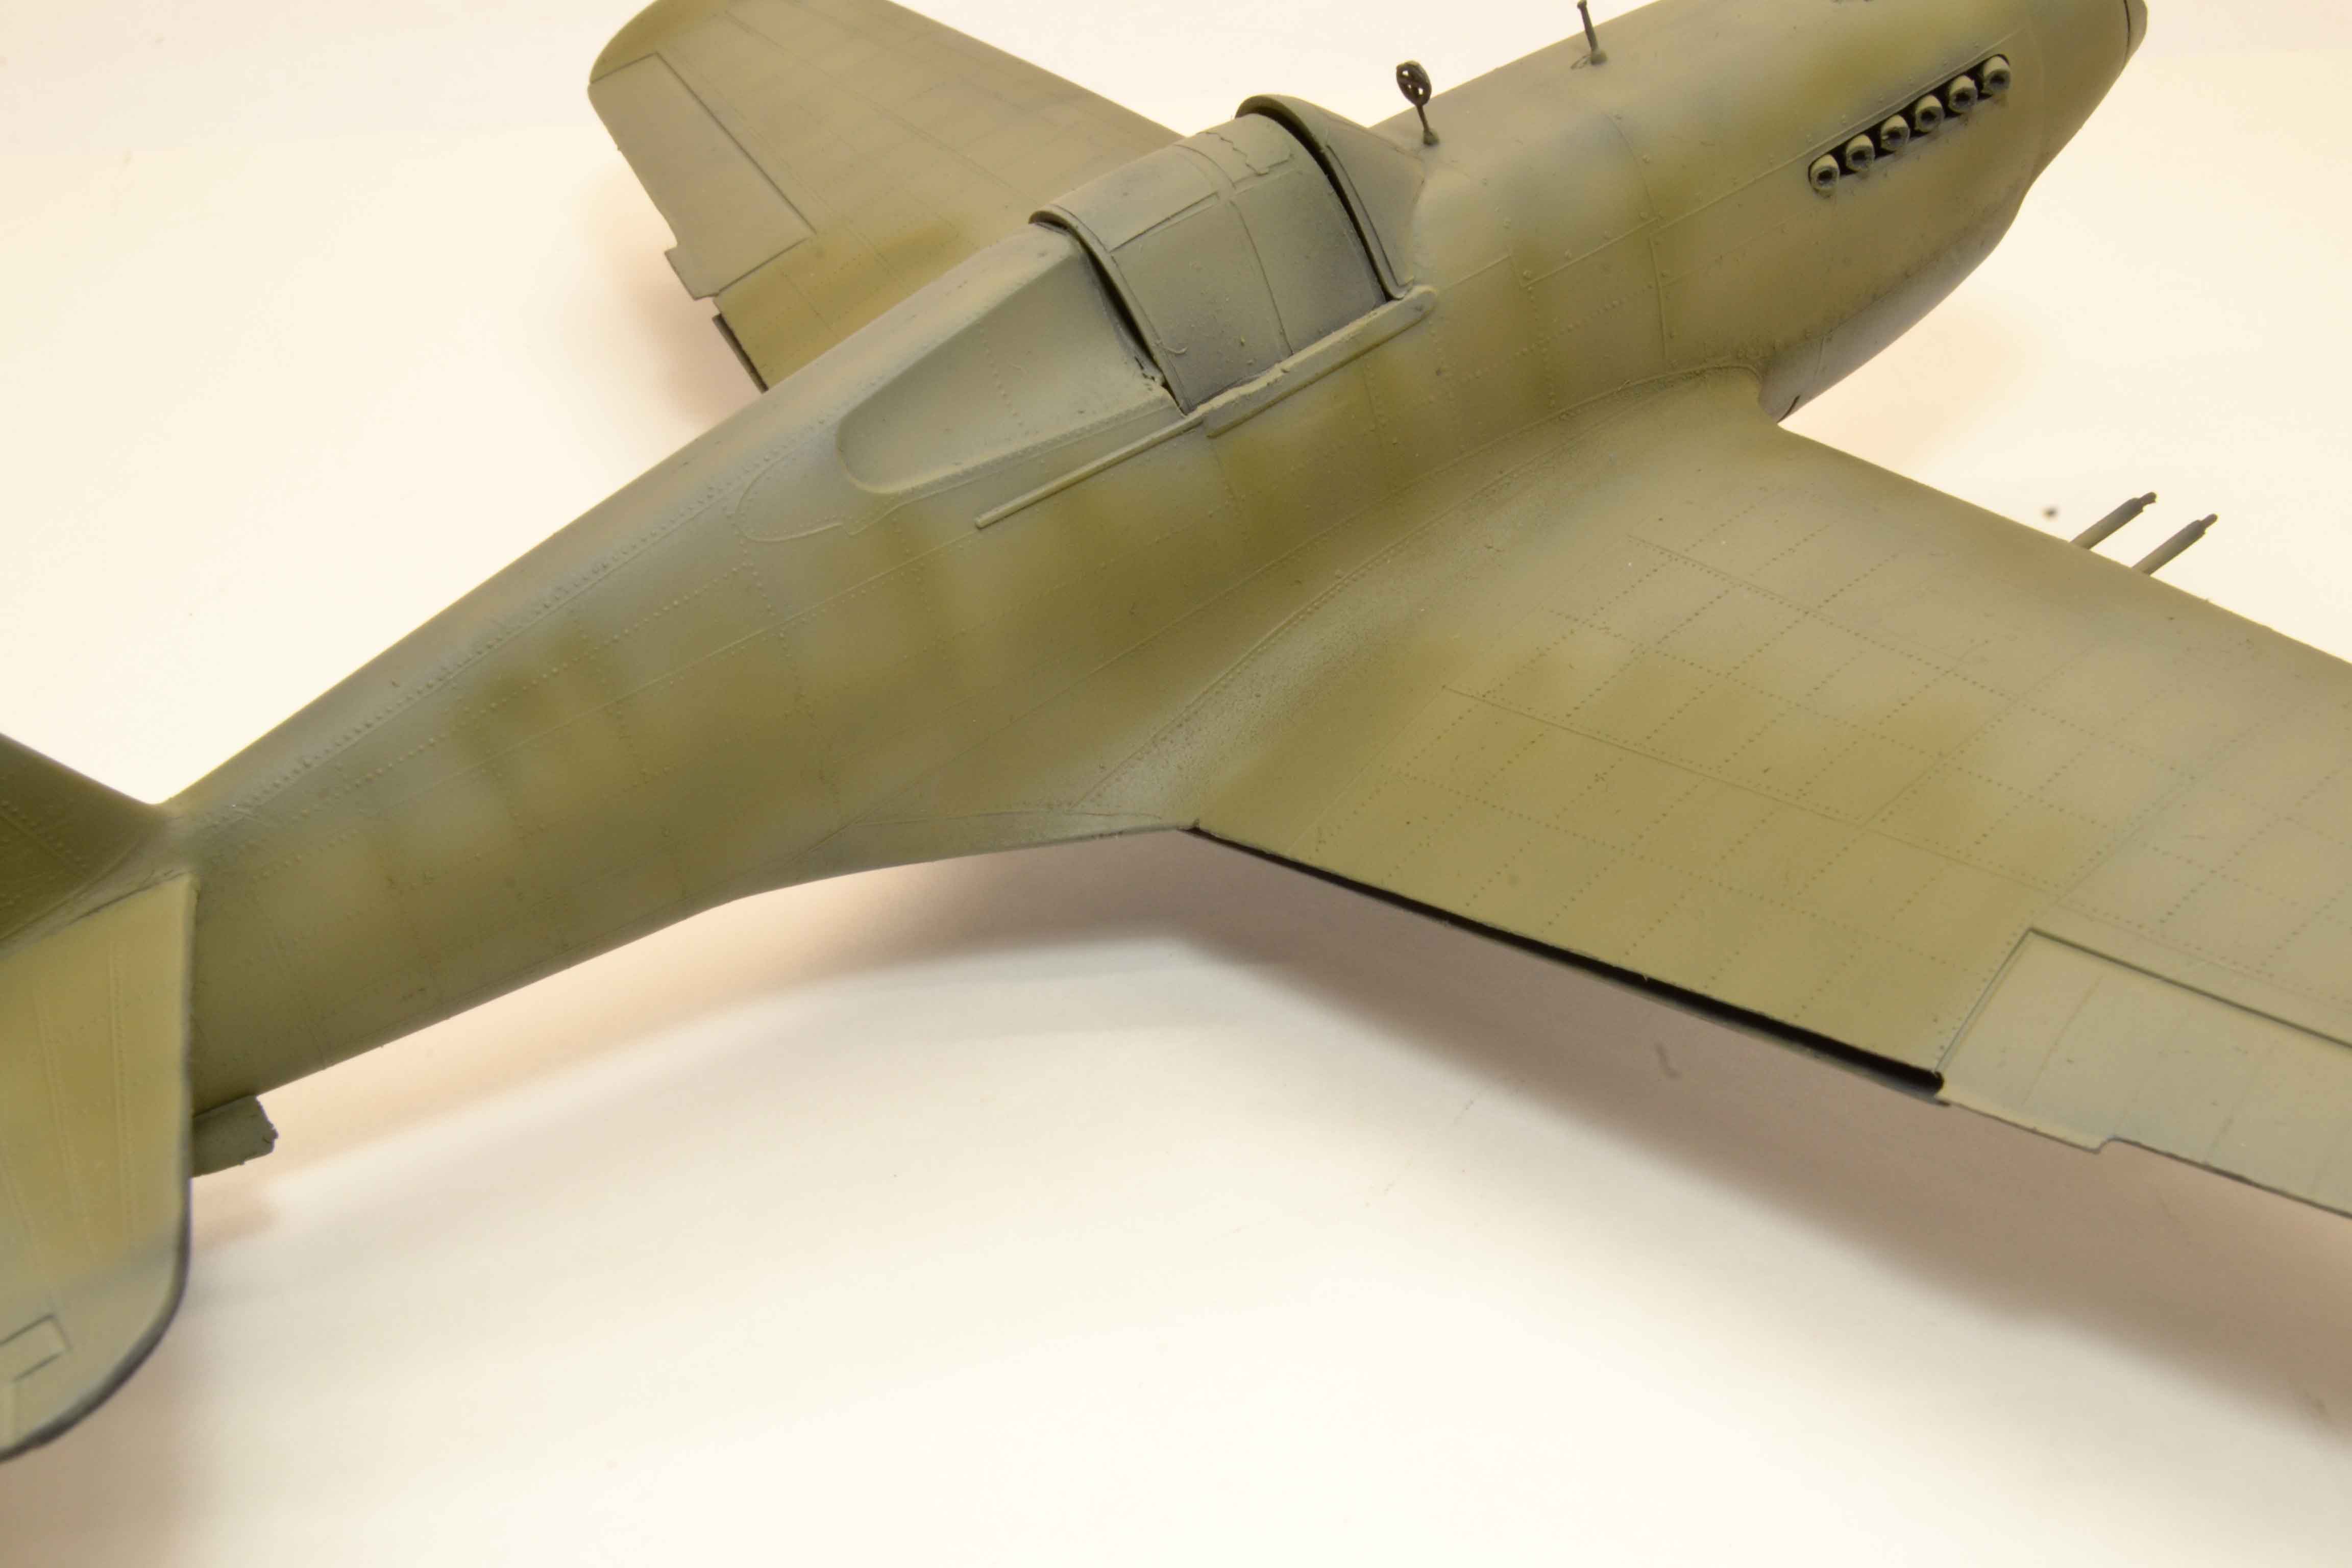
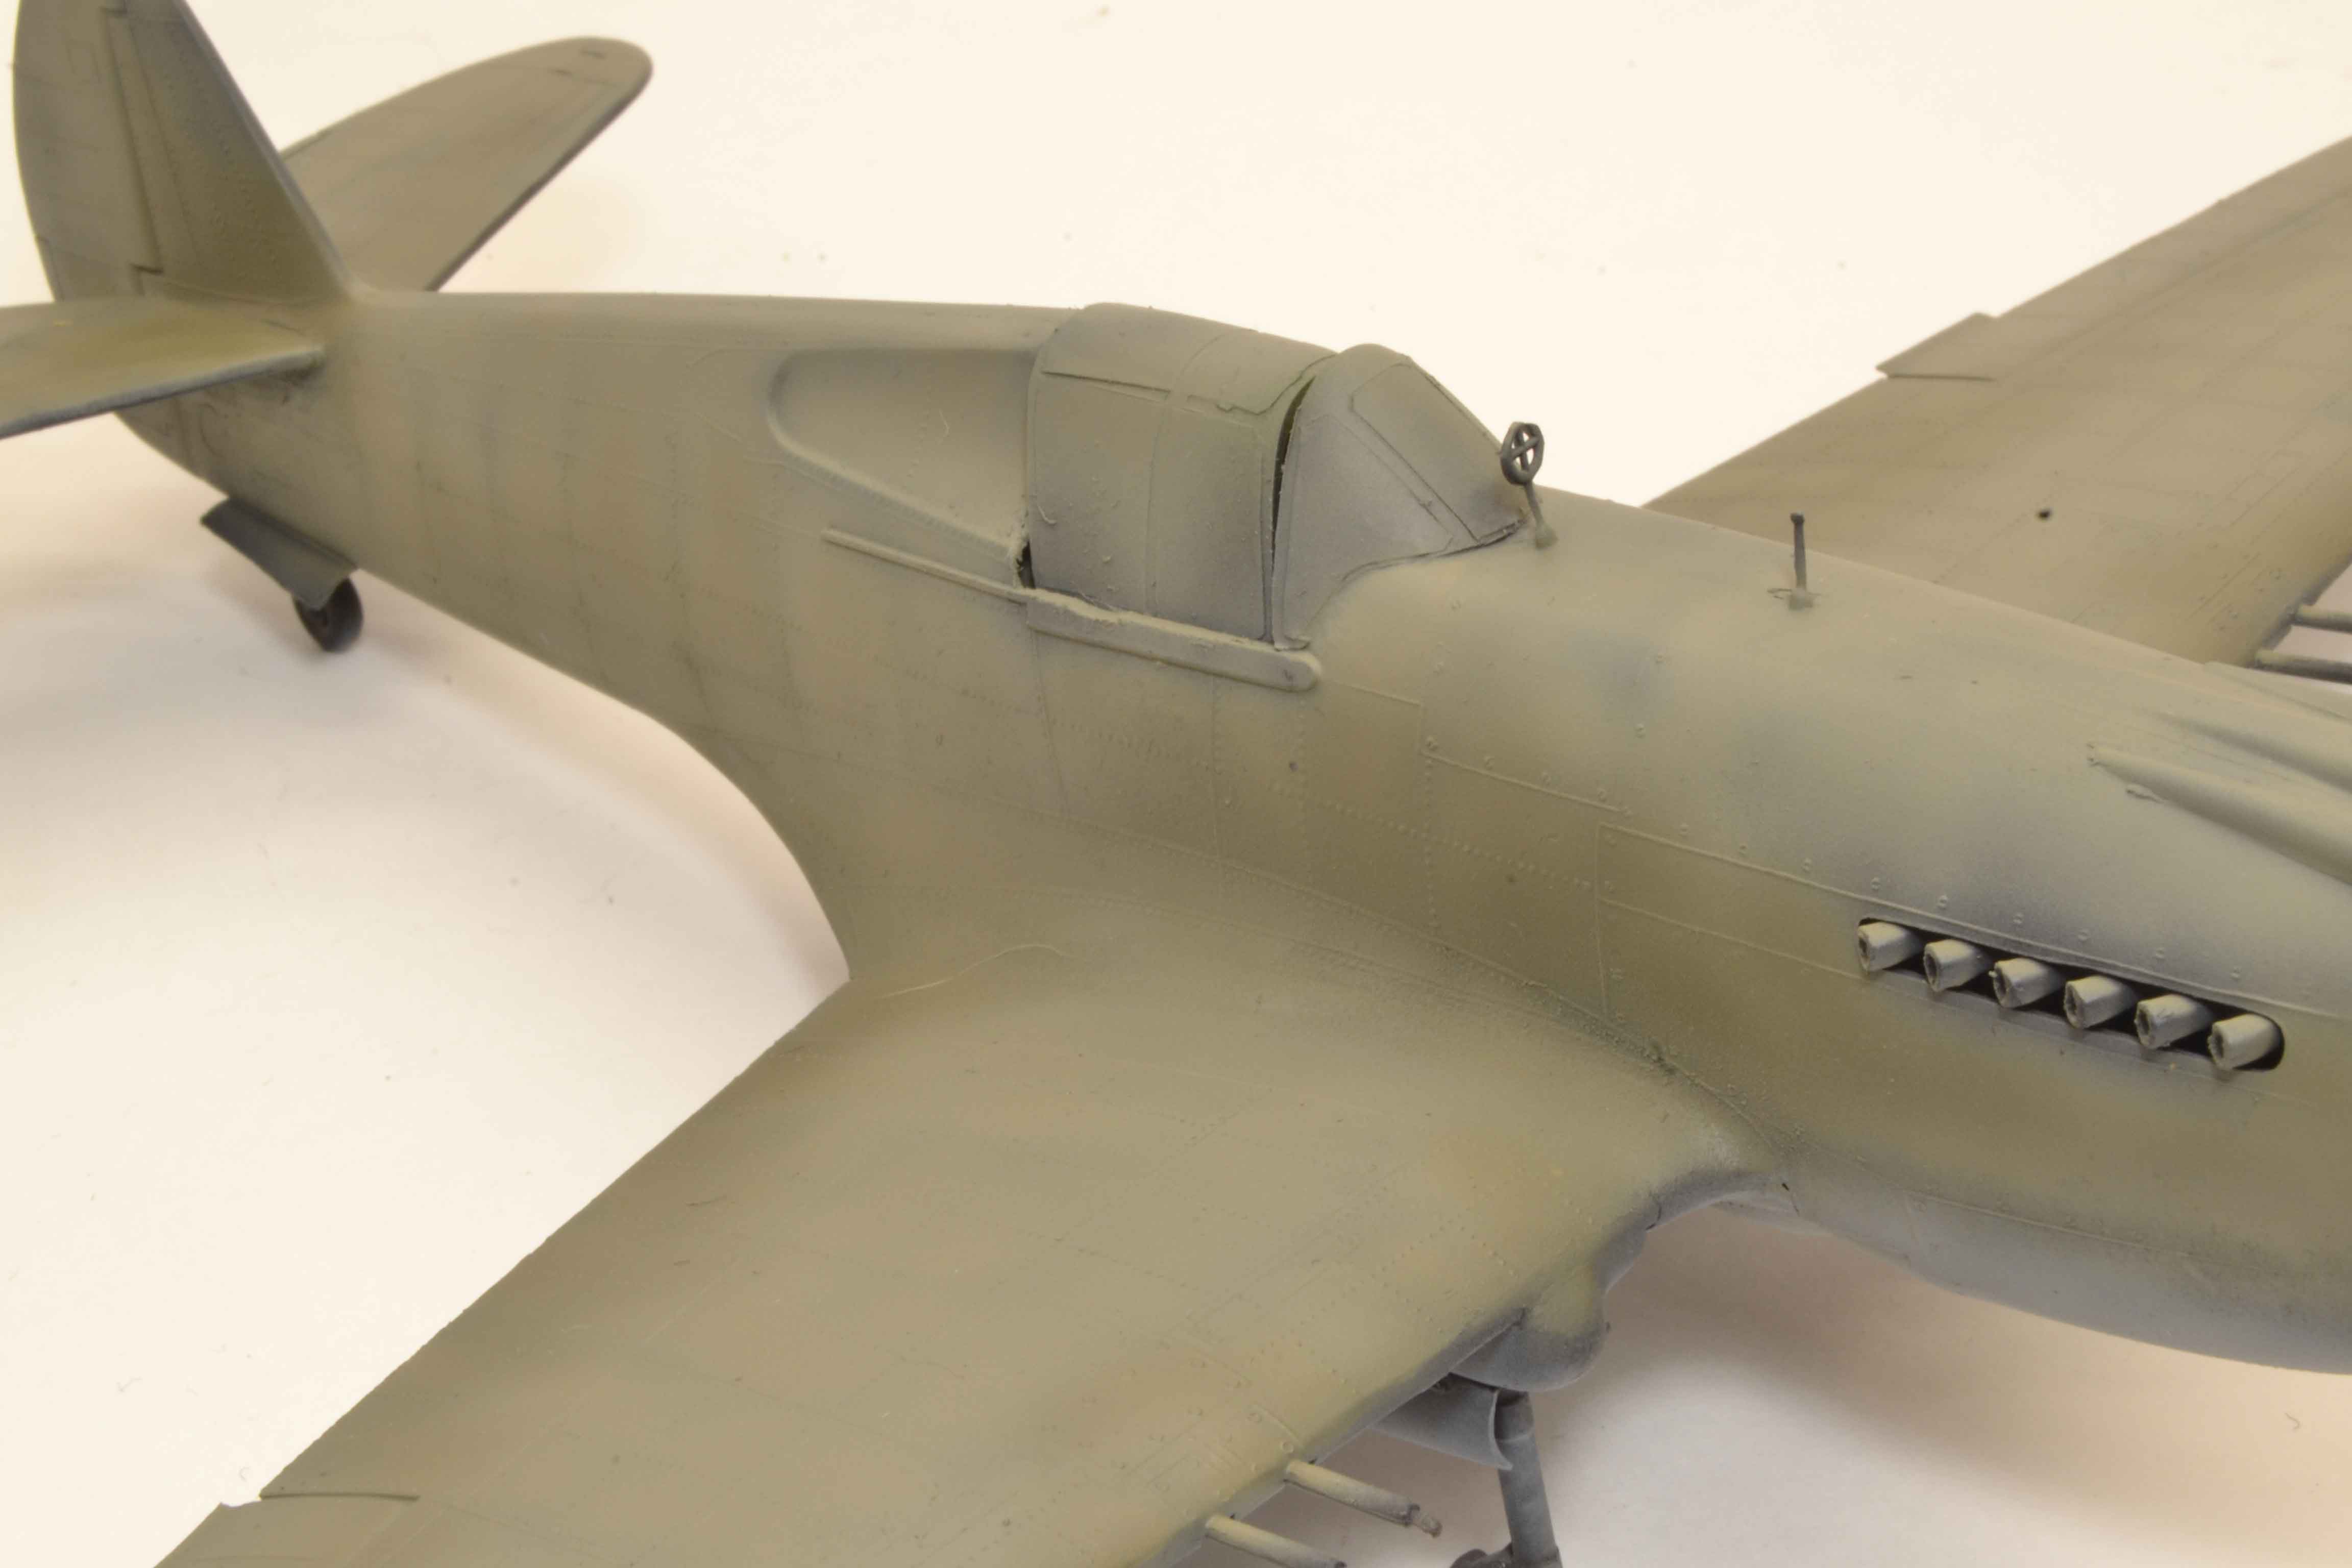
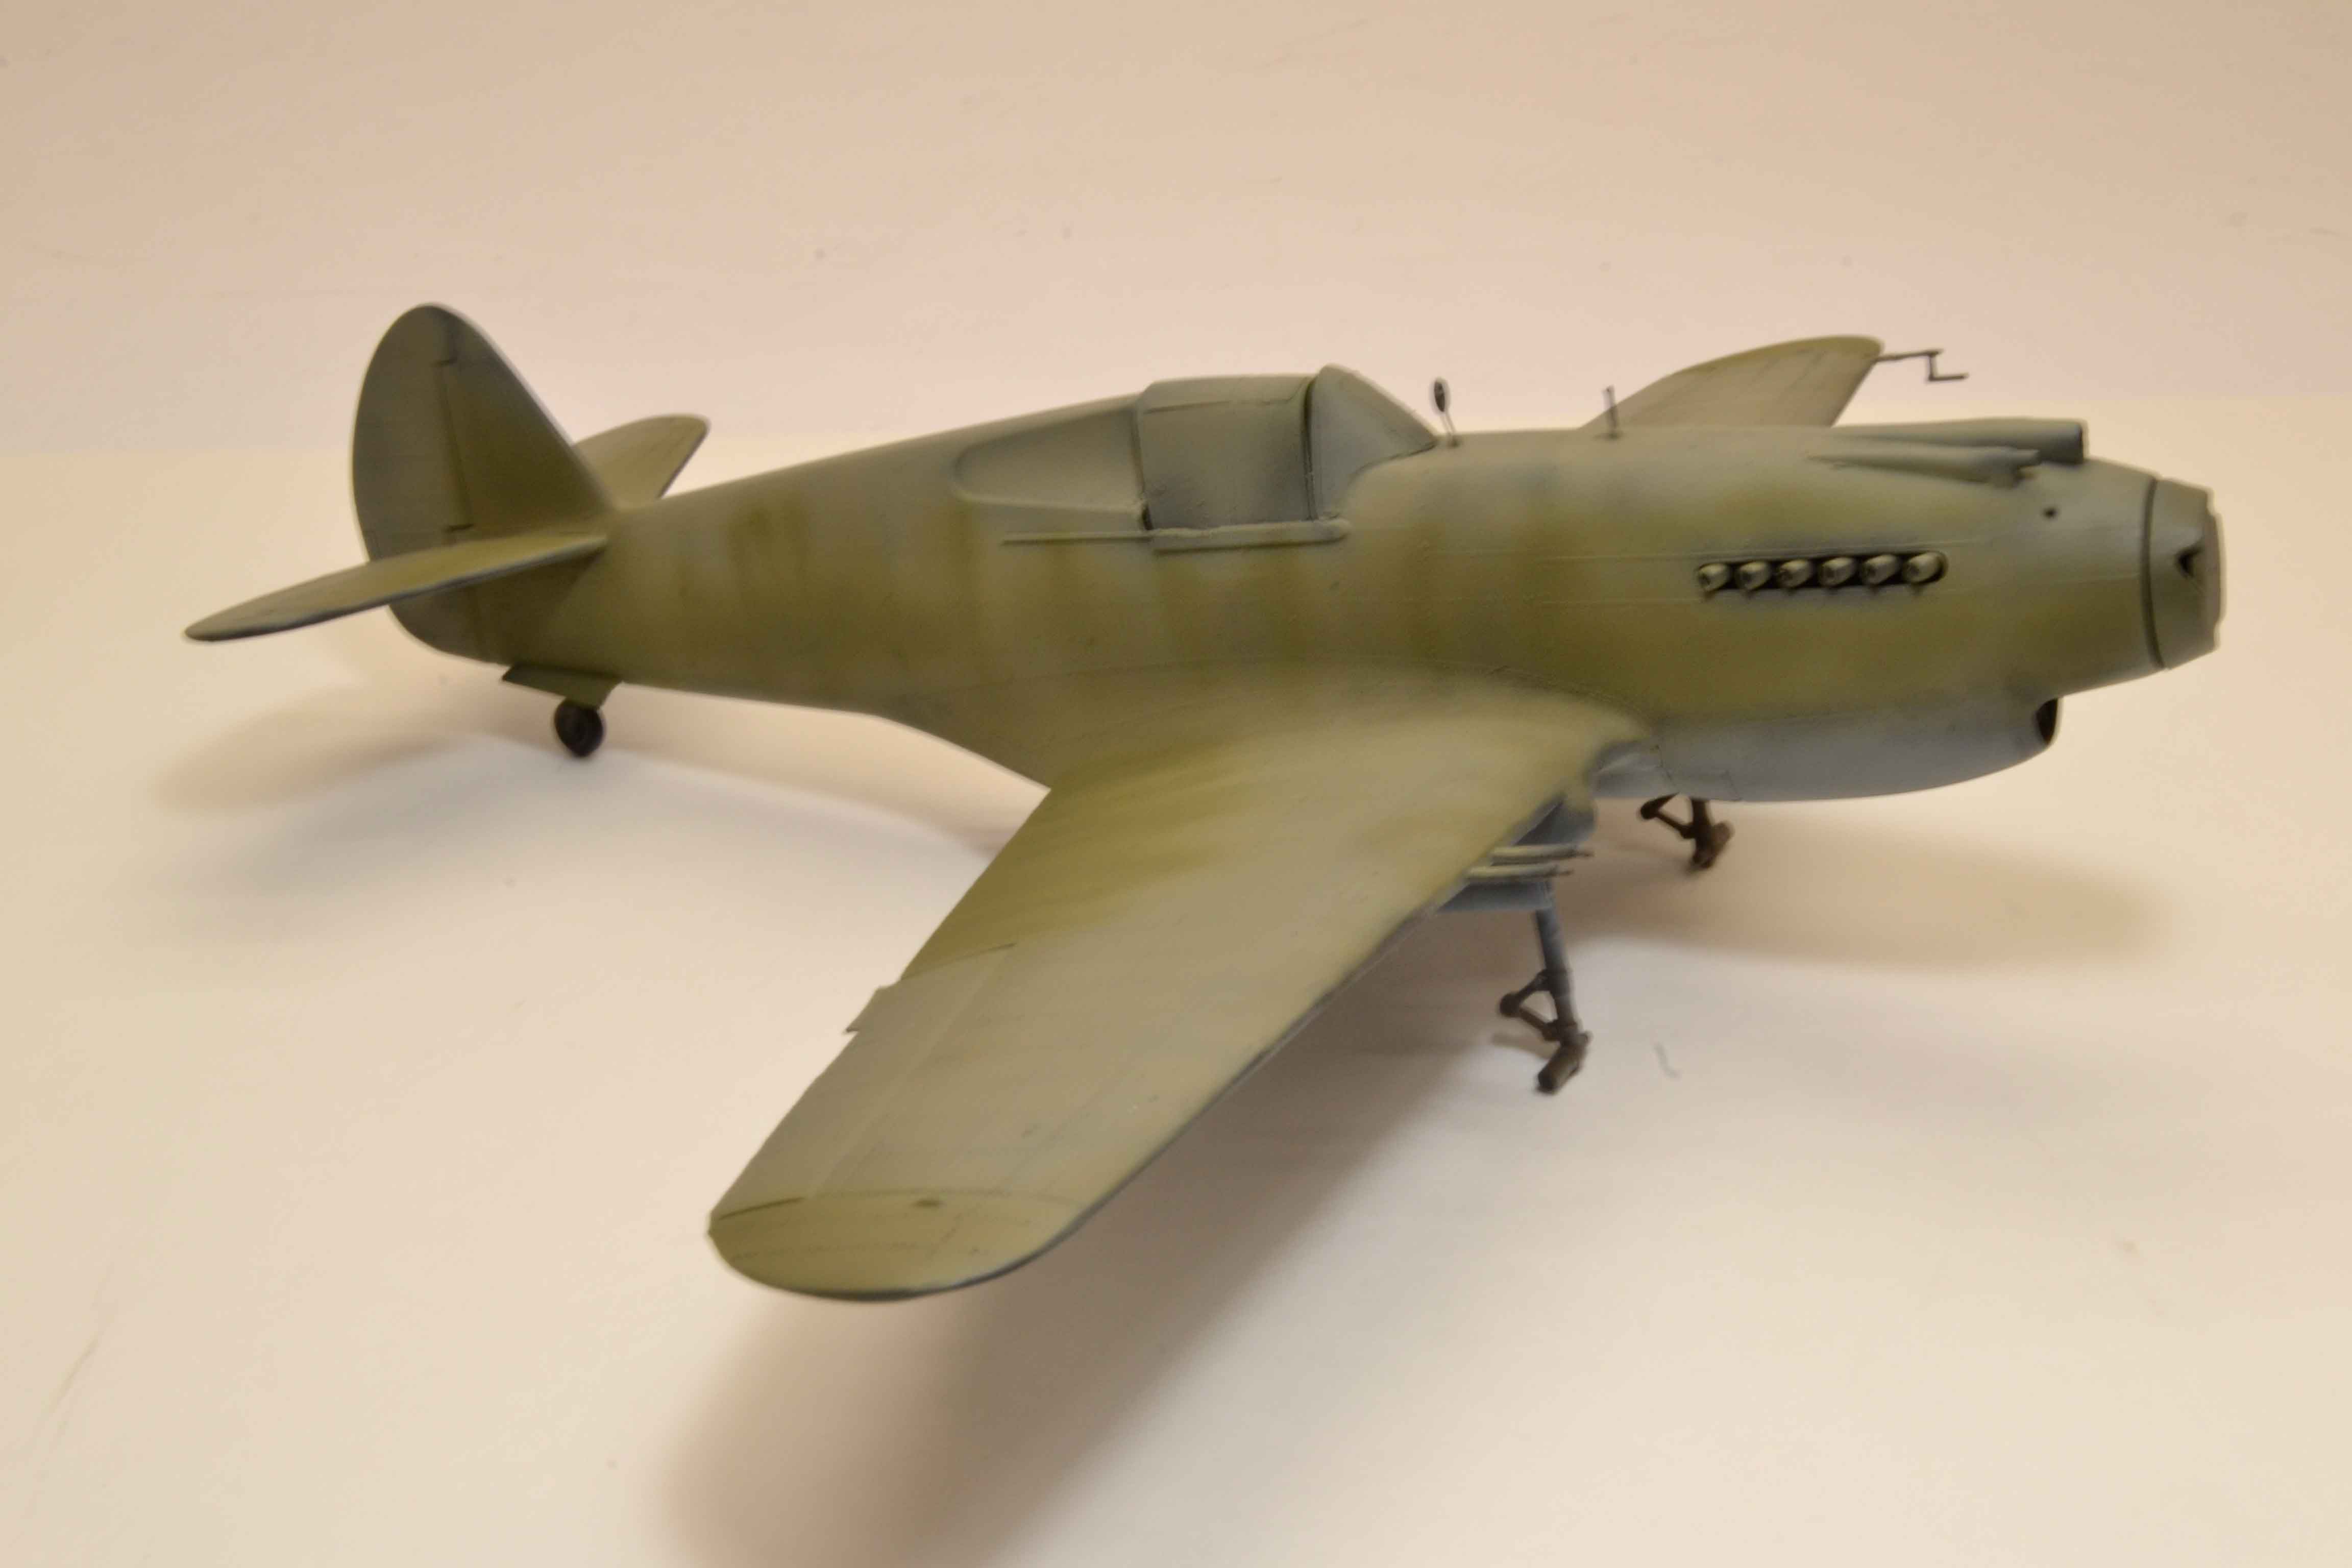
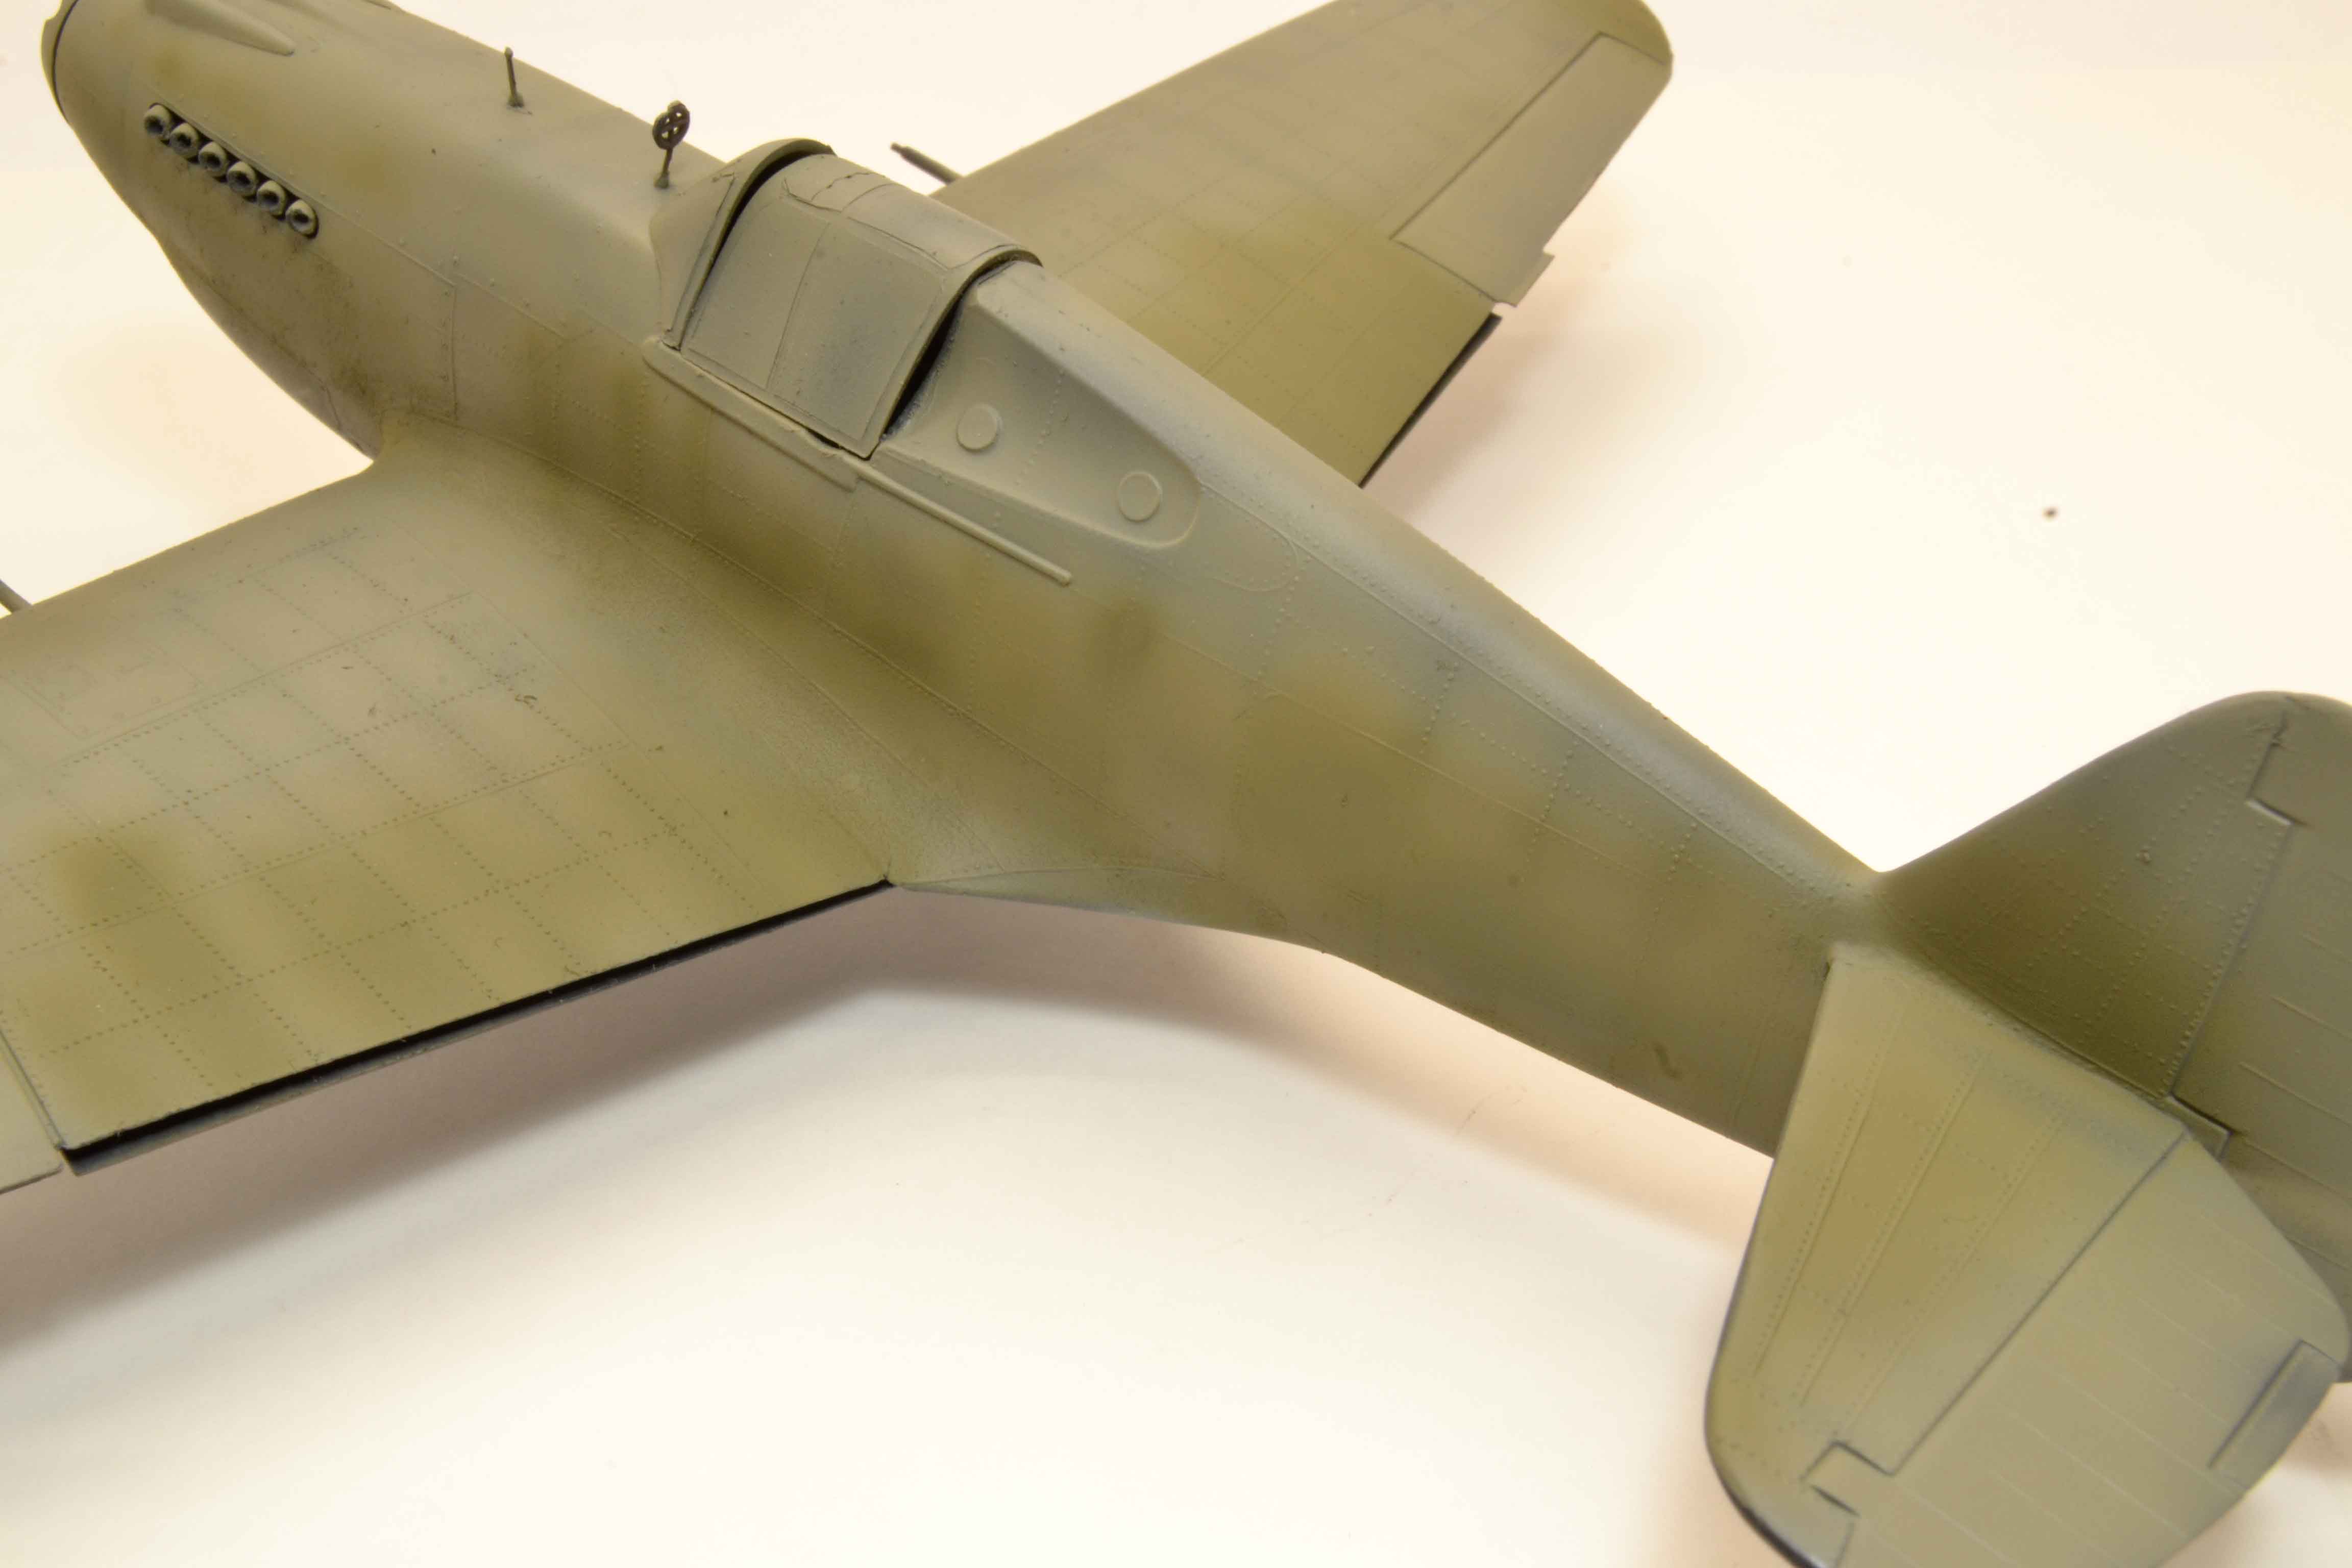
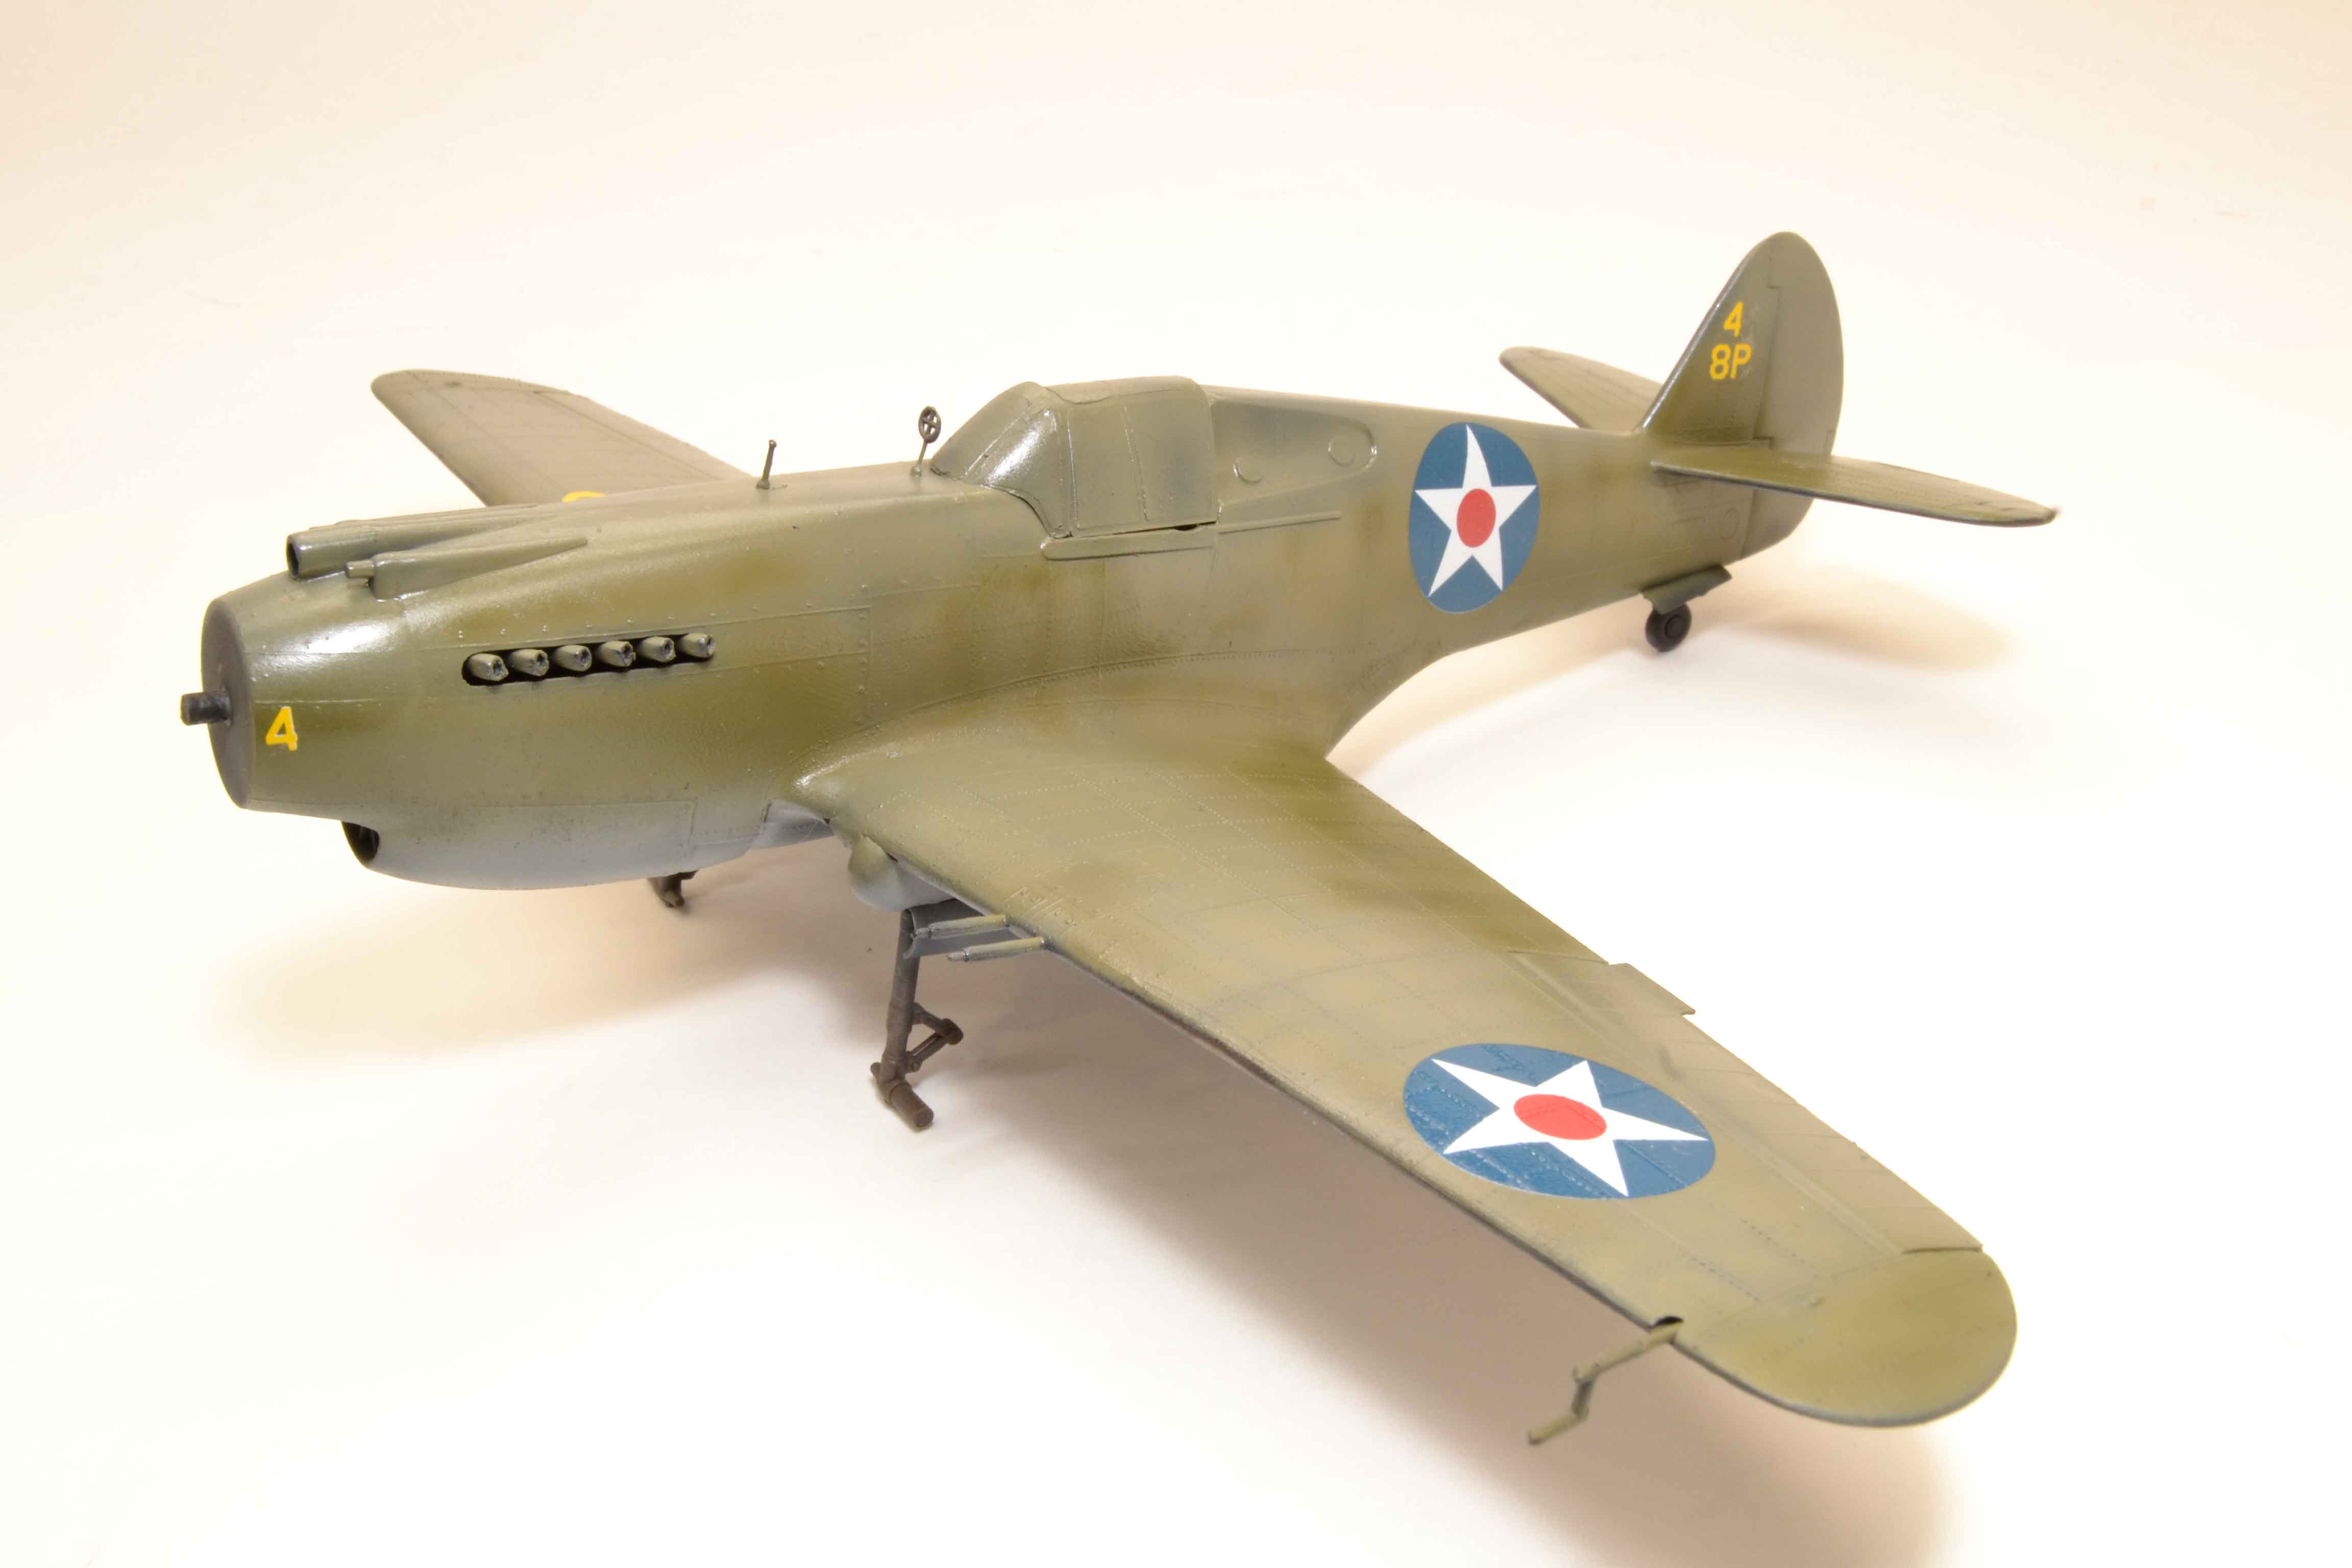
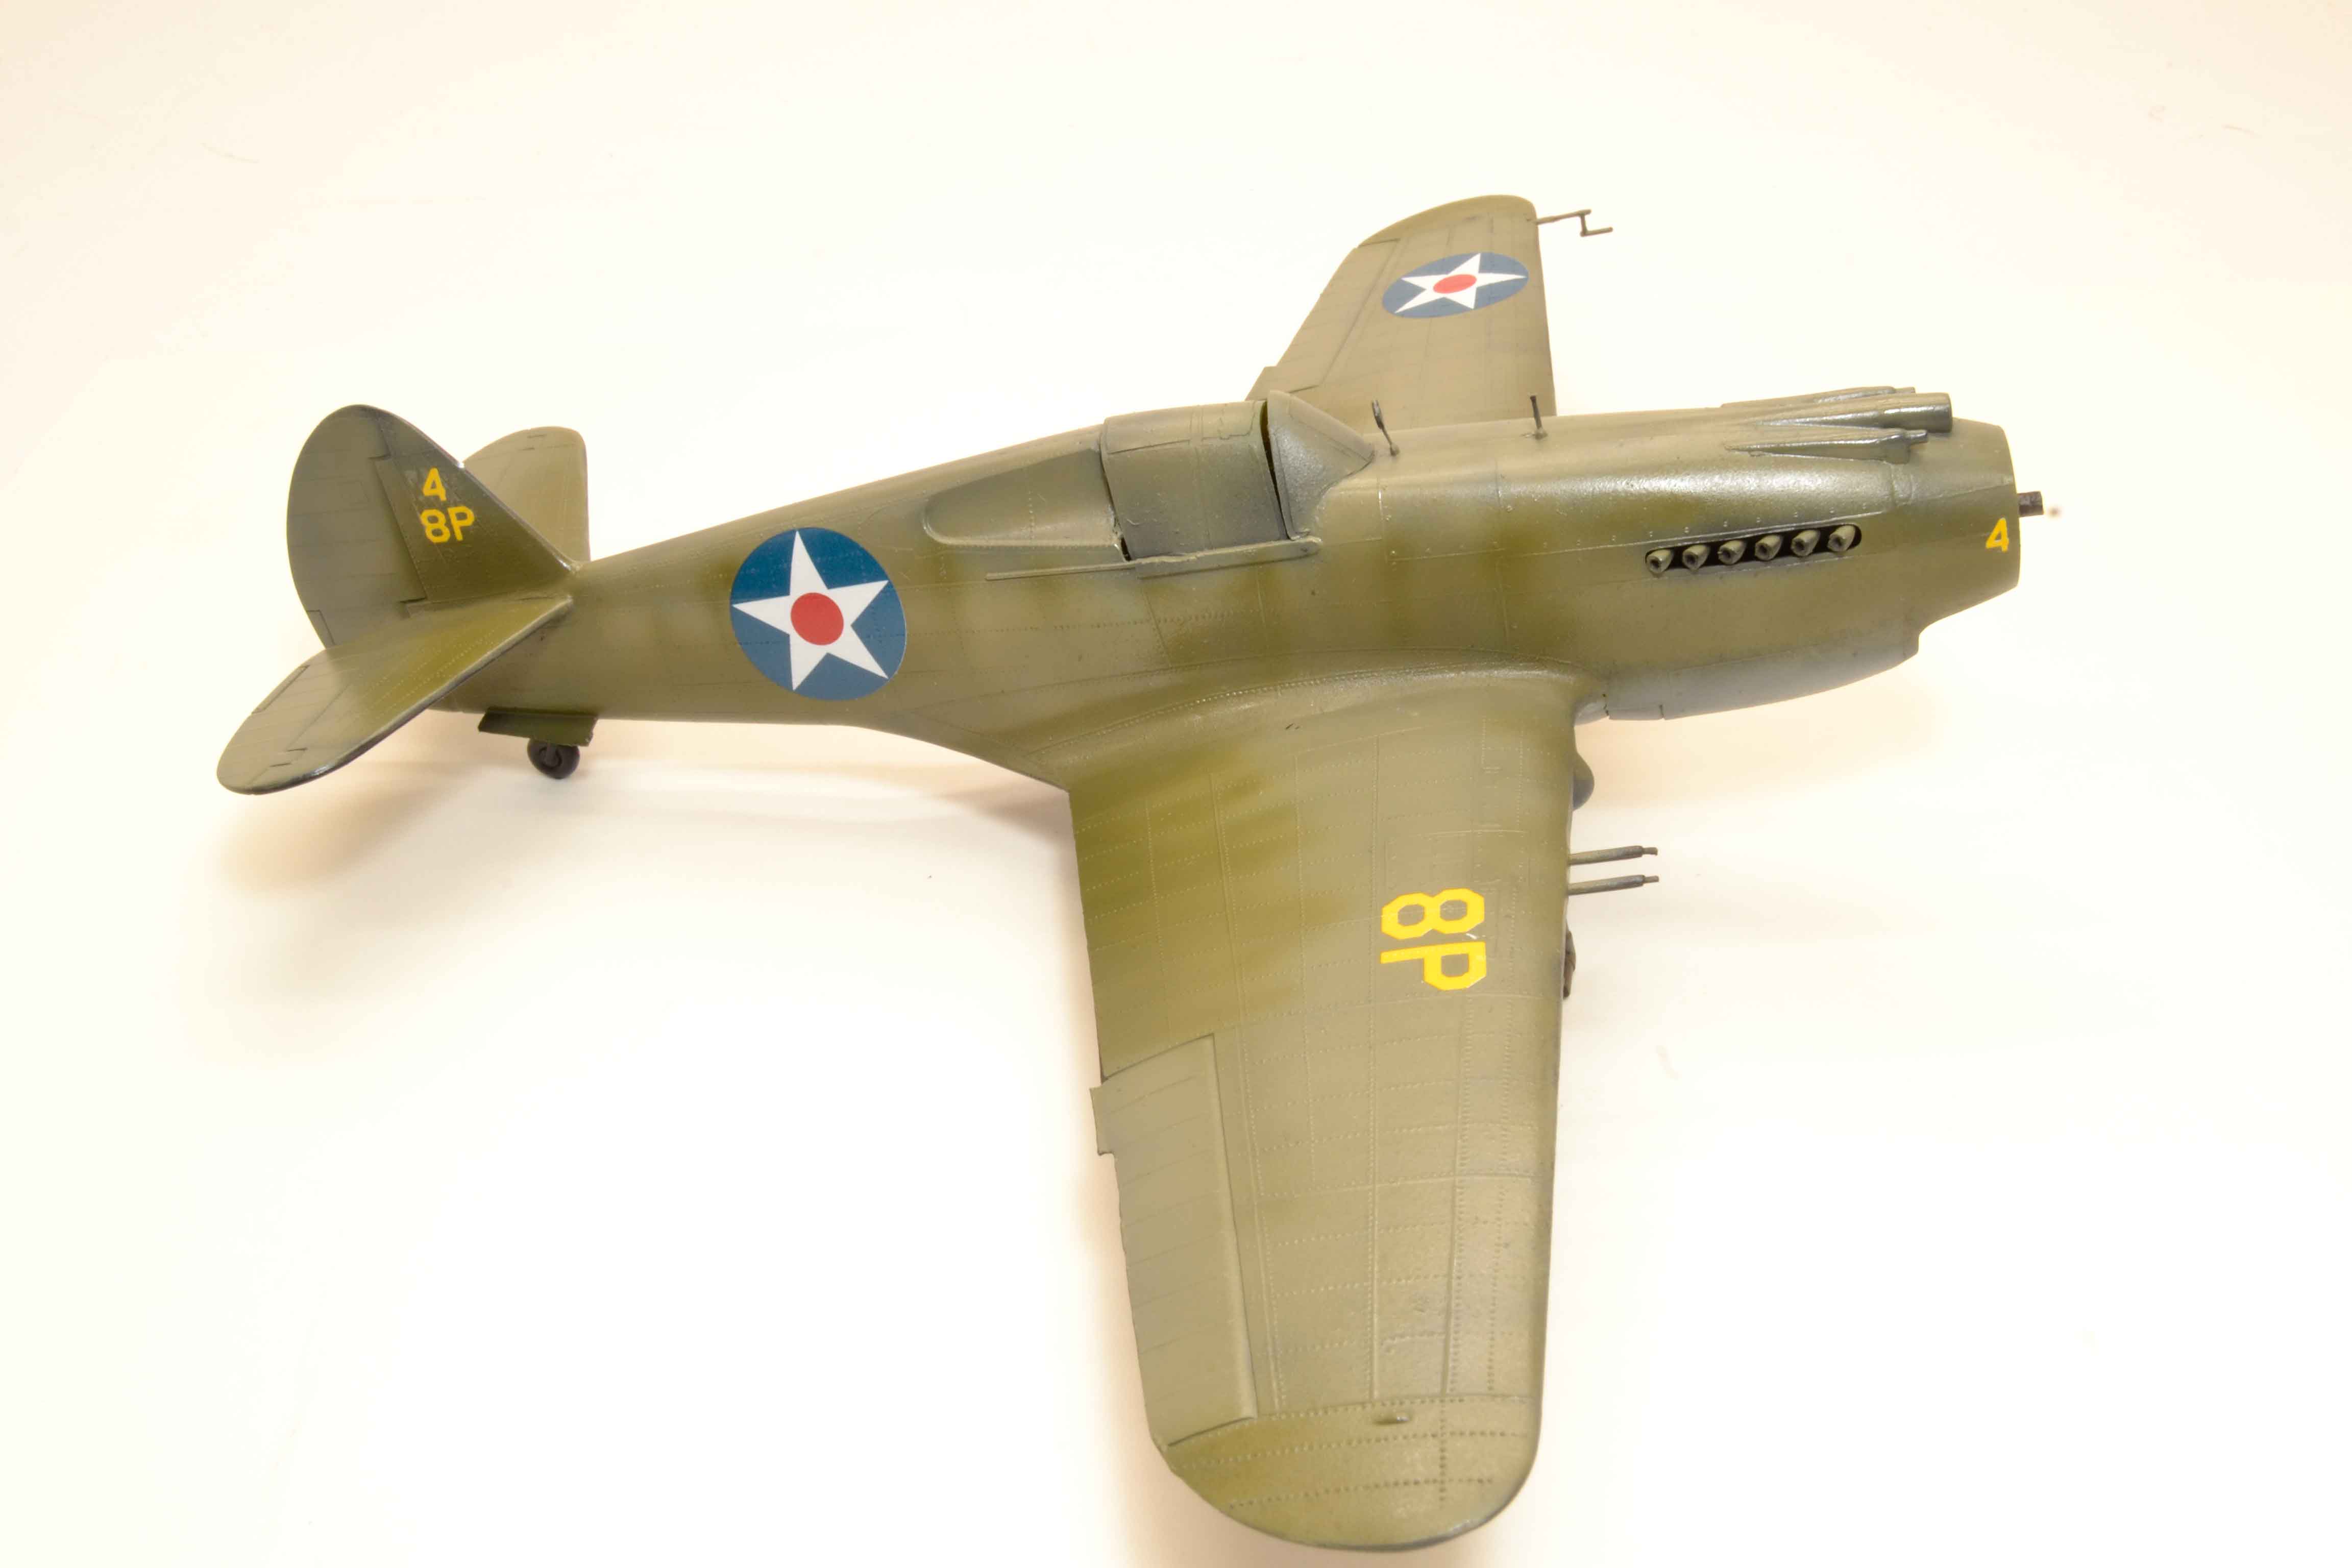
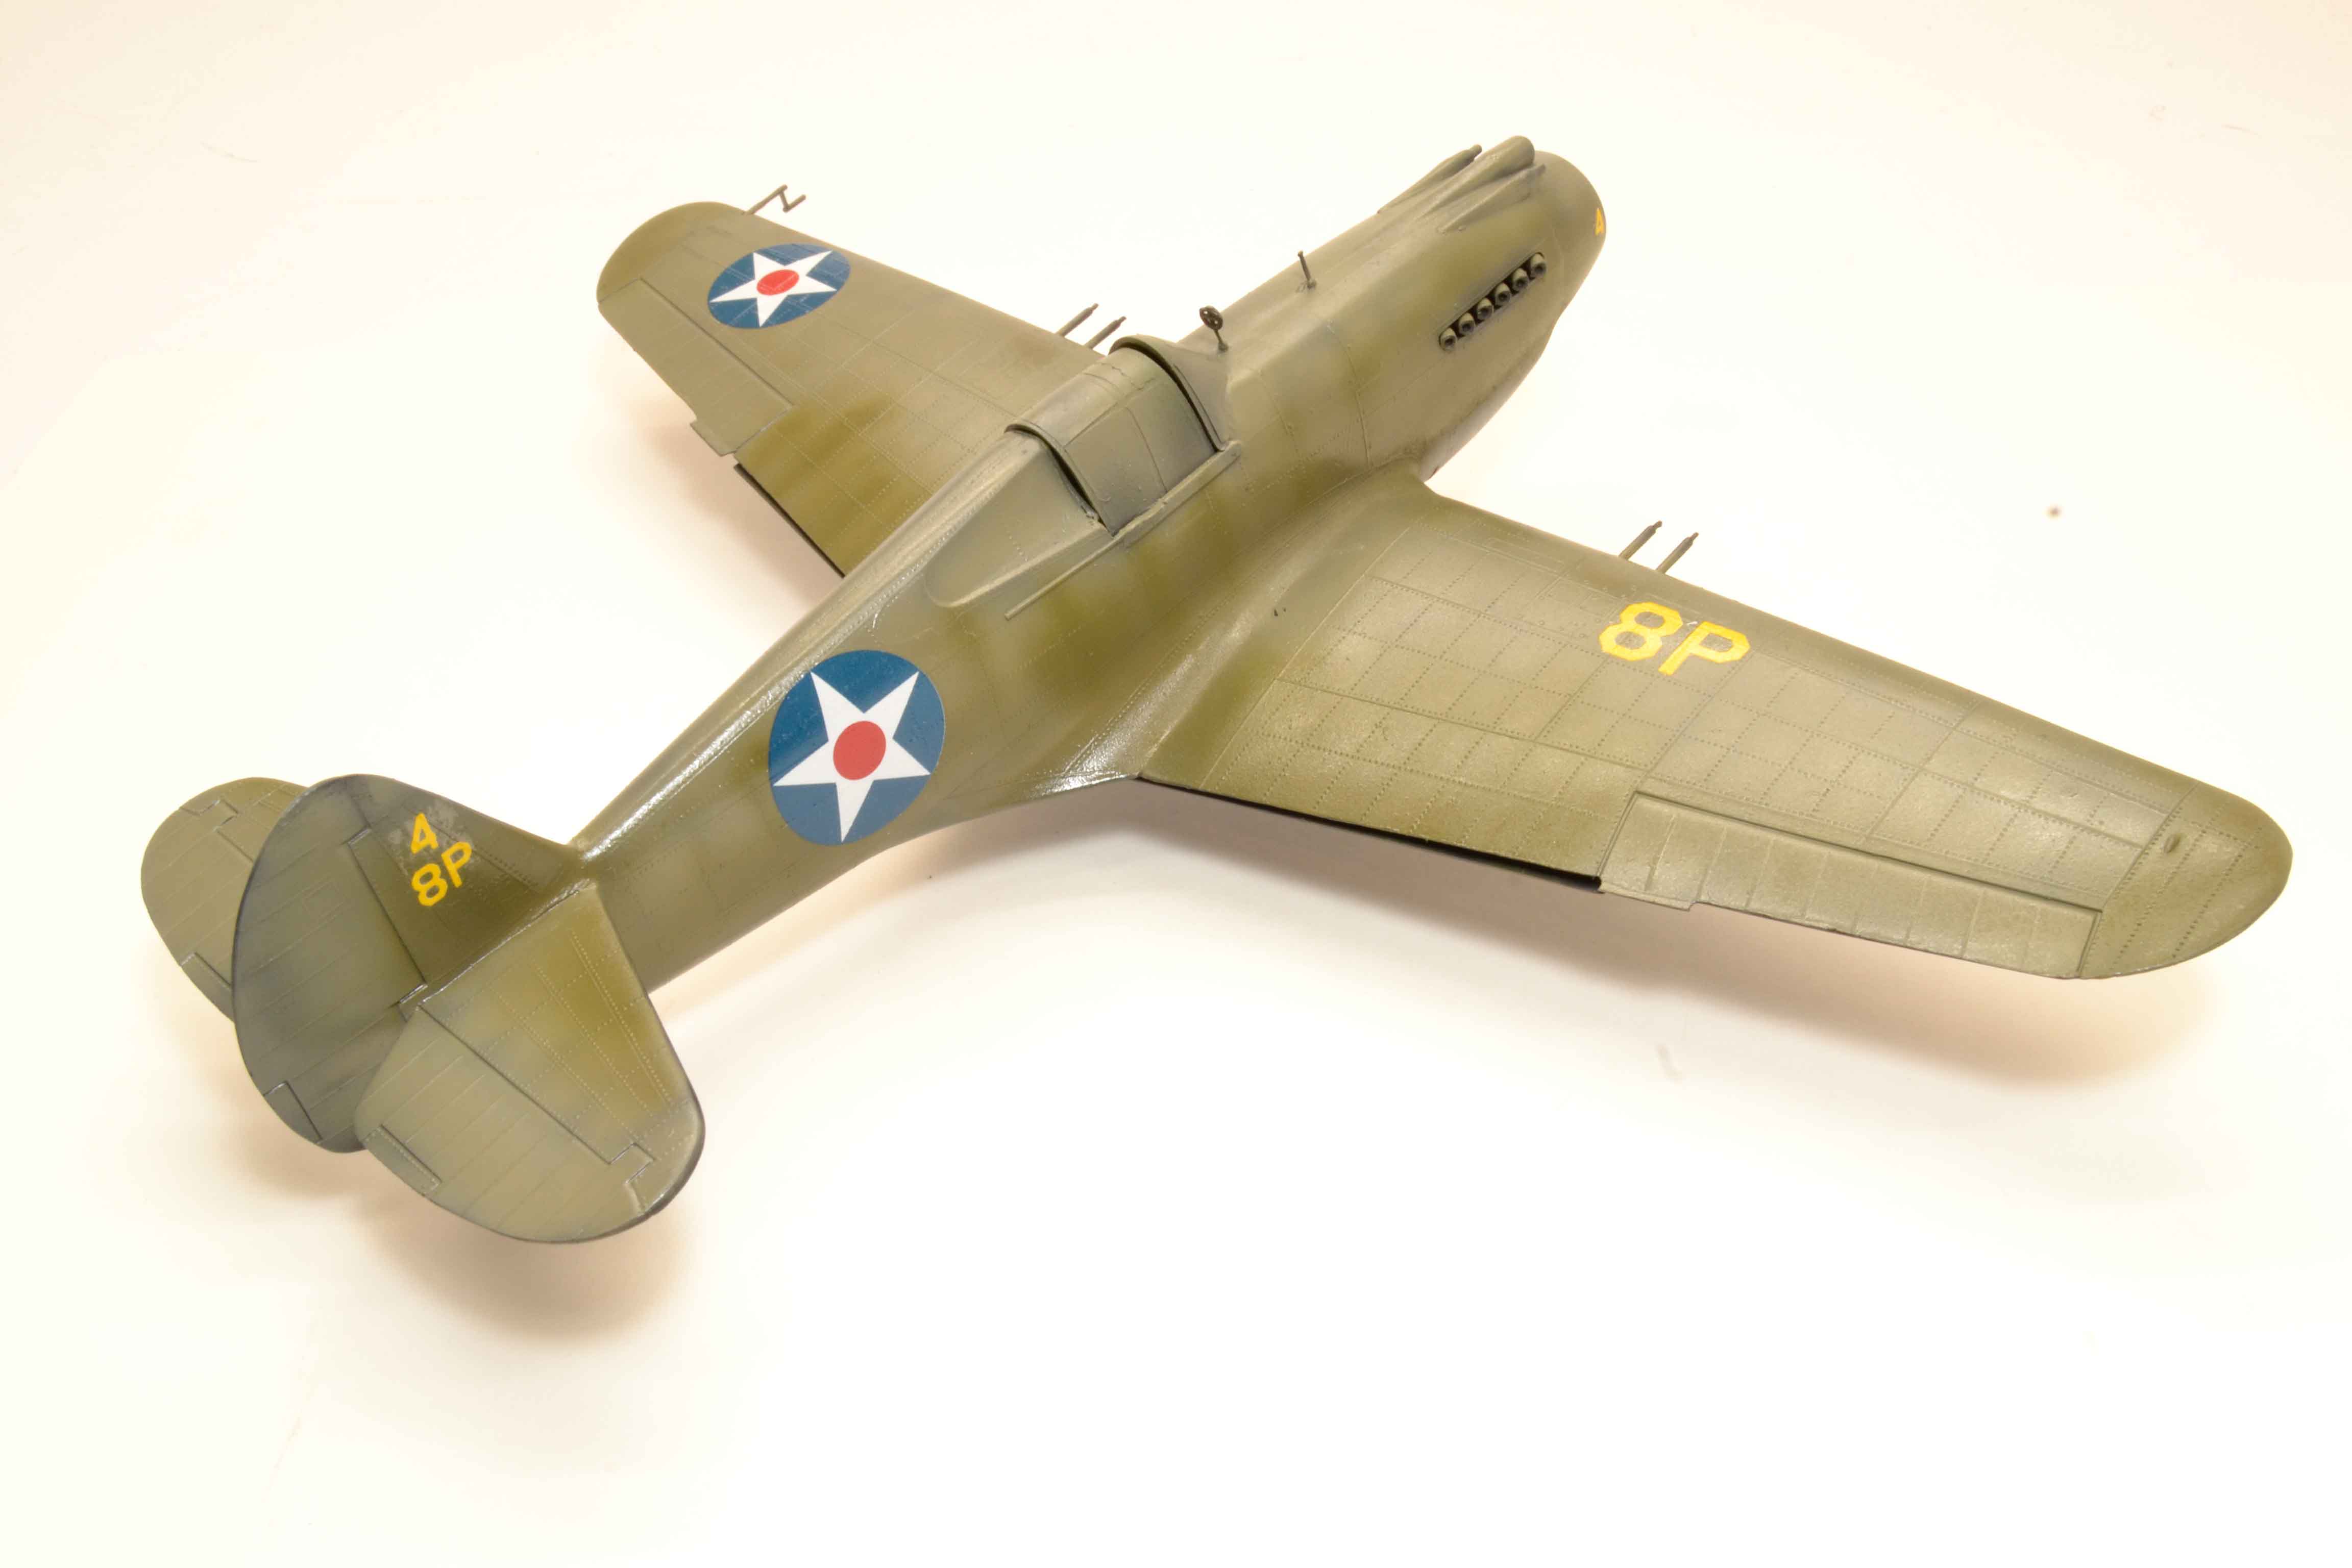
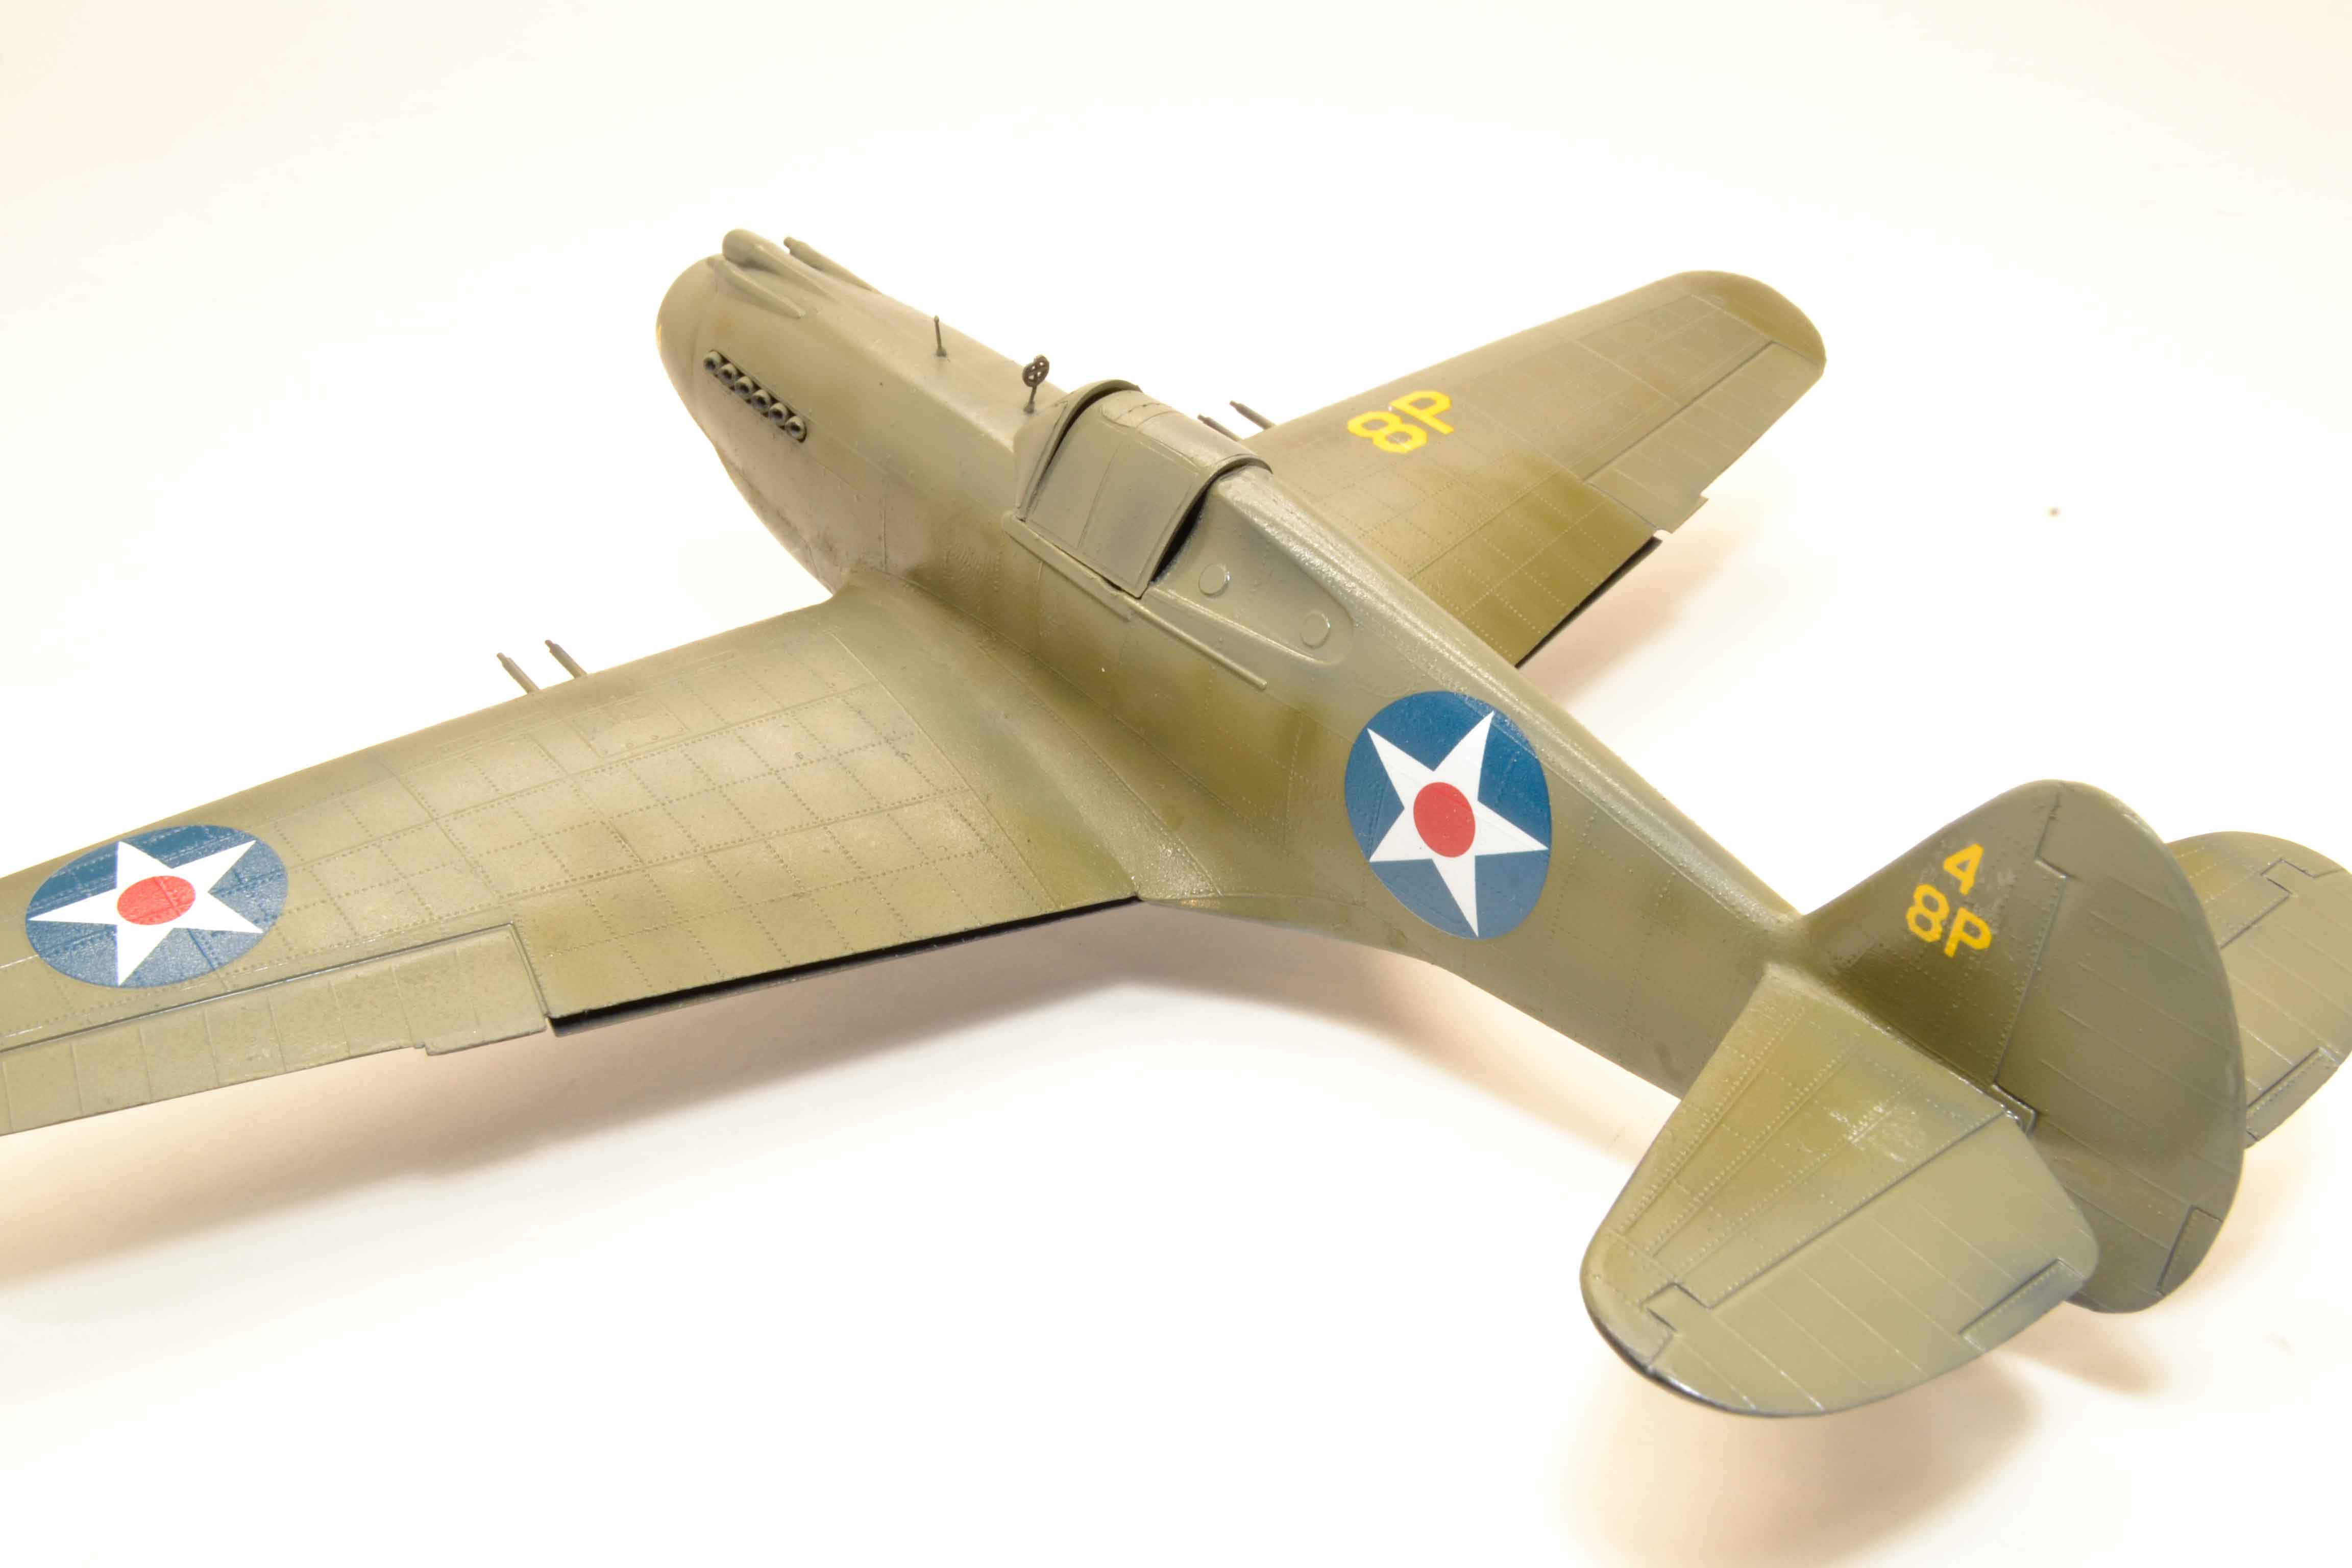
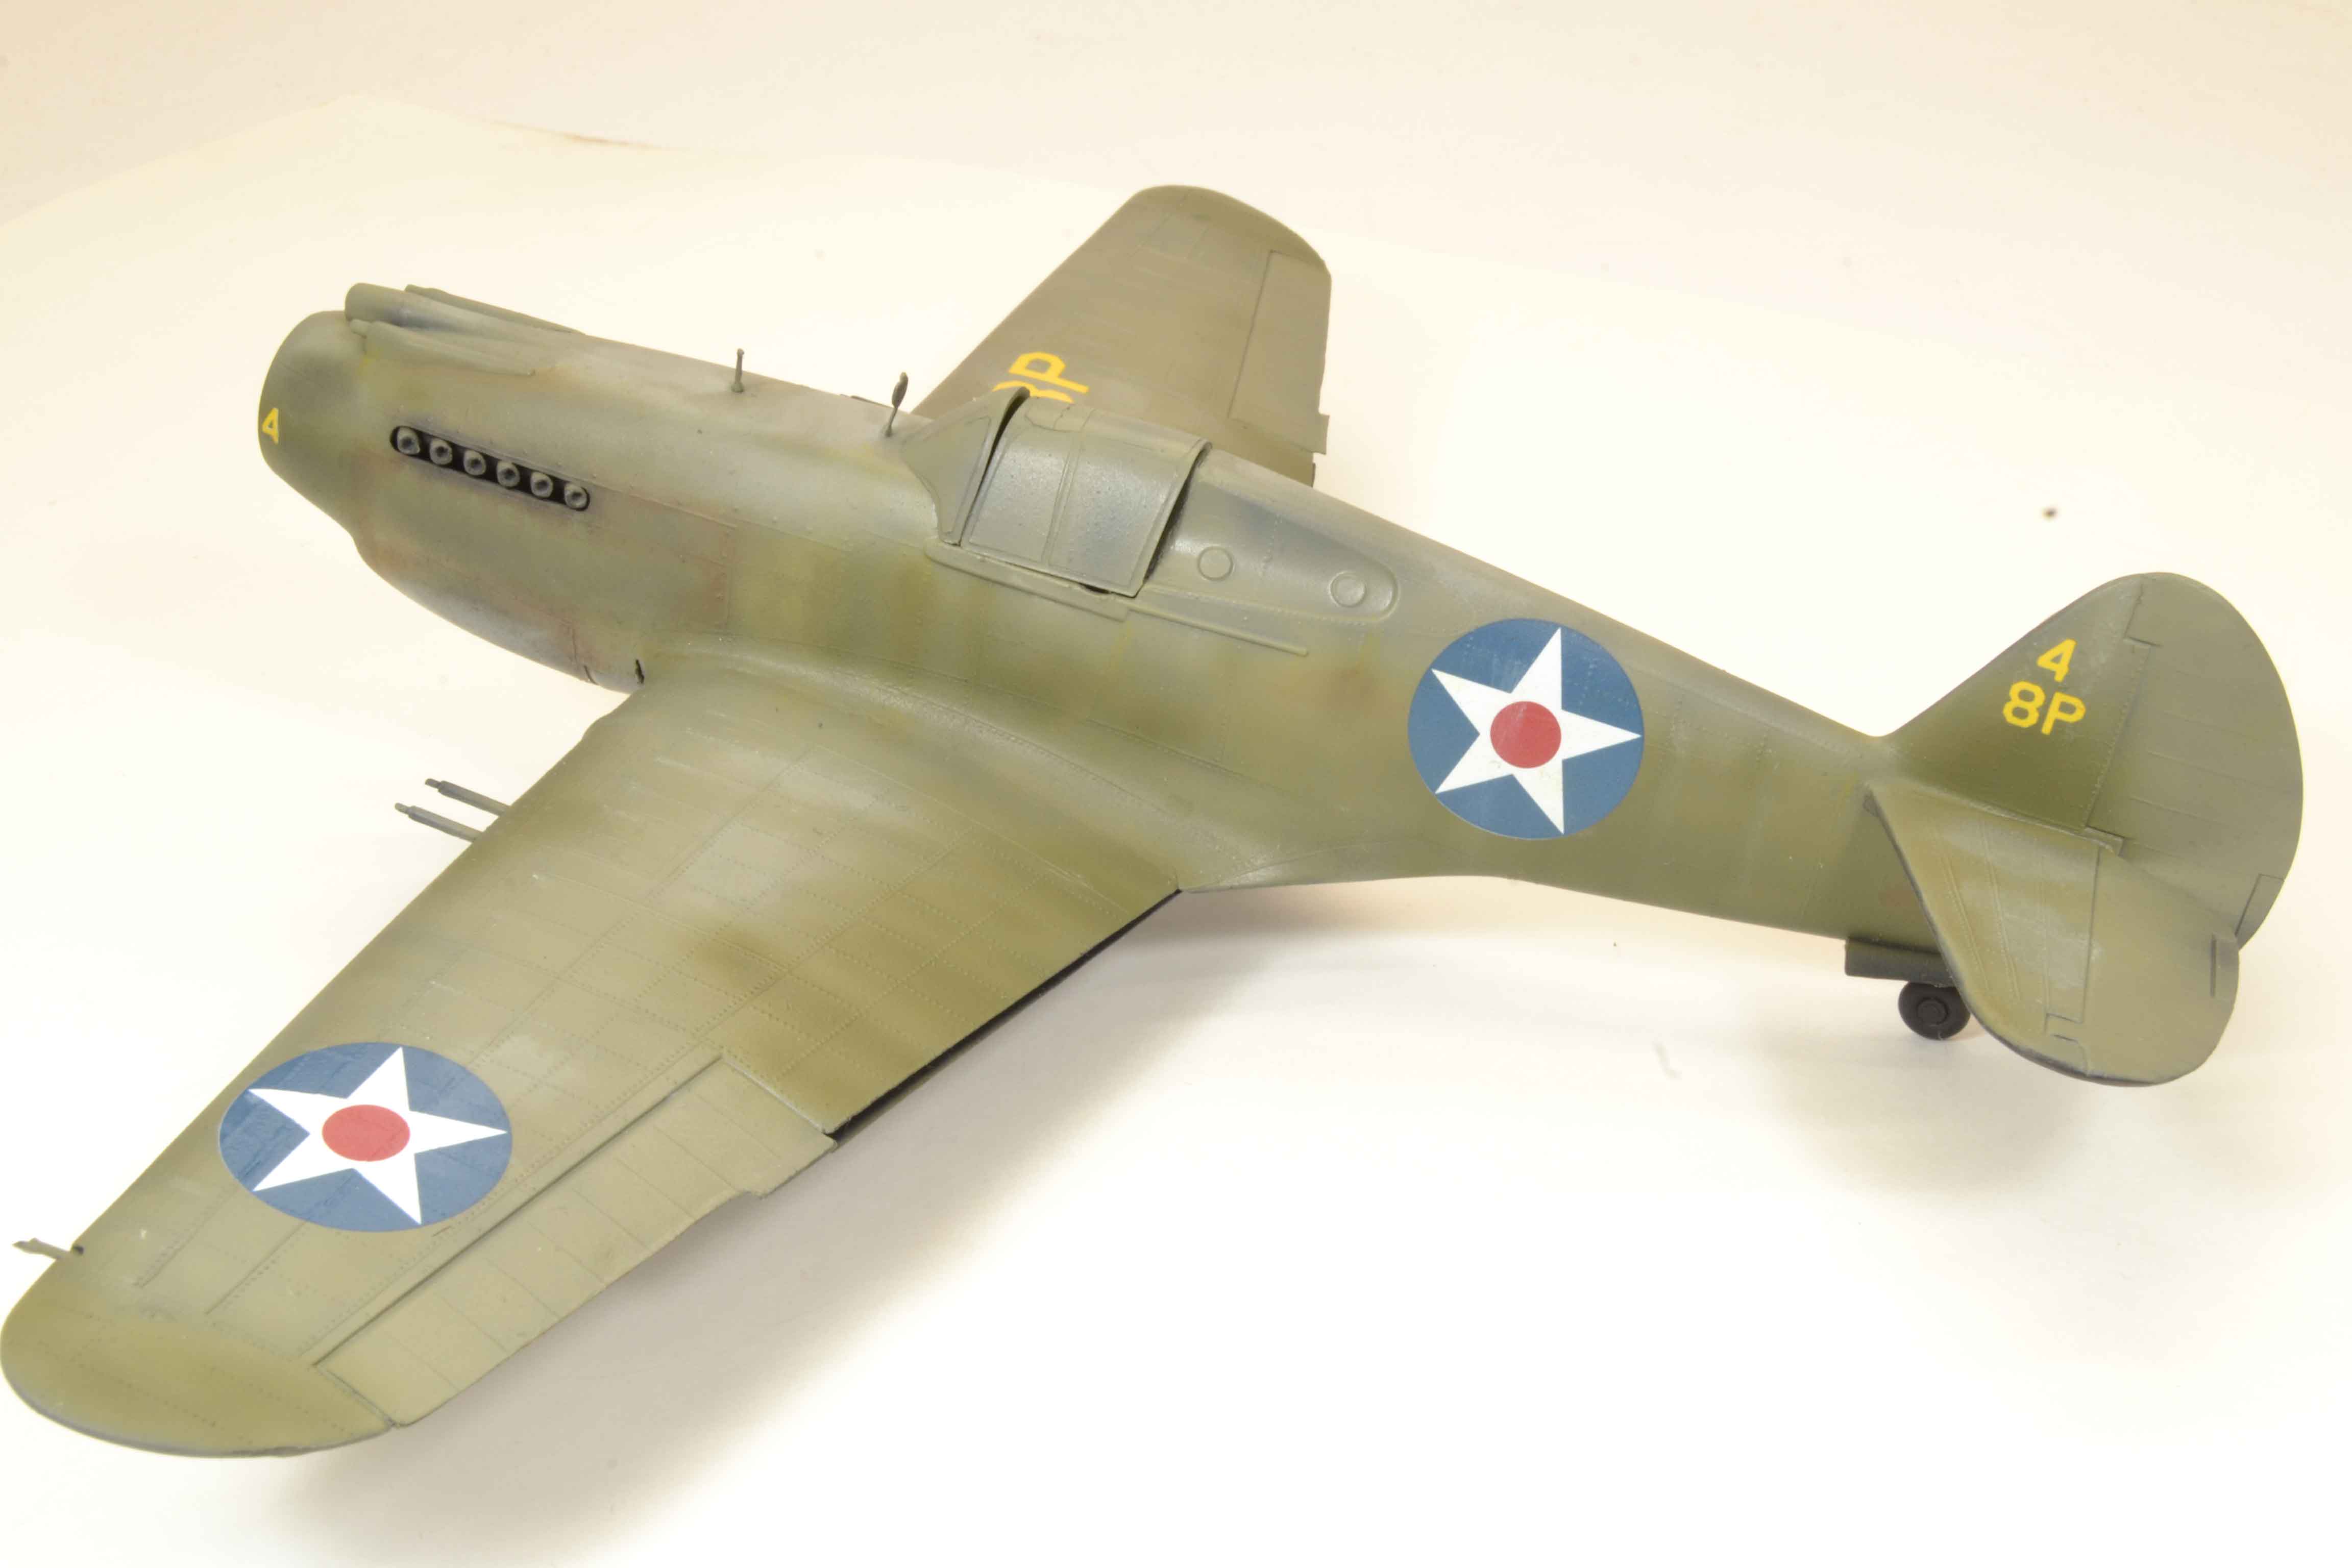
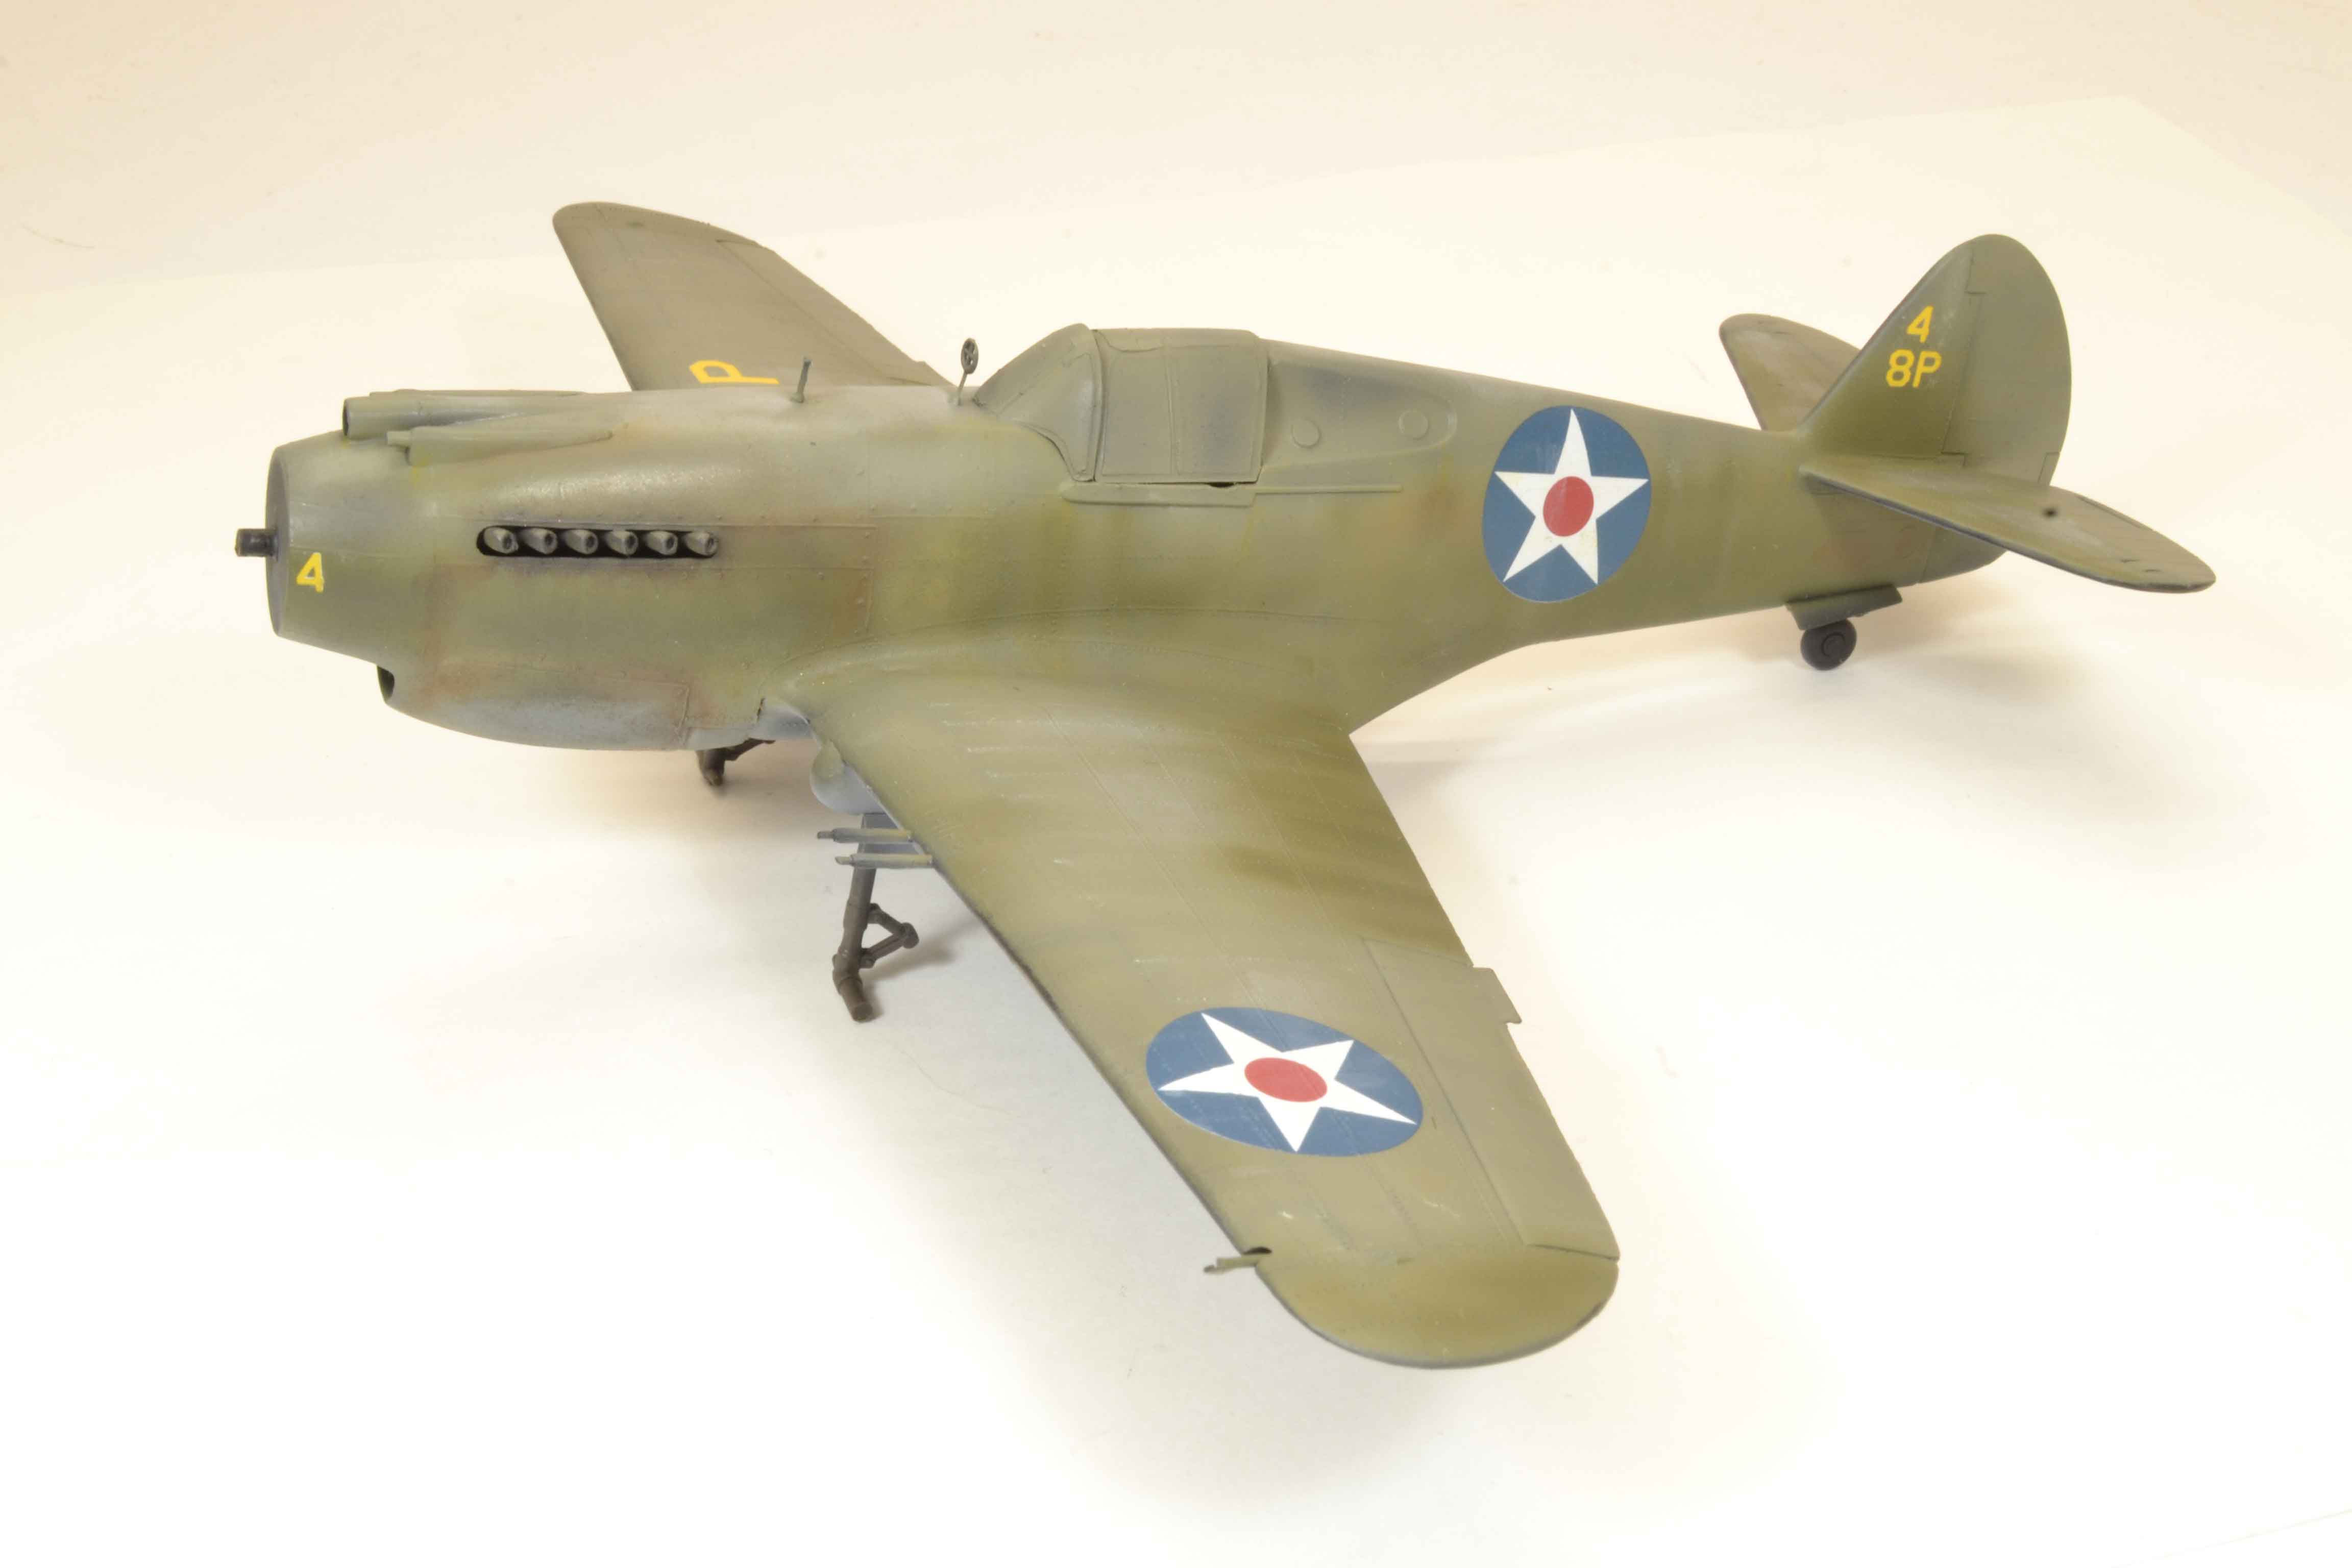
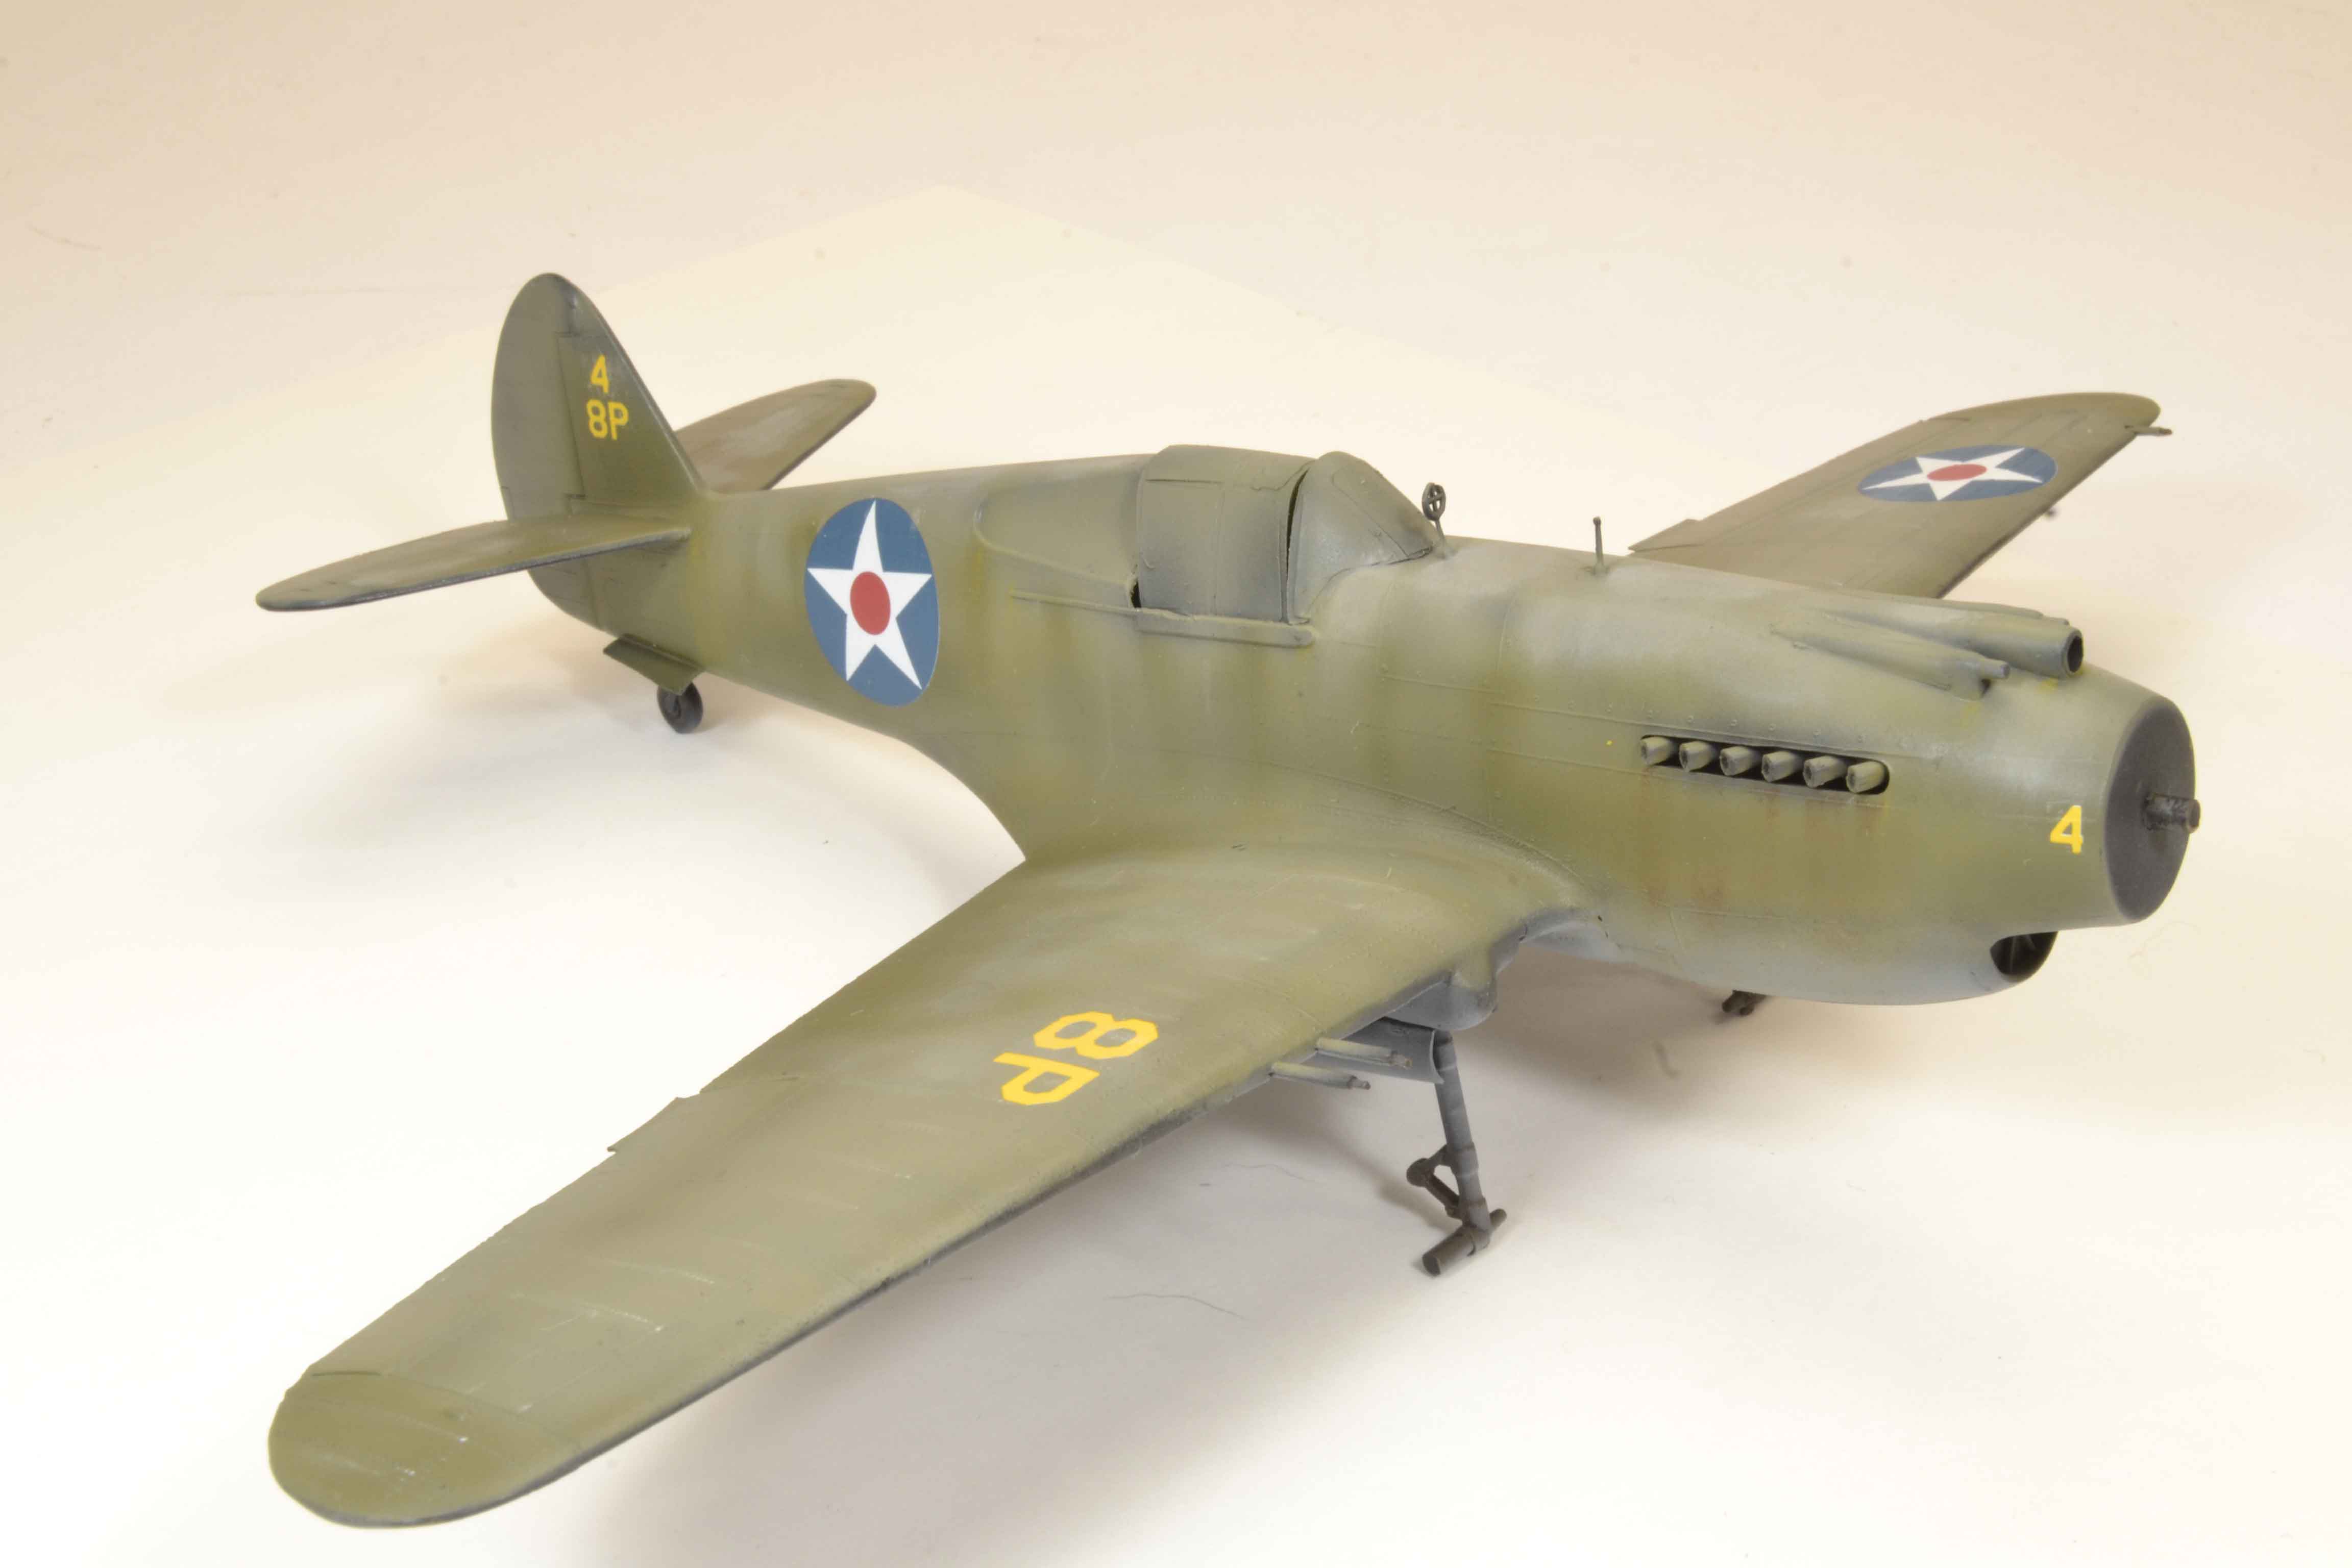
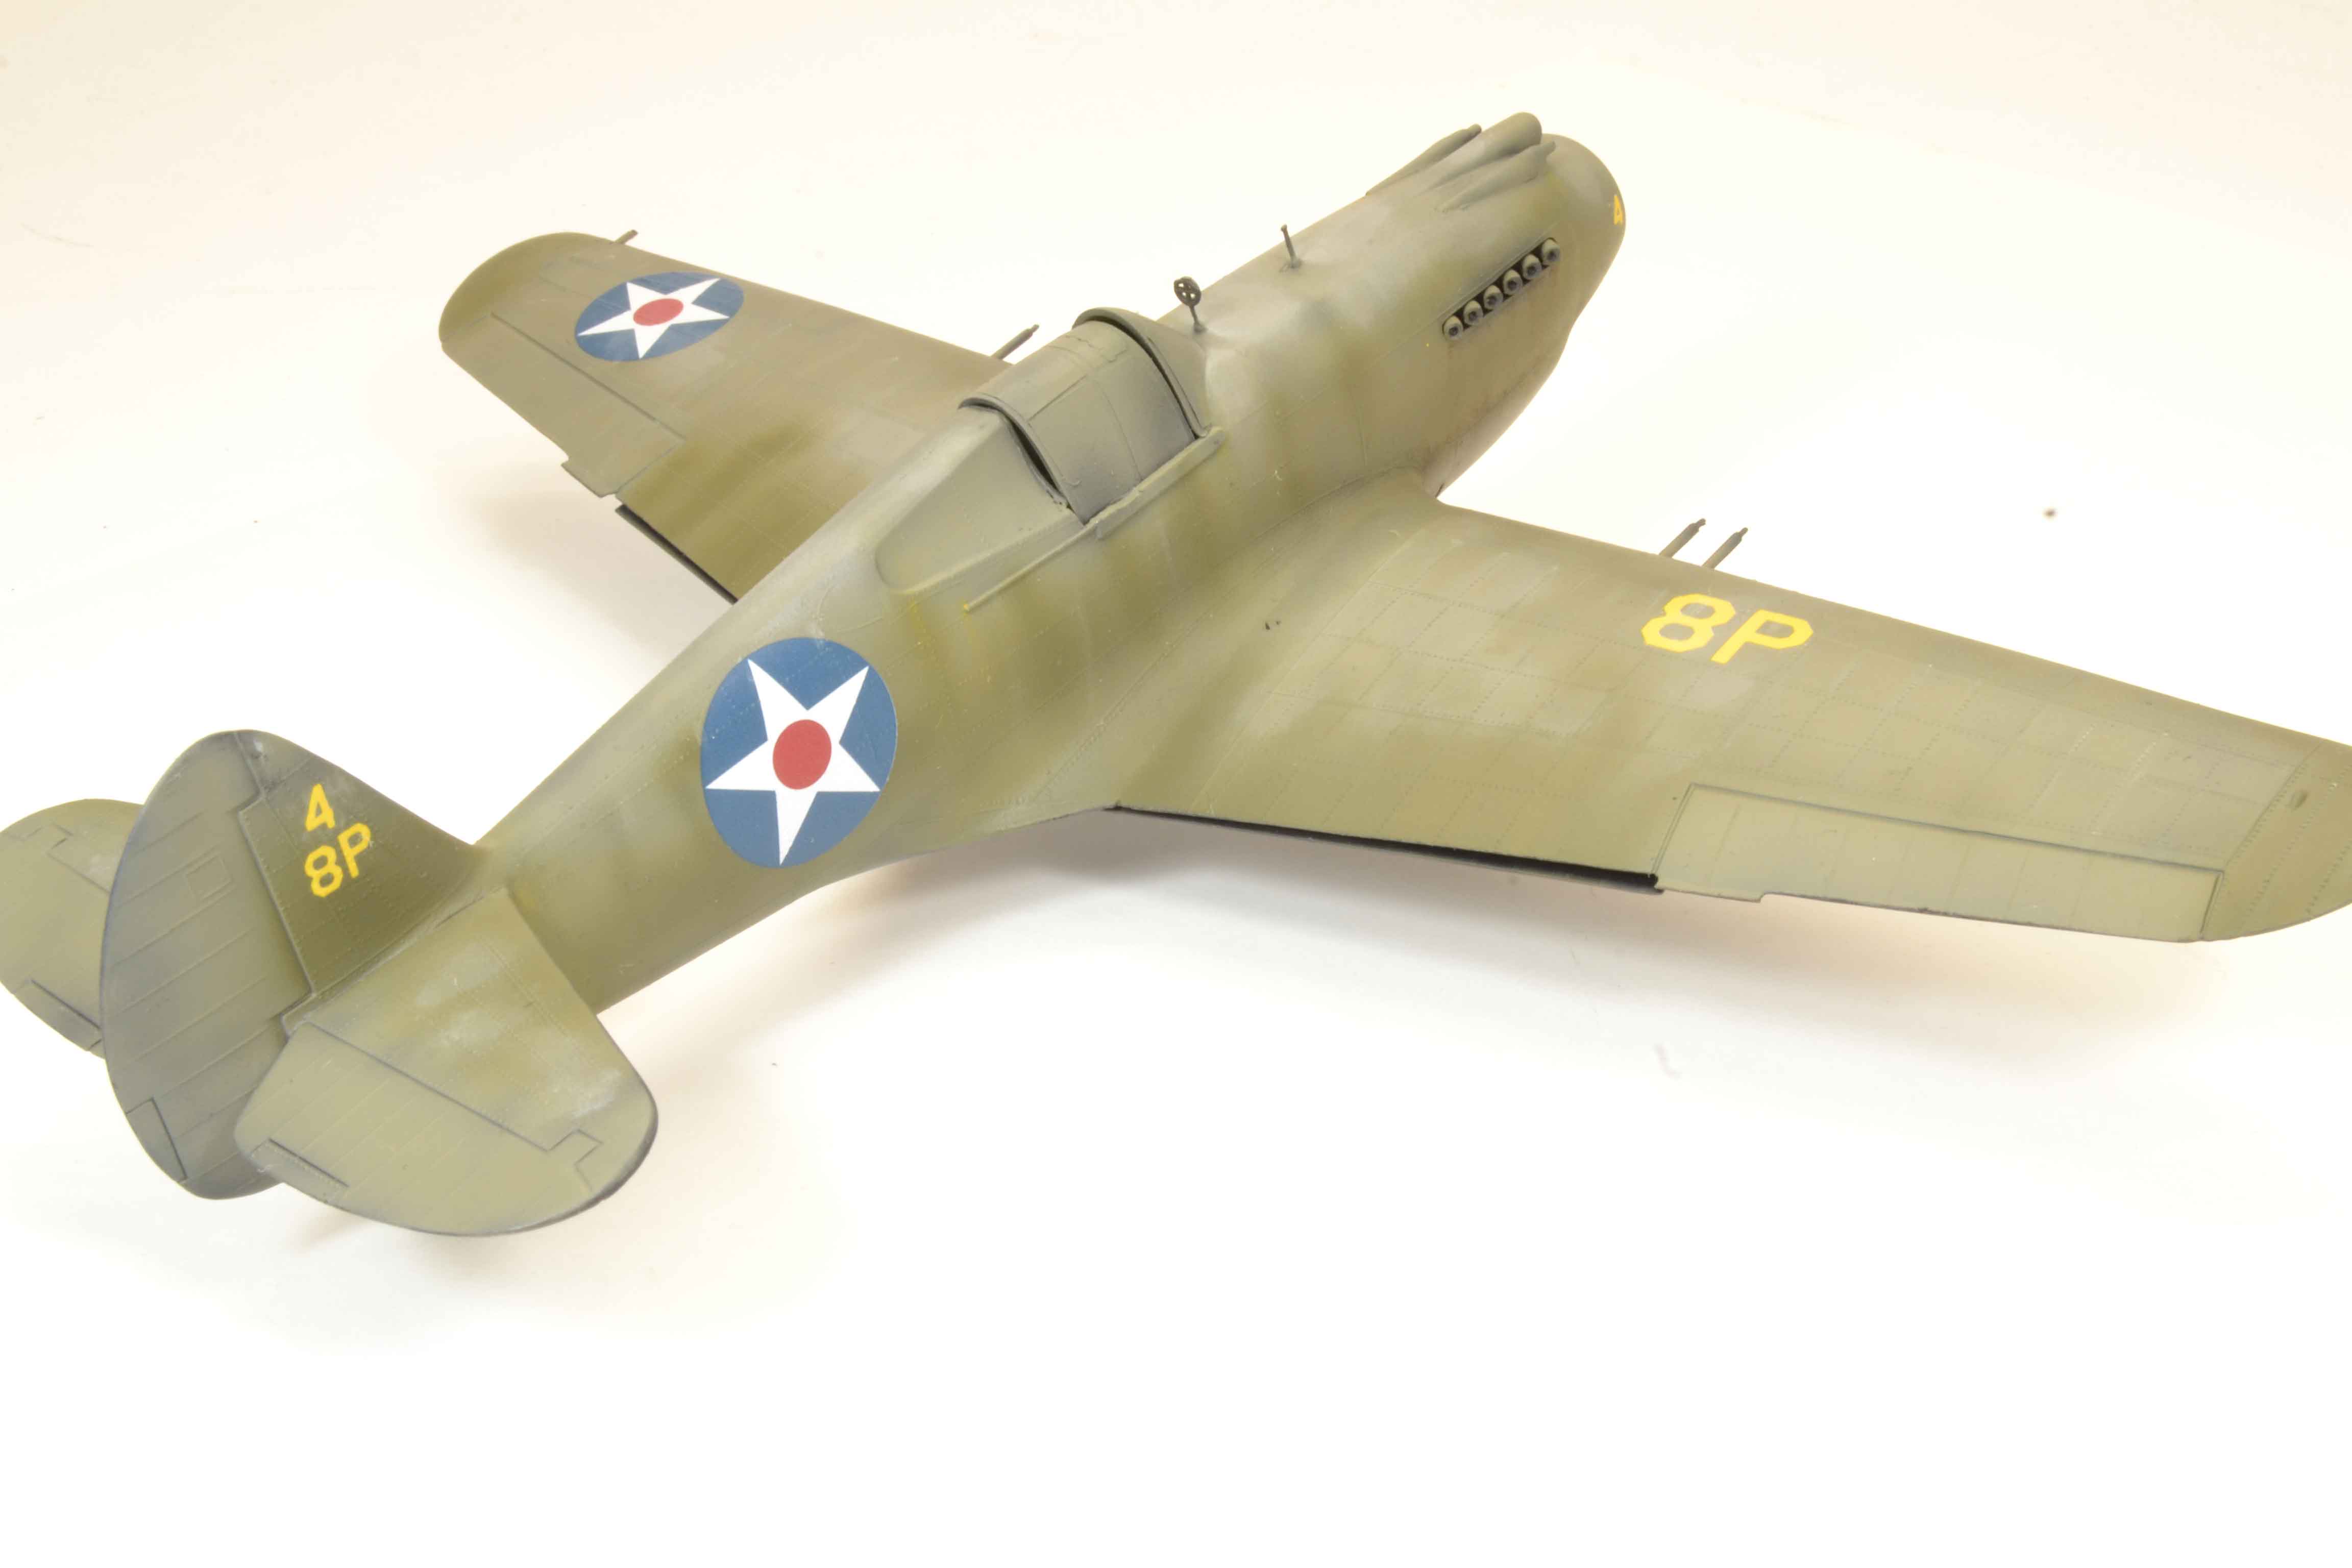
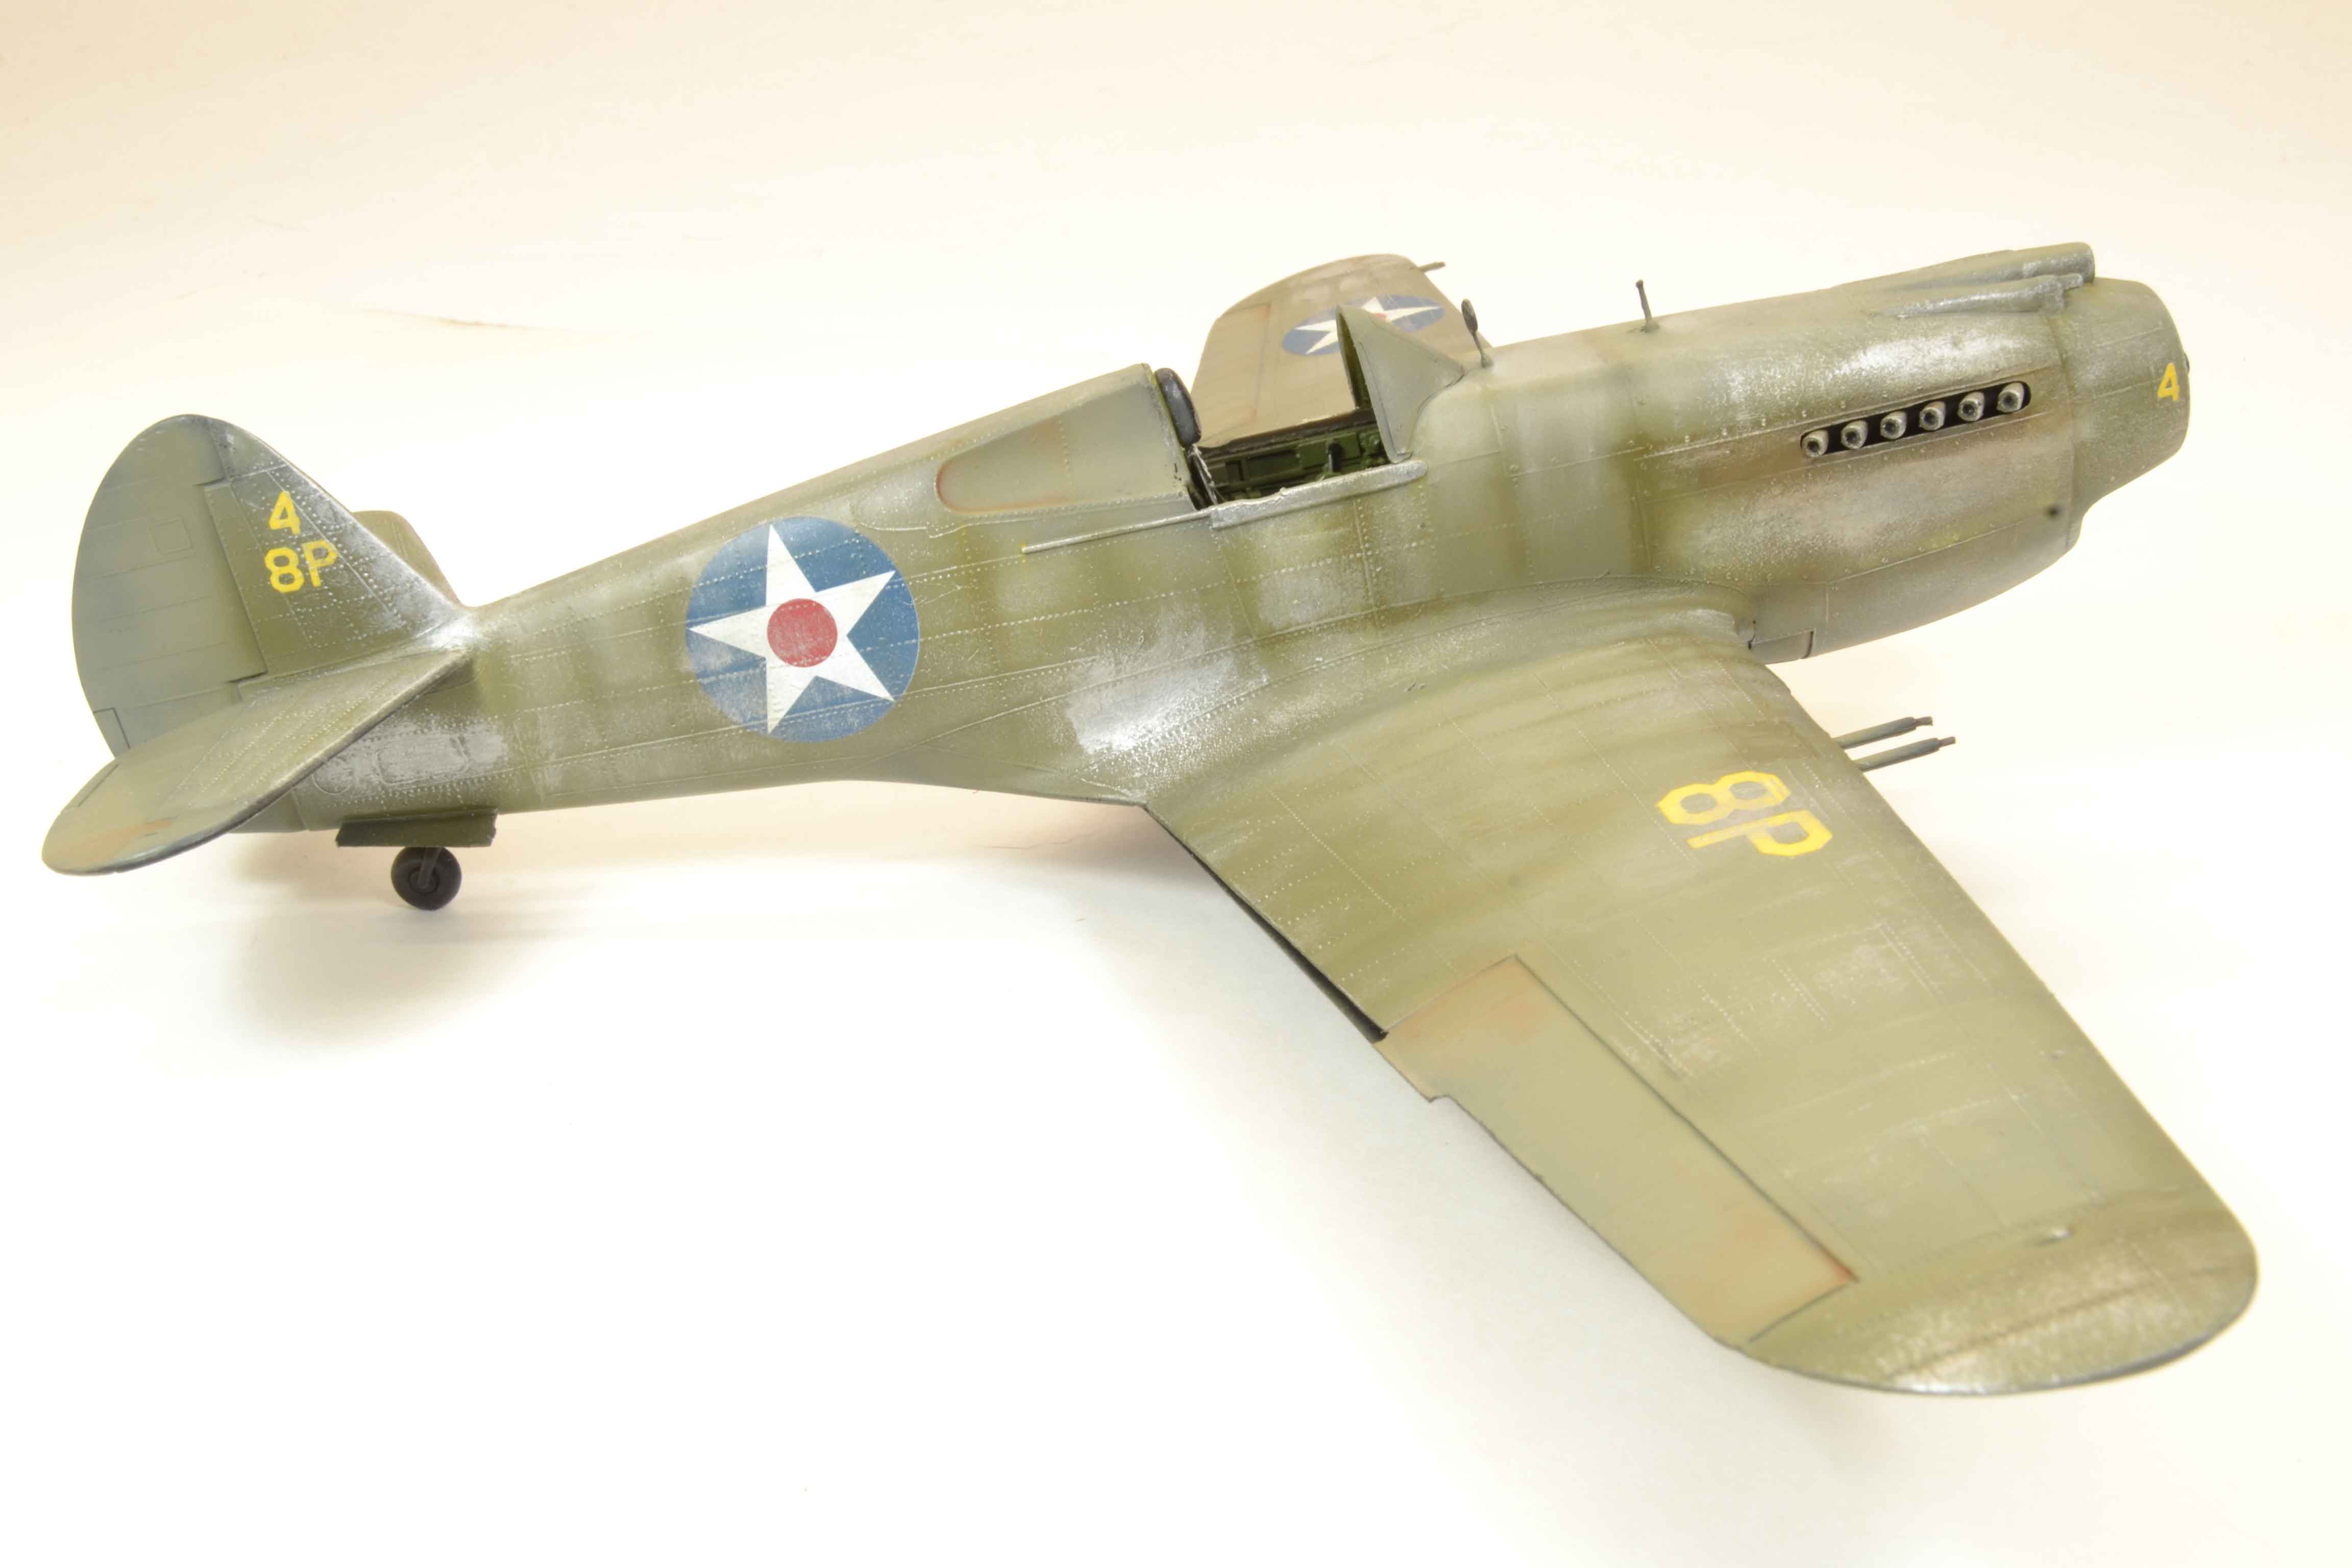
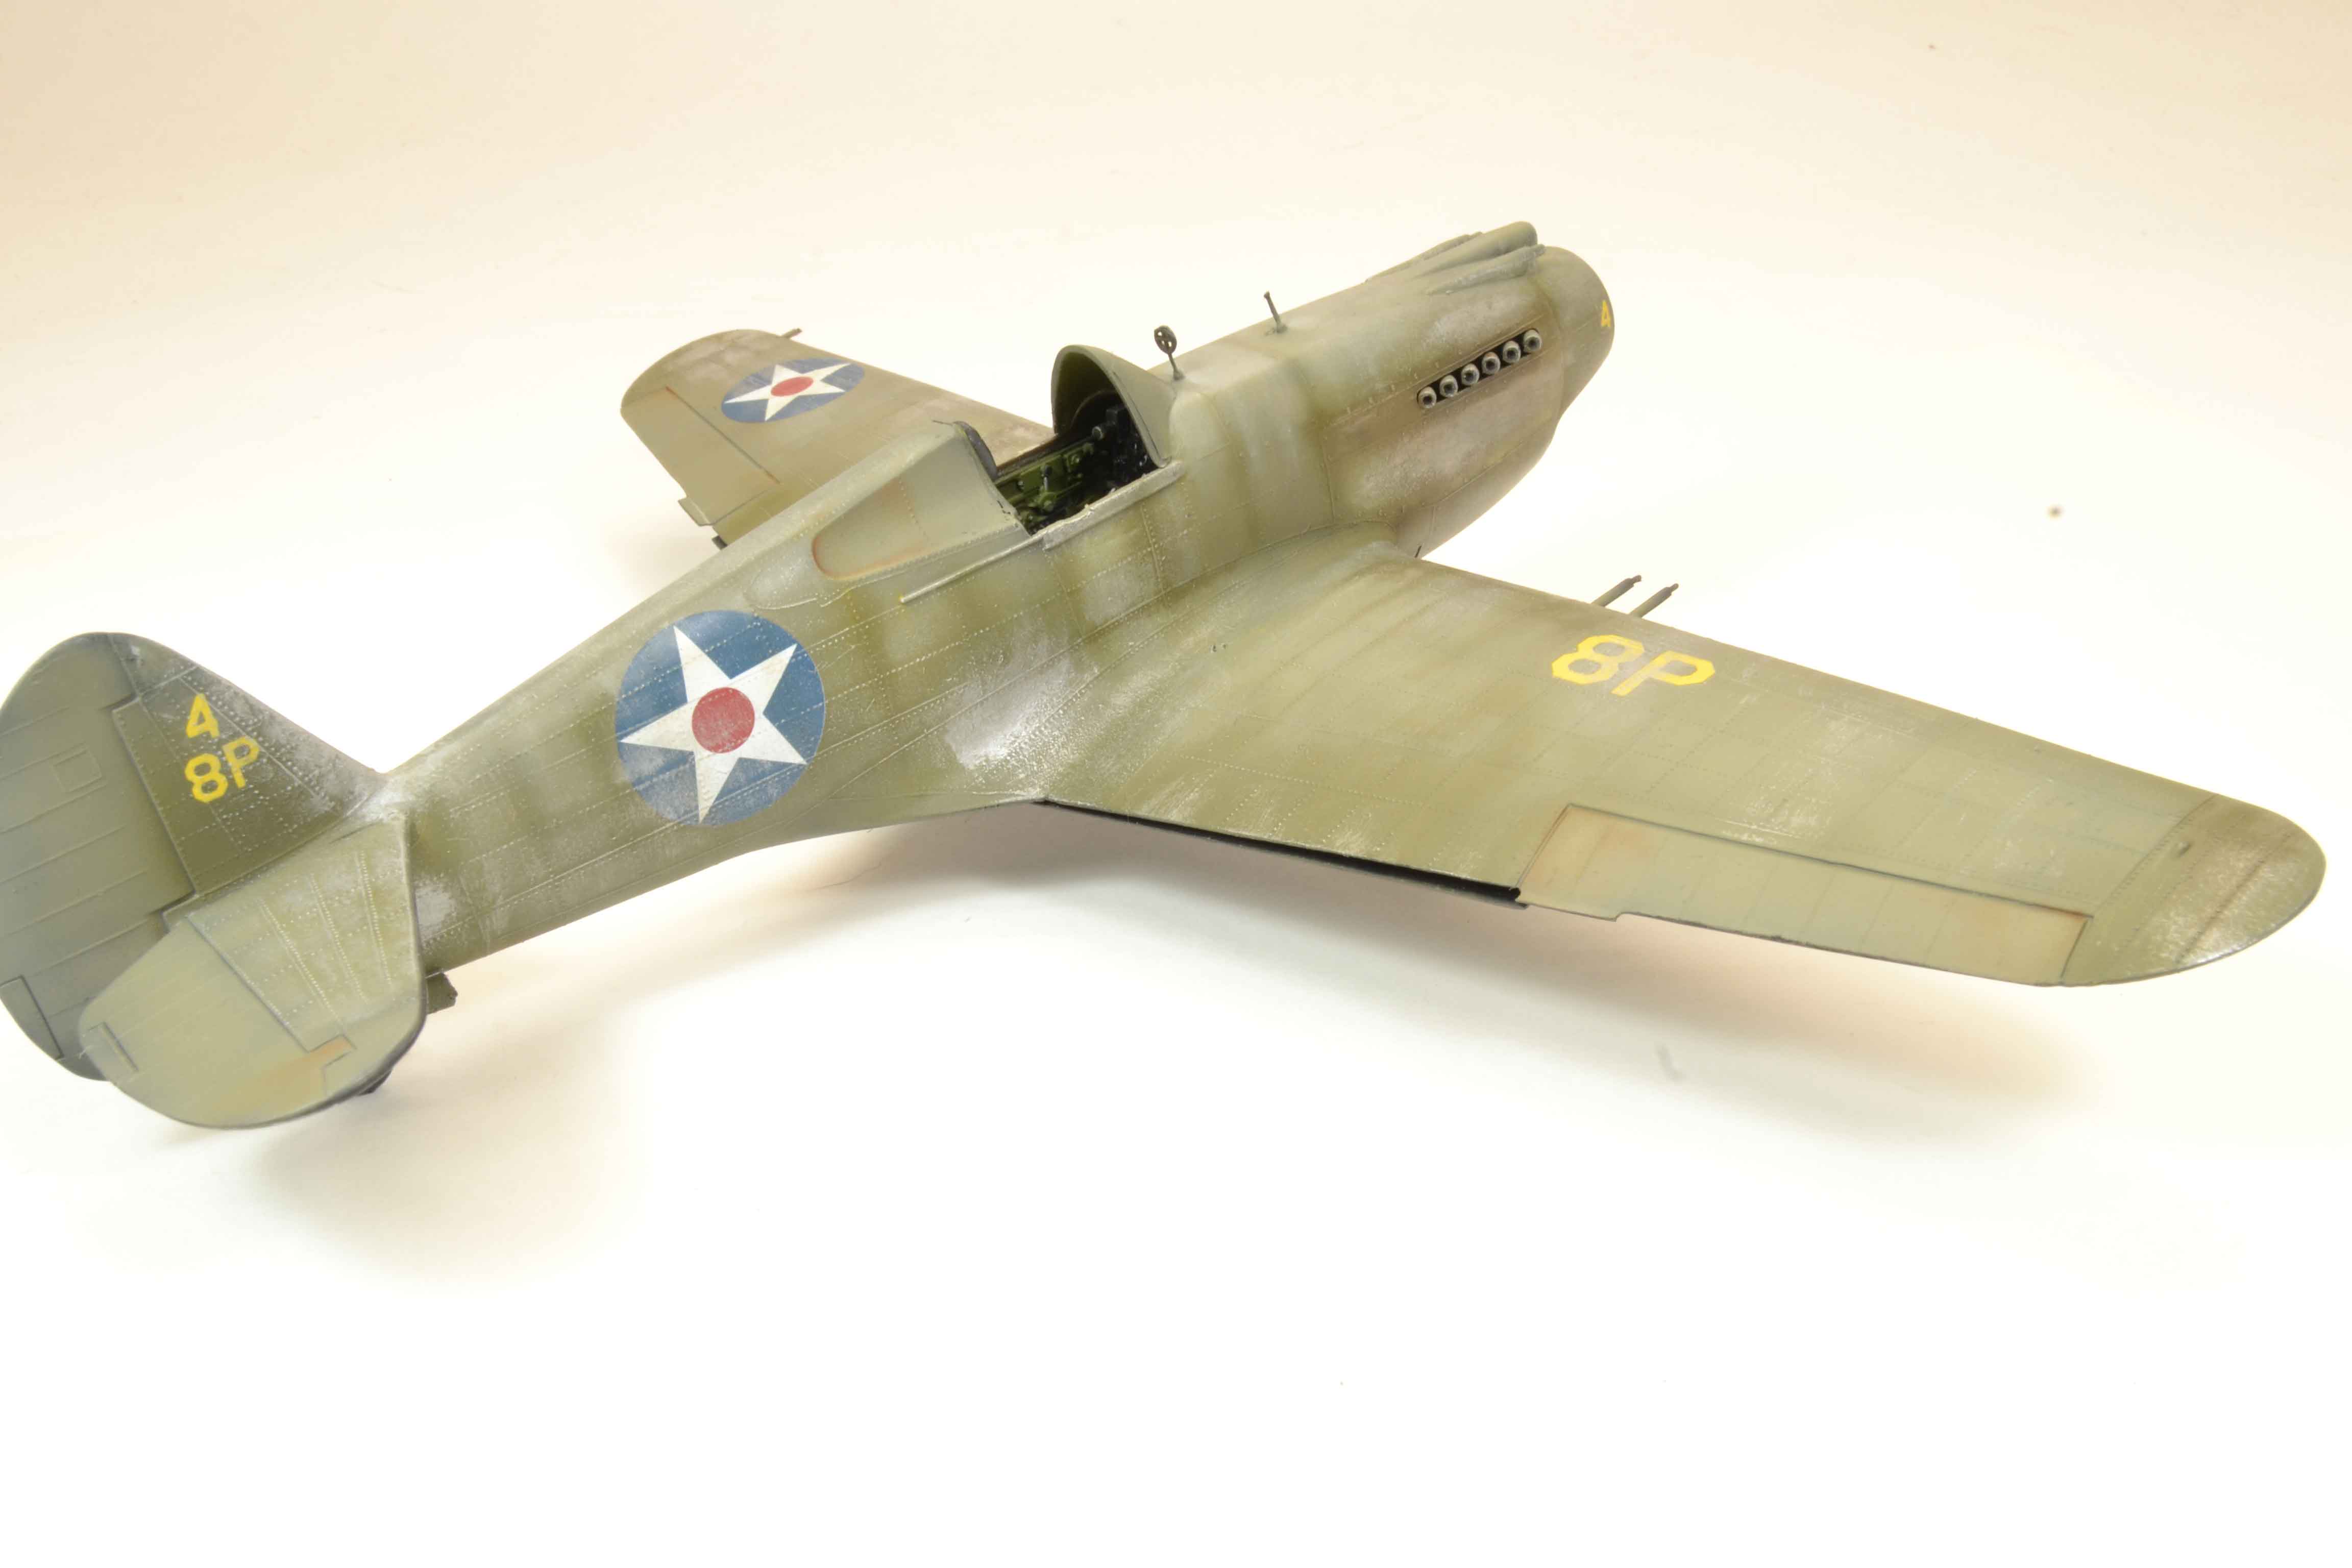
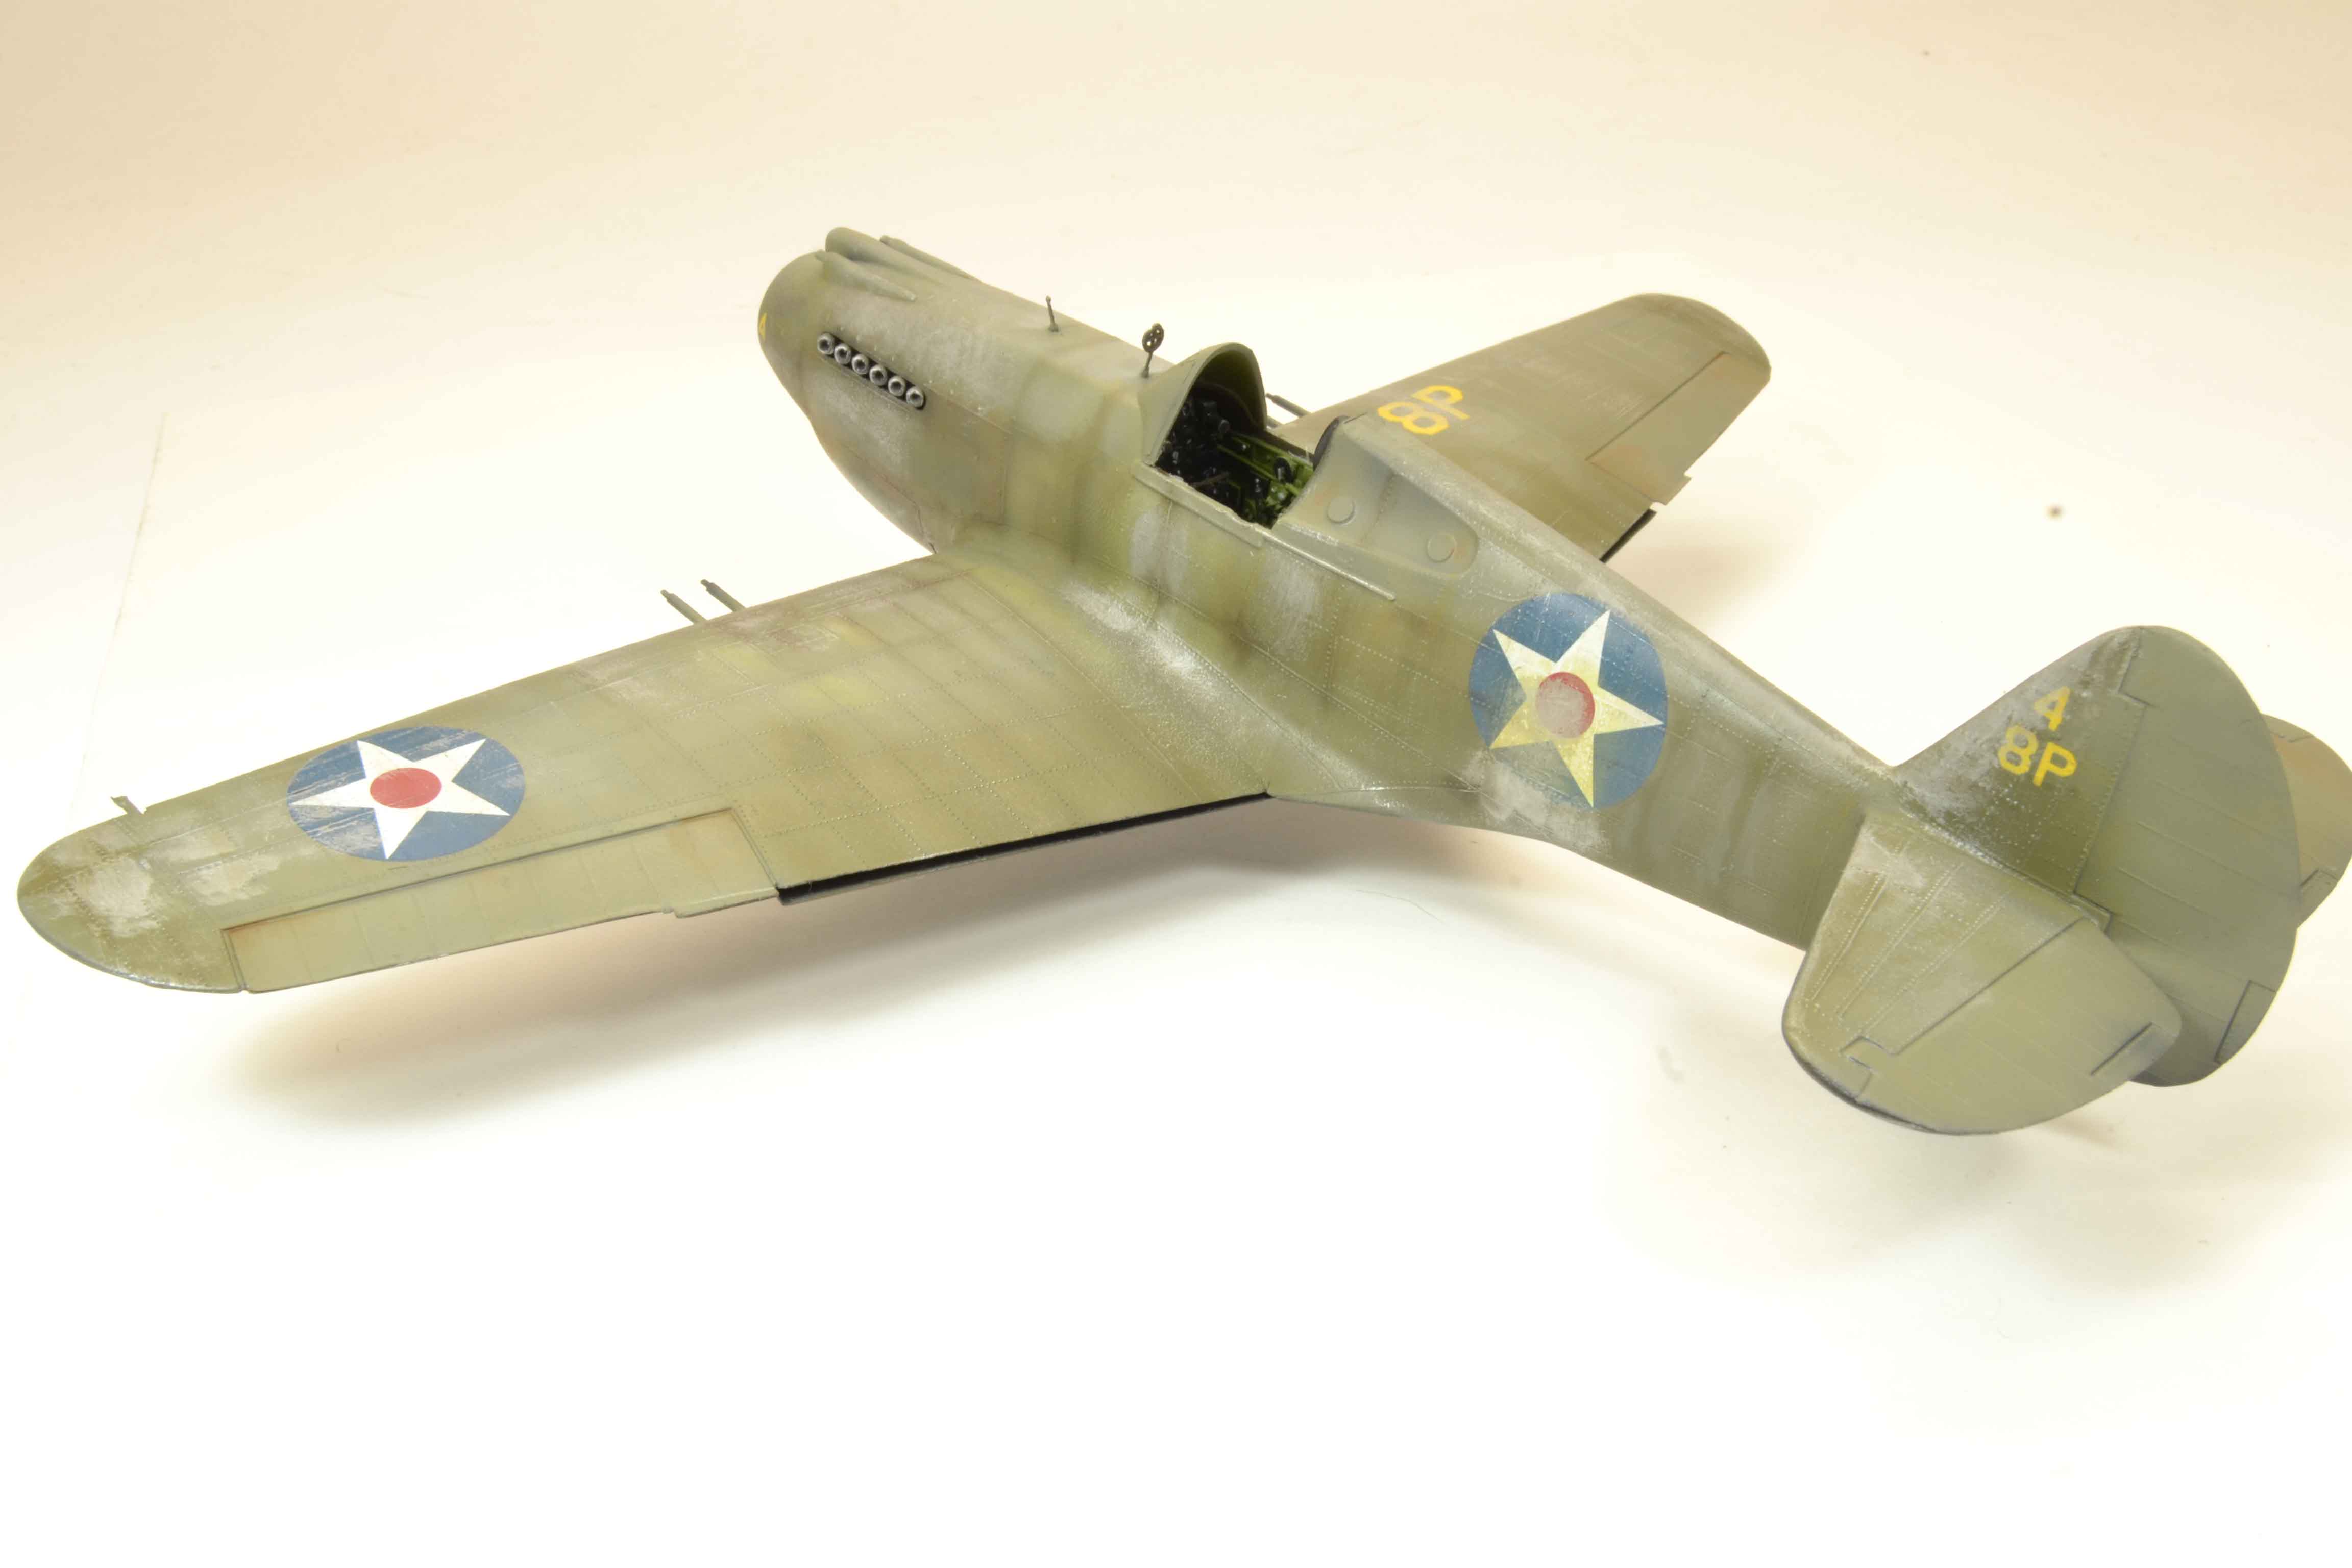
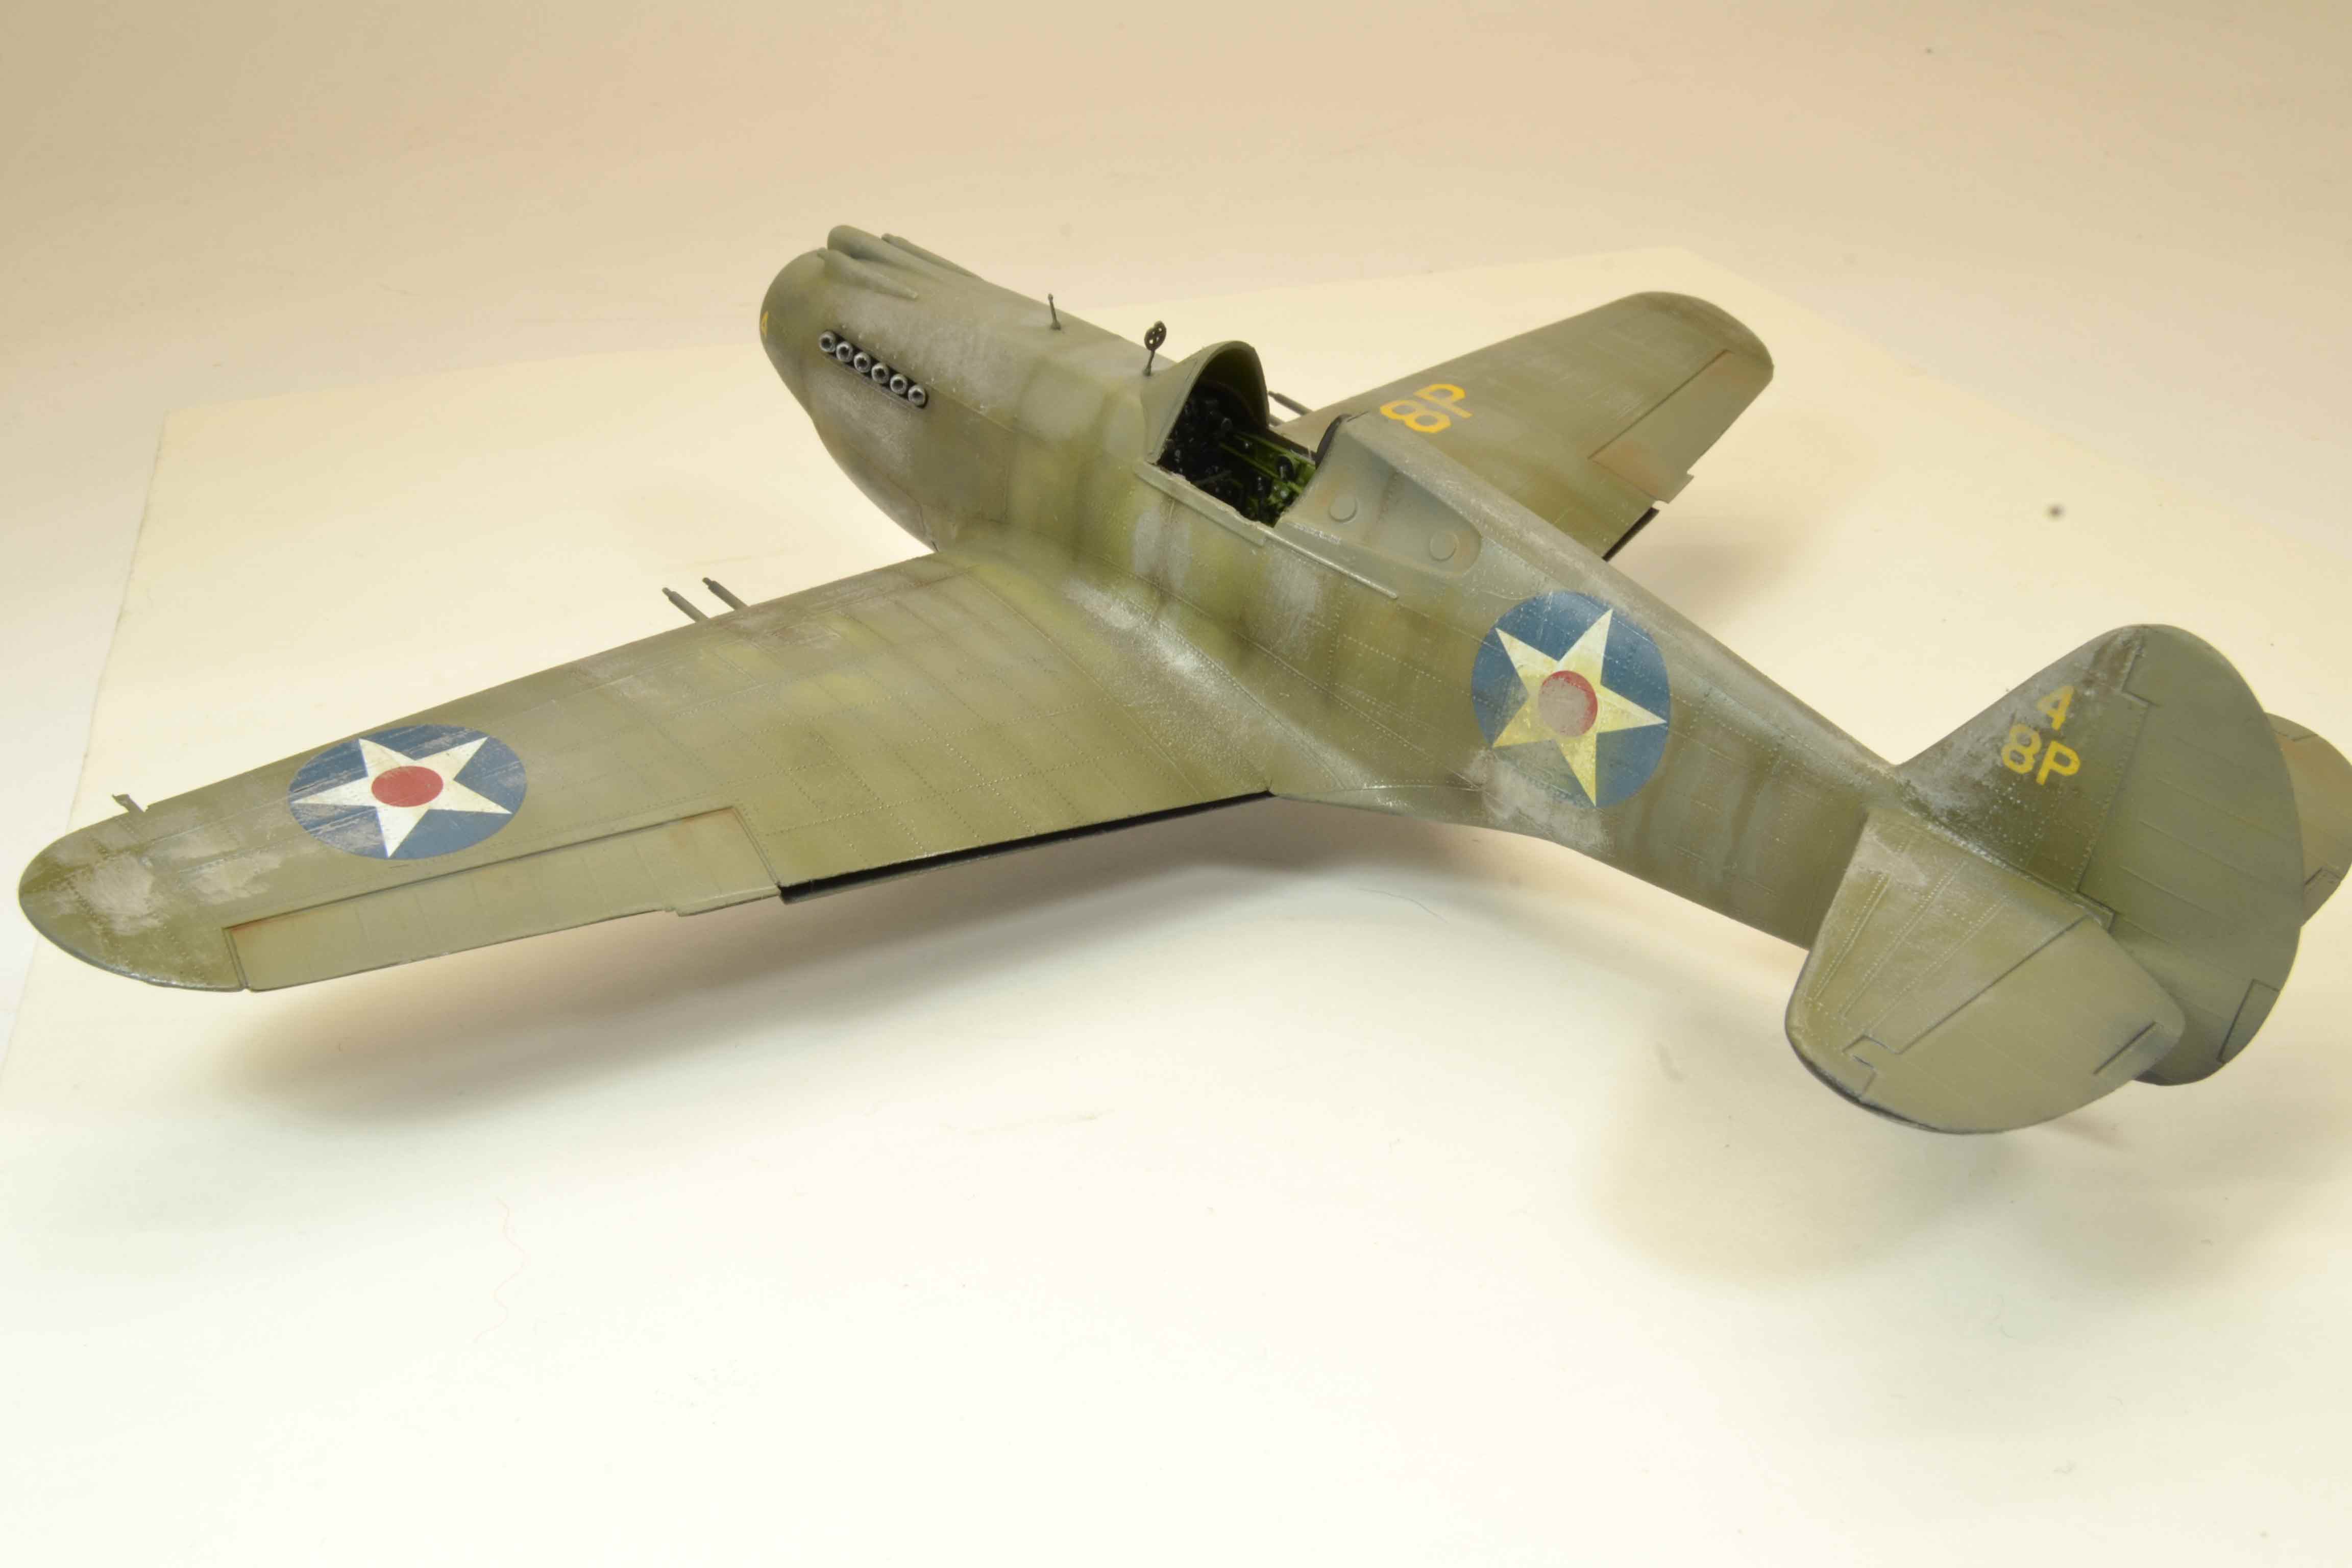
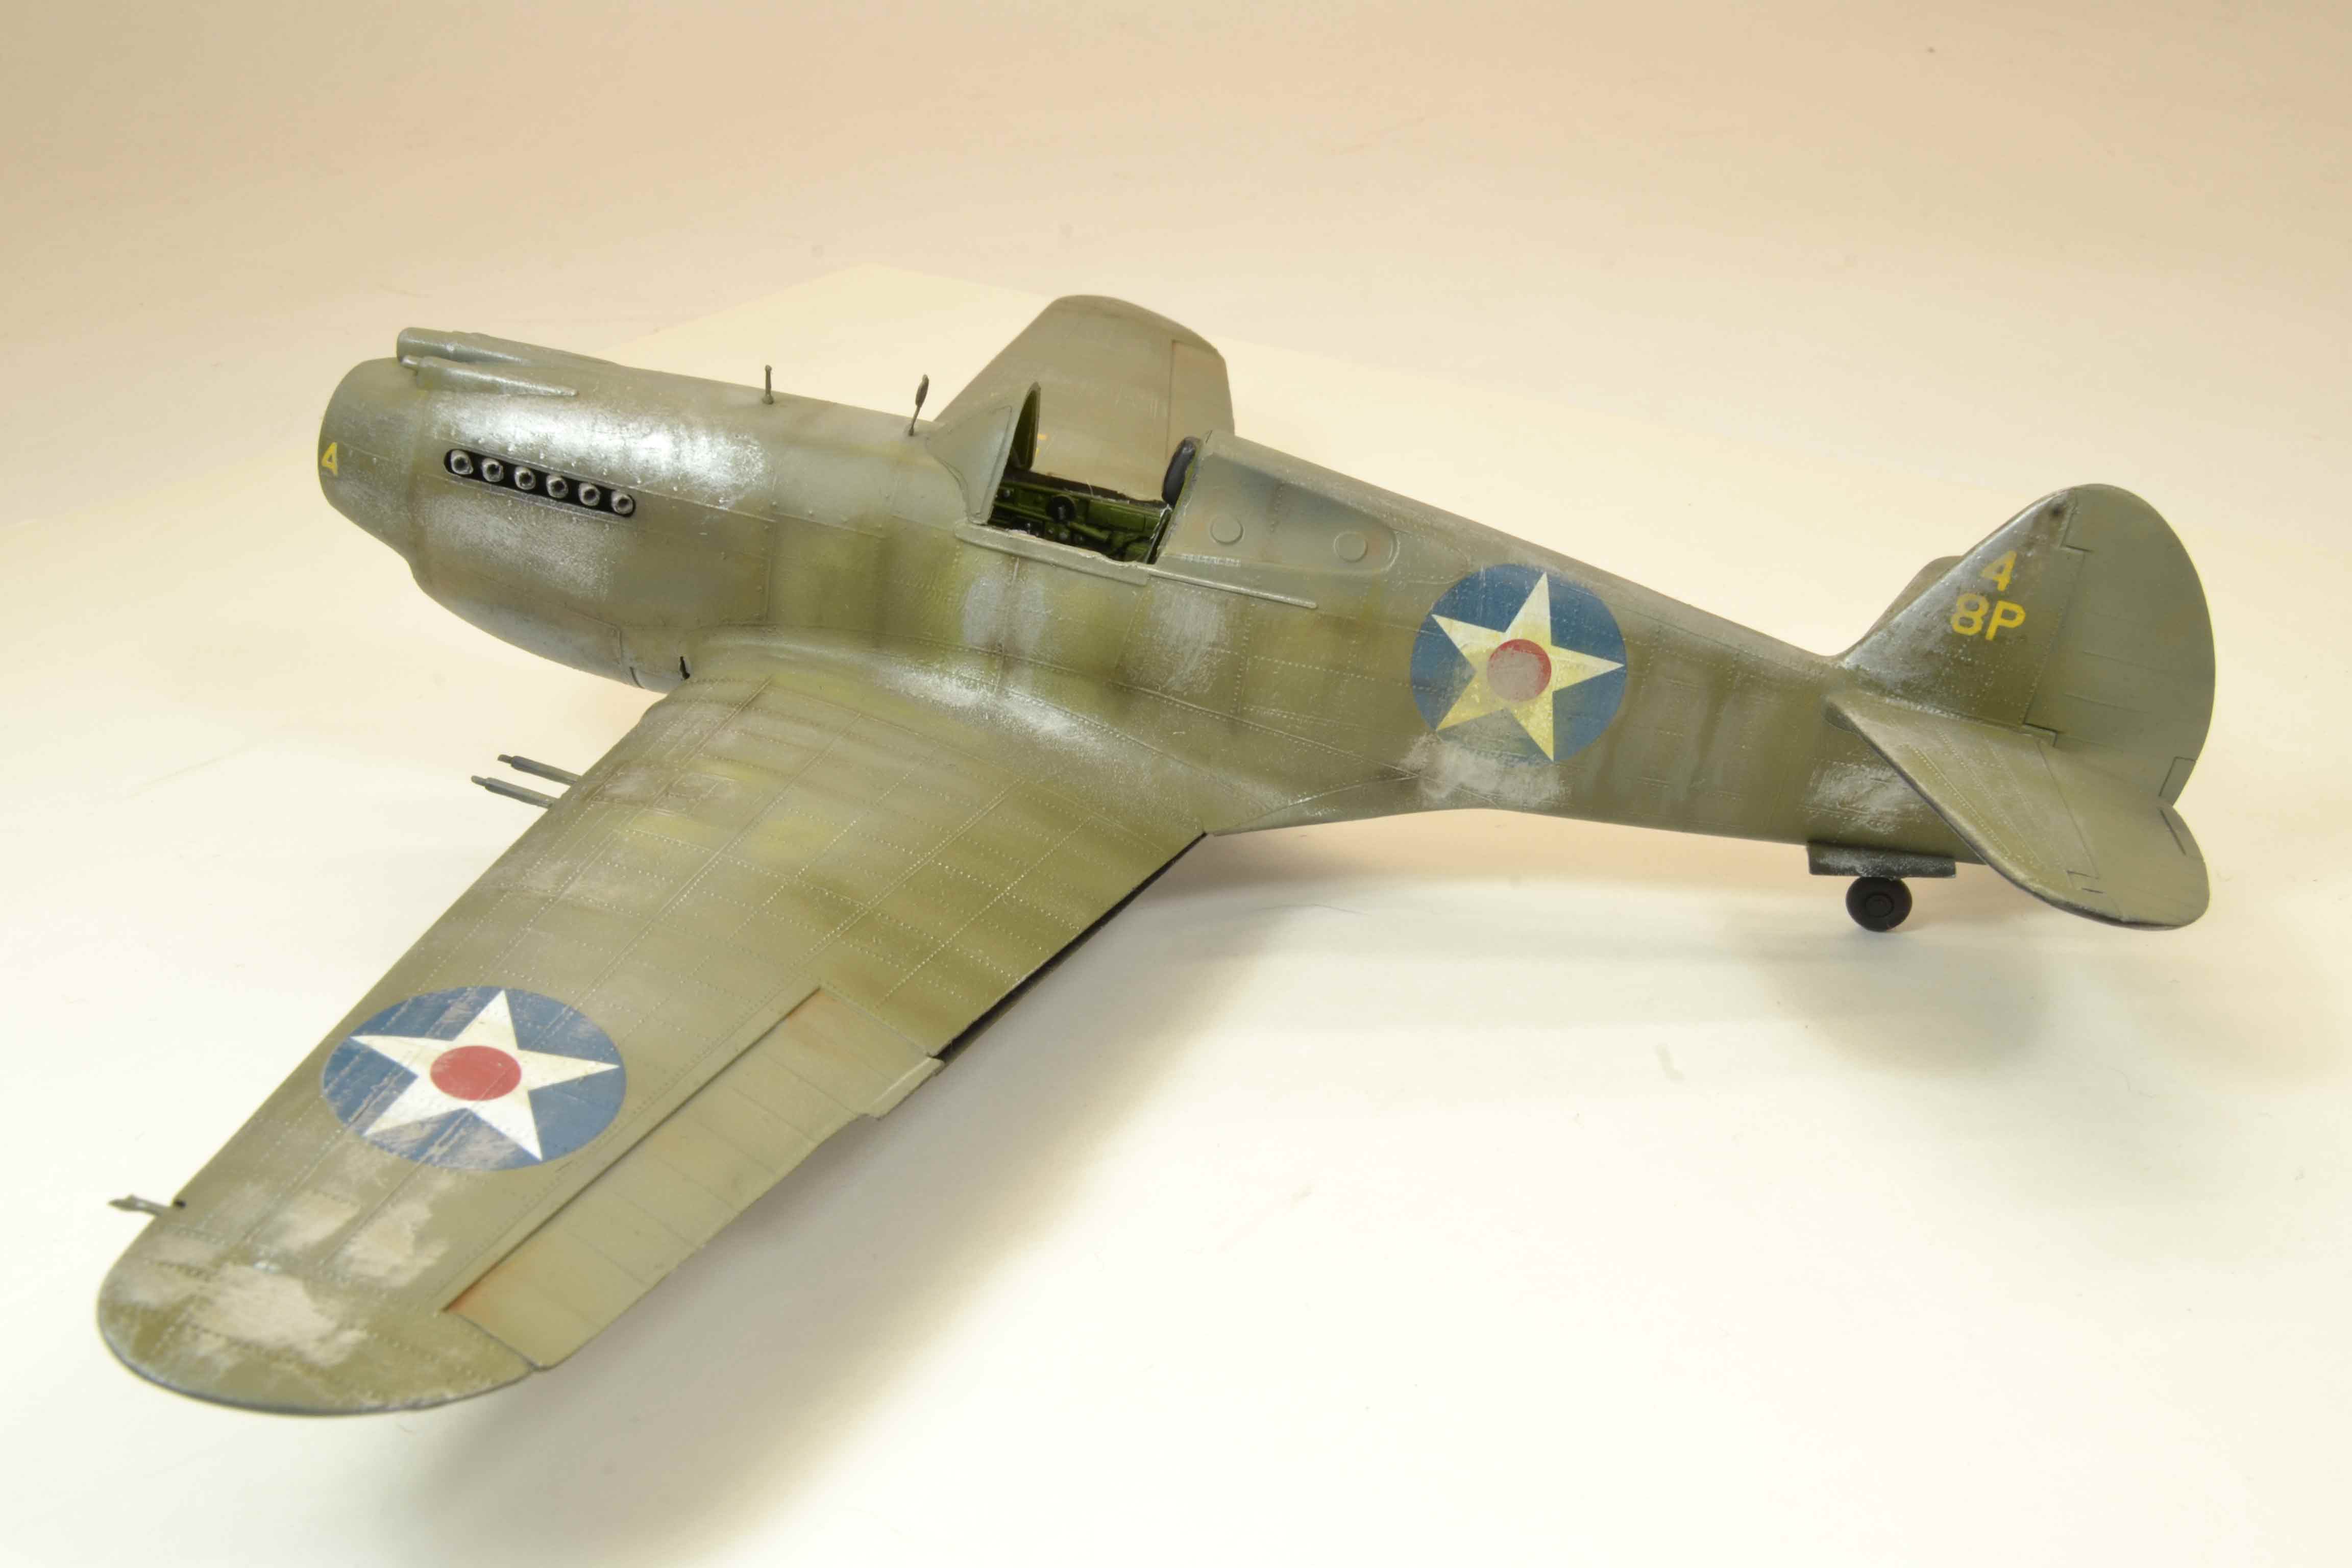
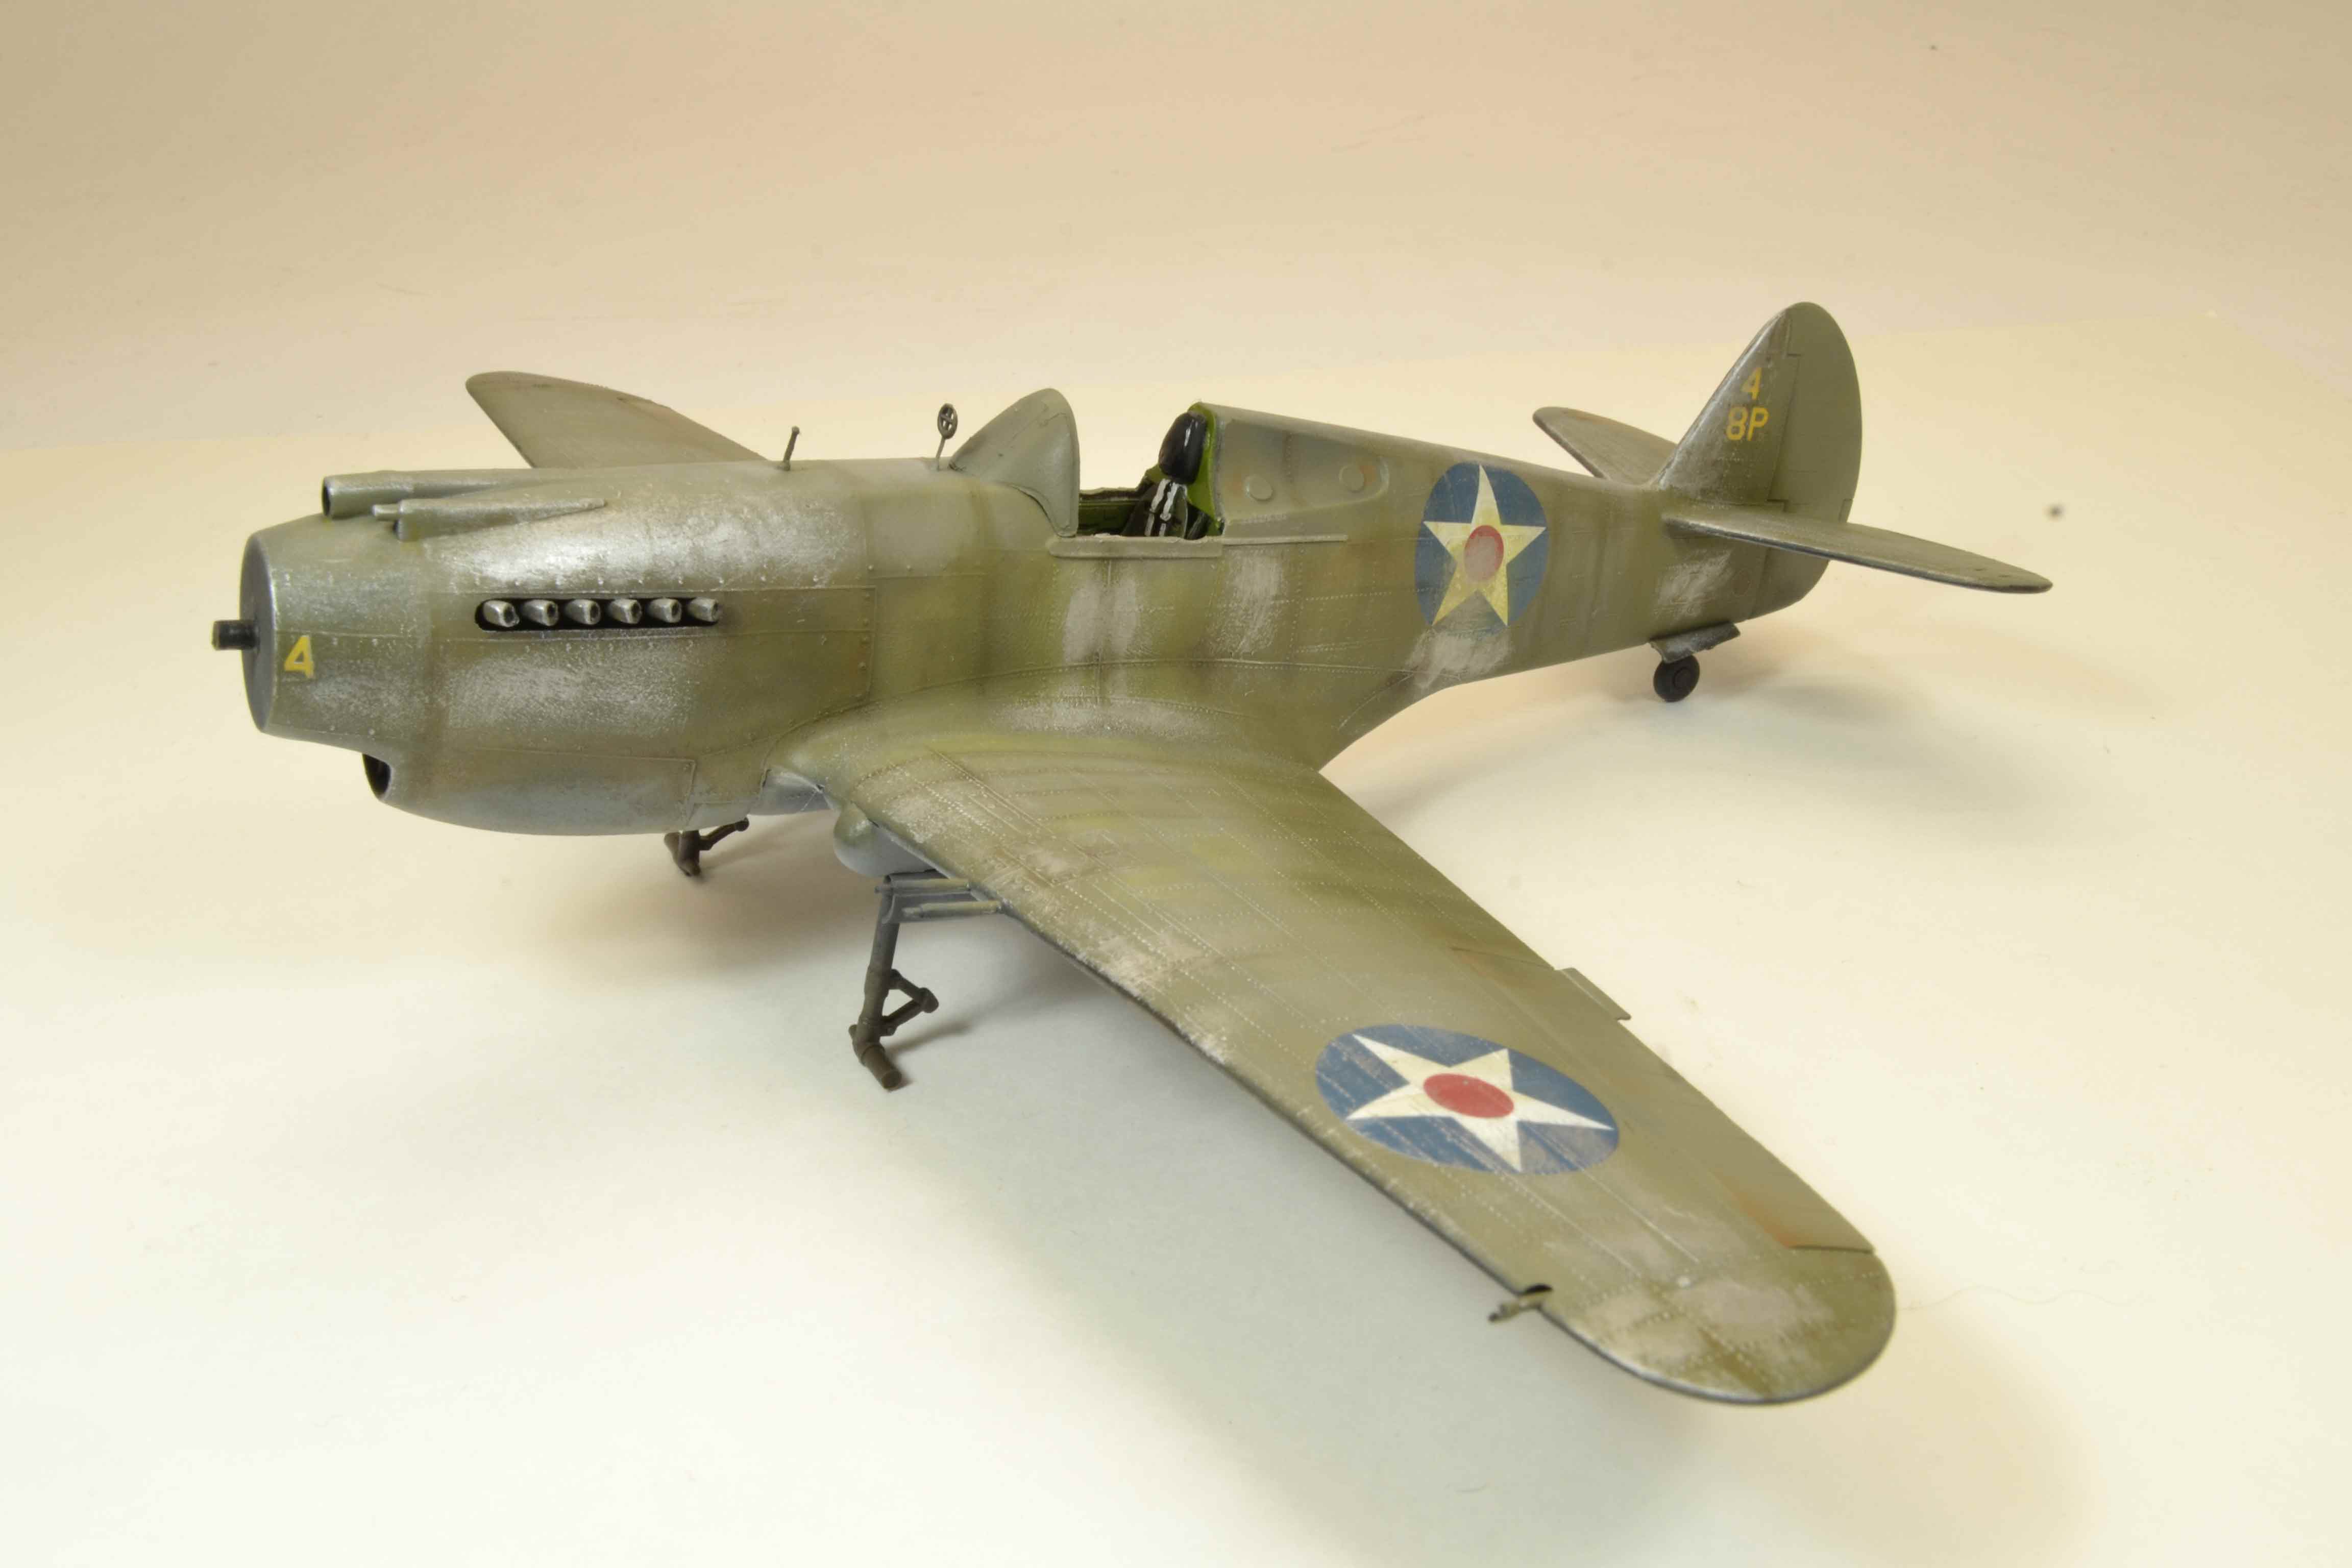
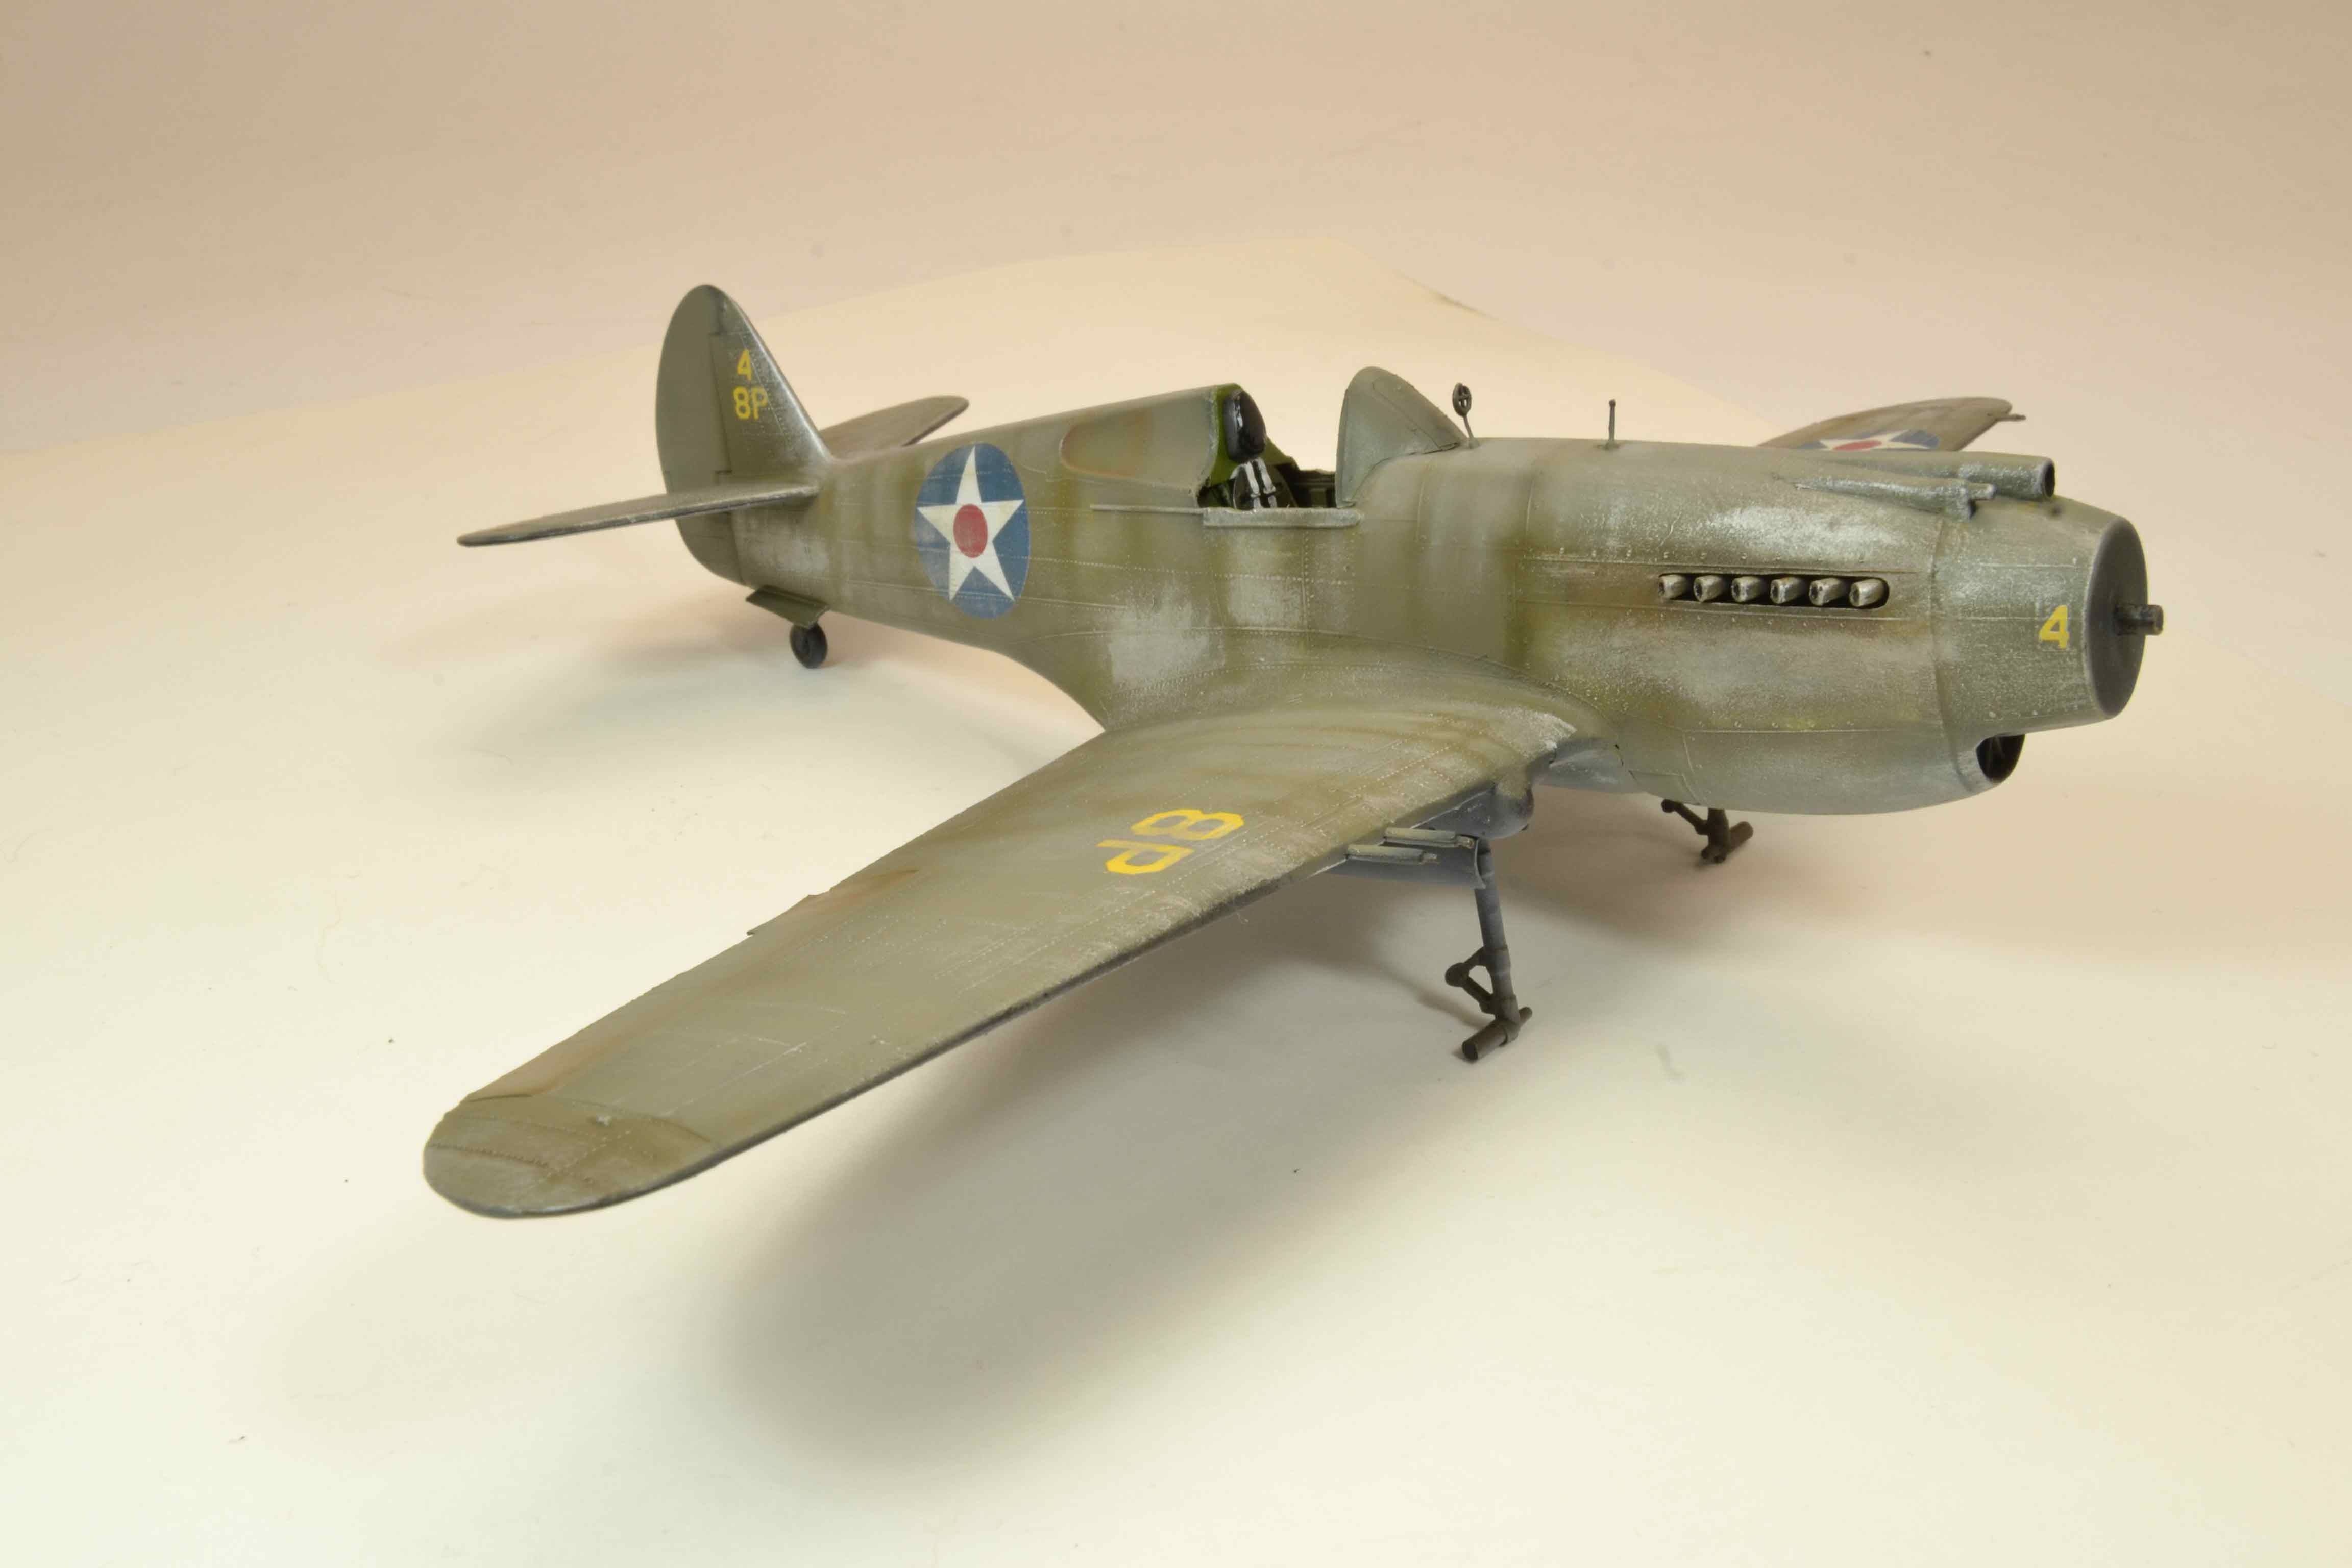
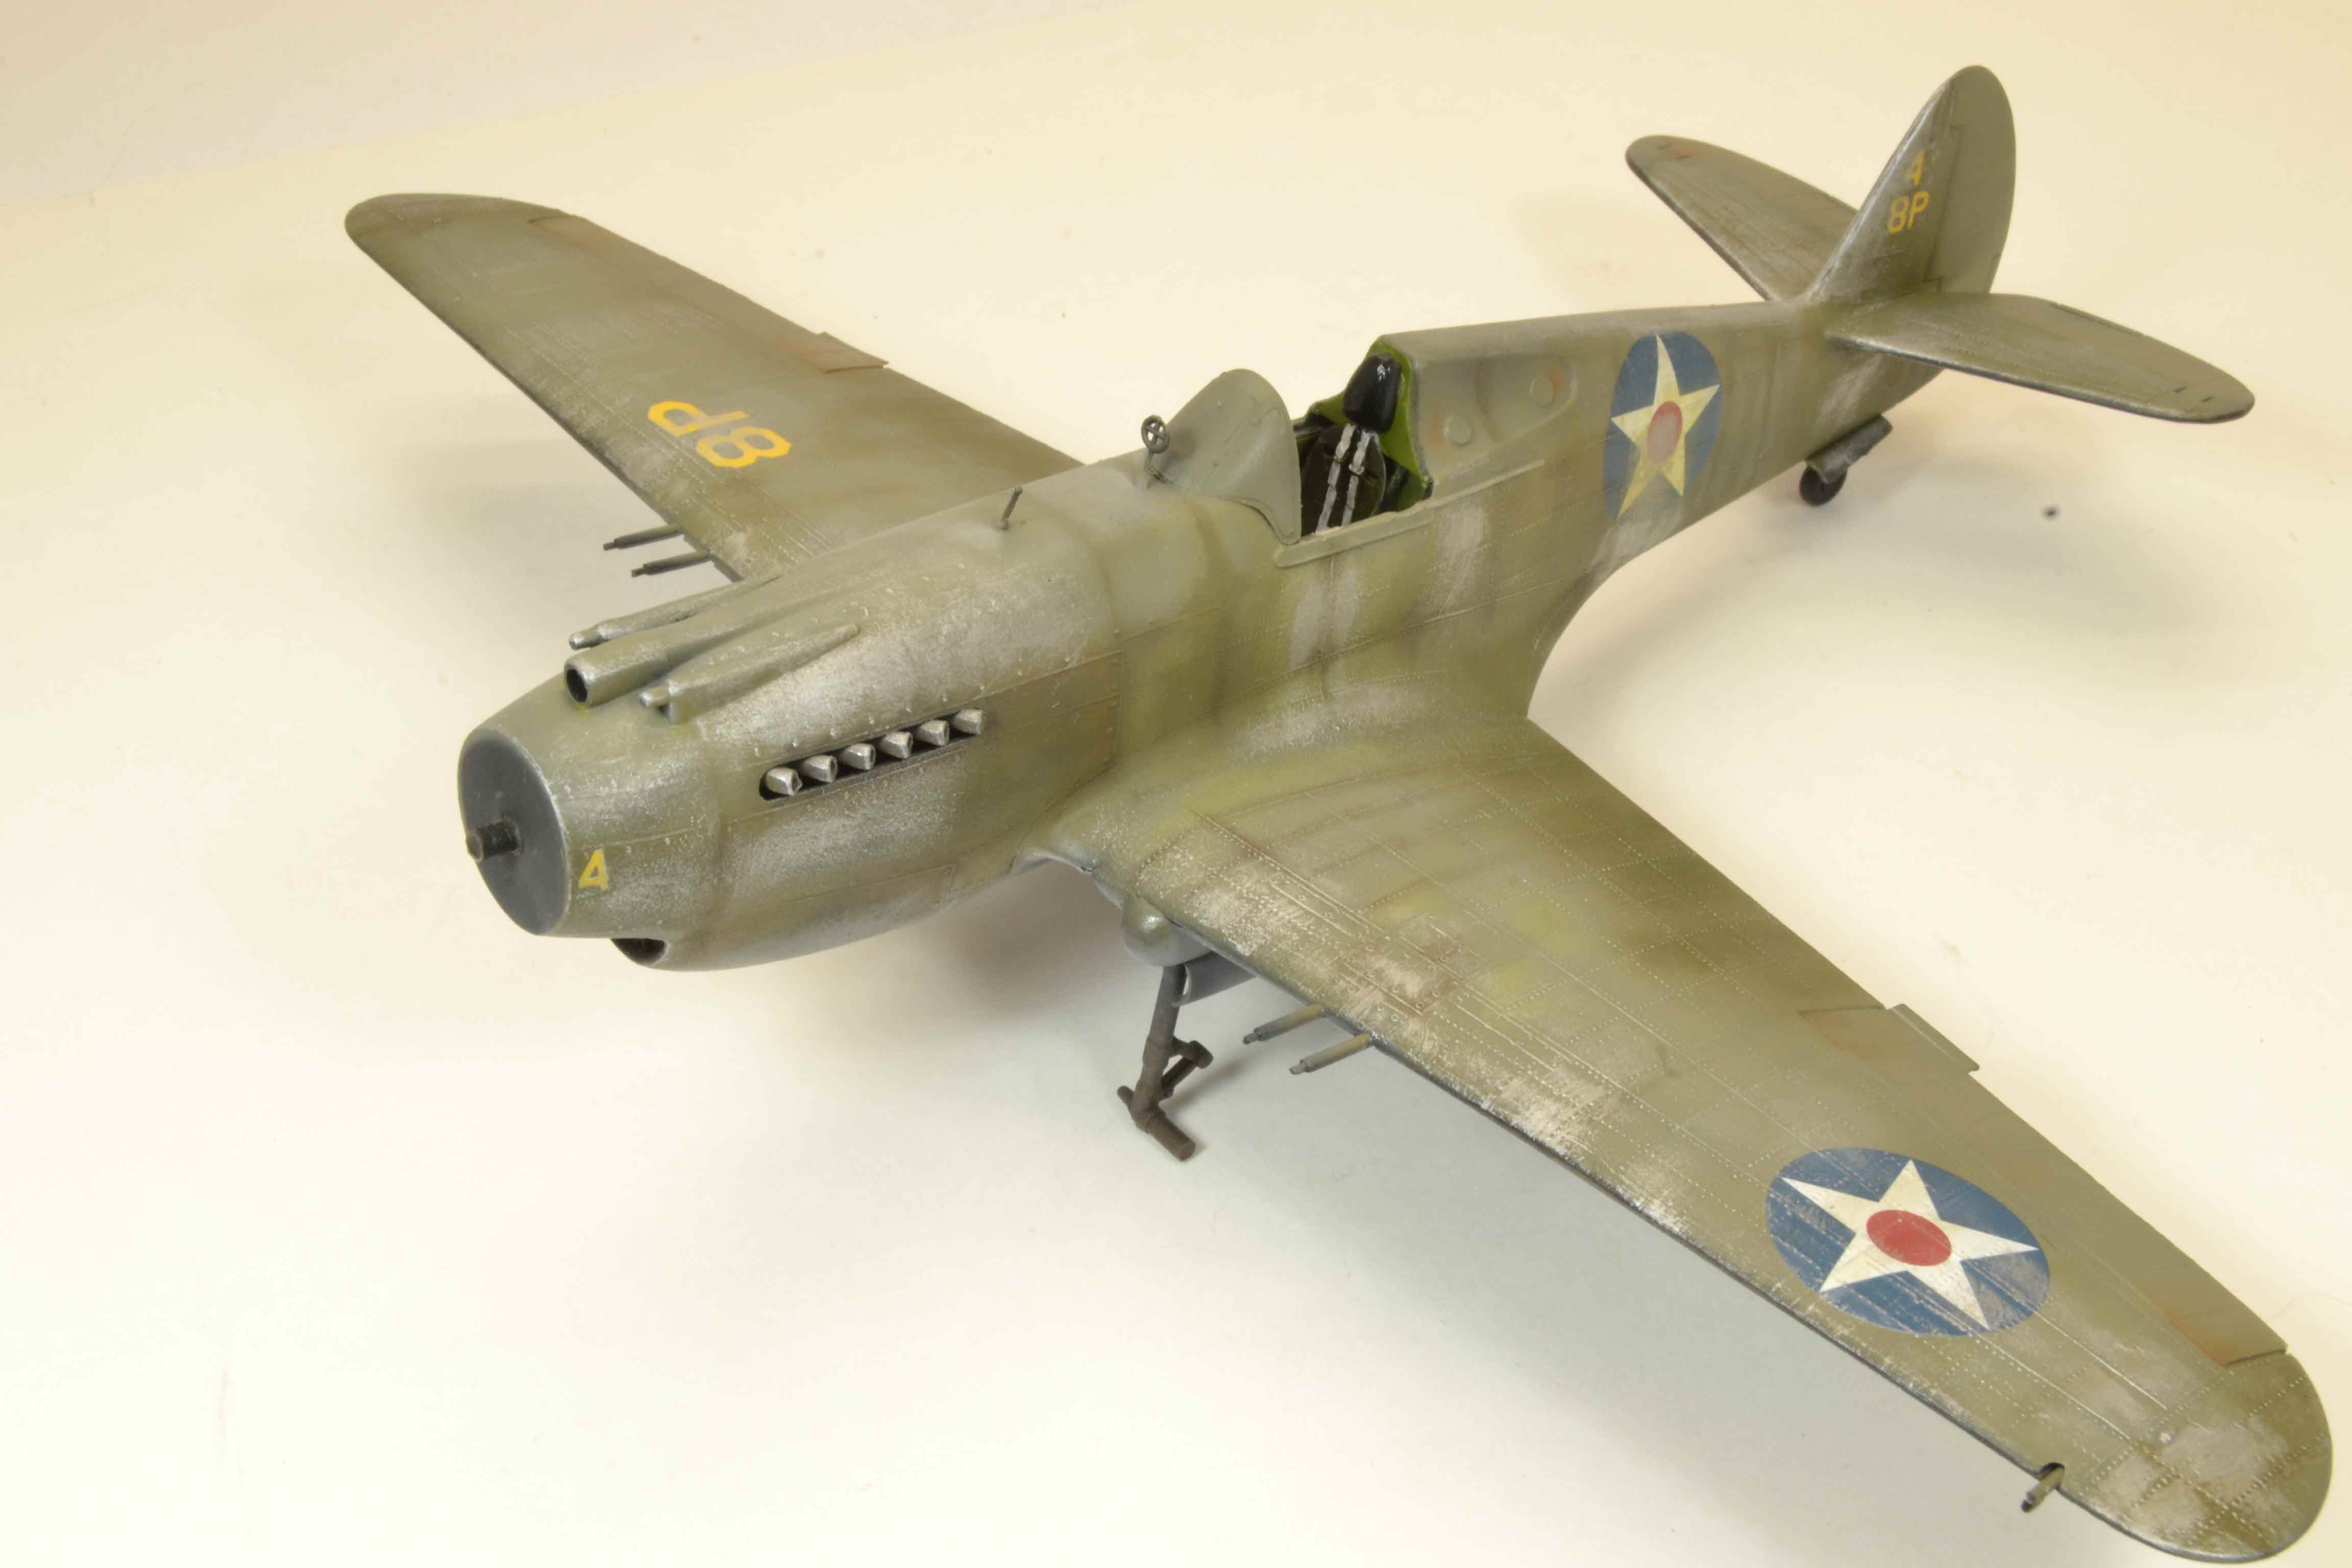
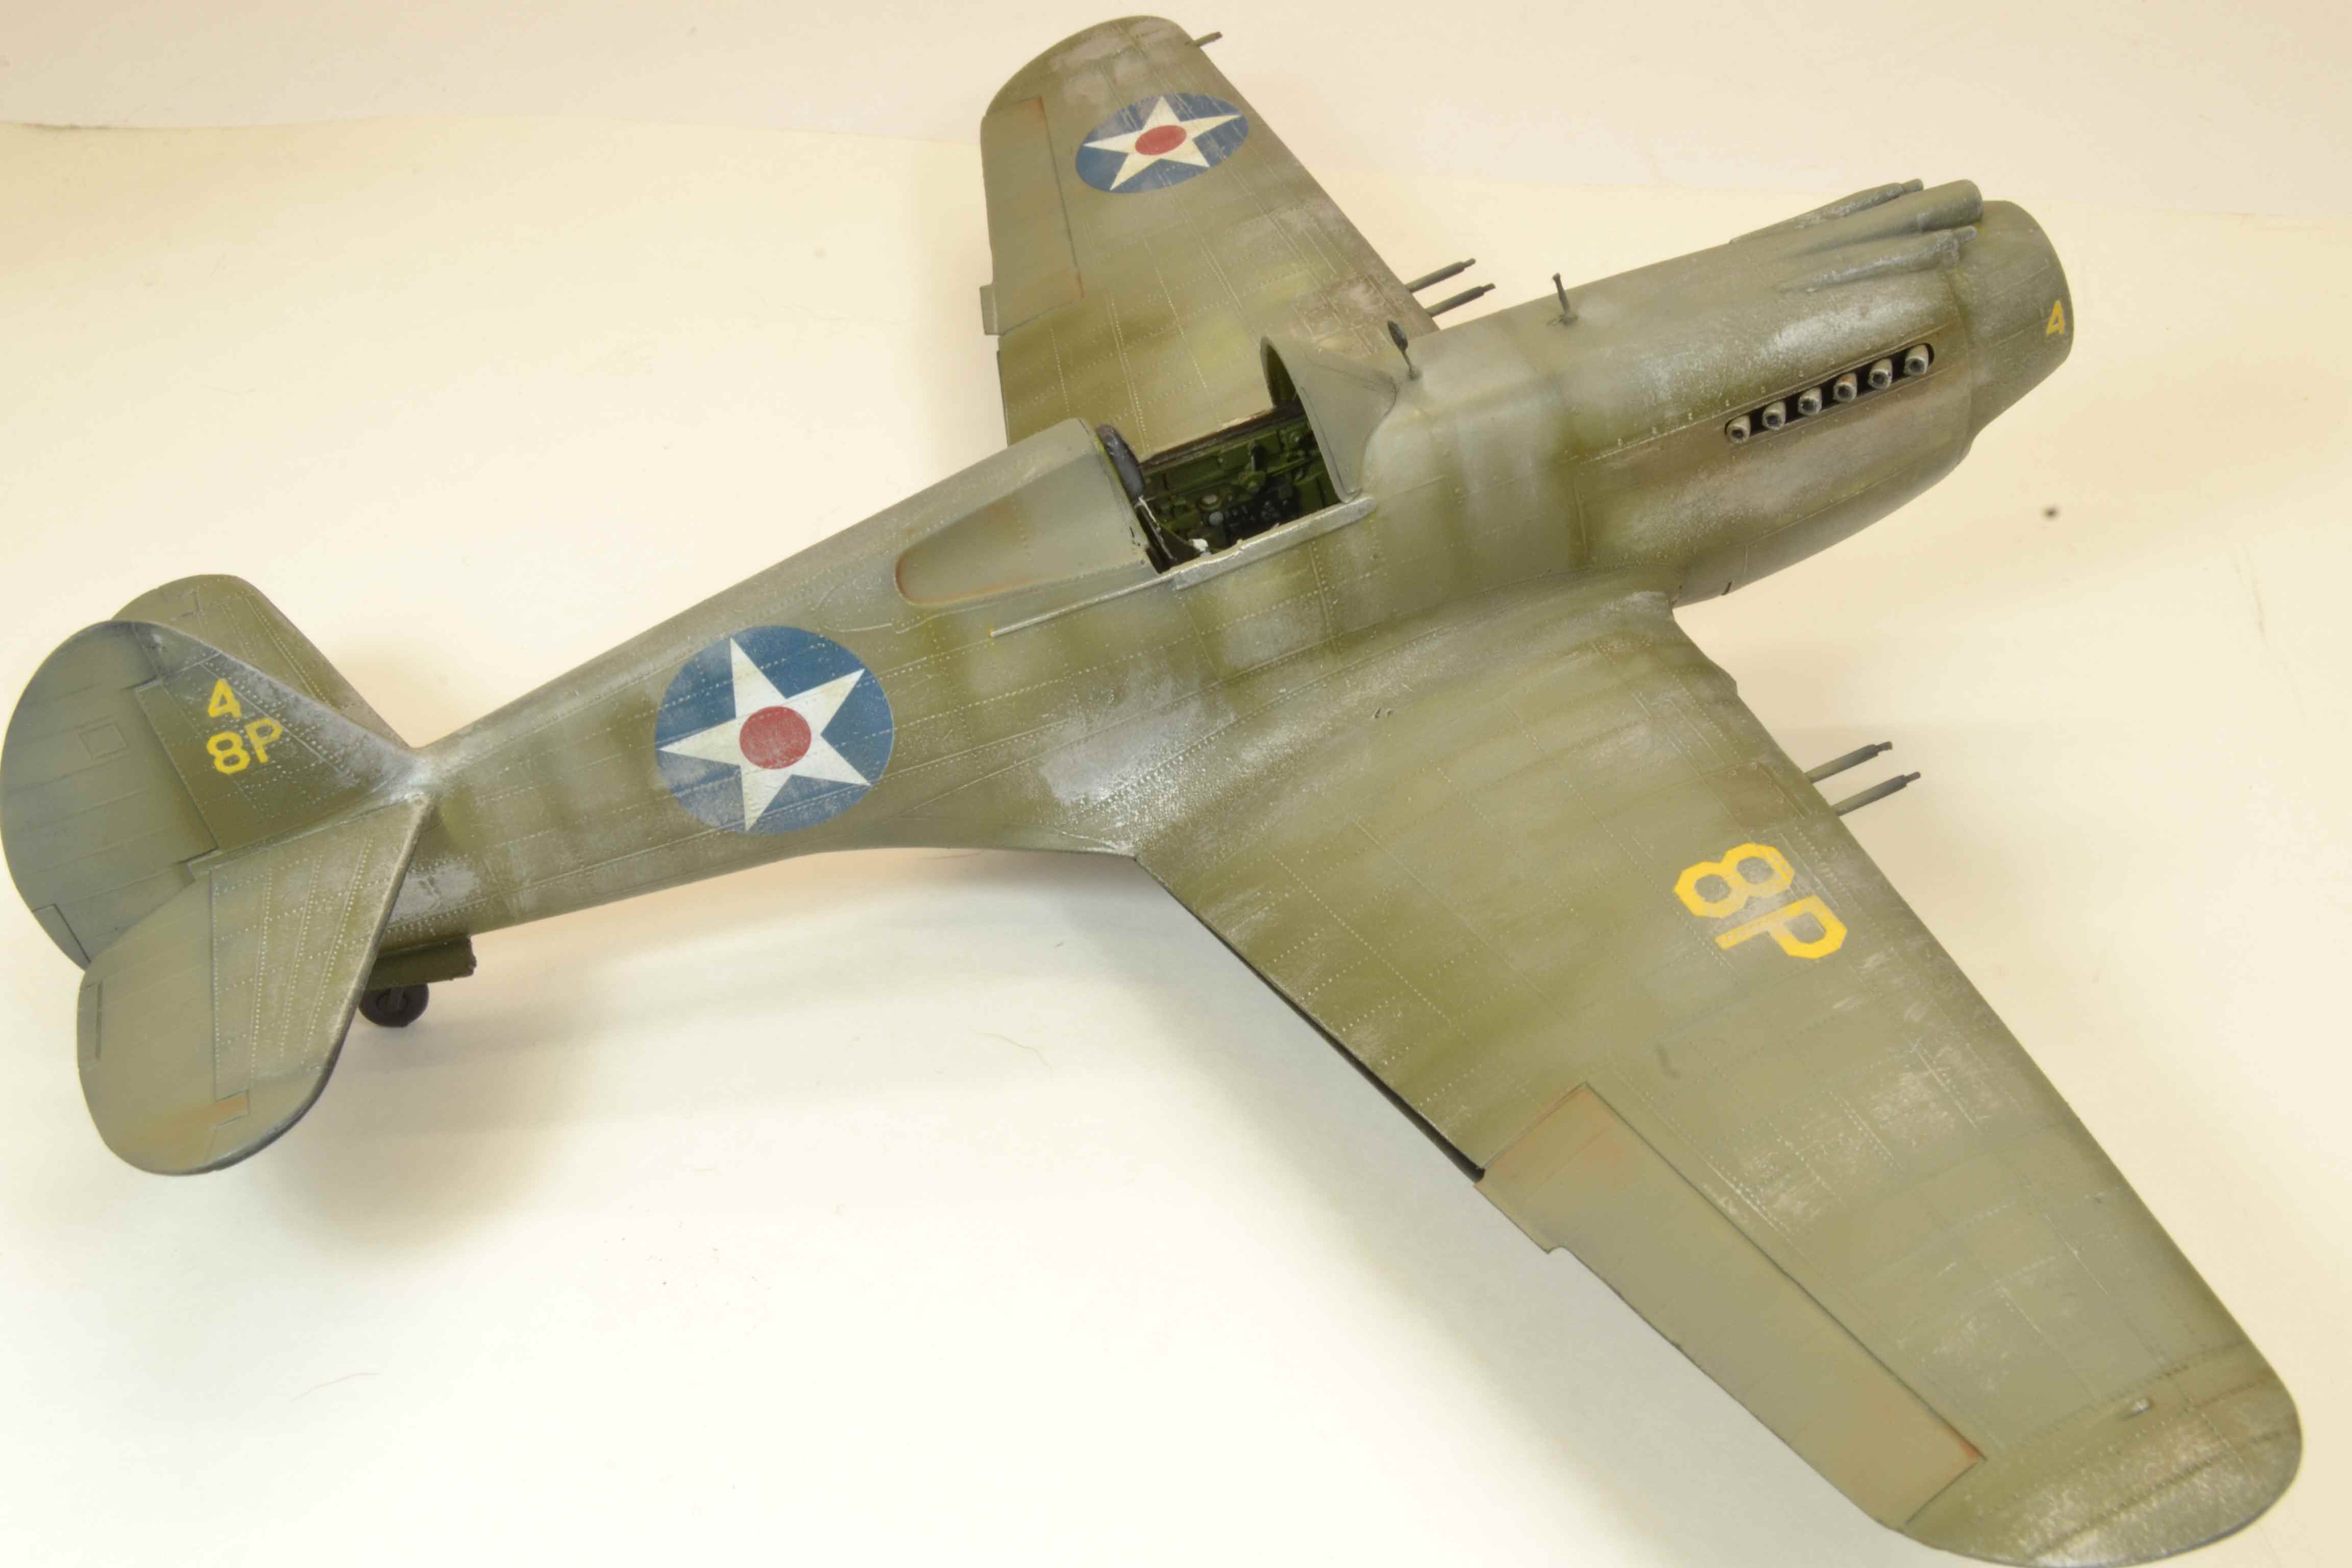
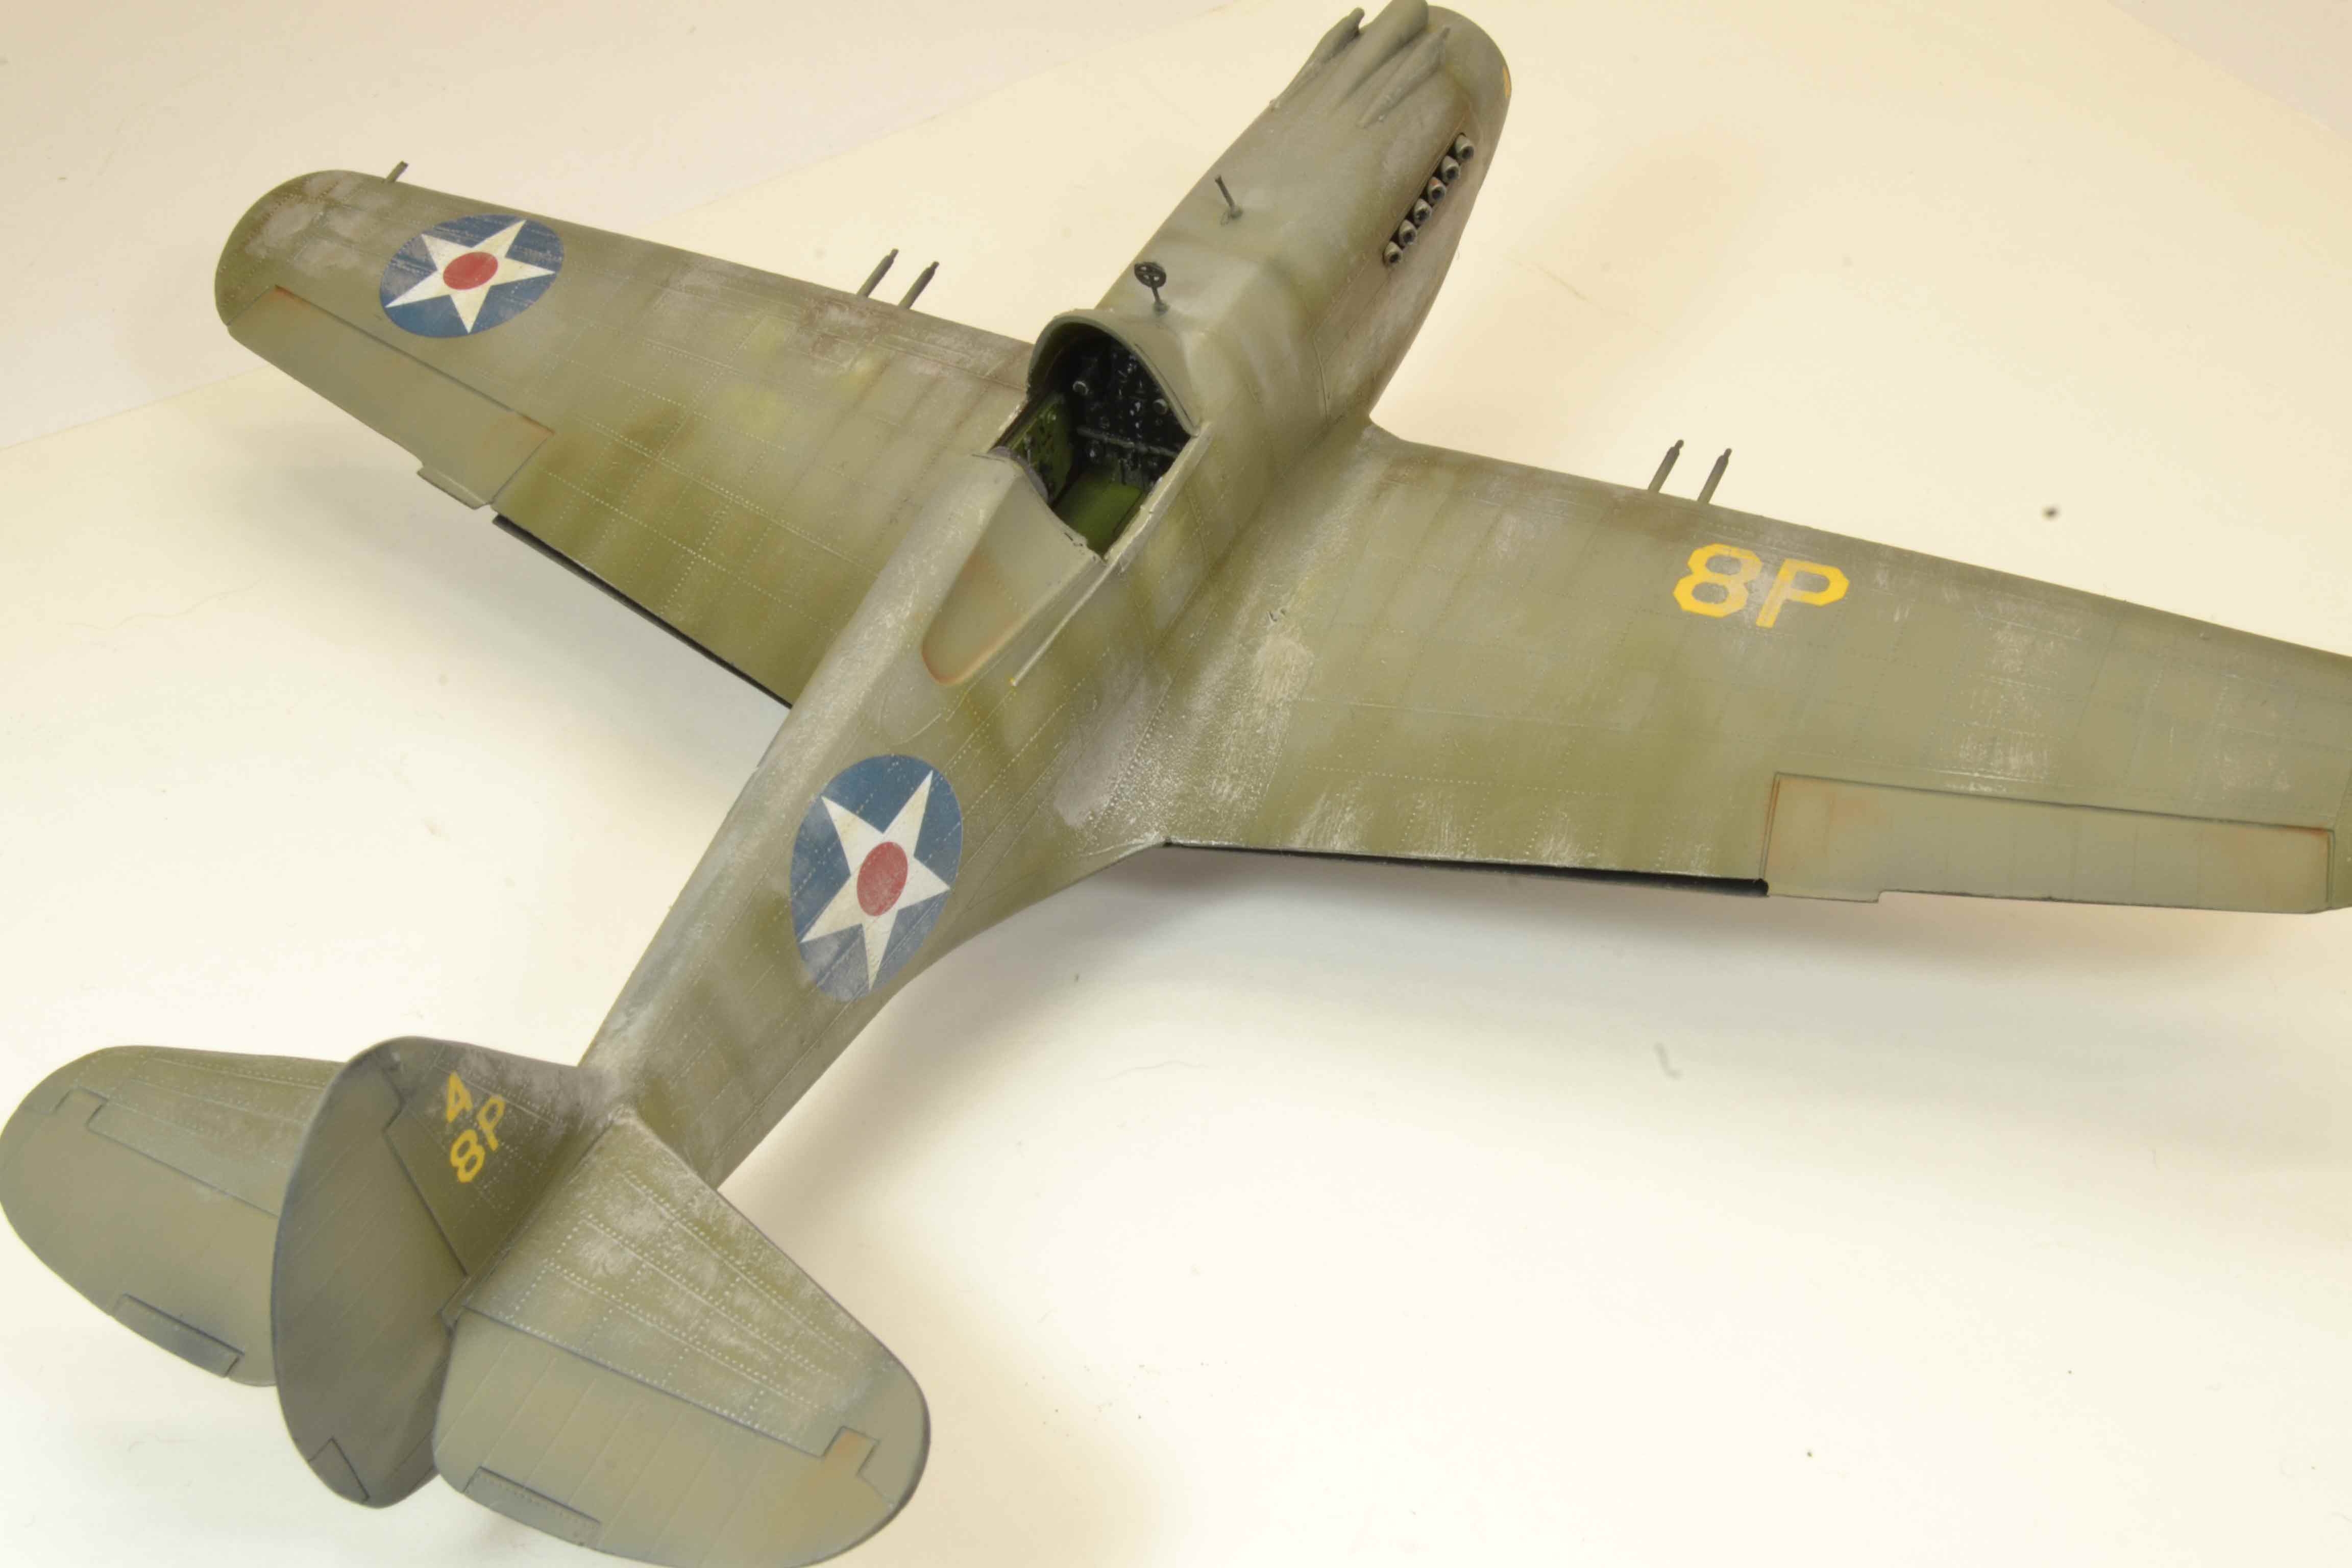
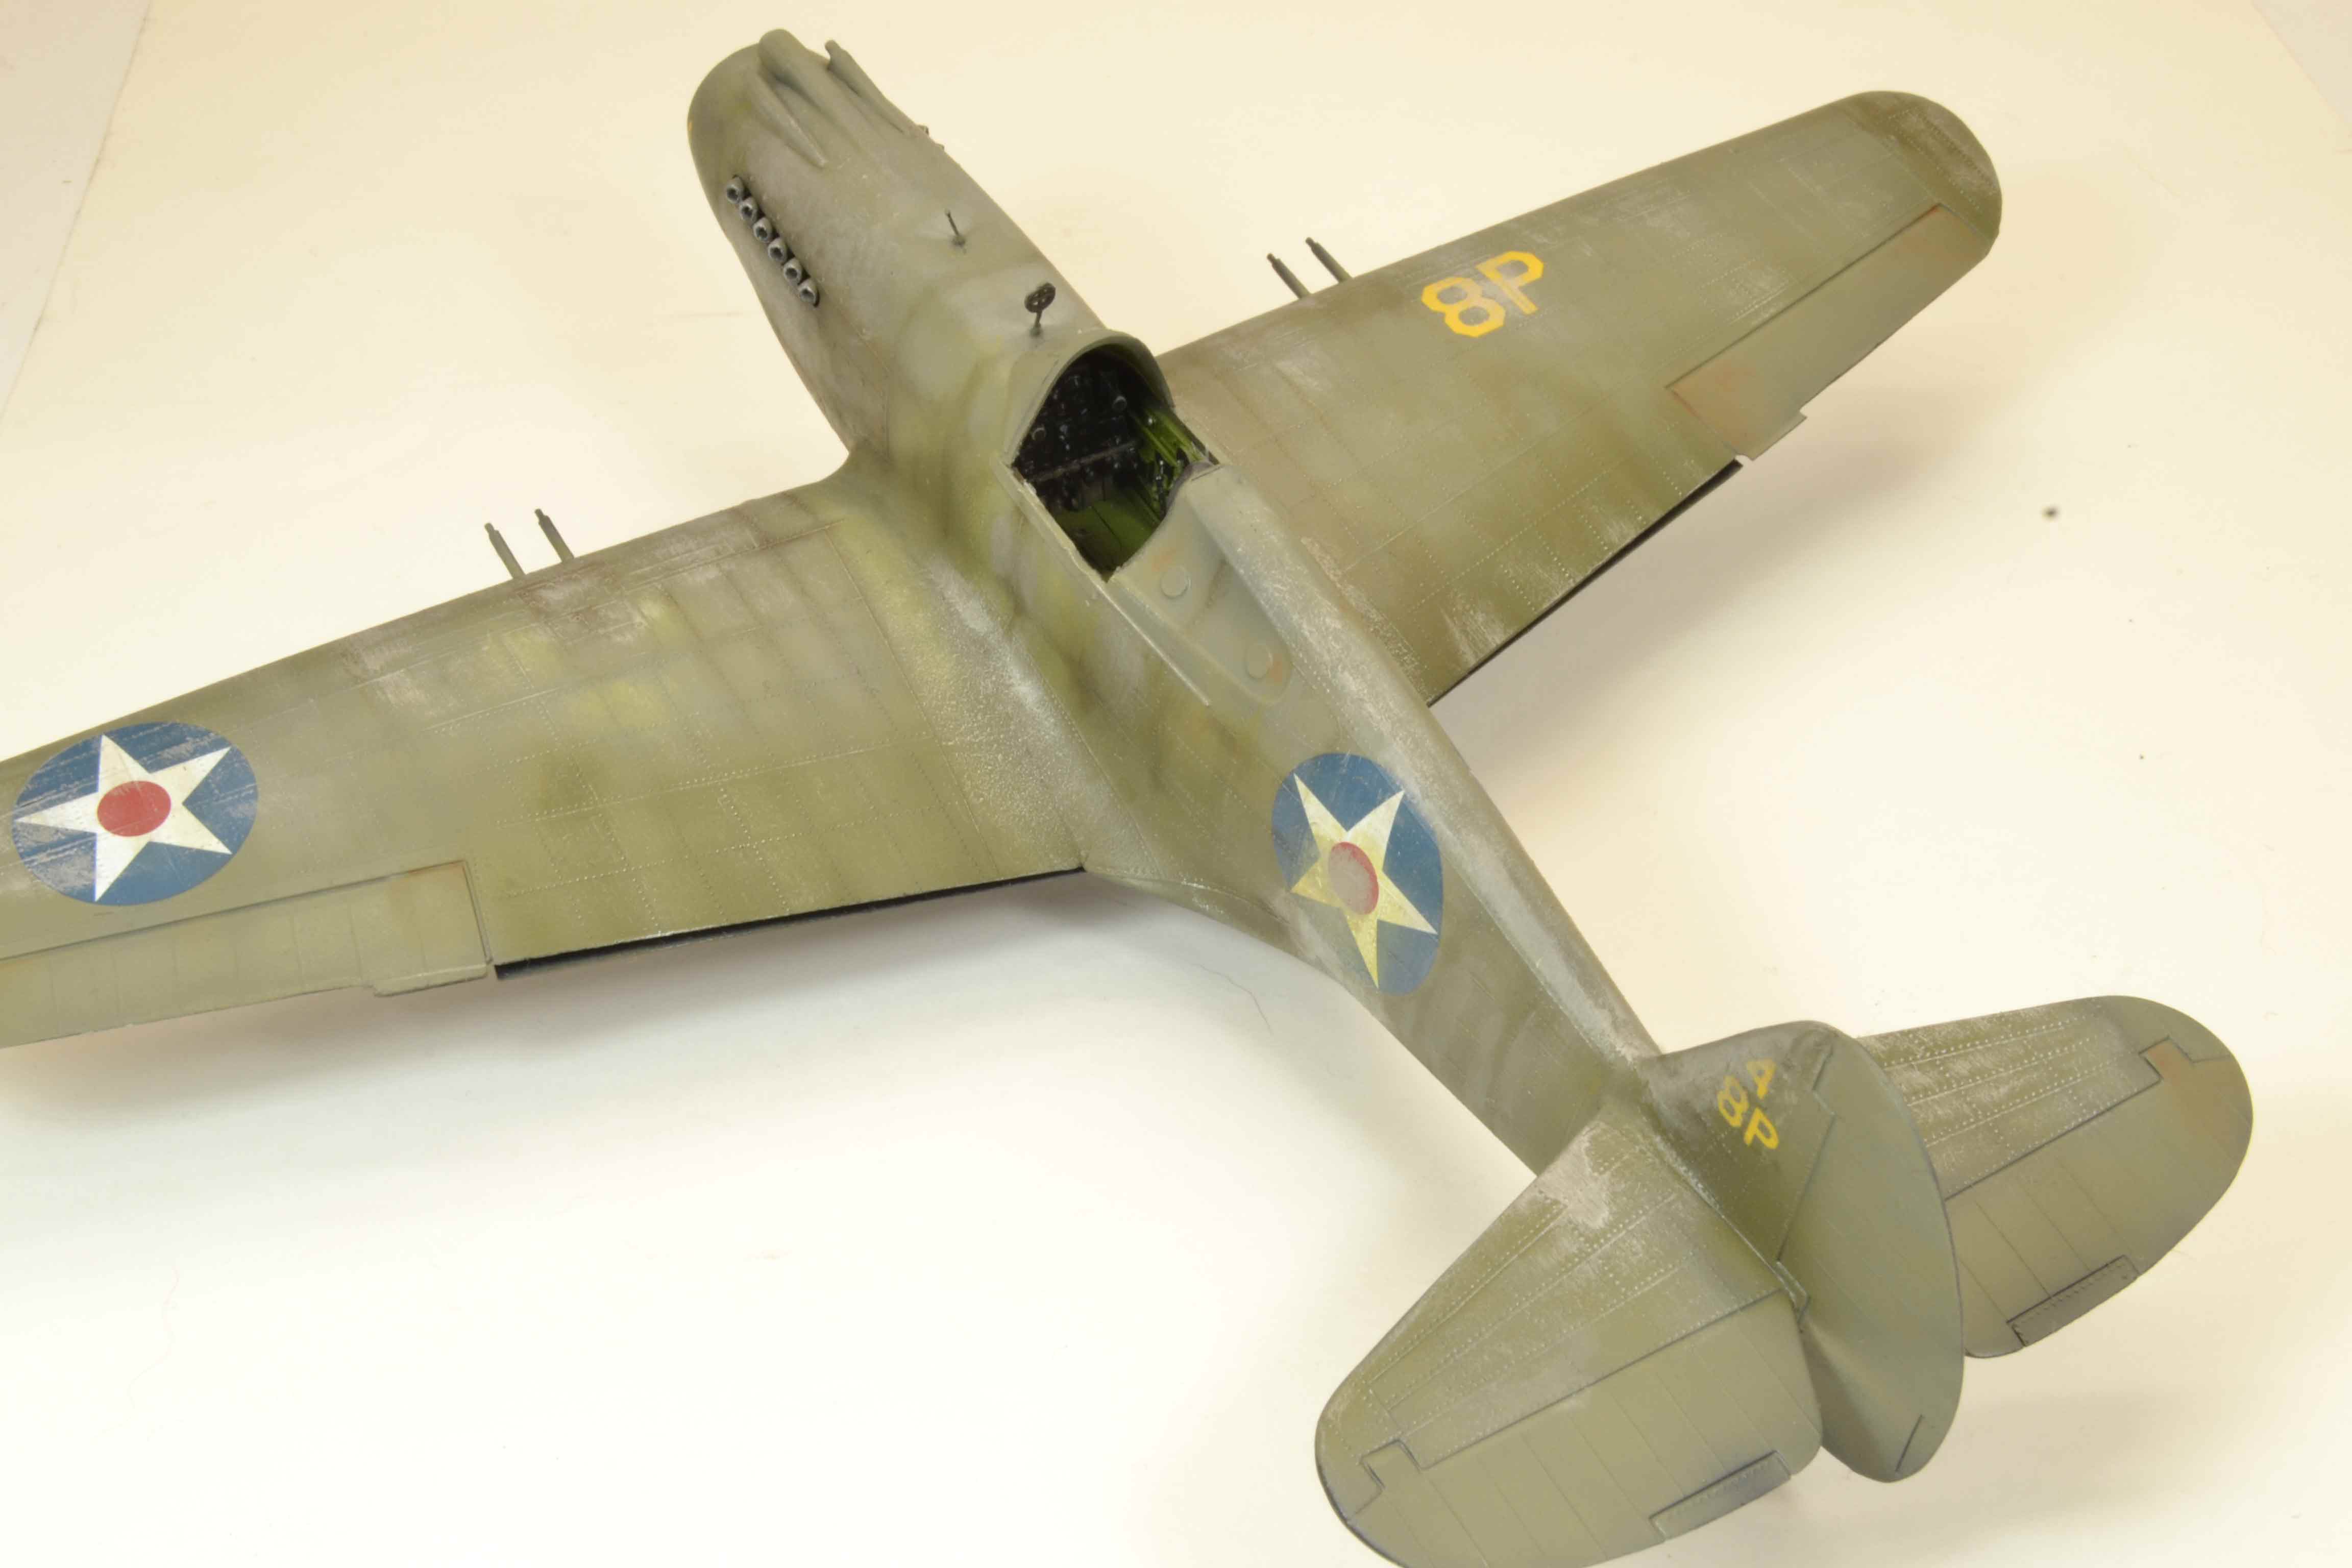
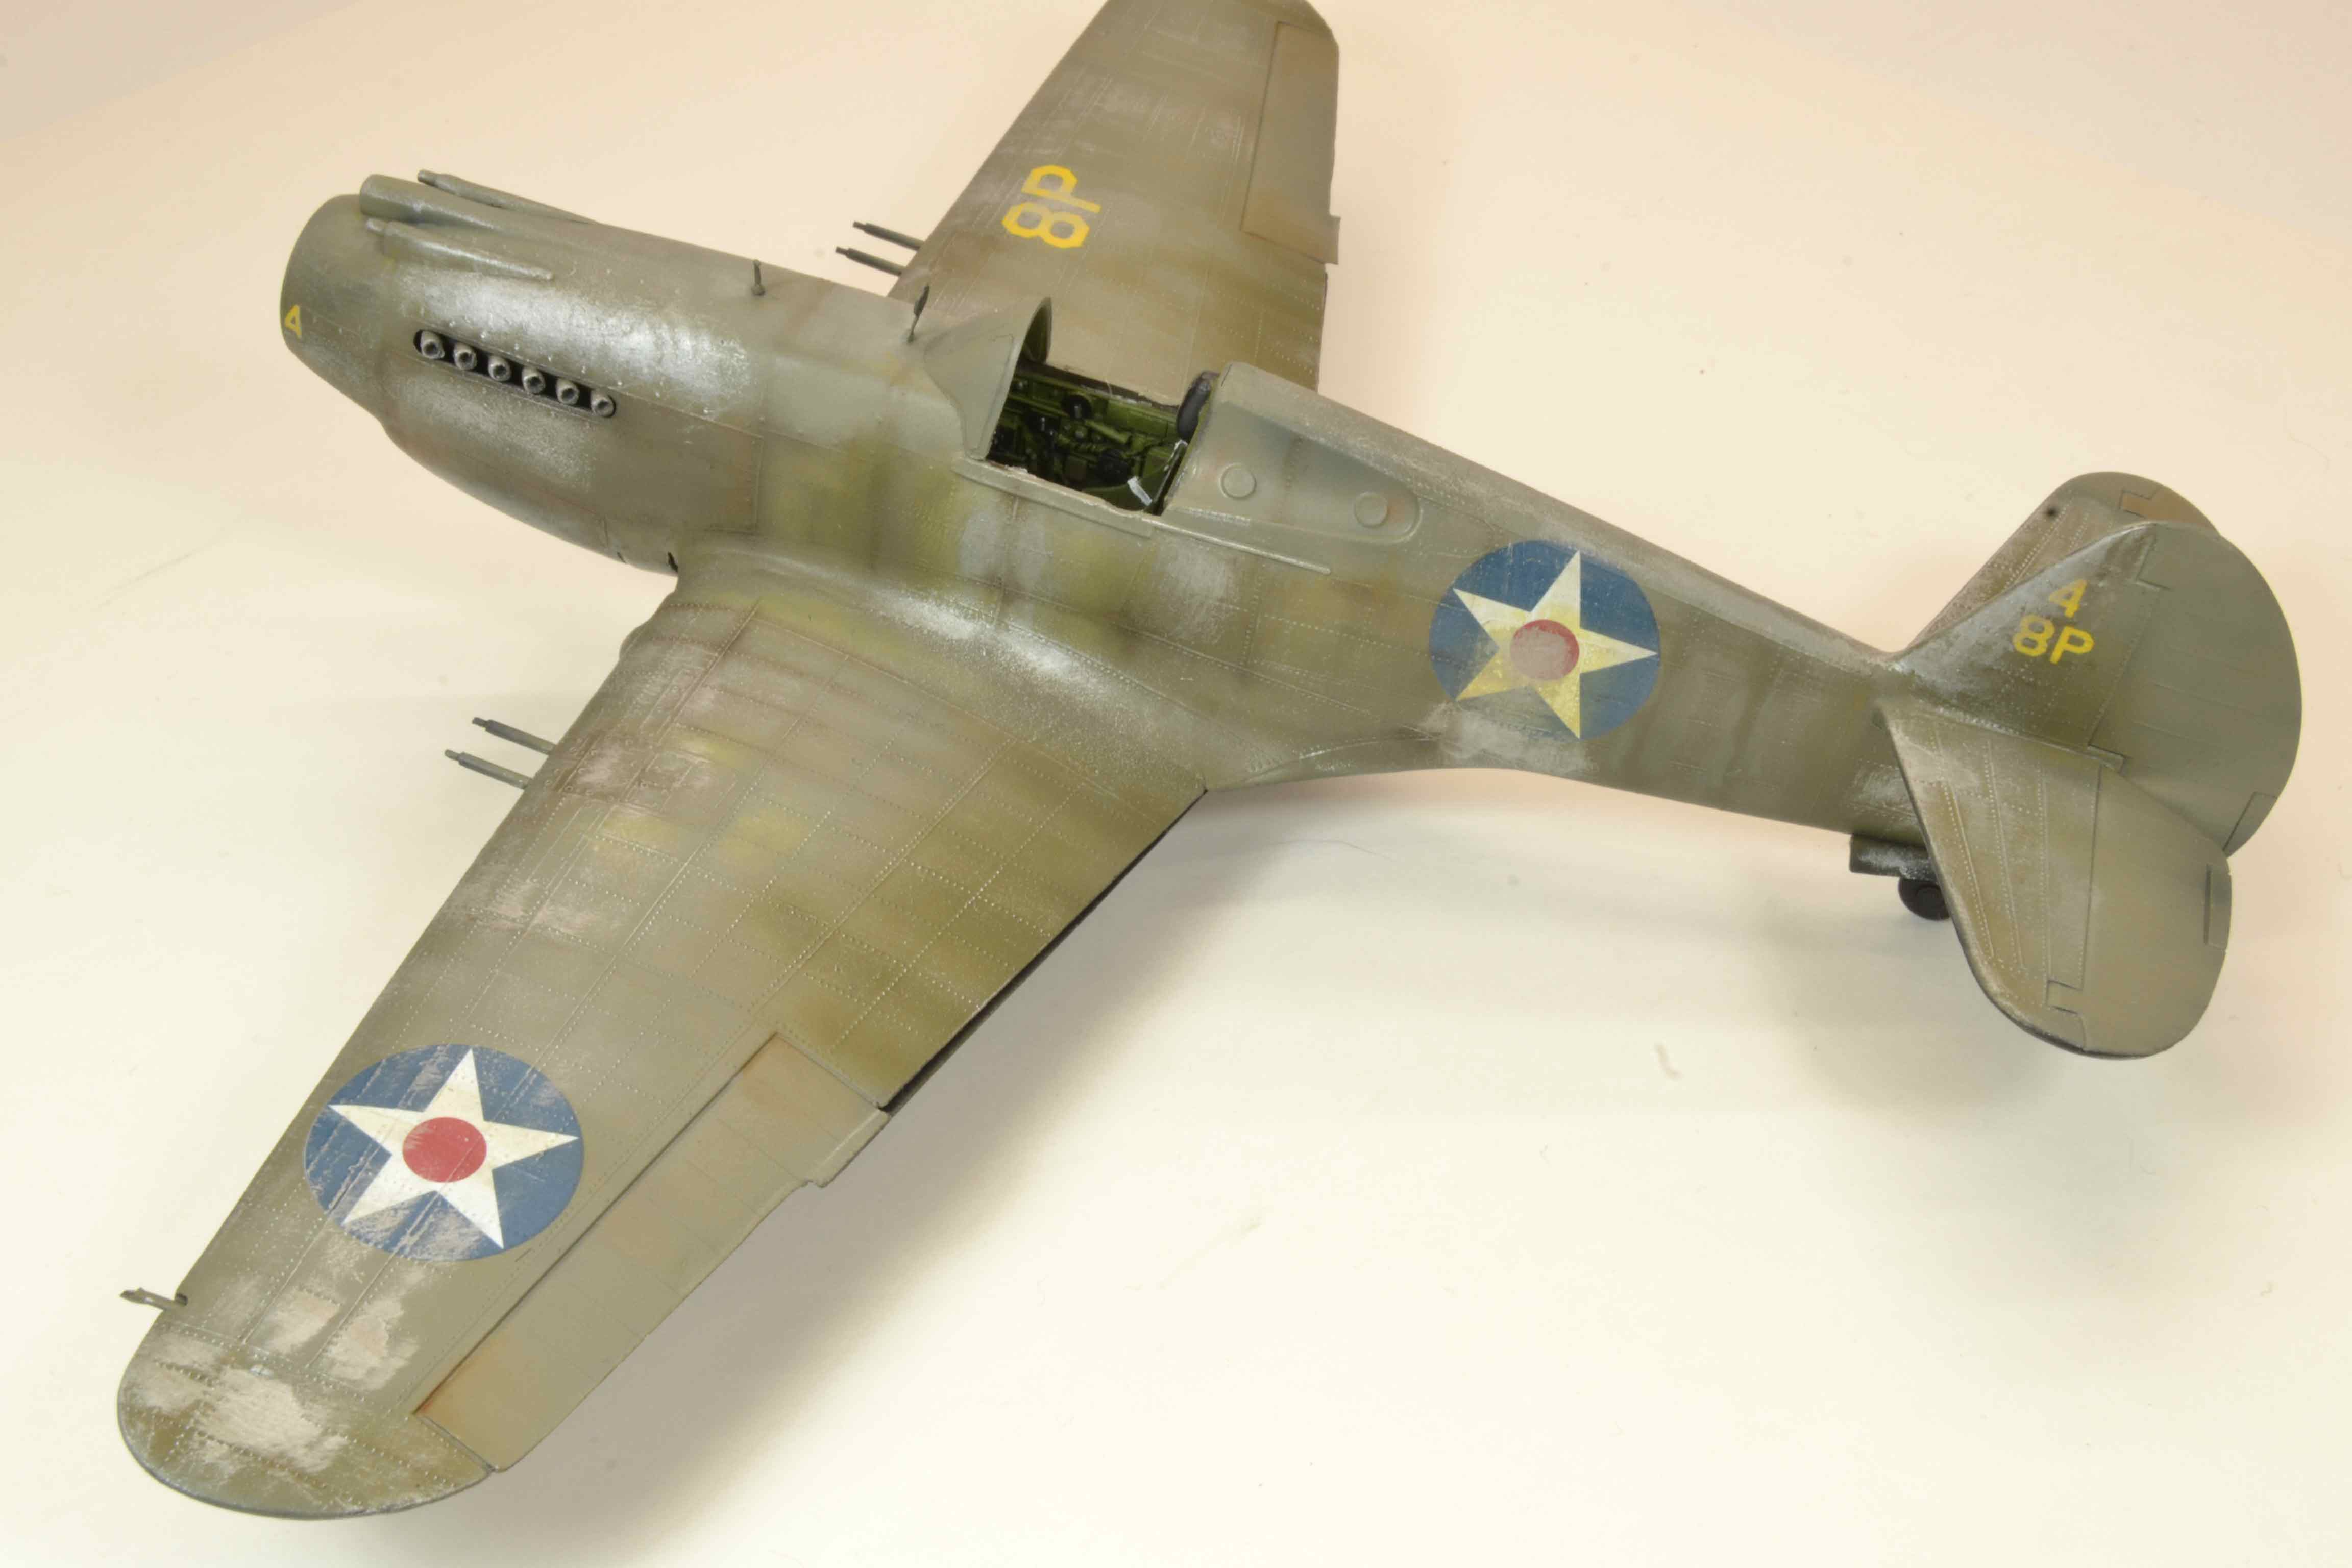
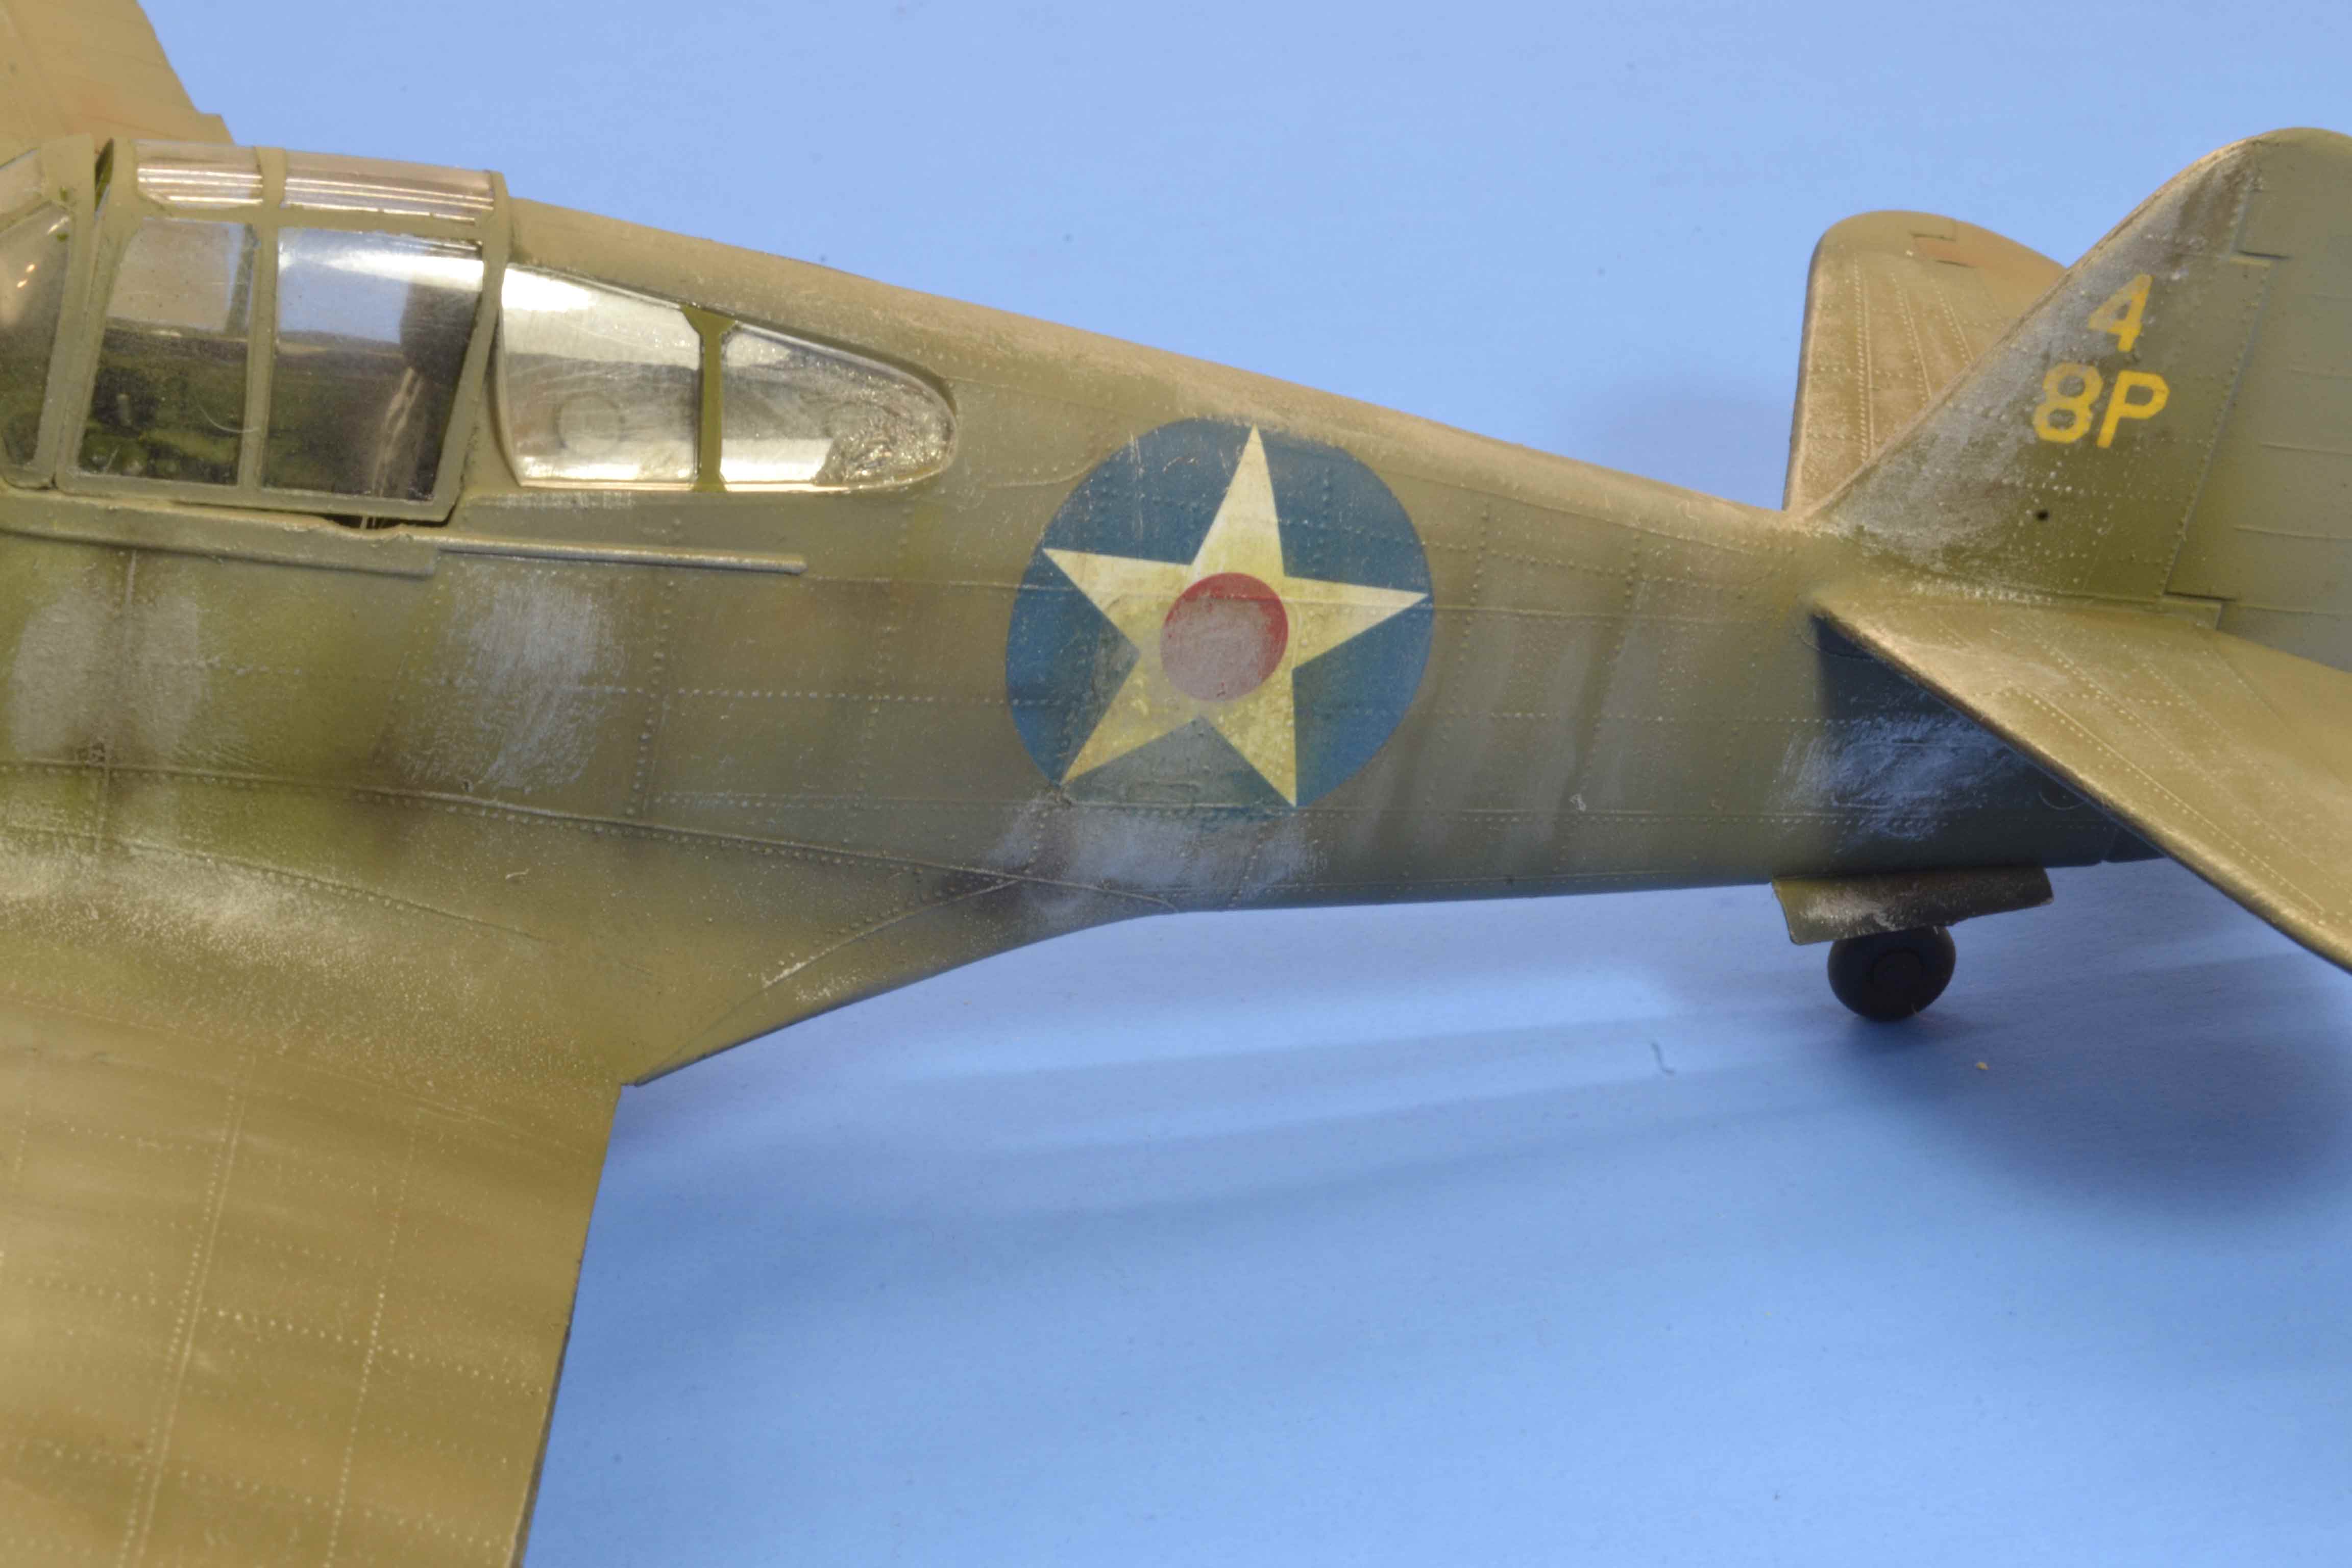
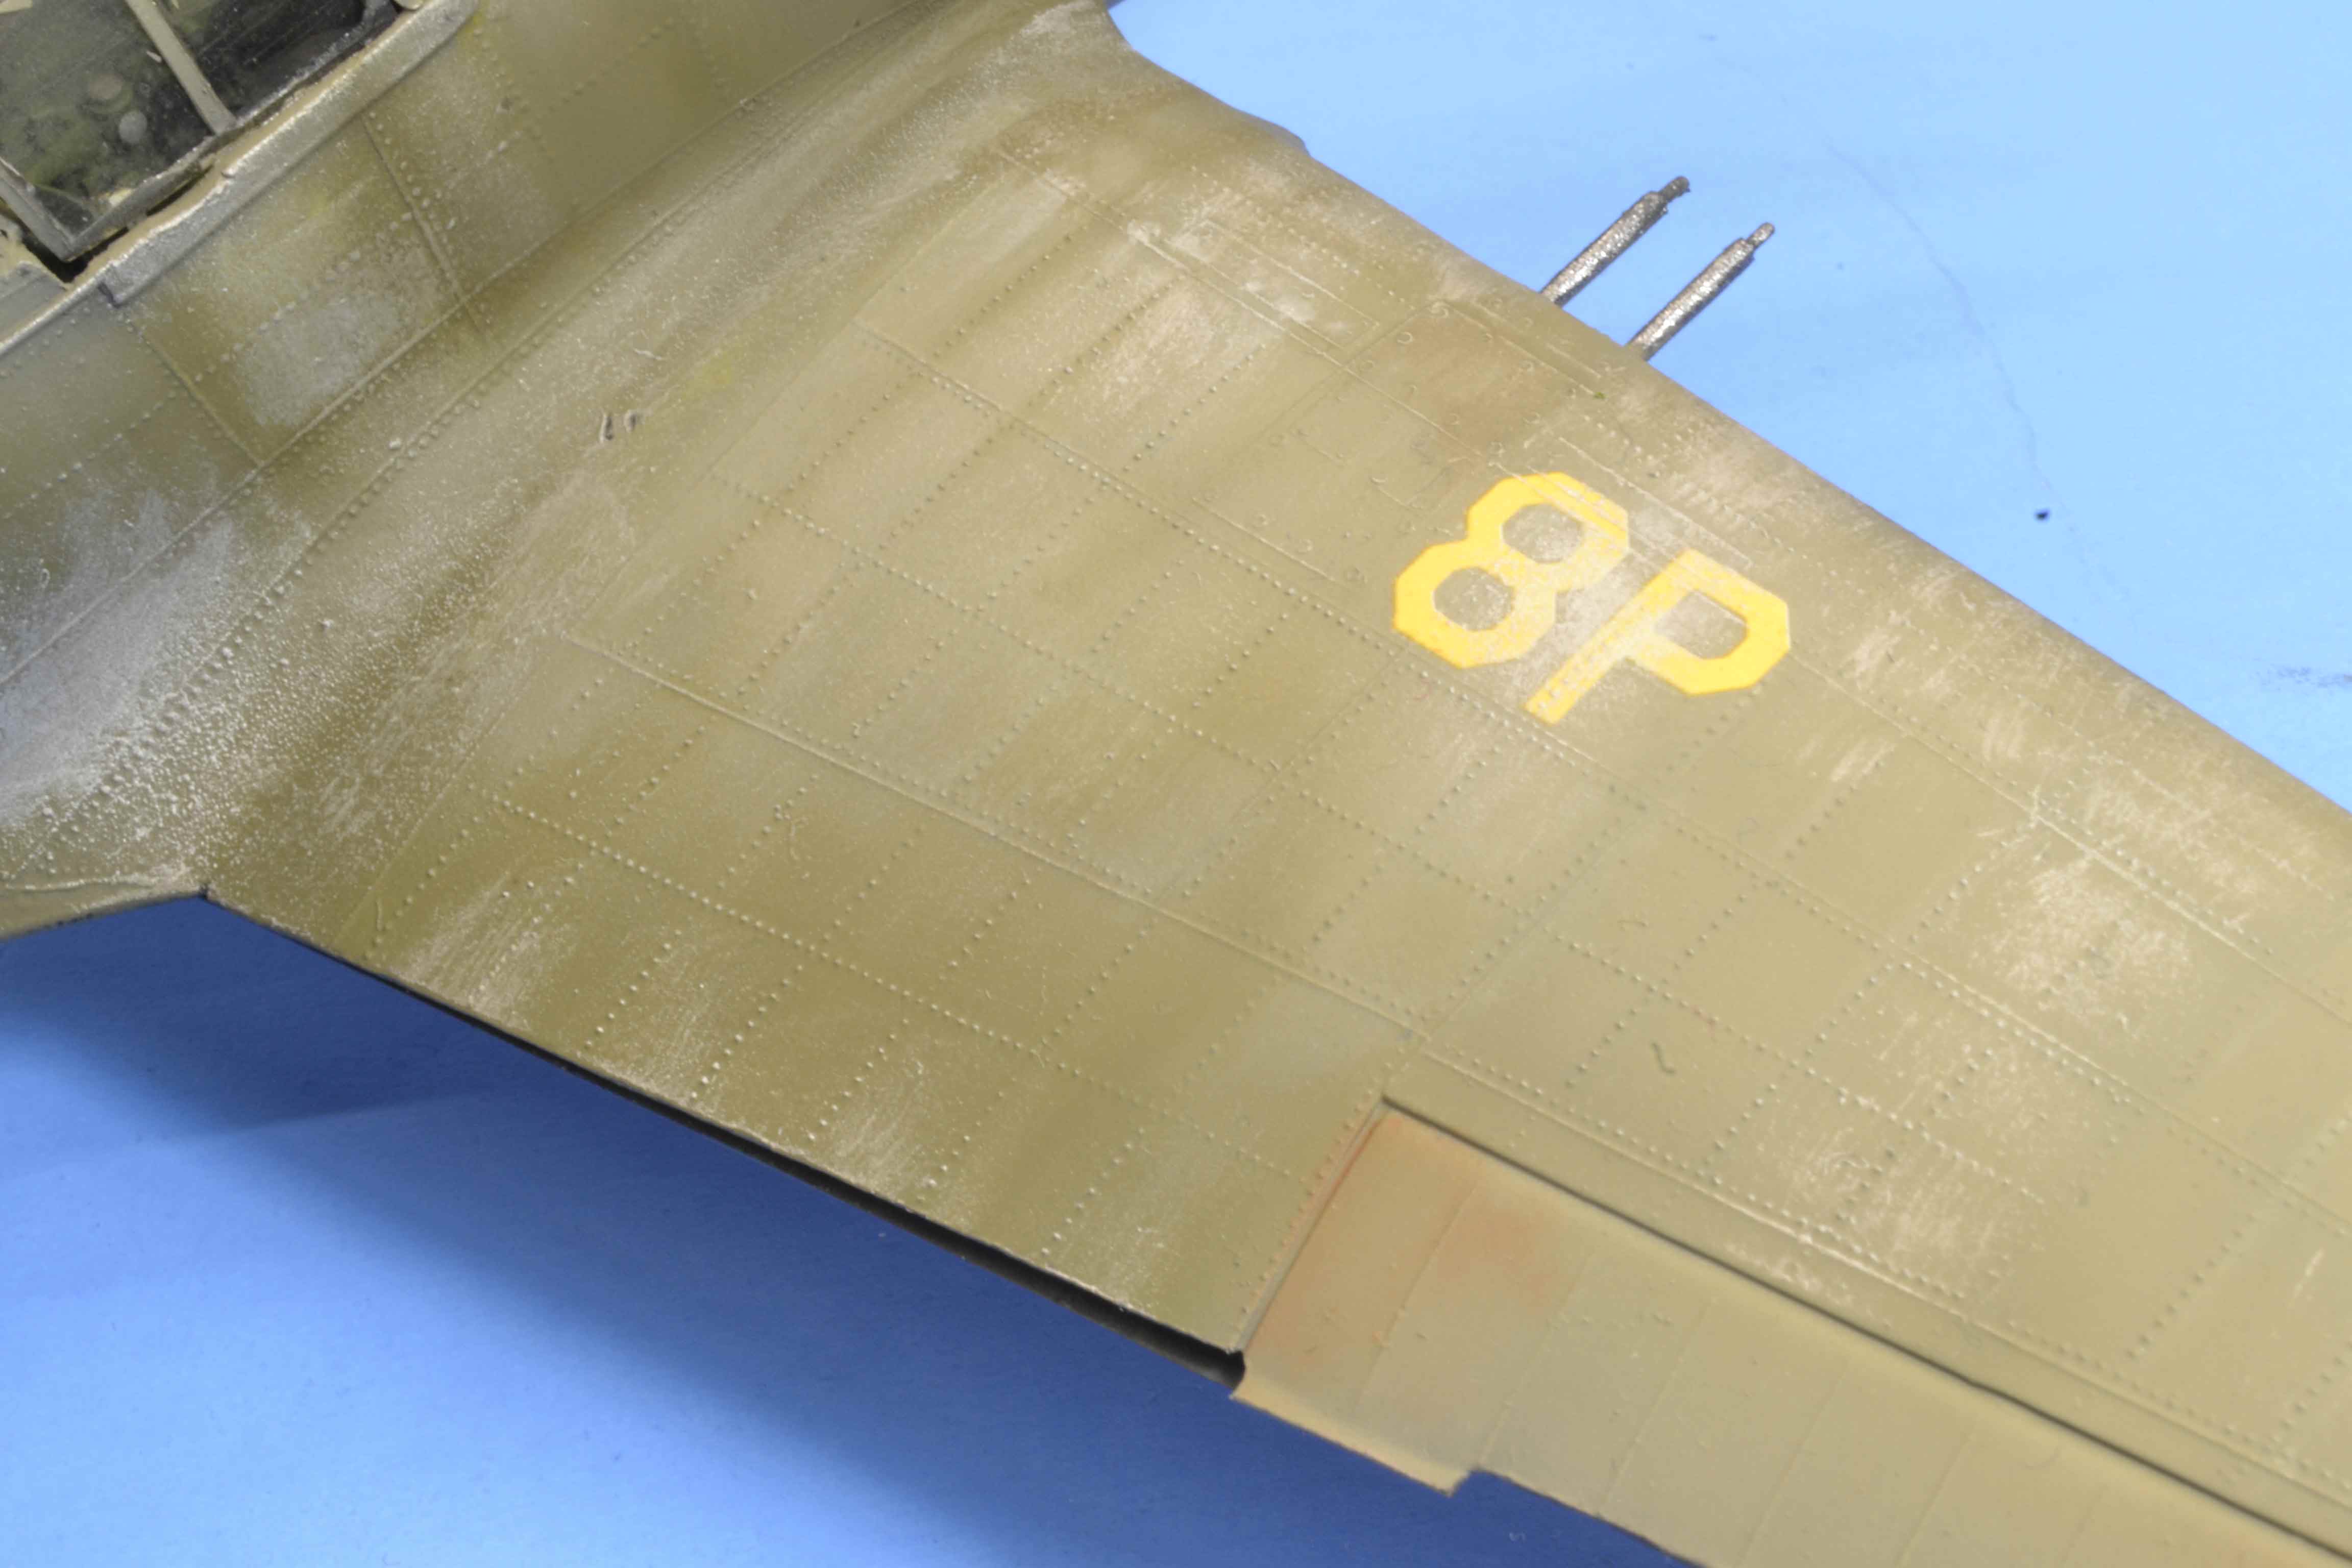
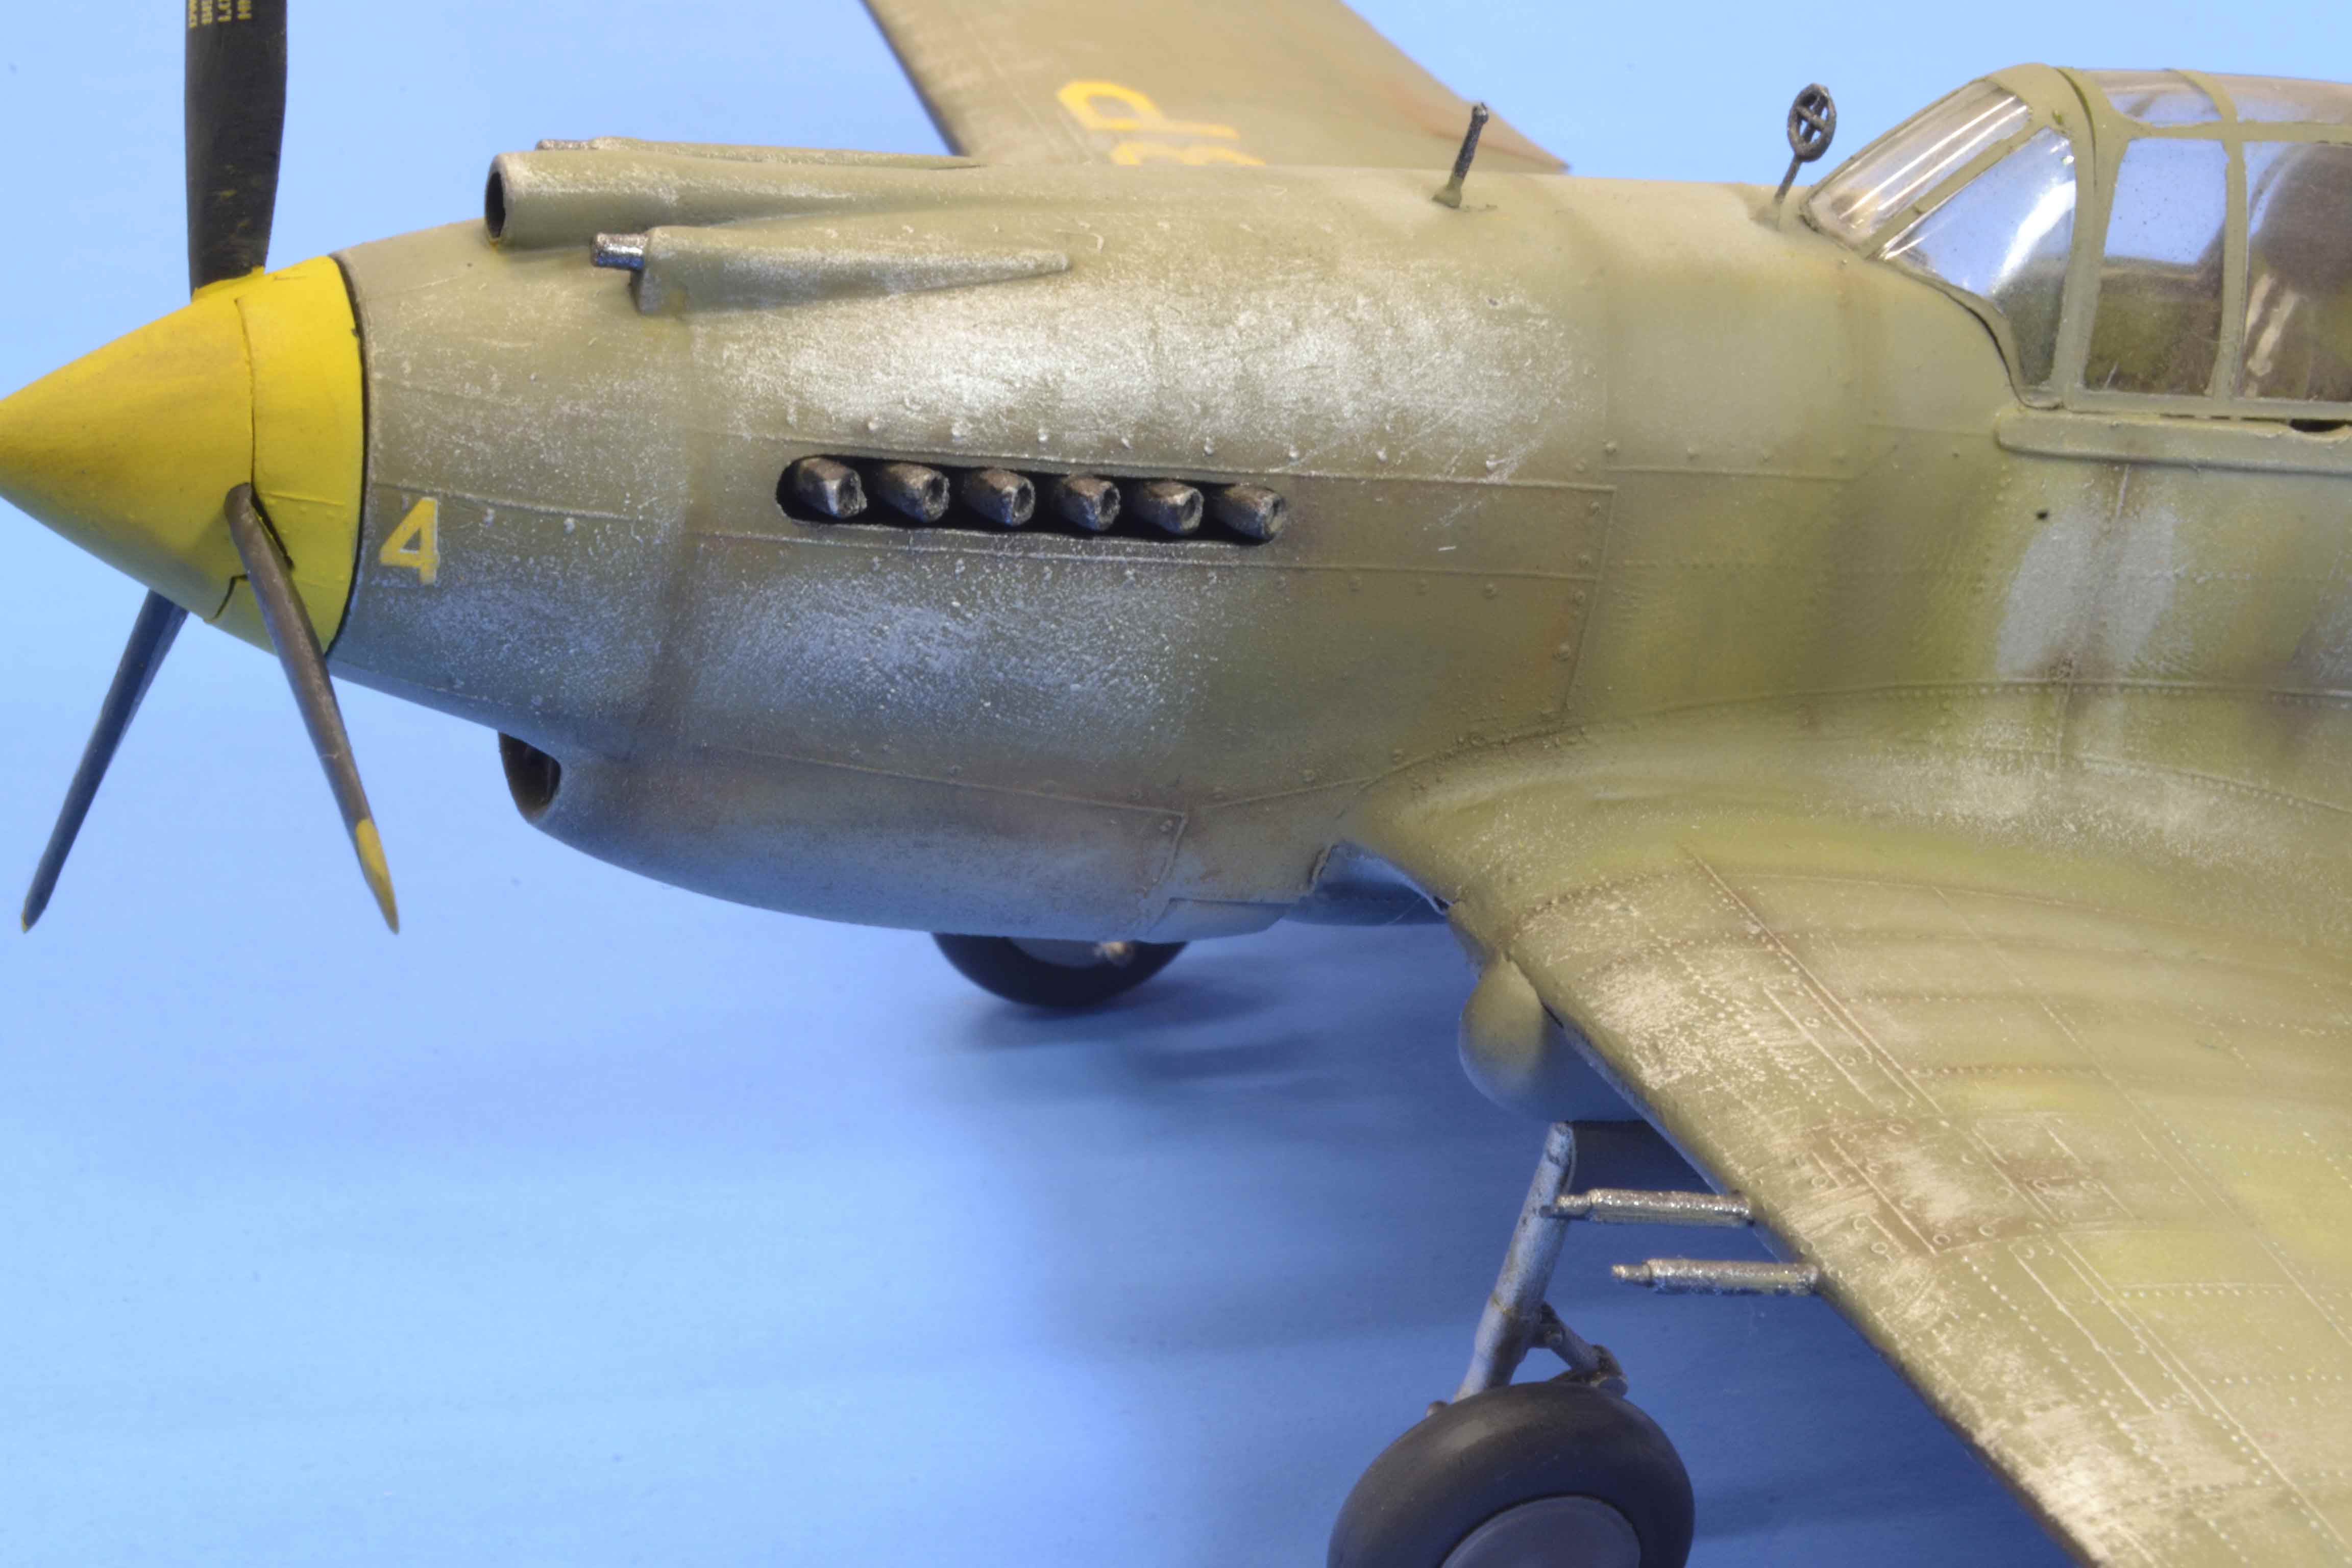
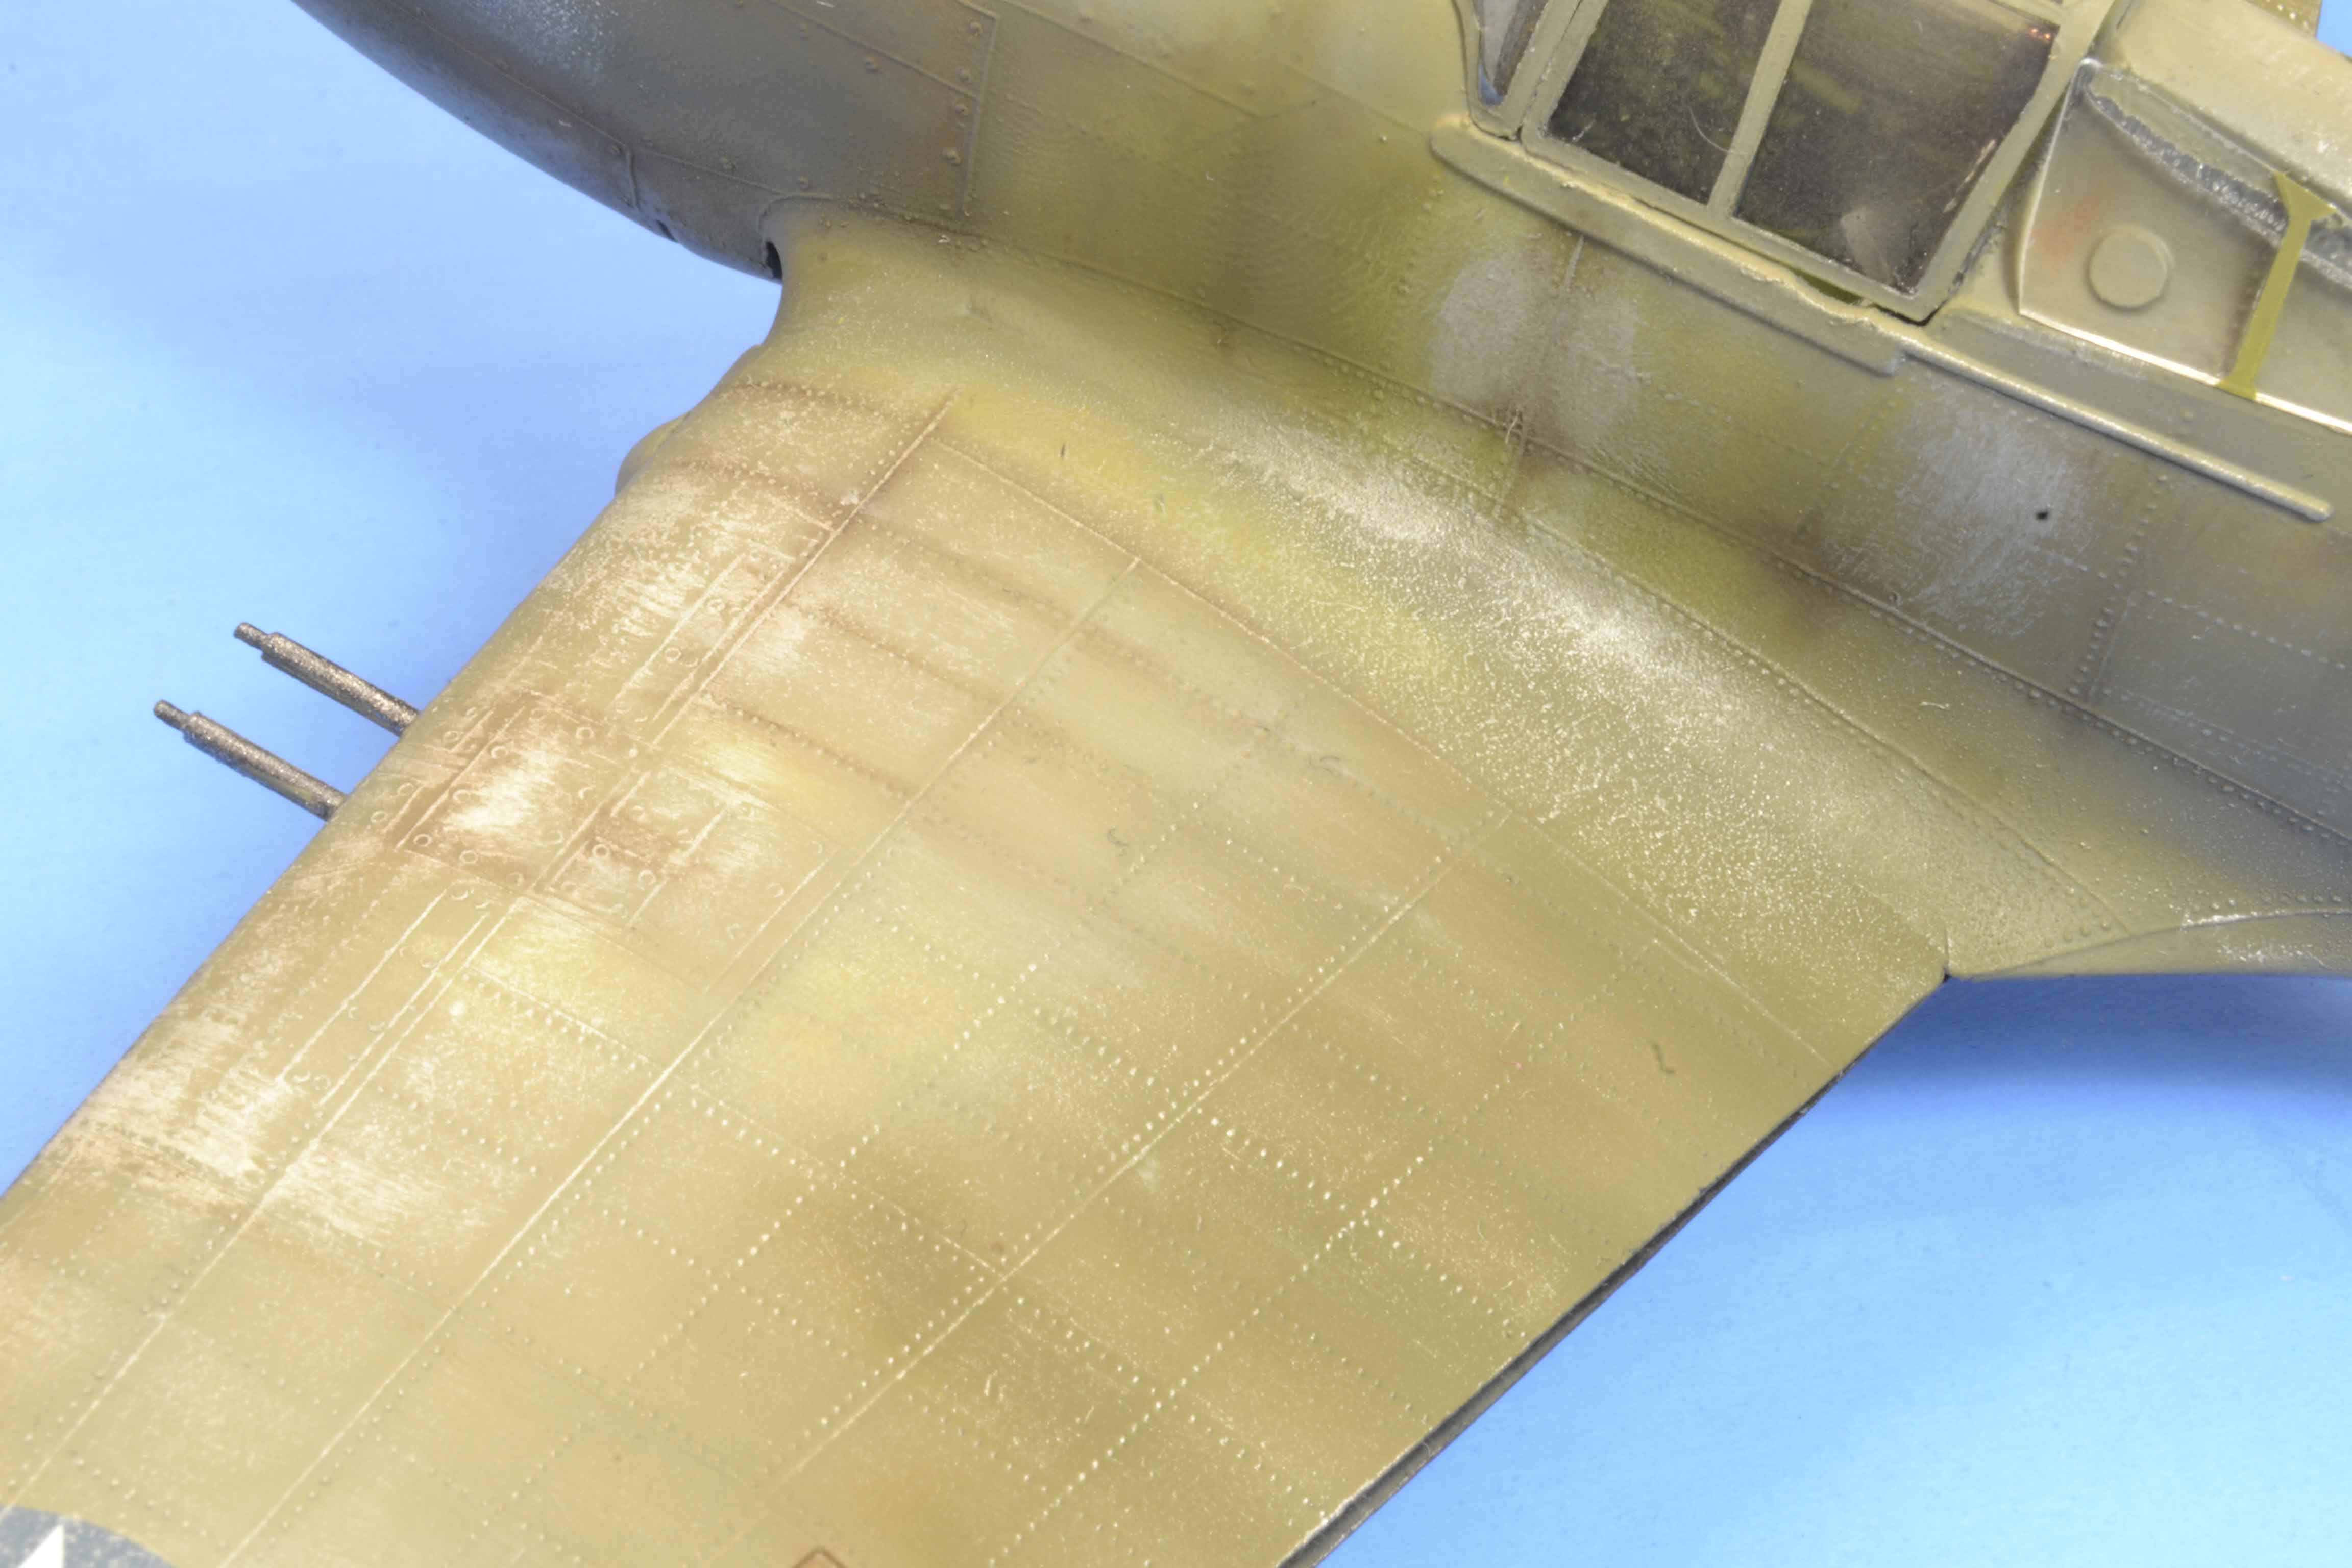
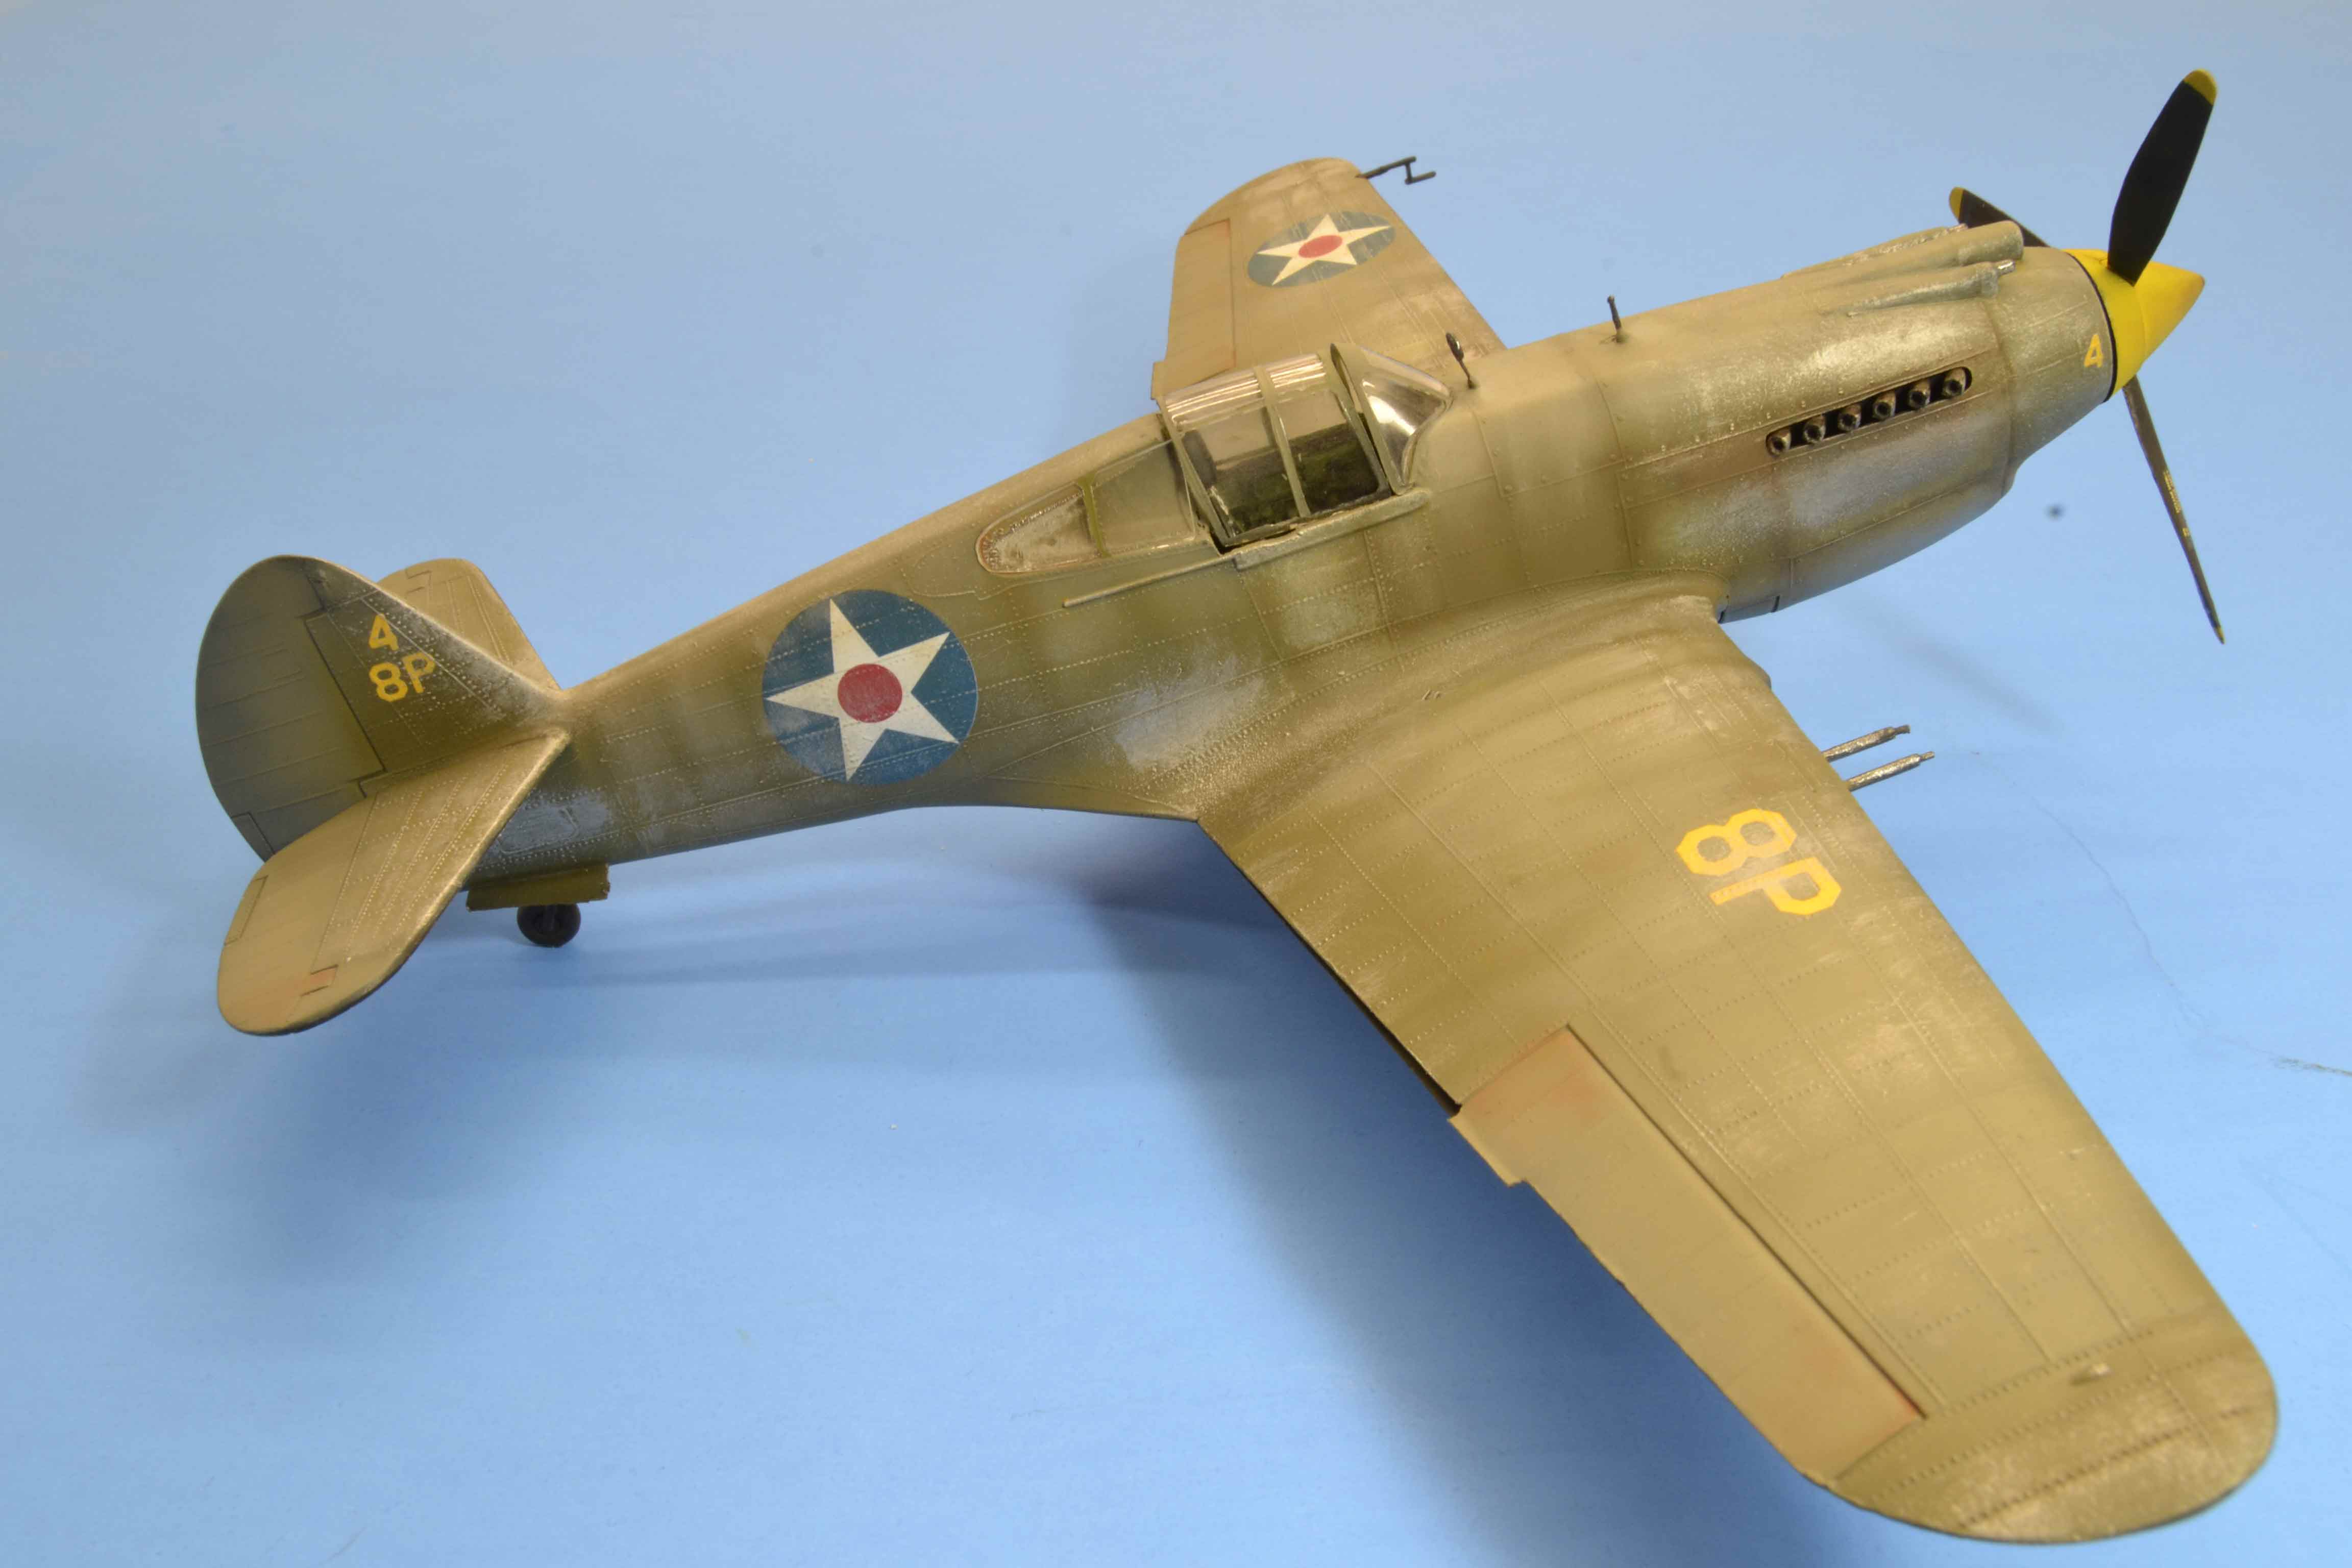
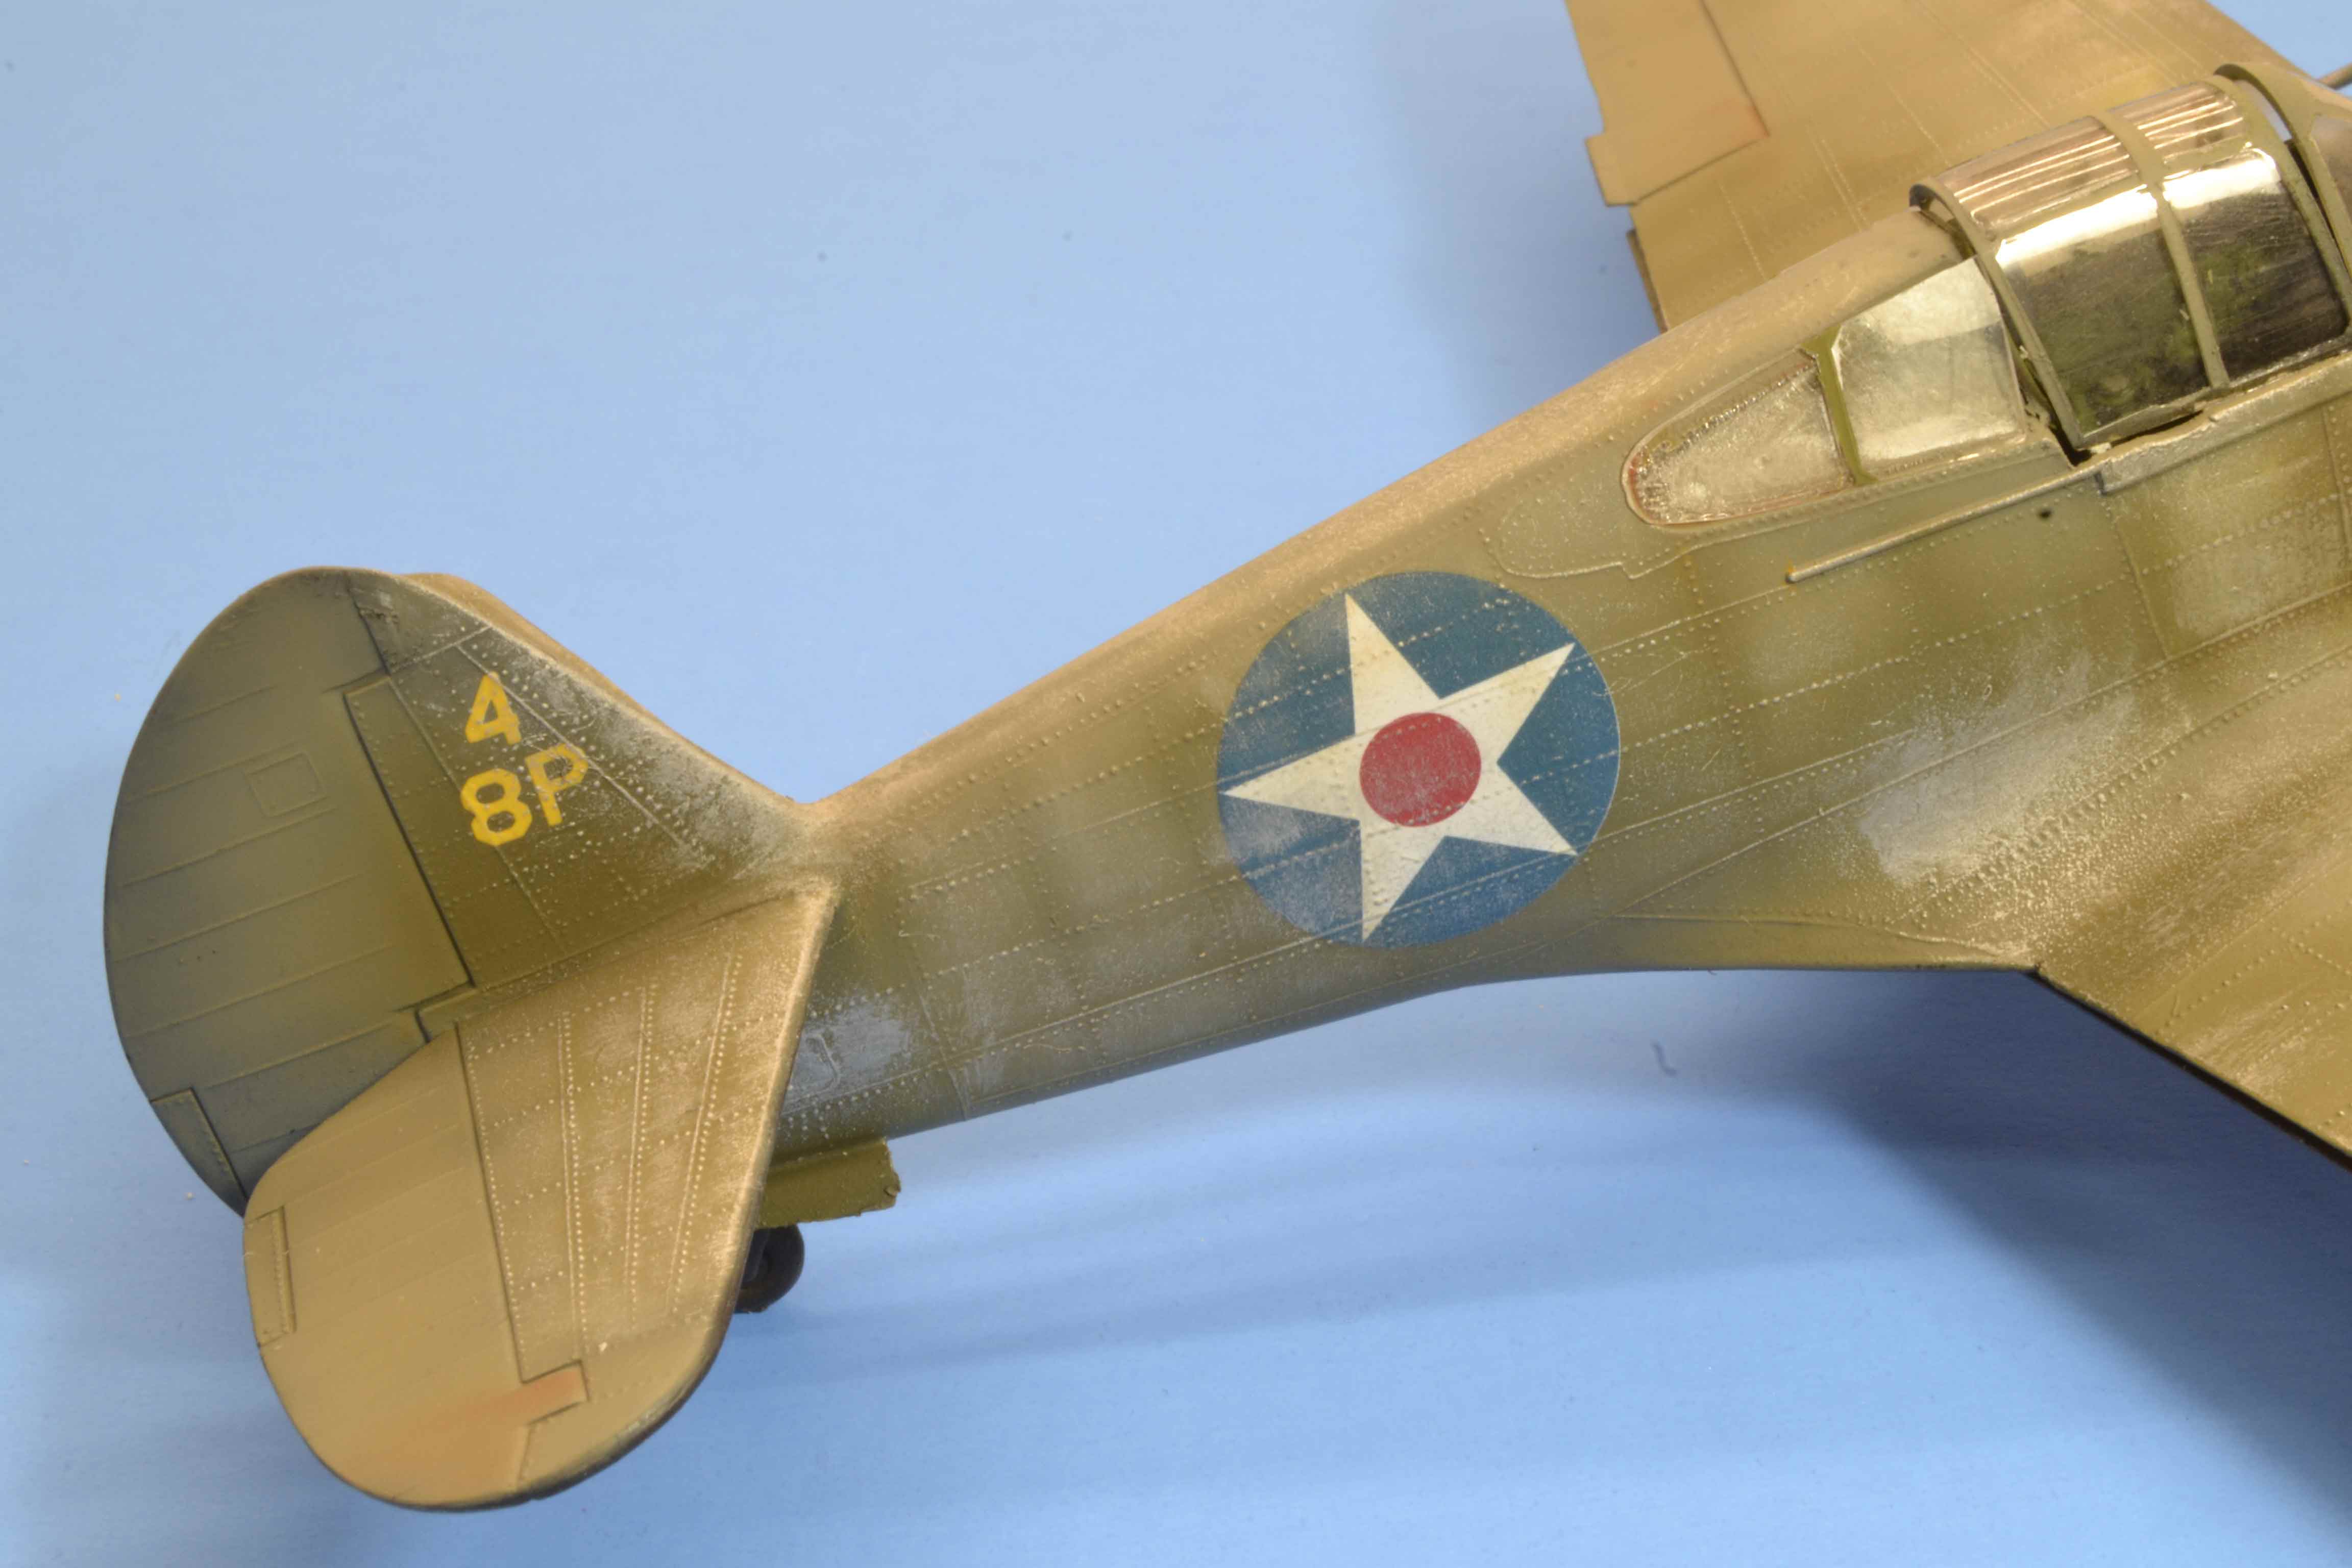
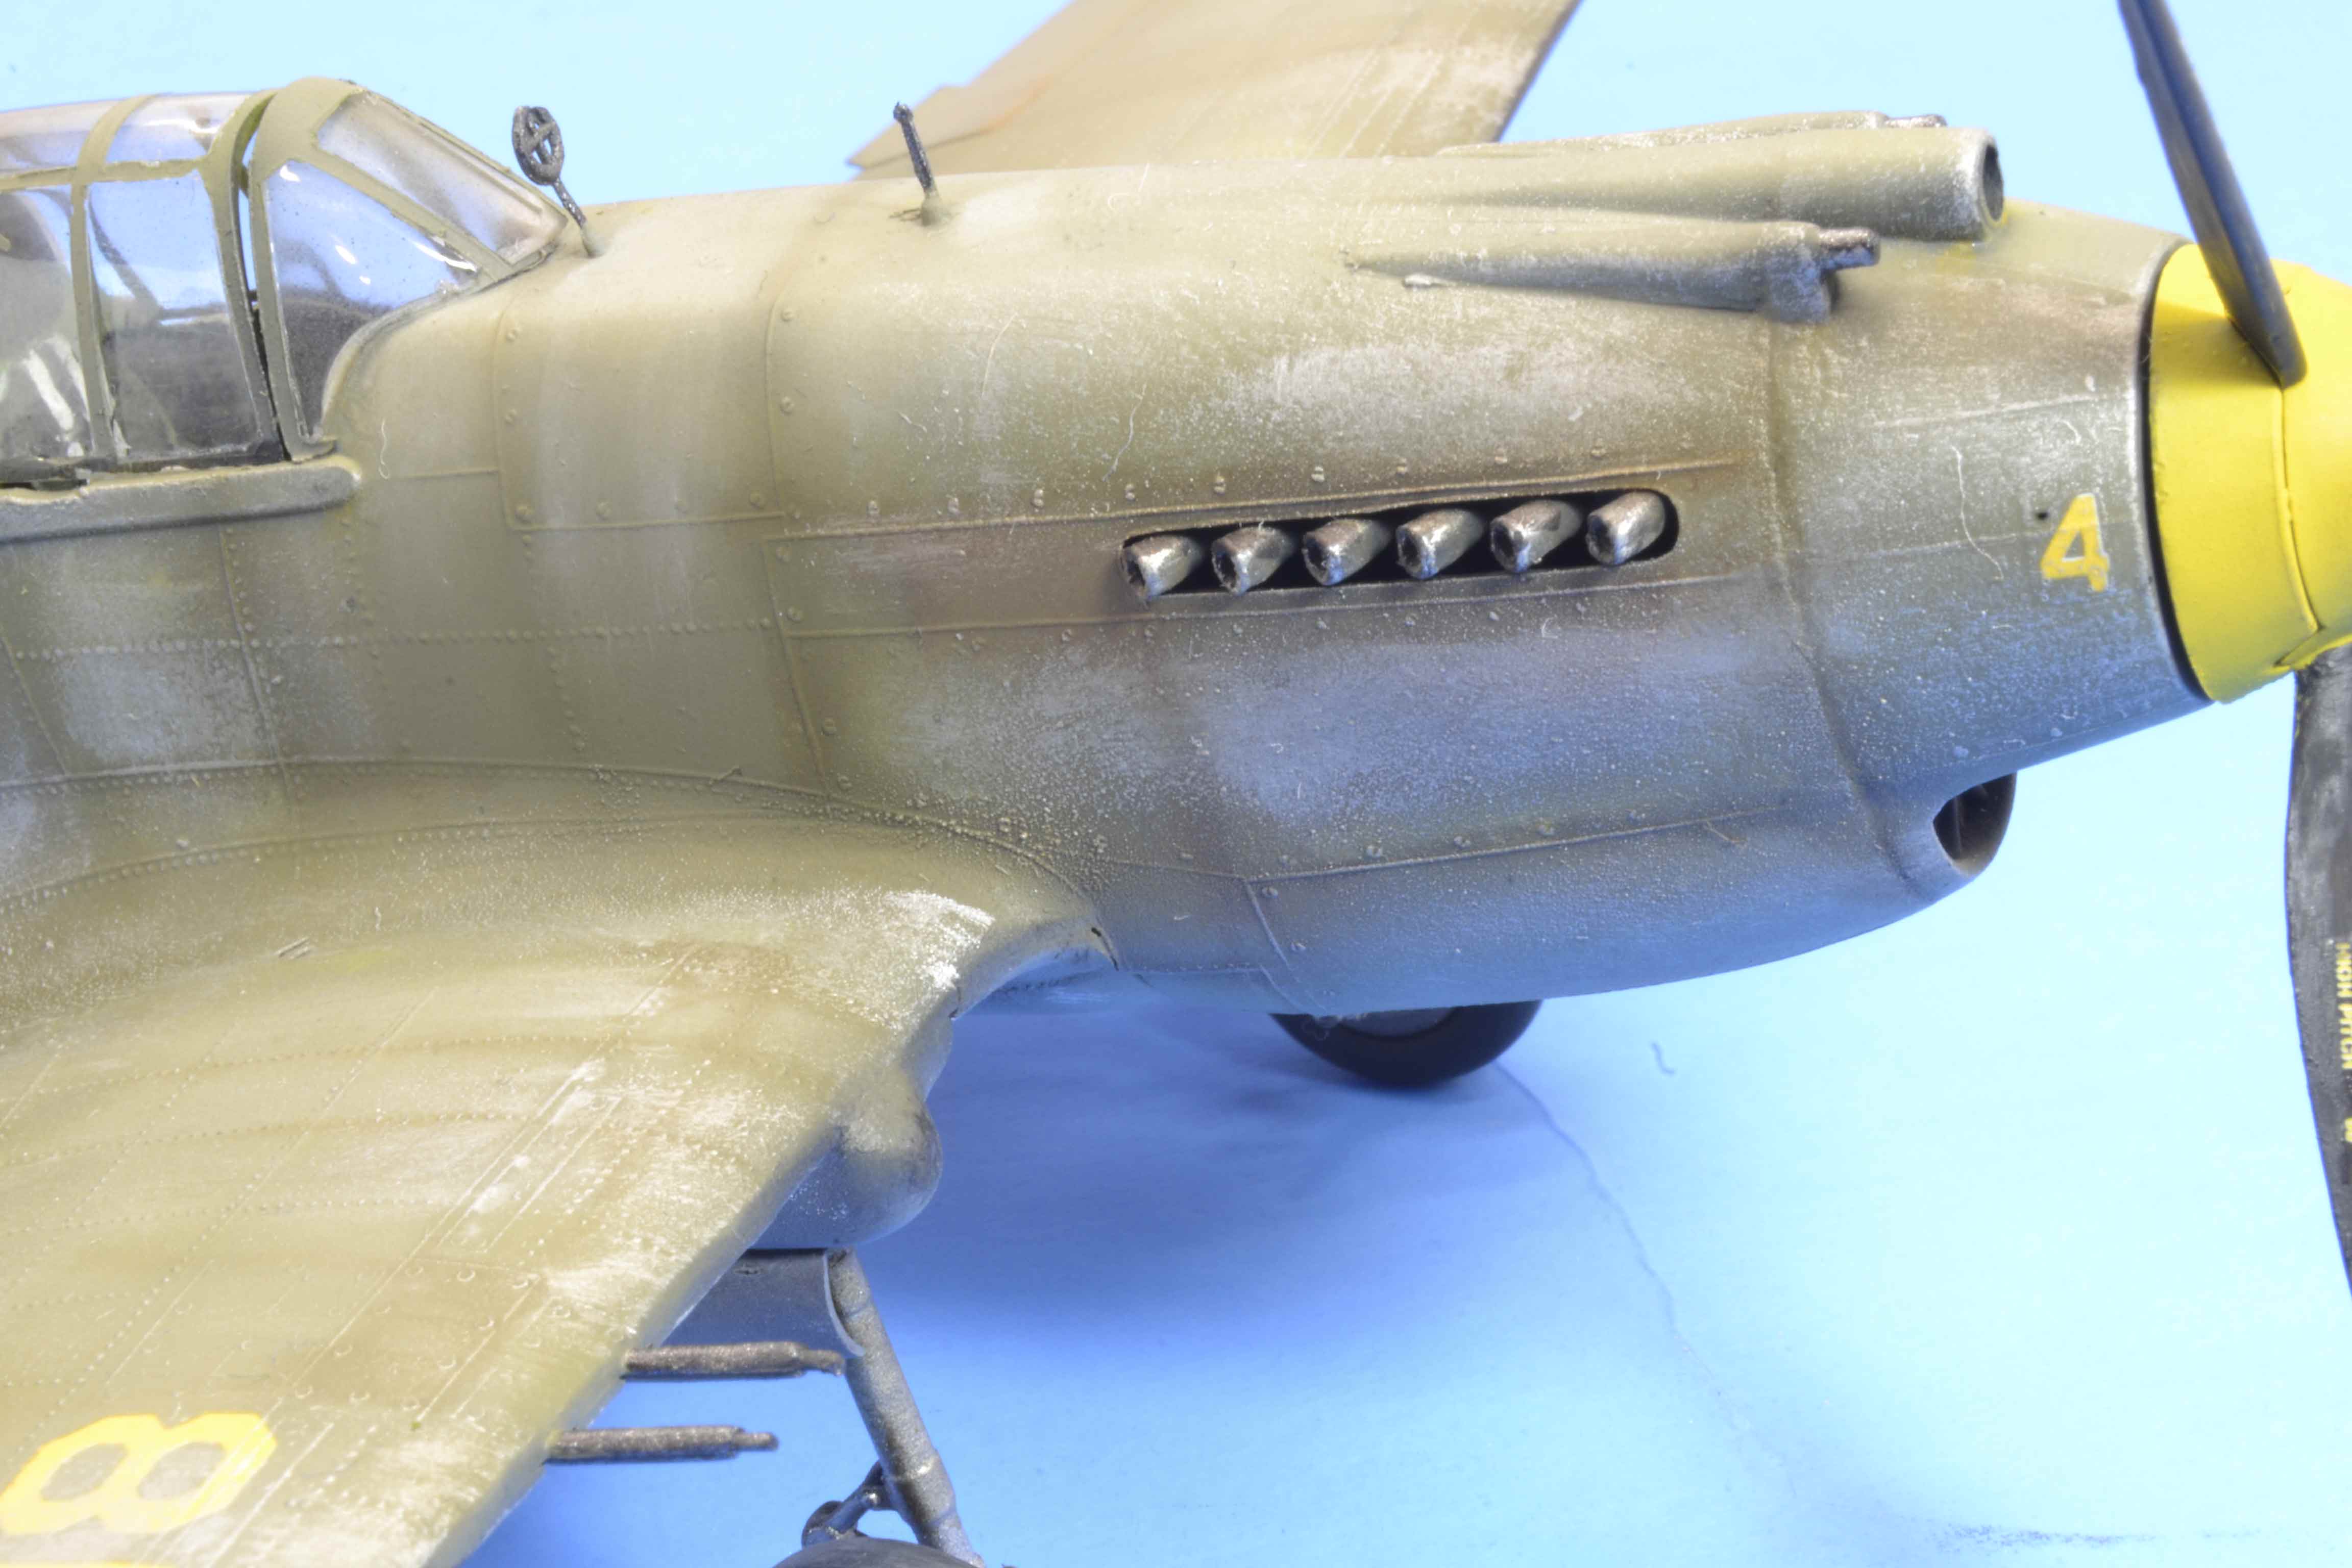
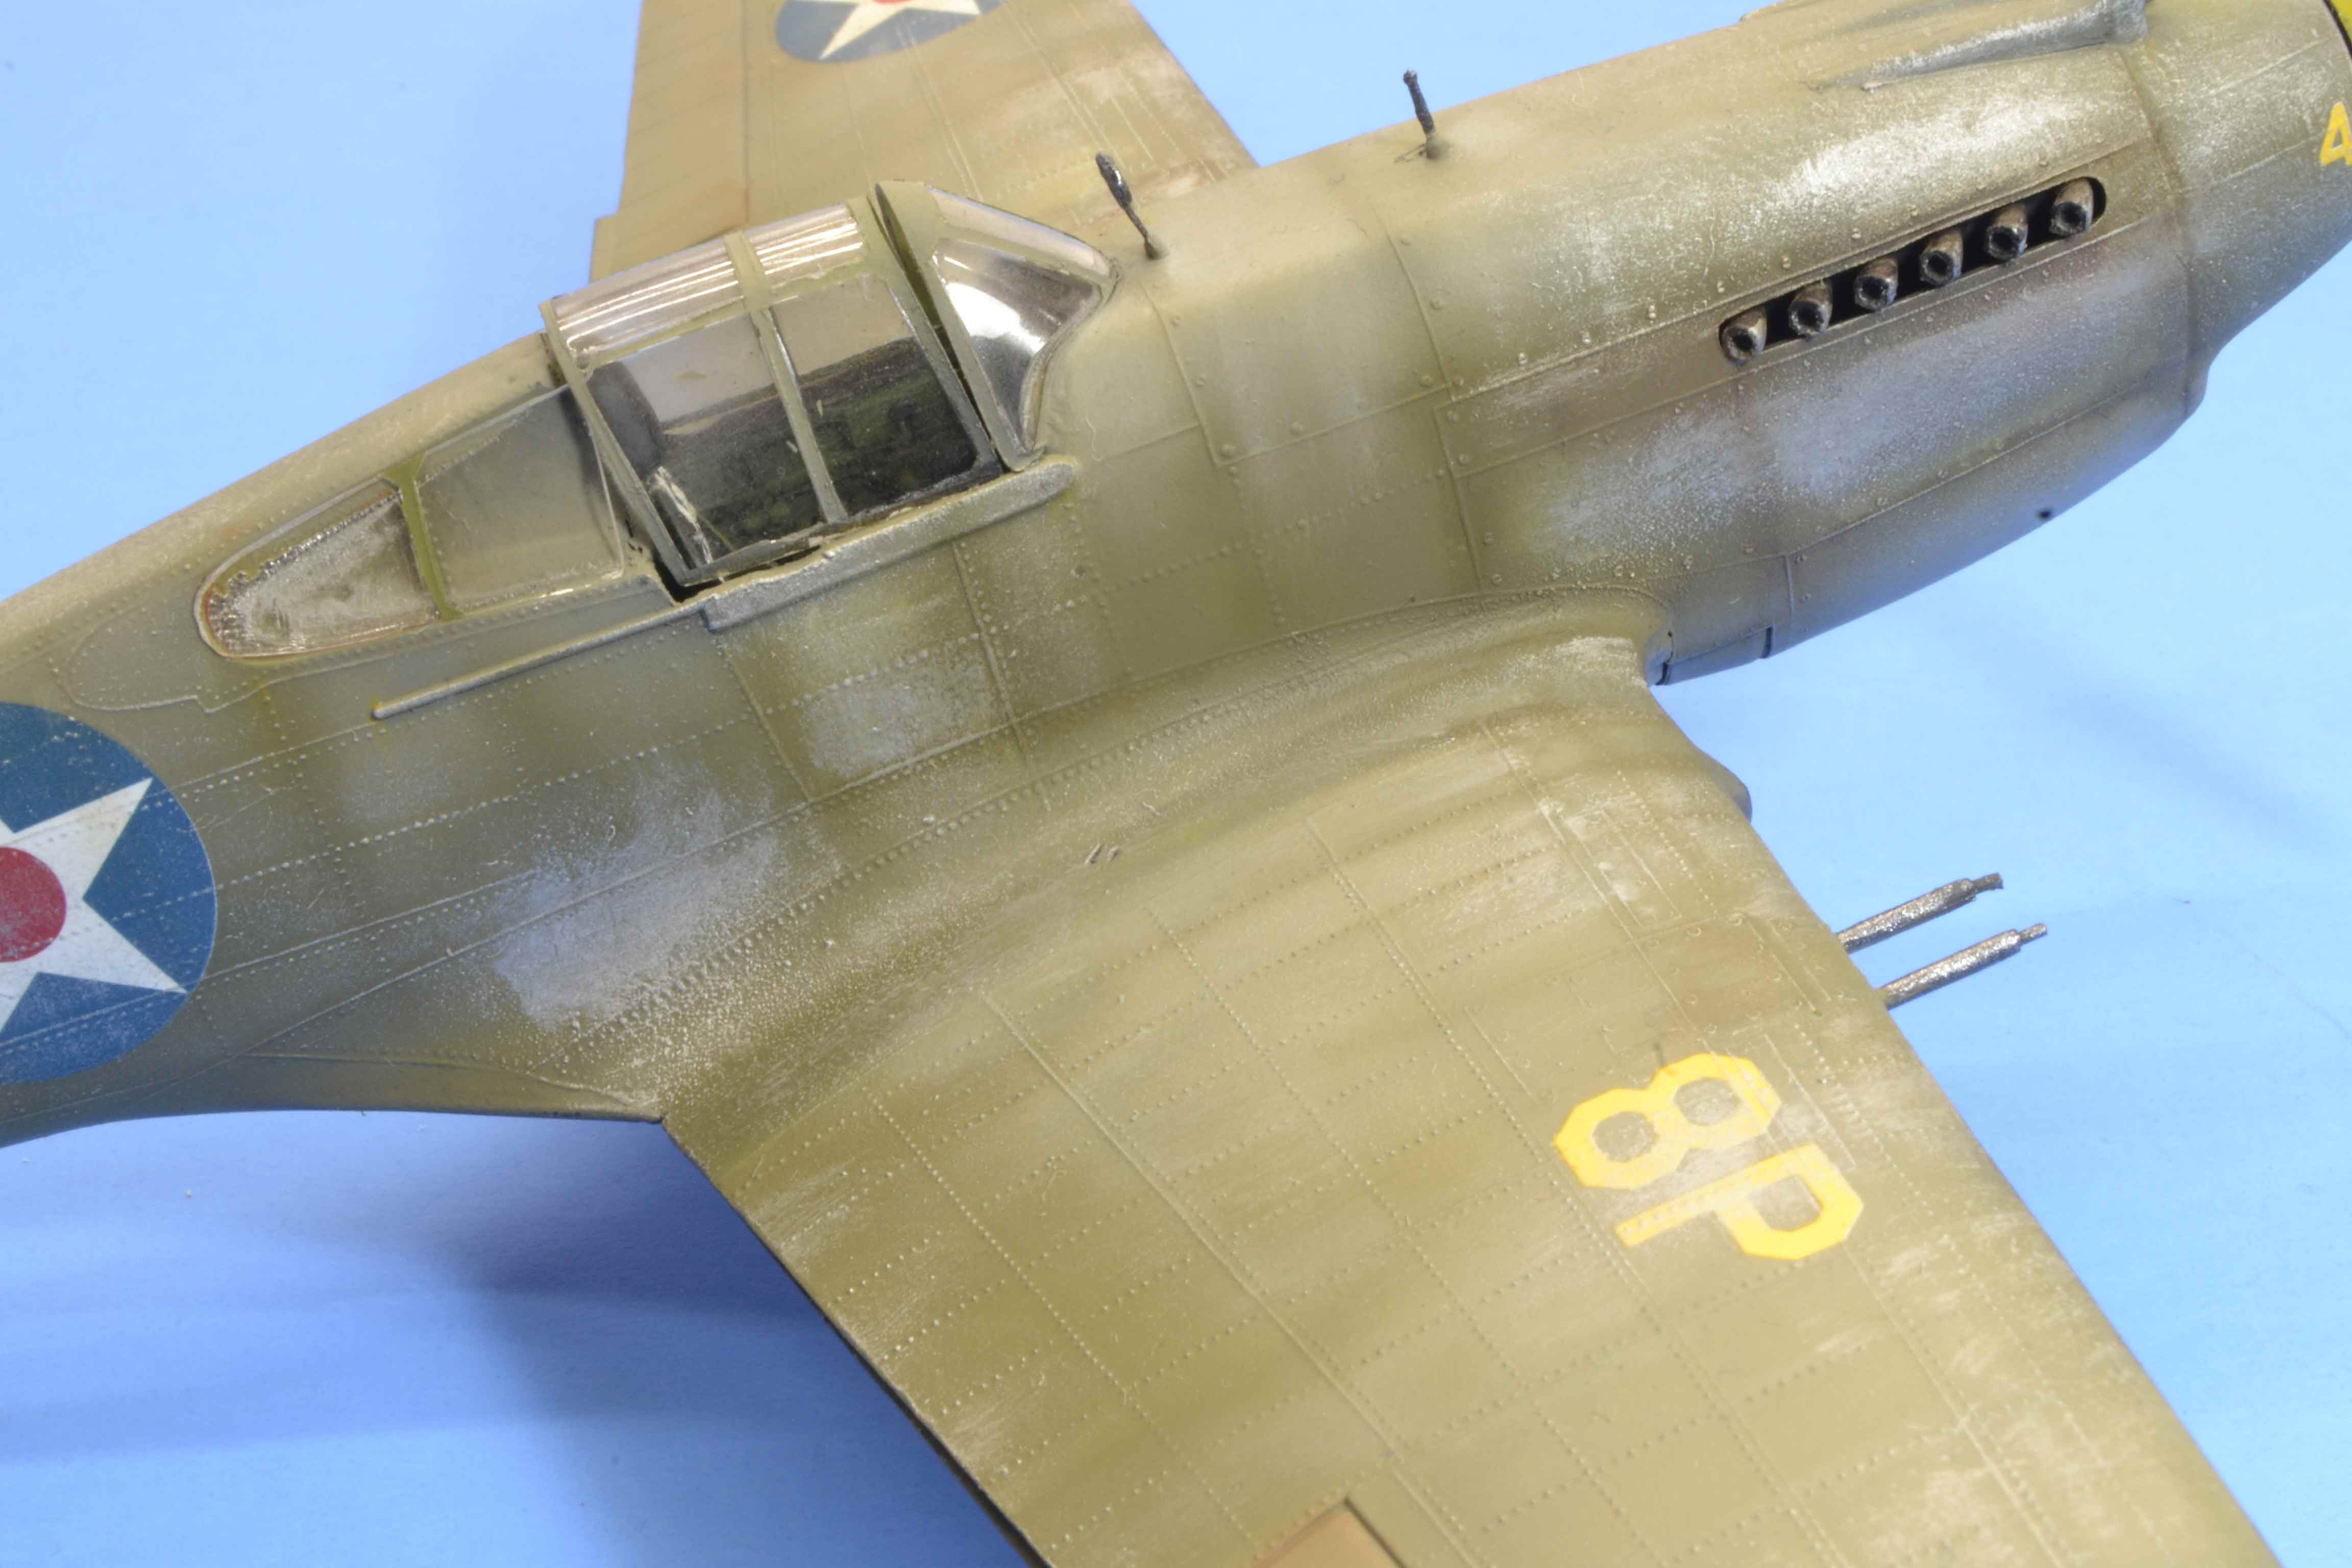
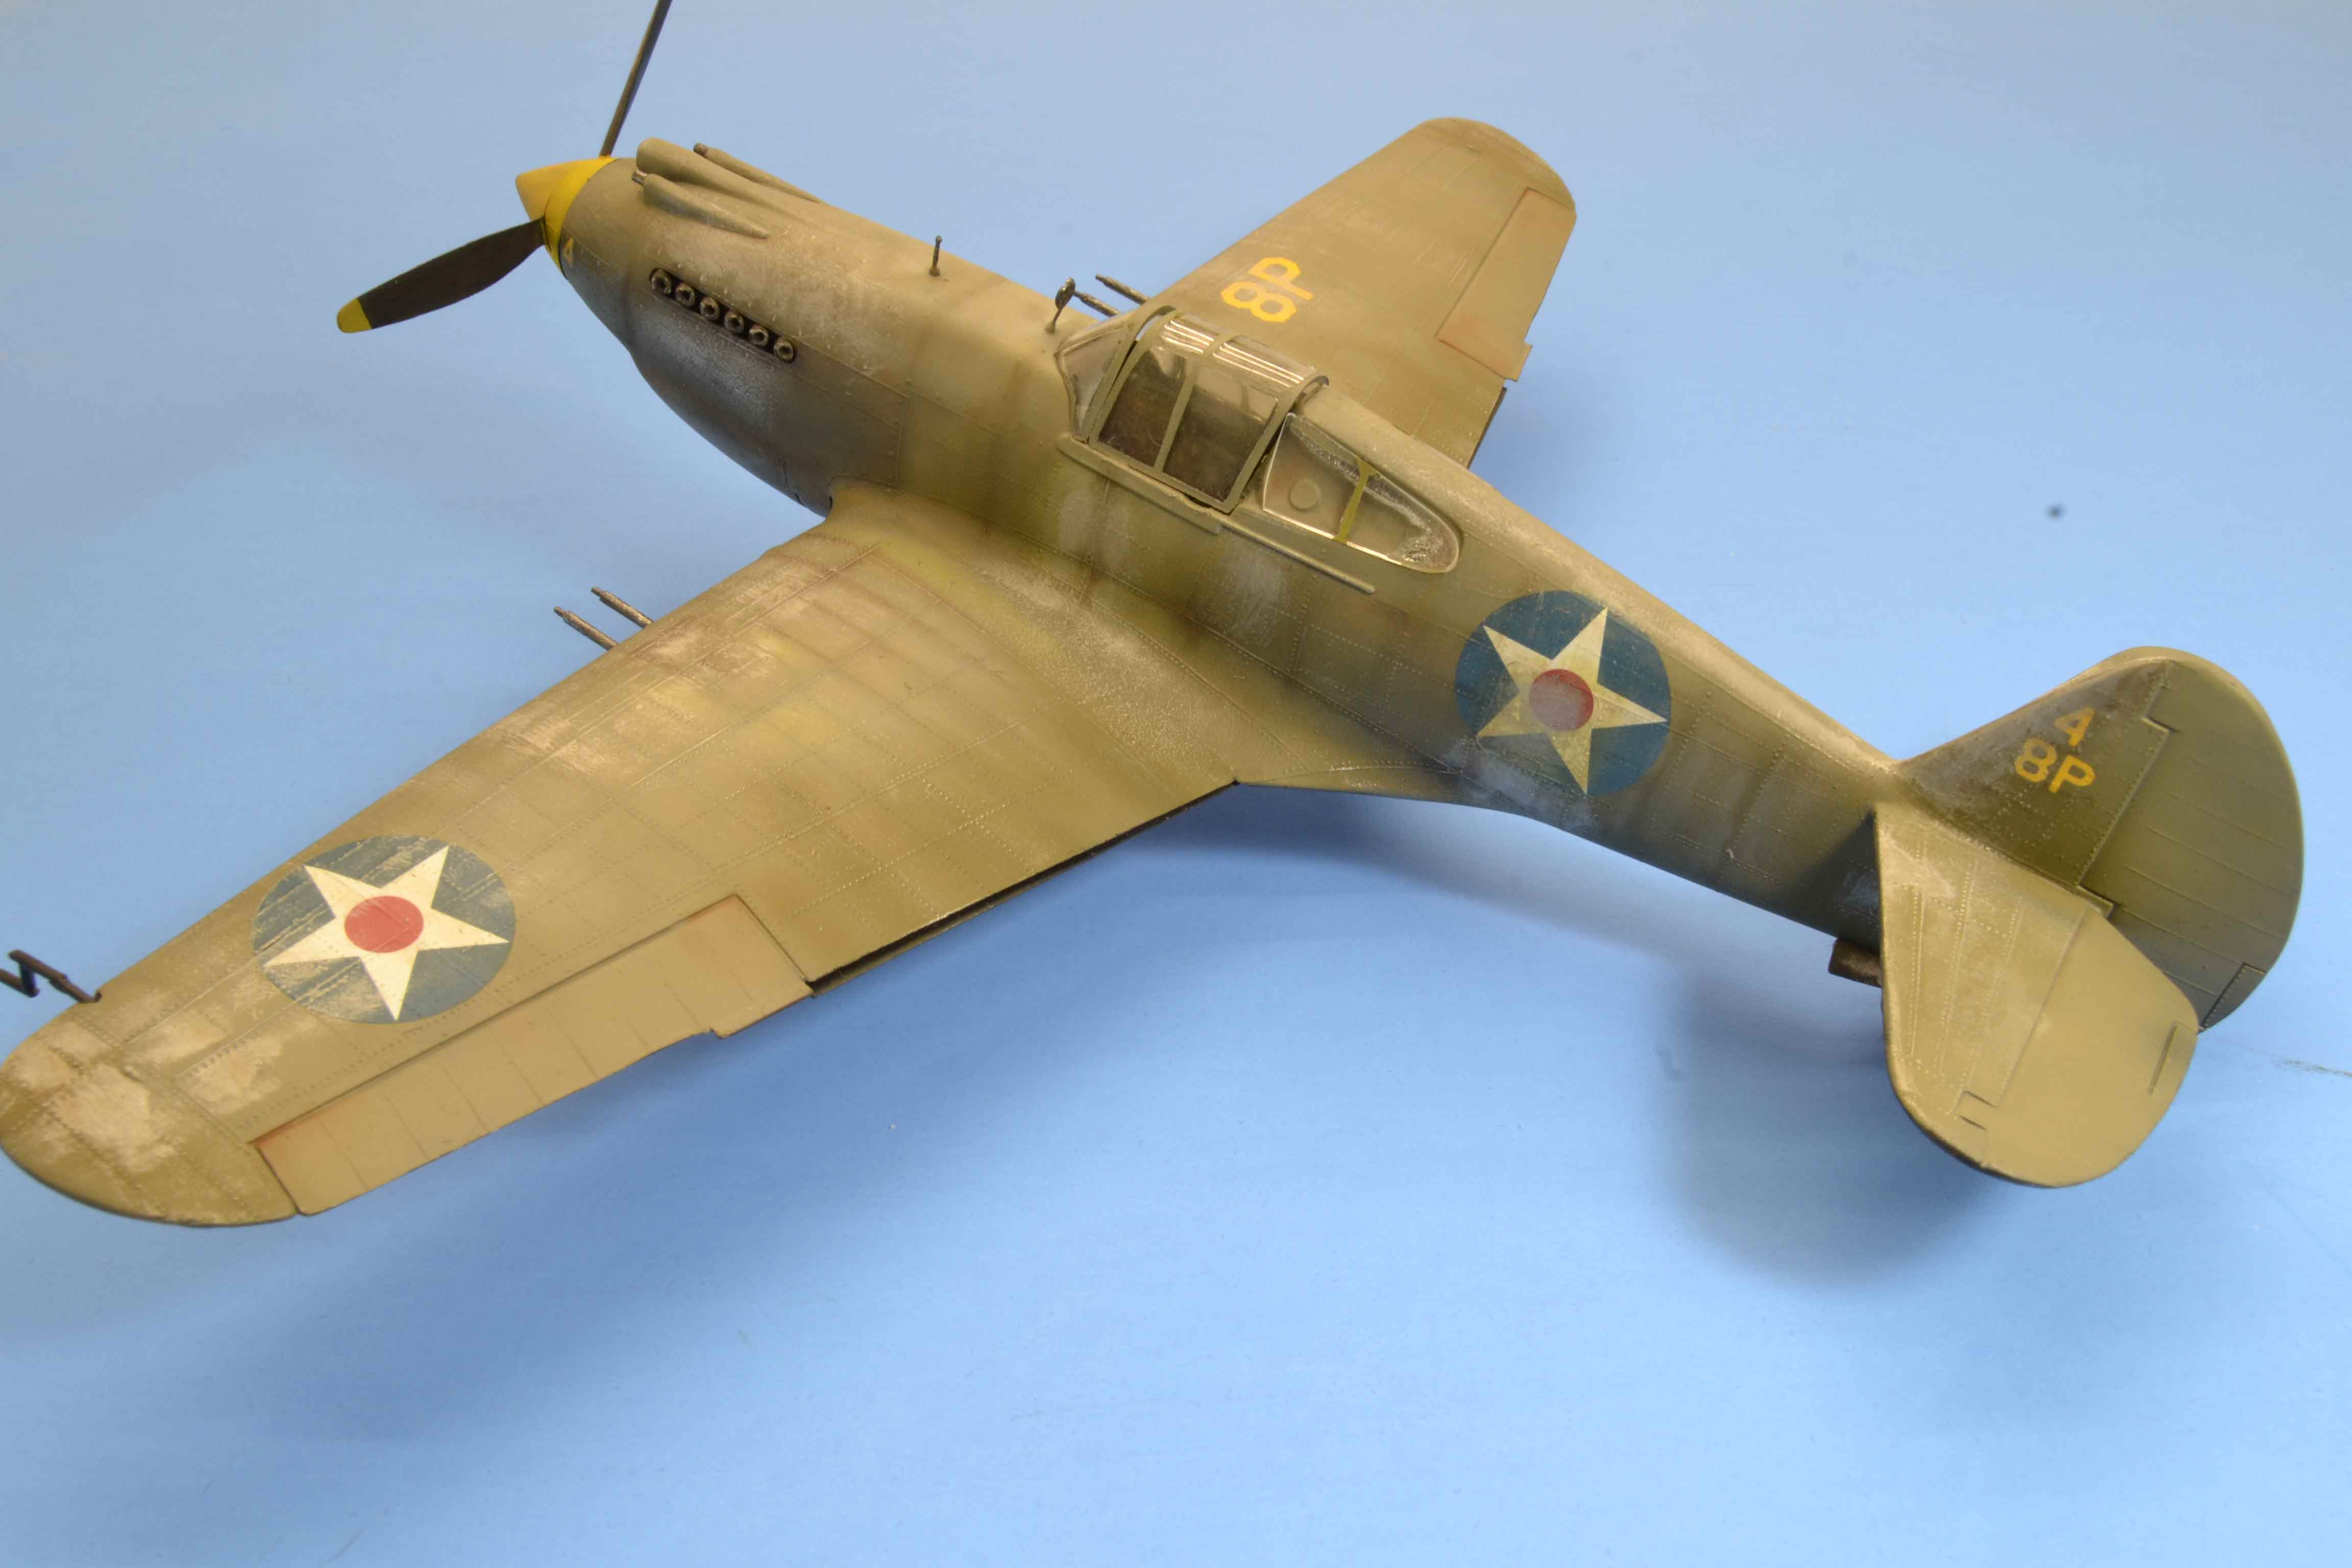
At the beginning of each of my builds I try to picture just what I want to accomplish with the build. What look am I going after. This one is no different. I want to try to portray a bird that has been forgotten. A bone yard find. Weathered, faded, just a relic.

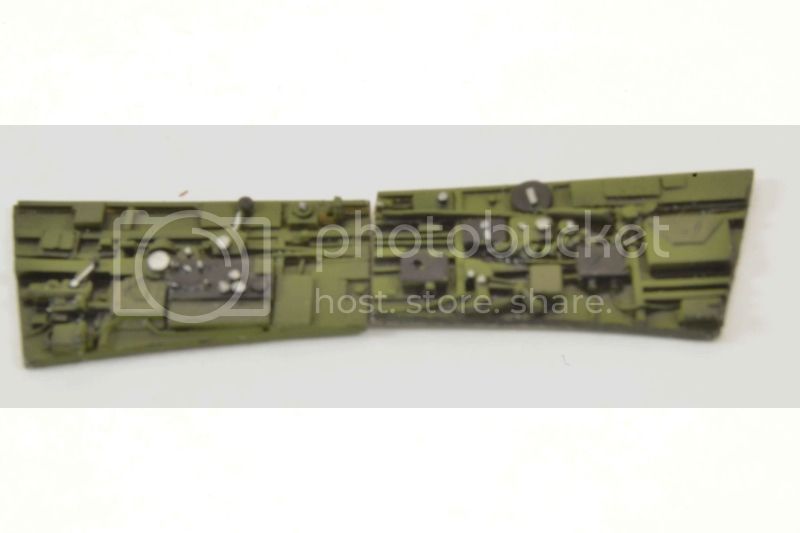
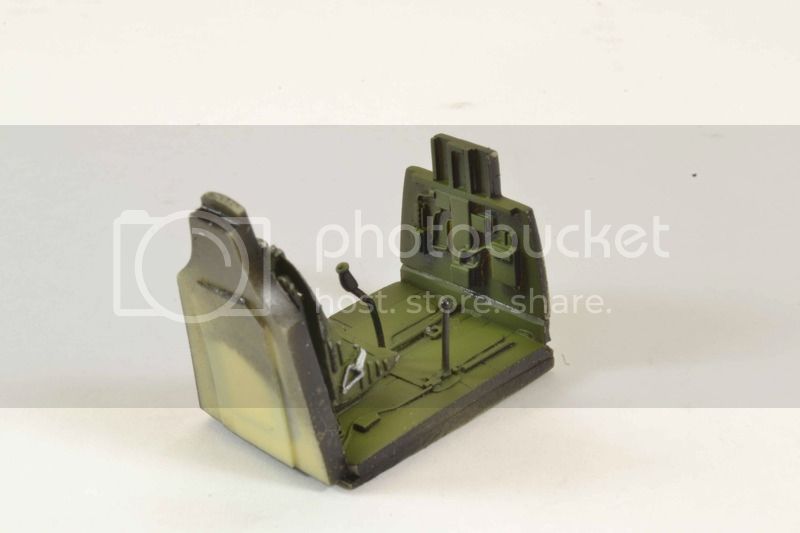
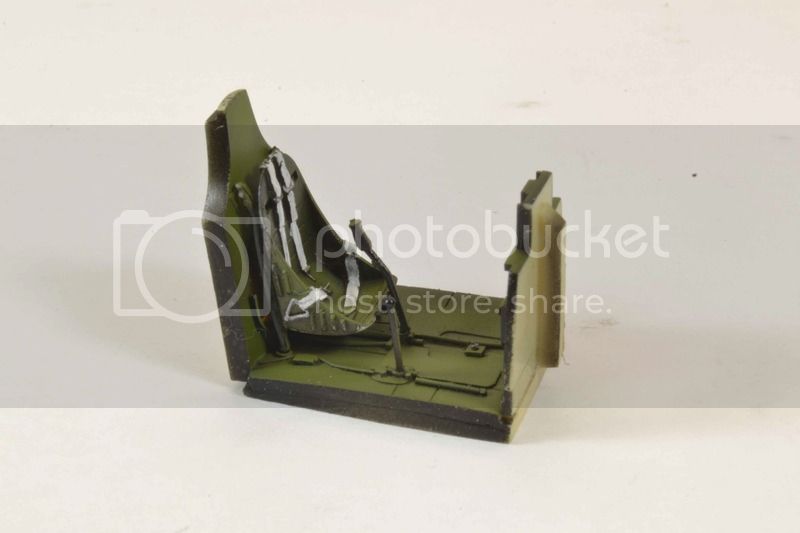
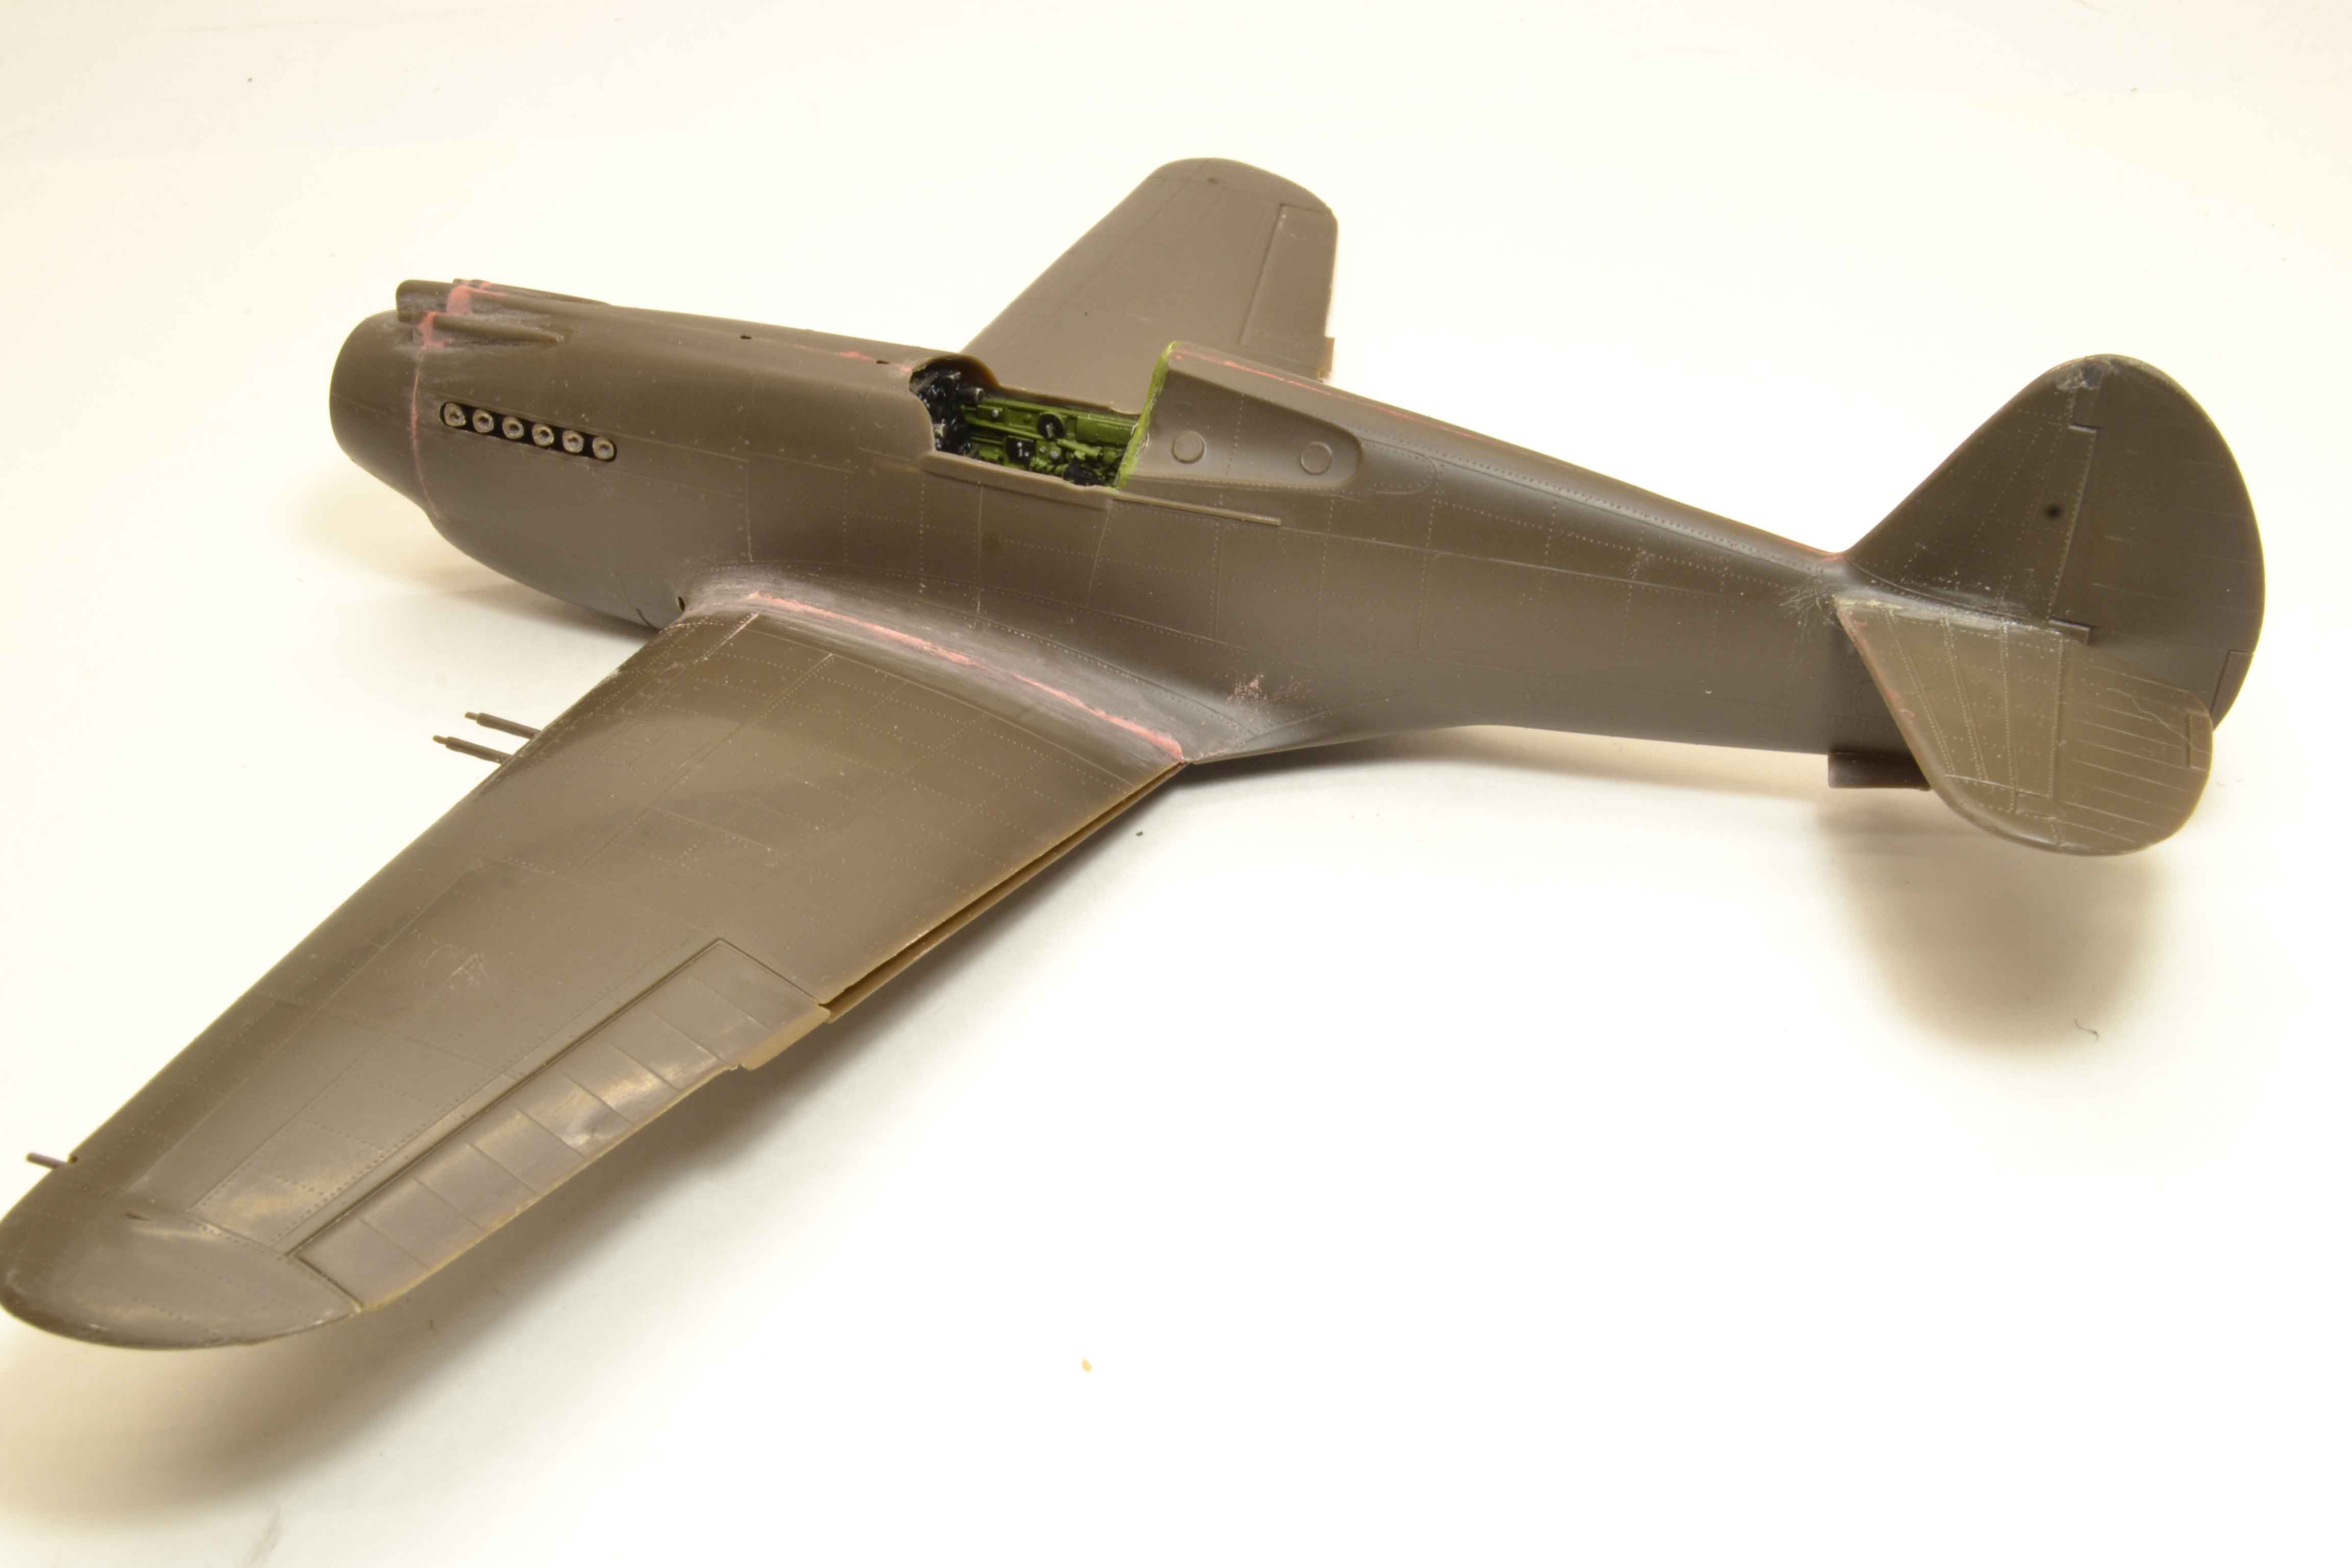
The construction aspect will be simple. The only real modification will be the installation of the Legend resin cockpit set.

More of this journey to follow.


Joe
JPTRR
Staff MemberManaging Editor
RAILROAD MODELING
#051
_VISITCOMMUNITY
Tennessee, United States
Joined: December 21, 2002
KitMaker: 7,772 posts
AeroScale: 3,175 posts
Posted: Thursday, May 18, 2017 - 10:03 AM UTC
Joe,

Looking forward to this build. For various reasons this model is still one of my favorites.
AussieReg
Staff MemberAssociate Editor
AUTOMODELER
#007
_VISITCOMMUNITY
Victoria, Australia
Joined: June 09, 2009
KitMaker: 8,156 posts
AeroScale: 3,756 posts
Posted: Thursday, May 18, 2017 - 01:17 PM UTC
Like sinking into your favourite old comfy lounge chair, a simple pleasure, everything is familiar, no nasty surprises.

Looking forward to this one Joe, best of luck.

Cheers, D
fightnjoe
_VISITCOMMUNITY
Washington, United States
Joined: August 16, 2004
KitMaker: 603 posts
AeroScale: 565 posts
Posted: Friday, May 19, 2017 - 03:58 AM UTC
Many thanks for looking in.


Joe
fightnjoe
_VISITCOMMUNITY
Washington, United States
Joined: August 16, 2004
KitMaker: 603 posts
AeroScale: 565 posts
Posted: Monday, June 26, 2017 - 08:05 AM UTC
Well my friends here I am to finally get started on the Hawk.

First up is the cockpit. That means clean up of the resin, really not bad at all, and getting some color.

After cleanup I began with a base coat of Flat Black Rustoleum, this is for shadows. I then sprayed Interior Green, Model Master Enamel, from the "top" down. Preserving the shadows as much as I can. The final bit for this stage is the picking out of details with a small pointed brush. A P-40 has little variance, dominated mostly with Greens and Black.


Not really much for excitement but I did record this as I was moving along. Posted https://www.youtube.com/playlist?list=PLv01K9HzdizV76TPa-VRxL_3N9qmJJwq4


I will be updating that playlist with the newest for this build.


All comments, critiques, and criticism are encouraged.


Joe
bomber14
_VISITCOMMUNITY
New Jersey, United States
Joined: February 02, 2015
KitMaker: 330 posts
AeroScale: 286 posts
Posted: Monday, June 26, 2017 - 11:25 PM UTC
hi joe. i just finished this kit using the legend resin cockpit myself.it is a good looking piece but i had to shape the rear bulkhead to fit into the fuselage. also i sanded the molded in shoulder harness. from my research i found the p-40 b's did not have shoulder harnesses.
i haven't made the airfix kit yet but i think the old monogram kit has the best lines and shape. i look forward to your build. maybe we could compare notes when your done.

joe
fightnjoe
_VISITCOMMUNITY
Washington, United States
Joined: August 16, 2004
KitMaker: 603 posts
AeroScale: 565 posts
Posted: Thursday, June 29, 2017 - 04:58 PM UTC
Joe your research is spot on. For this build though most of that will be hidden and the focus is more on the exterior. One of the parts of the resin upgrade that I dislike is everytime I have used it I had to carve out for the rear bulkhead.


Joe
fightnjoe
_VISITCOMMUNITY
Washington, United States
Joined: August 16, 2004
KitMaker: 603 posts
AeroScale: 565 posts
Posted: Wednesday, August 02, 2017 - 06:46 PM UTC
Well folks here I am after a long delay.

First of all let me say this. All photos have now been lost at photobucket. I am not going to redo them at all. I am using Imgur to post my updates.

On to the build.

With the work on the cockpit done it was time to close up the fuselage. As with most Revell kits there was a bit of cleanup and putty work to do.


It was then time to move on to the wings and the installation of them. Some sanding prepped the wings to get the best fit I could. I then used Tamiya Orange cap as well as MEK to get them in place.


Next up will be to clean up the wings and attach the stabilizers.


All comments, critiques, and criticism are encouraged.


Joe
bomber14
_VISITCOMMUNITY
New Jersey, United States
Joined: February 02, 2015
KitMaker: 330 posts
AeroScale: 286 posts
Posted: Monday, August 07, 2017 - 12:55 AM UTC
how did you get away without using any filler on the wing roots? i had to use plastic strip and a mix of glue and plastic shavings slurry.

i see you went ahead and left the shoulder harness anyway

joe
fightnjoe
_VISITCOMMUNITY
Washington, United States
Joined: August 16, 2004
KitMaker: 603 posts
AeroScale: 565 posts
Posted: Monday, August 14, 2017 - 09:11 AM UTC
I have to tell you what you see in these pictures is not where I ended up with it. I did use some filler, not much to be honest. As for the shoulder straps, if this were a bit more of a detail oriented build I most likely would have fixed that but with my intent to have this for demonstration I chose not to this time.


Joe
Kevlar06
_VISITCOMMUNITY
Washington, United States
Joined: March 15, 2009
KitMaker: 3,670 posts
AeroScale: 833 posts
Posted: Tuesday, August 15, 2017 - 07:31 AM UTC
Joe, just saw this as a finished product over on Cybermodeler. You did a great job on this old dog. The Monogram P40 was one of my favorites too-- I must have built a half dozen as a kid in the 60s. In 1998, when my oldest daughter wanted to build something, I gave her one to build. Then, the youngest daughter wanted one too-- so she built one, and she still has it on display today, even though she's turned 34 now! She said it reminds her of good times. I always thought the kit was pretty darn good for its age-- a lot of the old Monogram 1/4 scale kits were cutting edge back then.
VR, Russ
fightnjoe
_VISITCOMMUNITY
Washington, United States
Joined: August 16, 2004
KitMaker: 603 posts
AeroScale: 565 posts
Posted: Tuesday, August 15, 2017 - 07:03 PM UTC
Russ I am glad you like her. I had been speaking to Mike at Cybermodeller to see if I could join his impressive line up of writers. He said ok and asked if I had anything I could forward to him. That build is one that was not posted or published anywhere. He liked it and put it up. I truly love this kit, blemishes and all.


Joe
fightnjoe
_VISITCOMMUNITY
Washington, United States
Joined: August 16, 2004
KitMaker: 603 posts
AeroScale: 565 posts
Posted: Monday, August 21, 2017 - 07:01 AM UTC
Moving right along with this build.

First up is to show ....


I did make it through the attachment of the stabilizers. Once sanded and prepped it was paint time.

After an initial coat of Rustoleum Flat Black the lower fuselage and wings received a bit of Model Master Neutral Gray.


Actually this is after several coats with just minutes between. Then it is on to the upper fuselage. First will be a very thinned spray of Model Master #8 Olive Drab.


Next will be to set up for the weathering. A few coats of the OD to blend things in and then off to bigger and better.


All comments, critiques, and criticism are encouraged.


Joe
fightnjoe
_VISITCOMMUNITY
Washington, United States
Joined: August 16, 2004
KitMaker: 603 posts
AeroScale: 565 posts
Posted: Monday, September 25, 2017 - 07:57 AM UTC
Folks finally back to give a bit of an update.

First up is to let you know that this has actually progressed quite a bit. This will show you the first few stages of the painting.

First was a Flat Black overall coat then into the color. Model Master Neutral Color was first on the lower sections. On to the upper, Model Master #8 Olive Drab was the color of choice and the first session saw it mixed with Model Master Flat White. Eyeballed to the shade I hoped to portray and then sprayed within the panel lines. Careful but not too worried about overspray. I did not want to have the quilt look. Several sessions followed with more and more of the Olive Drab added until I got to a place where I was somewhat happy.

Several pictures for you.


There will be another quick update soon to show the remainder of the paint sessions.

All comments, critiques, and criticism are encouraged.

Joe
fightnjoe
_VISITCOMMUNITY
Washington, United States
Joined: August 16, 2004
KitMaker: 603 posts
AeroScale: 565 posts
Posted: Monday, September 25, 2017 - 08:14 AM UTC
Ok second part.

After several sessions I was not particularly thrilled with the look and went back and carefully sprayed some Testors Olive Drab from the square bottle to give it a bit of warmth.

A couple of things I am pretty happy with. The appearance of staining and panel paint fading.


Alrighty then, she is pretty much ready to decal up.


All comments, critiques, and criticism are encouraged.


Joe
Bigrip74
_VISITCOMMUNITY
Texas, United States
Joined: February 22, 2008
KitMaker: 5,026 posts
AeroScale: 2,811 posts
Posted: Monday, September 25, 2017 - 10:37 AM UTC
Joe, Ive been quietly watching your progress and I like what you have done to this old kit. Cannot wait to see the next posts.

Bob
fightnjoe
_VISITCOMMUNITY
Washington, United States
Joined: August 16, 2004
KitMaker: 603 posts
AeroScale: 565 posts
Posted: Wednesday, September 27, 2017 - 10:59 PM UTC
Bob I am glad you like her.


Joe
fightnjoe
_VISITCOMMUNITY
Washington, United States
Joined: August 16, 2004
KitMaker: 603 posts
AeroScale: 565 posts
Posted: Friday, September 29, 2017 - 09:48 PM UTC
Another update.

Decals are on. Again for this build the markings are not my focus. This will however be the last update showing what I had planned to show. After this I go a bit off road.

The decals went down with no issues. I used MicroSol to get them to conform and then threw a gloss over the top to seal them in.


Next up is the weathering.

All comments, critiques, and criticism are encouraged.


Joe
fightnjoe
_VISITCOMMUNITY
Washington, United States
Joined: August 16, 2004
KitMaker: 603 posts
AeroScale: 565 posts
Posted: Tuesday, October 17, 2017 - 07:10 PM UTC
With the continuing movement forward with the videos on this build it is time to throw out some better, used very loosely, quality images of the weathering.

First up, and each of these will be a kind of summary of what happened.

First the initial process was with a gloss coat I used Titanium White, cheaper oil set, to try to get some streaking and a bit of weather staining on the fuselage. I also used Burnt Umber, same set, to try to get some distinct staining on the panels of the engine area. I did not like the way this came out.

Anyway the pics.


The process is started anyway. Teaser, a bit of a change in execution is next up.


All comments, critiques, and criticism are encouraged.


Joe
fightnjoe
_VISITCOMMUNITY
Washington, United States
Joined: August 16, 2004
KitMaker: 603 posts
AeroScale: 565 posts
Posted: Saturday, October 21, 2017 - 01:19 AM UTC
Ok for this update let me talk about my methods.

First up for me was a drybrush of Testors Flat Aluminium. This concentrated on areas I felt and have seen received excess wear and tear on the paint due to crew use or even weathering. Along those lines I also used my cheap Oil Paint Titanium White with an abused round brush as well as two sizes of flat brush. I put small dots into the centerish of panels and then worked them into the paint. Mind you that this is being done over a flat clear layer. After several passes that encompassed varied panels I came to the decision that one of my more recent investments needed to be used here.

Recently I purchased four sets of Abteilung 502 Oil Paints. Beginning with ABT070 Dark Rust I began to play a bit with panel lines. After just a brief attempt I just had the thought that it didnt look right. I used a cotton bud to remove most of it and brought out ABT004 Bitume and began to work around some of the lines. I tried to keep this to where dirt and grime would build up and where the weather would cause streaking. I did this over several sessions.

Overall there is several hours of work.


In the next update I will show what at the time I thought was the weathering finished.


All comments, critiques, and criticism are encouraged.


Joe
fightnjoe
_VISITCOMMUNITY
Washington, United States
Joined: August 16, 2004
KitMaker: 603 posts
AeroScale: 565 posts
Posted: Wednesday, November 08, 2017 - 09:43 AM UTC
Ok this is the last, or what I thought was the last, of the weathering.

For this part I did go back over the different panels with the oils again. This time my main goal was to add a bit of blending. I did manage to get some better definition on some of the panels and did add some further effects on the panels near the cowl.


Now following this set of photos this build went quickly. The small bits went on with little issue other than the canopy. I will expand on that more on the final update but for now I will leave these with you.


All comments, critiques, and criticism are encouraged.


Joe
greif8
_VISITCOMMUNITY
Bayern, Germany
Joined: January 17, 2006
KitMaker: 673 posts
AeroScale: 492 posts
Posted: Thursday, November 09, 2017 - 10:44 PM UTC
Hi Joe, that bird has seen some use! I like your idea of dry brushing silver to replicate wear, I'll have to try that on a future build. Normally I either use the hairbrush technique or the old silver pen and pencil technique.

Ernest
thegirl
_VISITCOMMUNITY
Alberta, Canada
Joined: January 19, 2008
KitMaker: 6,743 posts
AeroScale: 6,151 posts
Posted: Friday, November 10, 2017 - 05:38 AM UTC
She is well used , nicely done Joe


Terri
fightnjoe
_VISITCOMMUNITY
Washington, United States
Joined: August 16, 2004
KitMaker: 603 posts
AeroScale: 565 posts
Posted: Friday, November 10, 2017 - 10:16 PM UTC
Many thanks for your kindness.

Drybrushing can be effective for sure.


My friends this build is finished.

Following the last update the little things were completed and attached. There was one issue that is now a glaring reminder to me that it is not over until it is over. One of the last attachments was the clear parts. Following my normal procedure I fitted them and then used Tamiya Extra Thin to attach. This time the glue marred the surface and made the clear nasty. This does happen and in itself it did not bother me too much except for the idea that I had been working this "live" and did not have alternative parts.

All in all this experiment was a success in my mind and I put it to the shelf with a smile.


All comments, critiques, and criticism are encouraged.


Joe
 _GOTOTOP