Review Eduard: SE.5a Wolseley Viper
Merlin
 Senior Editor
#017
United Kingdom
Joined: June 11, 2003
KitMaker: 17,582 posts
AeroScale: 12,795 posts
Posted: Thursday, April 06, 2017 - 06:52 PM UTC
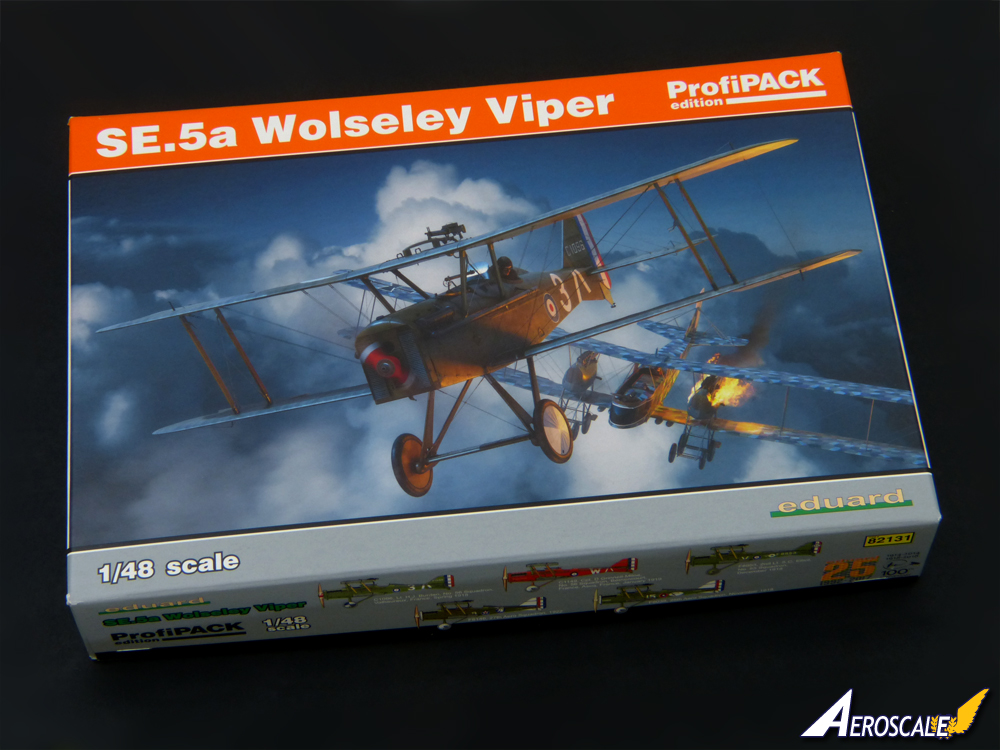
Here's a quick in-box look at Eduard's lovely new SE.5a ahead of starting construction.
Read the ReviewIf you have comments or questions please post them here.
Thanks!
BEWARE OF THE FEW...
As I grow older, I regret to say that a detestable habit of thinking seems to be getting a hold of me. - H. Rider Haggard
Merlin
Senior Editor #017
United Kingdom
Joined: June 11, 2003
KitMaker: 17,582 posts
AeroScale: 12,795 posts
Posted: Saturday, April 08, 2017 - 12:07 PM UTC
Hi again
The 100th anniversary of the Battle of Arras seems a fitting day to start a WWI build, so I'll begin work on the SE.5a this morning. I'll add some of the Brassin upgrades to the standard kit.
All the best
Rowan

BEWARE OF THE FEW...
As I grow older, I regret to say that a detestable habit of thinking seems to be getting a hold of me. - H. Rider Haggard
Merlin
Senior Editor #017
United Kingdom
Joined: June 11, 2003
KitMaker: 17,582 posts
AeroScale: 12,795 posts
Posted: Saturday, April 08, 2017 - 05:06 PM UTC
Hi again
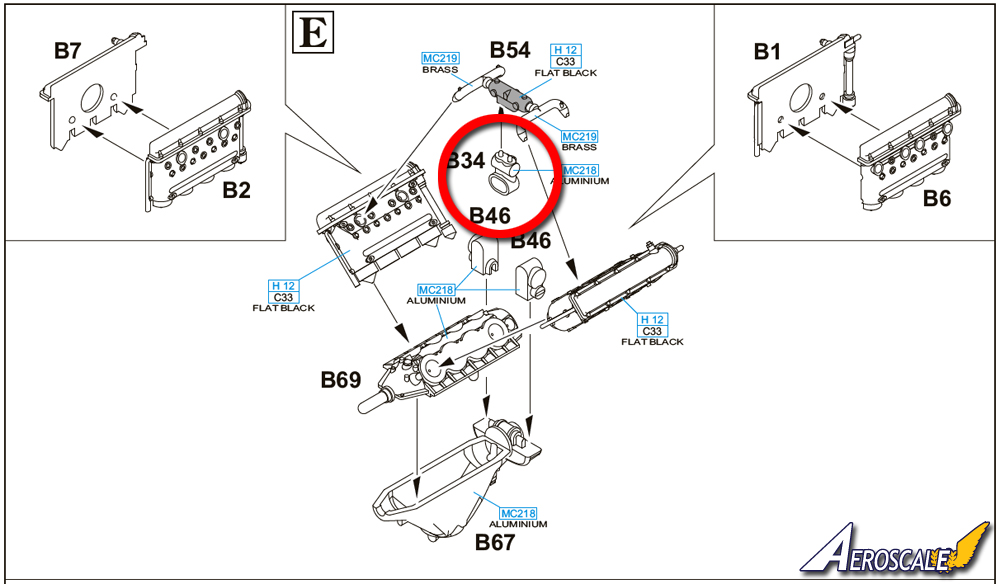
Predictably, I've started out of sequence by tackling the engine first. It's just tacked together and seeing it in the photo has highlighted a couple of mould seams that I still need to clean up:
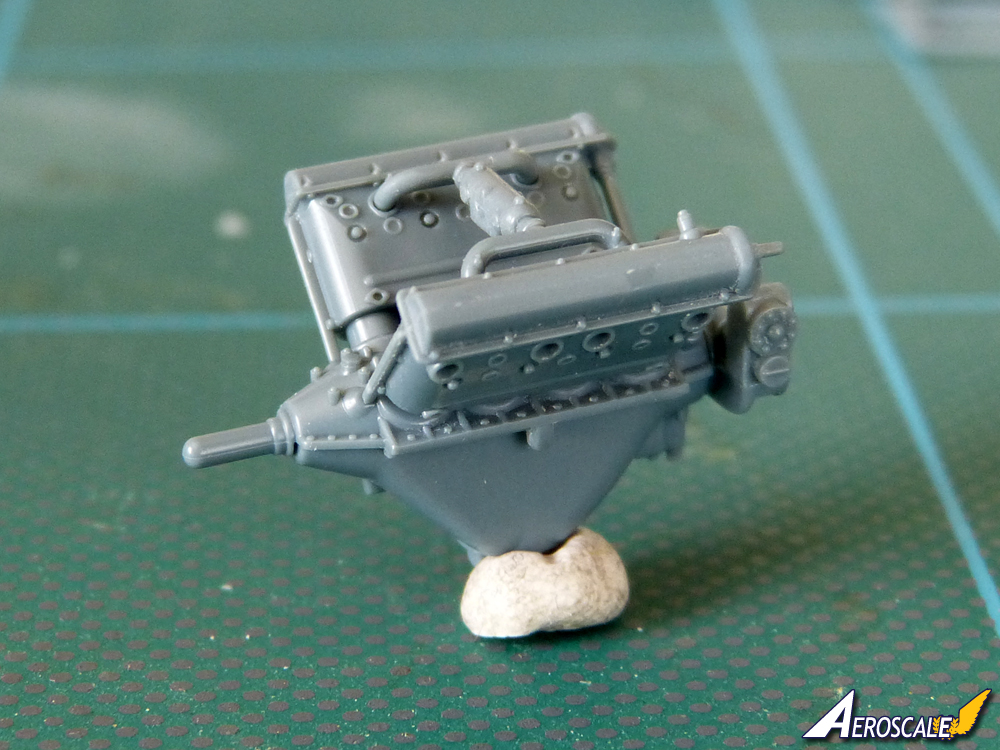
One thing to watch out for is that Eduard may have switched the diagrams for the cylinder banks in stage E. I say "may" because I'd already removed the parts from the sprues when I noticed. Anyway - just make sure you've got the 4 holes on the outside ready for the exhaust pipes.
All the best
Rowan
BEWARE OF THE FEW...
As I grow older, I regret to say that a detestable habit of thinking seems to be getting a hold of me. - H. Rider Haggard
betheyn
Senior Editor #019
England - South East, United Kingdom
Joined: October 14, 2004
KitMaker: 4,560 posts
AeroScale: 2,225 posts
Posted: Saturday, April 08, 2017 - 05:22 PM UTC
Quoted Text
One thing to watch out for is that Eduard may have switched the diagrams for the cylinder banks in stage E. I say "may" because I'd already removed the parts from the sprues when I noticed. Anyway - just make sure you've got the 4 holes on the outside ready for the exhaust pipes.
Hi Rowan,
Good start, I have already built the engine and have it installed in the fuselage, fits as snug as a bug.
Looking at the online instructions, they do show the four holes on the outside of the cylinders, but like yourself I didn't check either before cutting them off the sprues, then spent 5 mins wondering what way round they go lol.
Andy

It's not the same, better, but not the same...
Merlin
Senior Editor #017
United Kingdom
Joined: June 11, 2003
KitMaker: 17,582 posts
AeroScale: 12,795 posts
Posted: Saturday, April 08, 2017 - 09:26 PM UTC
Hi again
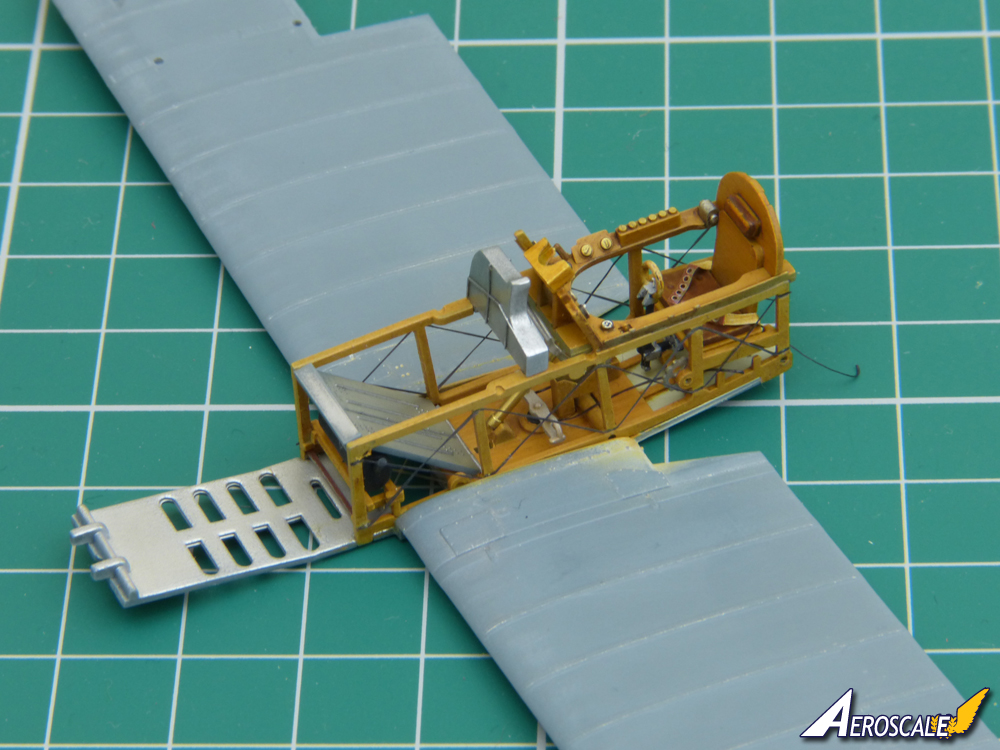
I've started to tinker with the cockpit, clipped together here ahead of painting some basic colours:
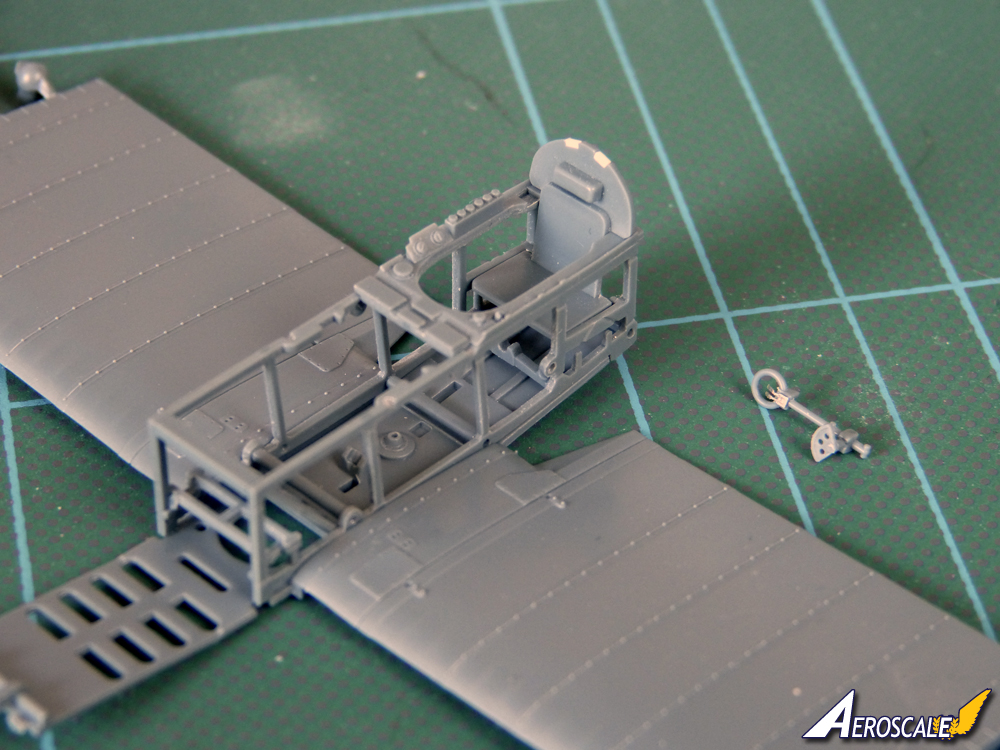
It fits together really nicely, but one change I've made is to fill the slots for the four-point harness. I'll just go for lap belts in mine, which I believe would be more likely for a wartime machine.
All the best
Rowan
BEWARE OF THE FEW...
As I grow older, I regret to say that a detestable habit of thinking seems to be getting a hold of me. - H. Rider Haggard
MichaelSatin
Campaigns Administrator Colorado, United States
Joined: January 19, 2008
KitMaker: 3,909 posts
AeroScale: 2,904 posts
Posted: Sunday, April 09, 2017 - 04:28 AM UTC
Beautiful so far Merlin. Think I'll subscribe to this one, though my preferred scale for The Great War is 1/32.
On the bench:
Sorta depends on your definition of "on the bench"...
Connecticut, United States
Joined: October 26, 2009
KitMaker: 424 posts
AeroScale: 389 posts
Posted: Sunday, April 09, 2017 - 09:50 PM UTC
A point on the painting... Box top... the prop seems to be in the upper position meaning a reduction gear was in use. Did not that require a different front end on that lovely model engine? or was the reduction gear Attached separate to the engine?
curious
Captn Tommy
Connecticut, United States
Joined: October 26, 2009
KitMaker: 424 posts
AeroScale: 389 posts
Posted: Sunday, April 09, 2017 - 10:21 PM UTC
Having actually looked at the 3-views, I see now I was incorrect the prop is in the correct pace for a non reduction gear engine.
Excuse Me
Captn Tommy
I am not really an SE5 person, And wrote too soon. Apologies.
Merlin
Senior Editor #017
United Kingdom
Joined: June 11, 2003
KitMaker: 17,582 posts
AeroScale: 12,795 posts
Posted: Tuesday, April 11, 2017 - 01:52 AM UTC
Hi Tom
Darn you - now you've got me thinking about putting the other engine together just for the sake of it!

All the best
Rowan
BEWARE OF THE FEW...
As I grow older, I regret to say that a detestable habit of thinking seems to be getting a hold of me. - H. Rider Haggard
Connecticut, United States
Joined: October 26, 2009
KitMaker: 424 posts
AeroScale: 389 posts
Posted: Wednesday, April 12, 2017 - 07:44 PM UTC
Remember those props, I believe the reduction engine needed a clockwise prop (when viewed from the front.
Also remind the ground crew...
Happy Easter, and Passover
Captn Tommy
Merlin
Senior Editor #017
United Kingdom
Joined: June 11, 2003
KitMaker: 17,582 posts
AeroScale: 12,795 posts
Posted: Tuesday, April 18, 2017 - 02:12 AM UTC
Hi again
Nothing fresh to show - but there has been progress behind the scenes, and the basic interior assemblies and colours are blocked out.
If nothing else, this project has really underlined the value of Andy's
"bare build". He's using the online PDF instructions, whereas I'm going by the printed set included with the kit.
So, when it got to the engine, I clipped everything together, as per printed instructions:
But Andy's shot confirmed a nagging doubt that something was missing - the carburetor:
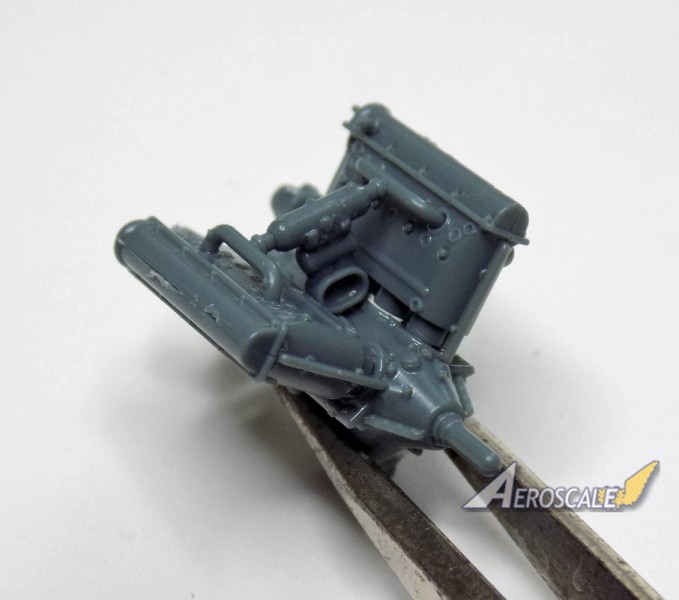
Checking online, this makes a miraculous re-appearance in Eduard's PDF instructions:
I guess Eduard spotted the mistake too late to include an addendum note in the kit - but, hopefully, this will be corrected in future print runs of the instructions.
All the best
Rowan
BEWARE OF THE FEW...
As I grow older, I regret to say that a detestable habit of thinking seems to be getting a hold of me. - H. Rider Haggard
betheyn
Senior Editor #019
England - South East, United Kingdom
Joined: October 14, 2004
KitMaker: 4,560 posts
AeroScale: 2,225 posts
Posted: Tuesday, April 18, 2017 - 04:13 PM UTC
Hi Rowan,
That is interesting, and I have made a note to myself too check the printed instructions against the PDF version for future releases of their kits, to see if there are any more differences.
I wonder if they forgot too fit the carburettor totally and updated the PDF ones, or its just the printed that has it missing?
Looking forward to seeing some paint on this.
Andy
It's not the same, better, but not the same...
Merlin
Senior Editor #017
United Kingdom
Joined: June 11, 2003
KitMaker: 17,582 posts
AeroScale: 12,795 posts
Posted: Friday, April 21, 2017 - 11:52 PM UTC
Quoted Text
Hi Rowan,
That is interesting, and I have made a note to myself too check the printed instructions against the PDF version for future releases of their kits, to see if there are any more differences.
I wonder if they forgot too fit the carburettor totally and updated the PDF ones, or its just the printed that has it missing?
Looking forward to seeing some paint on this.
Andy
Hi Andy
I imagine Eduard spotted the omission after the print run, but not in time to add an errata note to the kits.
"The Duellists" took up most of my day off work on Friday, but we've got cover at the shop tomorrow so it's looking good to crack on a bit with the SE.5a.
A day at the workbench! Yip yip coyote!

All the best
Rowan
BEWARE OF THE FEW...
As I grow older, I regret to say that a detestable habit of thinking seems to be getting a hold of me. - H. Rider Haggard
Merlin
Senior Editor #017
United Kingdom
Joined: June 11, 2003
KitMaker: 17,582 posts
AeroScale: 12,795 posts
Posted: Monday, April 24, 2017 - 12:27 AM UTC
Hi again
I was hoping to post some progress pics, but I've rather shot myself in the foot by using oils (instead of my usual water colours) for a basic wood effect on the interior. It's not totally unwitting - I want more practice with oils - but the extra drying time is a minor frustration. With oils being such a notorious dust magnet, I'm keeping the parts "cooking" in my "Heath Robinson" paint dryer (actually a heated seed propagator) for a while before moving on.
All the best
Rowan
BEWARE OF THE FEW...
As I grow older, I regret to say that a detestable habit of thinking seems to be getting a hold of me. - H. Rider Haggard
Victoria, Australia
Joined: November 26, 2006
KitMaker: 608 posts
AeroScale: 602 posts
Posted: Thursday, April 27, 2017 - 03:55 PM UTC
Well, I called in at my local hobby shop today and picked one of these up.
Wow! Eduard certainly have come a long way in their 25 years. The surface detail is so crisp!
I noticed though that the rib stitching and taping is quite pronounced. Not sure about that. At 1/48 scale, you'd hardly see it let alone feel it.... I'll be looking at that more at a later date... Maybe a discussion on how that feature should best be represented at out common scales... Or am I getting ahead of my self?
It's going to be a while before I start this kit though. I've waited 25 years for Eduard to do this kit... The building can wait too,
Cheers,
Hugh.
Merlin
Senior Editor #017
United Kingdom
Joined: June 11, 2003
KitMaker: 17,582 posts
AeroScale: 12,795 posts
Posted: Sunday, April 30, 2017 - 11:48 AM UTC
Hi Hugh
Yes, I'll knock back the stitching on my build. Eduard's interpretation is more subtle than many I've seen, but still looks overscale to my eyes. I guess the problem for manufacturers these days is that many modellers expect to see rib tapes and stitching, whether or not it's done strictly to scale. The same conundrum as with rivets.
I was hoping to make some proper progress yesterday on what should have been a day off, but ended up having to go in to work. I mustn't waste the opportunity to crack on today. Hopefully, I'll post a couple of pics by the end of play.
All the best
Rowan
BEWARE OF THE FEW...
As I grow older, I regret to say that a detestable habit of thinking seems to be getting a hold of me. - H. Rider Haggard
Victoria, Australia
Joined: November 26, 2006
KitMaker: 608 posts
AeroScale: 602 posts
Posted: Sunday, April 30, 2017 - 02:34 PM UTC
Hey Rowan,
I'm glad I'm not alone in that opinion.
I'm planning an article/ discussion for any to join in and discuss further.
I don't want to hijack this thread with an ongoing discussion of it, neither do I want to give the impression that I'm criticising Eduard for their efforts here.
It's a stunning kit and the attention to other aspects of the surface detail is superb.
Just out of interest, how are you planning to get the effect down?
Cheers,
Hugh
Merlin
Senior Editor #017
United Kingdom
Joined: June 11, 2003
KitMaker: 17,582 posts
AeroScale: 12,795 posts
Posted: Sunday, April 30, 2017 - 04:52 PM UTC
Hi Hugh
It's not hijacking - it's great to have you along for the ride and taking an interest. I've no doubt I'll be picking your brains for help at many points.
I'll use a padded levelling sander on the rib tapes. I've made a start, but will do more.
I've finally got a couple of progress shots to show I haven't been entirely idle all this time. The main parts are only dry-fitted and there are more details to add. I'll also give light coat of varnish to tie everything together and a dusting with pastels.


Andy's warned that a lot of the detail will be hidden, so I won't go crazy, but I want to put in control cables and a few other bits and bobs.
More later.
All the best
Rowan
BEWARE OF THE FEW...
As I grow older, I regret to say that a detestable habit of thinking seems to be getting a hold of me. - H. Rider Haggard
Victoria, Australia
Joined: November 26, 2006
KitMaker: 608 posts
AeroScale: 602 posts
Posted: Sunday, April 30, 2017 - 05:01 PM UTC
Oh, like a nail buffing stick or some such?
Nice work on the interior Rowan.
Cheers,
Hugh
Merlin
Senior Editor #017
United Kingdom
Joined: June 11, 2003
KitMaker: 17,582 posts
AeroScale: 12,795 posts
Posted: Sunday, April 30, 2017 - 10:07 PM UTC
Quoted Text
Oh, like a nail buffing stick or some such?
Hi Hugh
I still use the old
MasterCasters sponge sanders which I reviewed years ago.
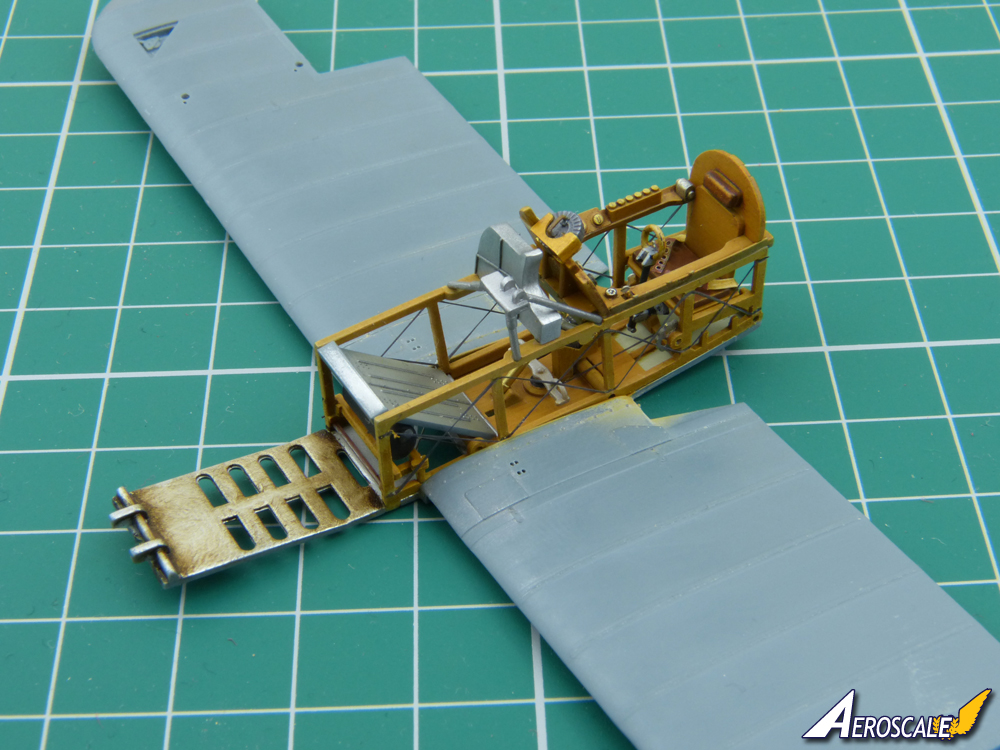
I've made a bit more progress today and got the bulk of the interior in place:
I need to tighten up the control cables and tuck them out of sight and add a few more small items, but it's coming together.
All the best
Rowan
BEWARE OF THE FEW...
As I grow older, I regret to say that a detestable habit of thinking seems to be getting a hold of me. - H. Rider Haggard
Gdańsk, Poland
Joined: February 18, 2016
KitMaker: 92 posts
AeroScale: 90 posts
Posted: Friday, May 05, 2017 - 01:37 PM UTC
Hi Rowan,
Great start with the kit! Never thought of comparing printed manual with the digital one - thanks for the heads up.
Definitely will follow the build
Cheers
Bart
Merlin
Senior Editor #017
United Kingdom
Joined: June 11, 2003
KitMaker: 17,582 posts
AeroScale: 12,795 posts
Posted: Friday, May 05, 2017 - 11:43 PM UTC
Hi Bart
Many thanks for your kind words. Touch wood(!), I've got a day off work tomorrow, so I hope to make a bit more progress. Looking at the photos "fresh", the engine compartment seems much too clean - I'm sure there would have been a bunch of oil and other muck accumulated there on a service aircraft - so I'll dirty it up before closing the fuselage.
The issue with the instructions surprised me too. If it hadn't been for Andy's build, I wouldn't have compared the printed and .pdf versions, but I'll remember it's worth checking in future if anything "rings wrong" like it did here.
All the best
Rowan
BEWARE OF THE FEW...
As I grow older, I regret to say that a detestable habit of thinking seems to be getting a hold of me. - H. Rider Haggard
Merlin
Senior Editor #017
United Kingdom
Joined: June 11, 2003
KitMaker: 17,582 posts
AeroScale: 12,795 posts
Posted: Saturday, May 20, 2017 - 06:51 PM UTC
Hi again
It's a treat to get back to the workbench for the first time in a couple of weeks, and my target this afternoon is to get the basic fuselage closed up.
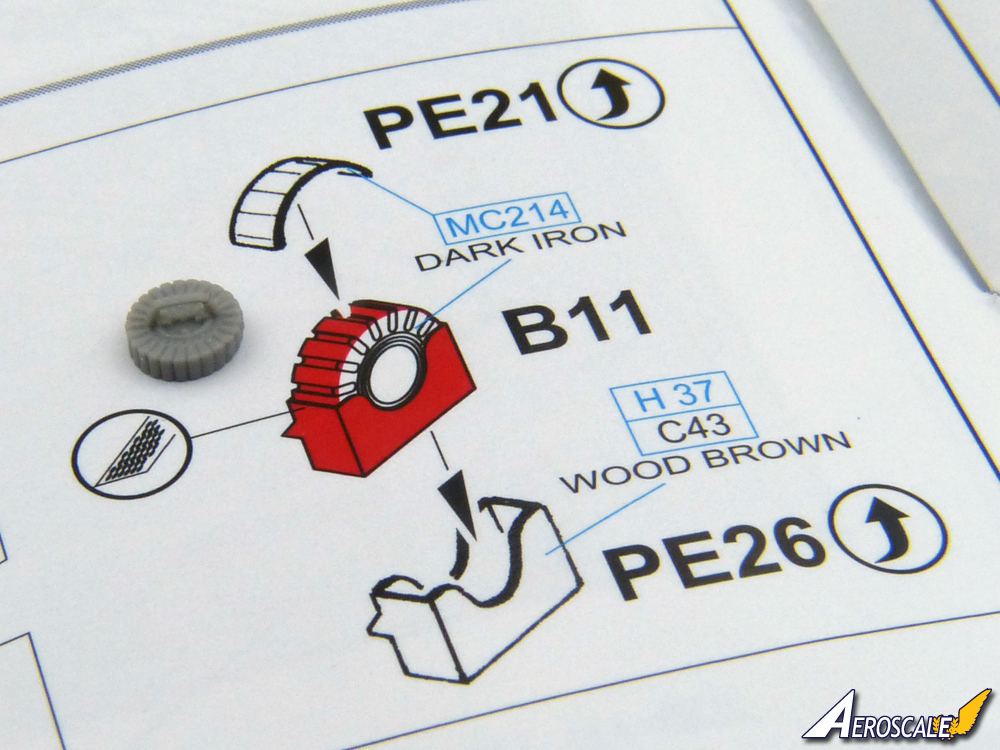
So, I'm installing the final details in the cockpit and I've used the Lewis magazines from the Brassin gun set #648299 reviewed
HERE. Using the kit parts involves carving away each holder from the styrene drum, adding an photo-etched rim and then installing the remaining partial drum in a new etched holder. That's all pretty fiddly and the Brassin parts are both easier to use and so much better detailed:
If all goes according to plan, I'll post another update later or tomorrow.
All the best
Rowan
BEWARE OF THE FEW...
As I grow older, I regret to say that a detestable habit of thinking seems to be getting a hold of me. - H. Rider Haggard
Merlin
Senior Editor #017
United Kingdom
Joined: June 11, 2003
KitMaker: 17,582 posts
AeroScale: 12,795 posts
Posted: Saturday, May 20, 2017 - 09:18 PM UTC
Hi again
Well - there's a bit of progress to show. As I promised to myself, I've dirtied up the aluminium cowl under the engine as though oil, grease and gunge had accumulated there:
Note: the Vickers gun mount is from the Brassin set and isn't included in the normal kit.
So, I don't think I've forgotten anything. The last few levers are in place in the cockpit, and the cross frames will go into the engine compartment when I close up the fuselage halves:
.
I think I've just about run out of excuses to avoid moving on.

All the best
Rowan
BEWARE OF THE FEW...
As I grow older, I regret to say that a detestable habit of thinking seems to be getting a hold of me. - H. Rider Haggard
Merlin
Senior Editor #017
United Kingdom
Joined: June 11, 2003
KitMaker: 17,582 posts
AeroScale: 12,795 posts
Posted: Sunday, May 21, 2017 - 03:43 AM UTC
Hi again
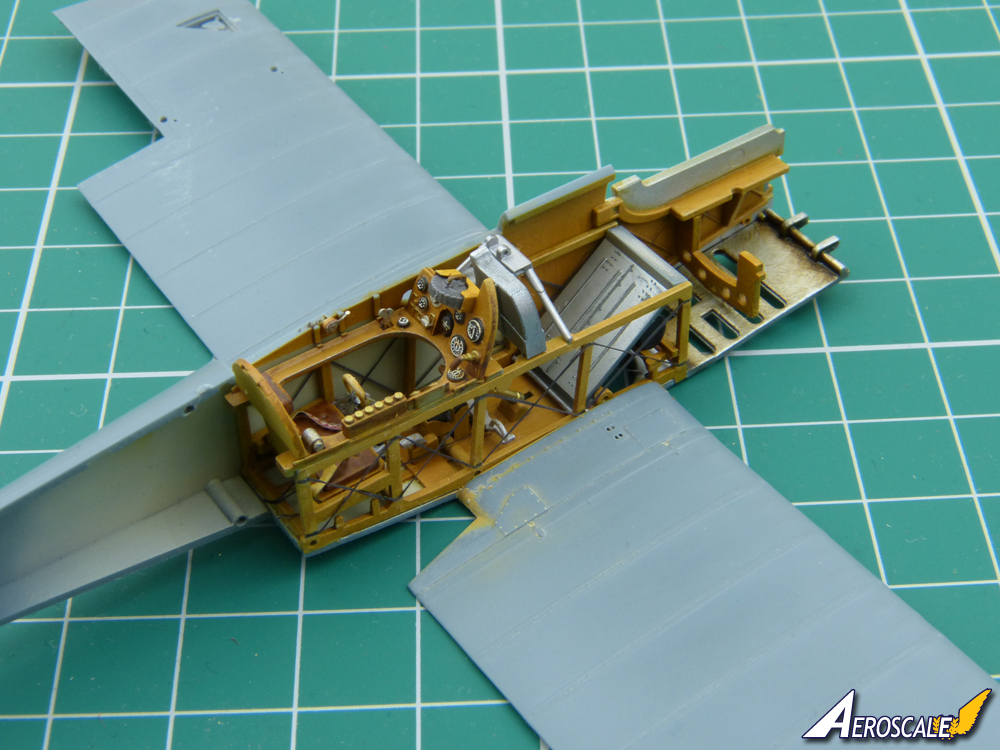
I took a couple ox extra shots earlier before heading out for the evening. I pretty much reached my target for the day and closed up the fuselage sides. The top cowls and coaming are only dry-fitted to make sure there aren't any major problems looming. Touch wood, it all looks very promising - but it underlines what Andy said about a lot of the interior detail being hidden:
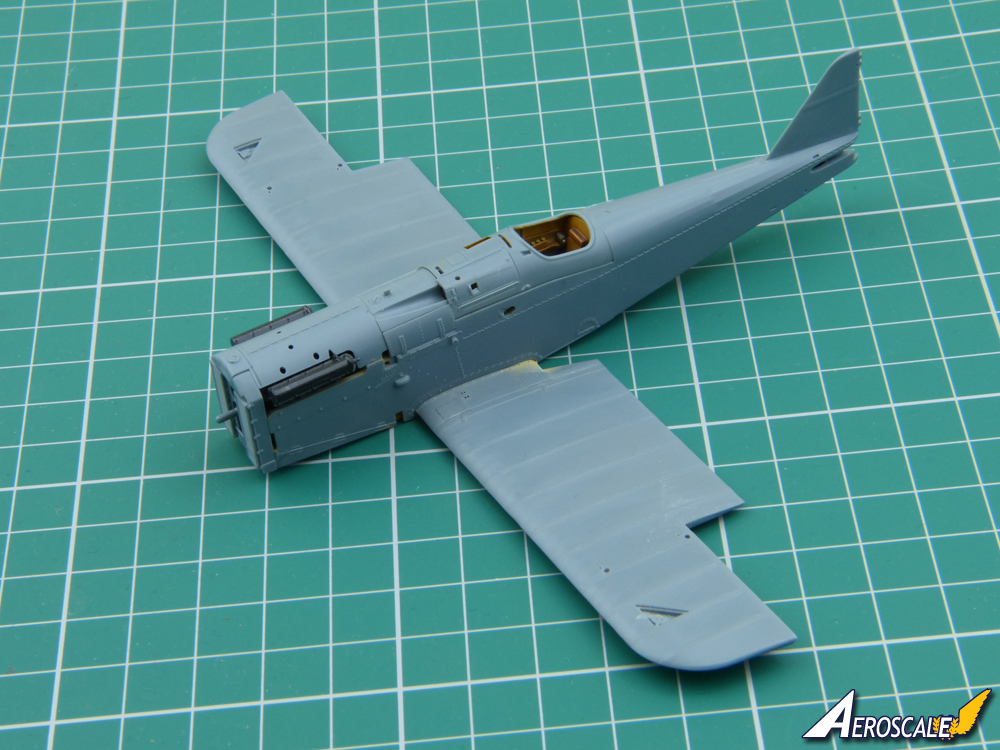
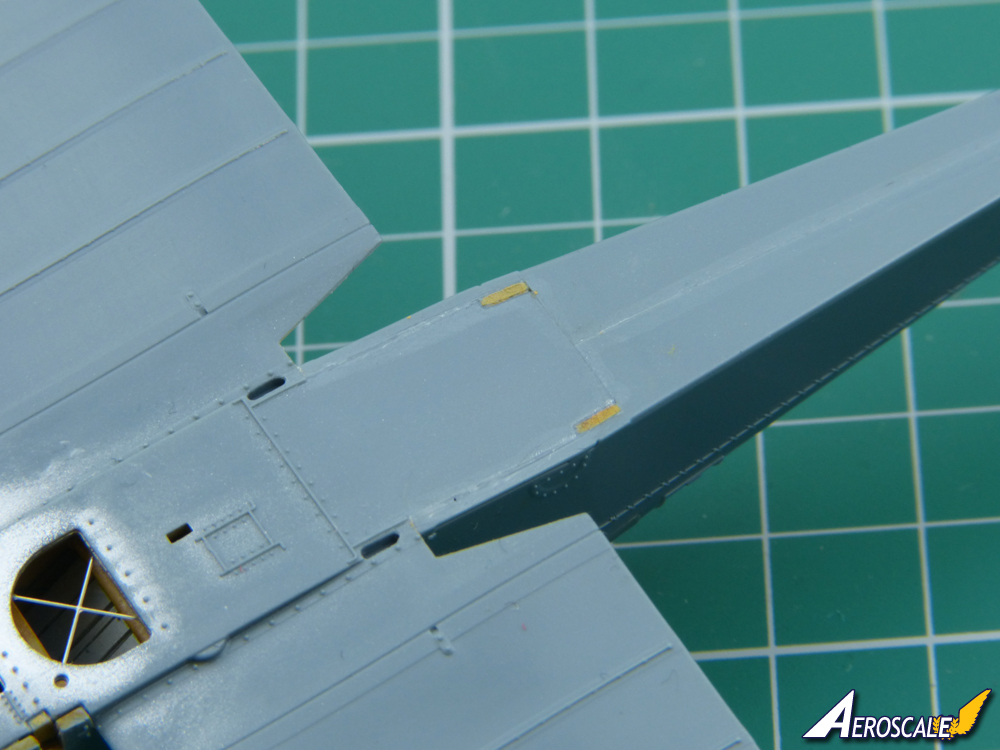
Eduard's way of attaching the cockpit parts to a one-piece lower wing makes for a very solid foundation. But it also means a bit of work on the underside to hide the joints. Hopefully a few dabs of filler will soon take care of things:
All the best
Rowan
BEWARE OF THE FEW...
As I grow older, I regret to say that a detestable habit of thinking seems to be getting a hold of me. - H. Rider Haggard