

Thanks so much for your kind words.
One of the problems of course with a tri-cycle gear model is to get it to sit on all 3 wheels as the CG without the weight of the real plane's equipment makes the model tail heavy. I put some weight in the bottom of the nose turret and inside the nose wheel itself, but what seems to have really helped is that since the engines all sit forward of the main gear, I stuffed a bunch of washers behind each firewall hoping the fact that it was quite a bit of weight would compensate for the fact that it was only slightly forward of the gears. I'm hopeful that it will be enough.
Having an aircraft with the CG right at just barely in front of the main gear would make landings and take offs pretty tricky for sure.
Hosted by Rowan Baylis
B-24H Libra 1/48 Scale

thathaway3

Joined: September 10, 2004
KitMaker: 1,610 posts
AeroScale: 85 posts
Posted: Sunday, August 26, 2018 - 06:52 AM UTC


GastonMarty

Joined: April 19, 2008
KitMaker: 595 posts
AeroScale: 507 posts
Posted: Sunday, August 26, 2018 - 12:08 PM UTC
Quoted Text
Hi Tom - I've been lurking in the shadows and just want to compliment you on your beautiful workmanship . Nice to see another post - hurry up and get the basement done so we can have more !
As an aside I have watched the Collings Foundation B 24 on several occasions and have come to the conclusion that it's center of gravity must be exactly over the main landing gear as I have never seen an an aircraft hobby horse so much while taxiing . Almost made me seasick while watching !
Cheers - Richard
That's interesting, and probably shows just how bombload dependent the thing was for balance...
That's also probably why the C-87 transport was so finicky (and was almost grounded after 2-3 accidents). The bomb racks set a regulated center of gravity, but a transport could have deadly variations if you were not careful...
Gaston
thathaway3
Joined: September 10, 2004
KitMaker: 1,610 posts
AeroScale: 85 posts
Posted: Sunday, August 26, 2018 - 01:09 PM UTC
That makes sense. It appears the bomb bay is pretty close to the main gear (give or take) and that would help to keep the CG in the middle to forward part of the A/C.
thathaway3
Joined: September 10, 2004
KitMaker: 1,610 posts
AeroScale: 85 posts
Posted: Monday, December 24, 2018 - 04:58 PM UTC
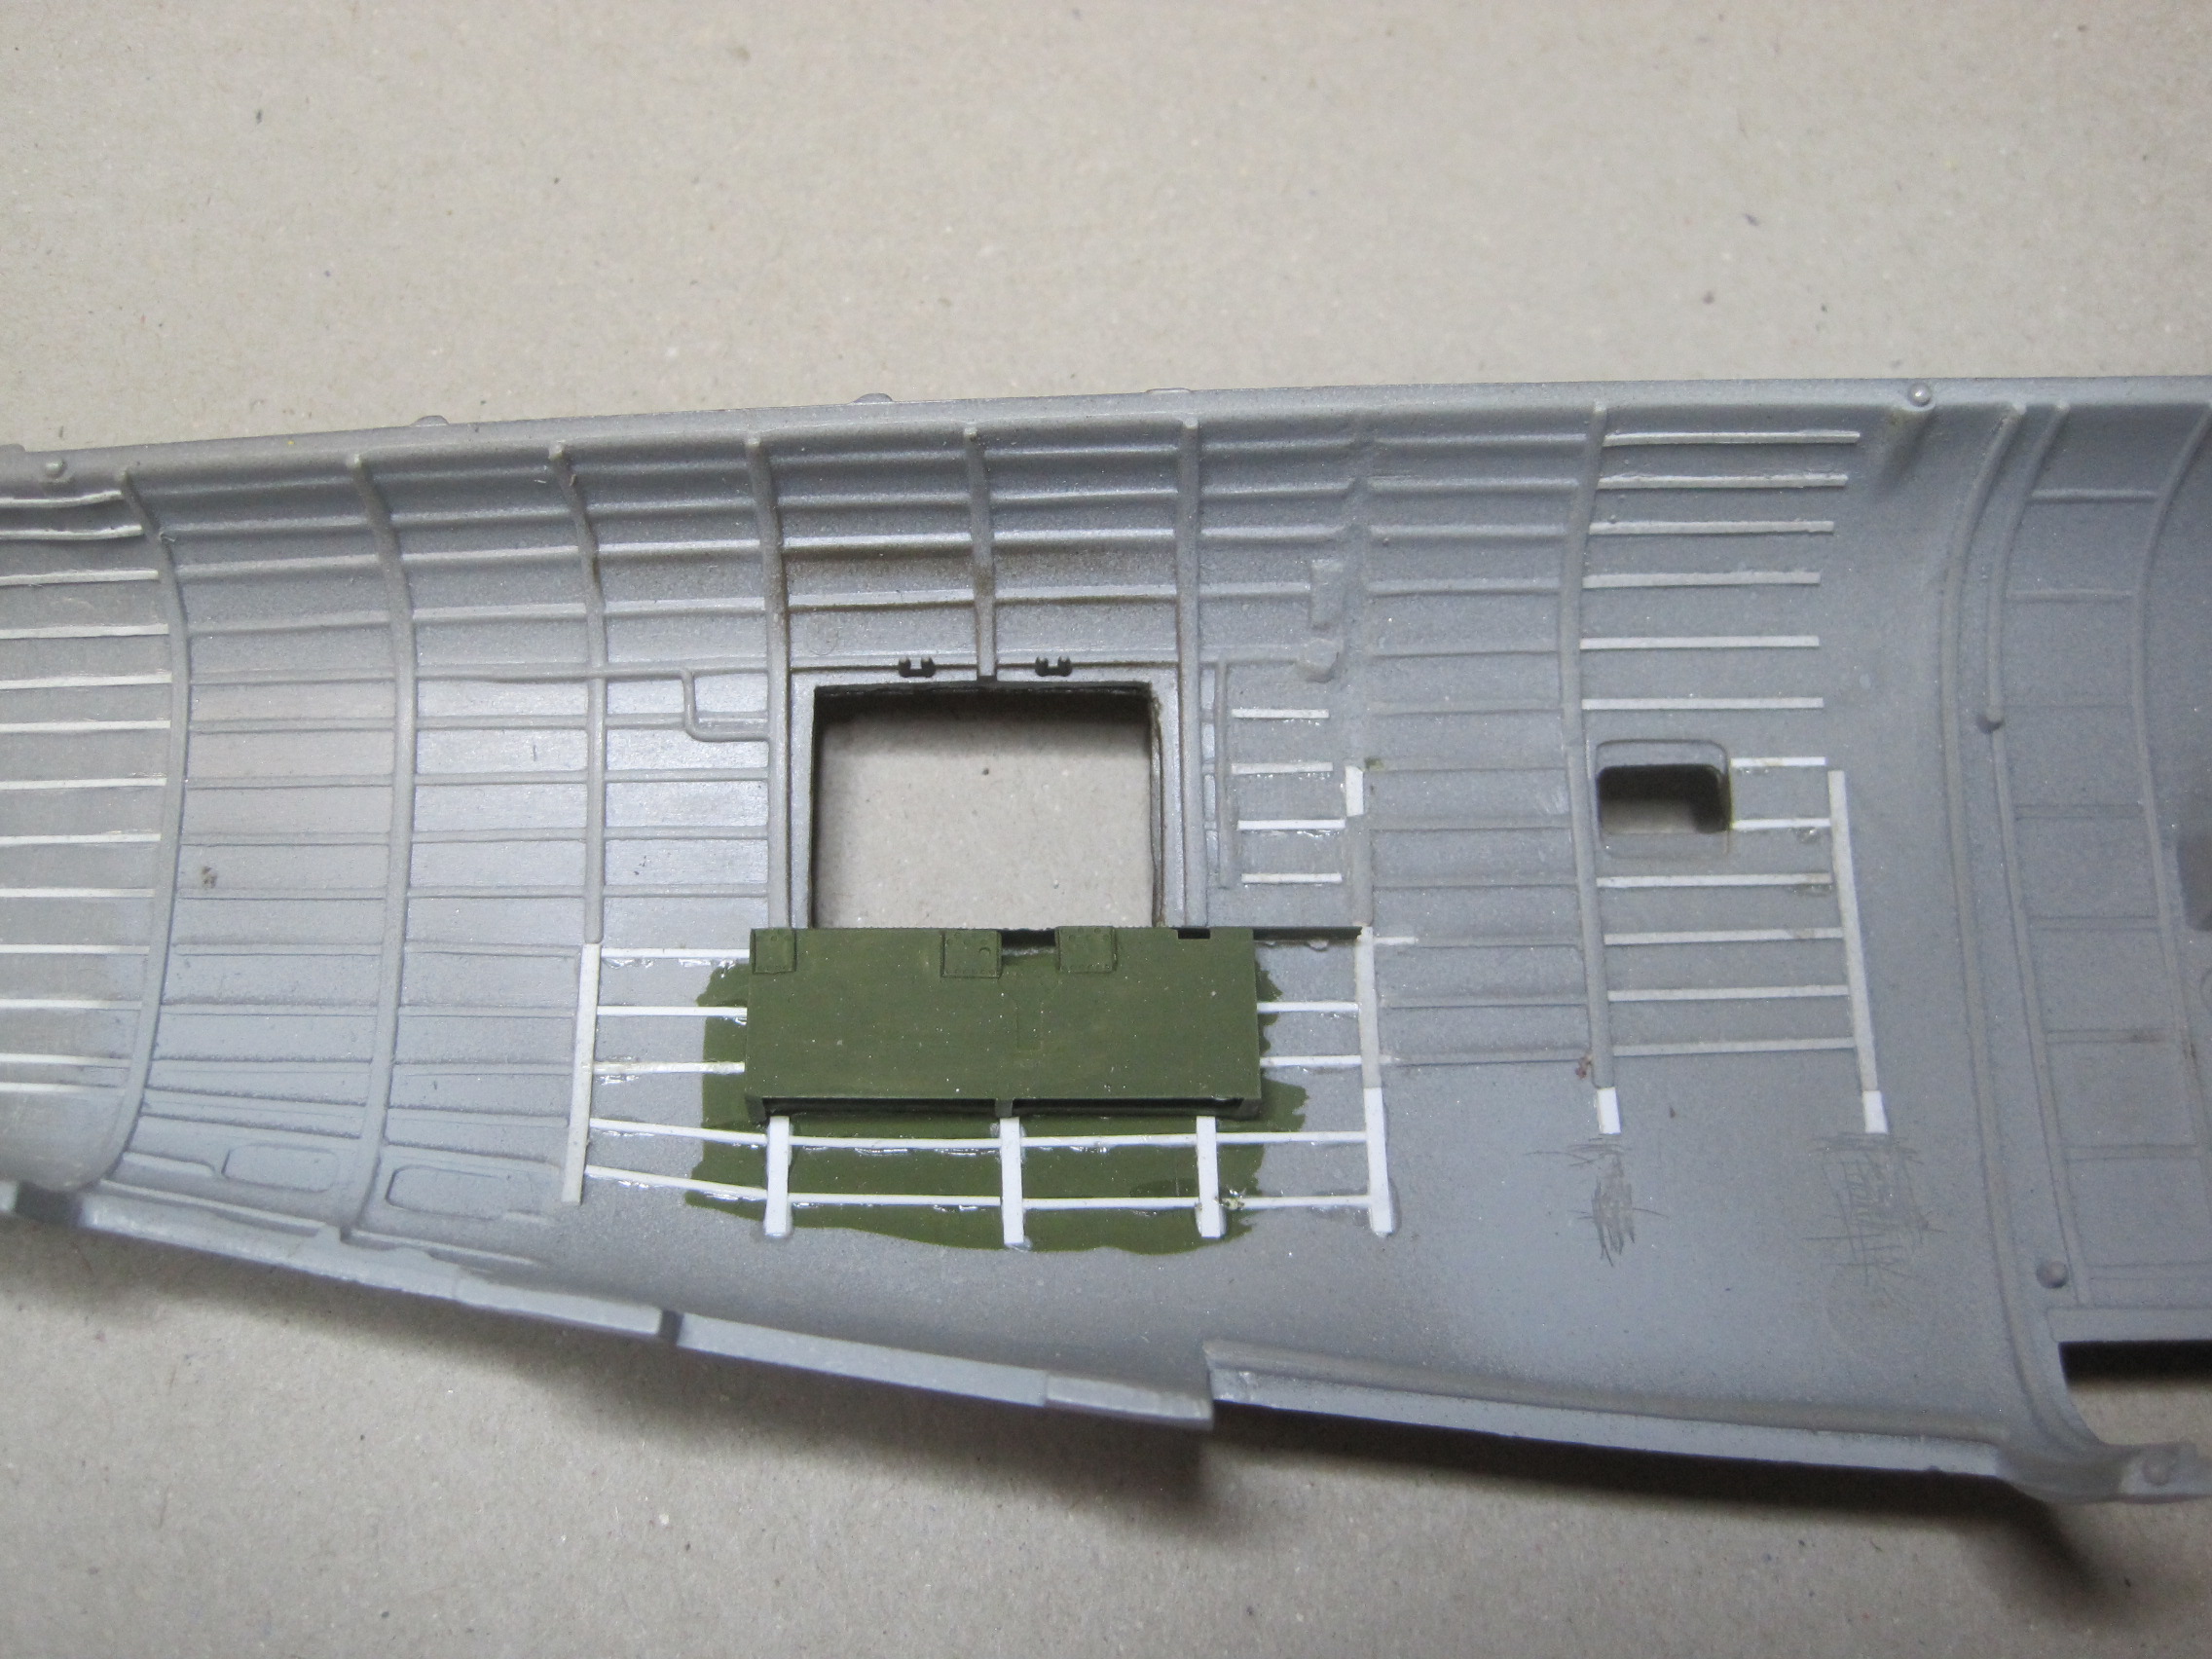
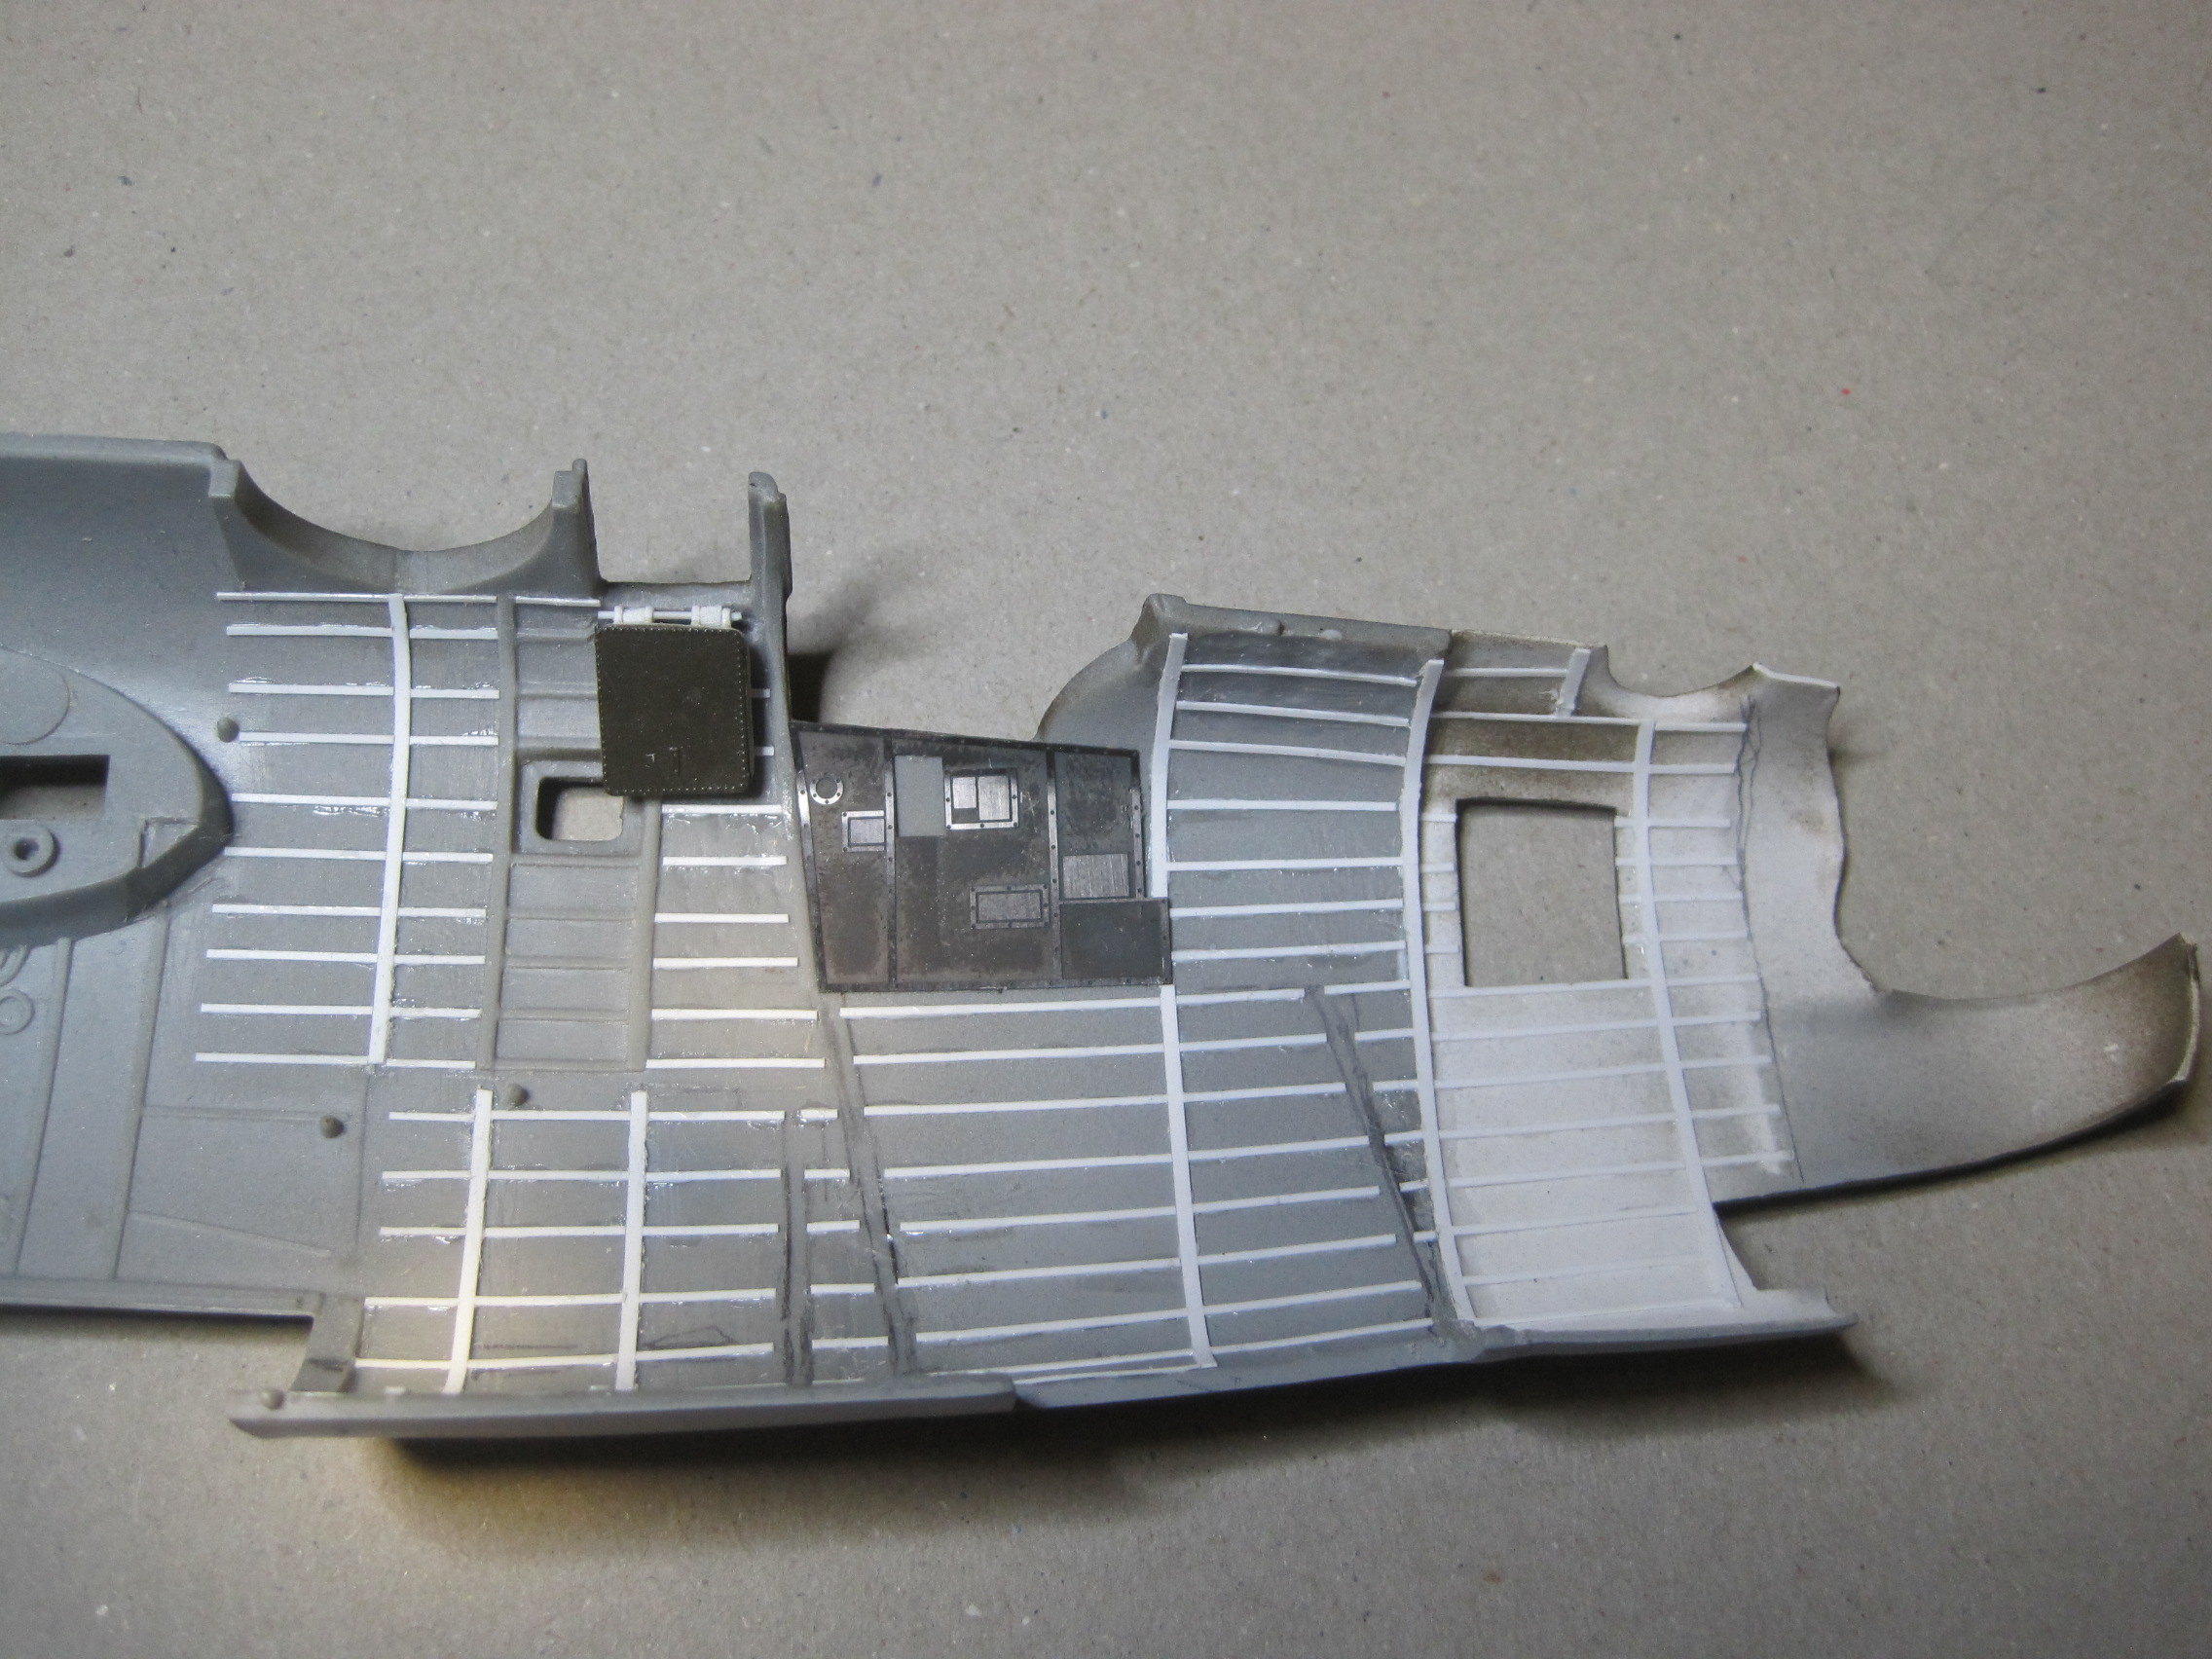
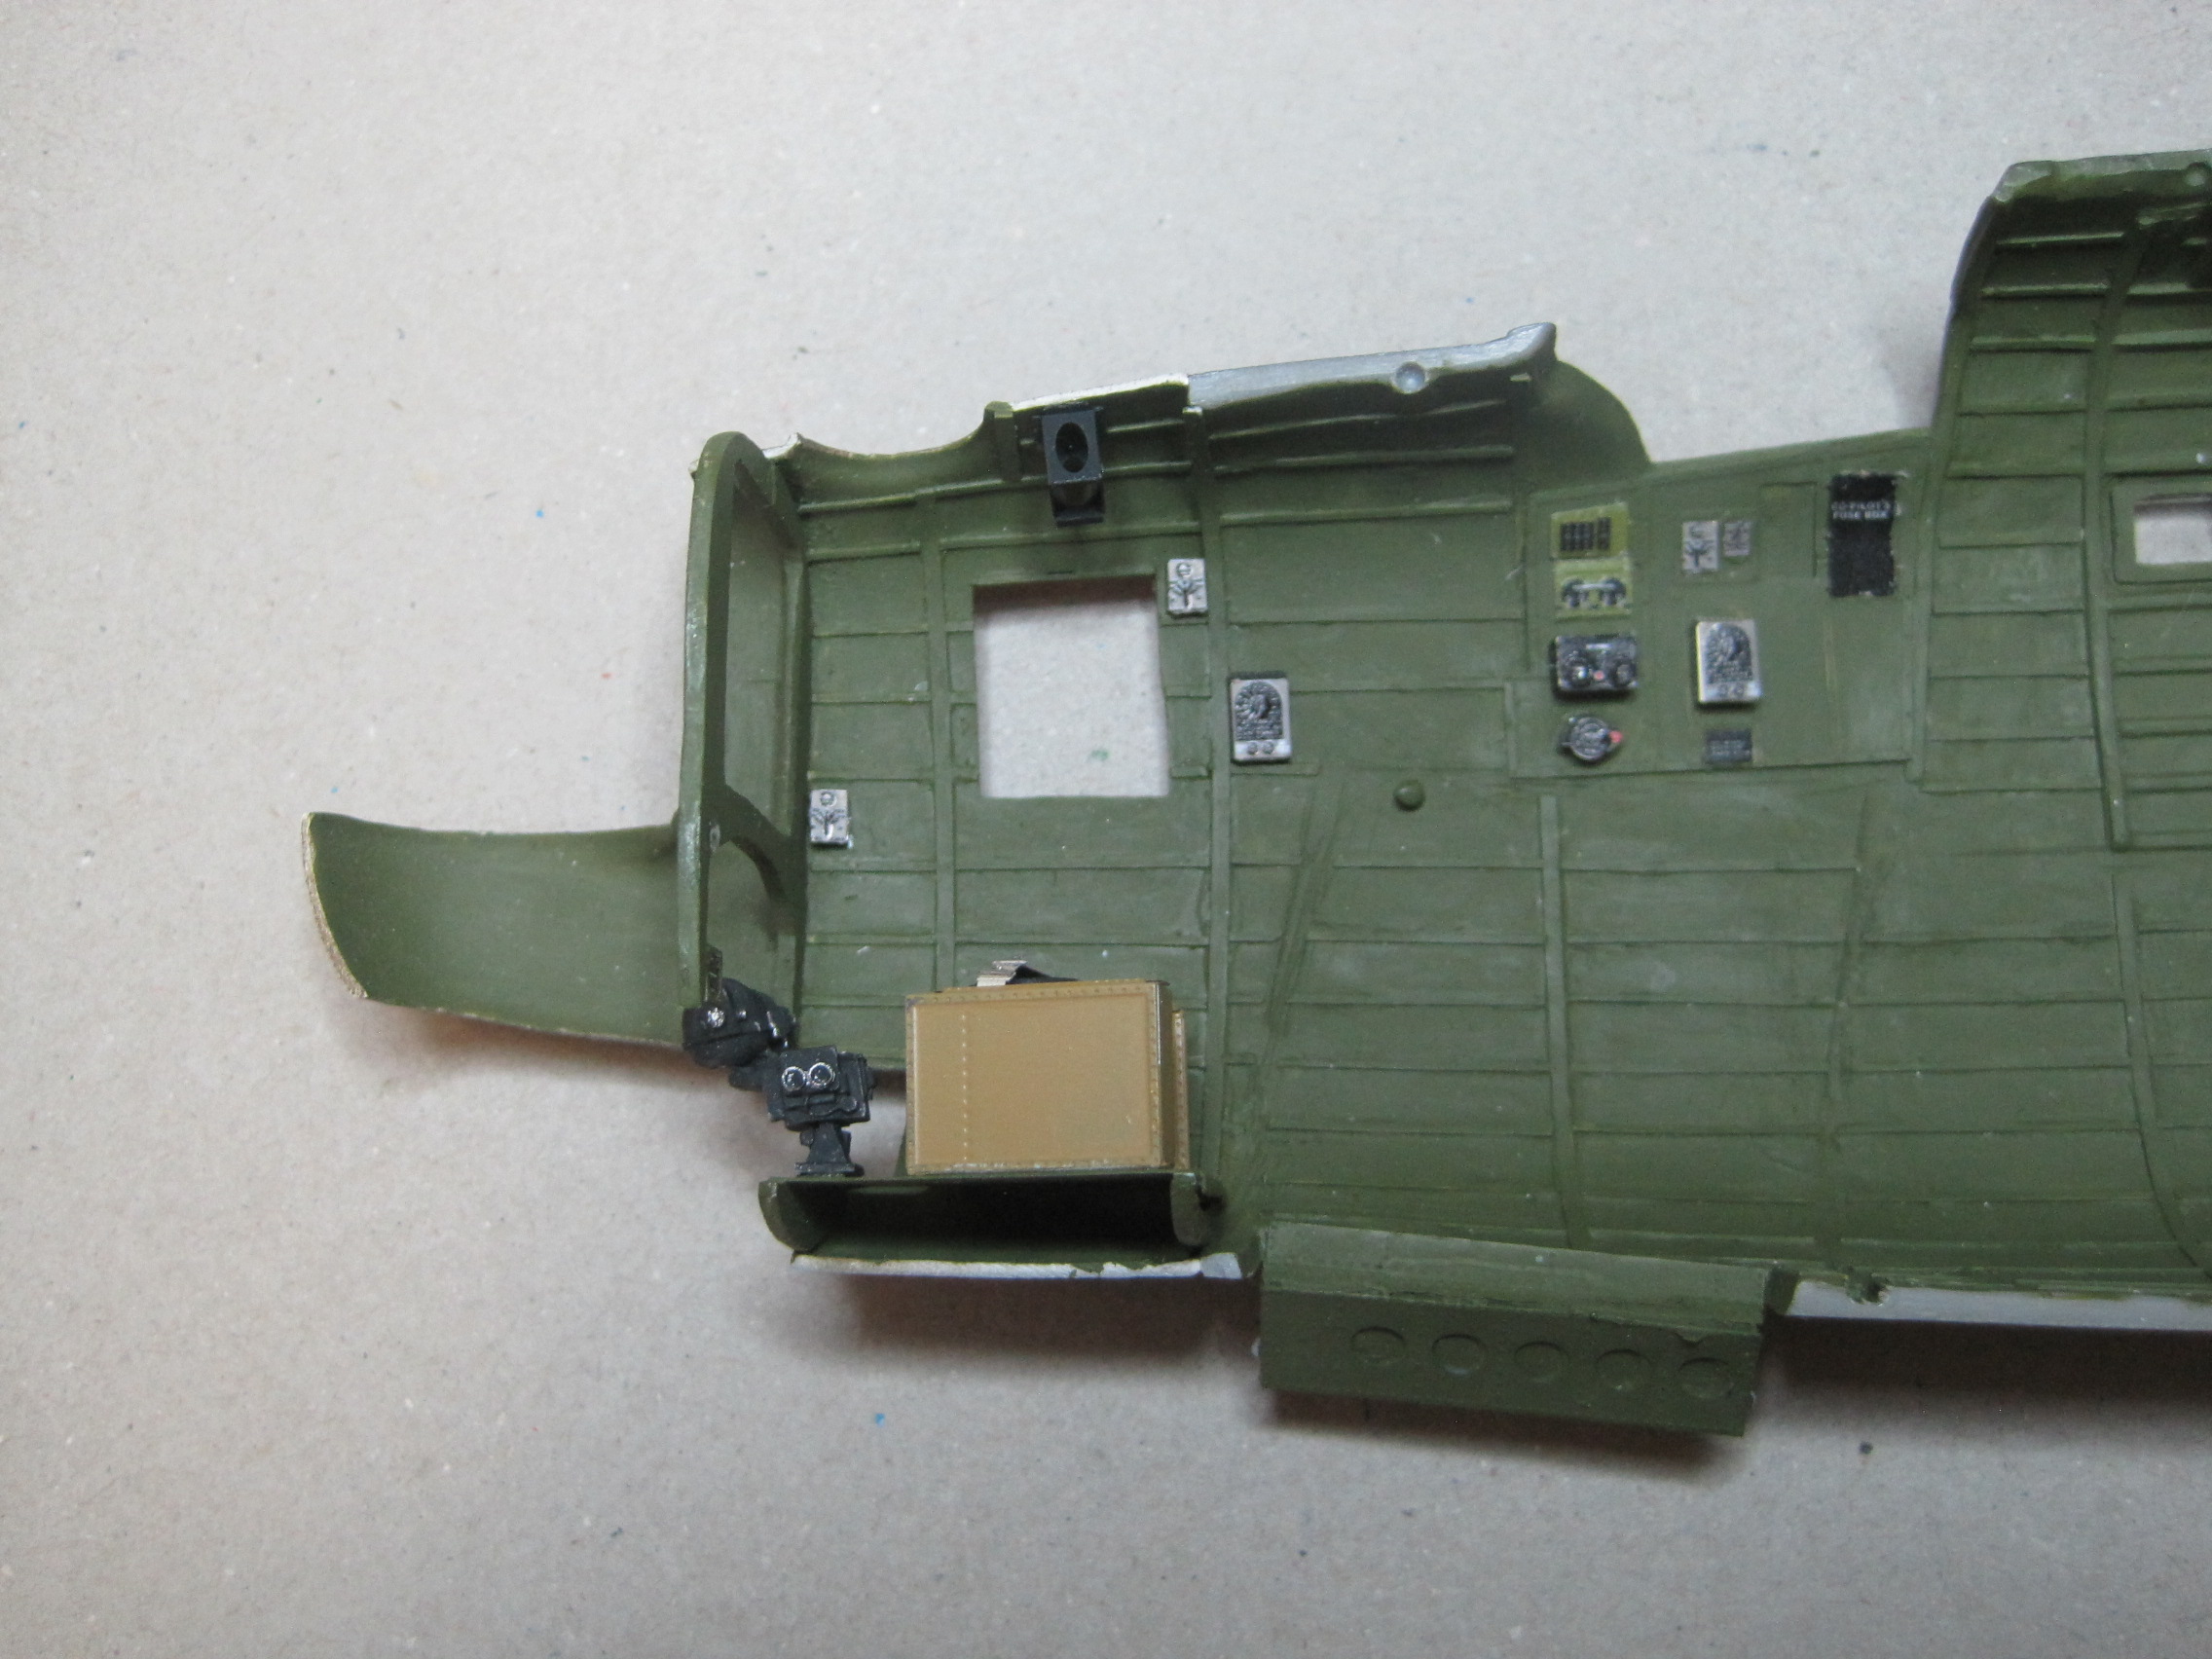
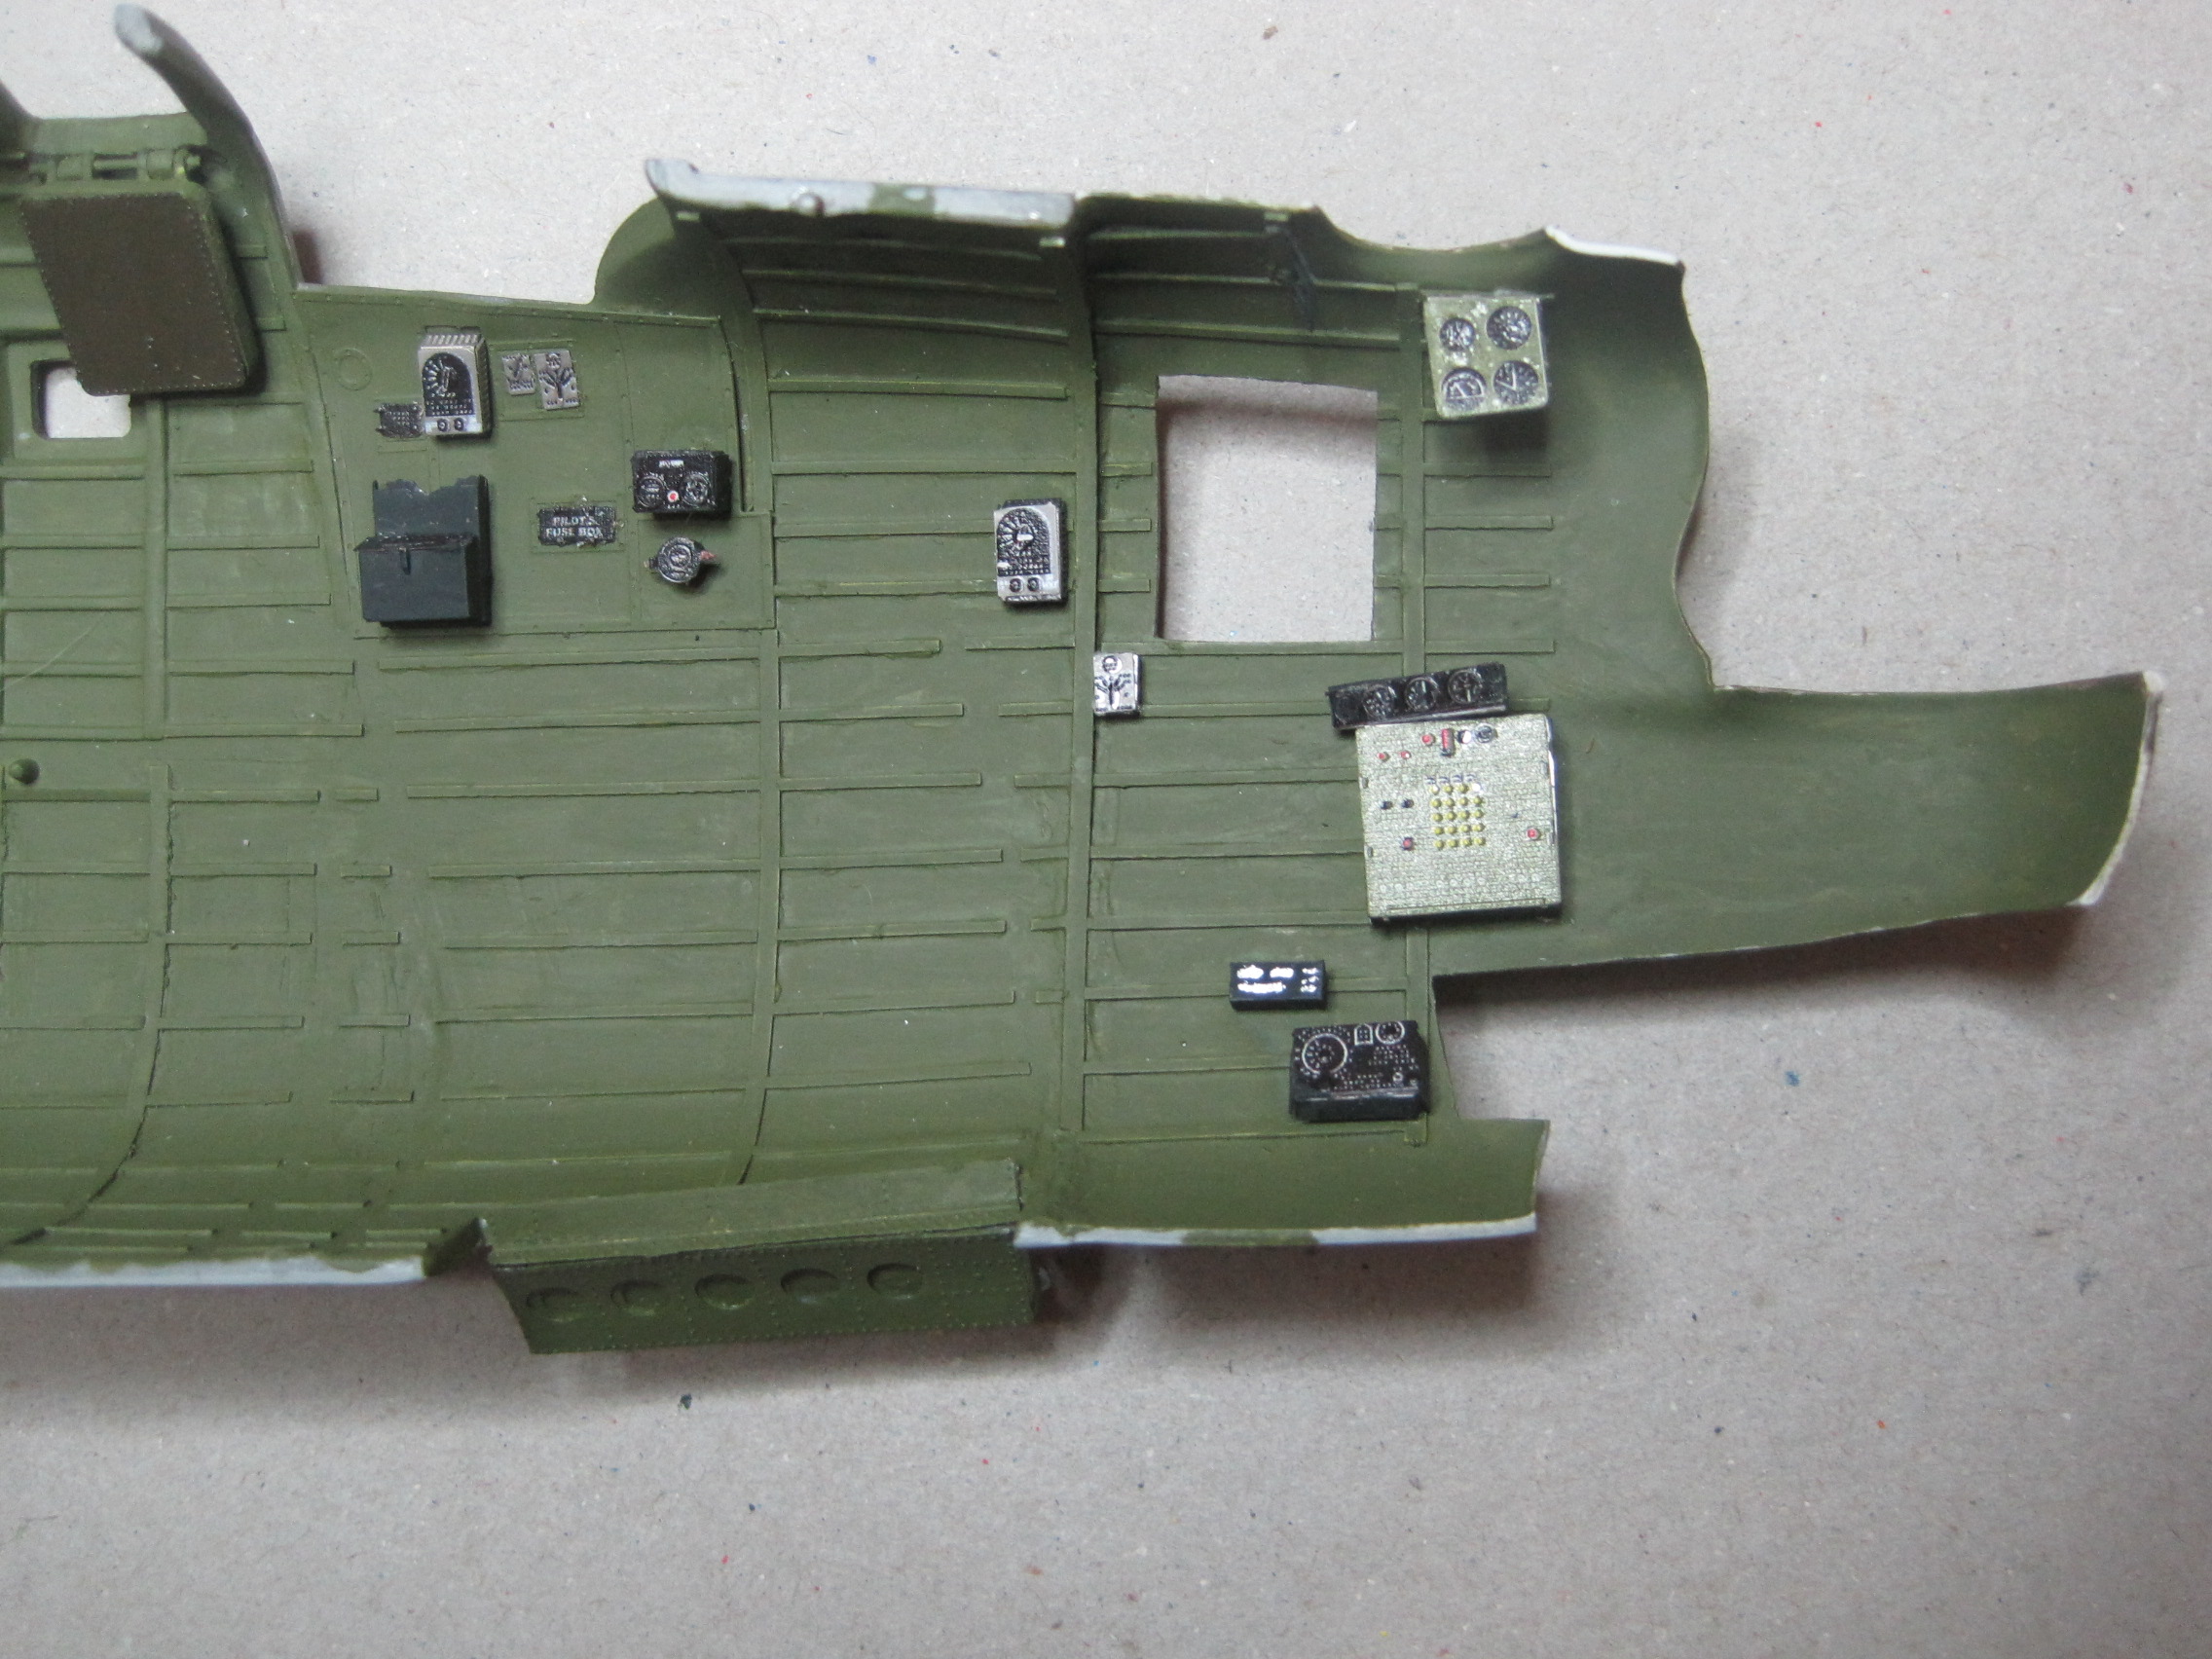
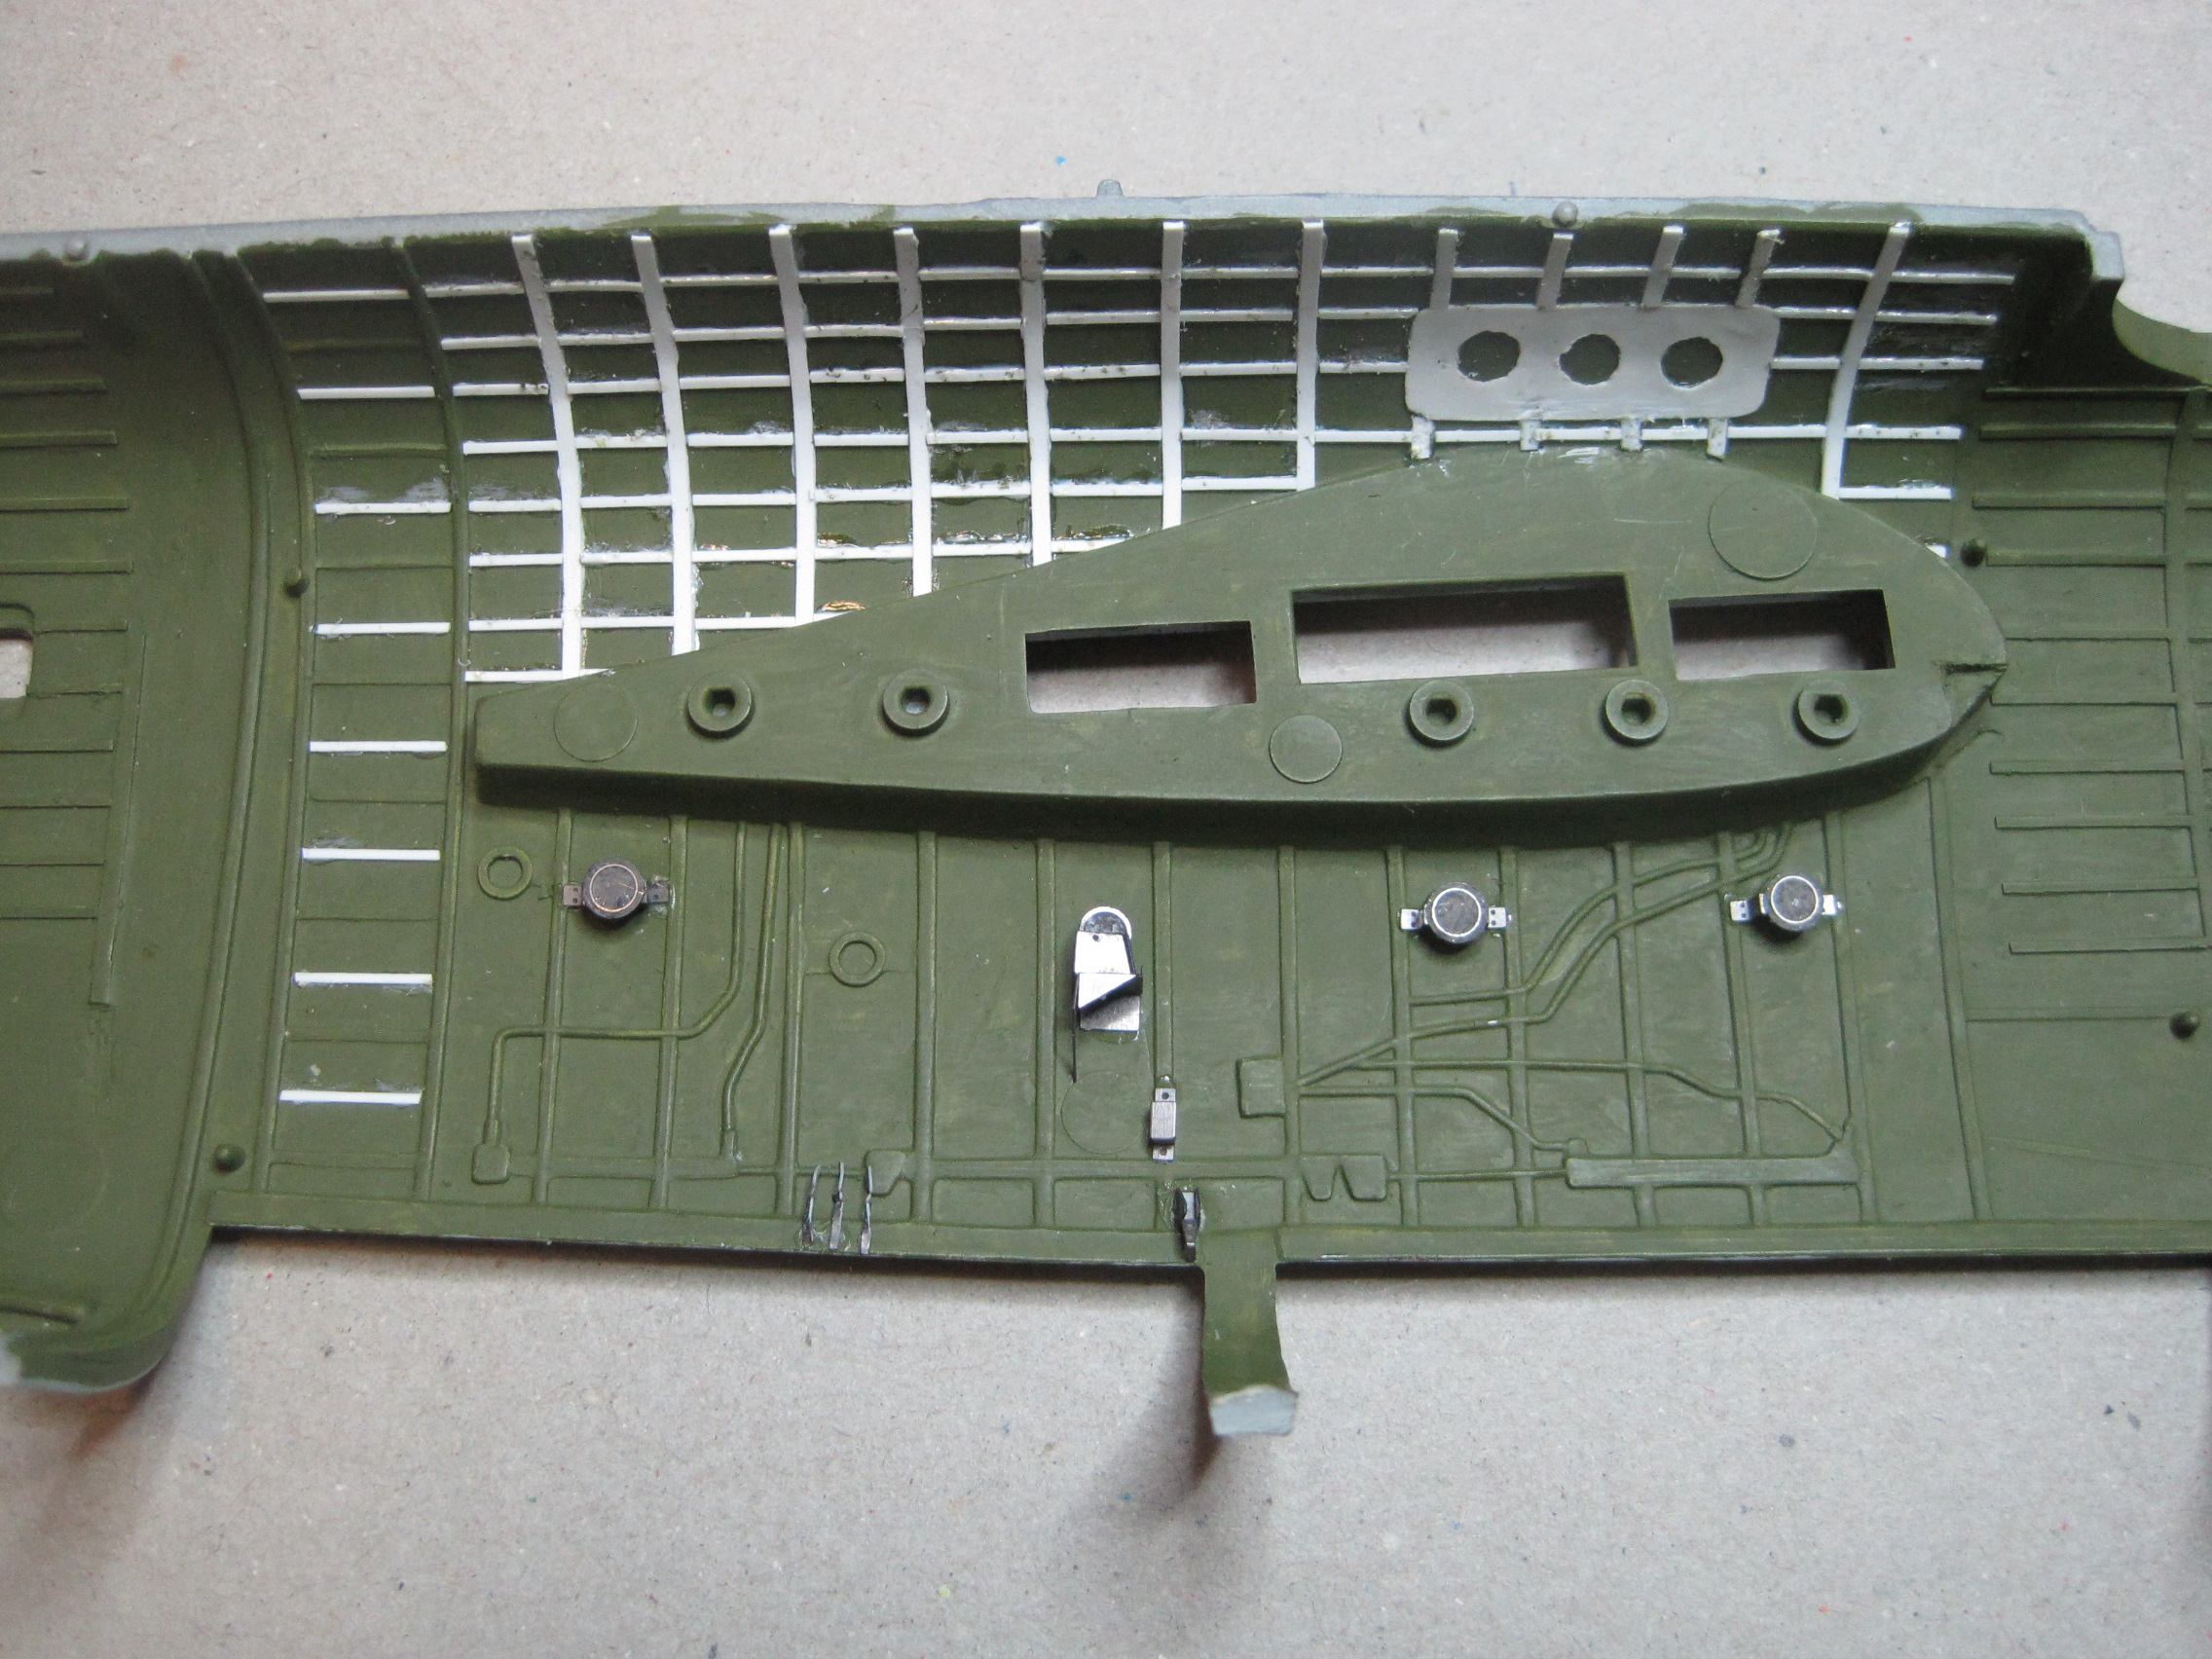
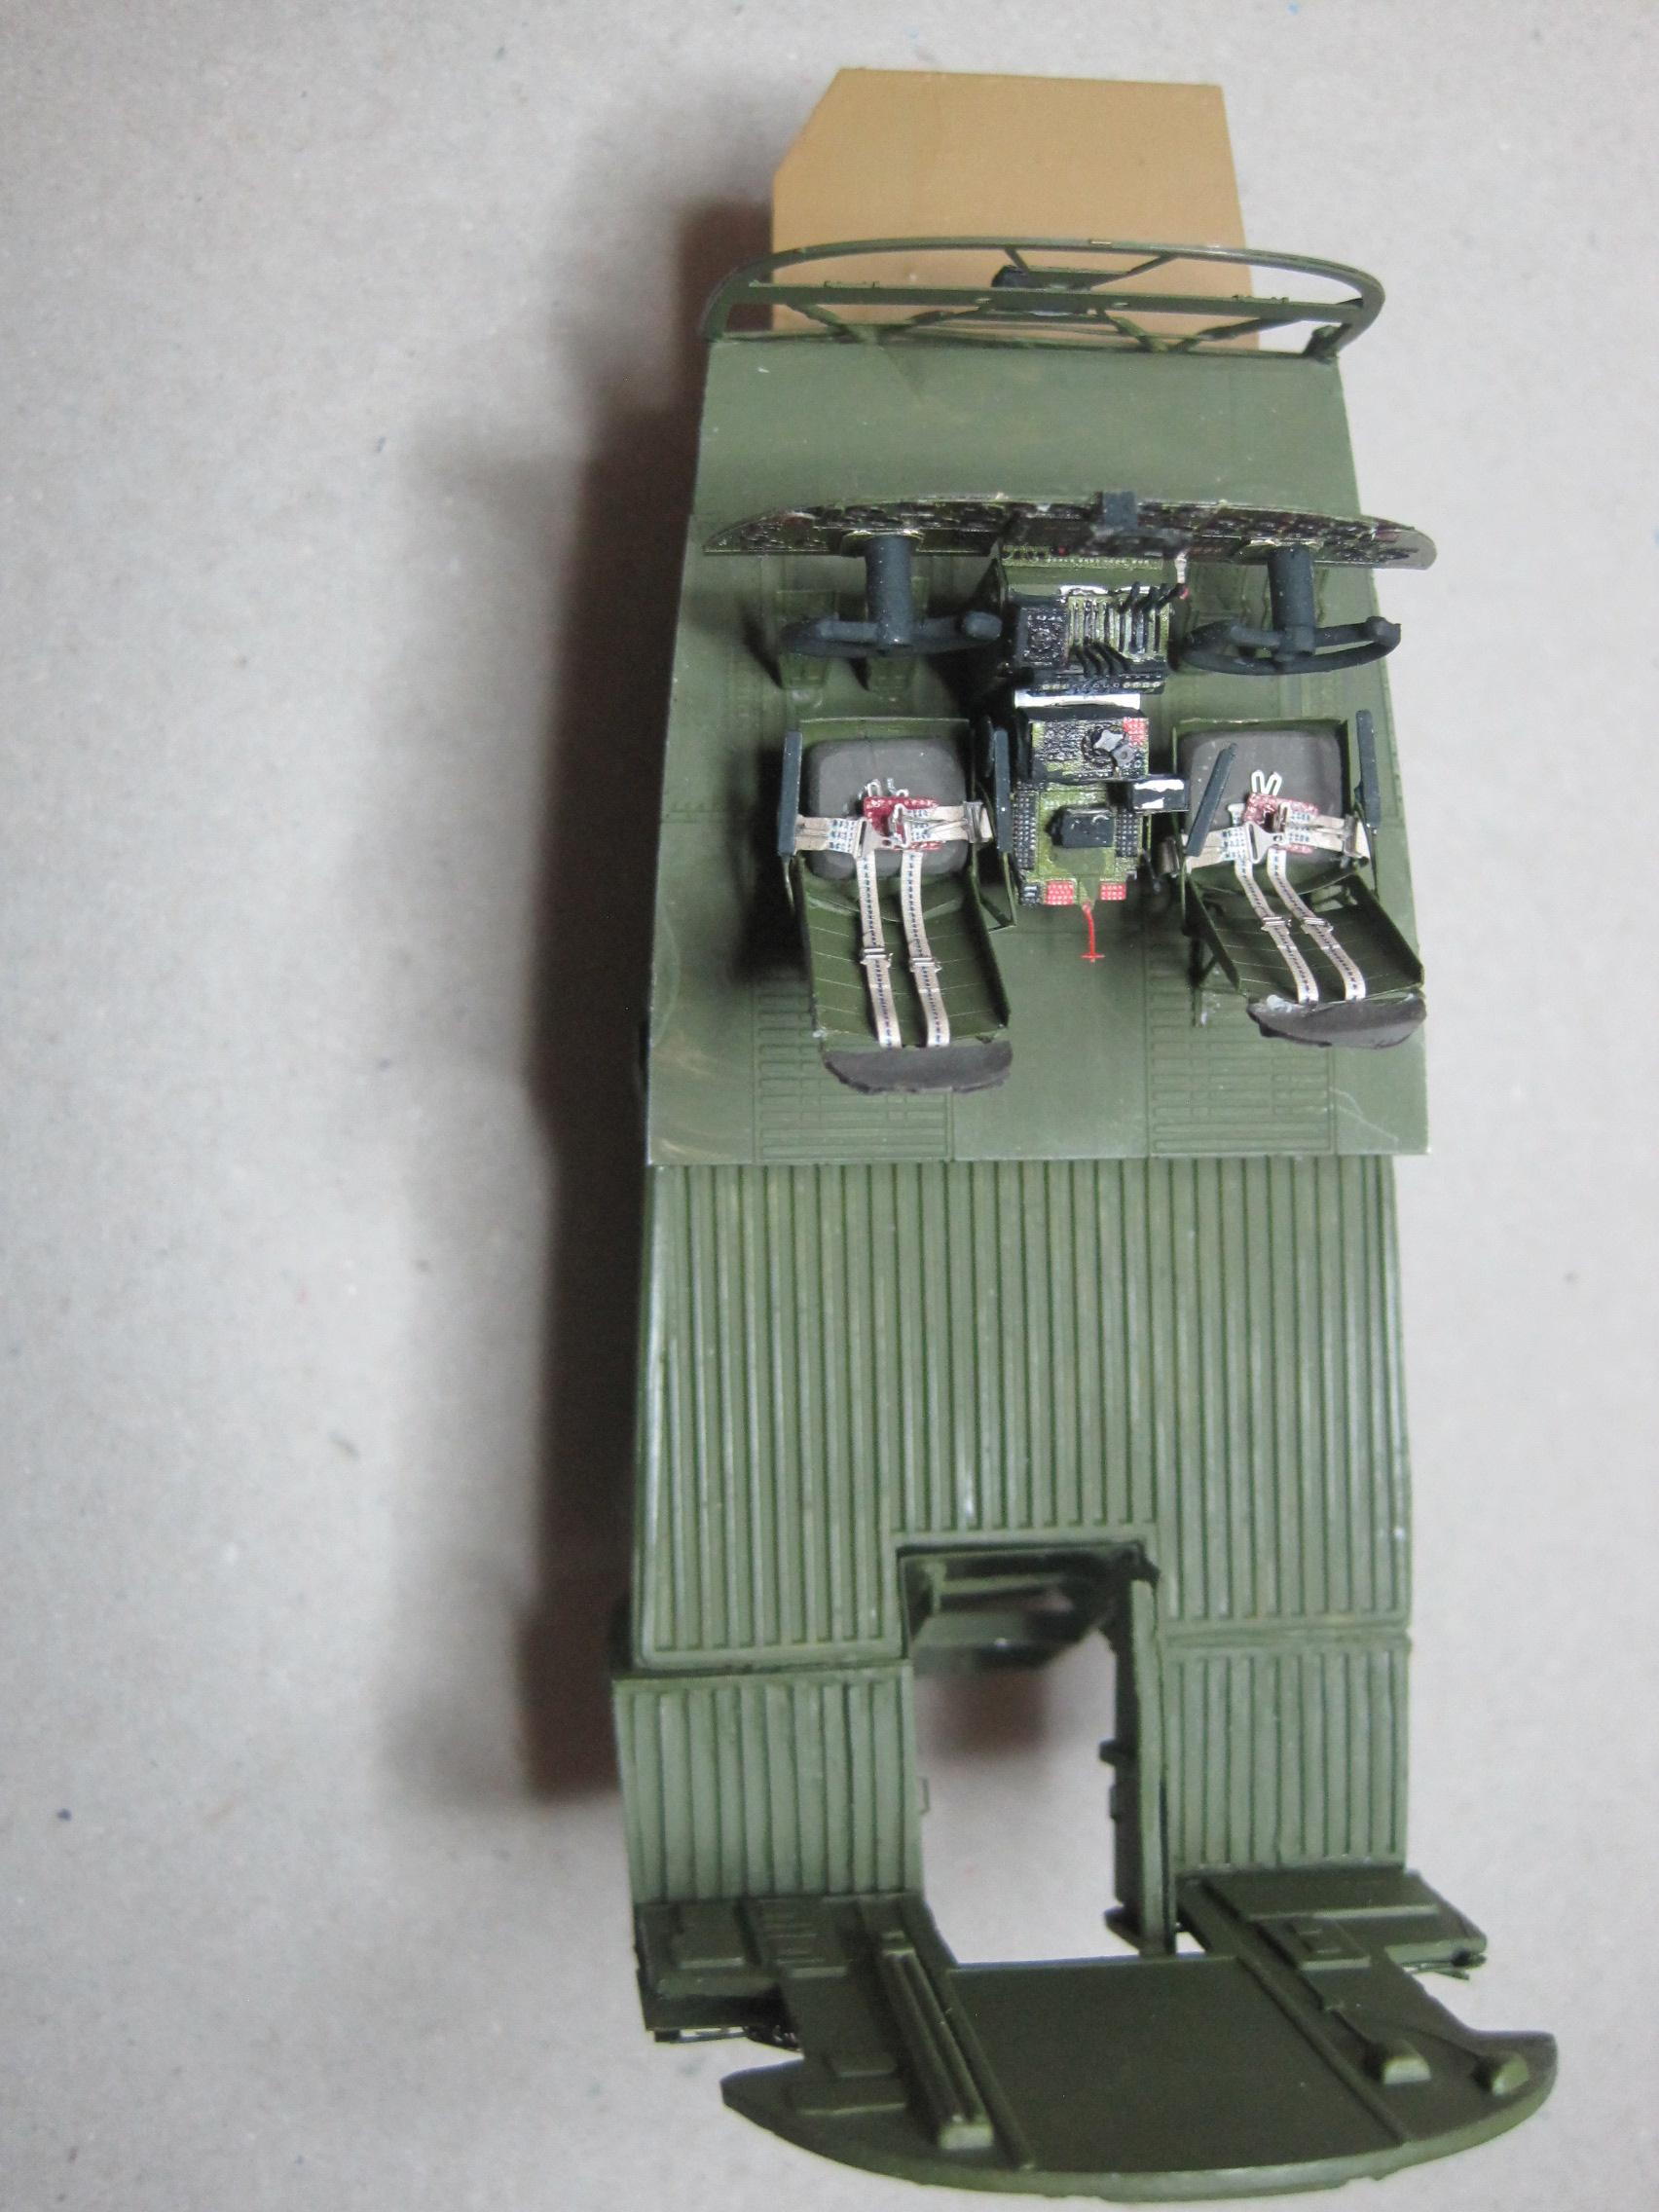
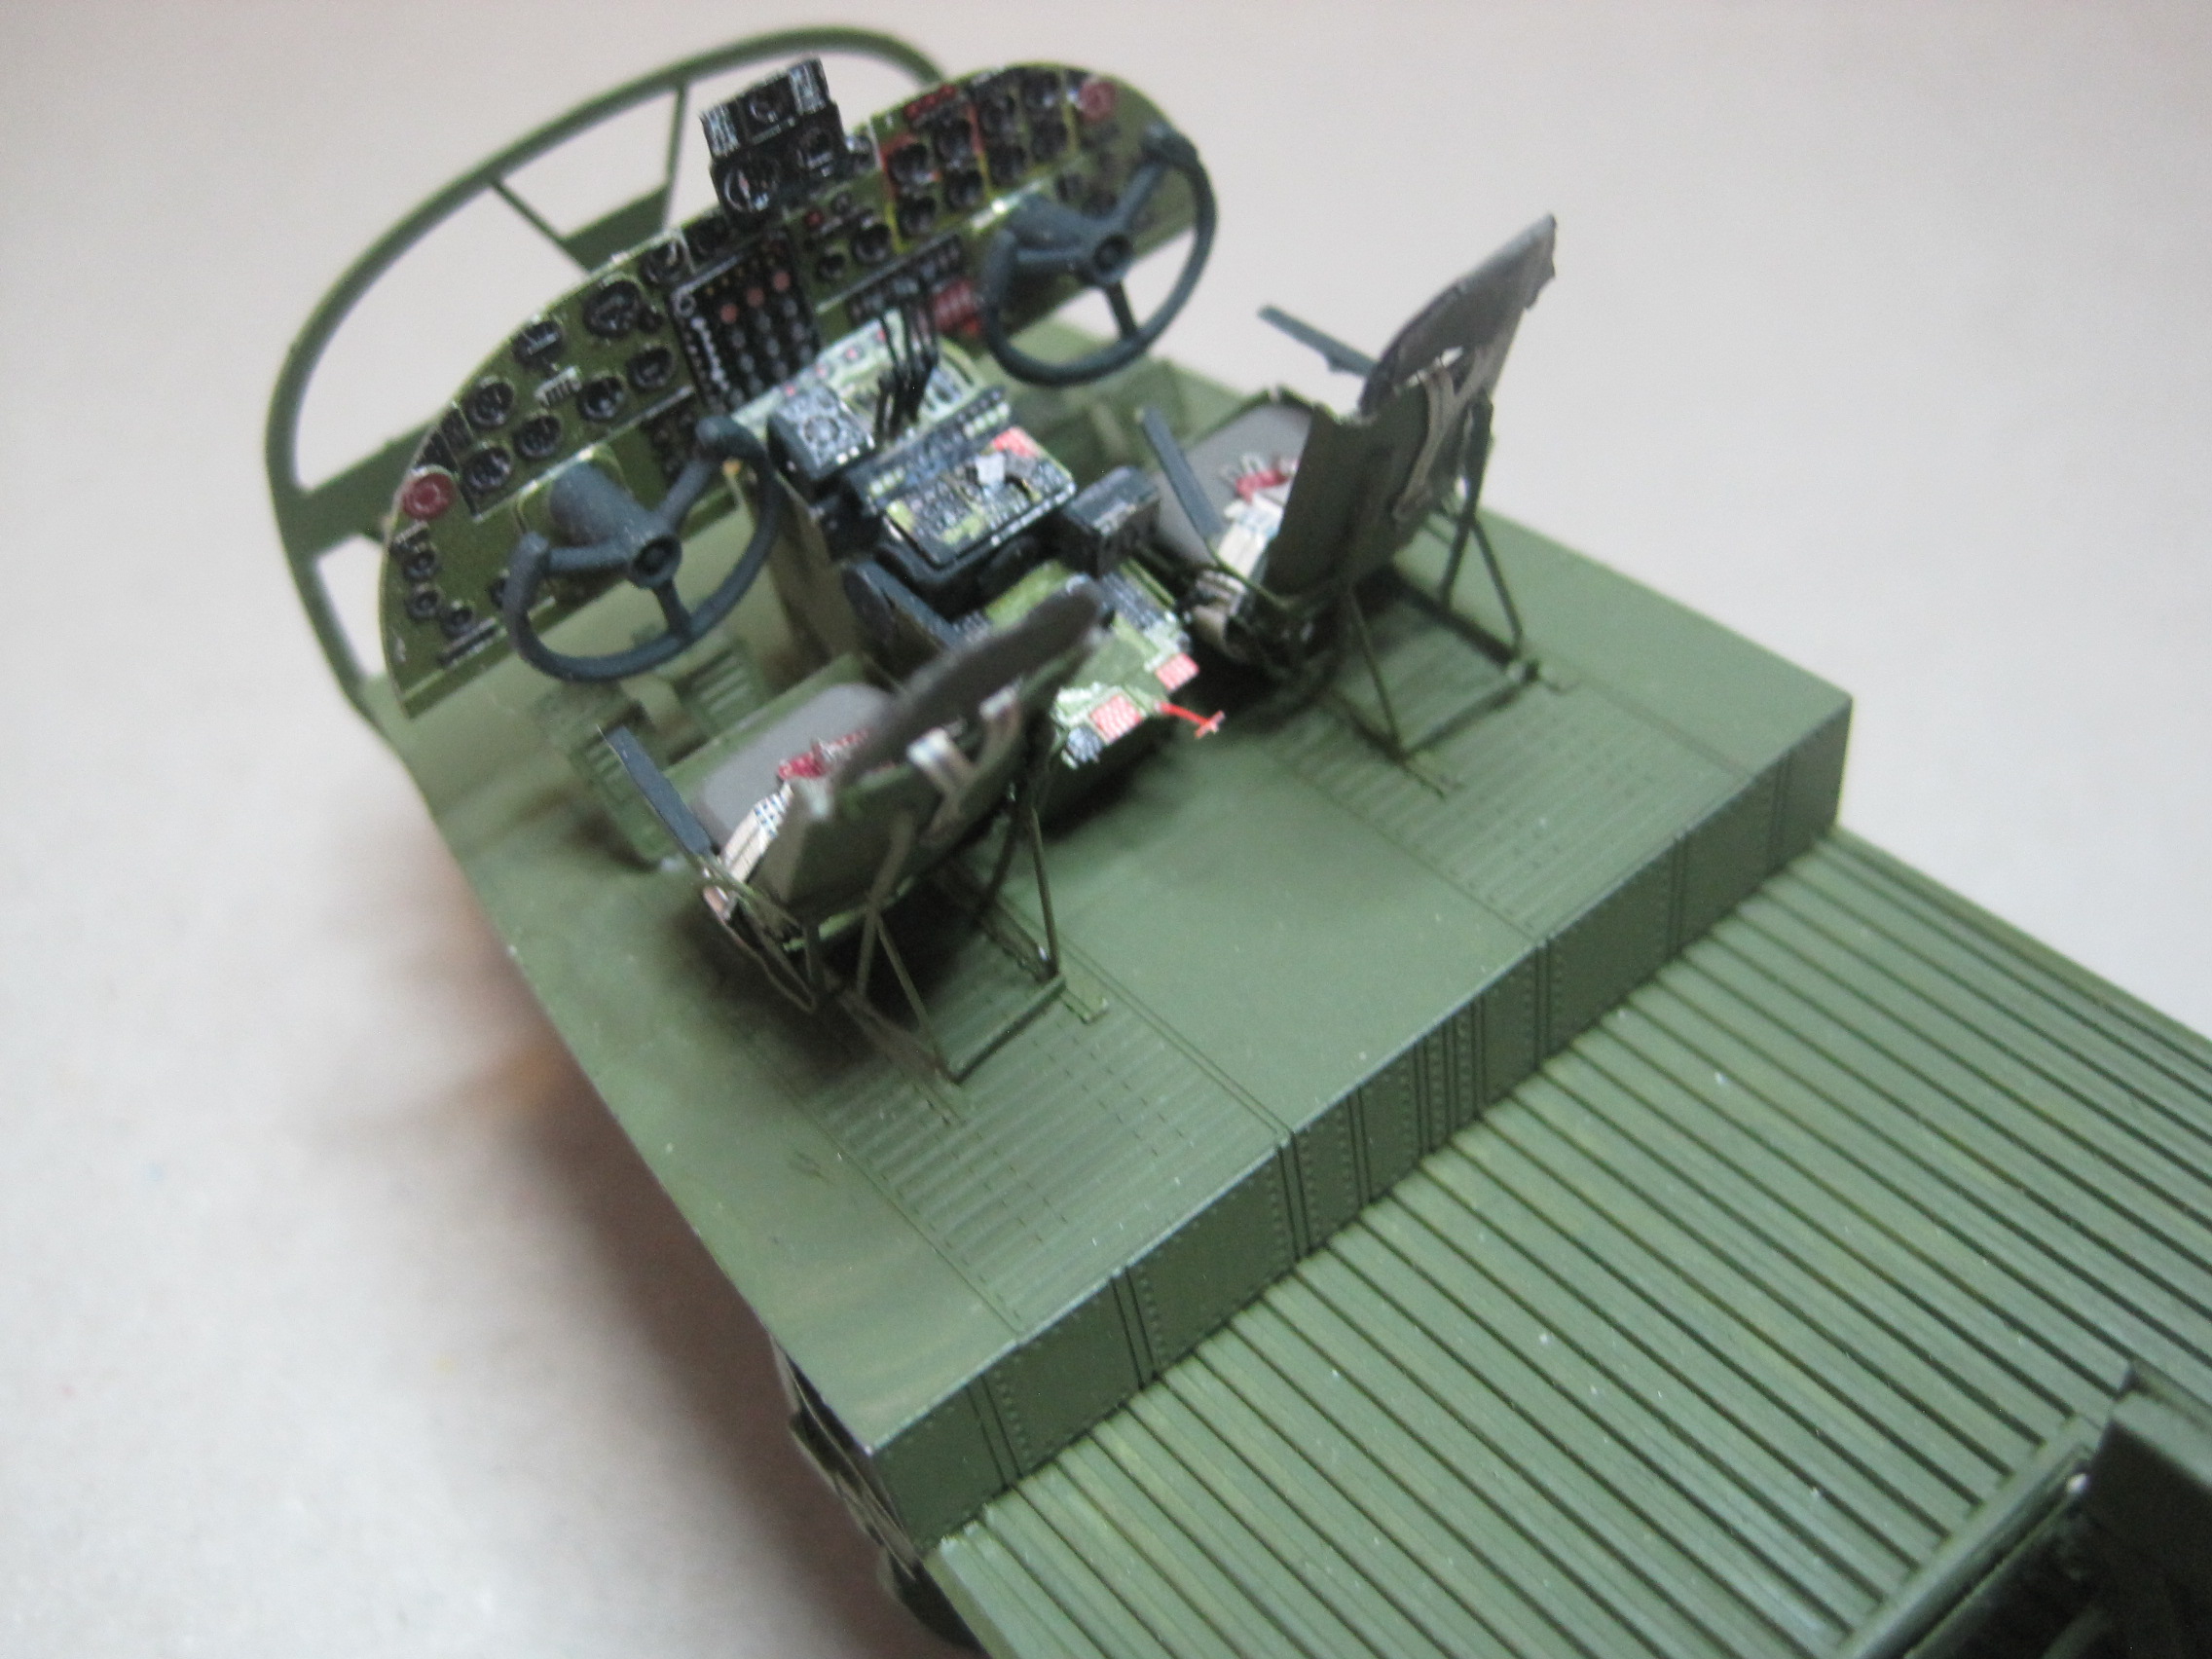
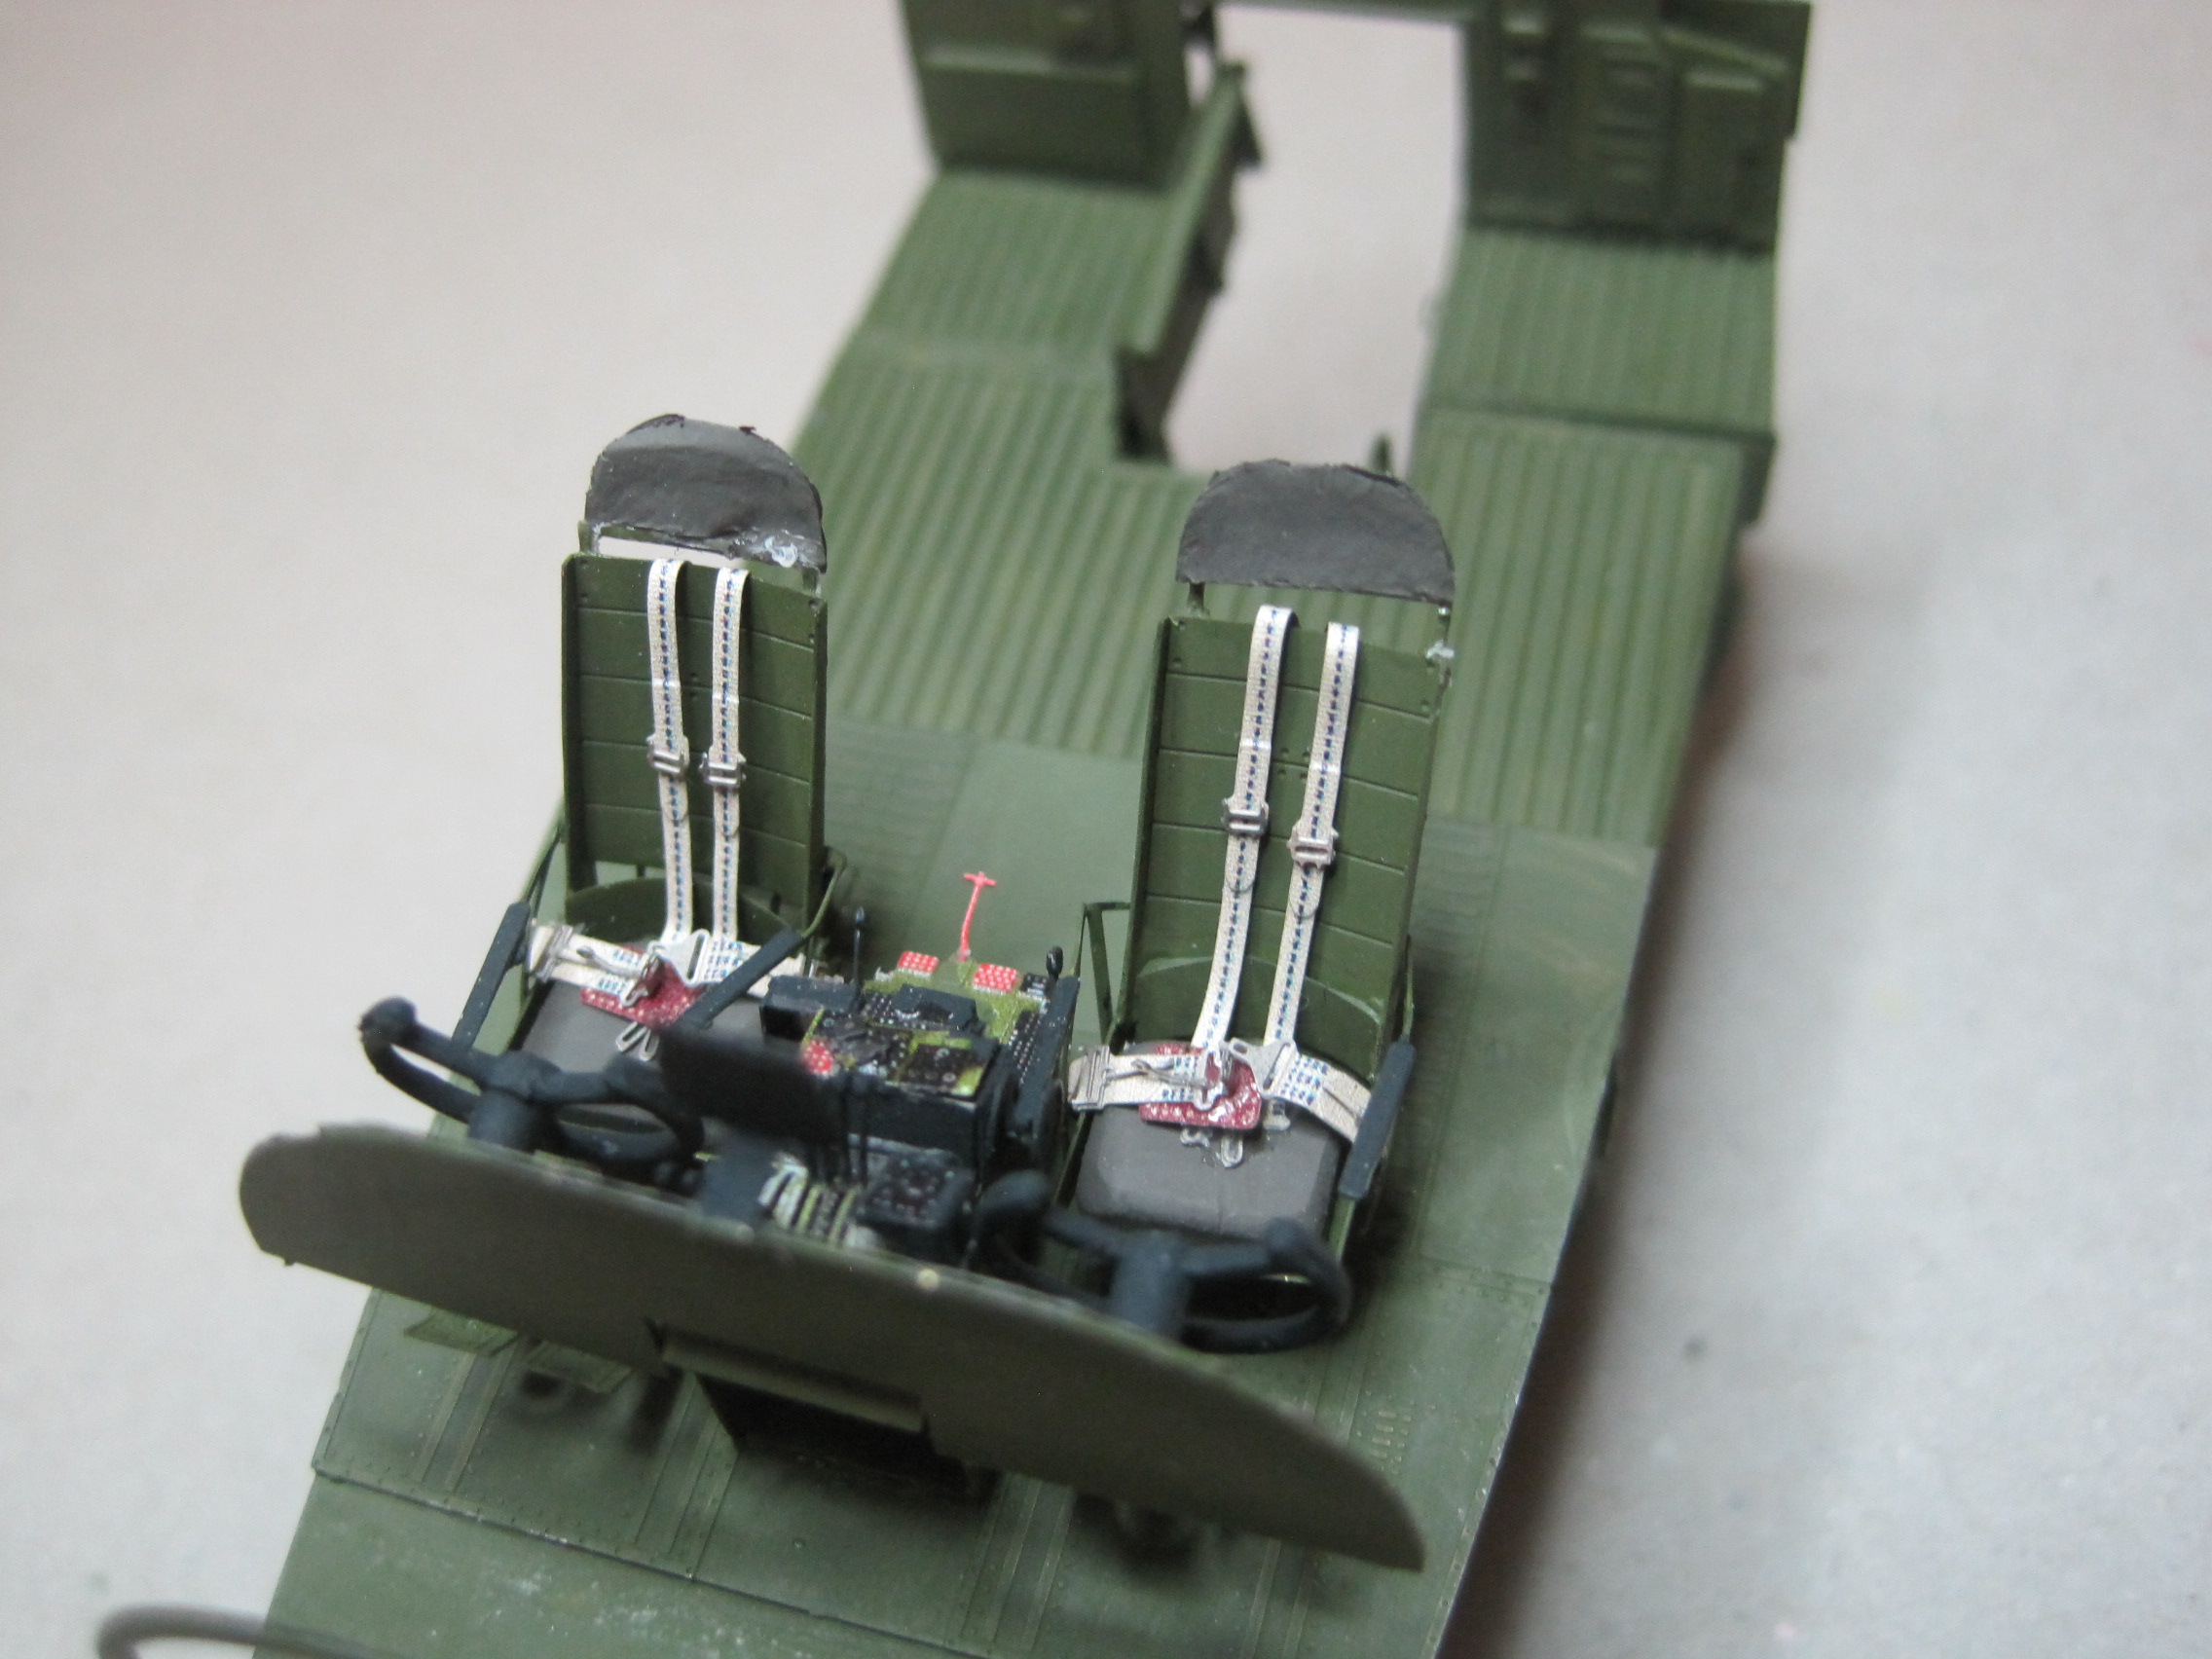
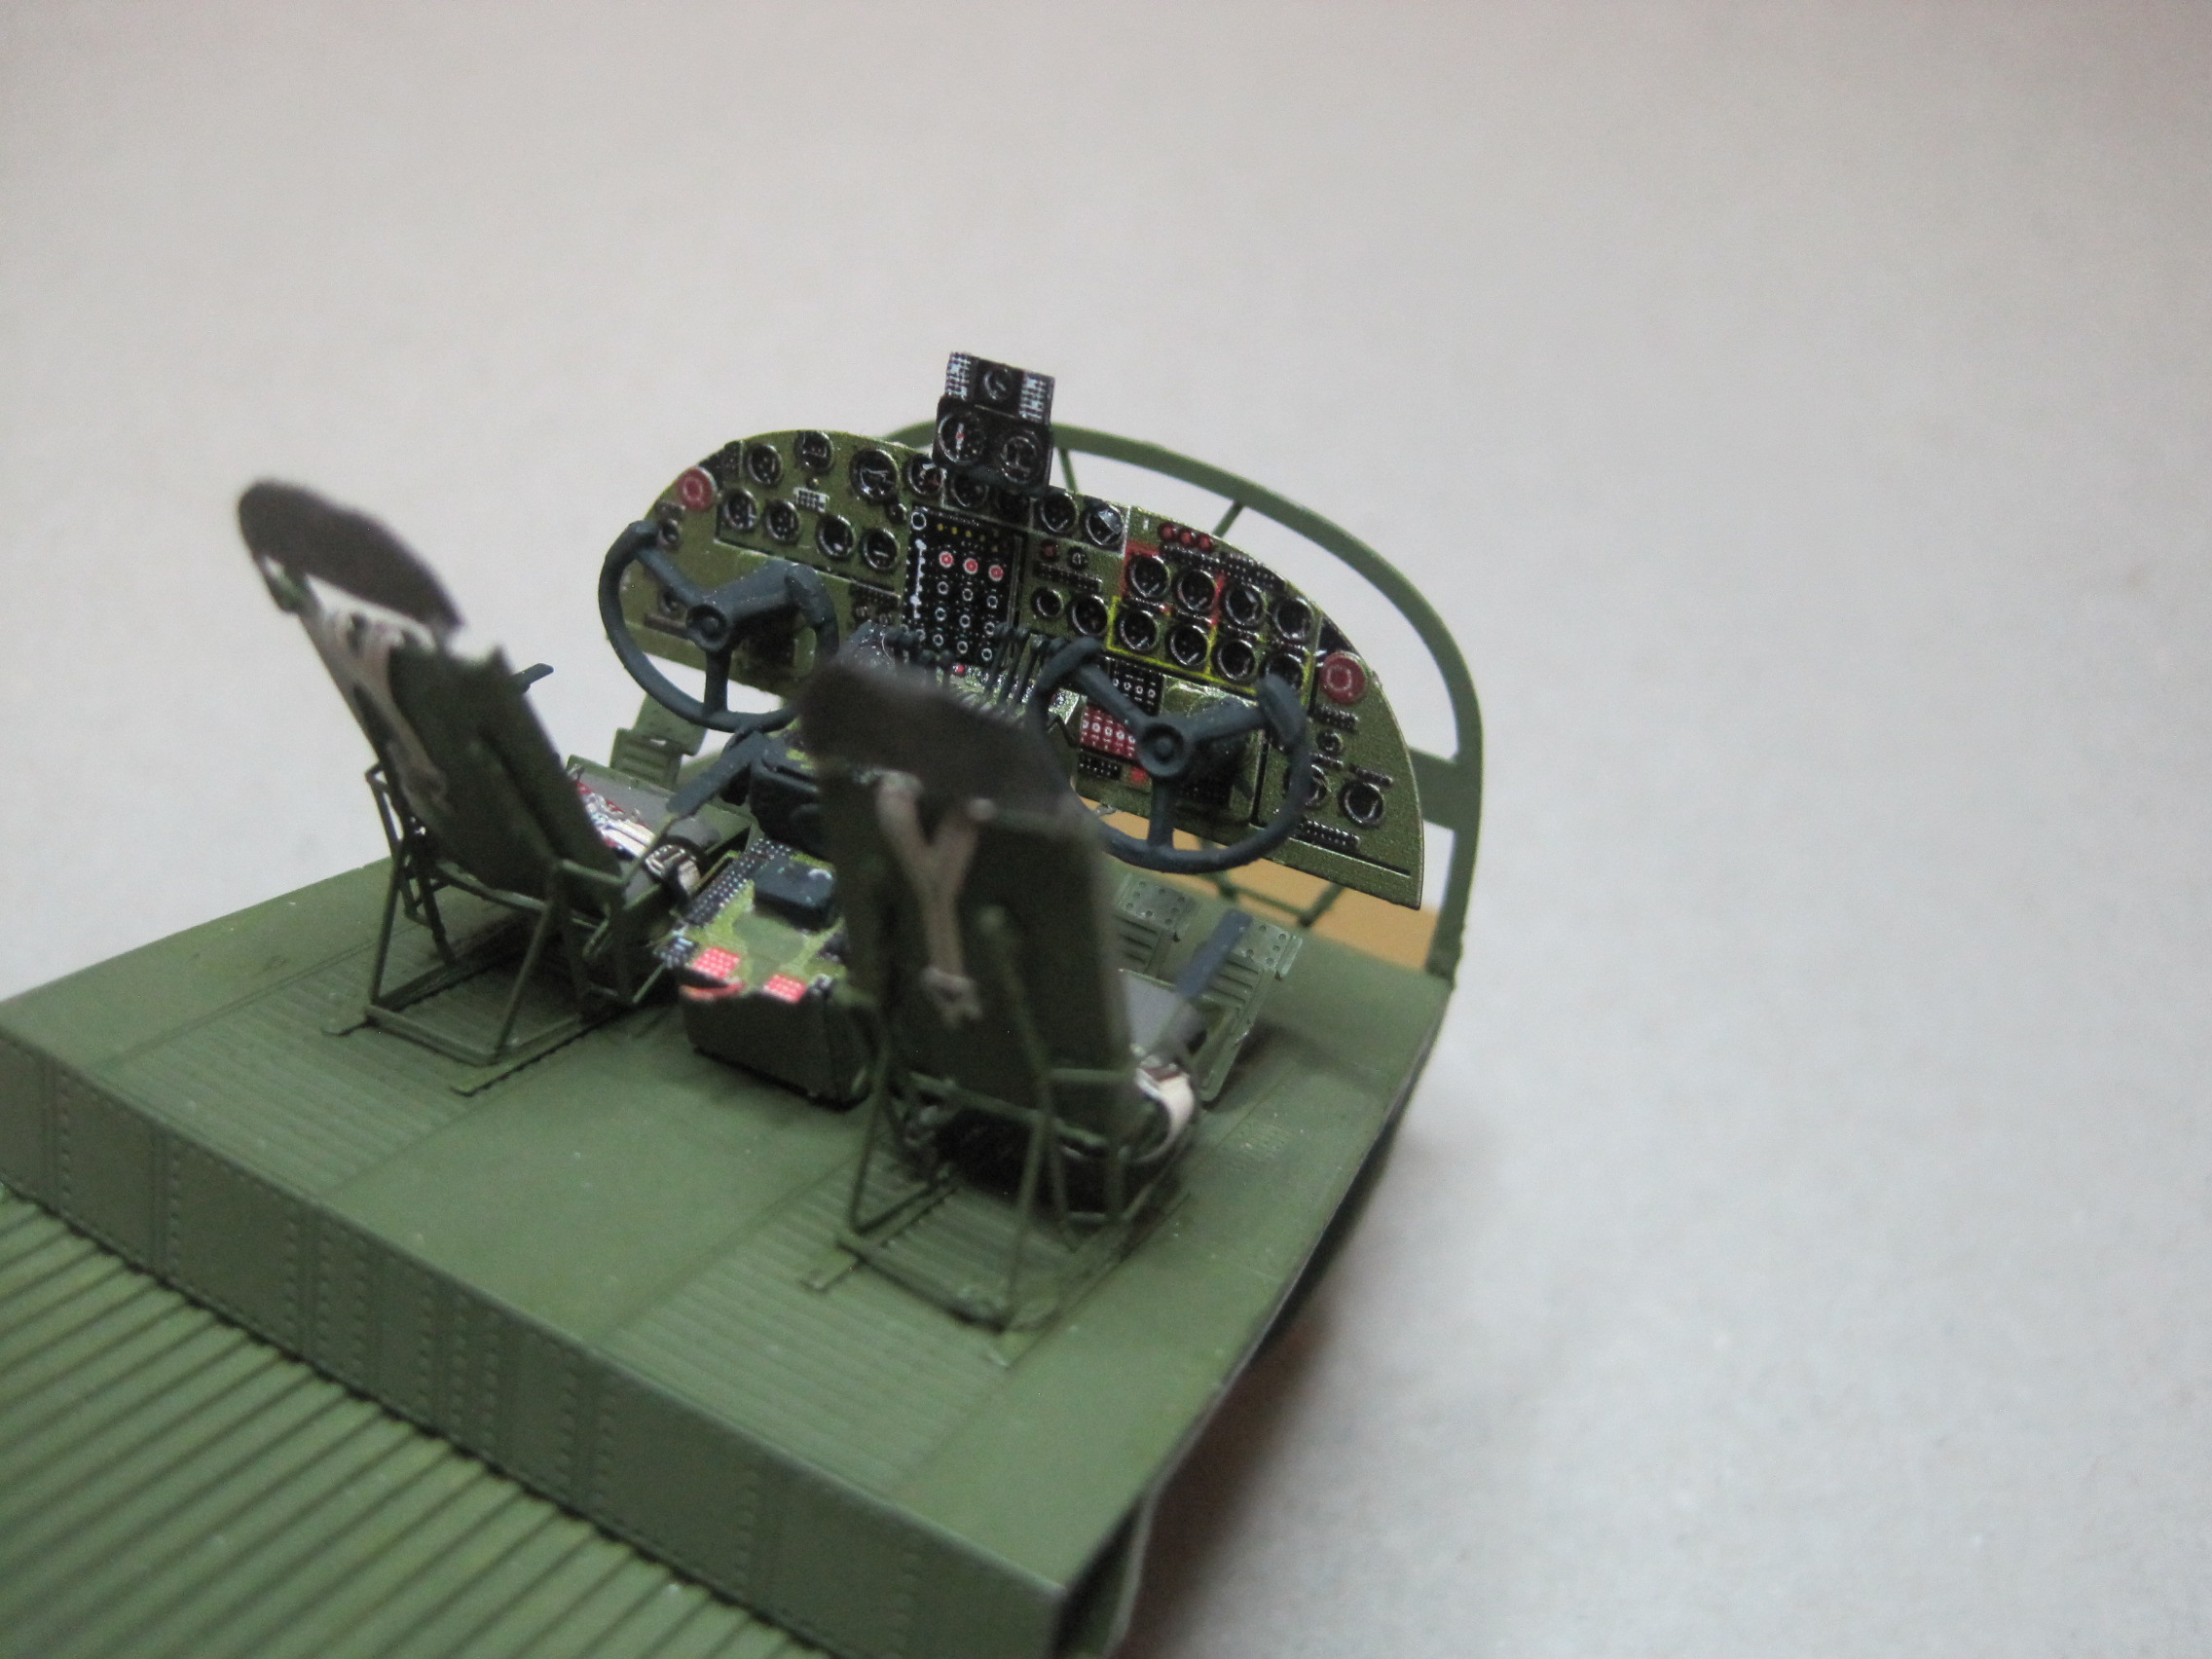
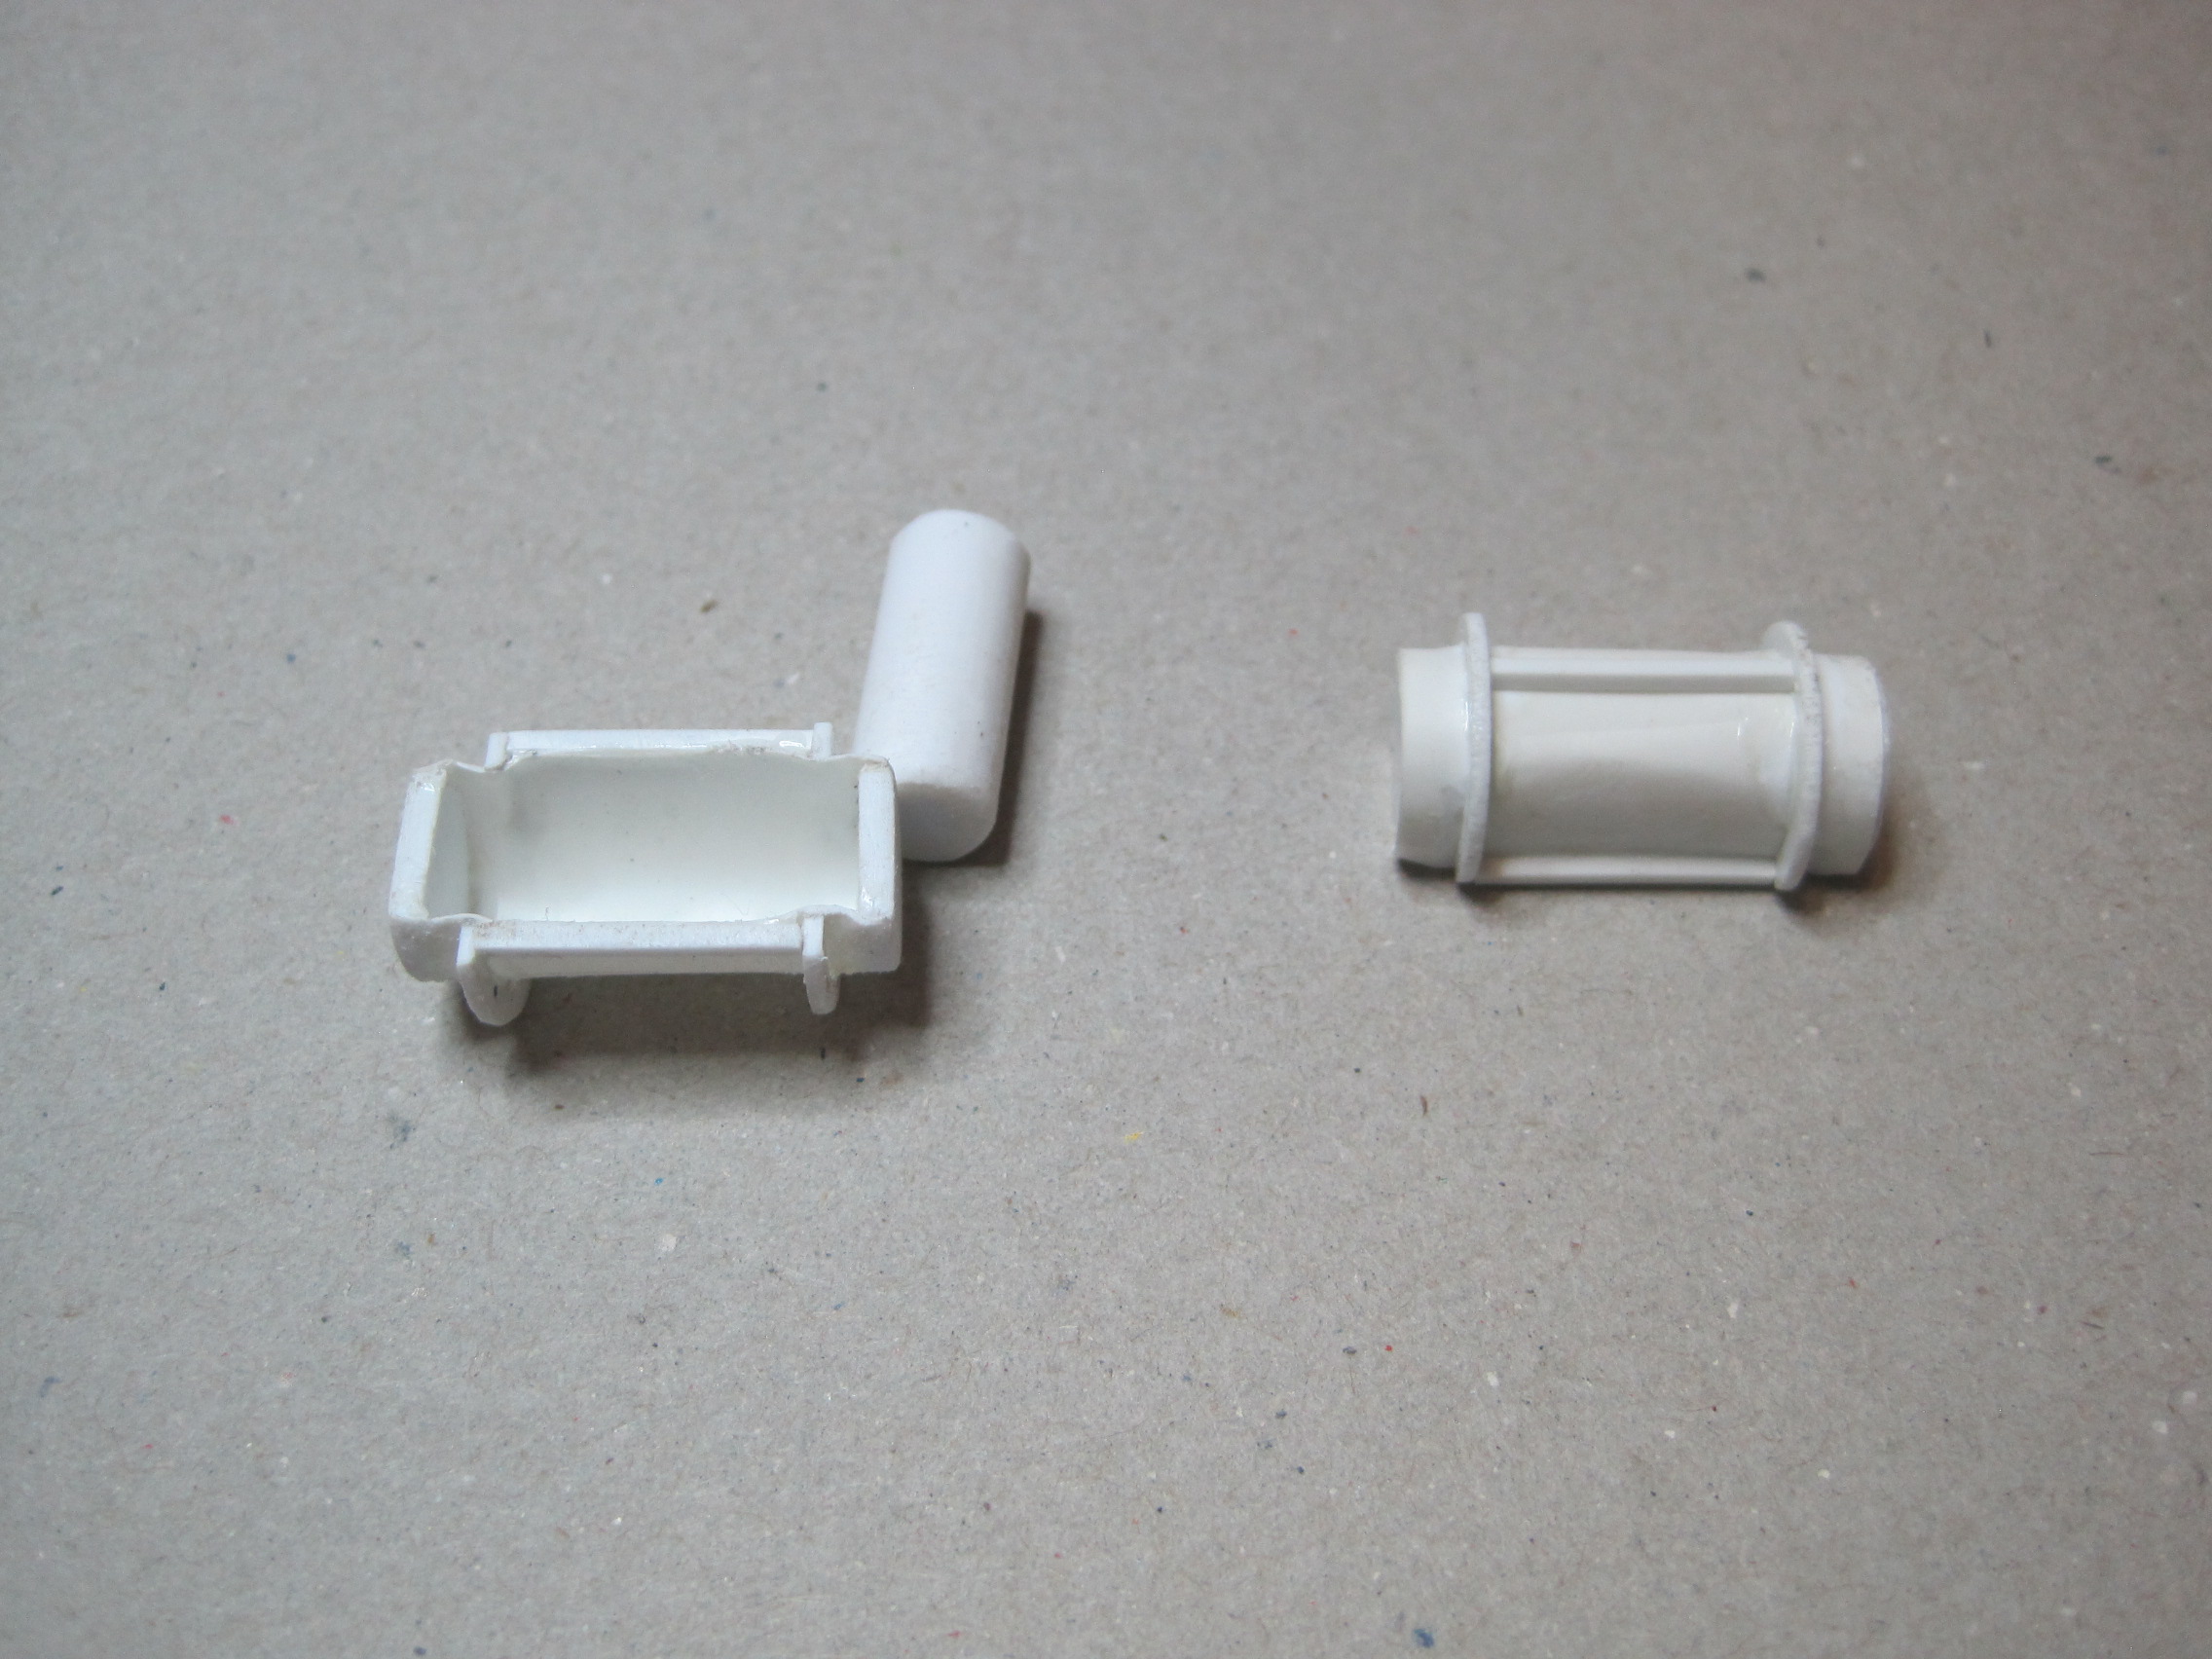
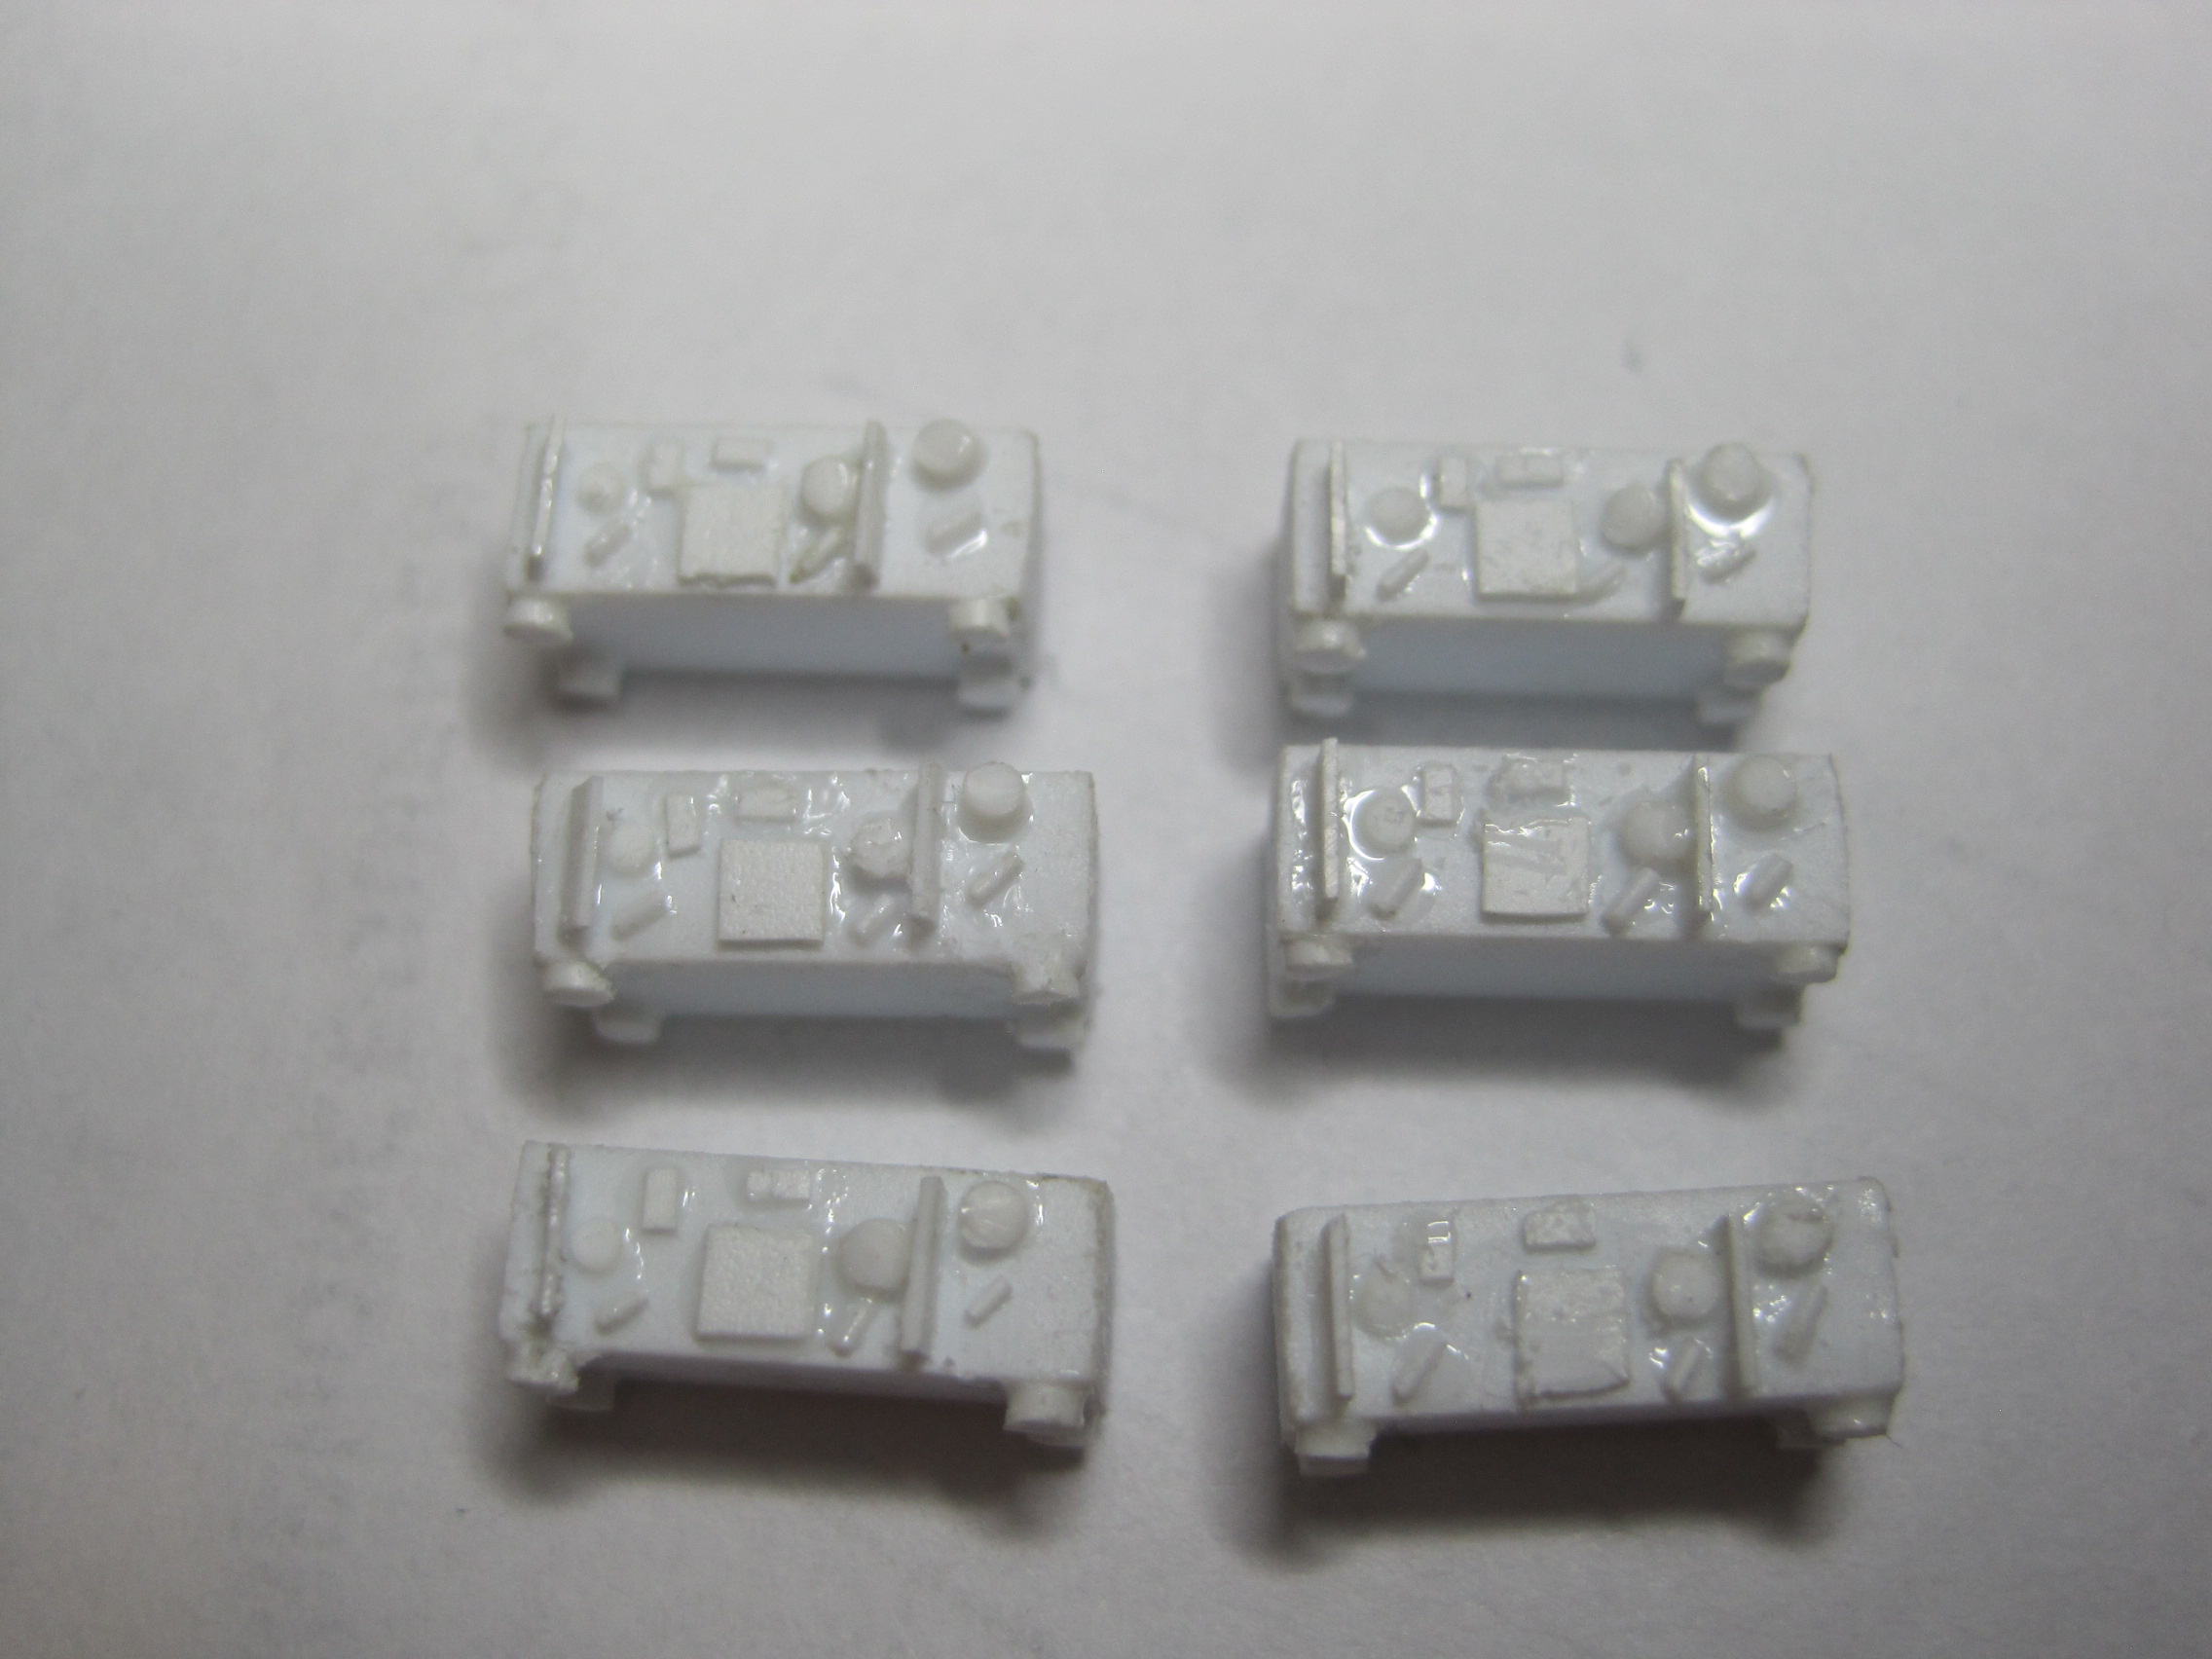
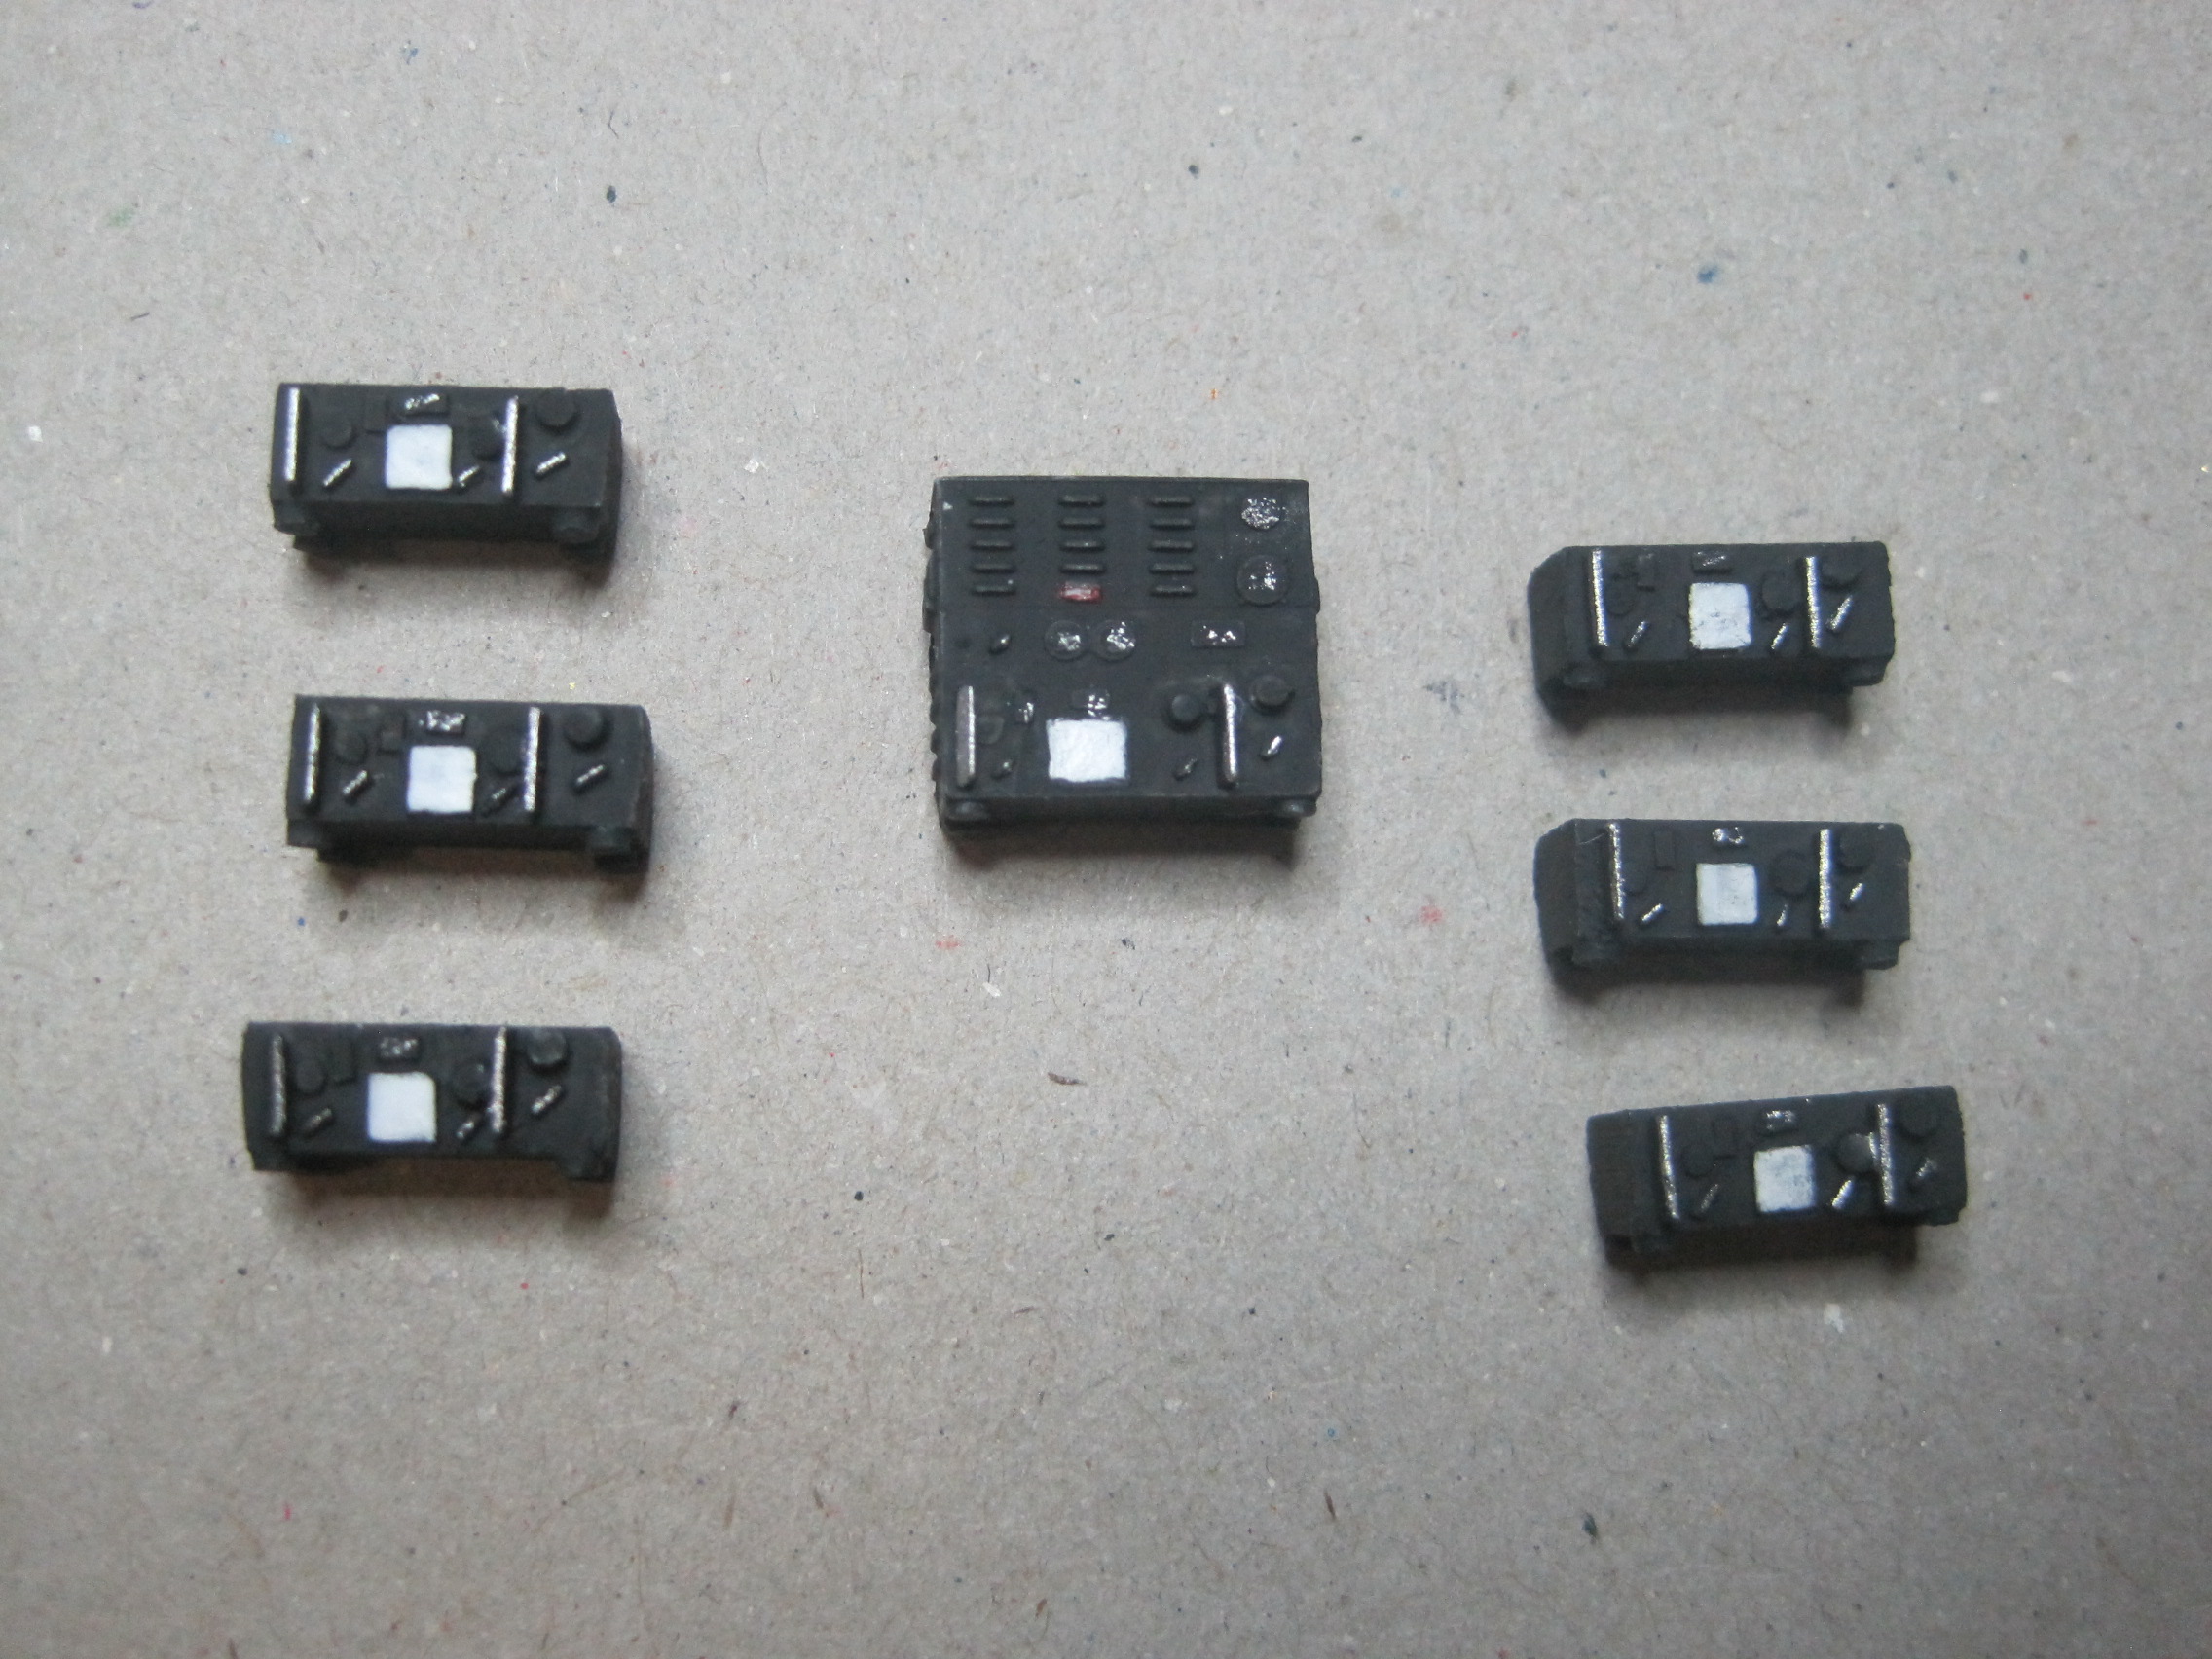
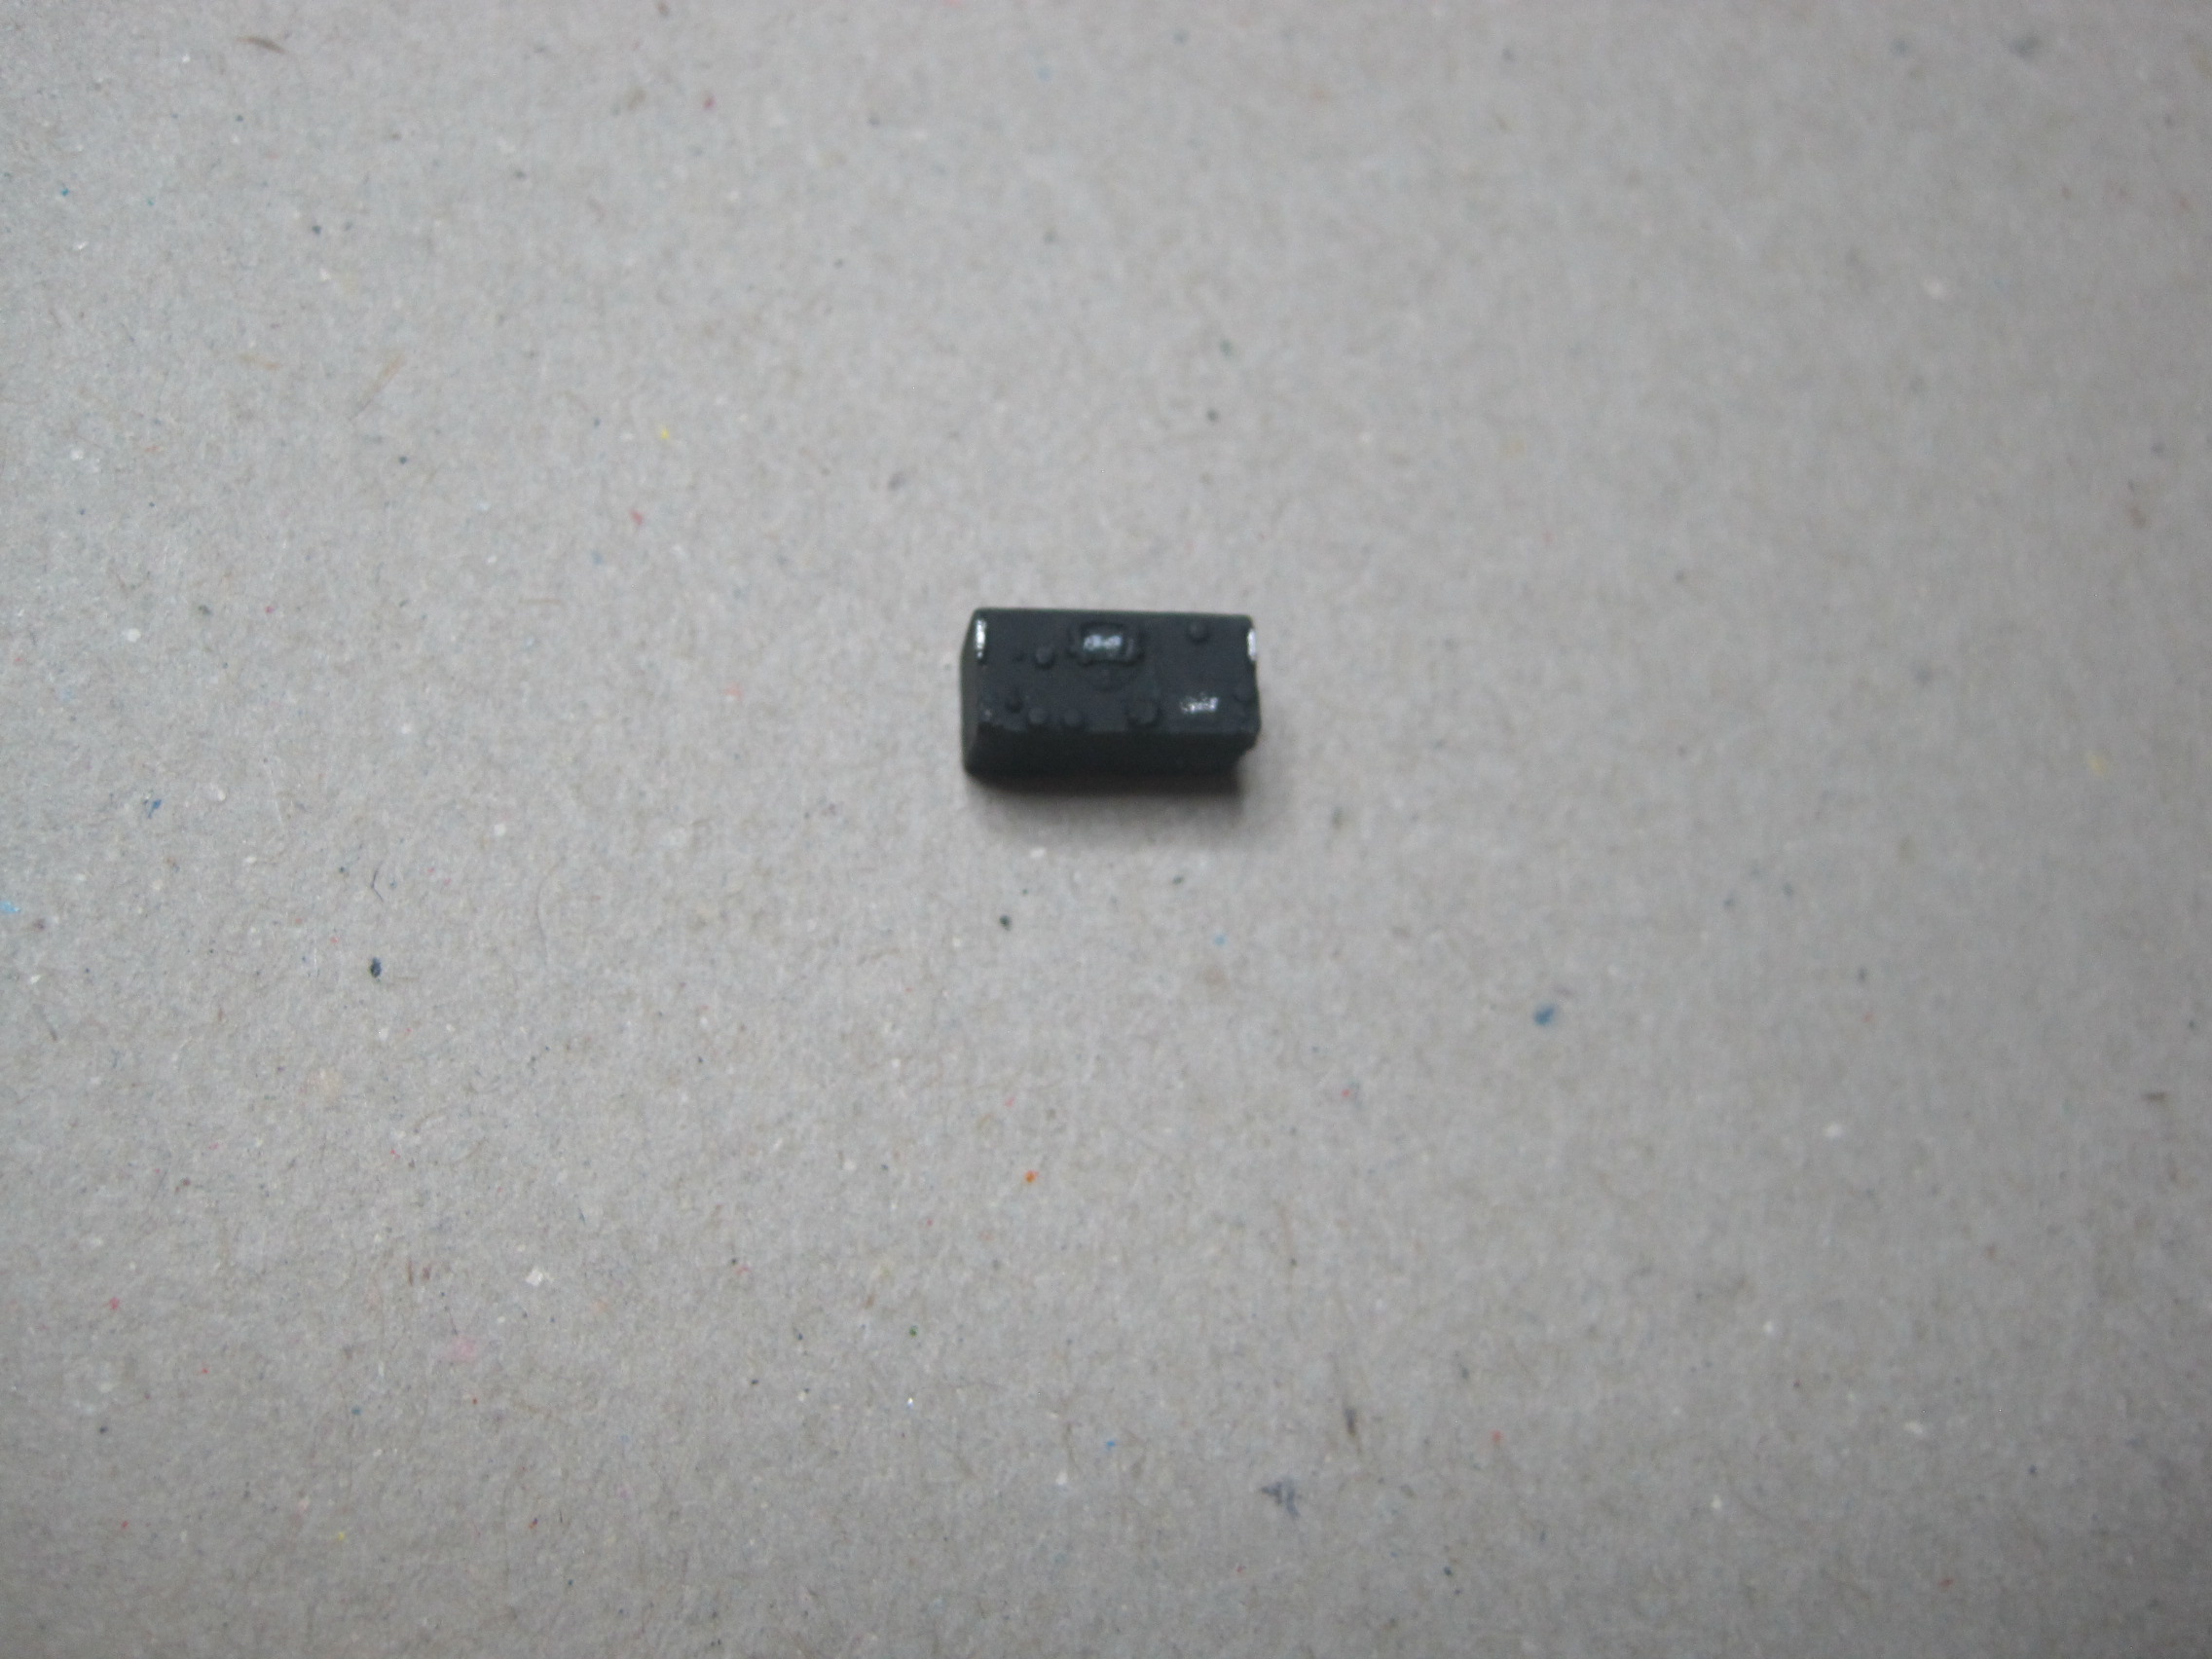
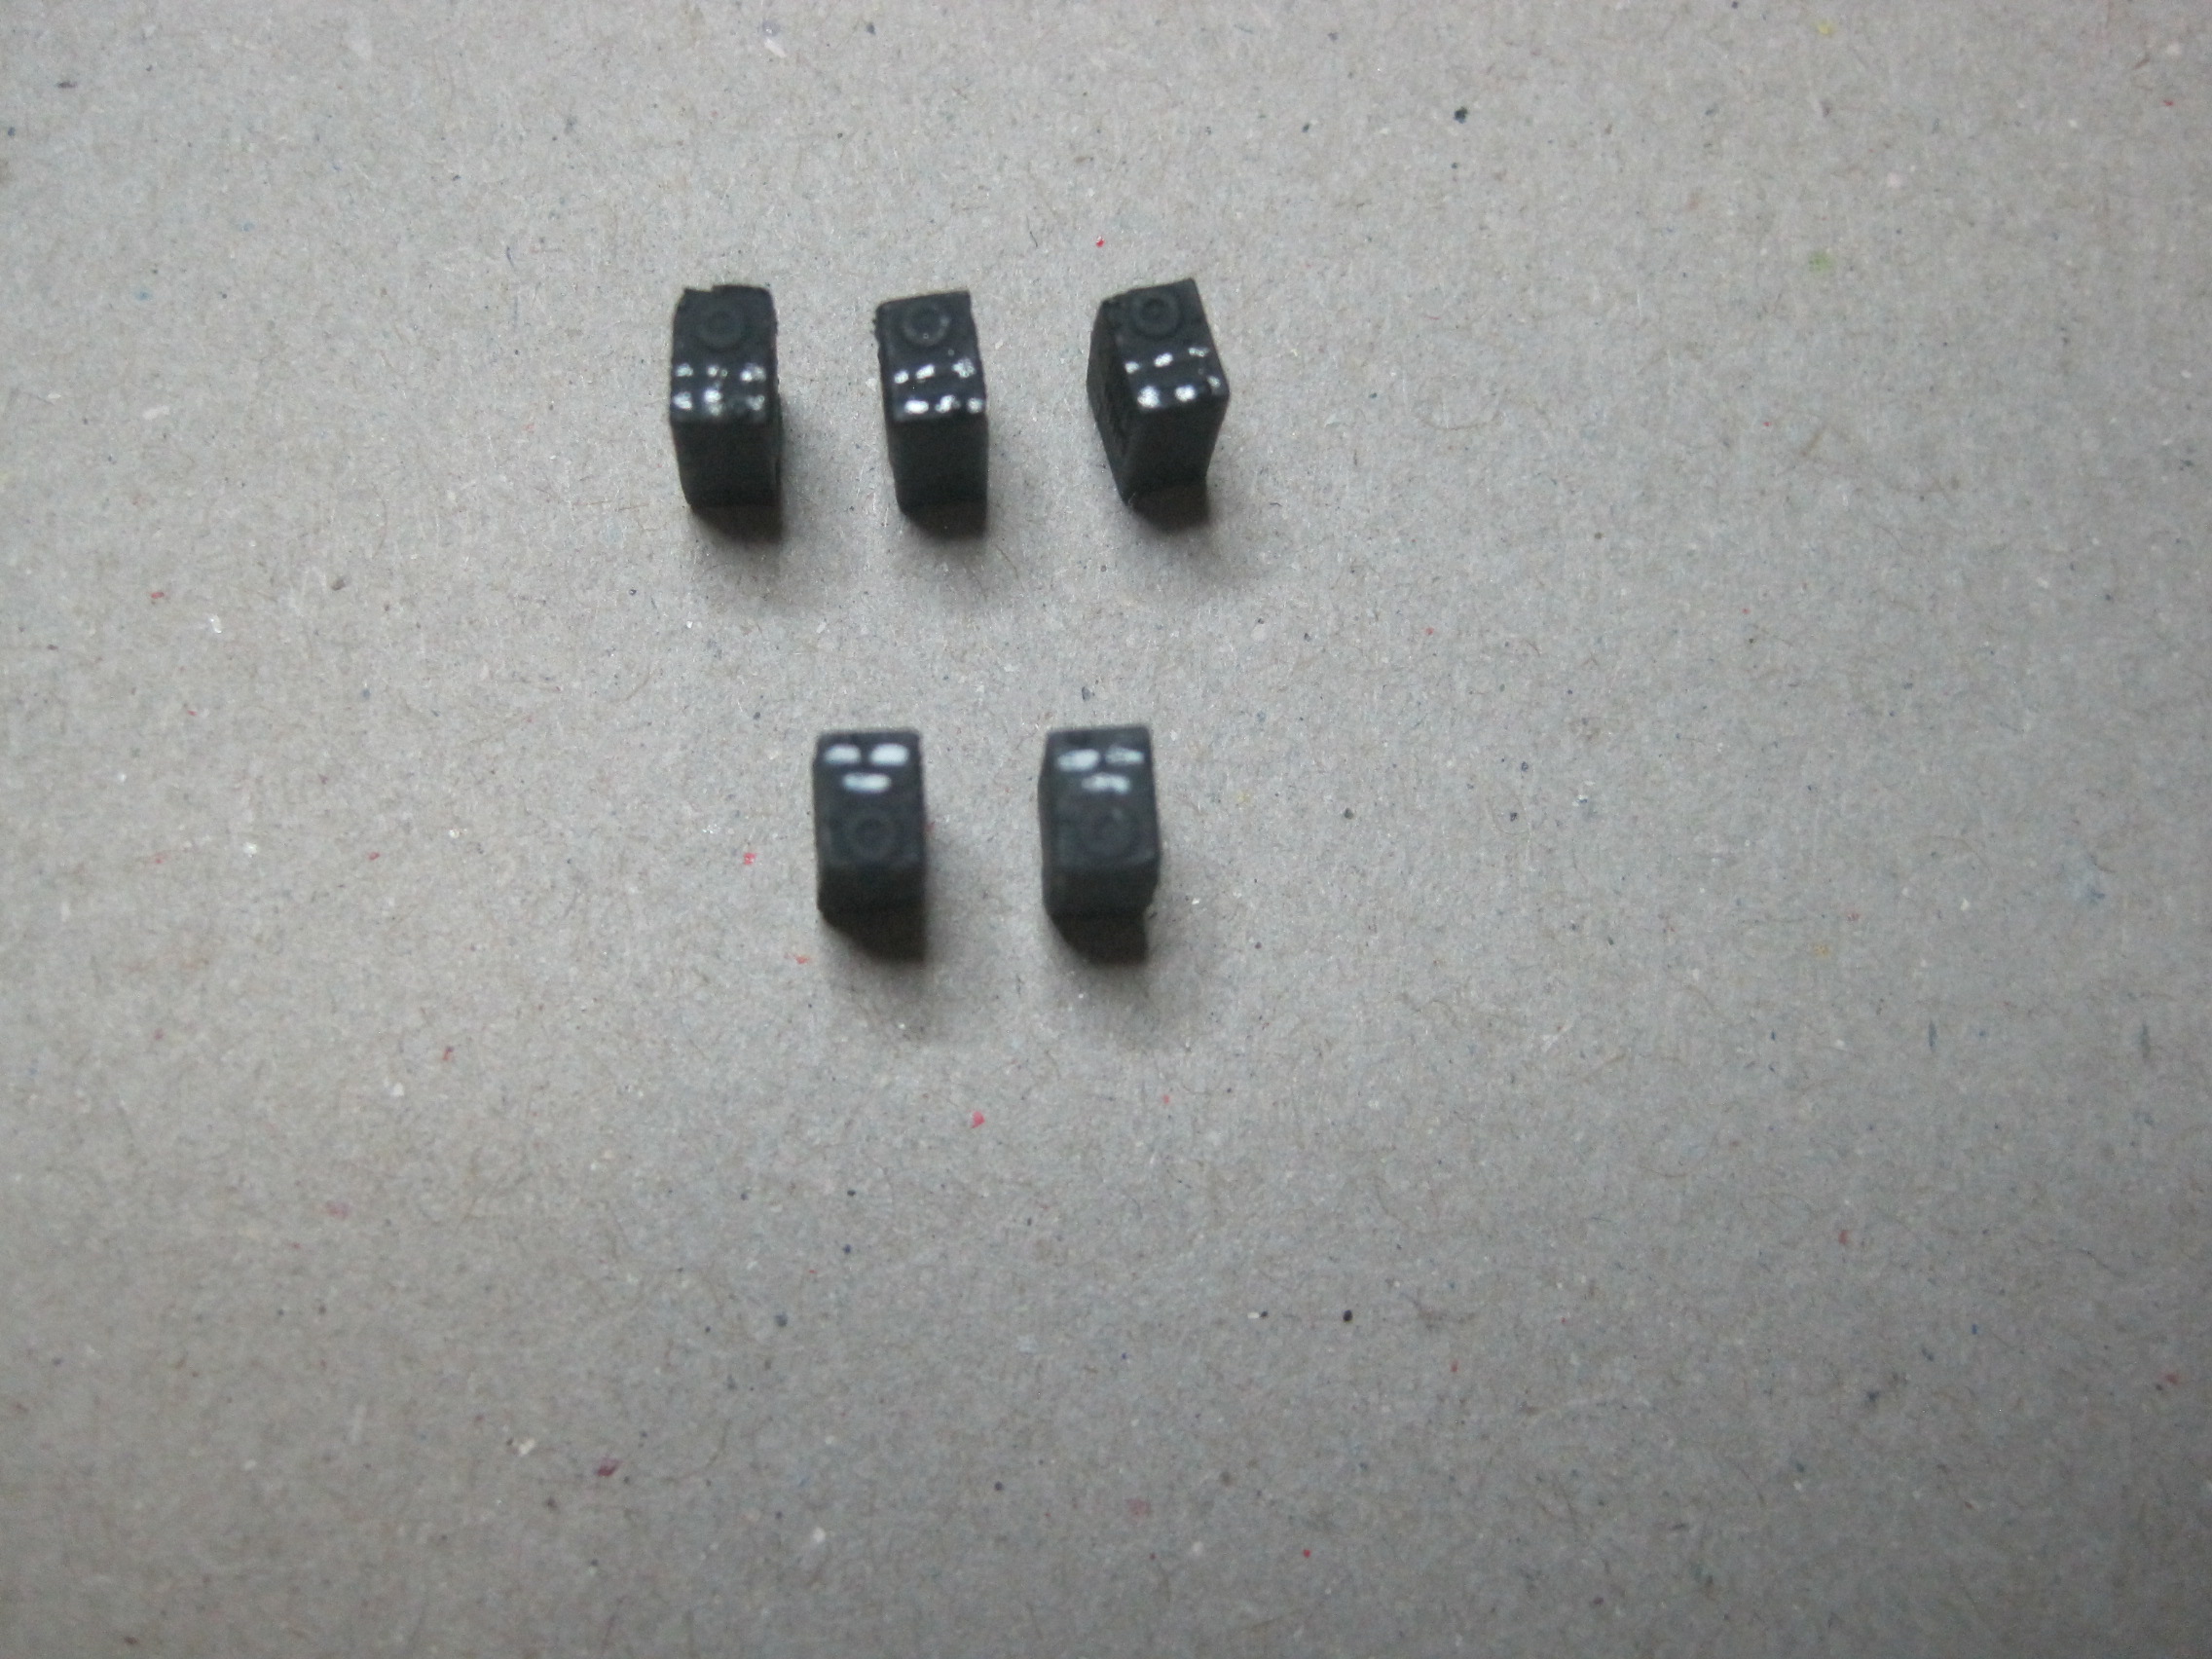
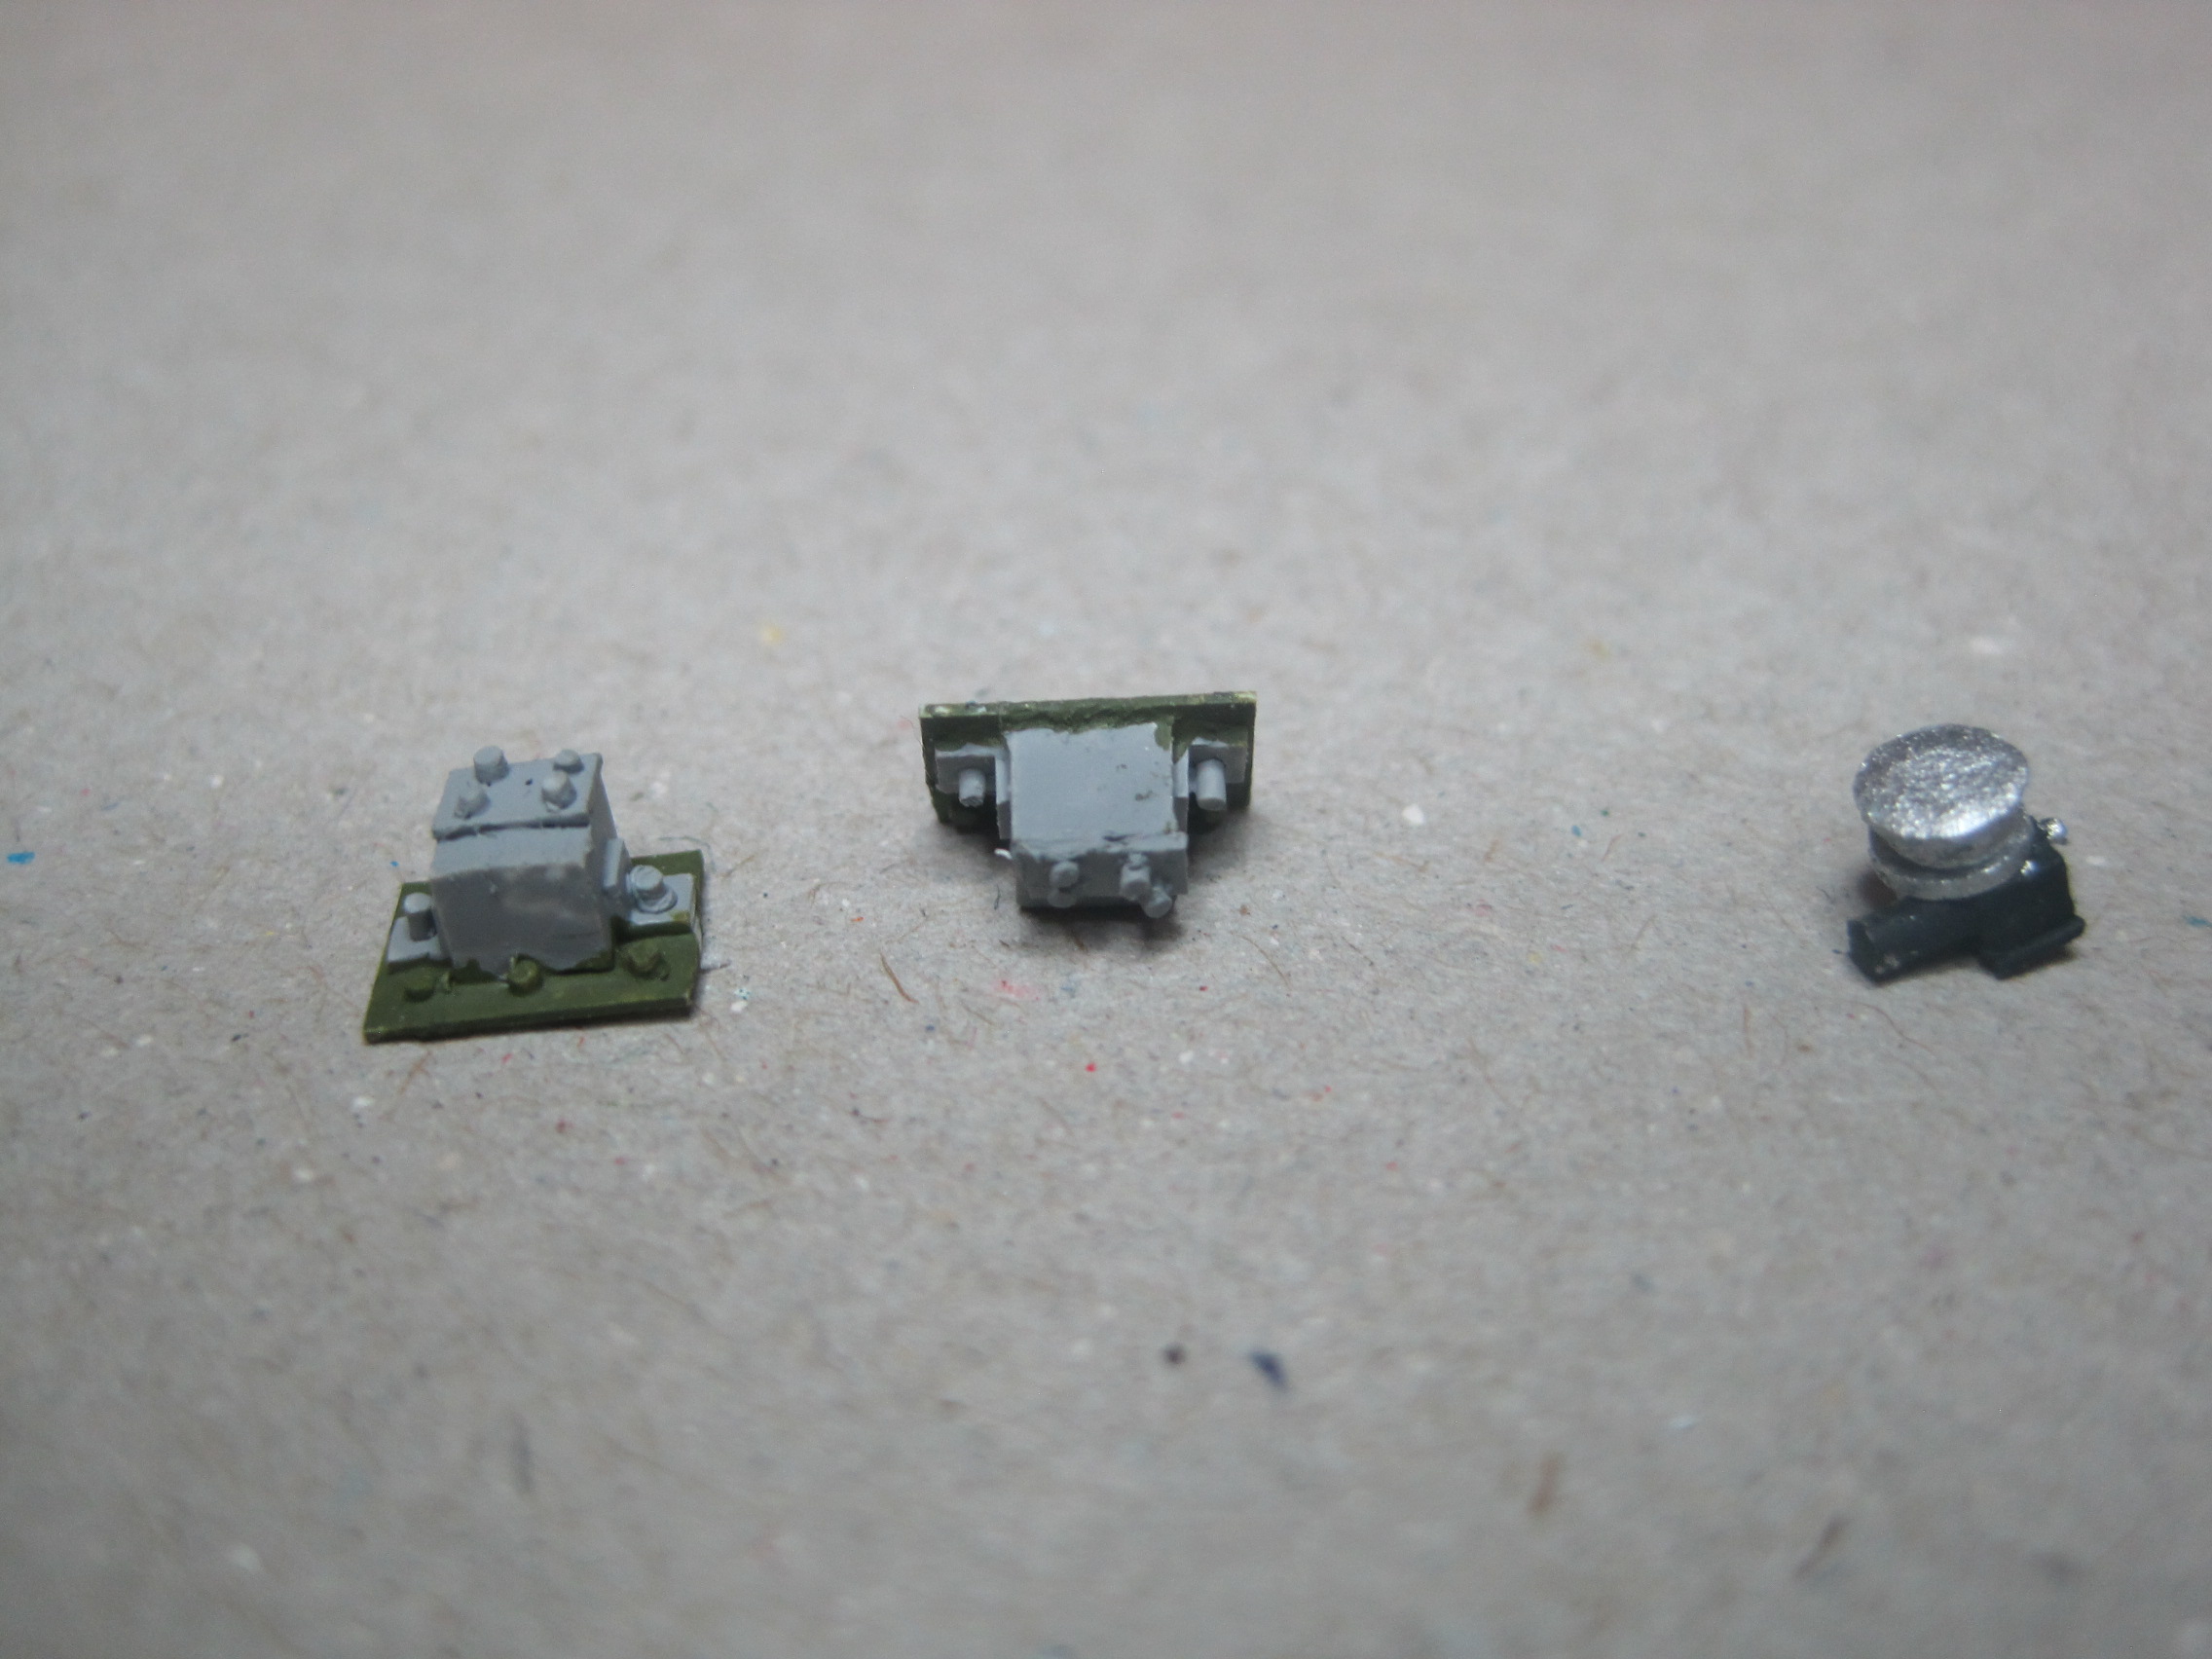
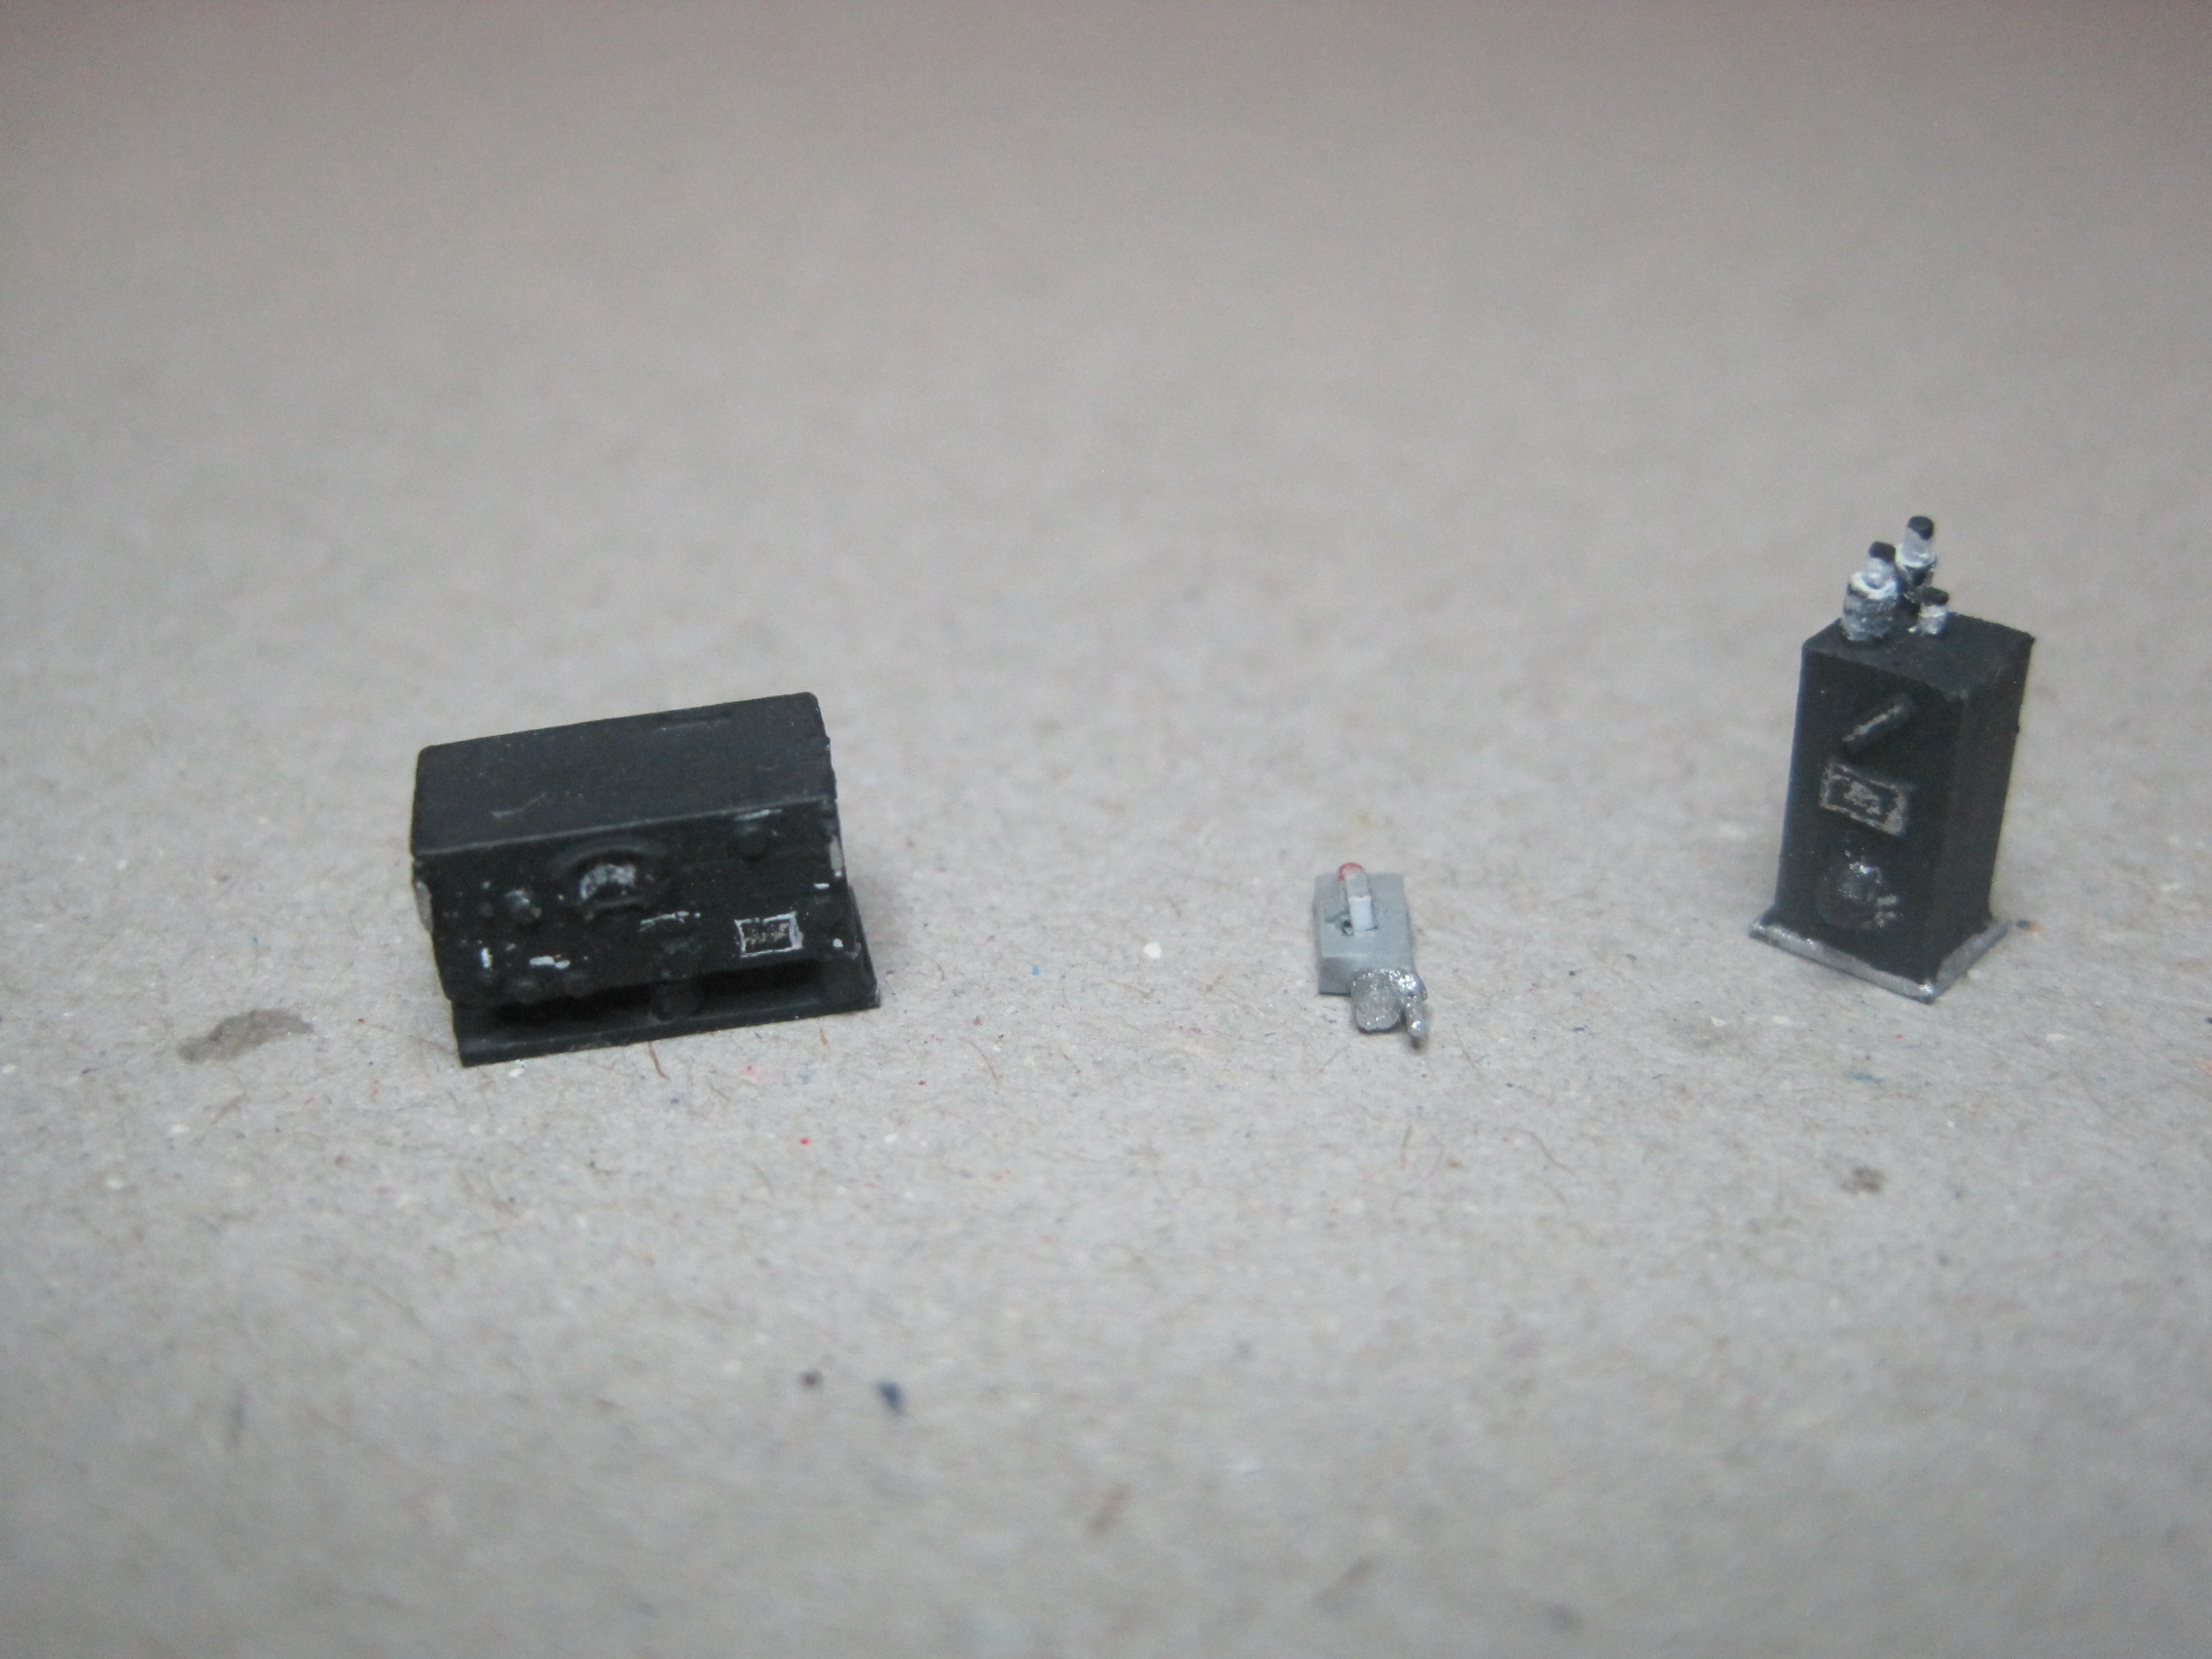
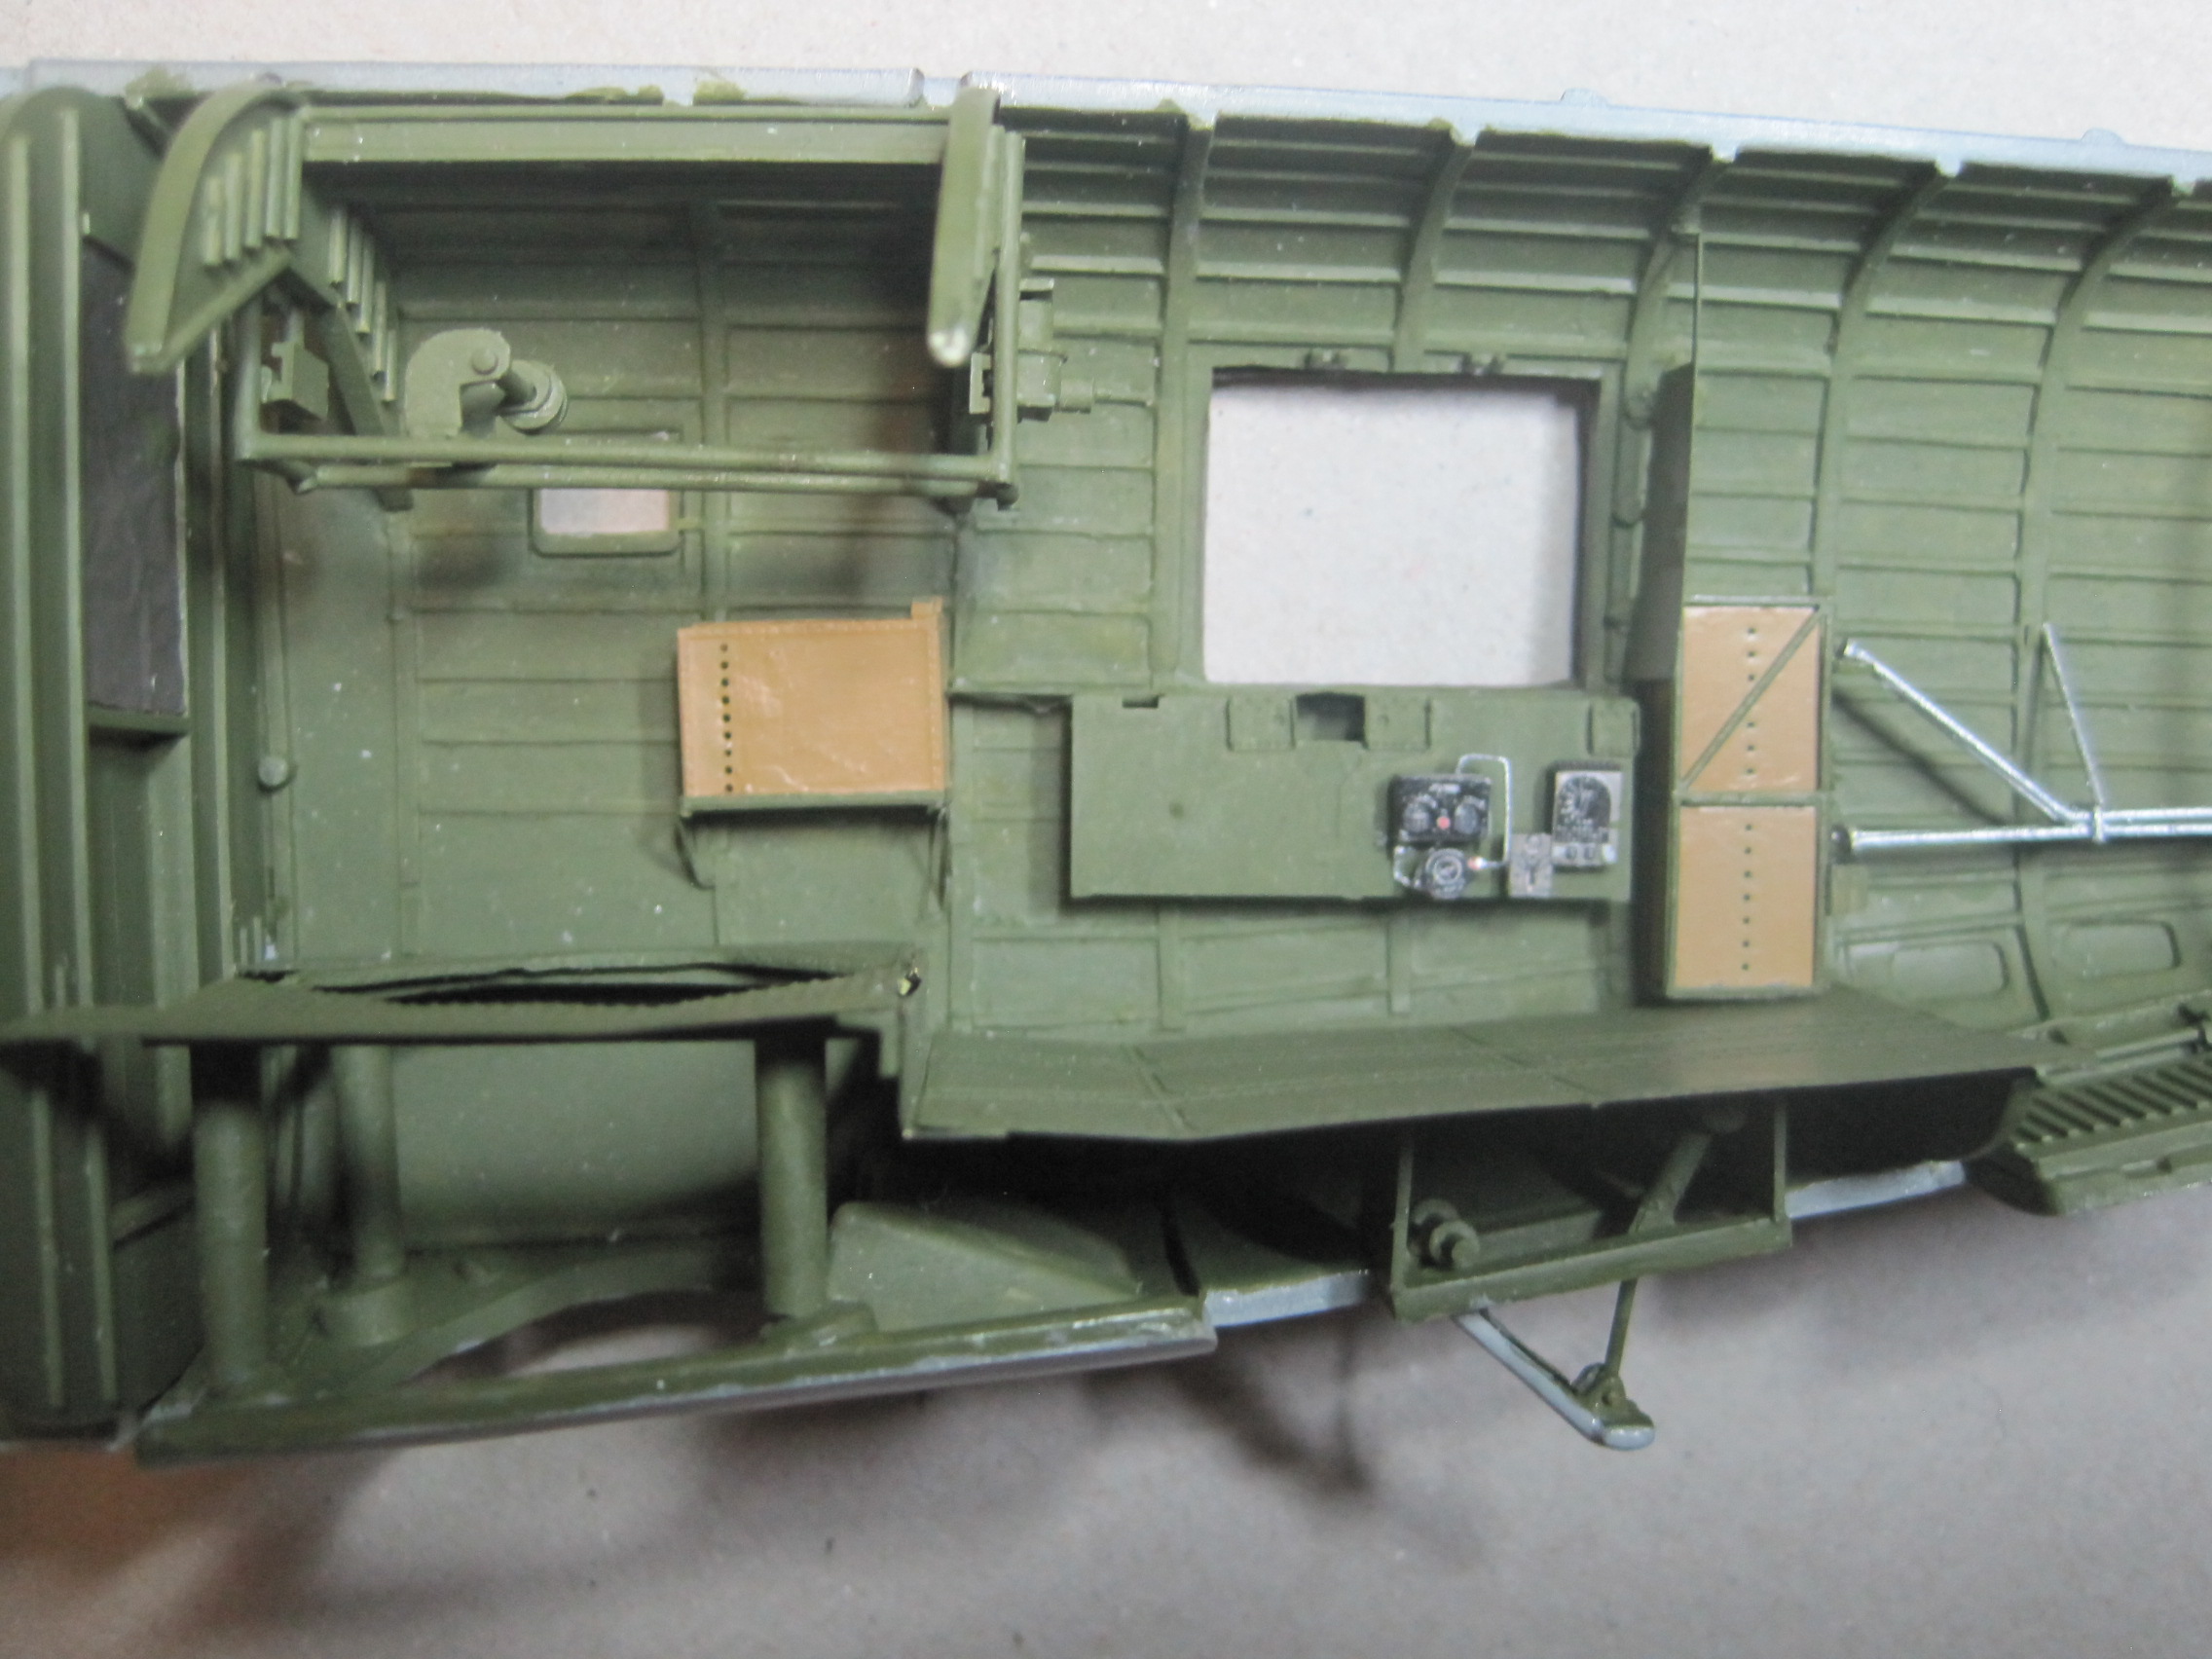
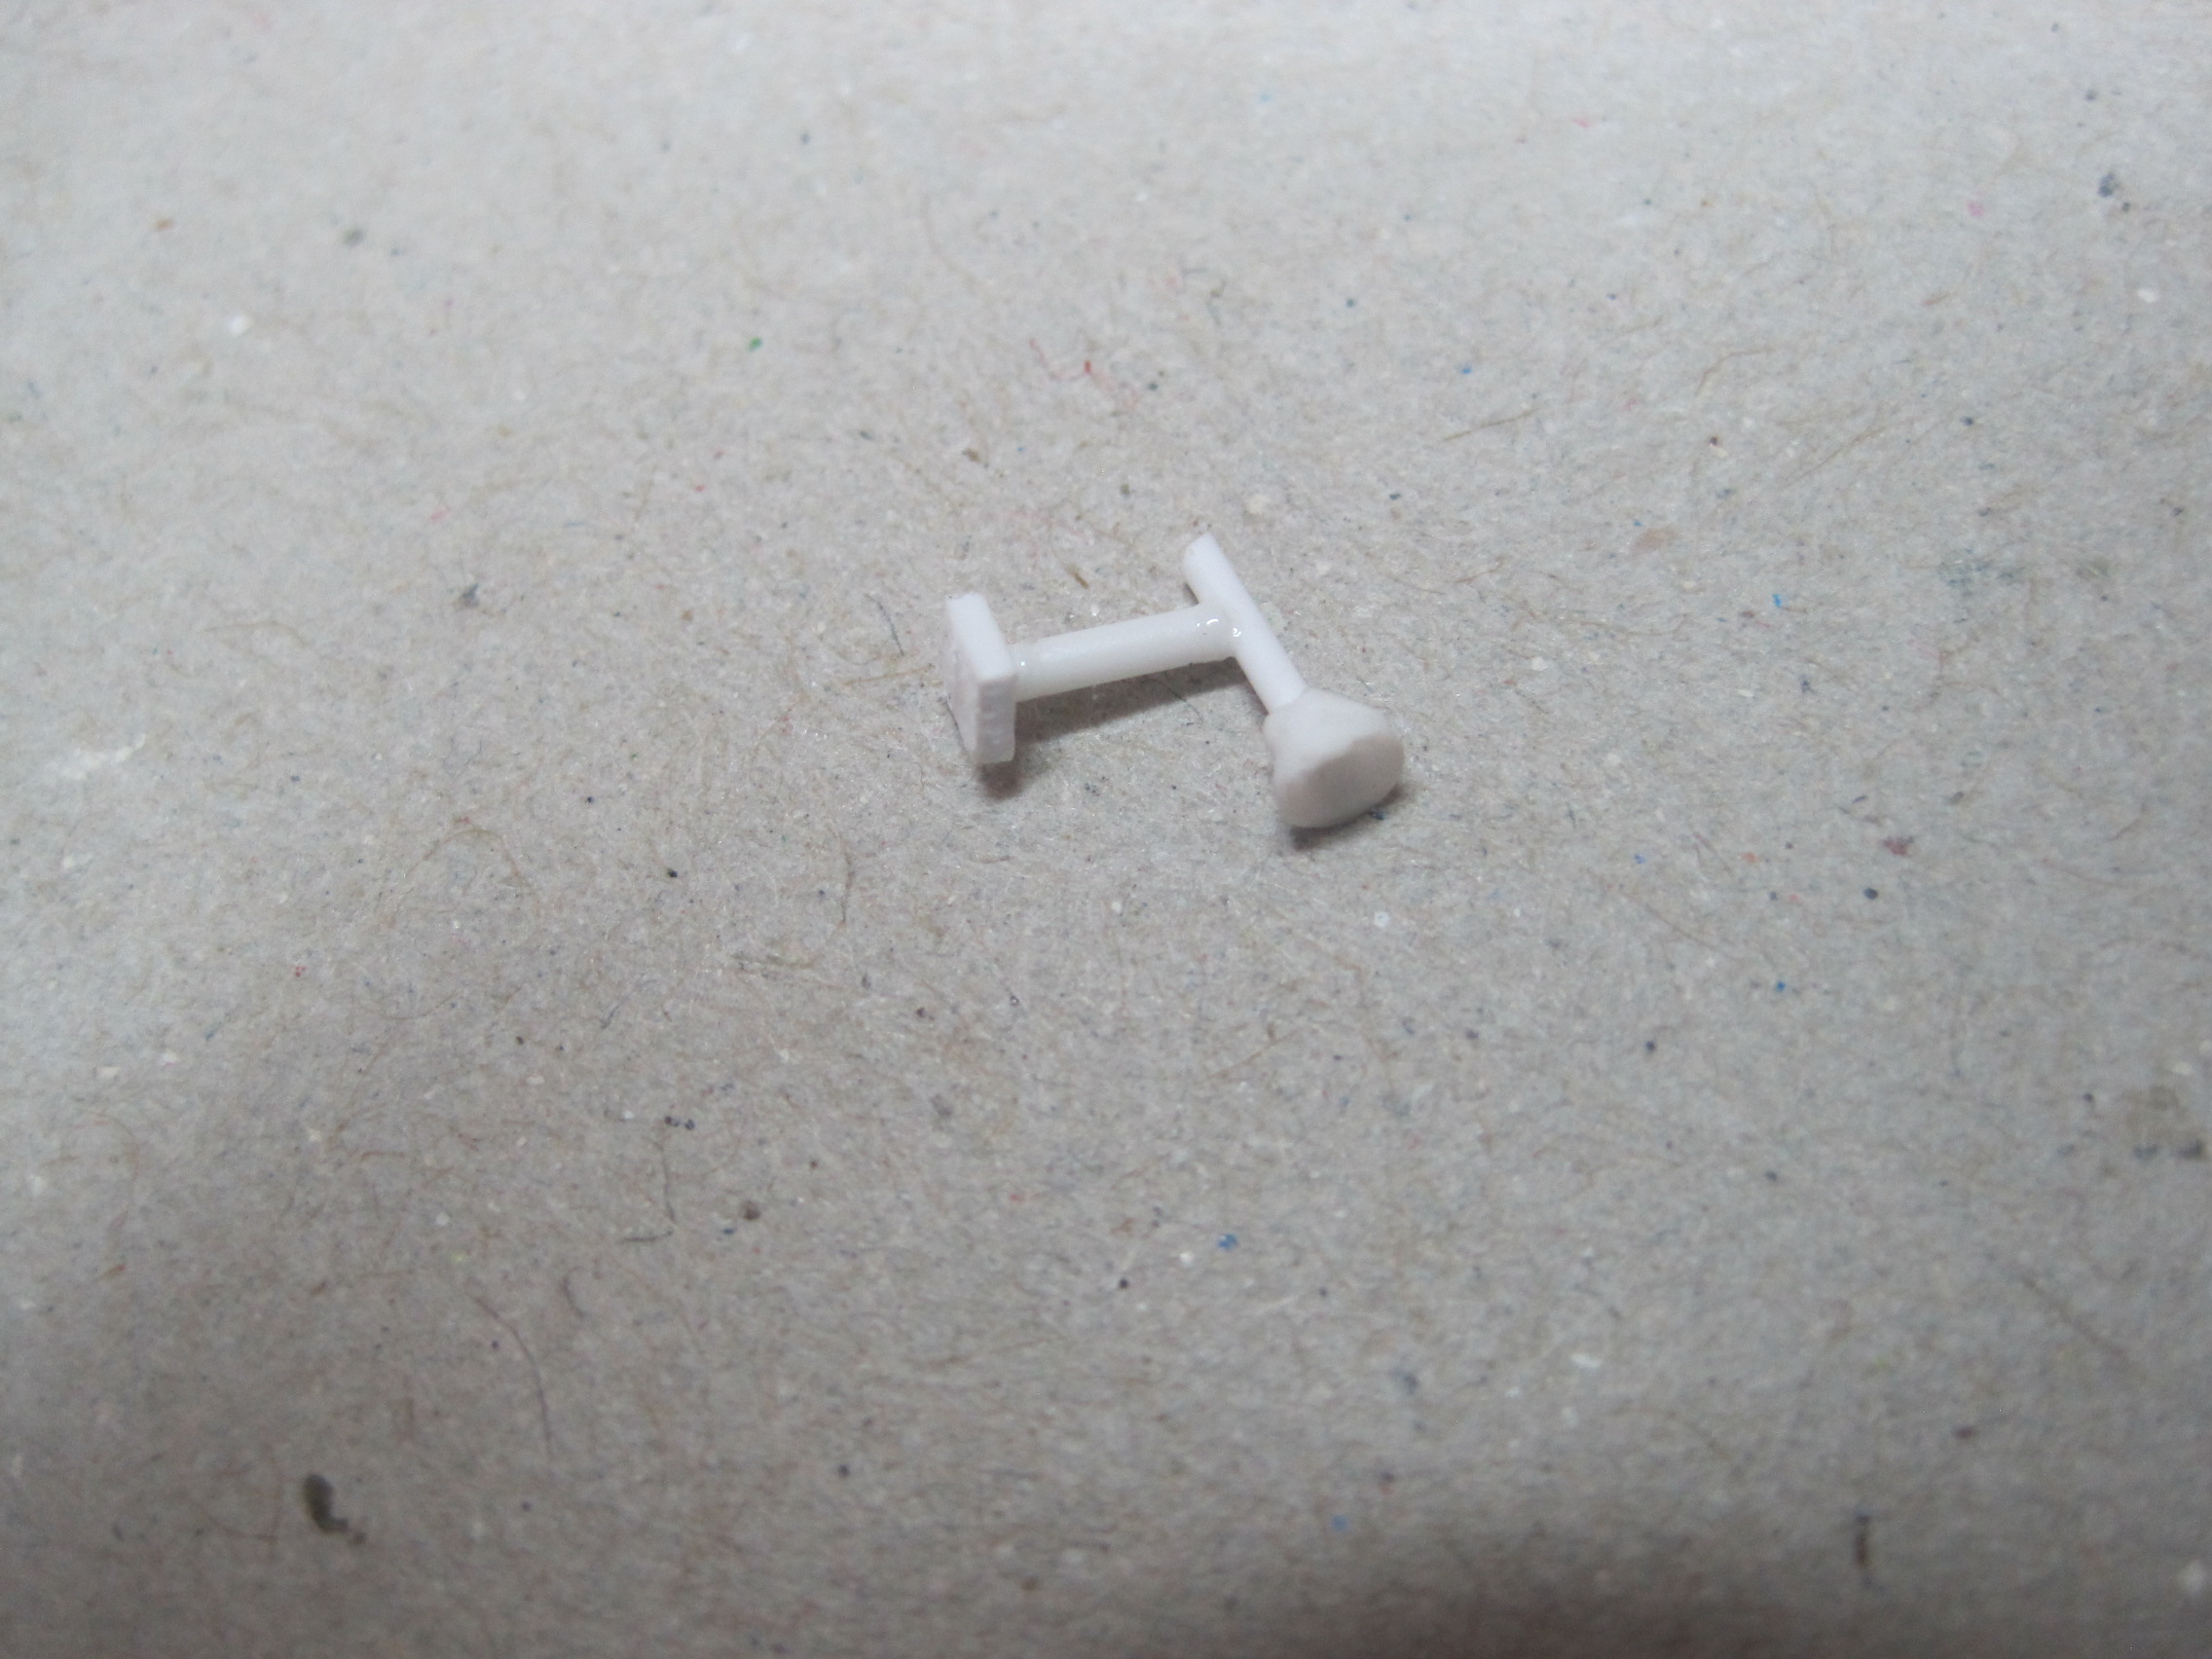
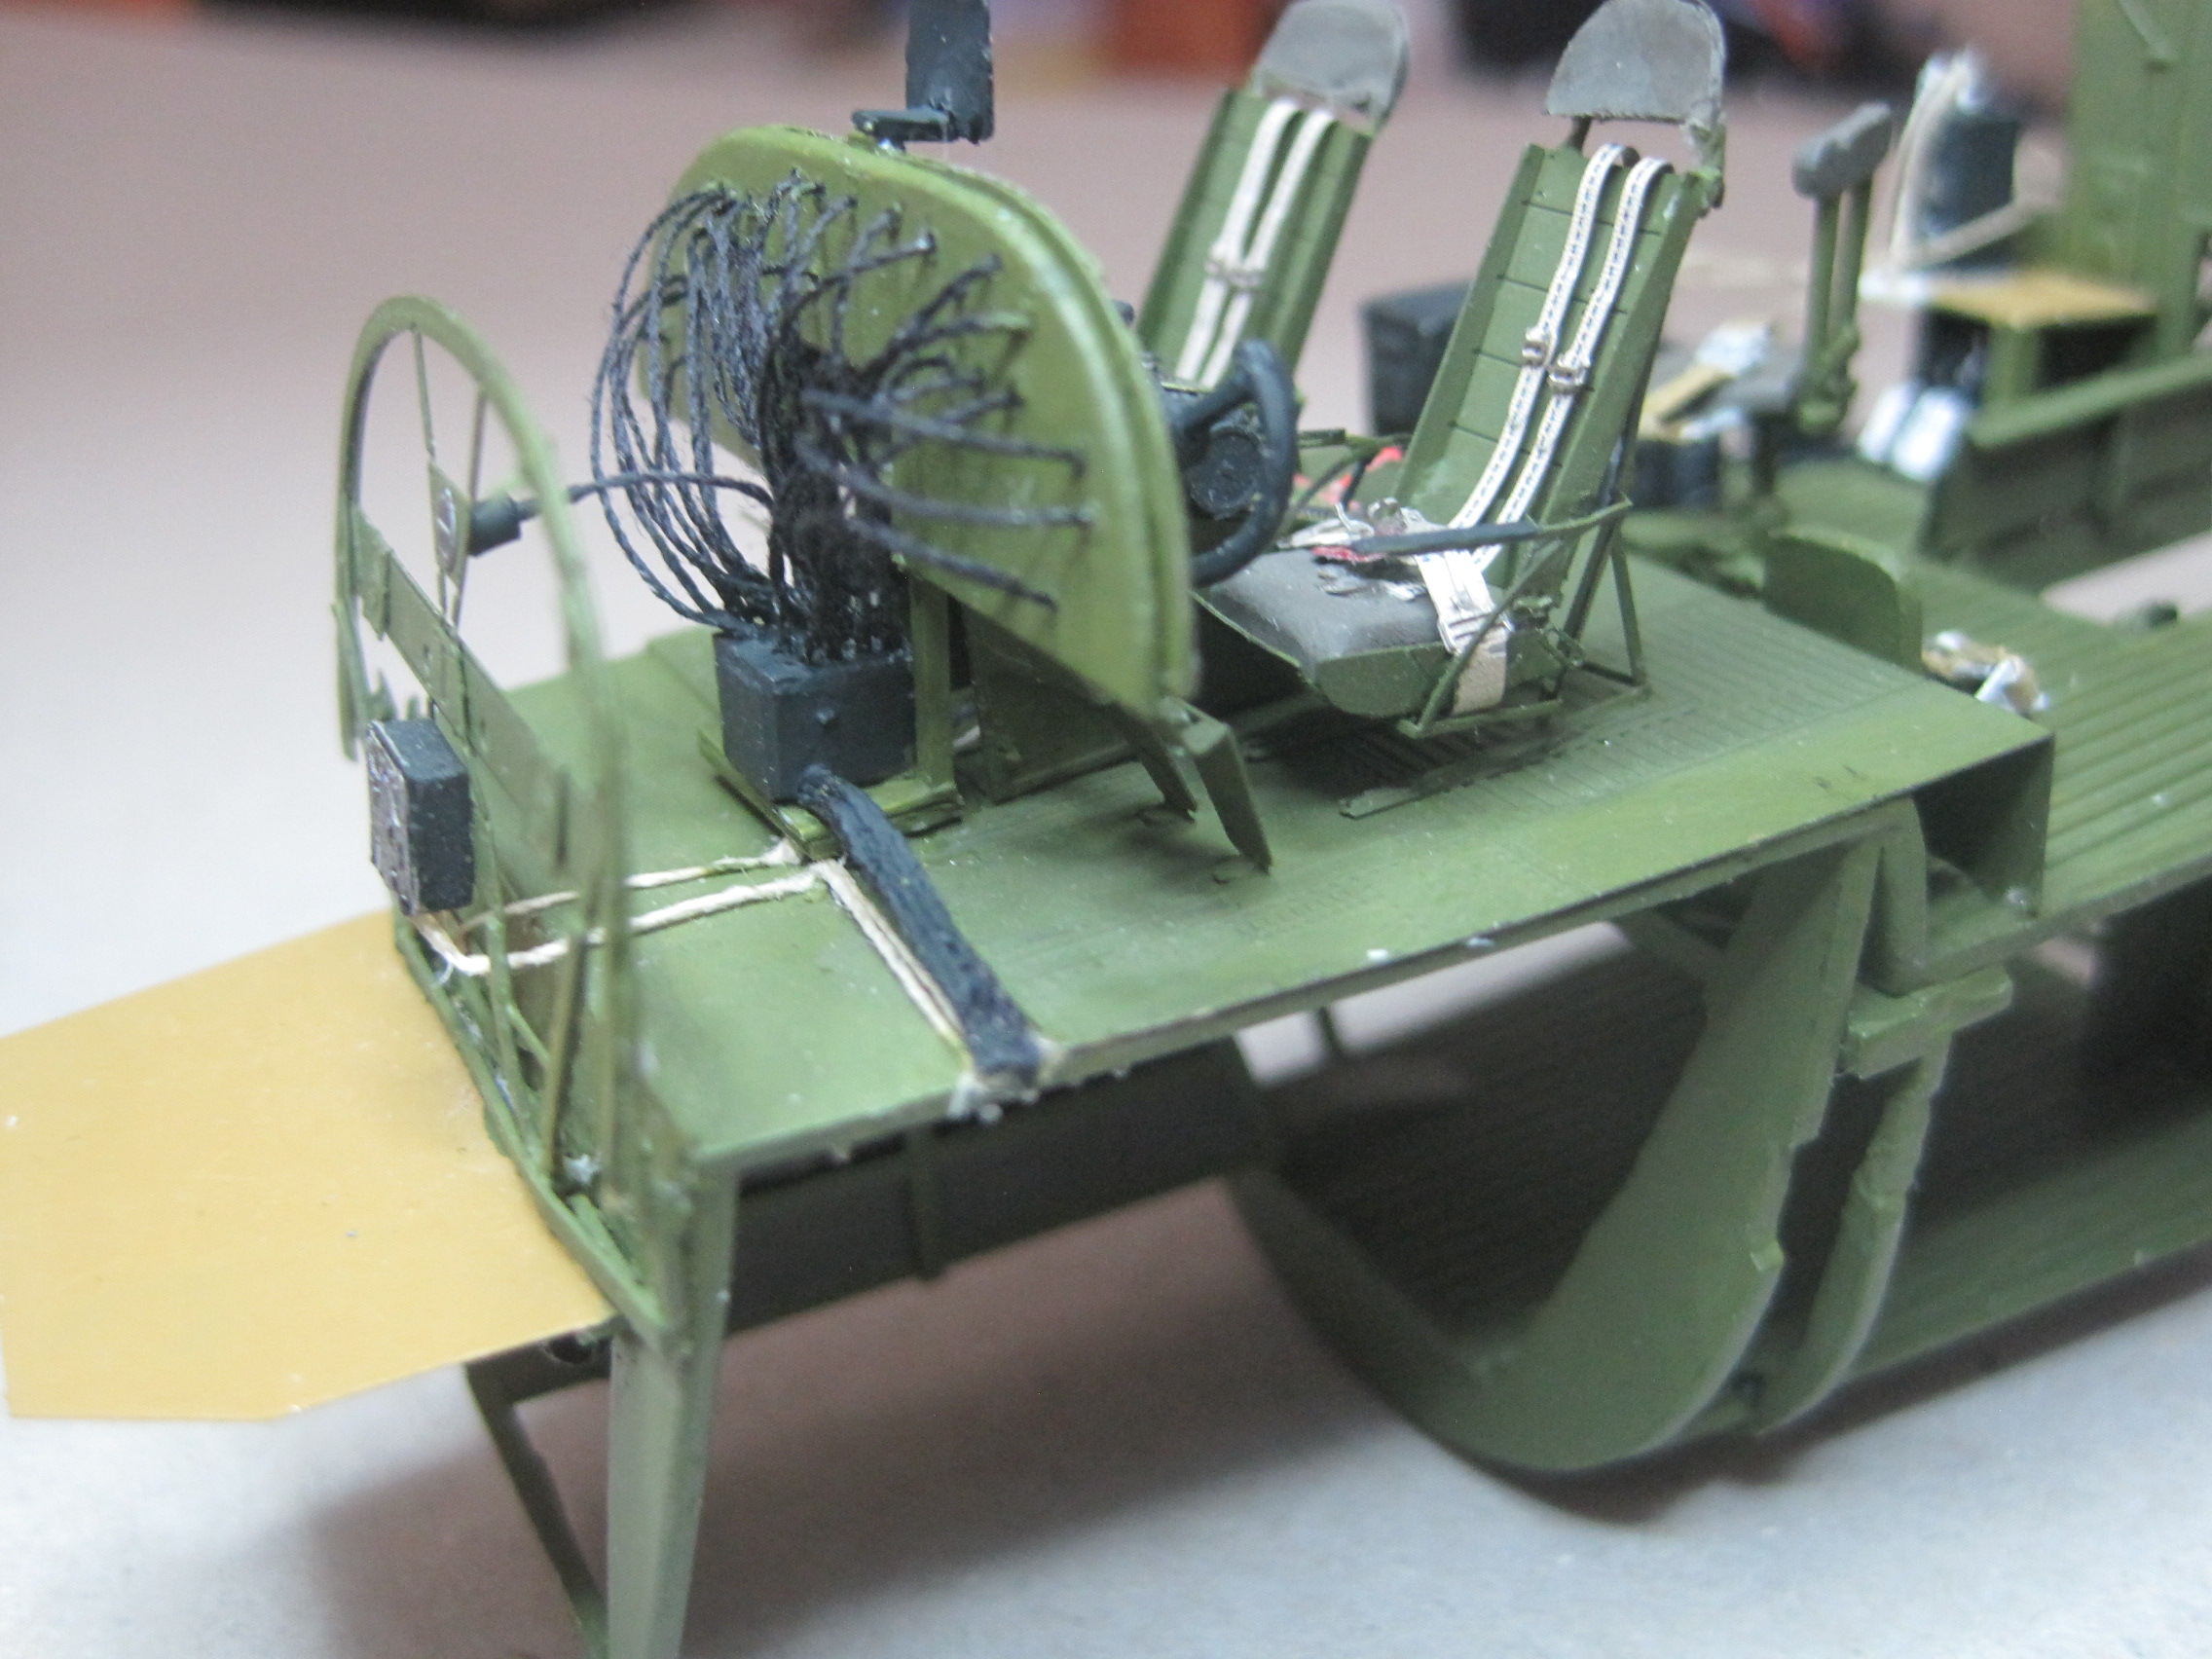
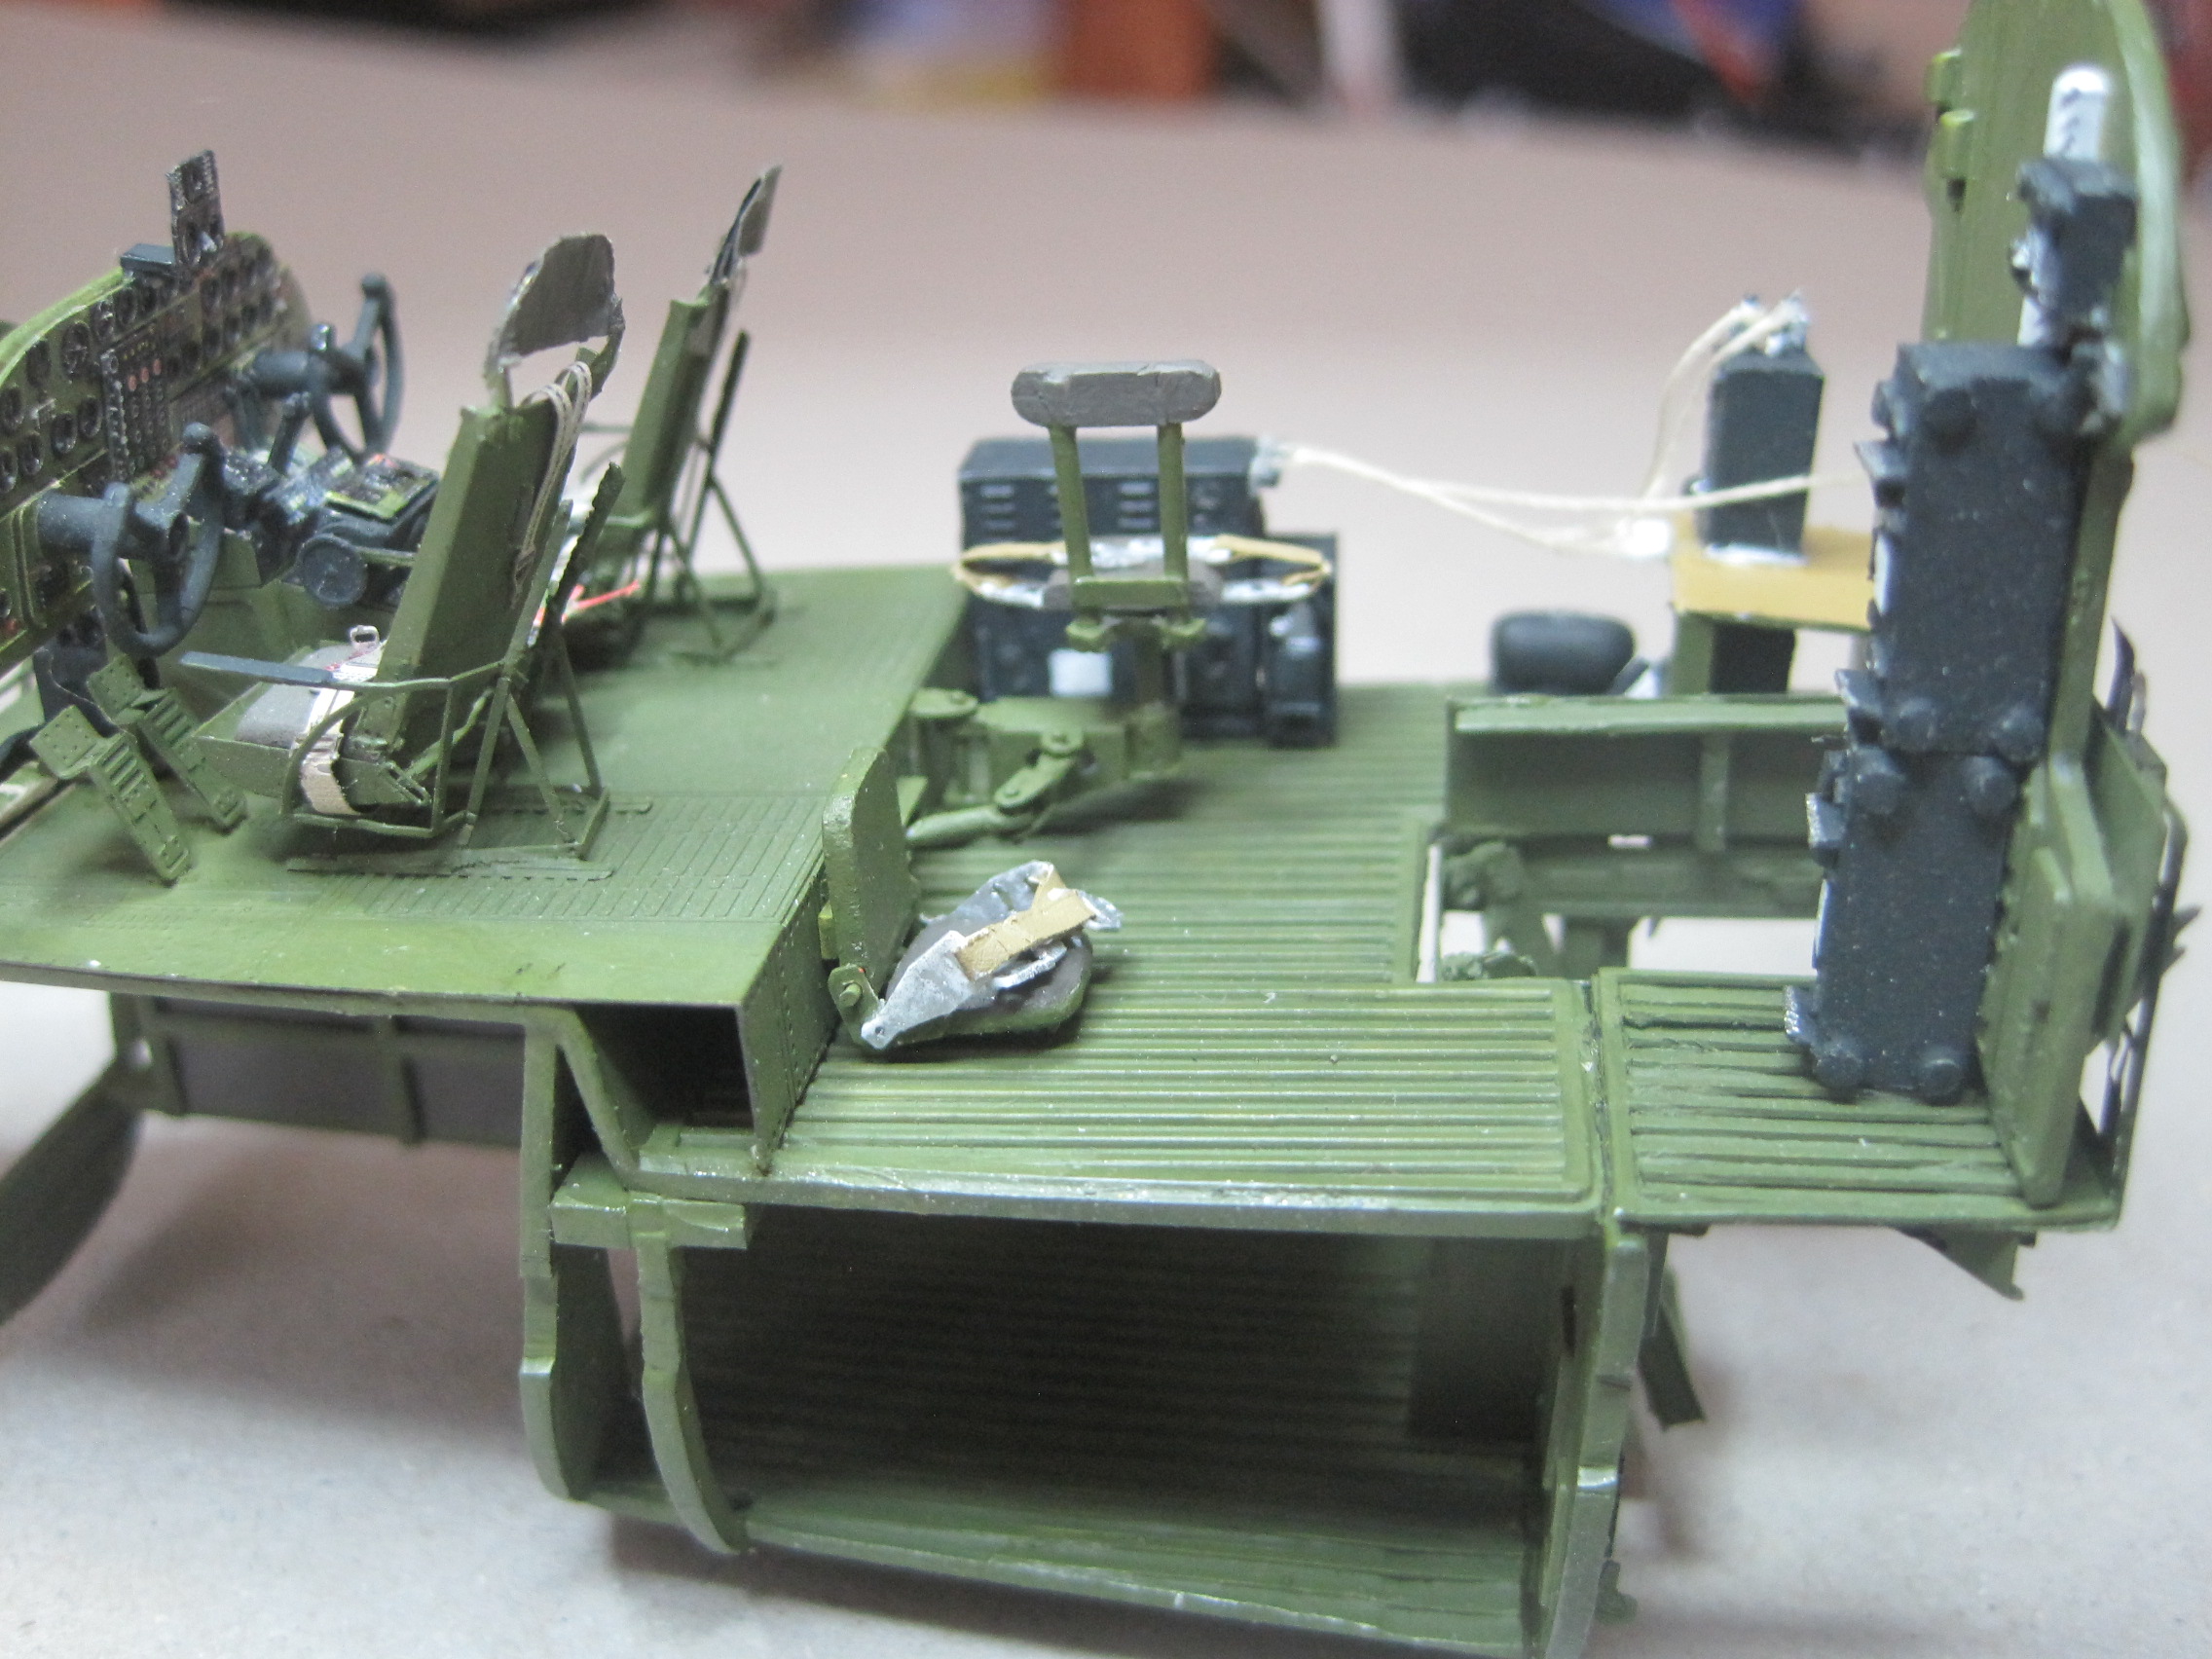
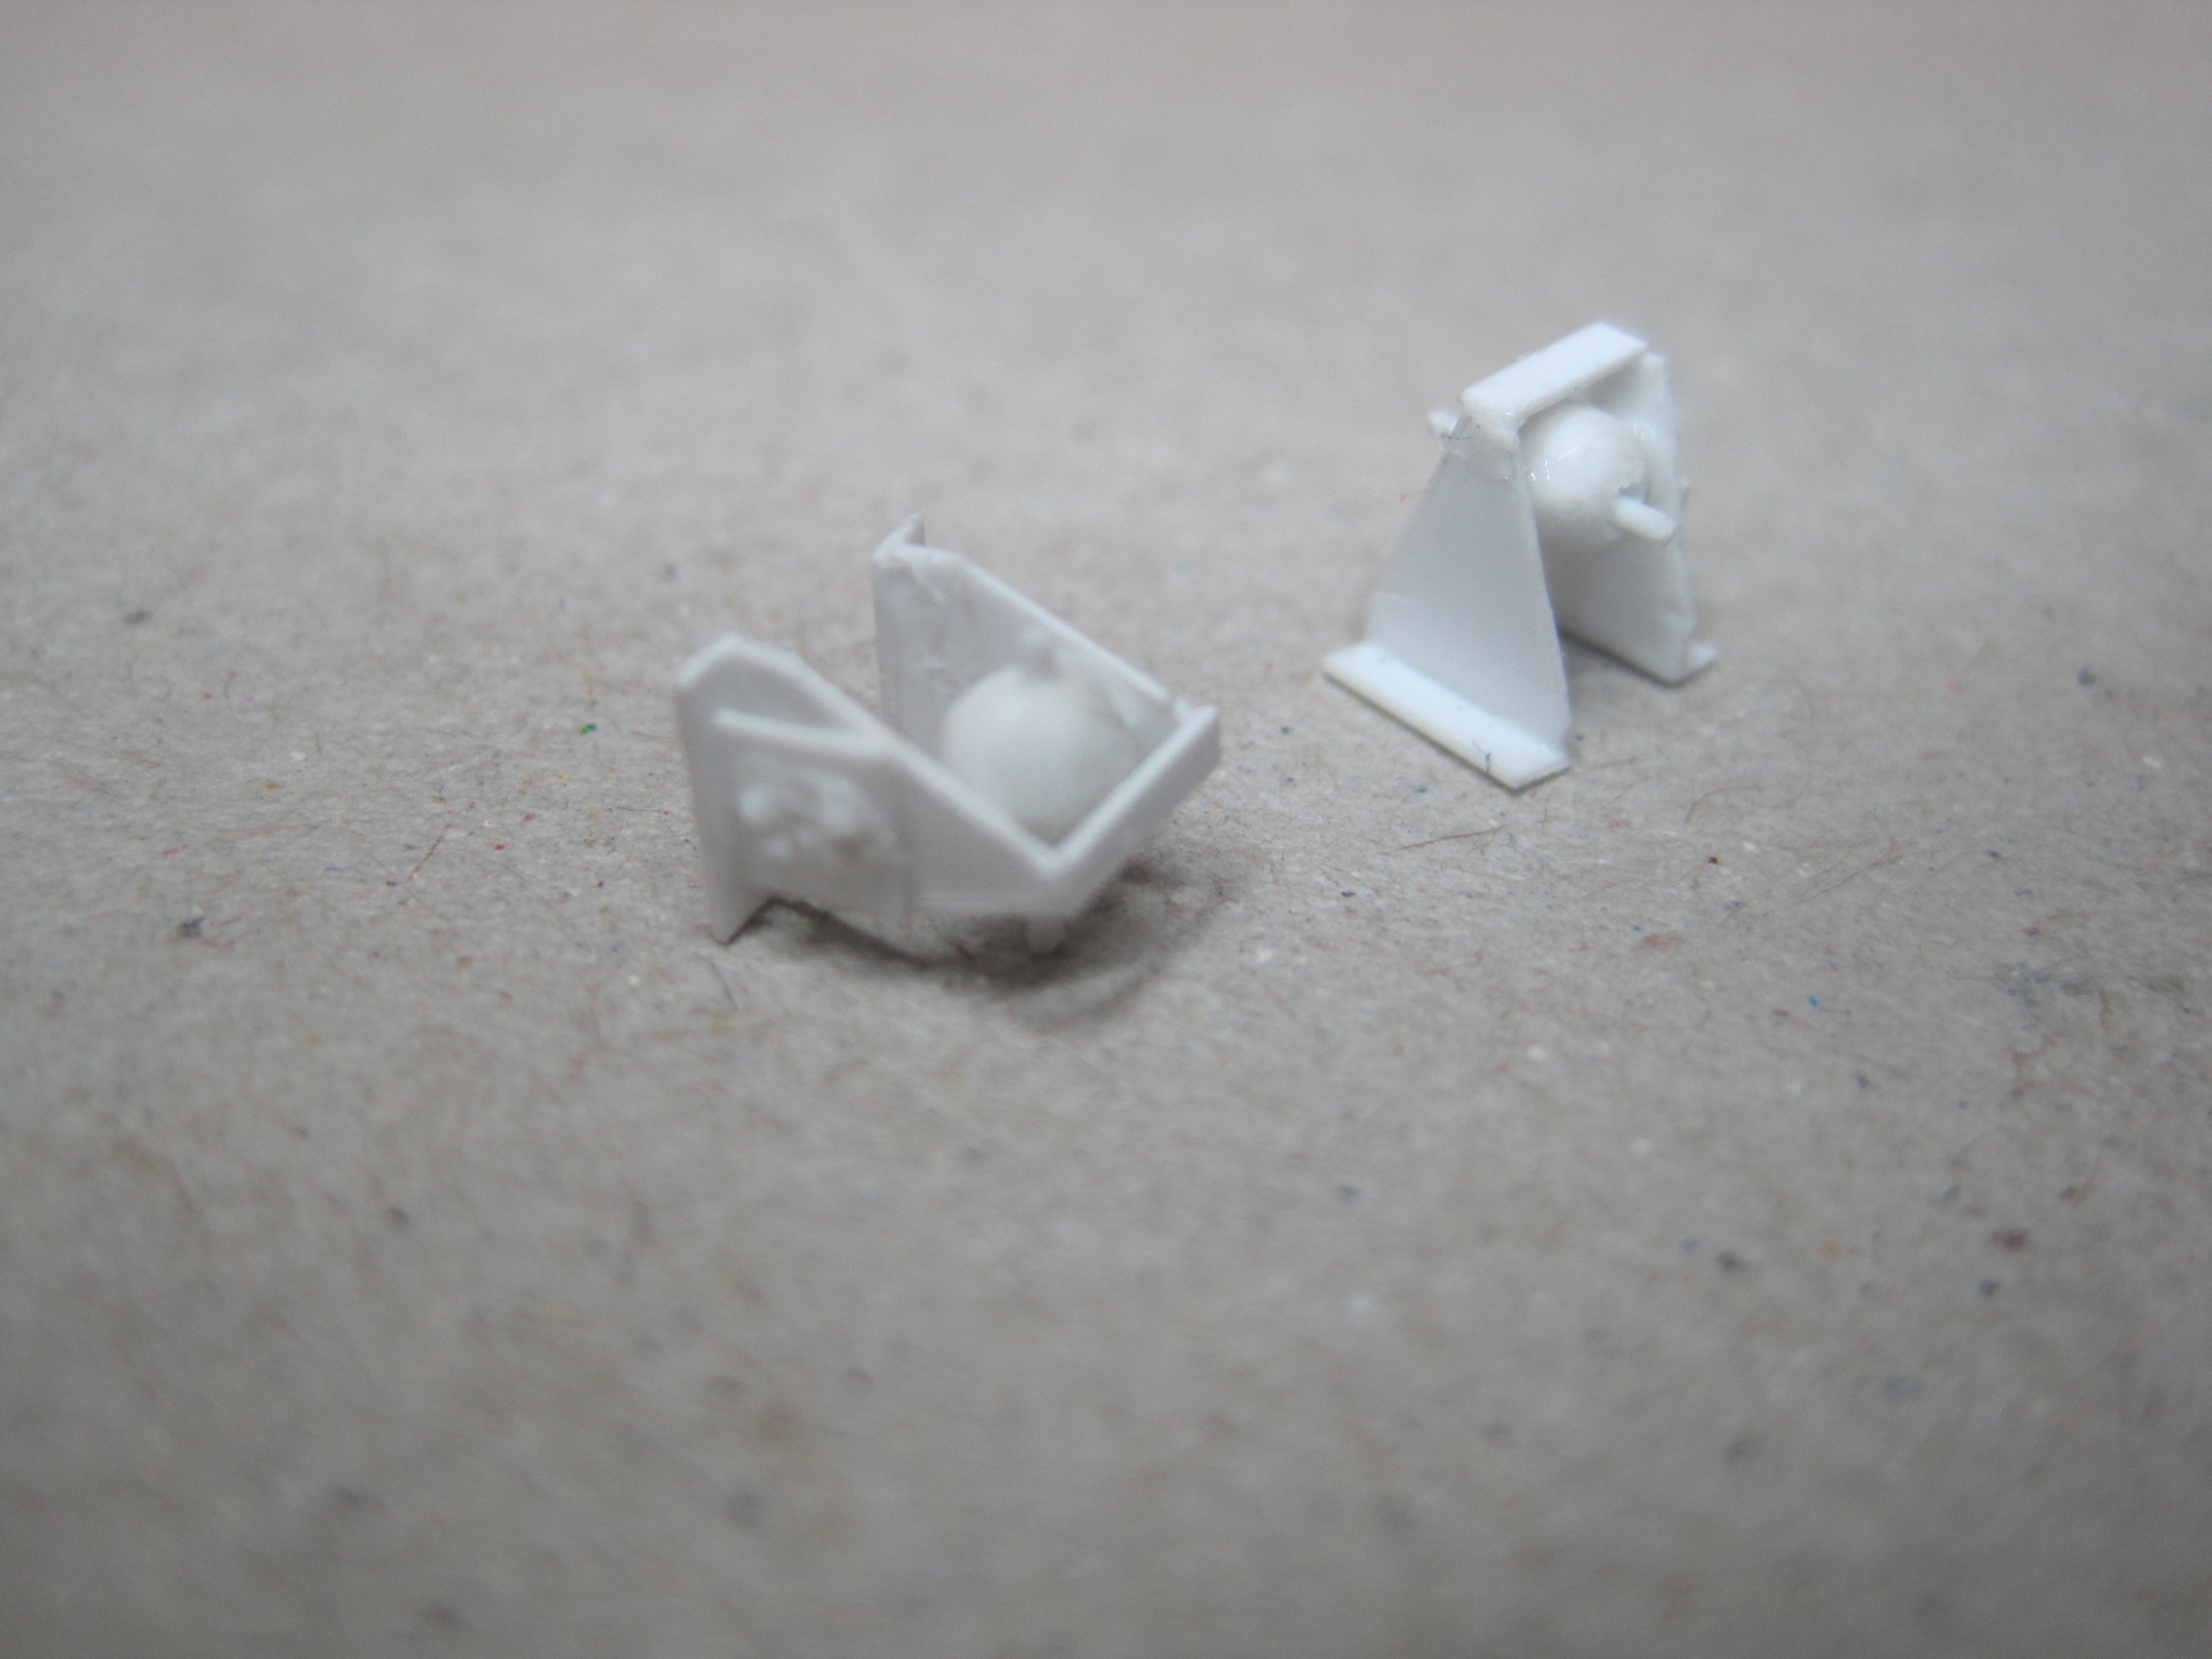
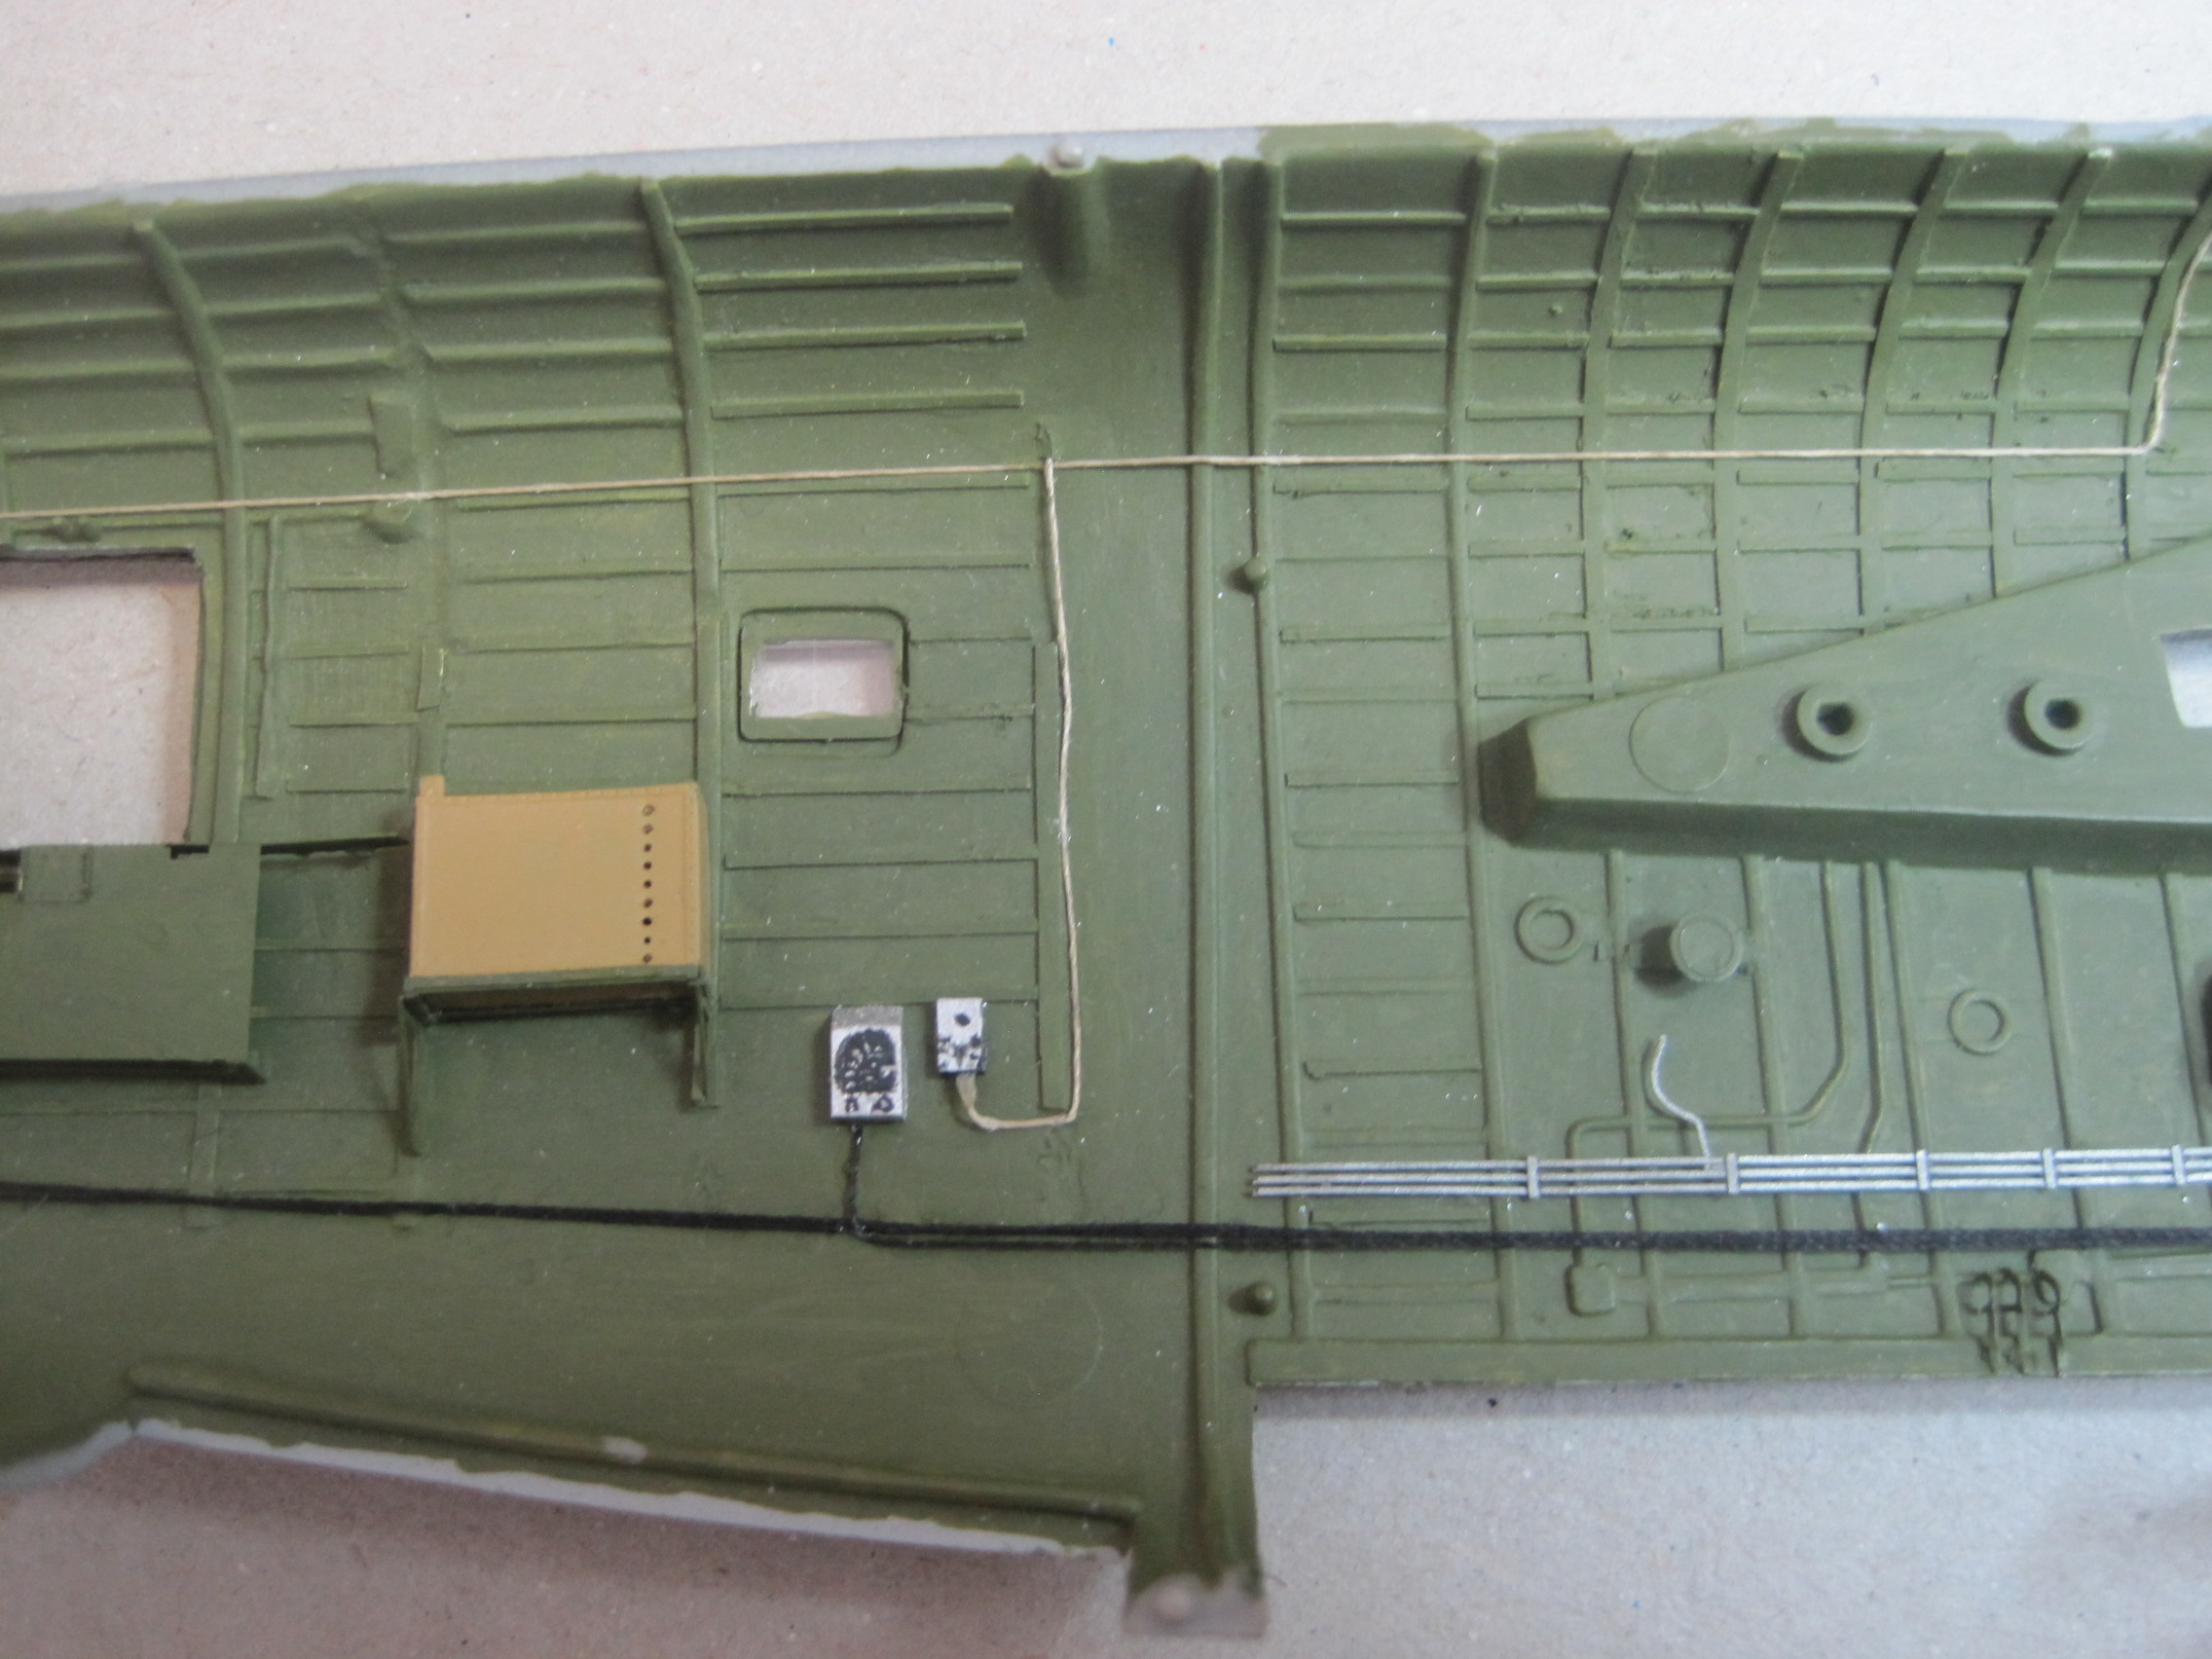
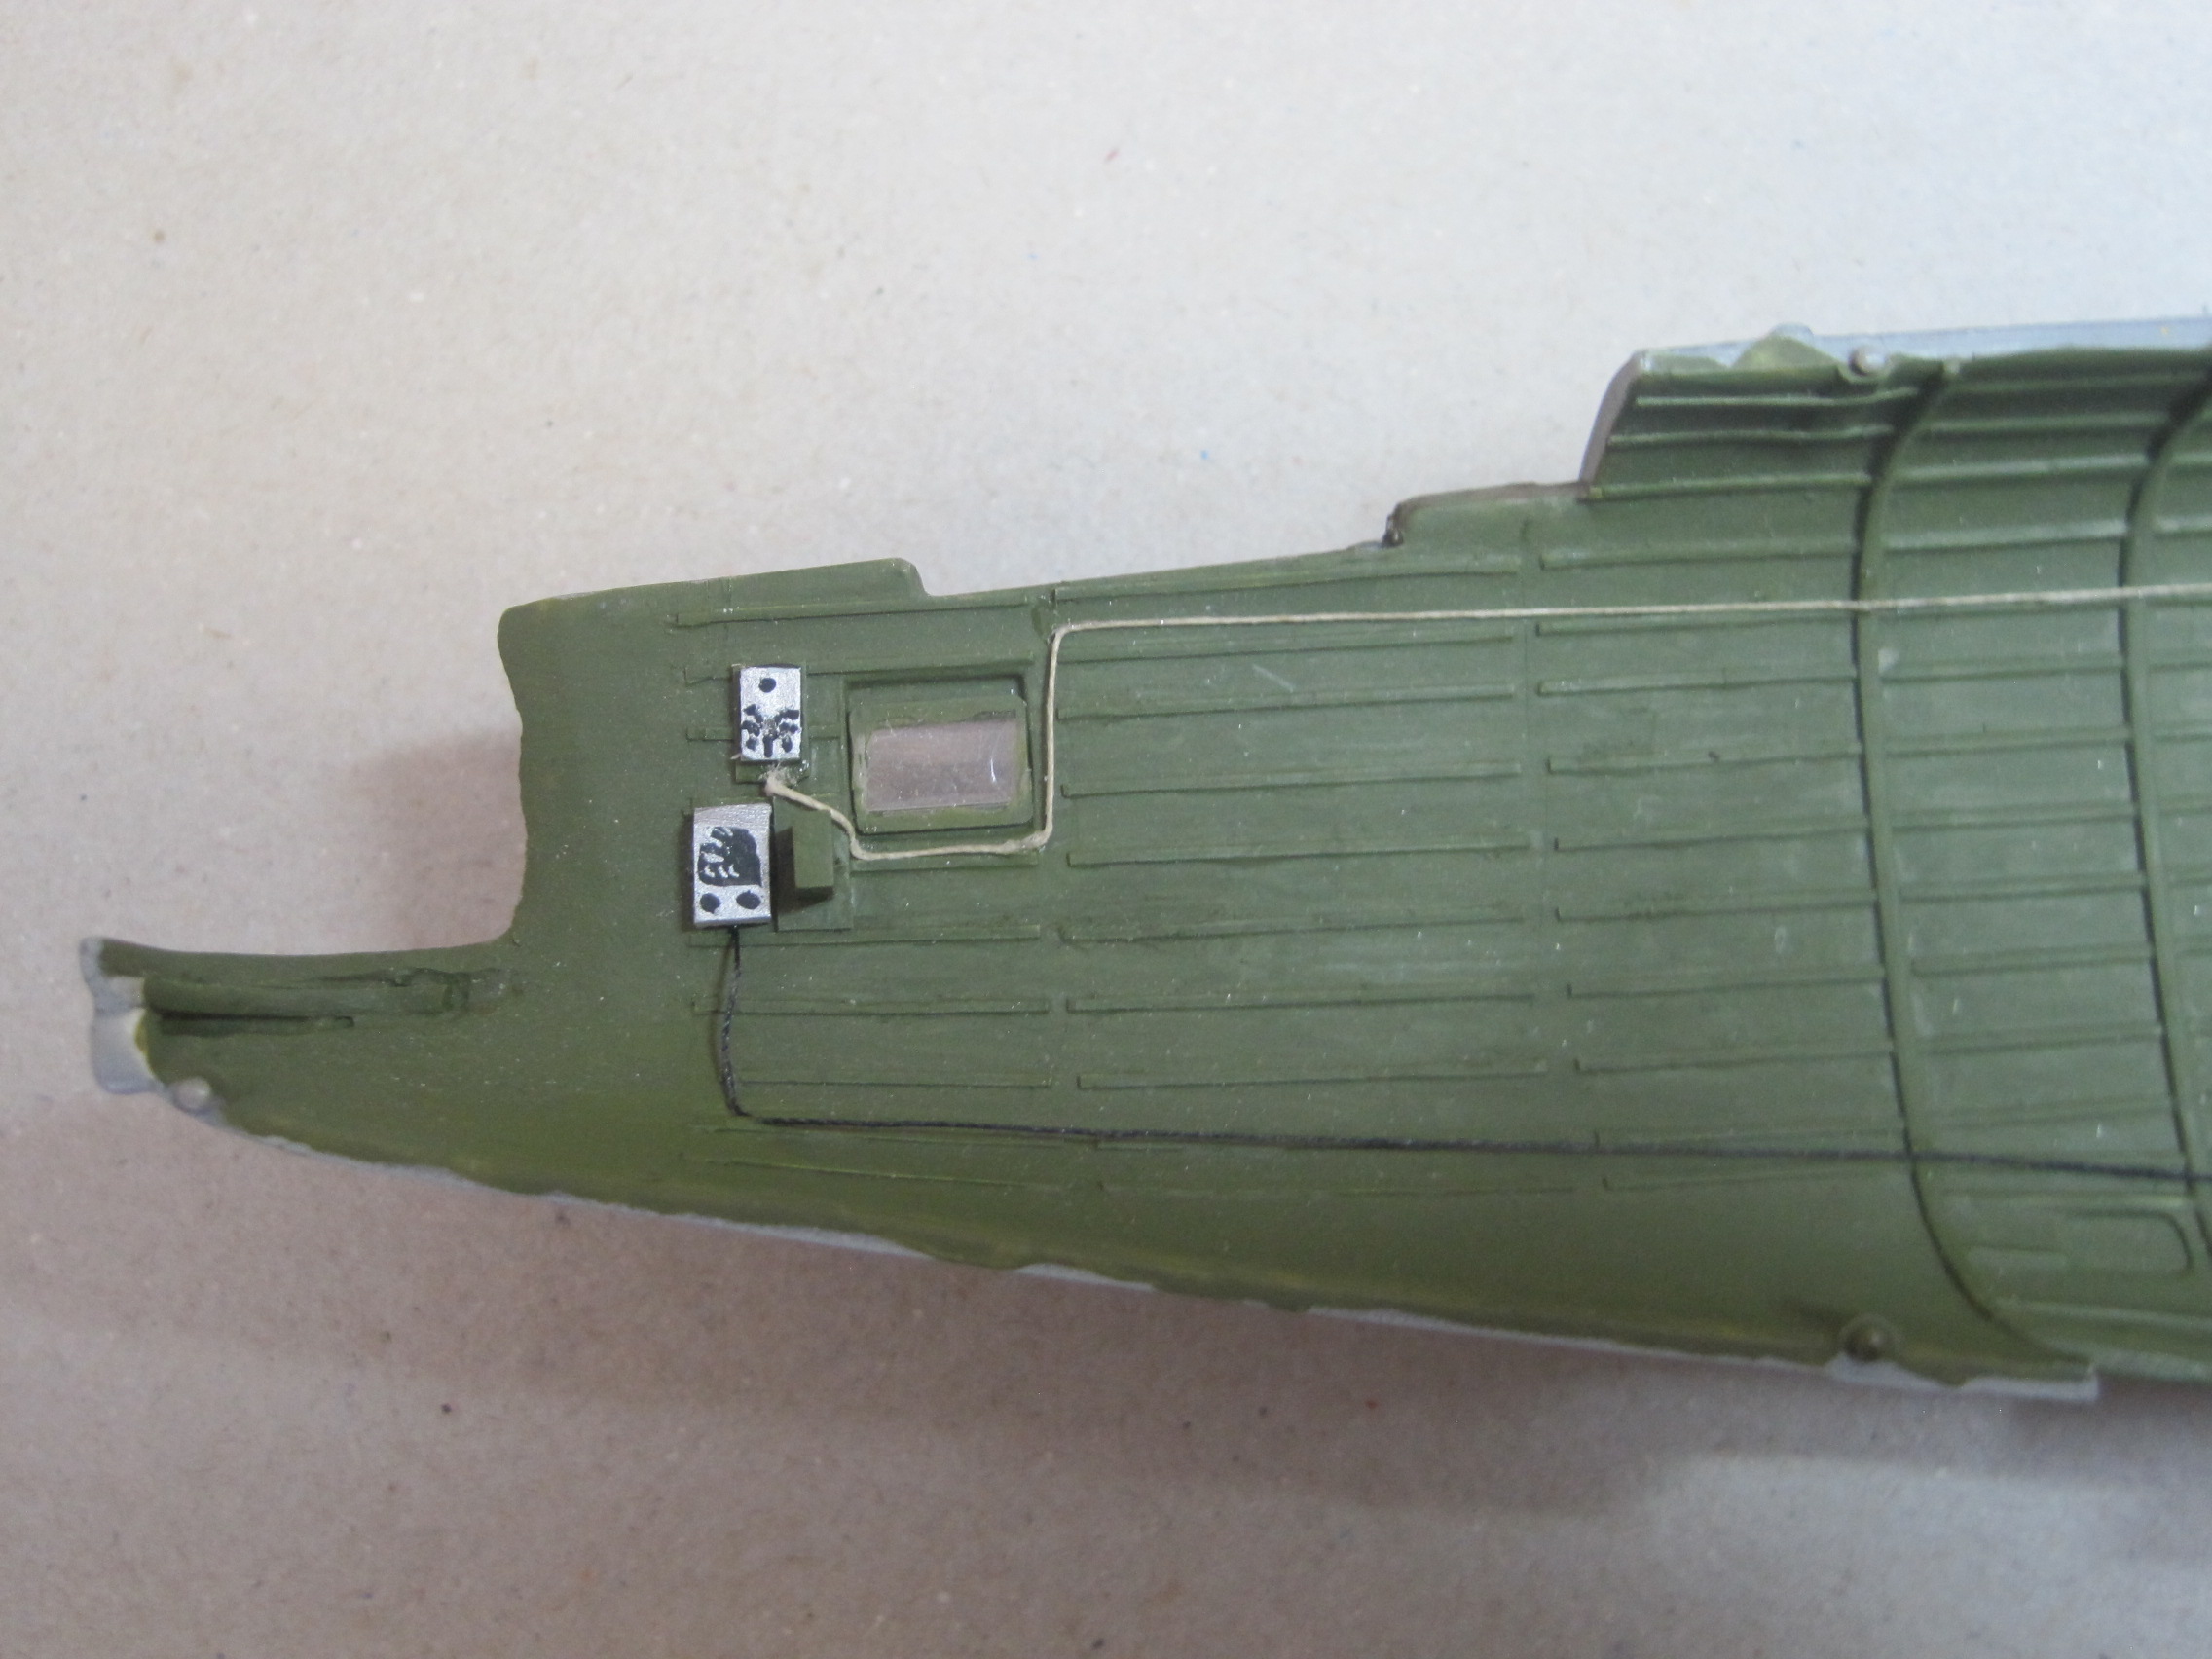
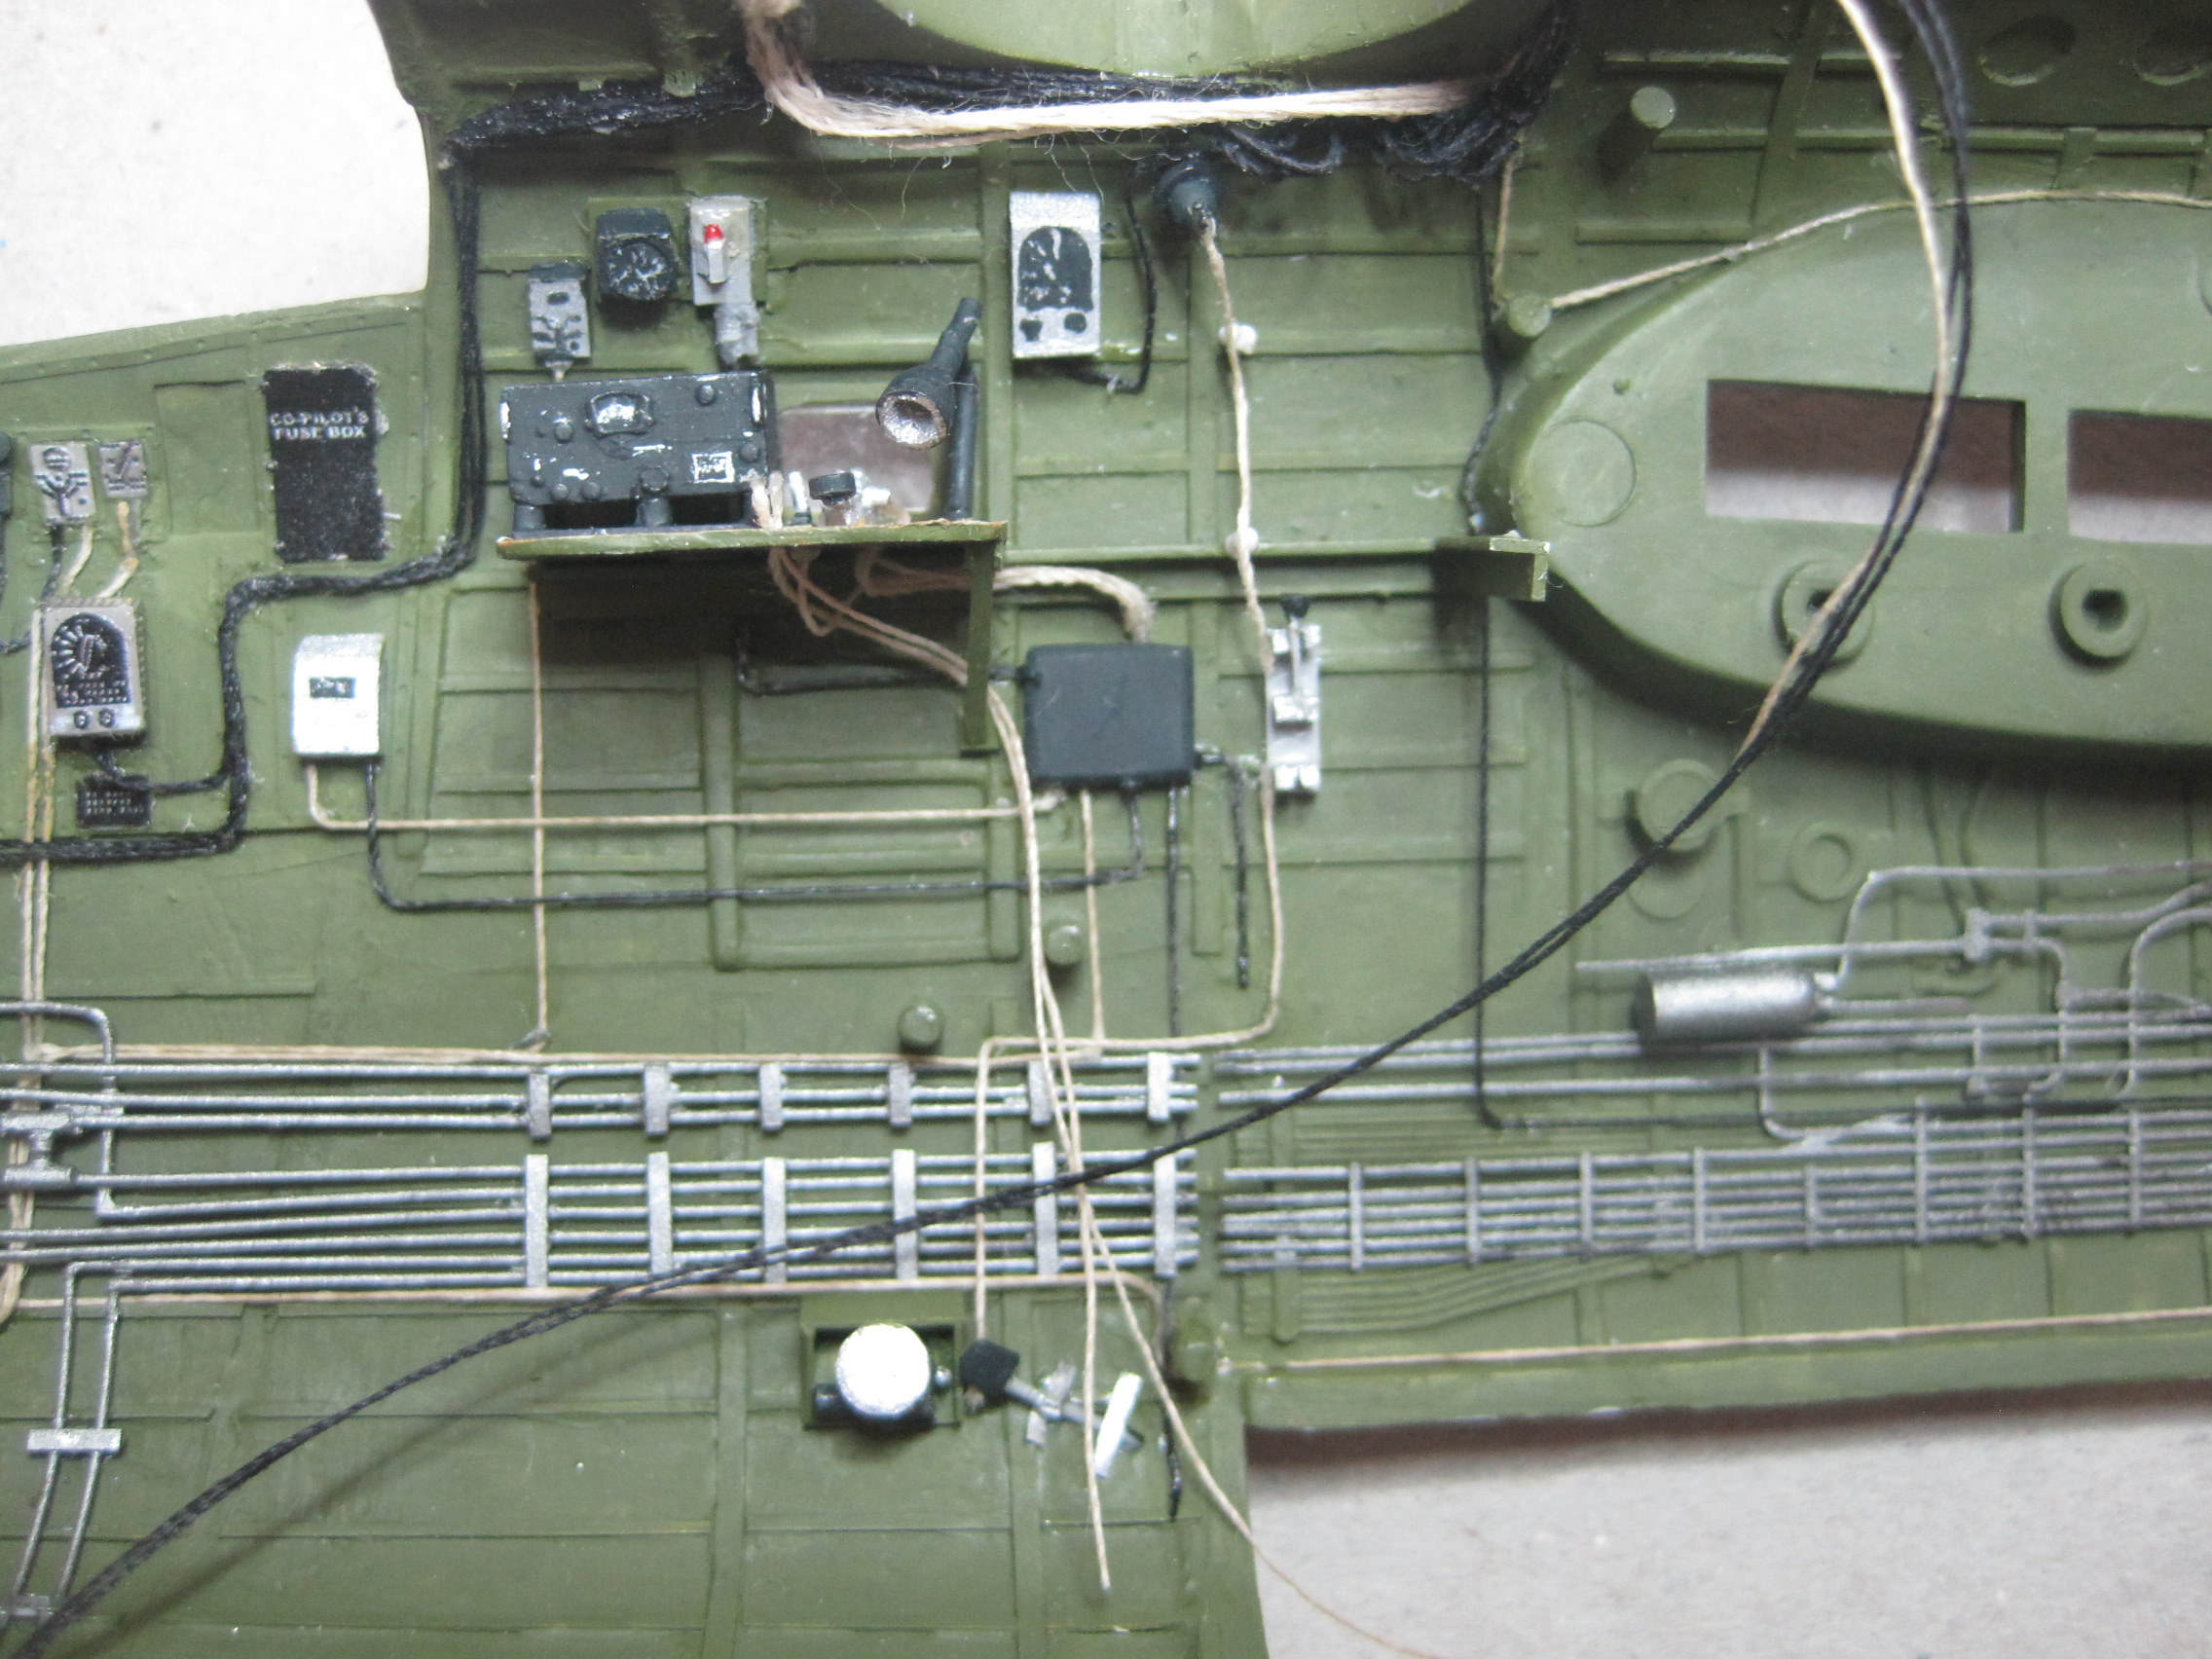
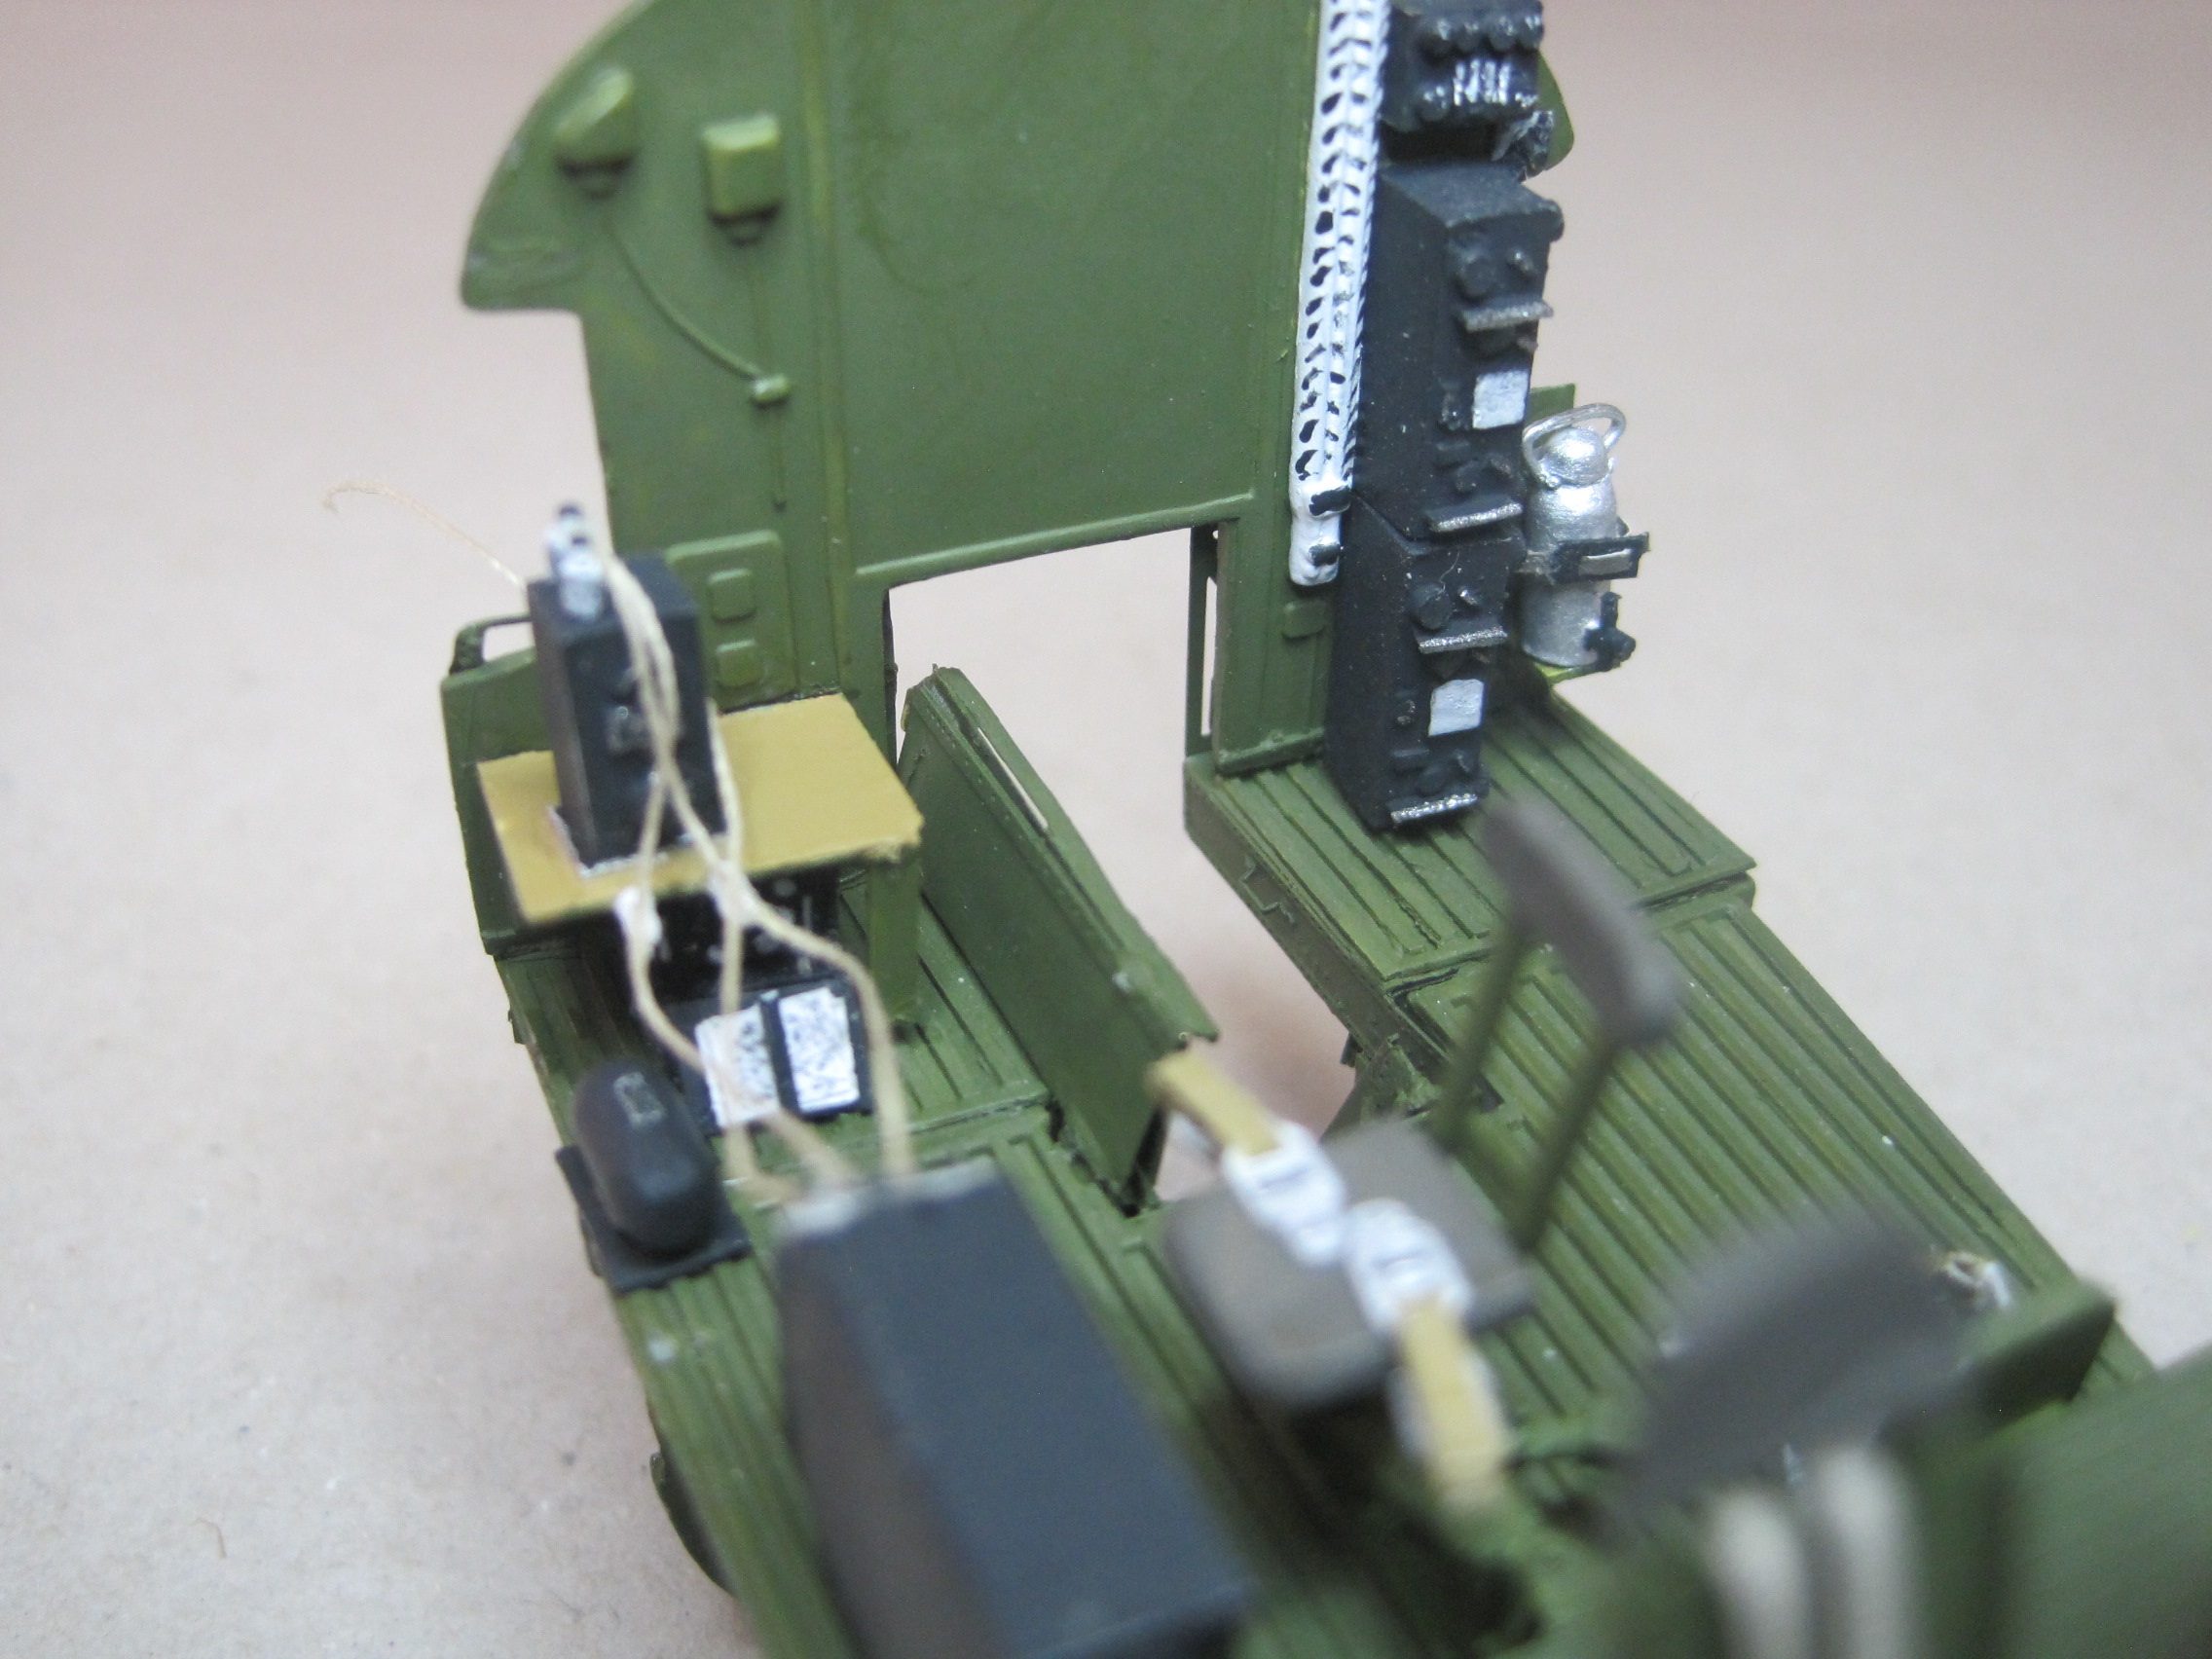
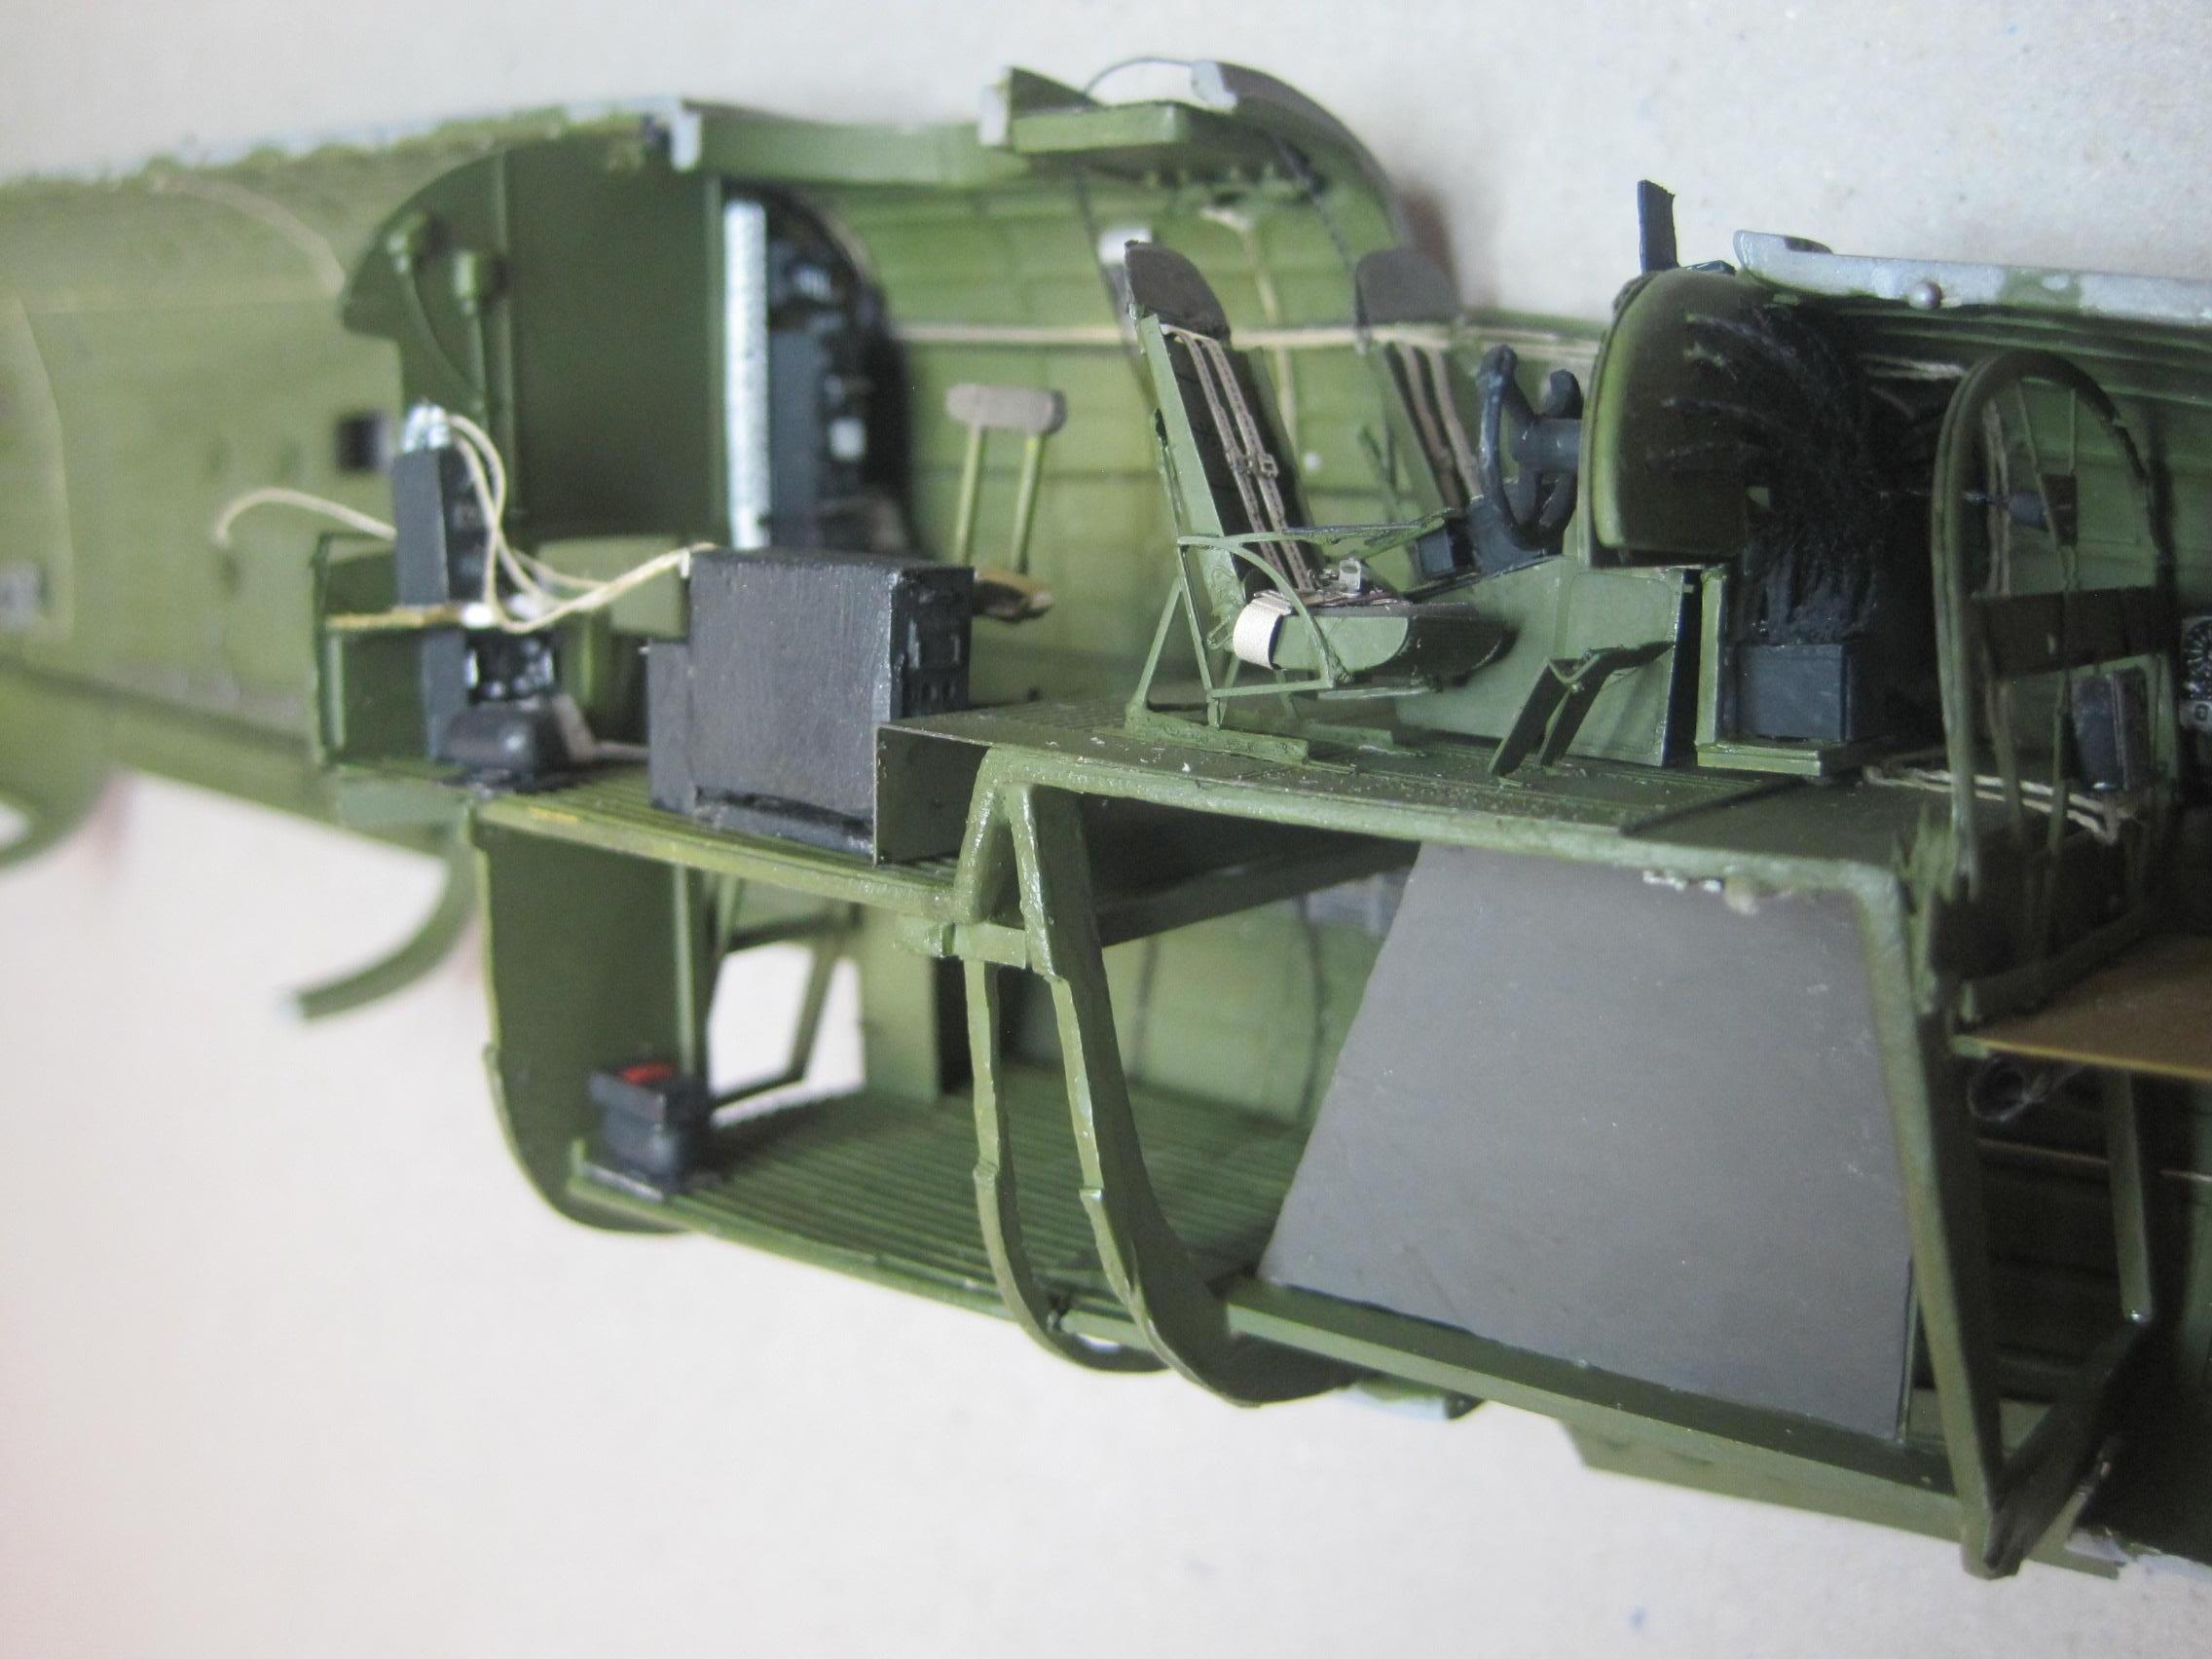
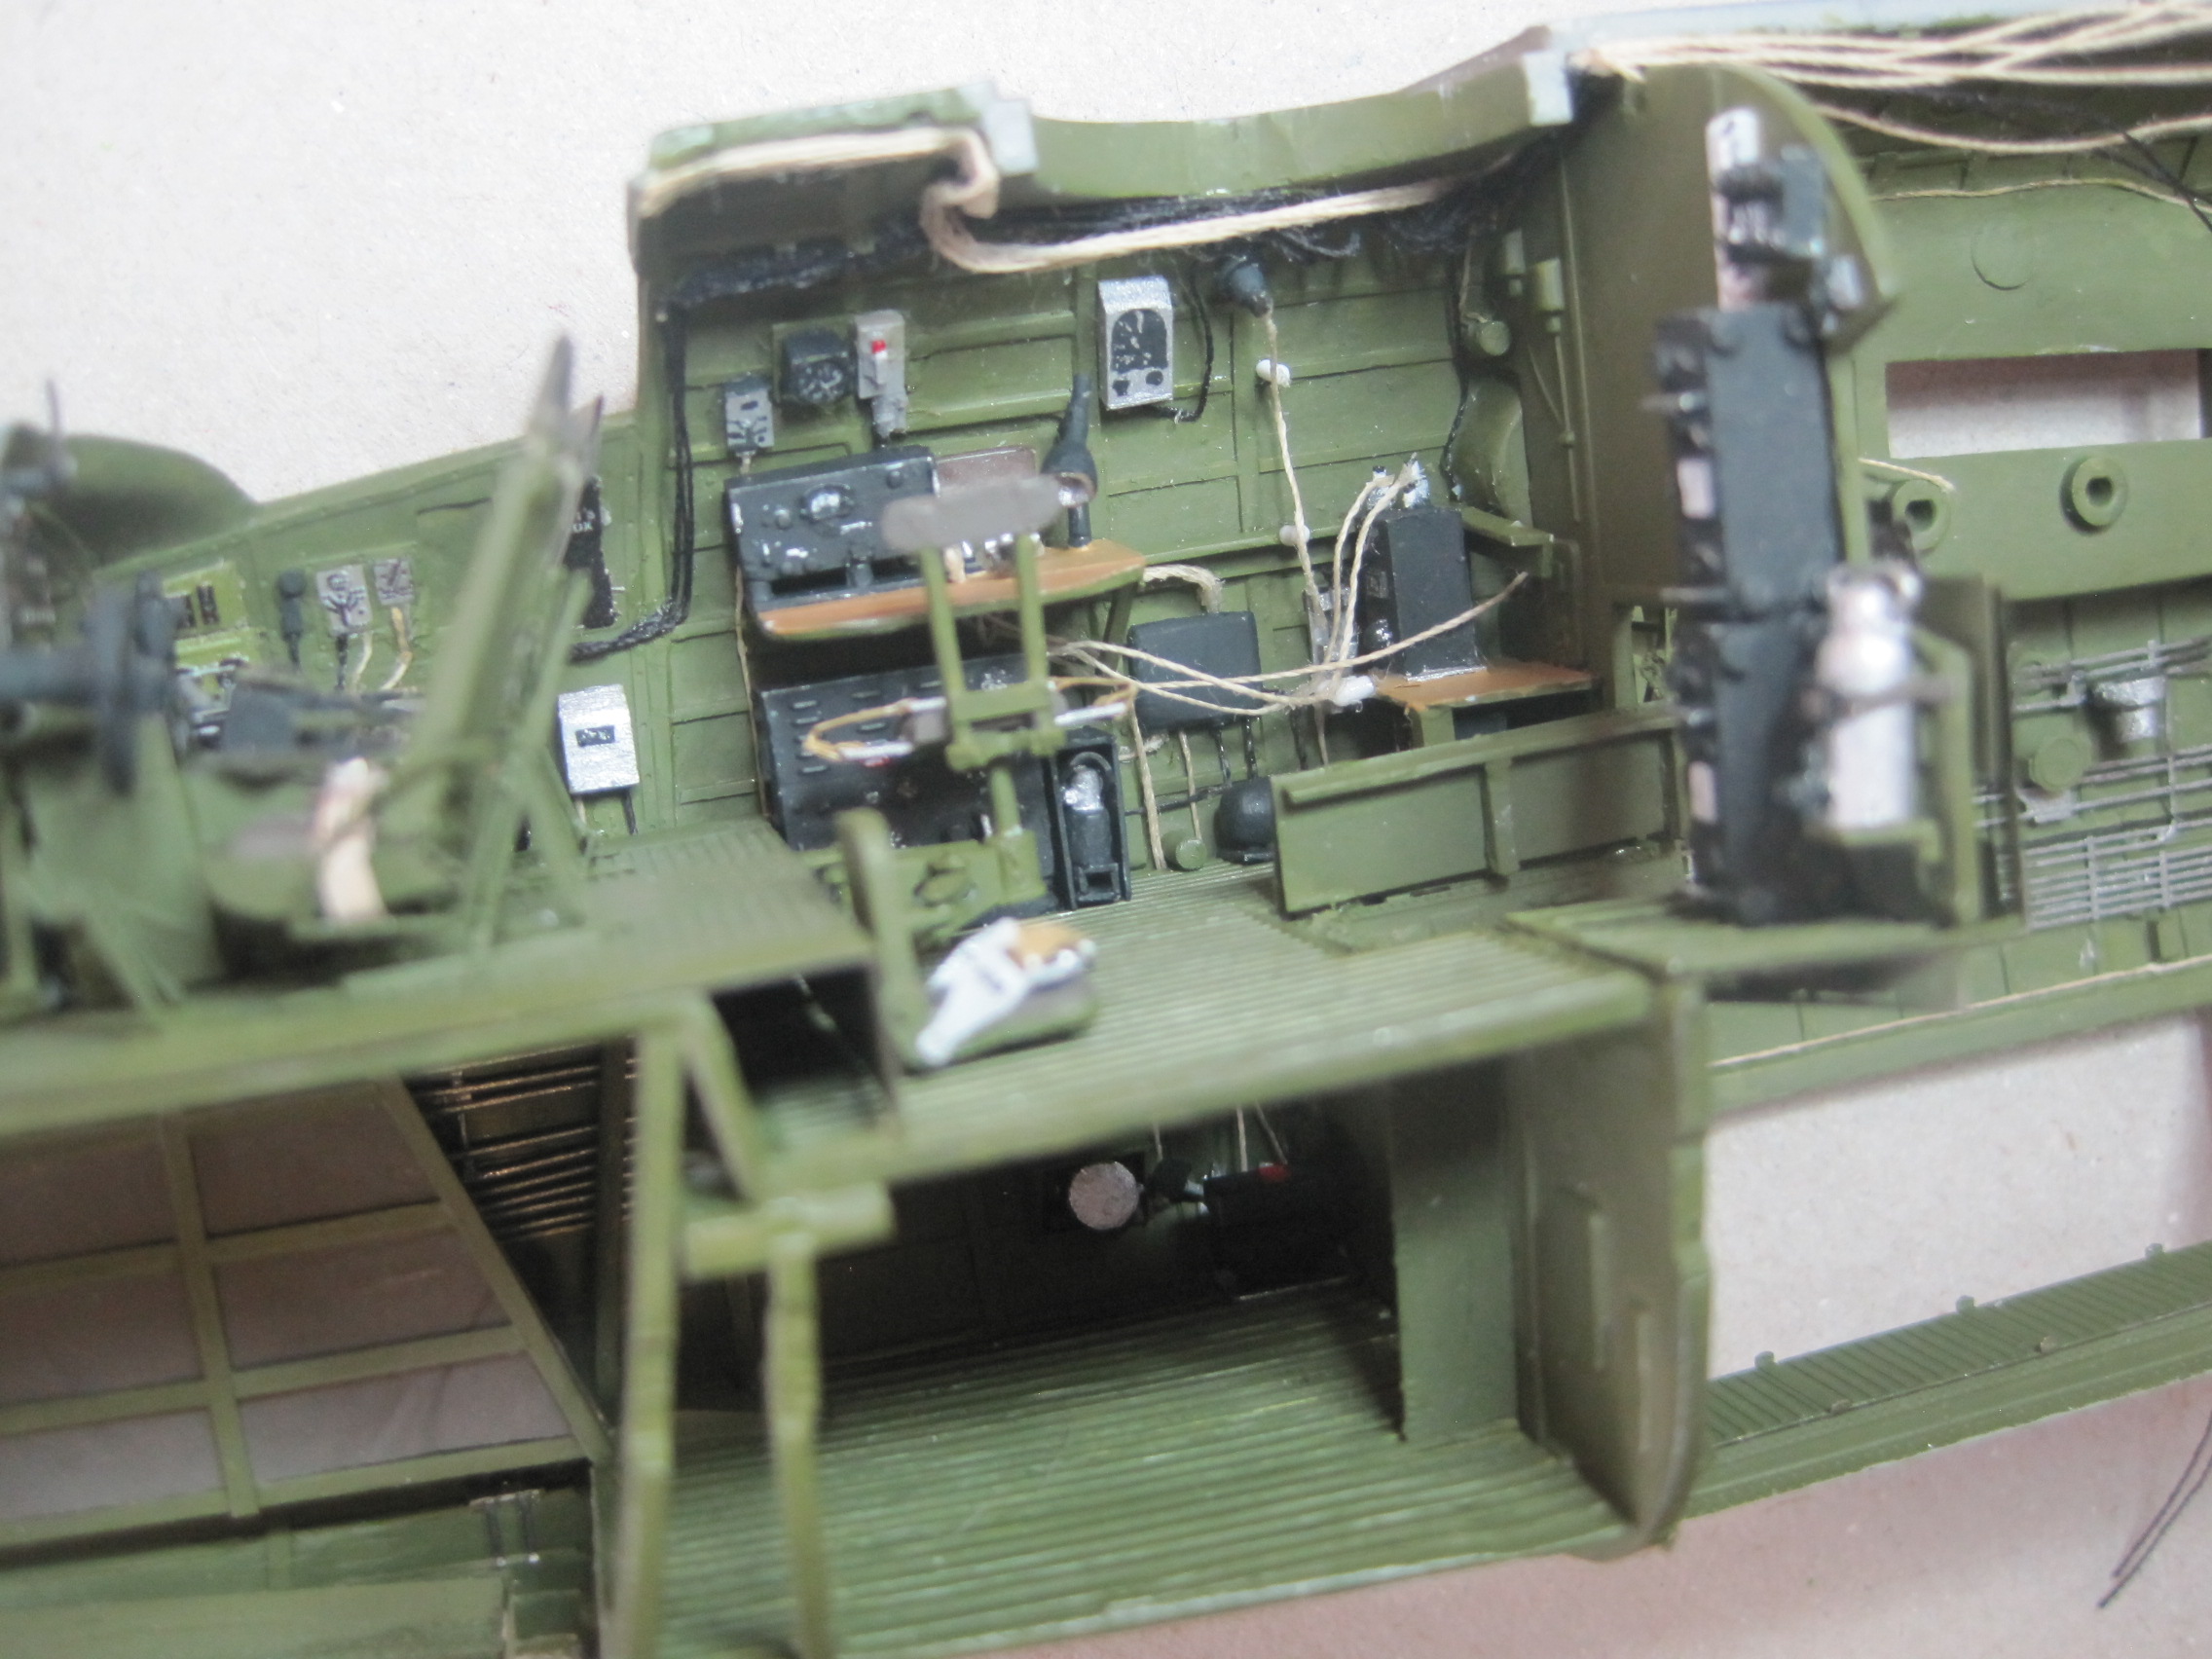
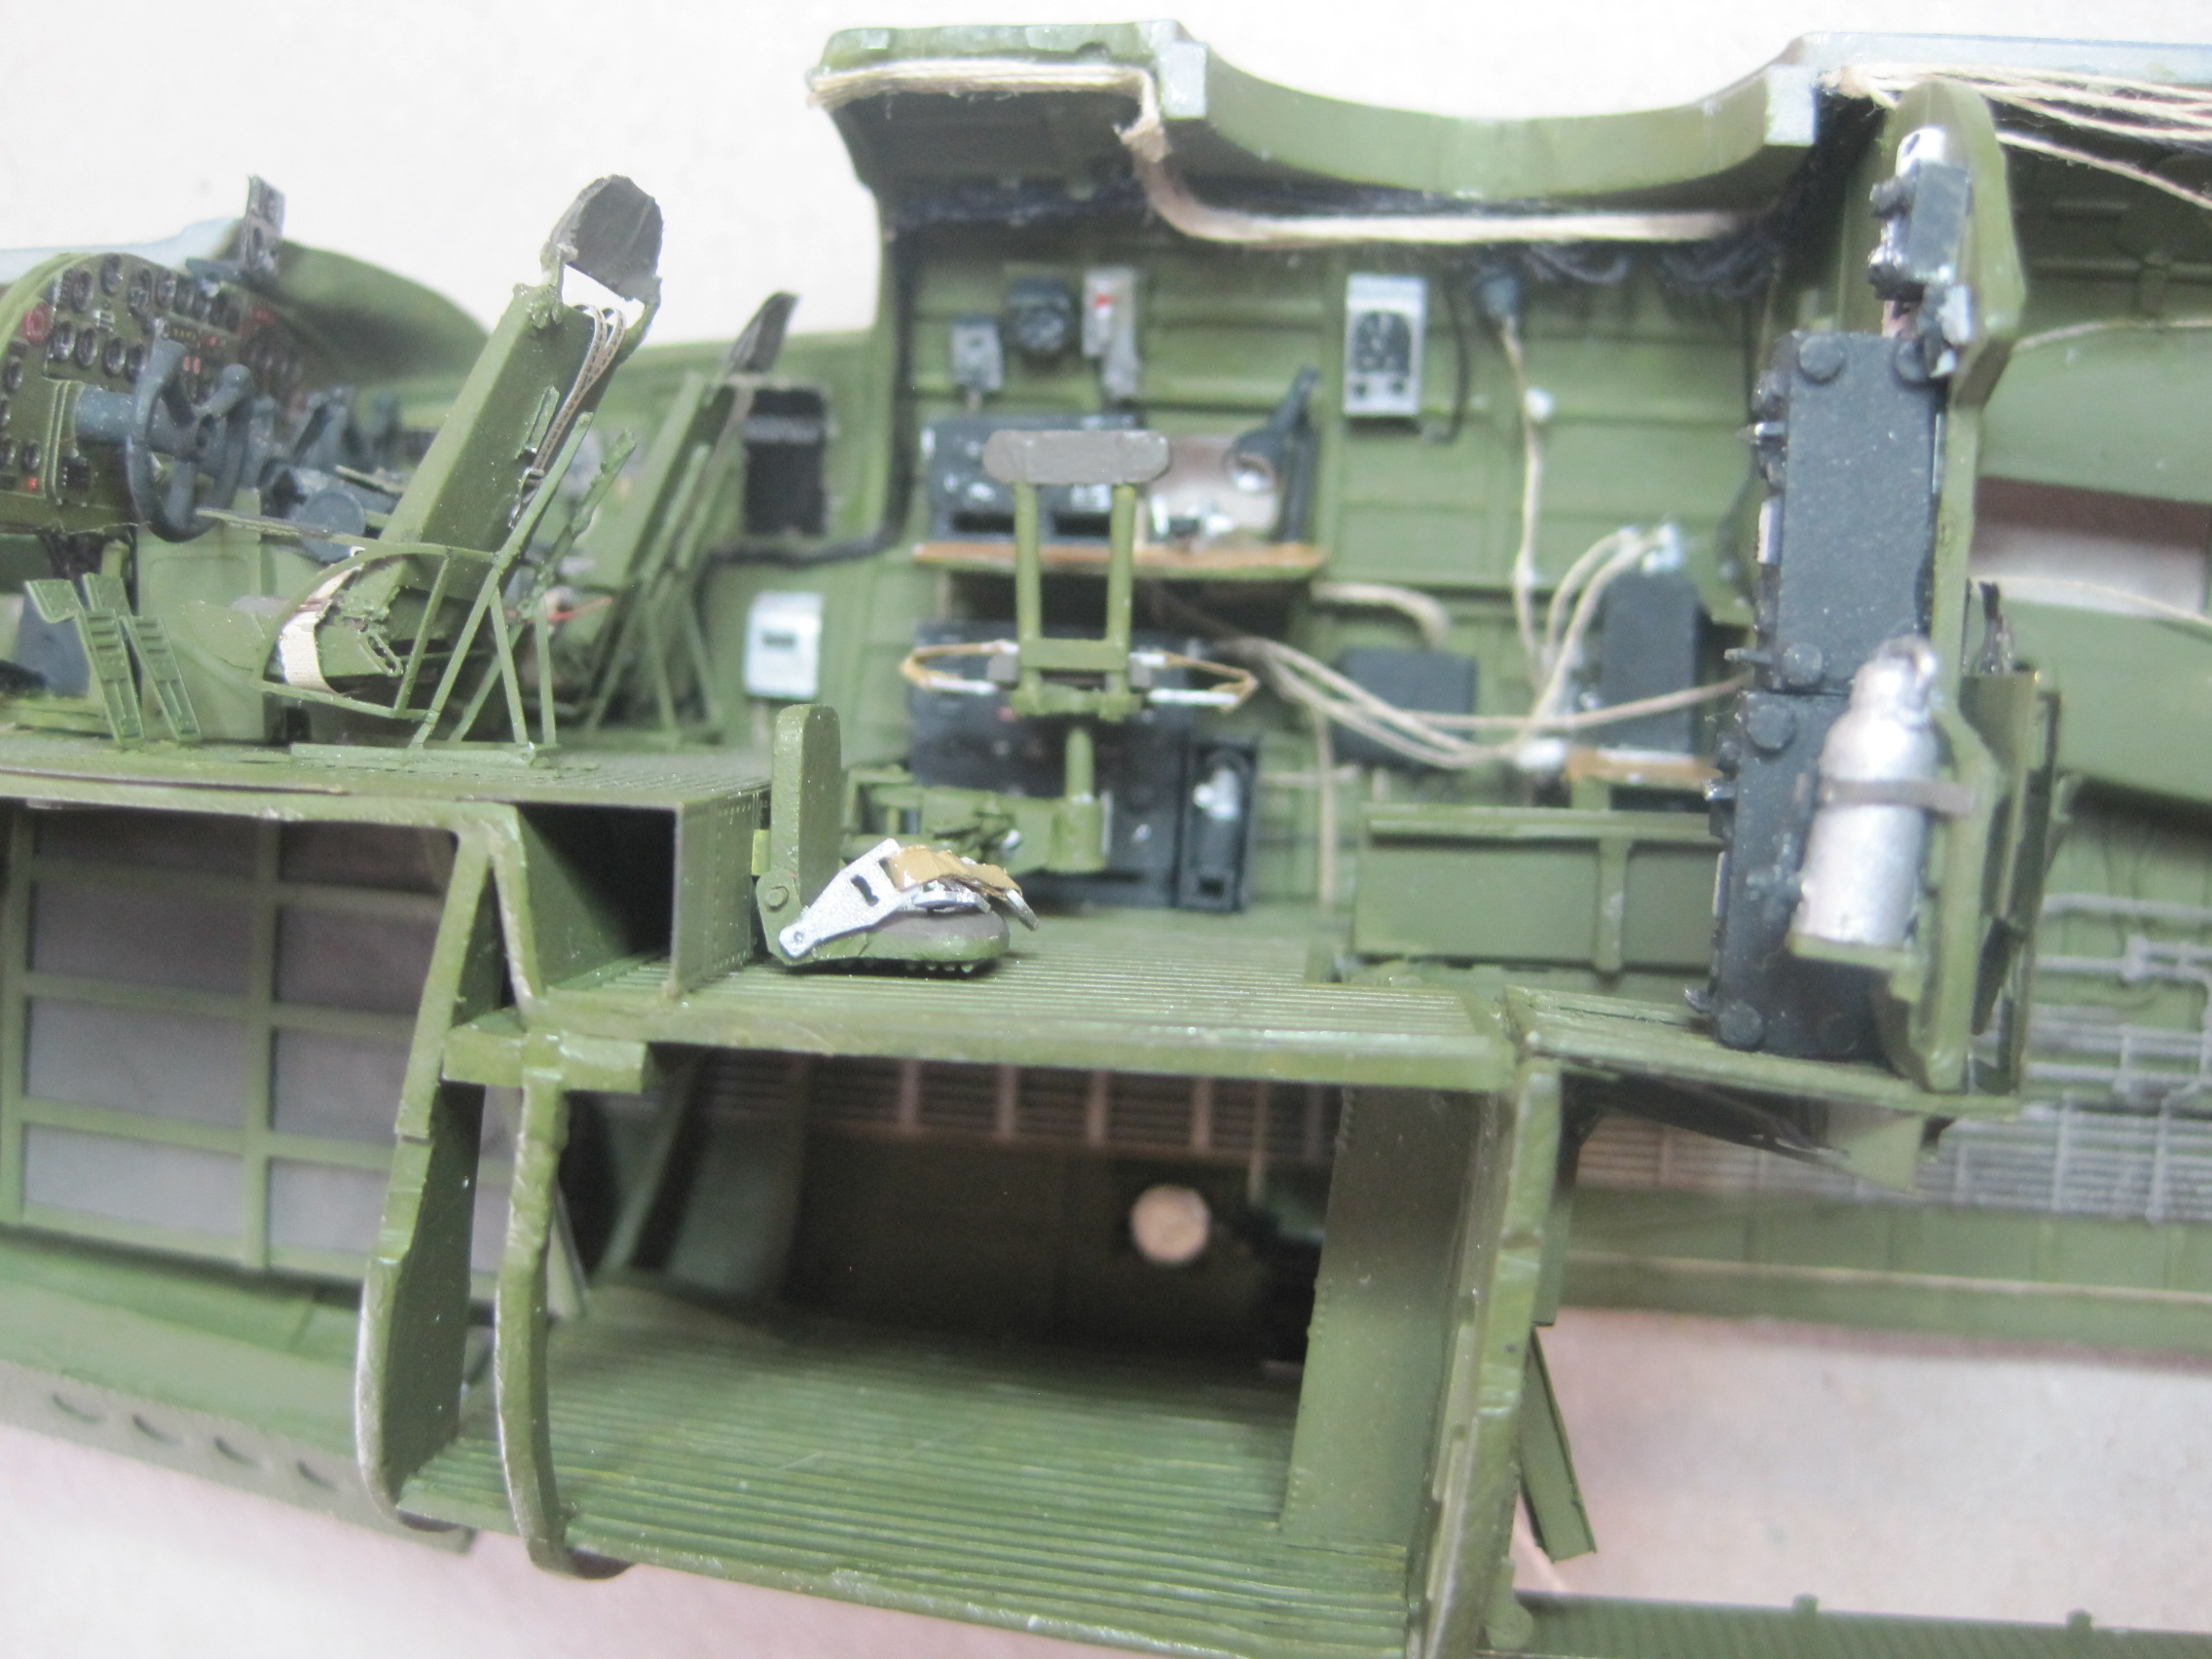
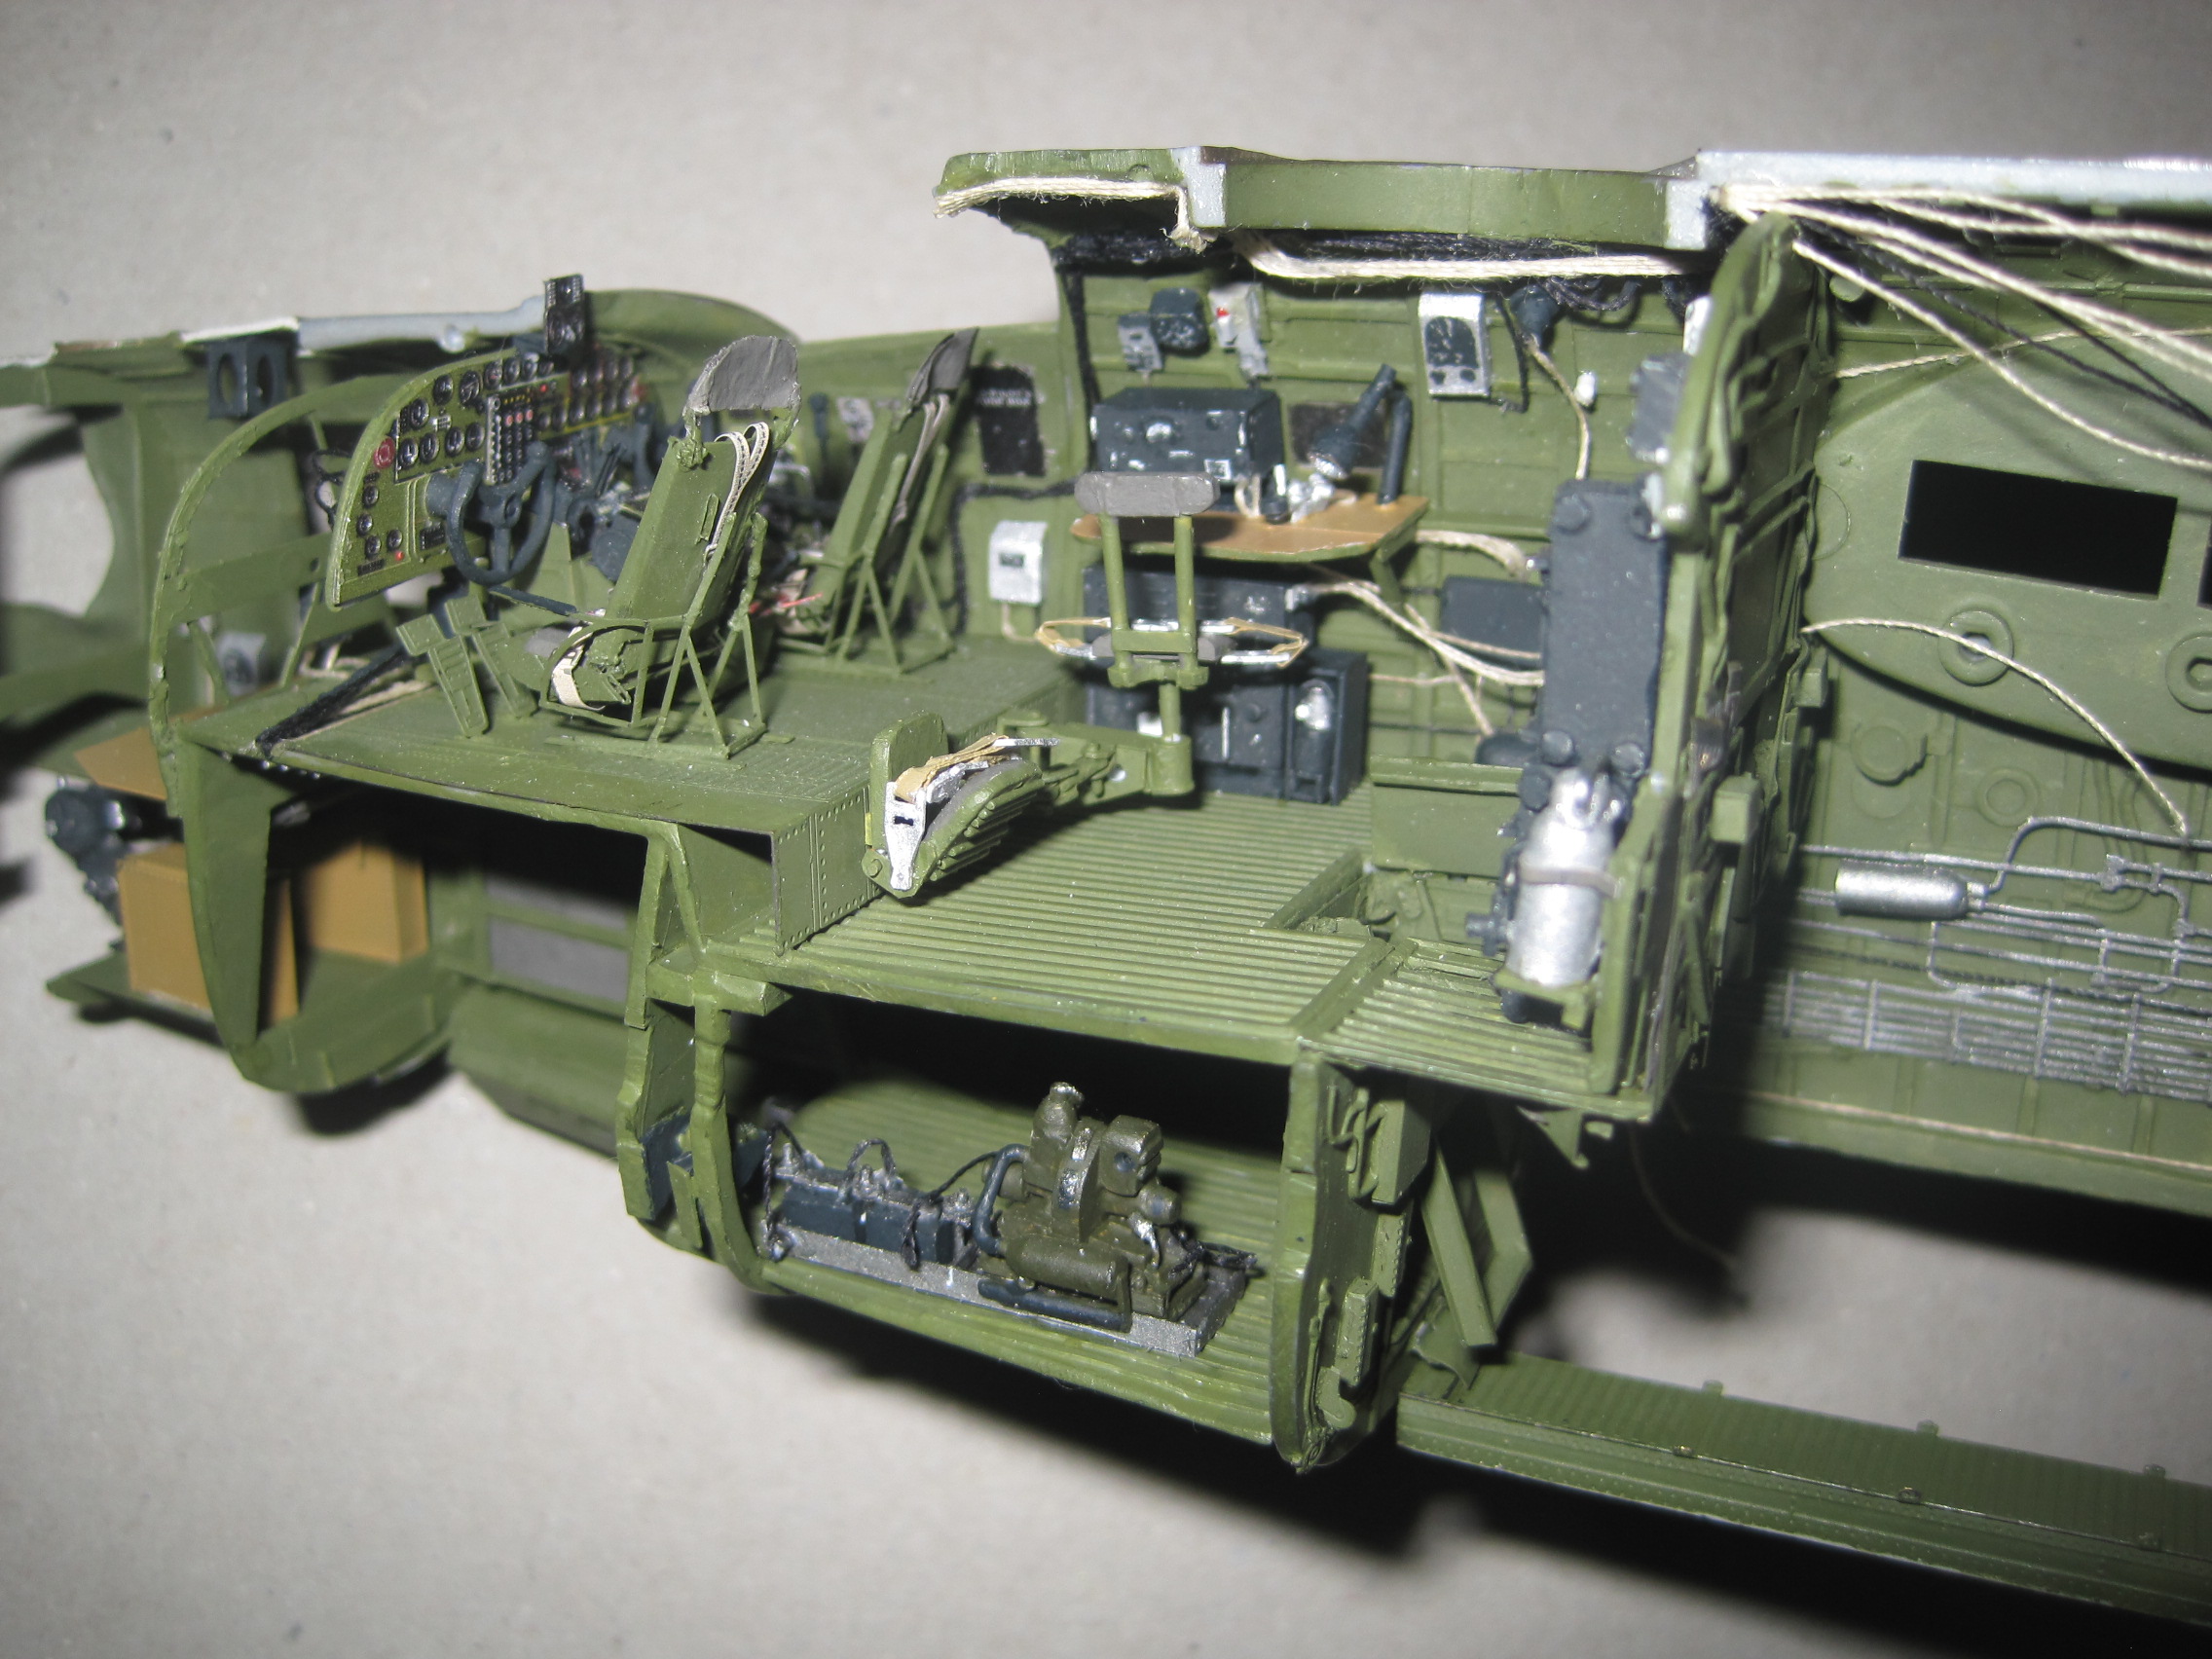
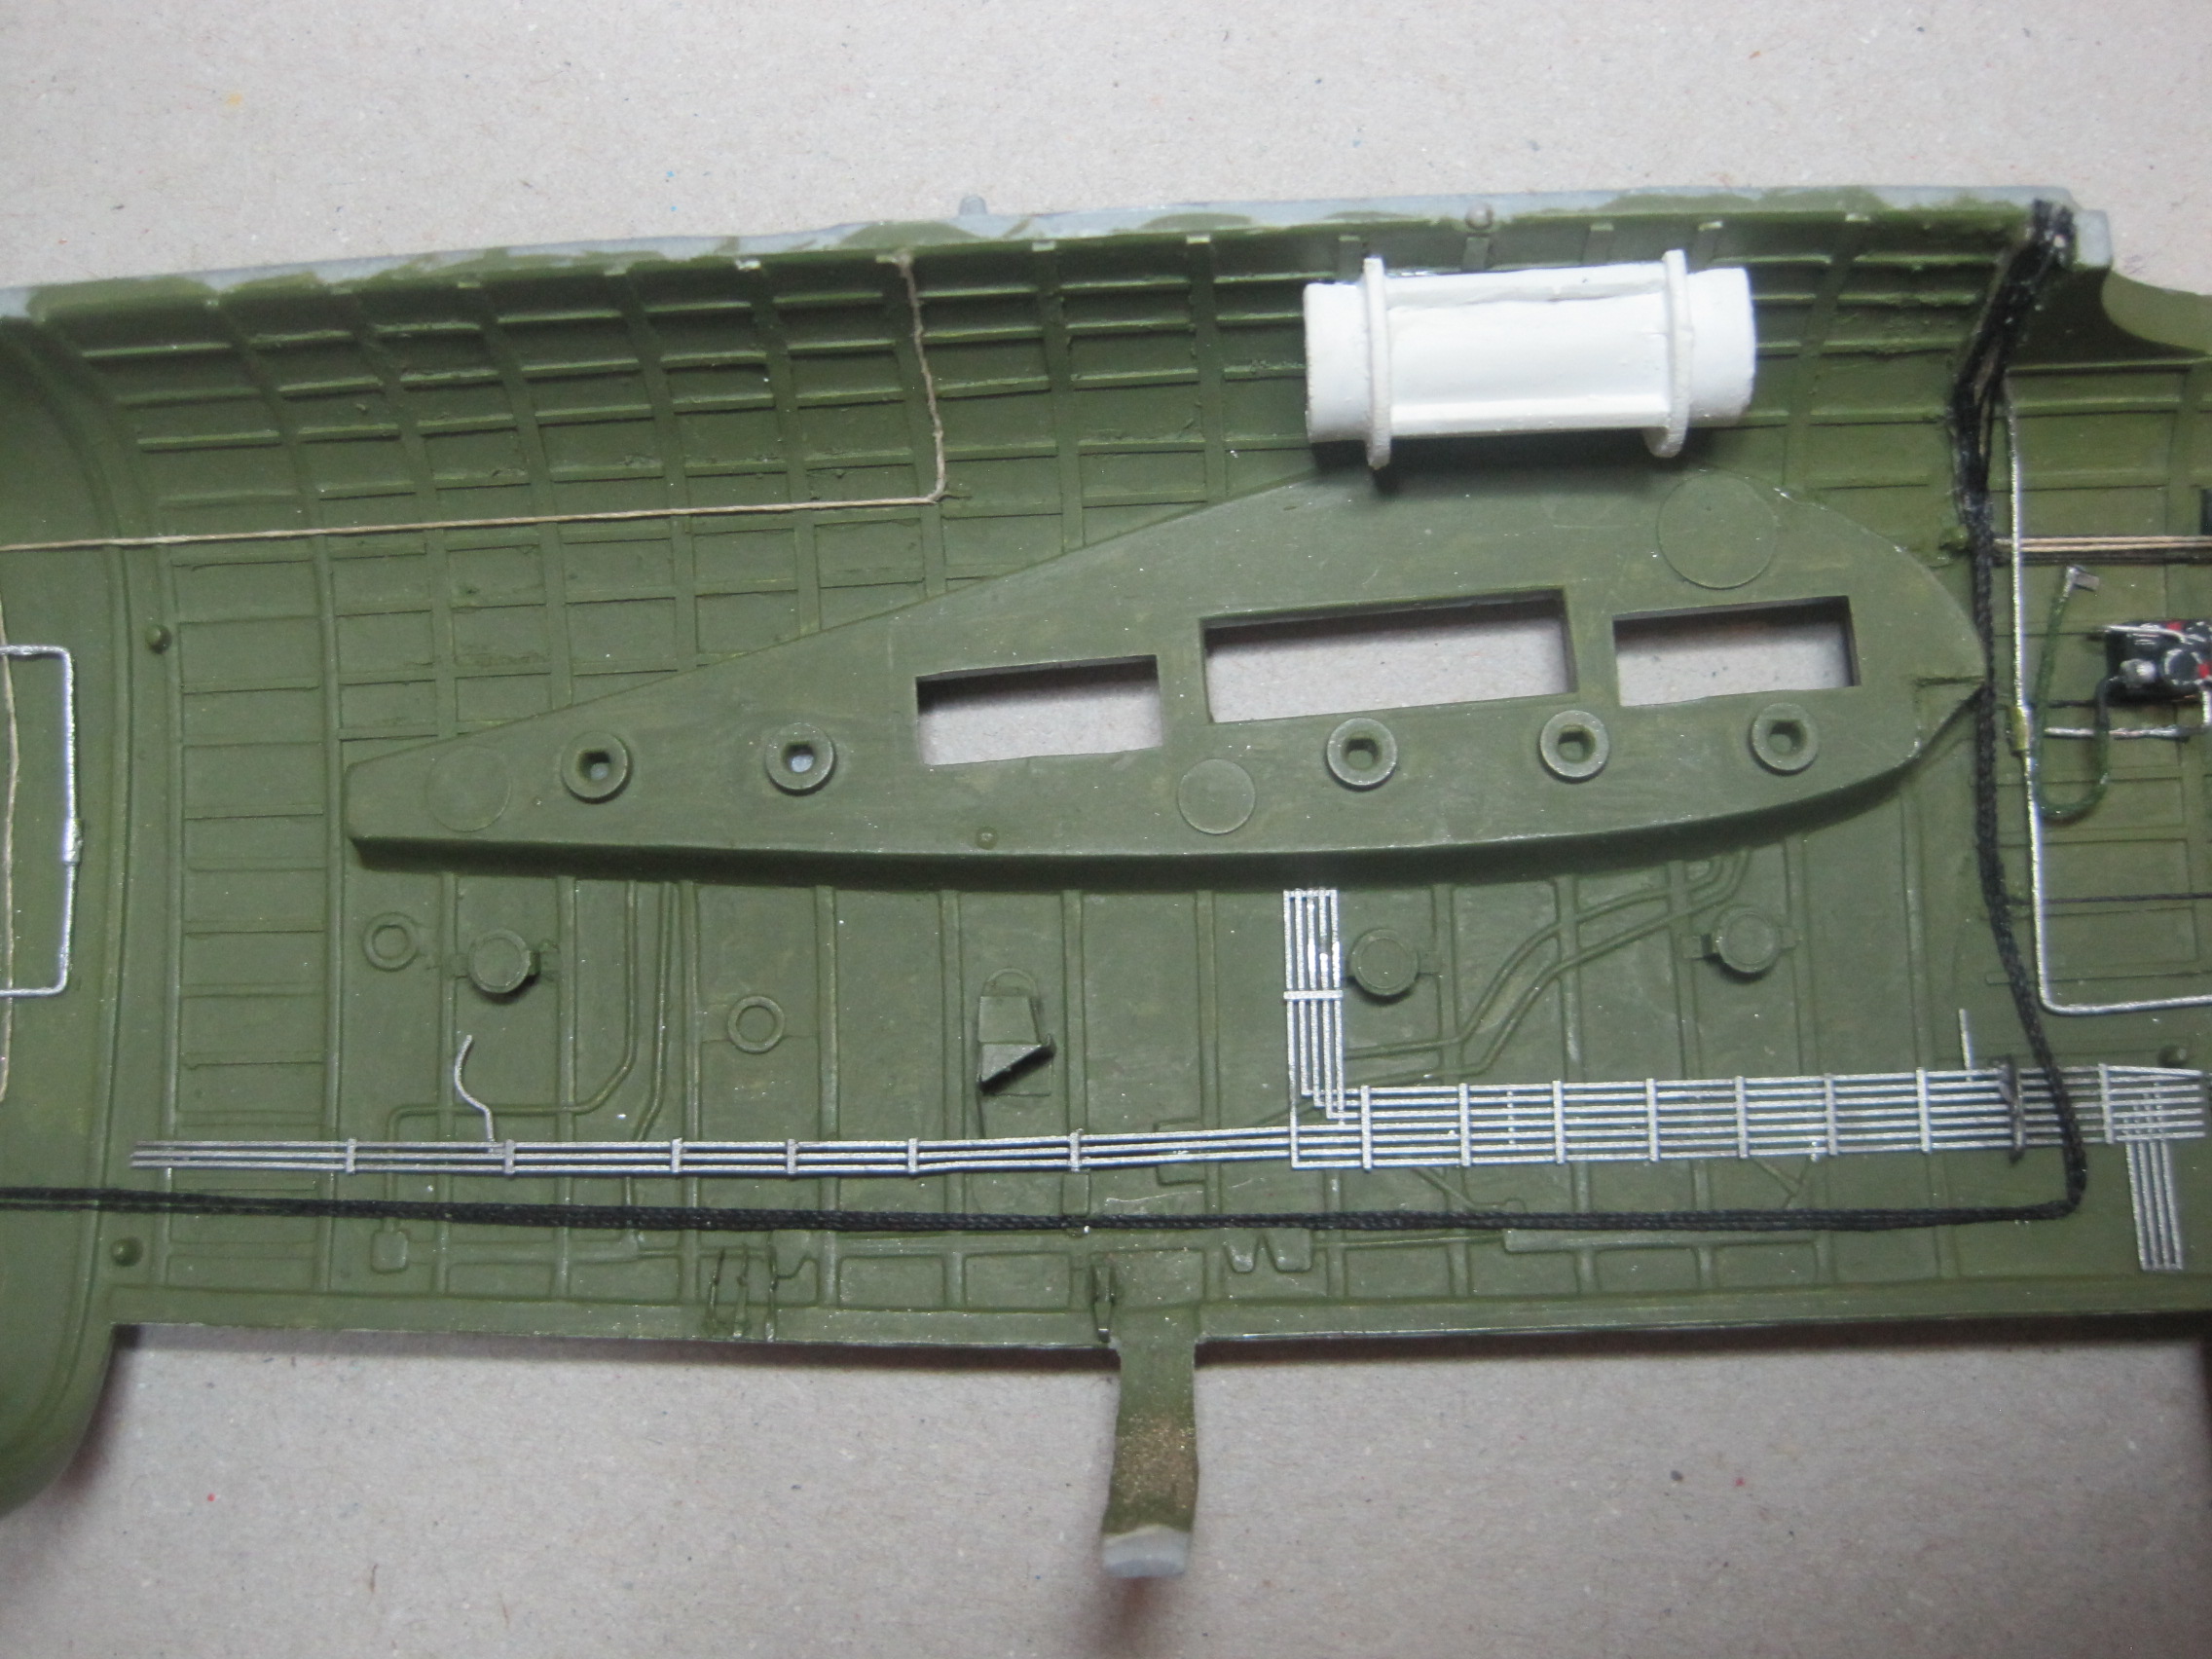
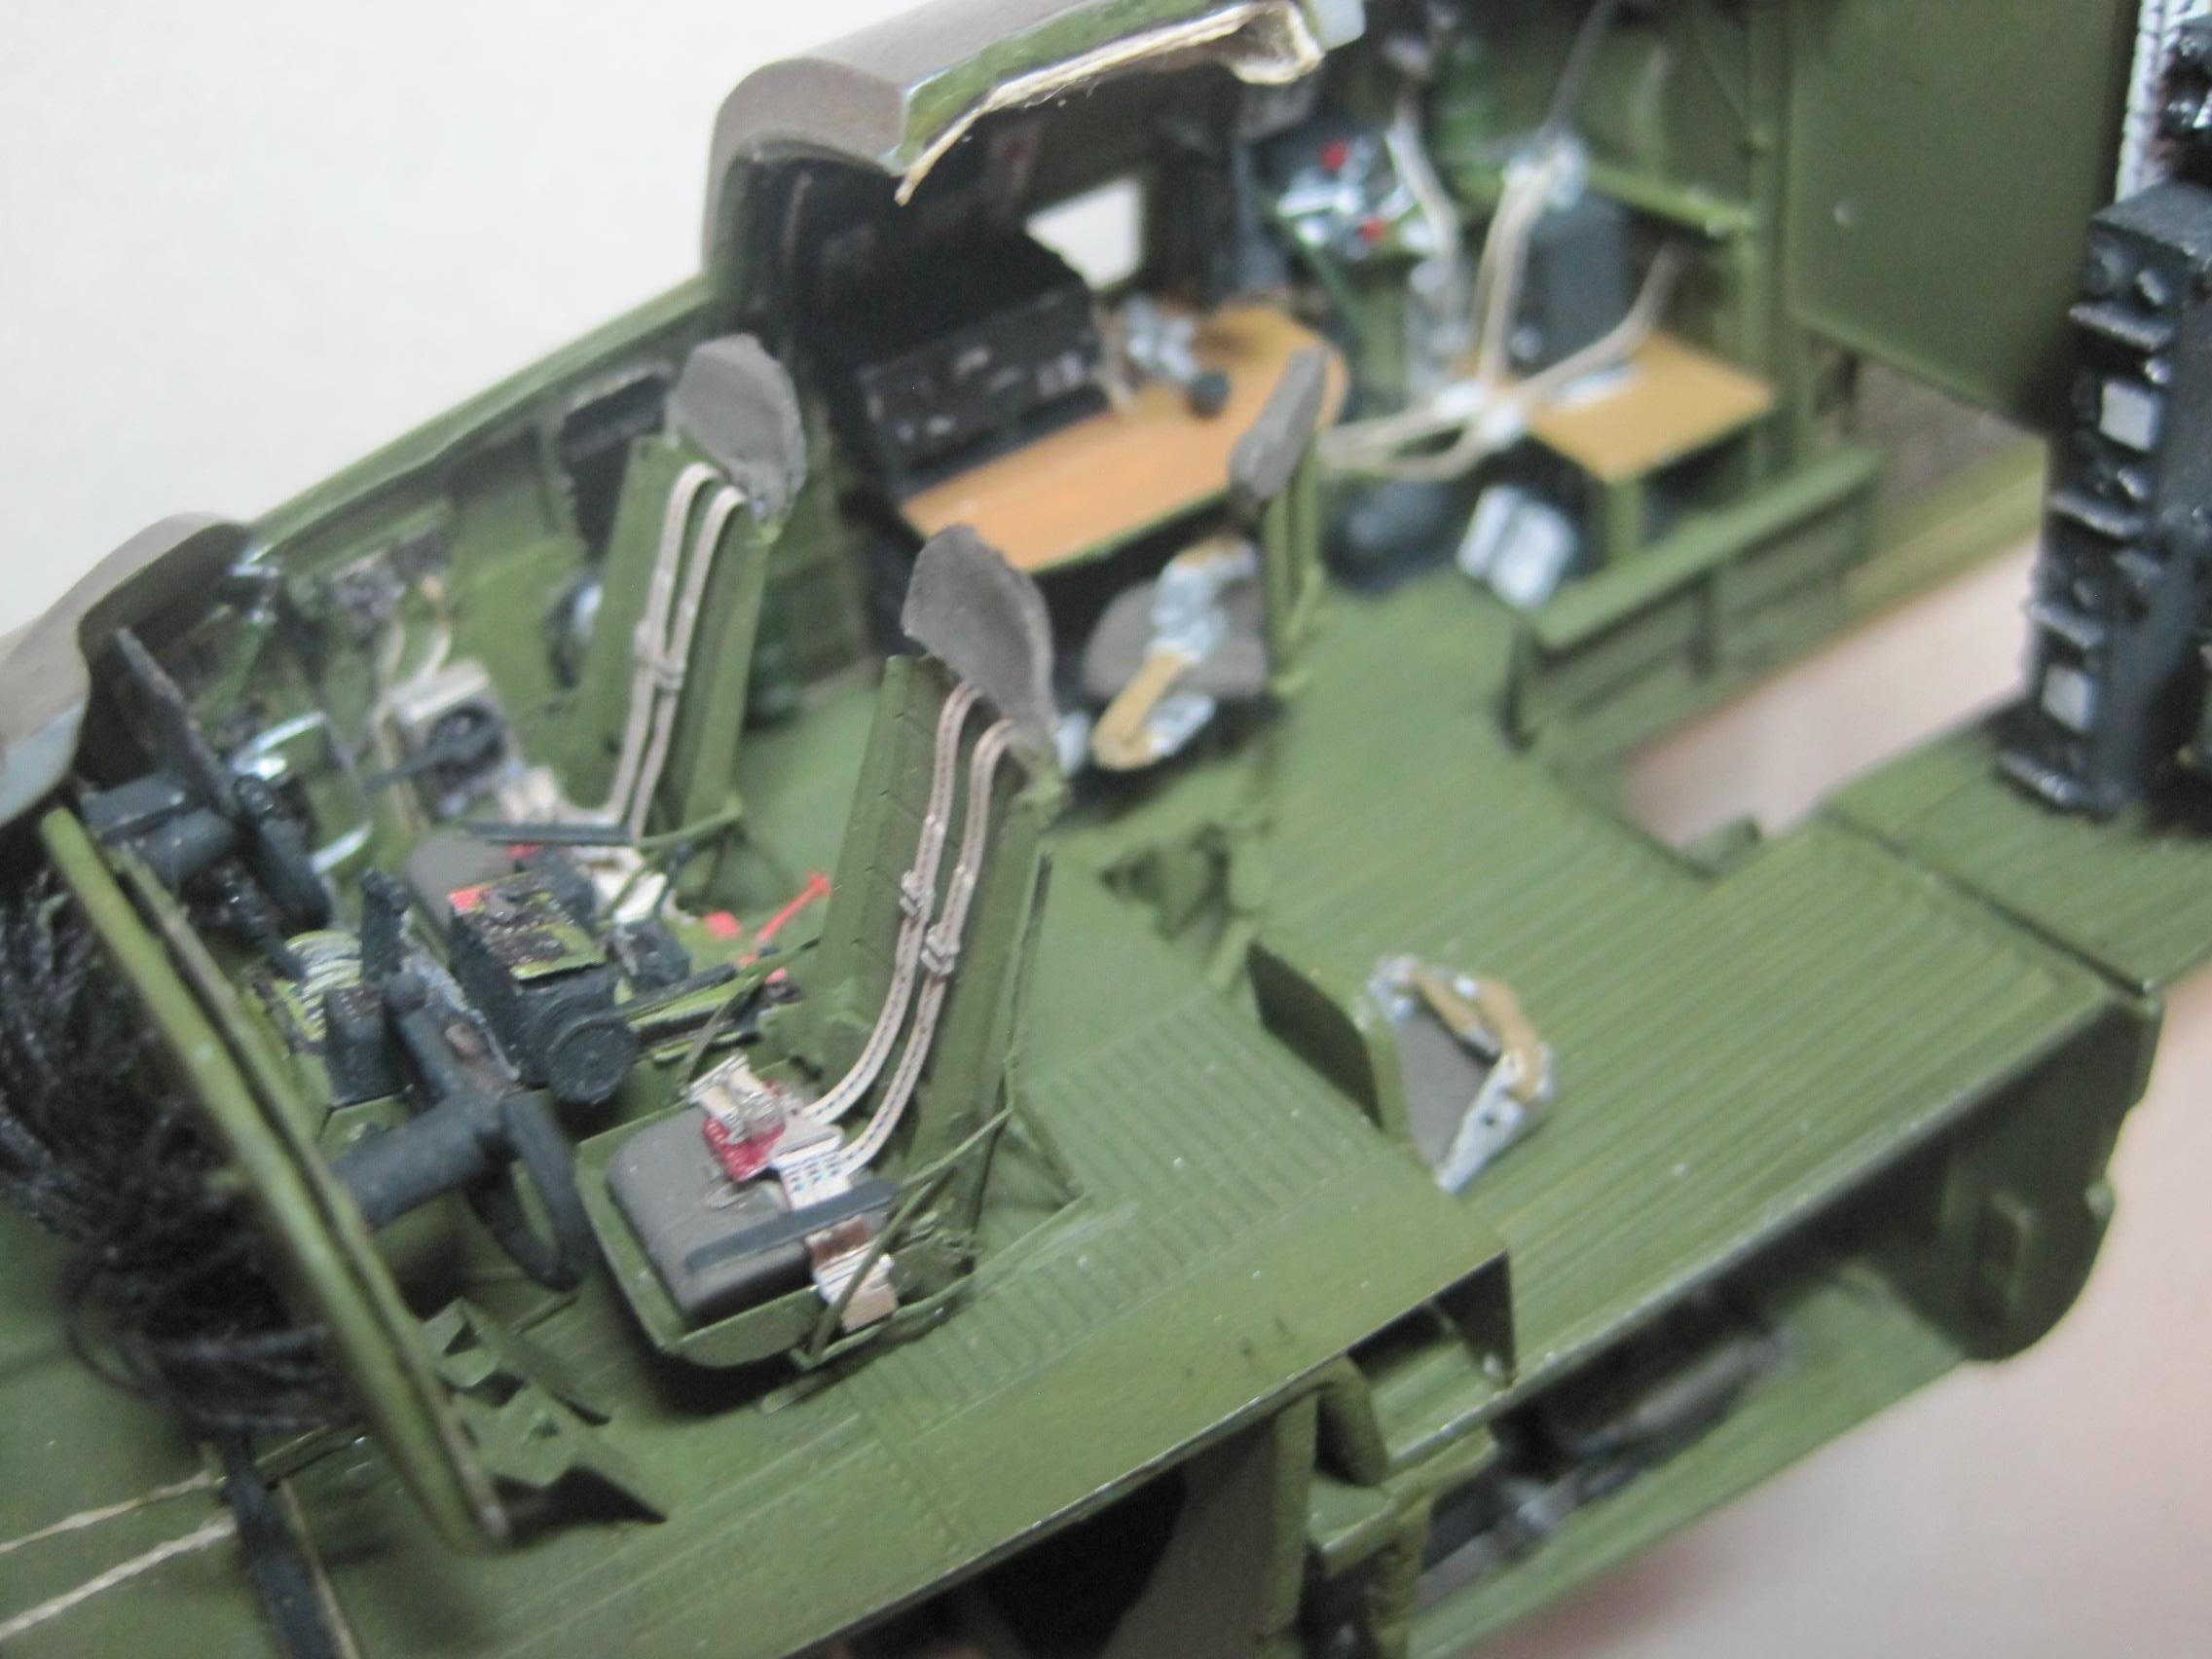
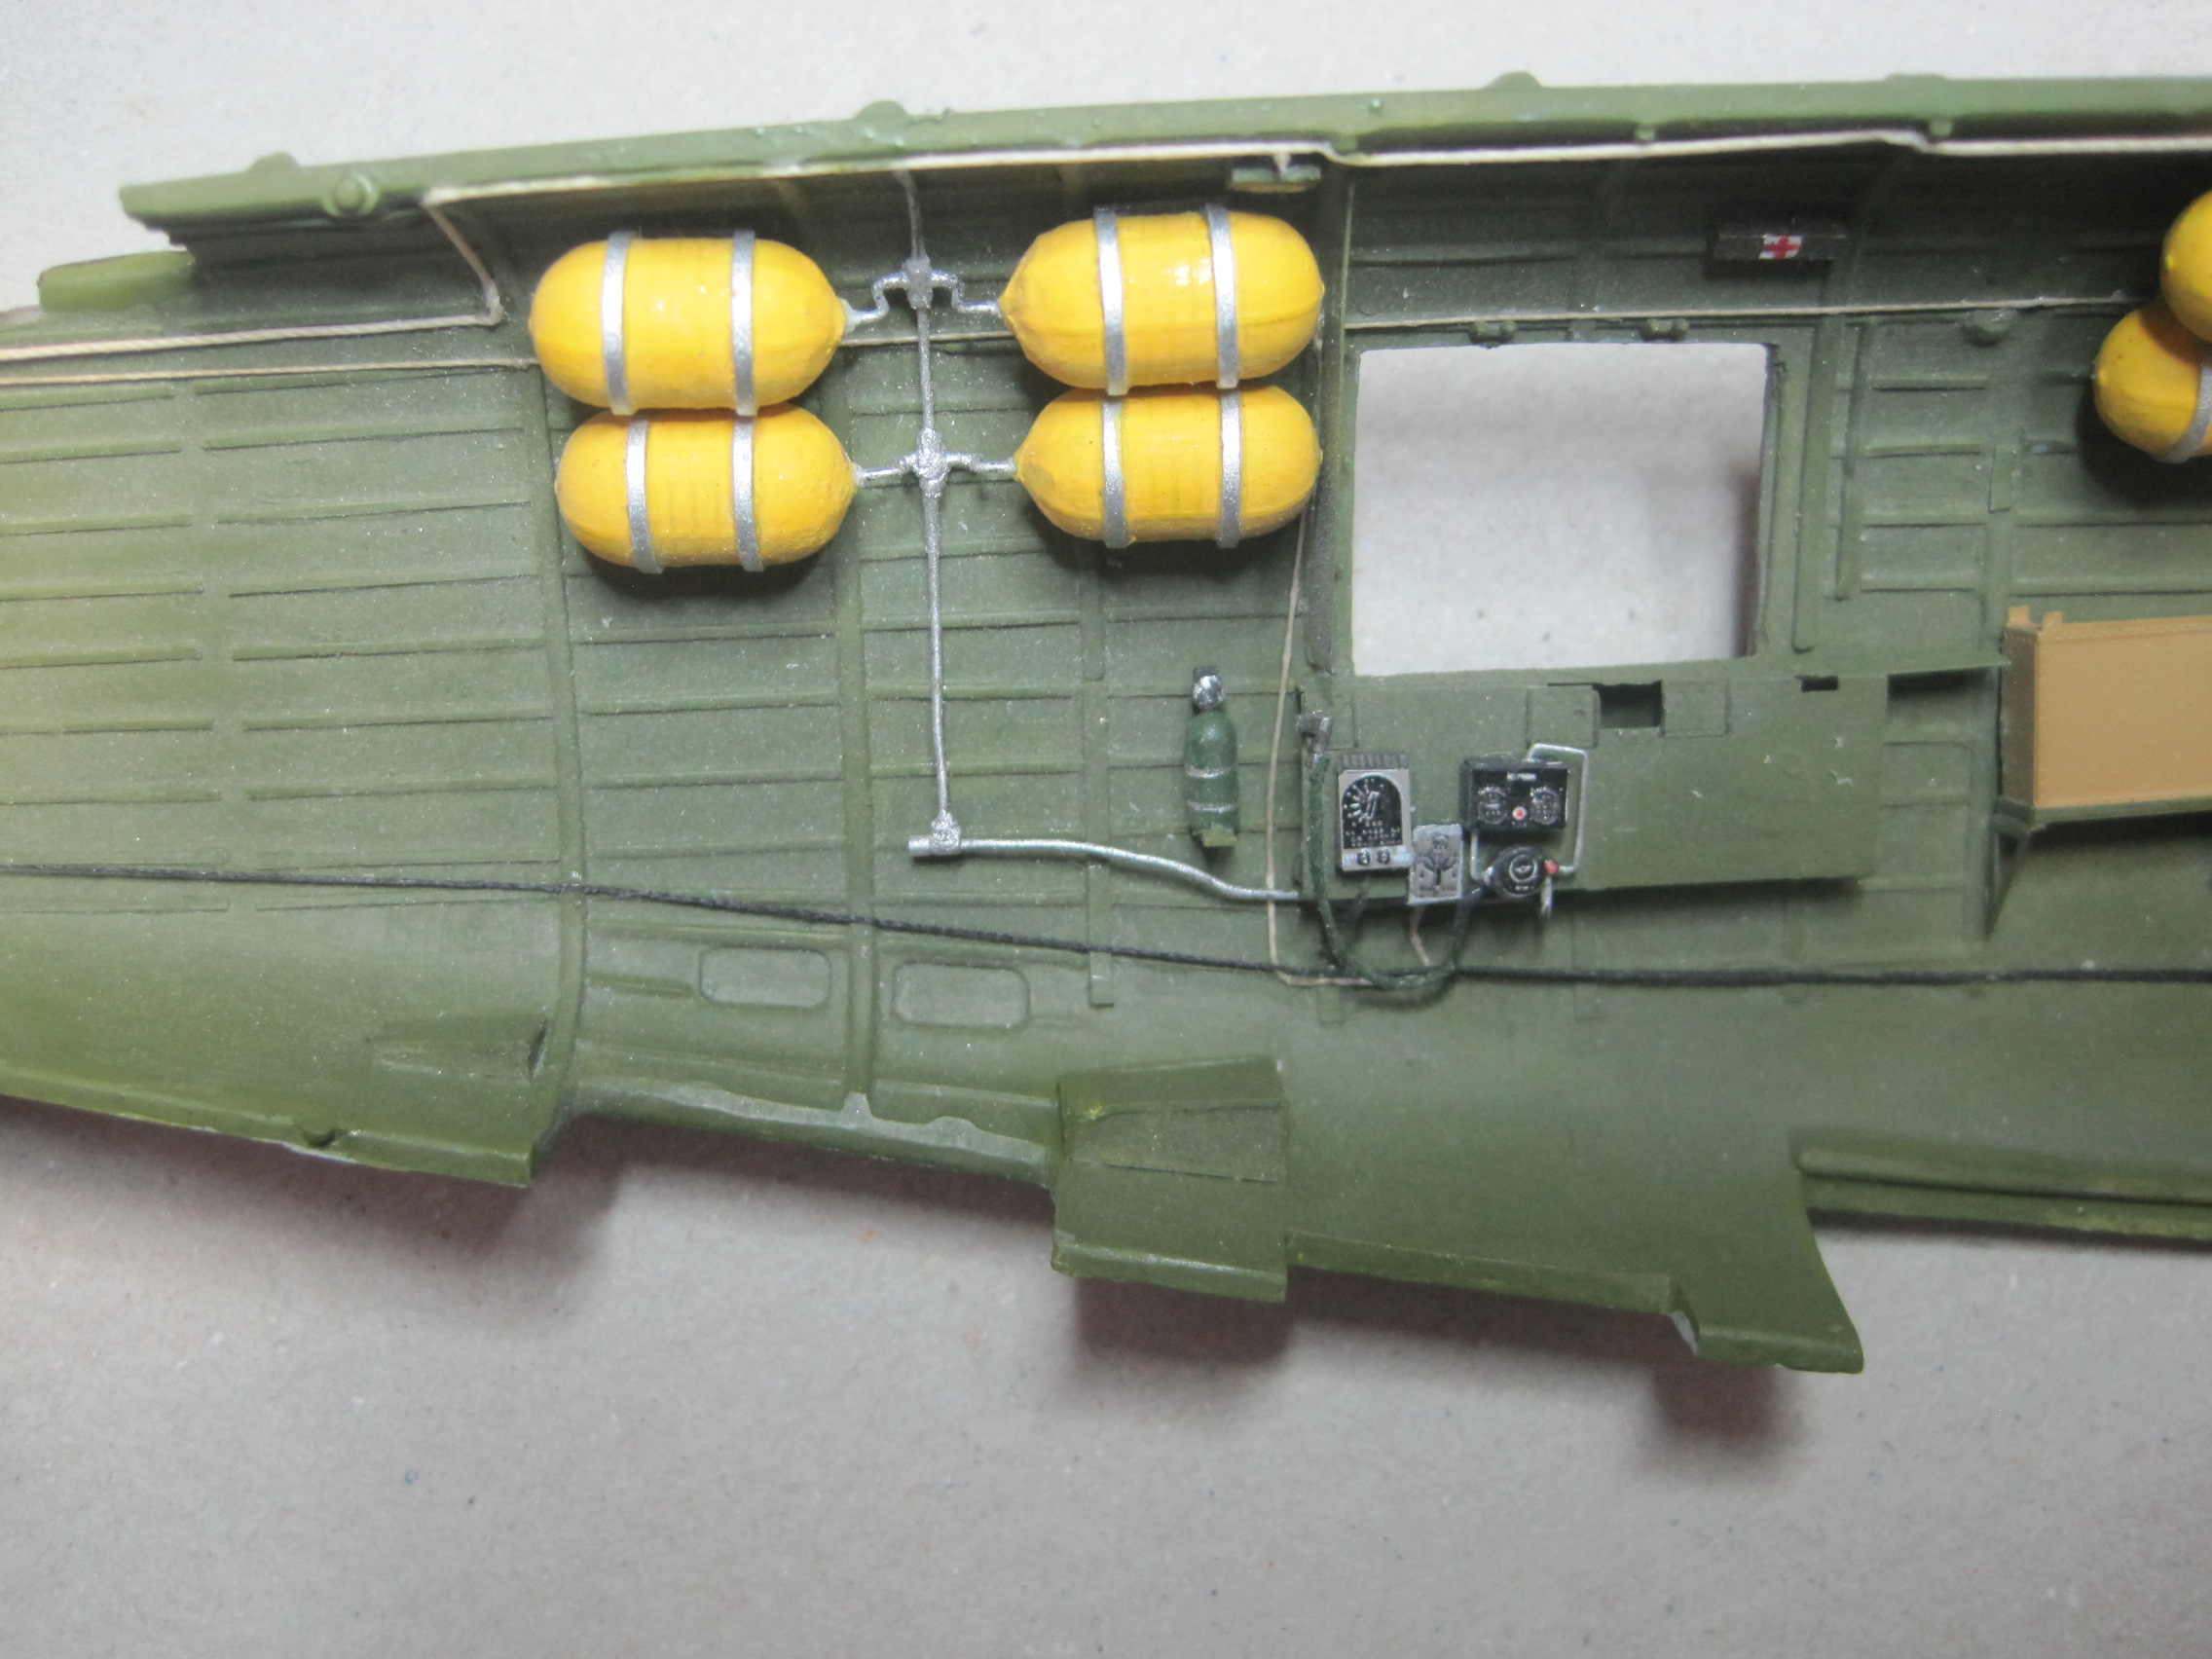
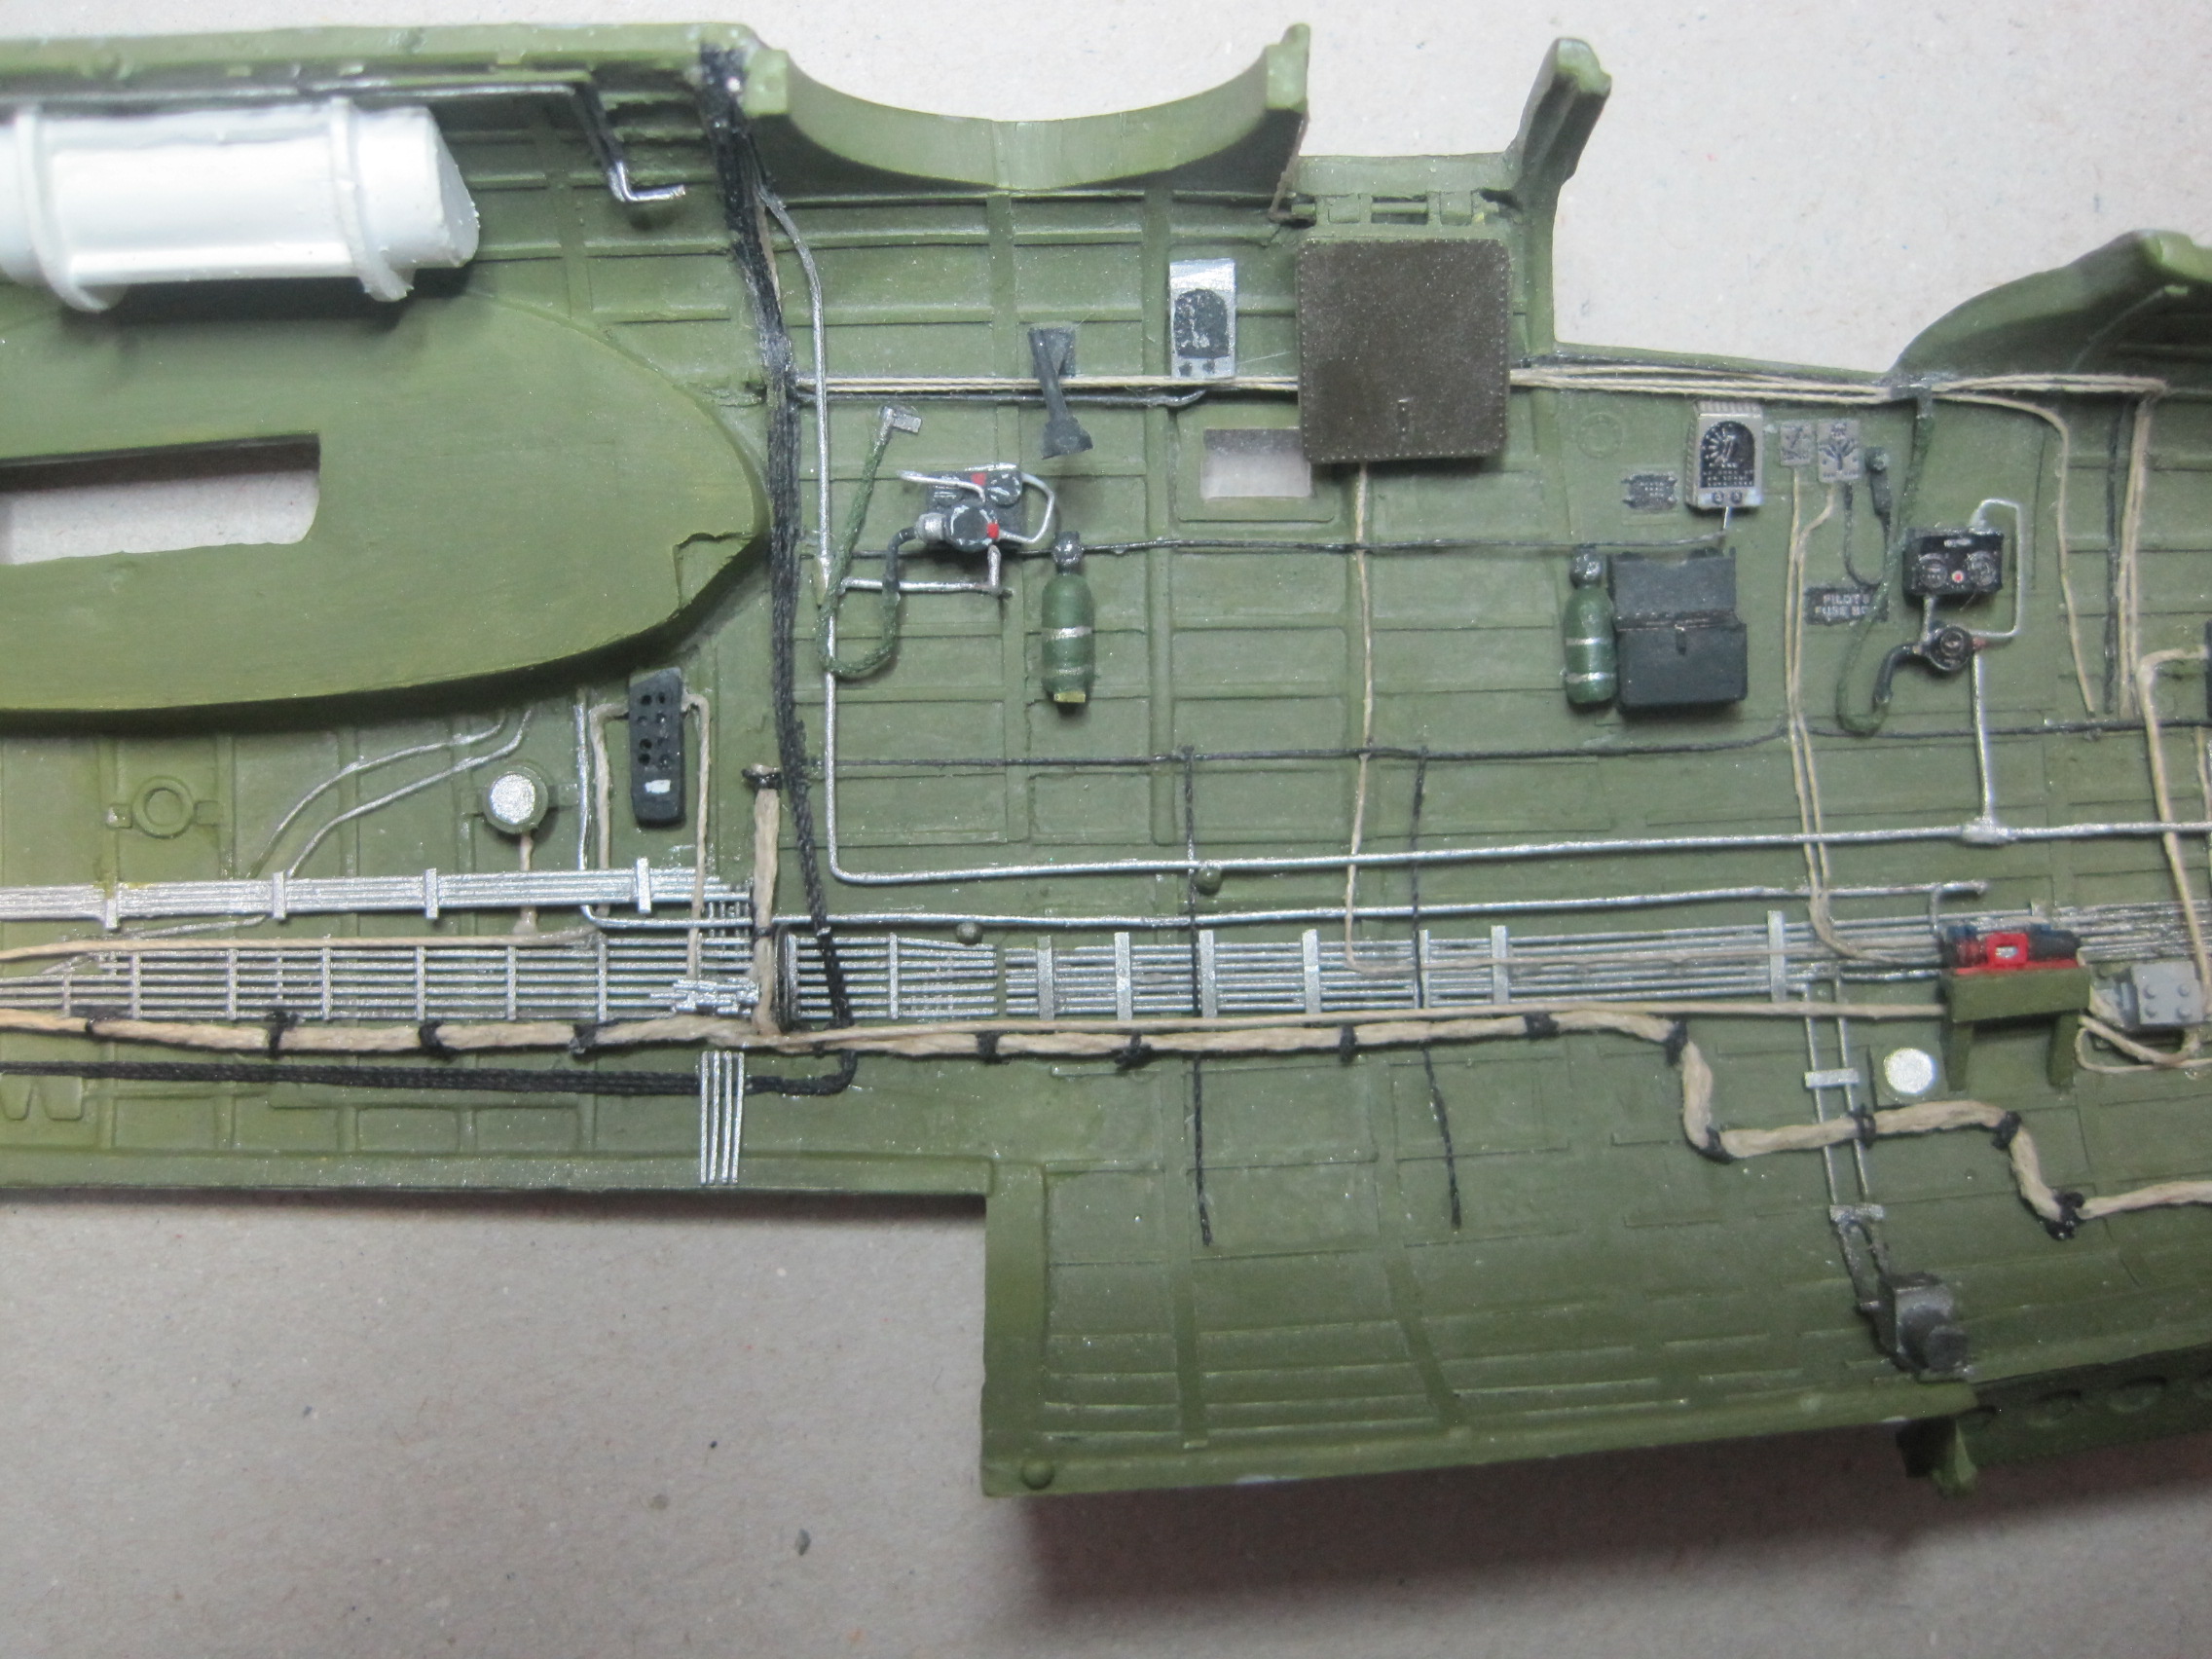
Time for an update. While my basement was being finished (Labor Day -Thanksgiving) I created a temporary work area in my den and actually continued to get some stuff done. Most of what I did was scratch build all of the interior items I wanted to add (mostly for the intercom and radio systems) along with other details. I'll probably have to stop for a while again, while I start to rebuild my work room in the basement so I can resume work there. Next big project will be the bomb bay as well as the radio operators station and the radio installation over the bomb bay.


padawan_82

Joined: December 10, 2008
KitMaker: 817 posts
AeroScale: 112 posts

Posted: Tuesday, December 25, 2018 - 09:52 AM UTC
Exceptional detail, my mind has been totally blown. Been following this build and it keeps getting better, your a true master well done Tom 
Dragon164

#226
Joined: February 20, 2012
KitMaker: 1,909 posts
AeroScale: 508 posts

Posted: Tuesday, December 25, 2018 - 12:42 PM UTC
Hey Tom!
Some nice fiddly bits there!
Cheers Rob.
Some nice fiddly bits there!
Cheers Rob.


ColinEdm
Joined: October 15, 2013
KitMaker: 1,355 posts
AeroScale: 107 posts
Posted: Wednesday, December 26, 2018 - 02:21 AM UTC
Wow, amazing detail work there! 
thathaway3
Joined: September 10, 2004
KitMaker: 1,610 posts
AeroScale: 85 posts
Posted: Wednesday, December 26, 2018 - 03:36 PM UTC
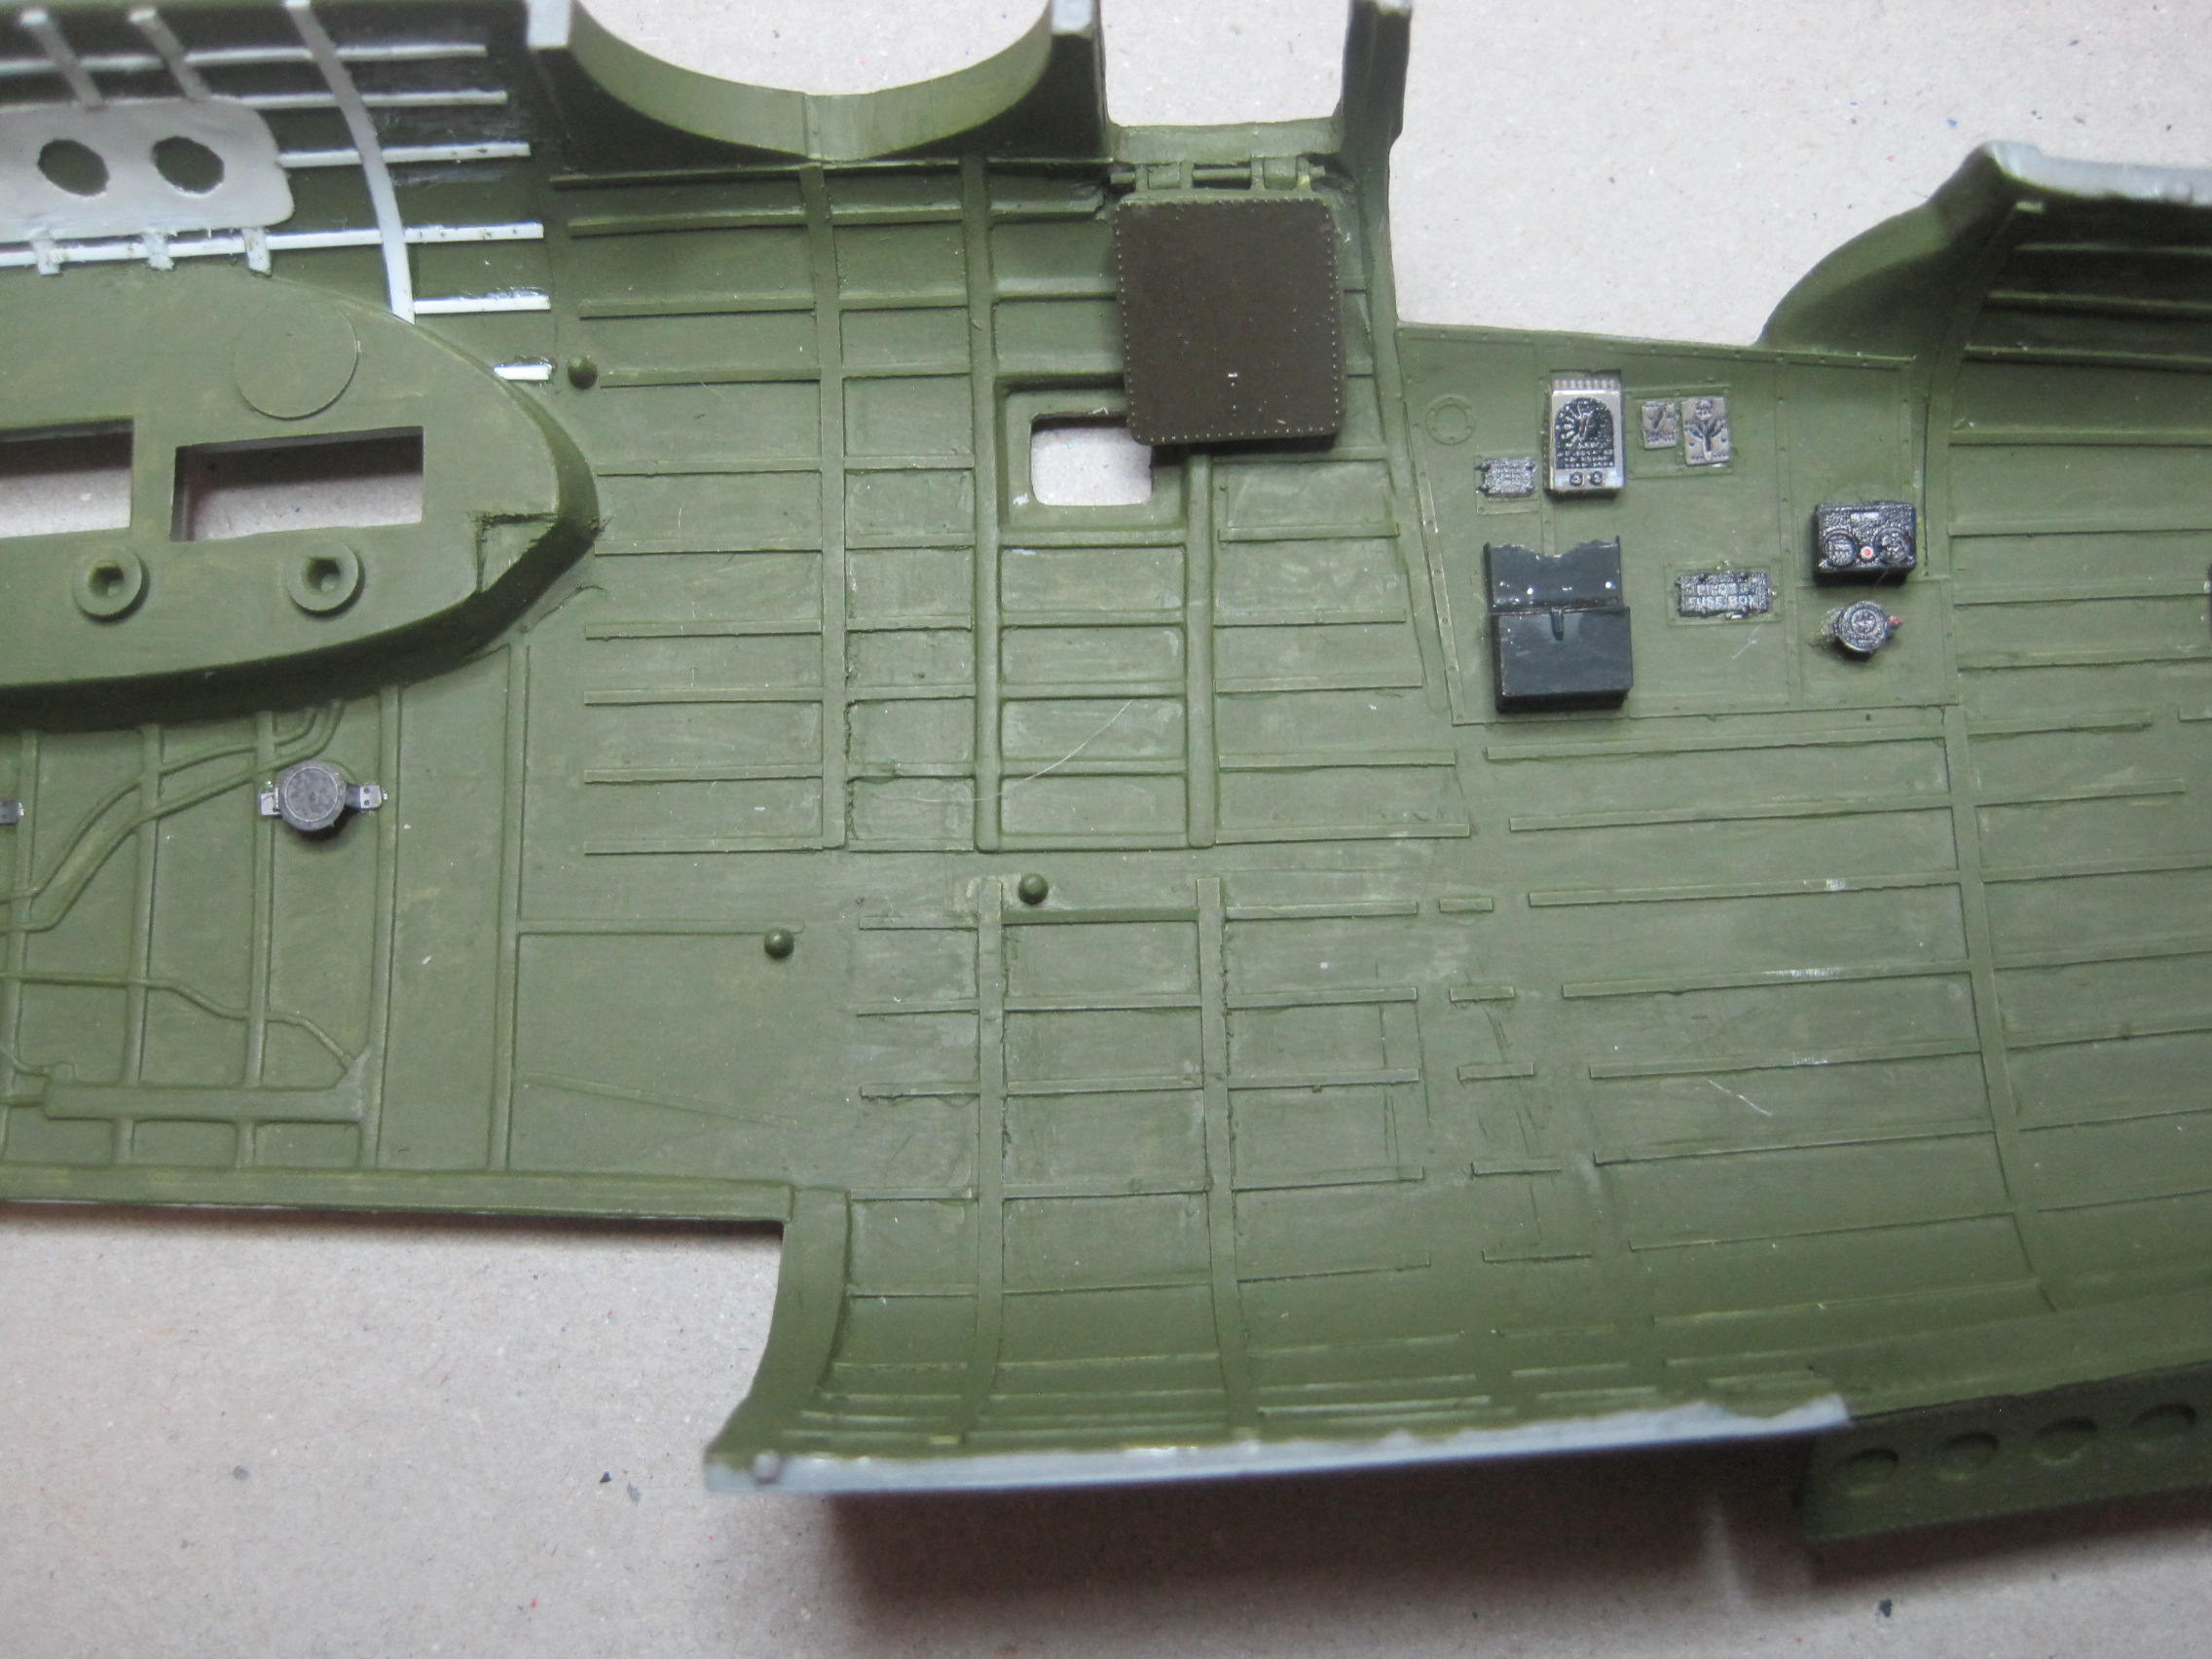
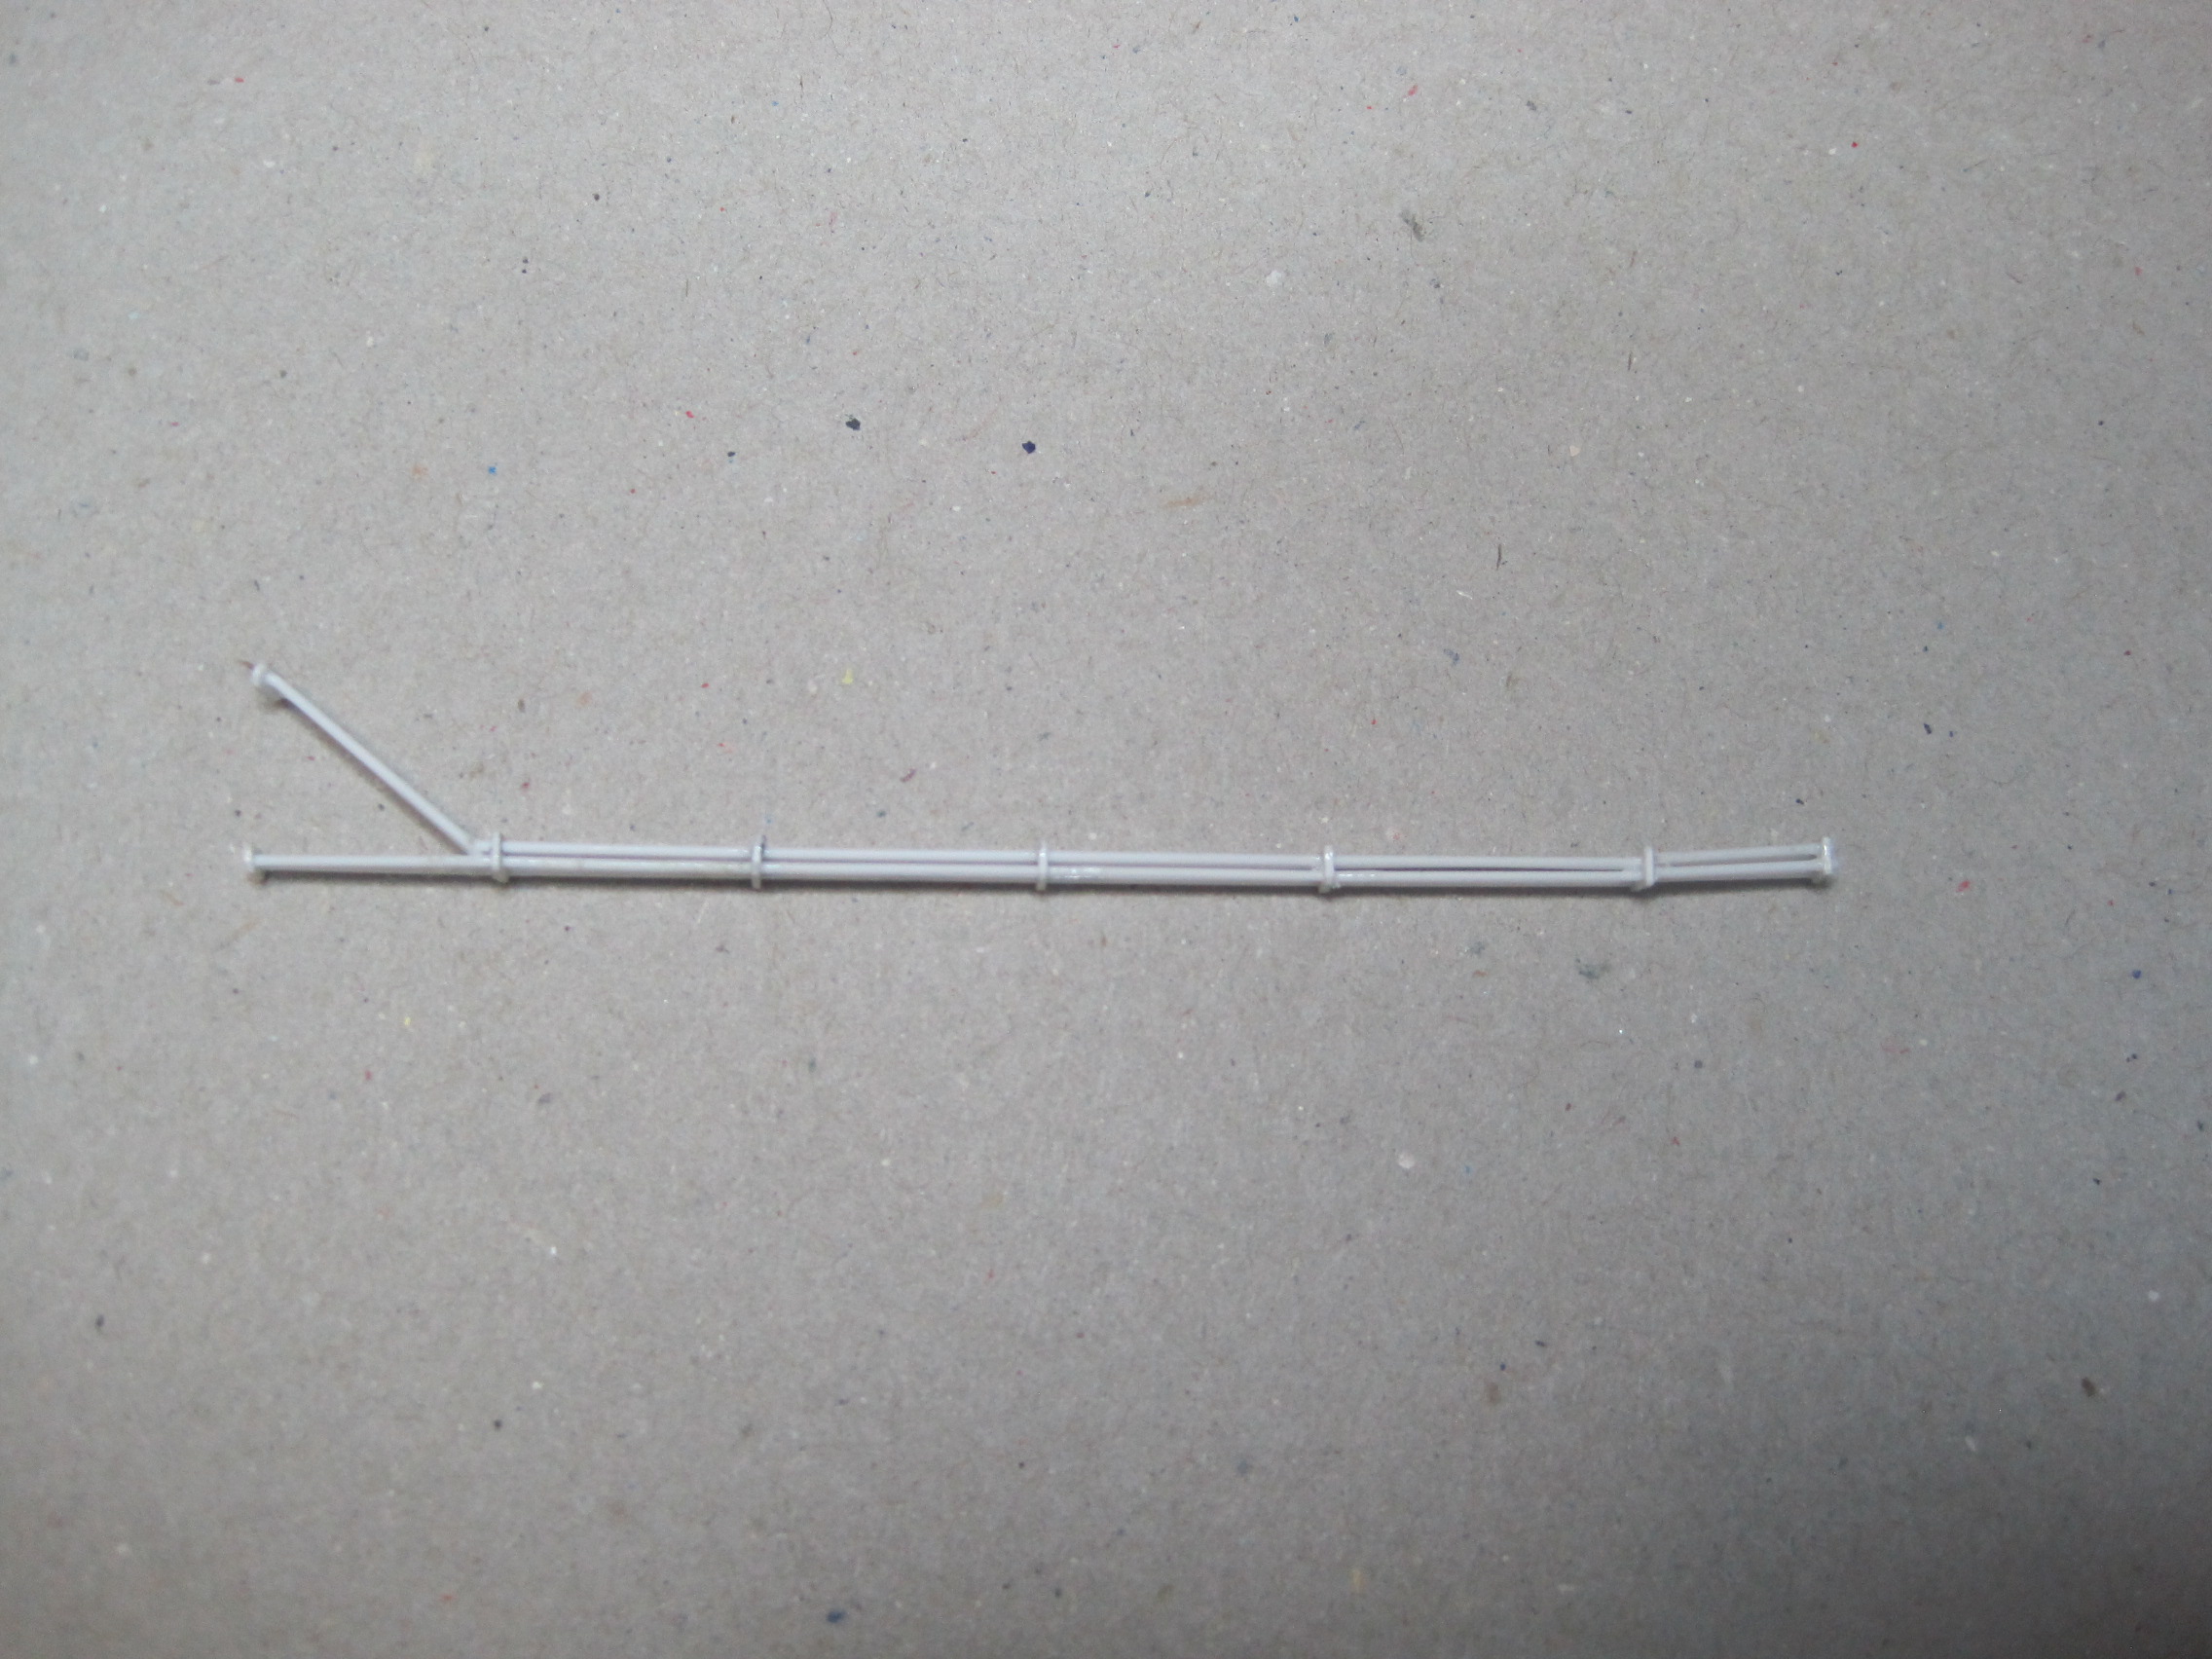
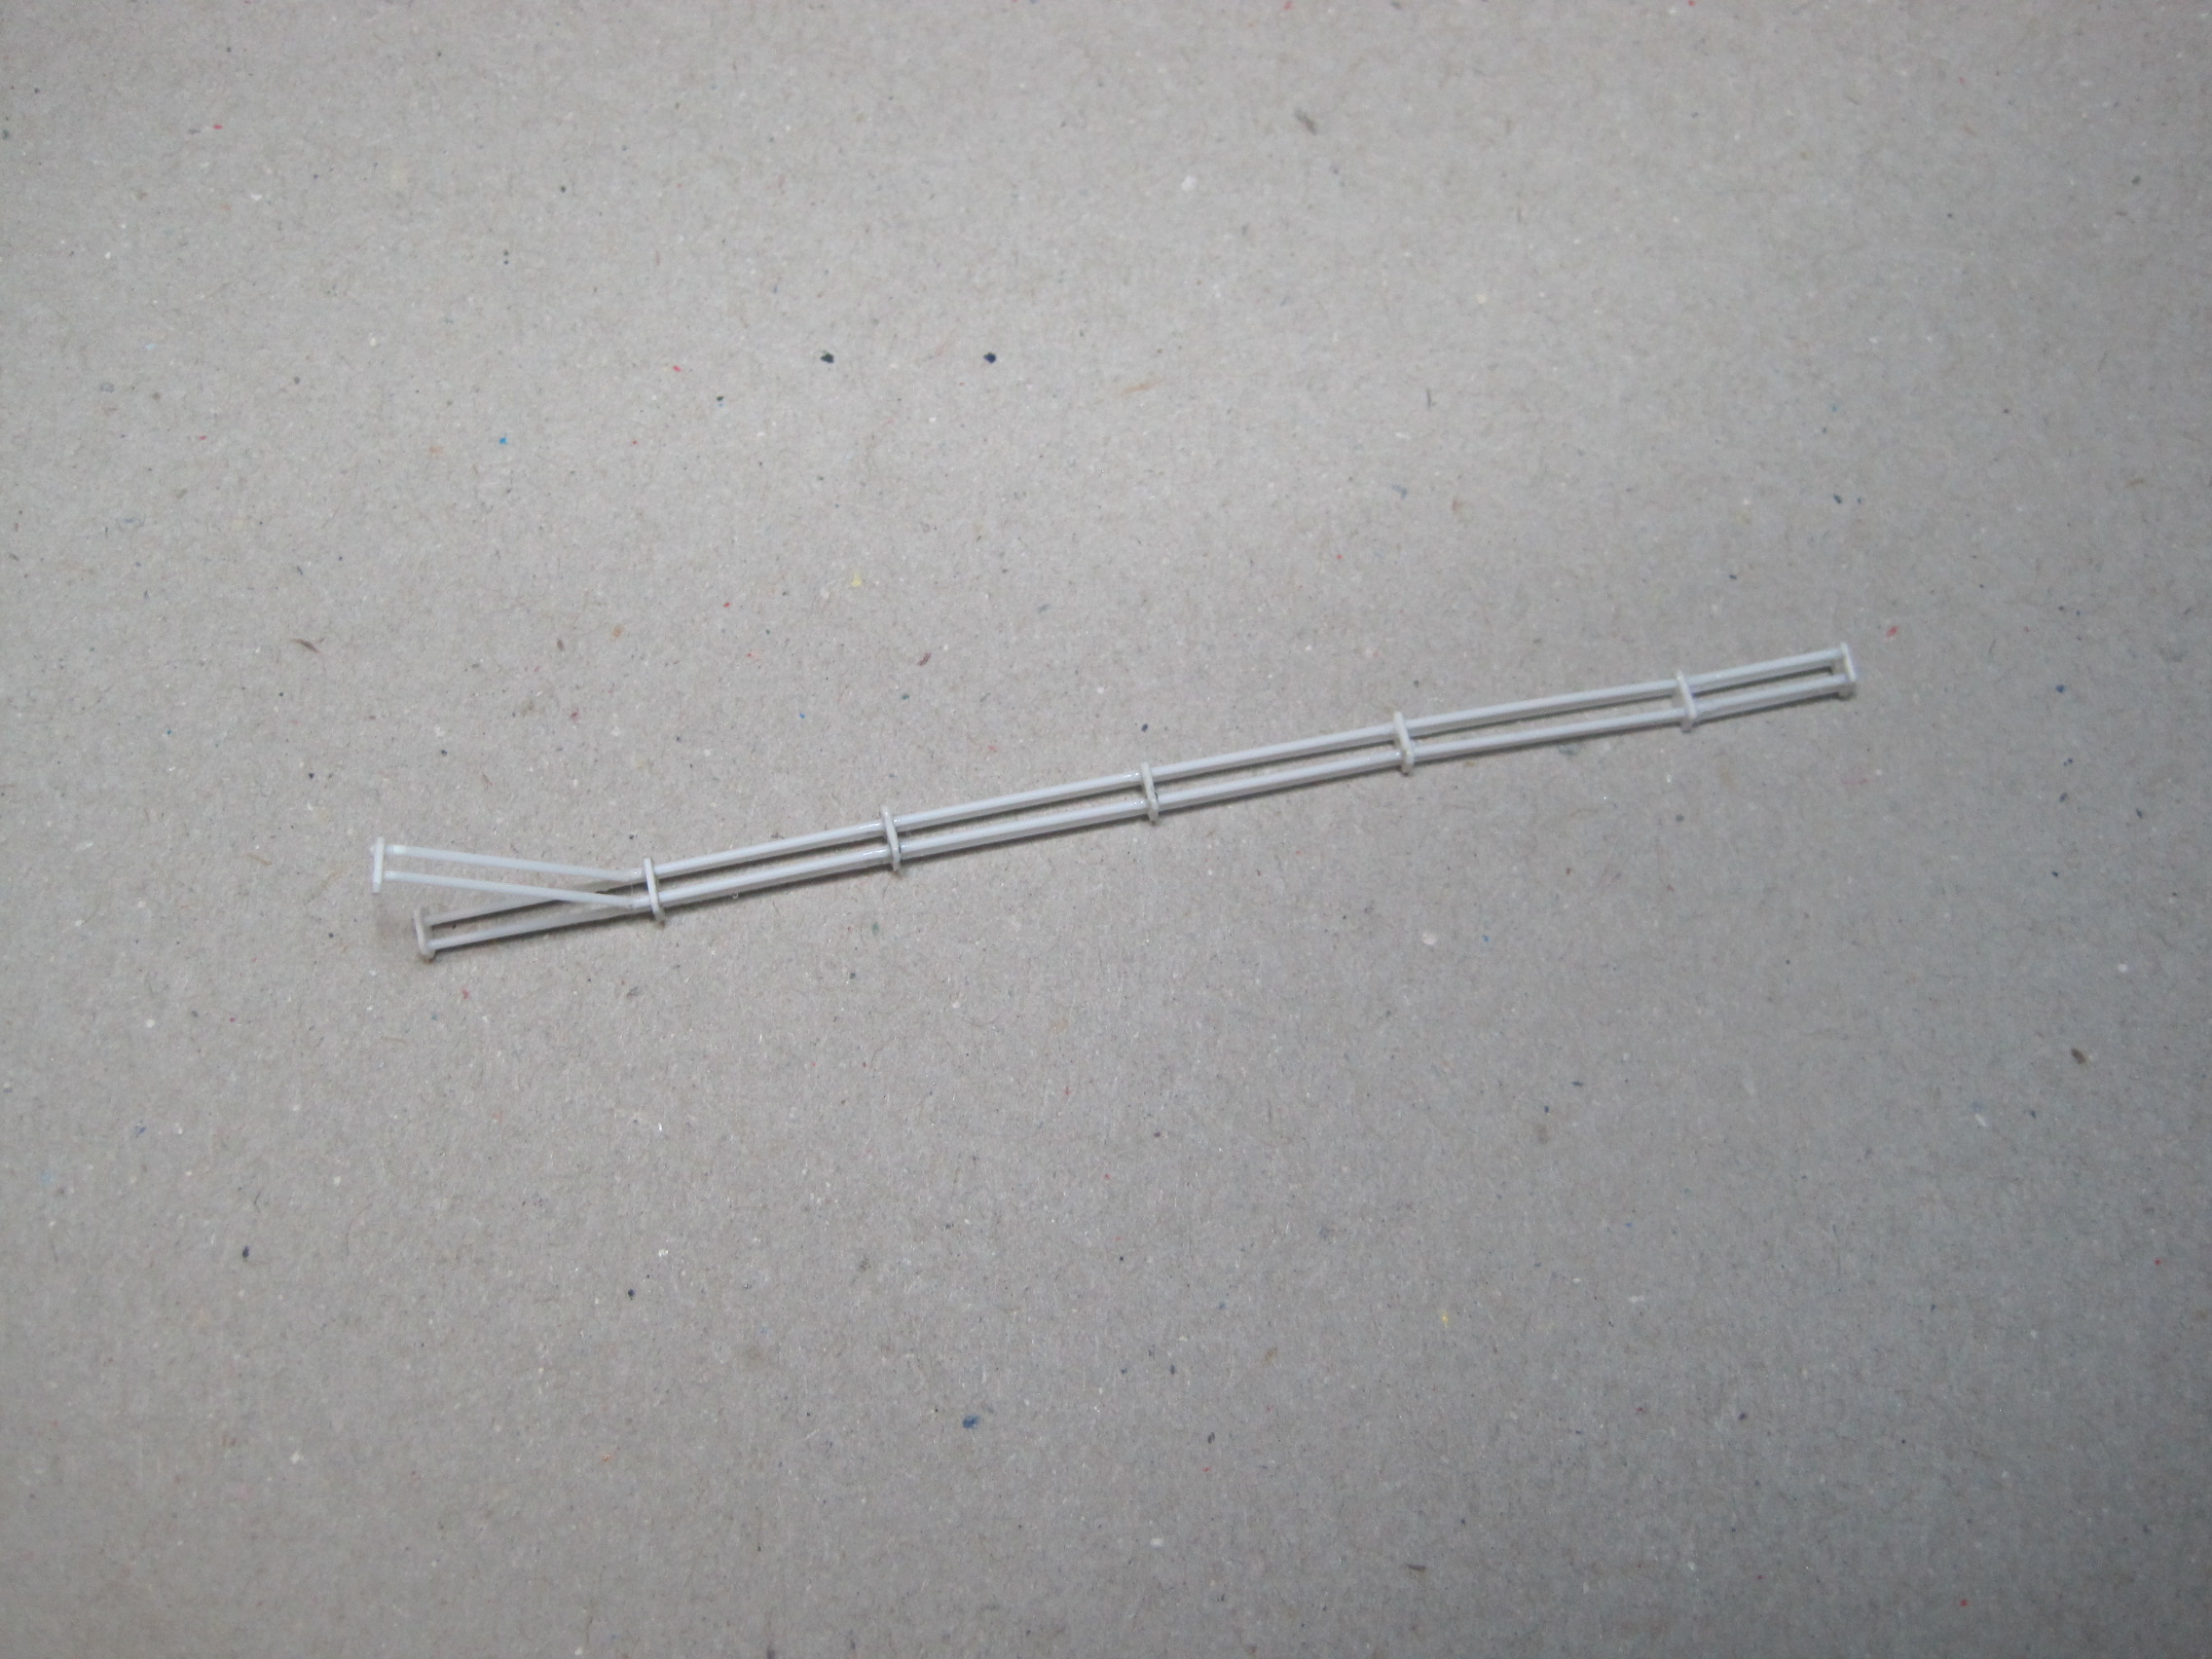
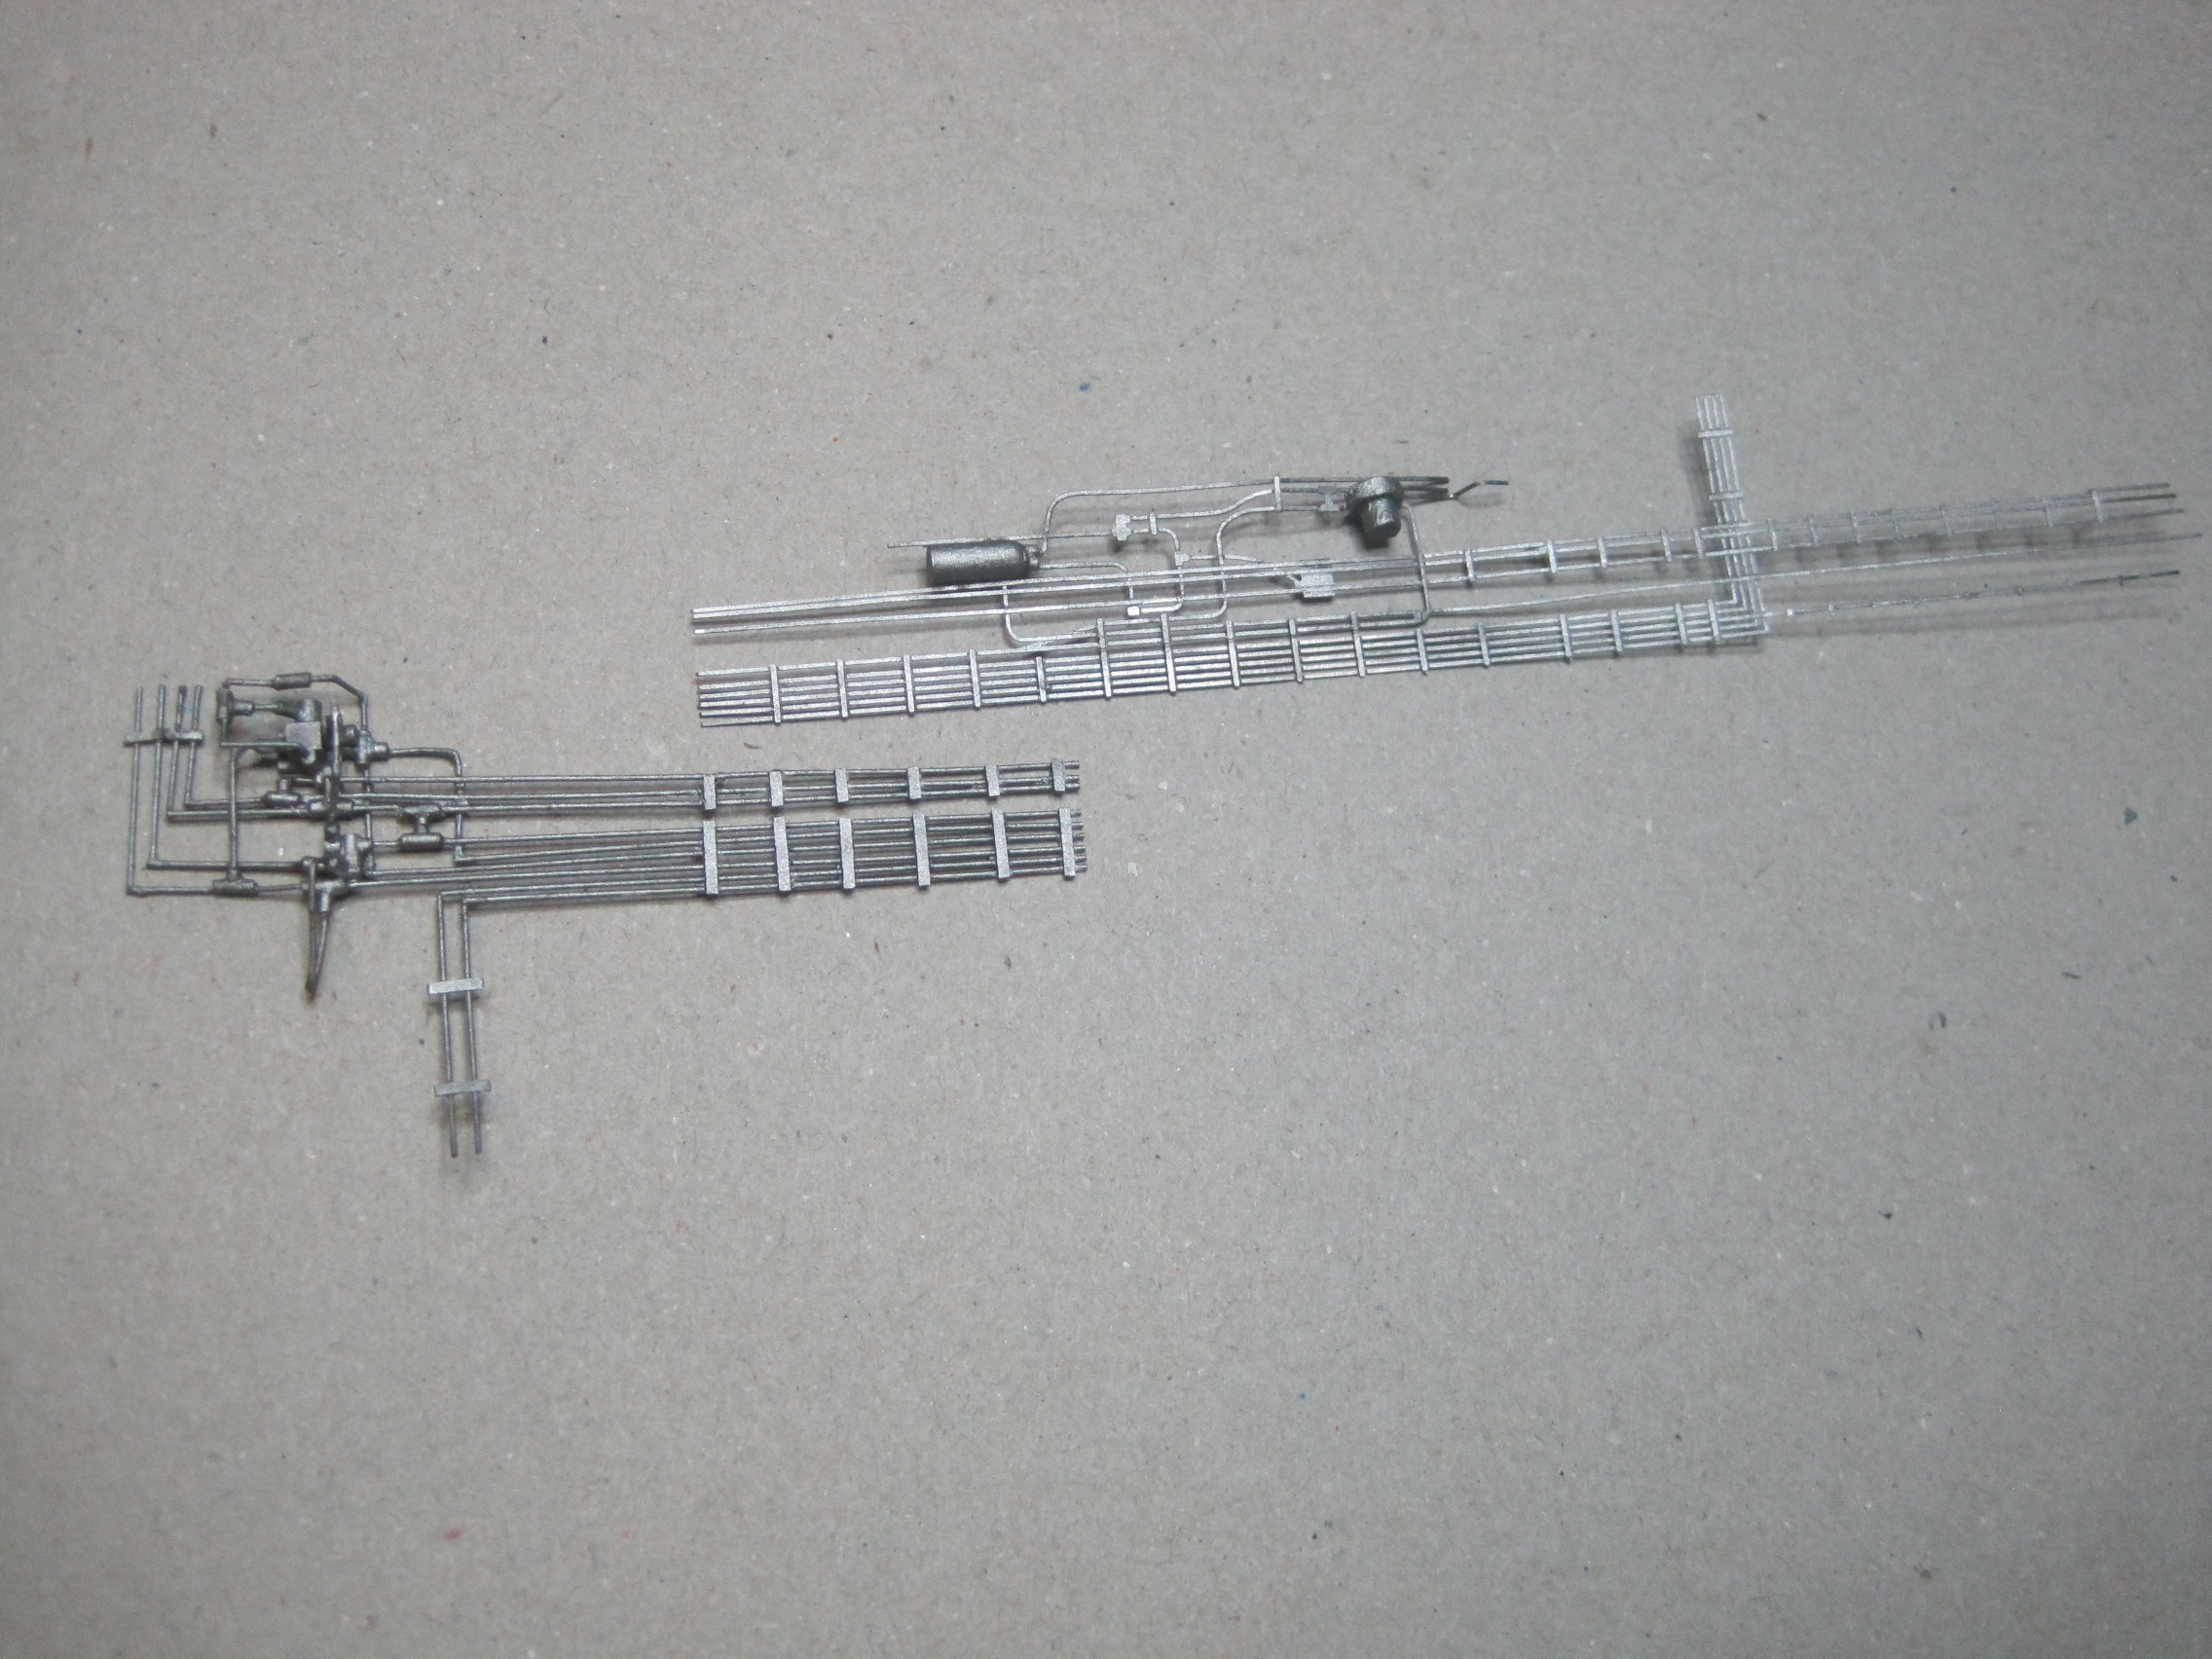
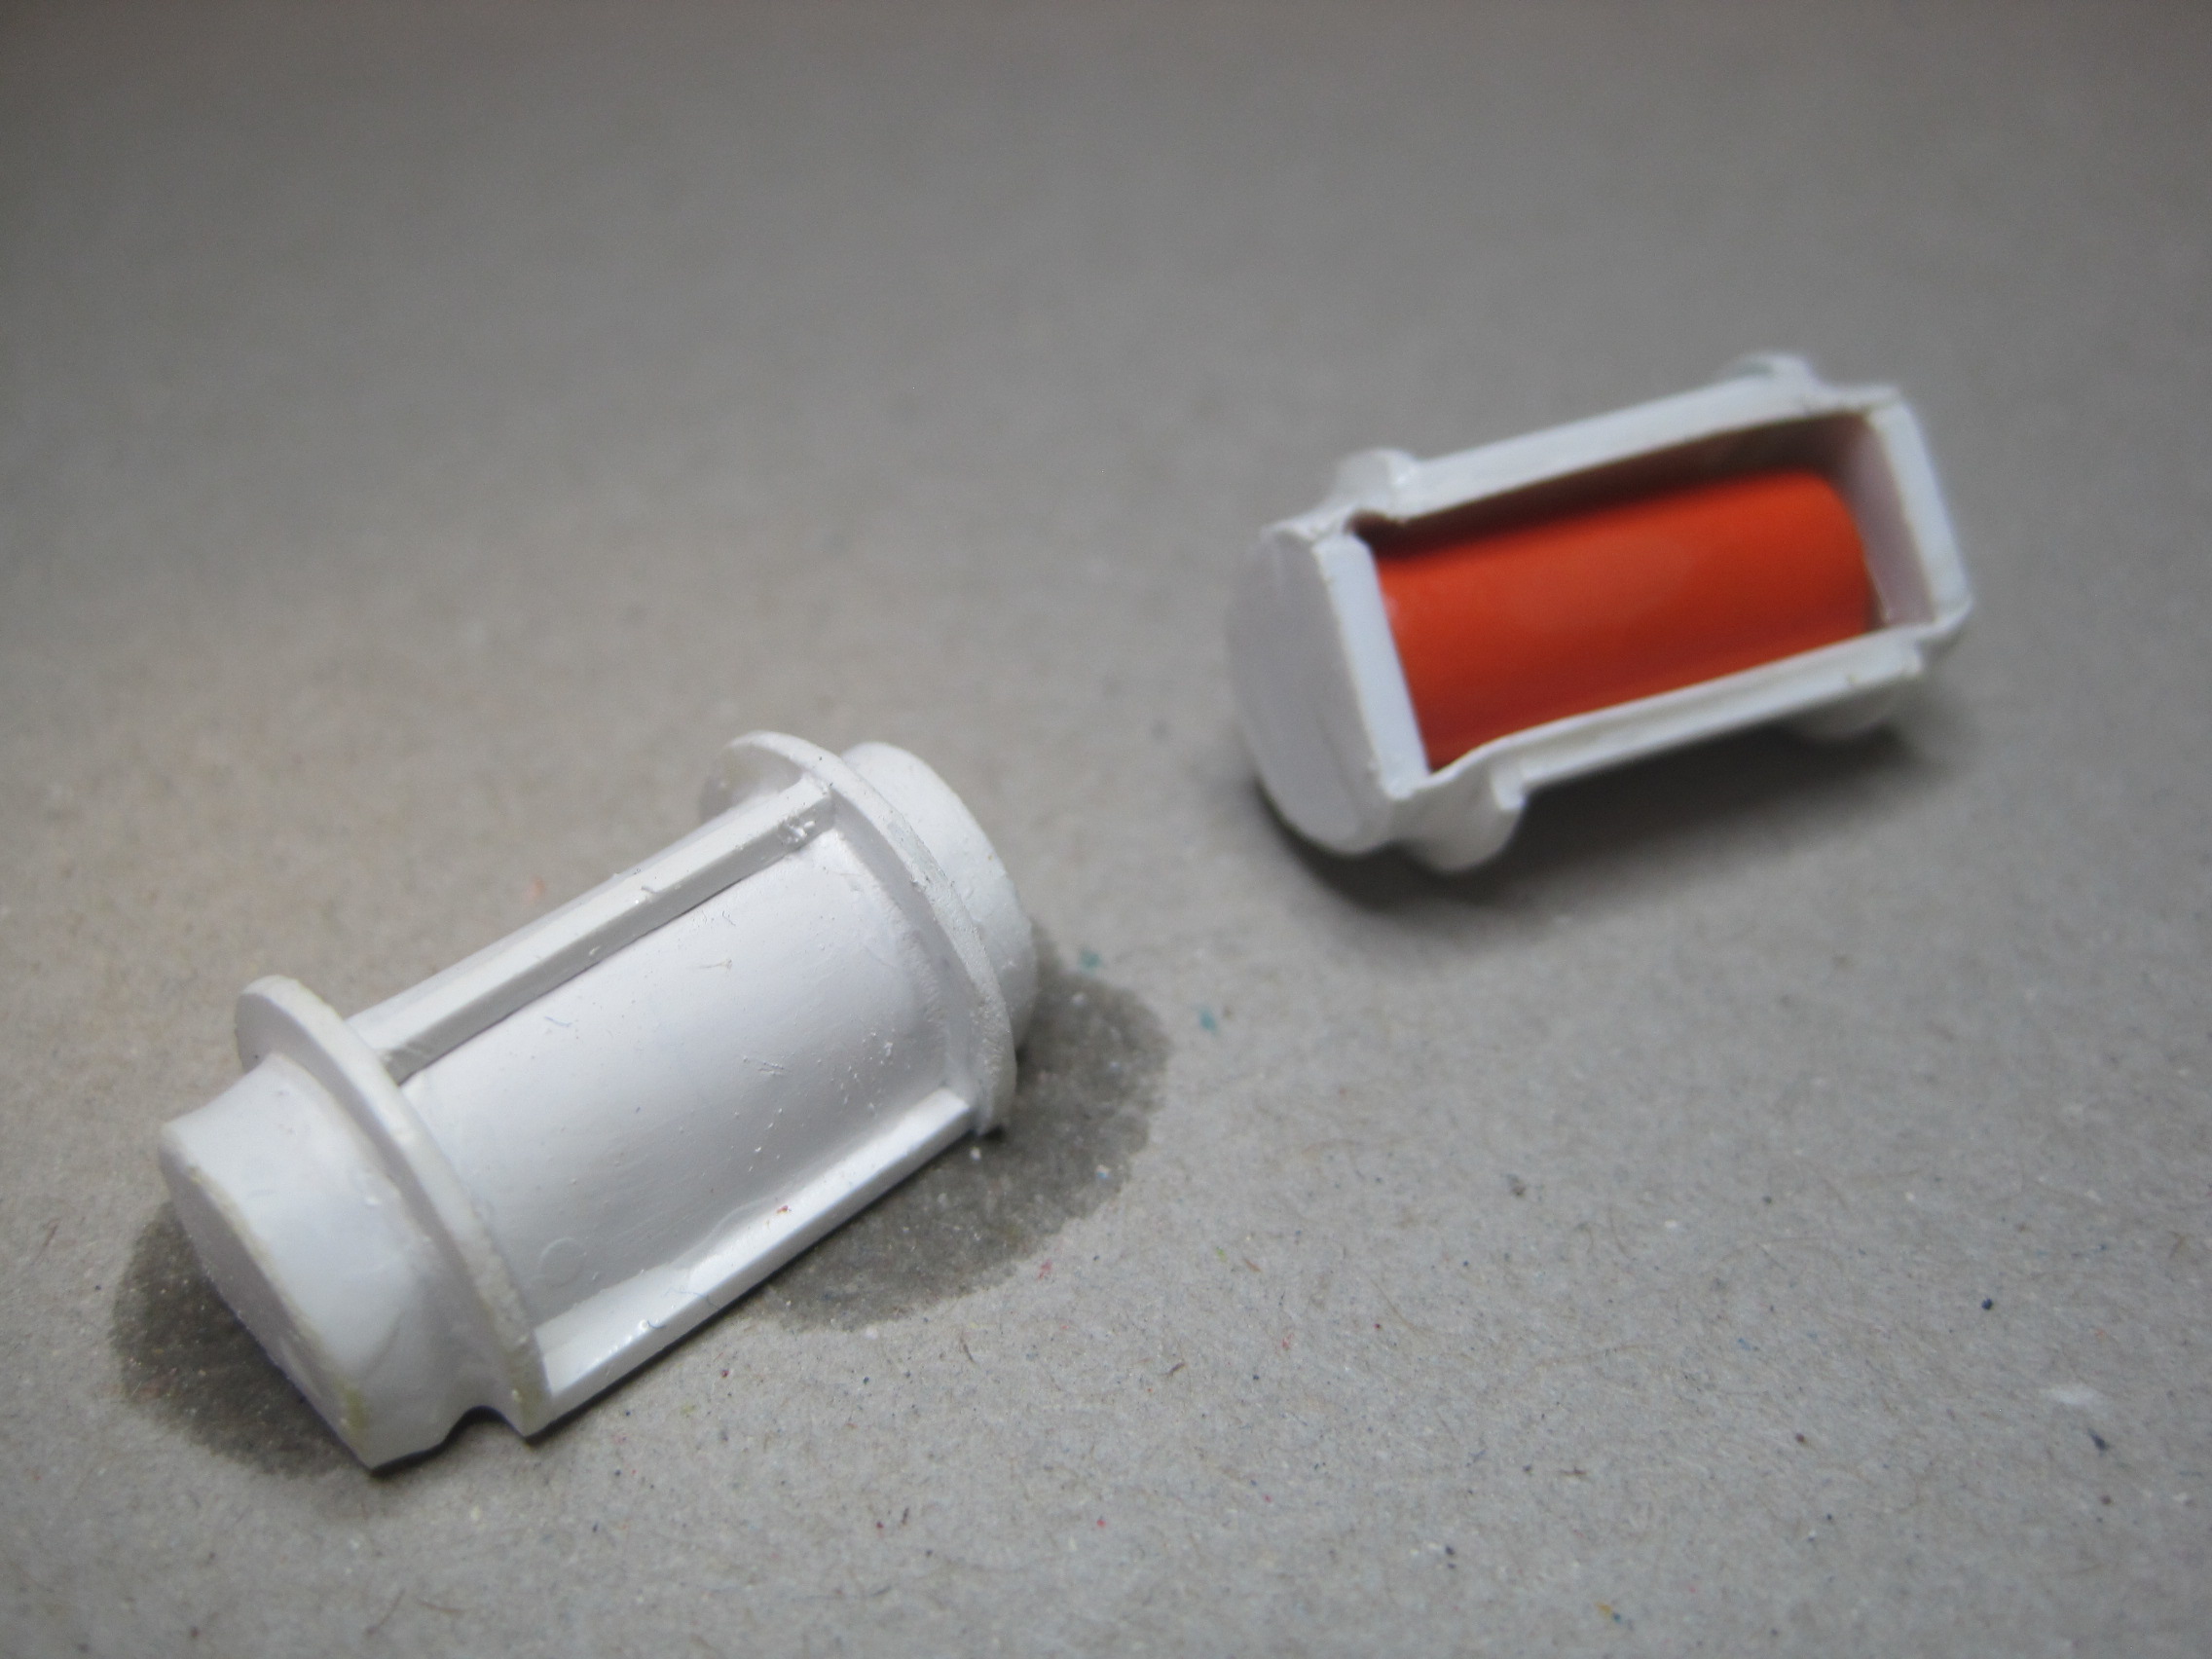
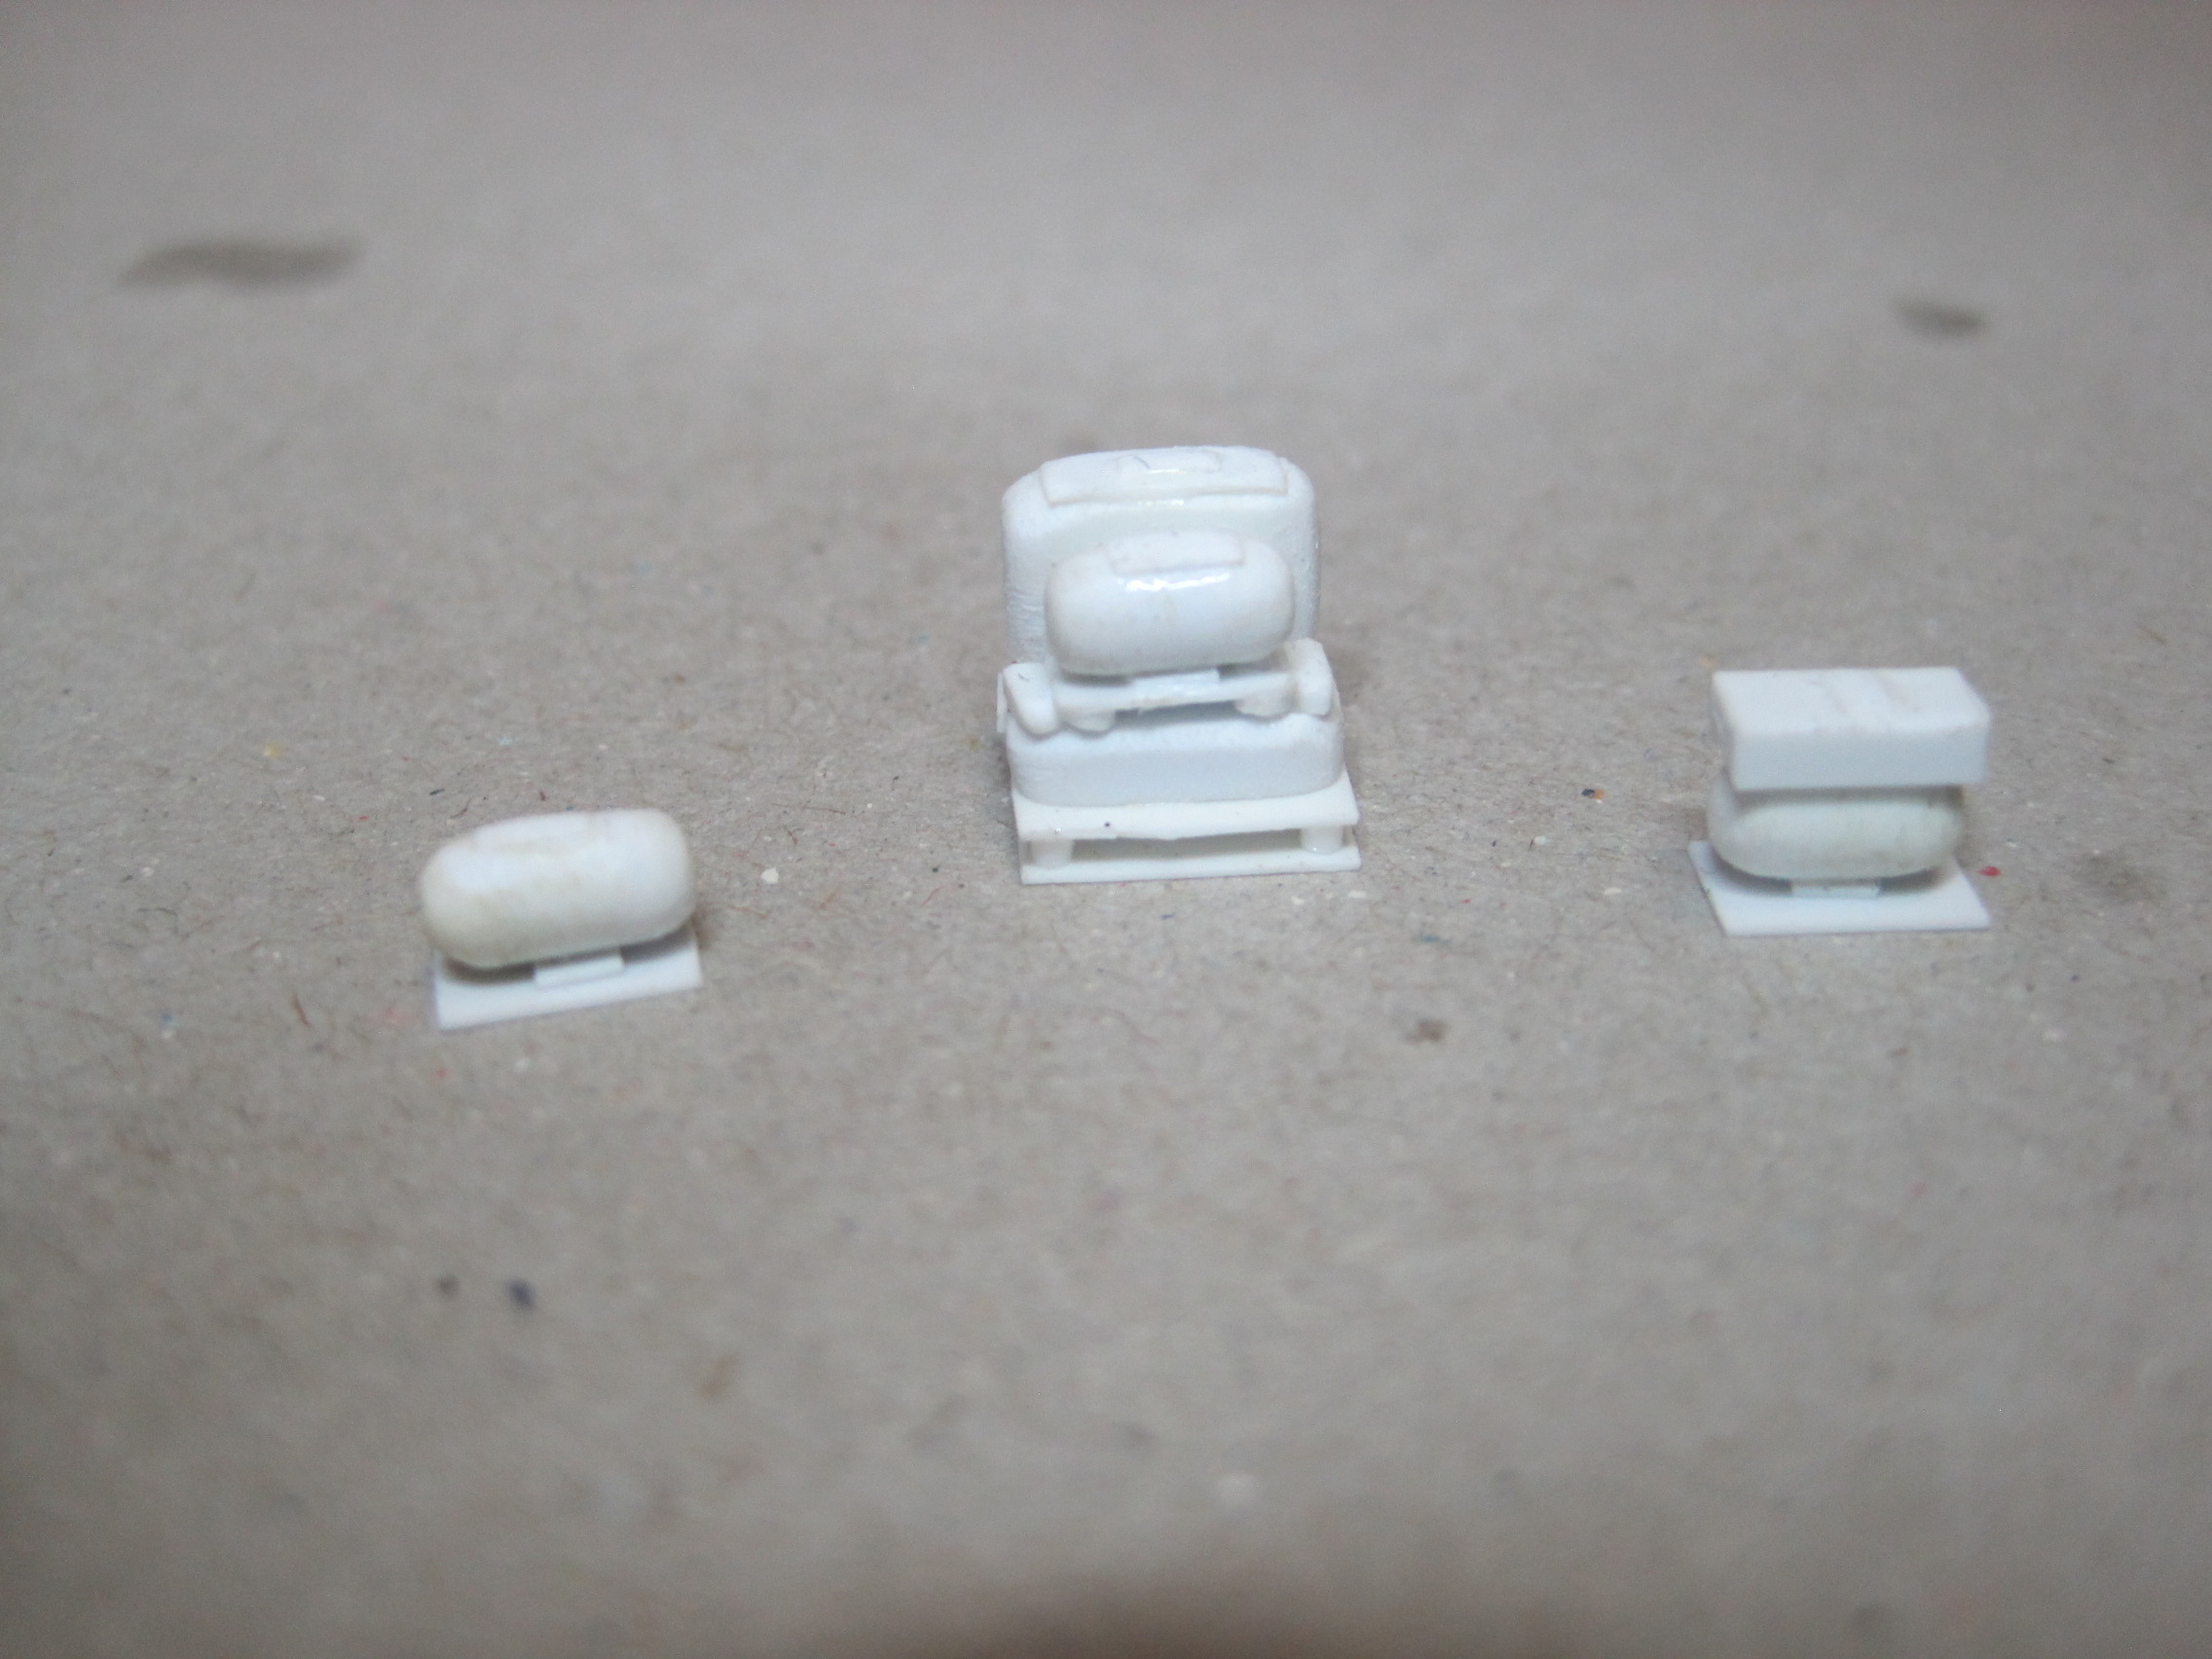
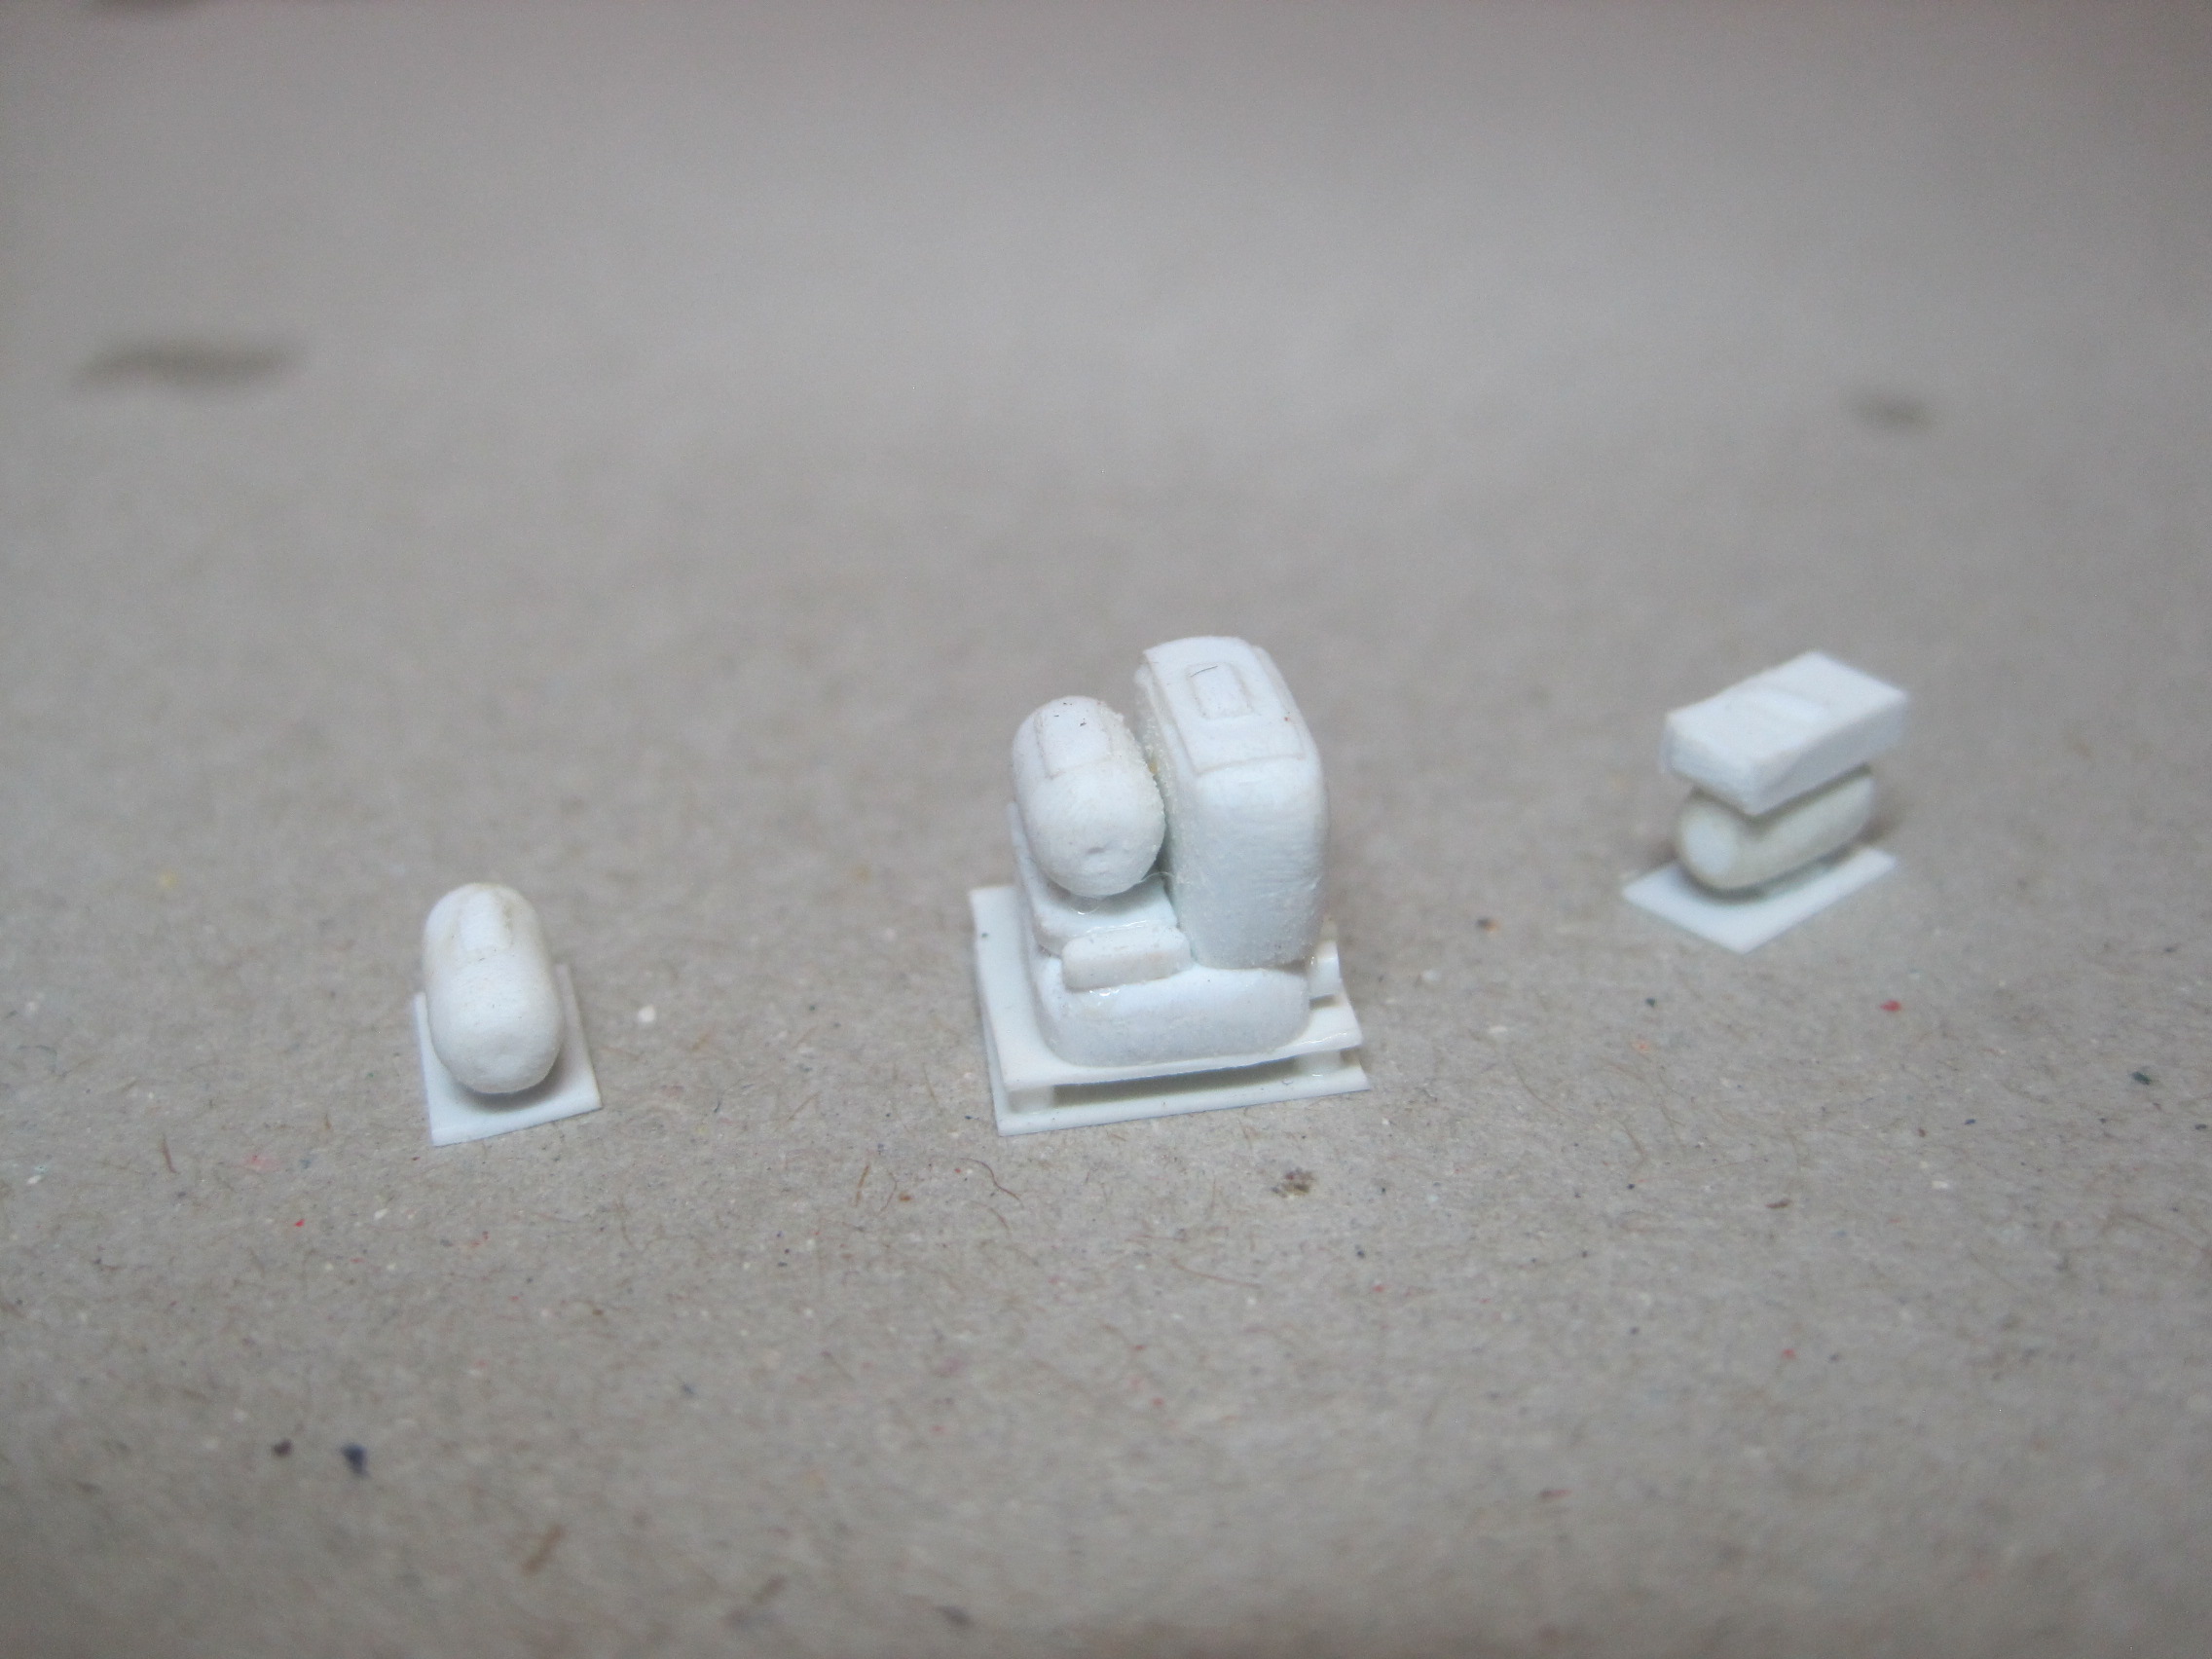
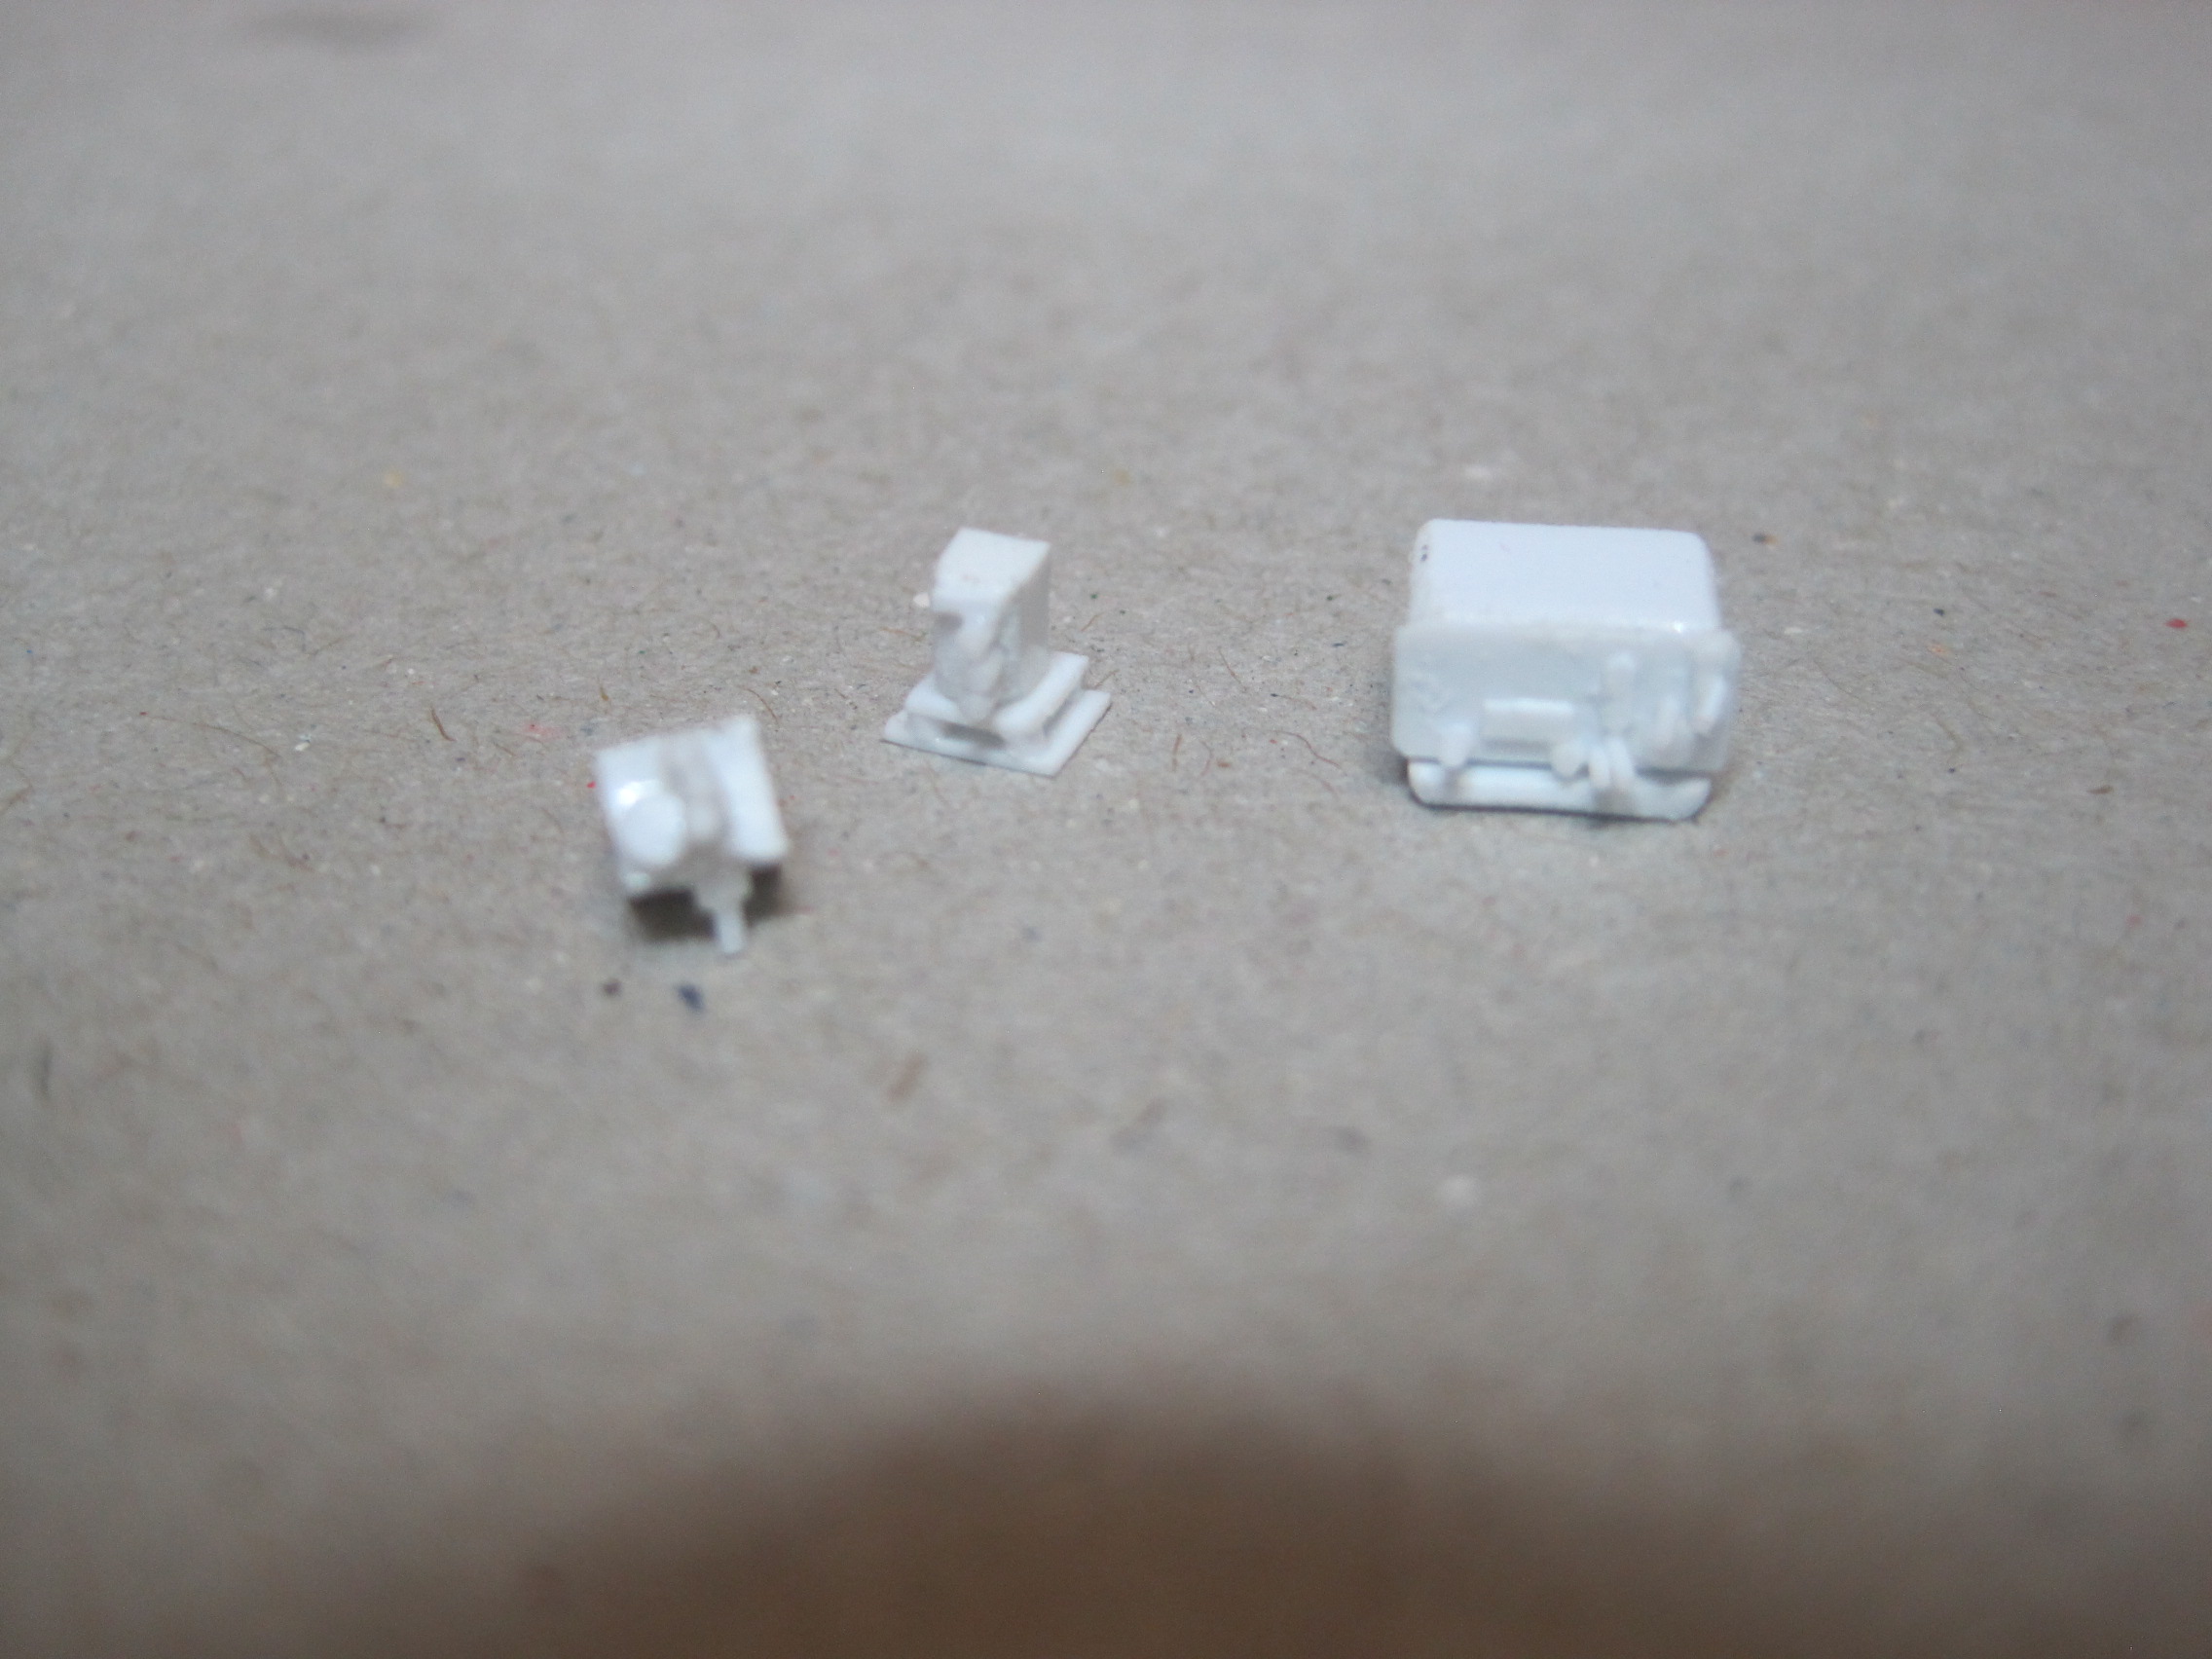
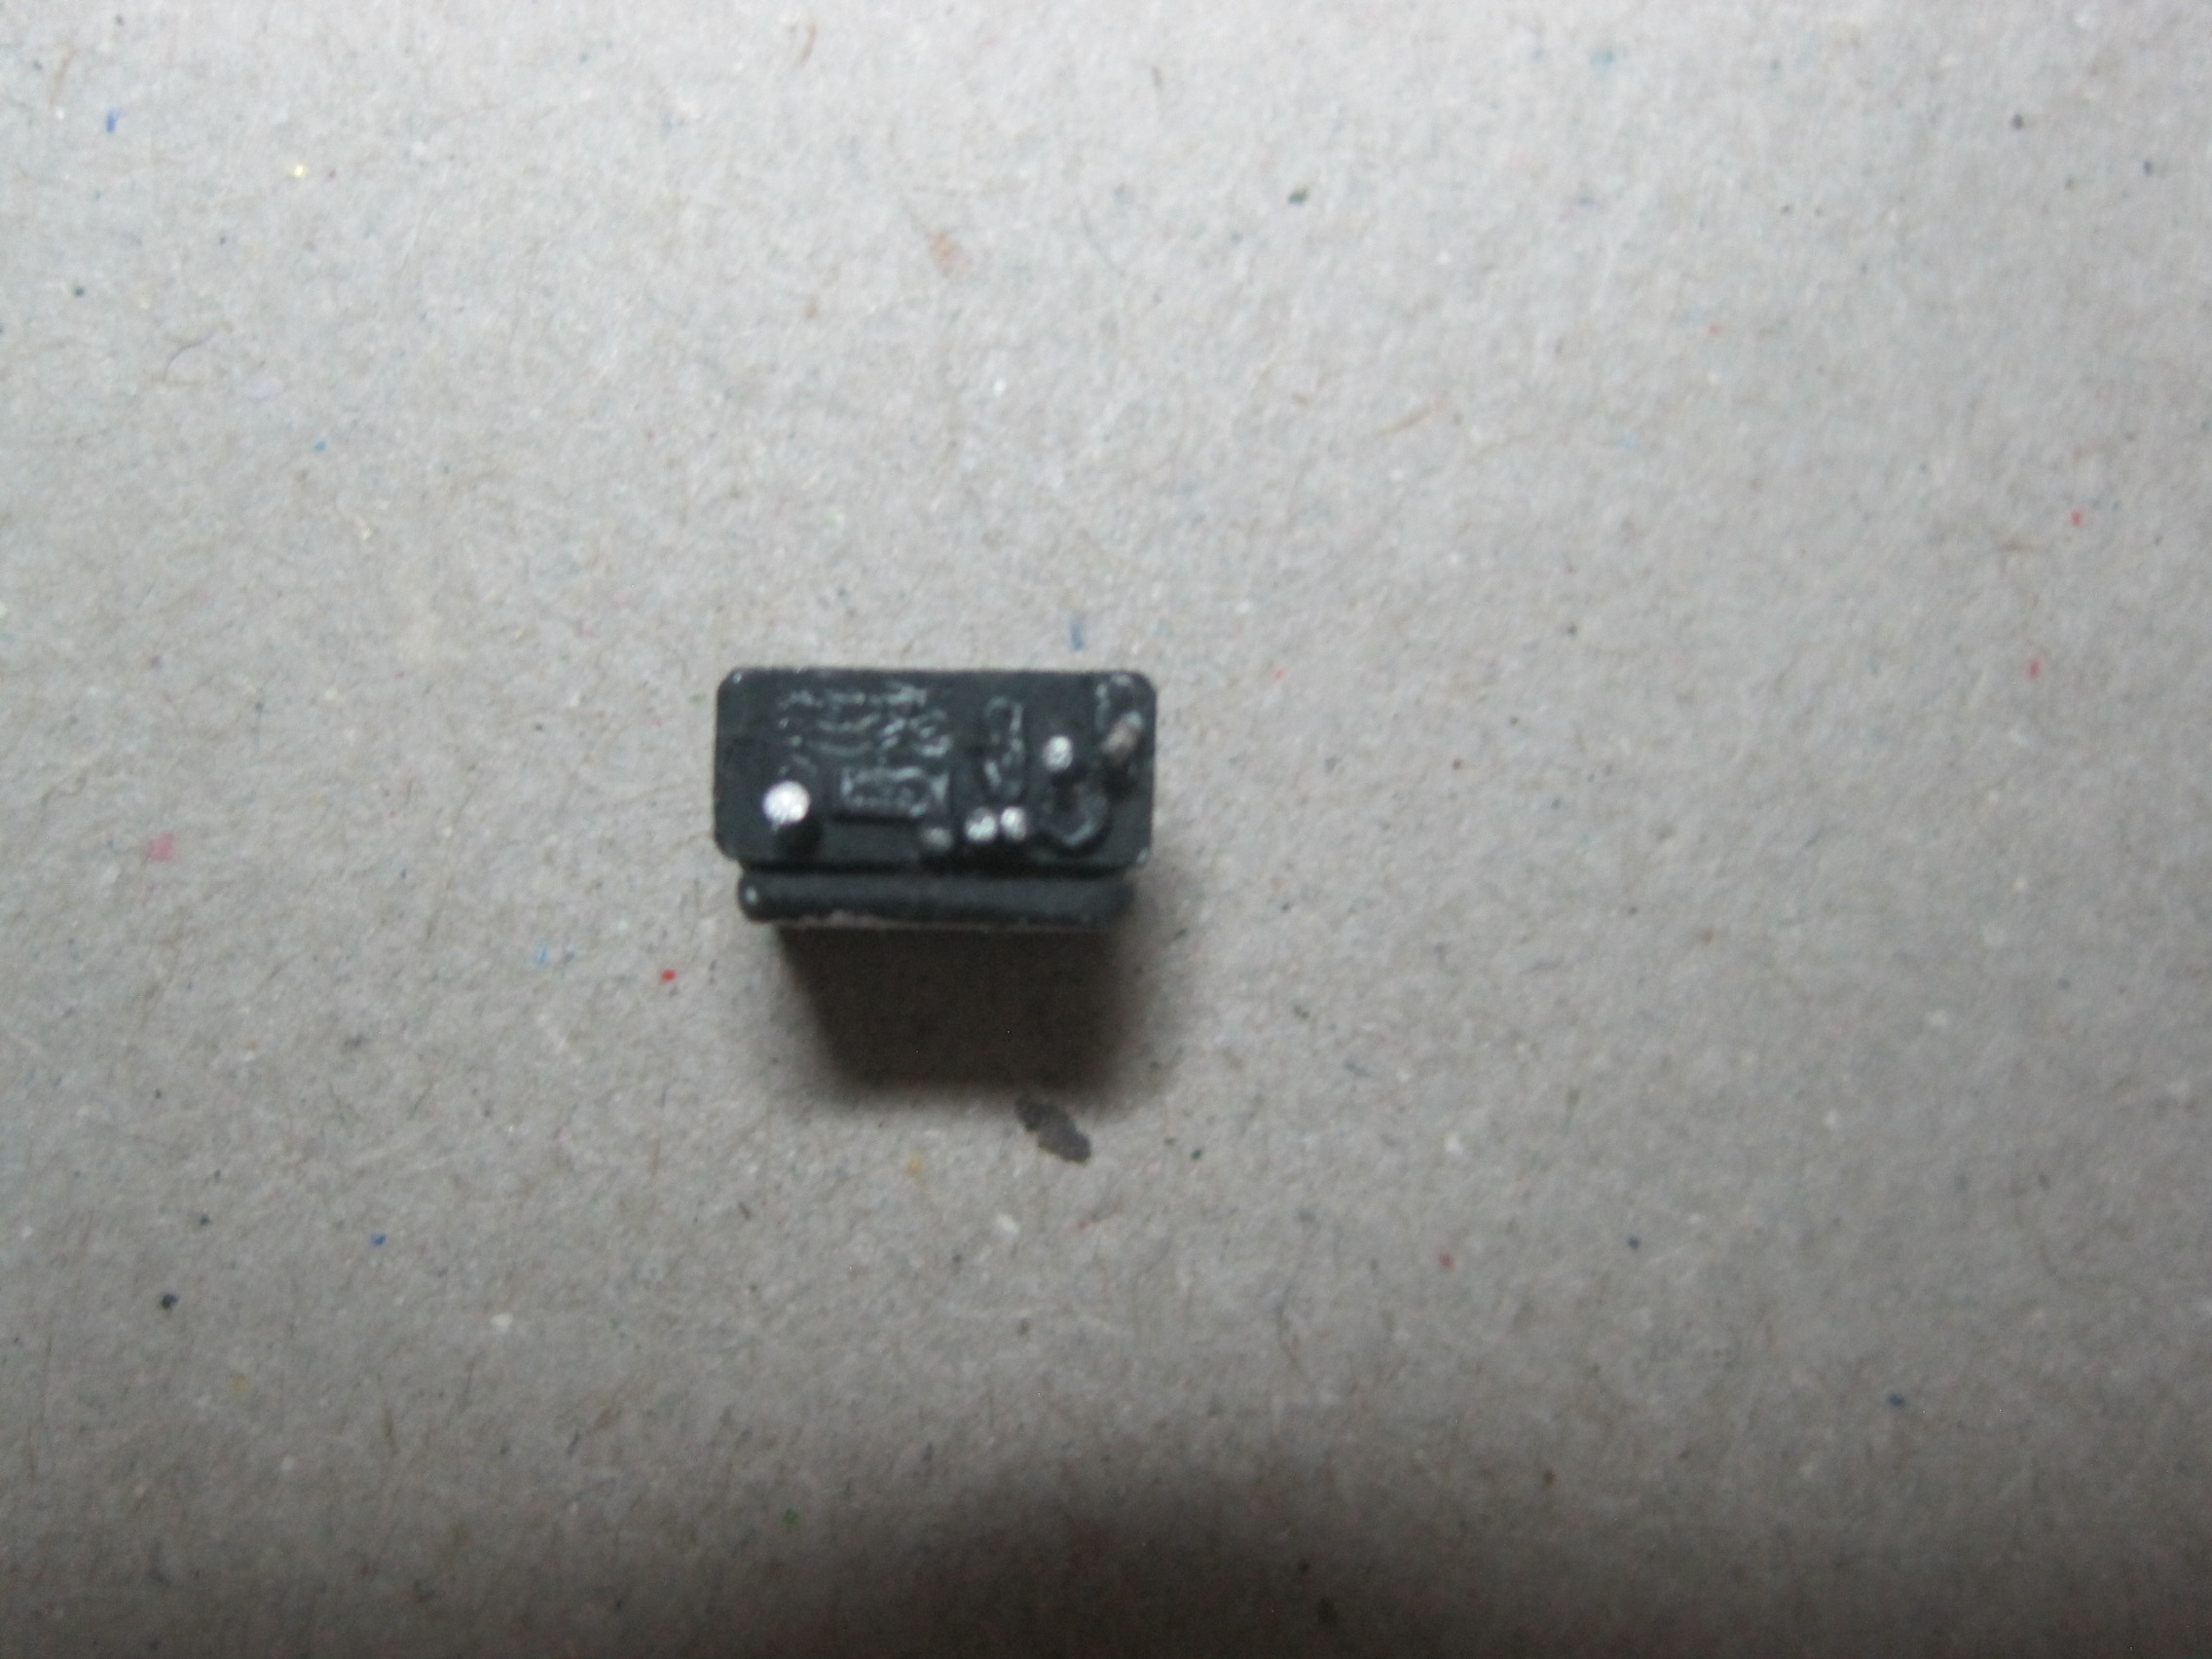
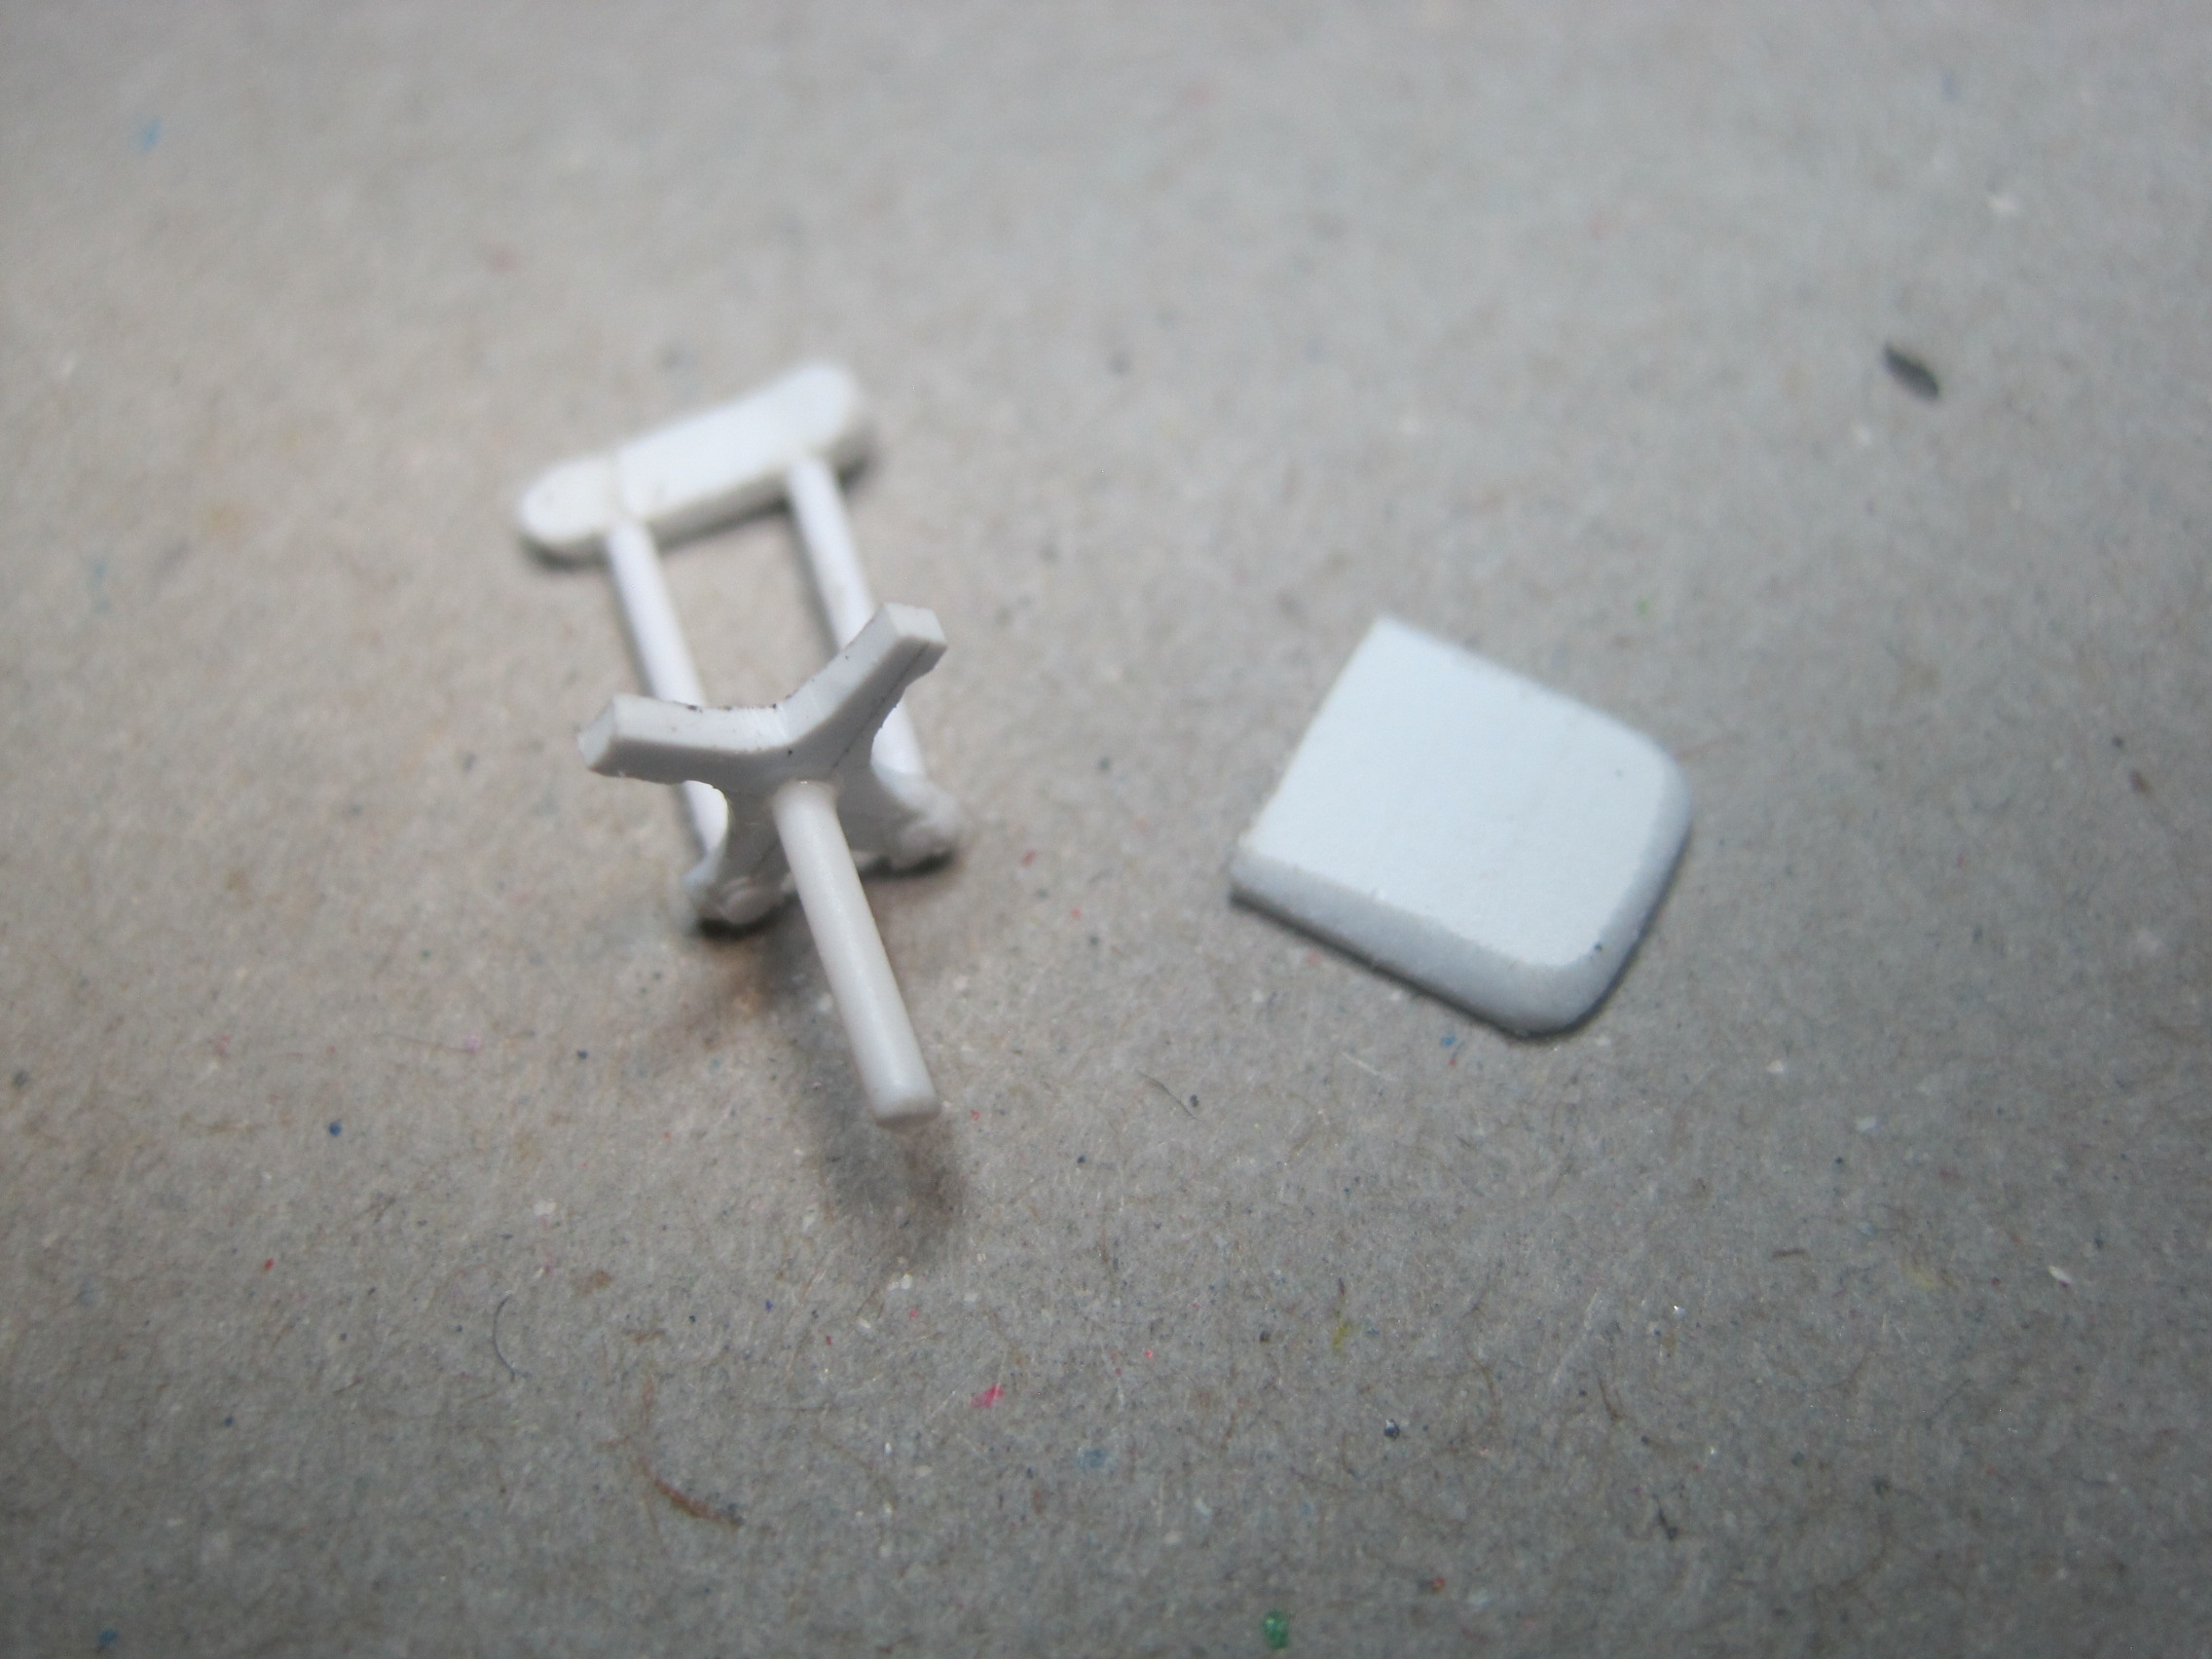
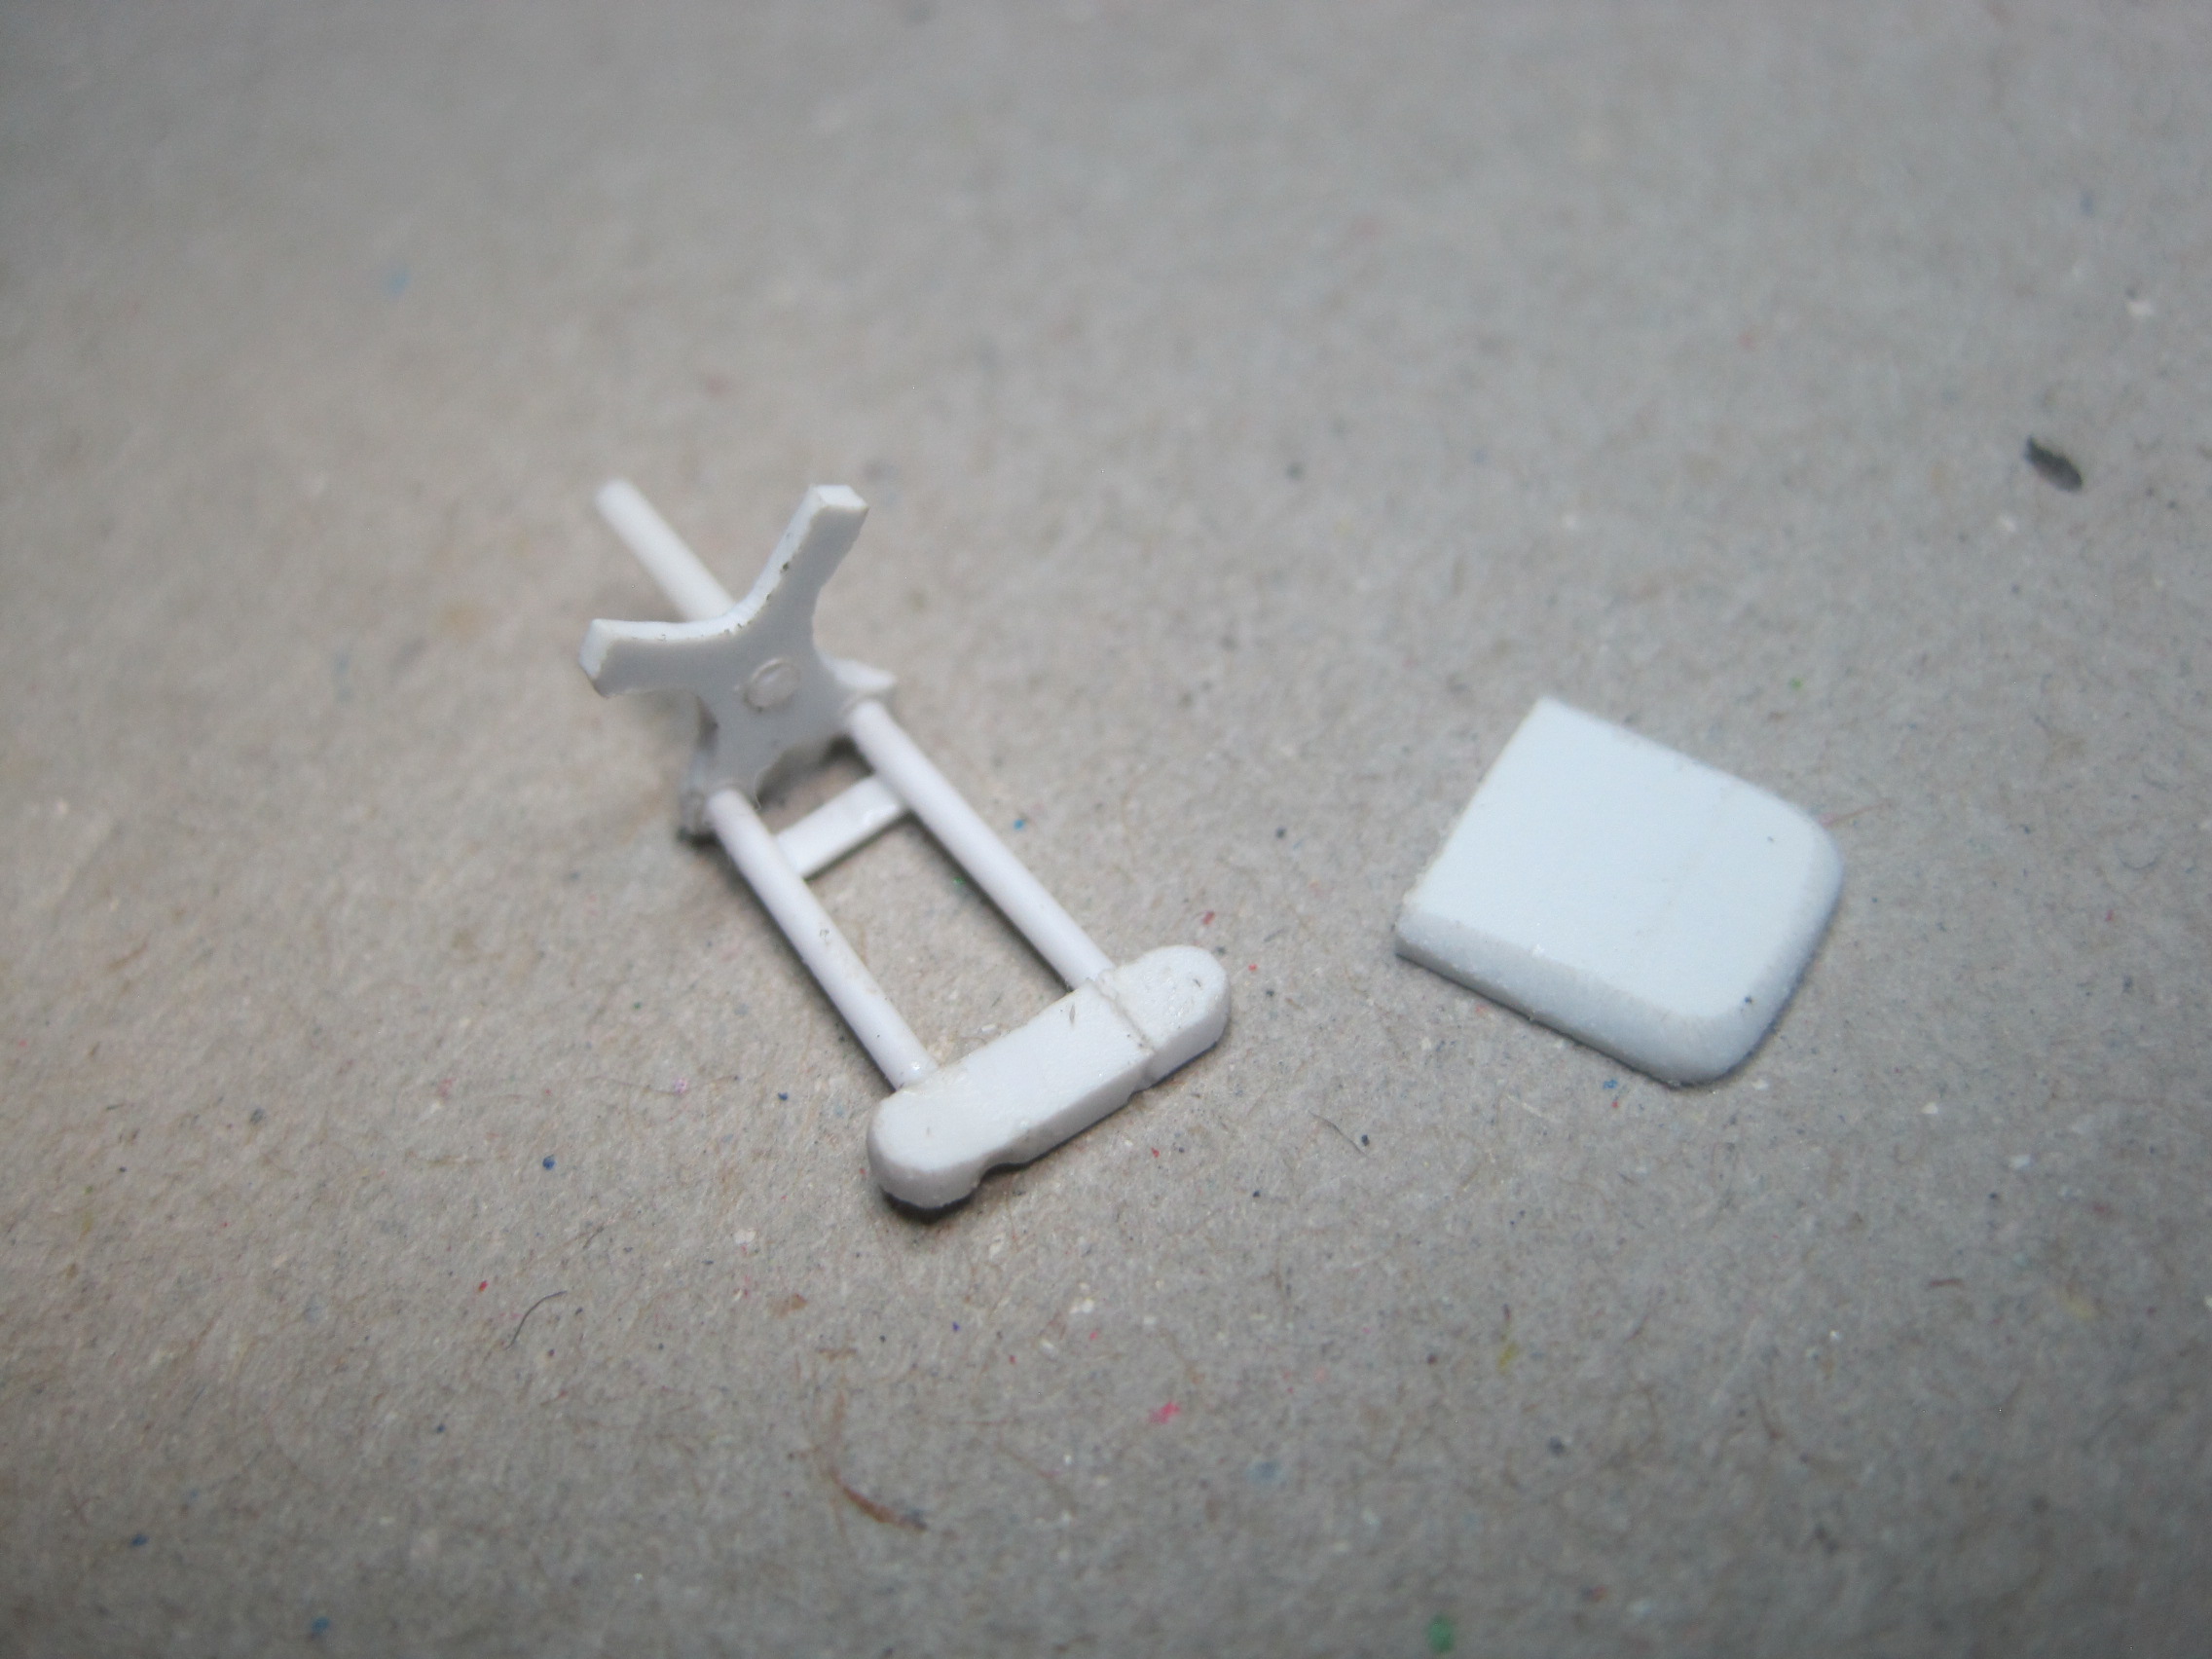
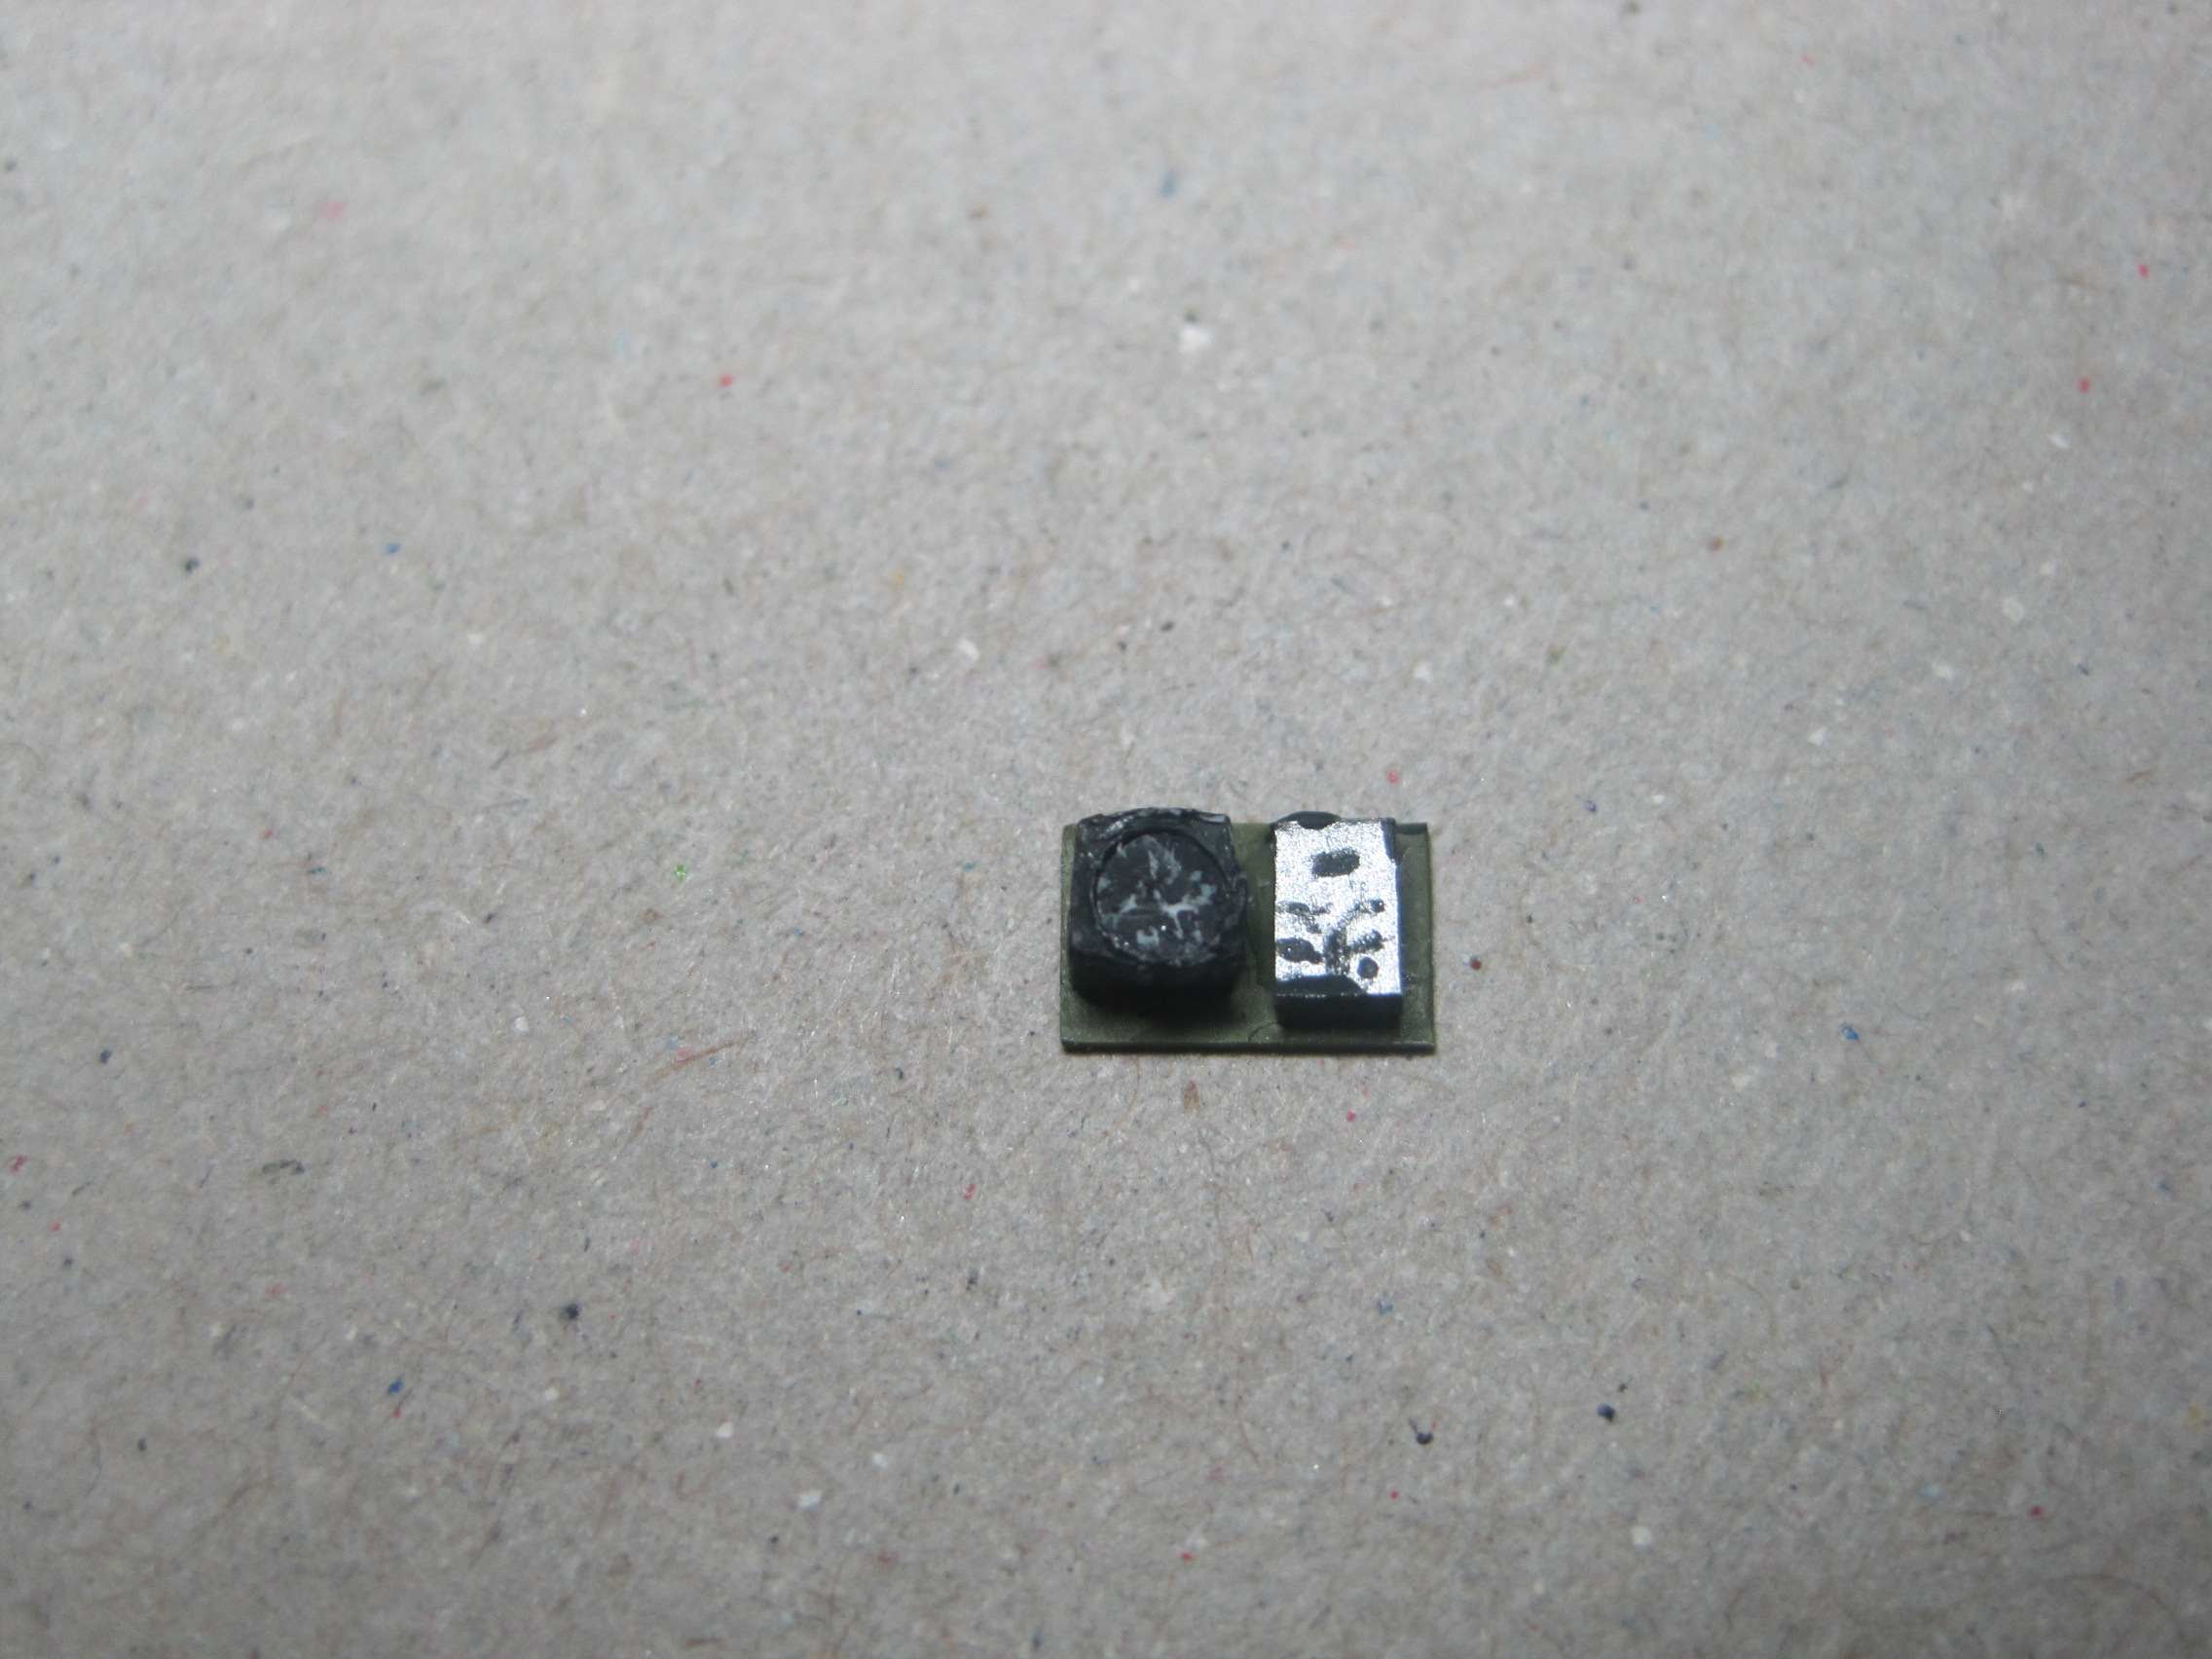
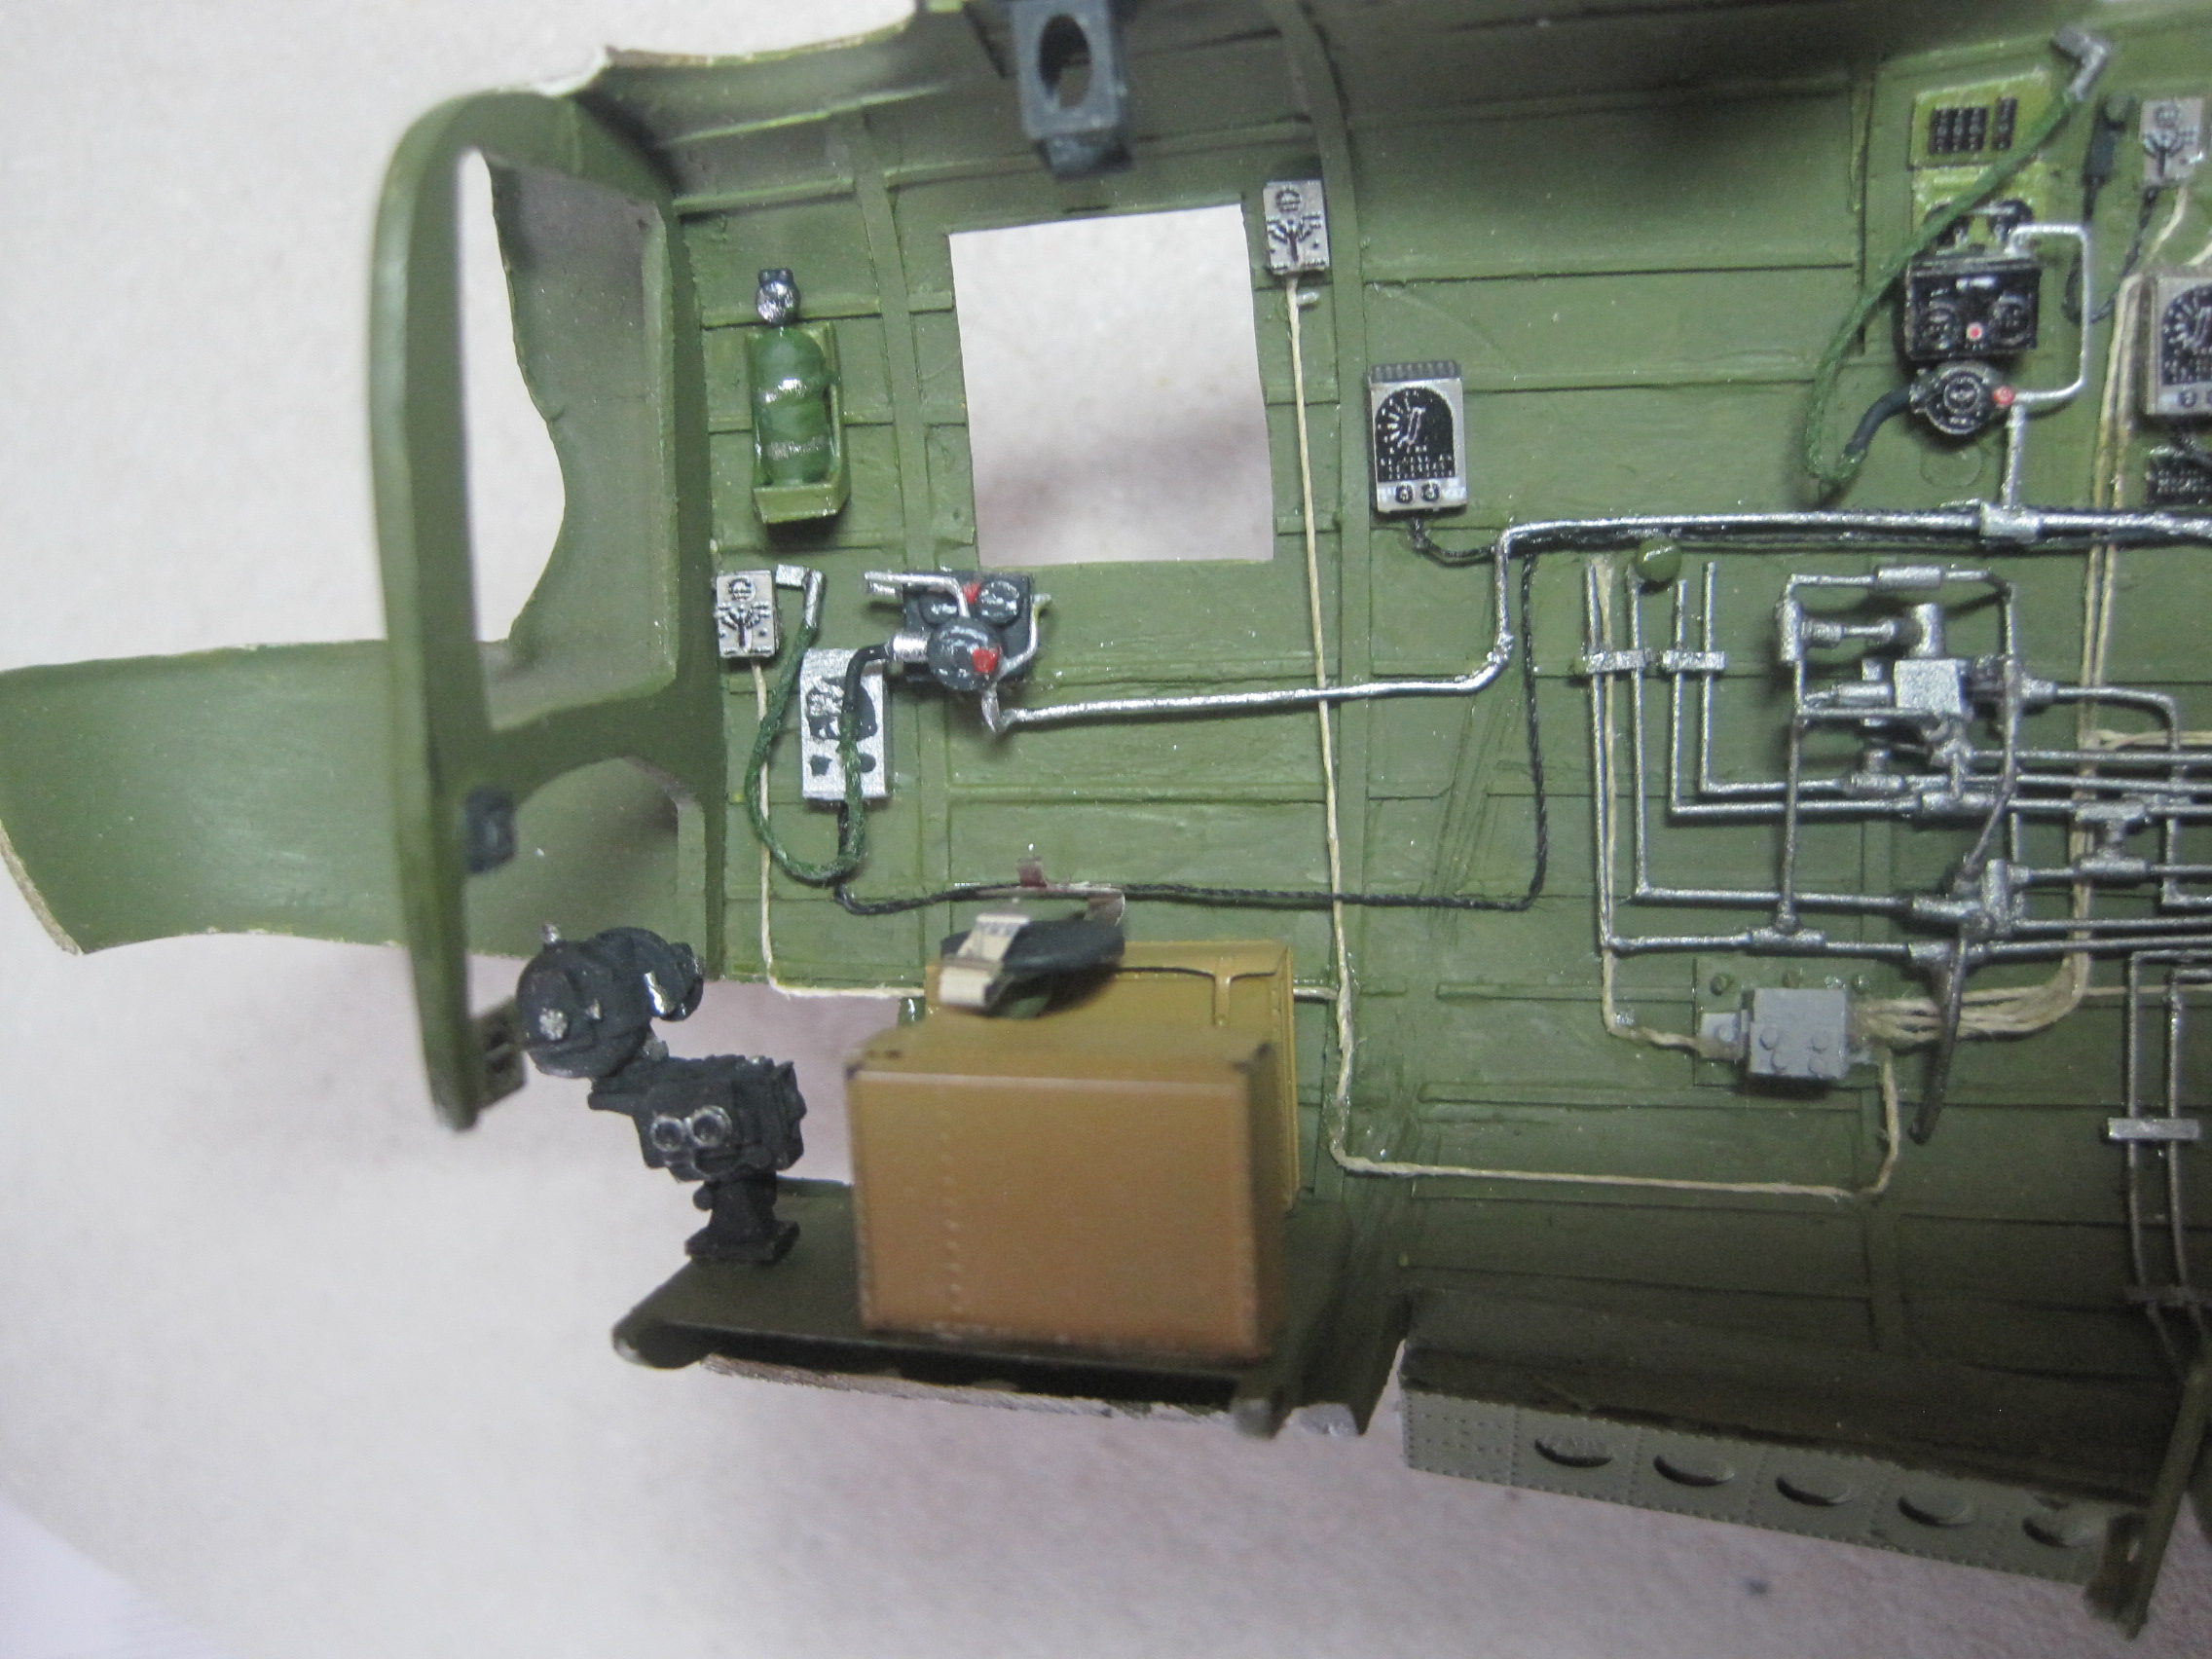
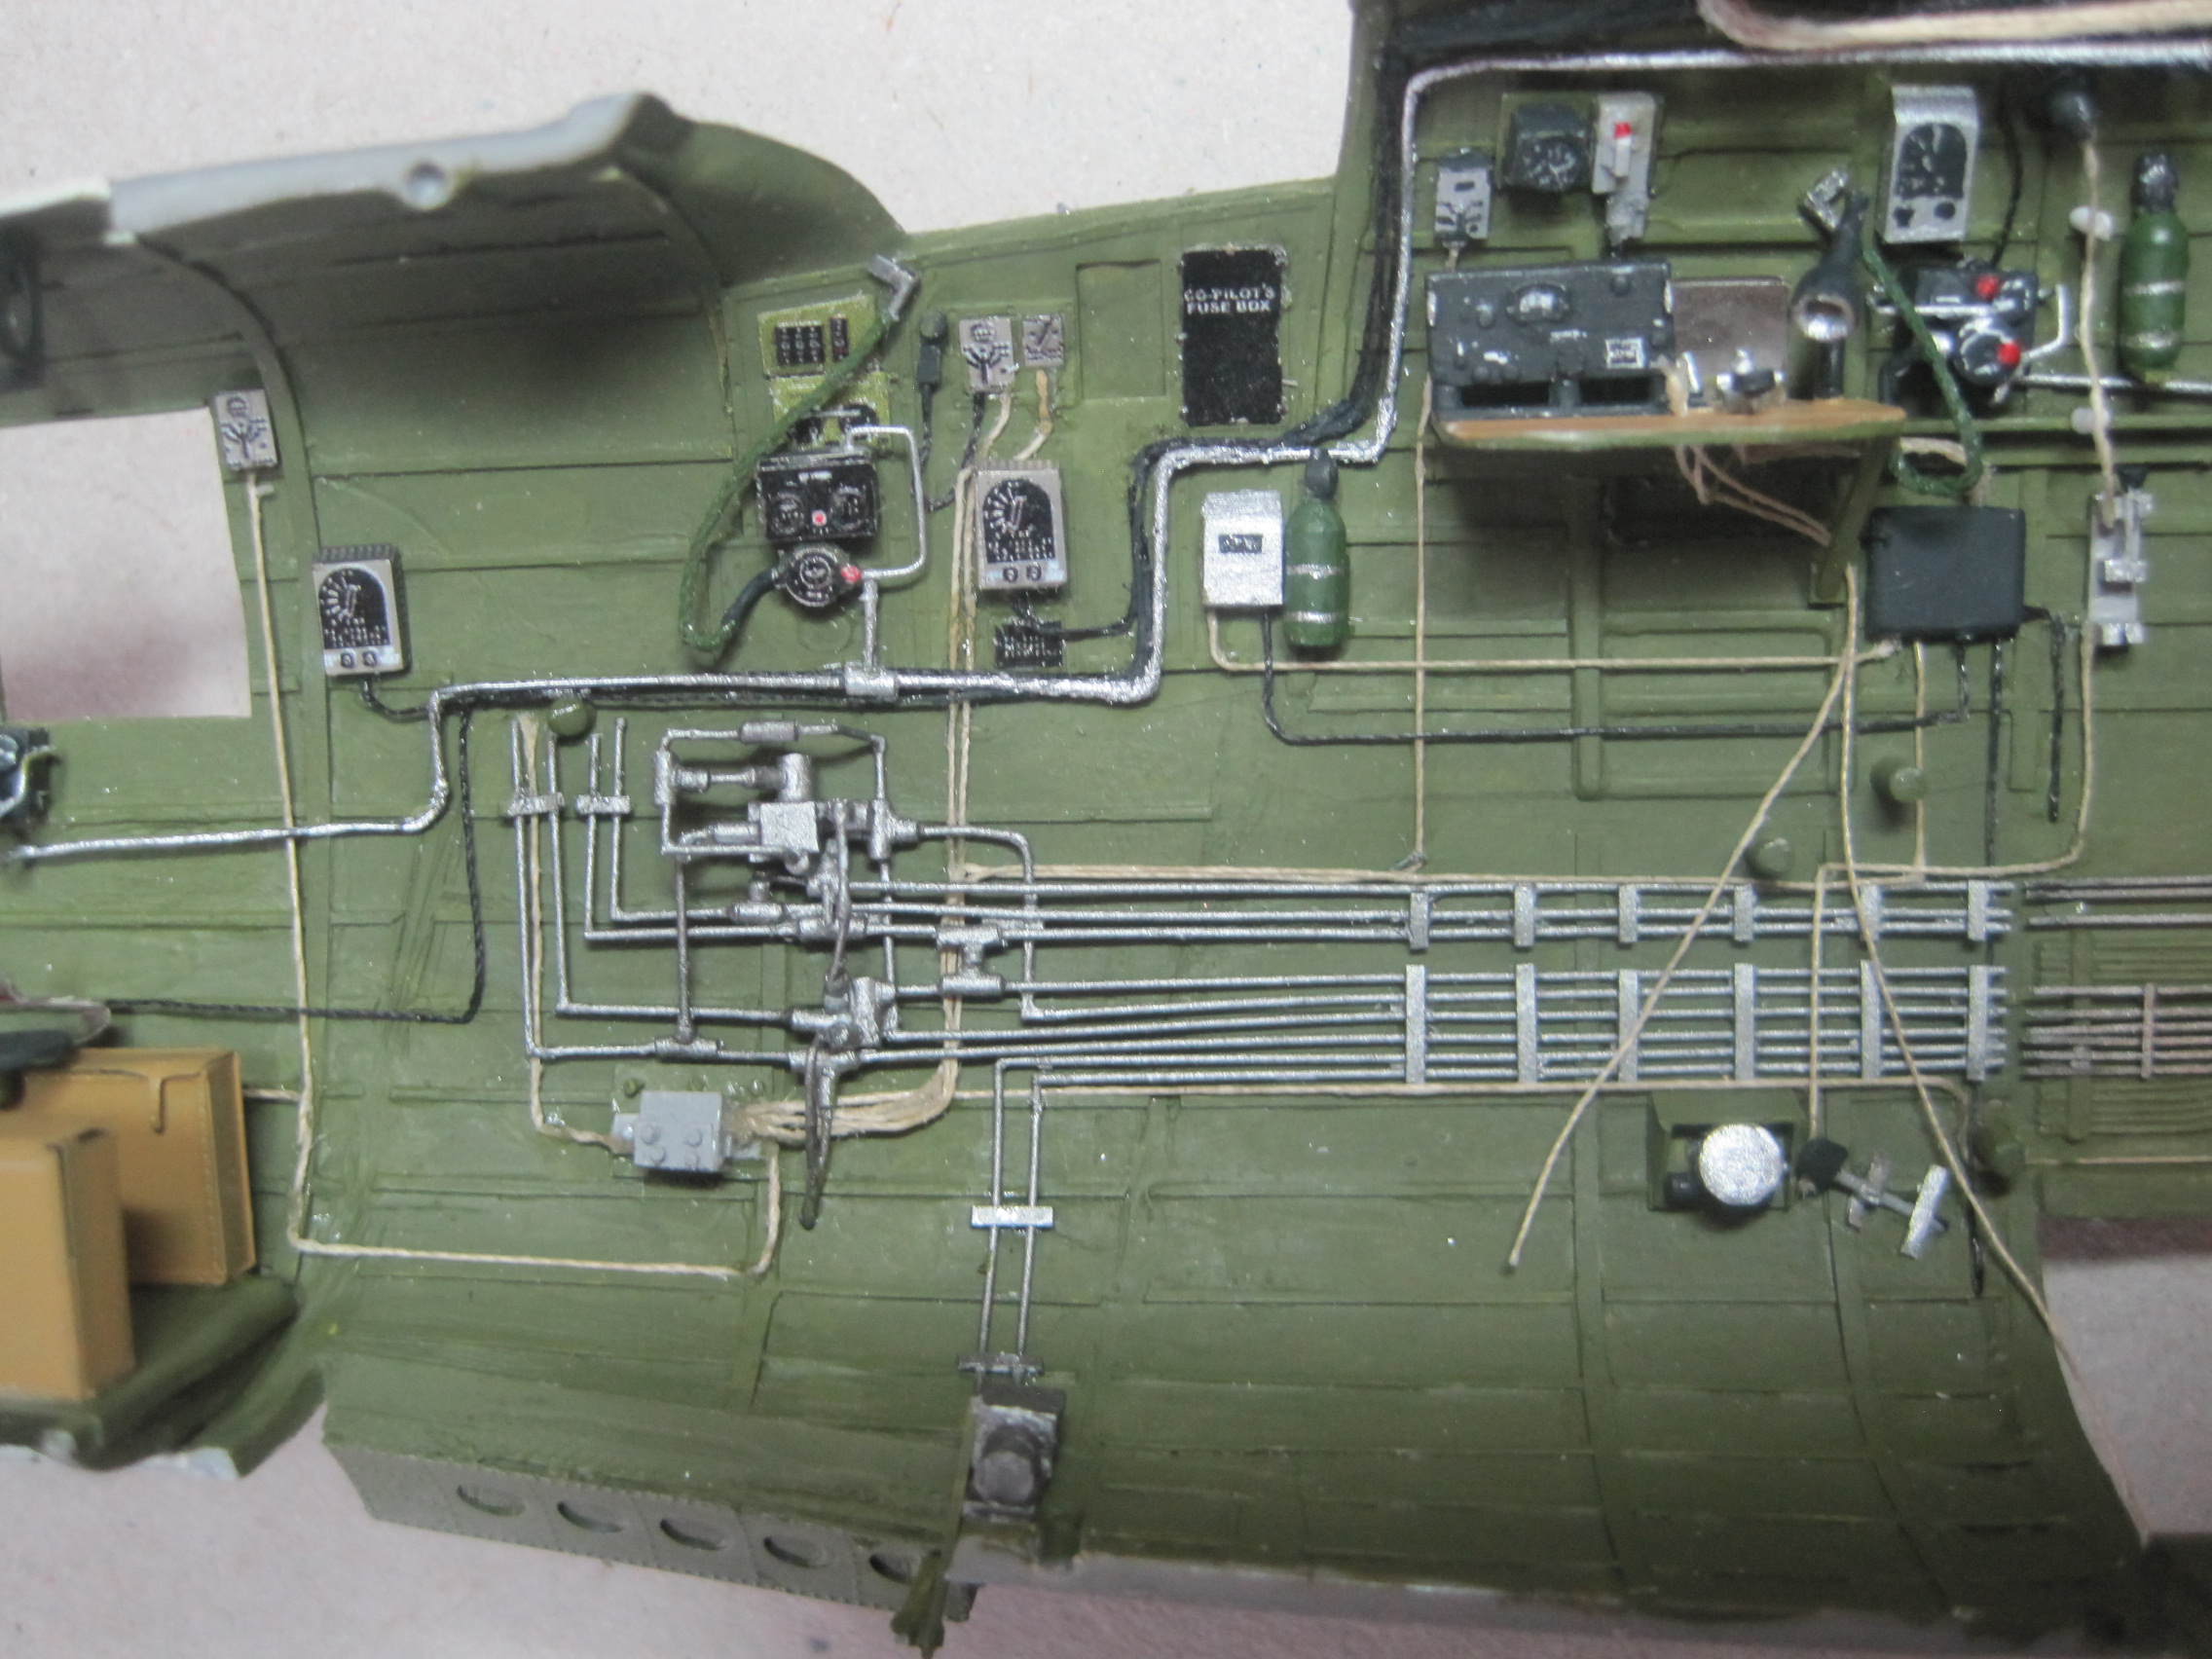
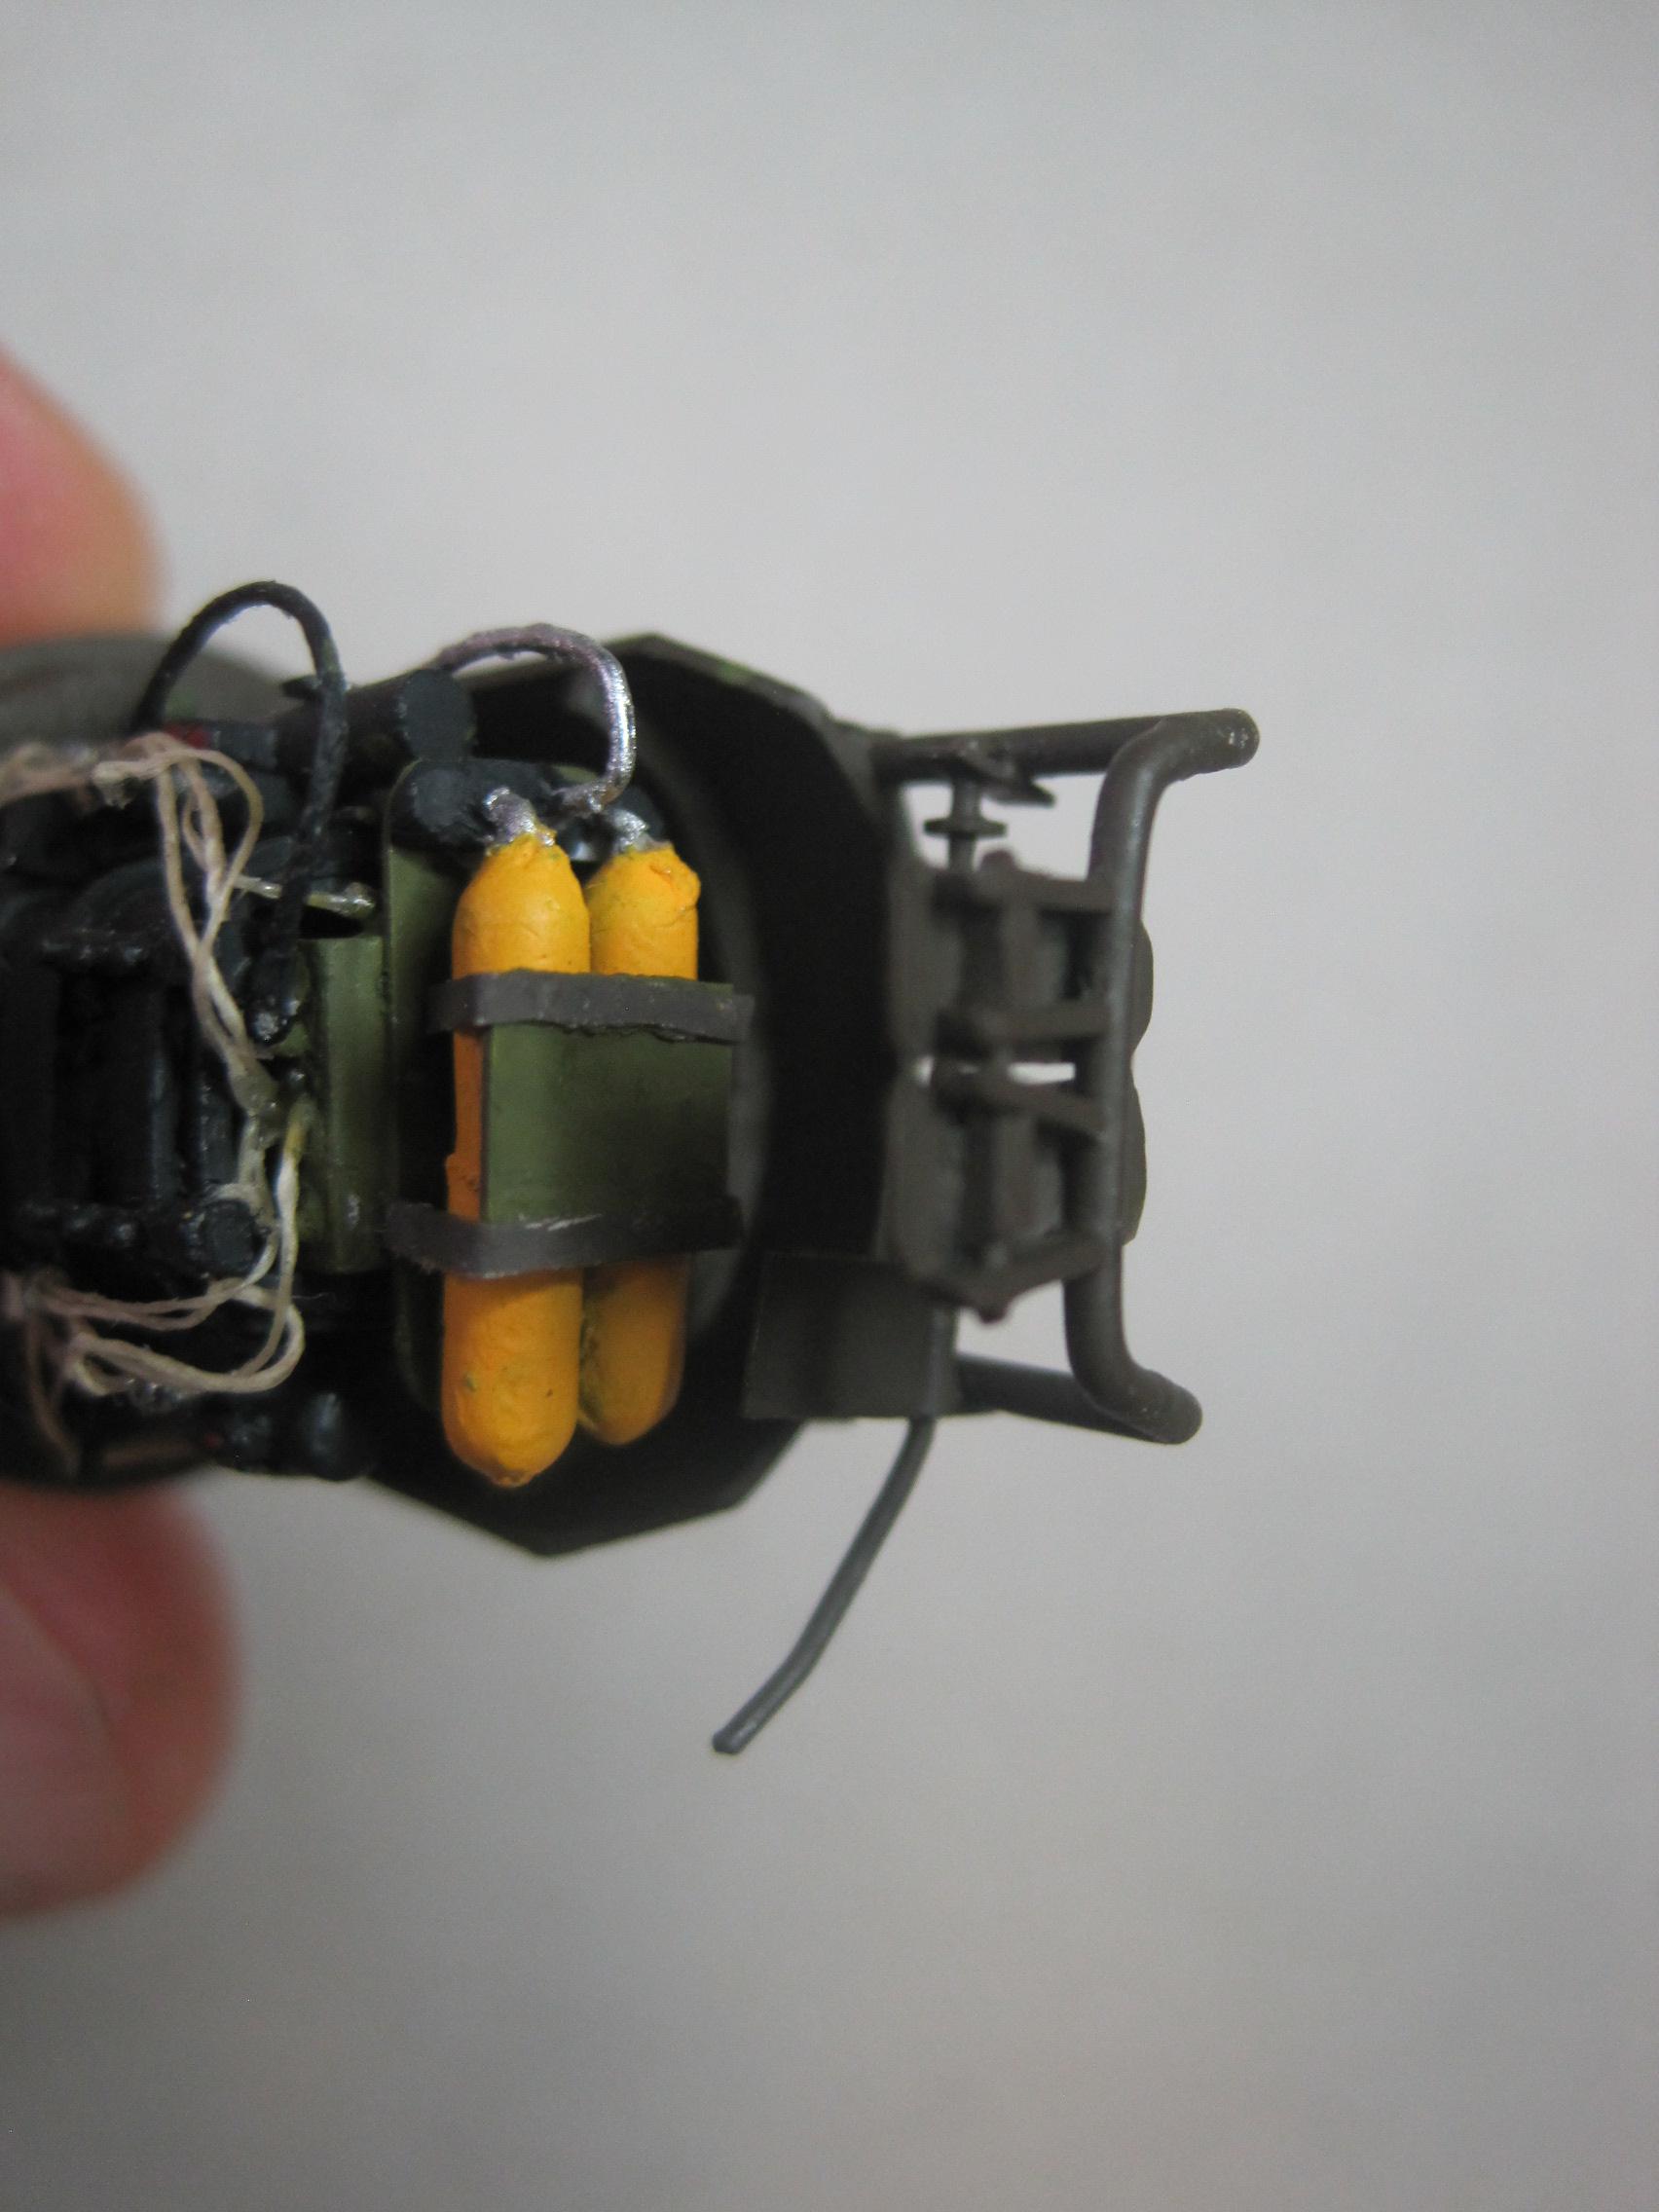
Thanks for all your kind words. After I bought the aftermarket radio set available, I realized that there were quite a few items not included, and it seemed silly to put a few in and not the rest, so I resorted to scratch building. The internet is so great for research, as I was able to find not only the flight manual which described all the items along with pictures, but additional photos of the items from various places as well. Once an engineer, always an engineer I guess!

JPTRR

#051

Joined: December 21, 2002
KitMaker: 7,772 posts
AeroScale: 3,175 posts
Posted: Wednesday, December 26, 2018 - 05:00 PM UTC
Tom,
I am in awe!
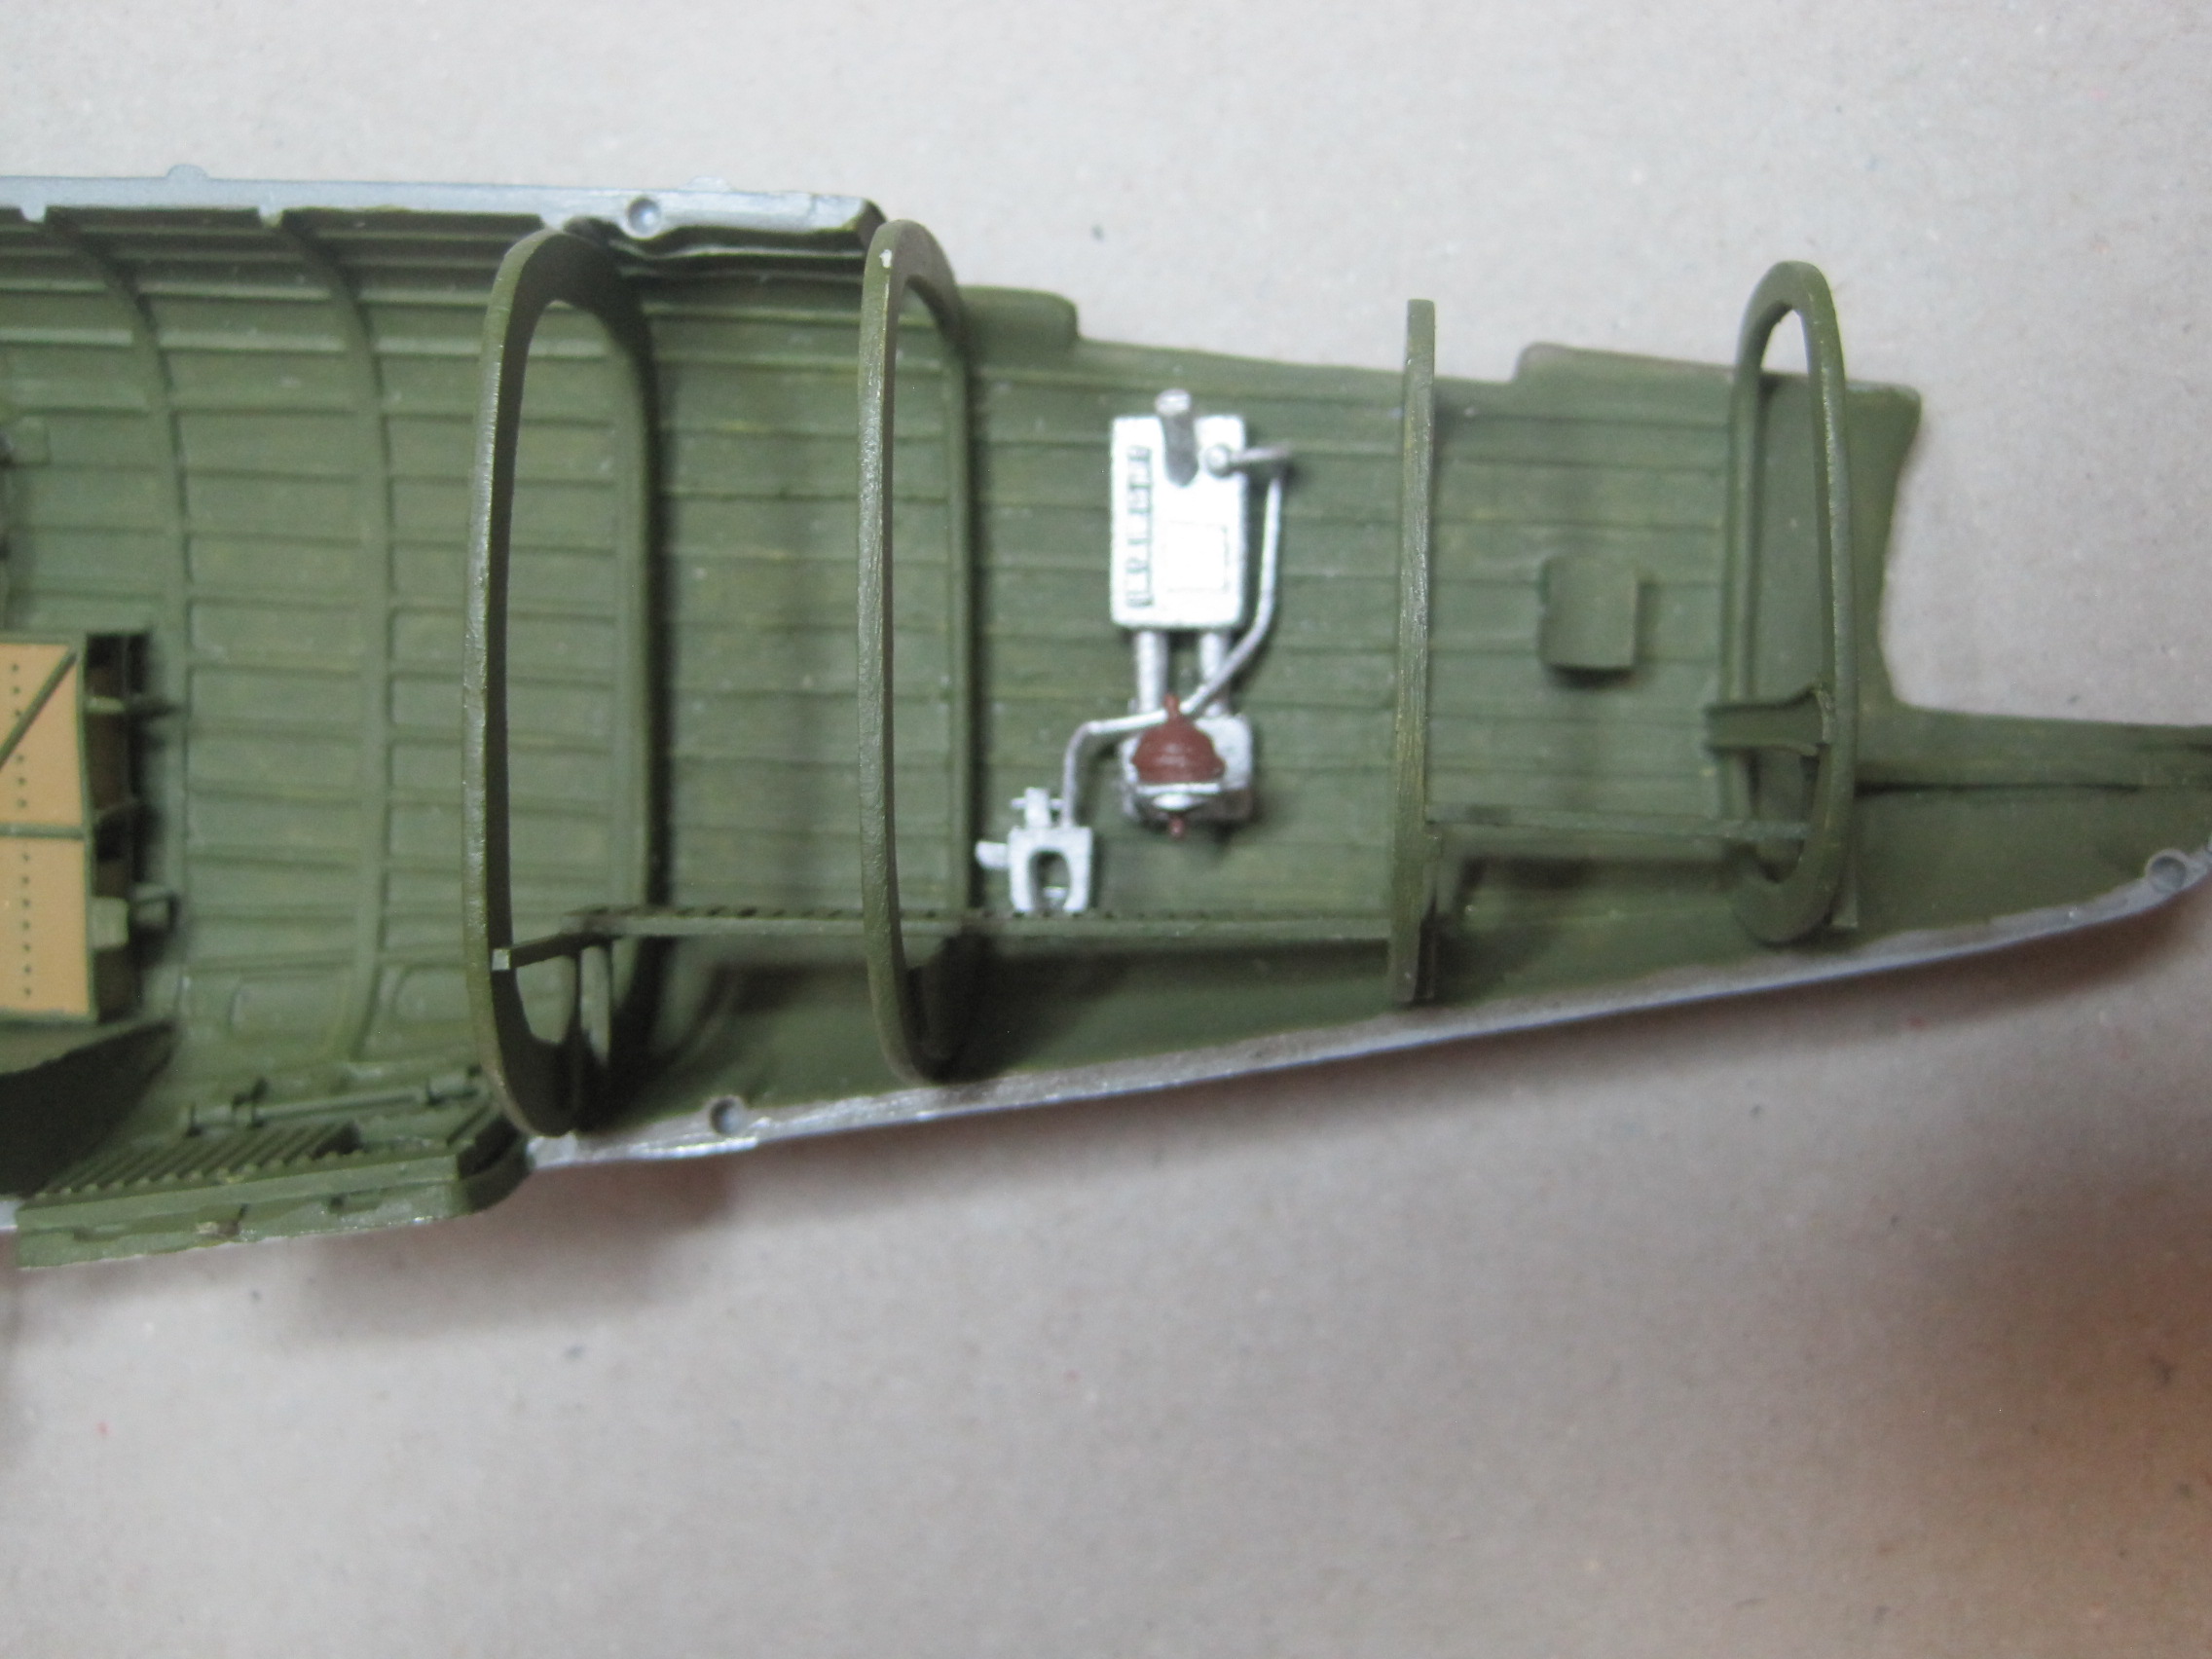
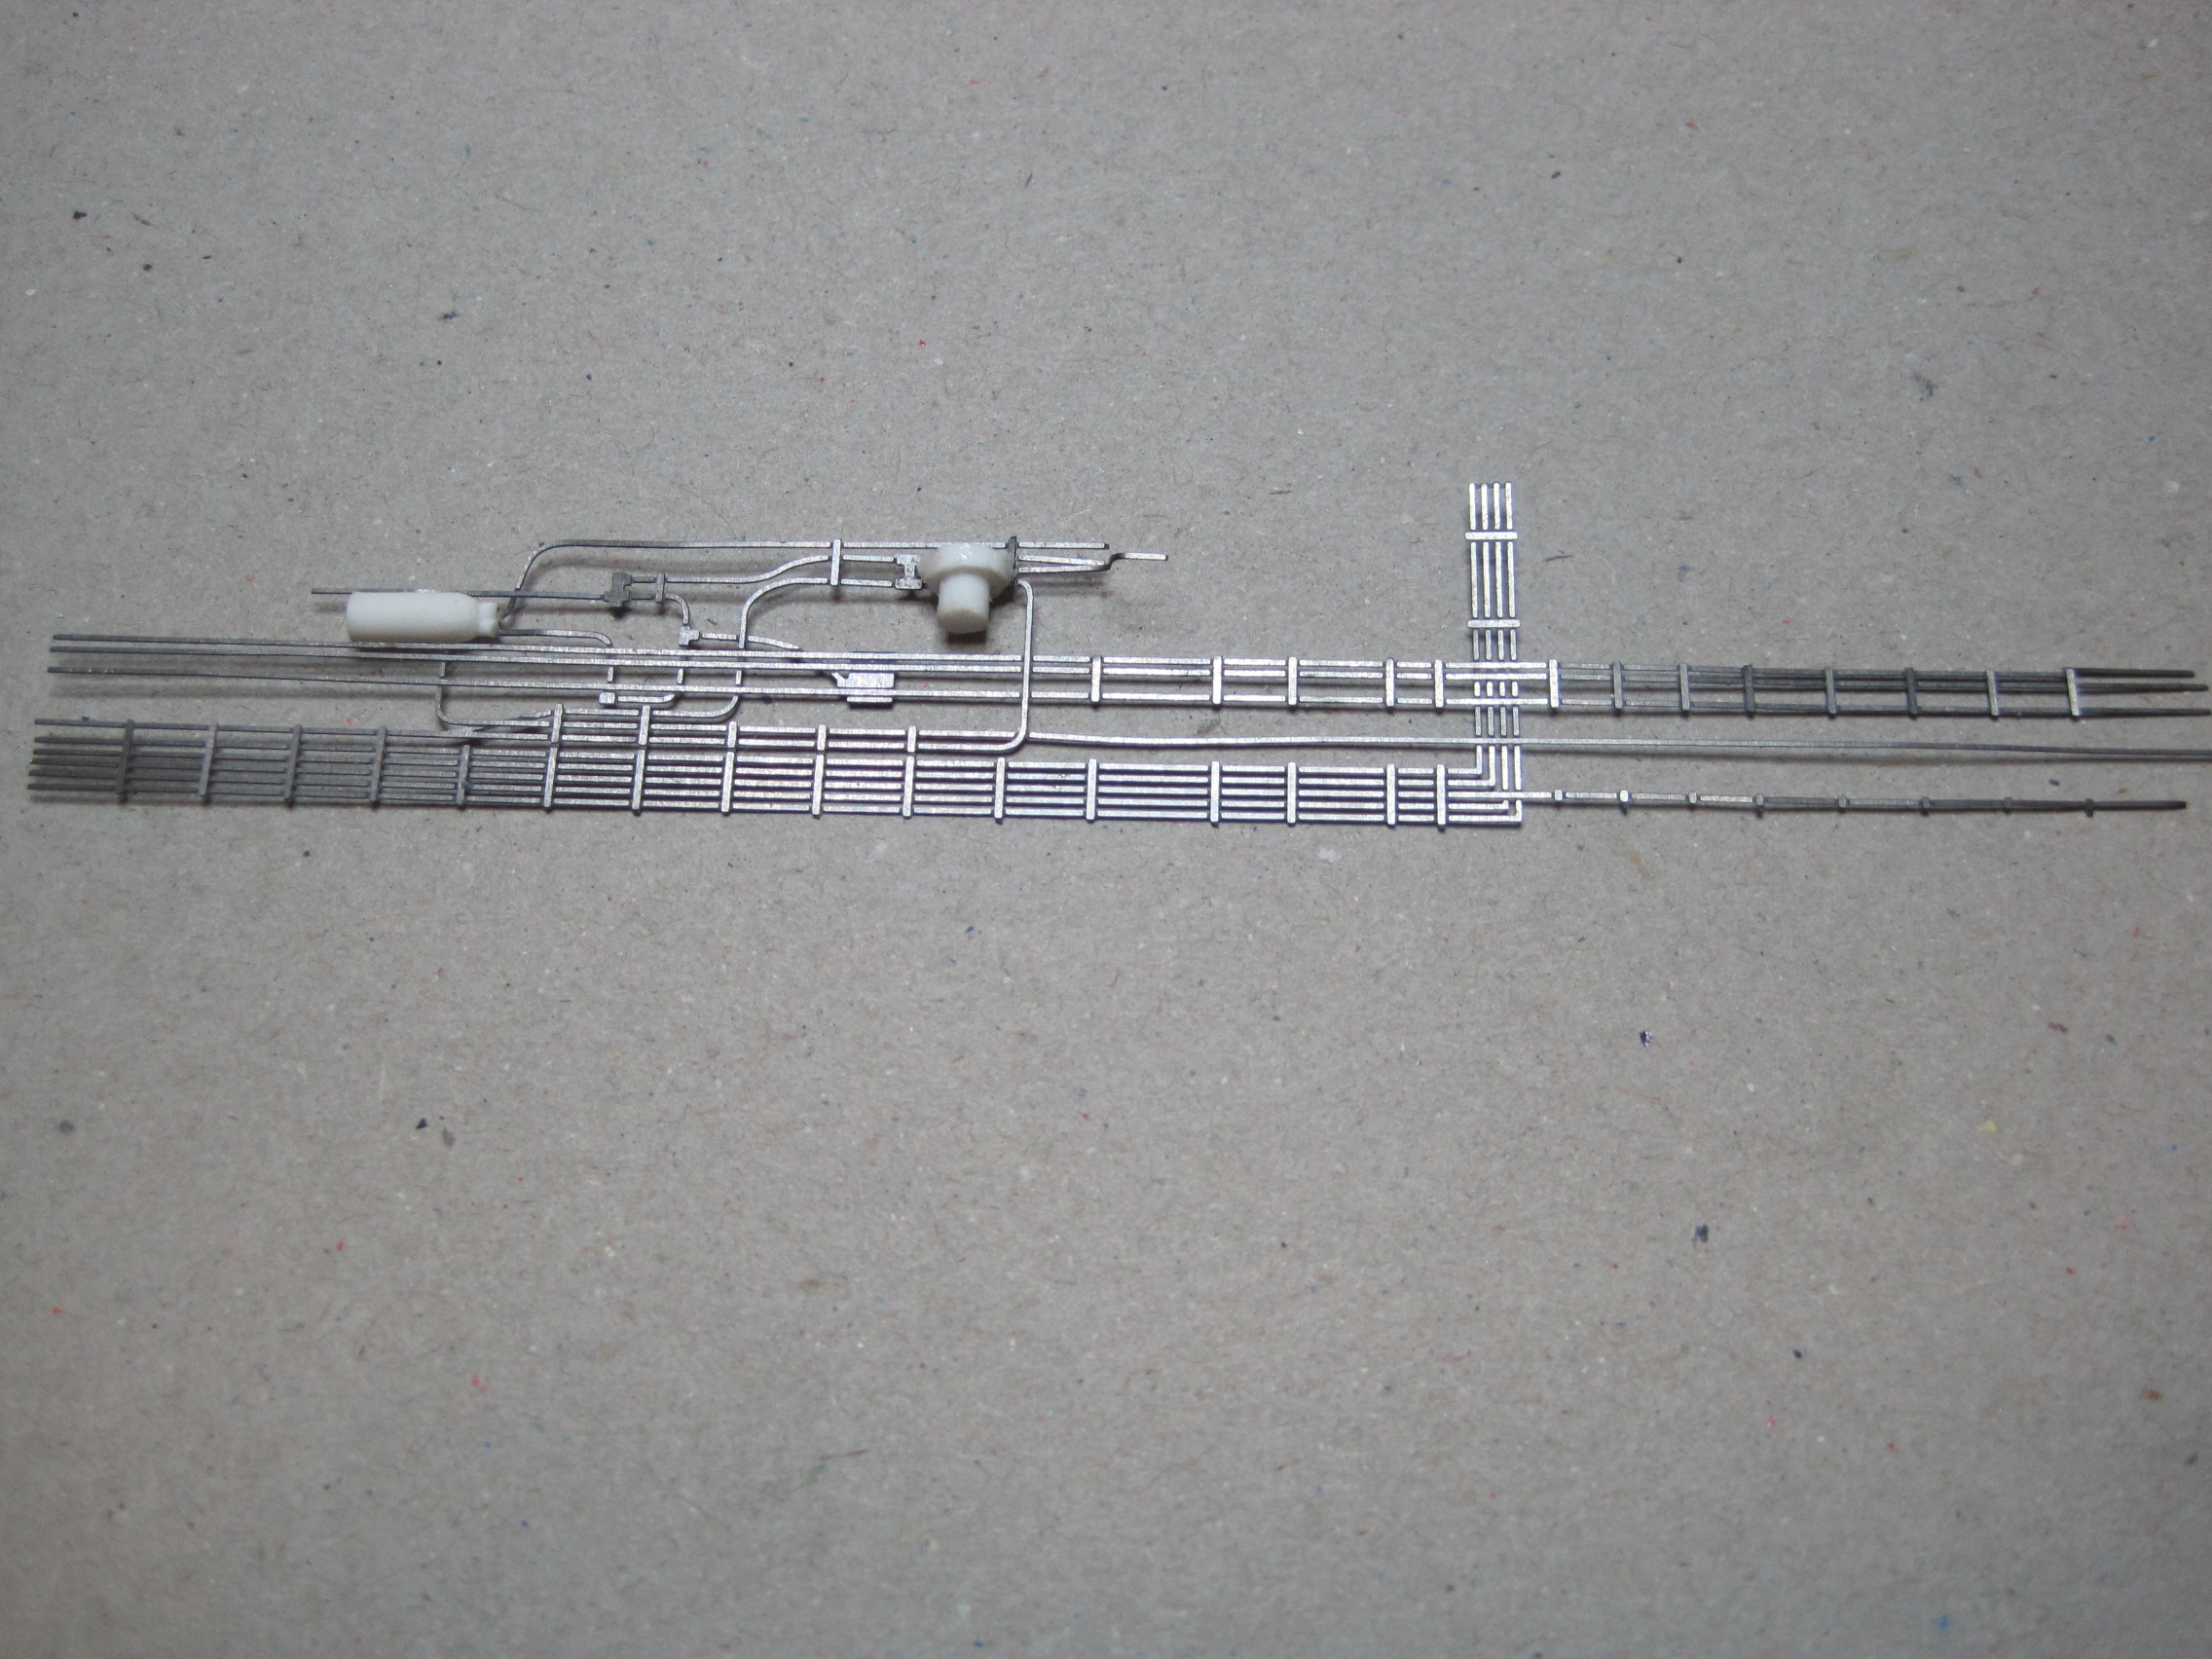
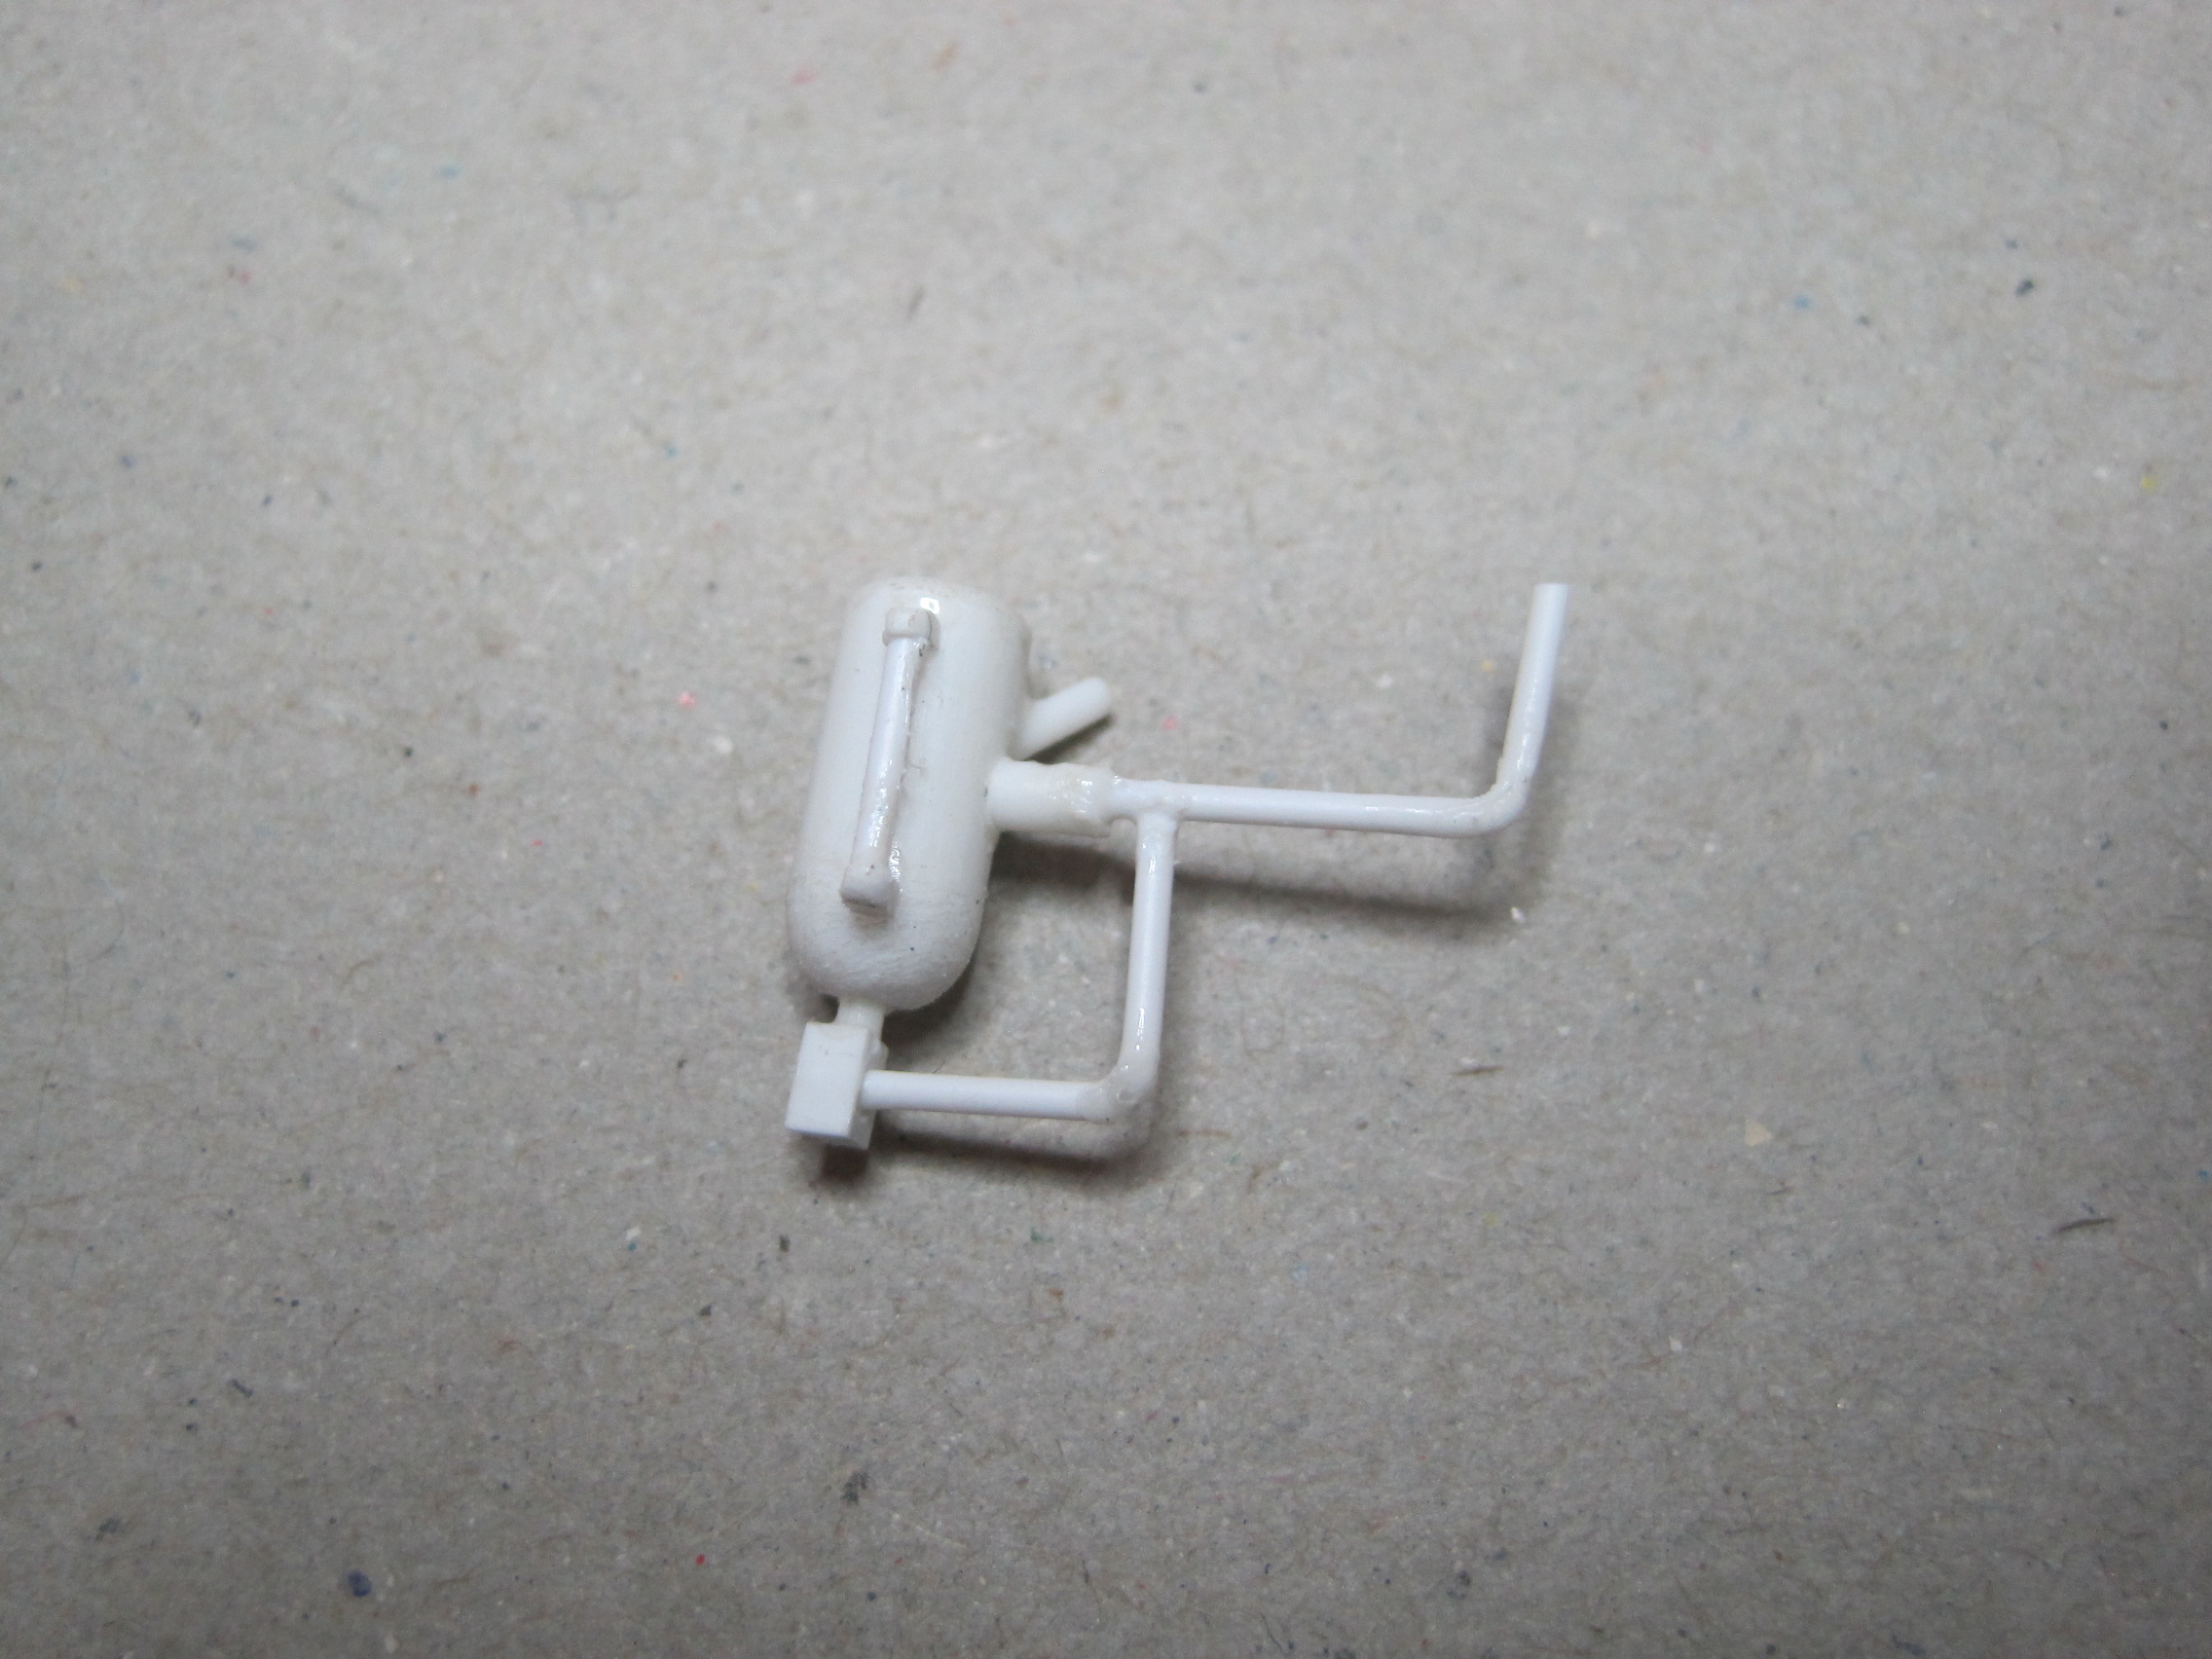
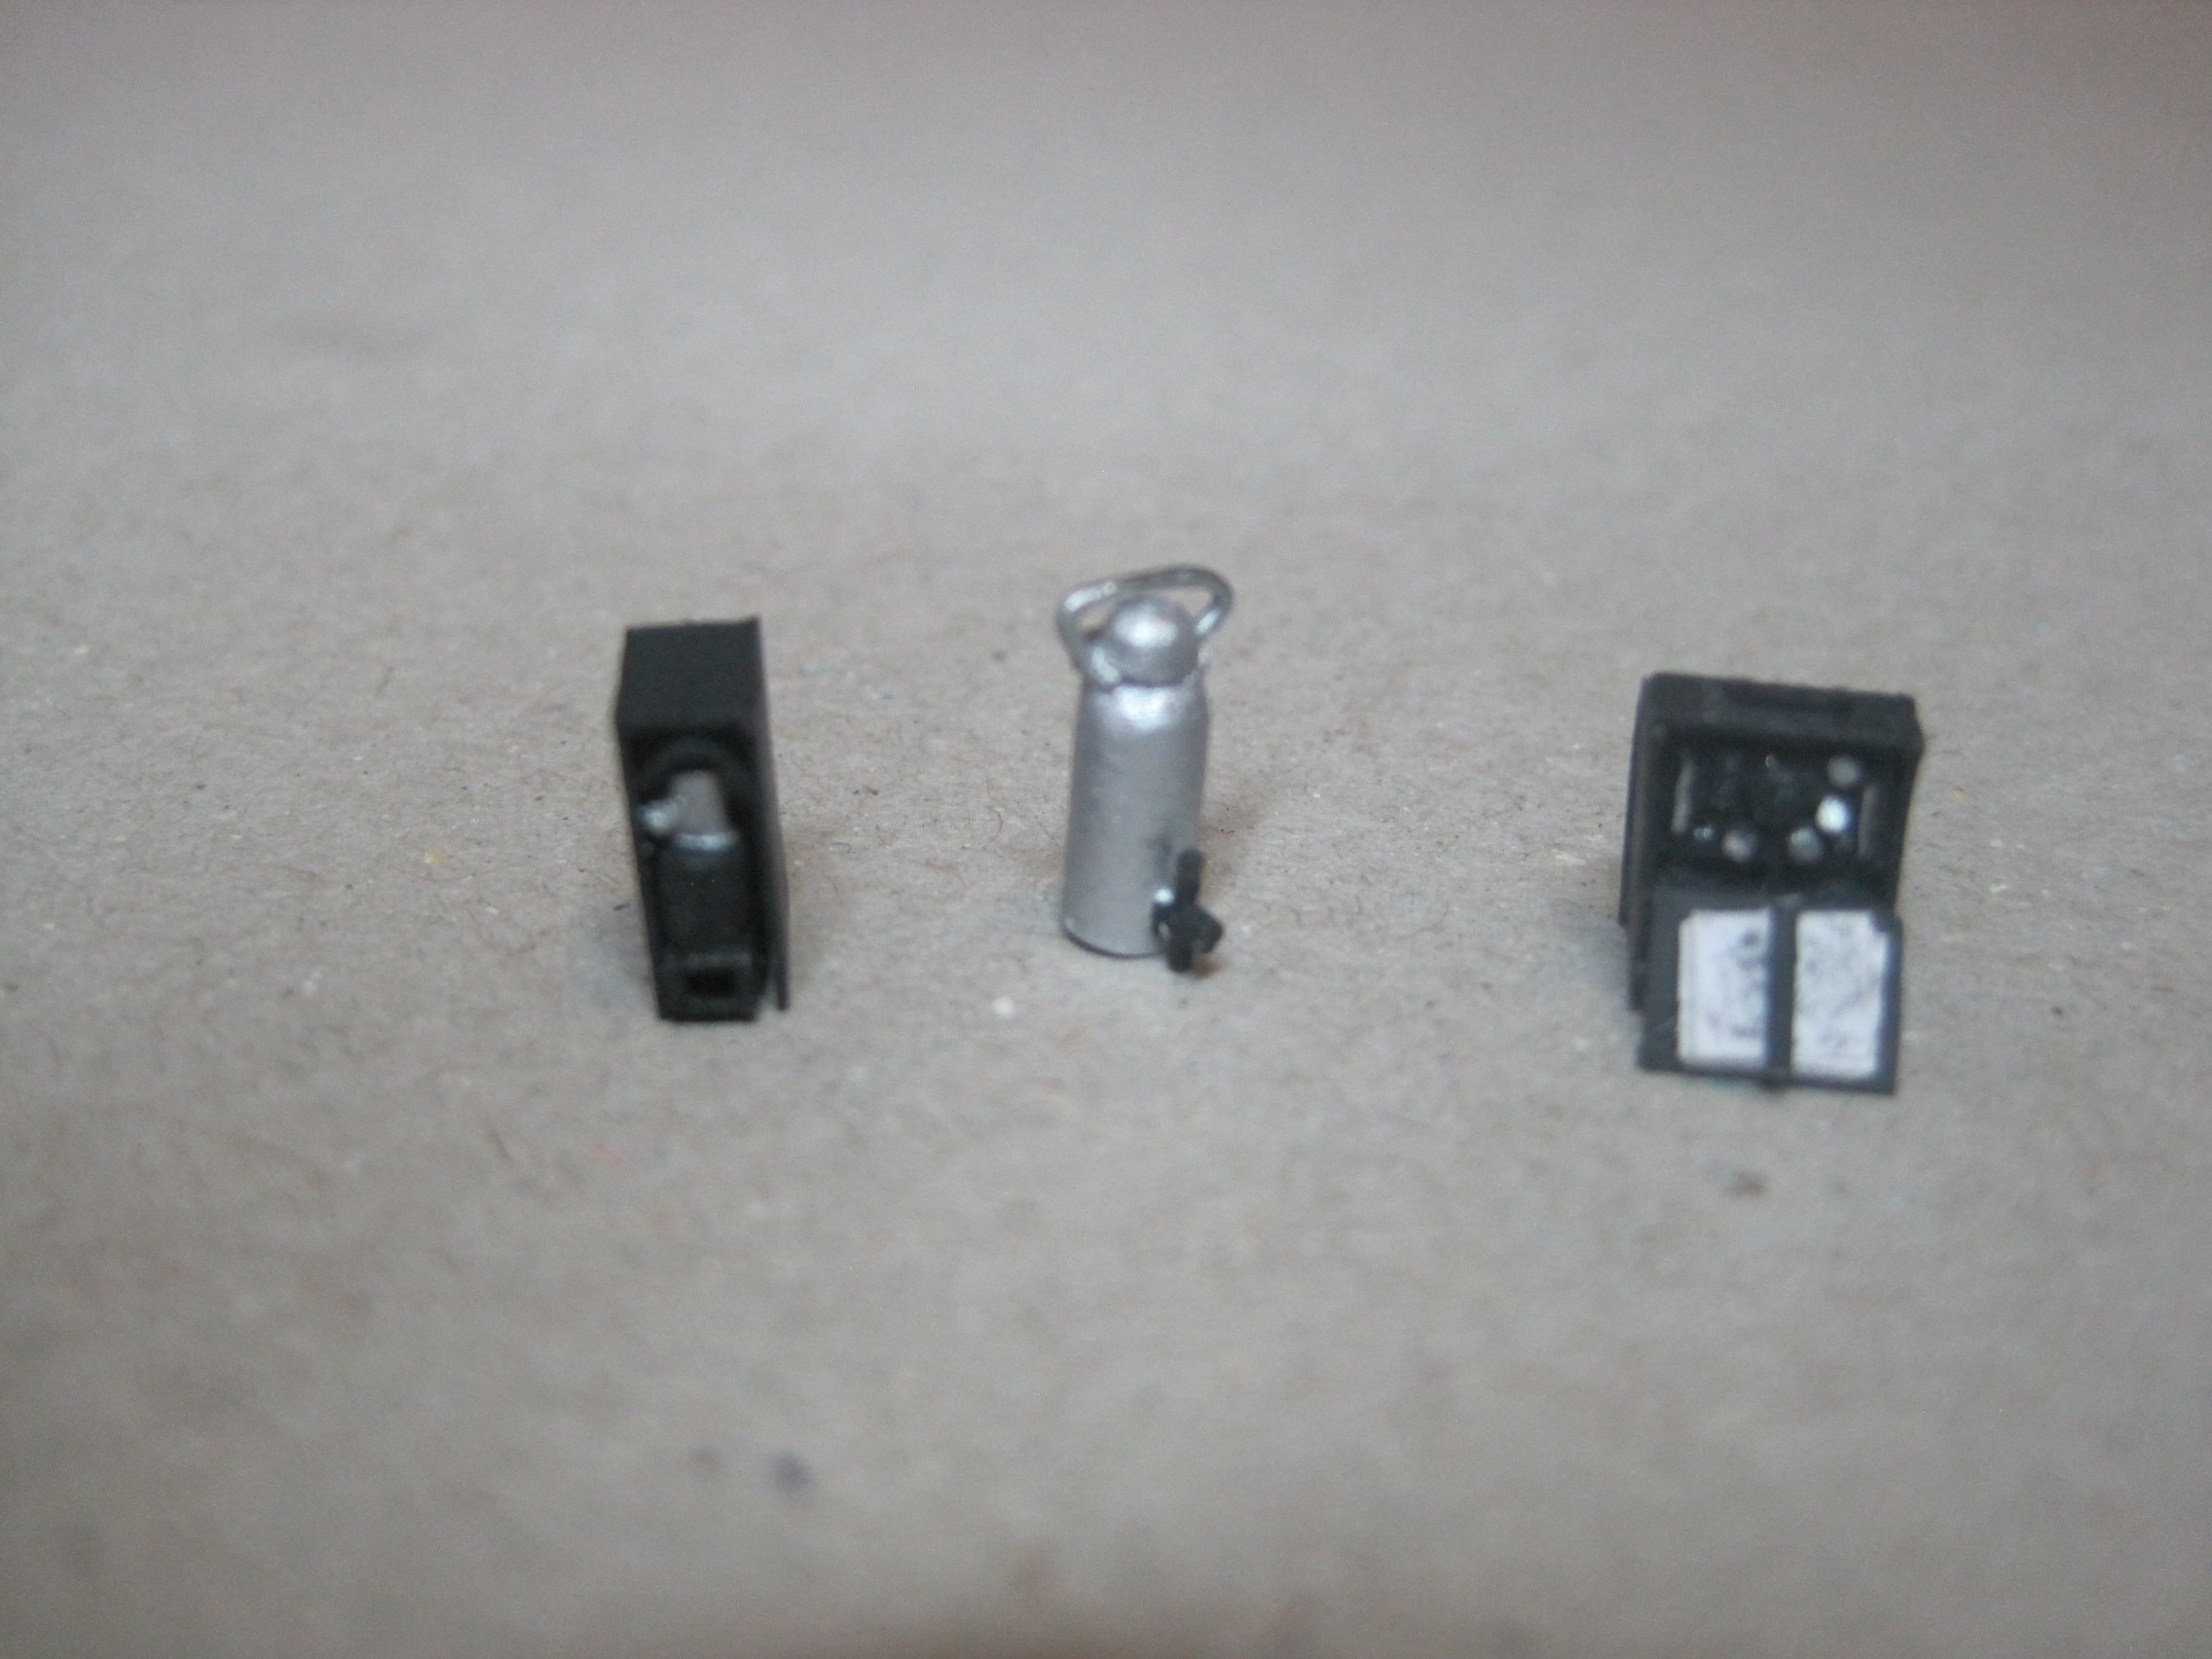
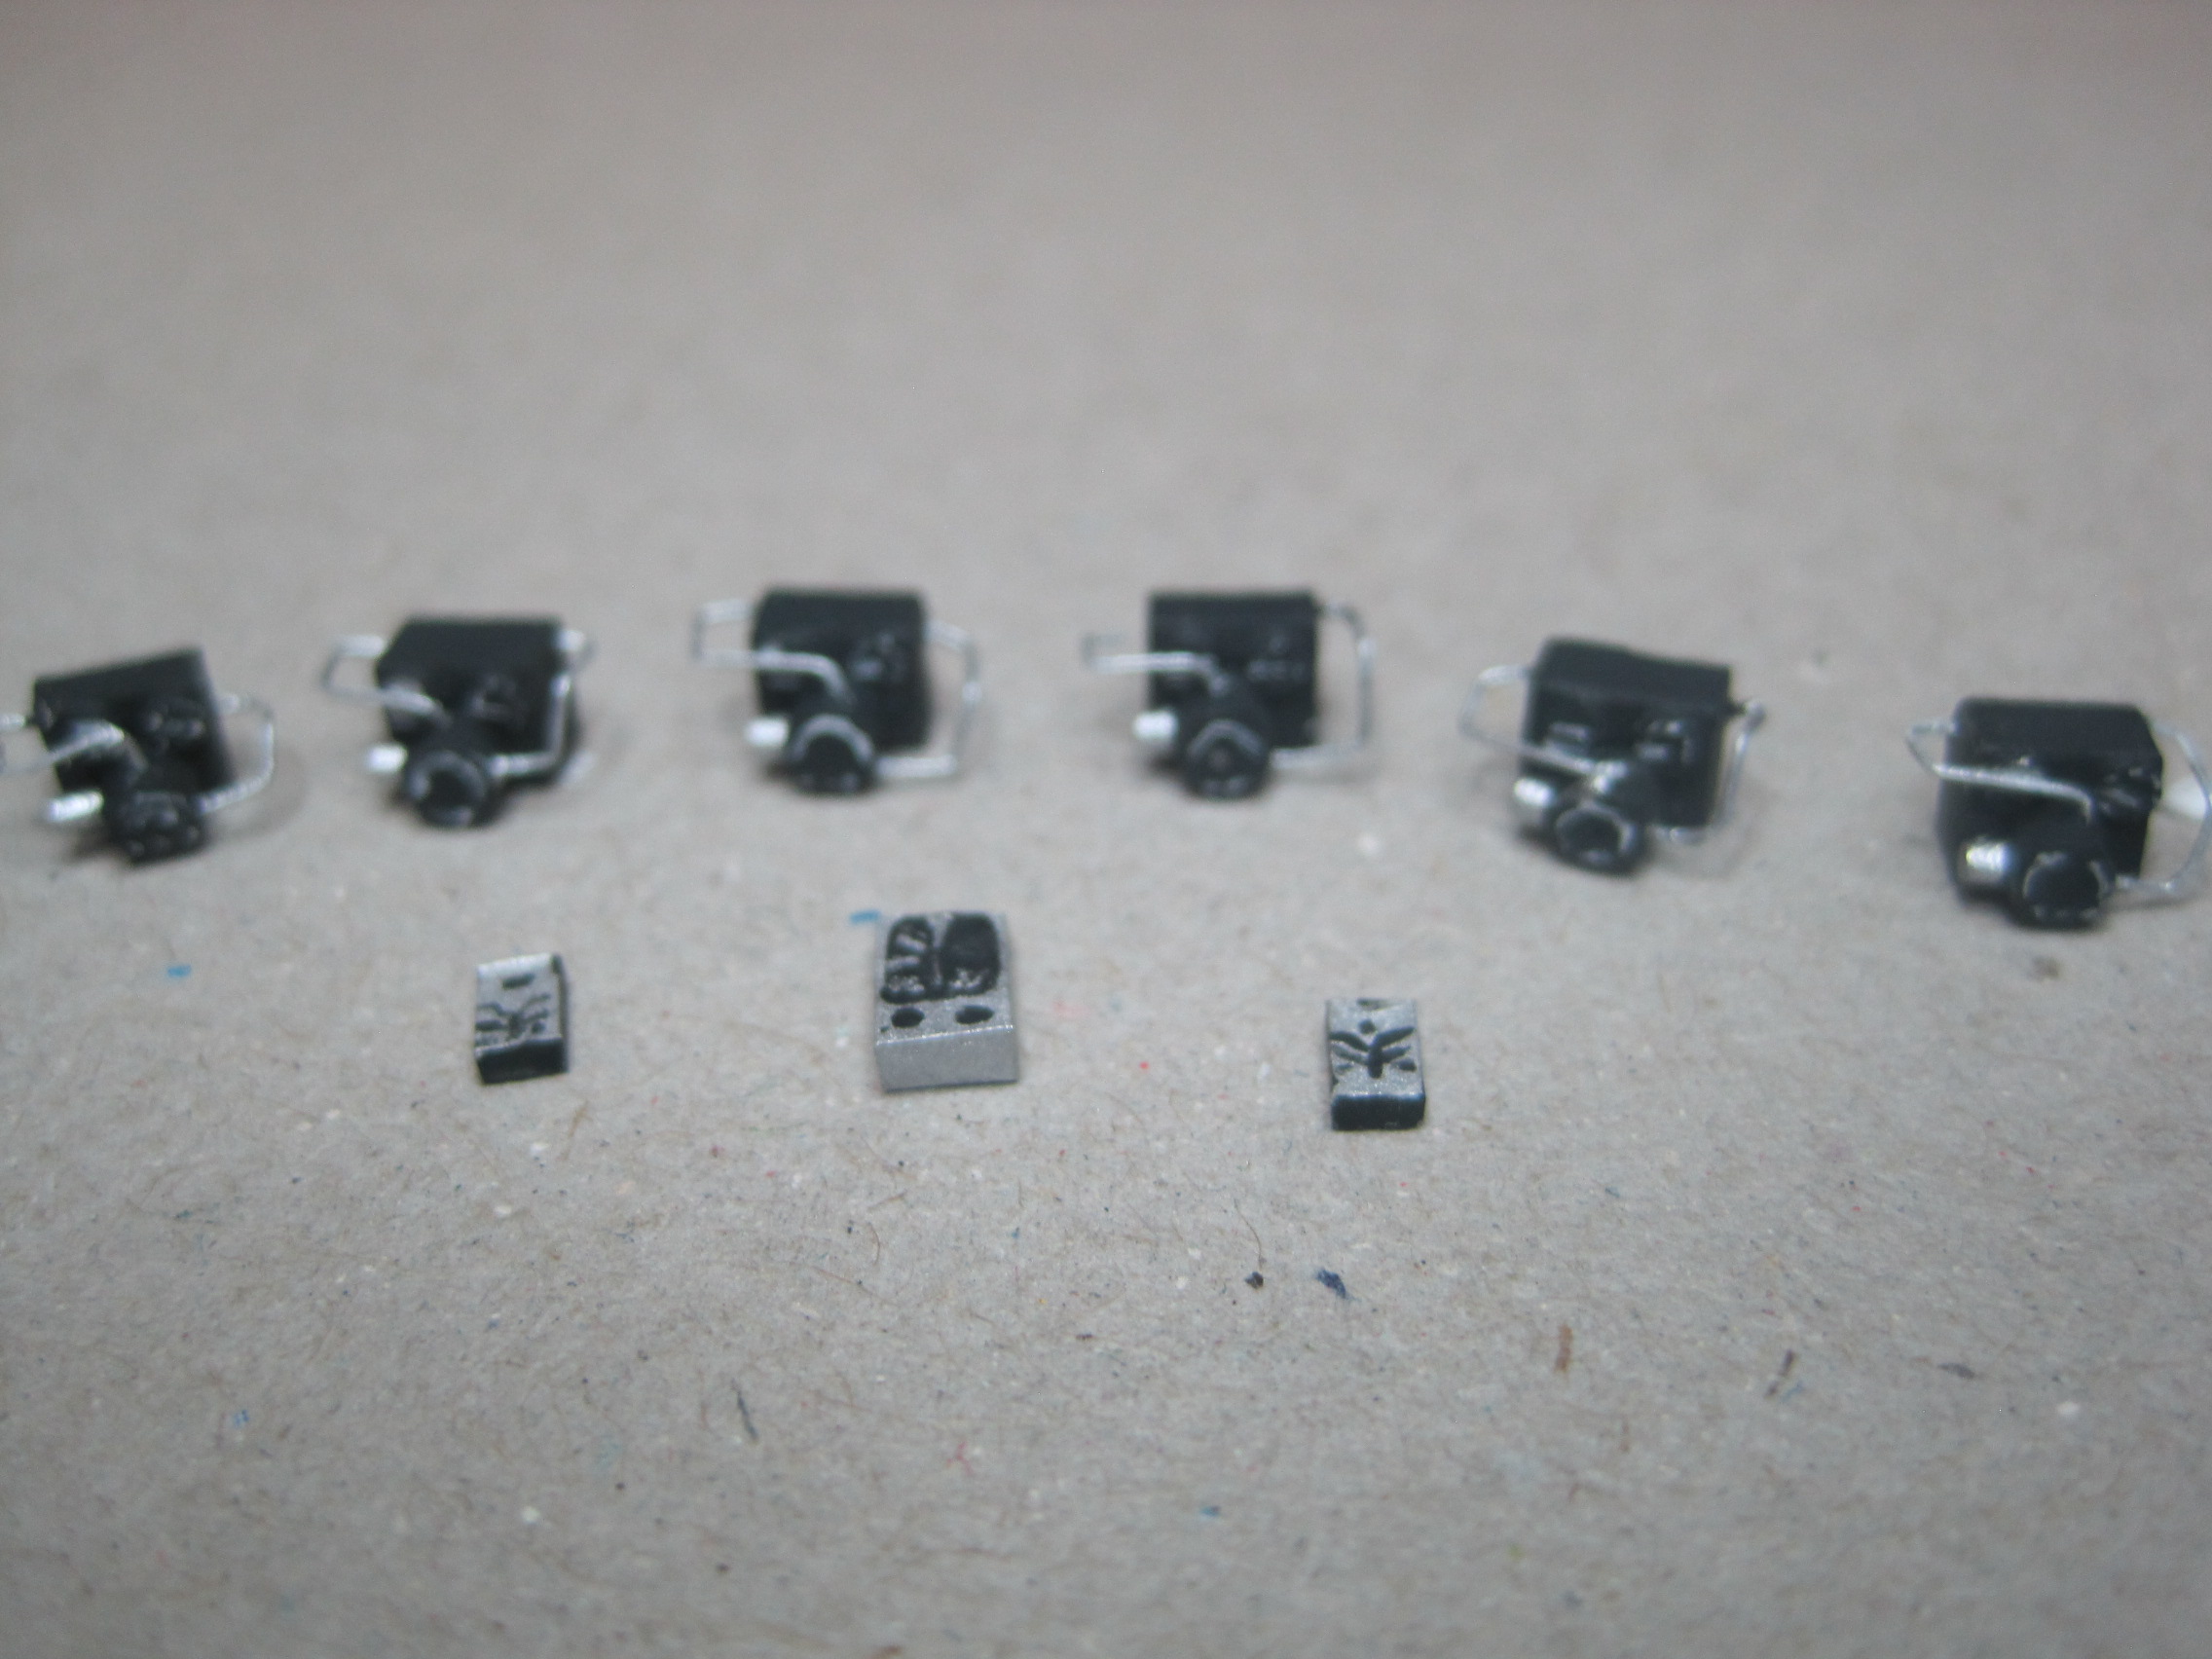
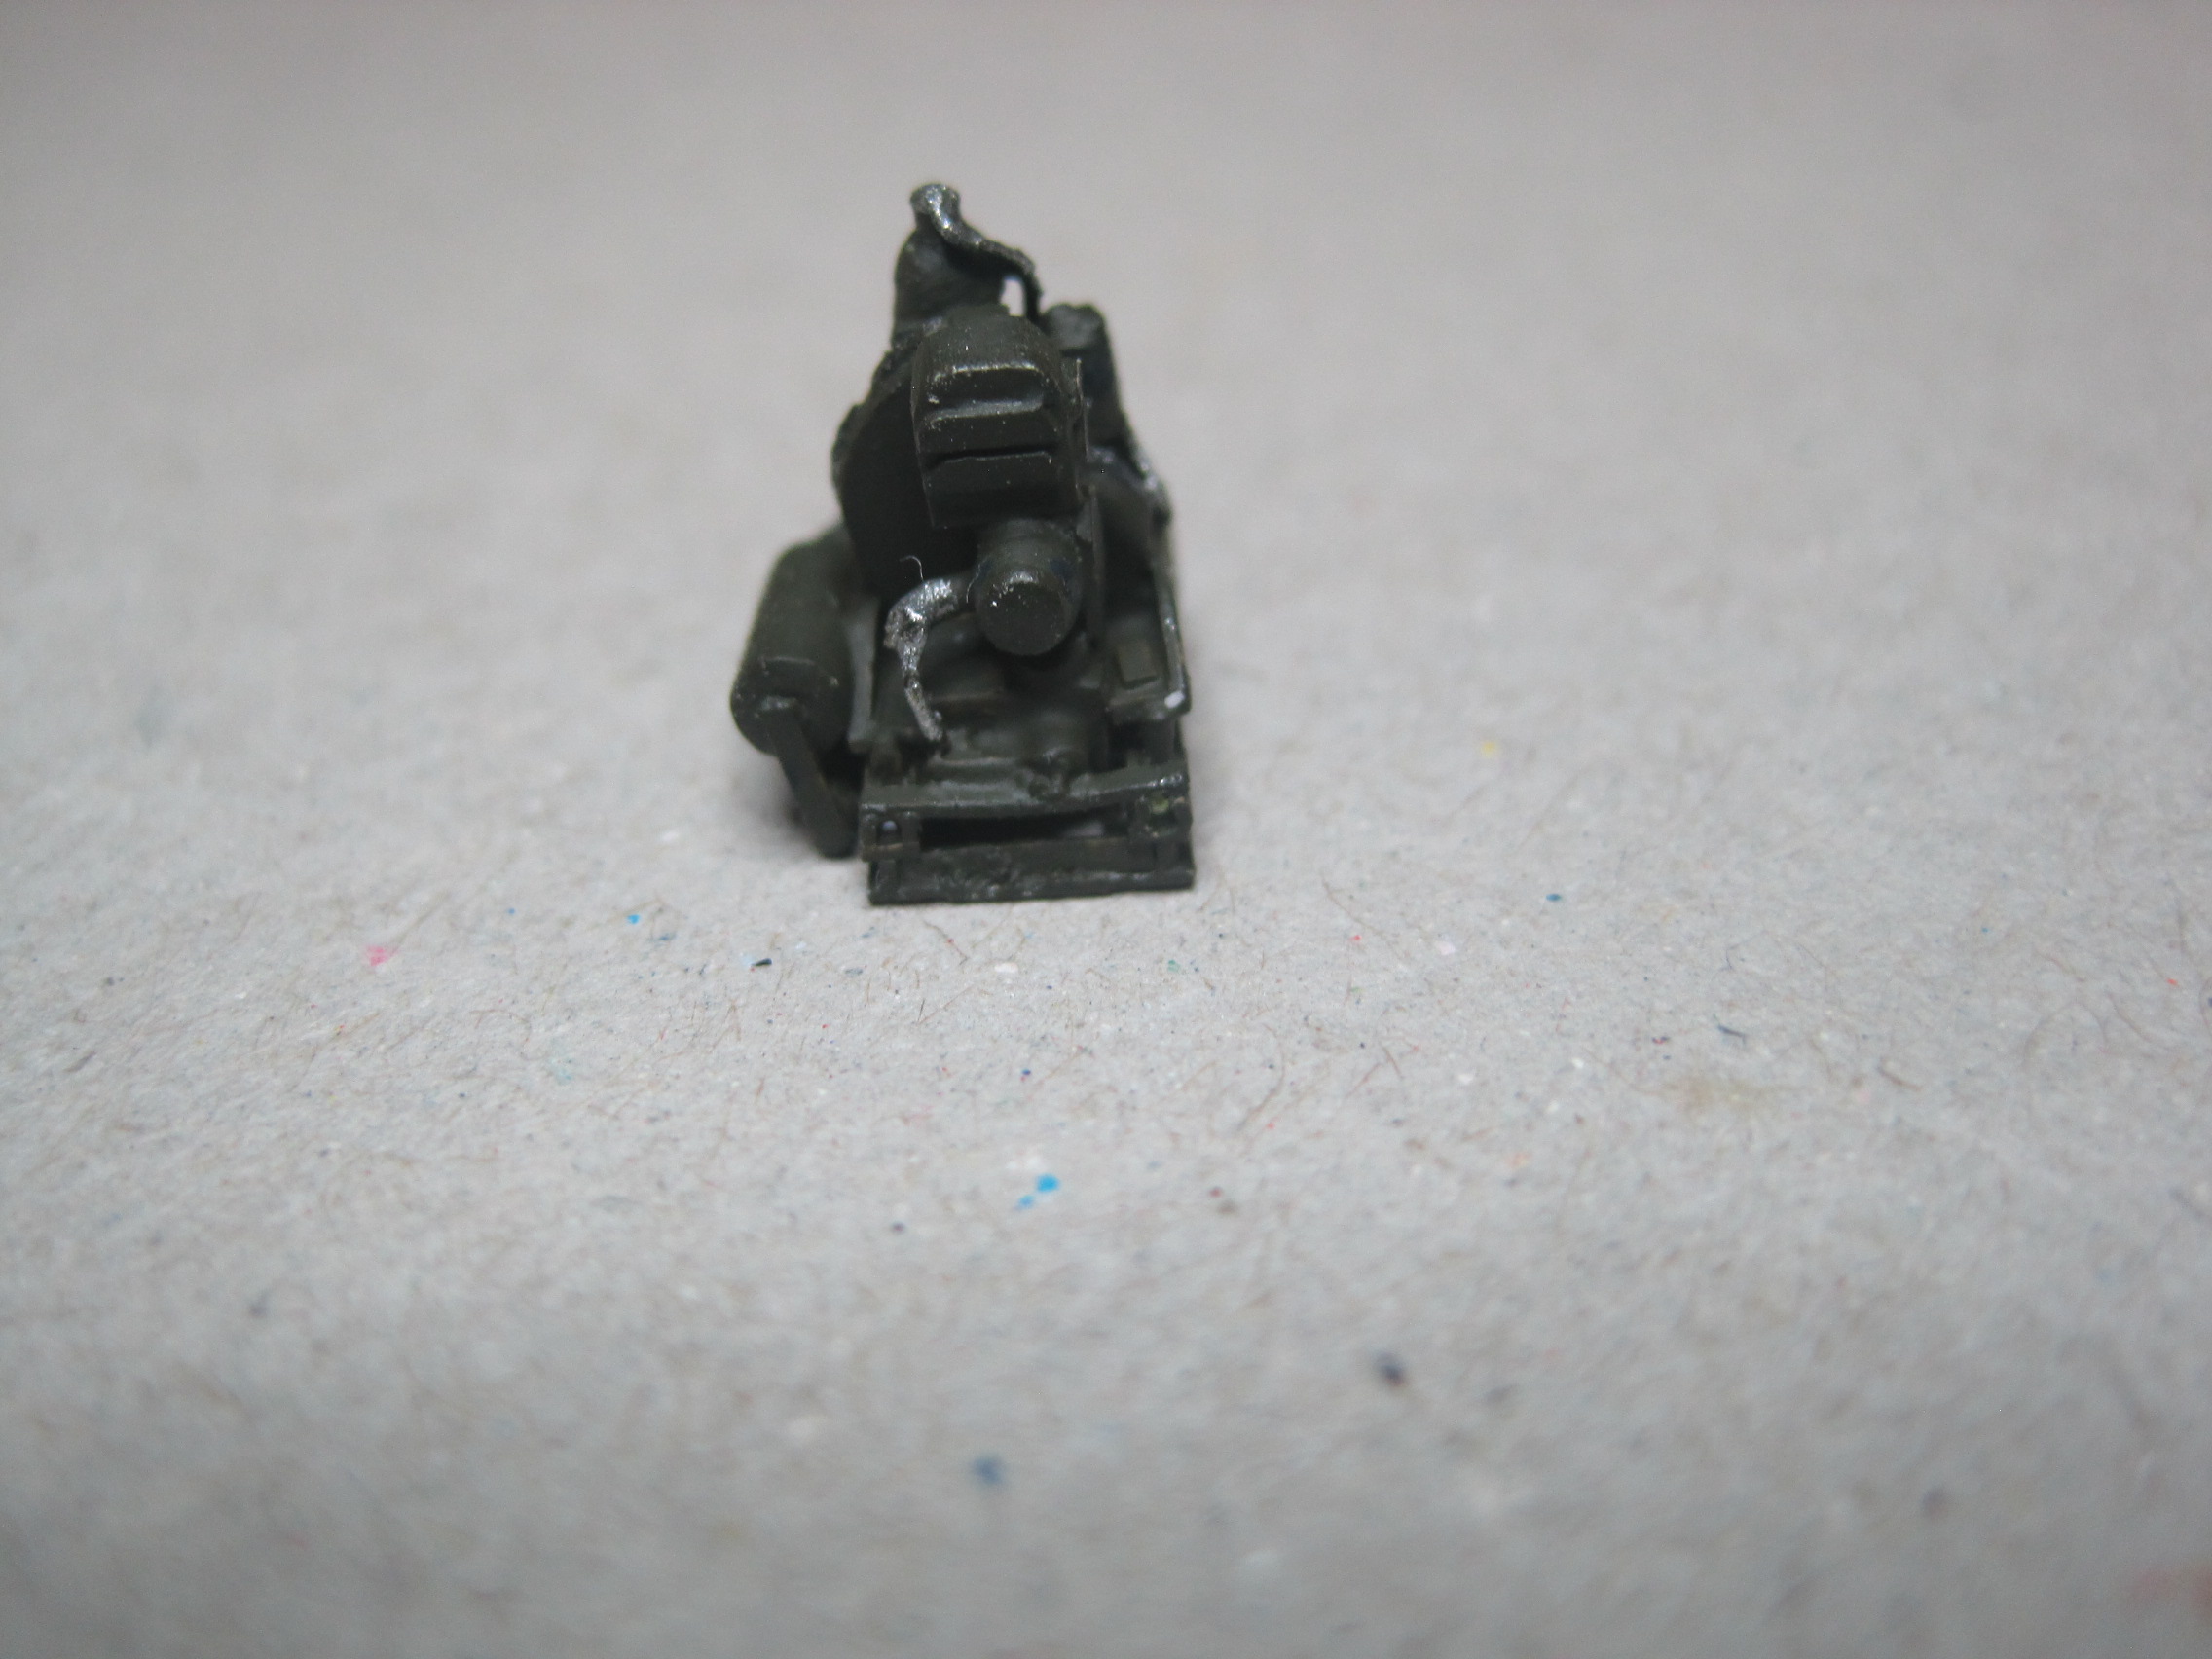
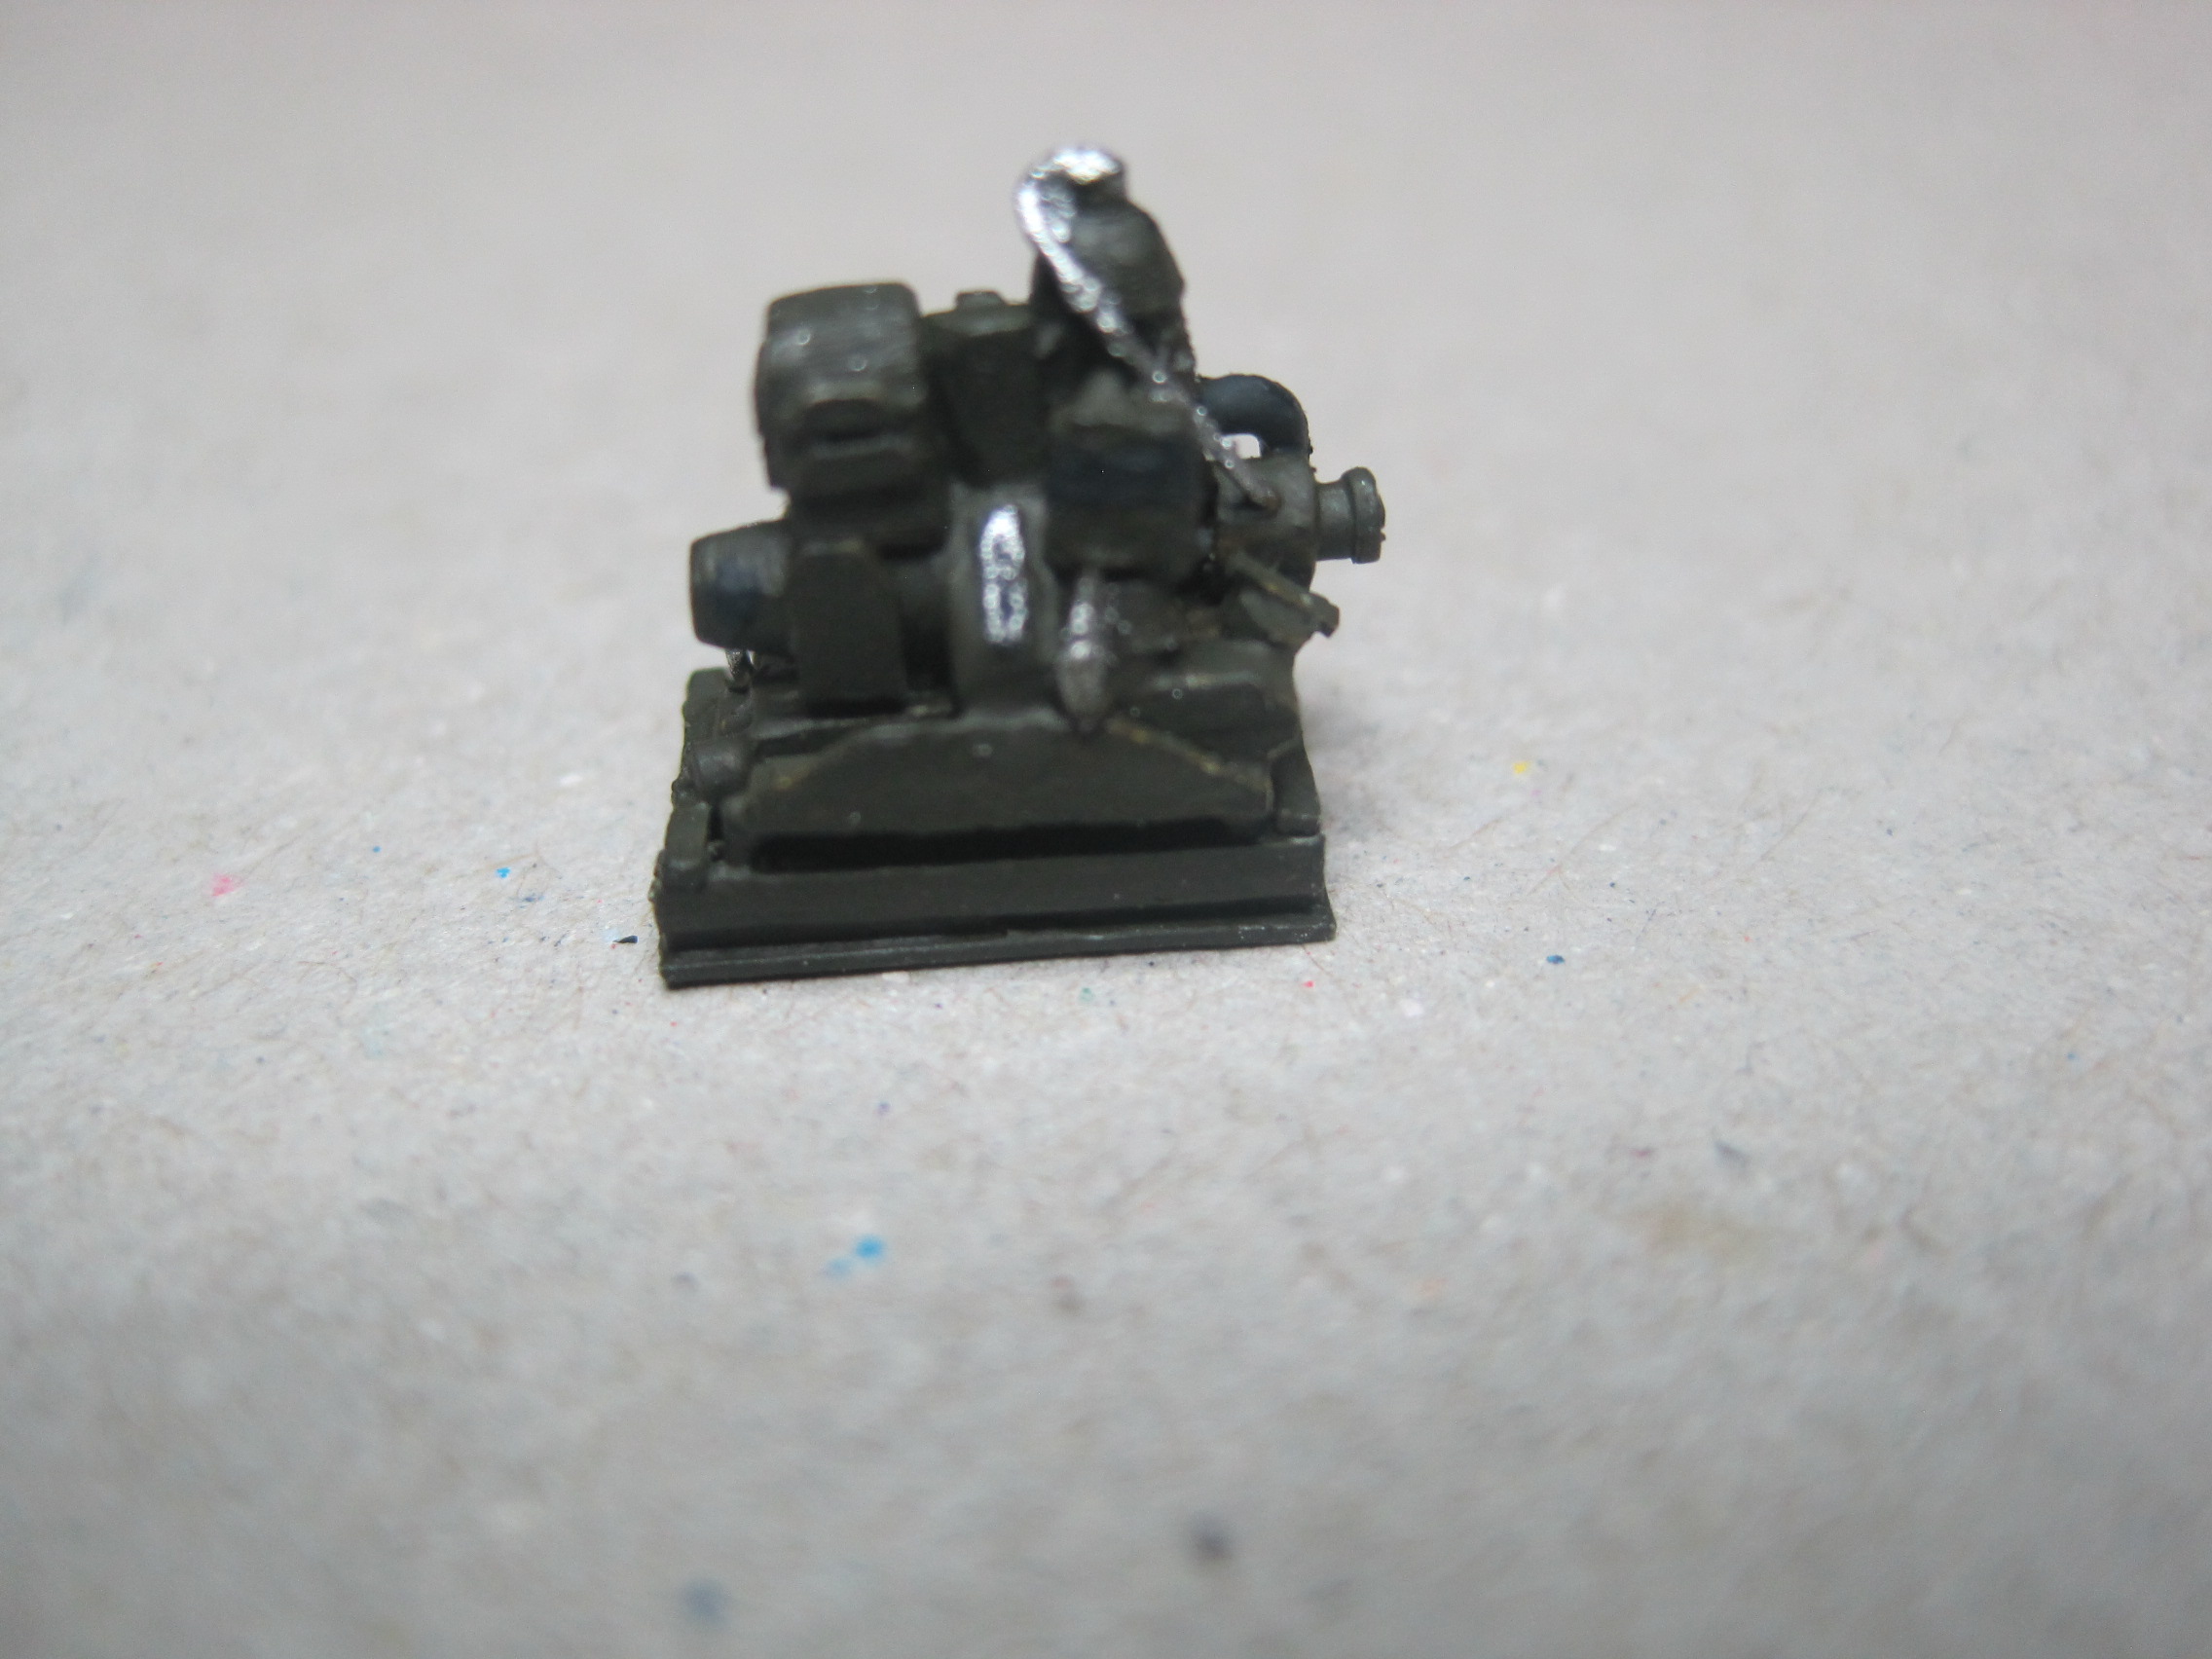
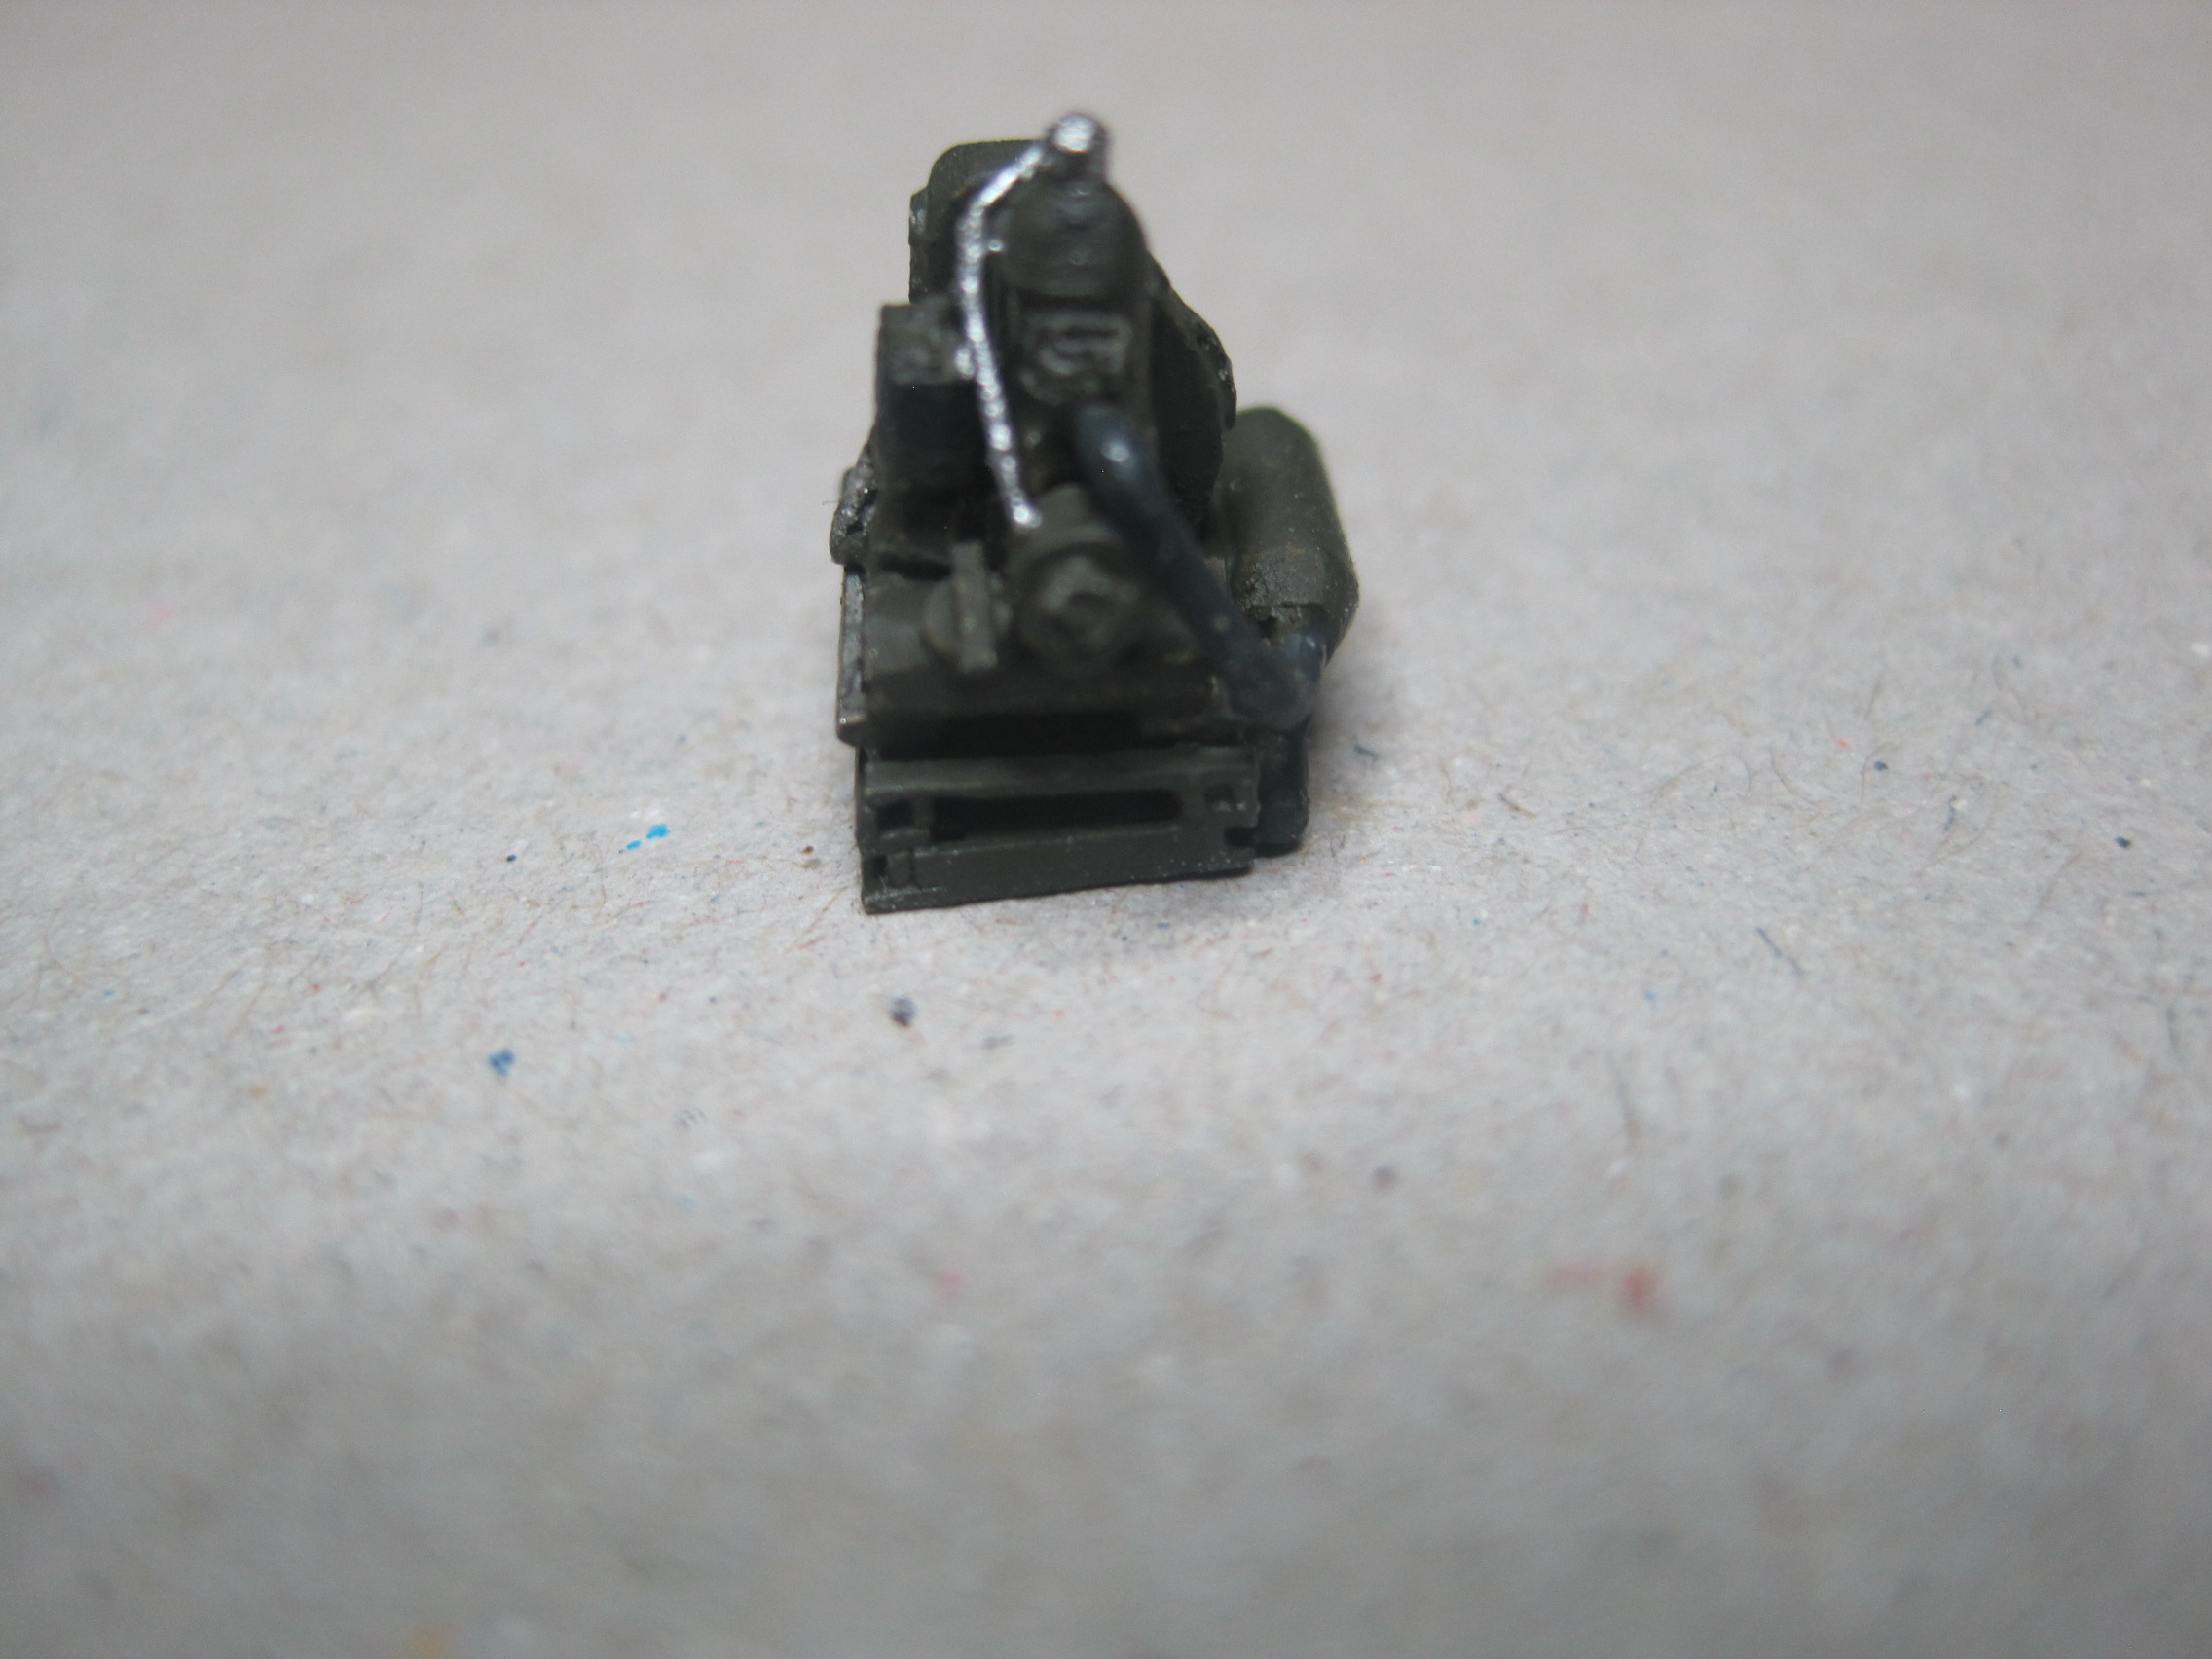
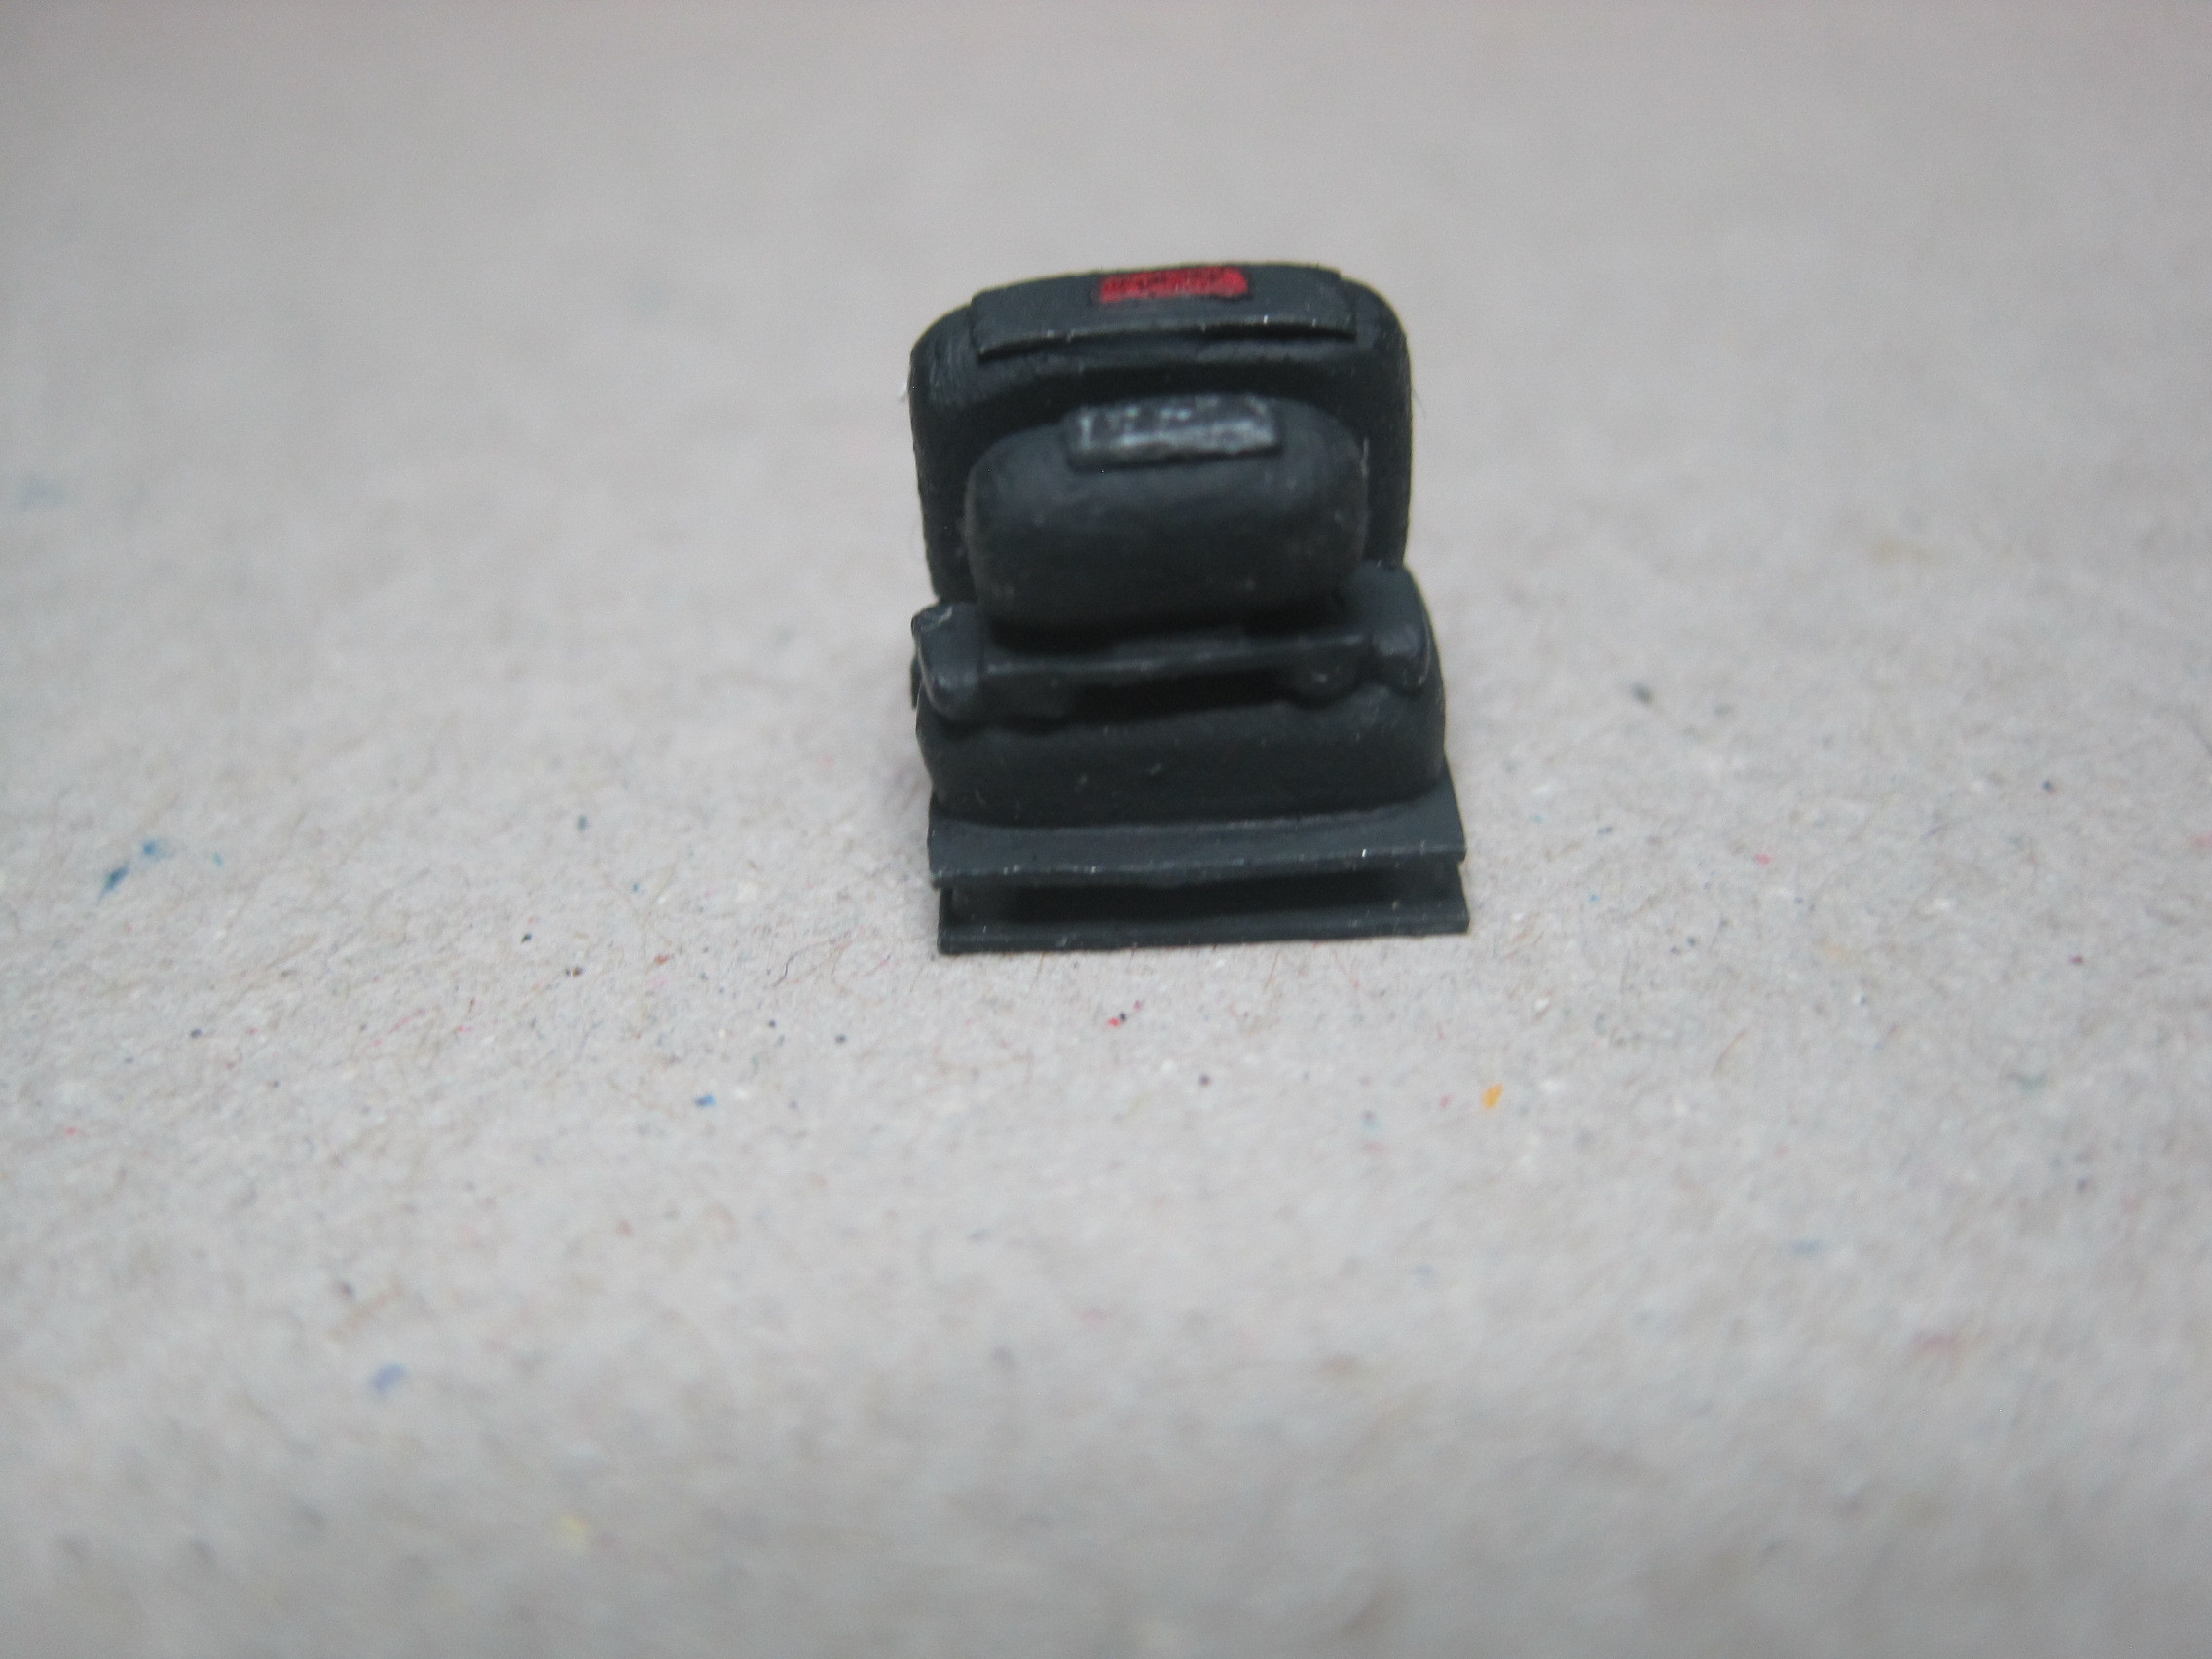
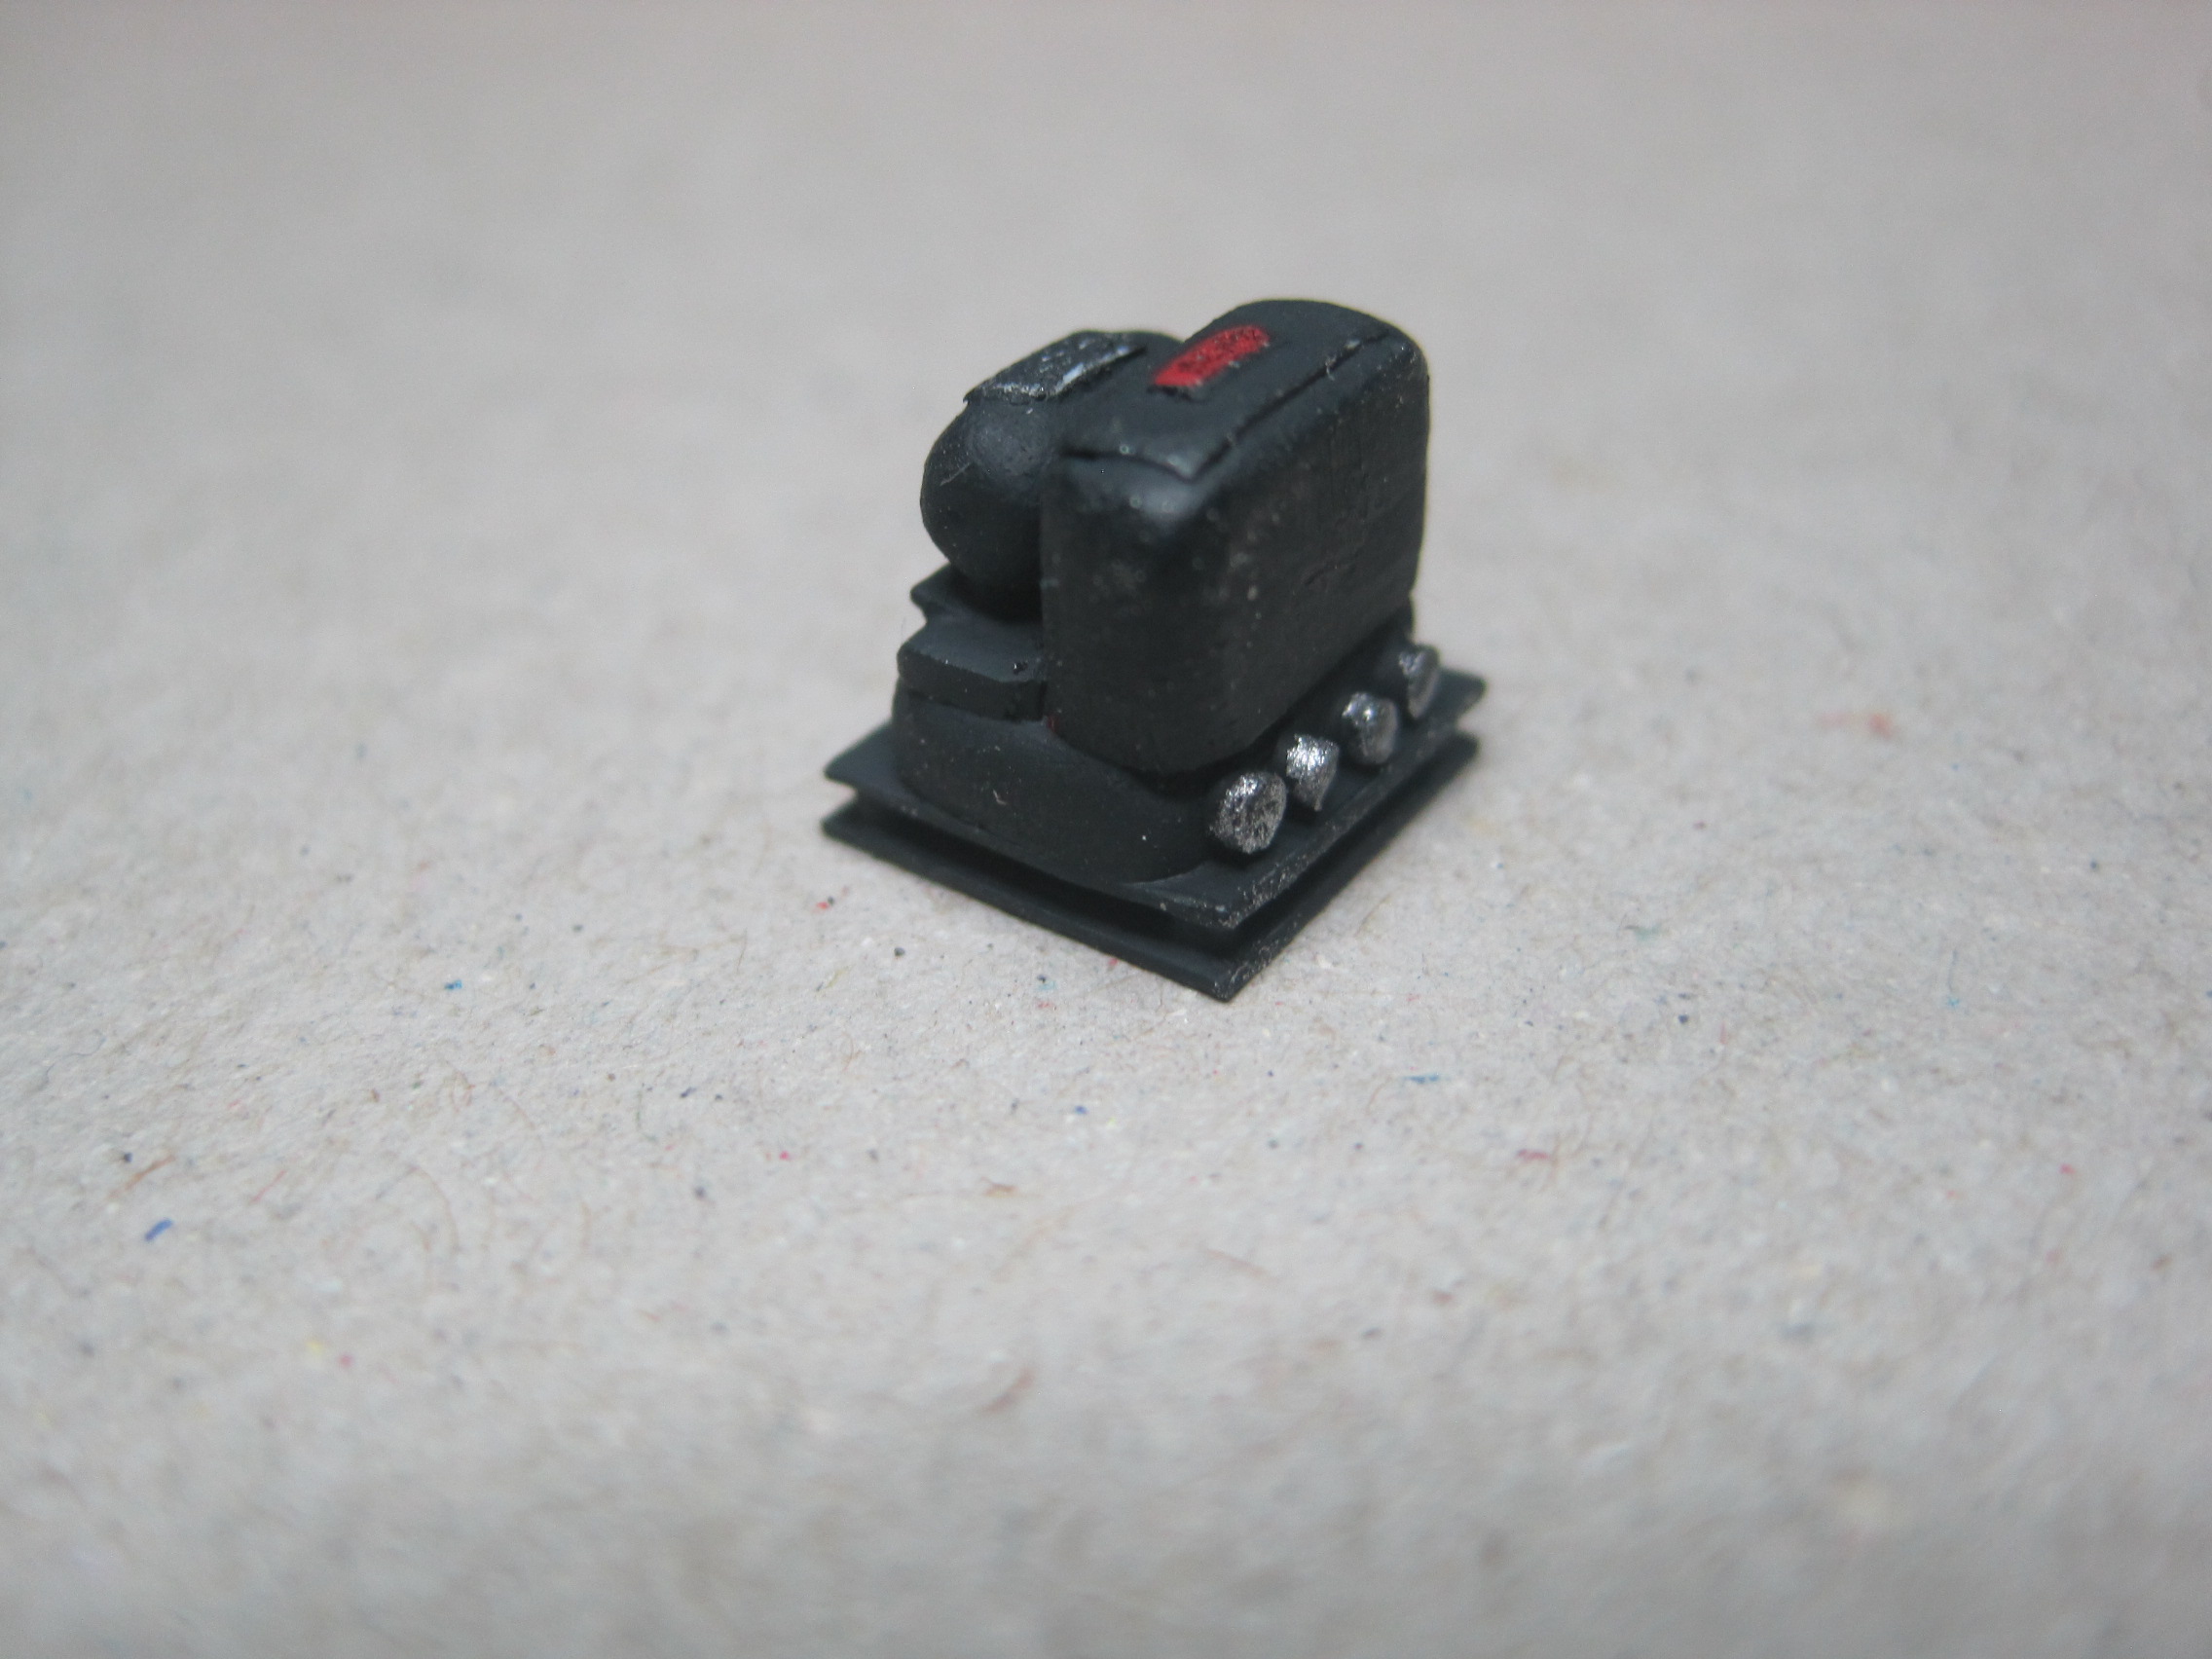
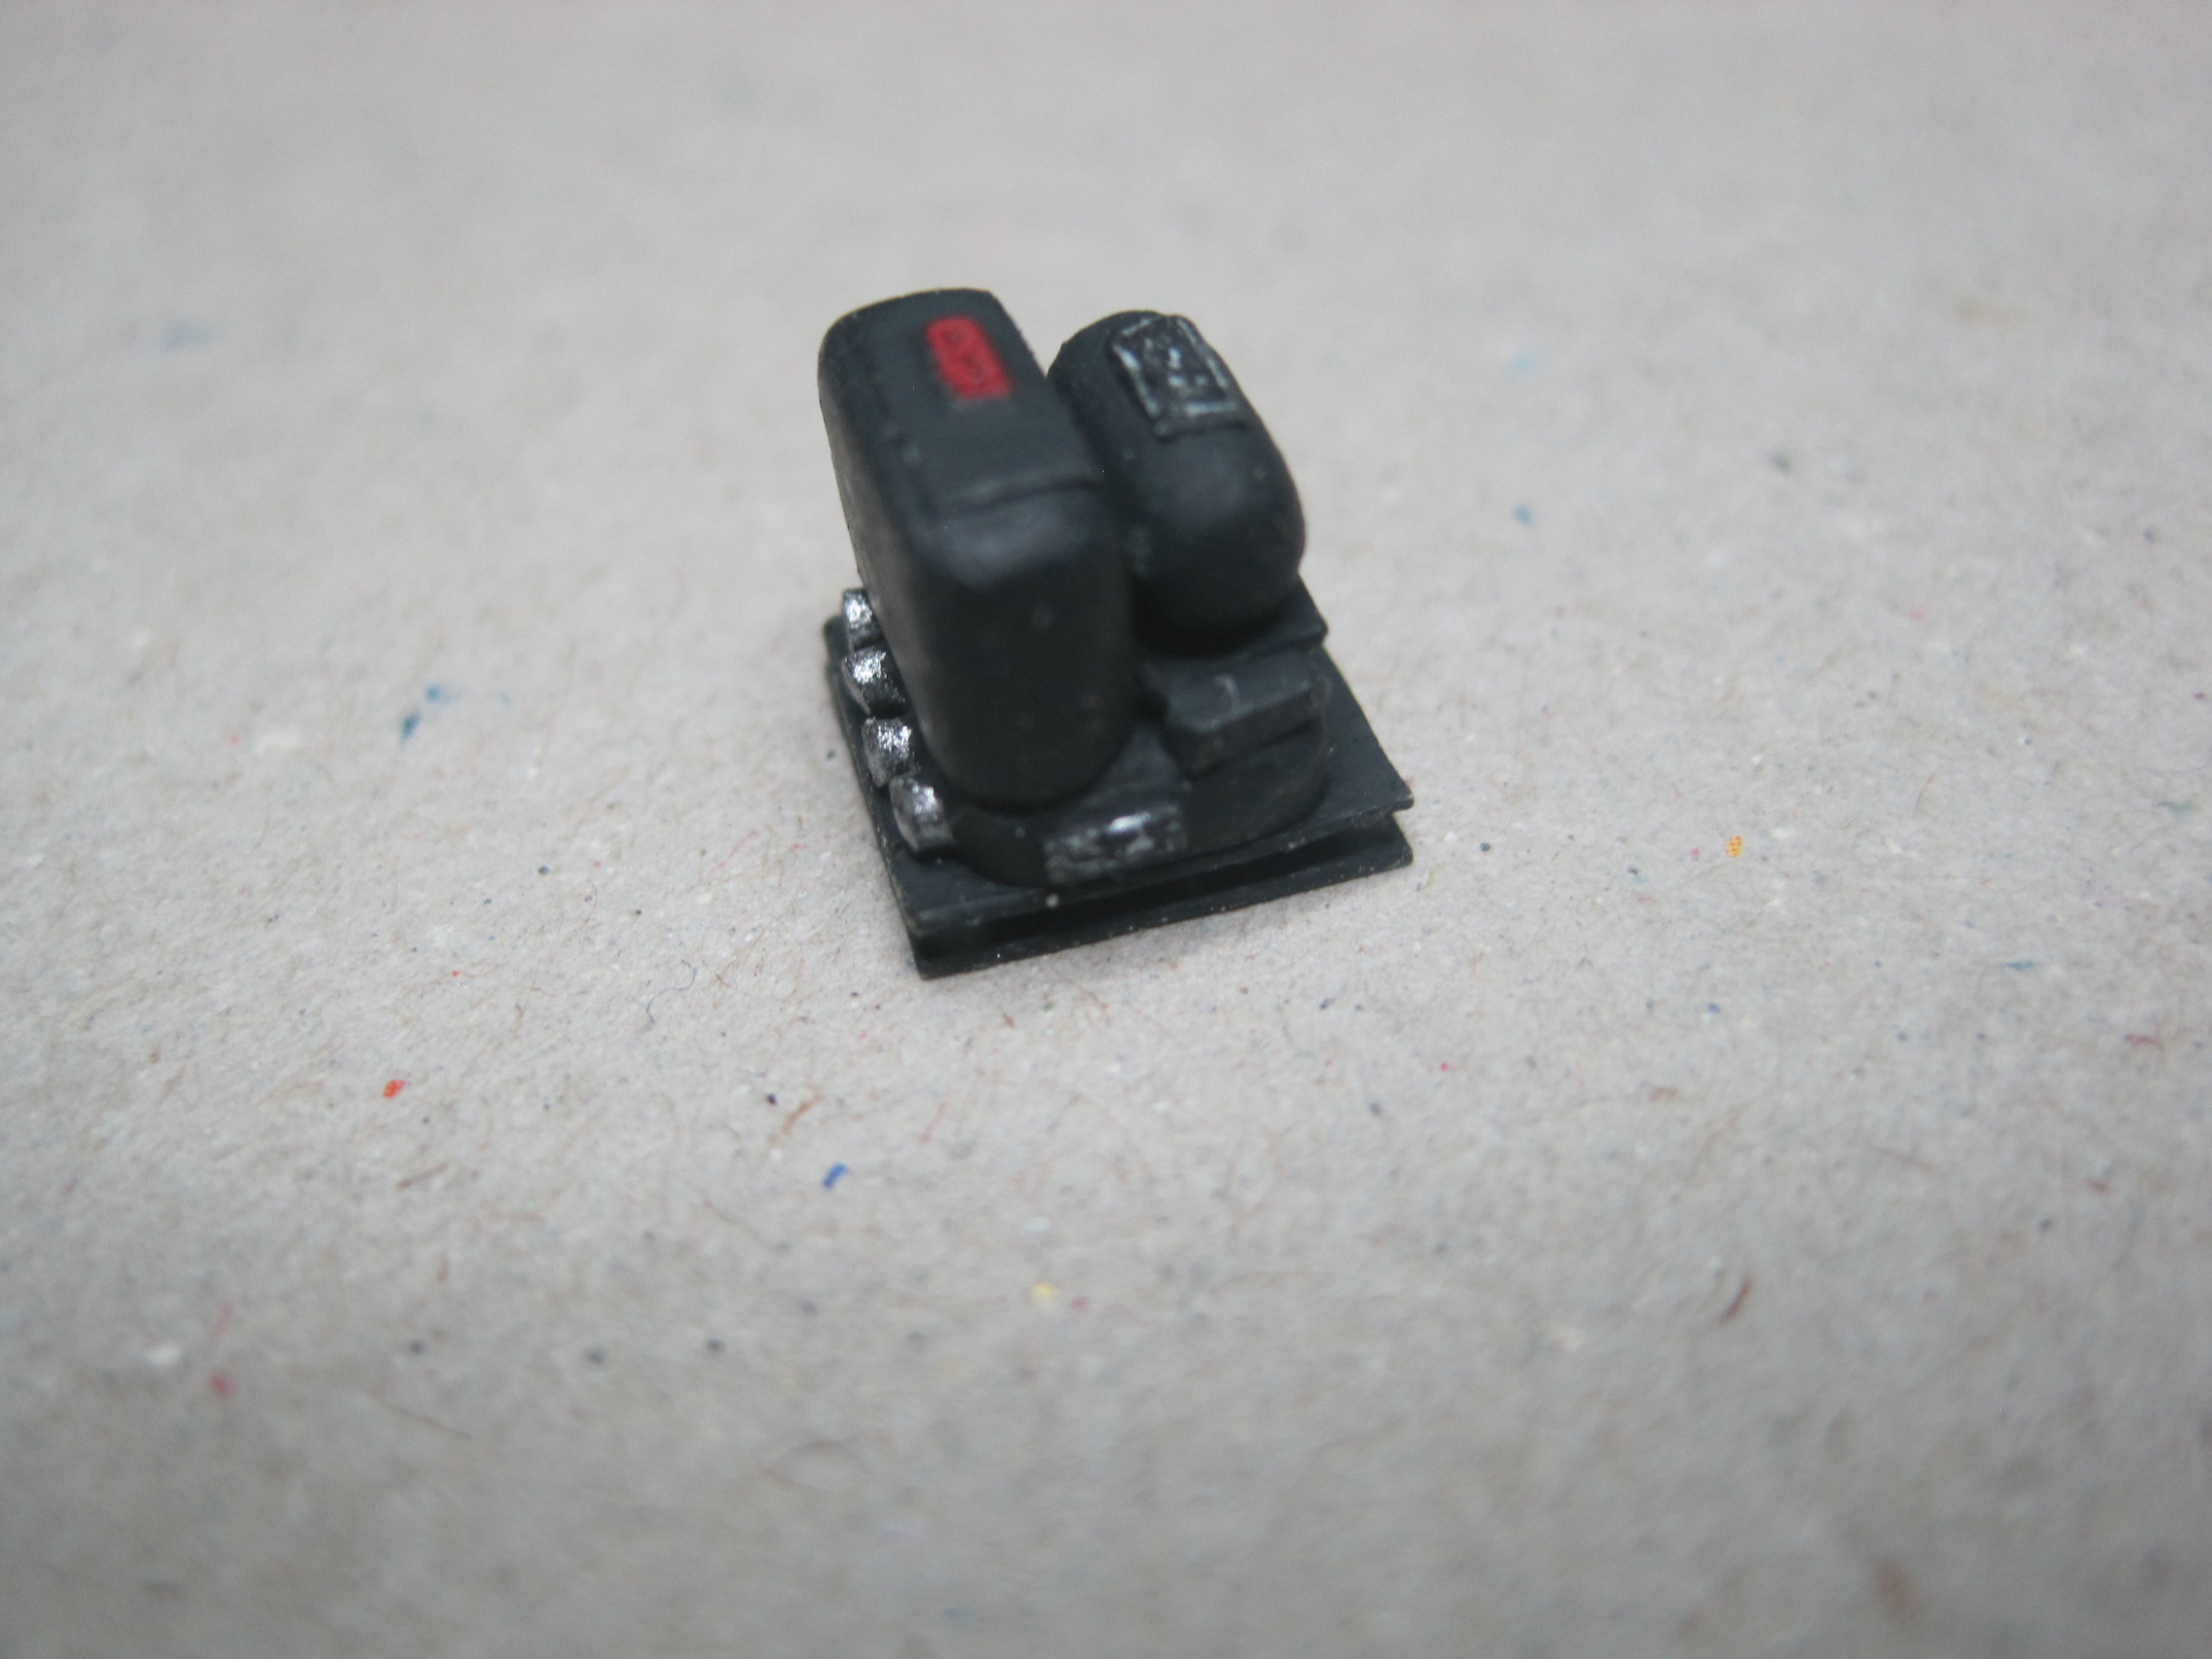
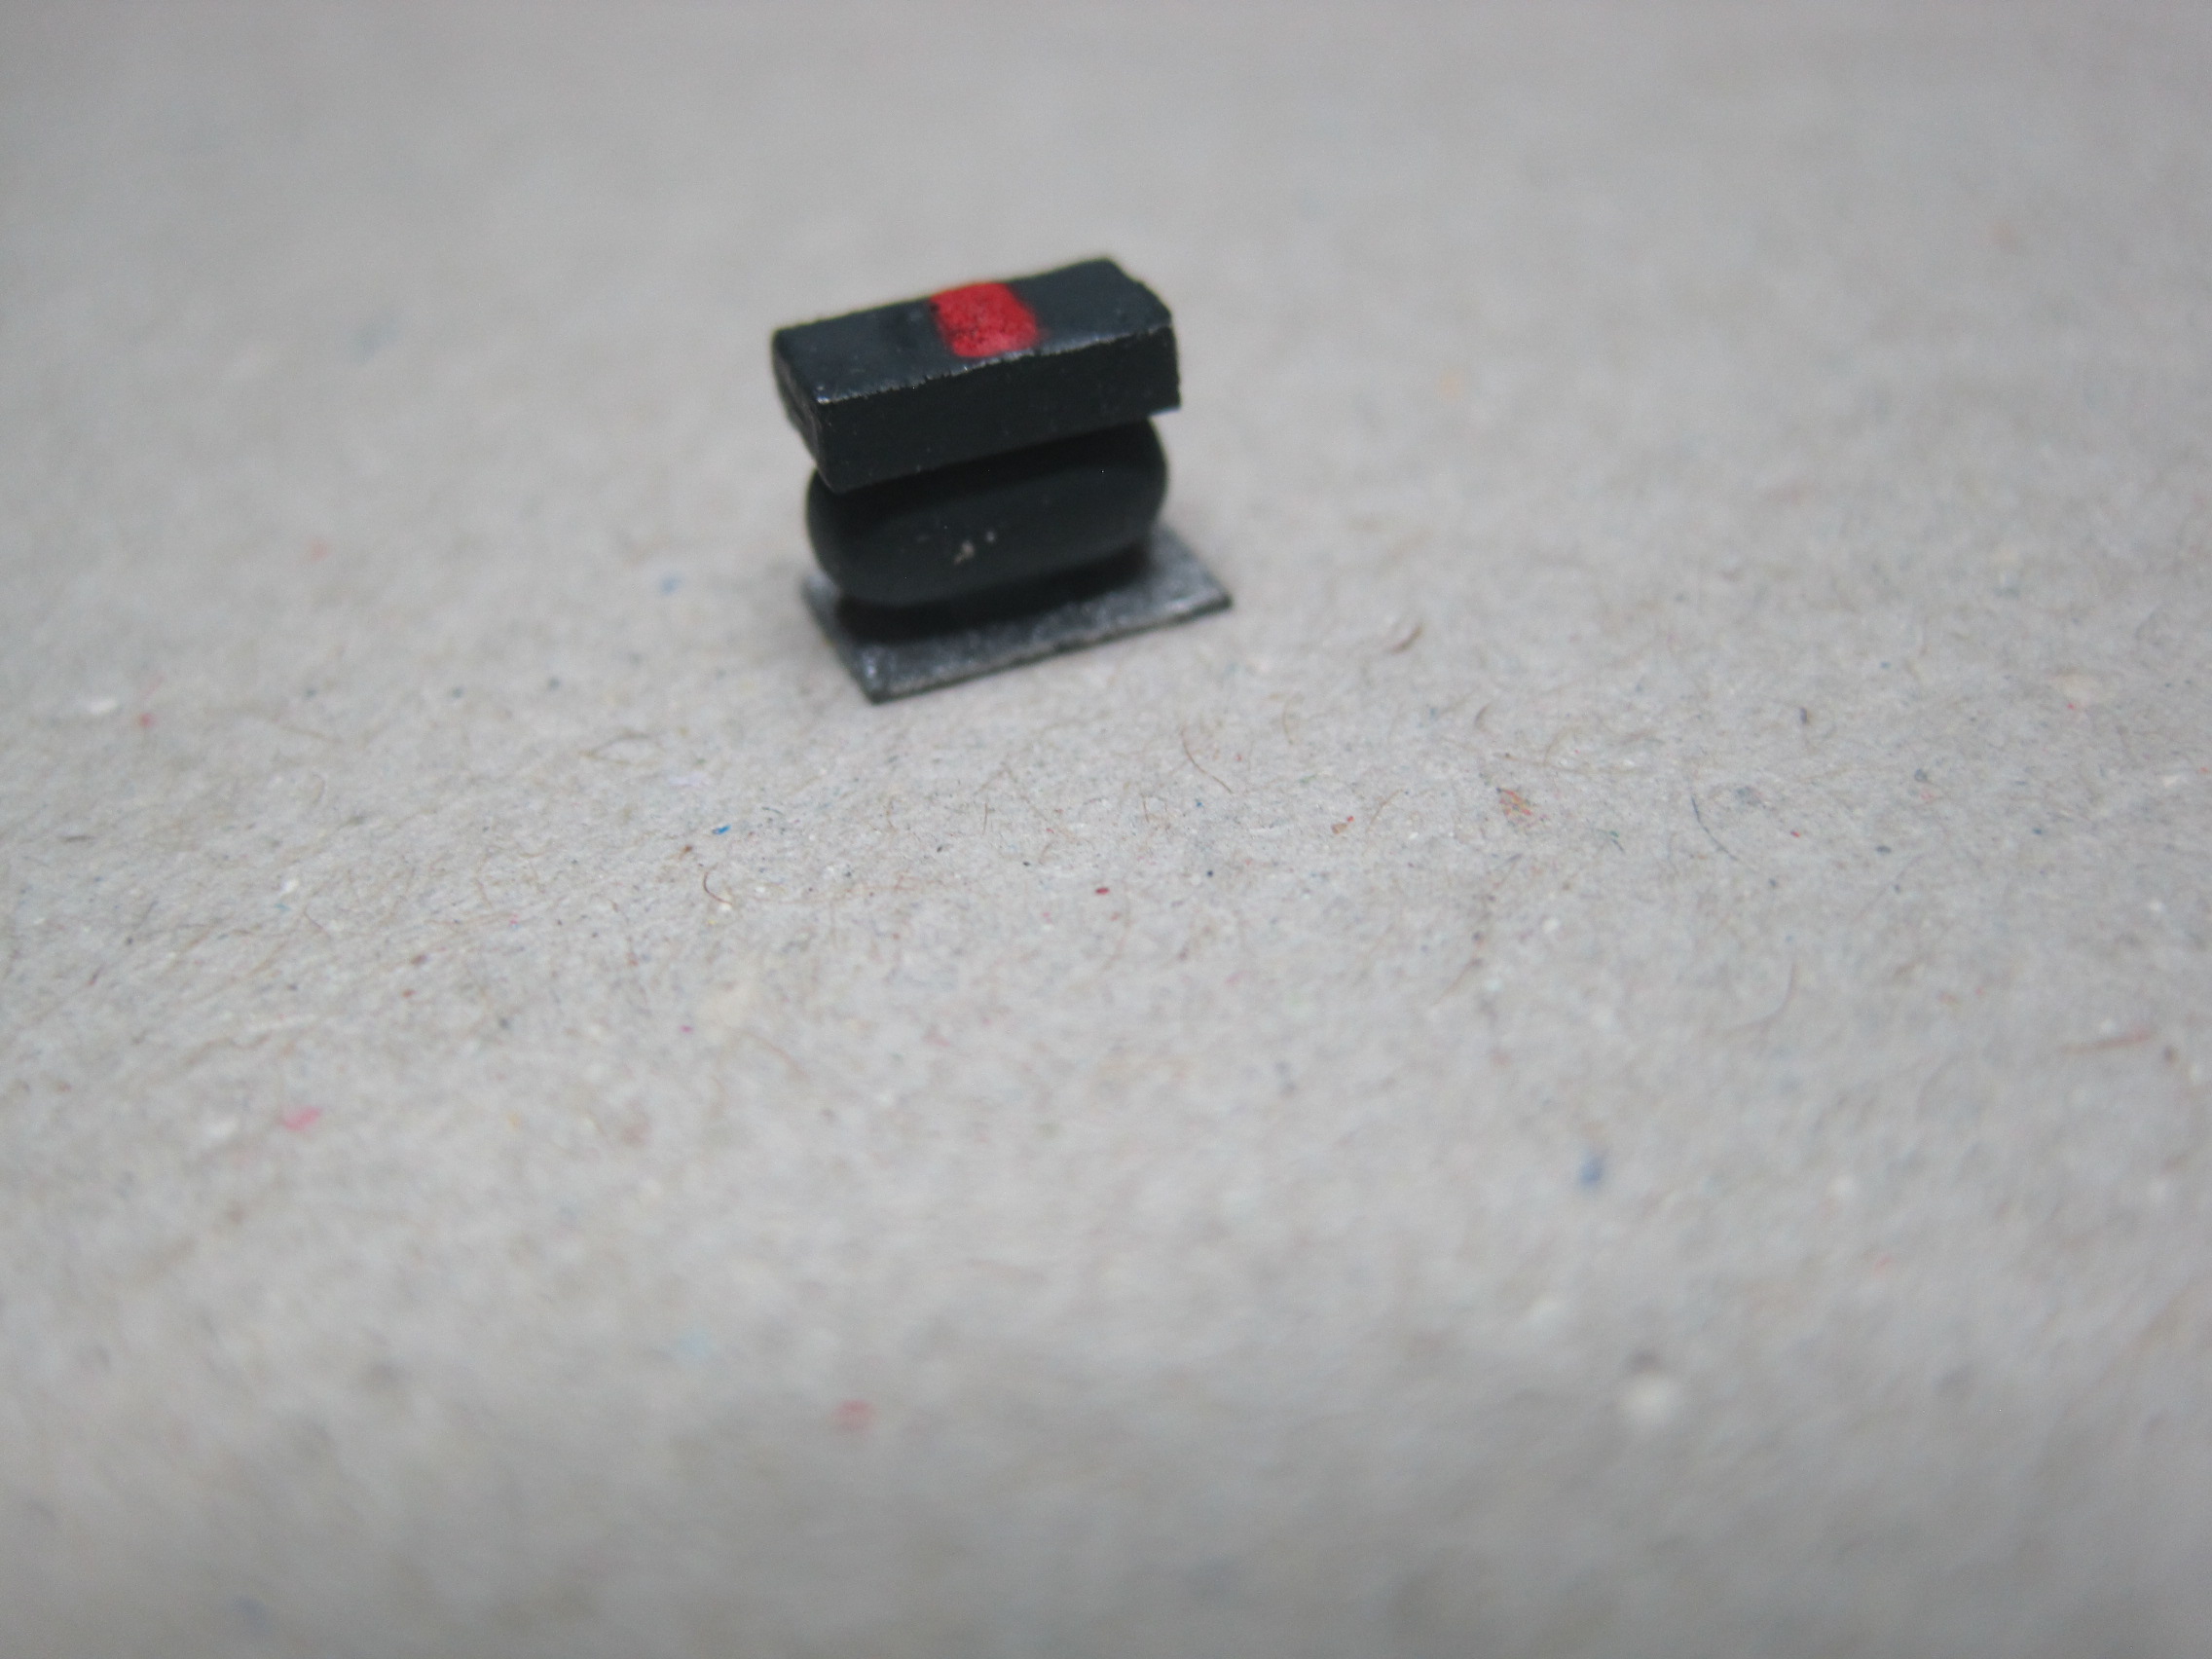
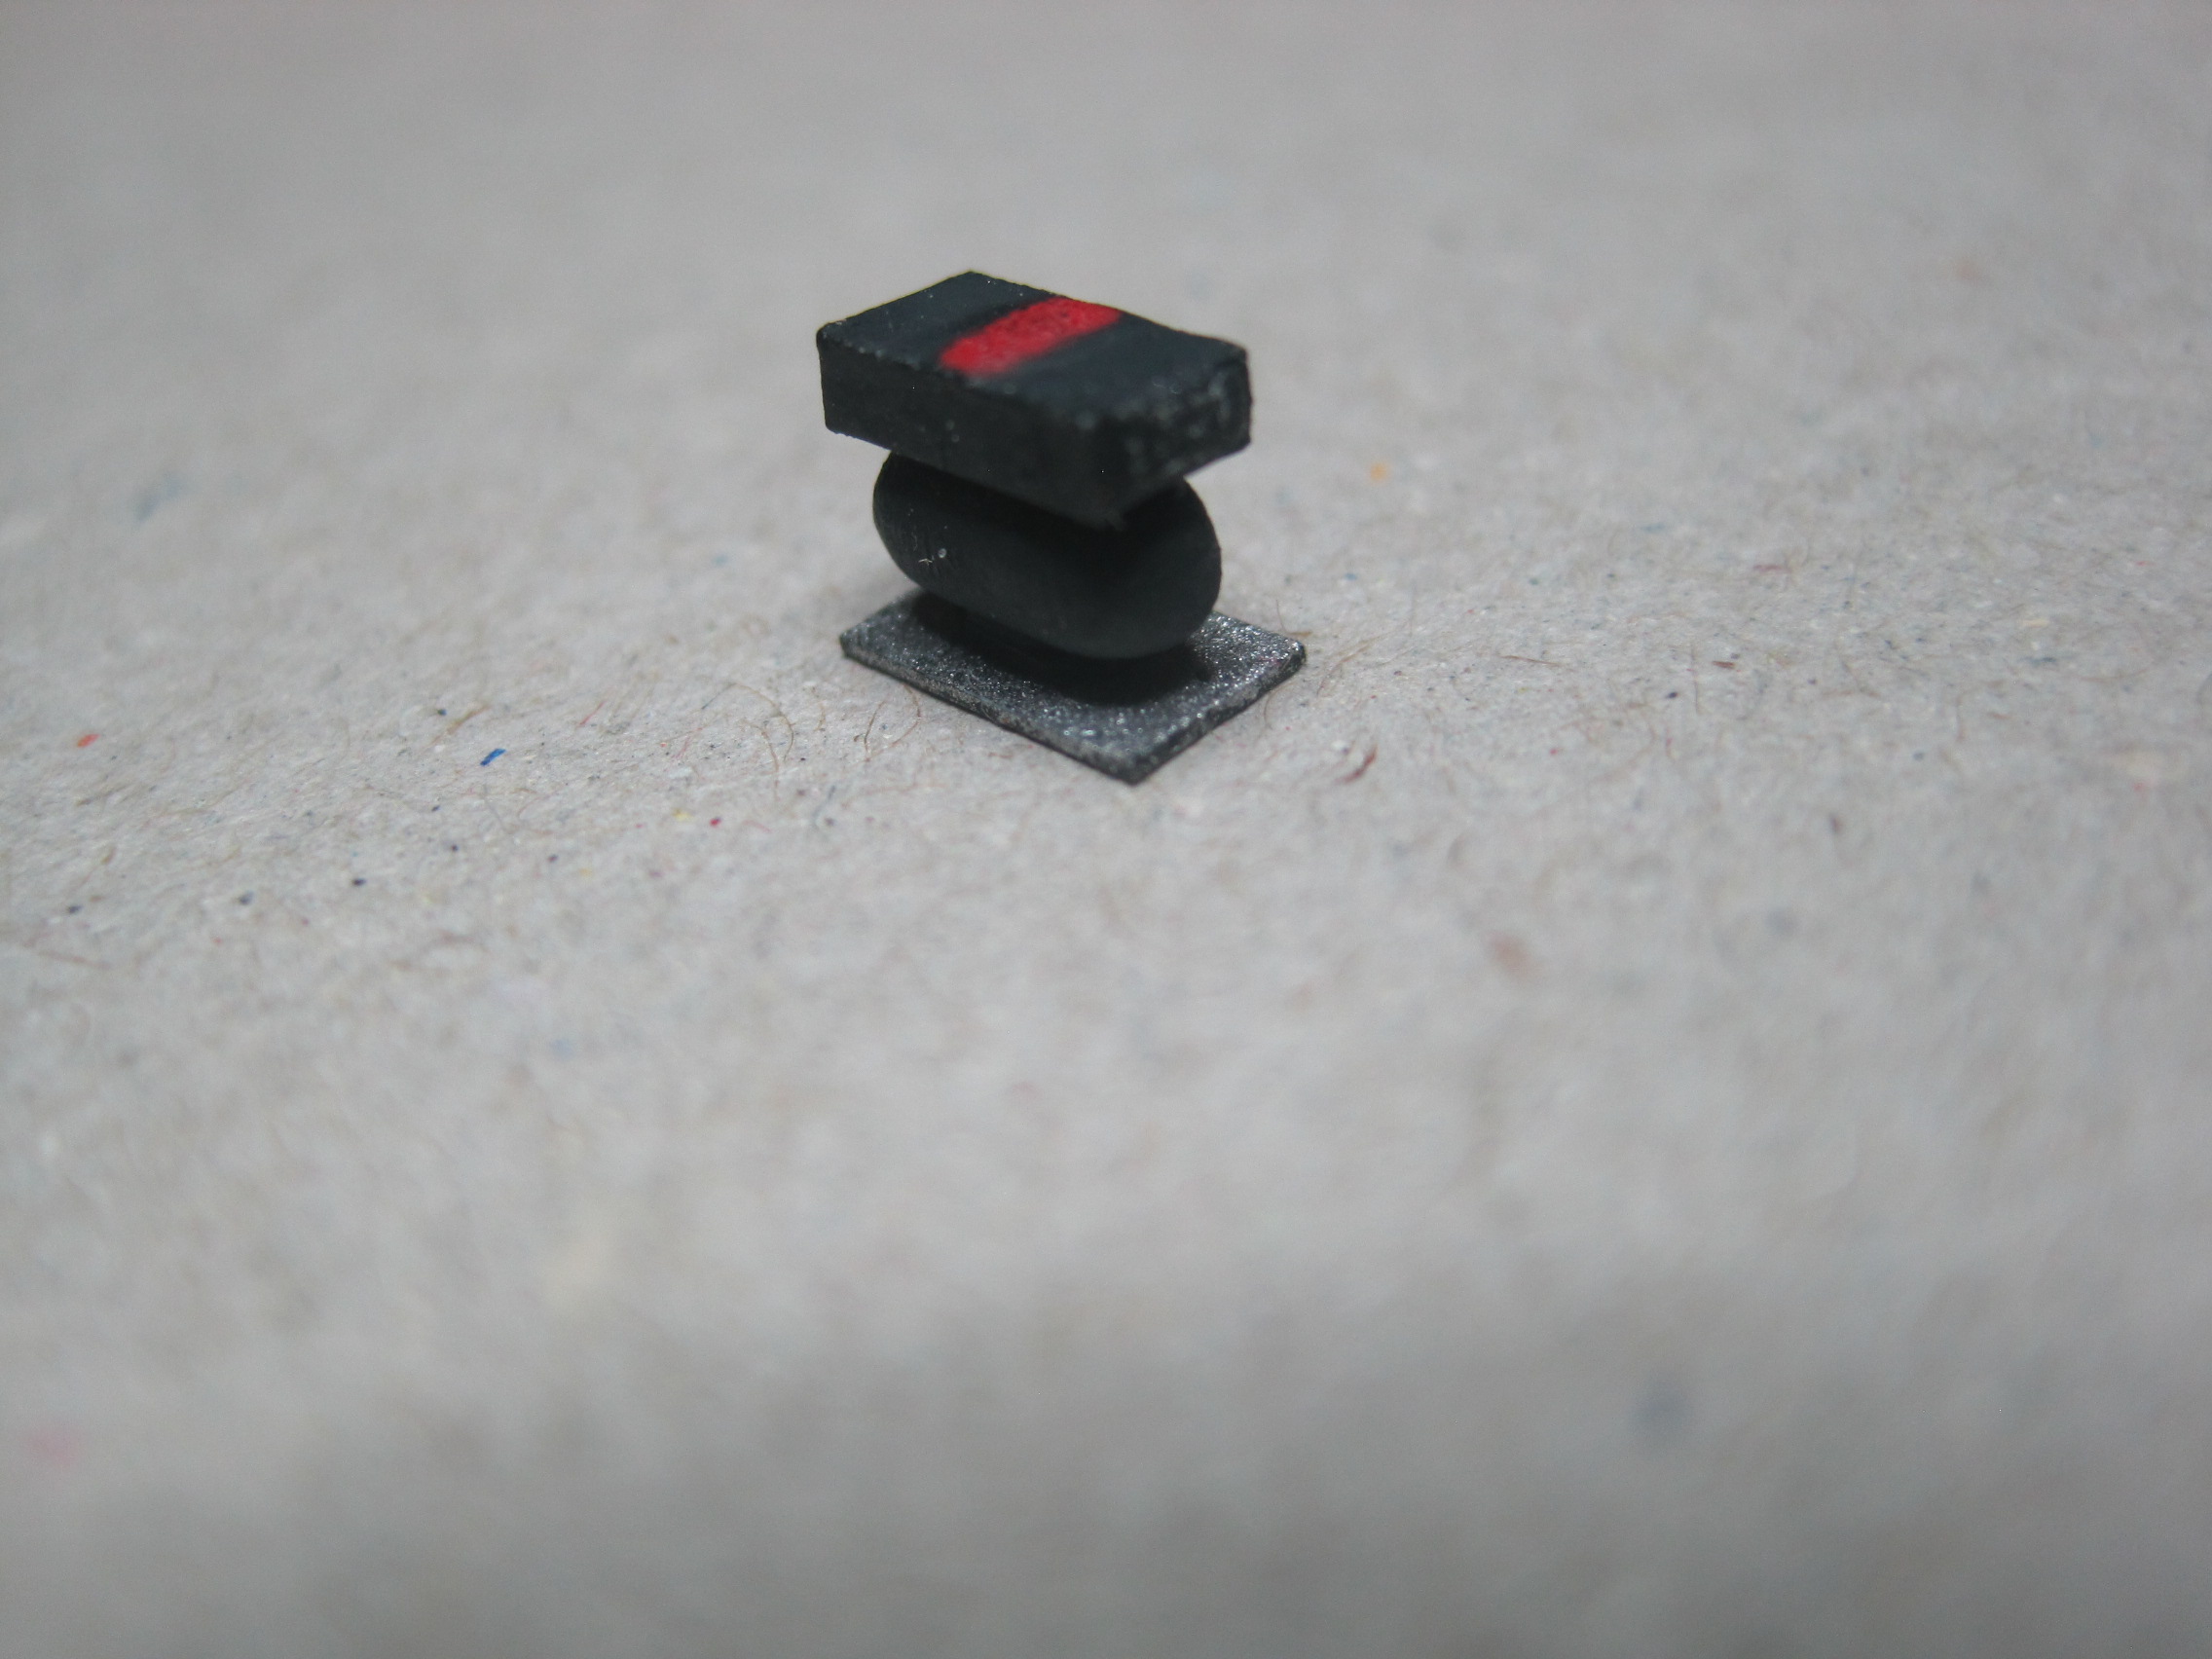
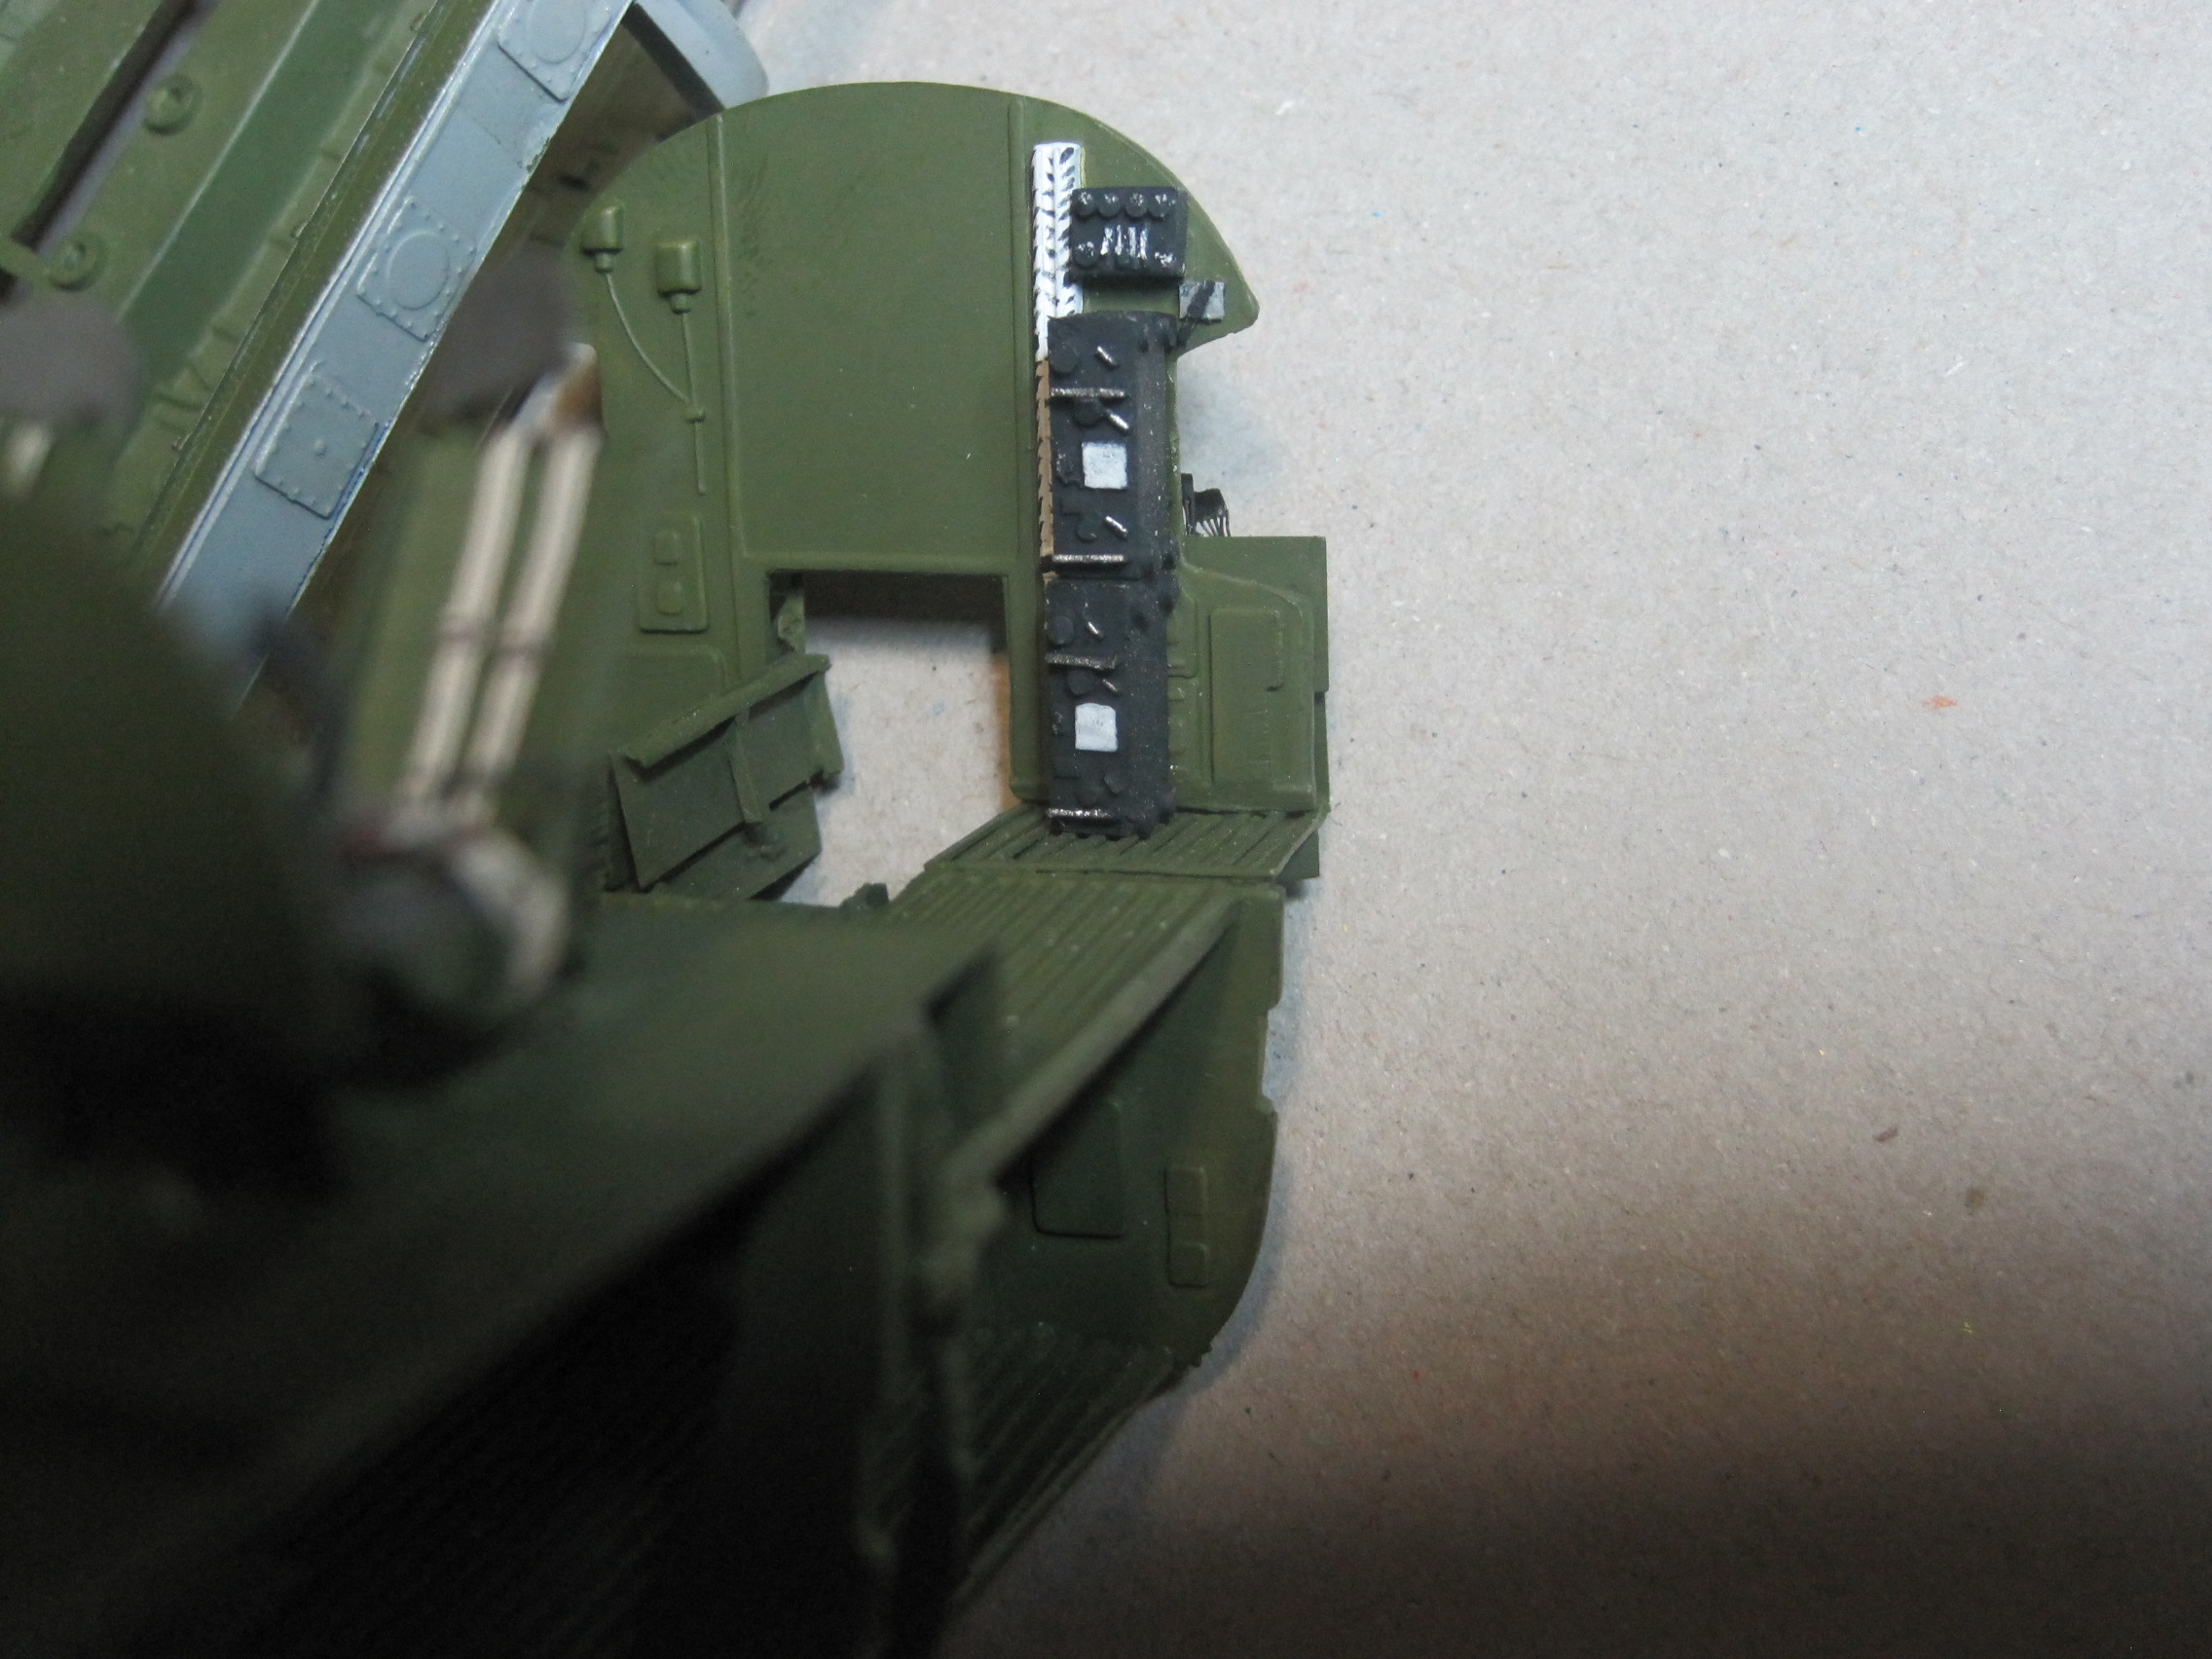
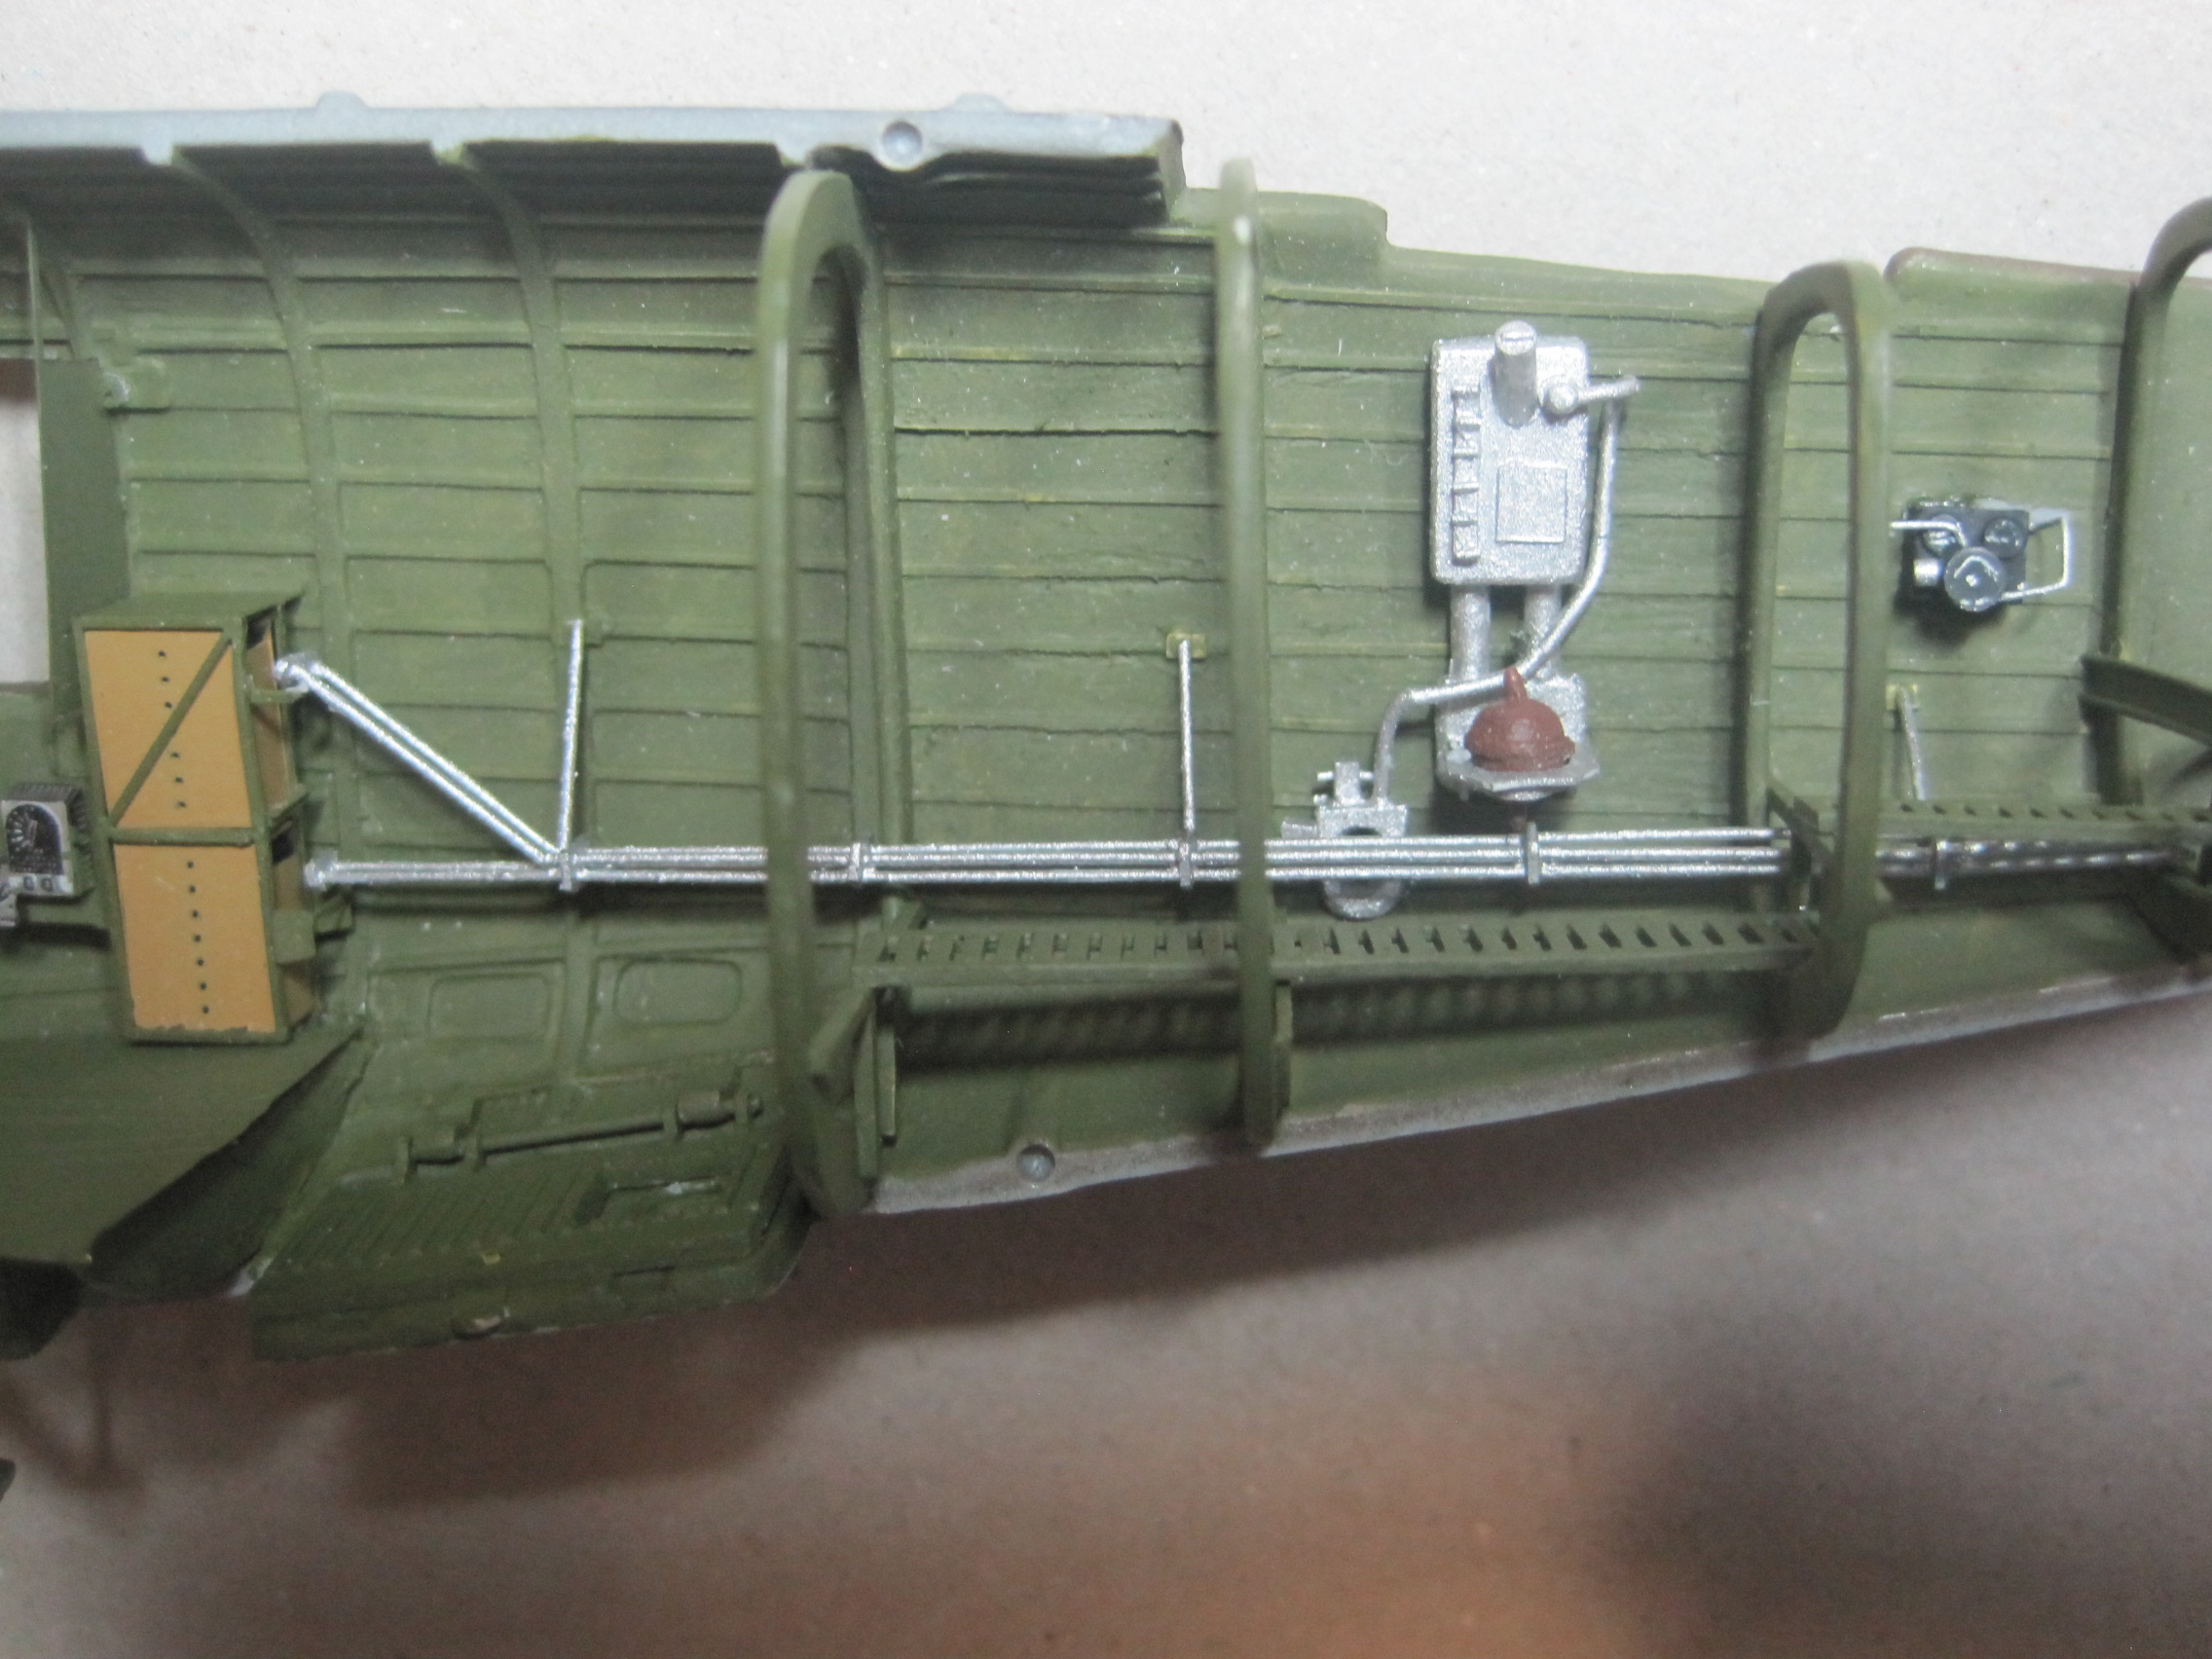
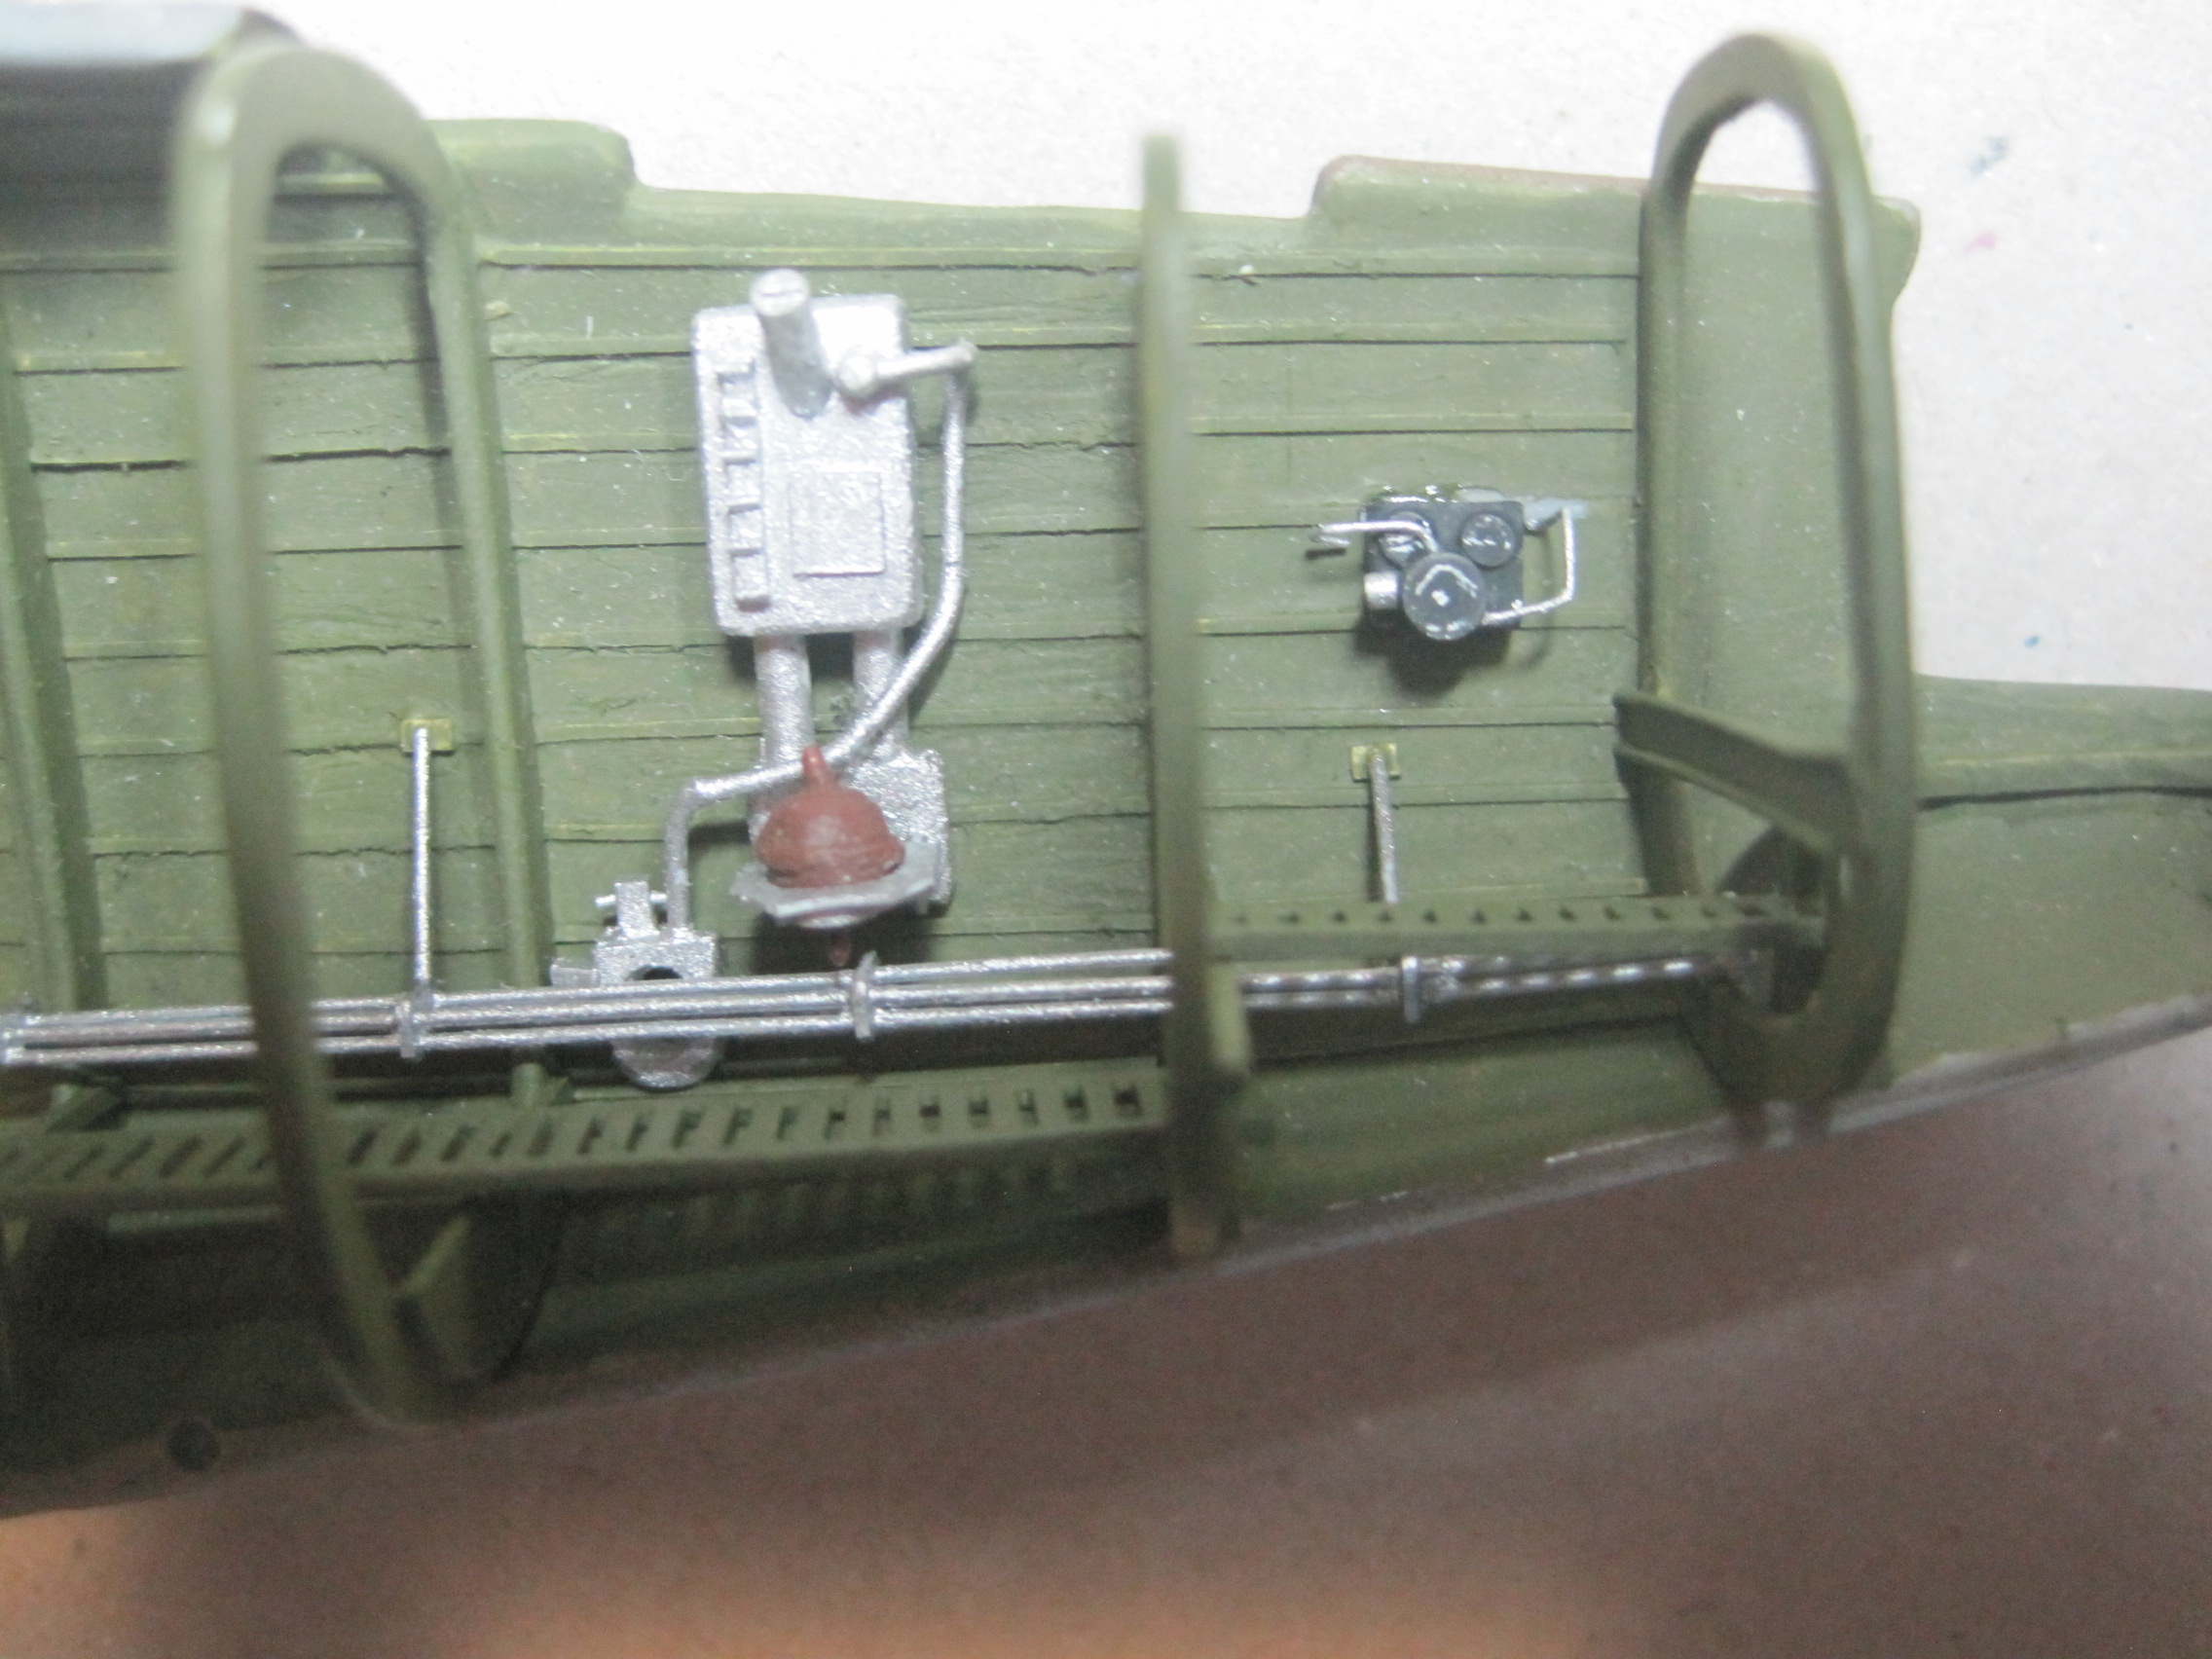
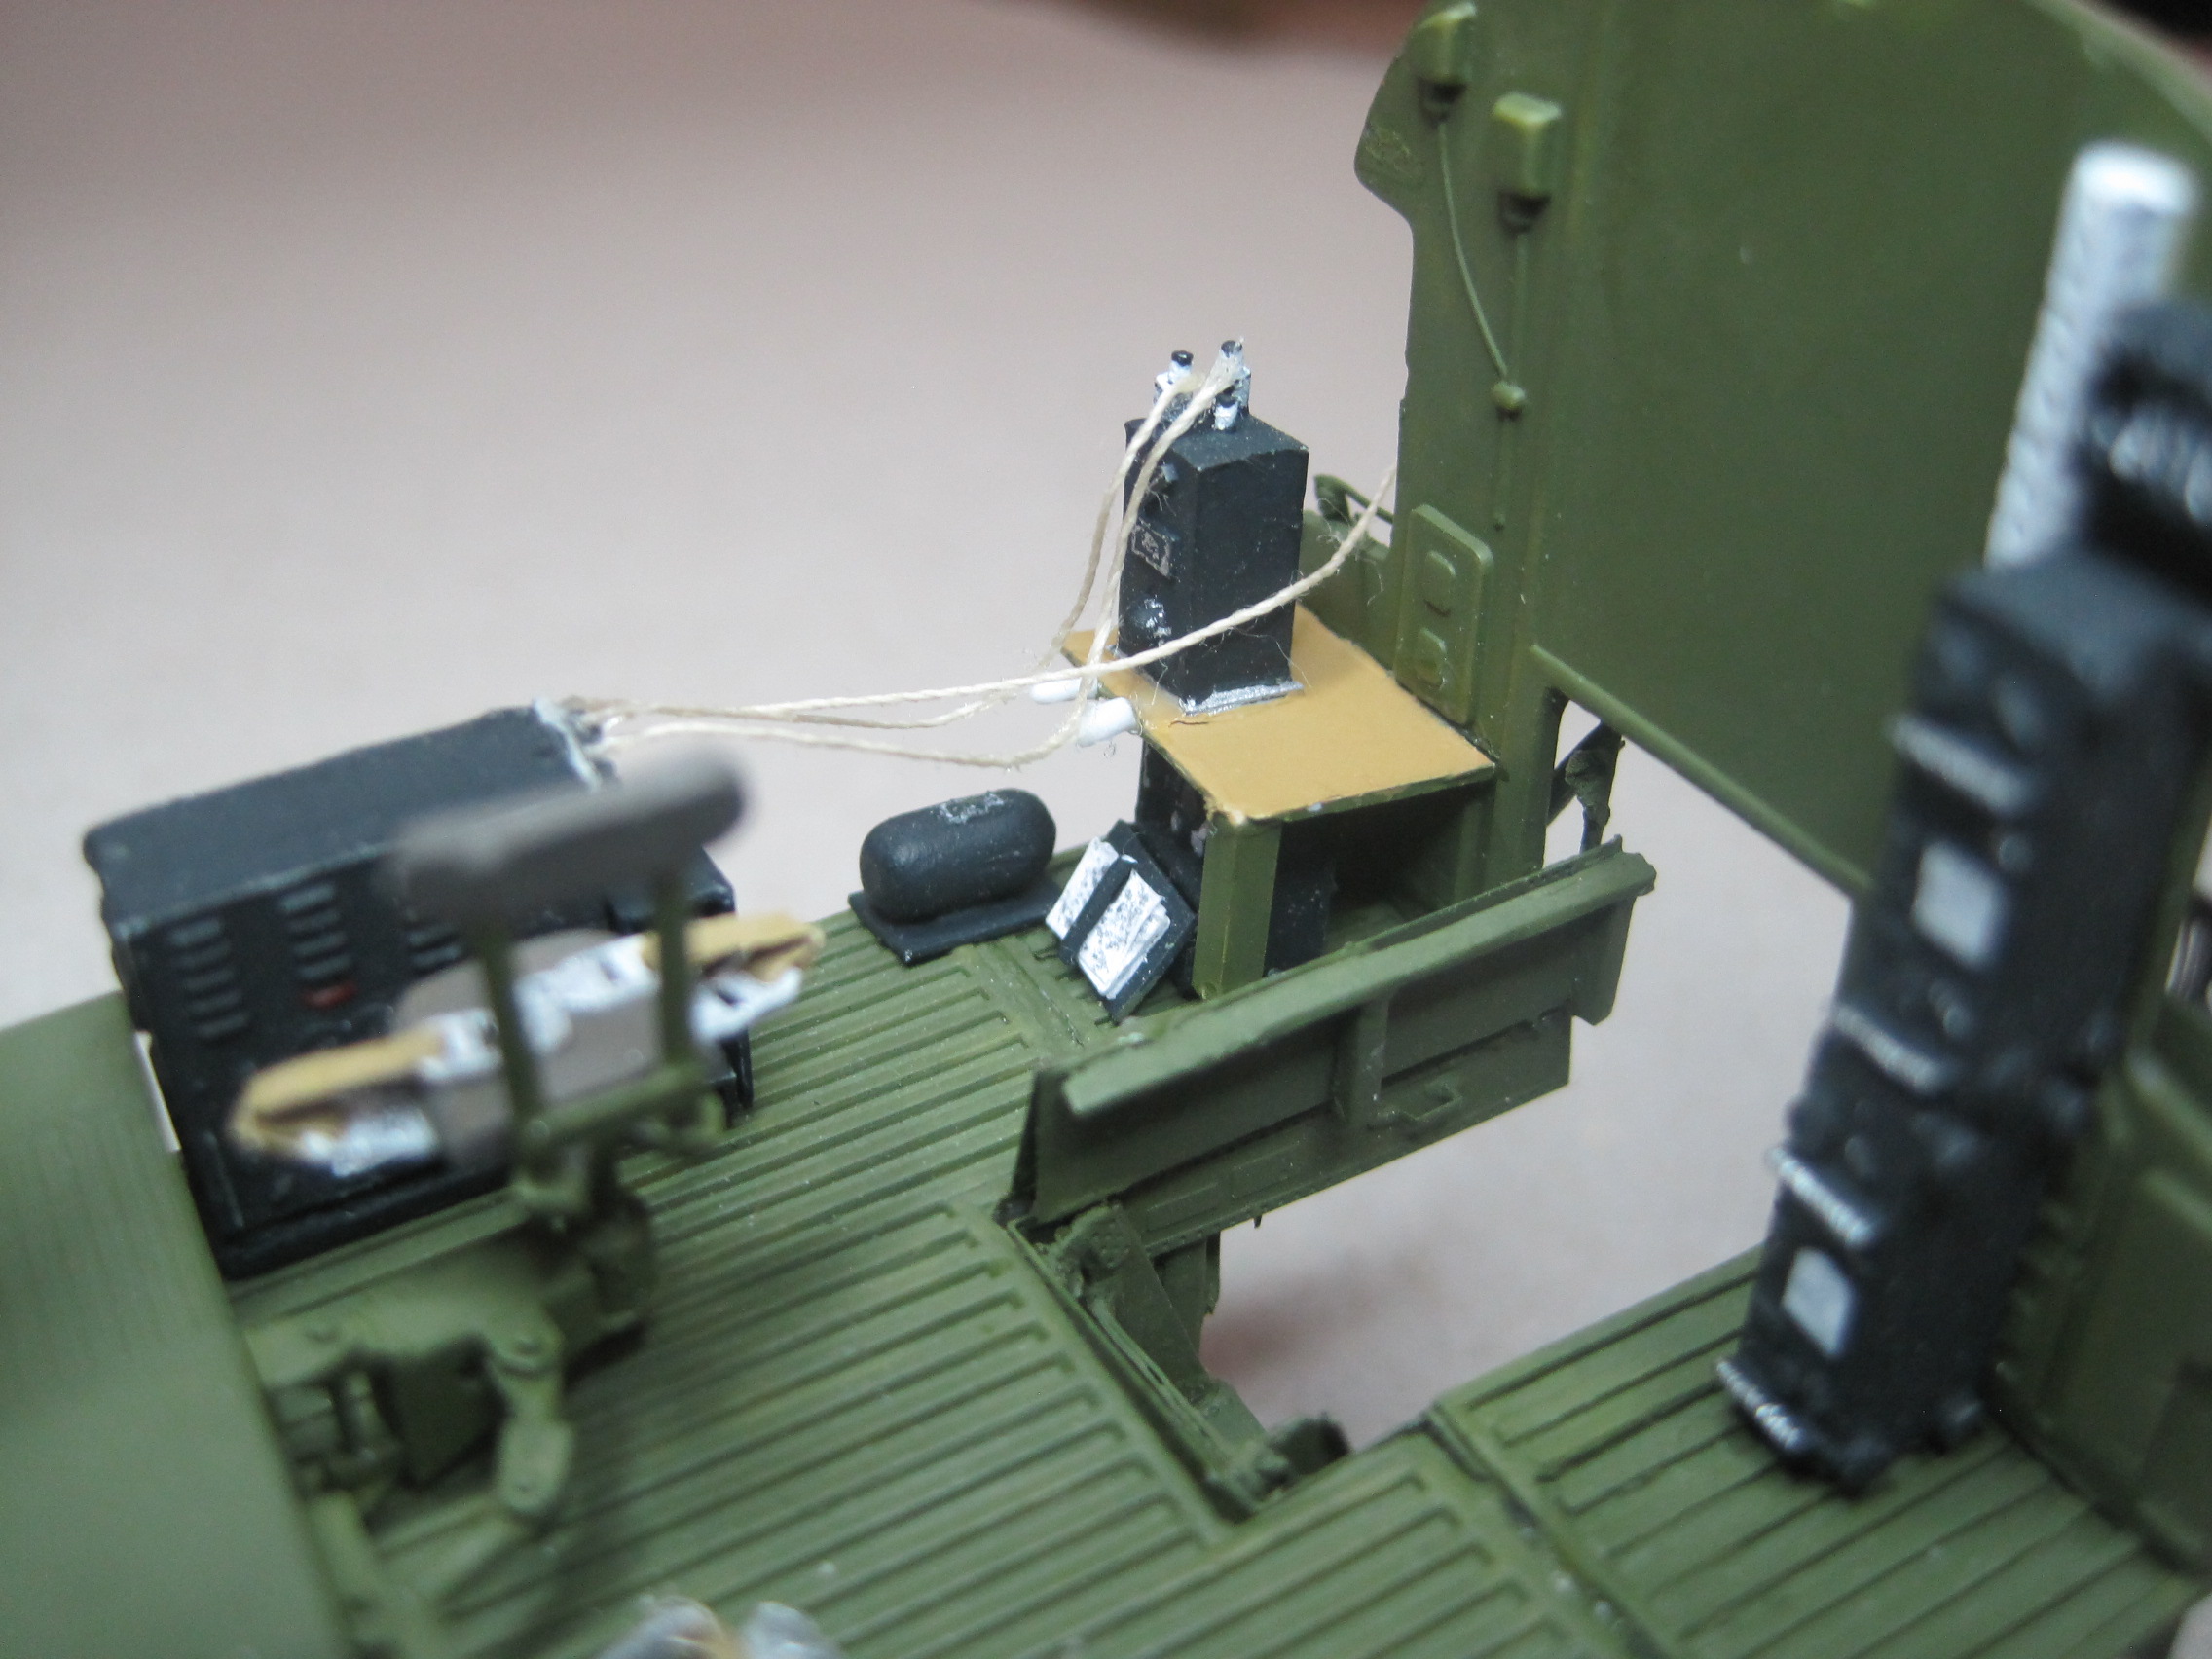
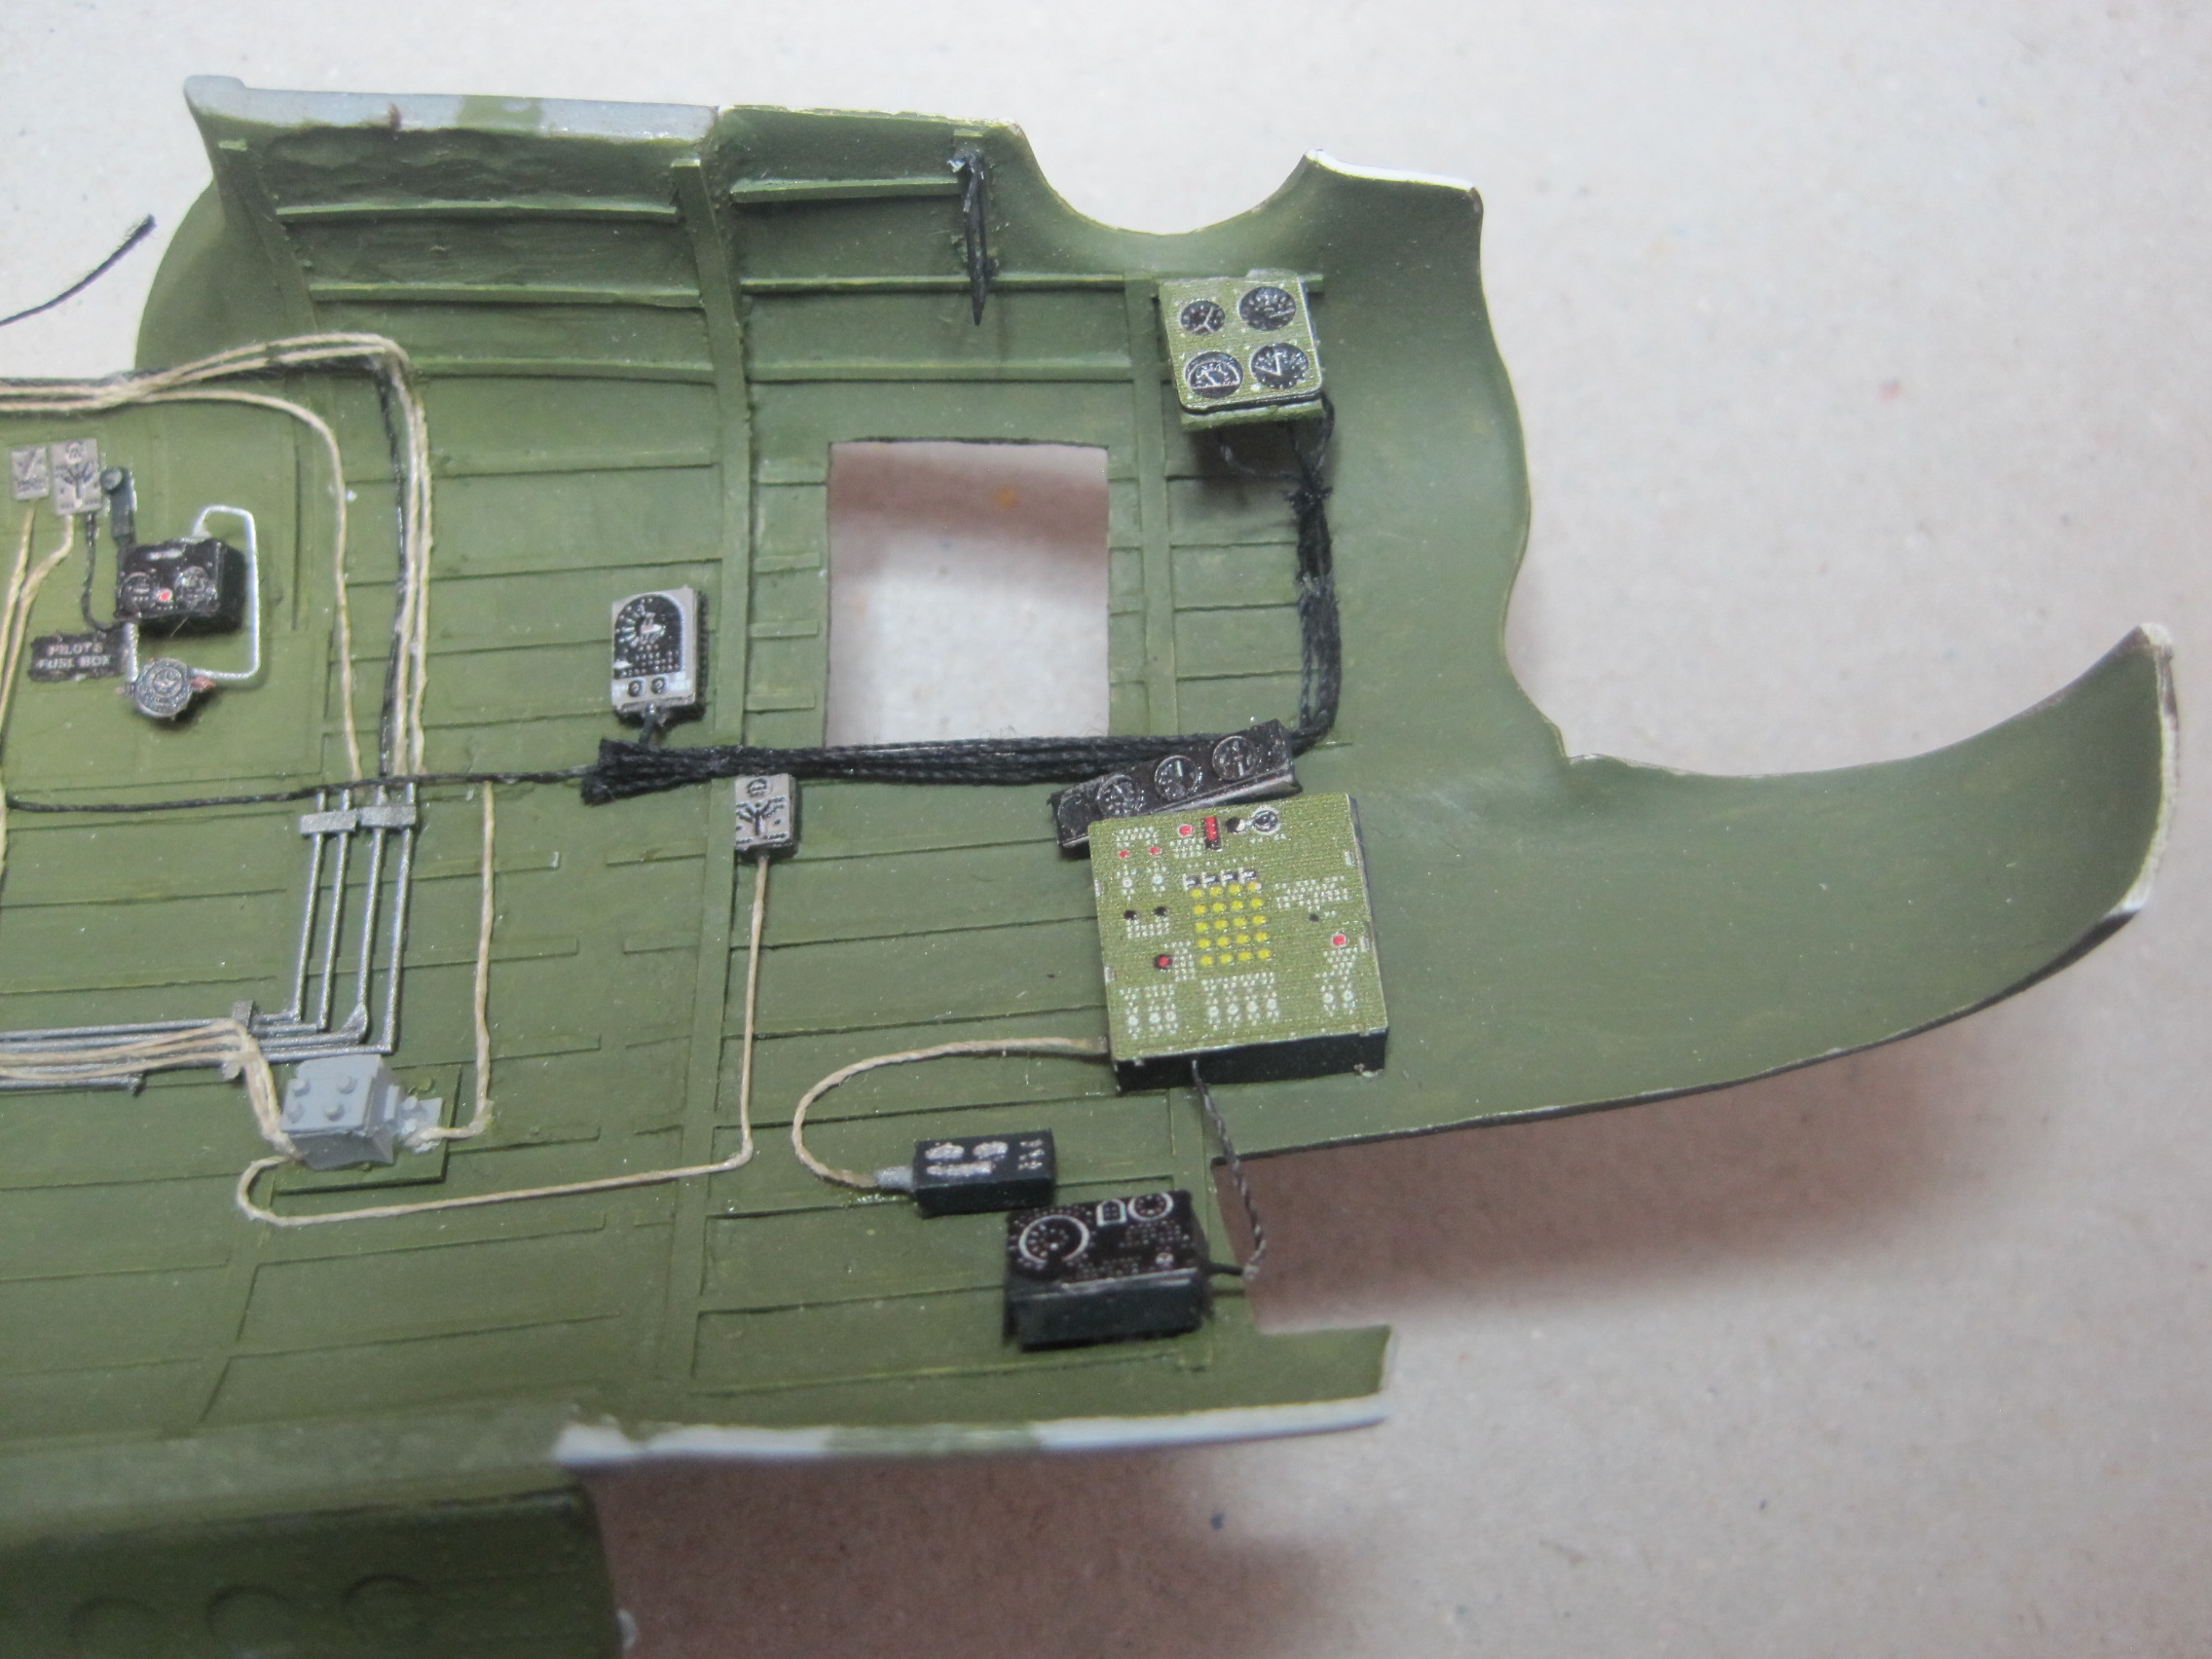
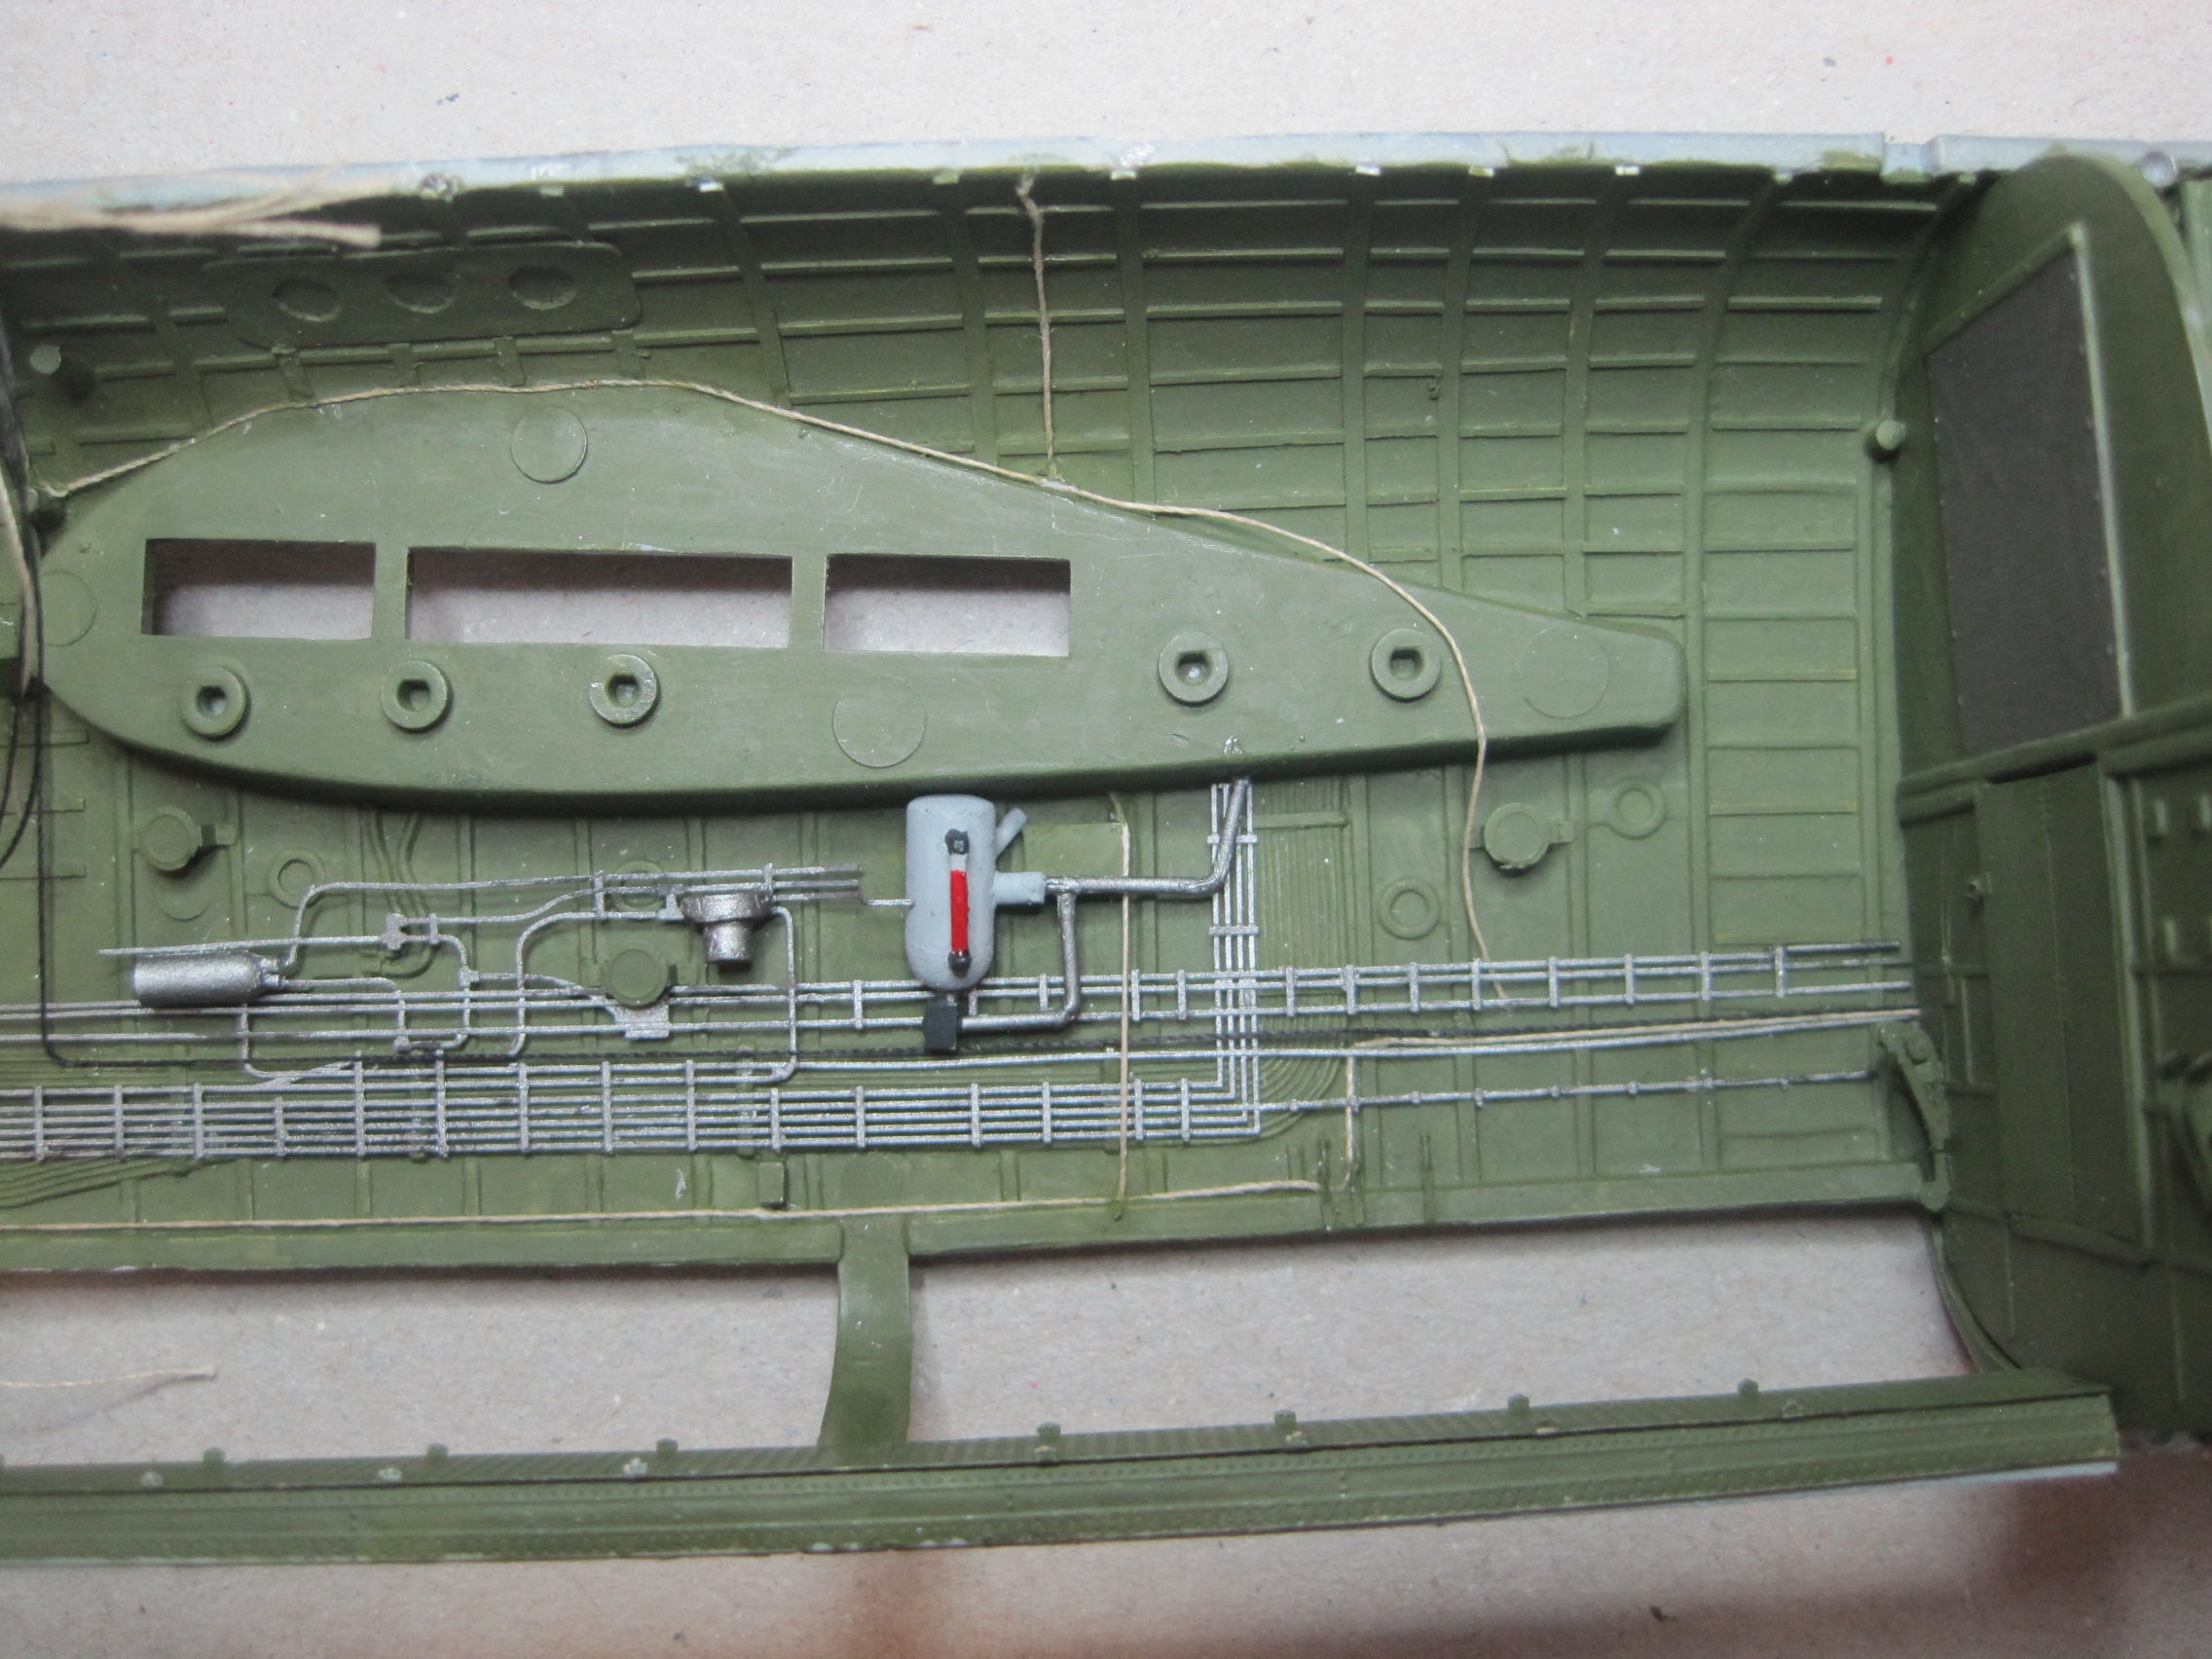
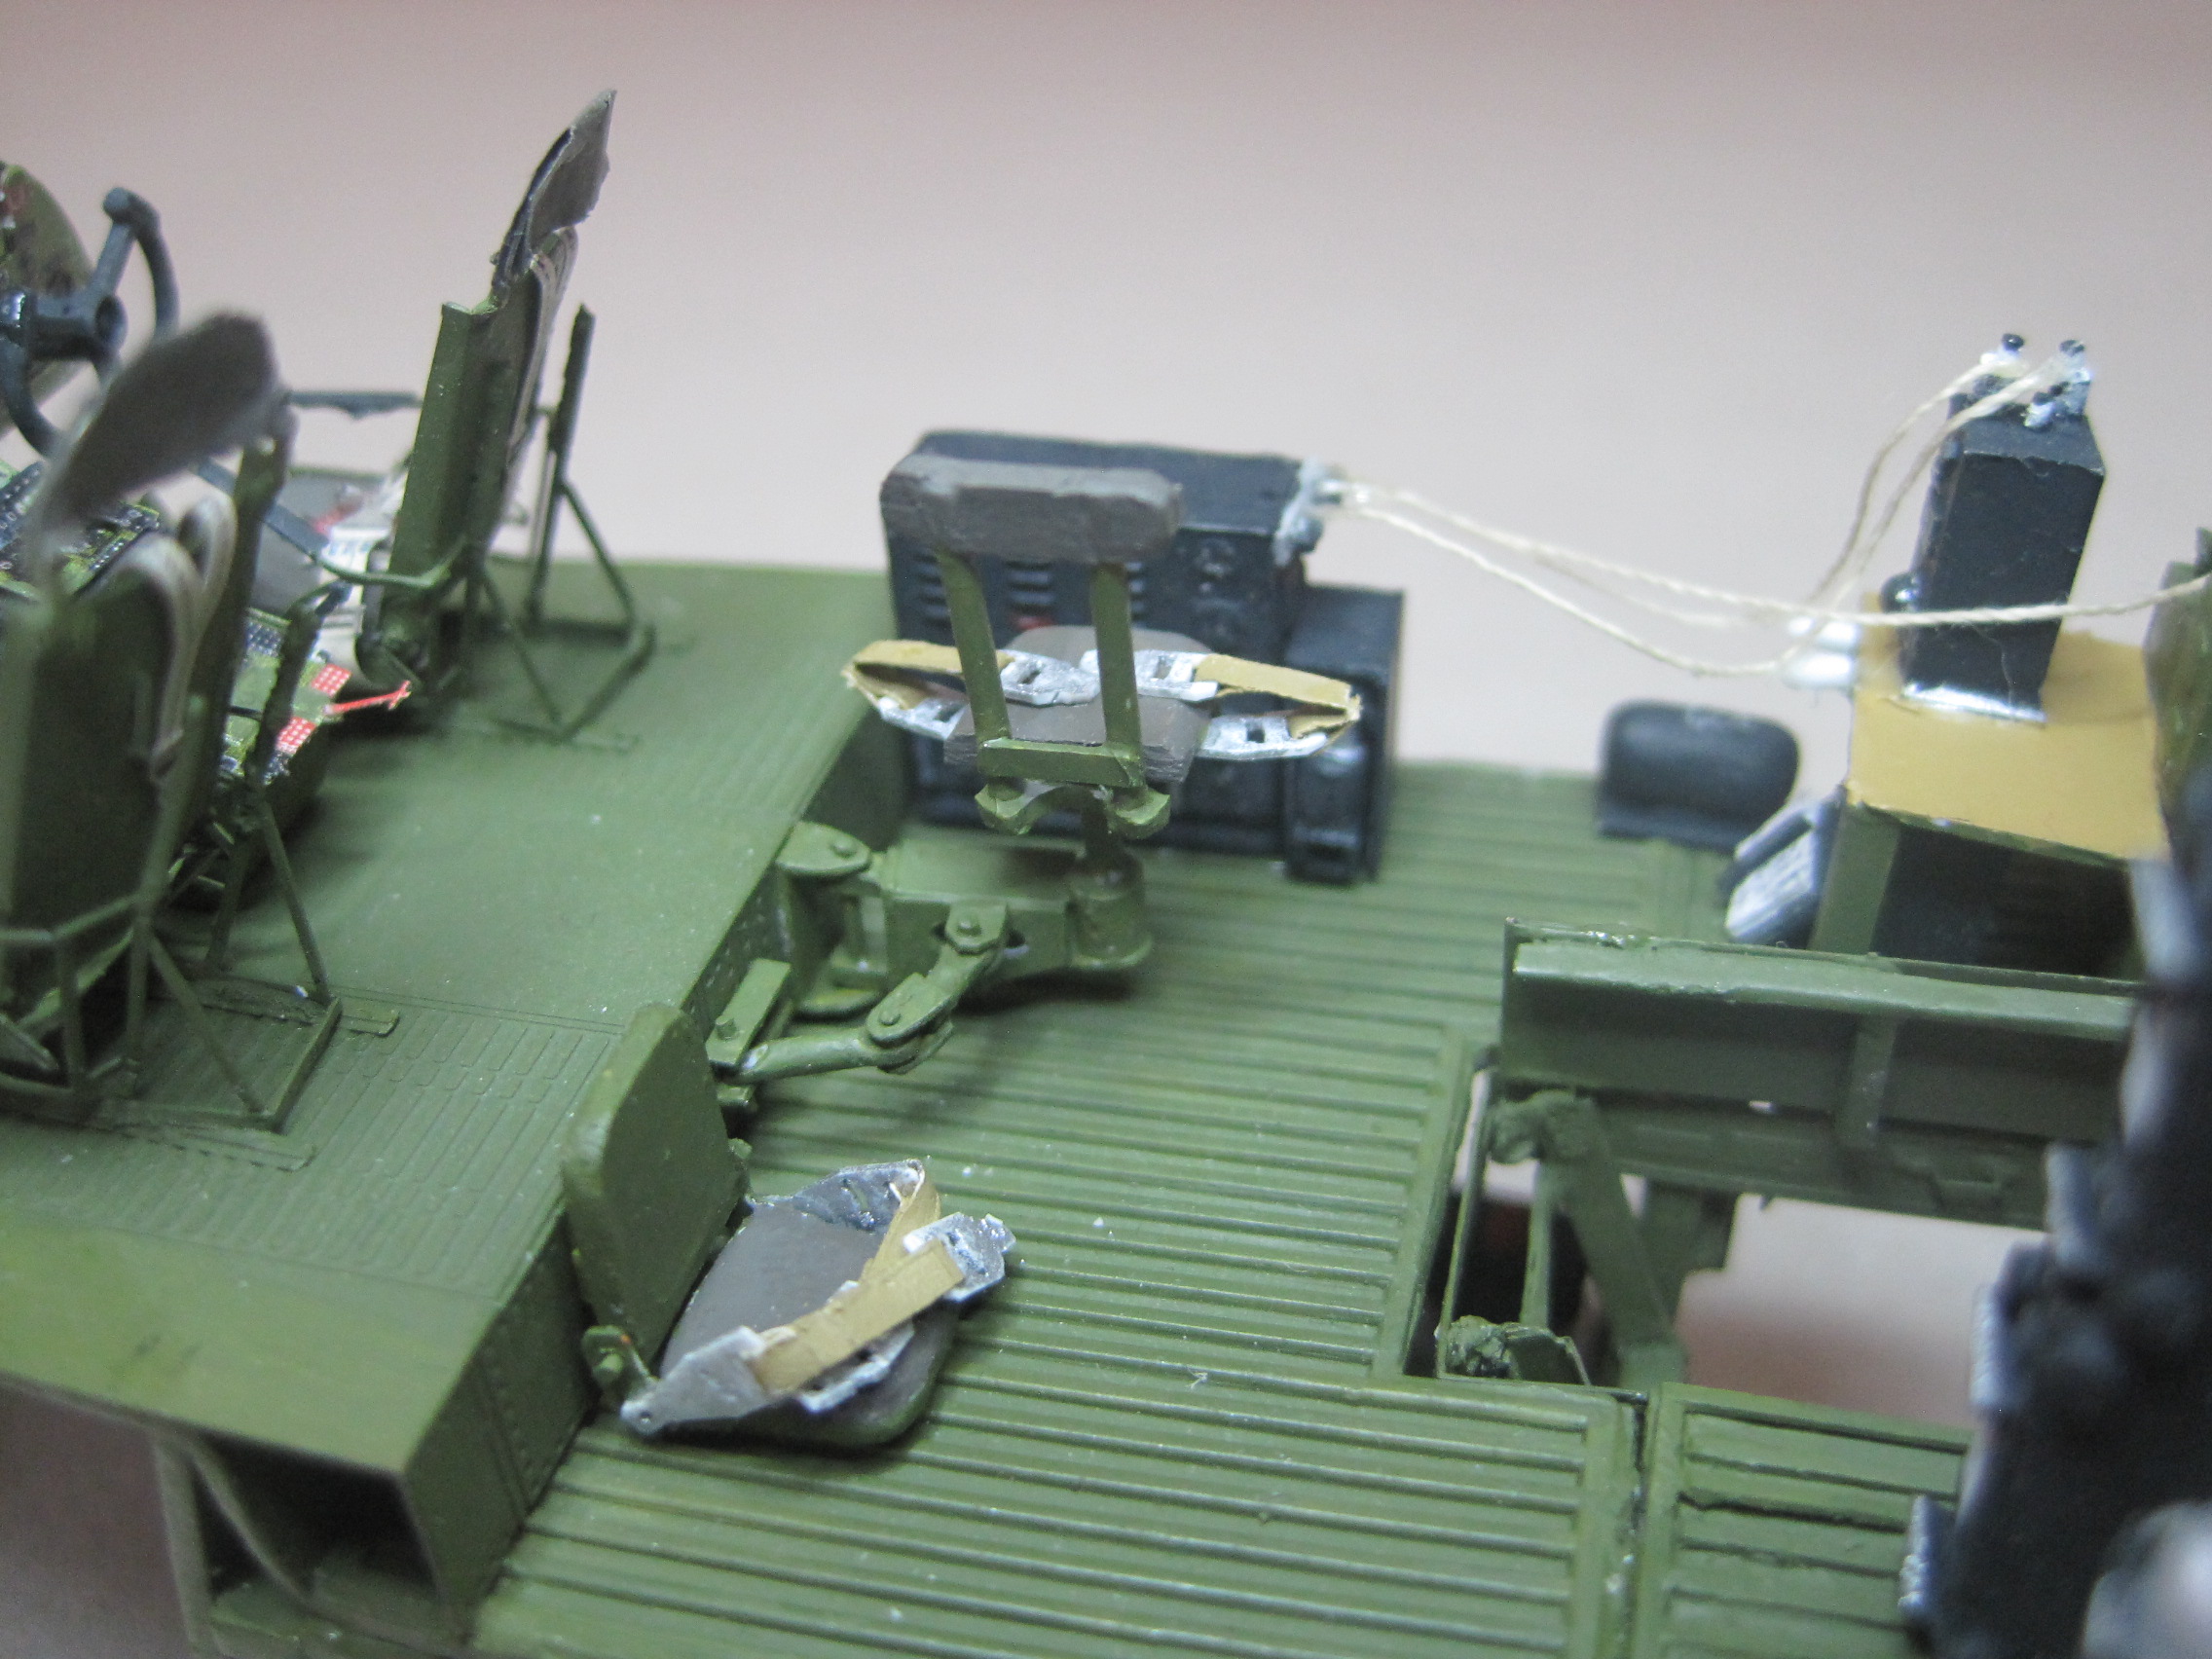
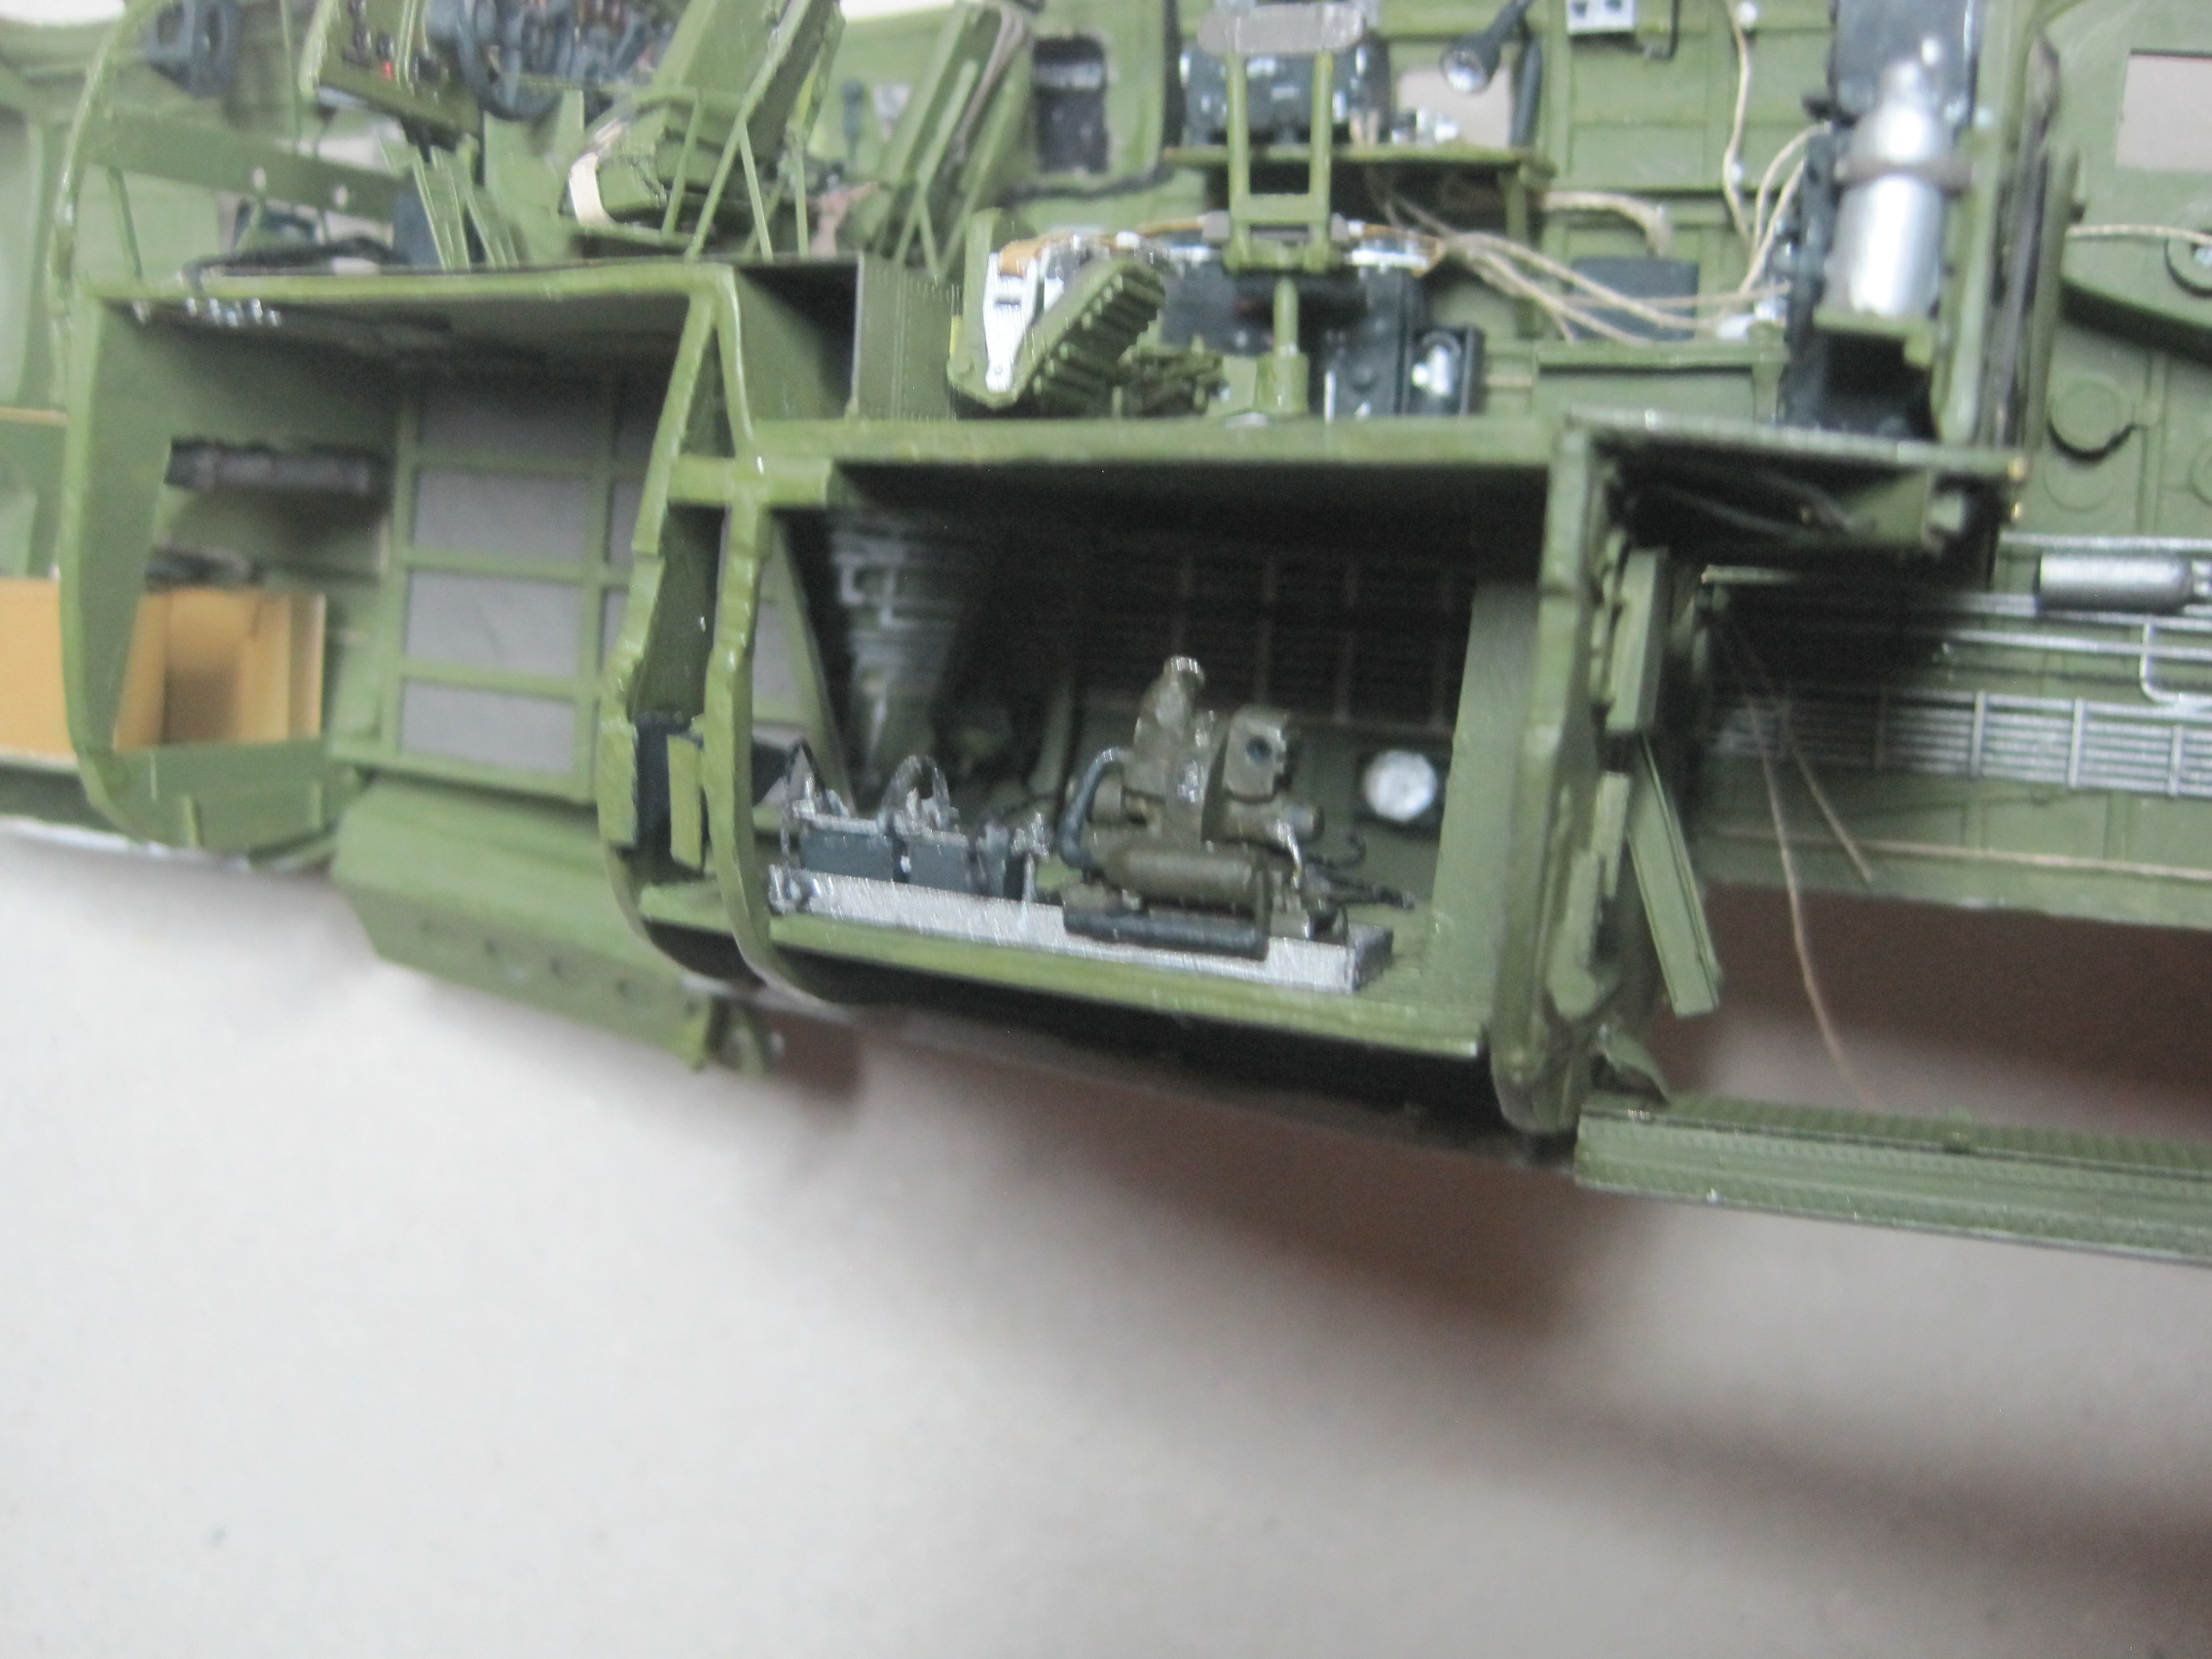
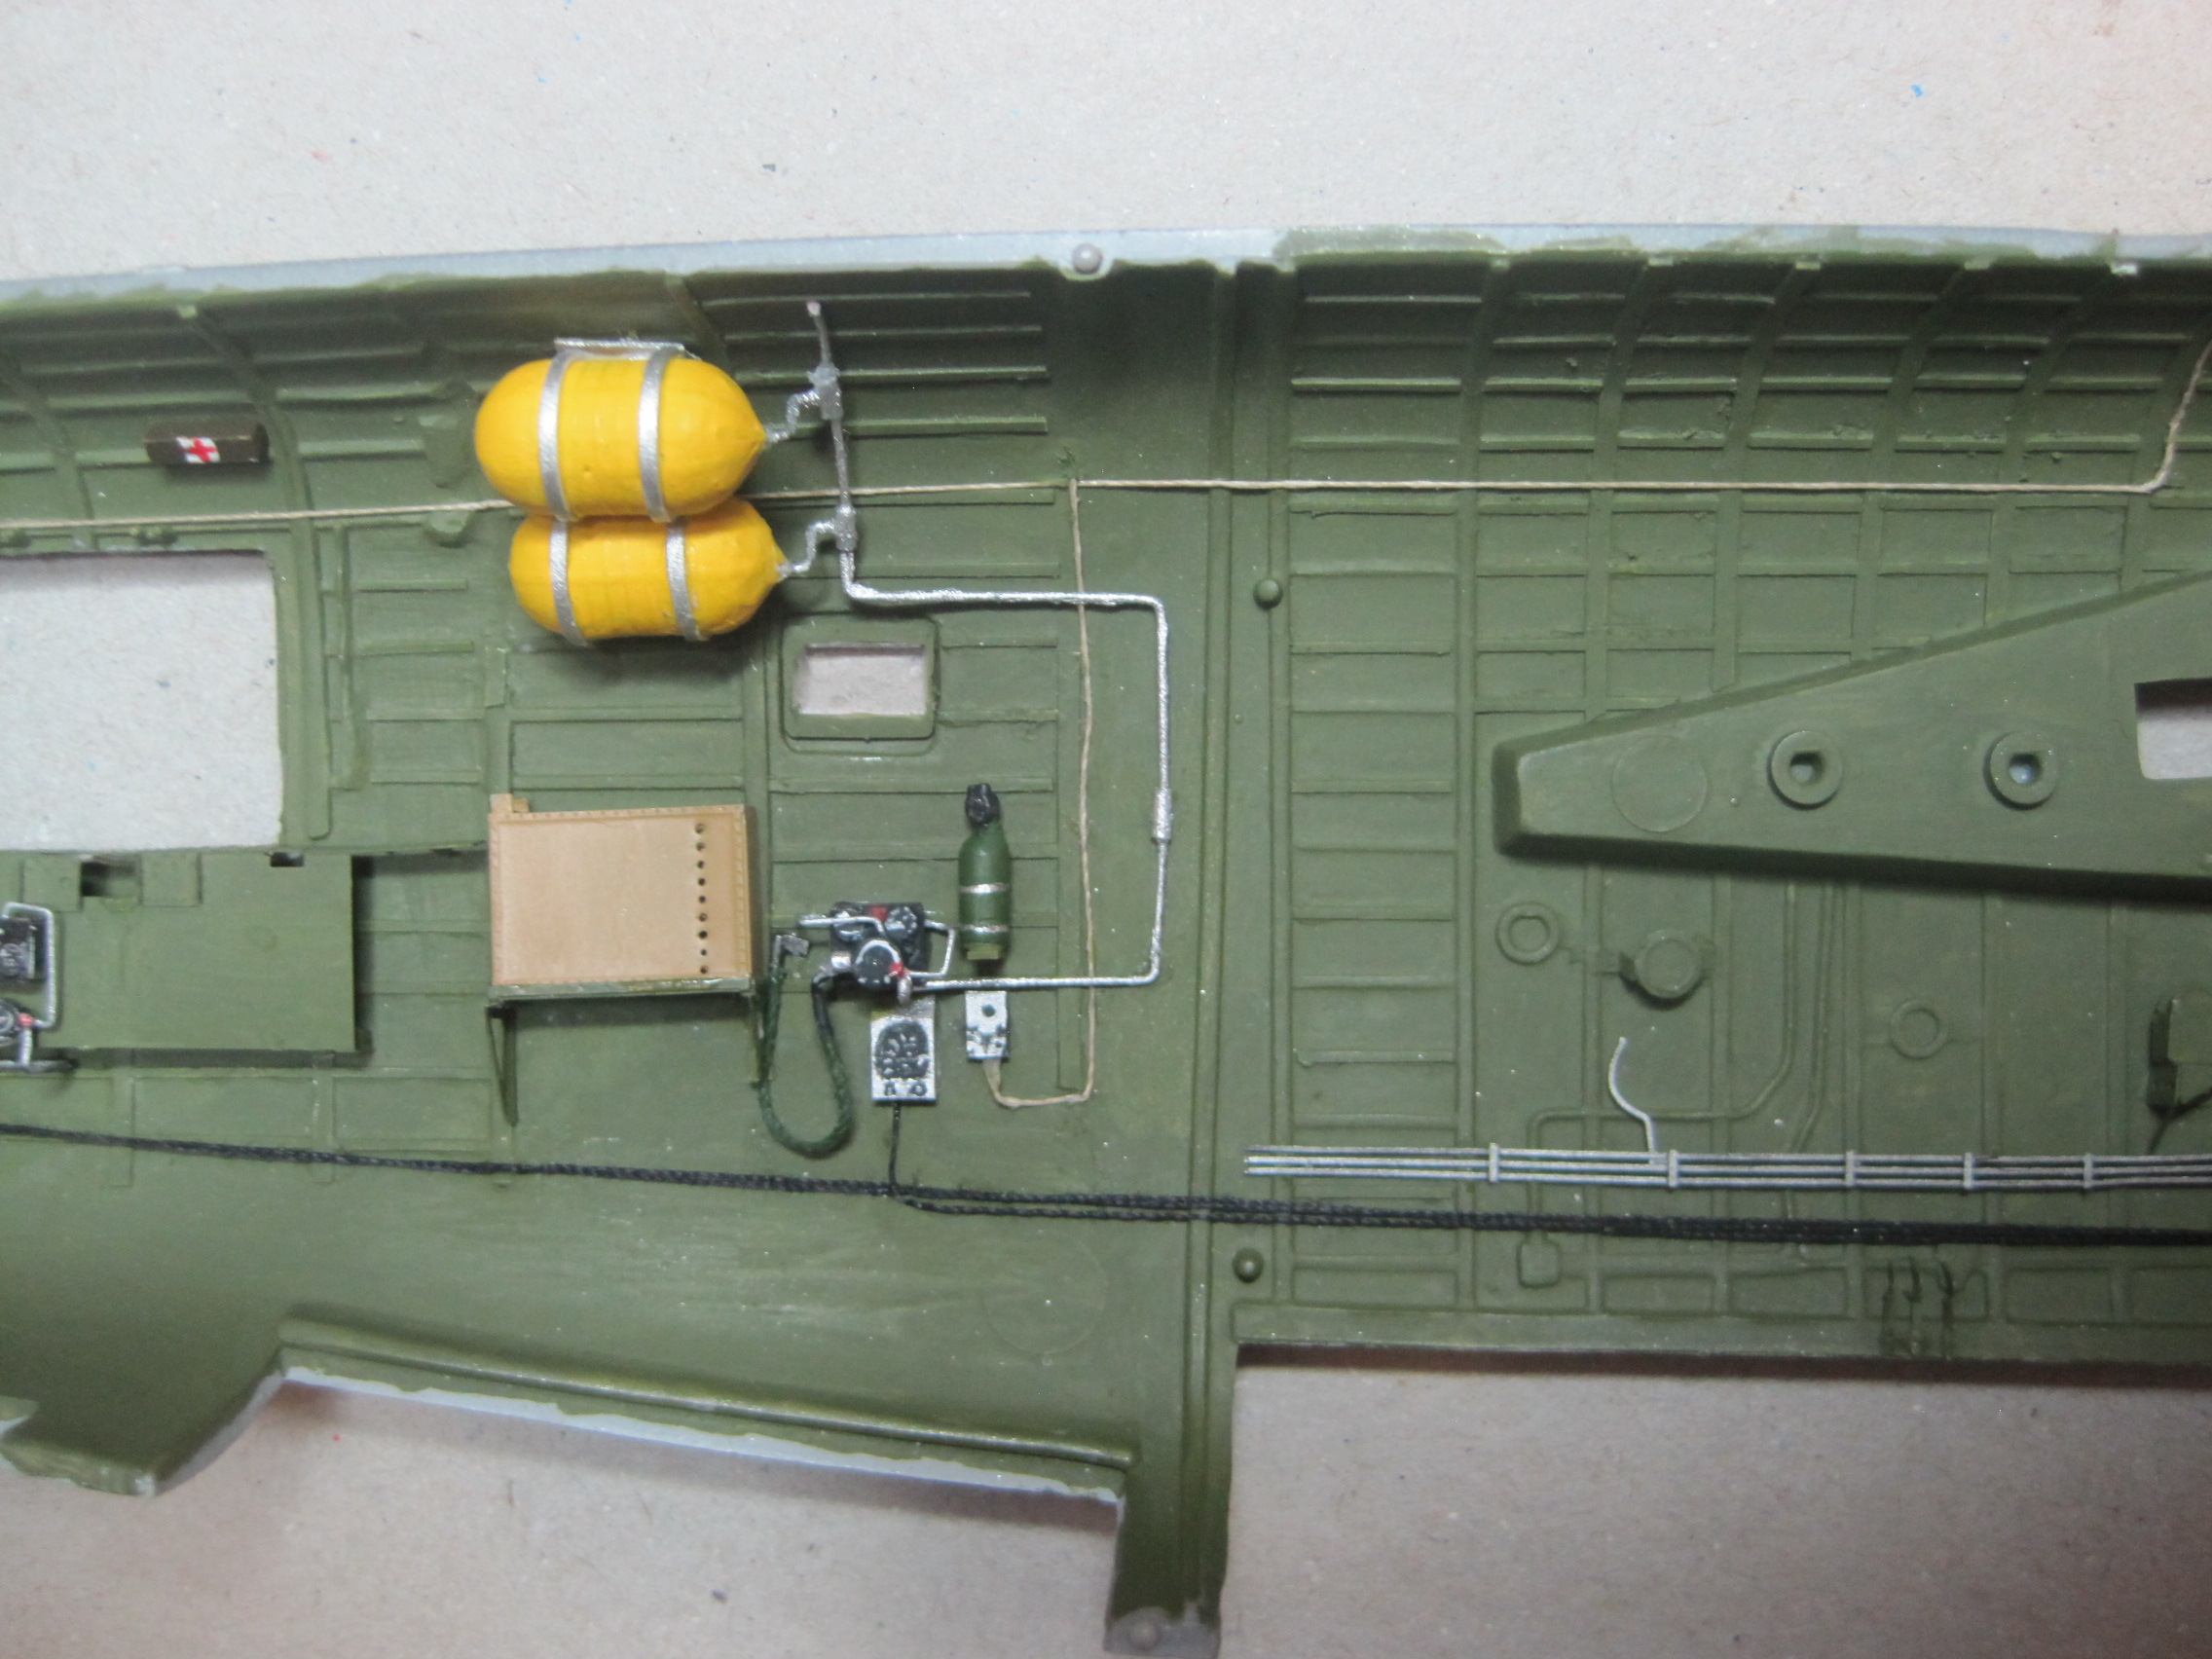
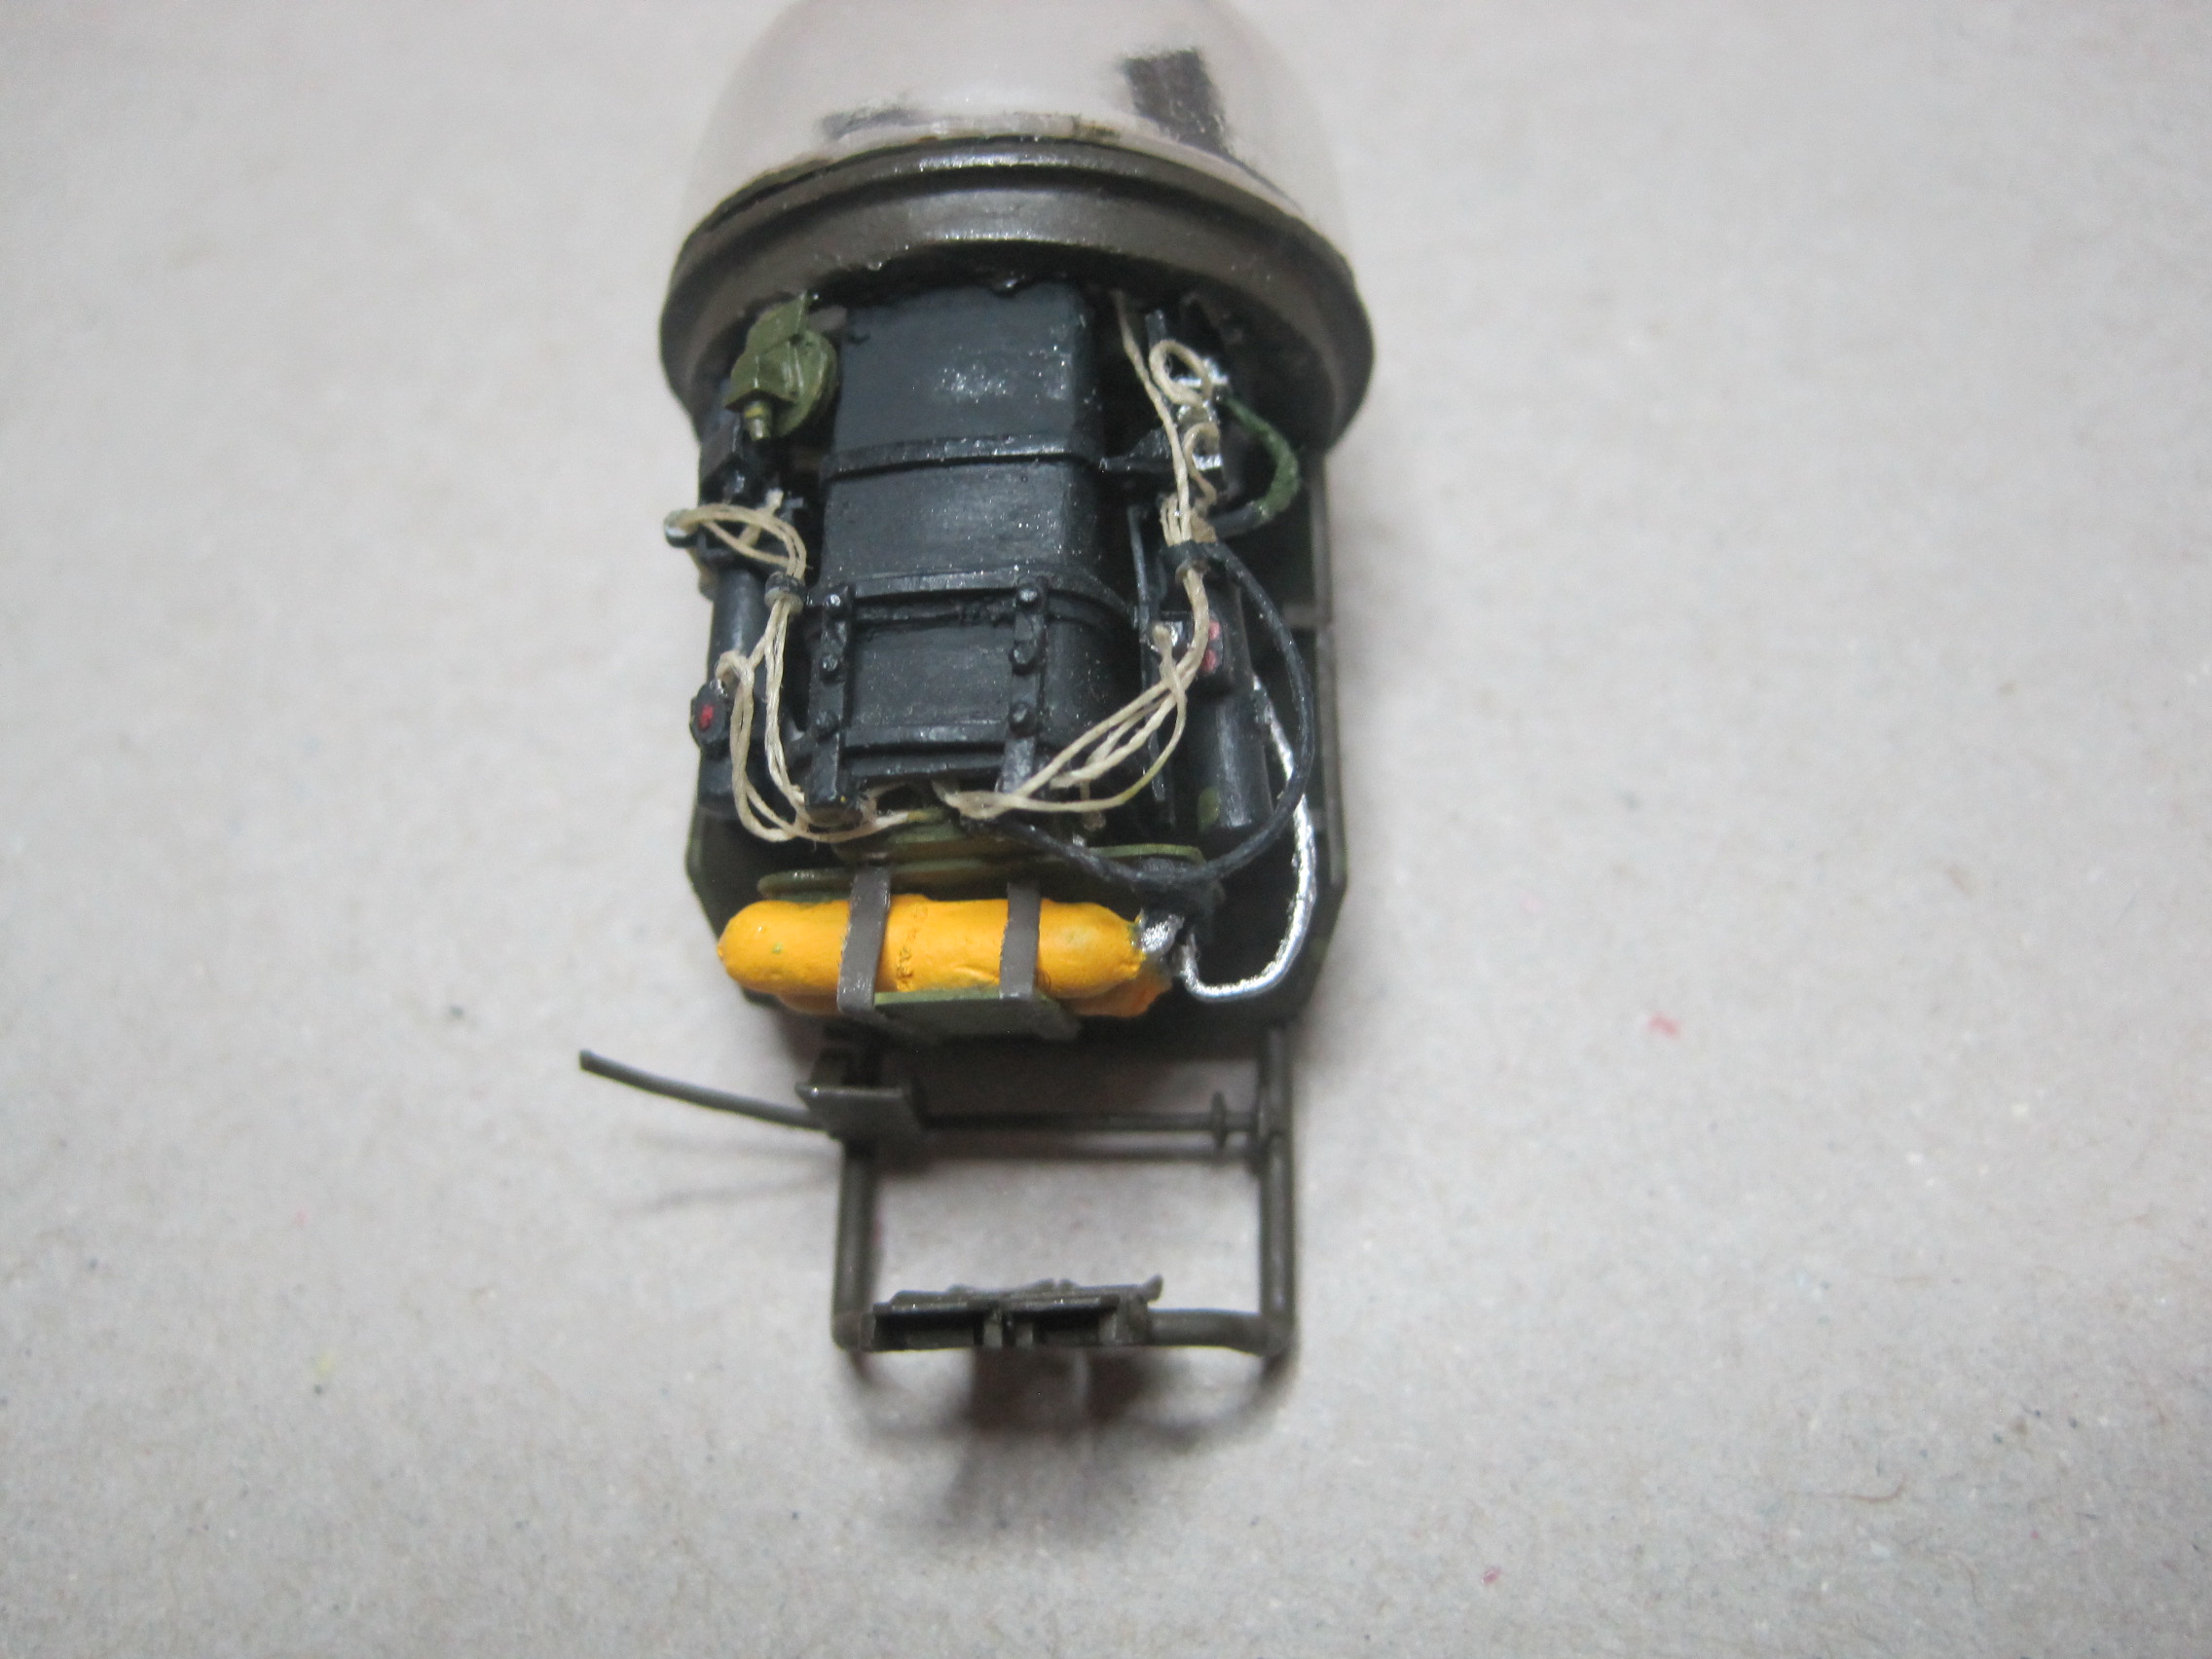
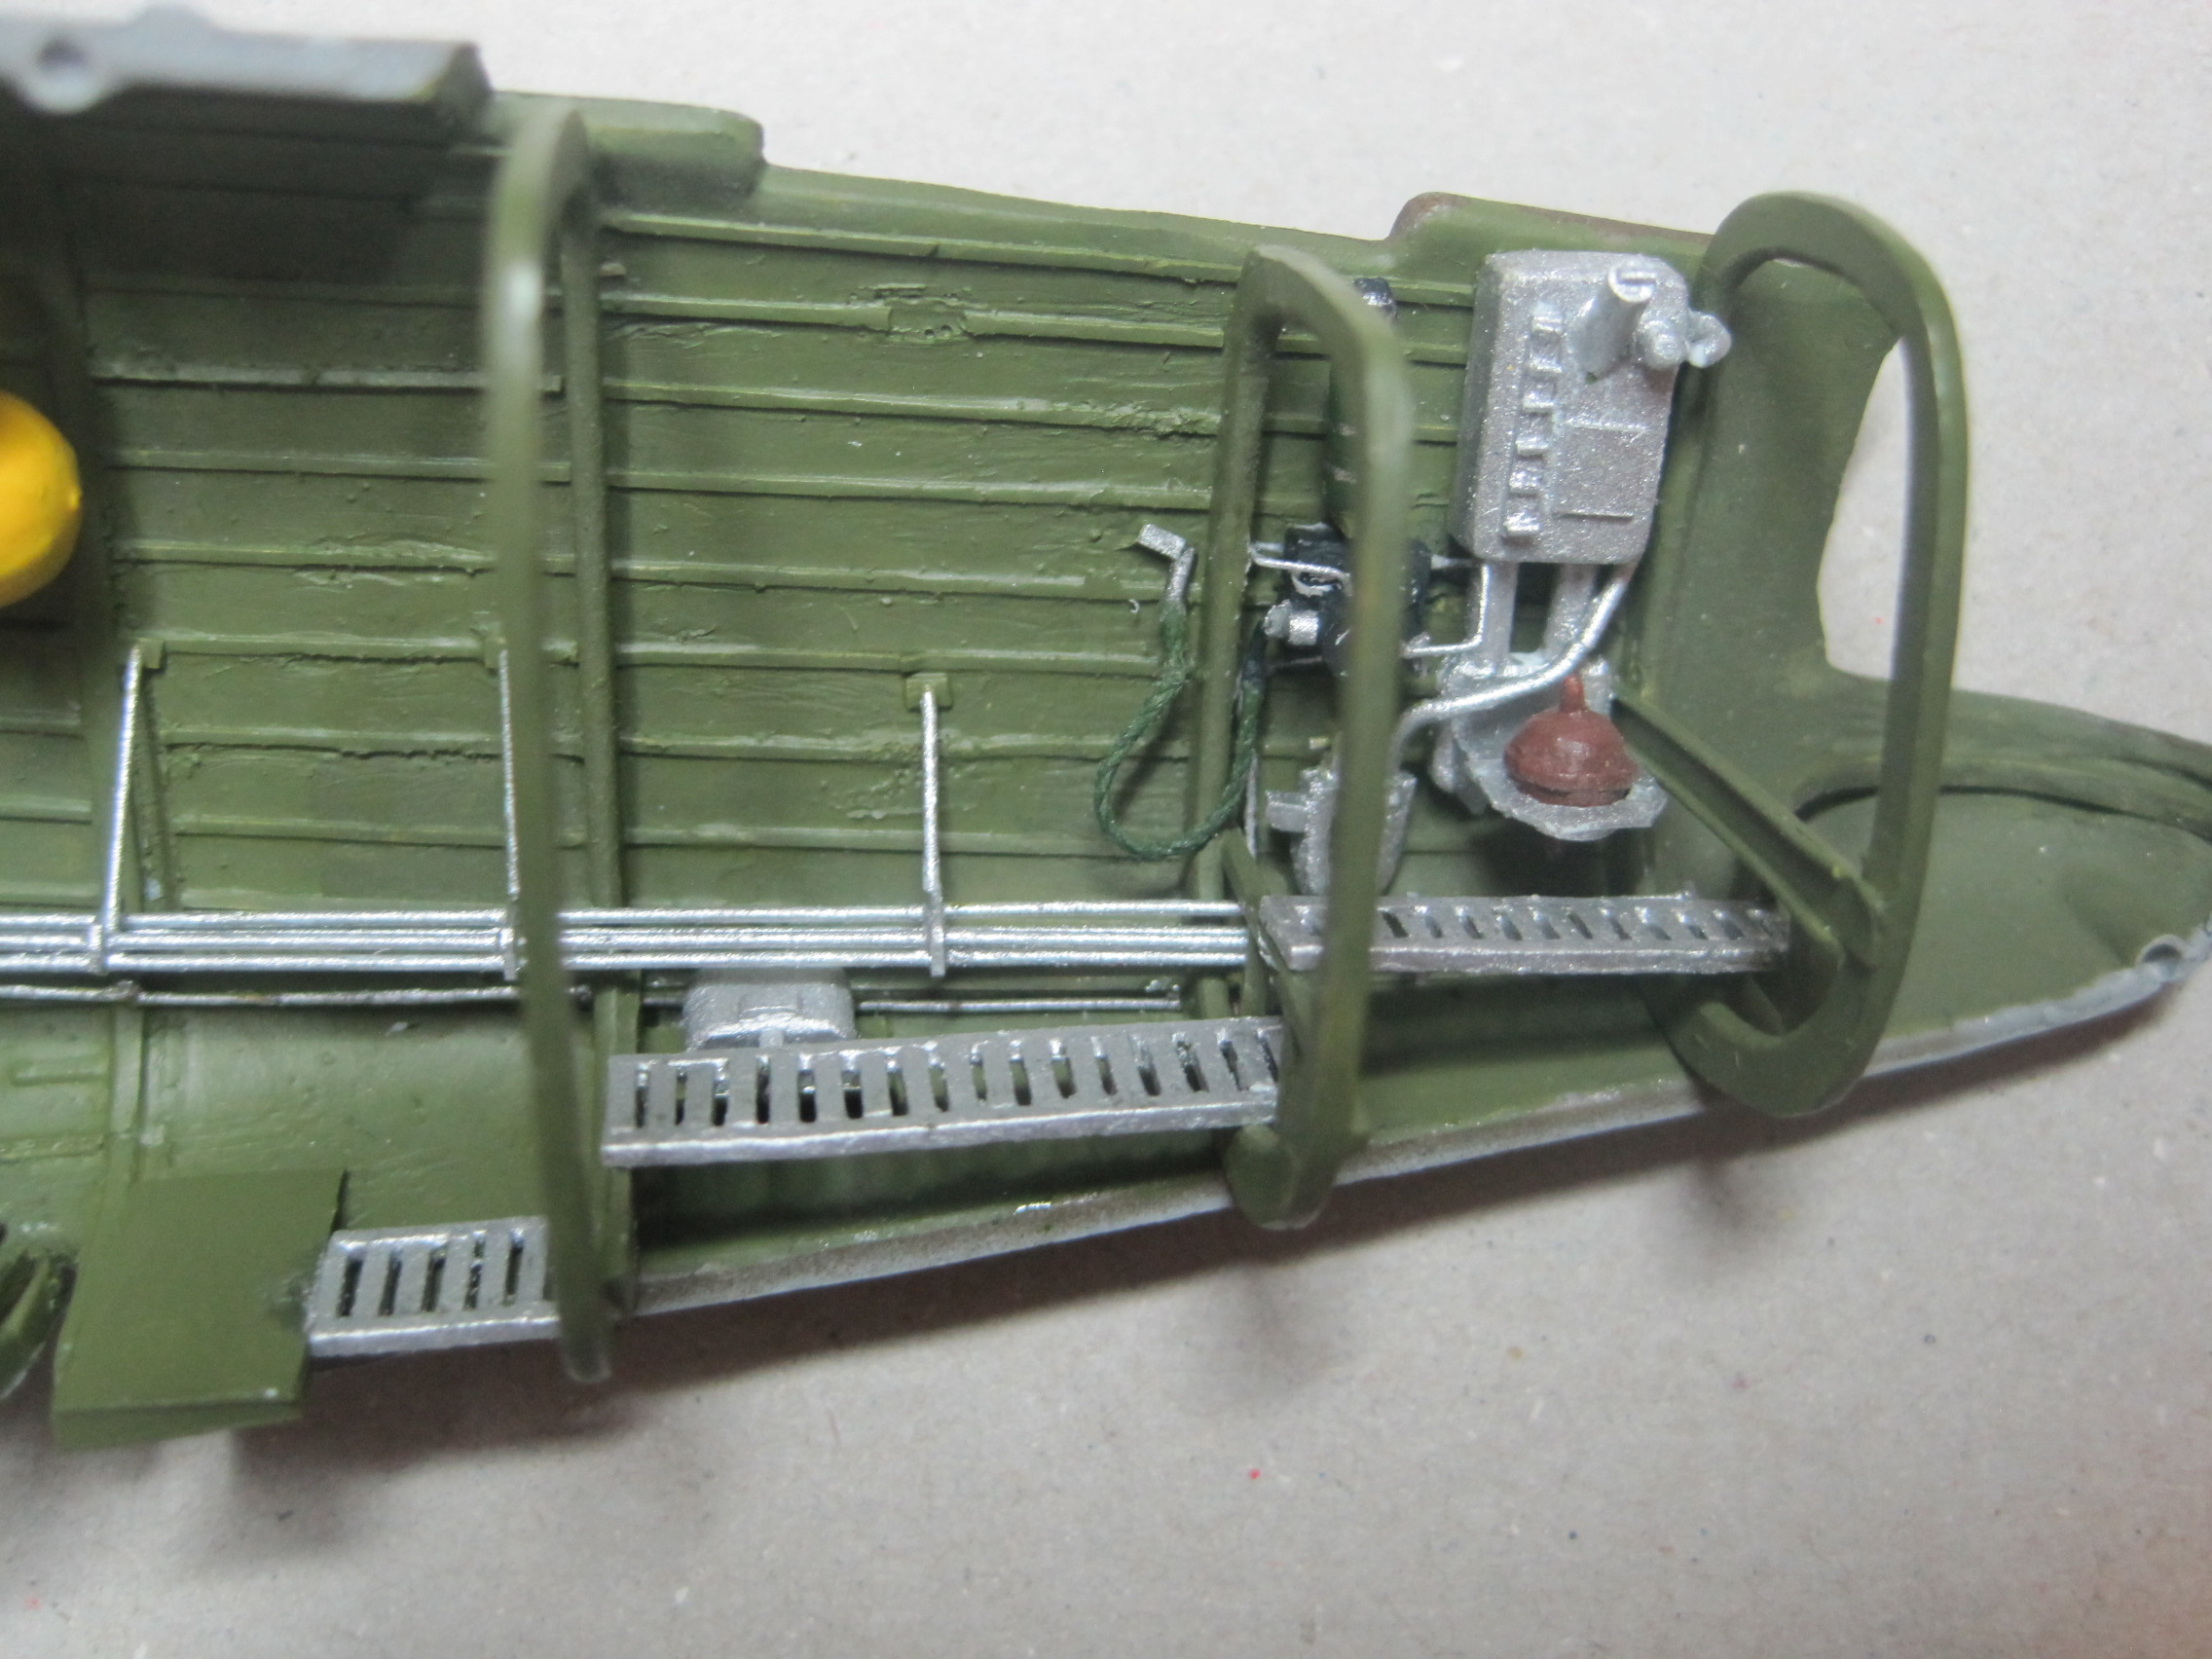
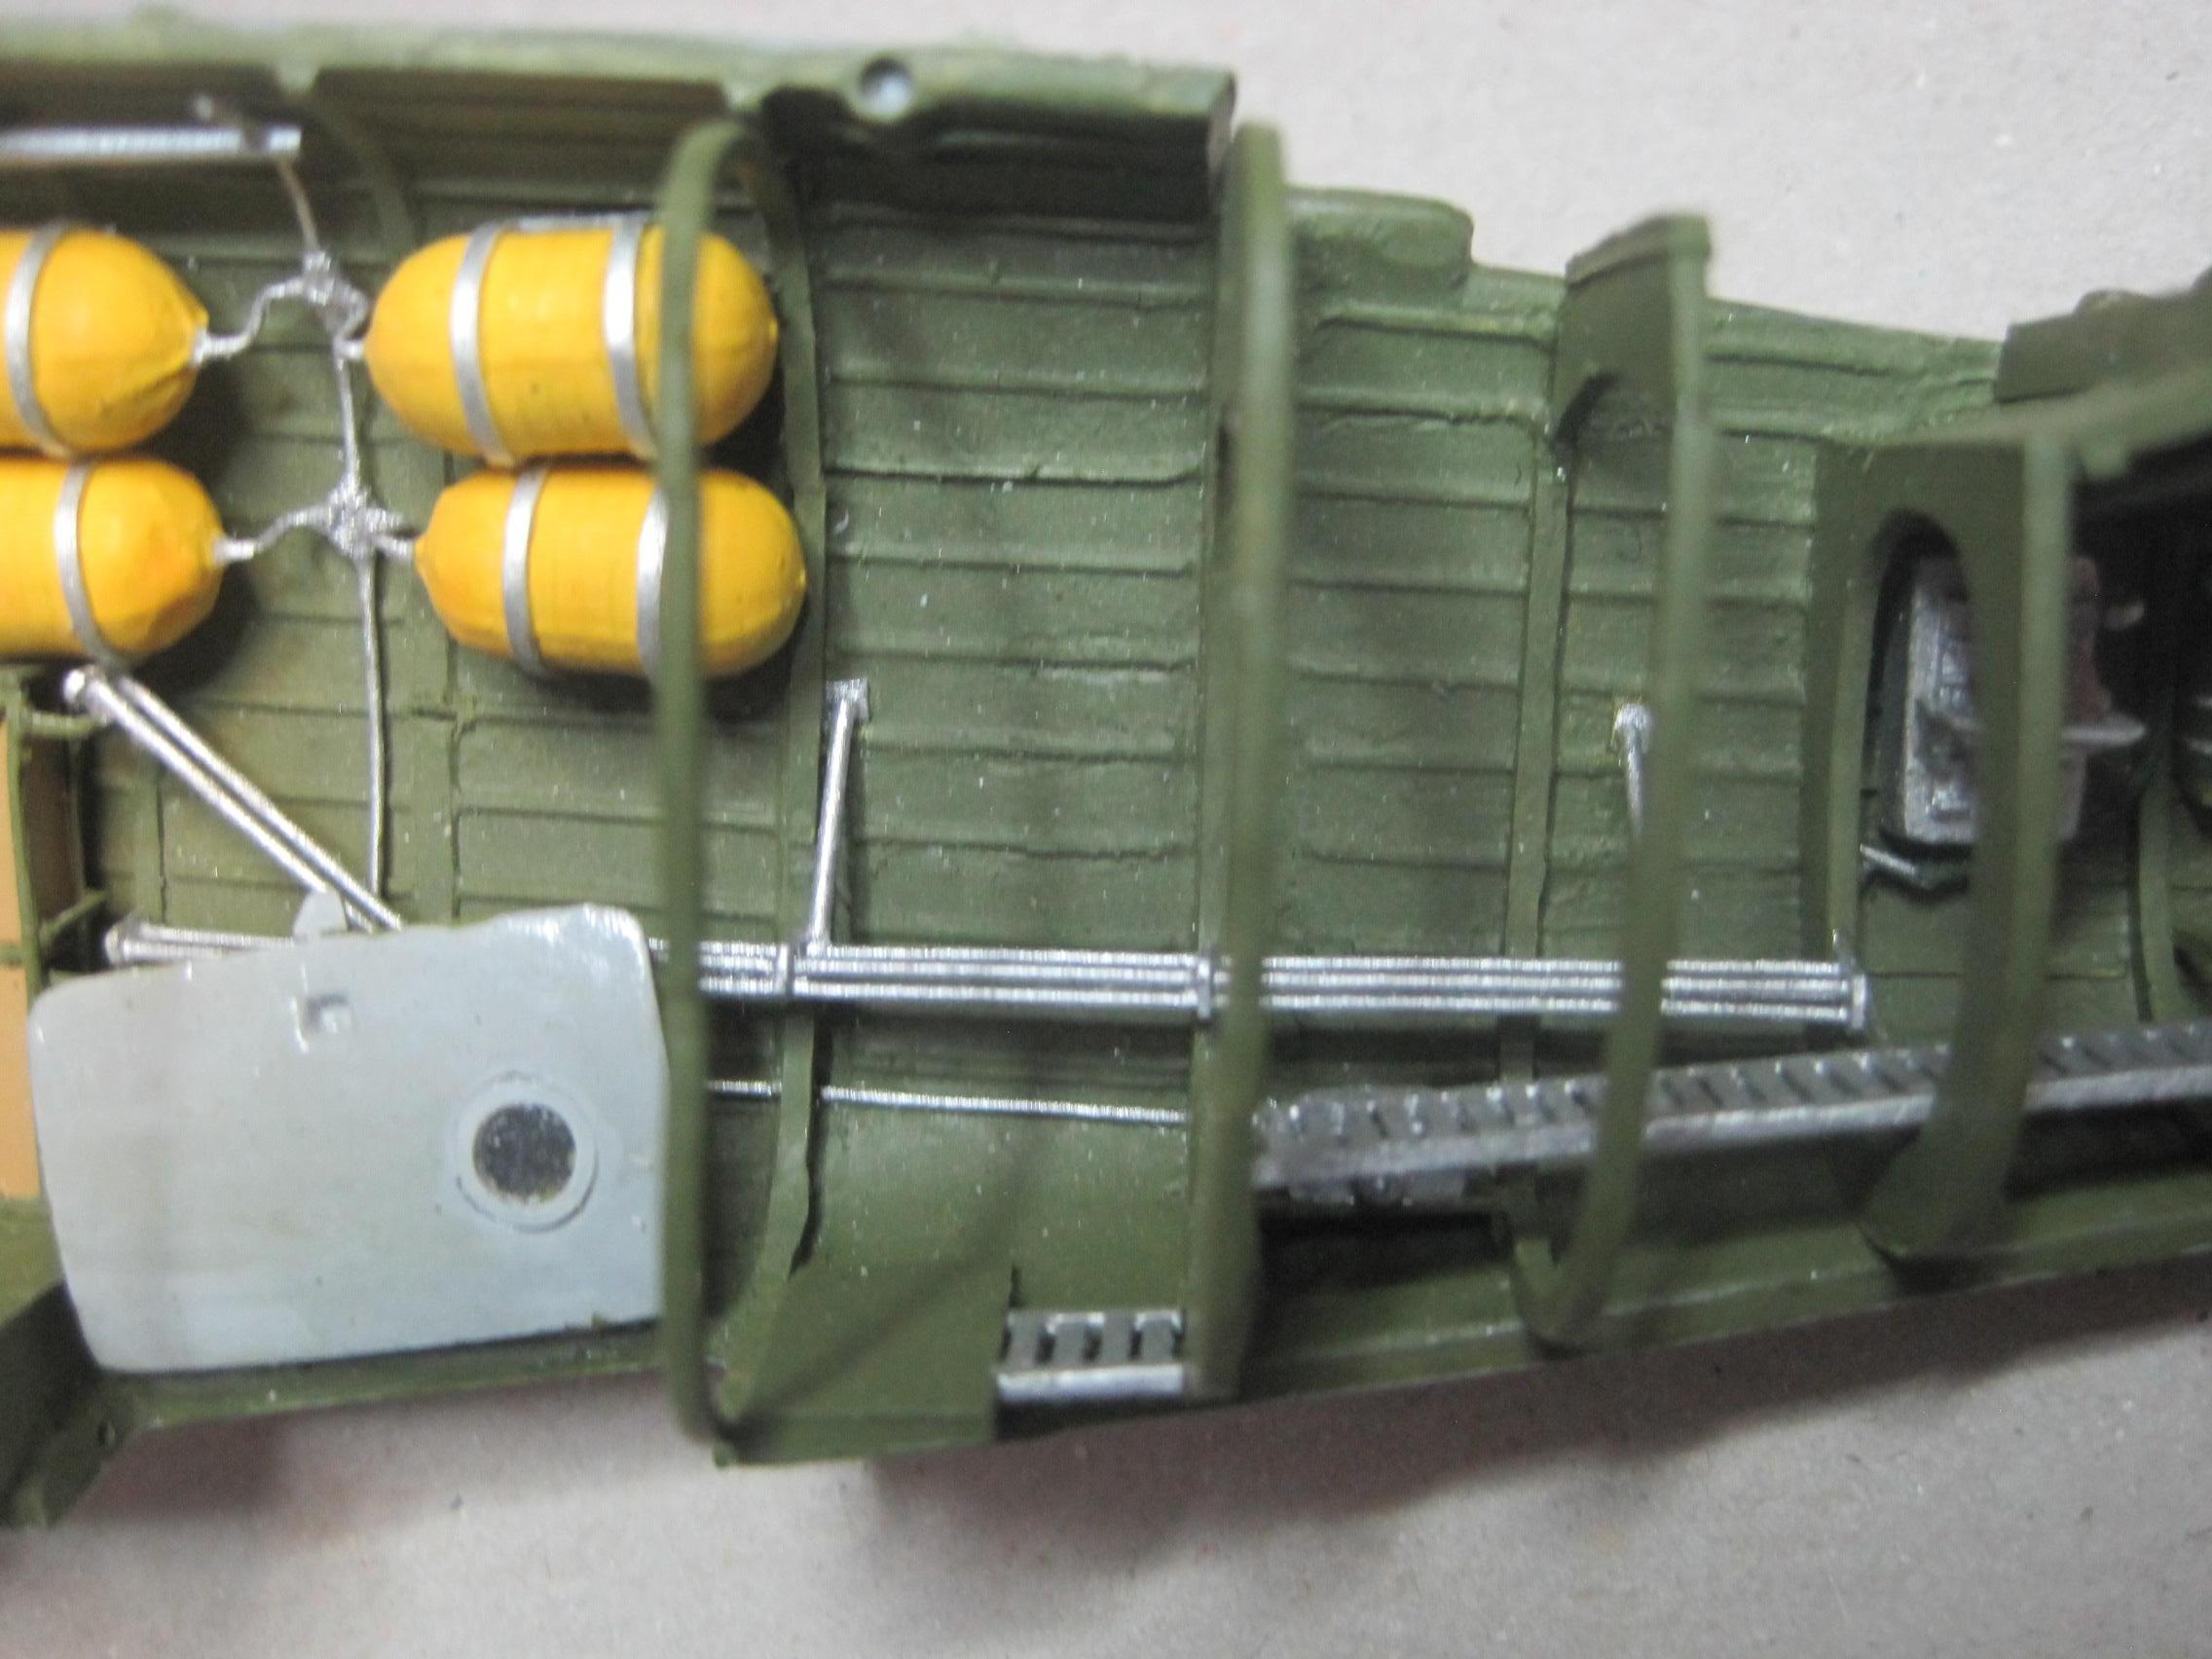
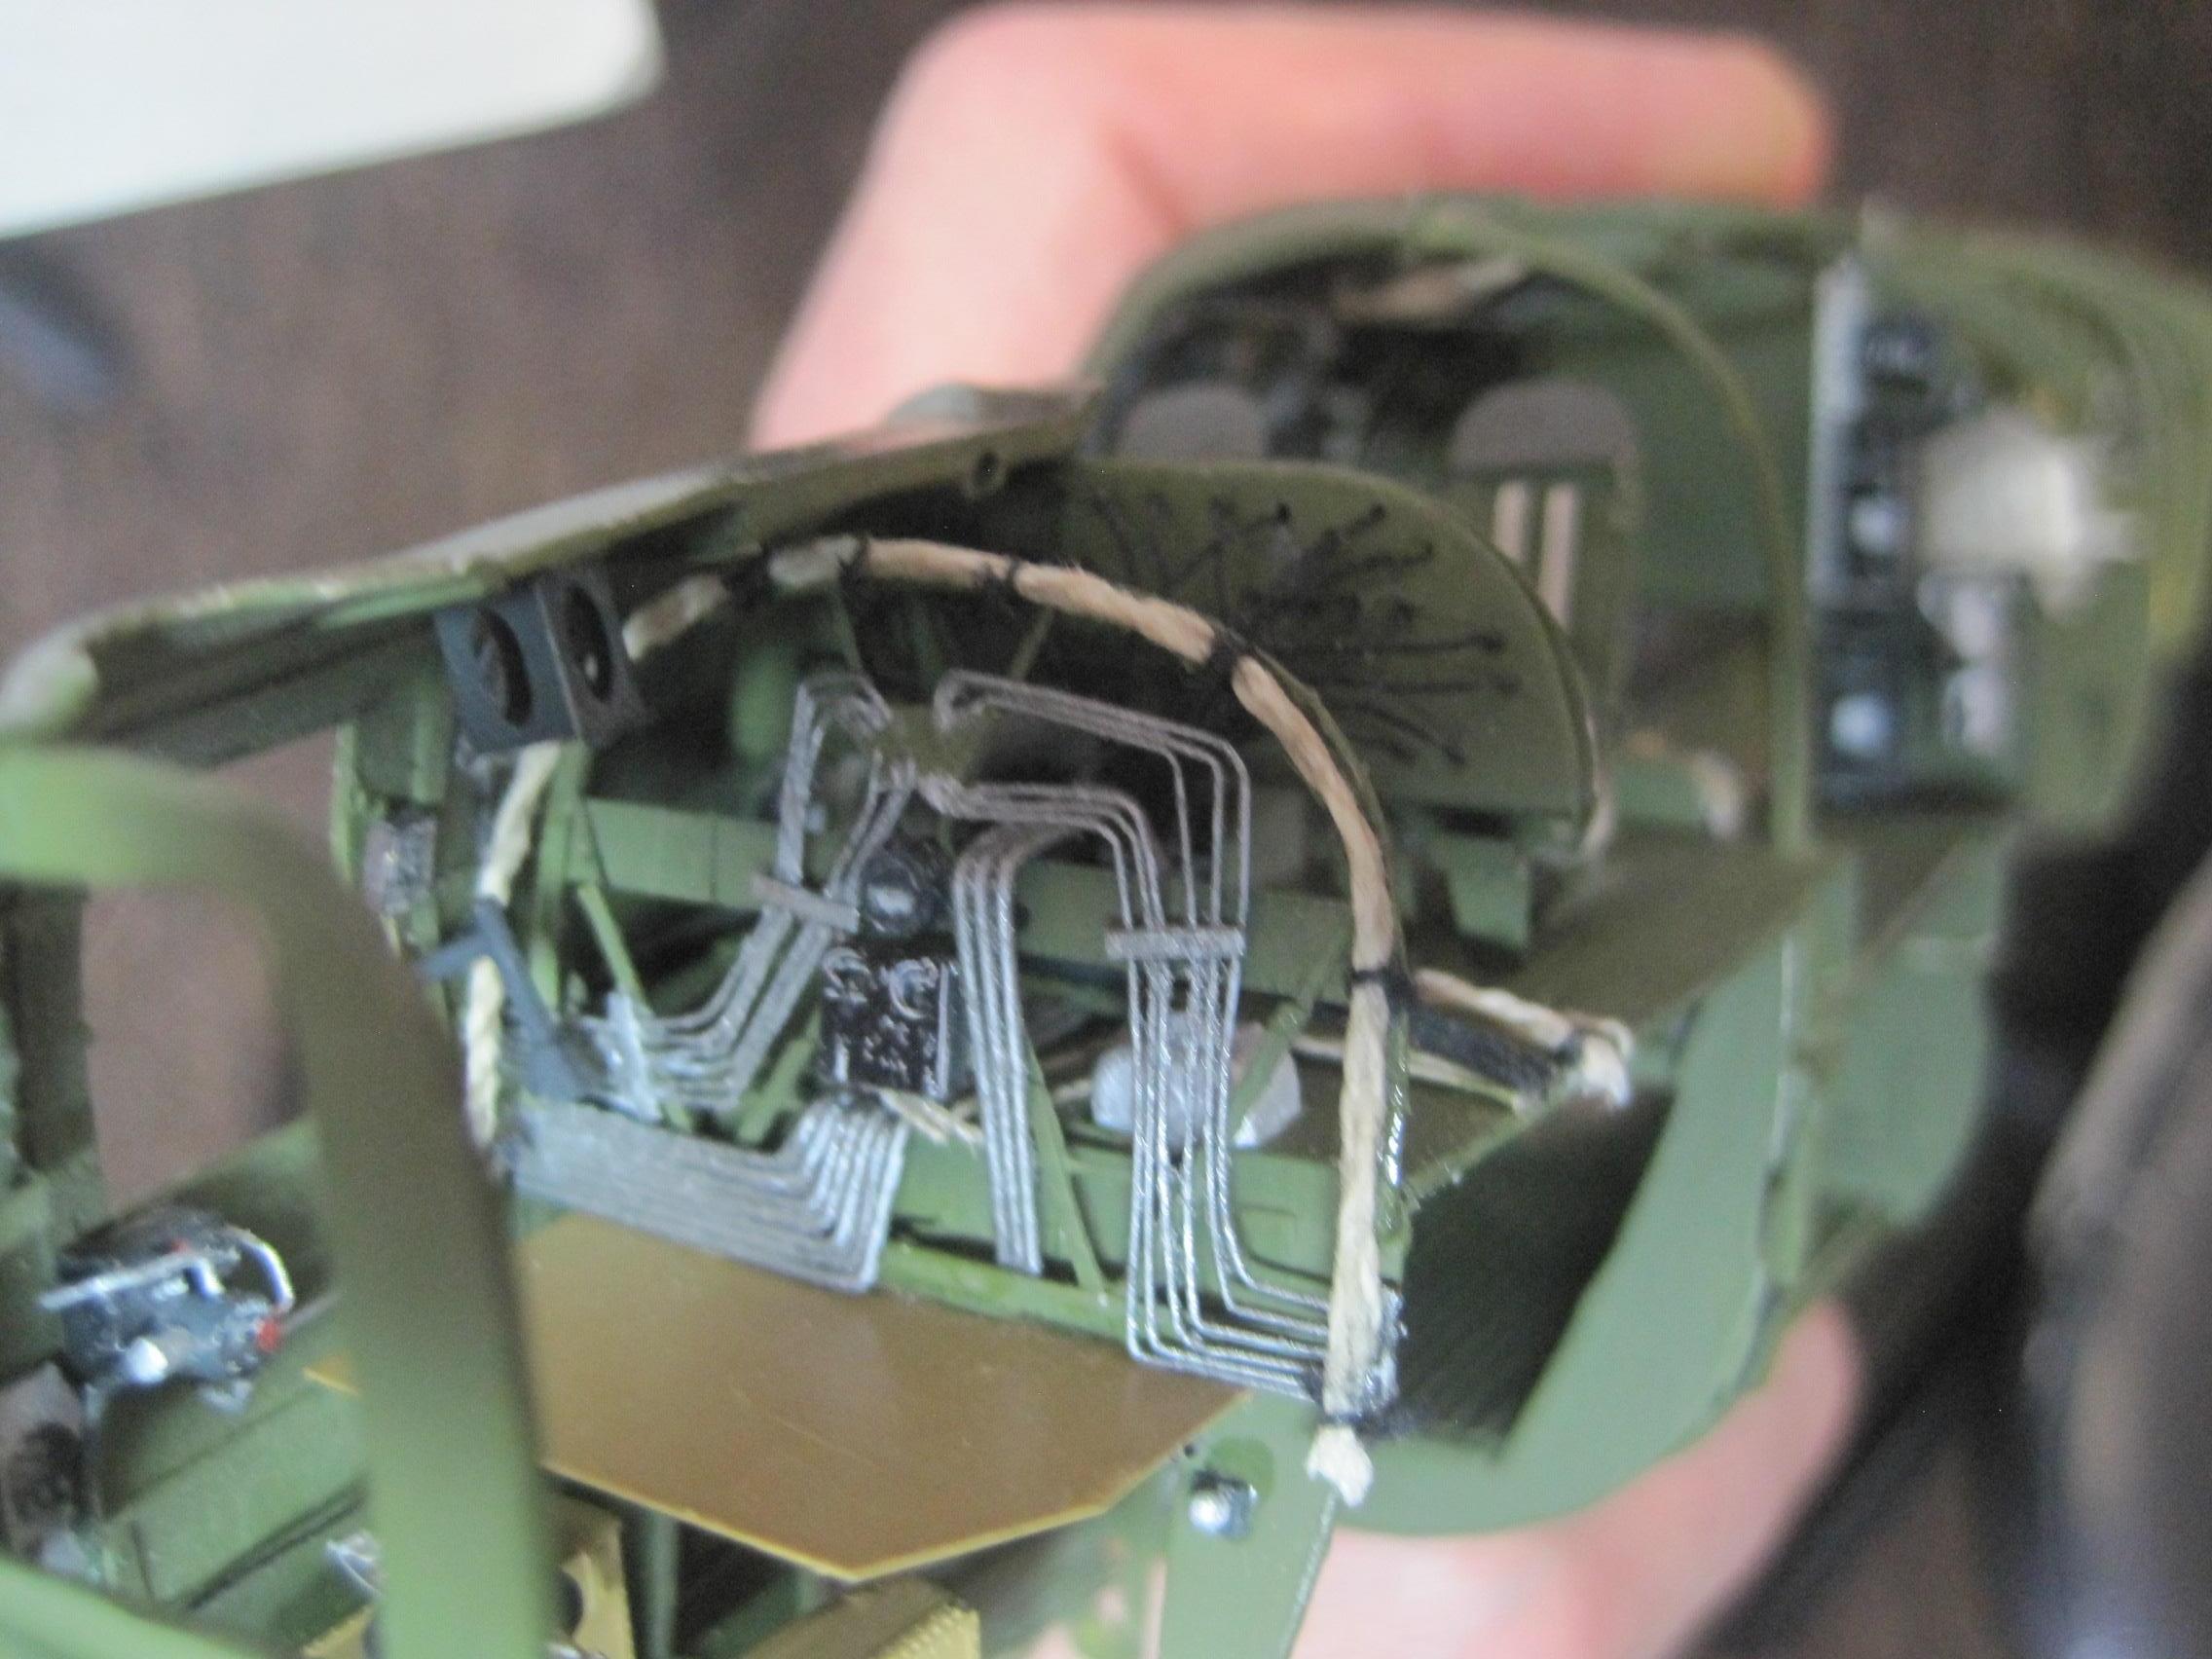
Splendid work. So where did you get these - scratchbuilt? I think this is a hydraulic/fuel system:
I am in awe!
Splendid work. So where did you get these - scratchbuilt? I think this is a hydraulic/fuel system:

thathaway3
Joined: September 10, 2004
KitMaker: 1,610 posts
AeroScale: 85 posts
Posted: Thursday, December 27, 2018 - 01:35 AM UTC
Quoted Text
Tom,
I am in awe!
Splendid work. So where did you get these - scratchbuilt? I think this is a hydraulic/fuel system:
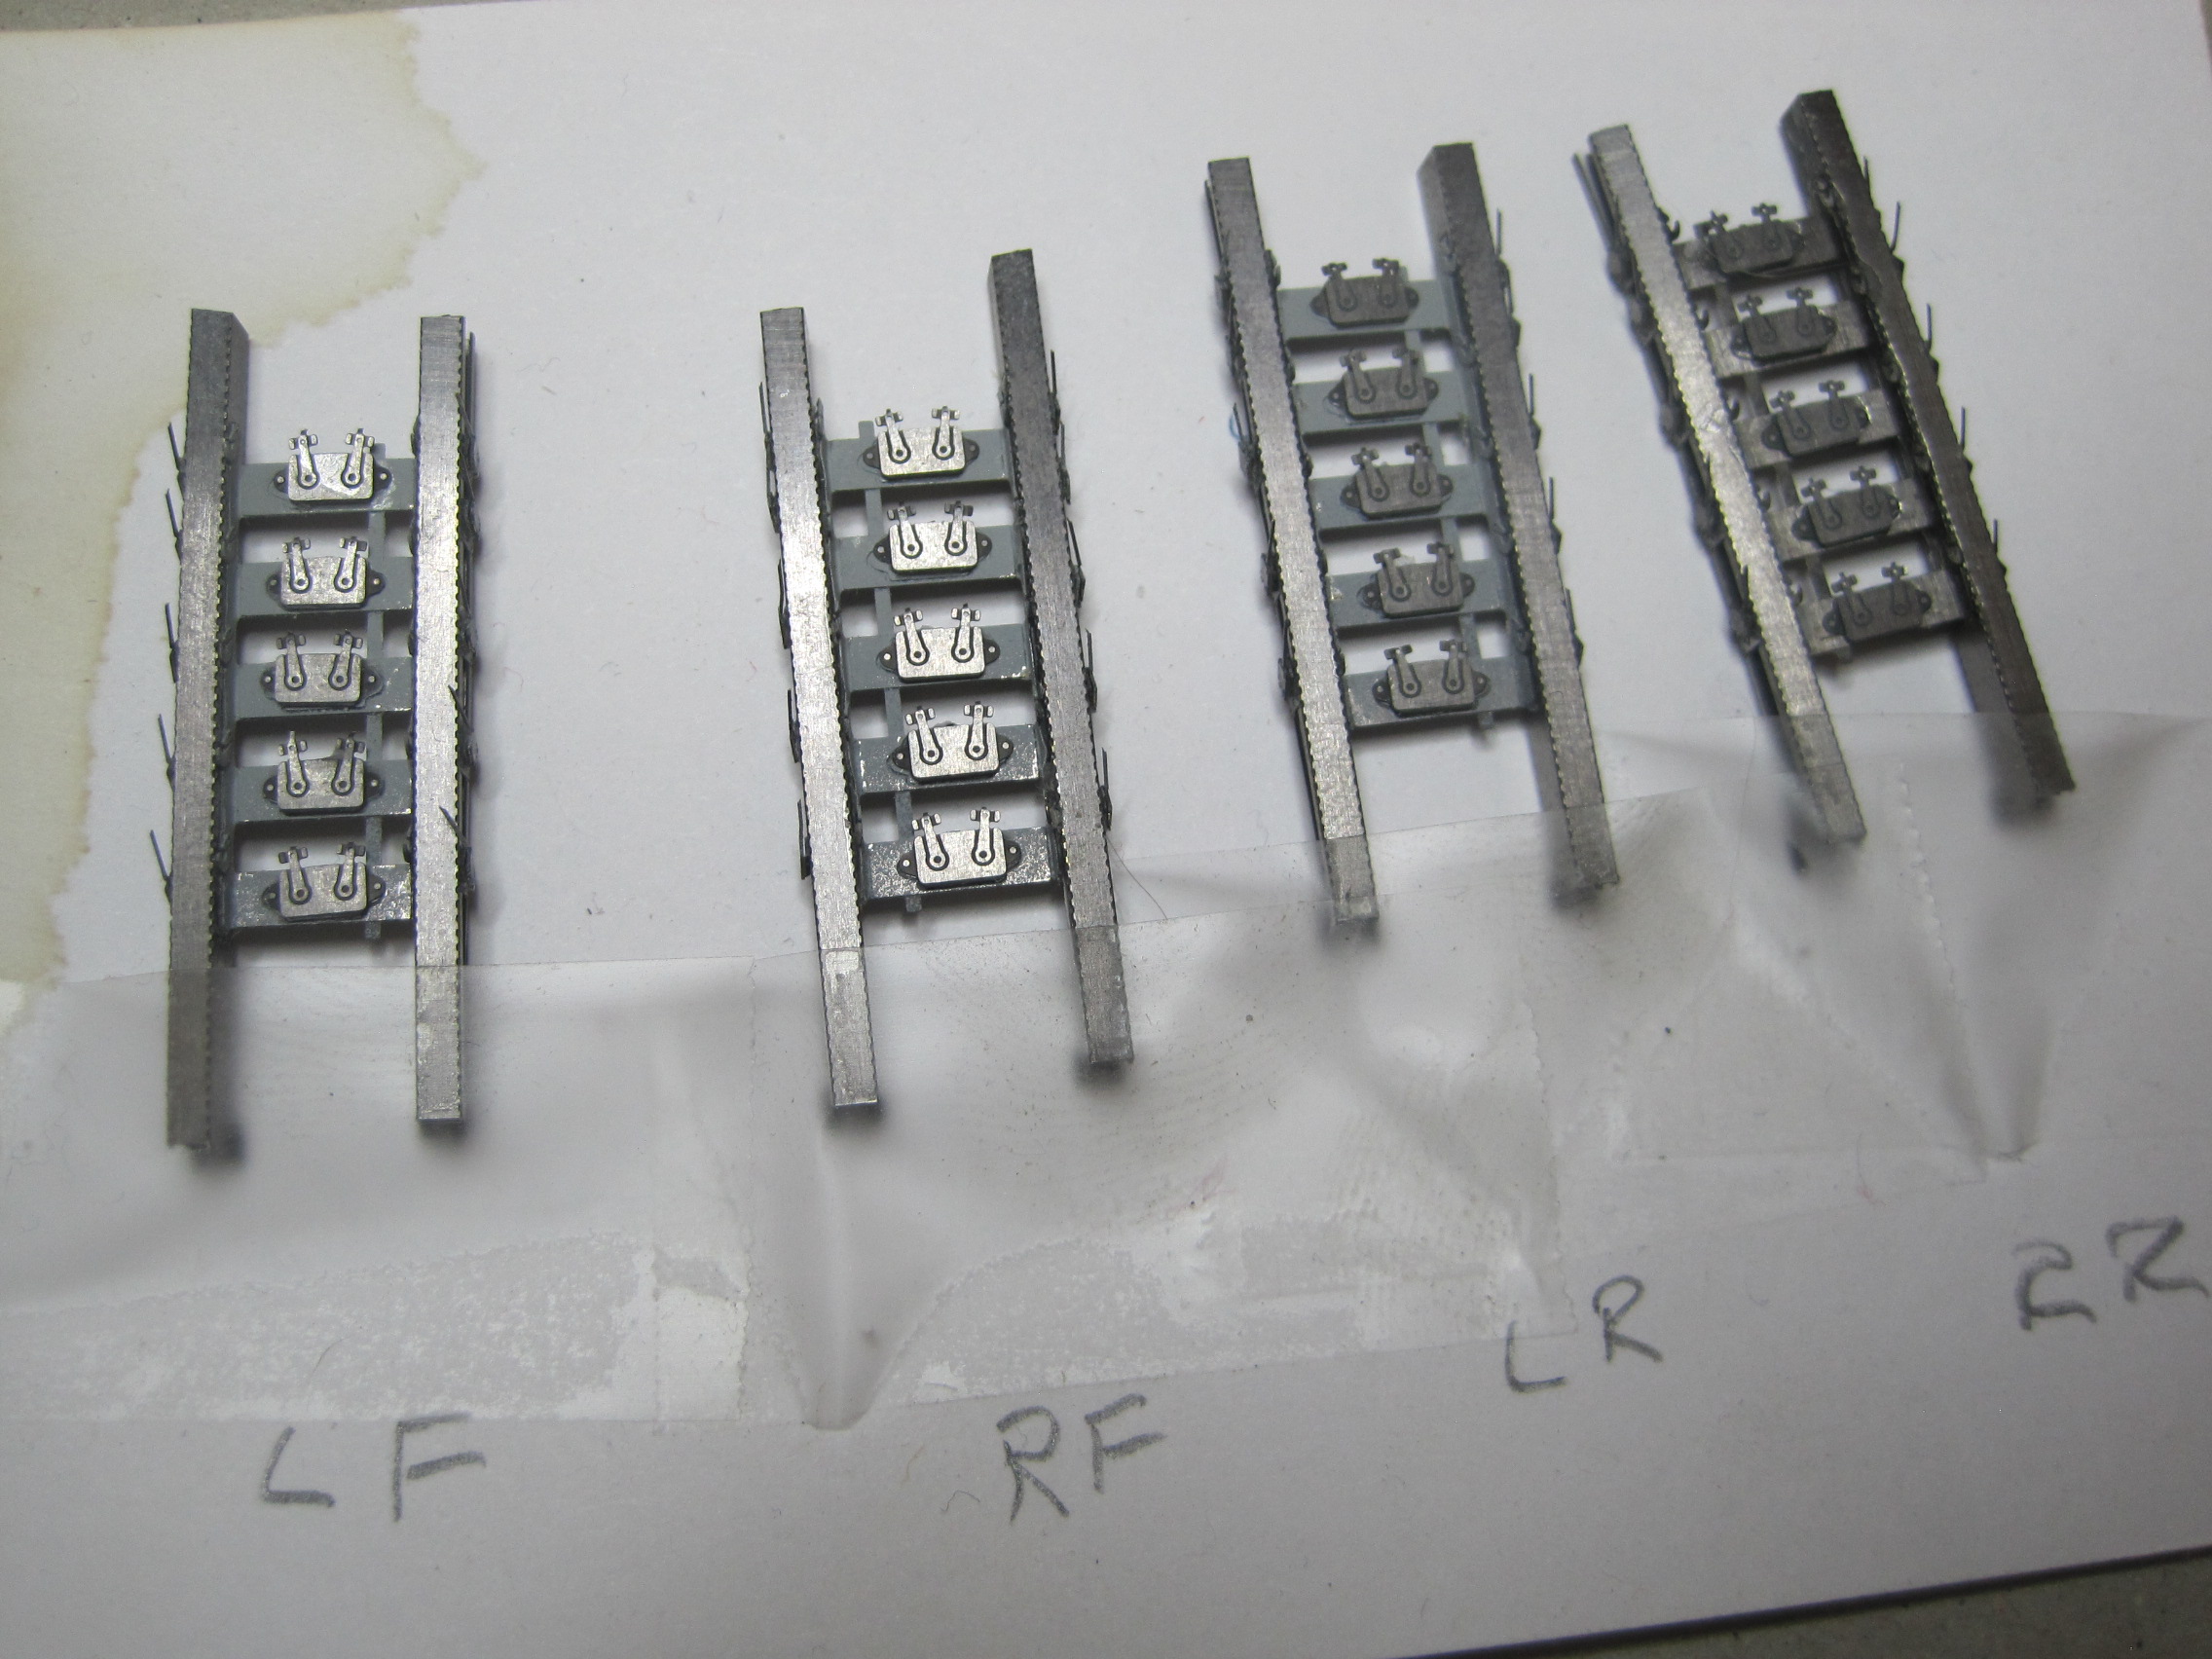
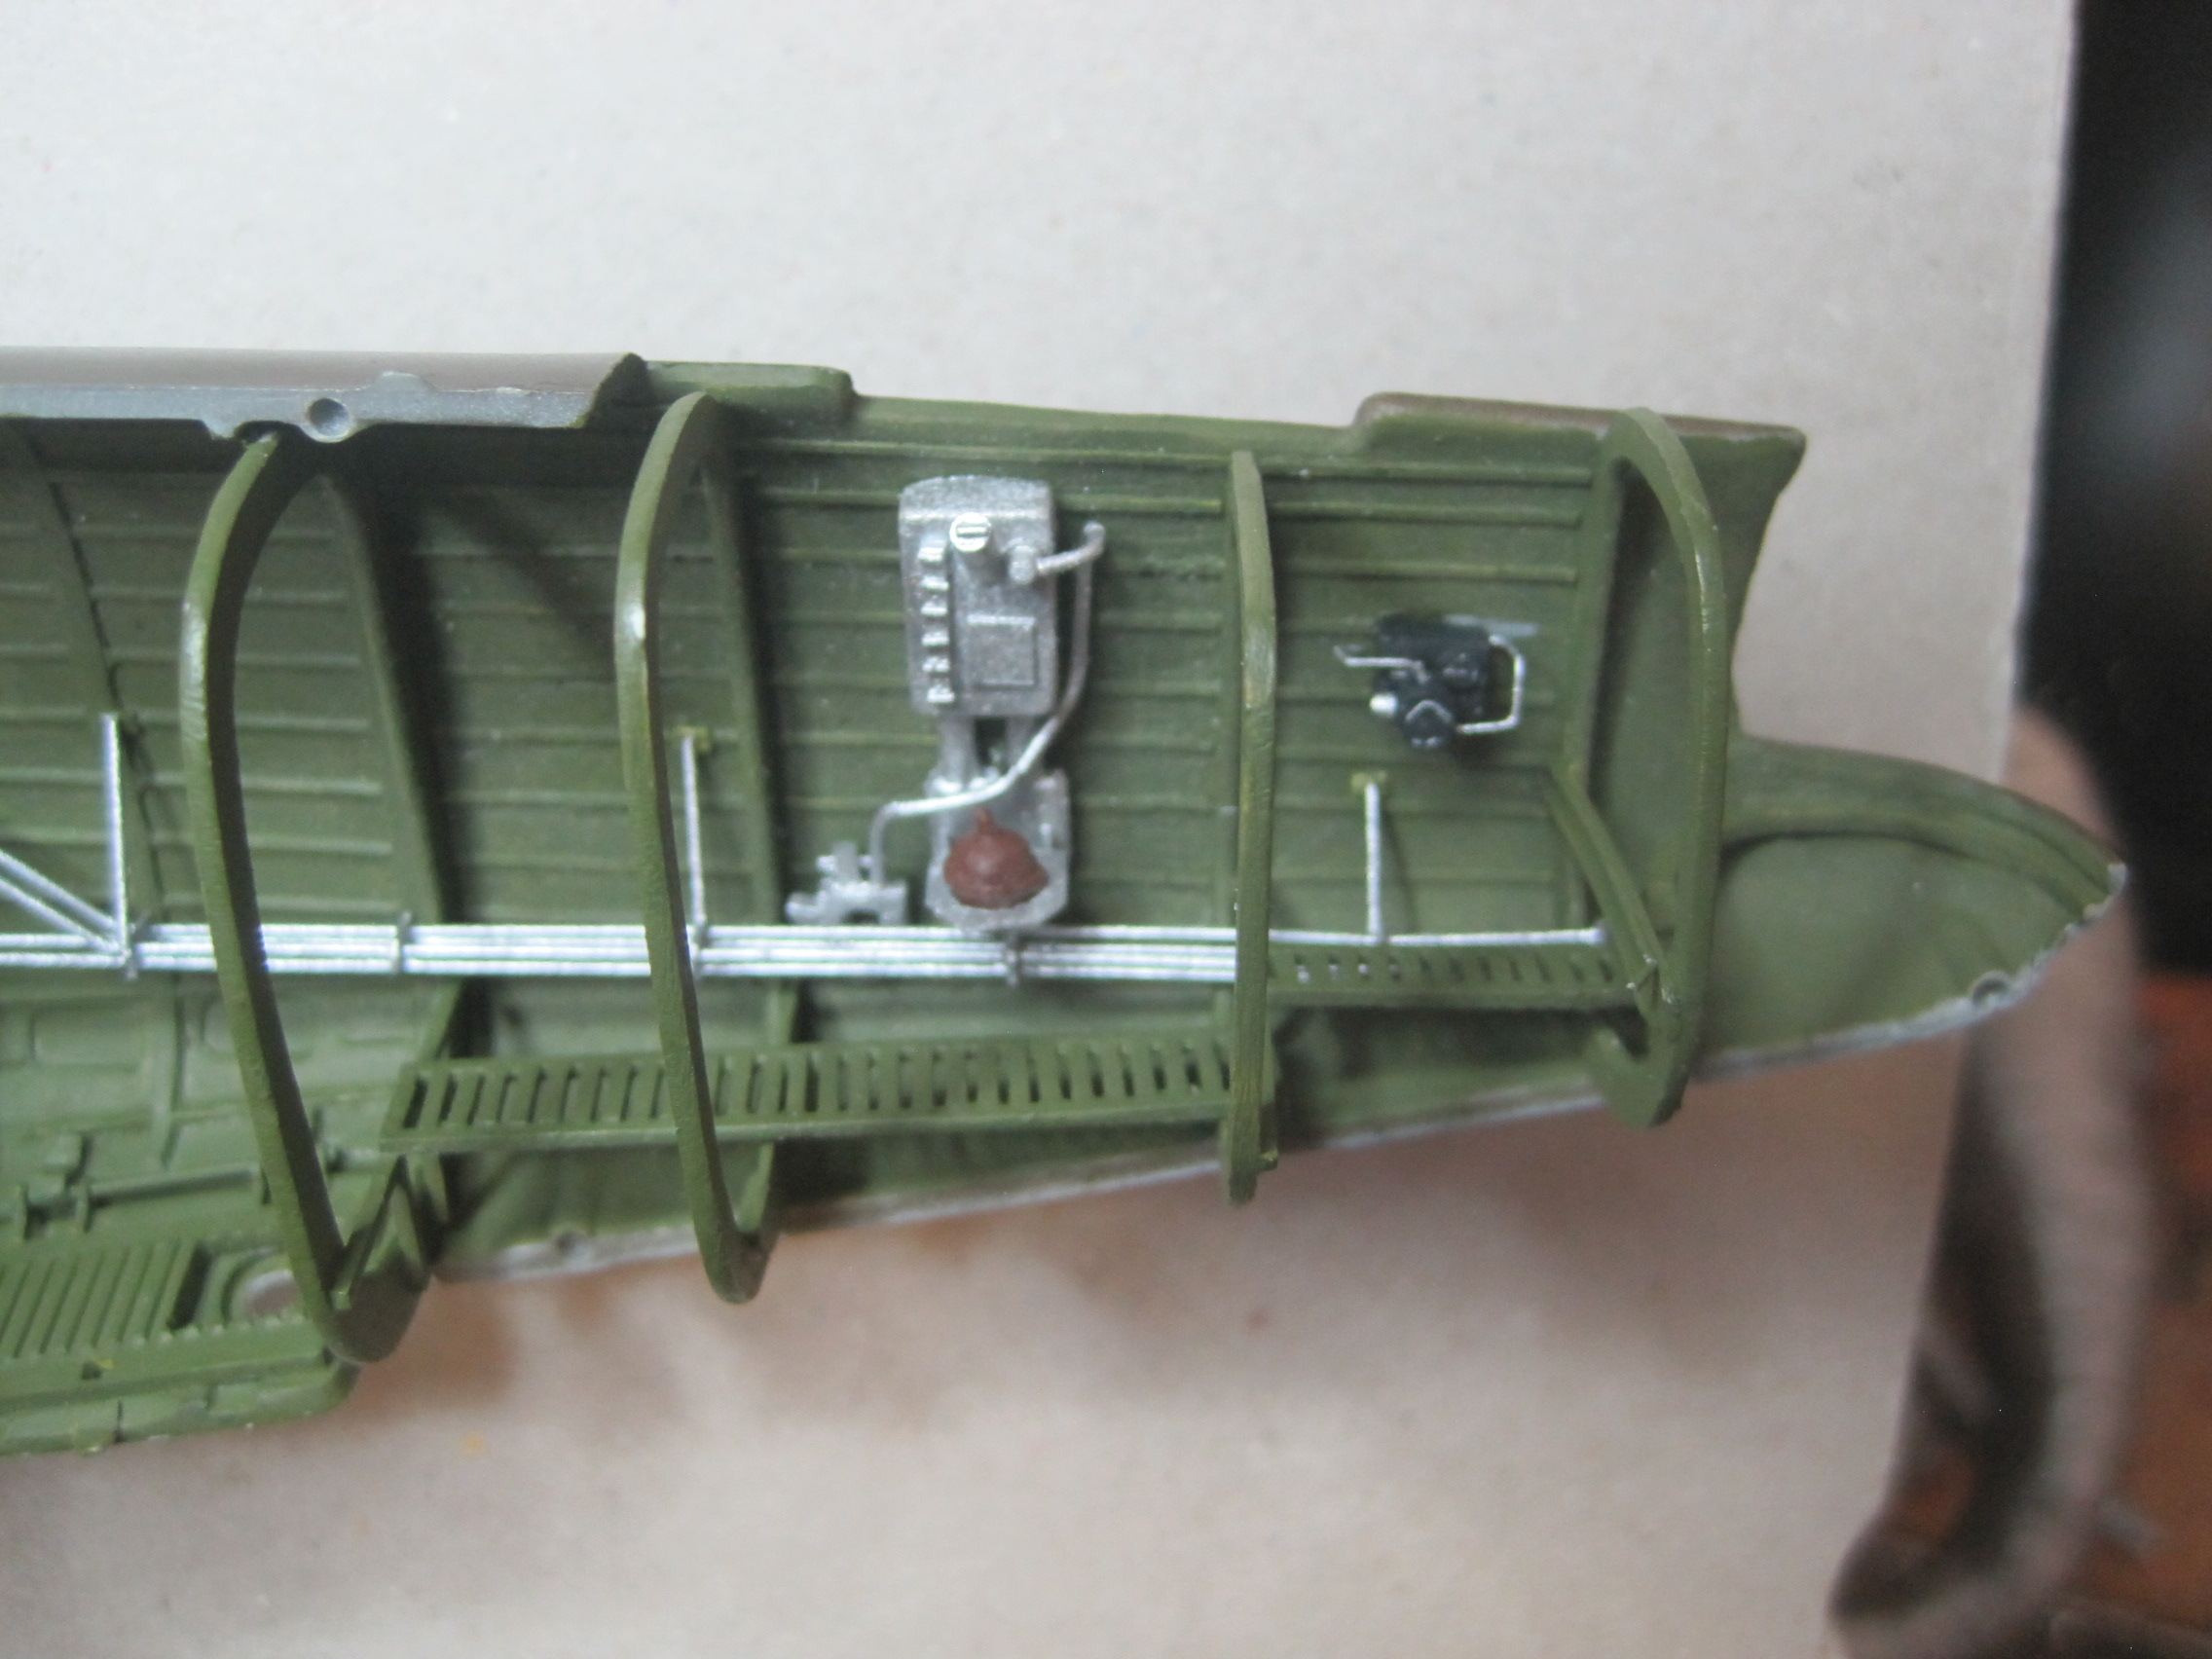
It's a hybrid. The main piece you're looking at in the photo is from the Eduard PE set with some scratch built pieces to give it more depth. There's another similar PE piece for the LH side of the aircraft. But these pieces go only in the bomb bay section, so I scratch built some additional pieces to go into the area under the flight deck. I didn't make as many lines as there actually are according to the photos, but only enough to match the PE lines.
thathaway3
Joined: September 10, 2004
KitMaker: 1,610 posts
AeroScale: 85 posts
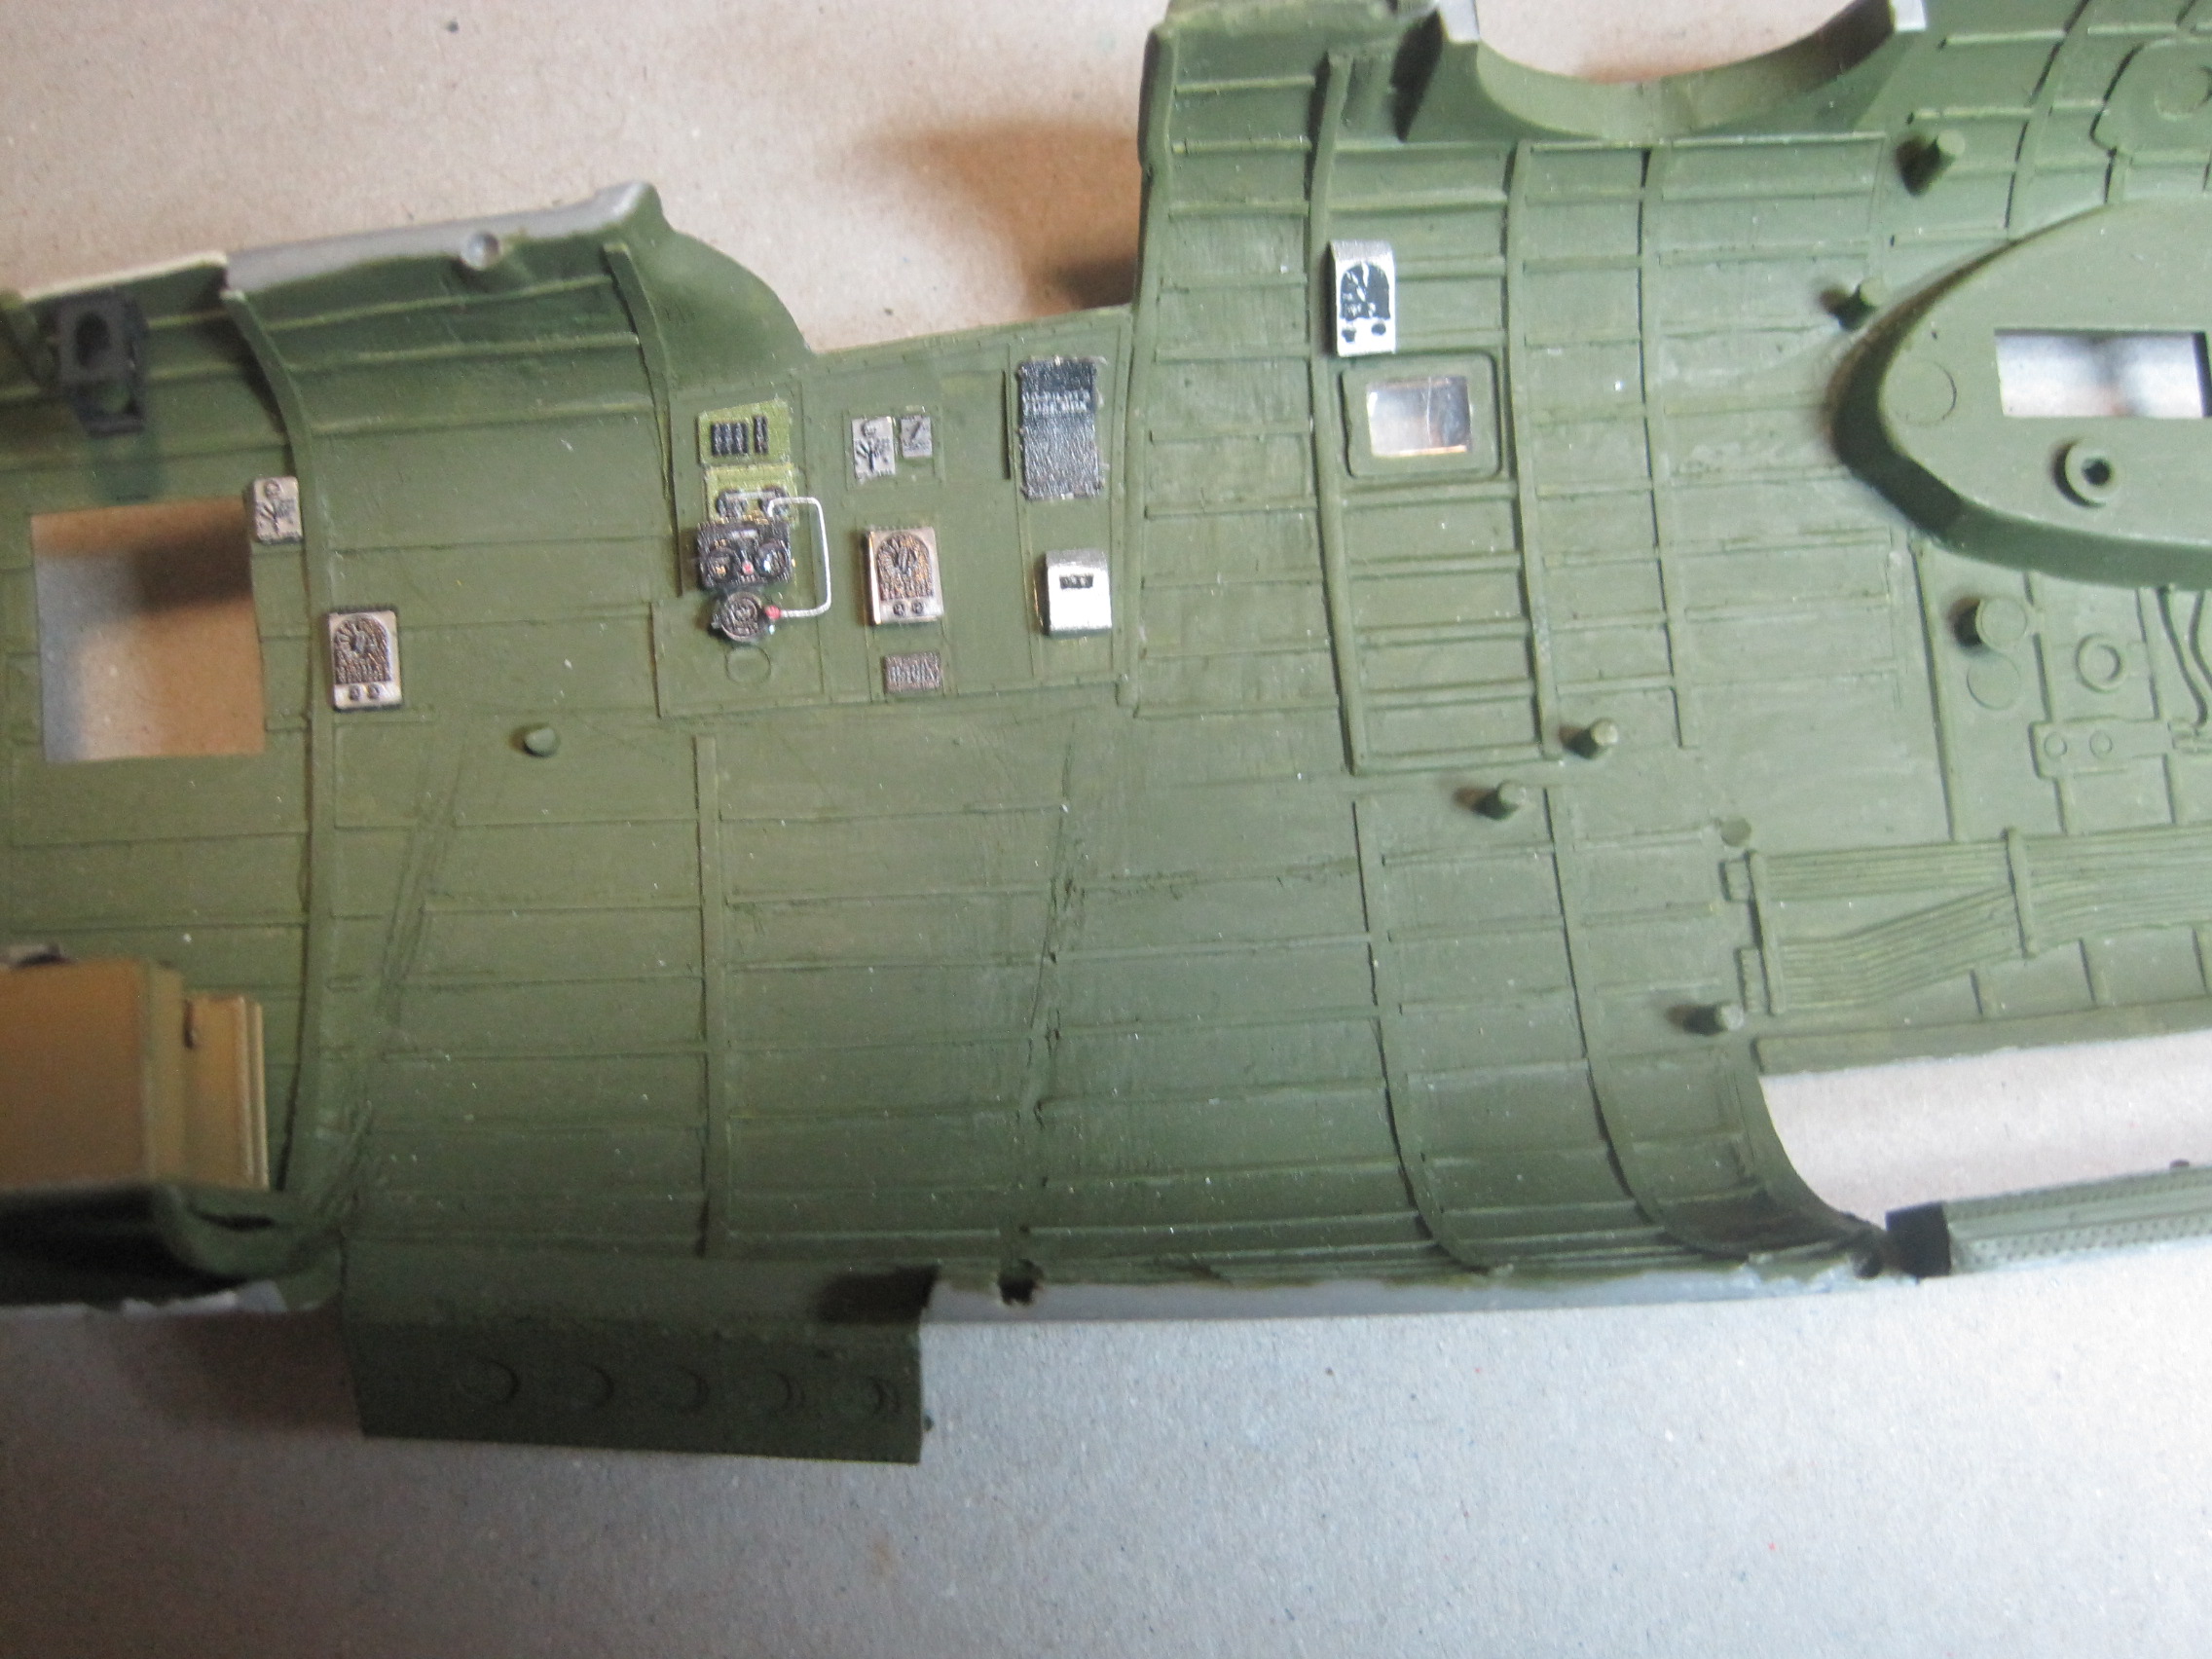
Posted: Monday, February 04, 2019 - 08:53 AM UTC
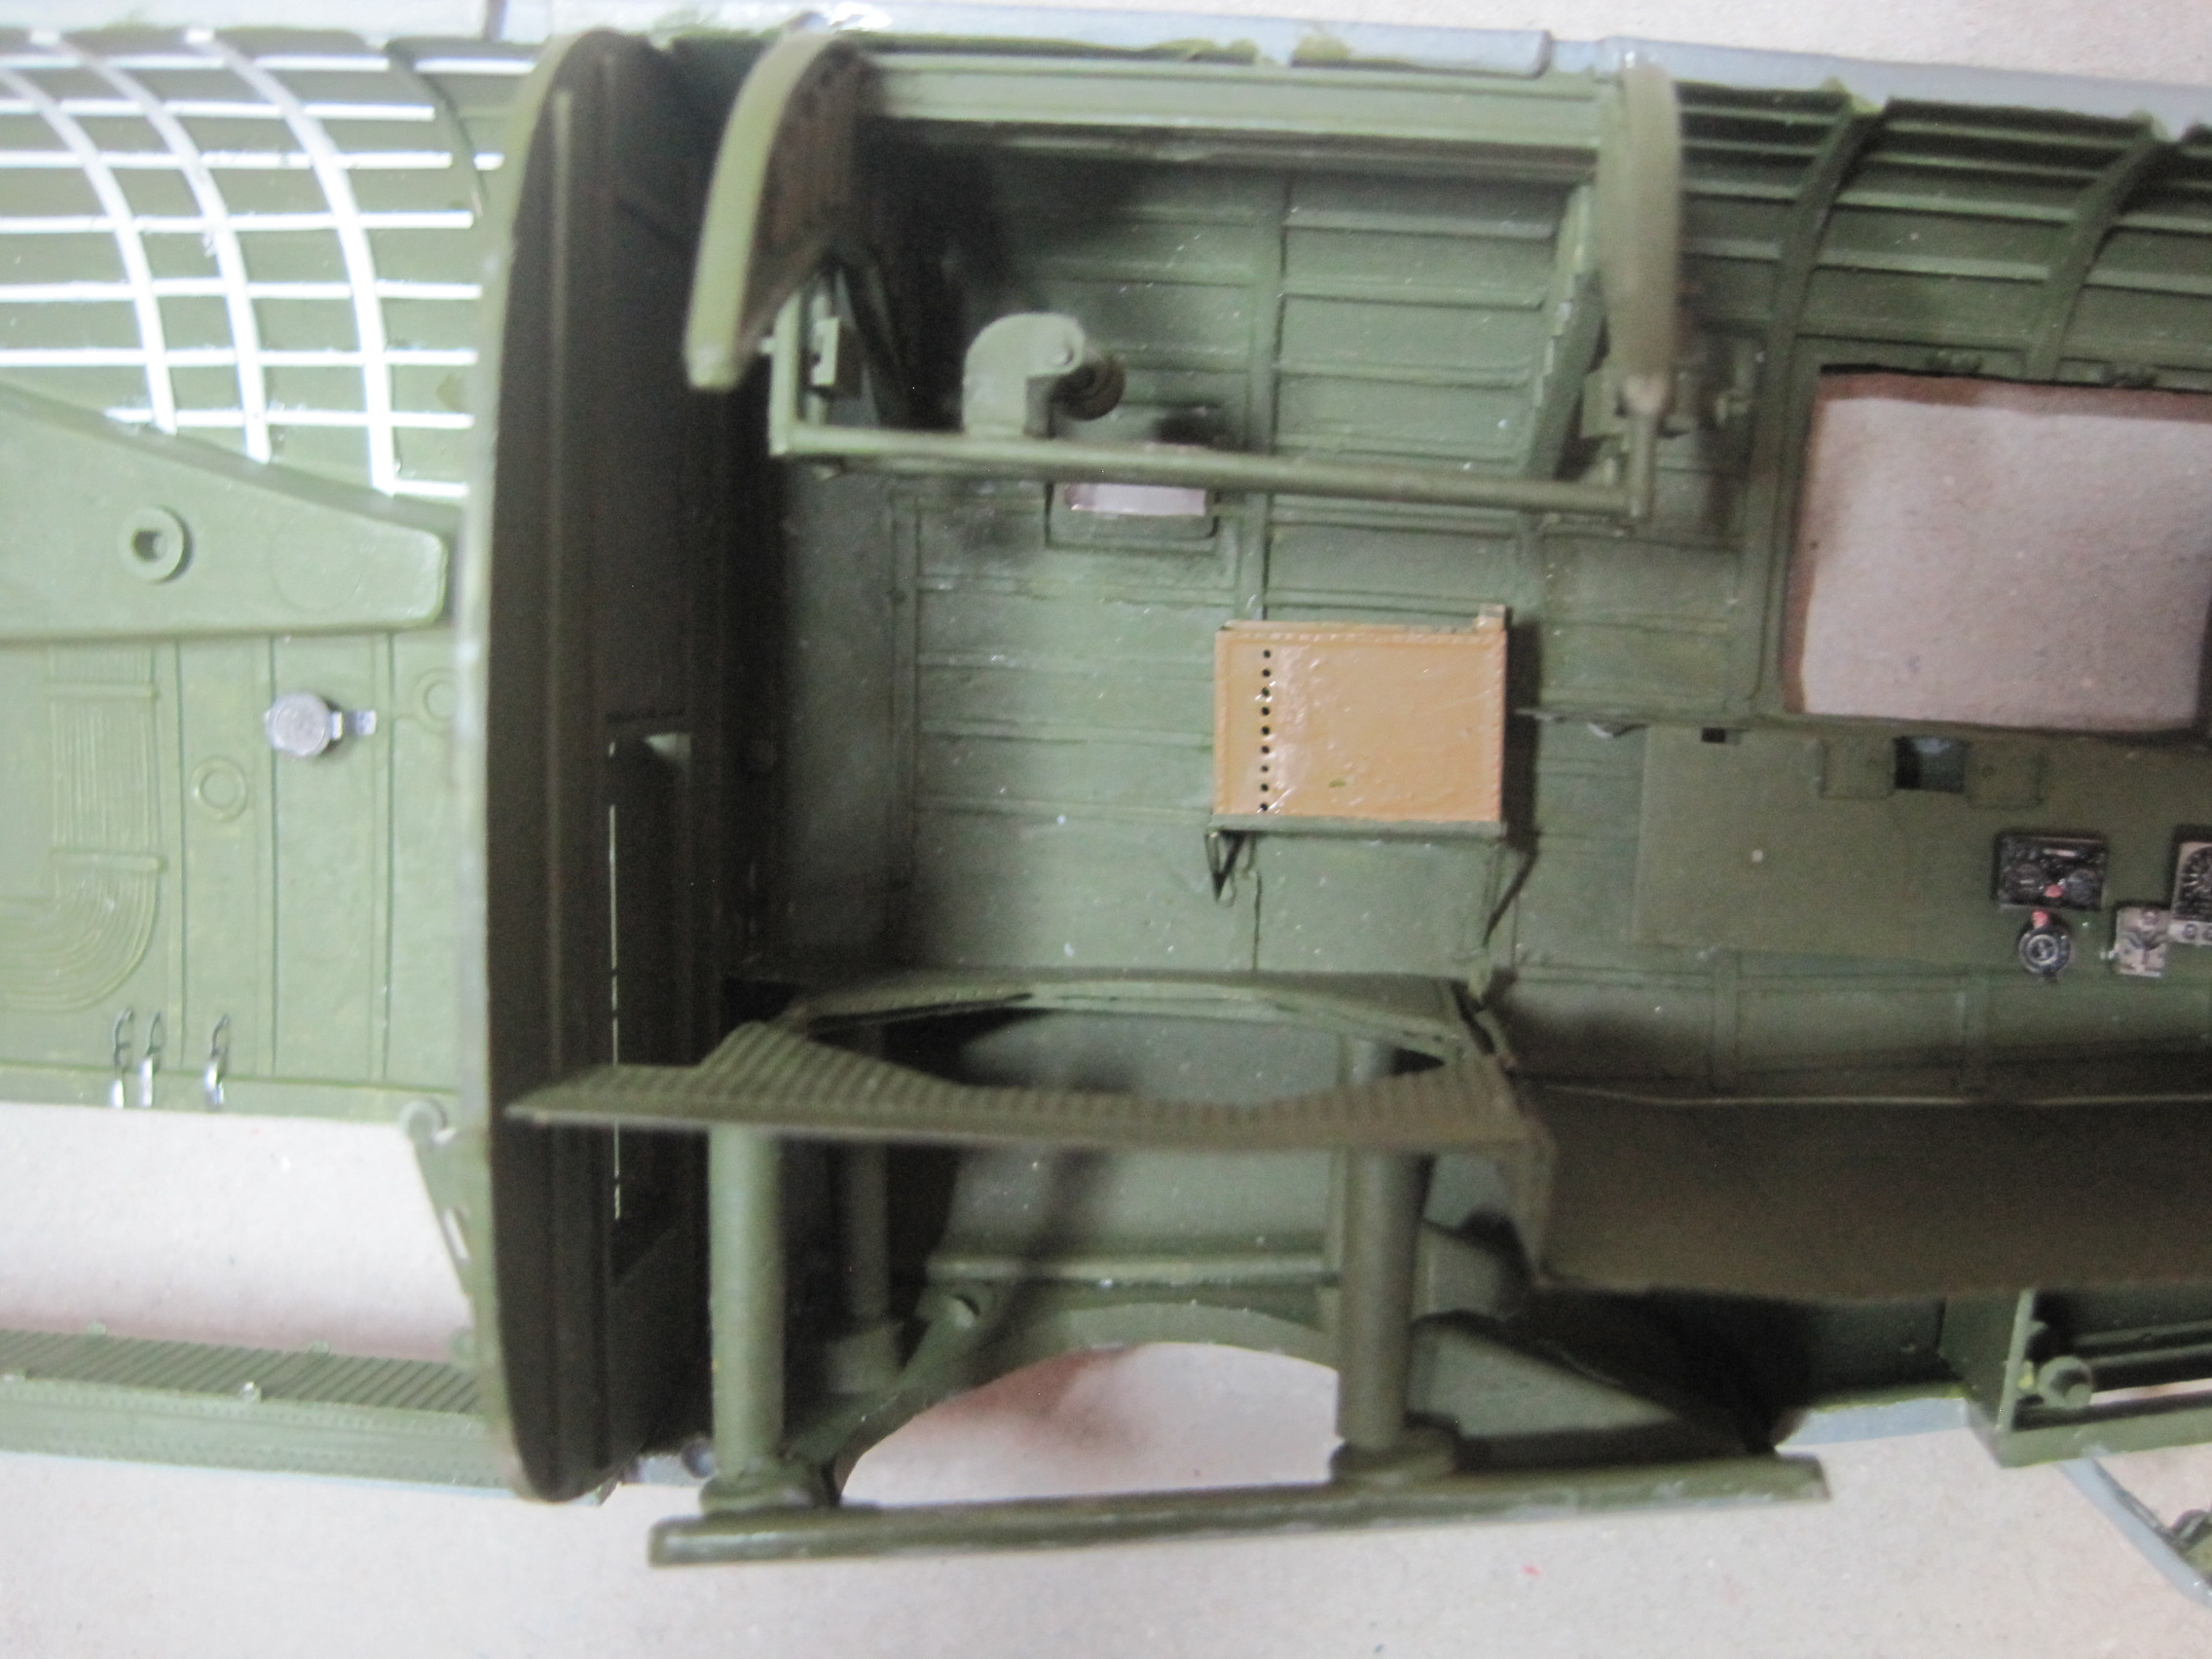
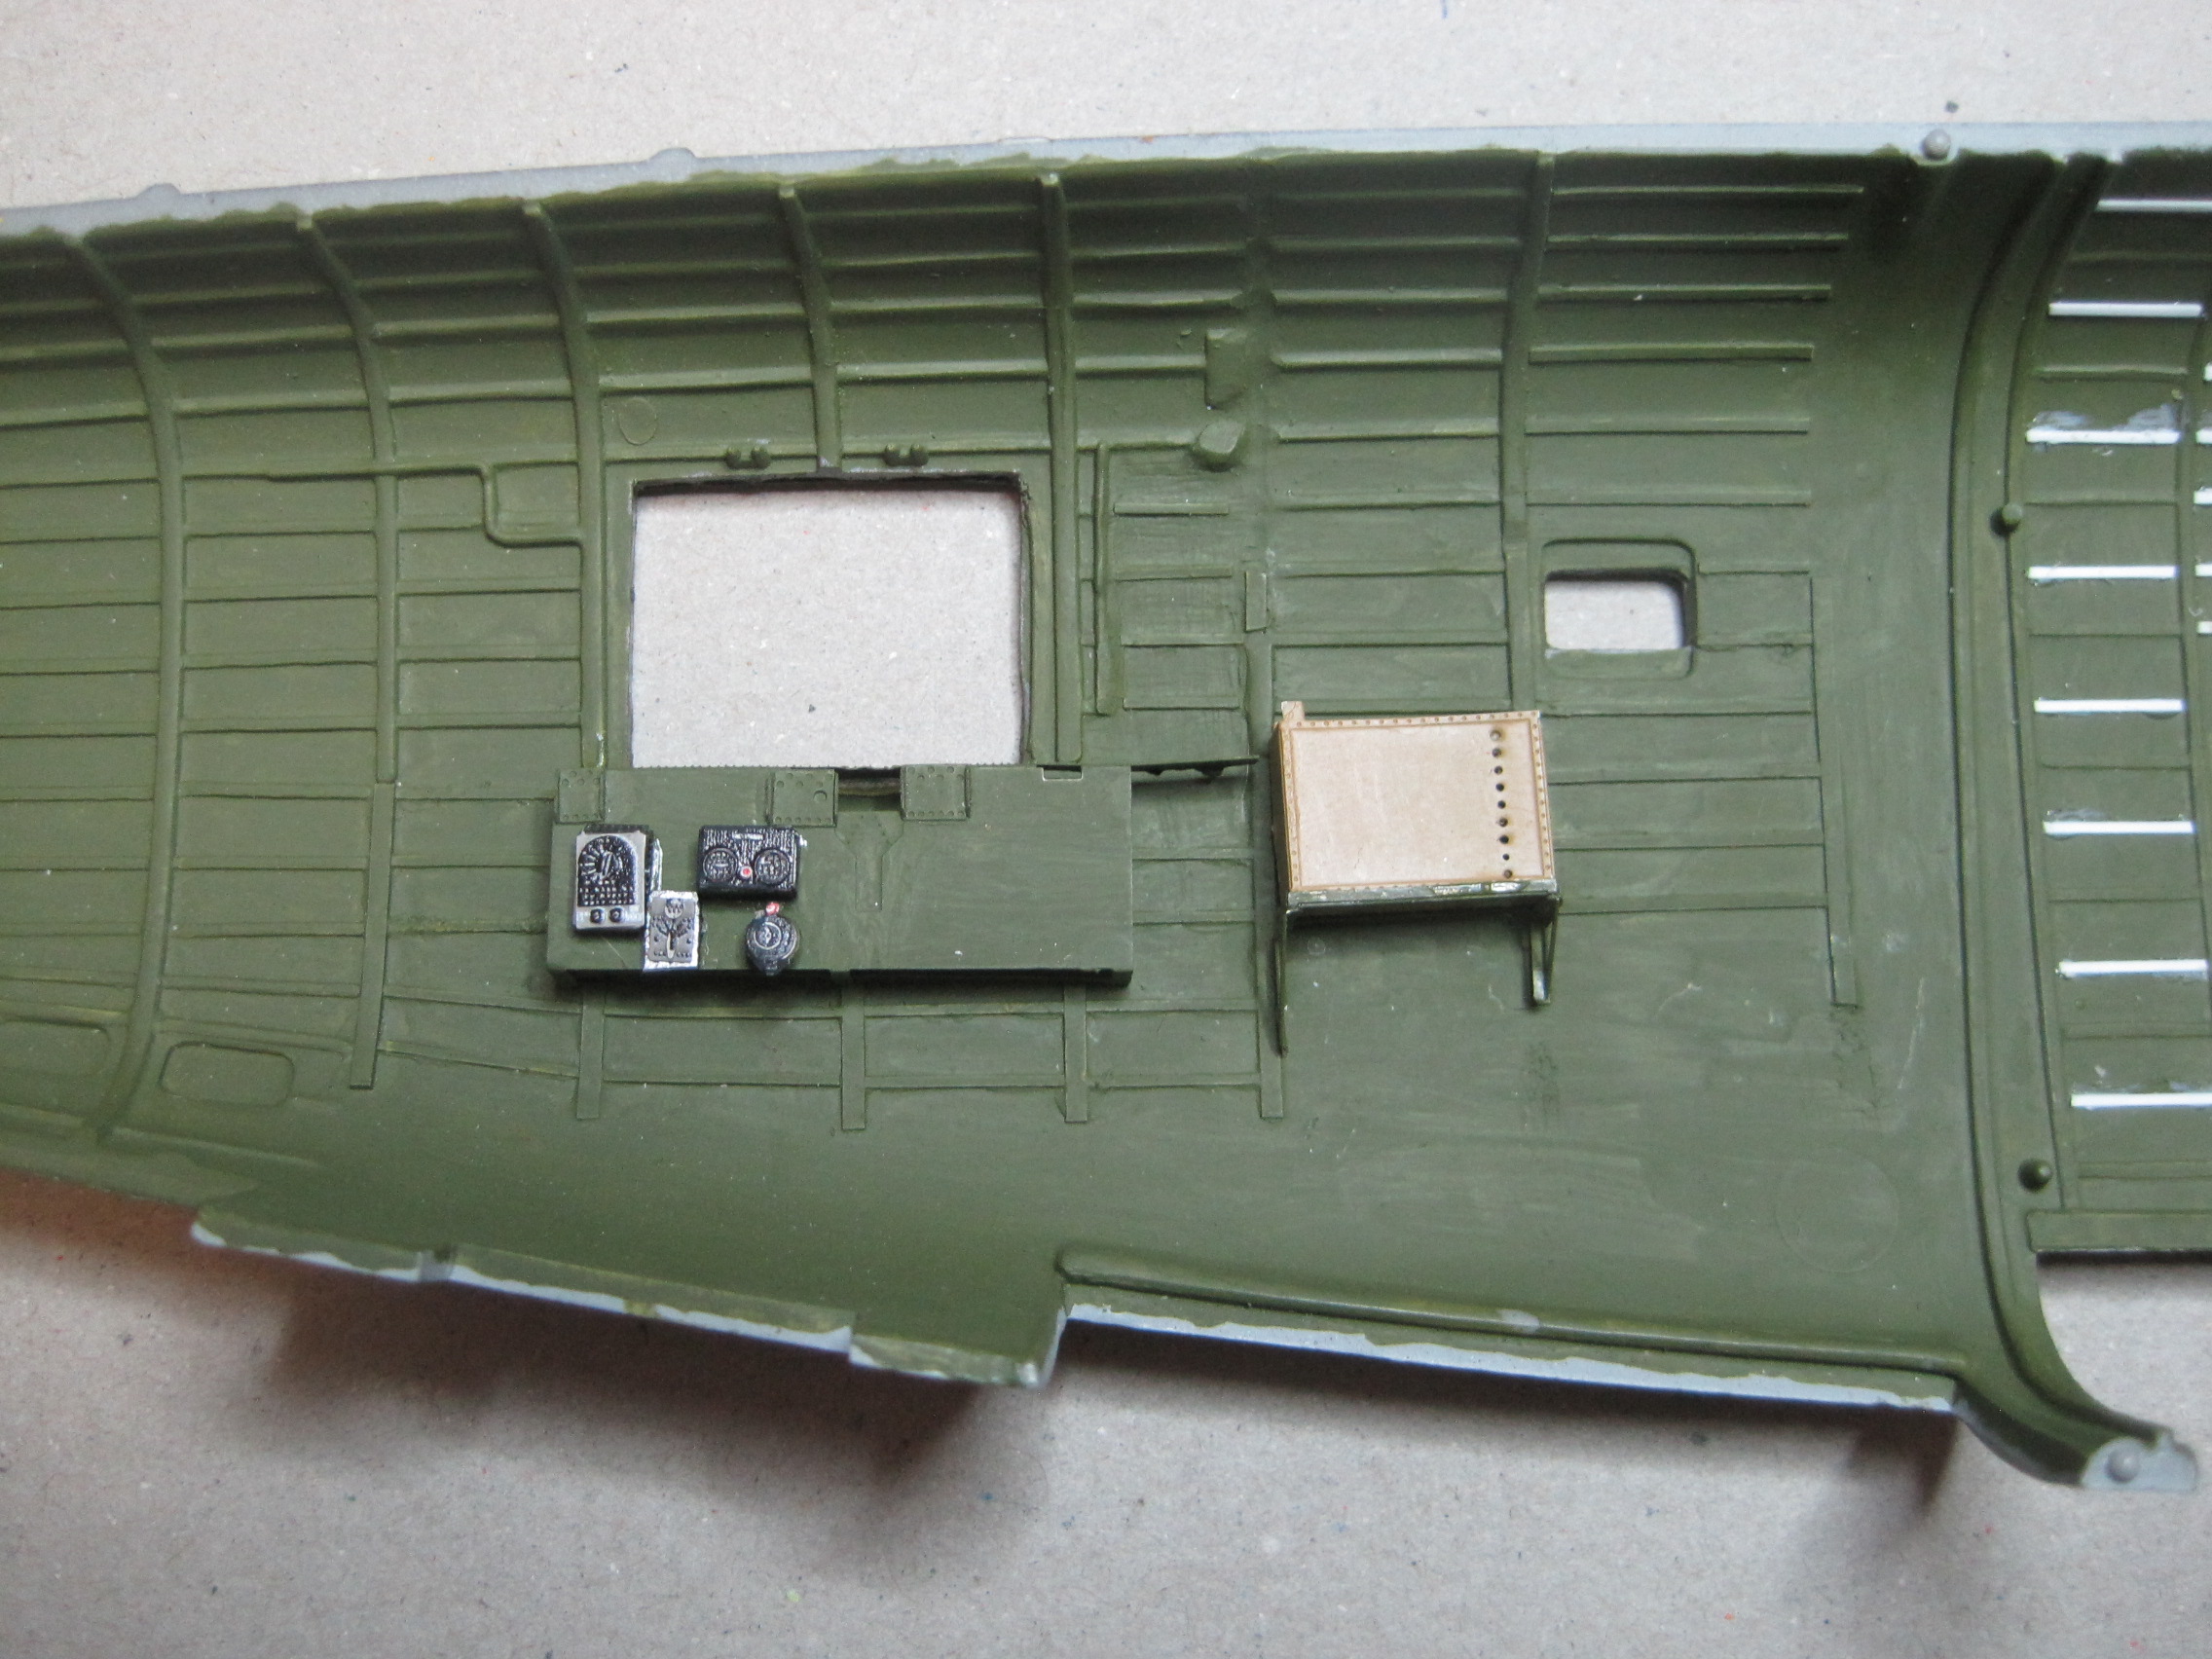
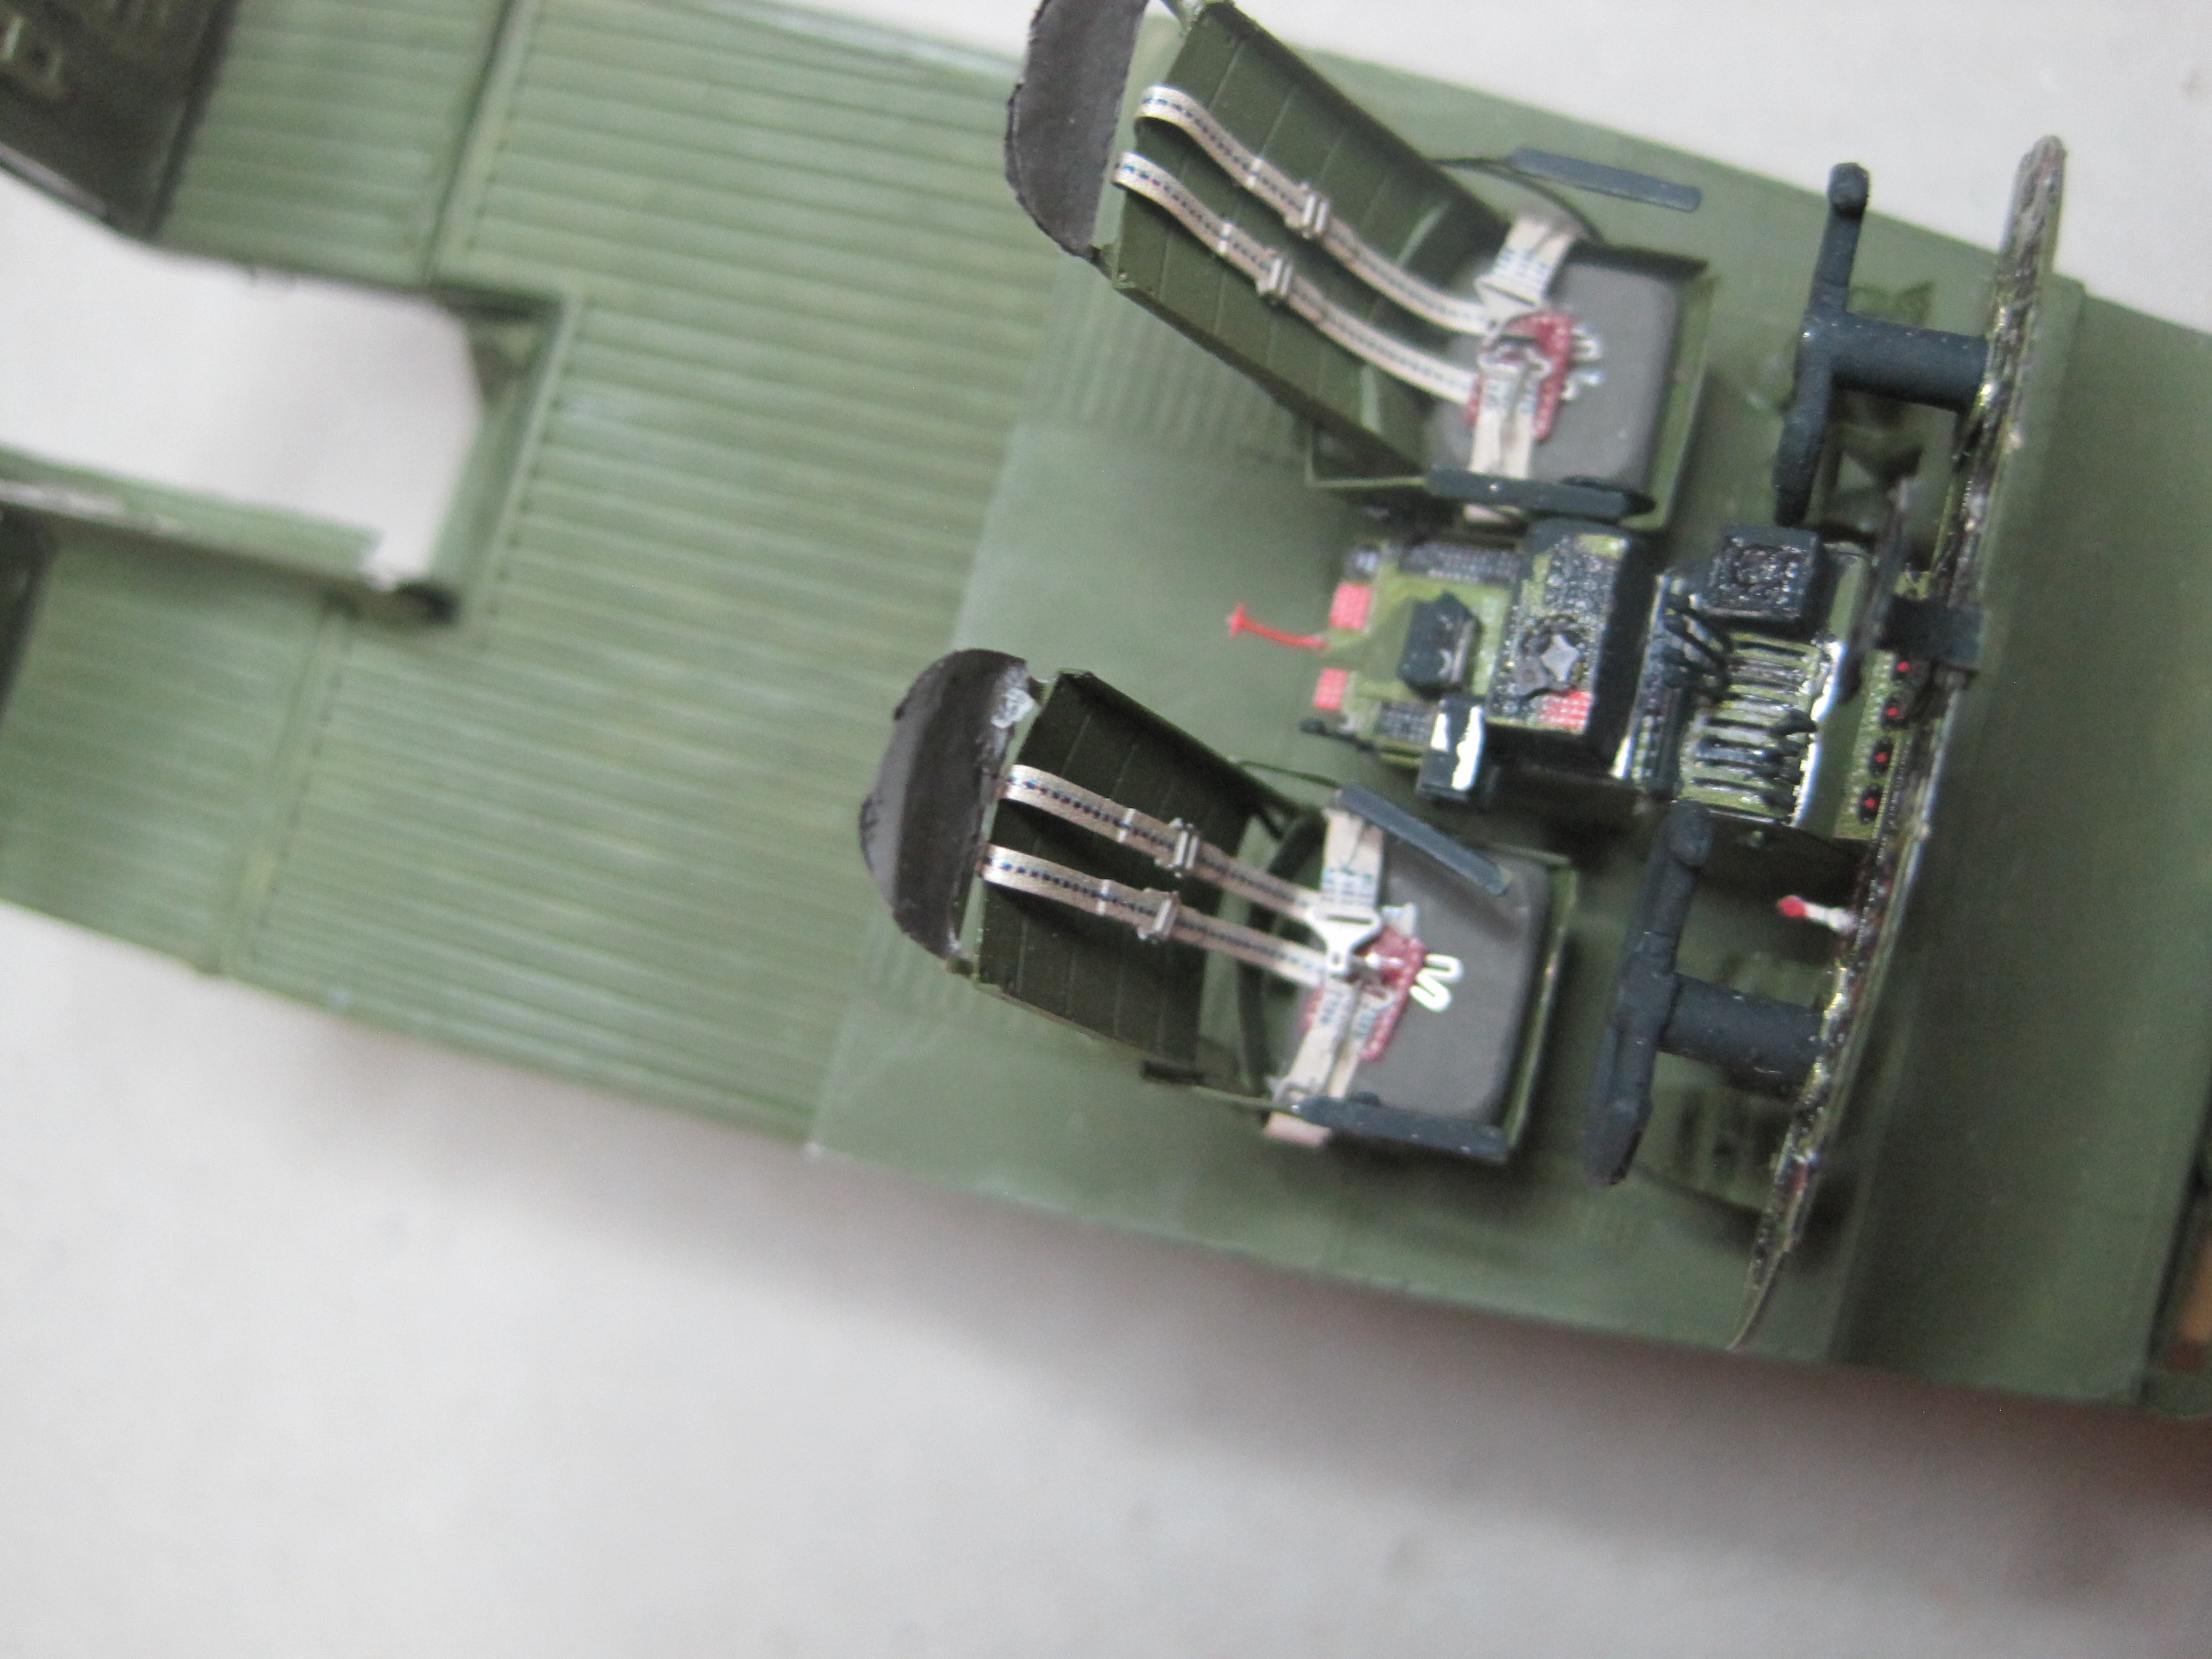
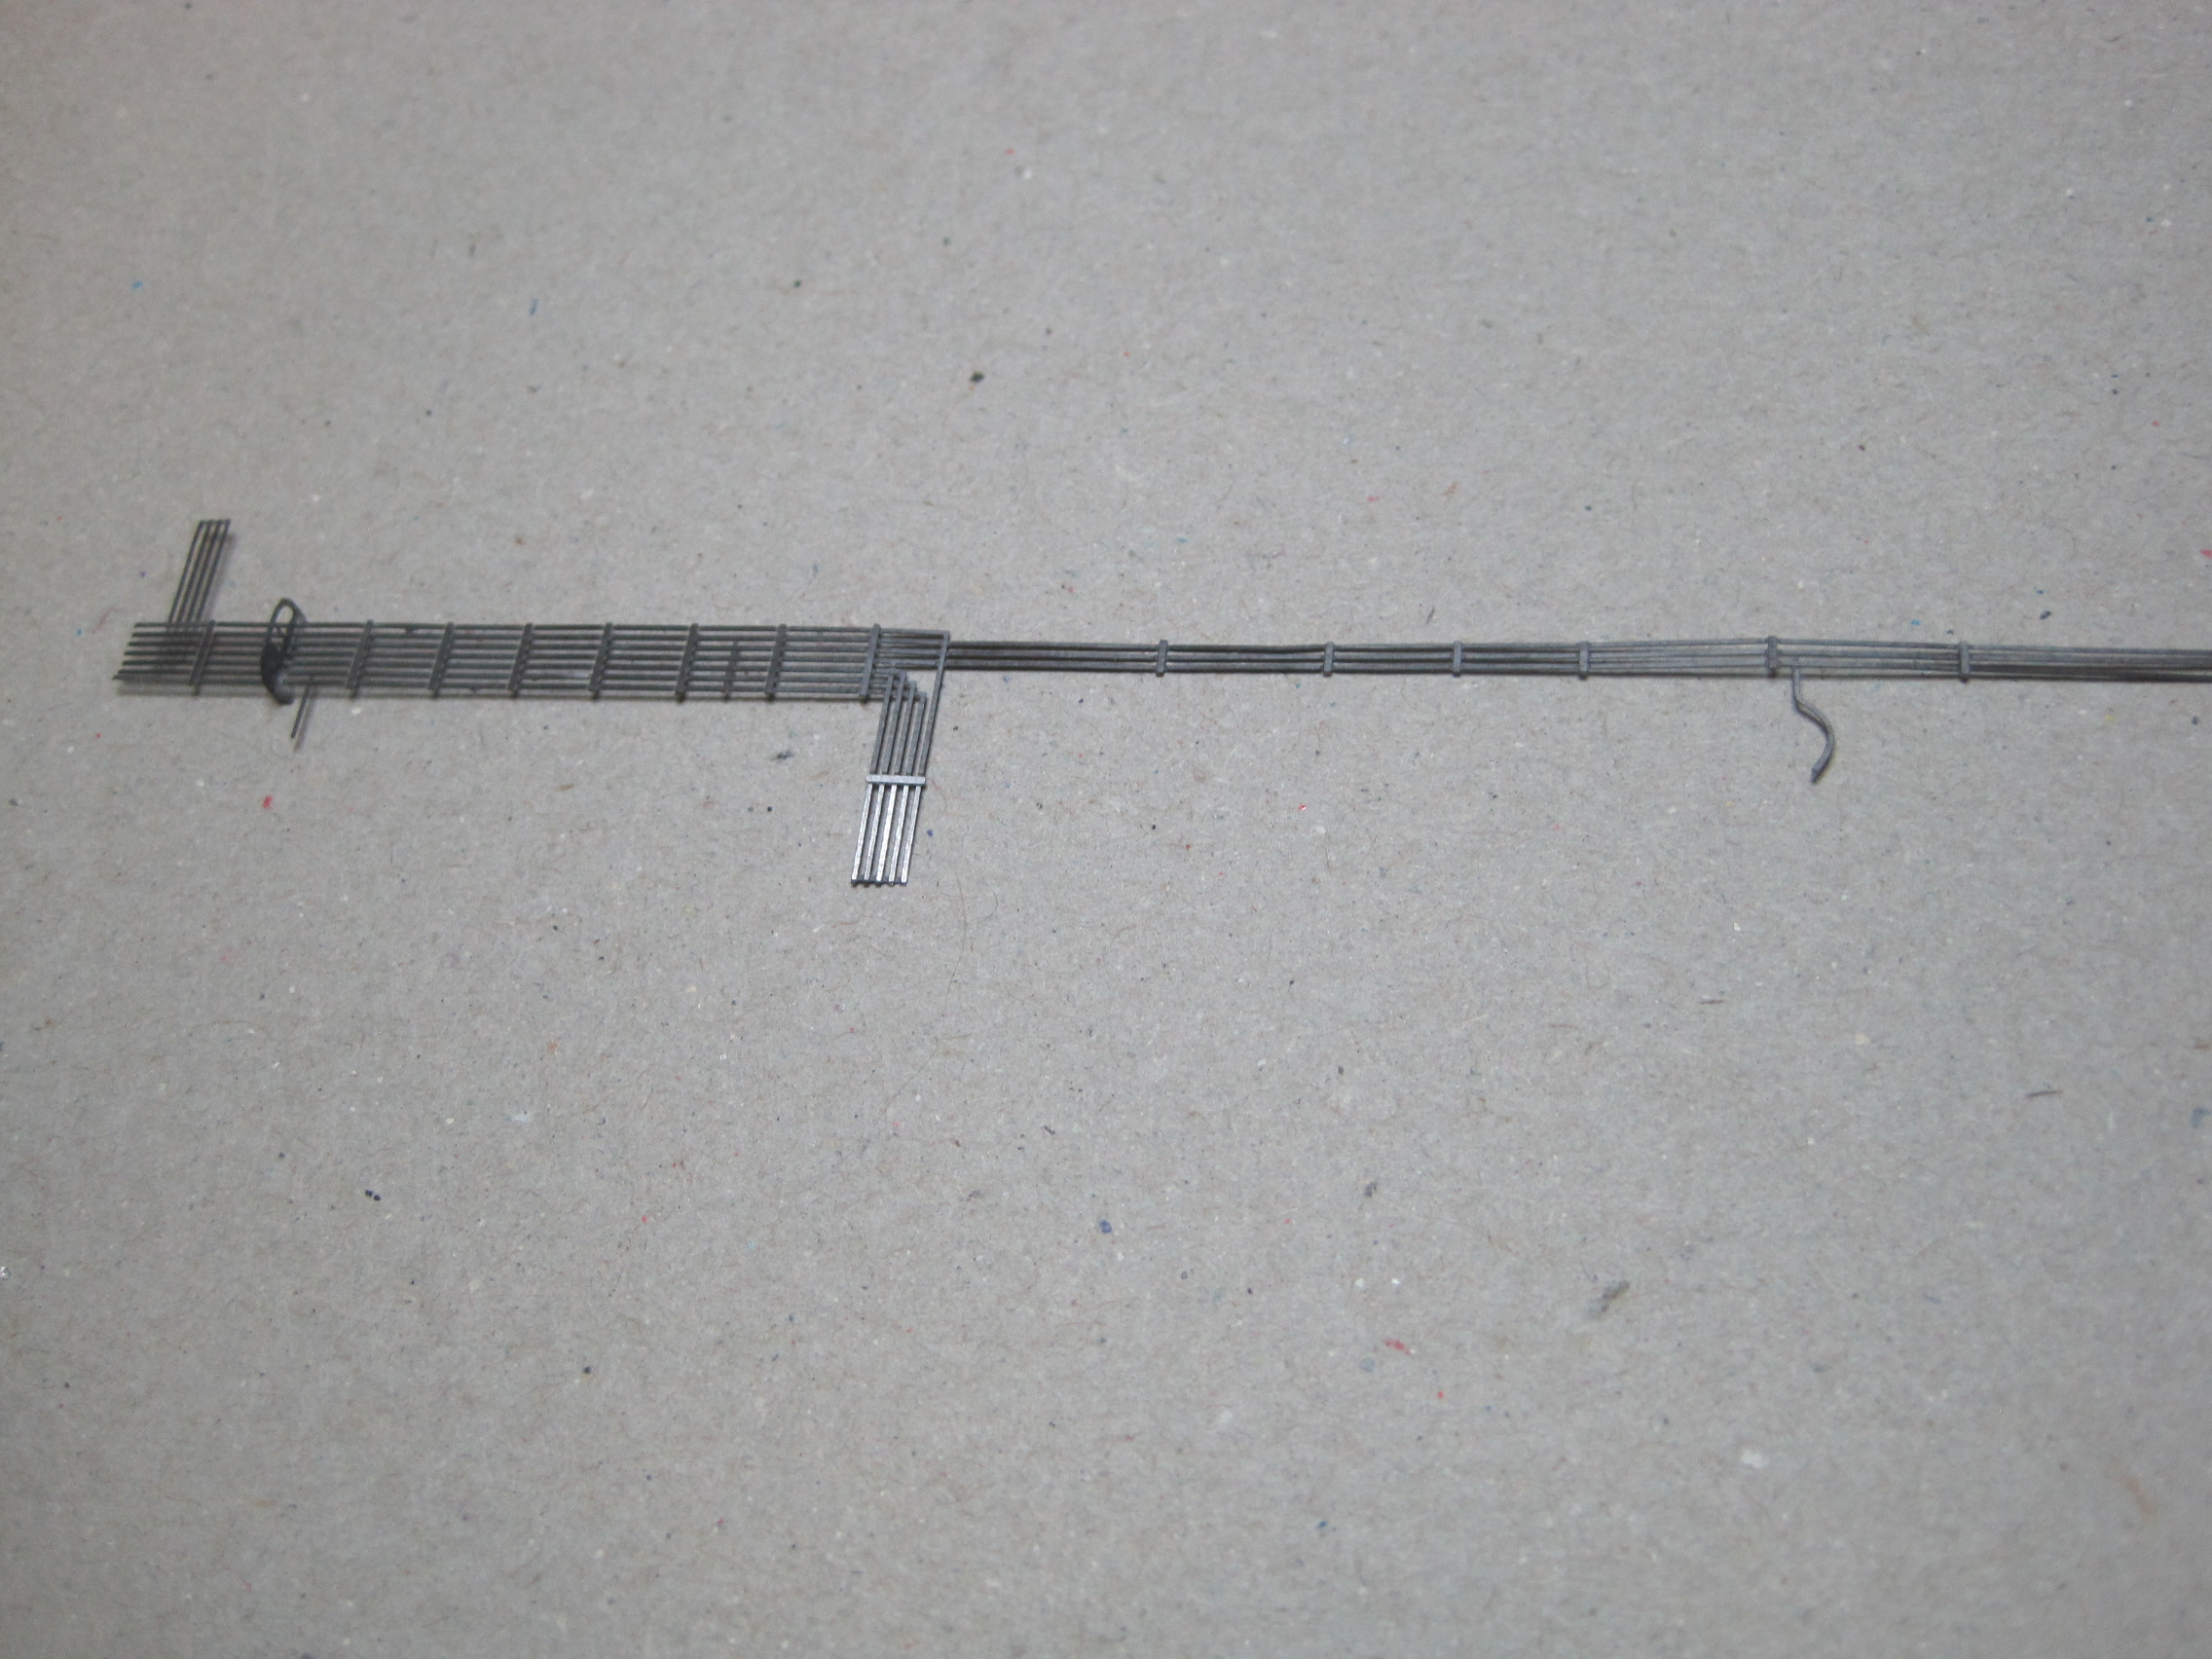
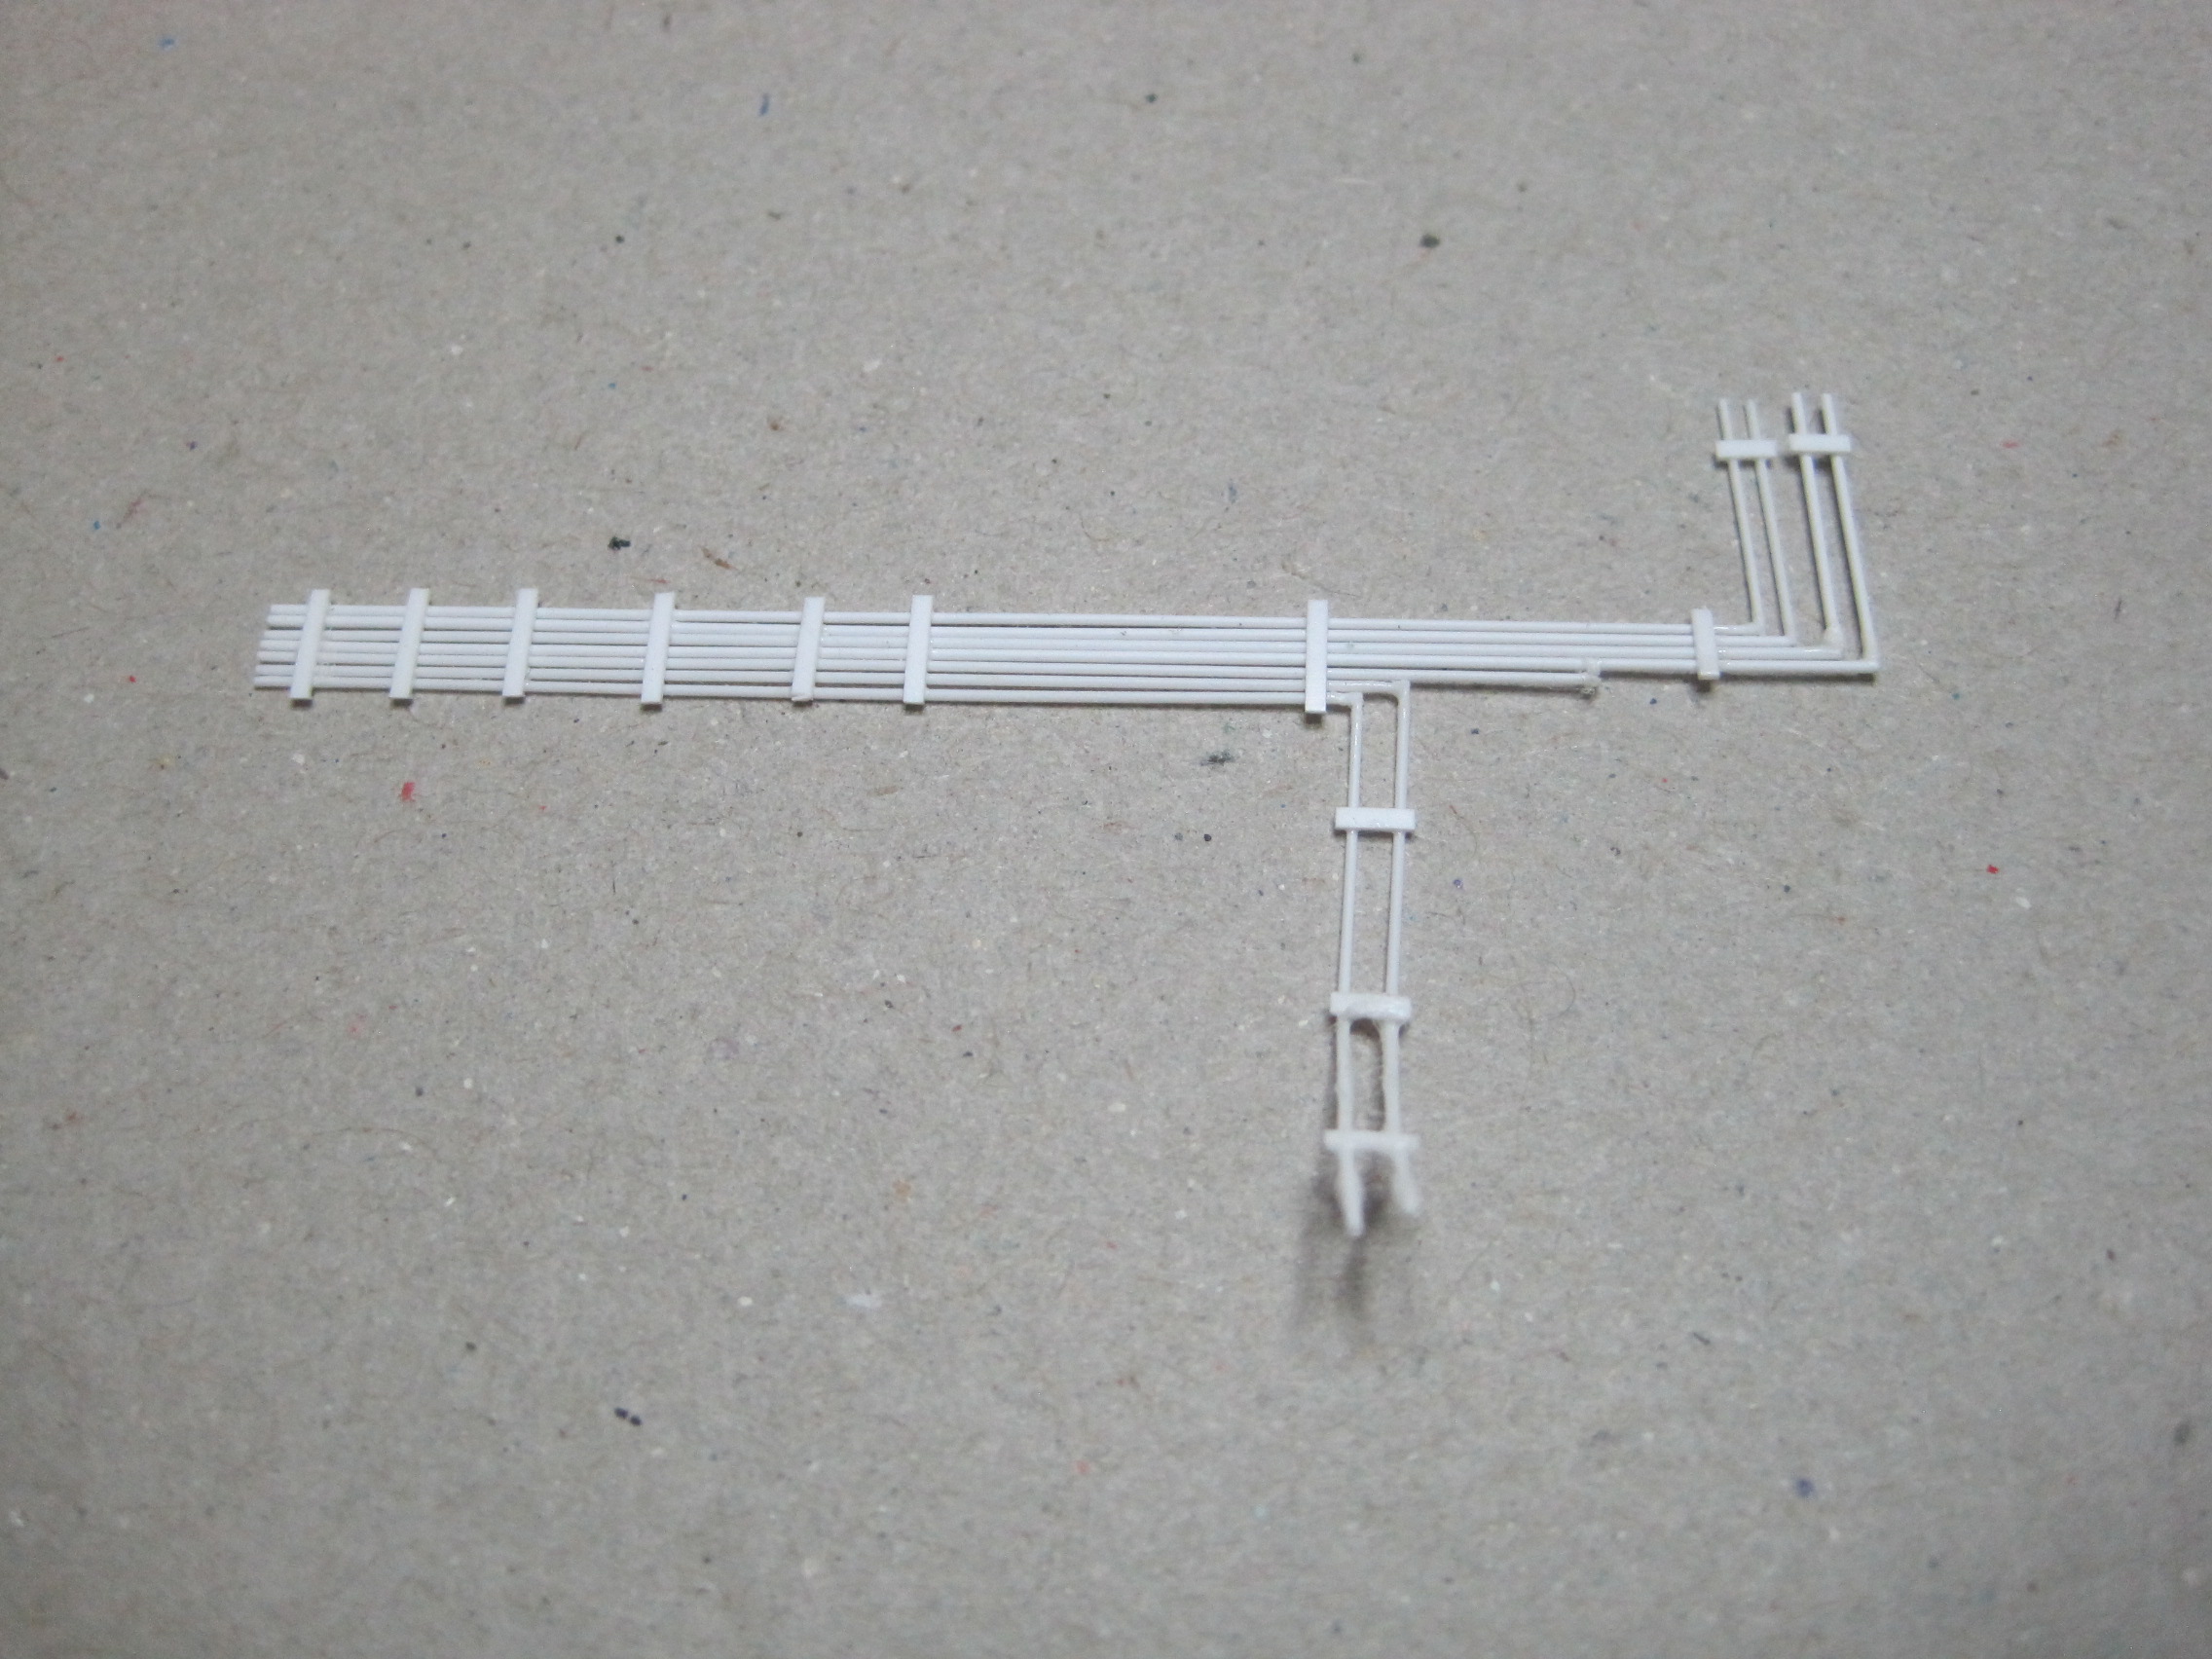
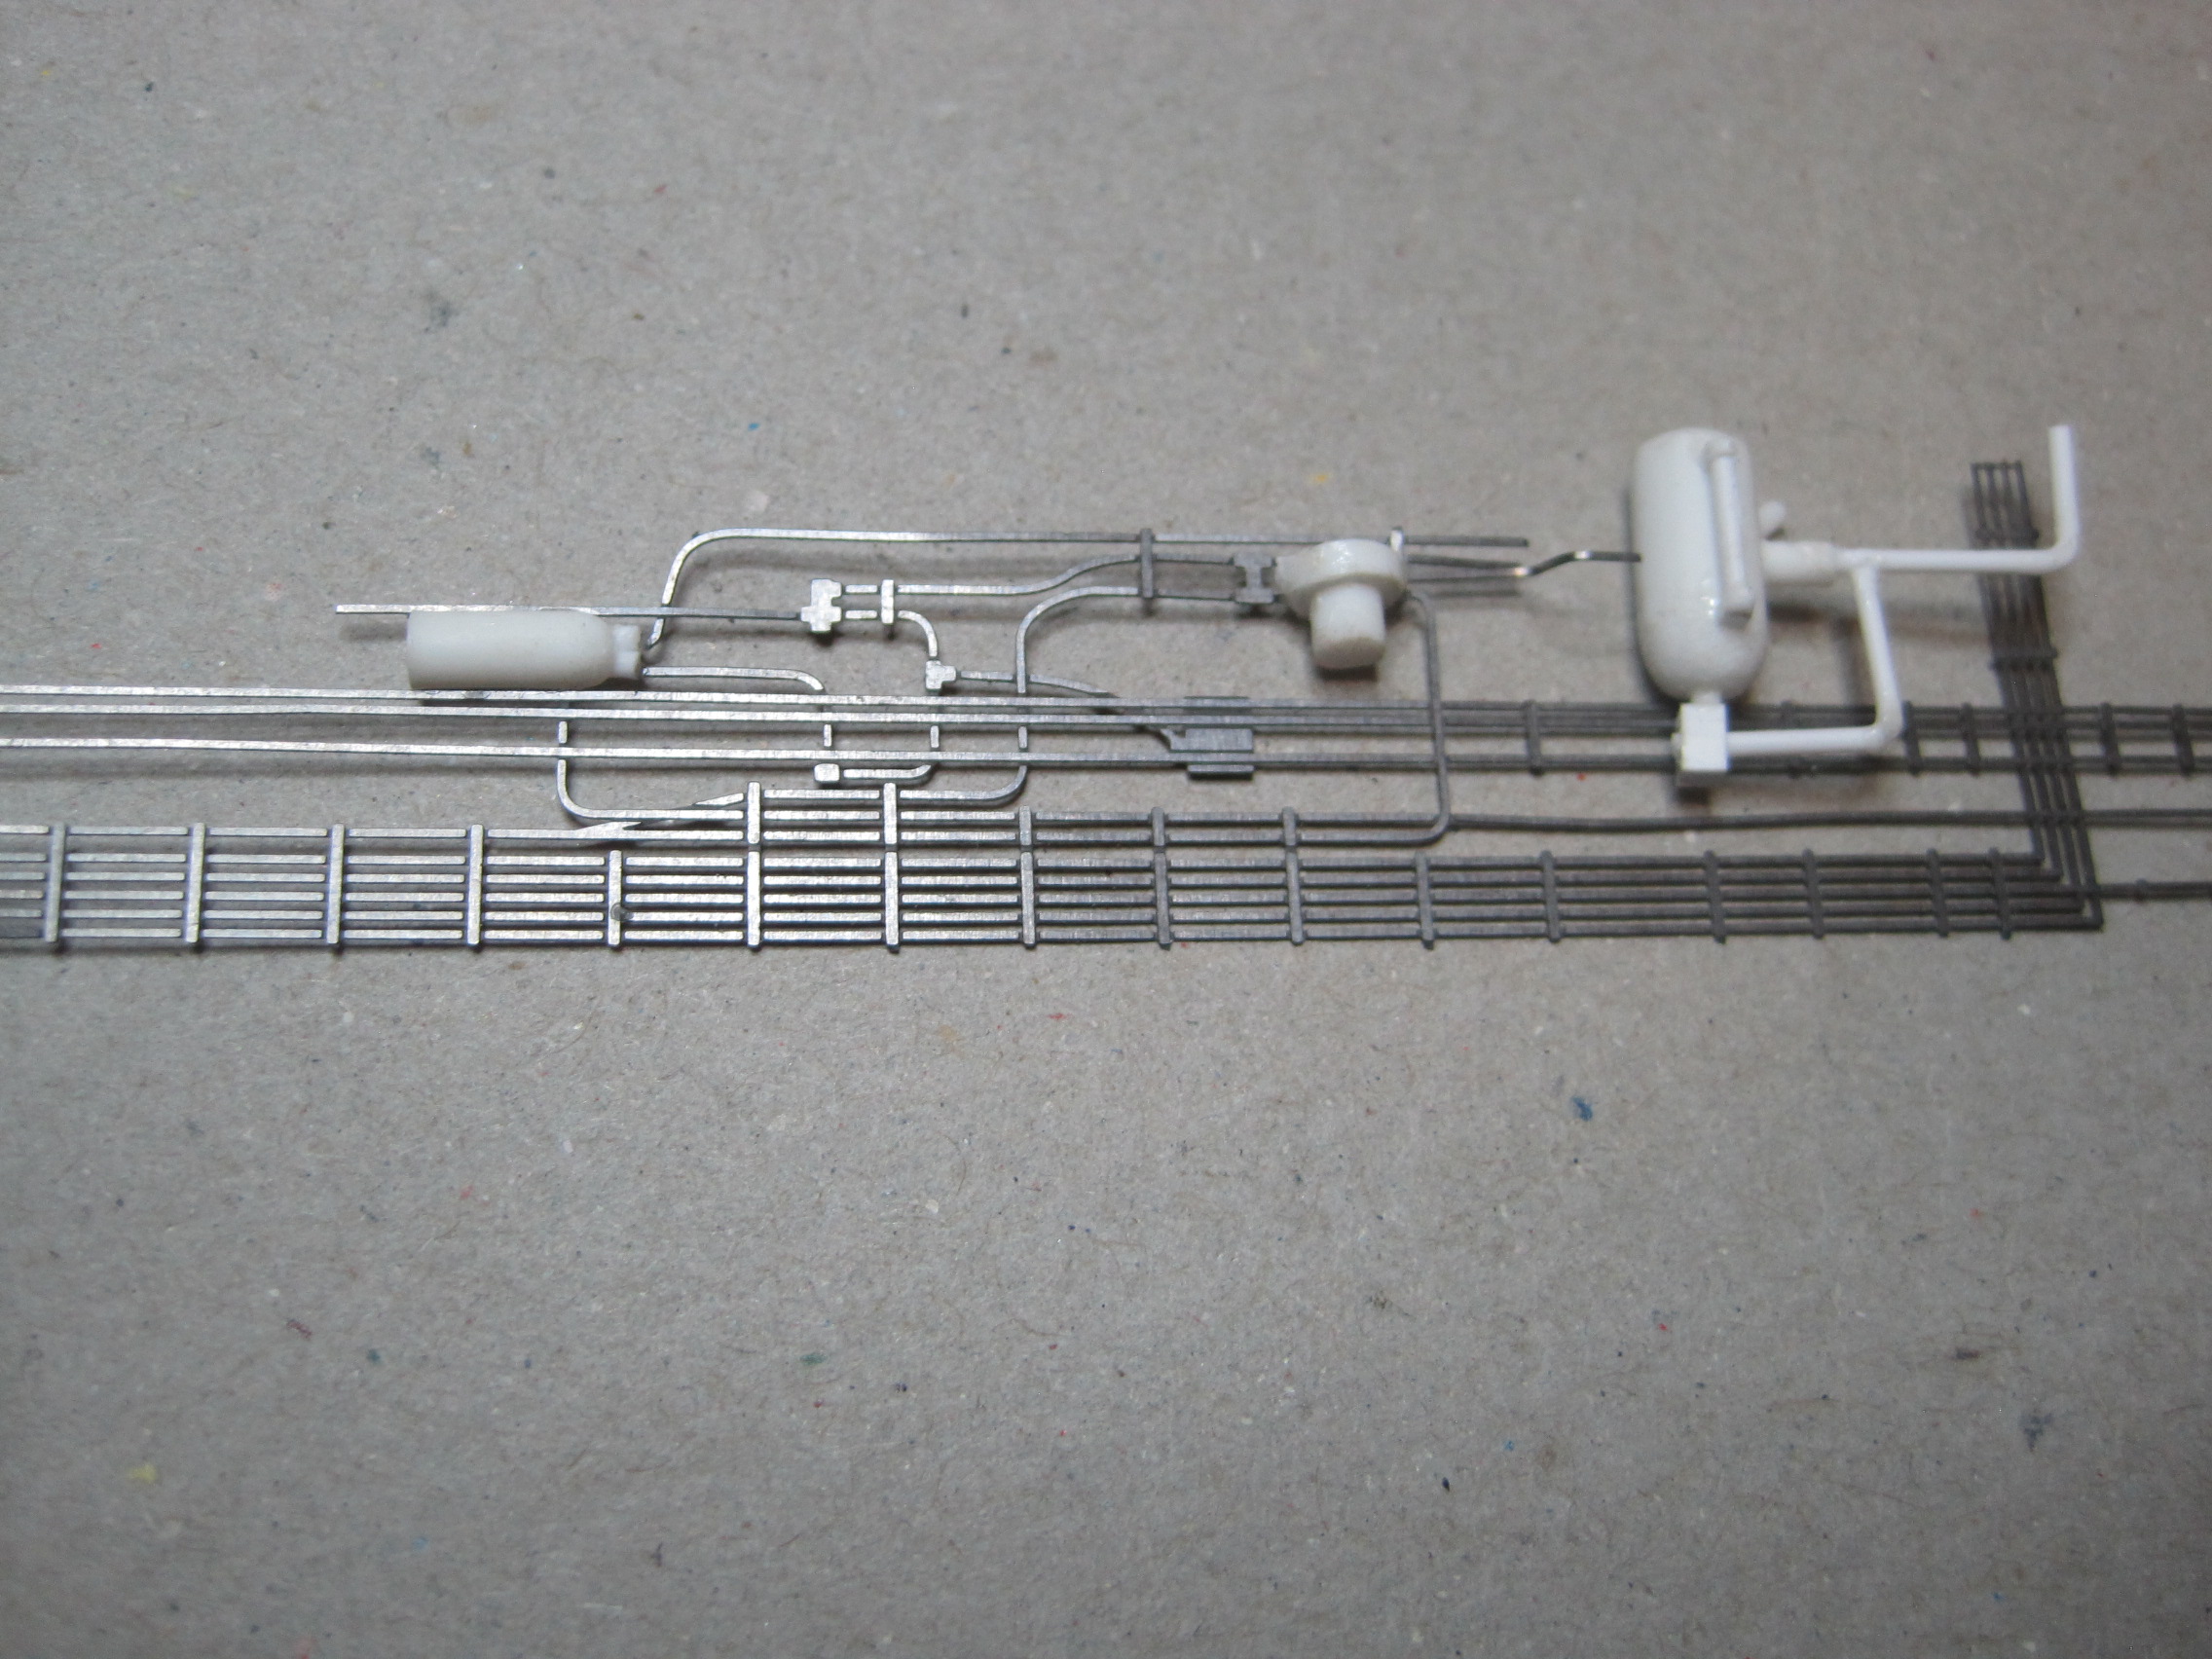
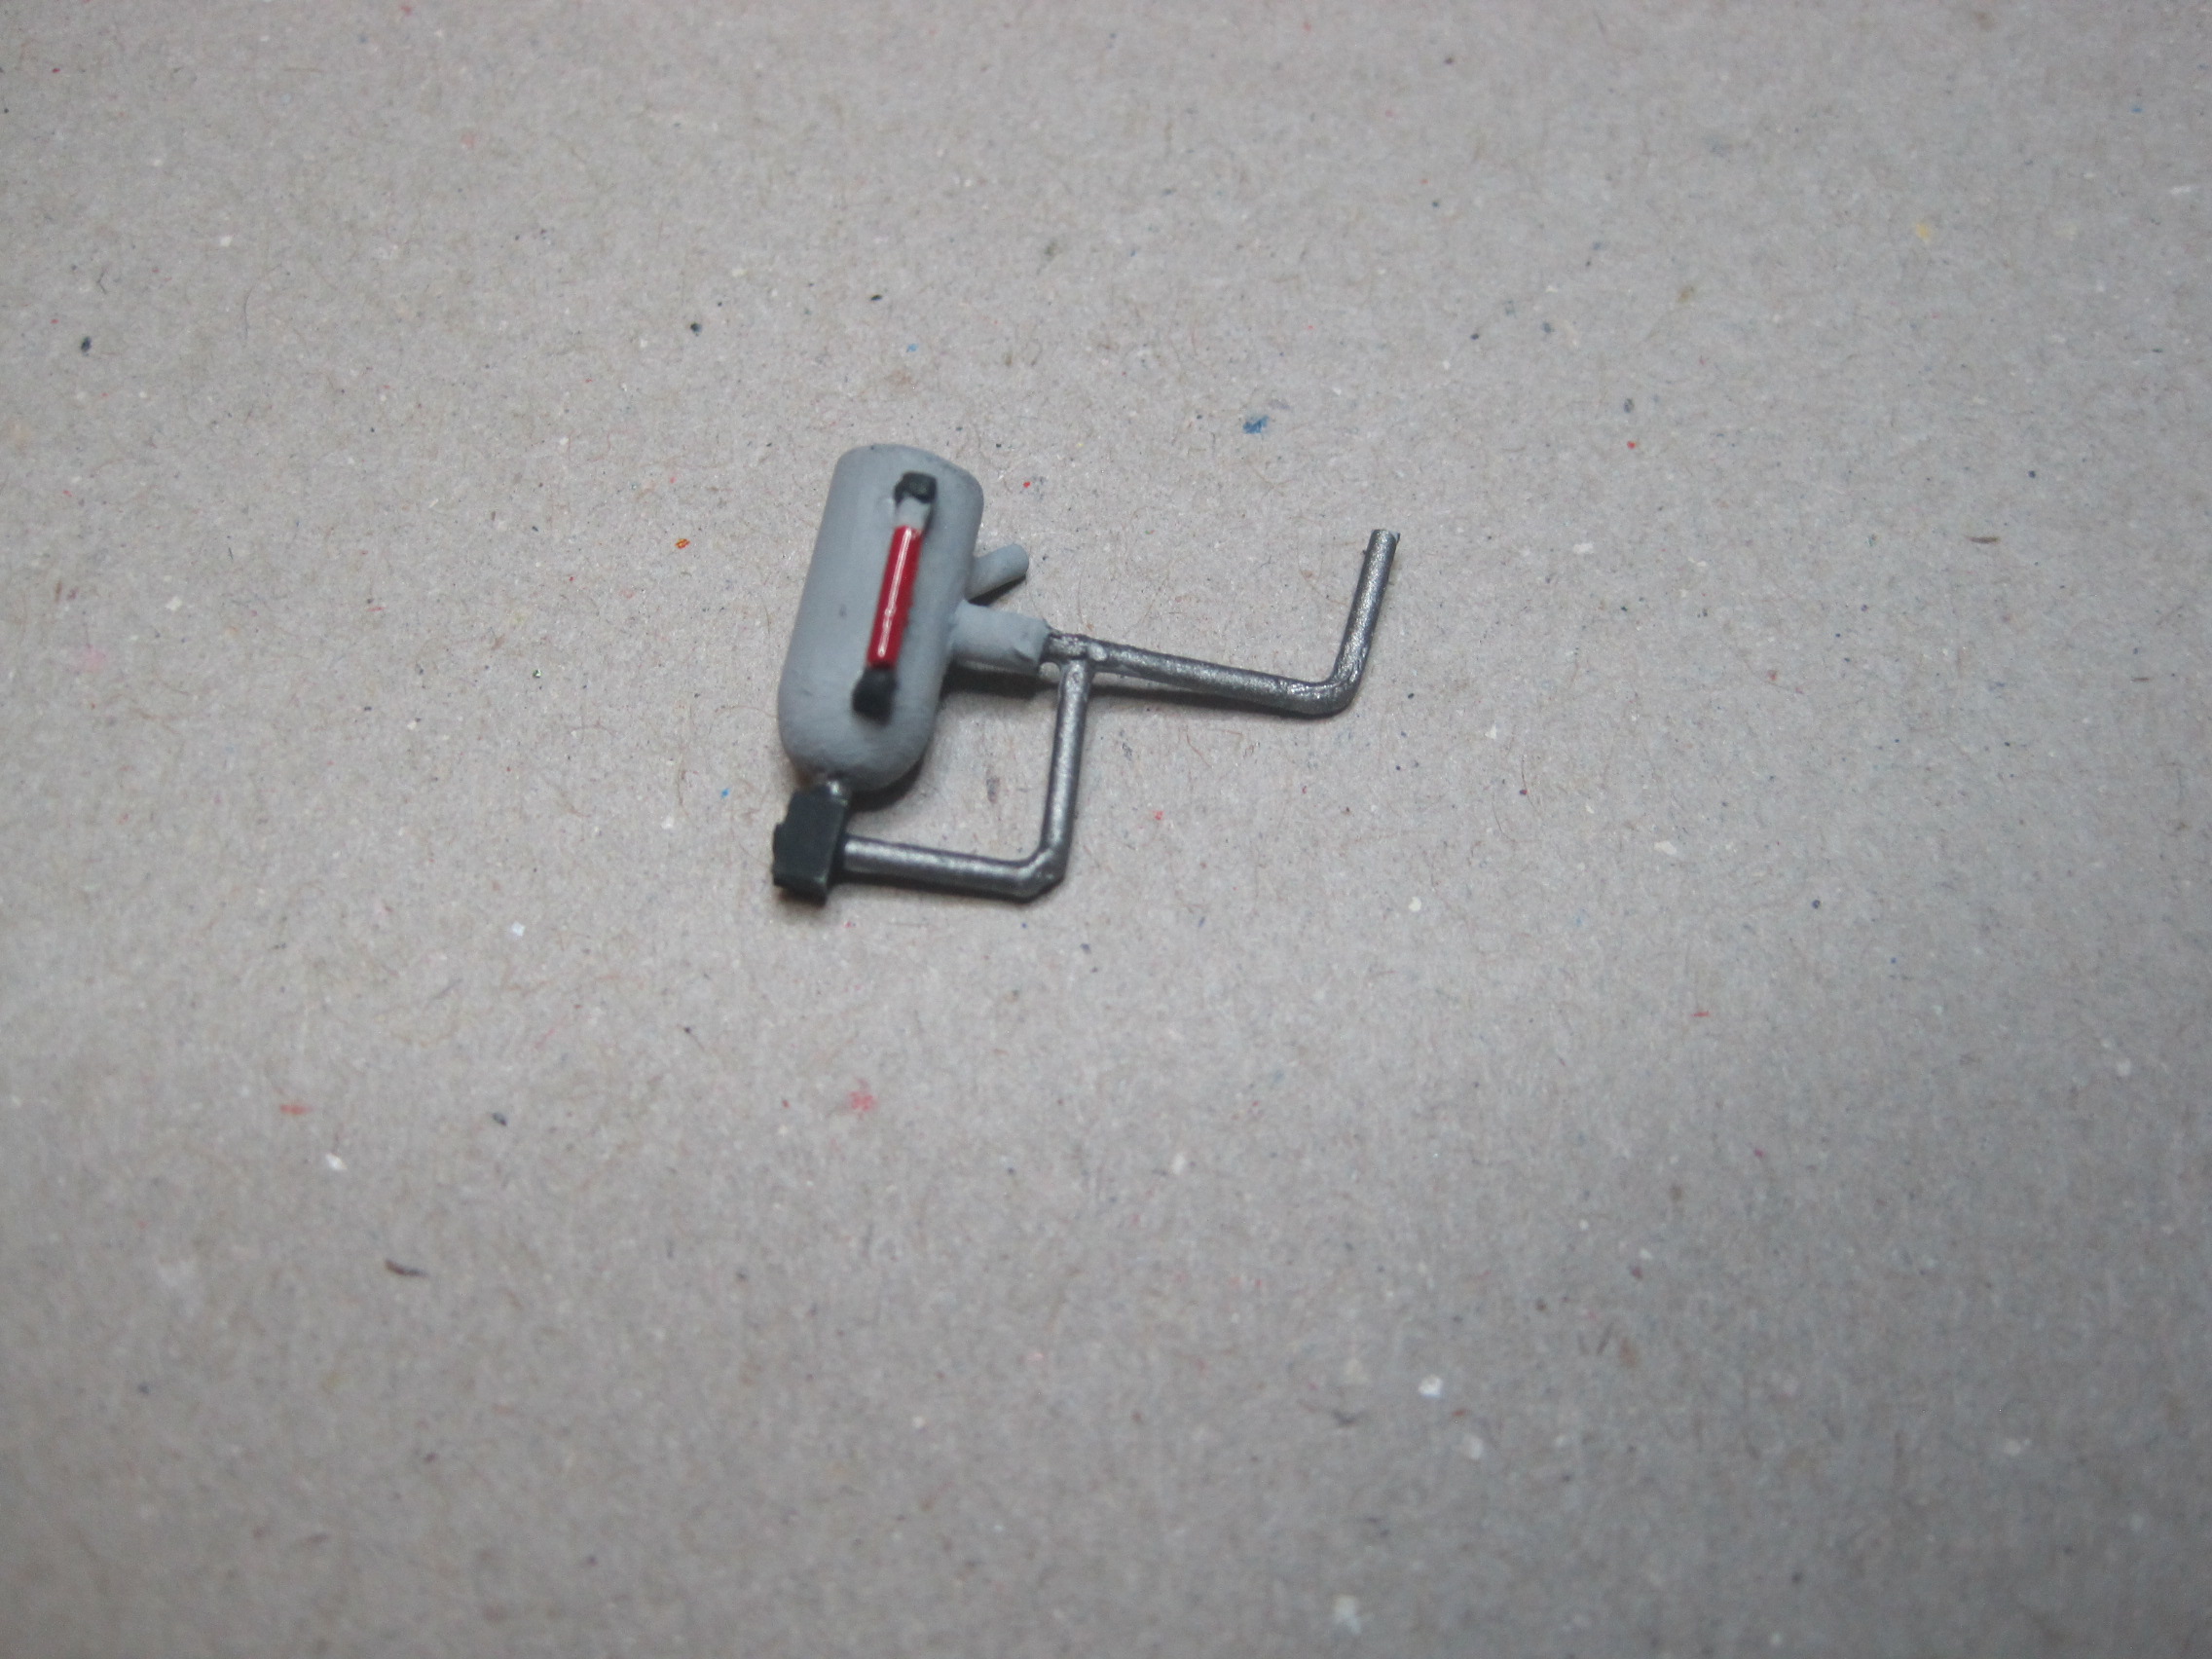
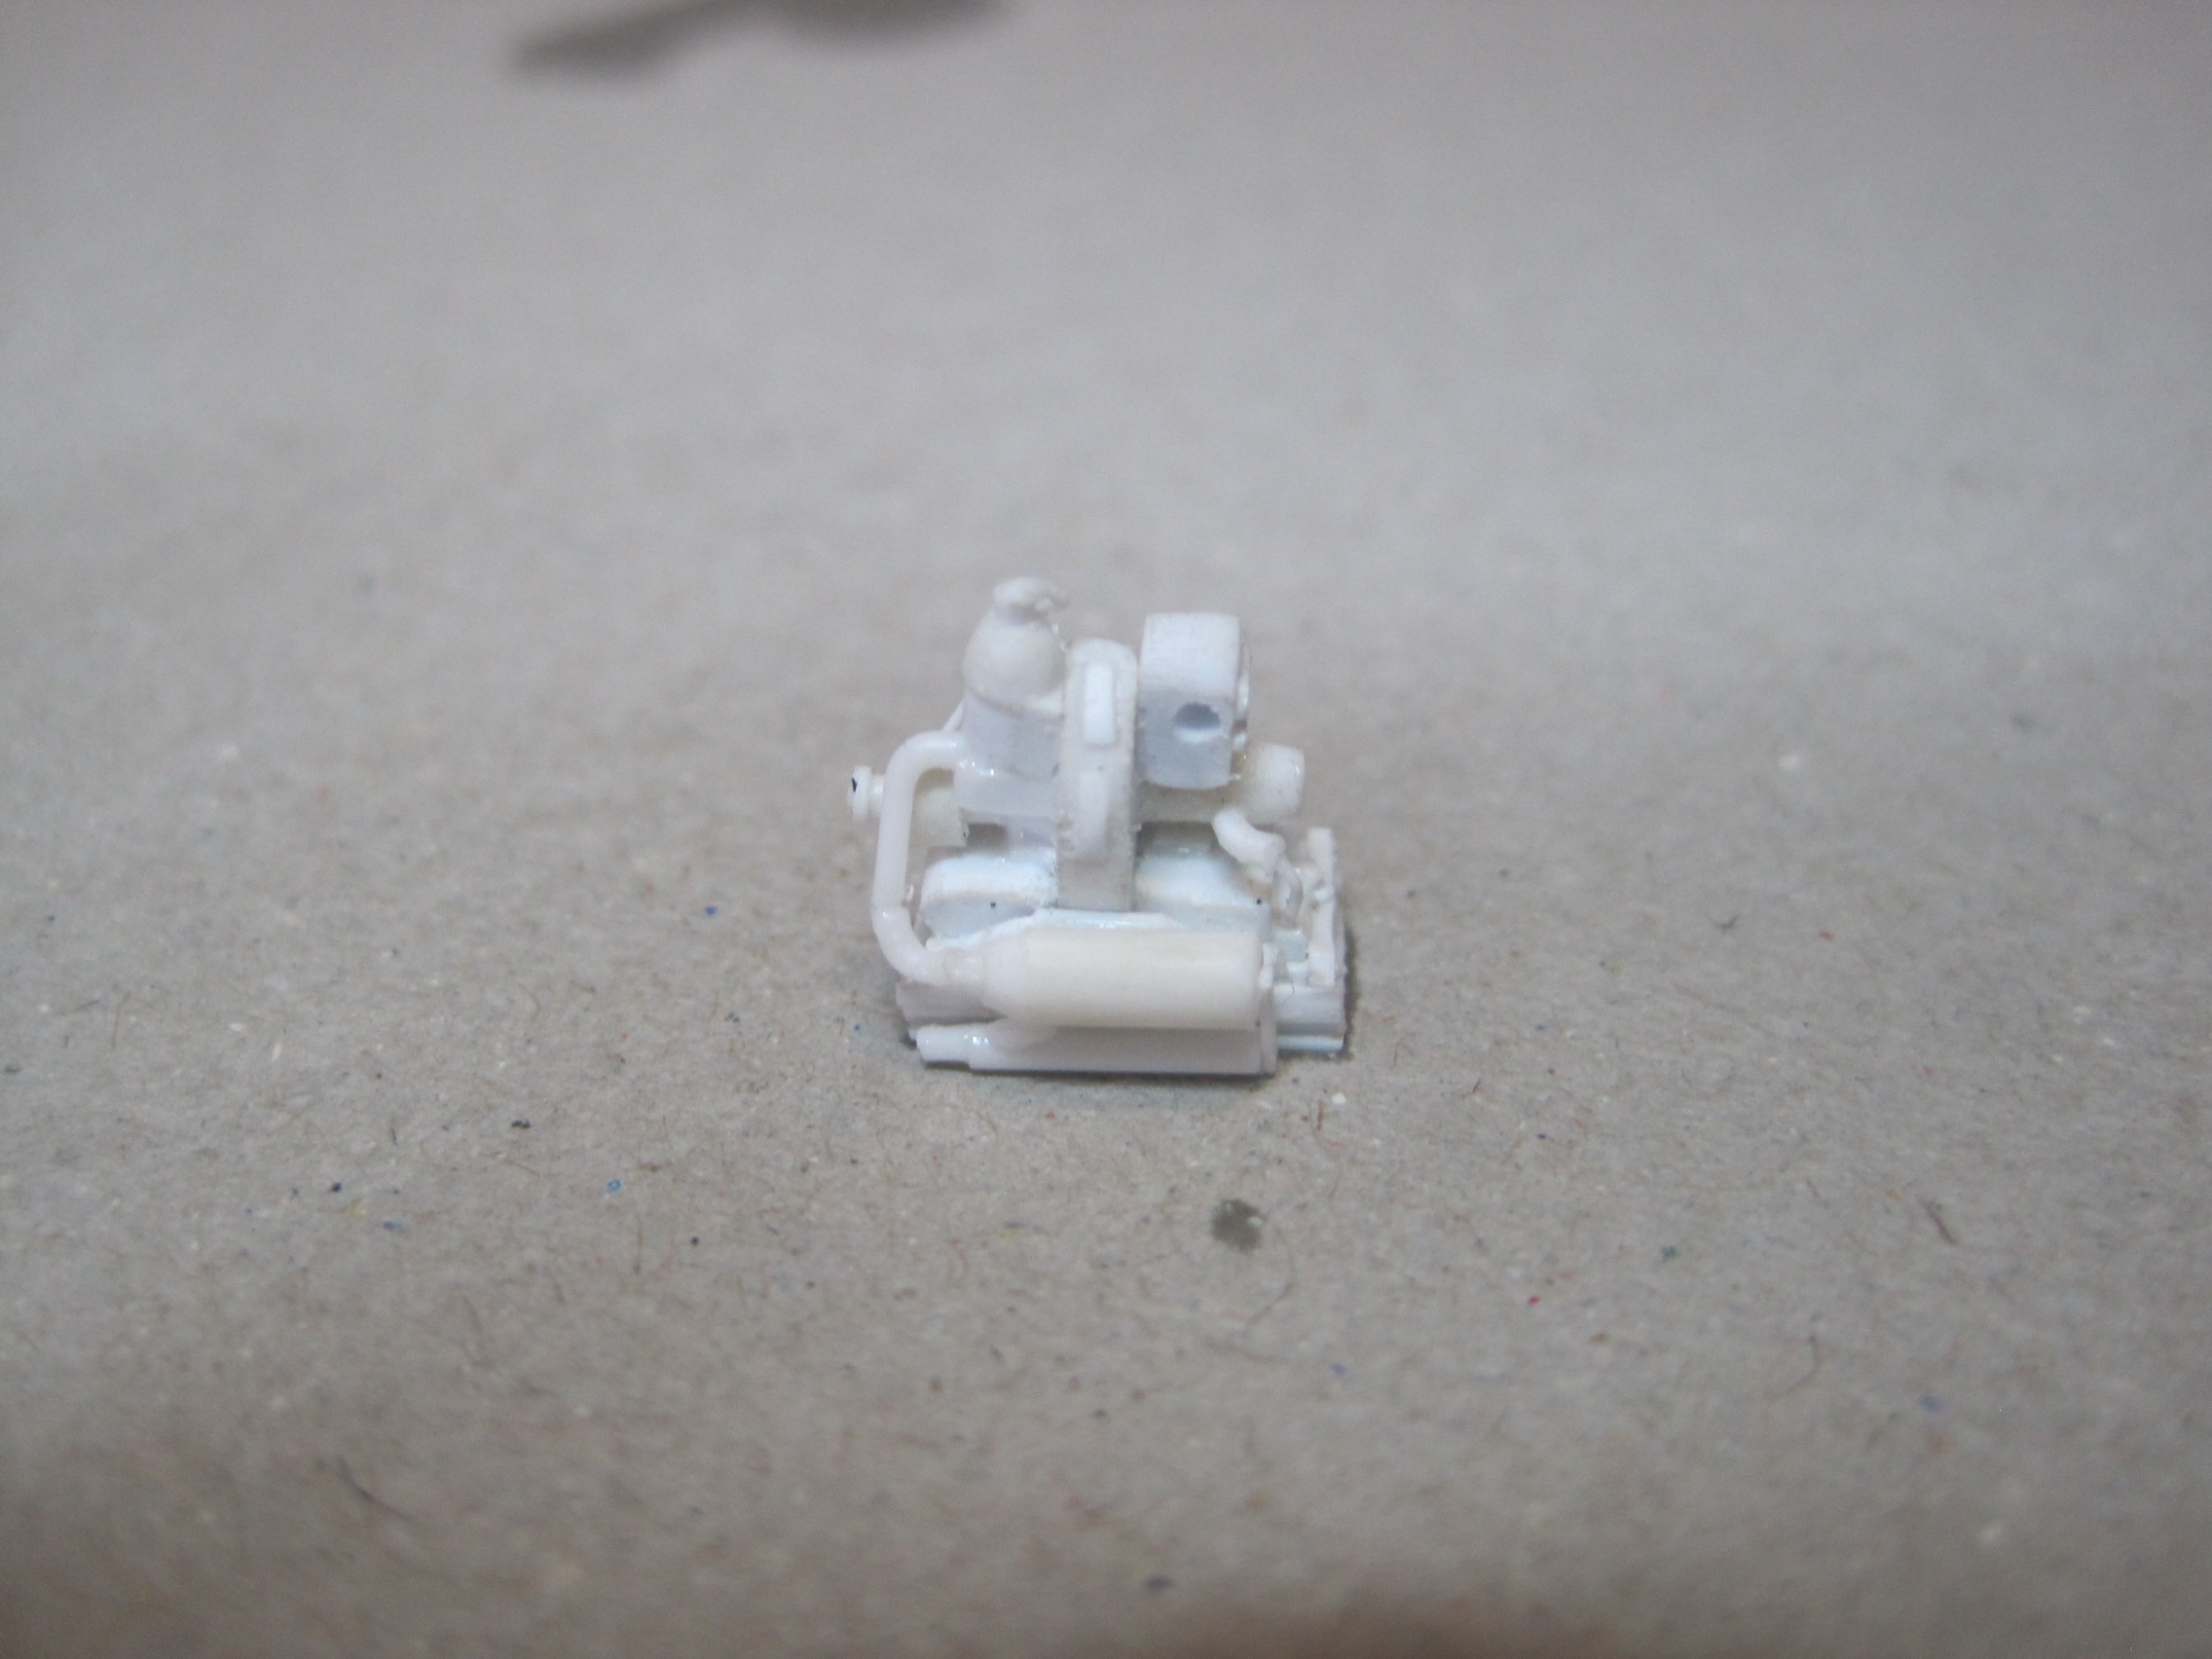
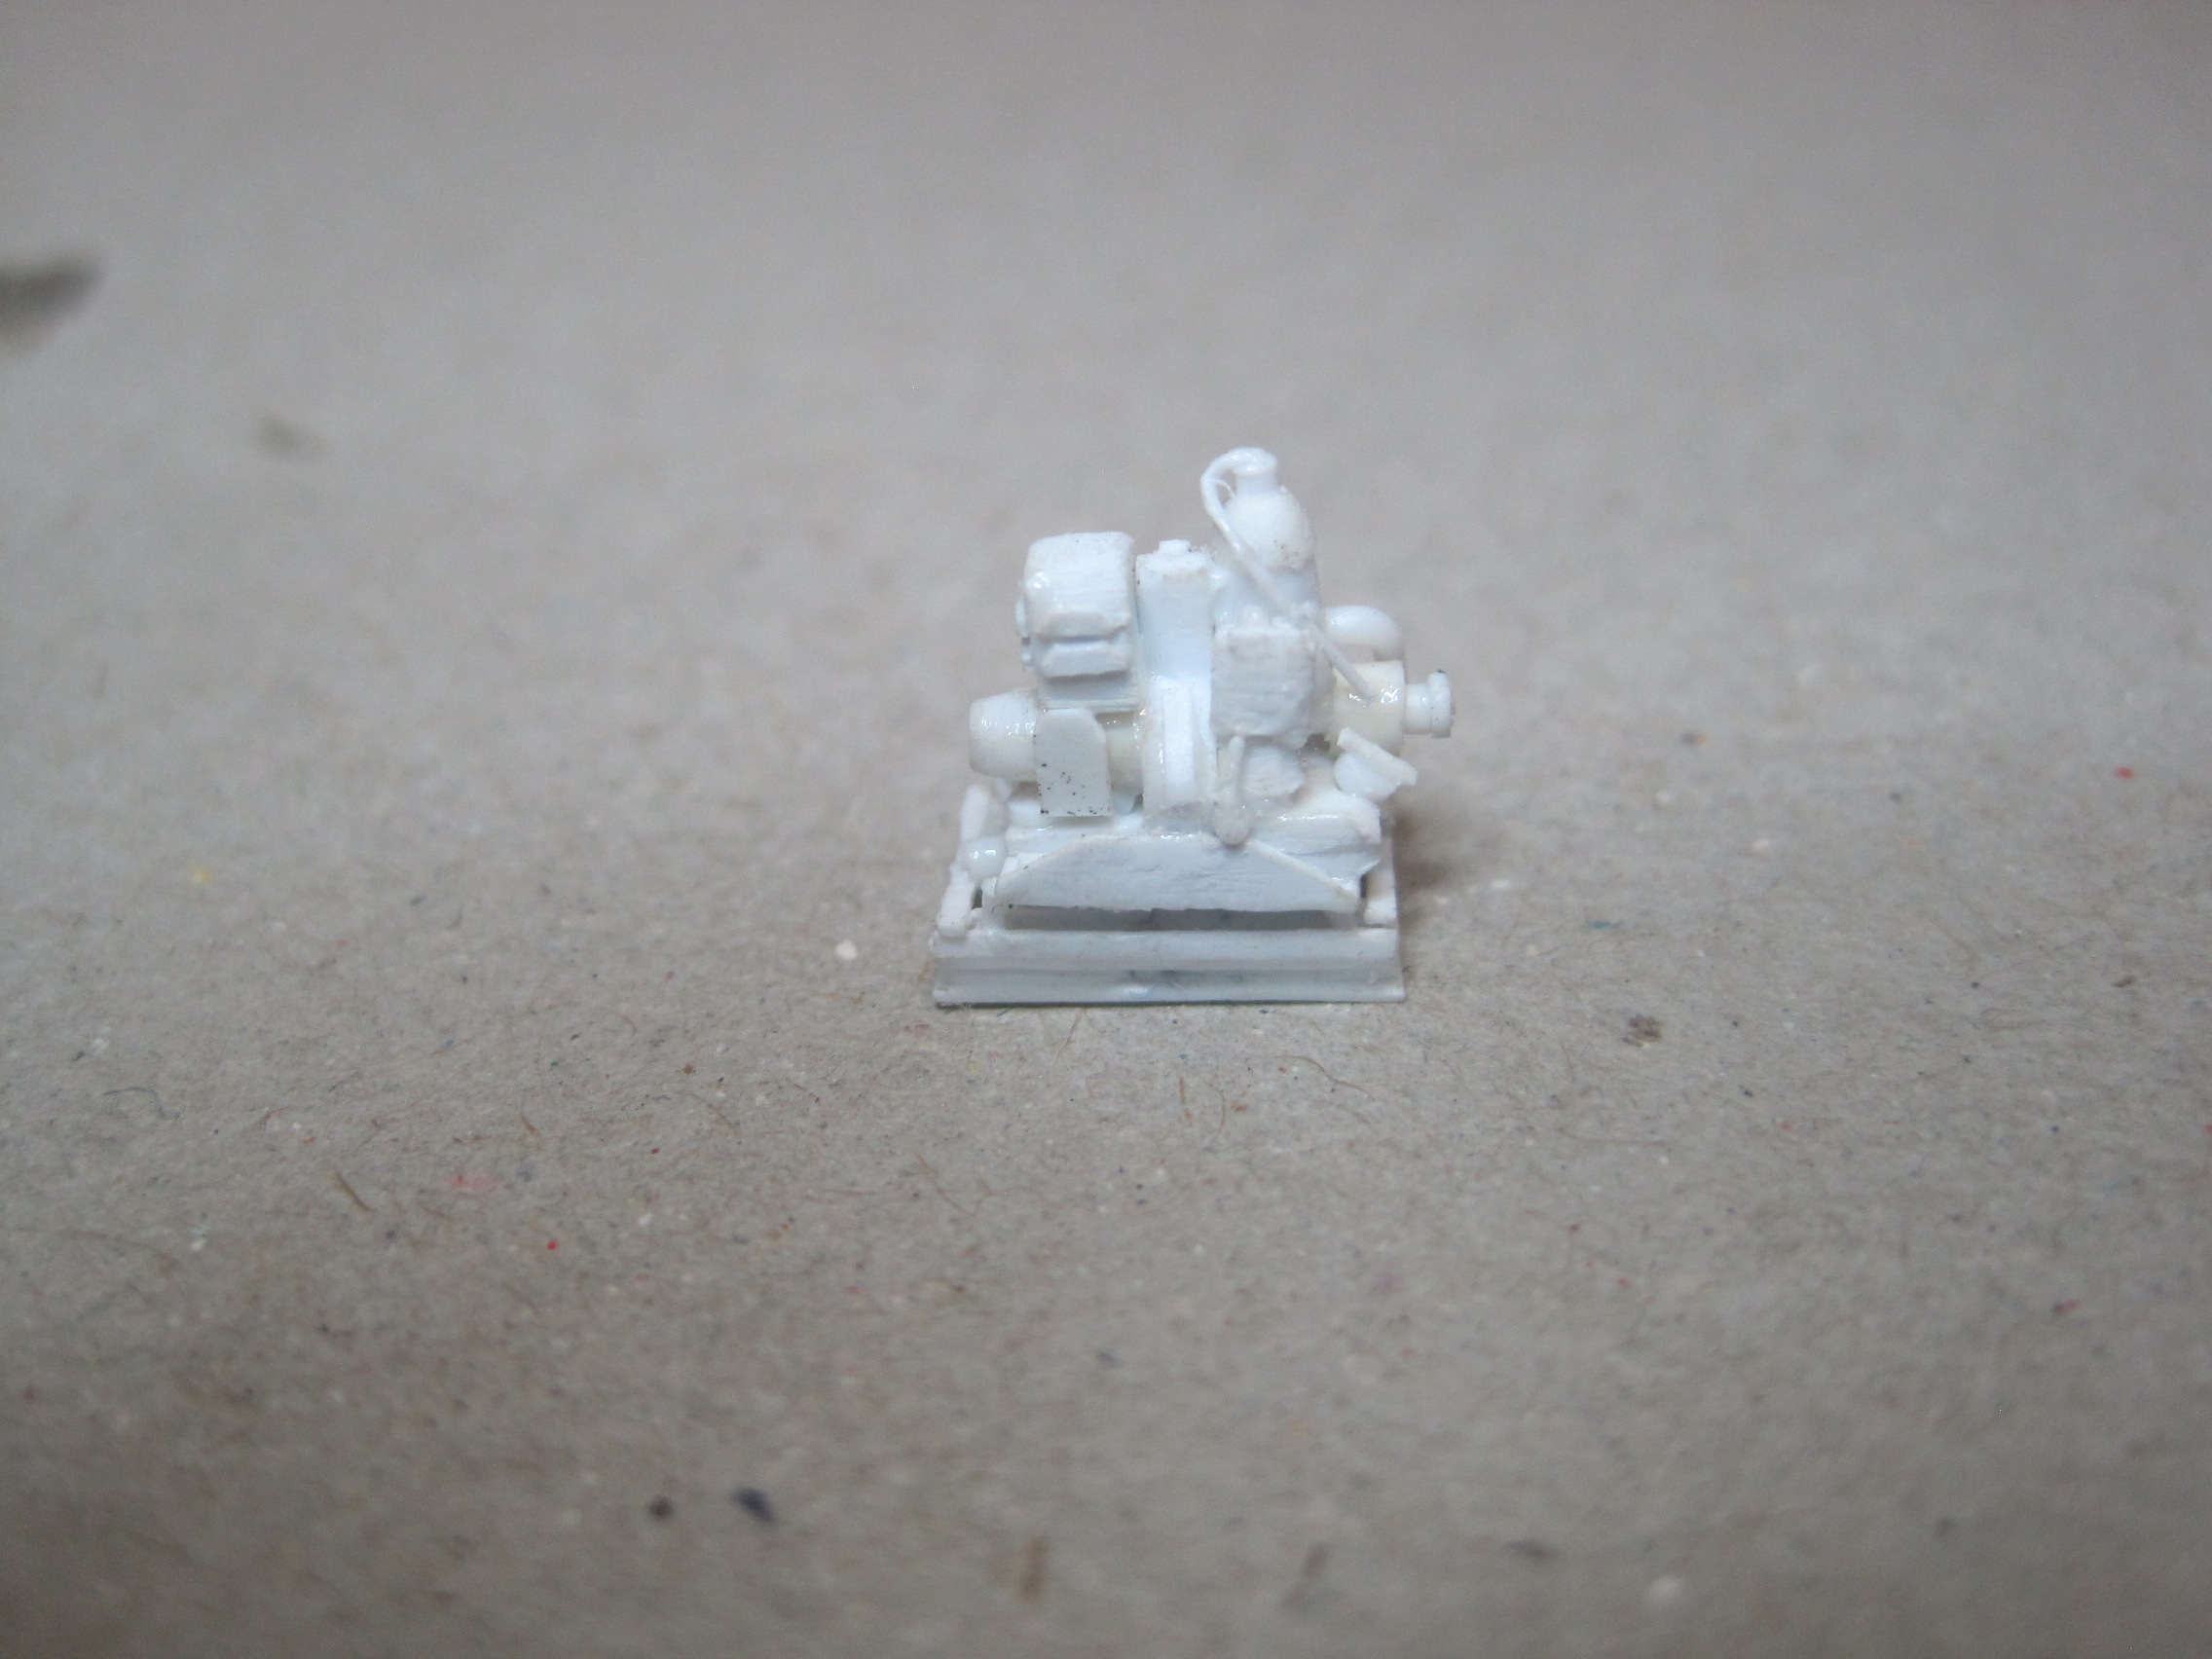
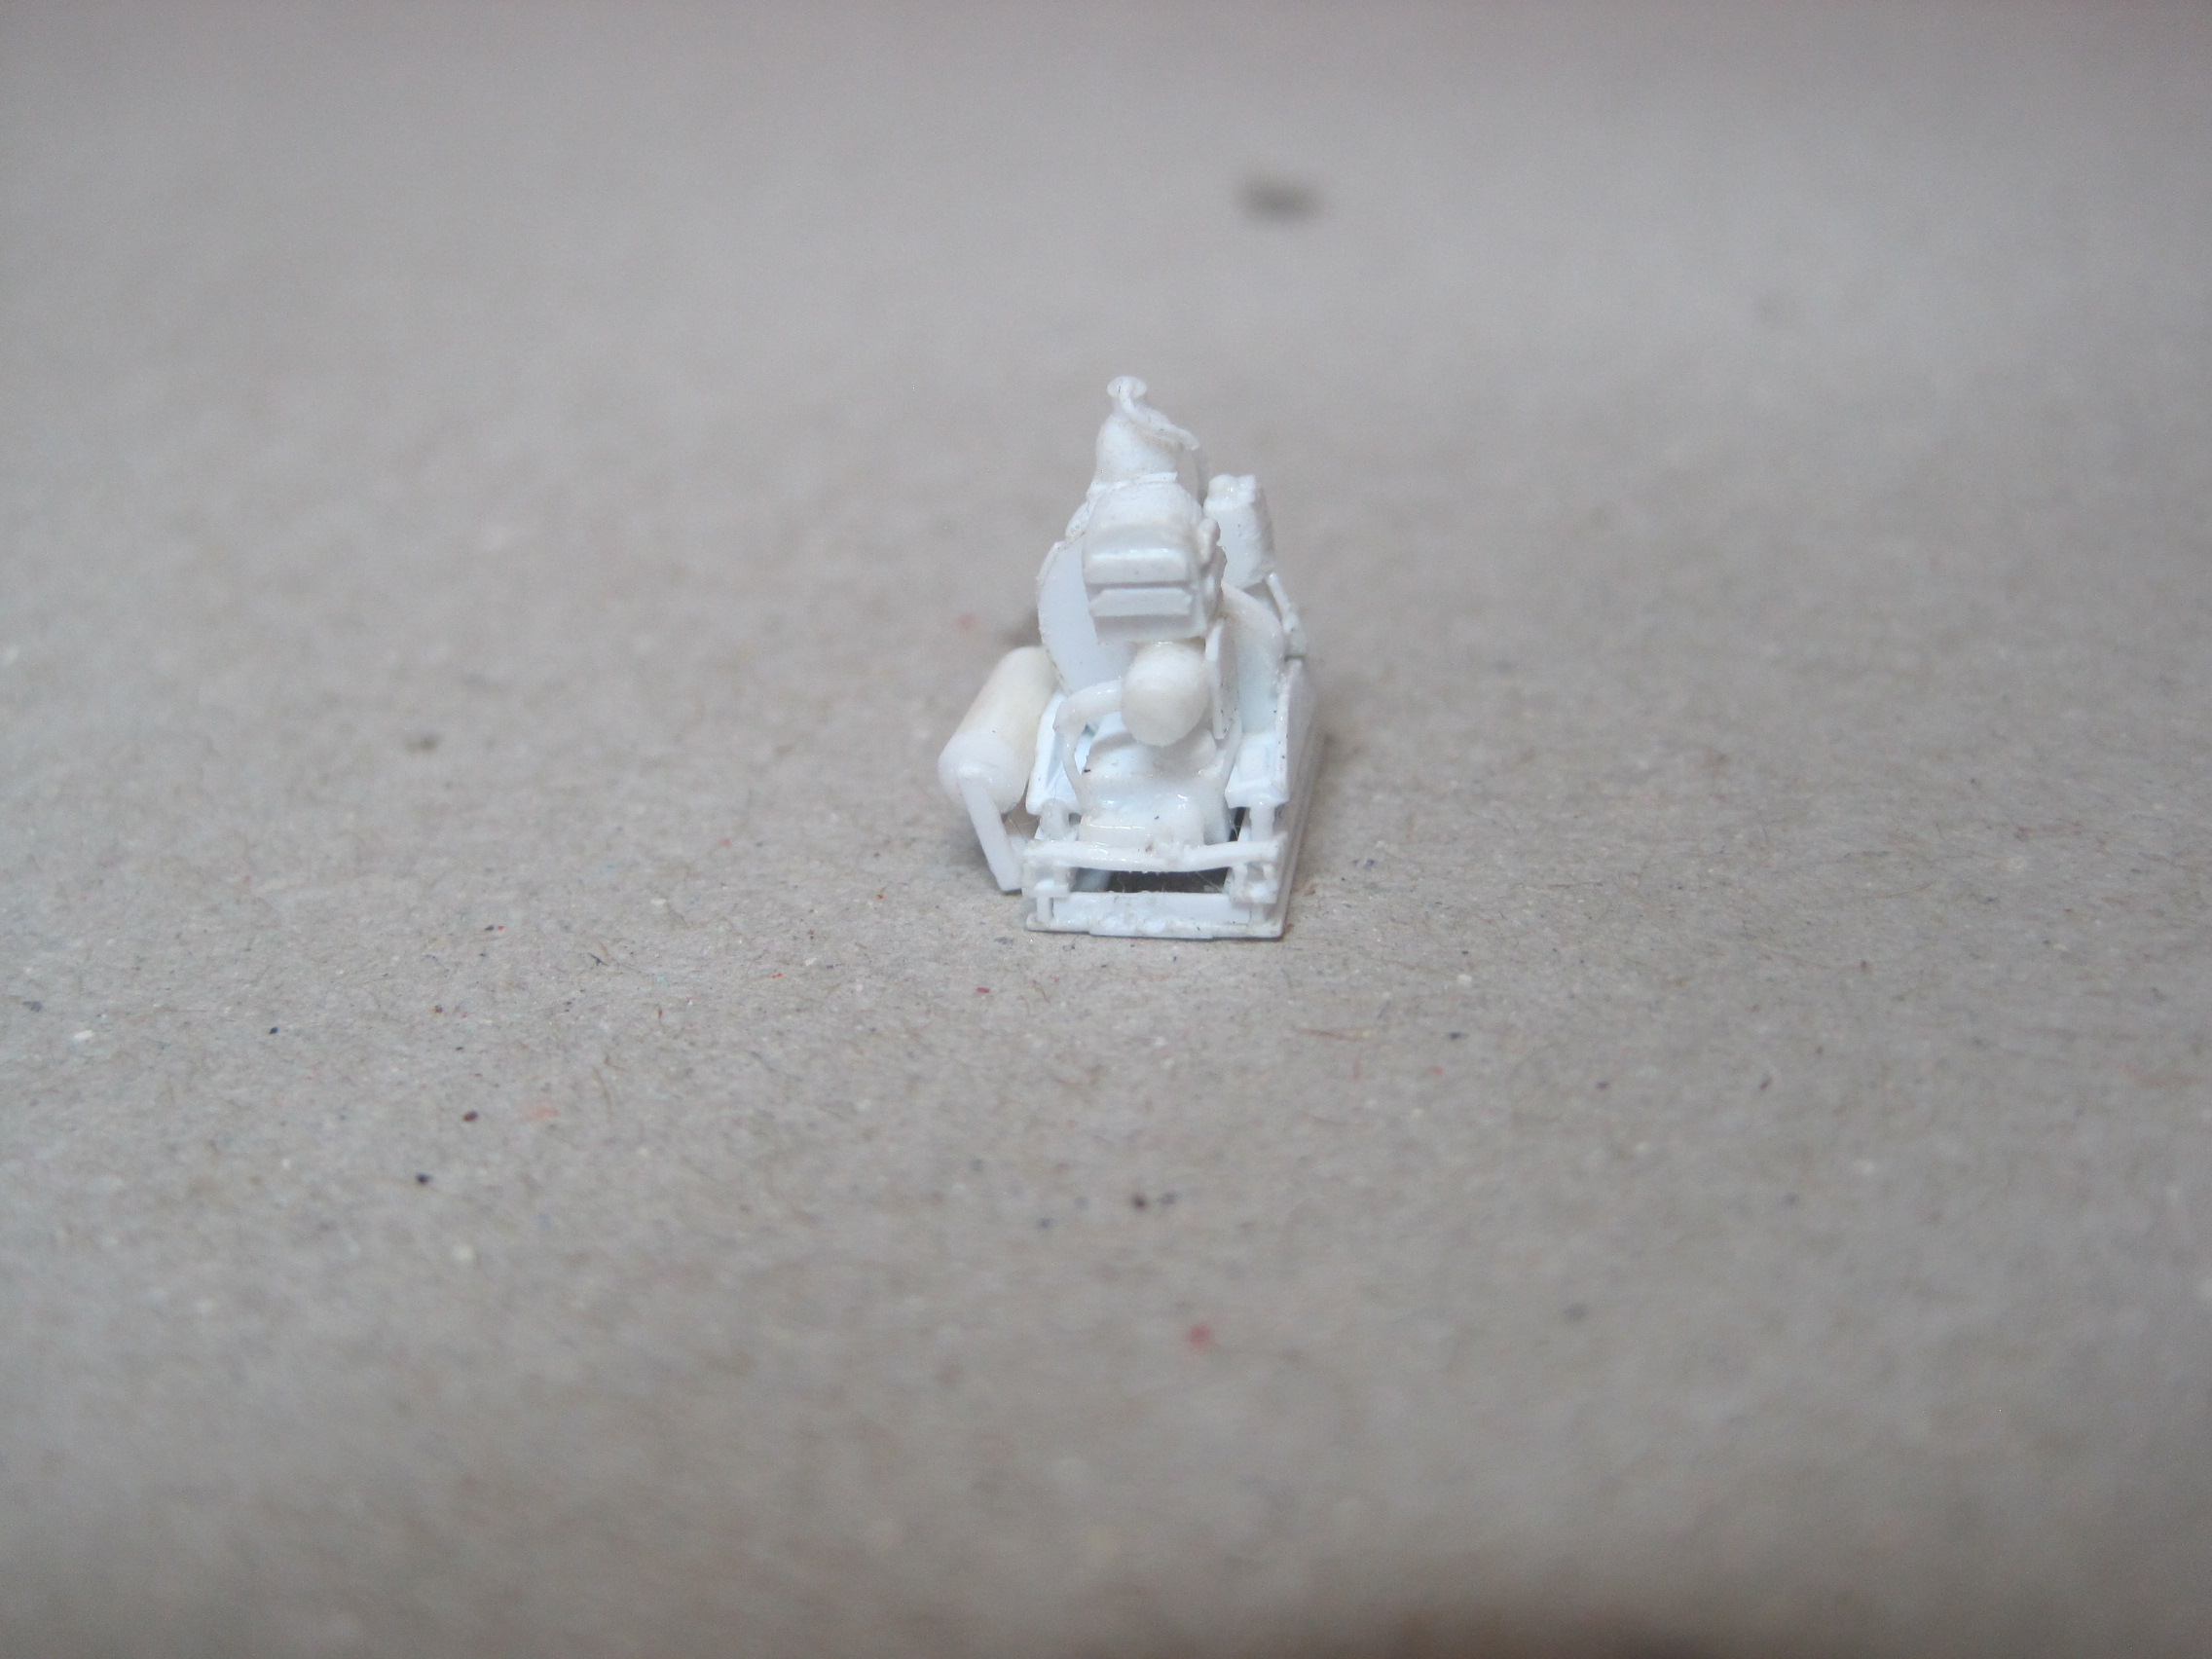
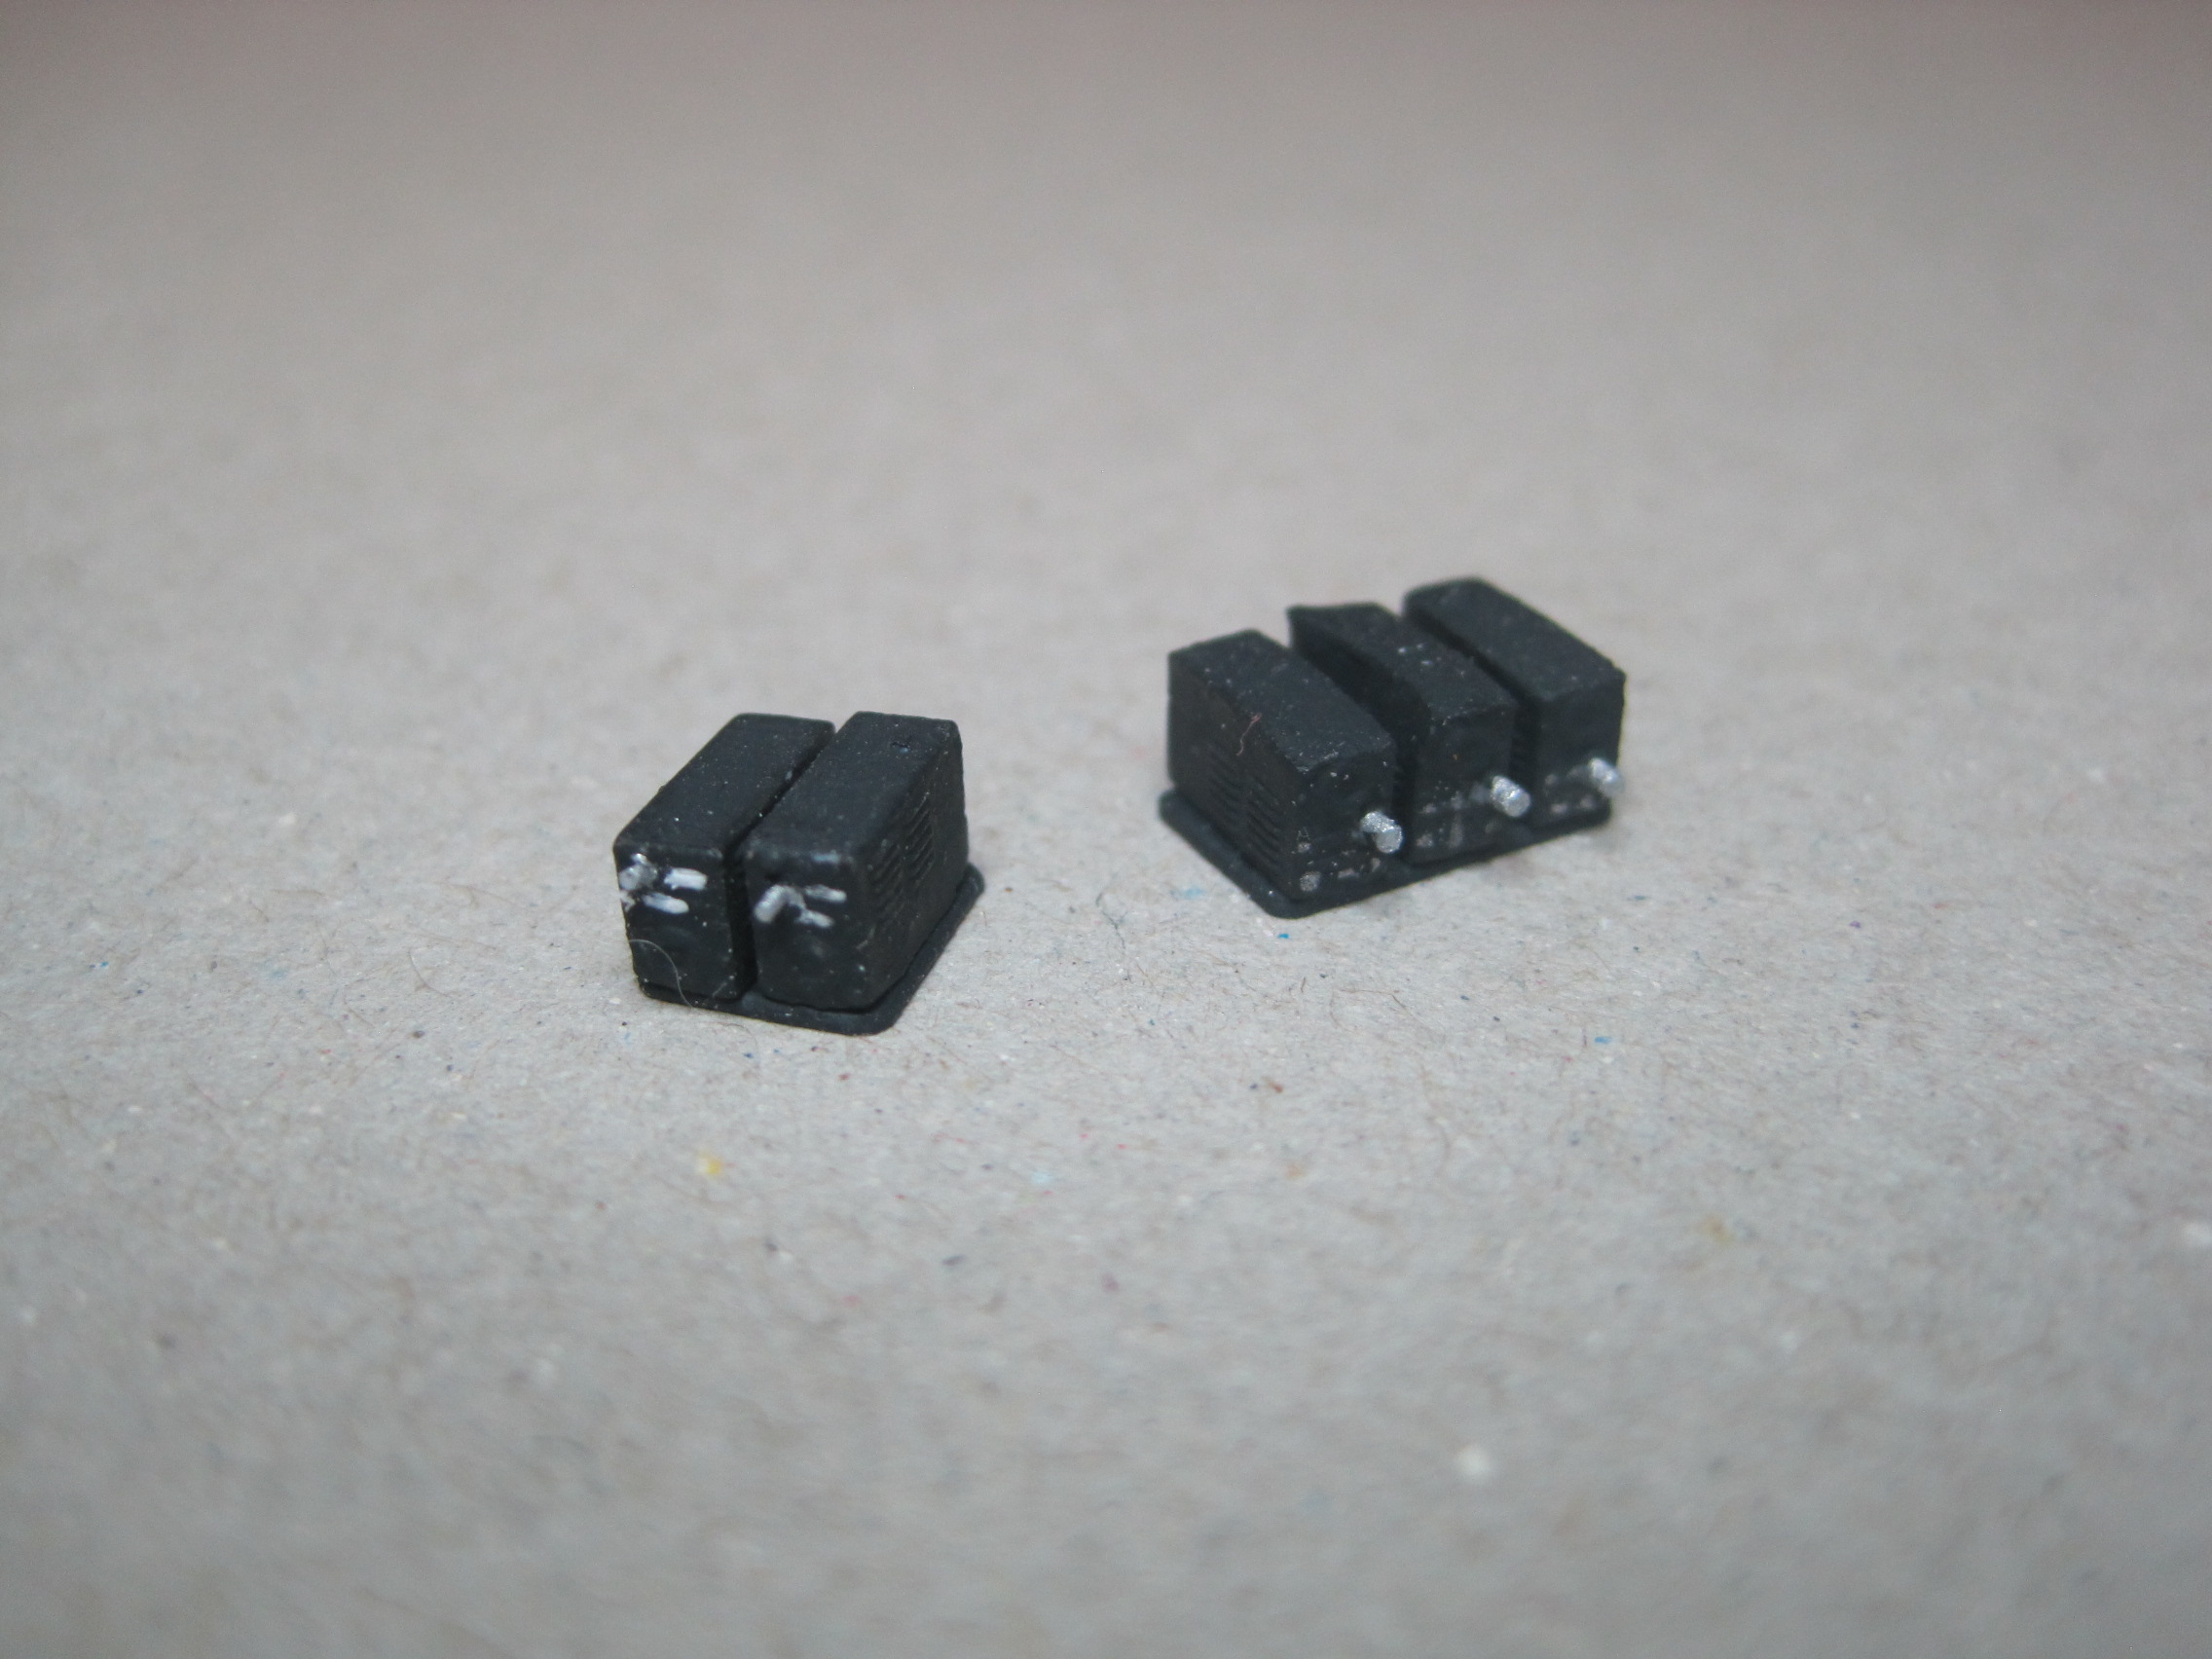
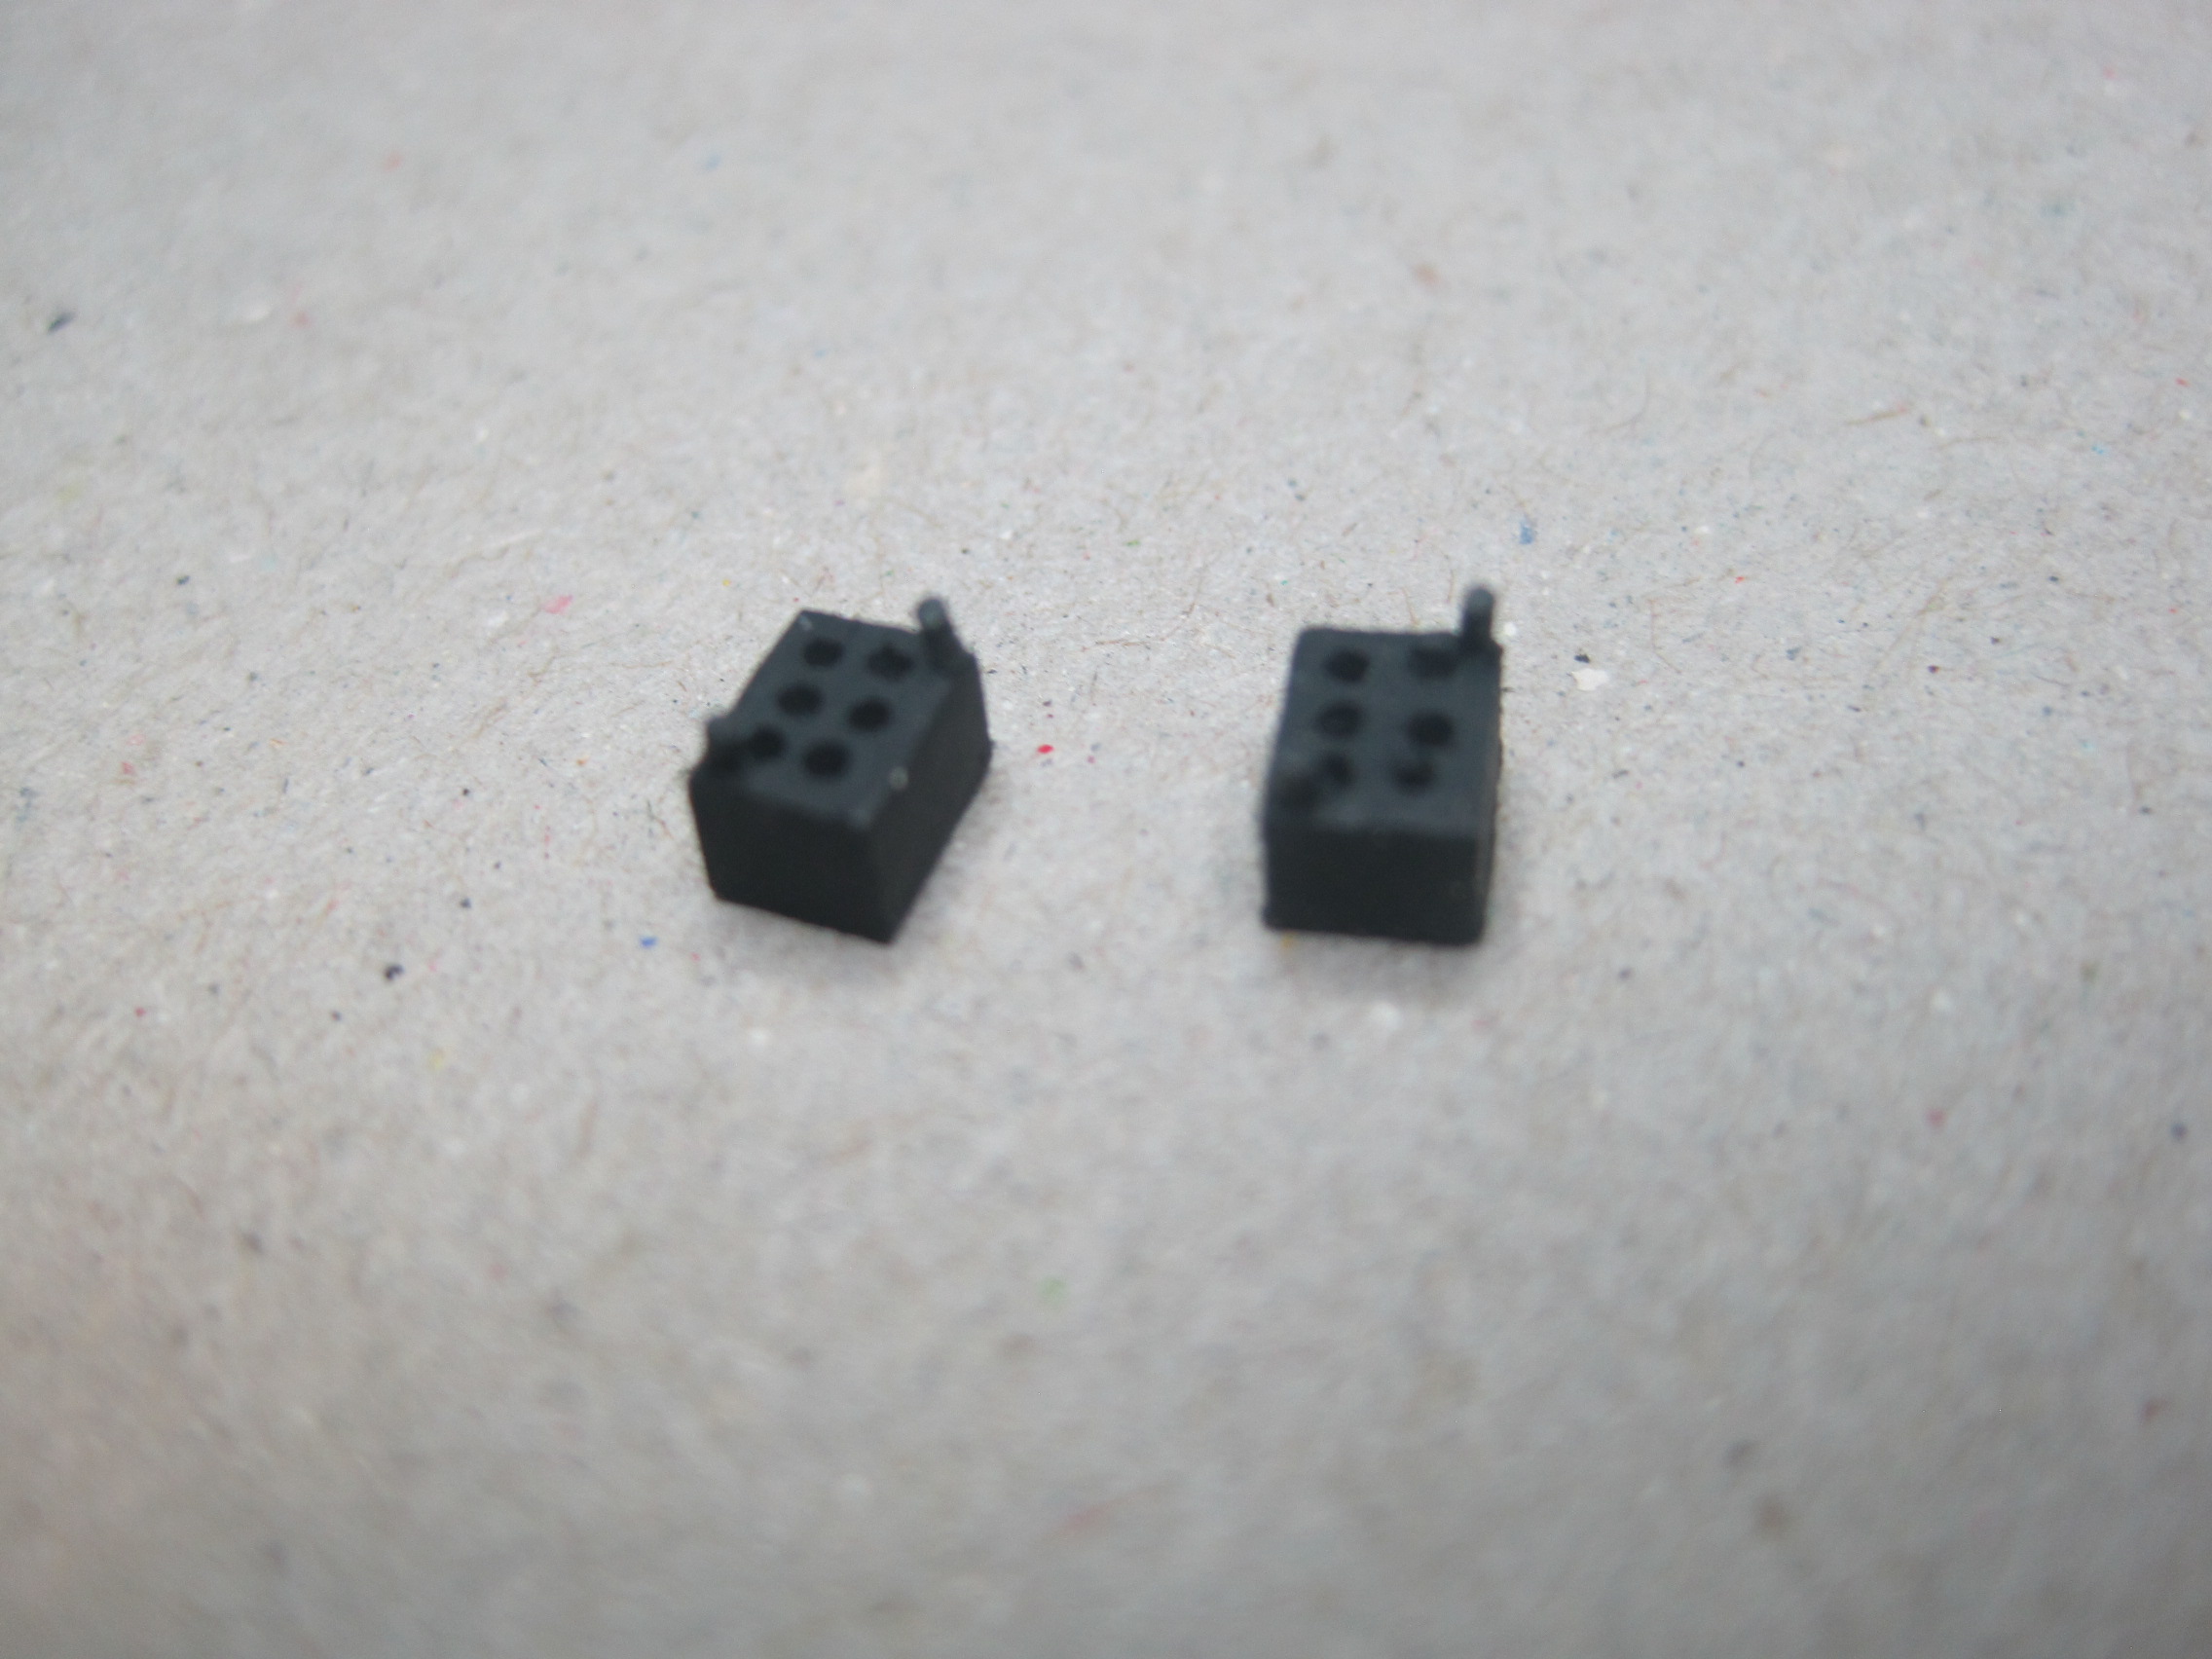
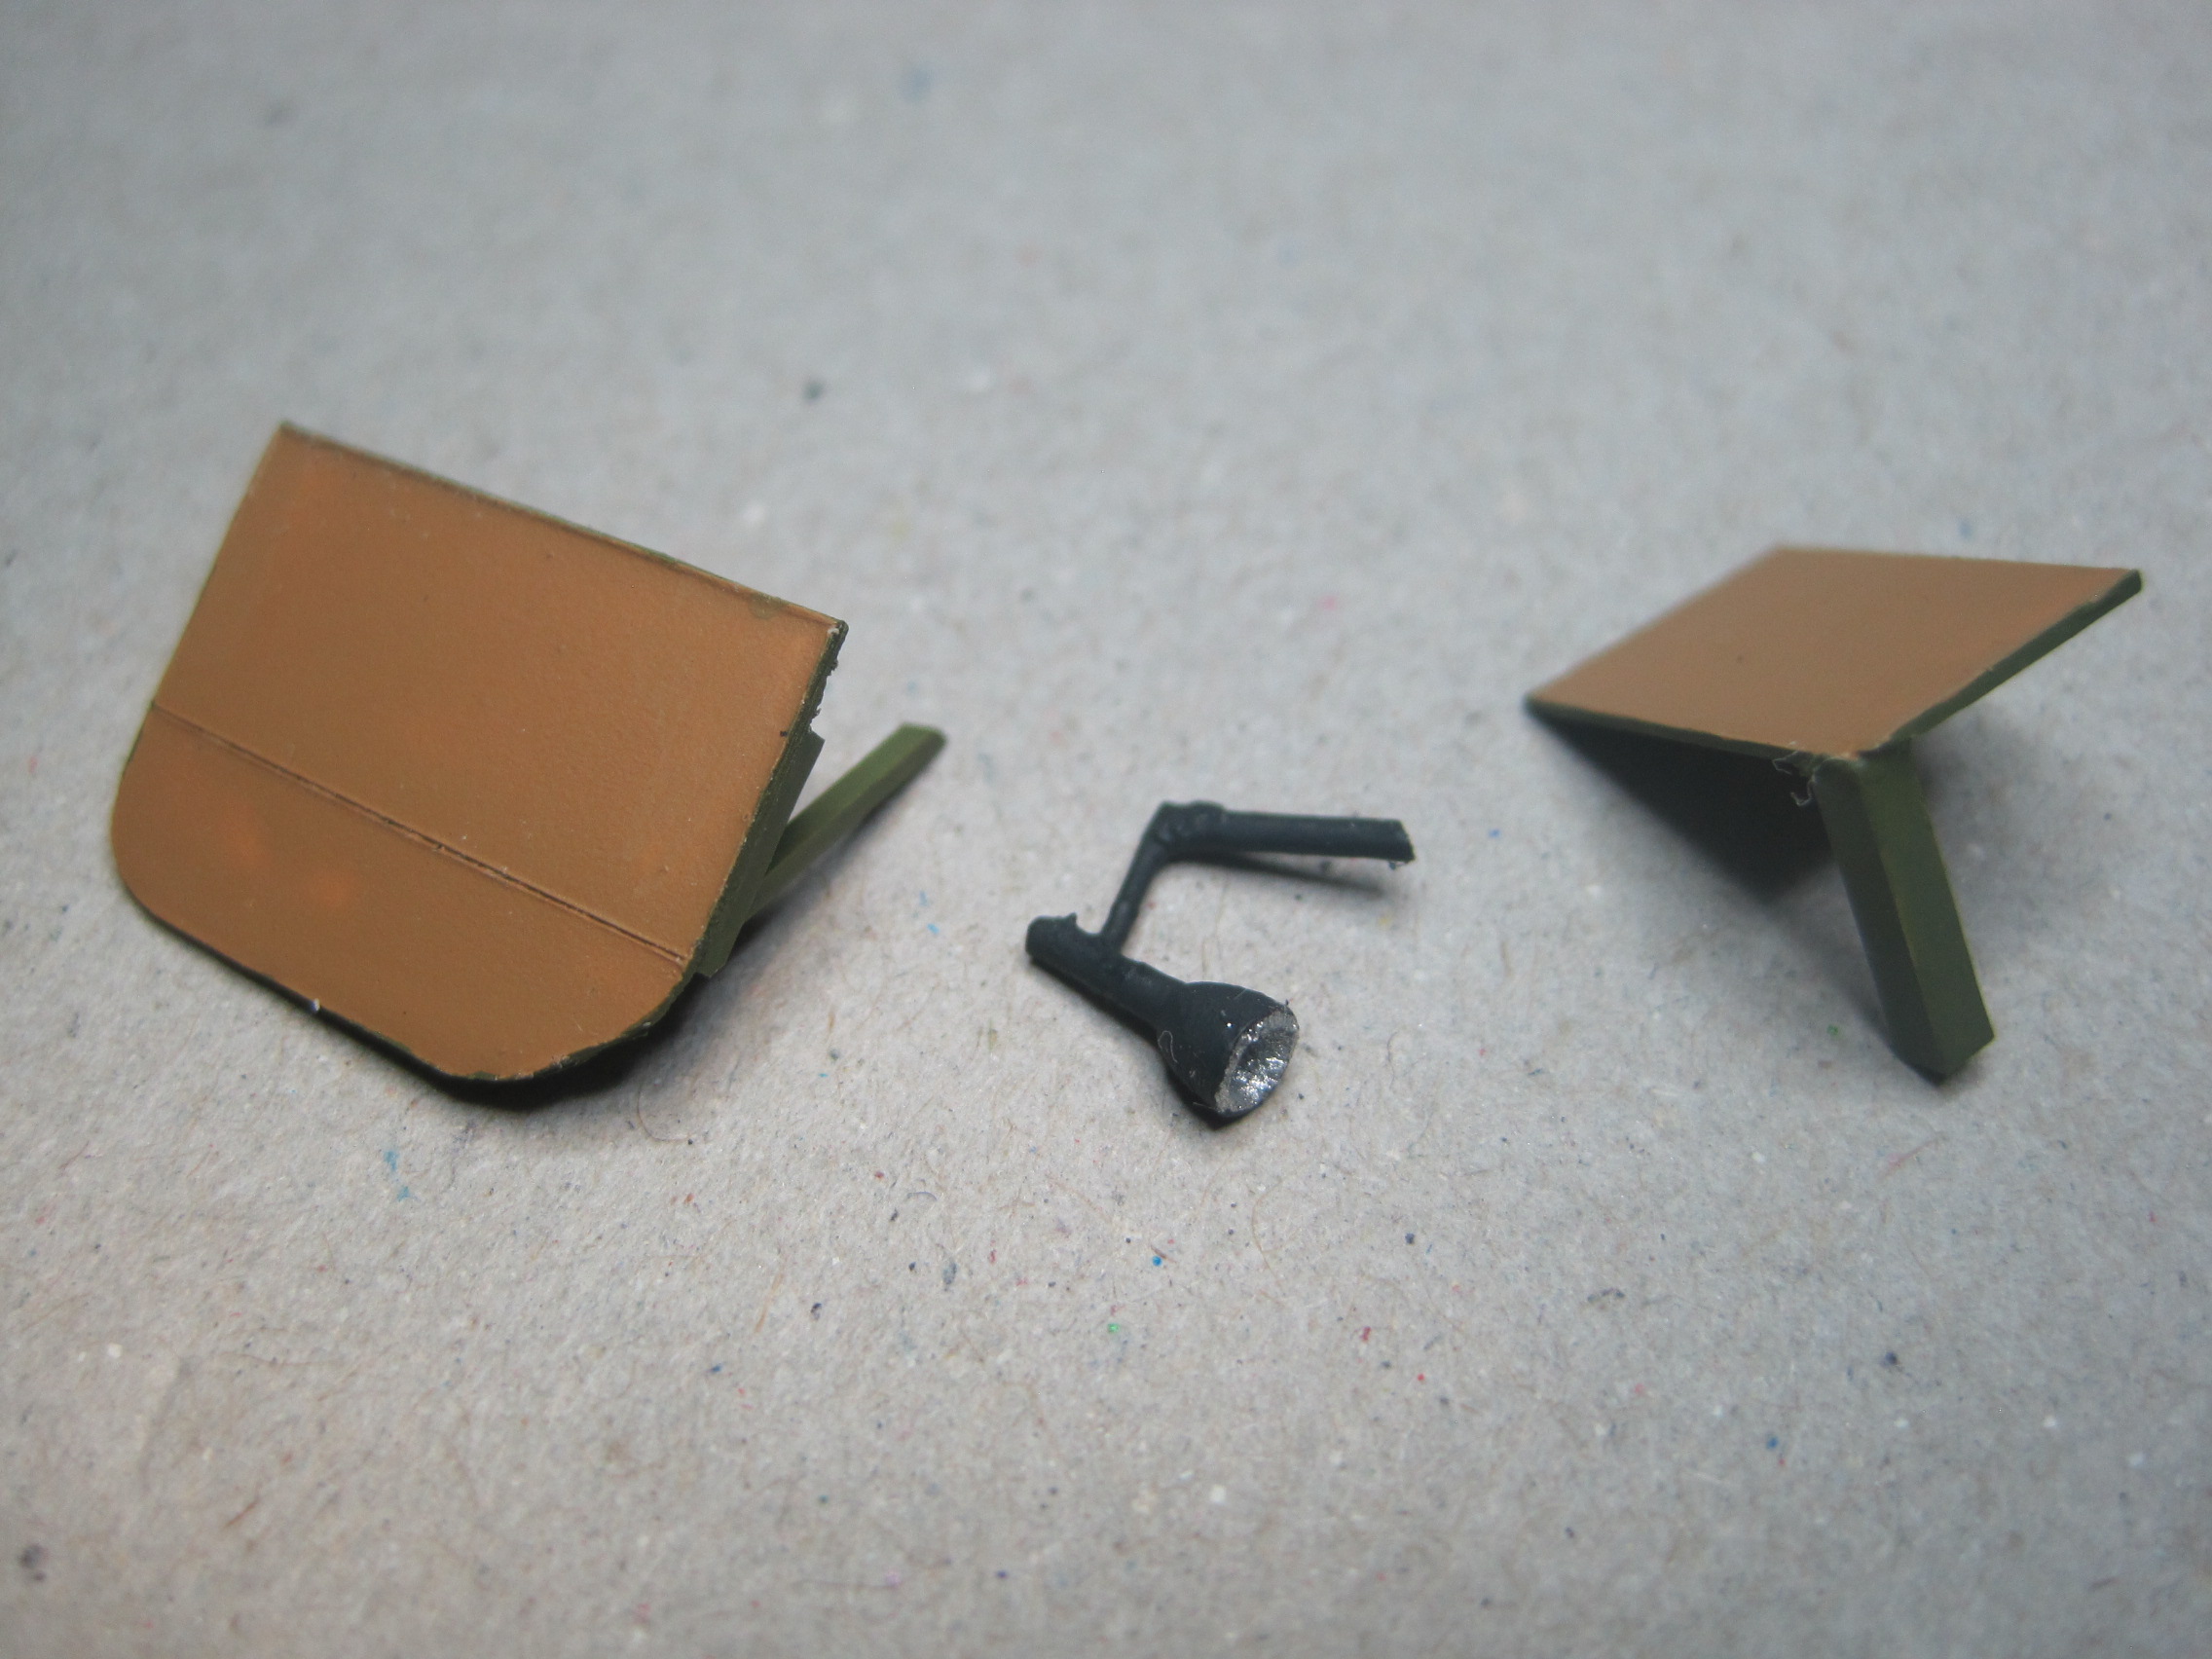
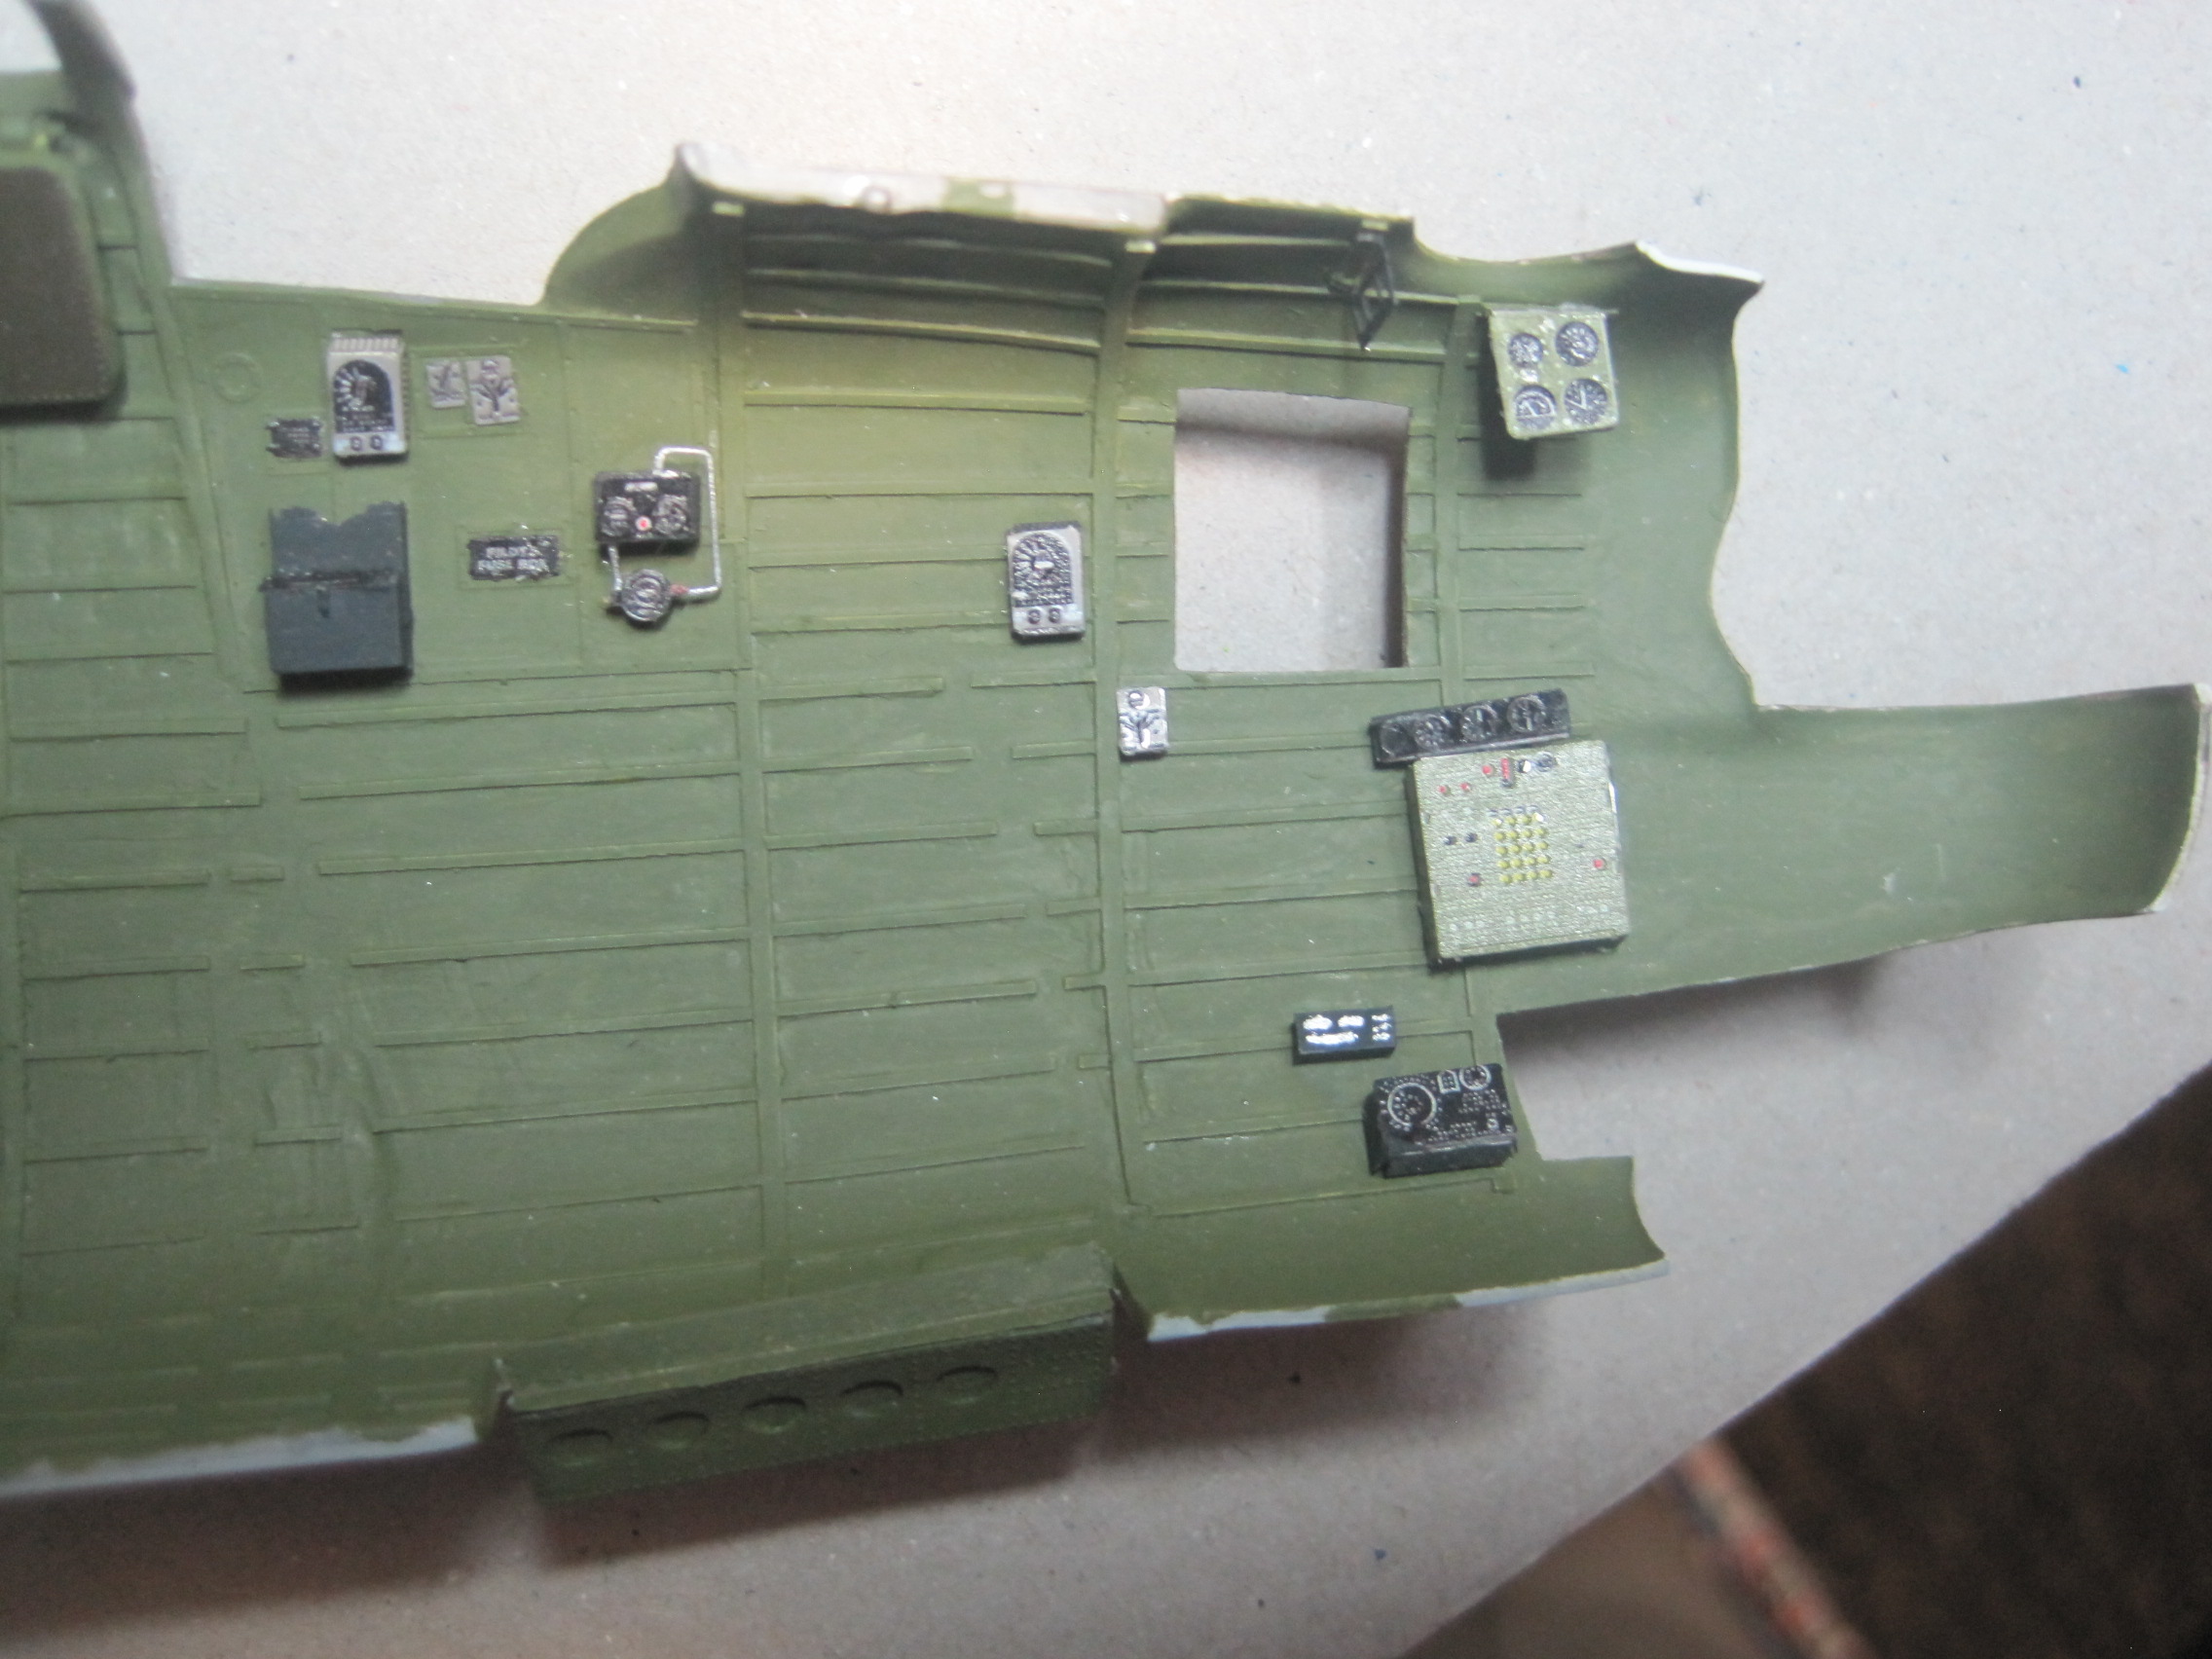
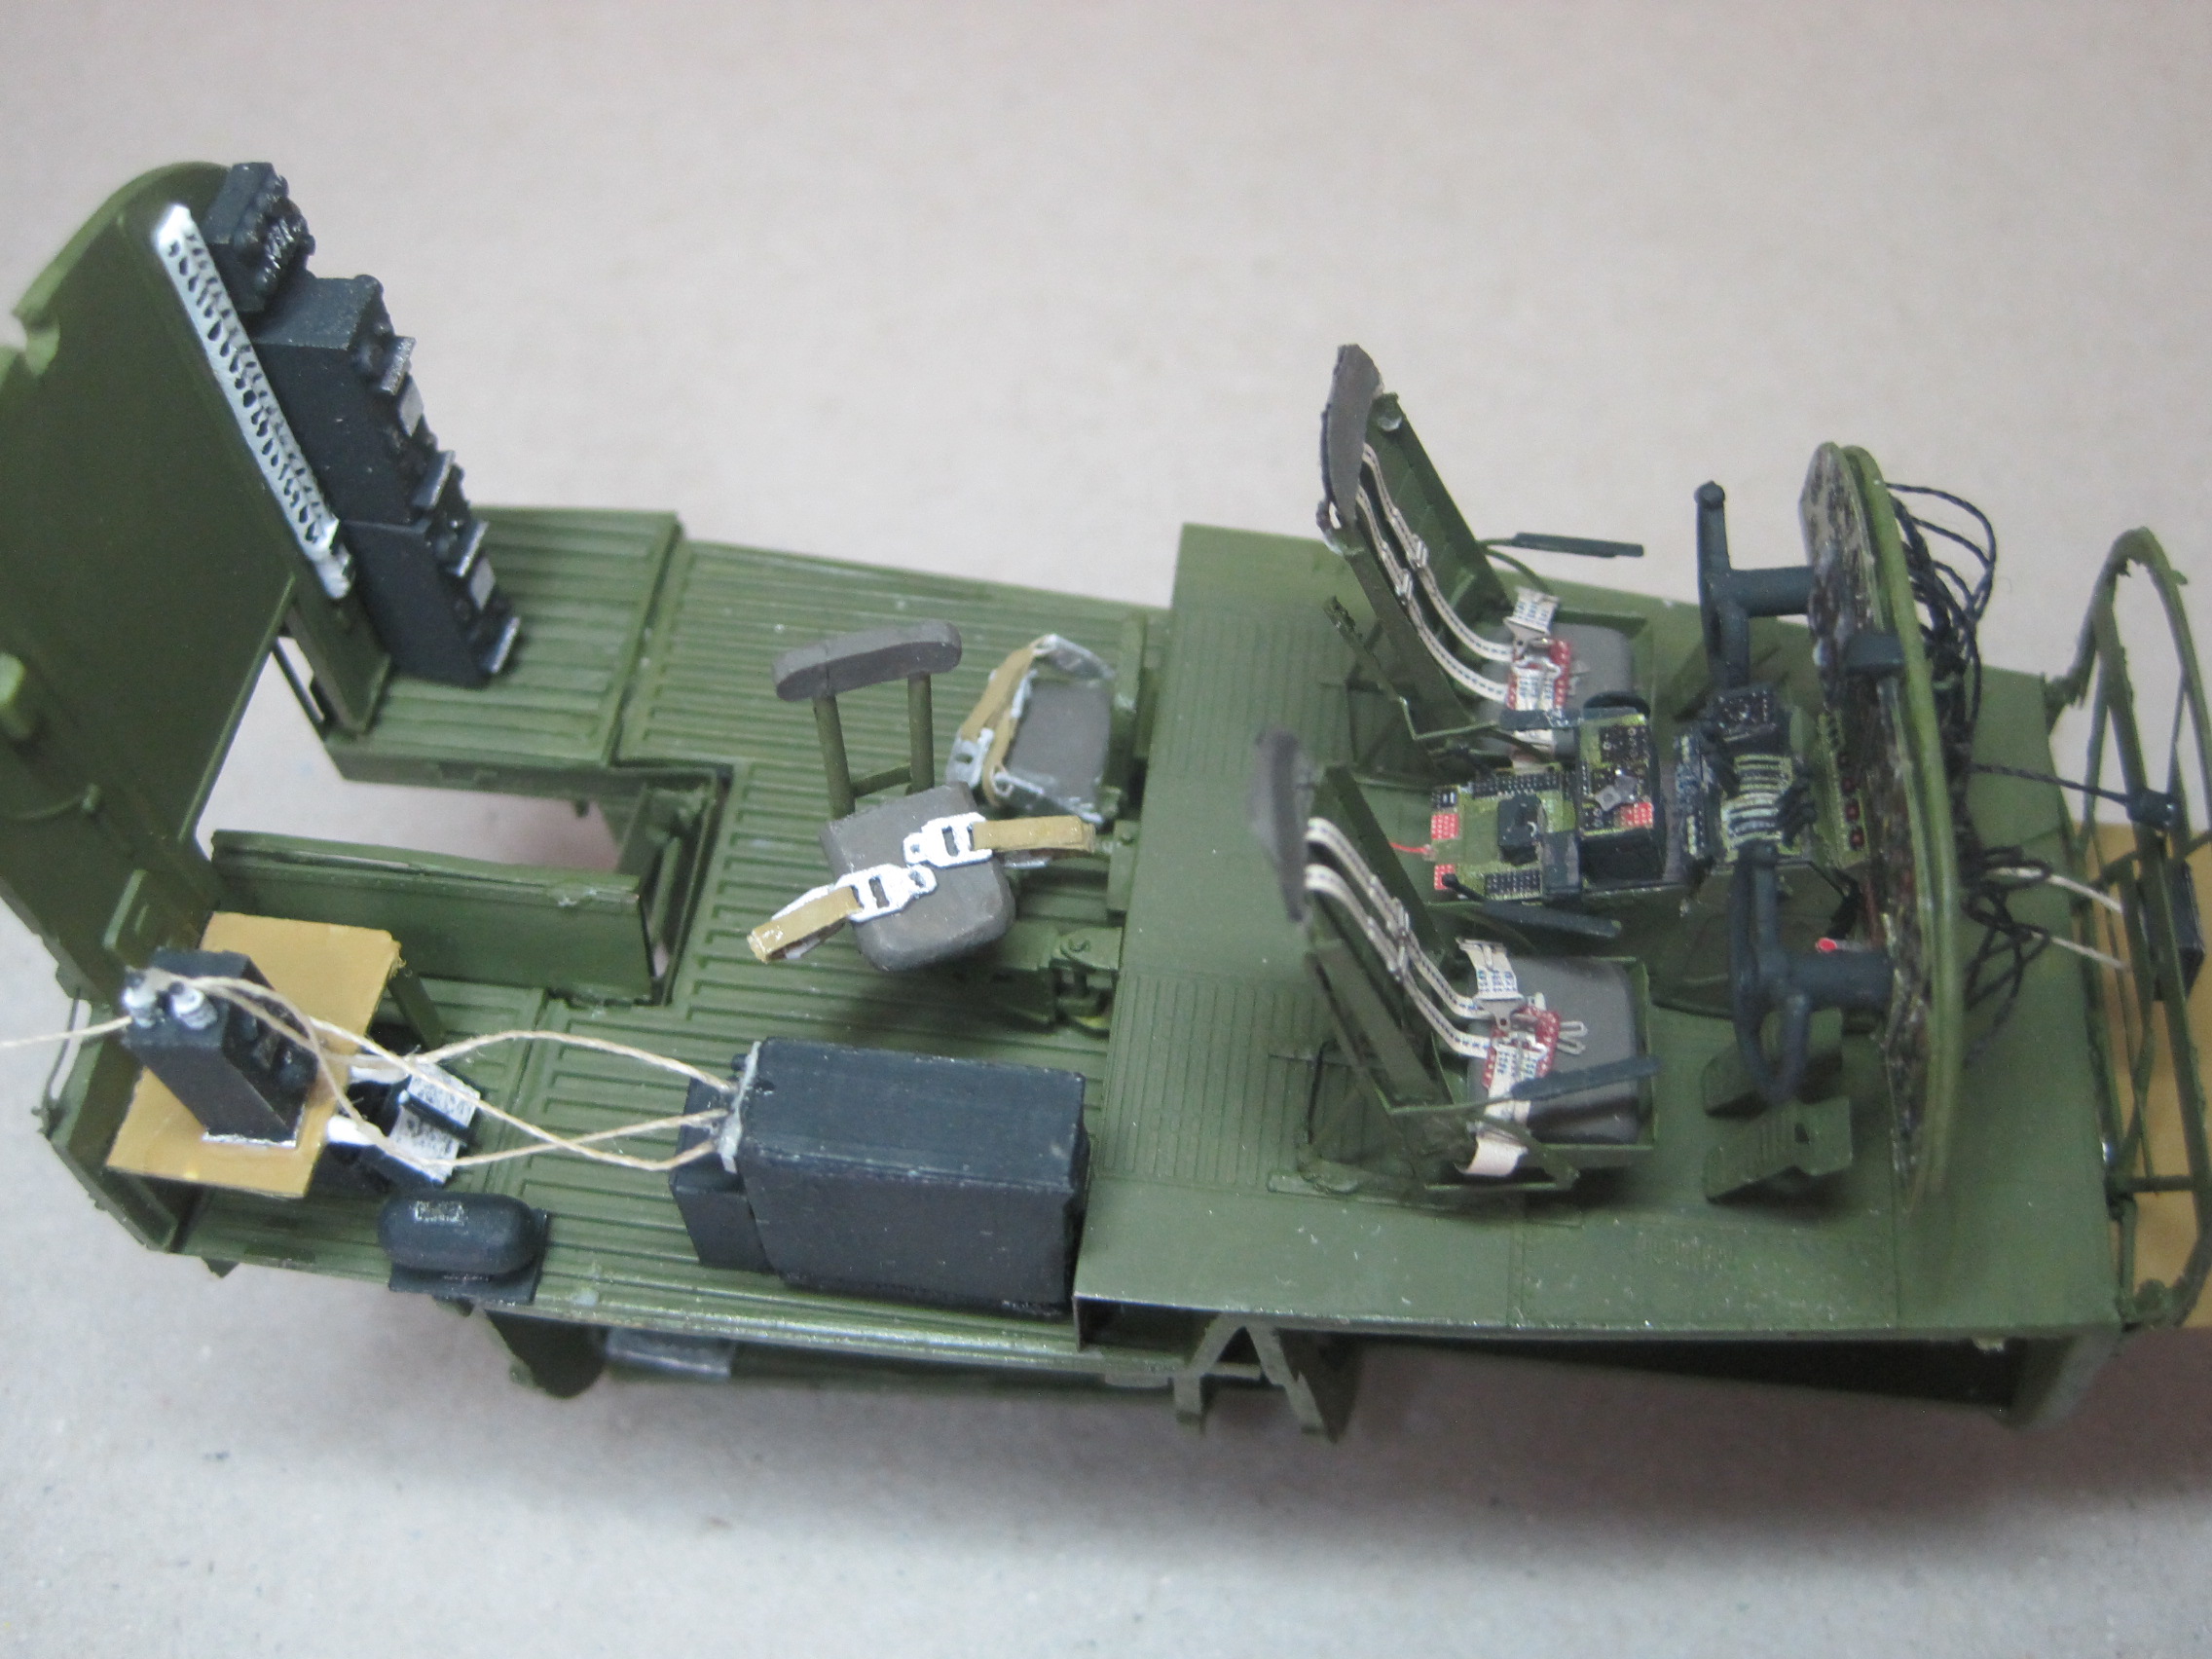
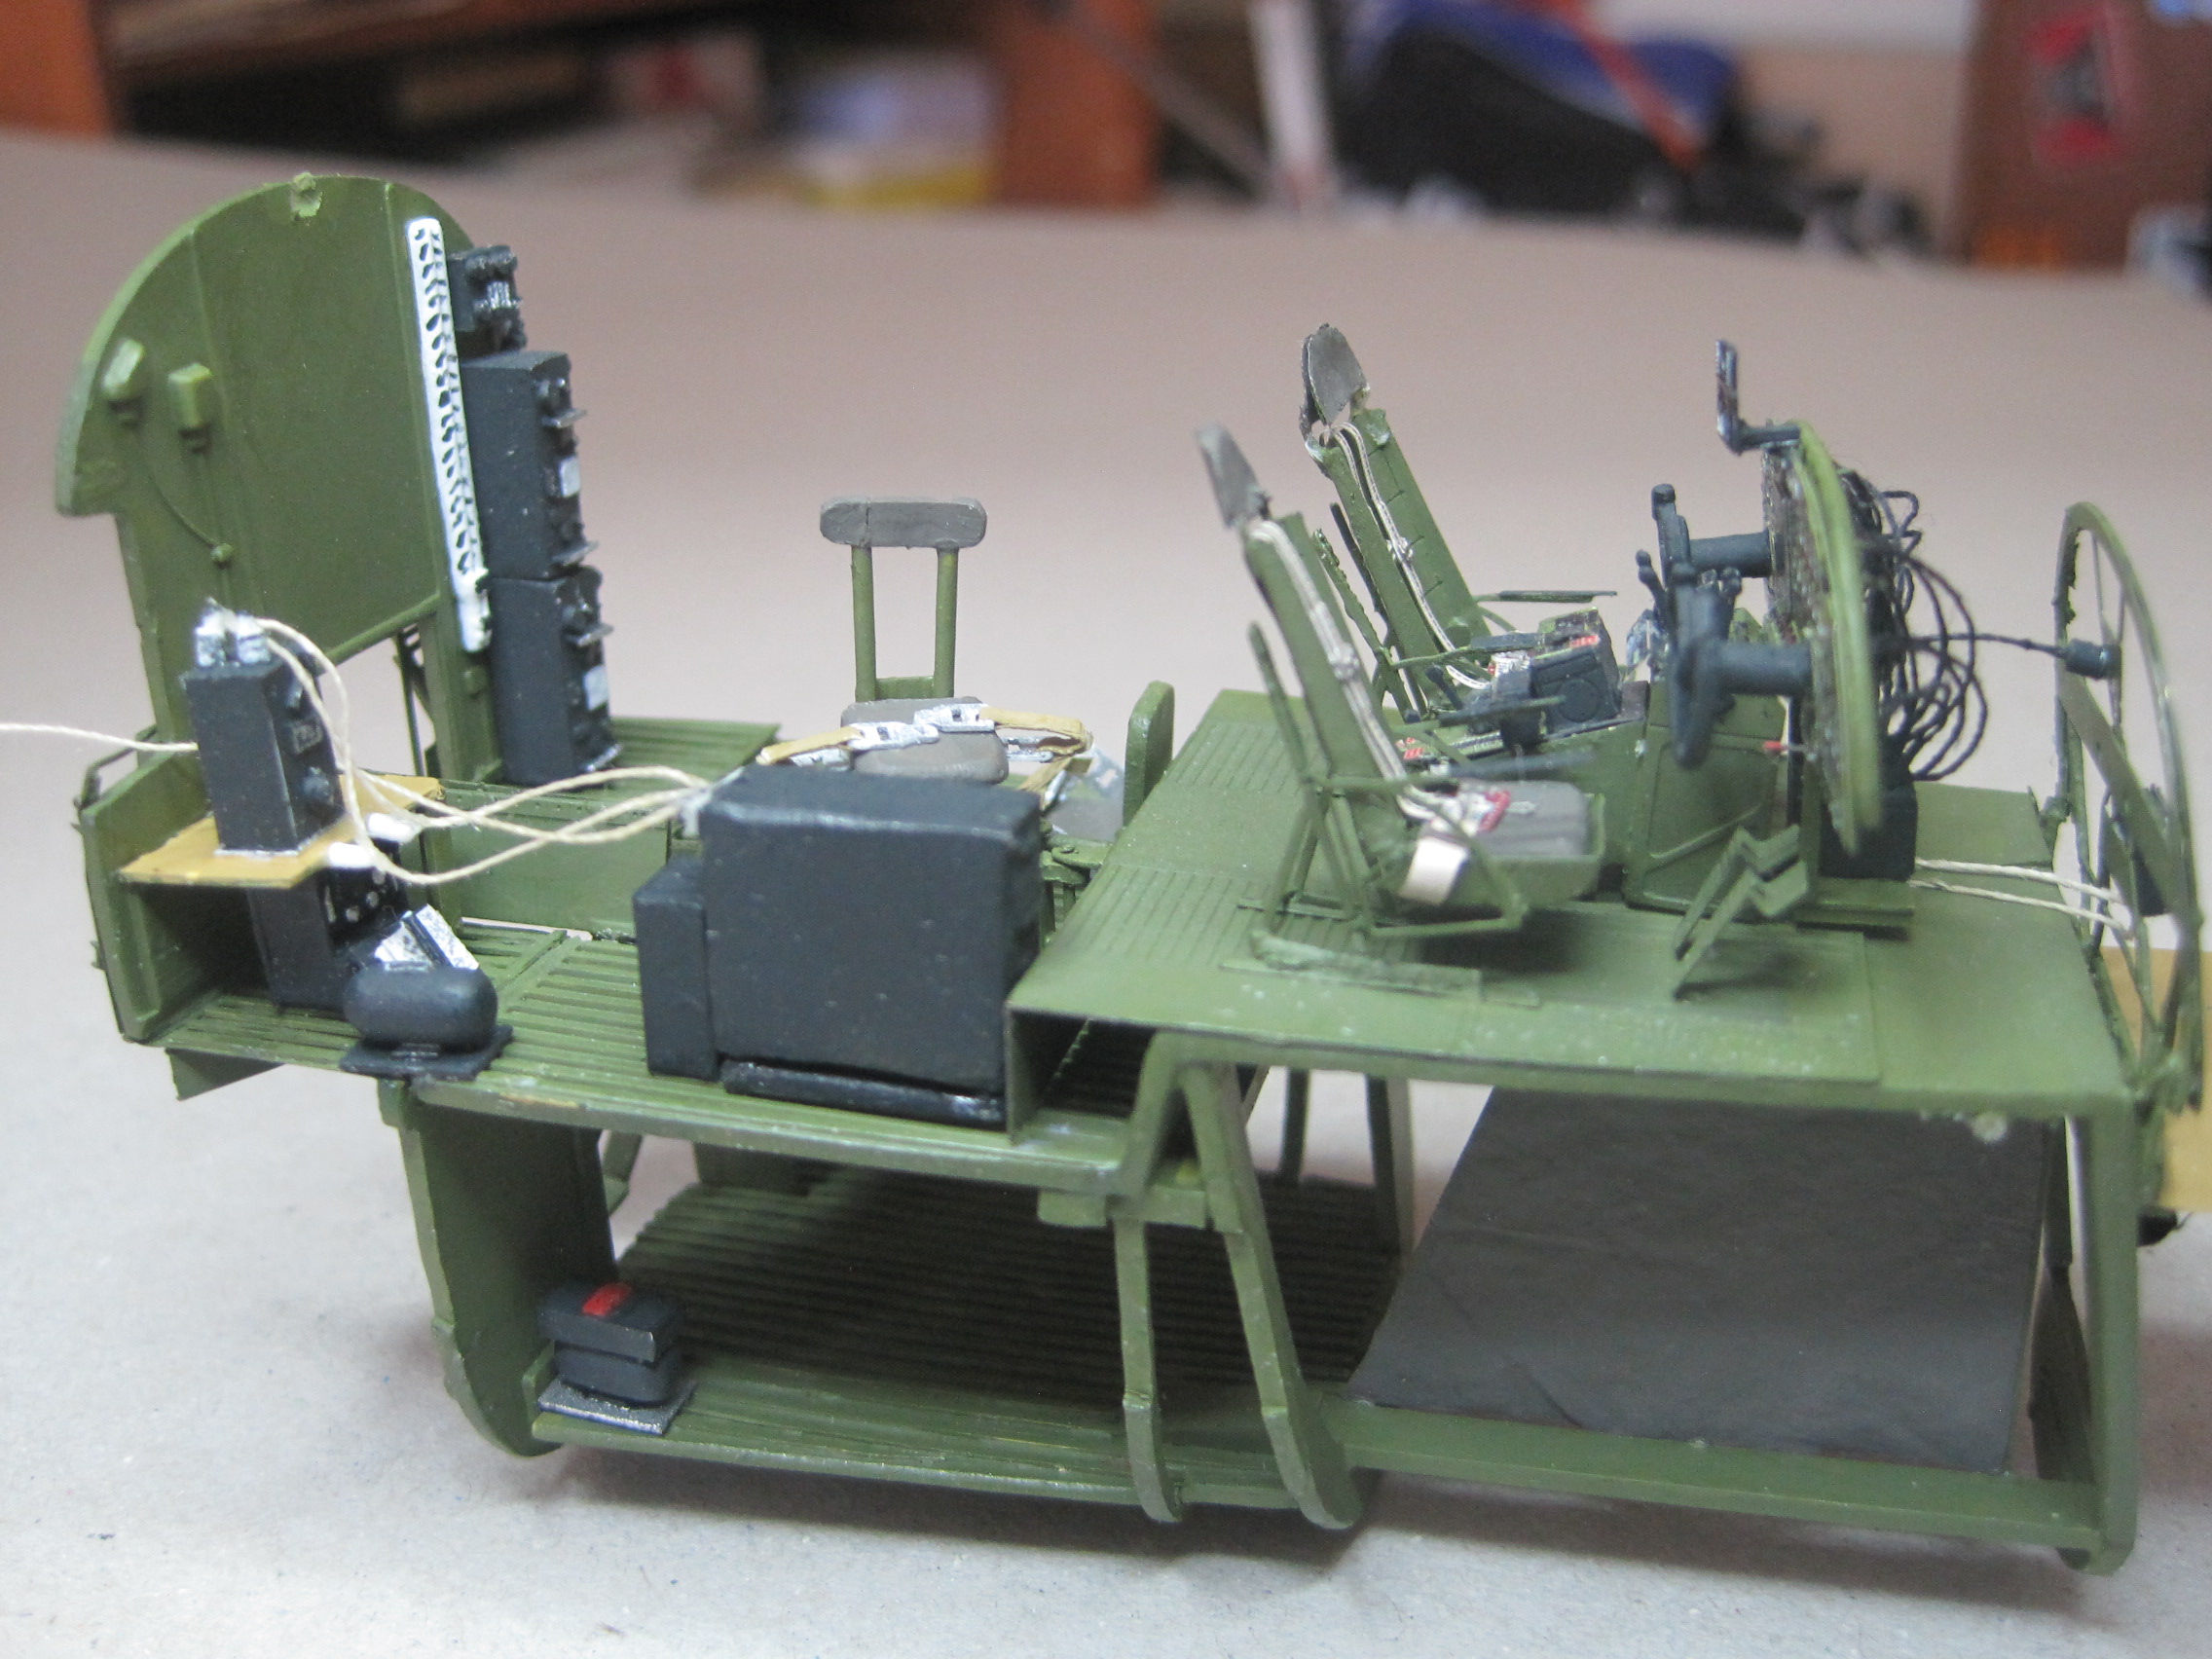
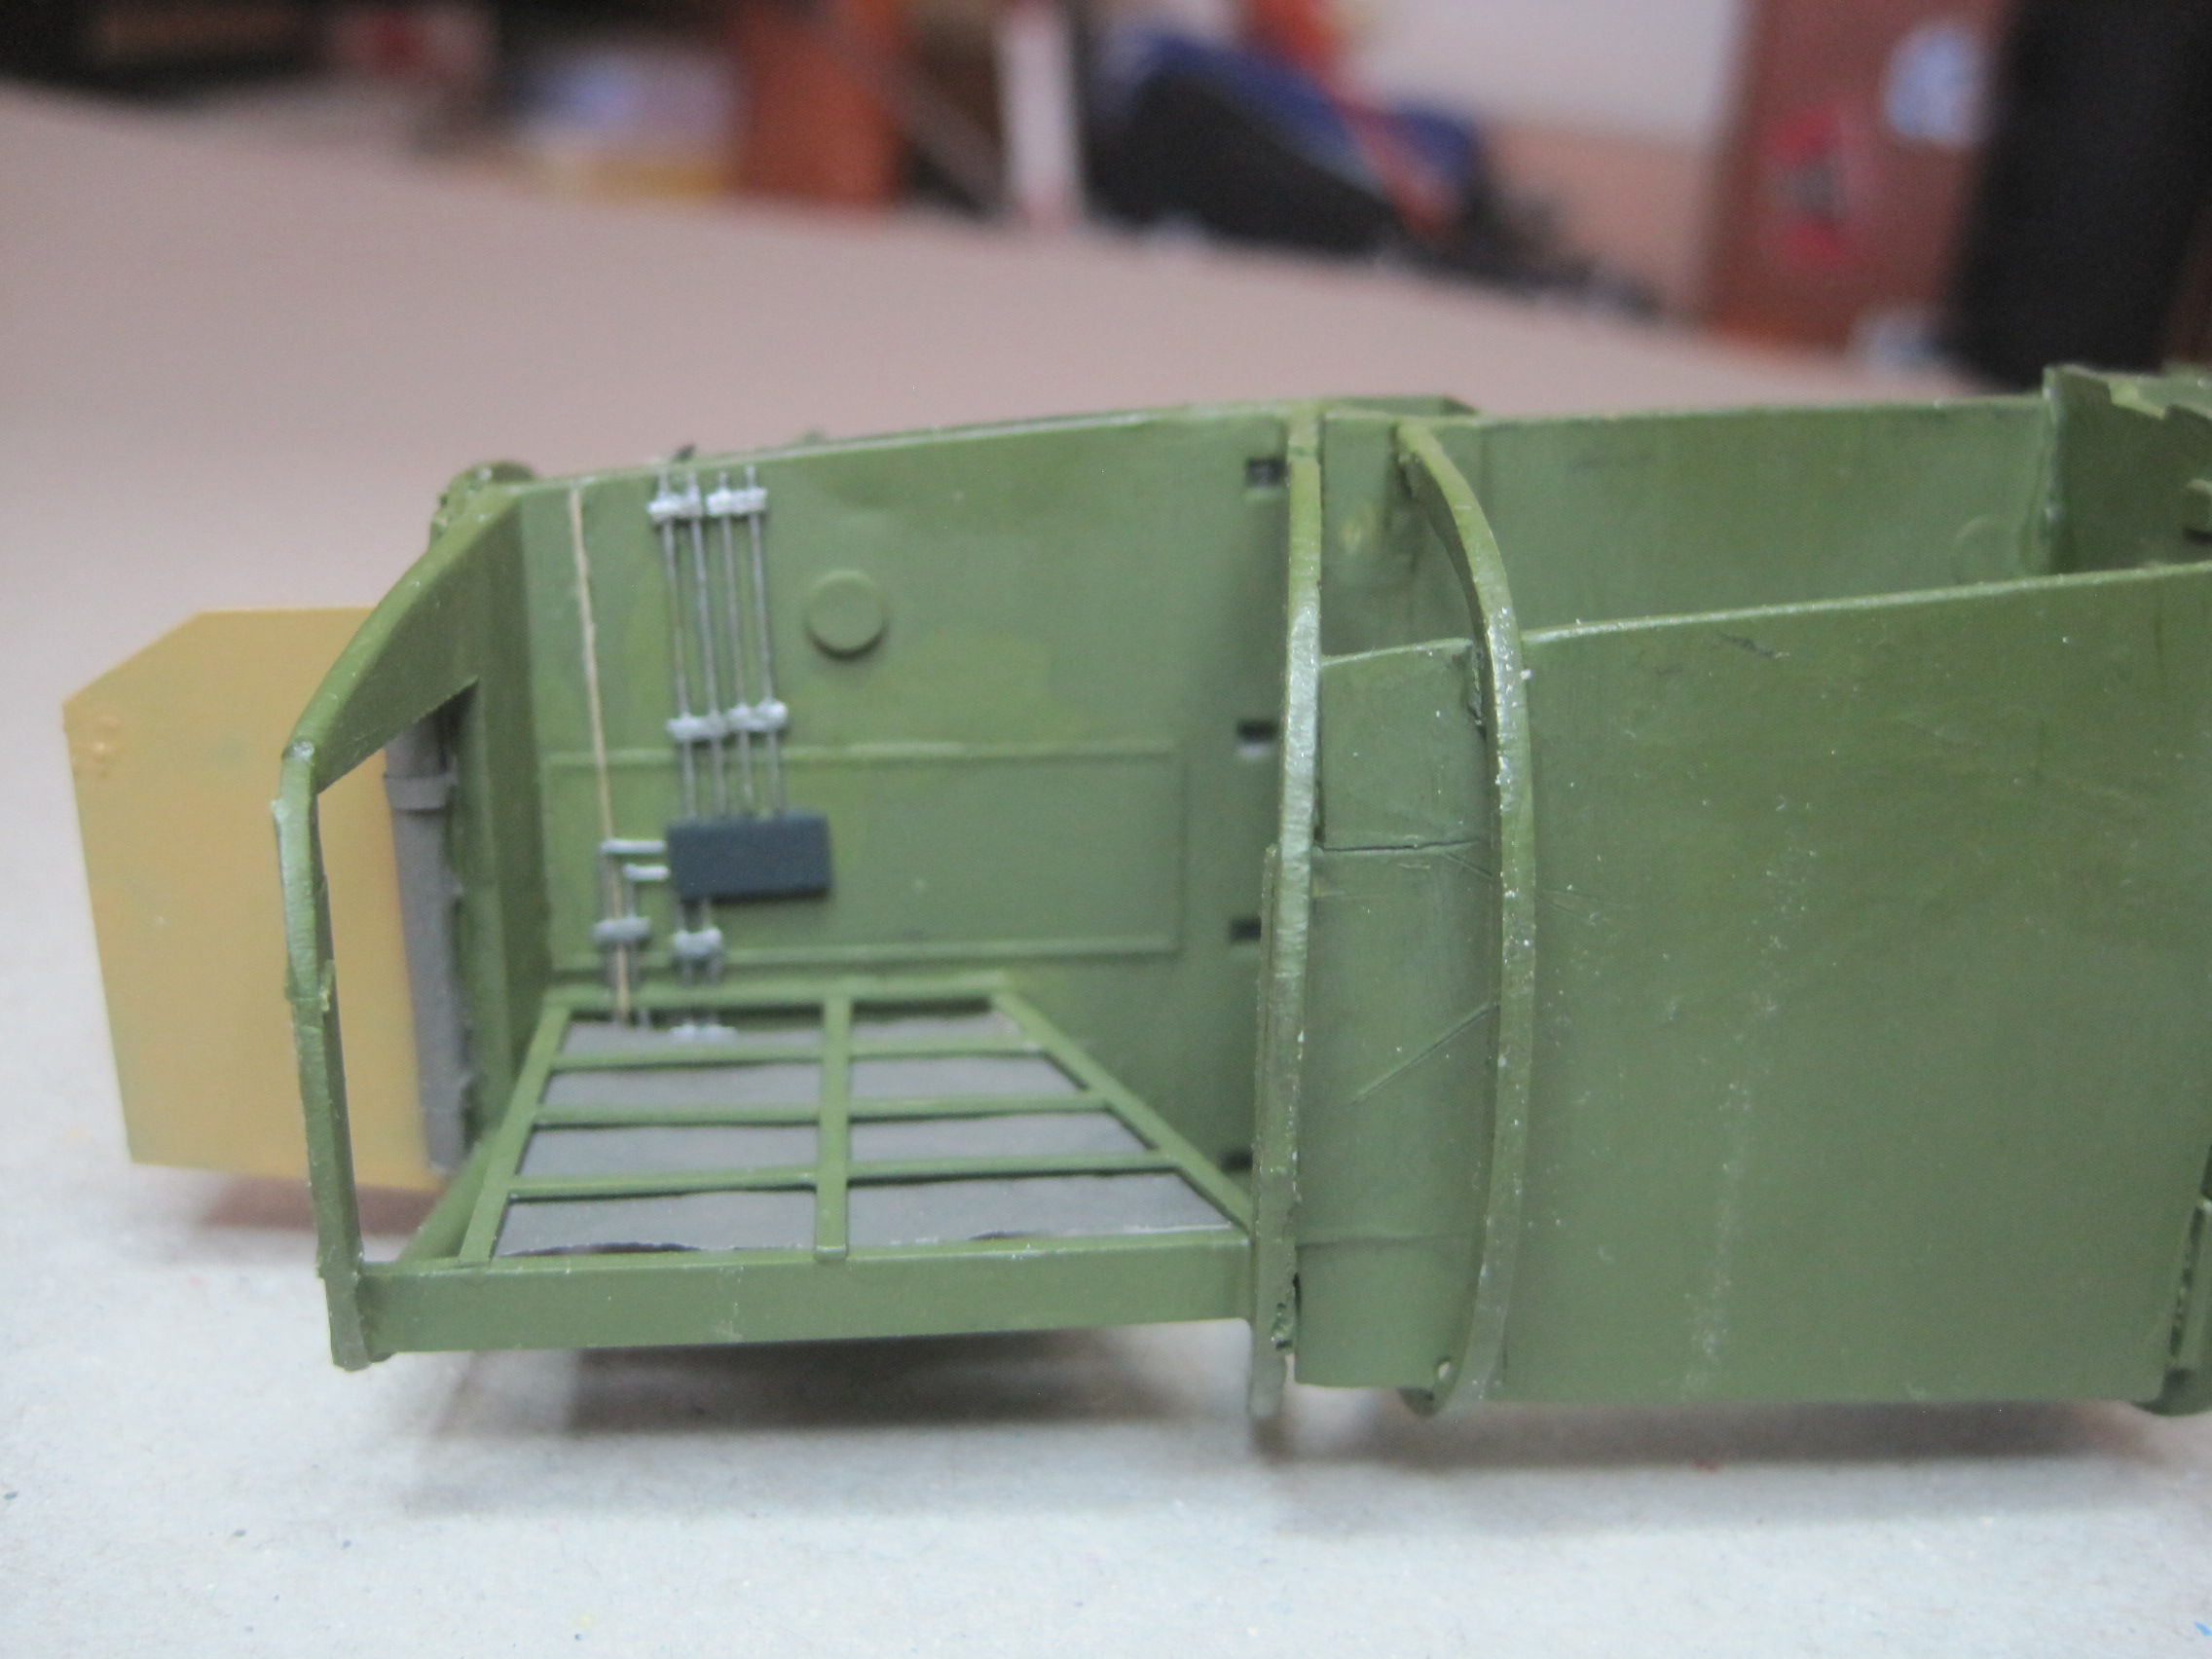
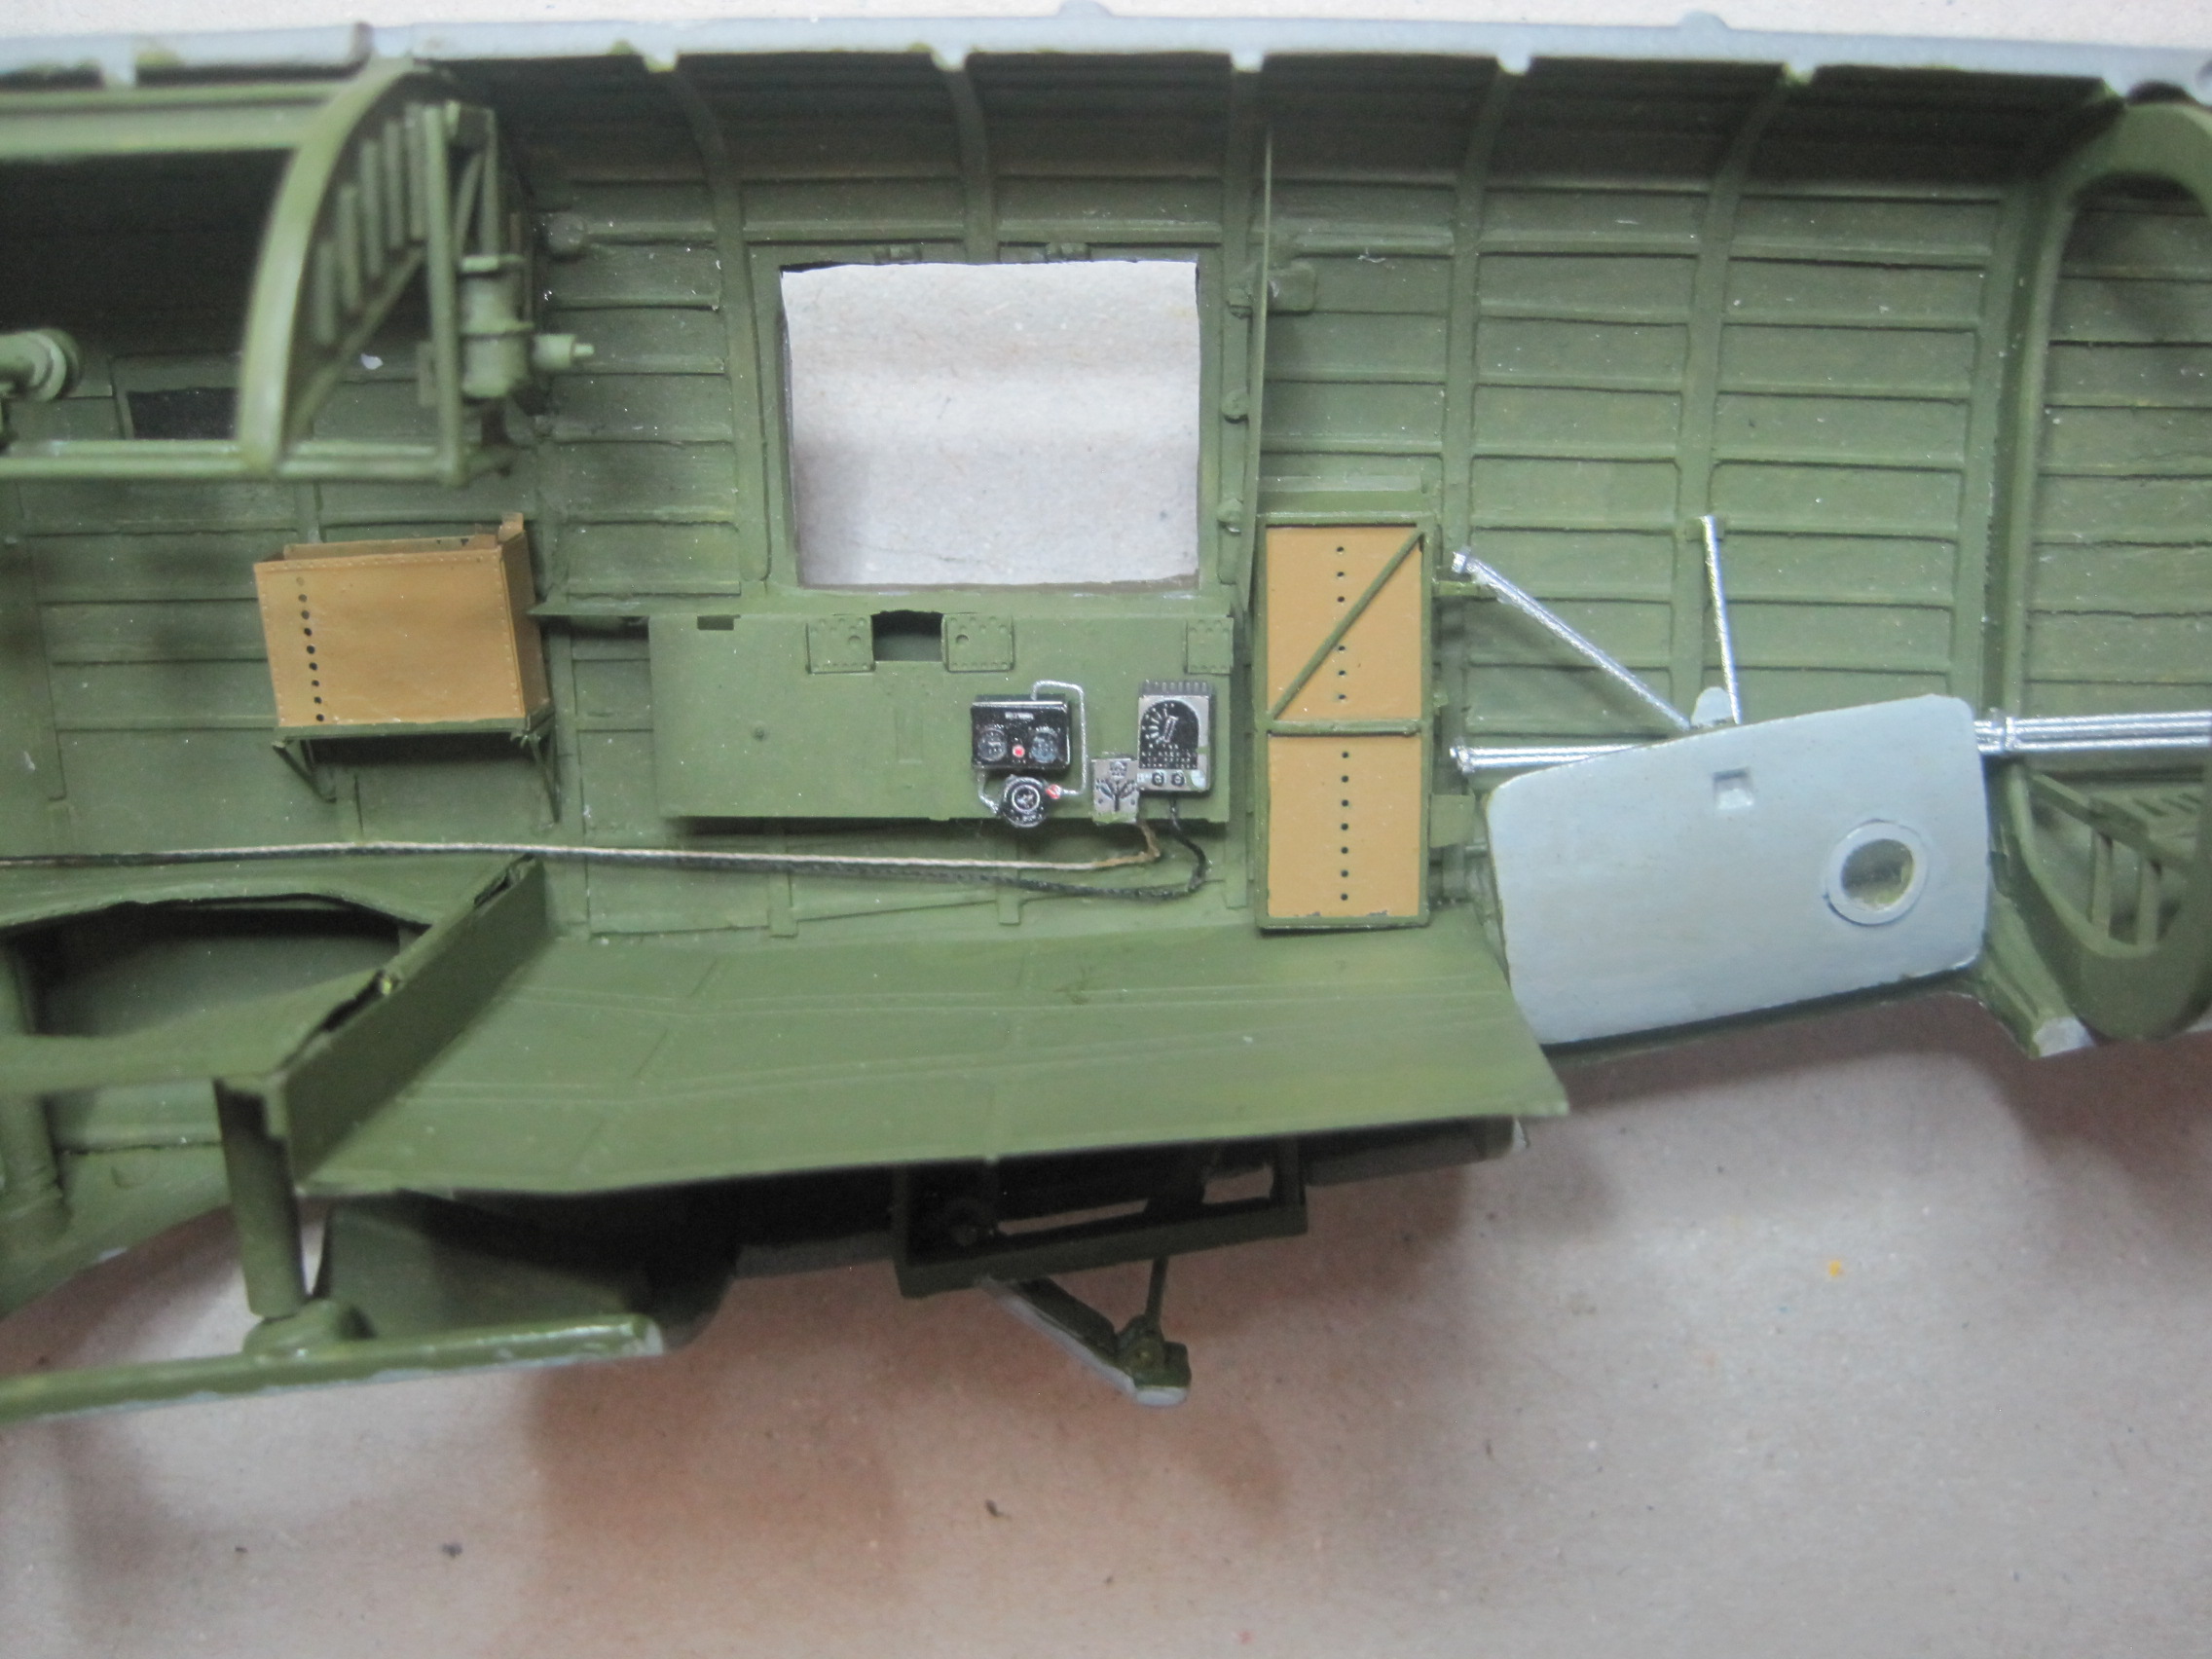
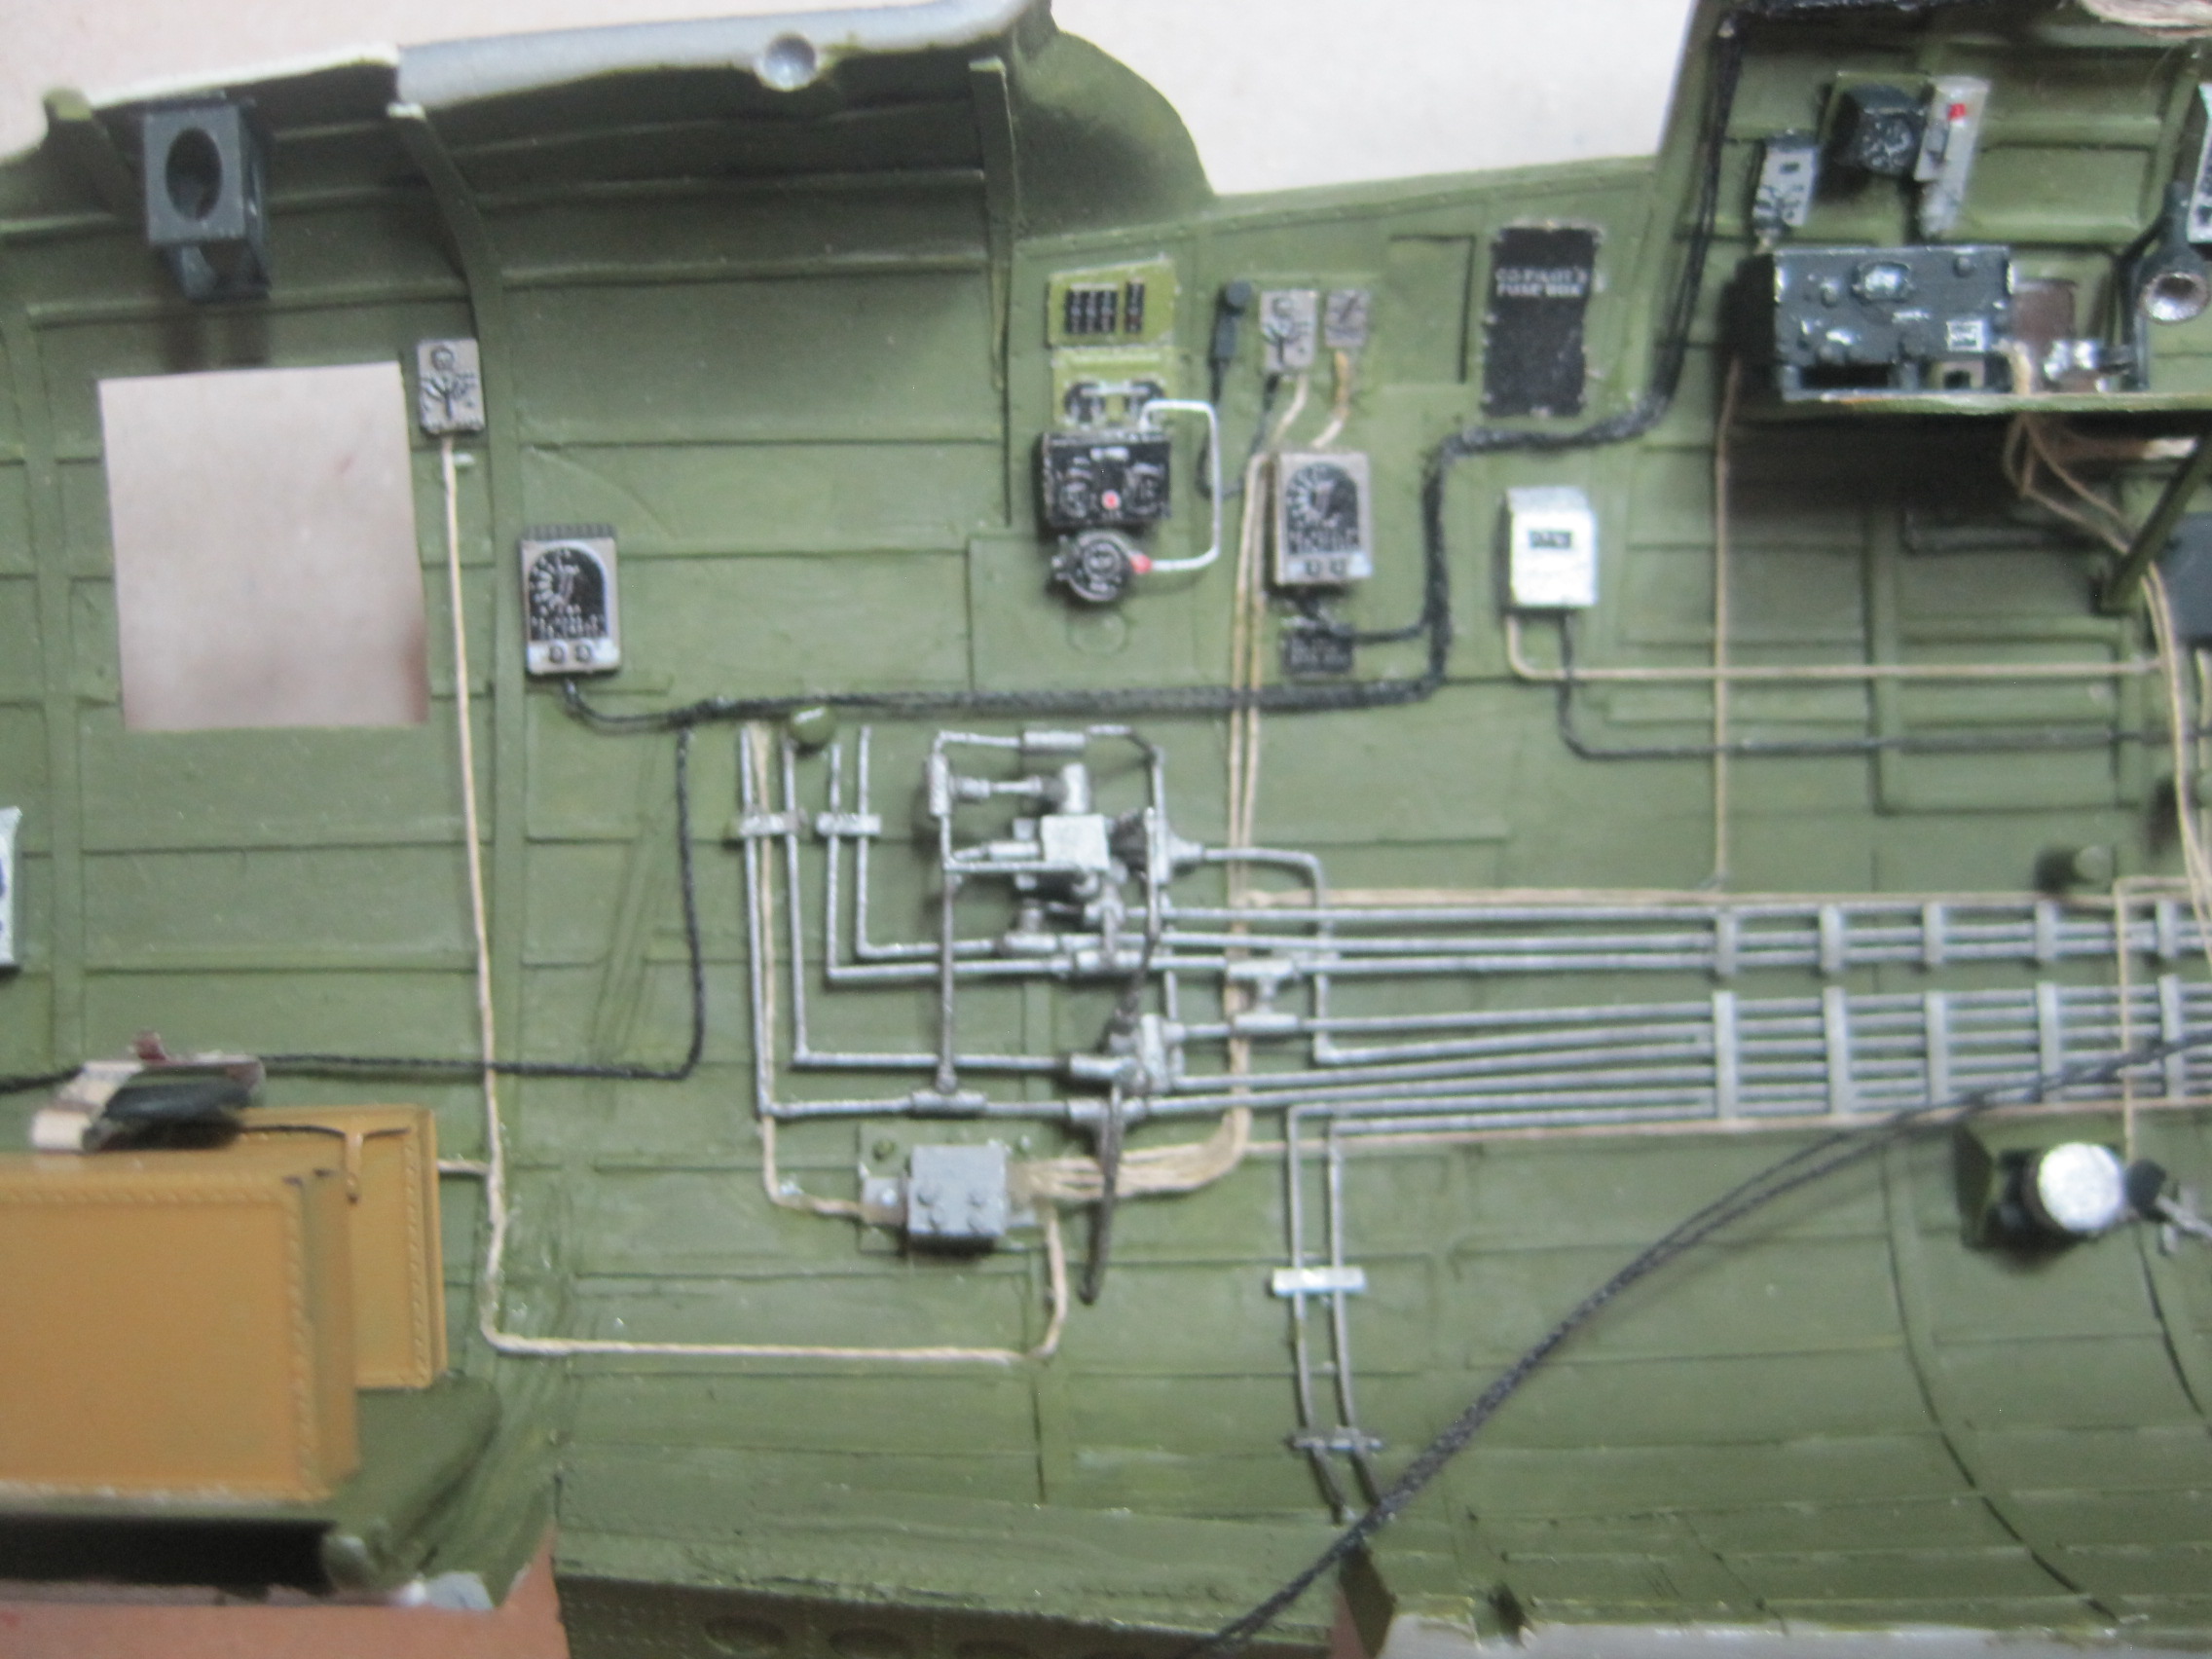
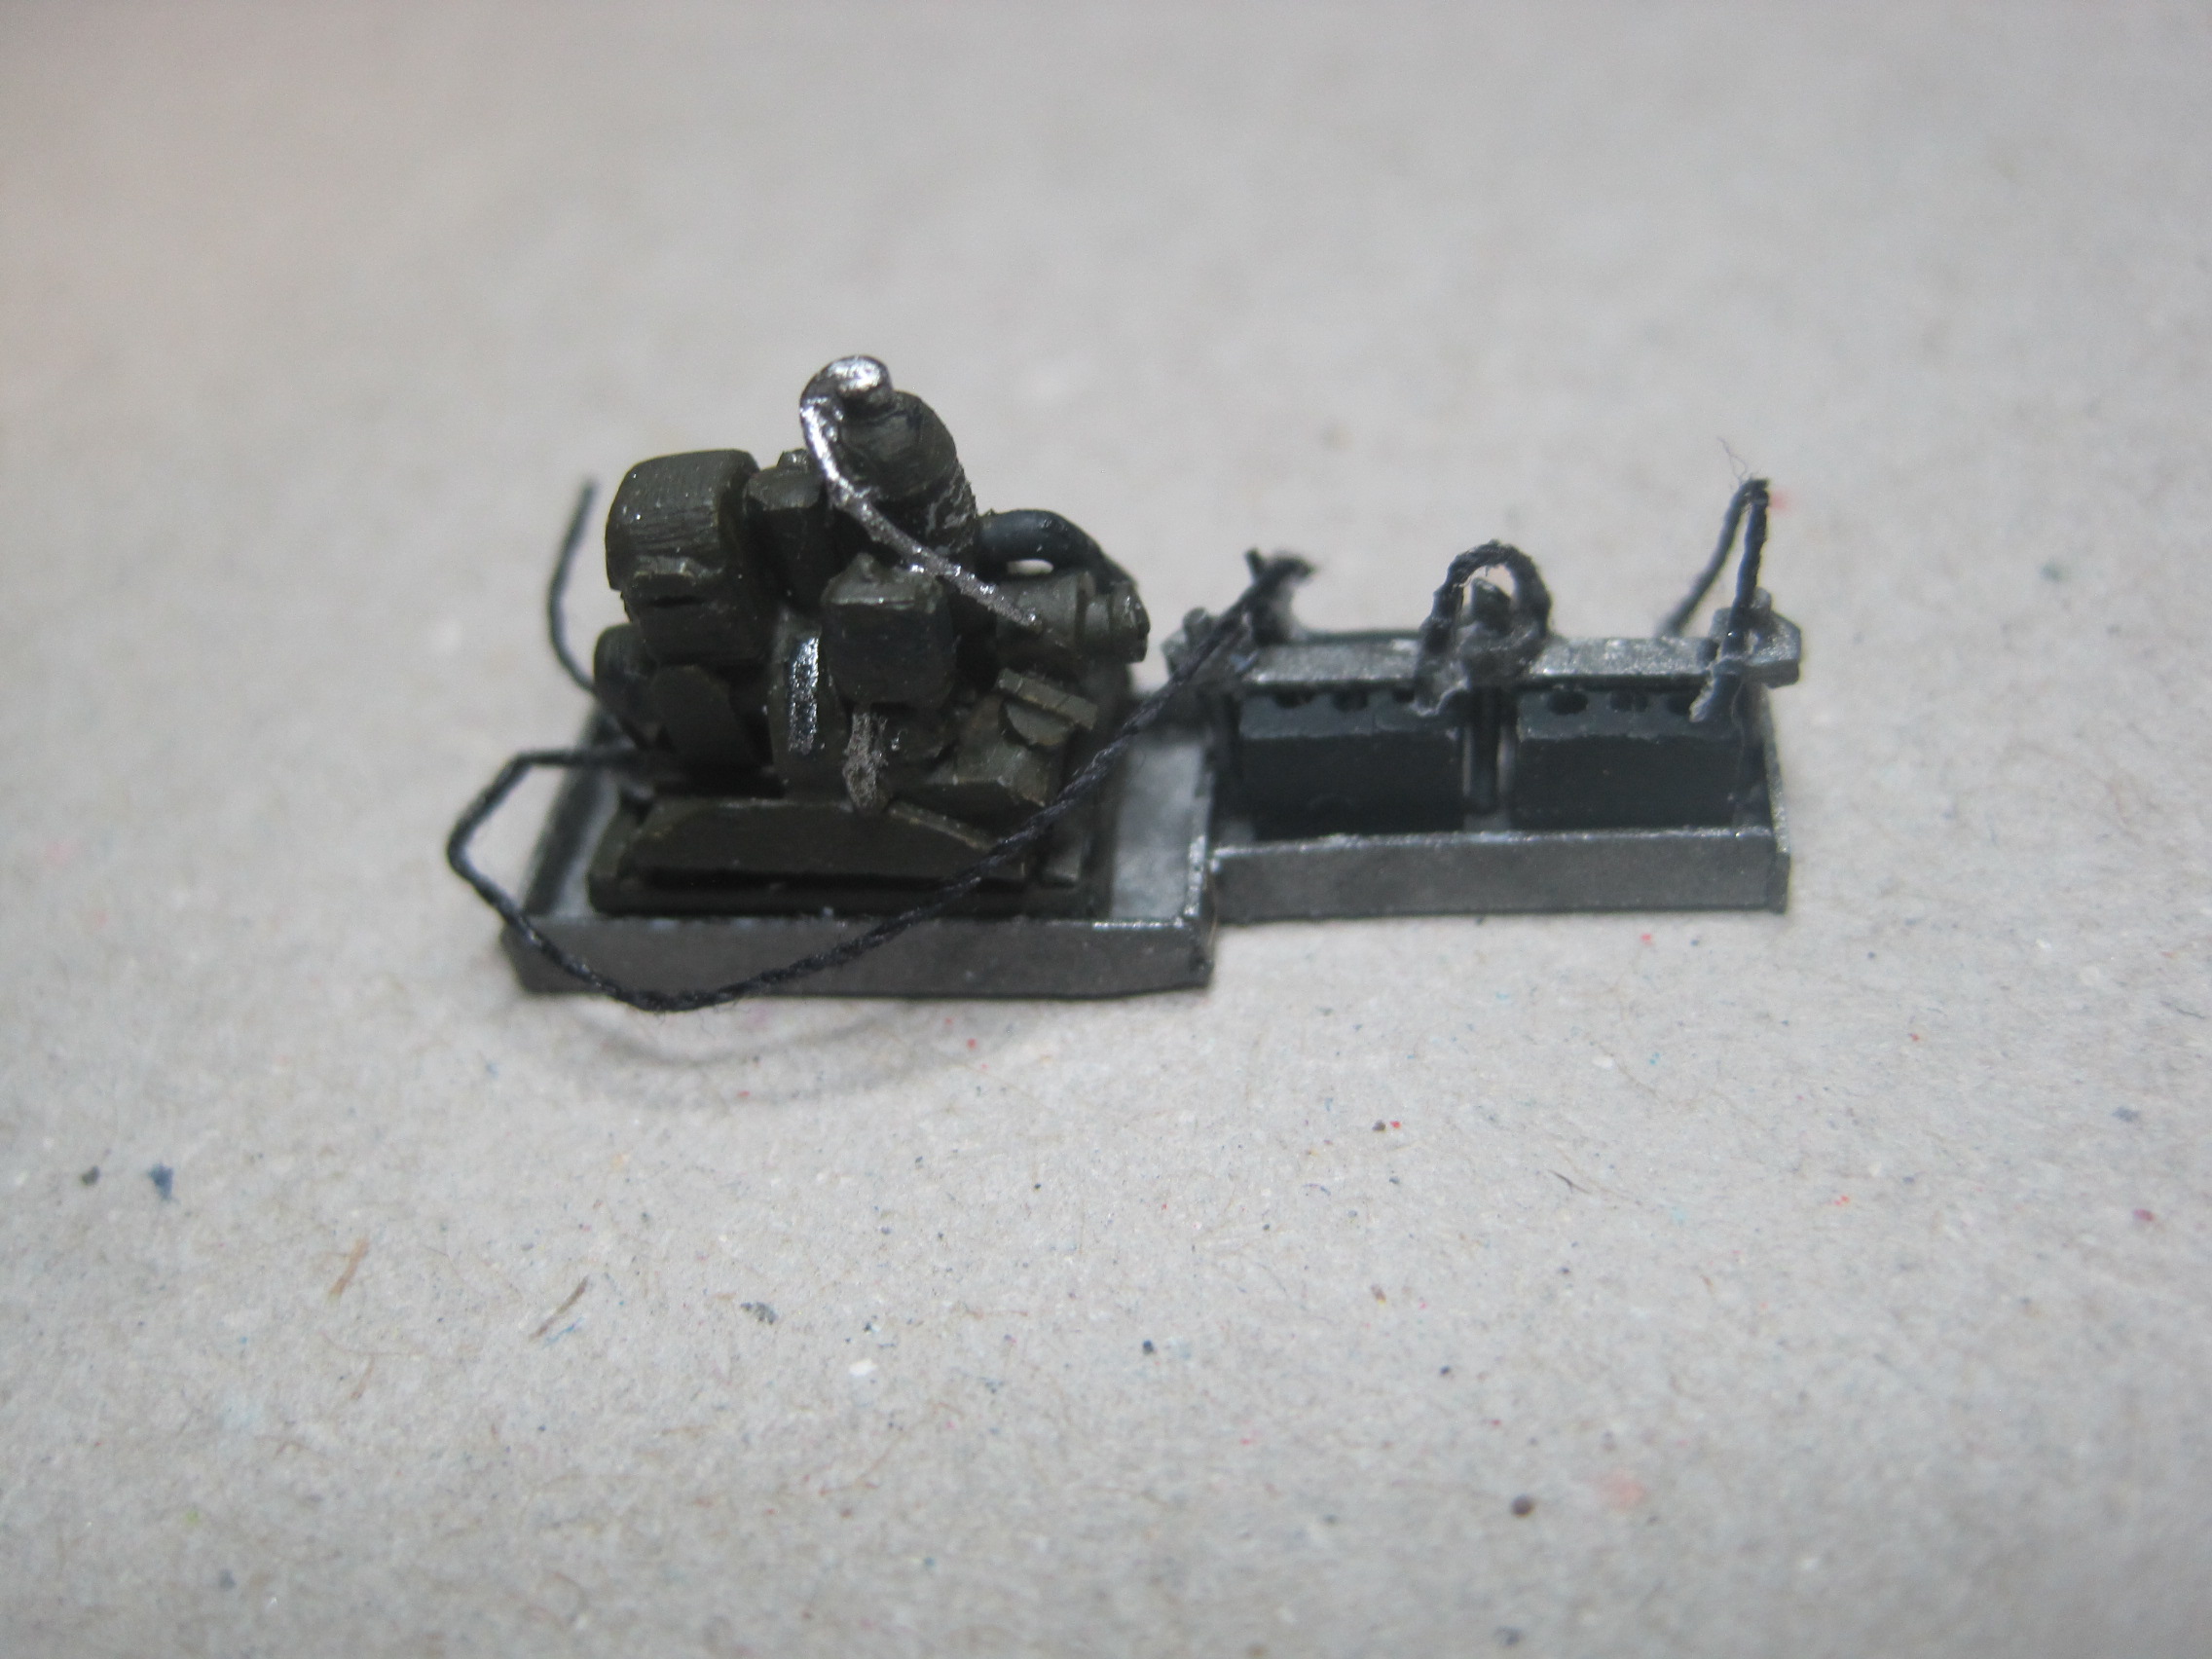
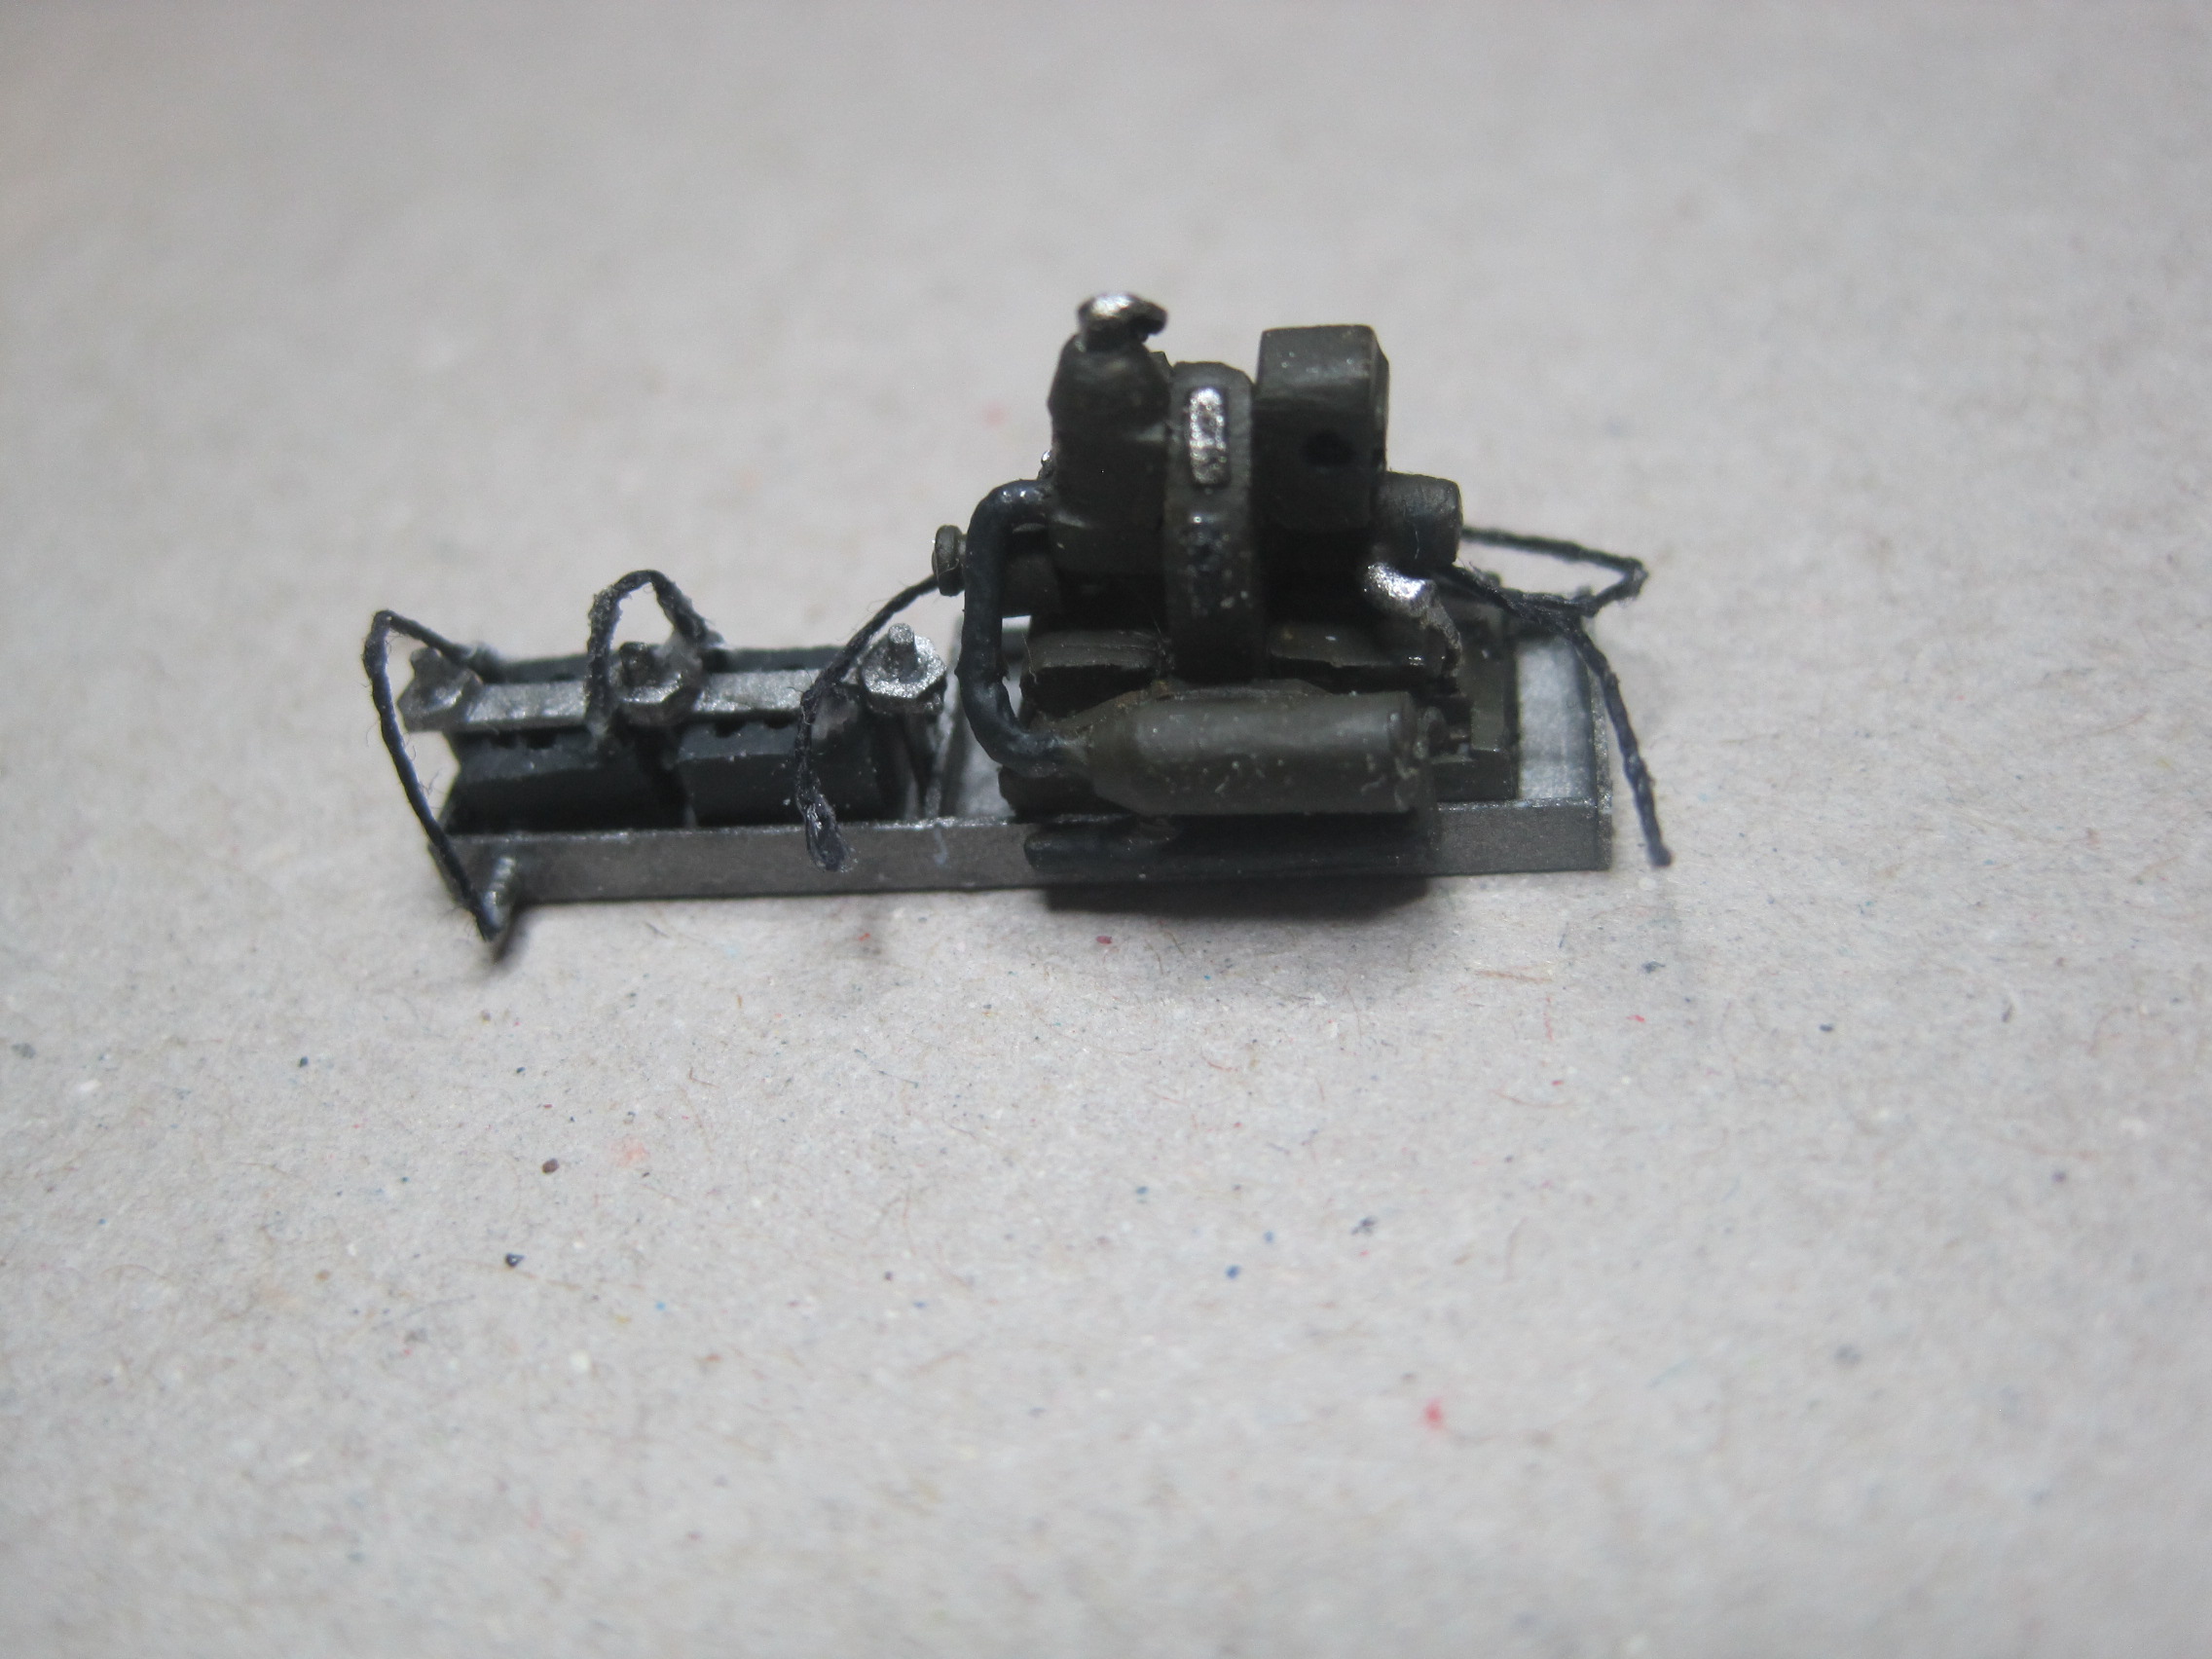
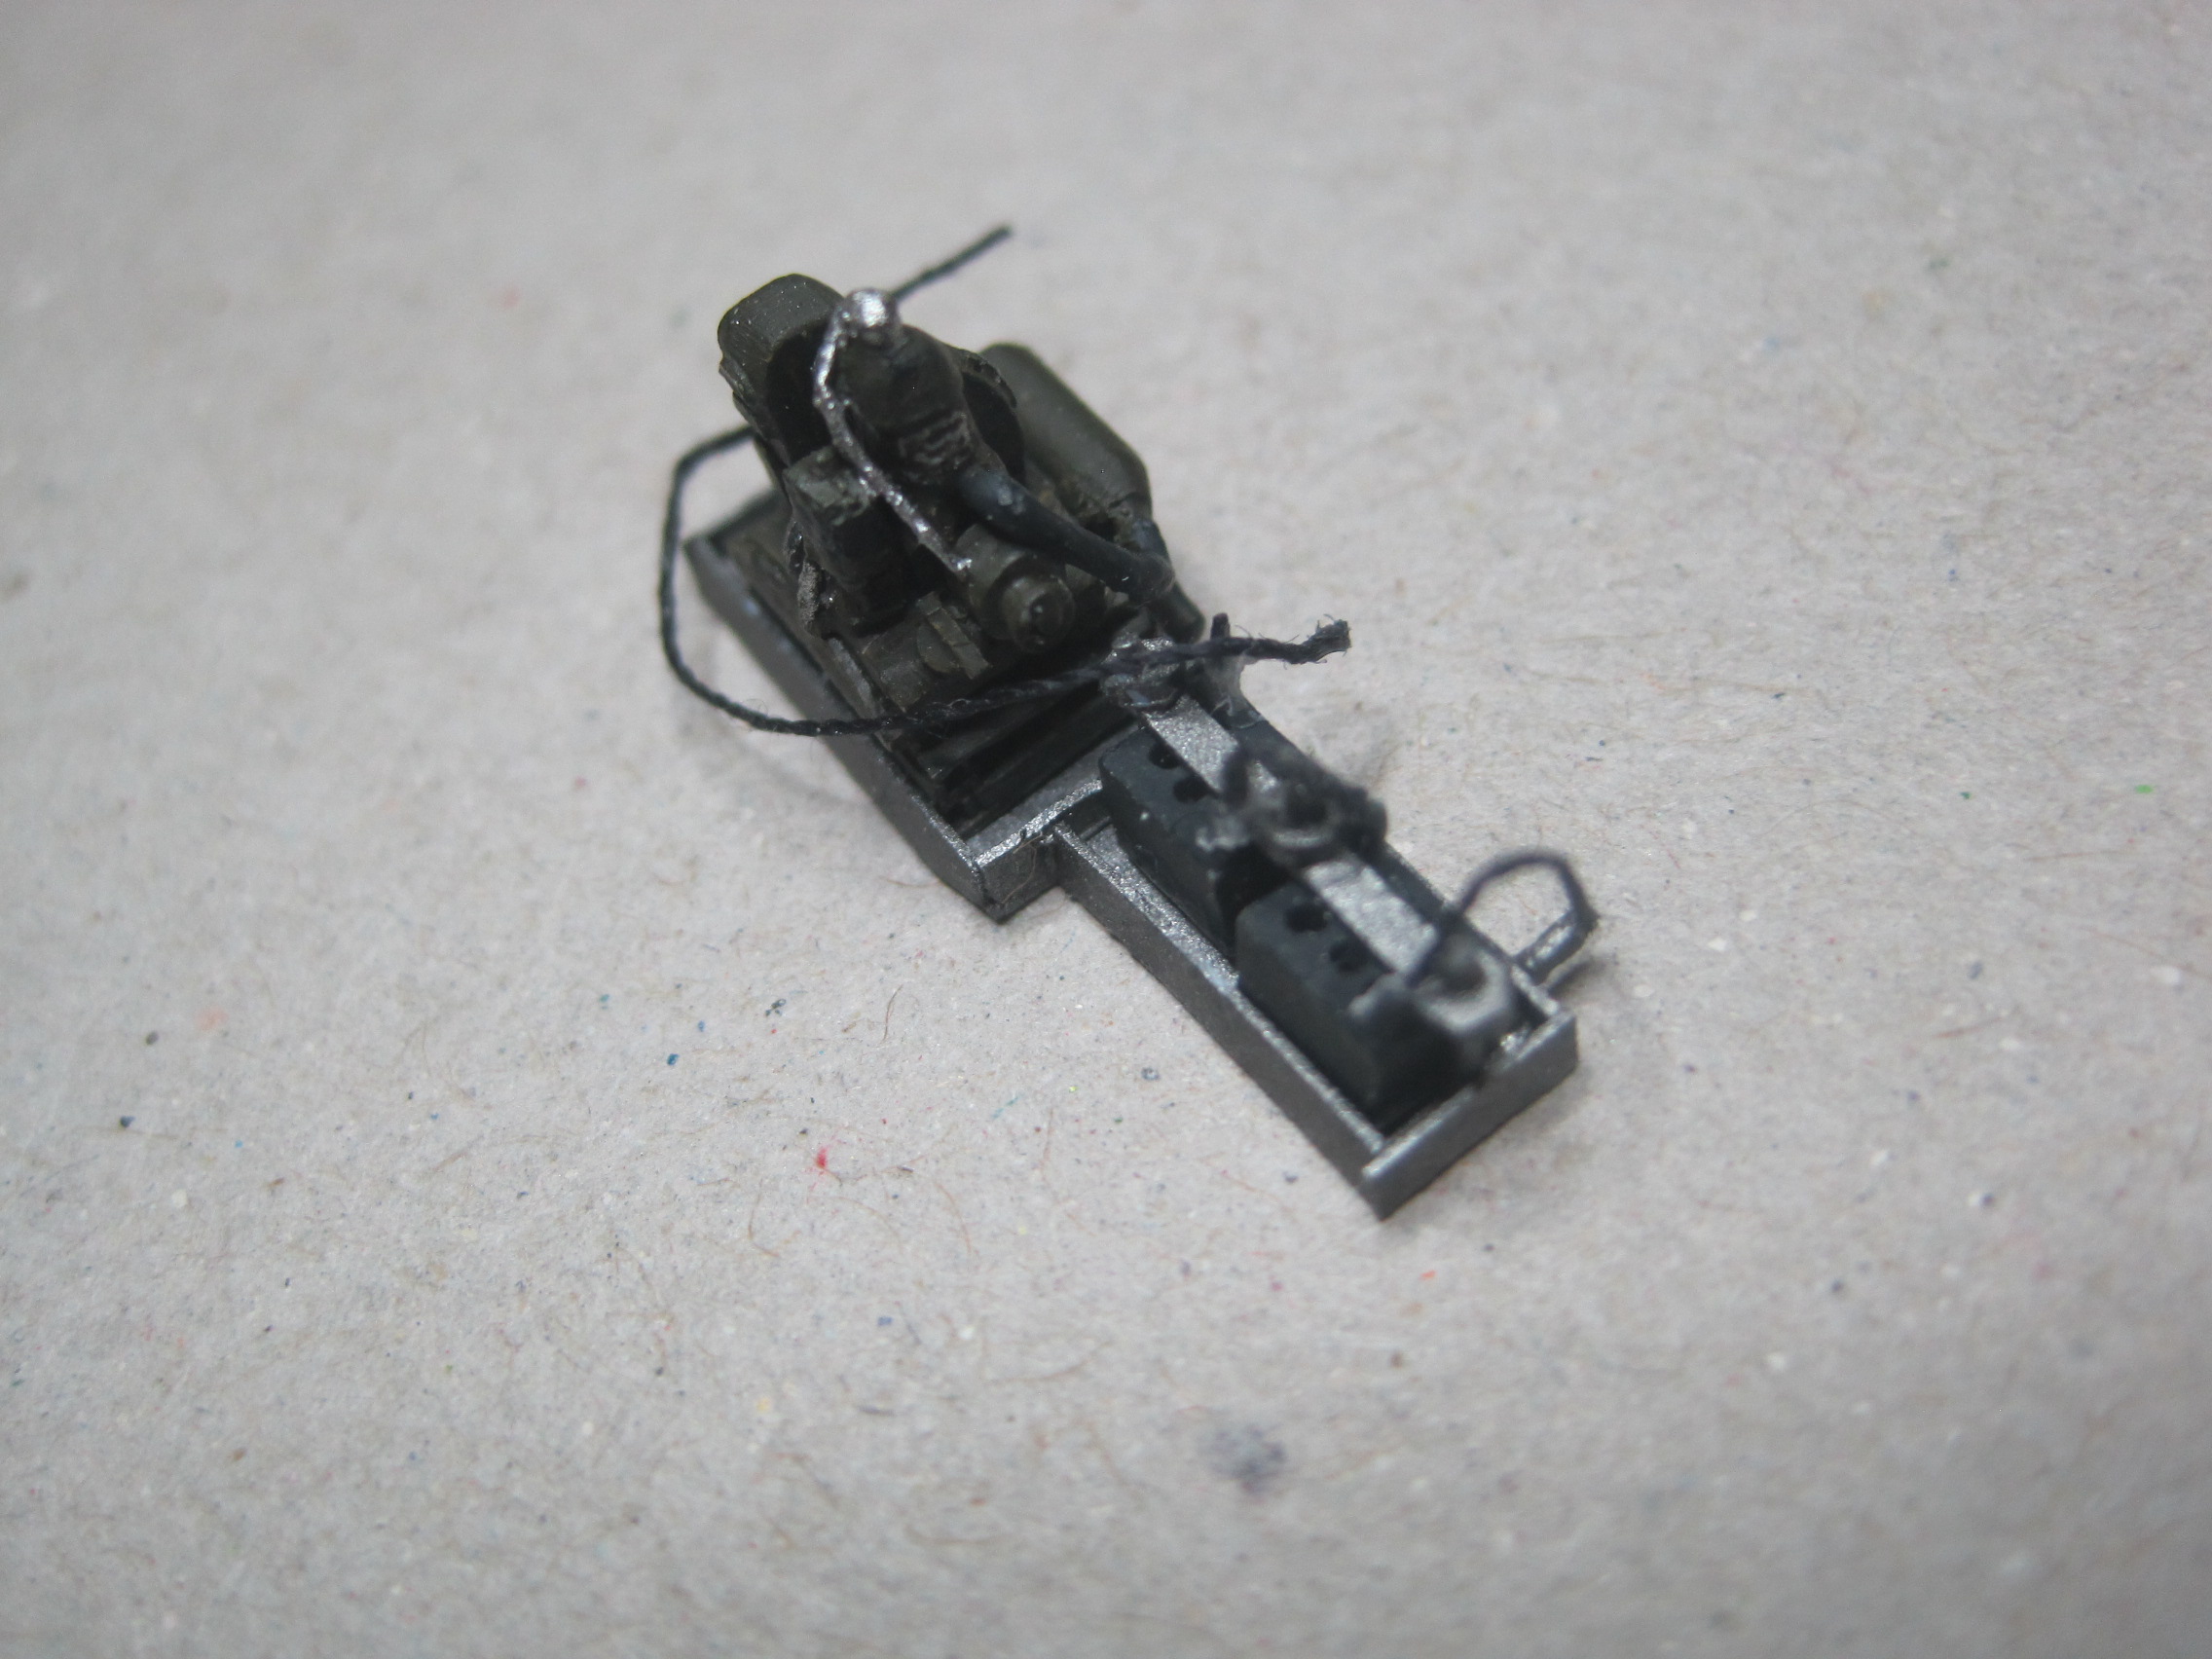
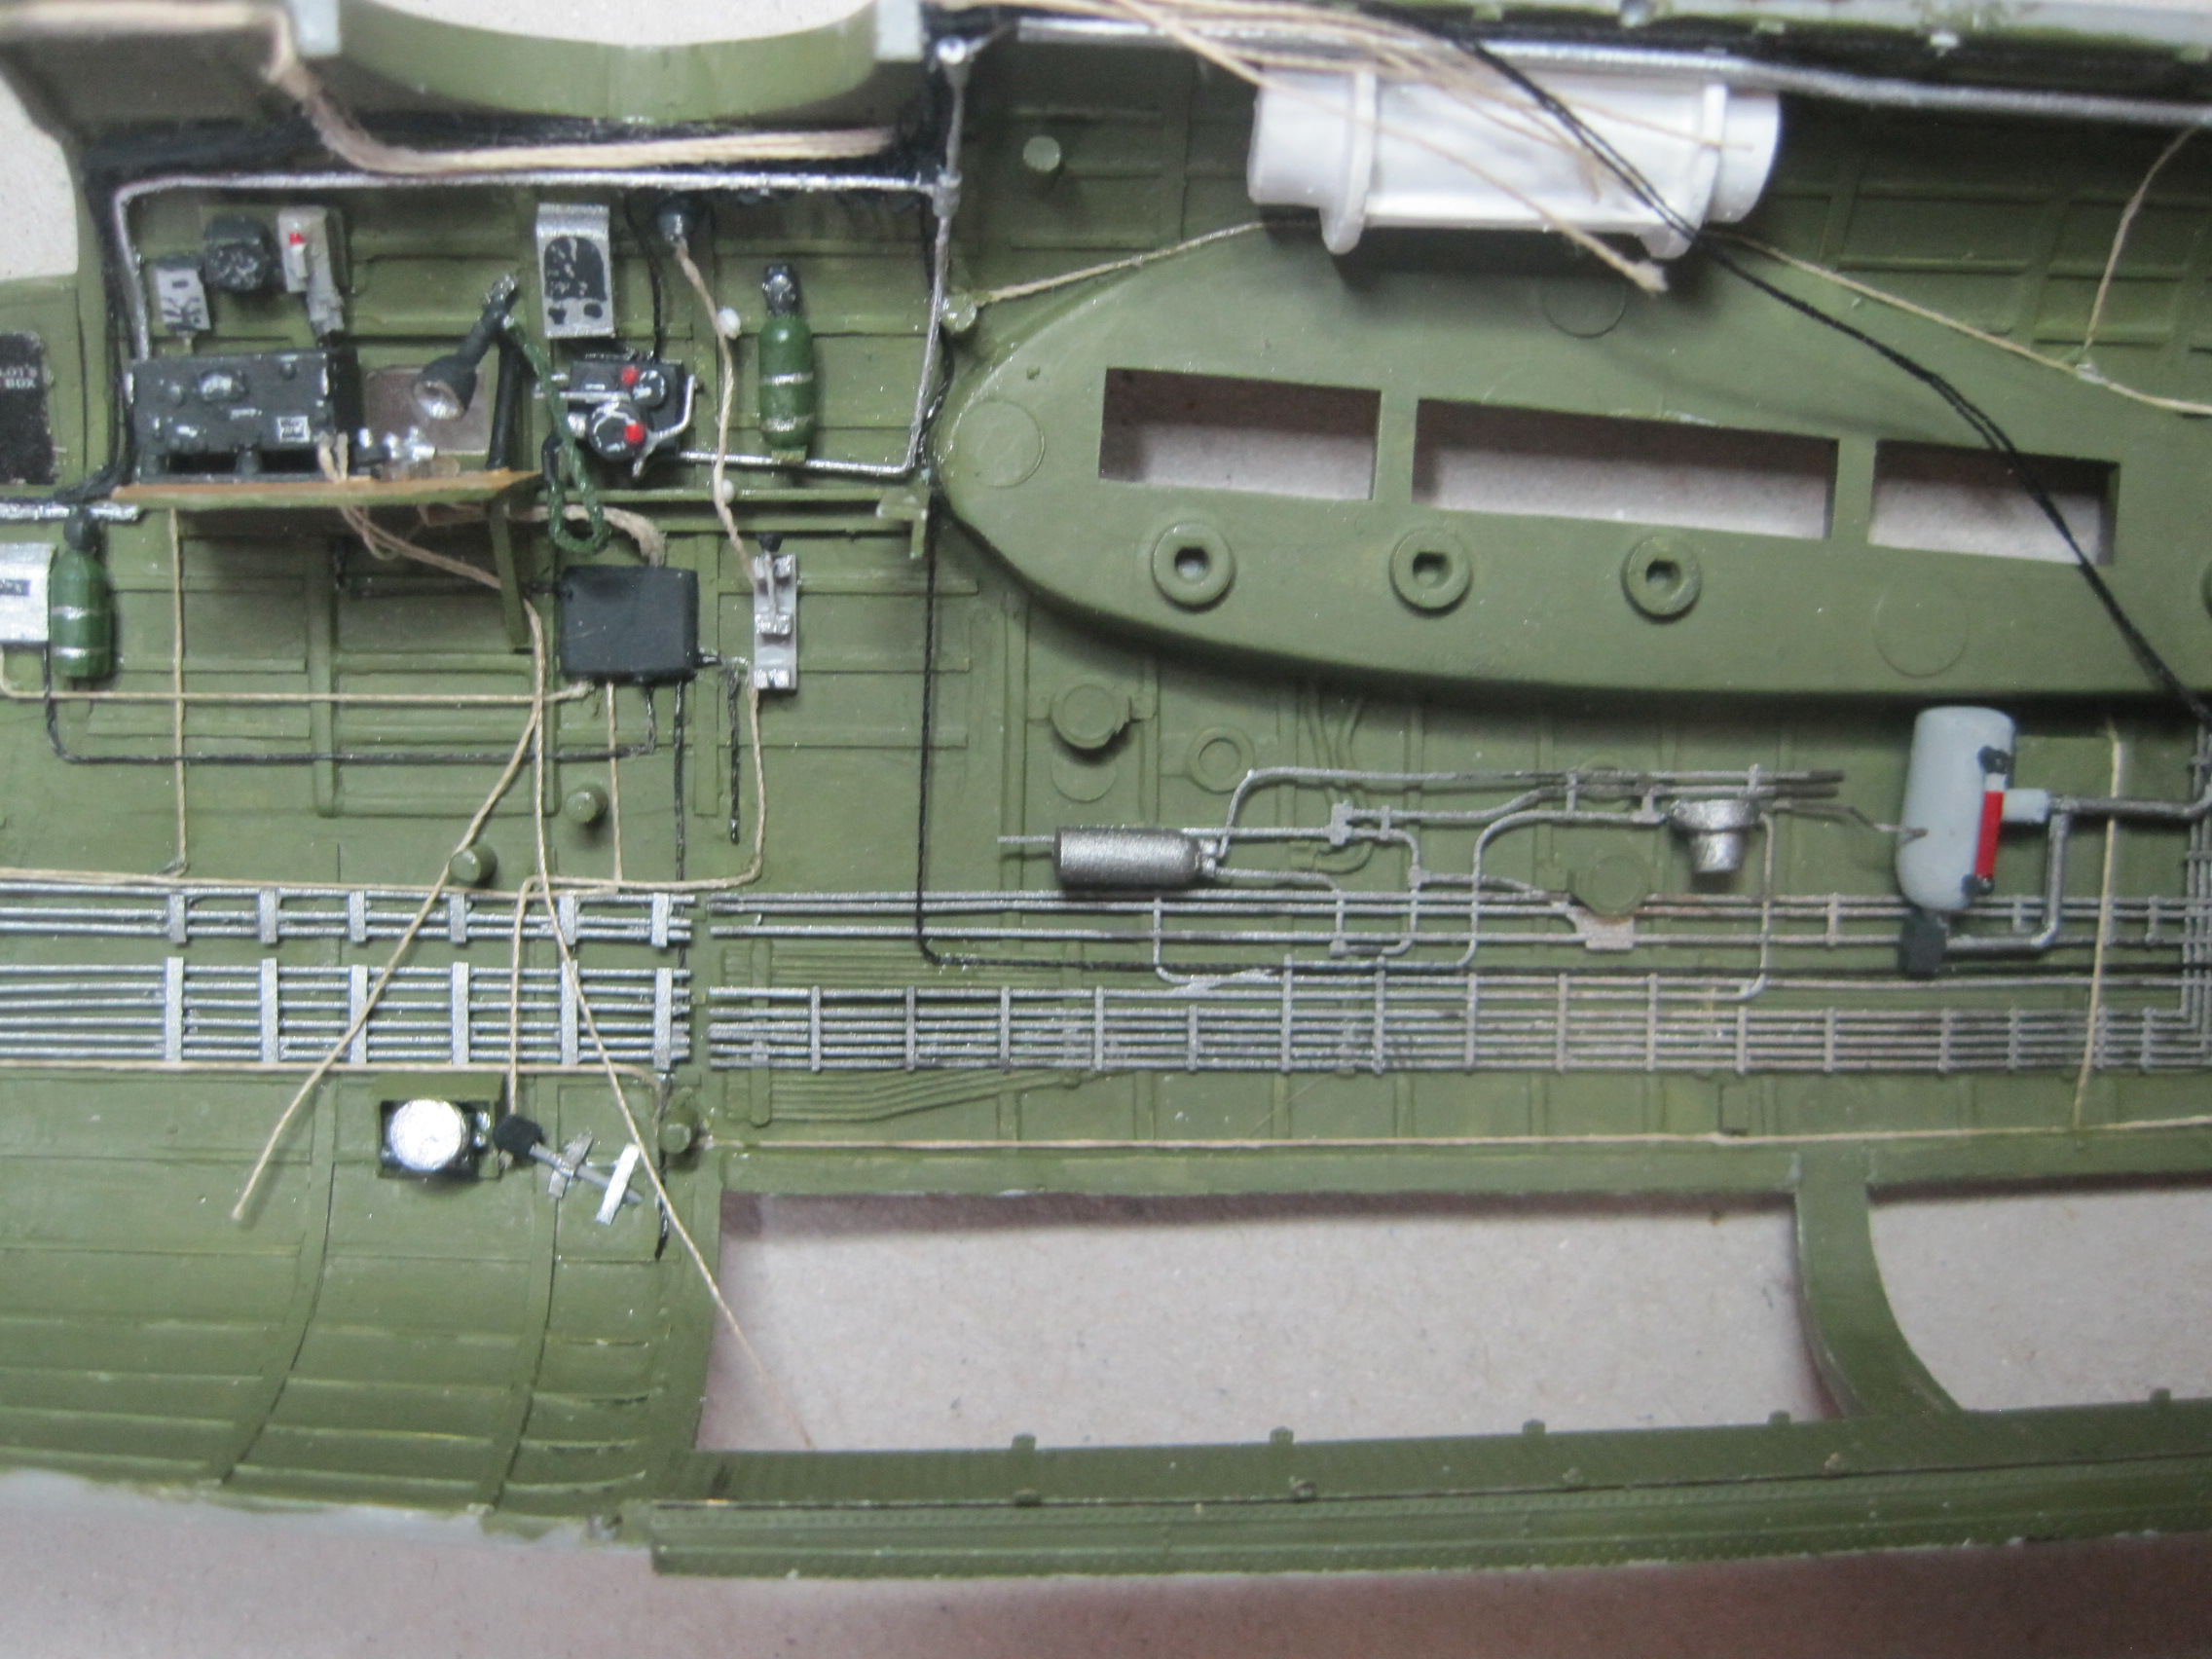
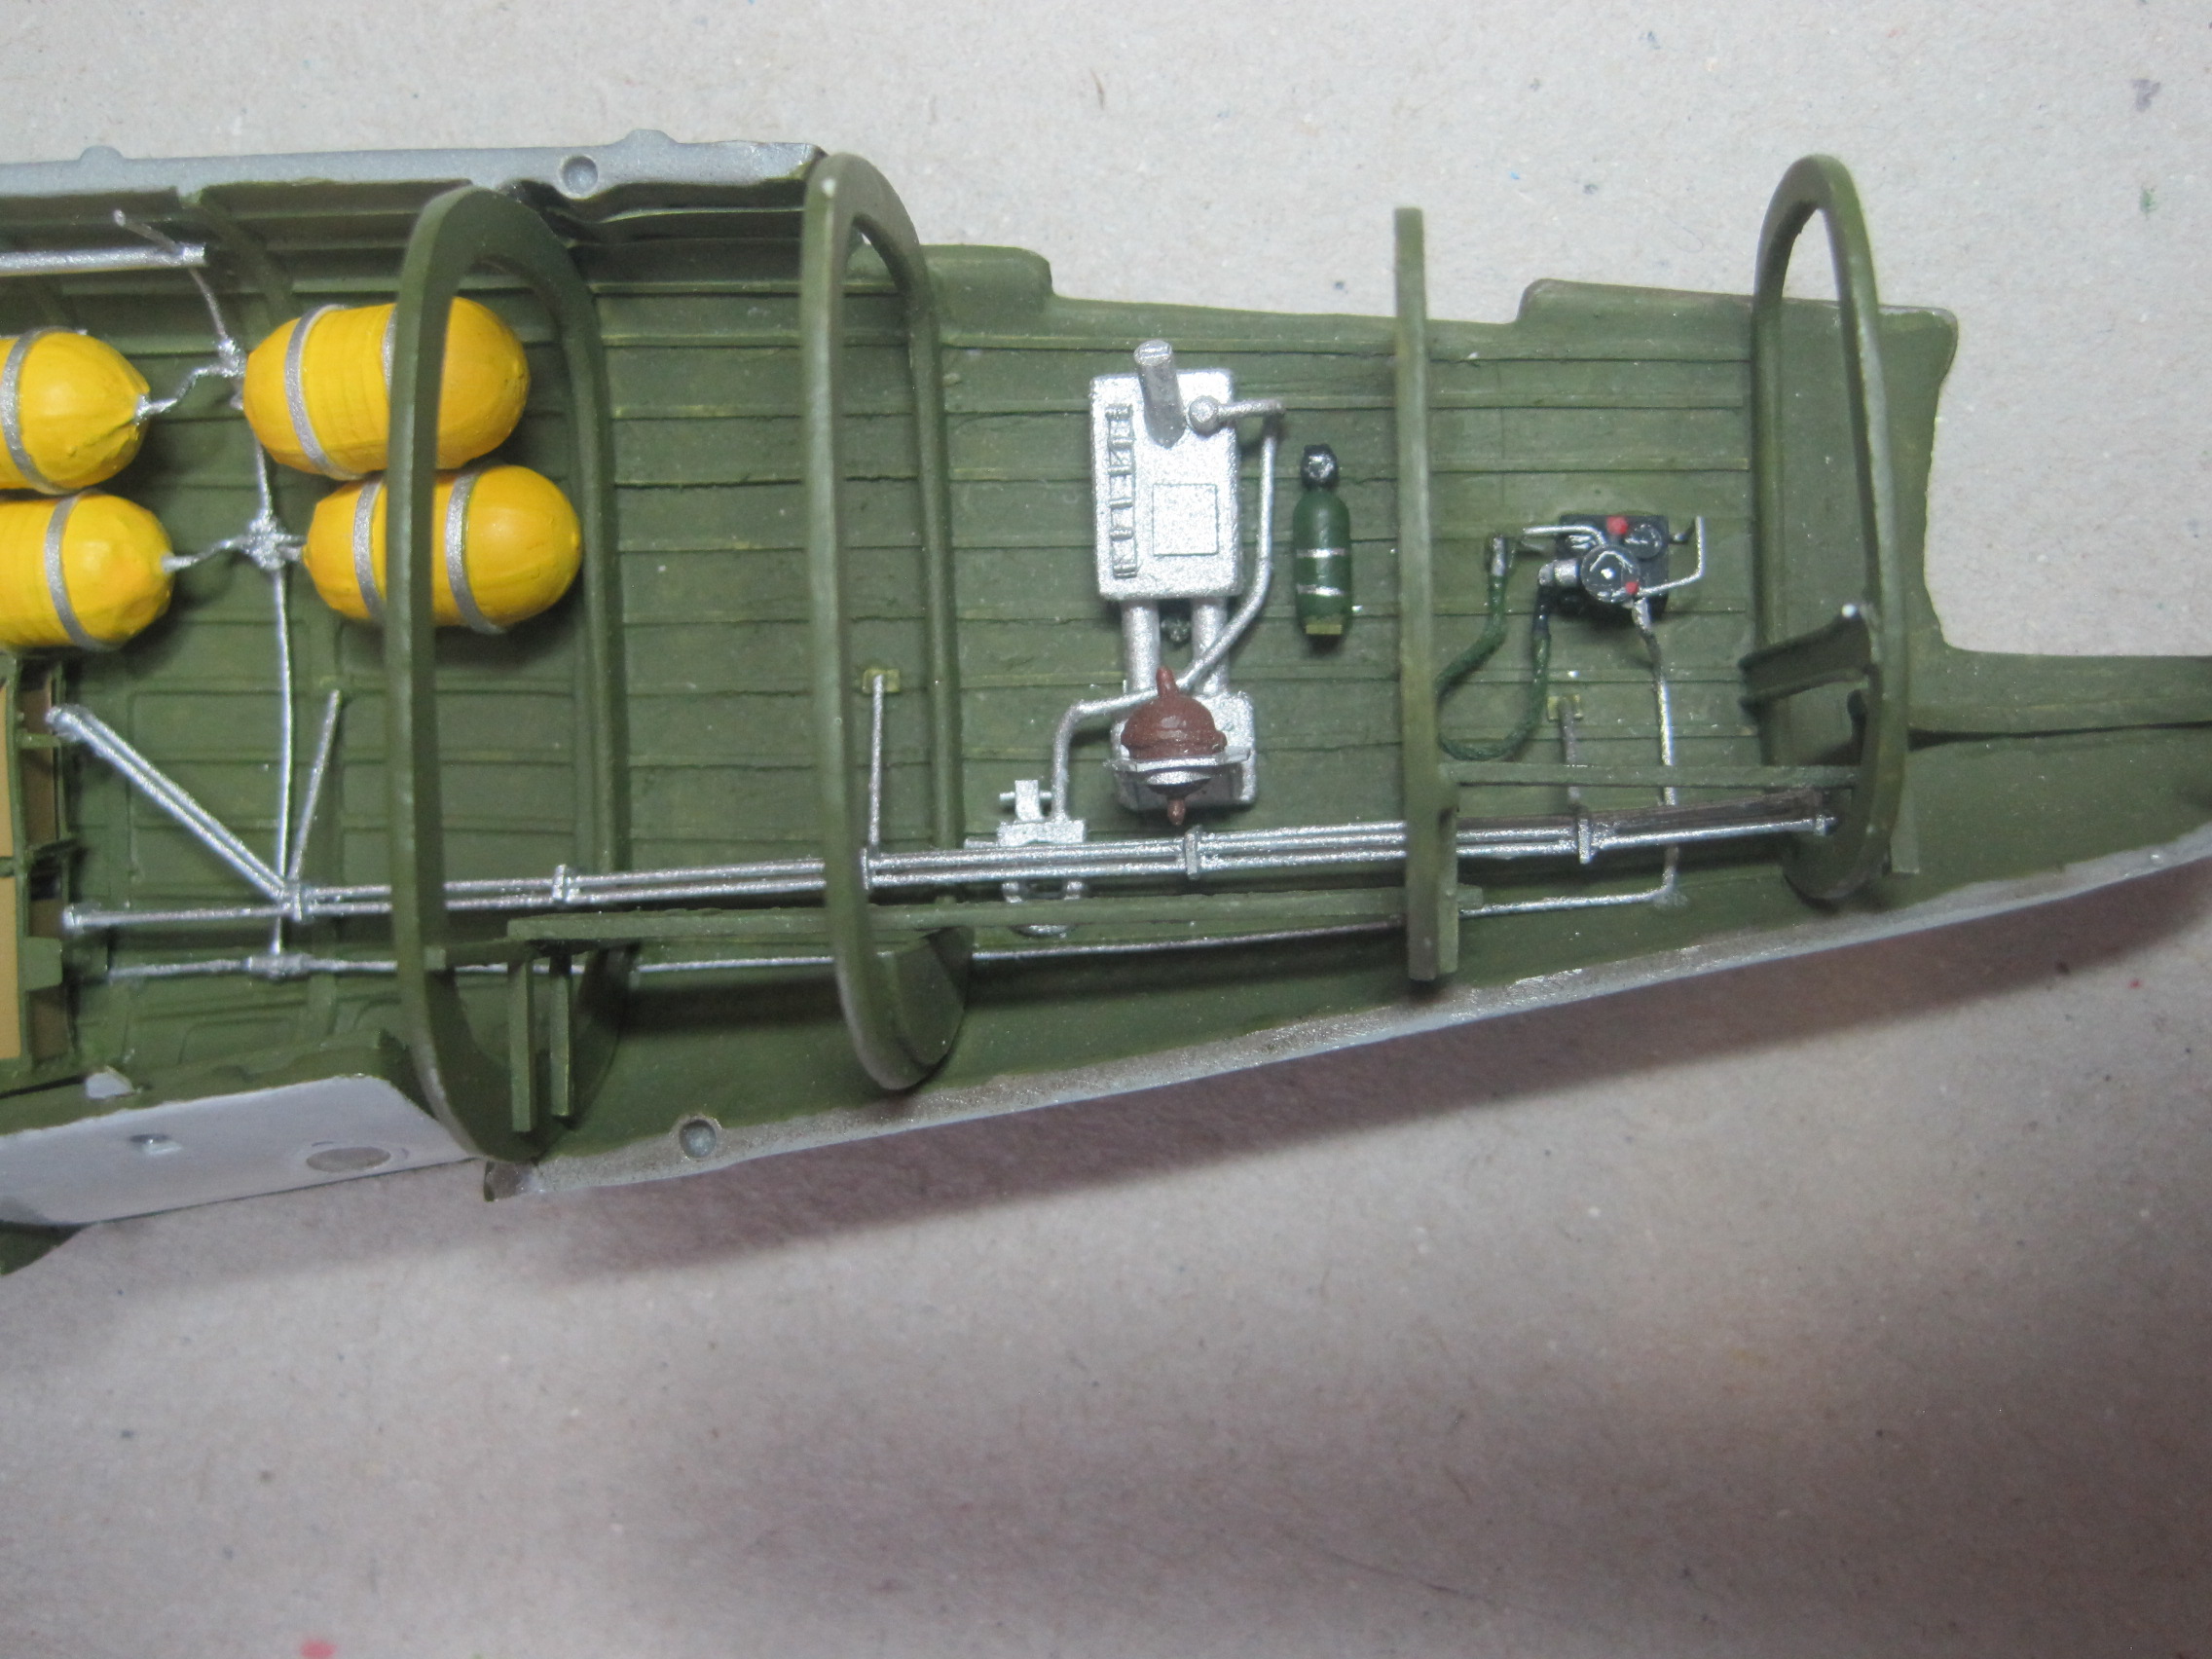
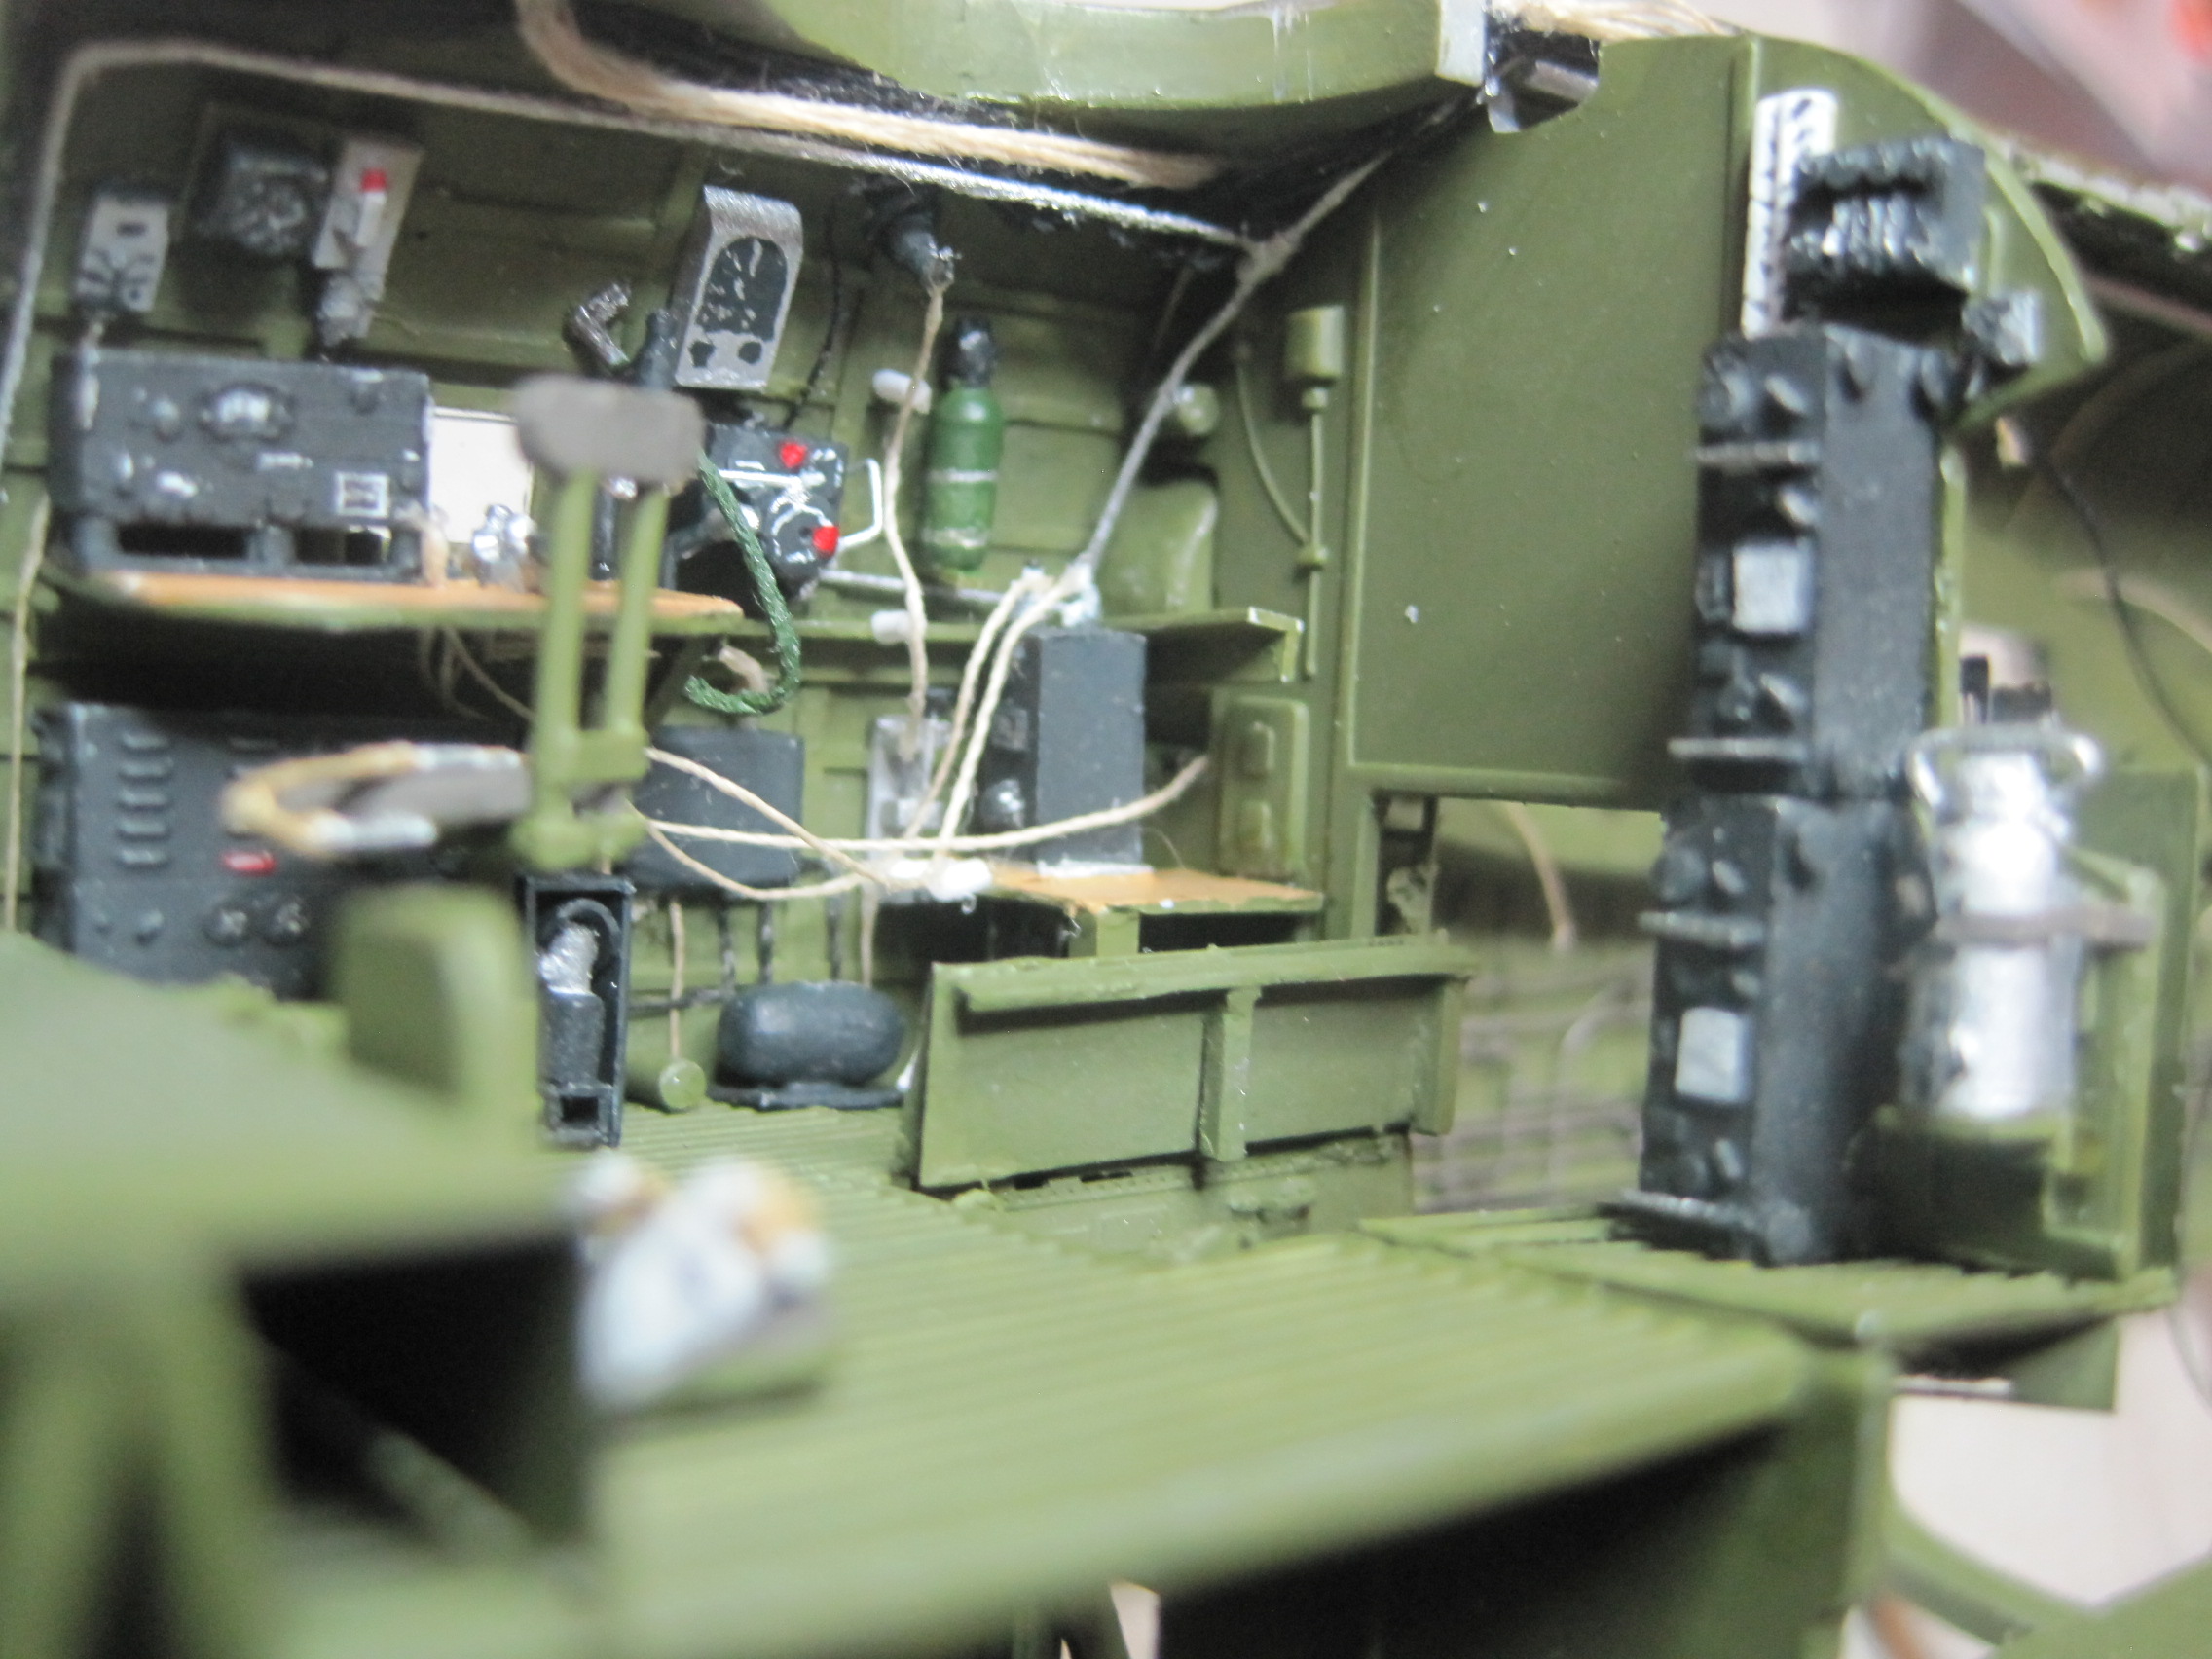
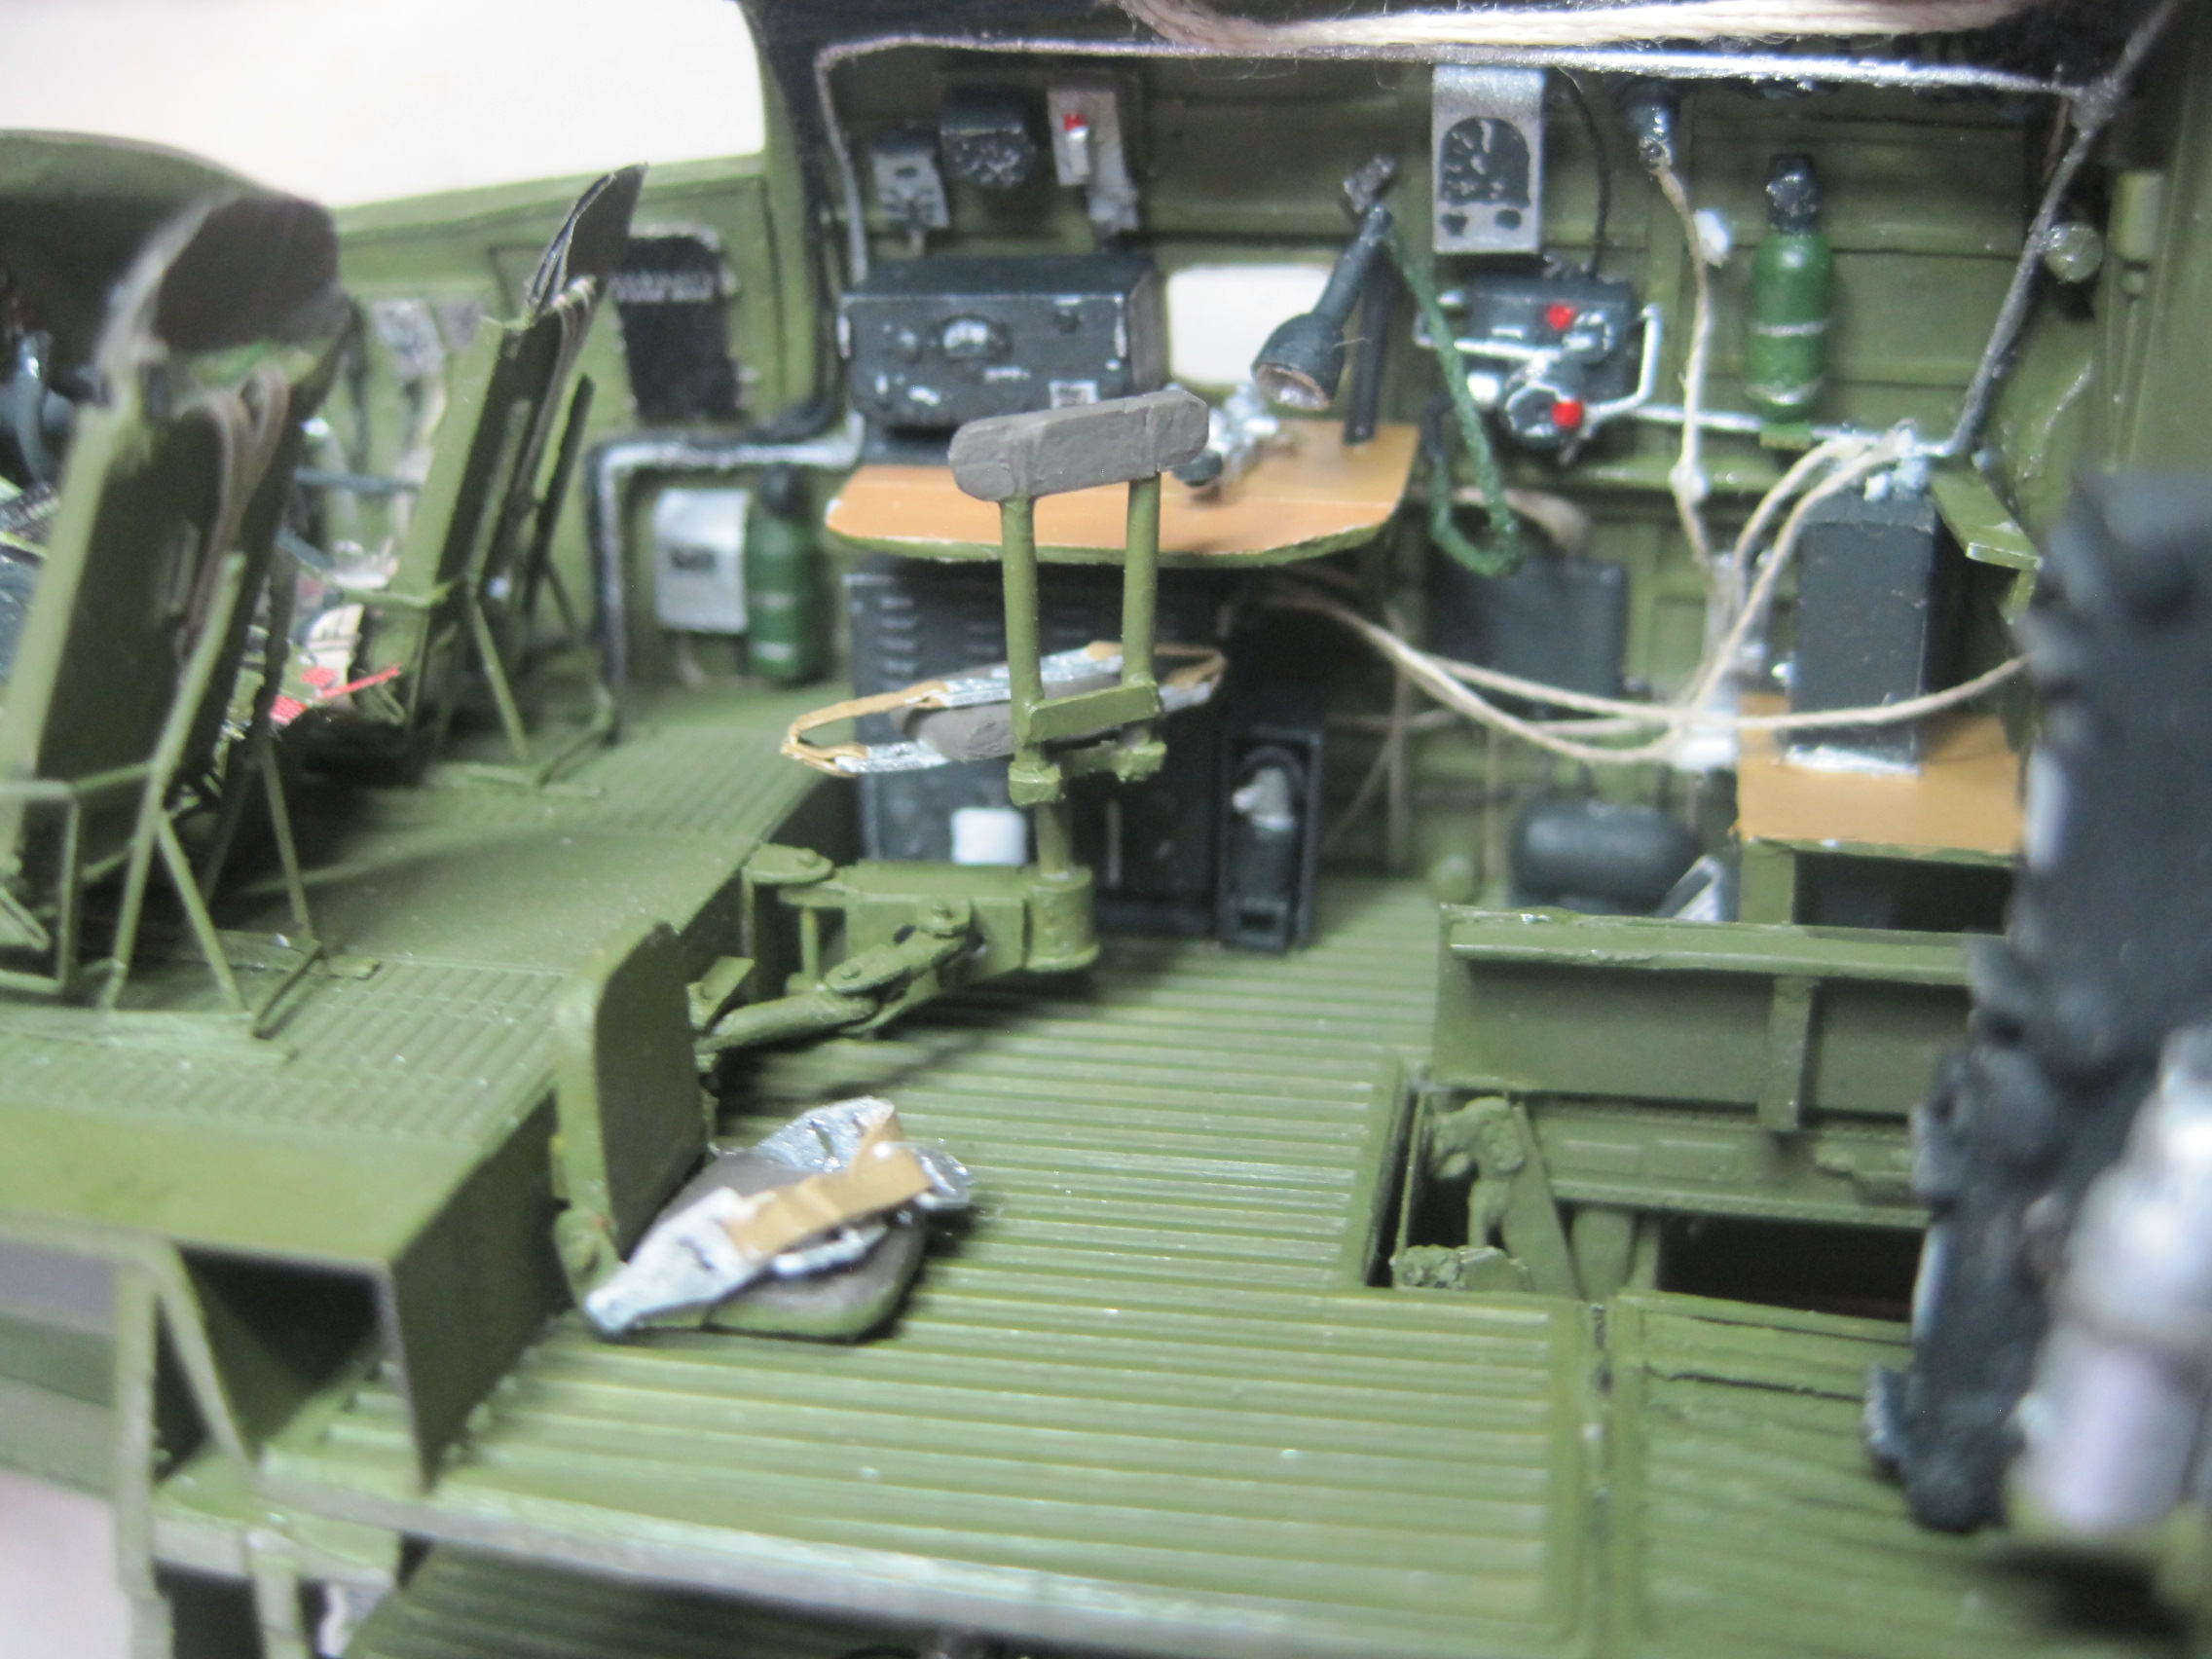
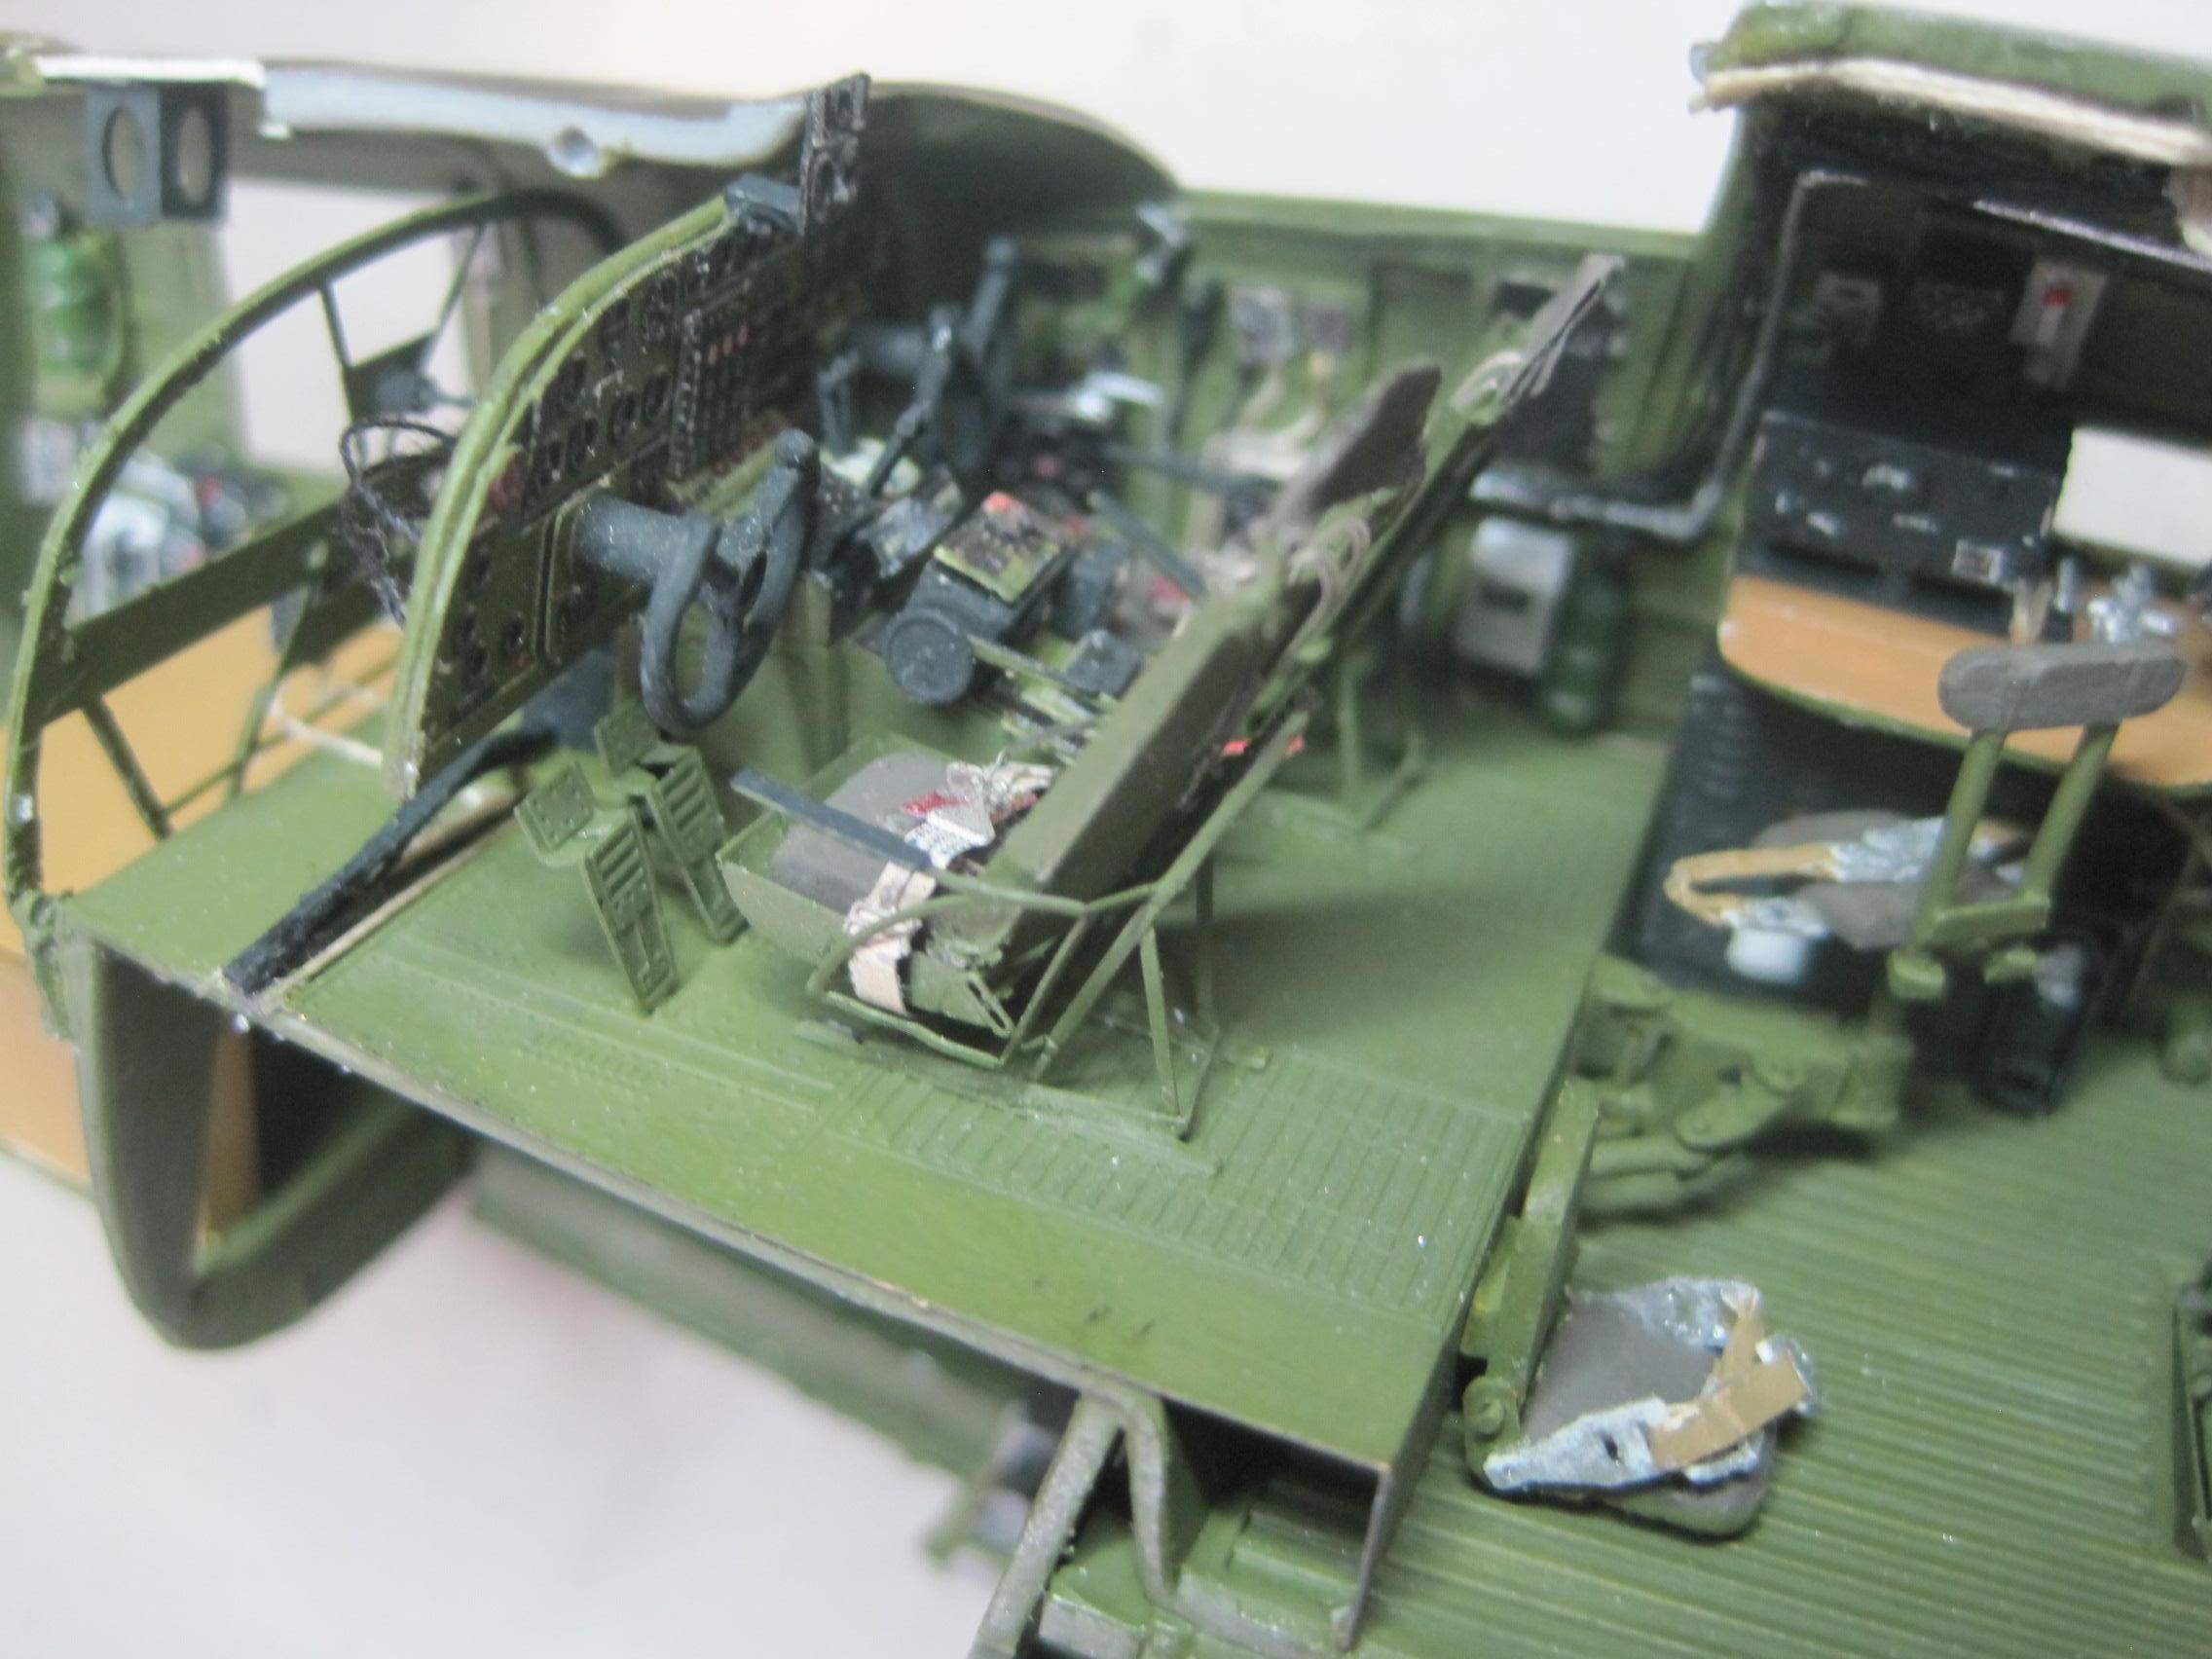
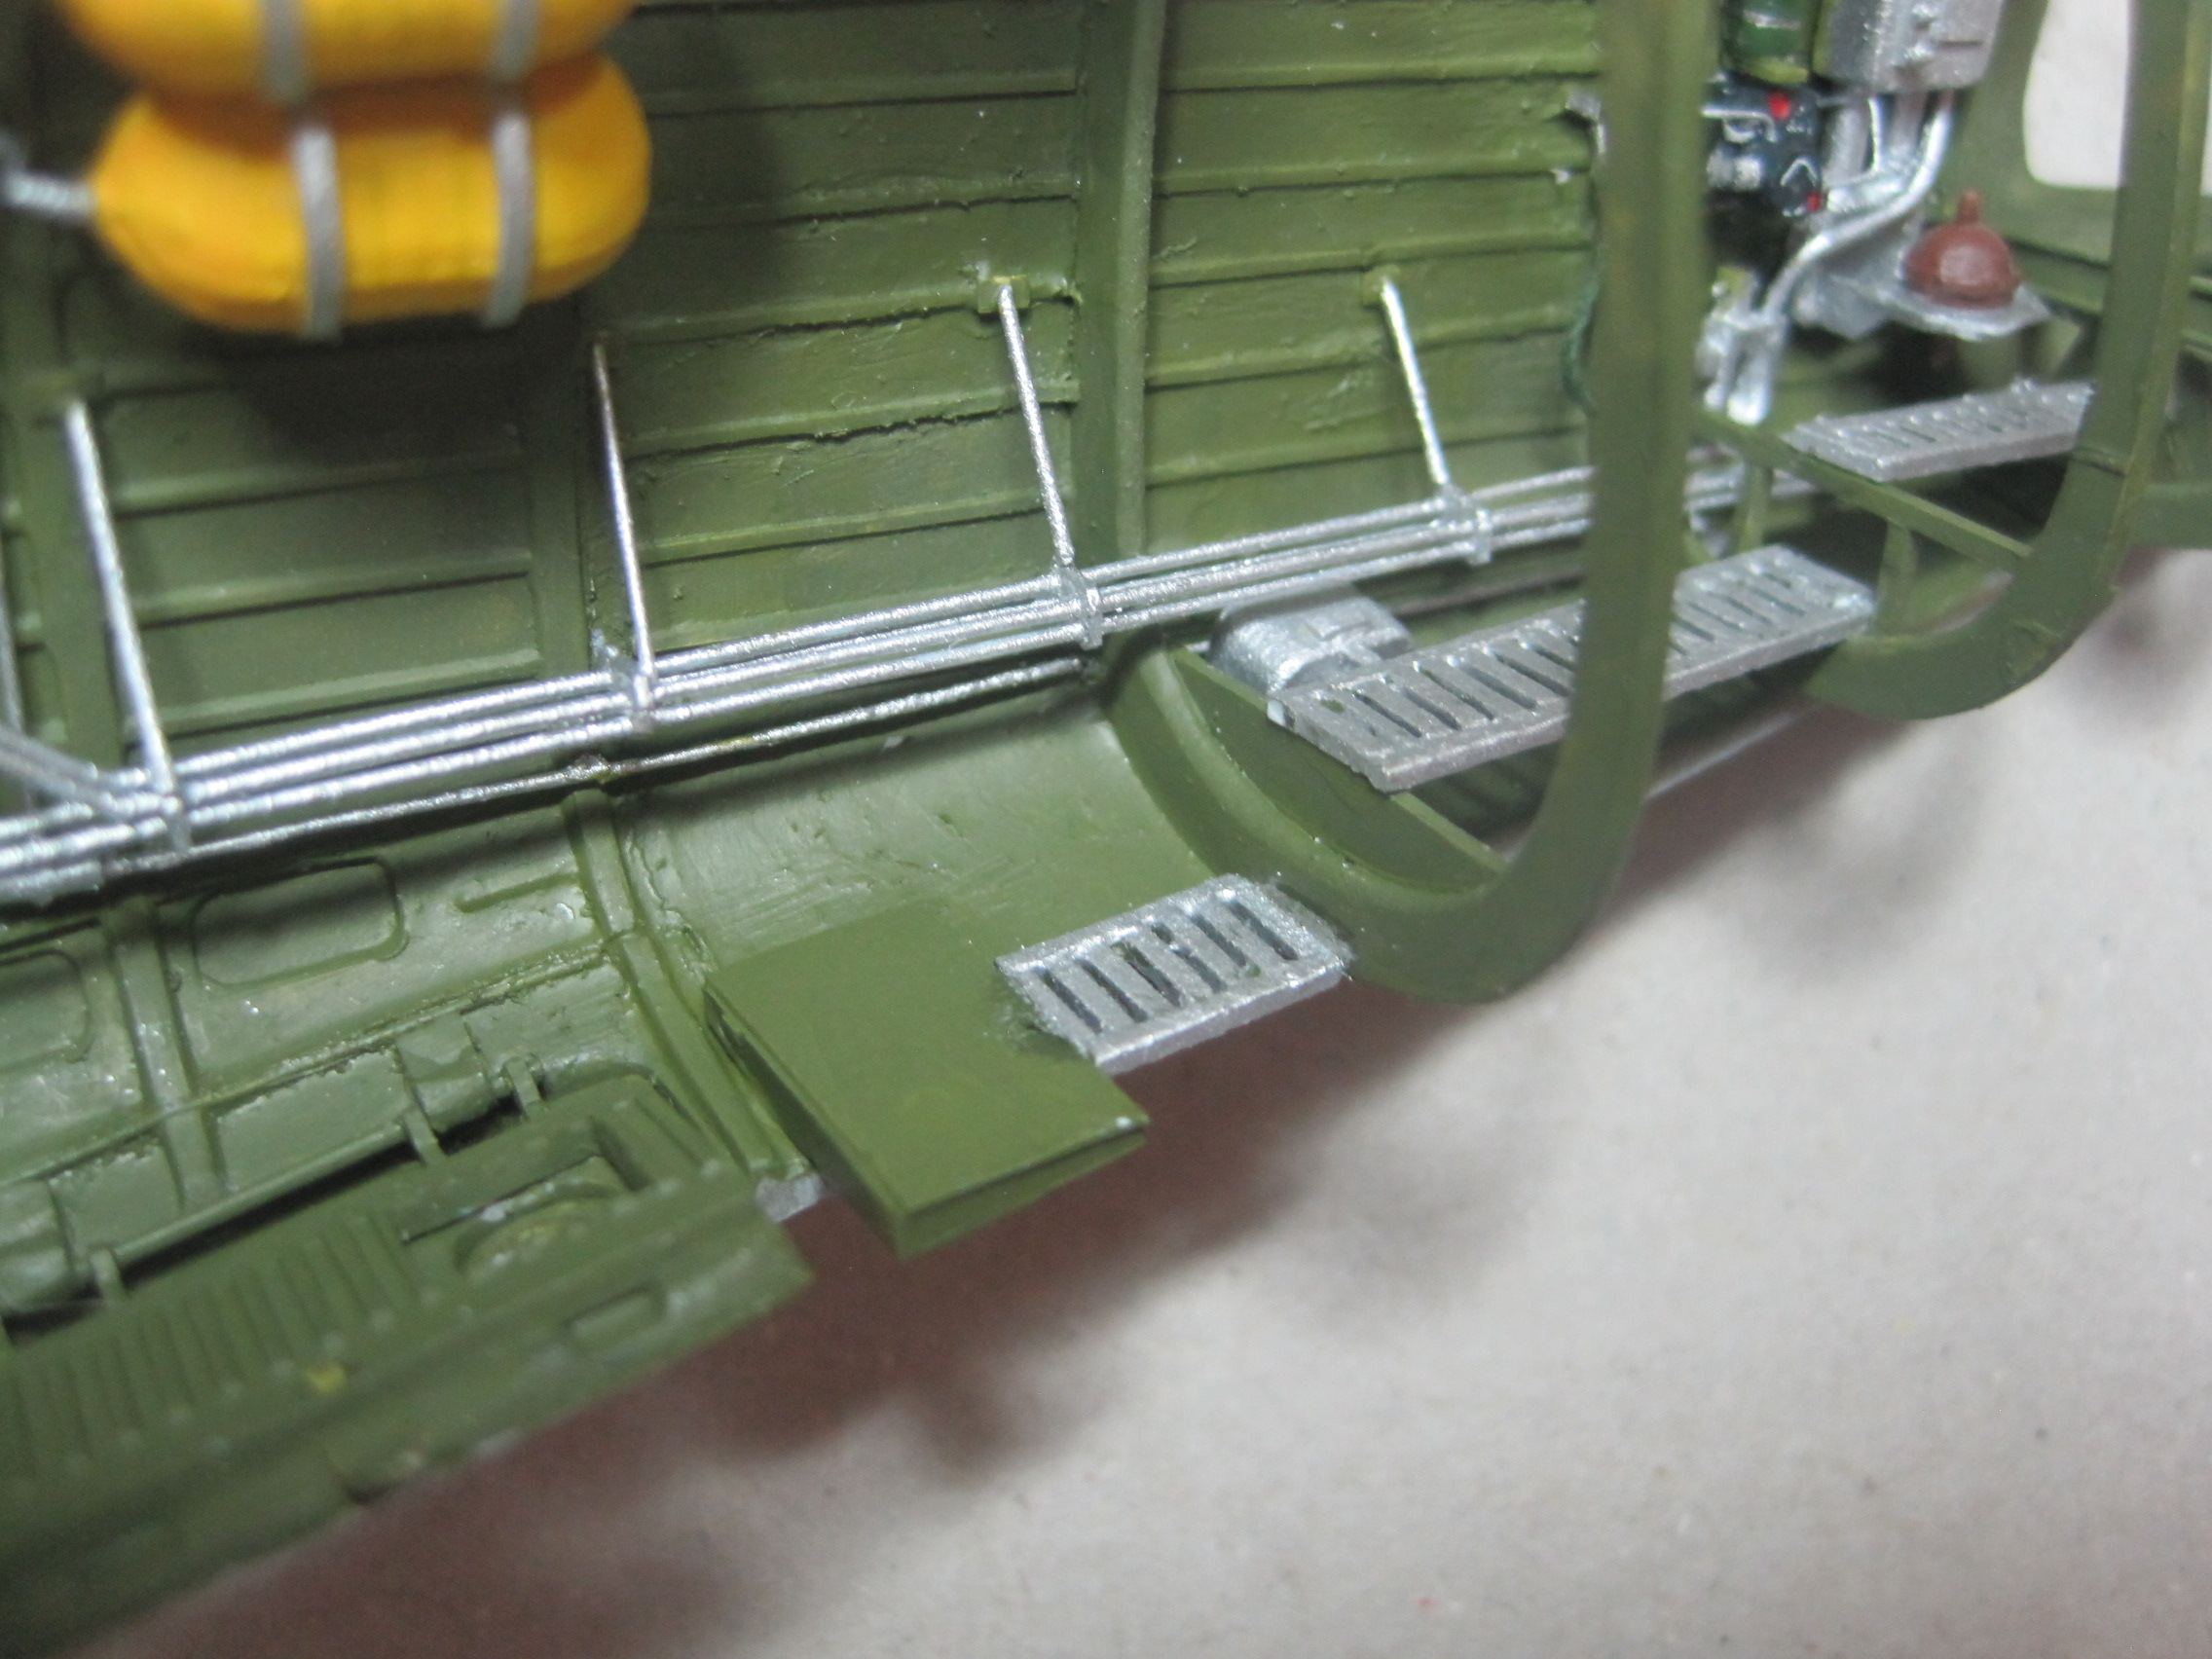
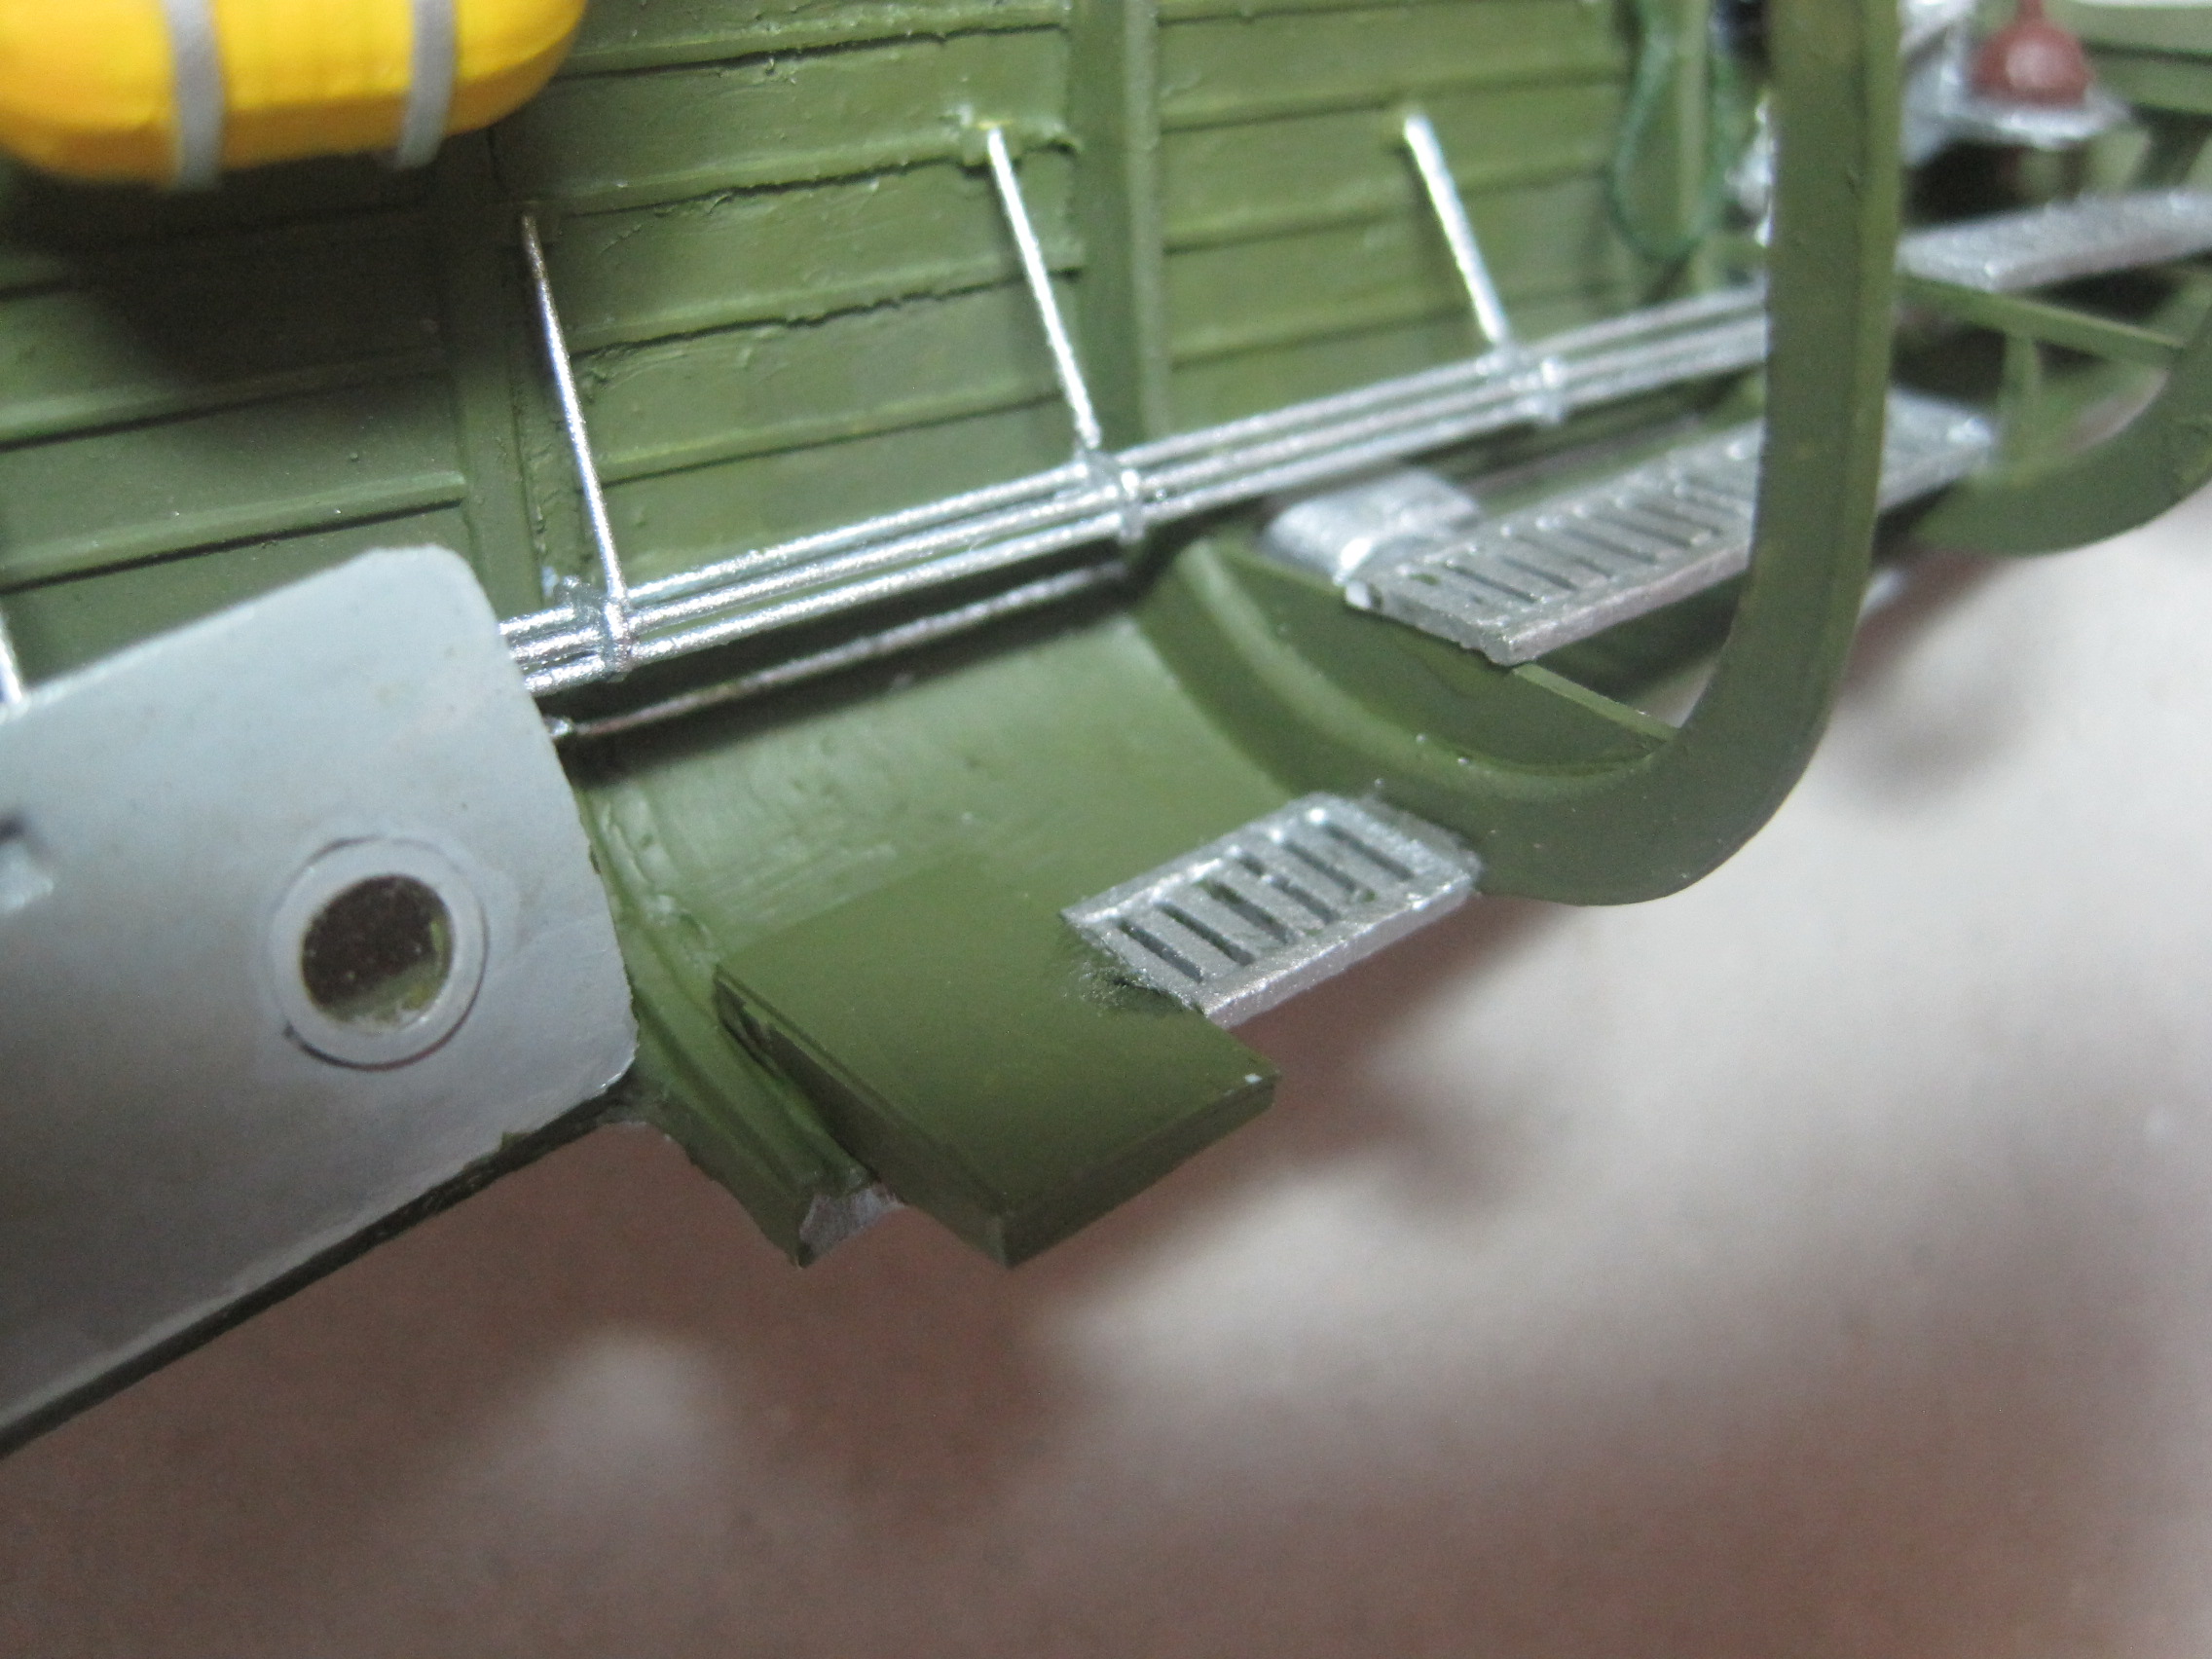
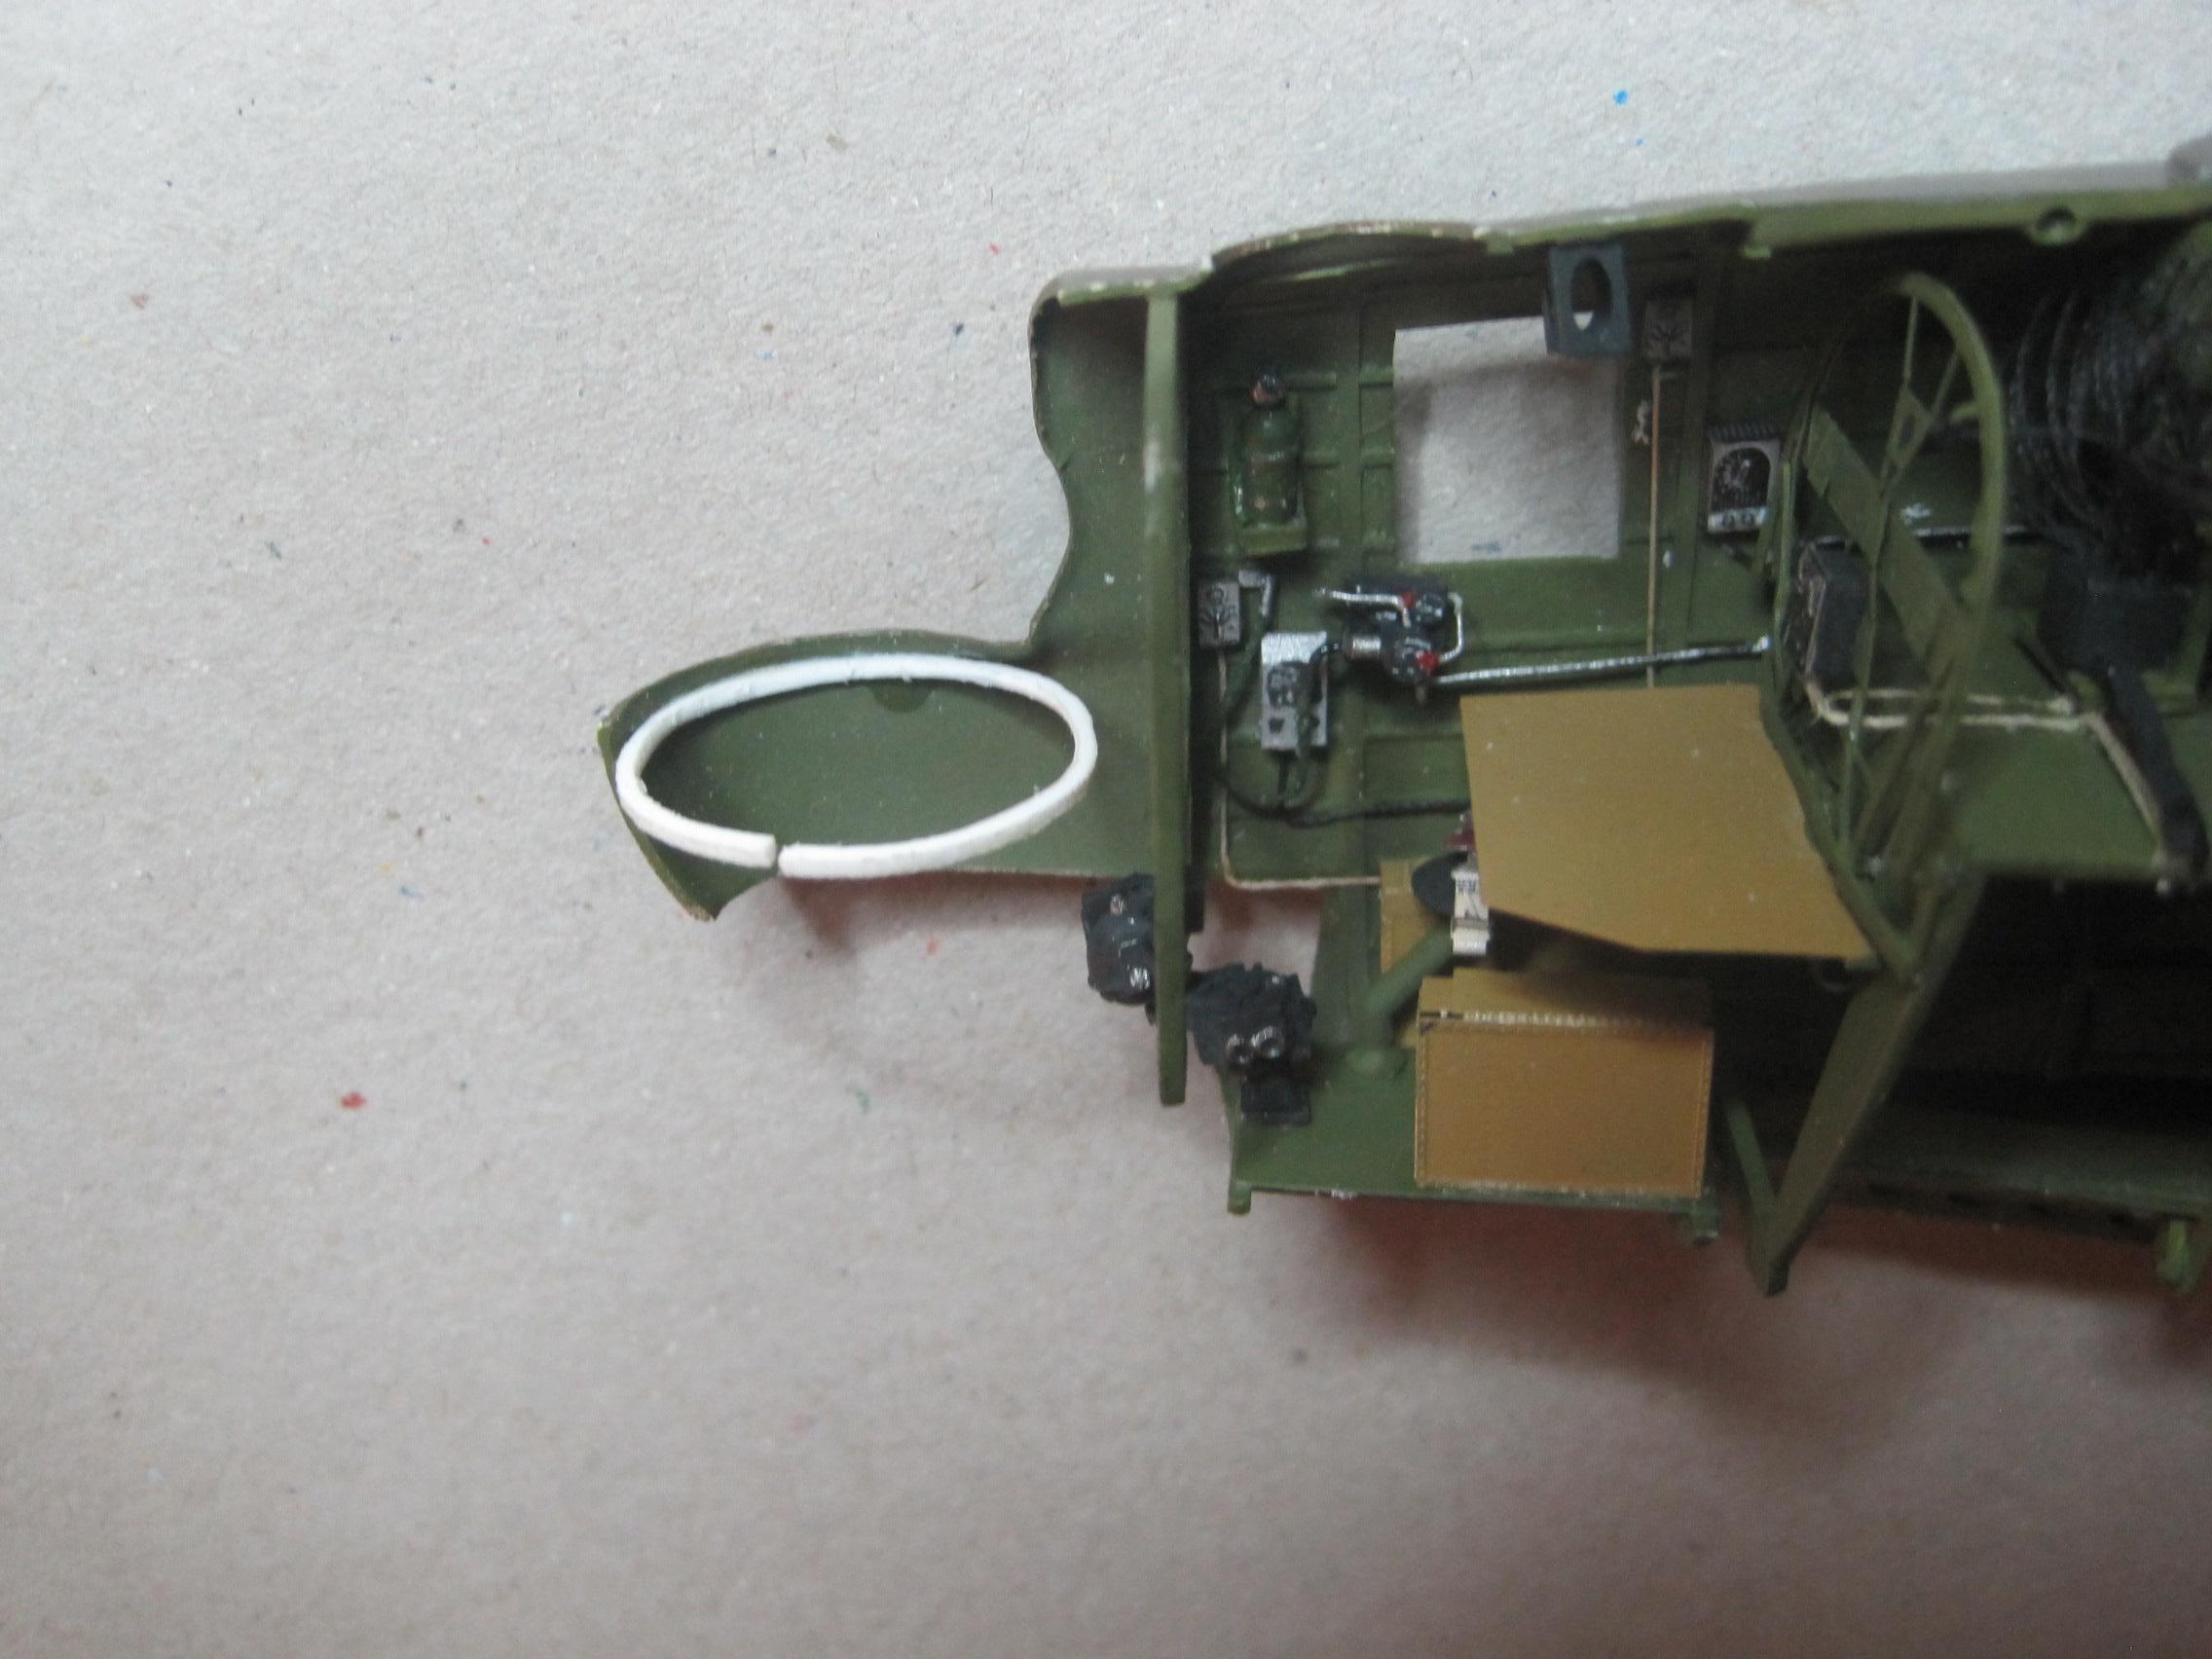
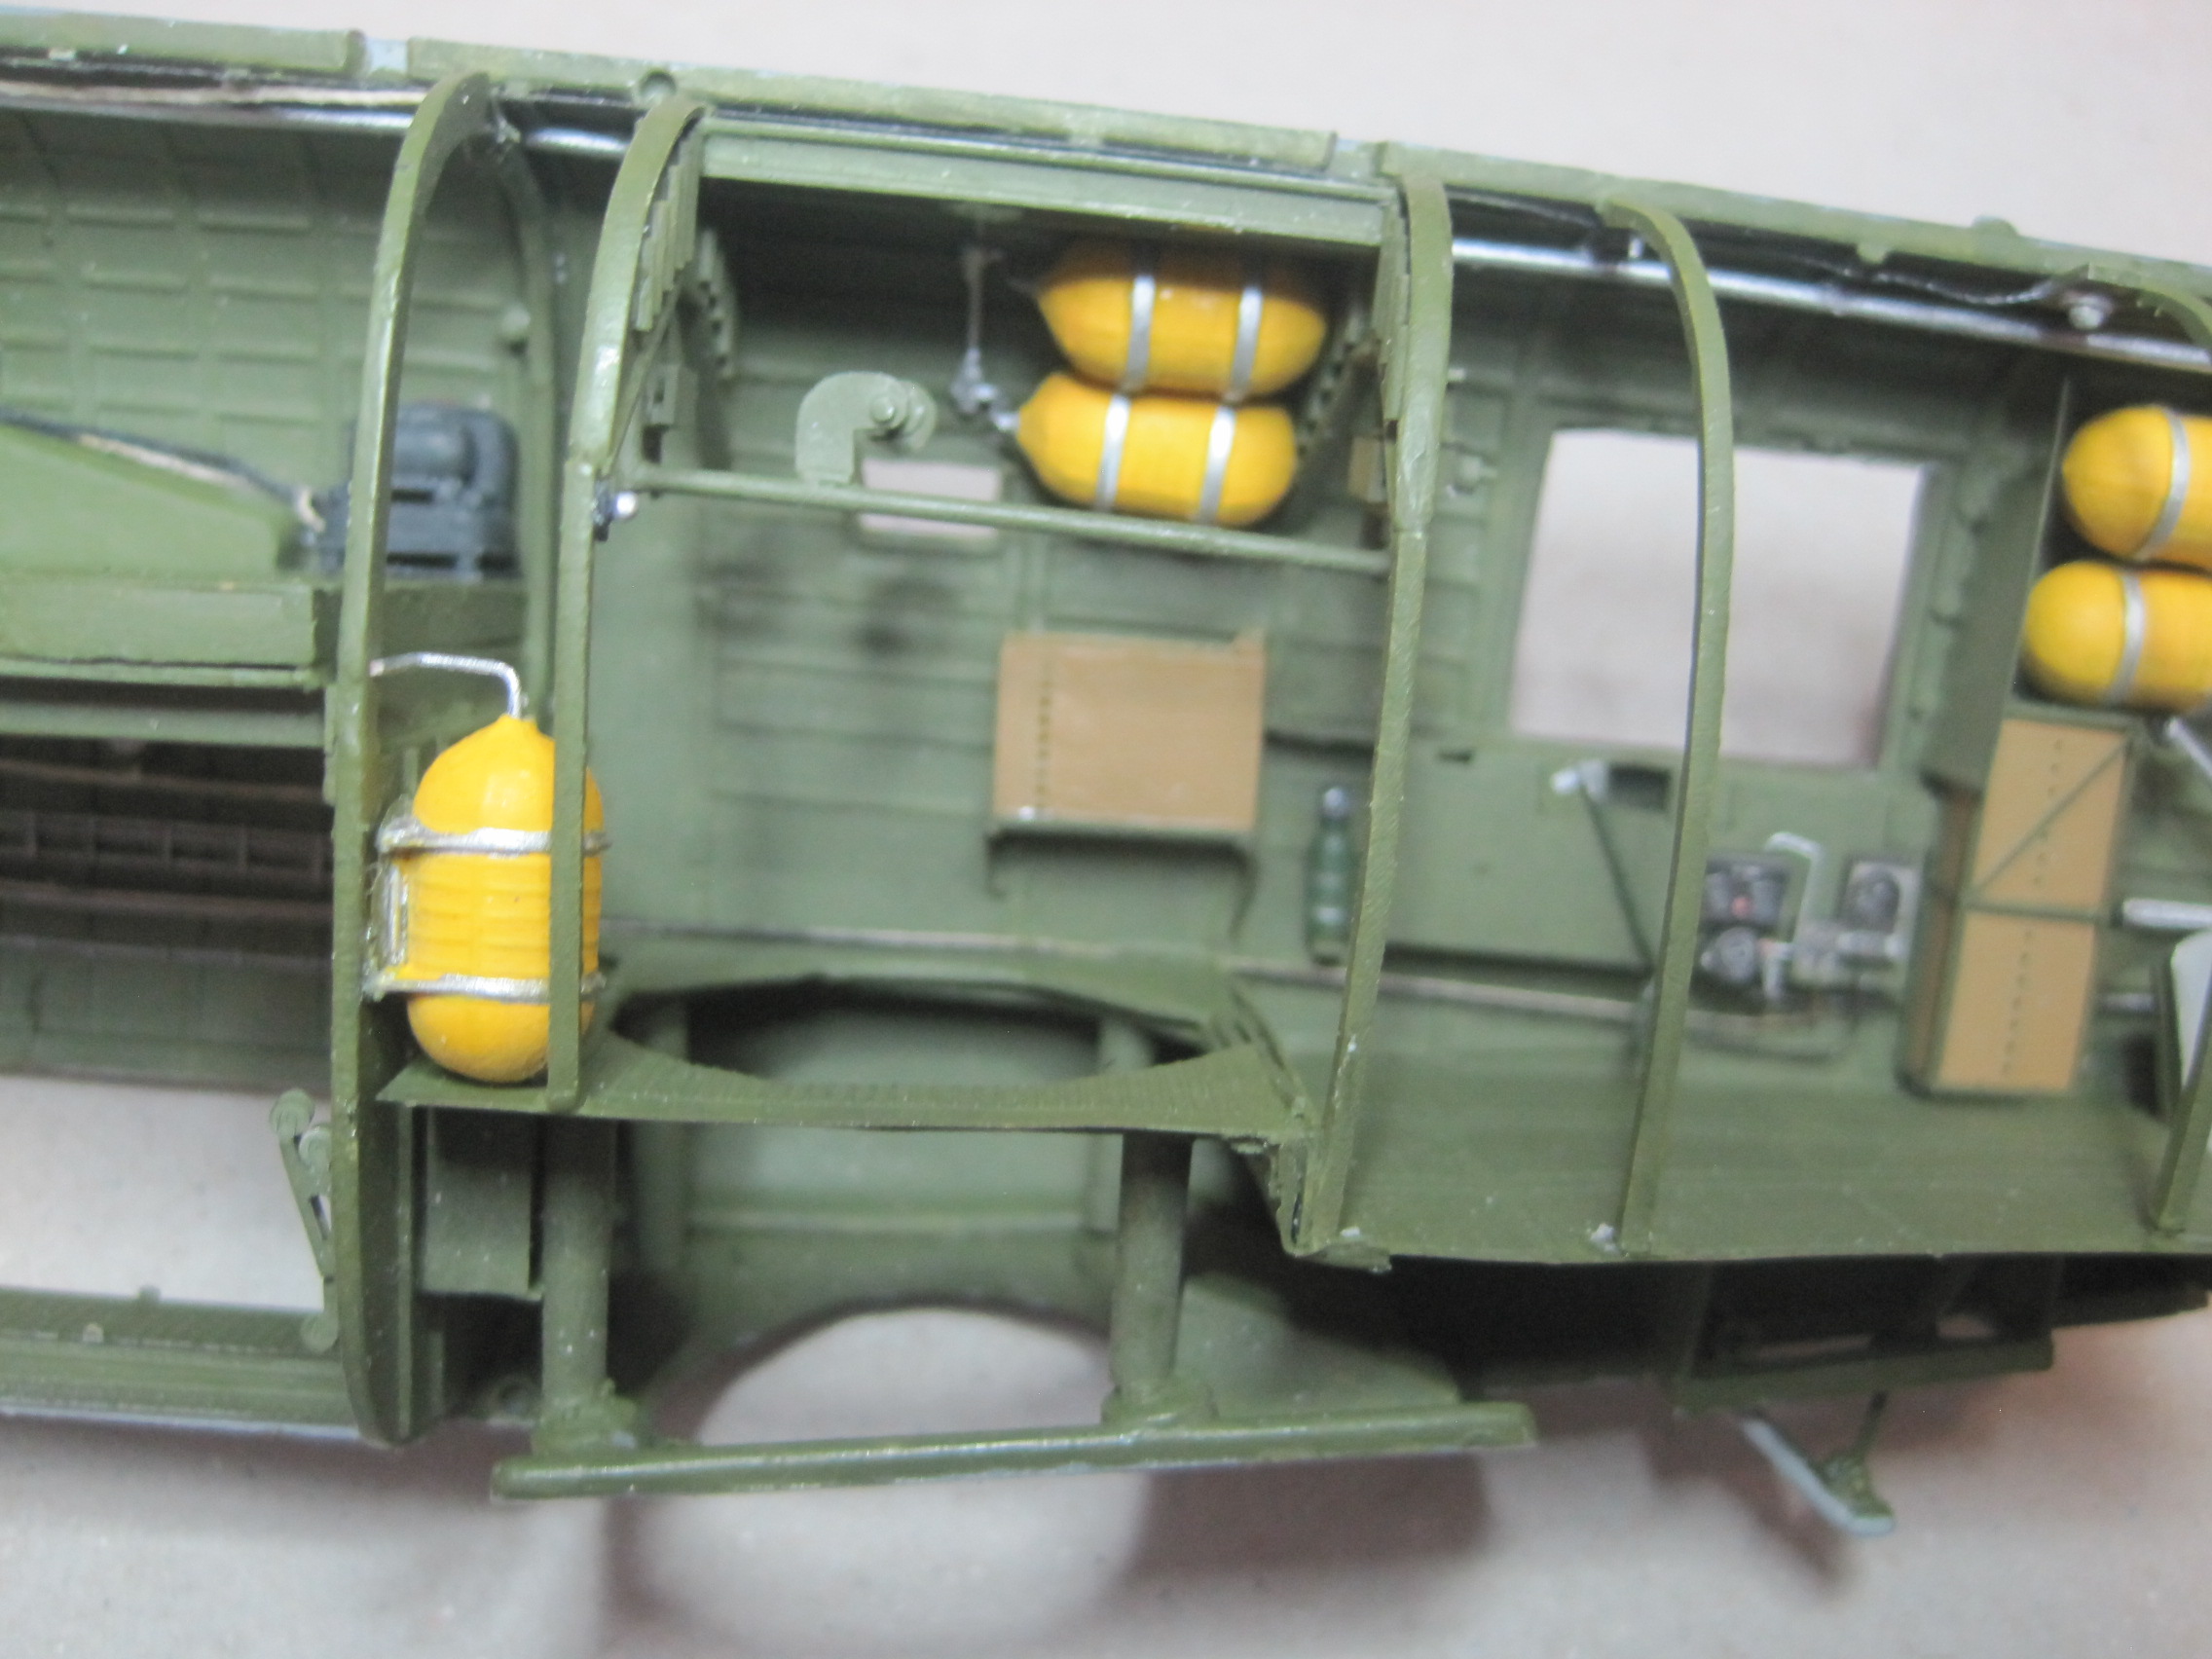
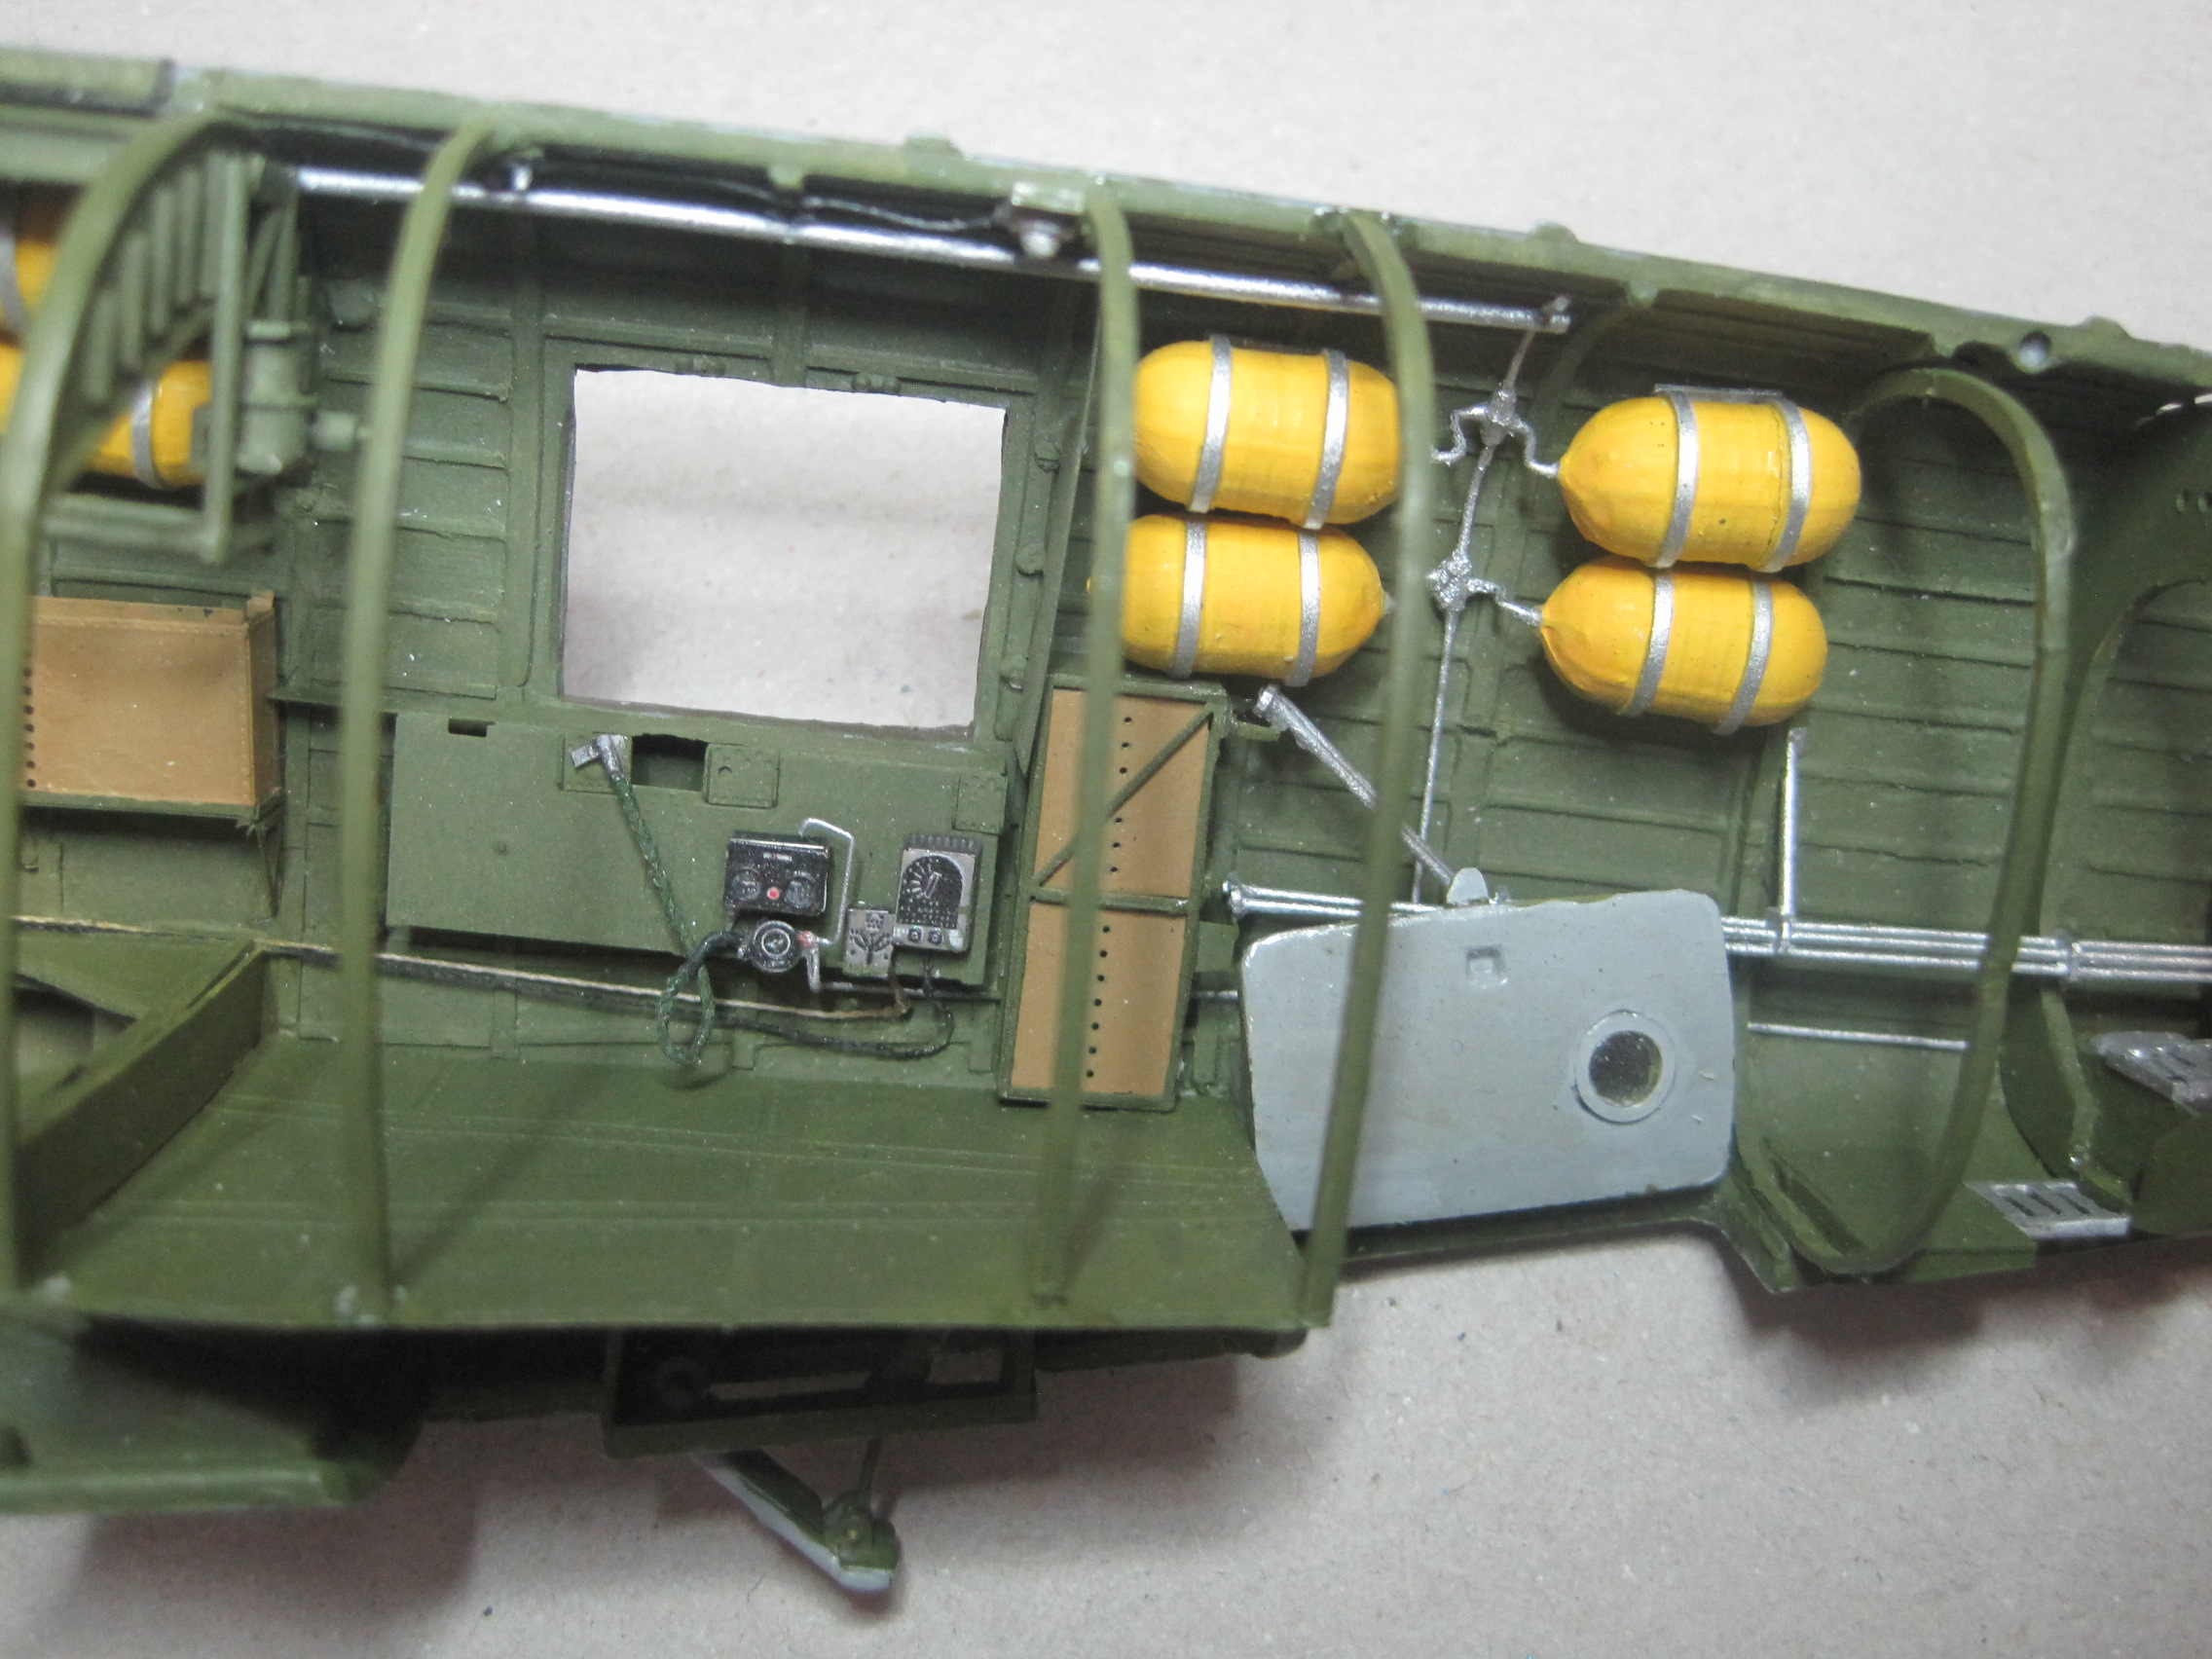
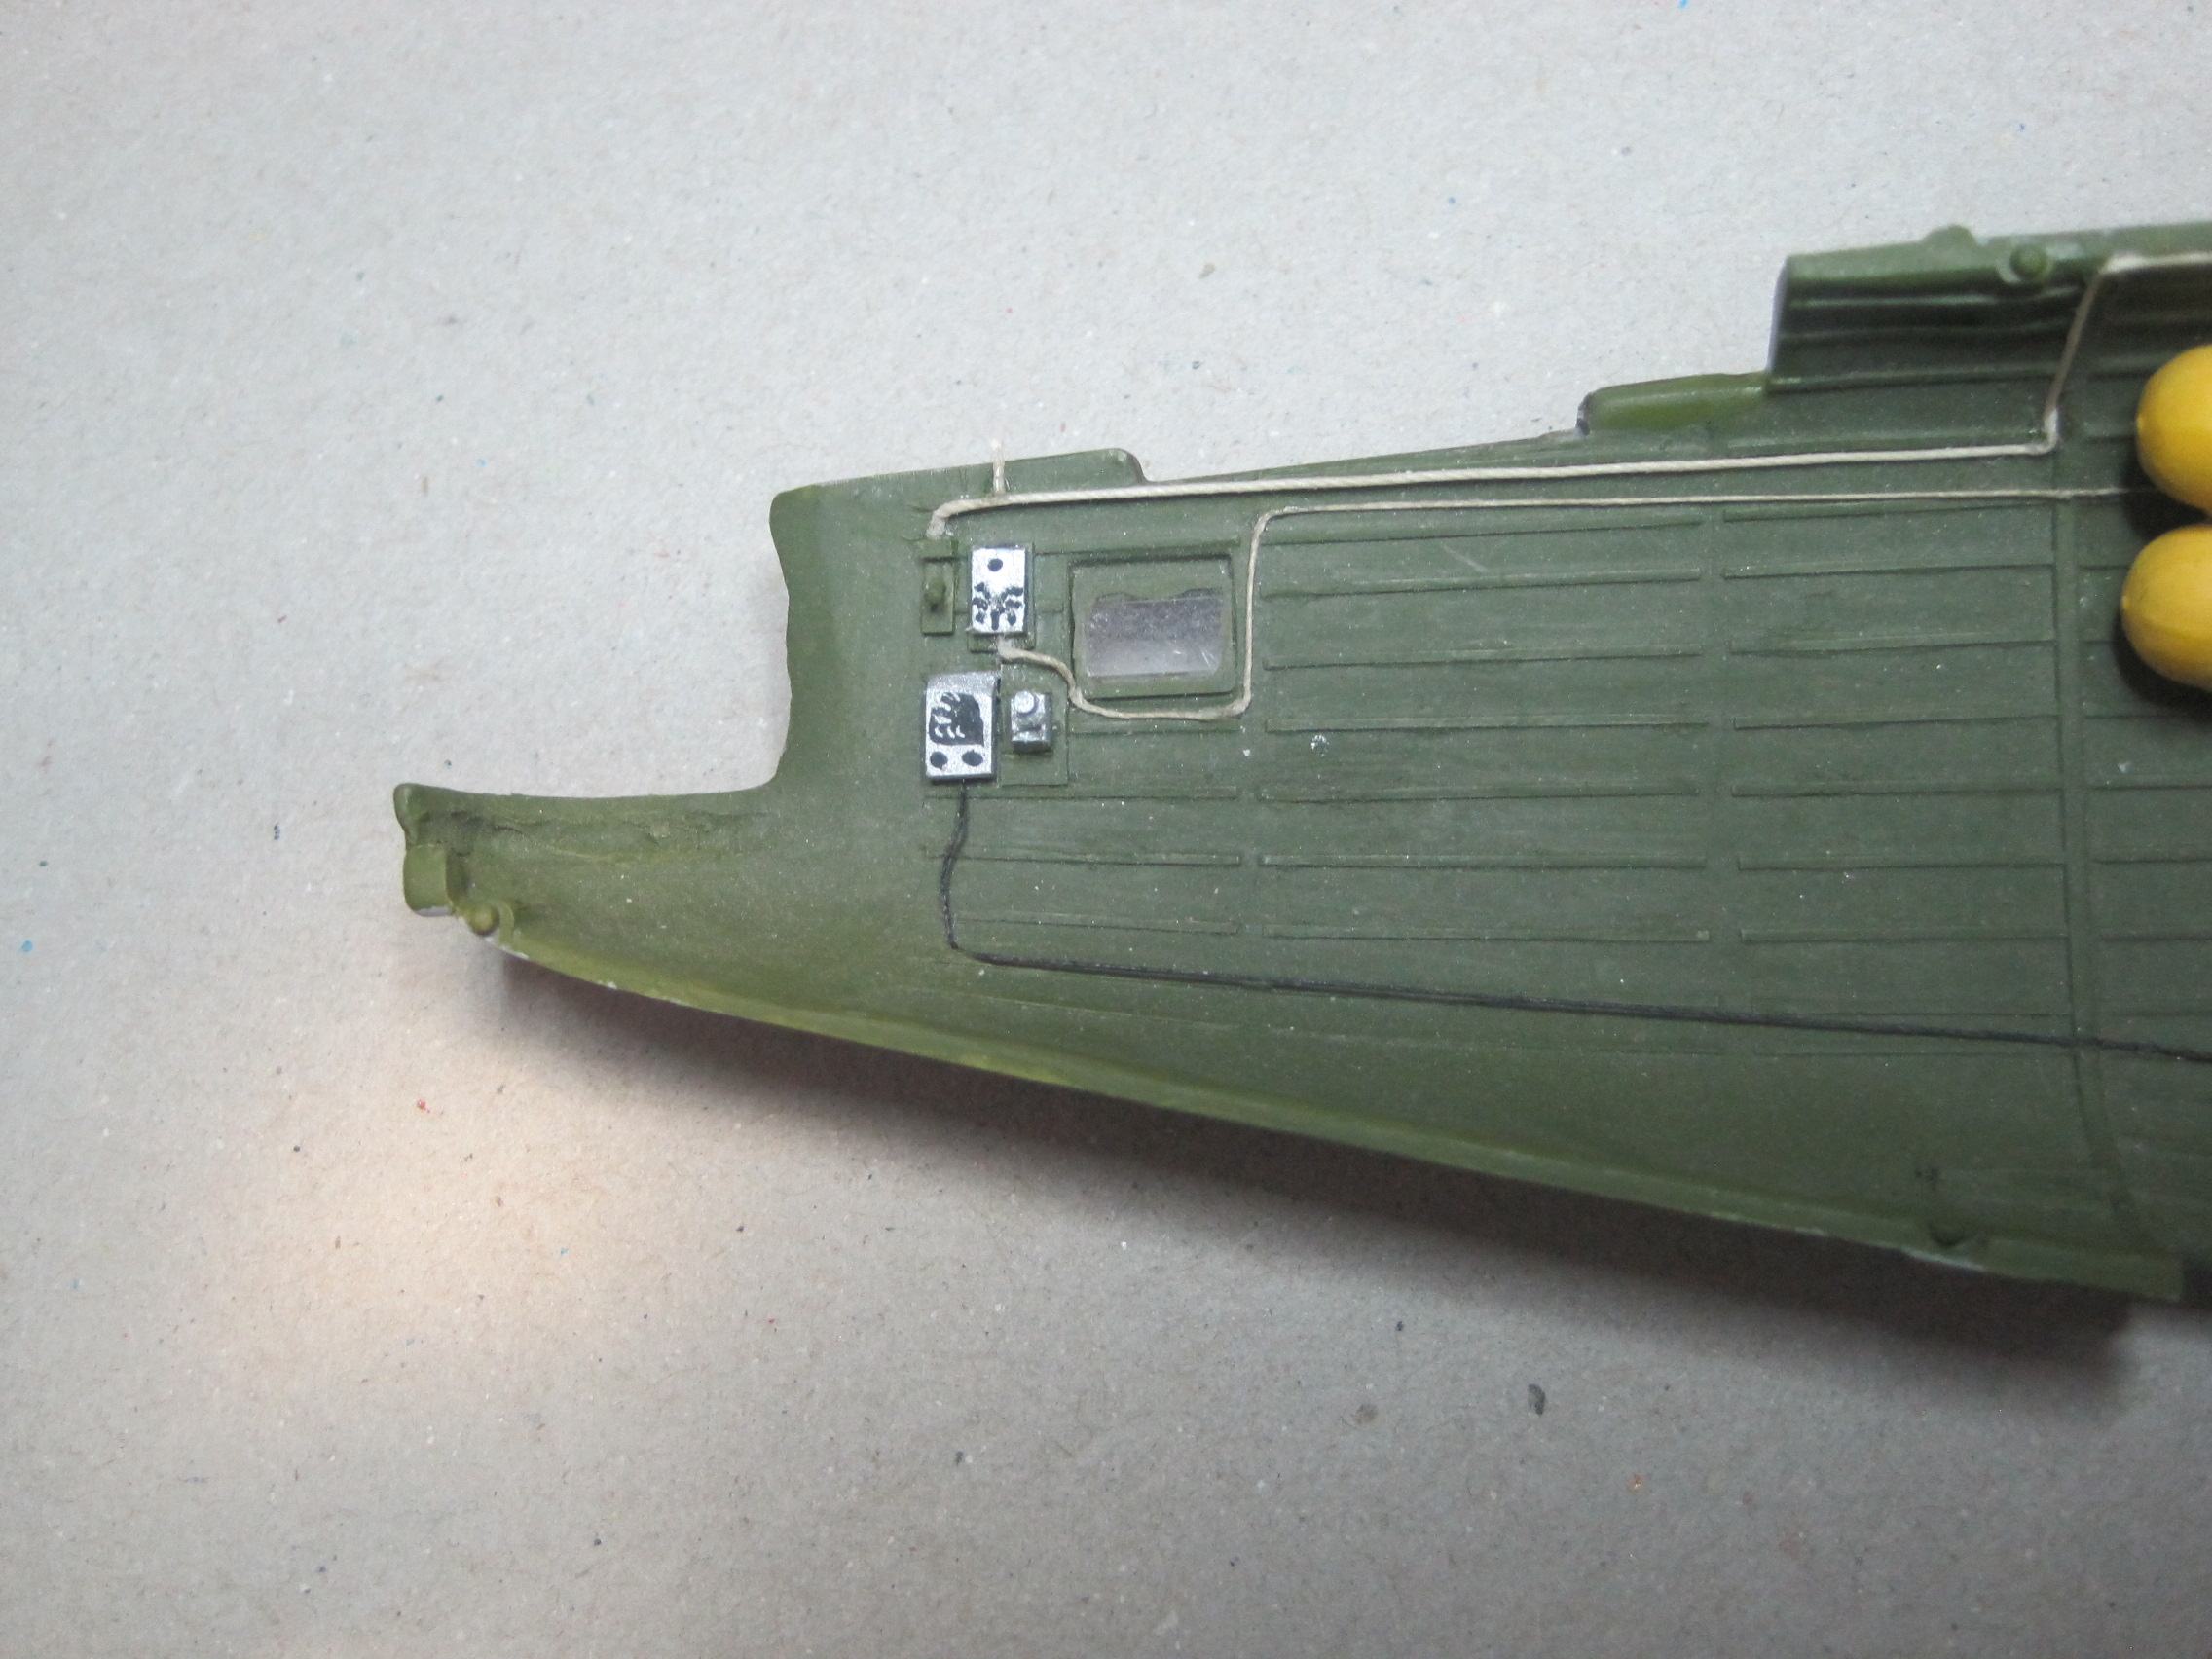
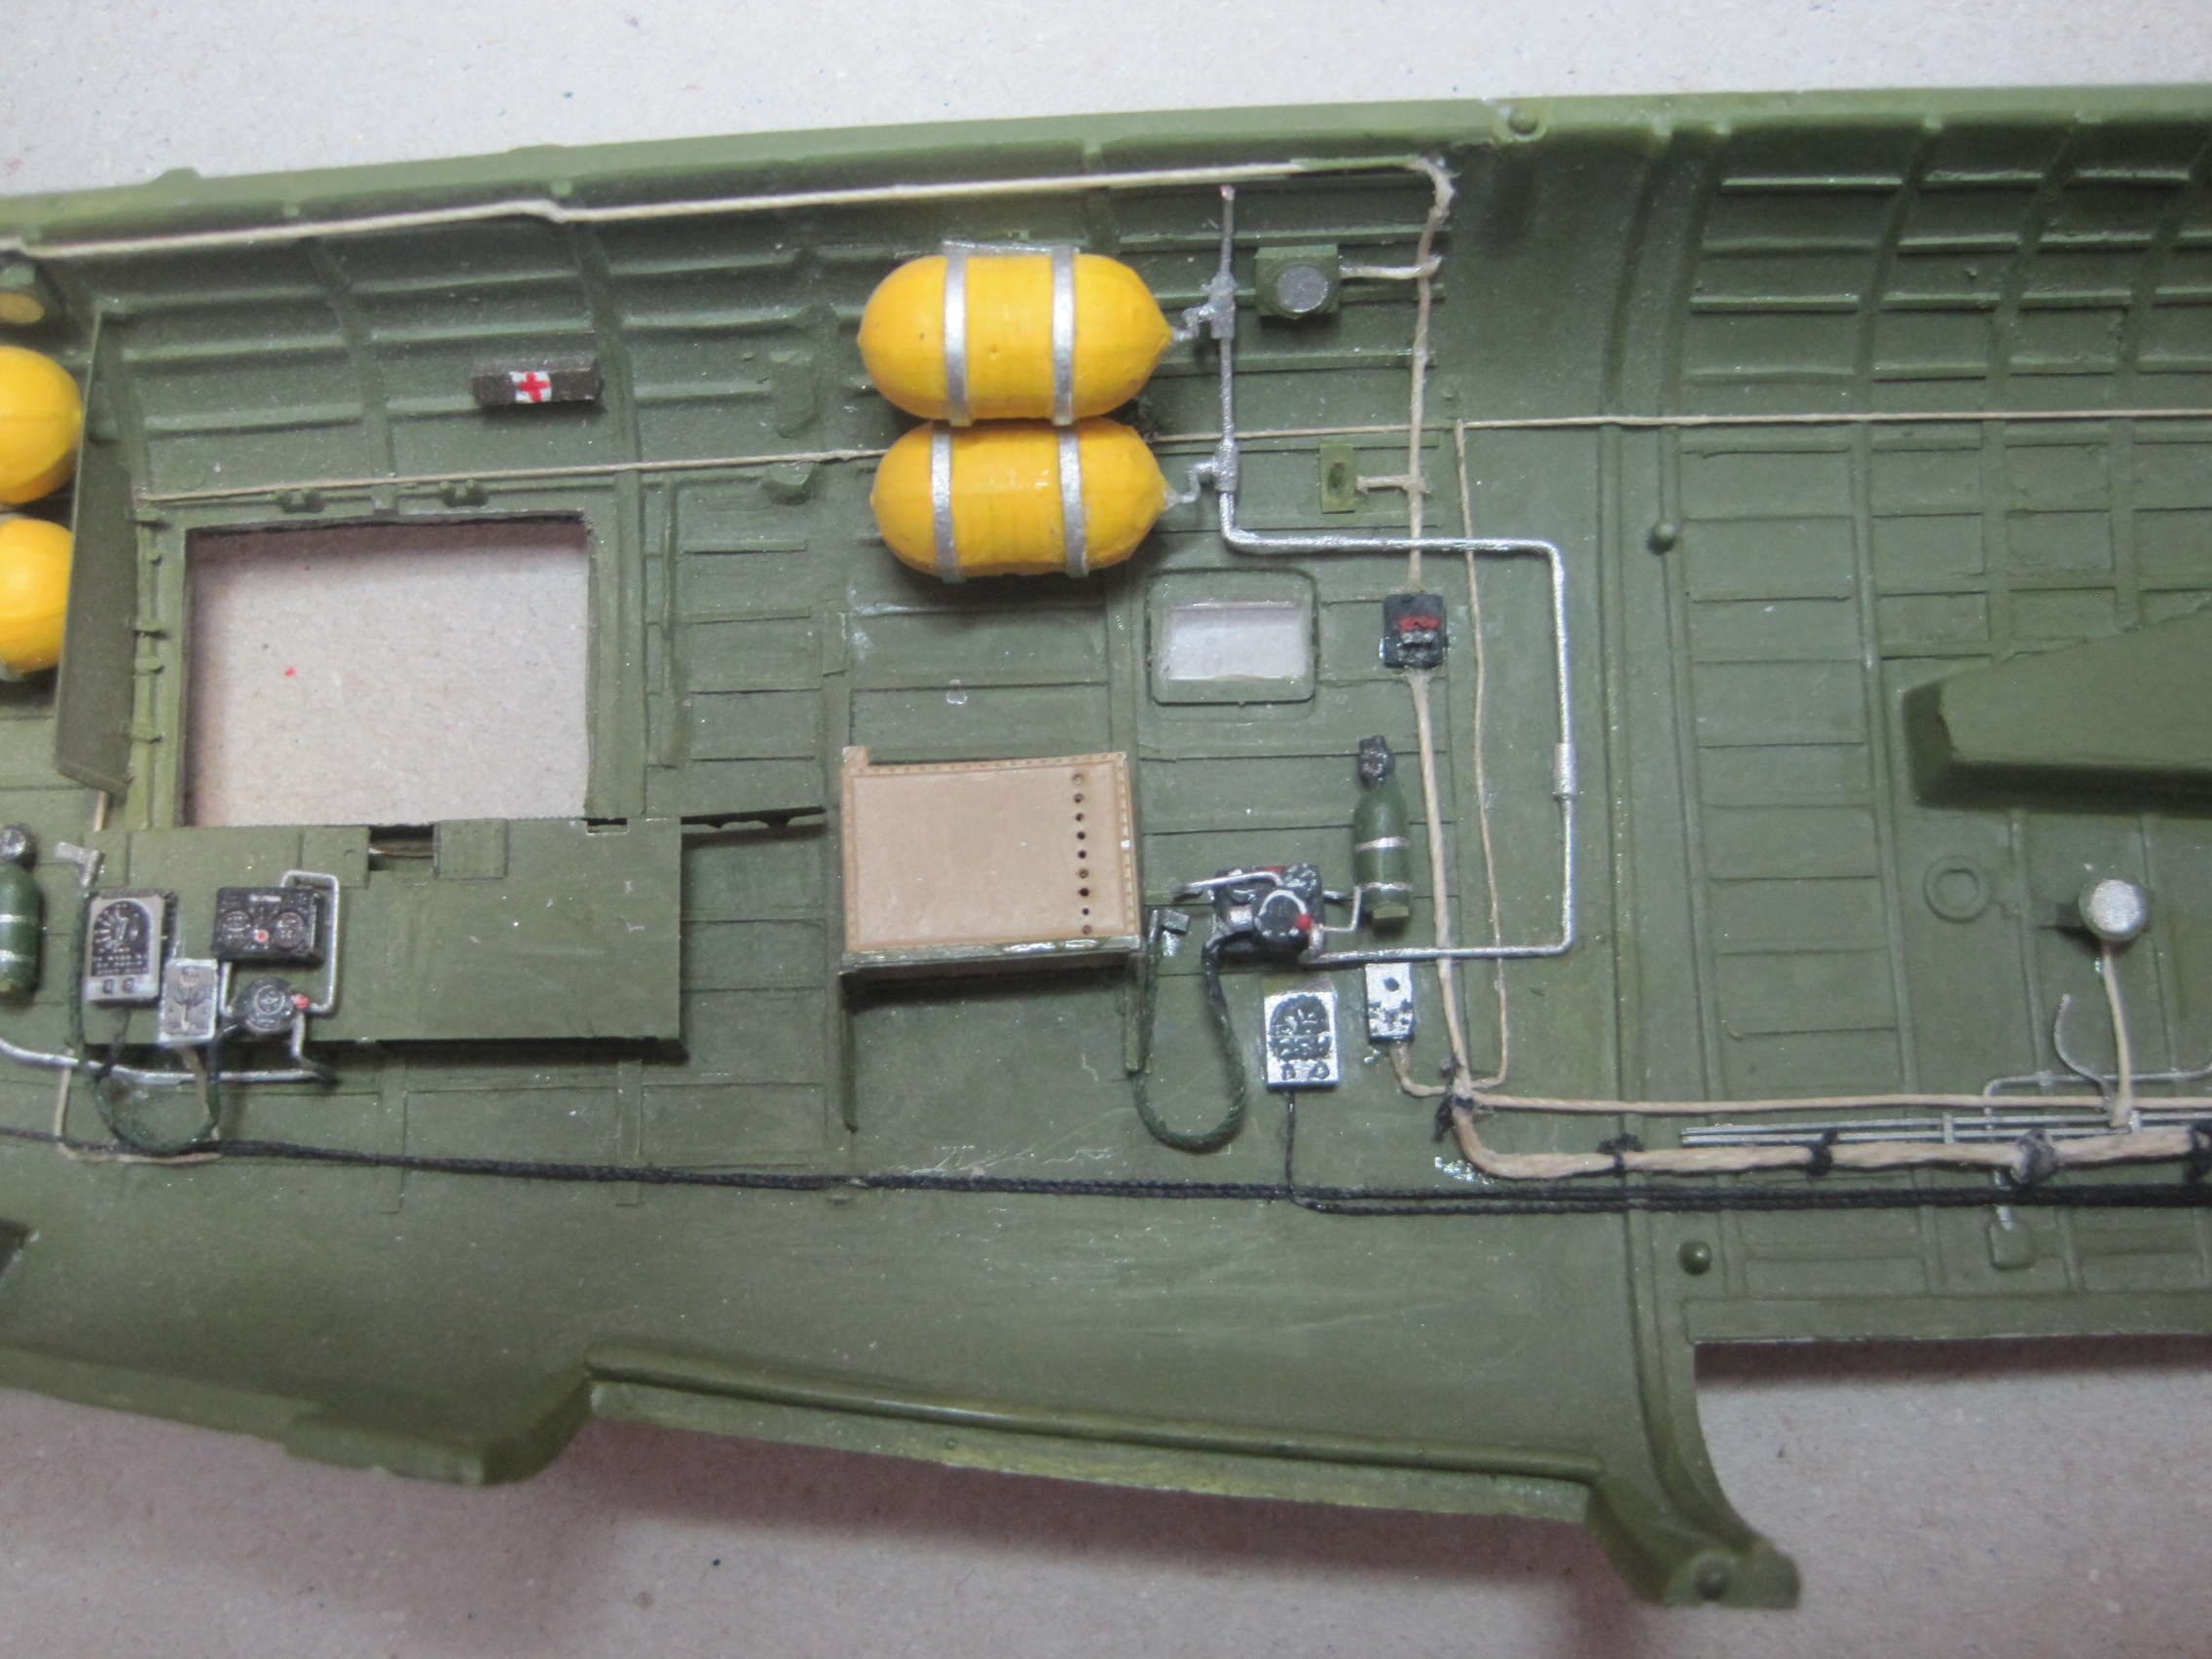
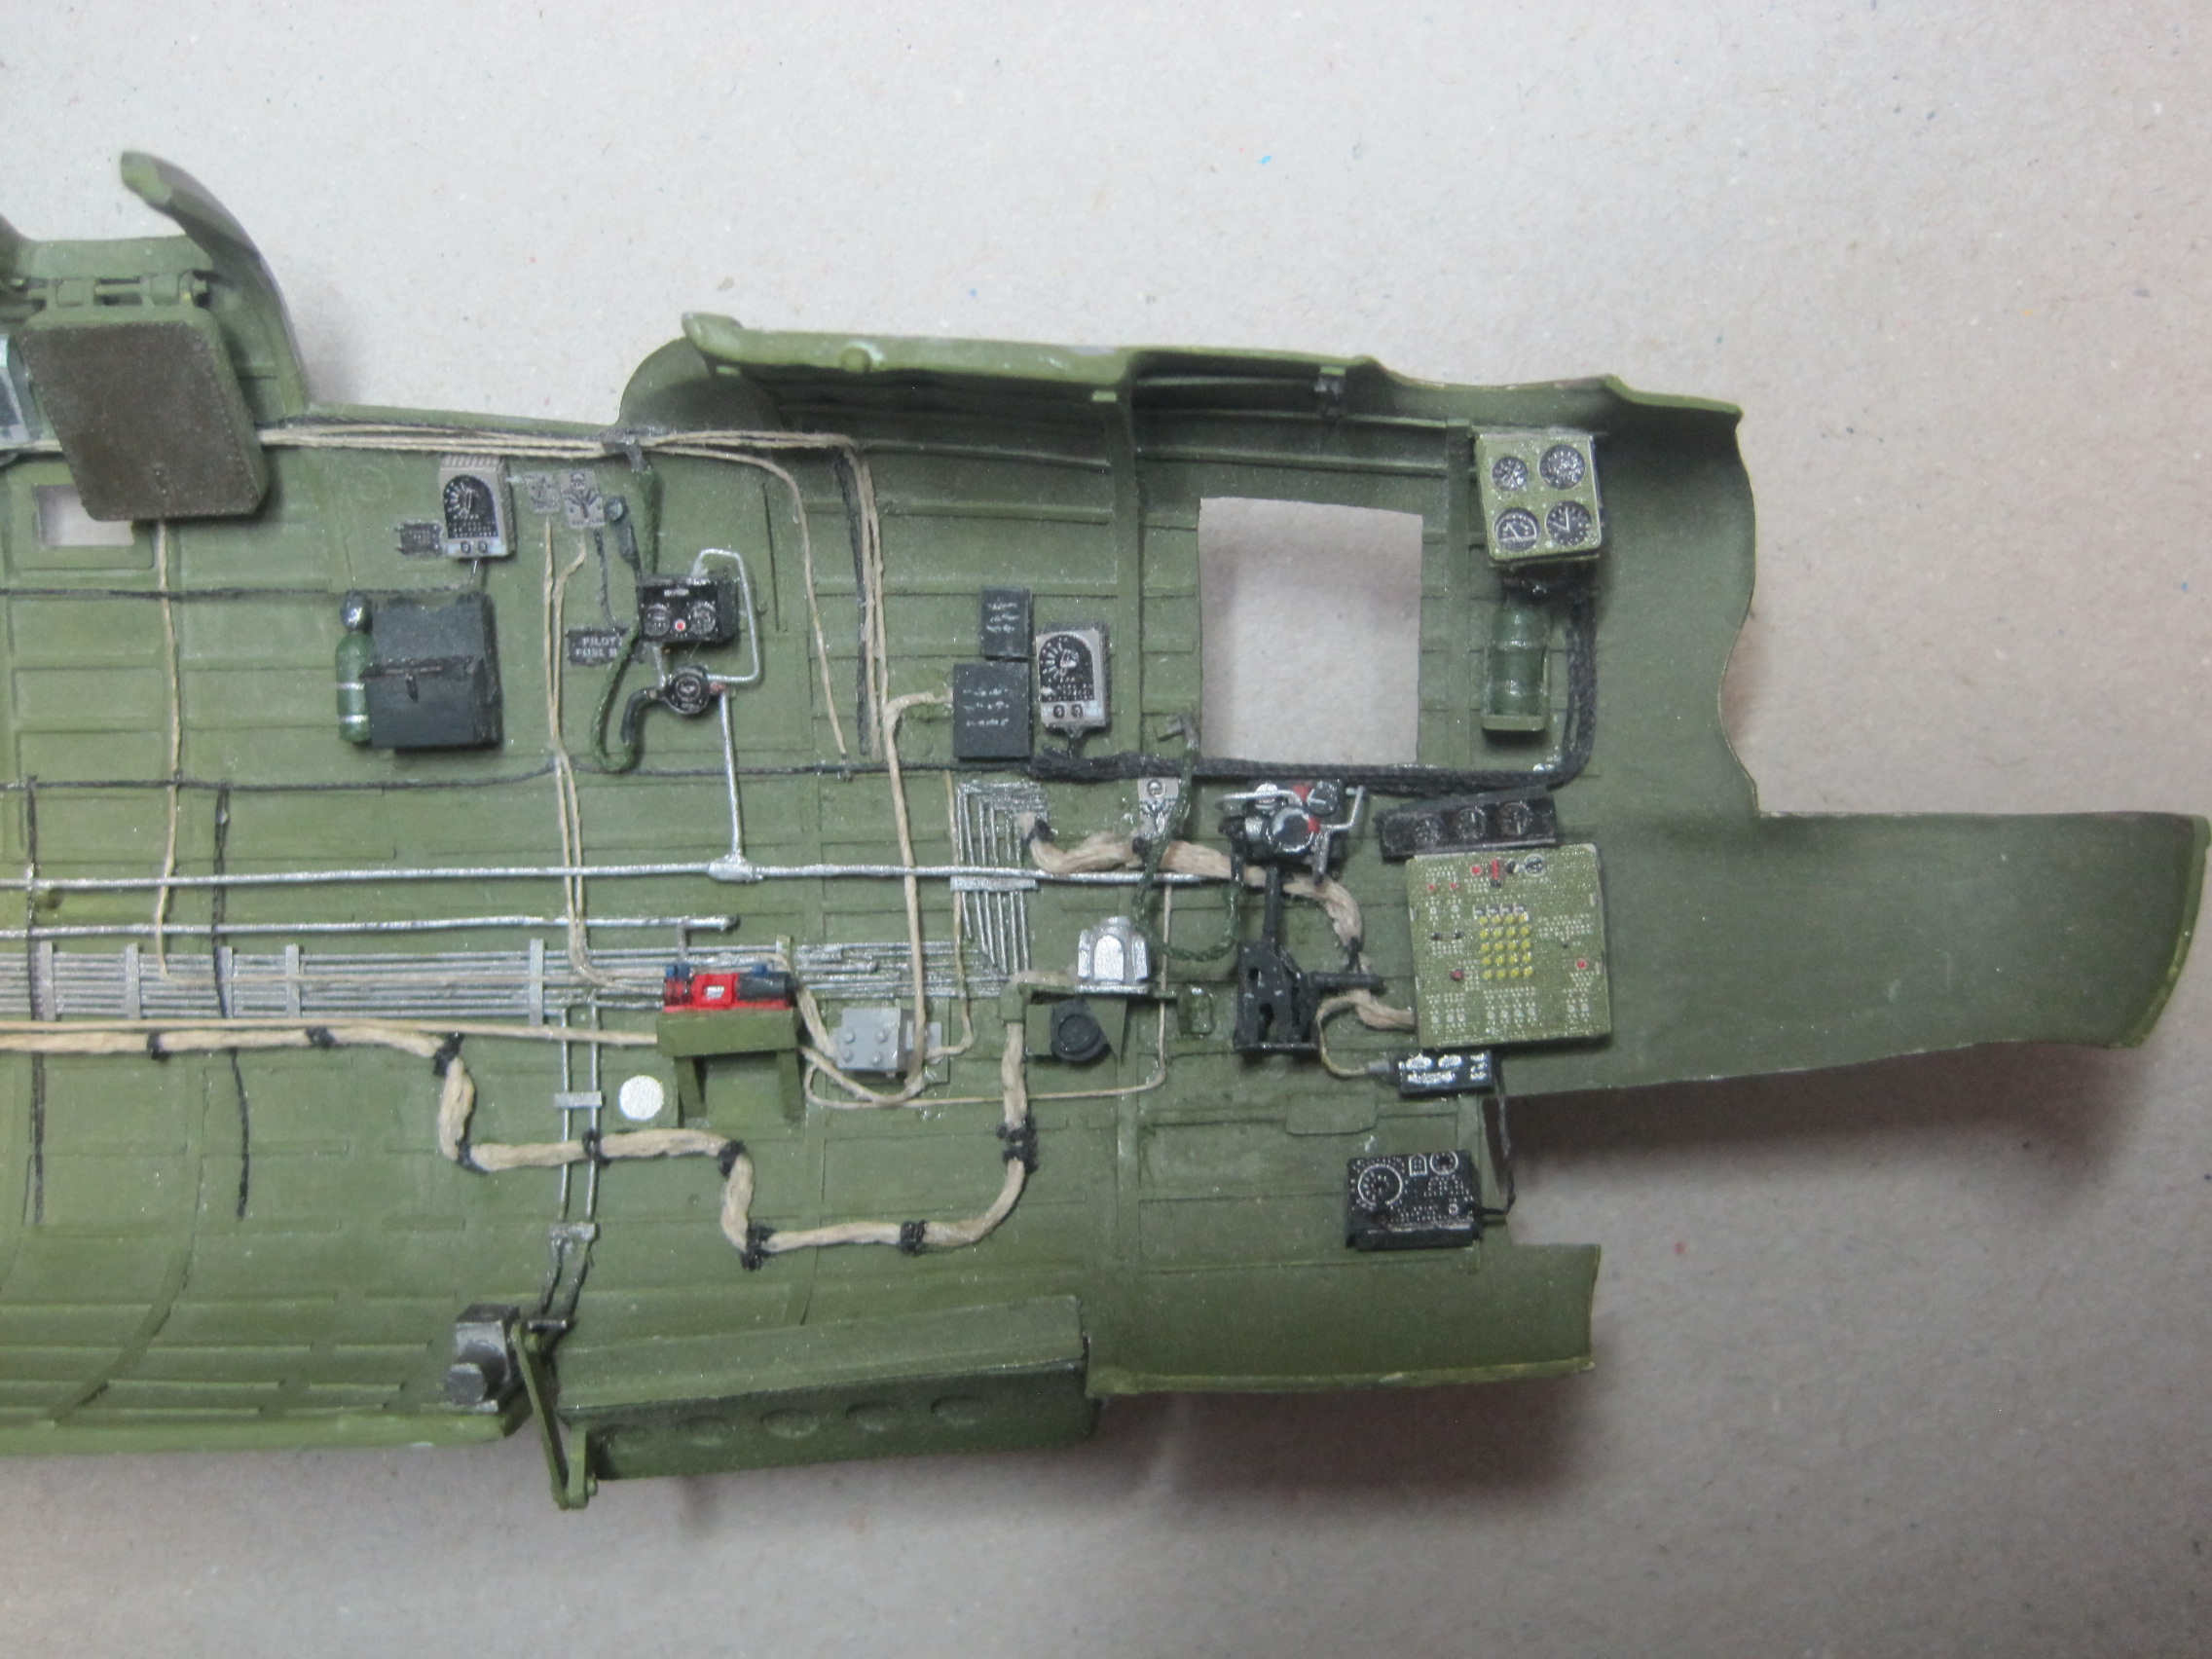
Time for an update. I've mostly finished the intercom wiring and the radio system installation. A large part of that has to wait until after I build the compartment over the bomb bay. I've also installed the flight suit heater system and the aux generator and batteries as well as two hydraulic reservoirs and the nose gear door retractors. Next up will be the oxygen and fuel systems and then on to the bomb bay which will finally allow me to permanently install the flight deck and nose wheel assembly.


thathaway3
Joined: September 10, 2004
KitMaker: 1,610 posts
AeroScale: 85 posts
Posted: Wednesday, February 13, 2019 - 04:55 AM UTC
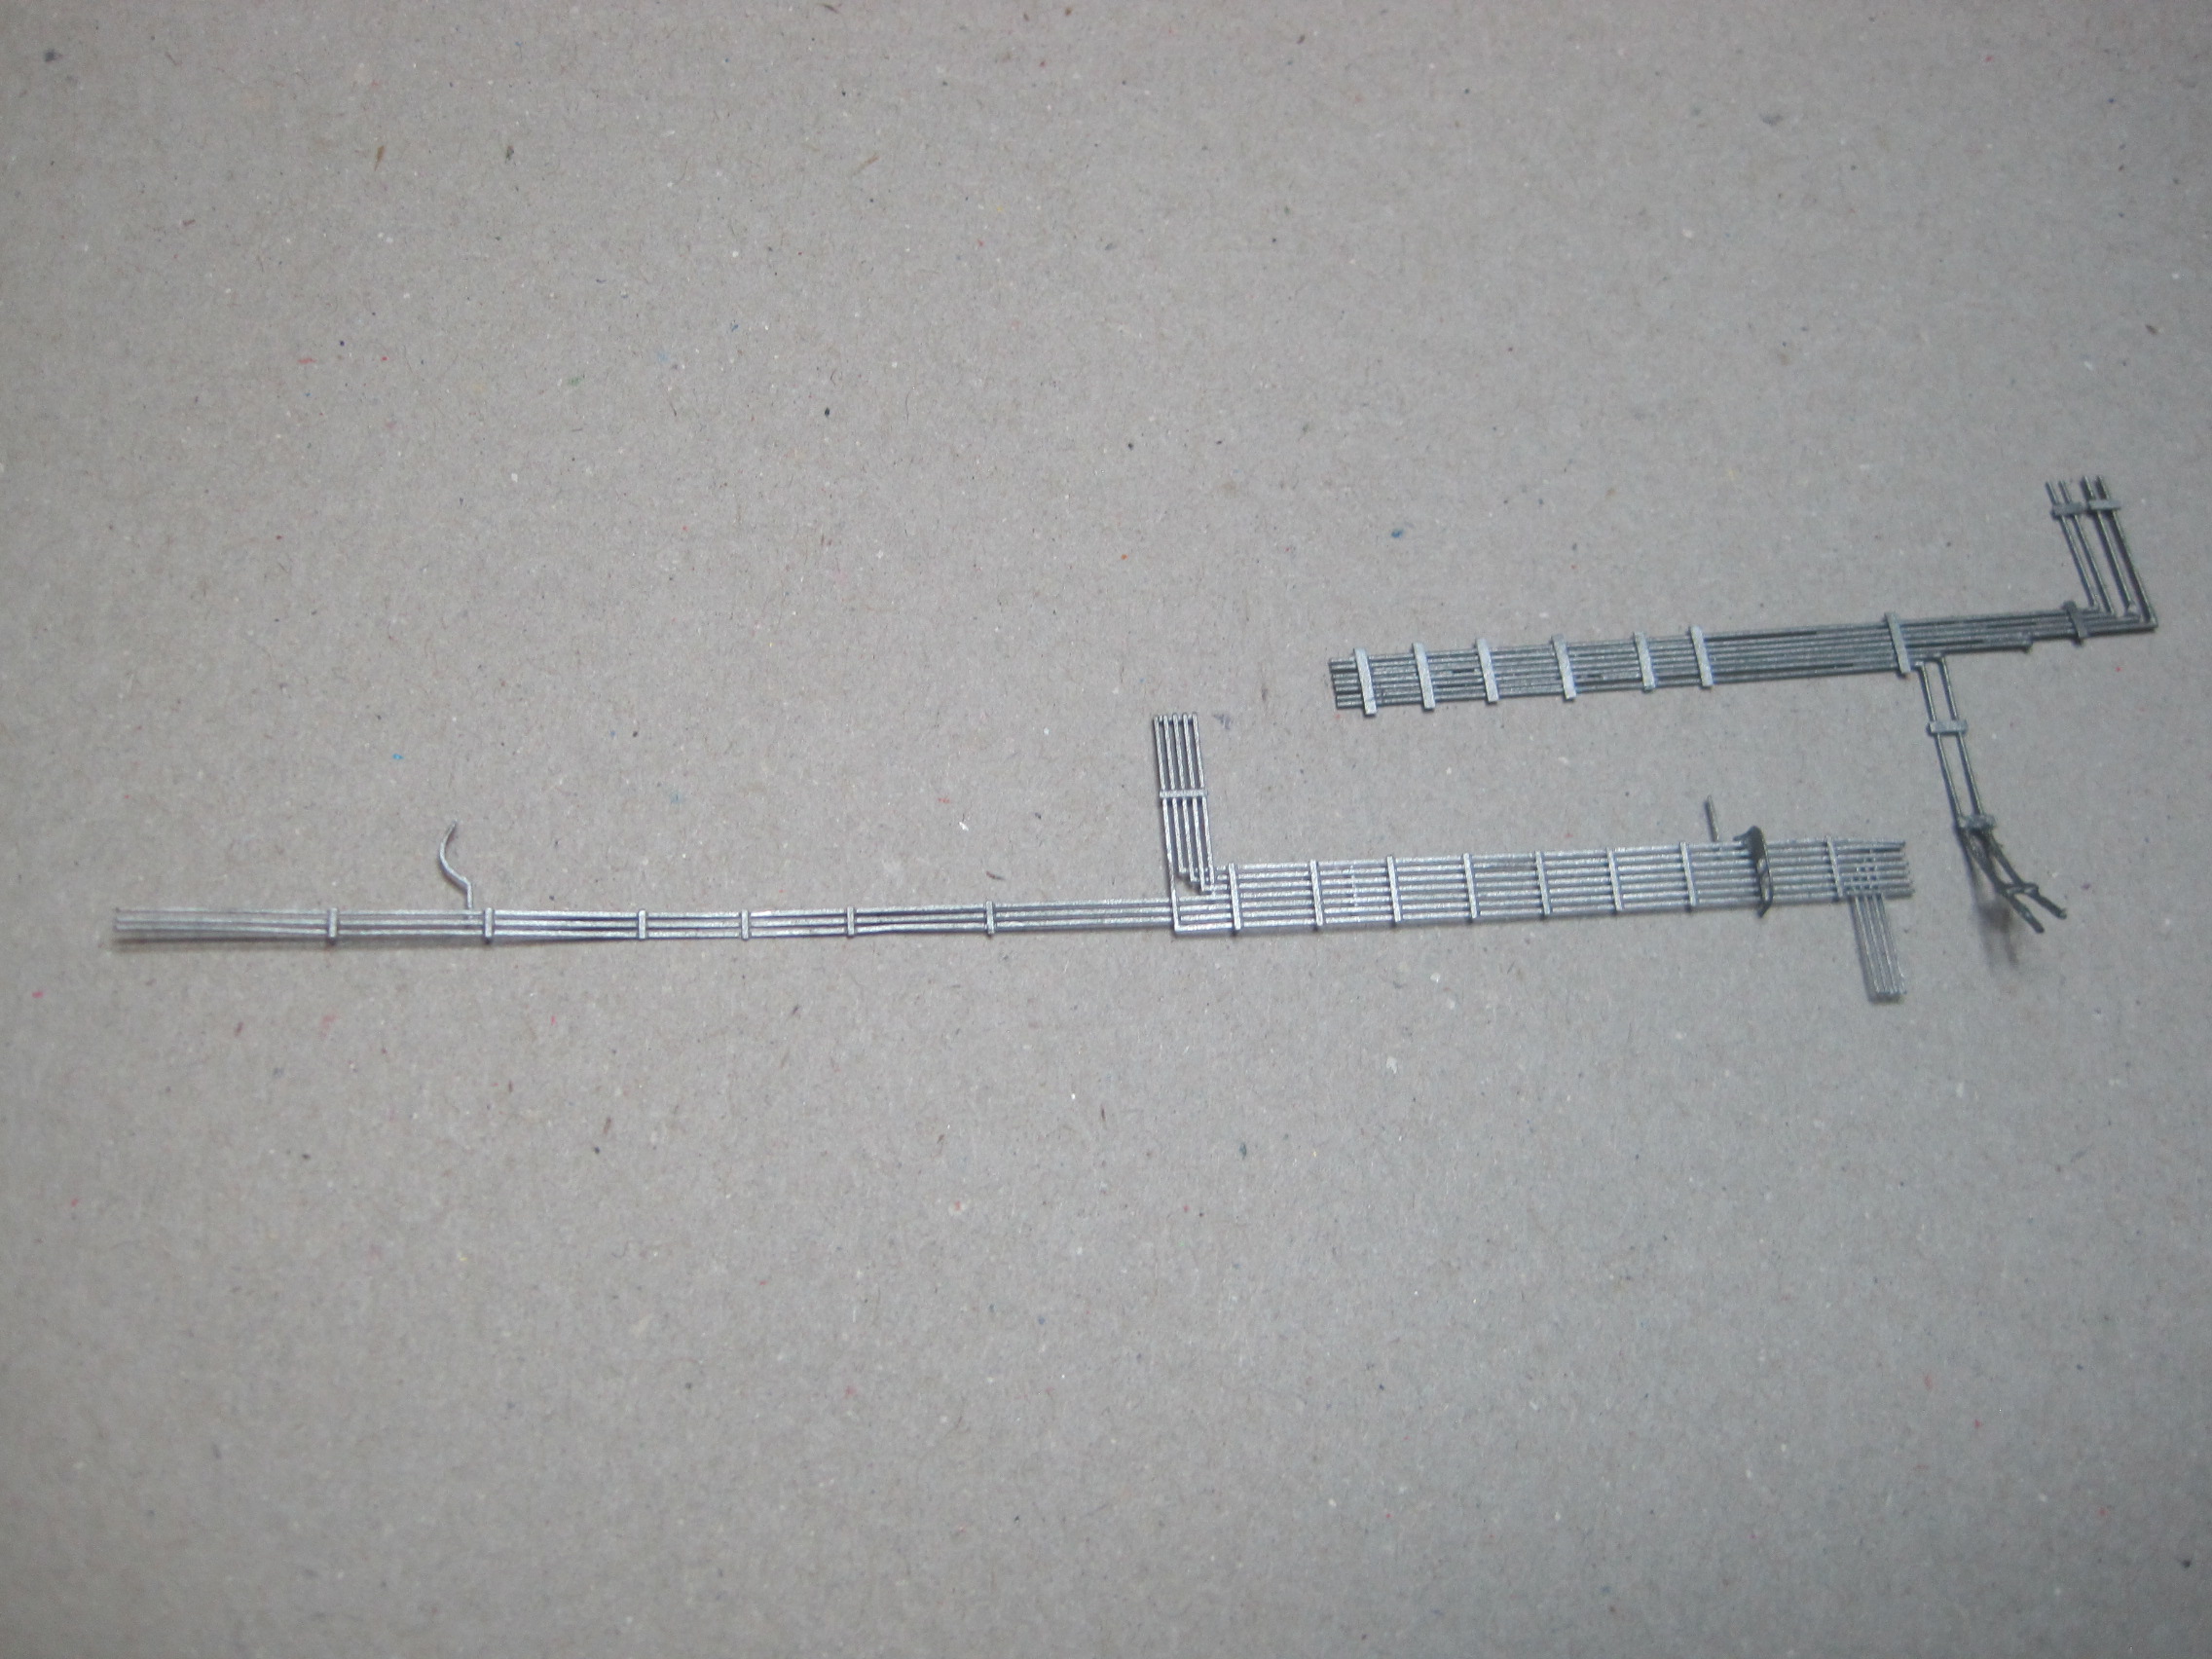
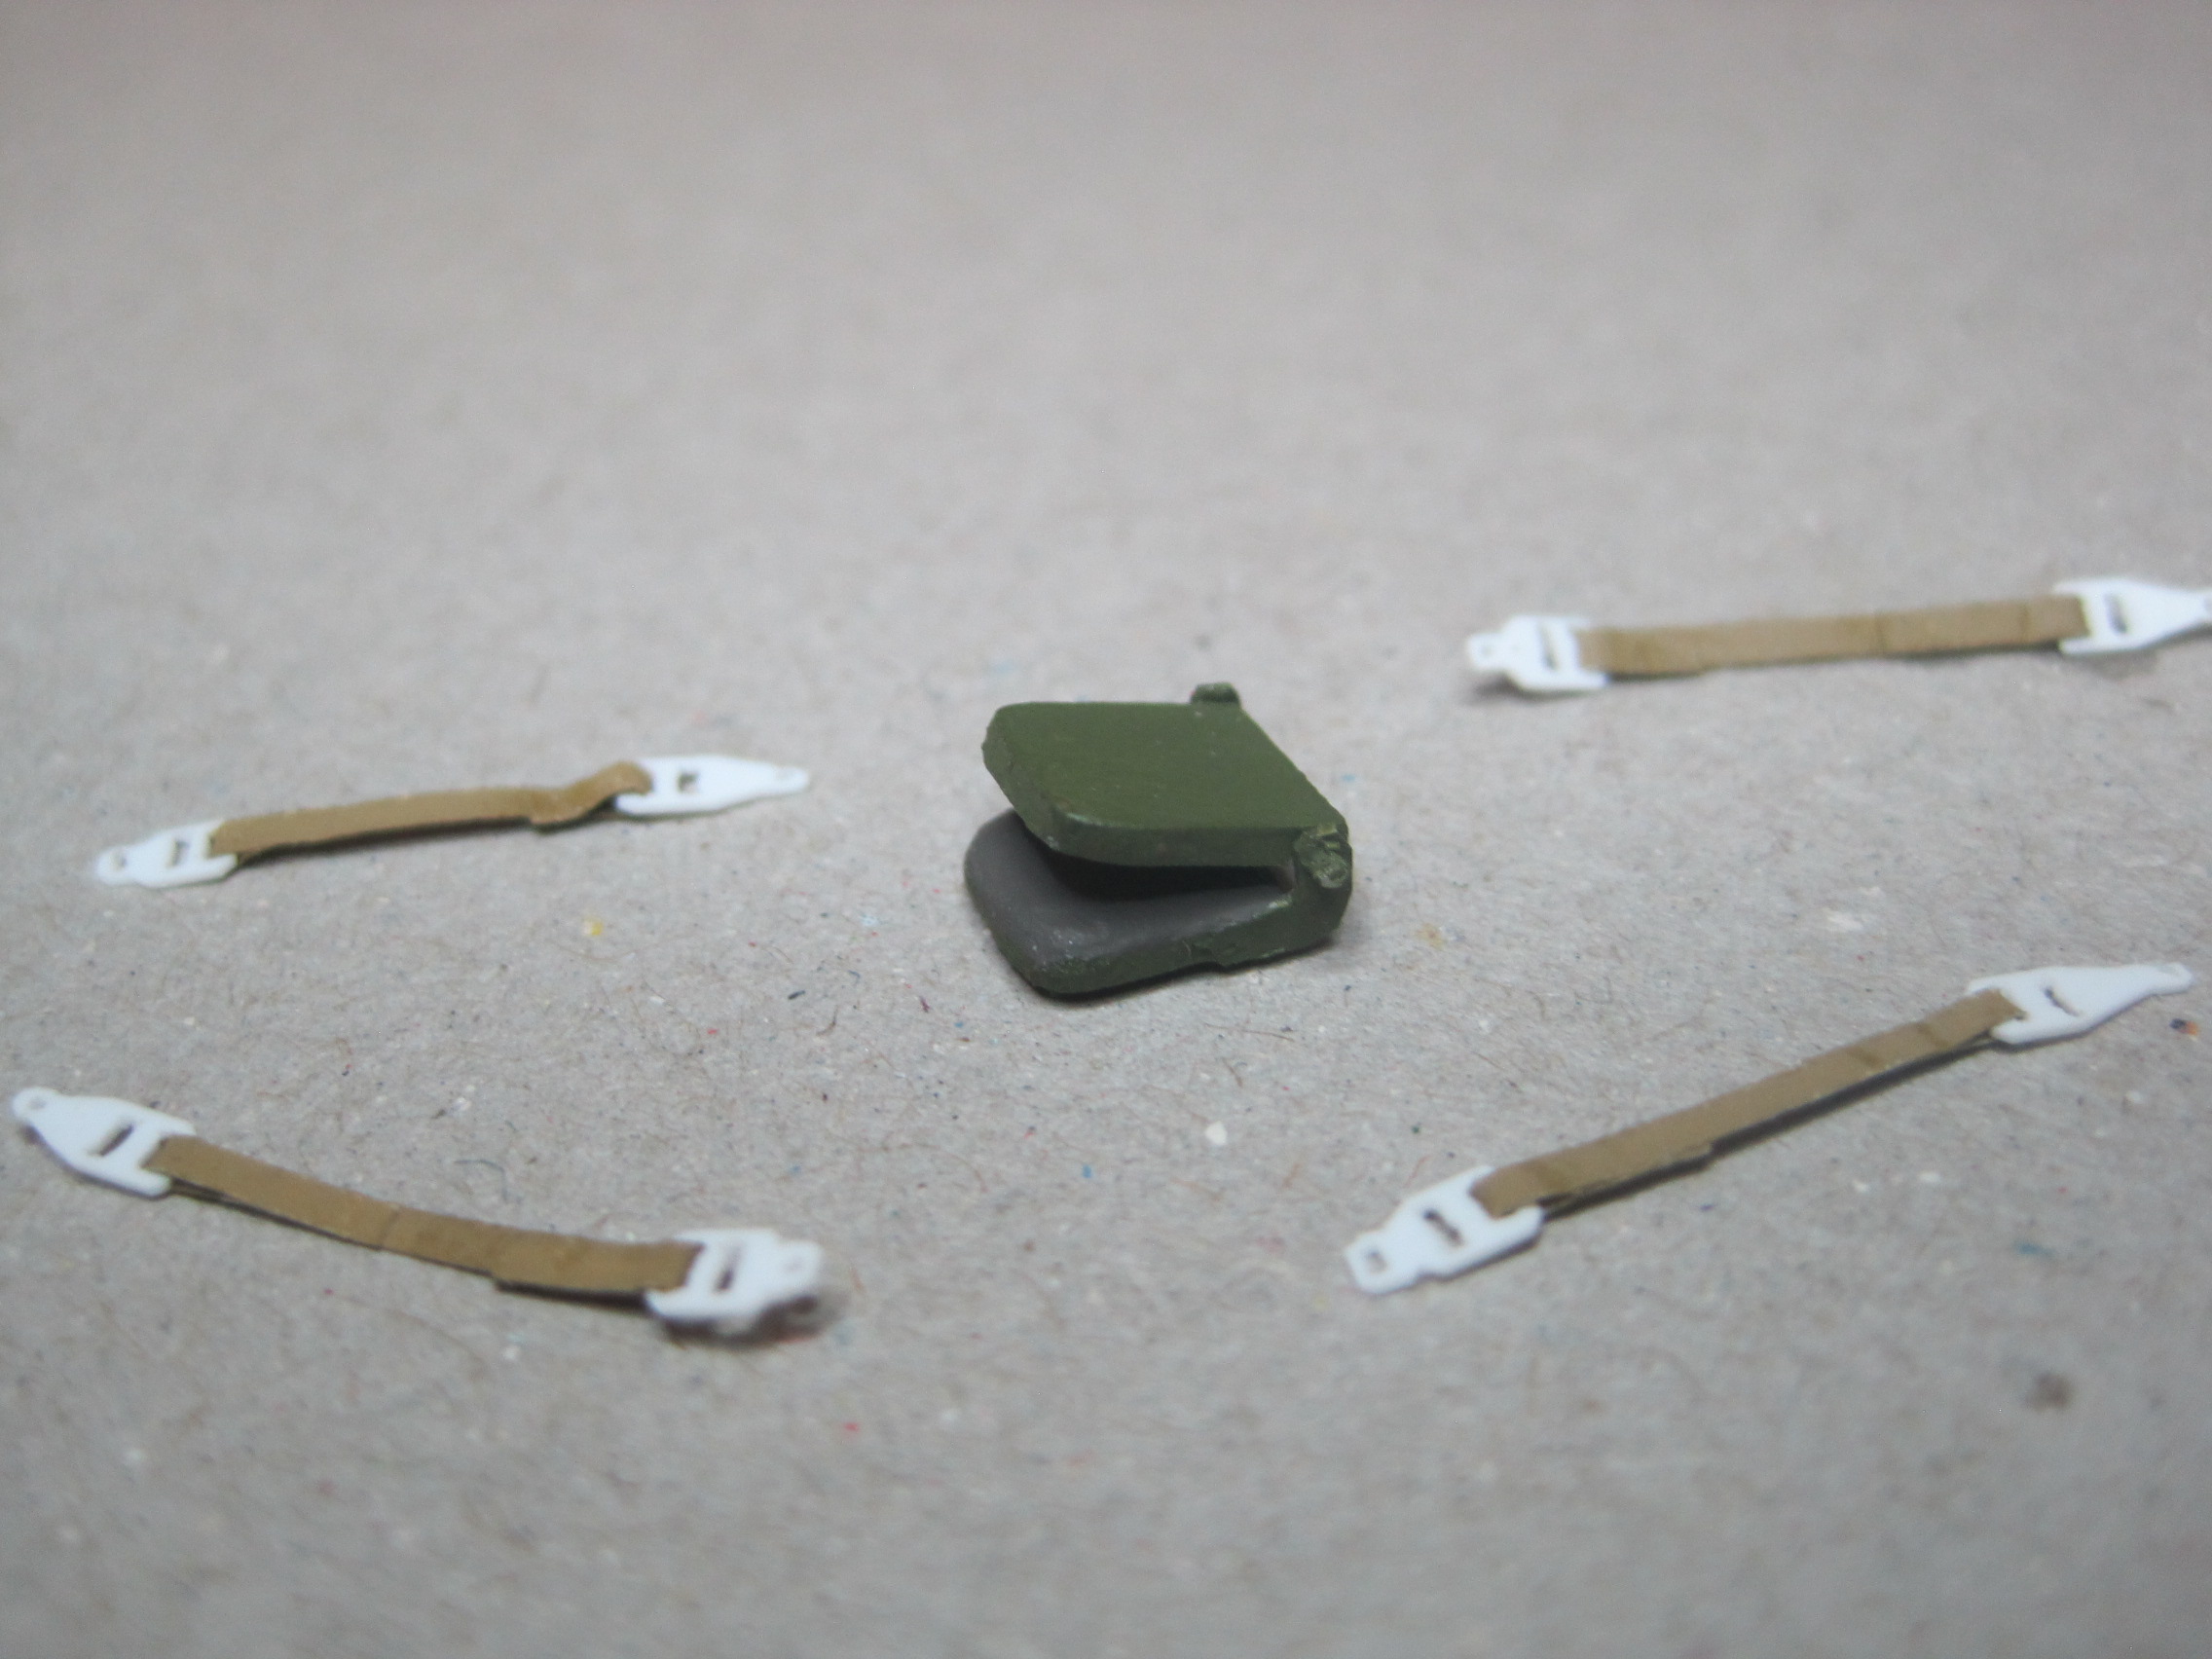
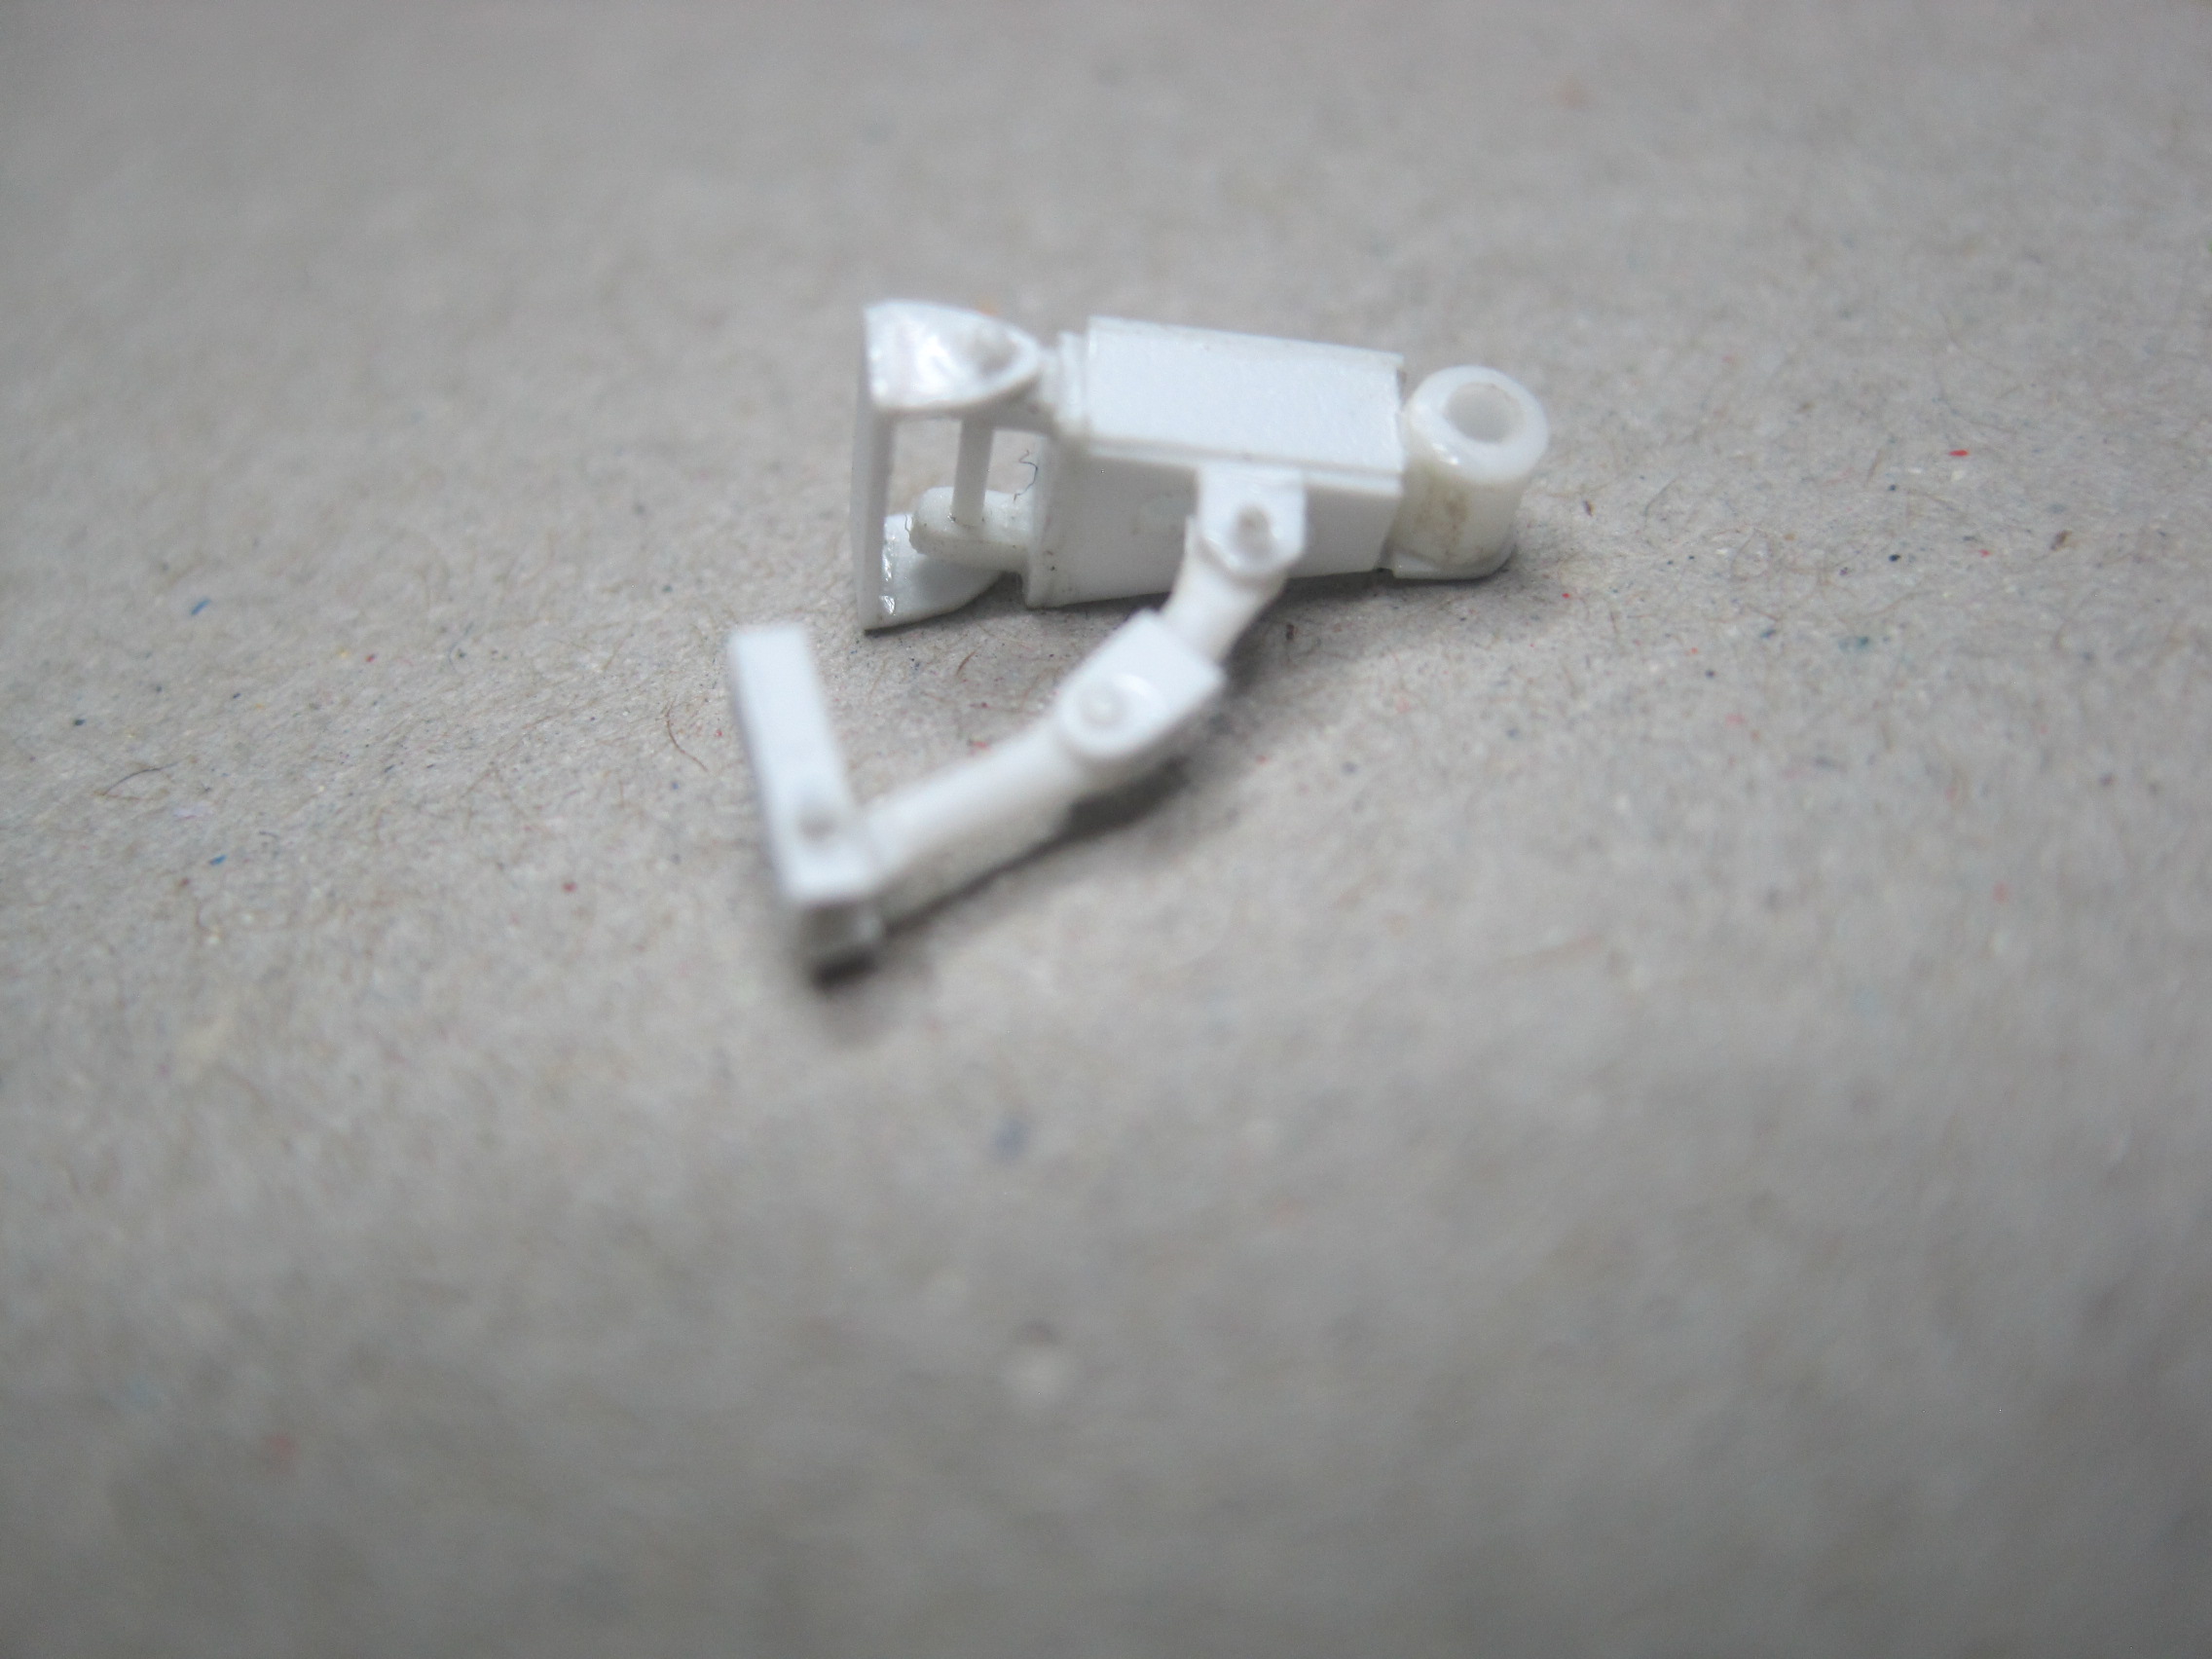
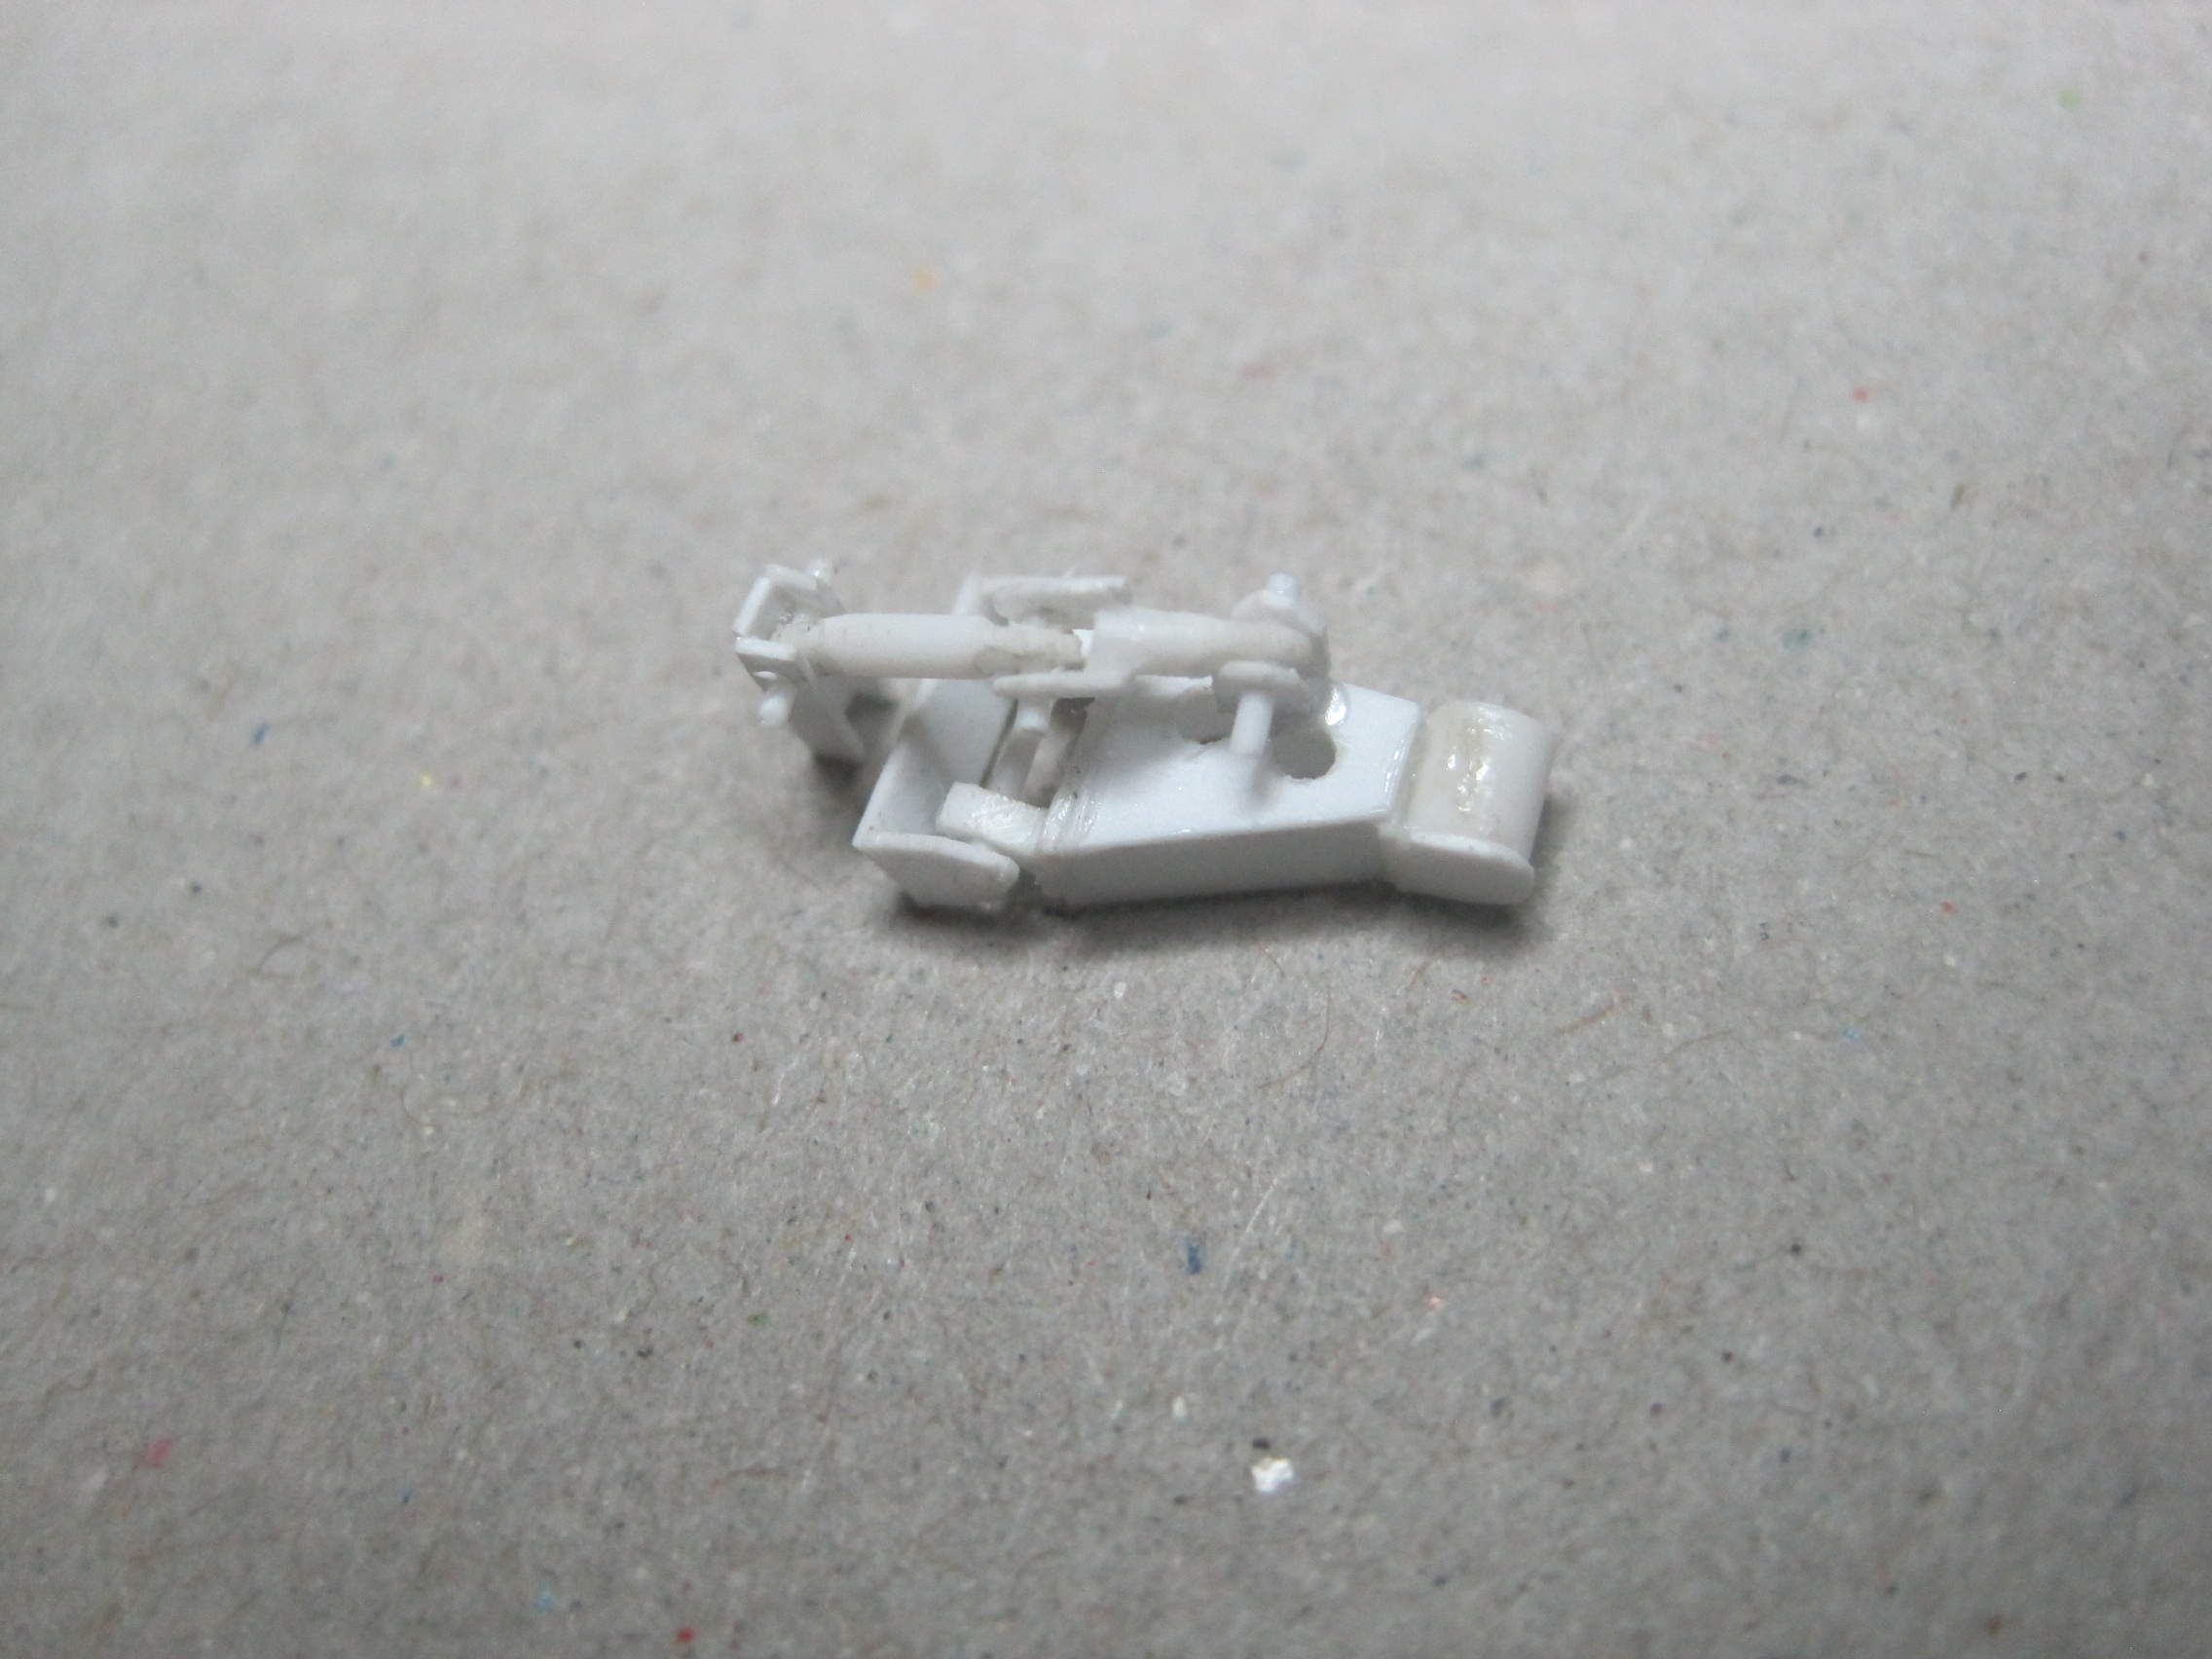
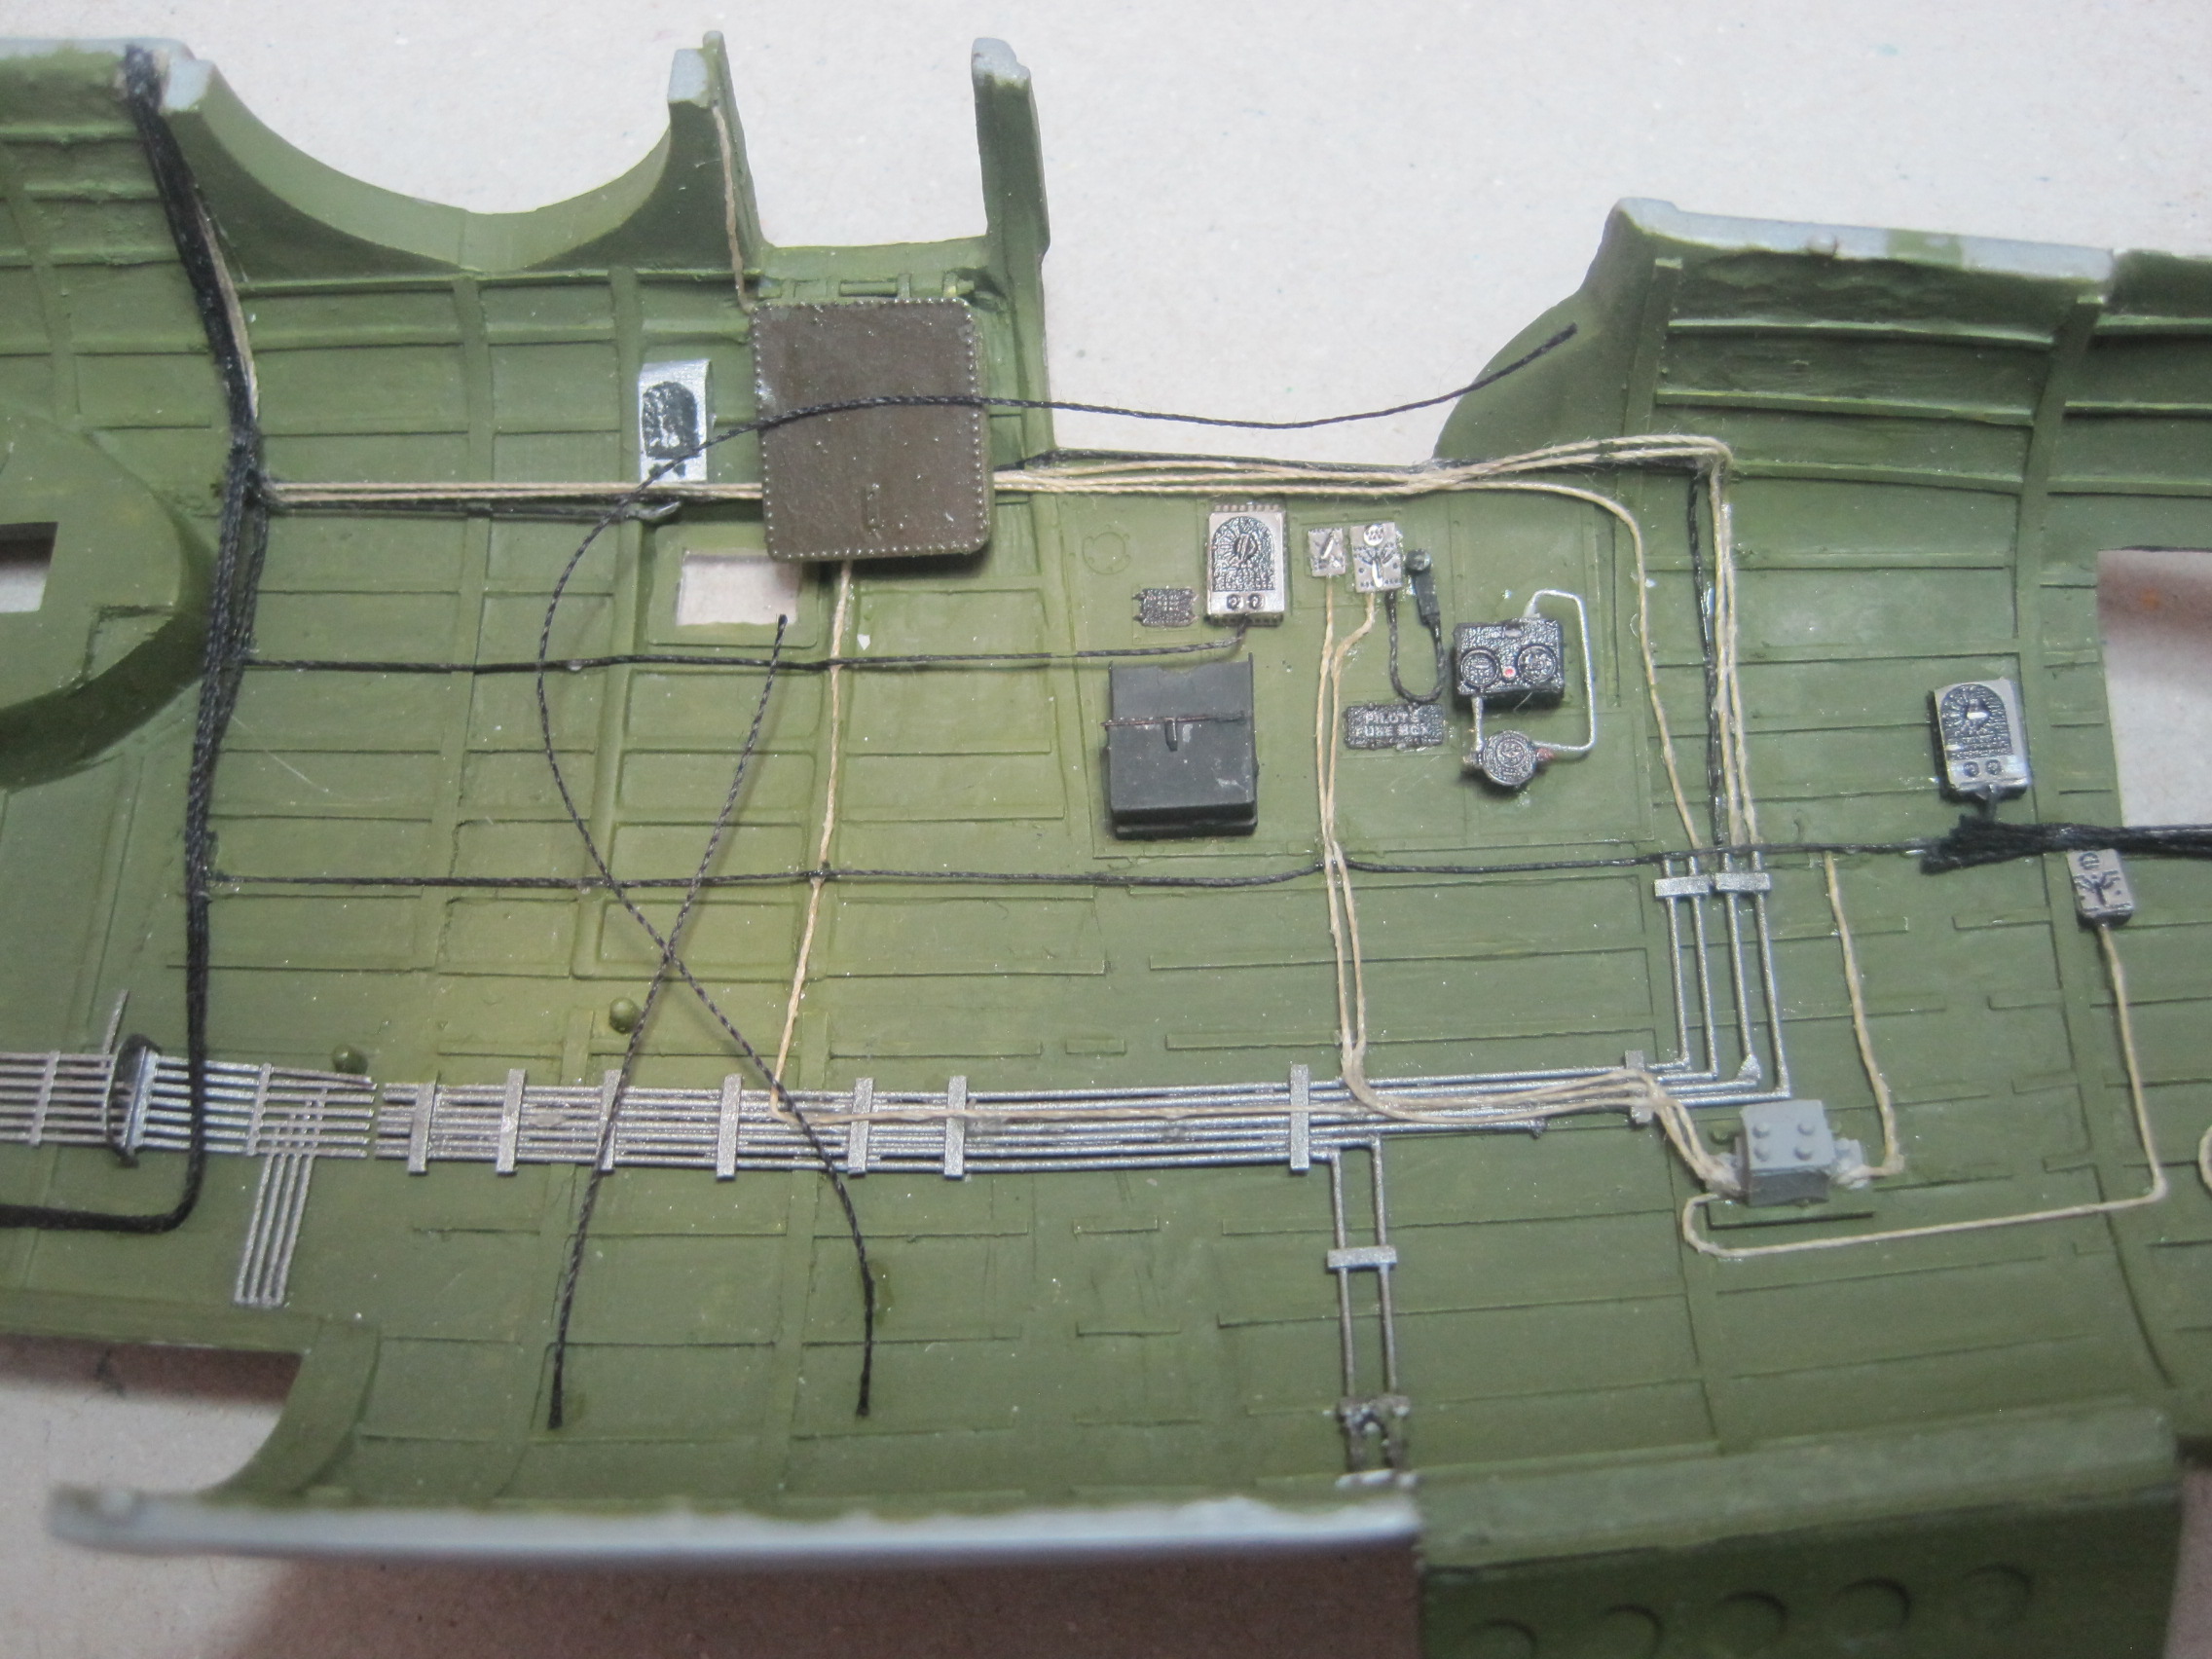
I've finished the oxygen system. Next up will be to finally complete the bomb bay which will include scratch building the radio compartment over the wings as well as do the fuel system. I won't do any tanks since those are either inside the wings (already completed) or in the space which the wing attachments are. But I plan to add the hoses, lines and valves which would either be in the radio compartment or bomb bay.


Dragon164
#226
Joined: February 20, 2012
KitMaker: 1,909 posts
AeroScale: 508 posts
Posted: Wednesday, February 13, 2019 - 06:22 PM UTC
WOW!
Very nice indeed Tom!
Cheers Rob.
Very nice indeed Tom!
Cheers Rob.
golfermd
Joined: March 01, 2013
KitMaker: 152 posts
AeroScale: 98 posts
Posted: Tuesday, February 19, 2019 - 07:13 AM UTC
Out fu@$ing standing work!
thathaway3
Joined: September 10, 2004
KitMaker: 1,610 posts
AeroScale: 85 posts
Posted: Monday, March 04, 2019 - 06:26 AM UTC
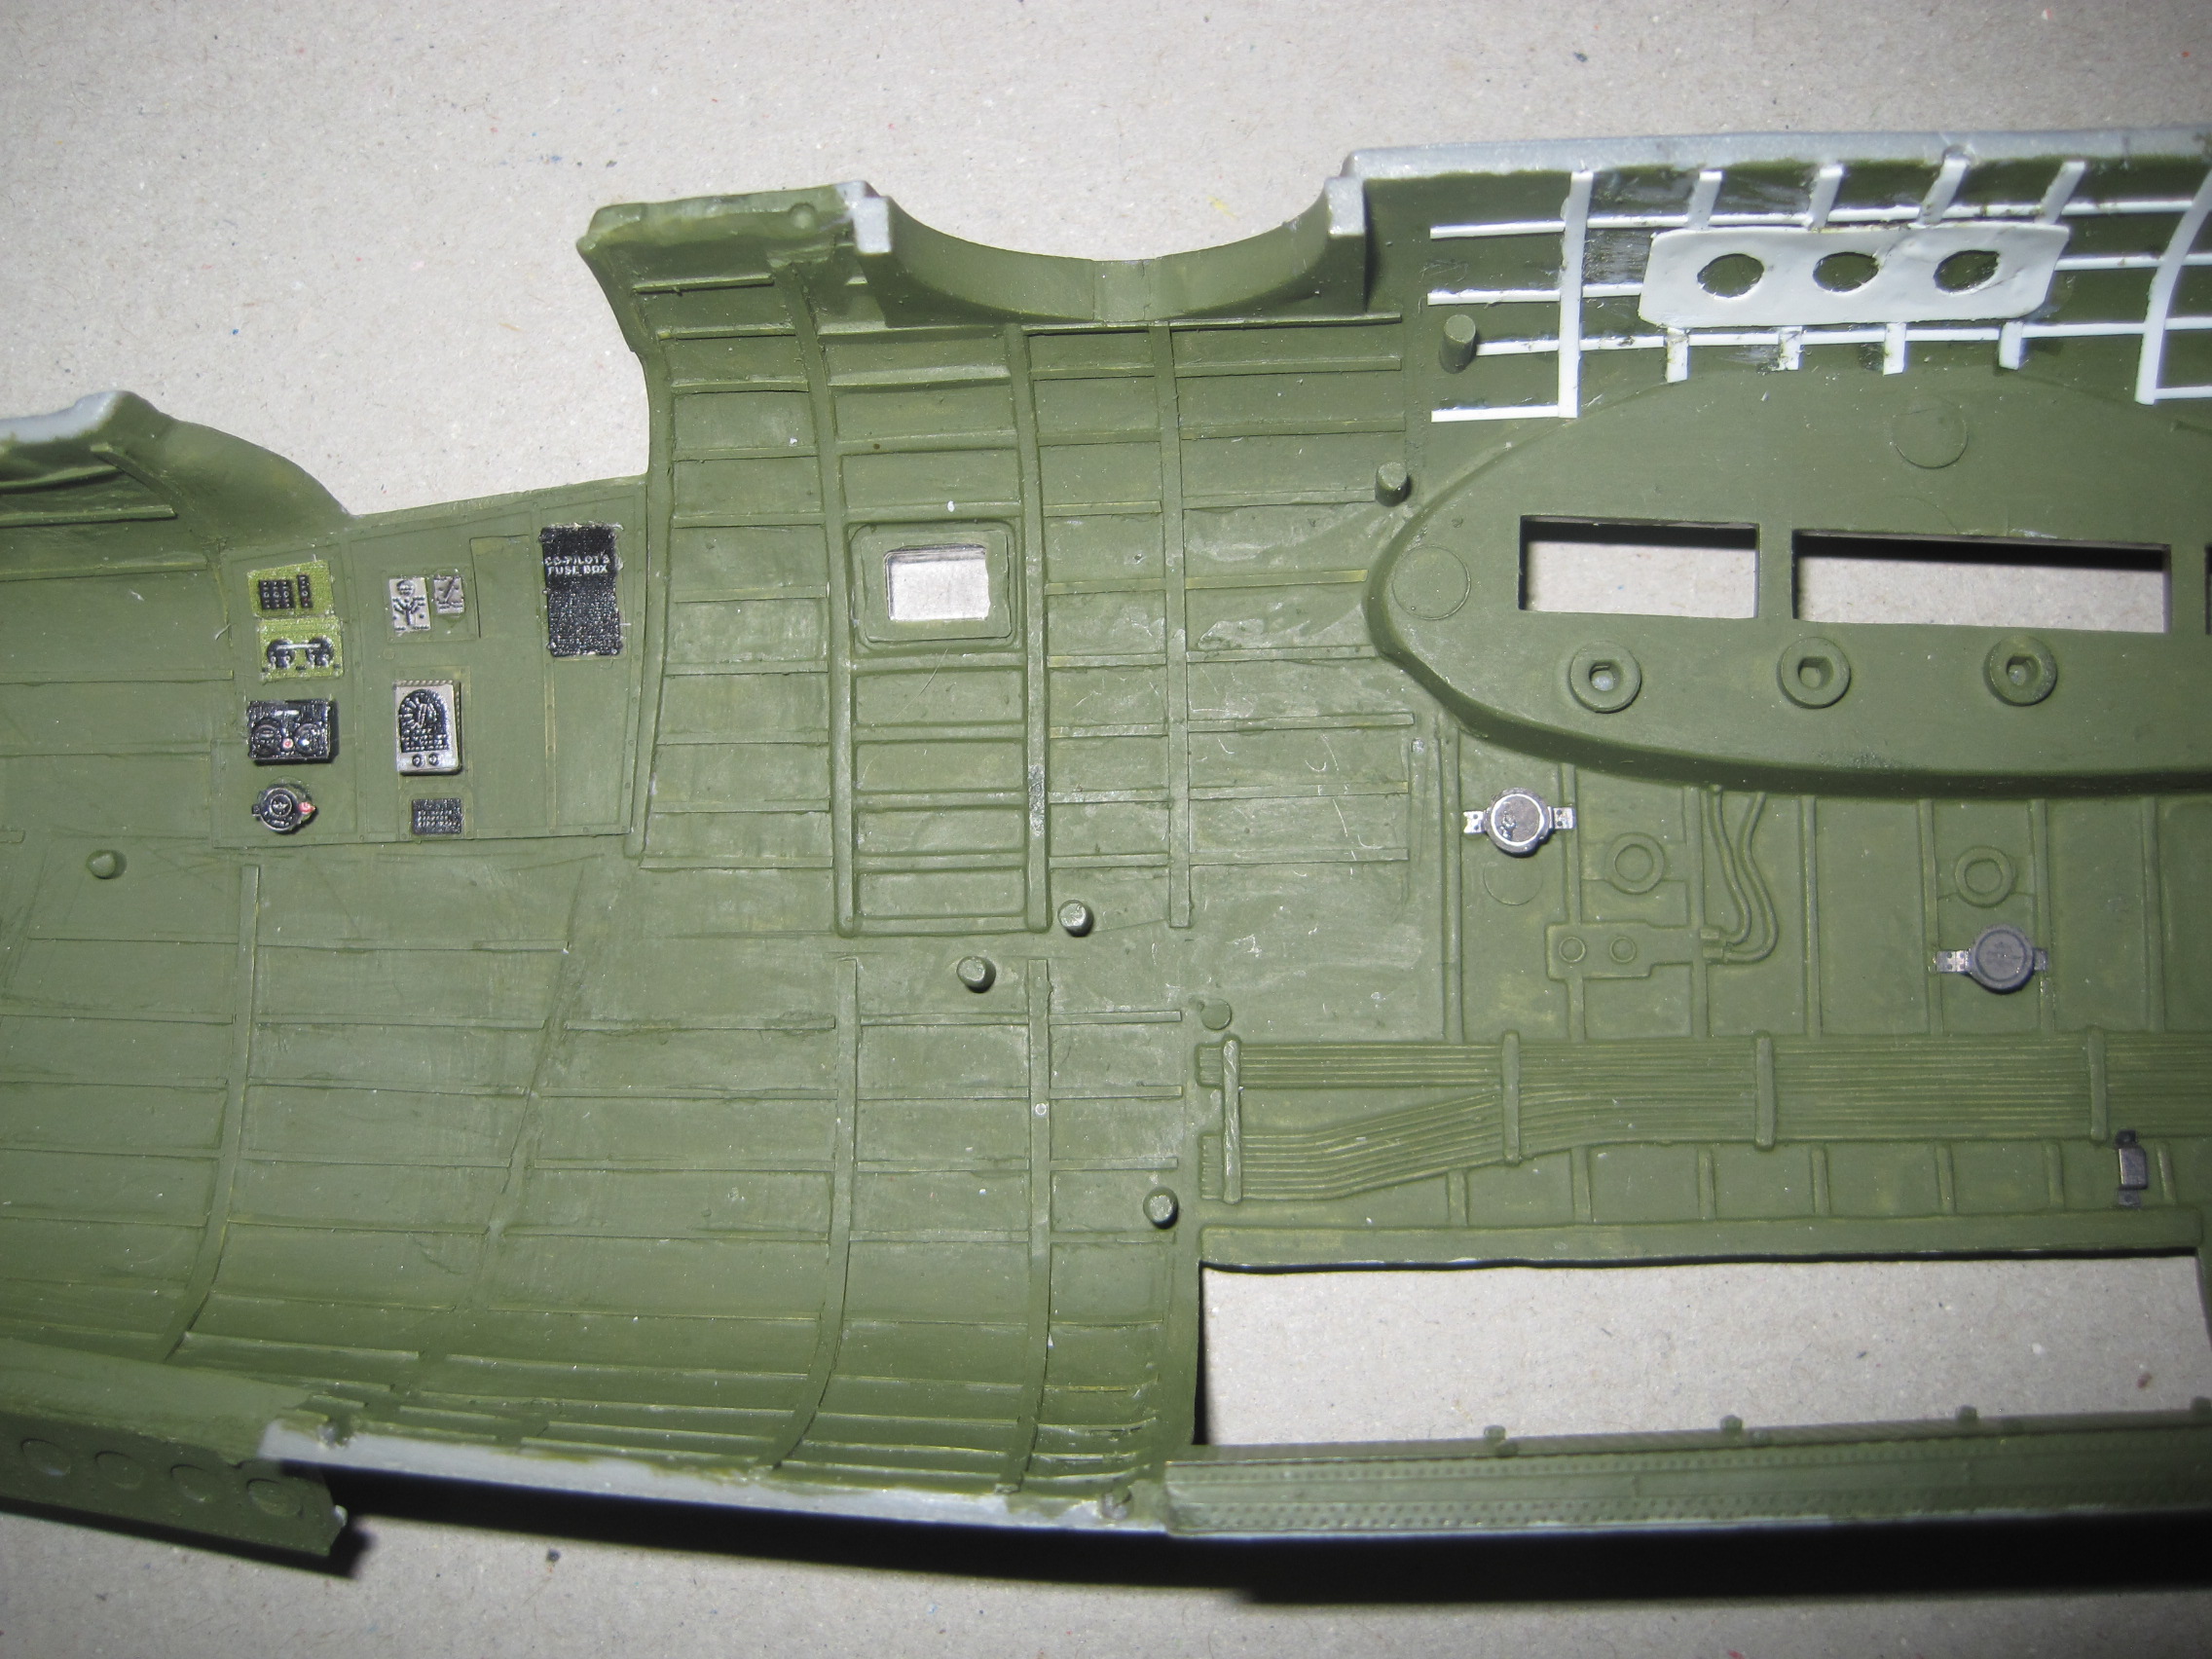
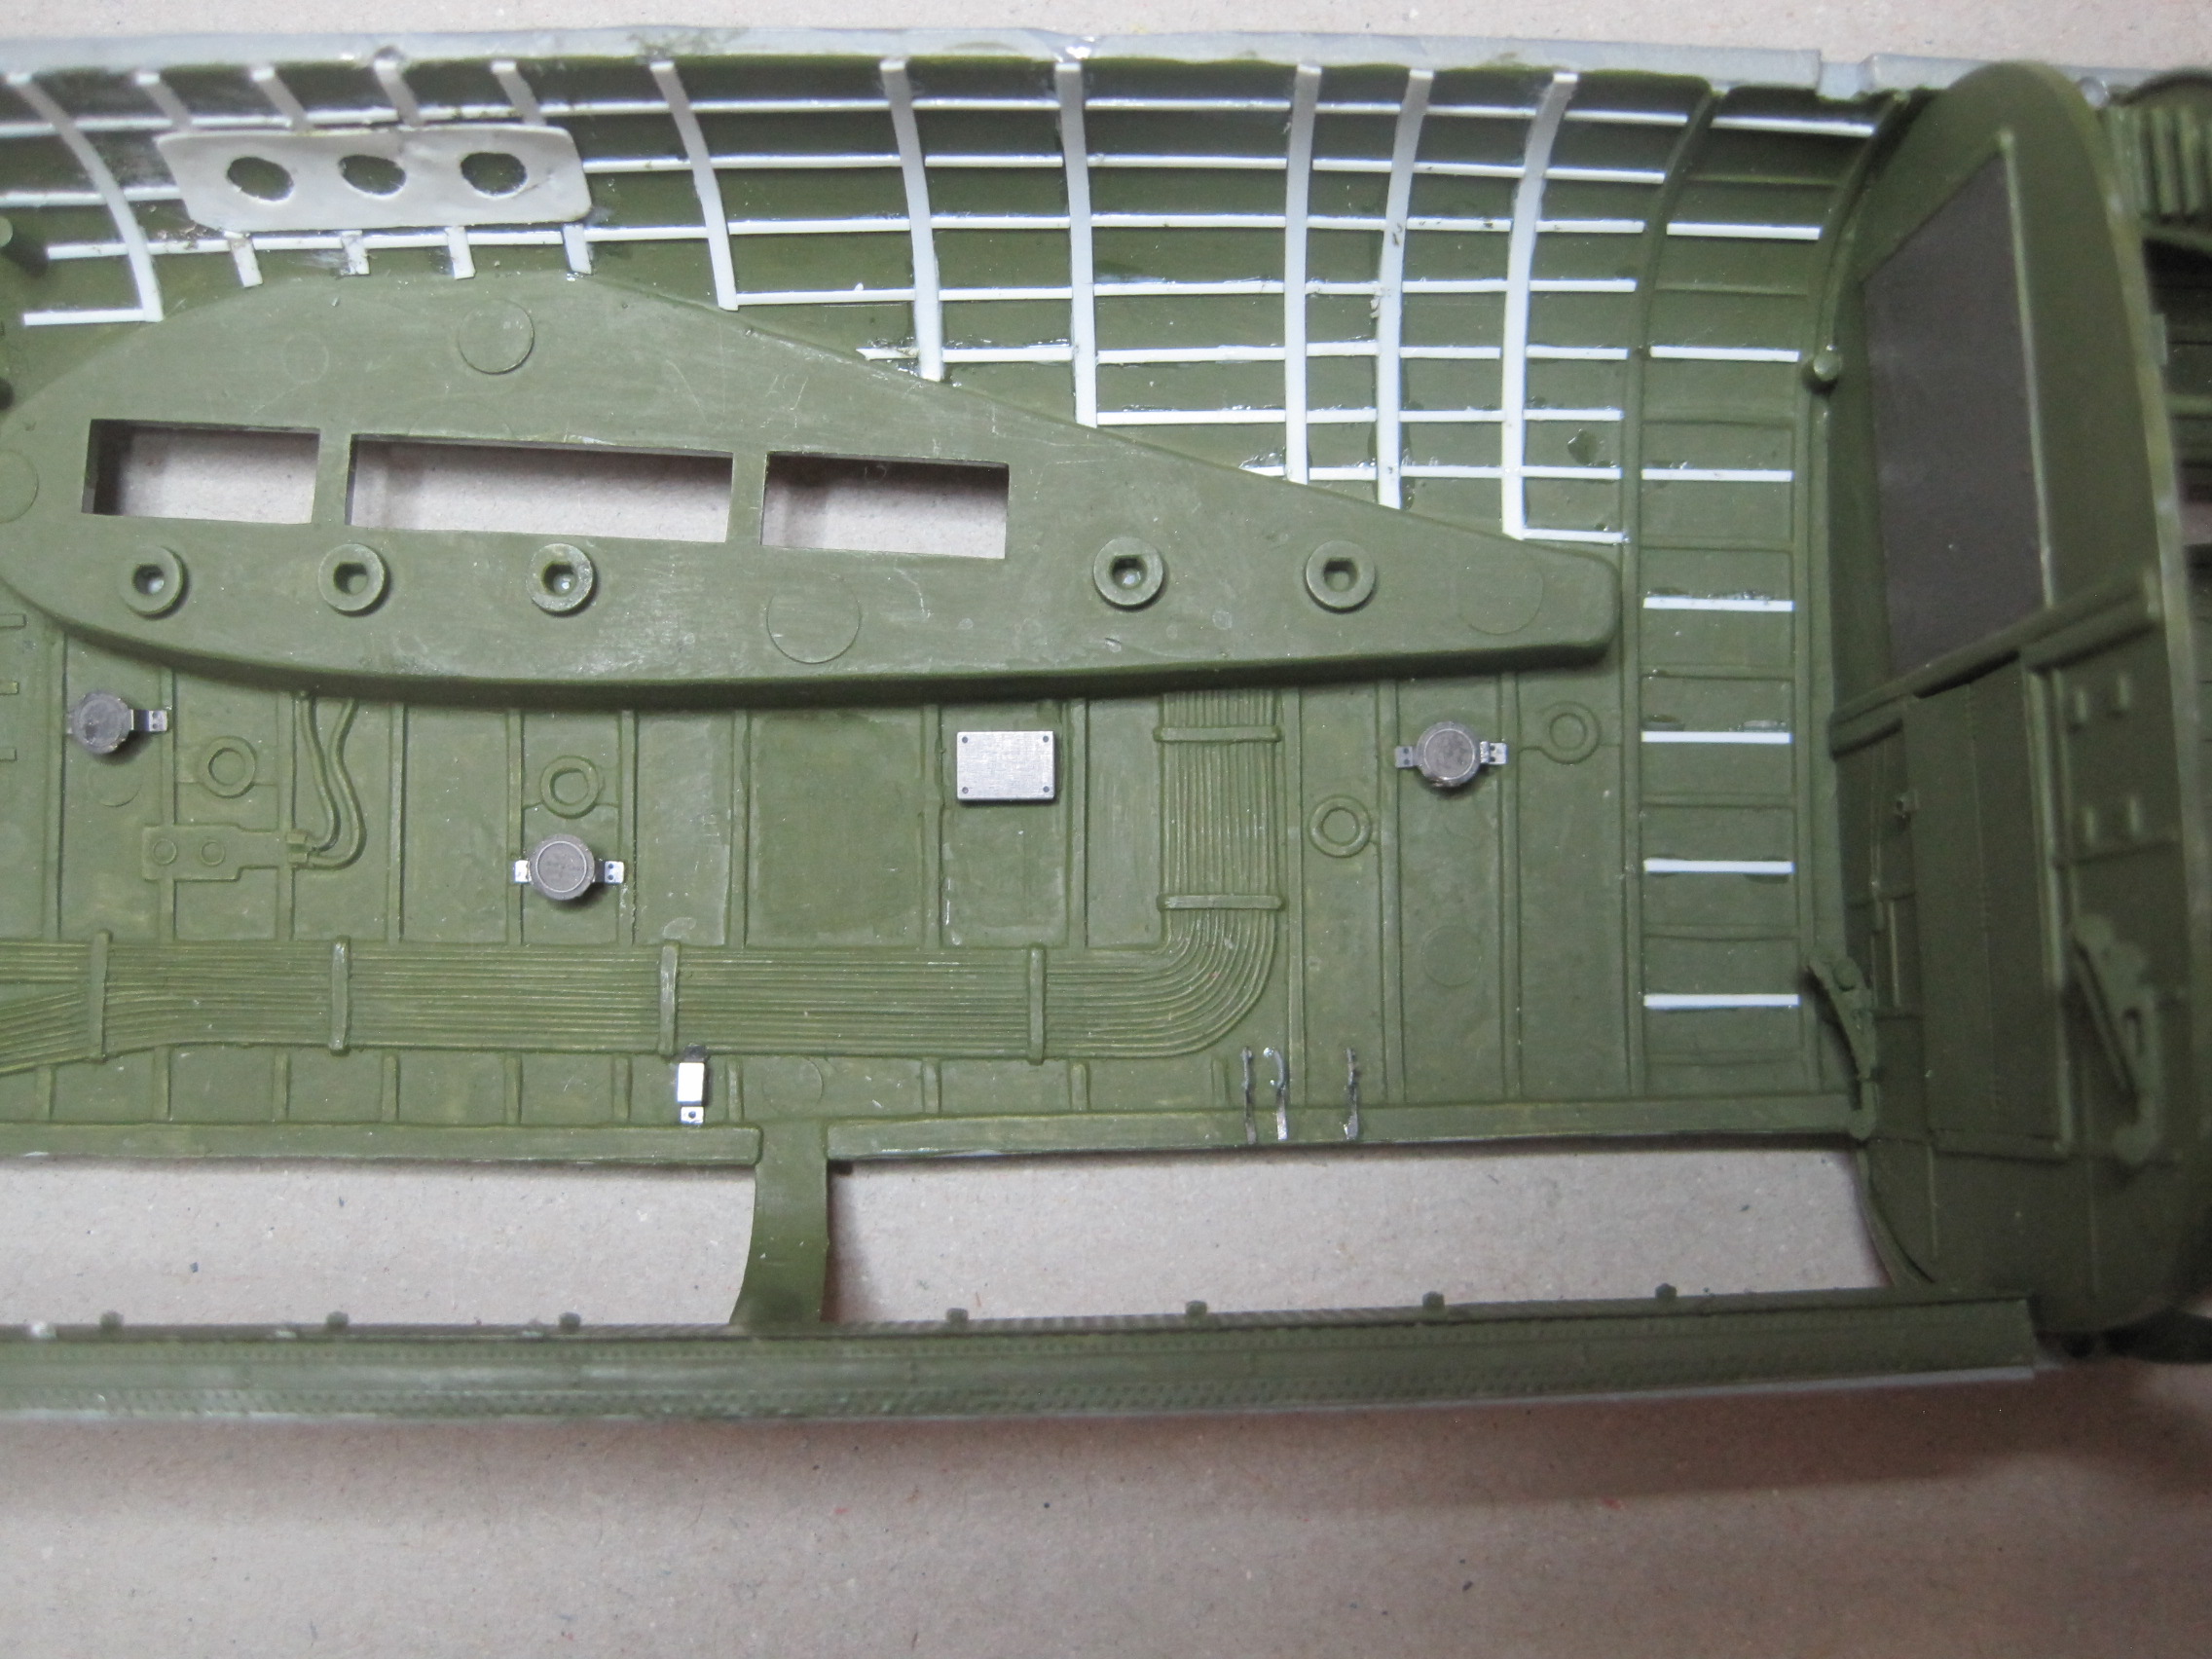
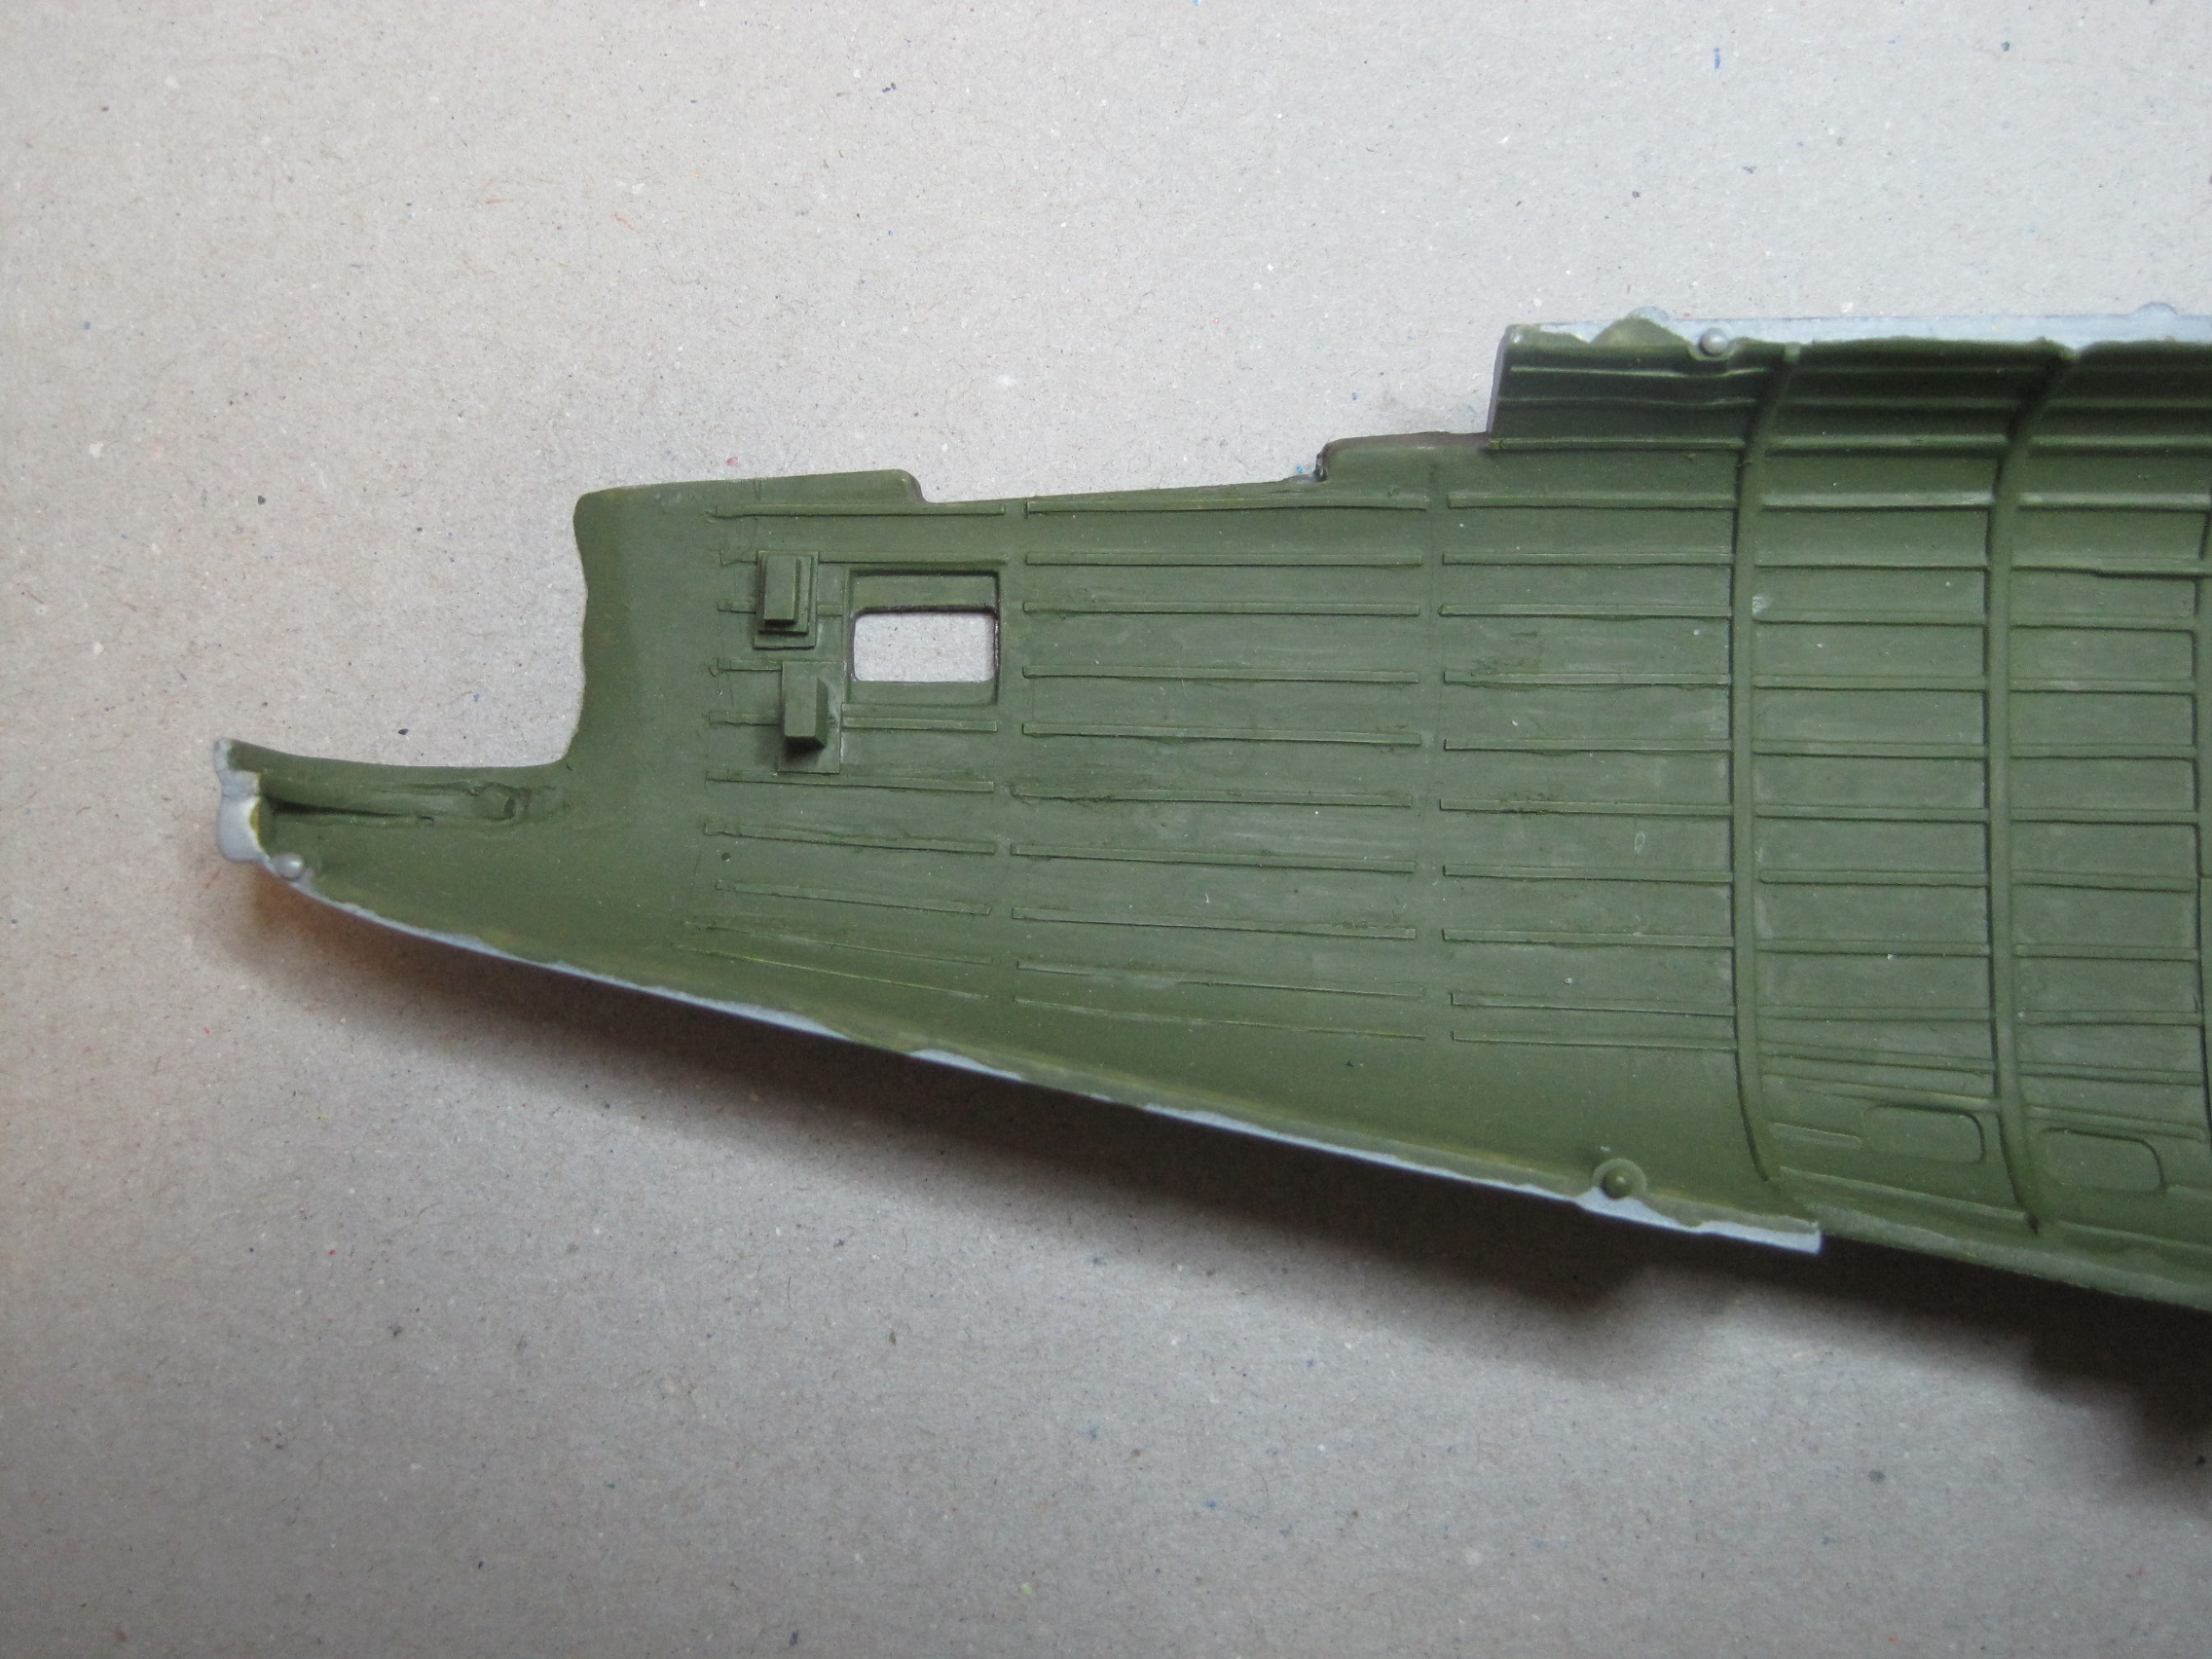
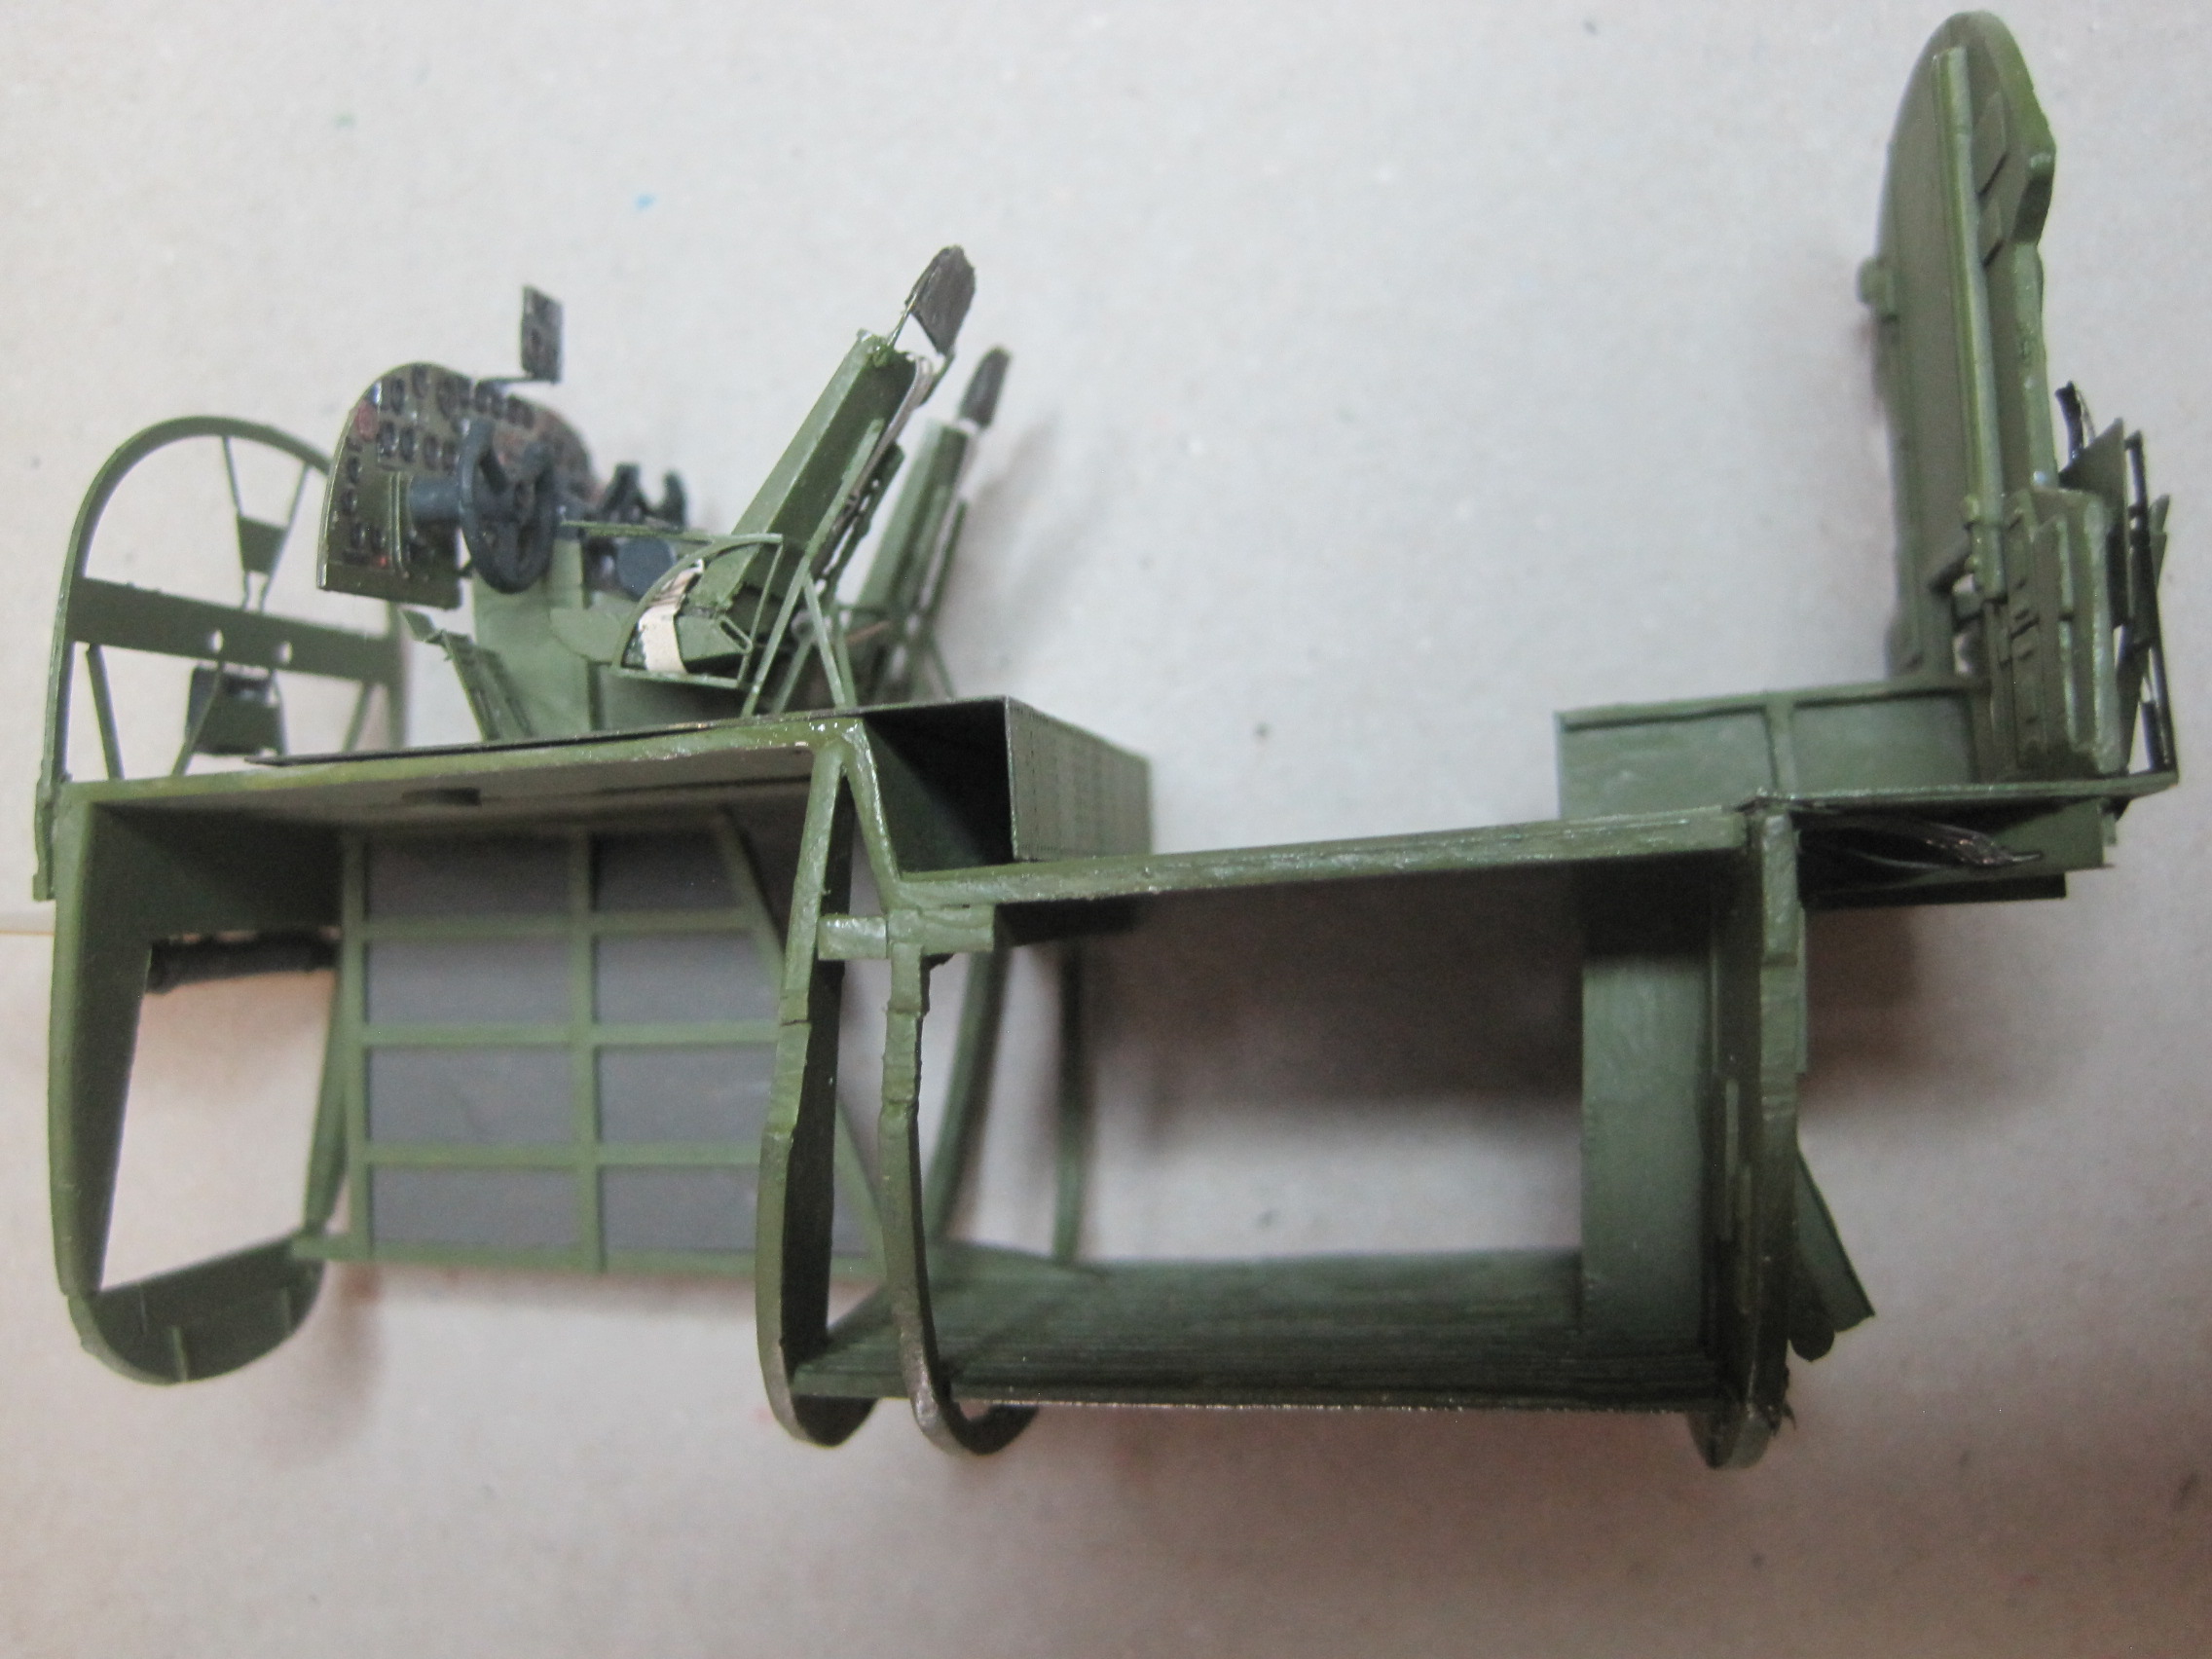
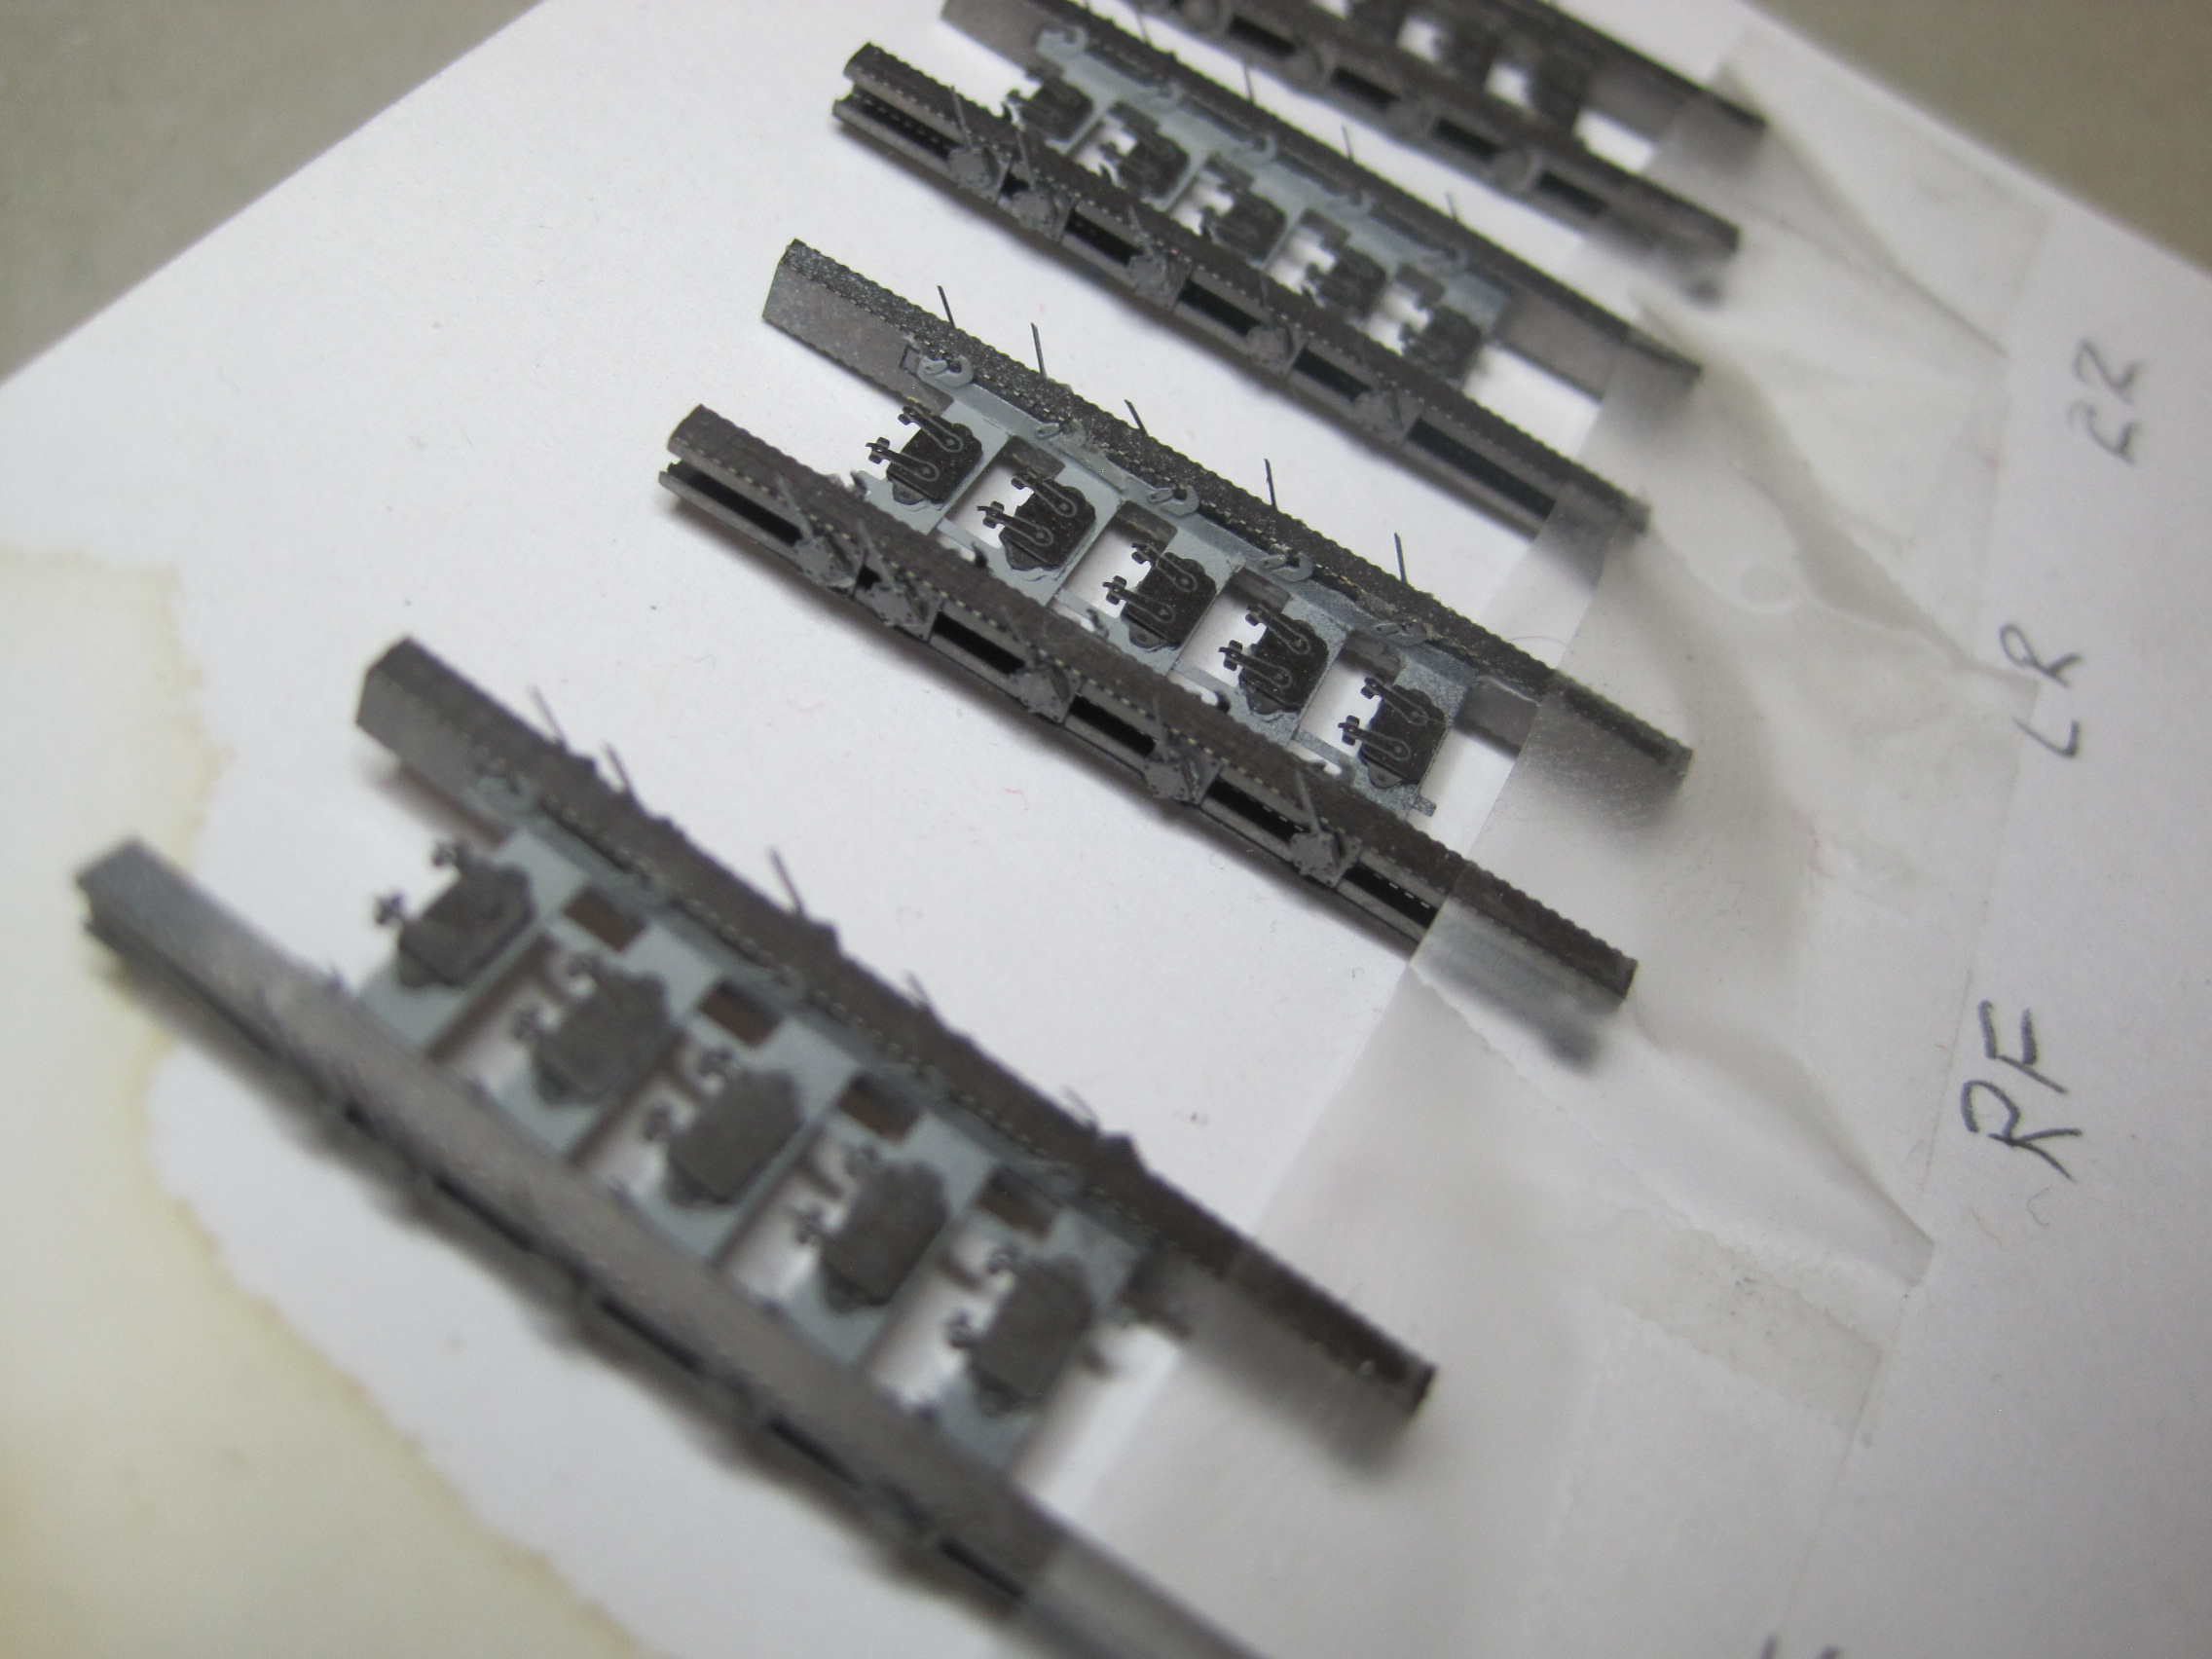
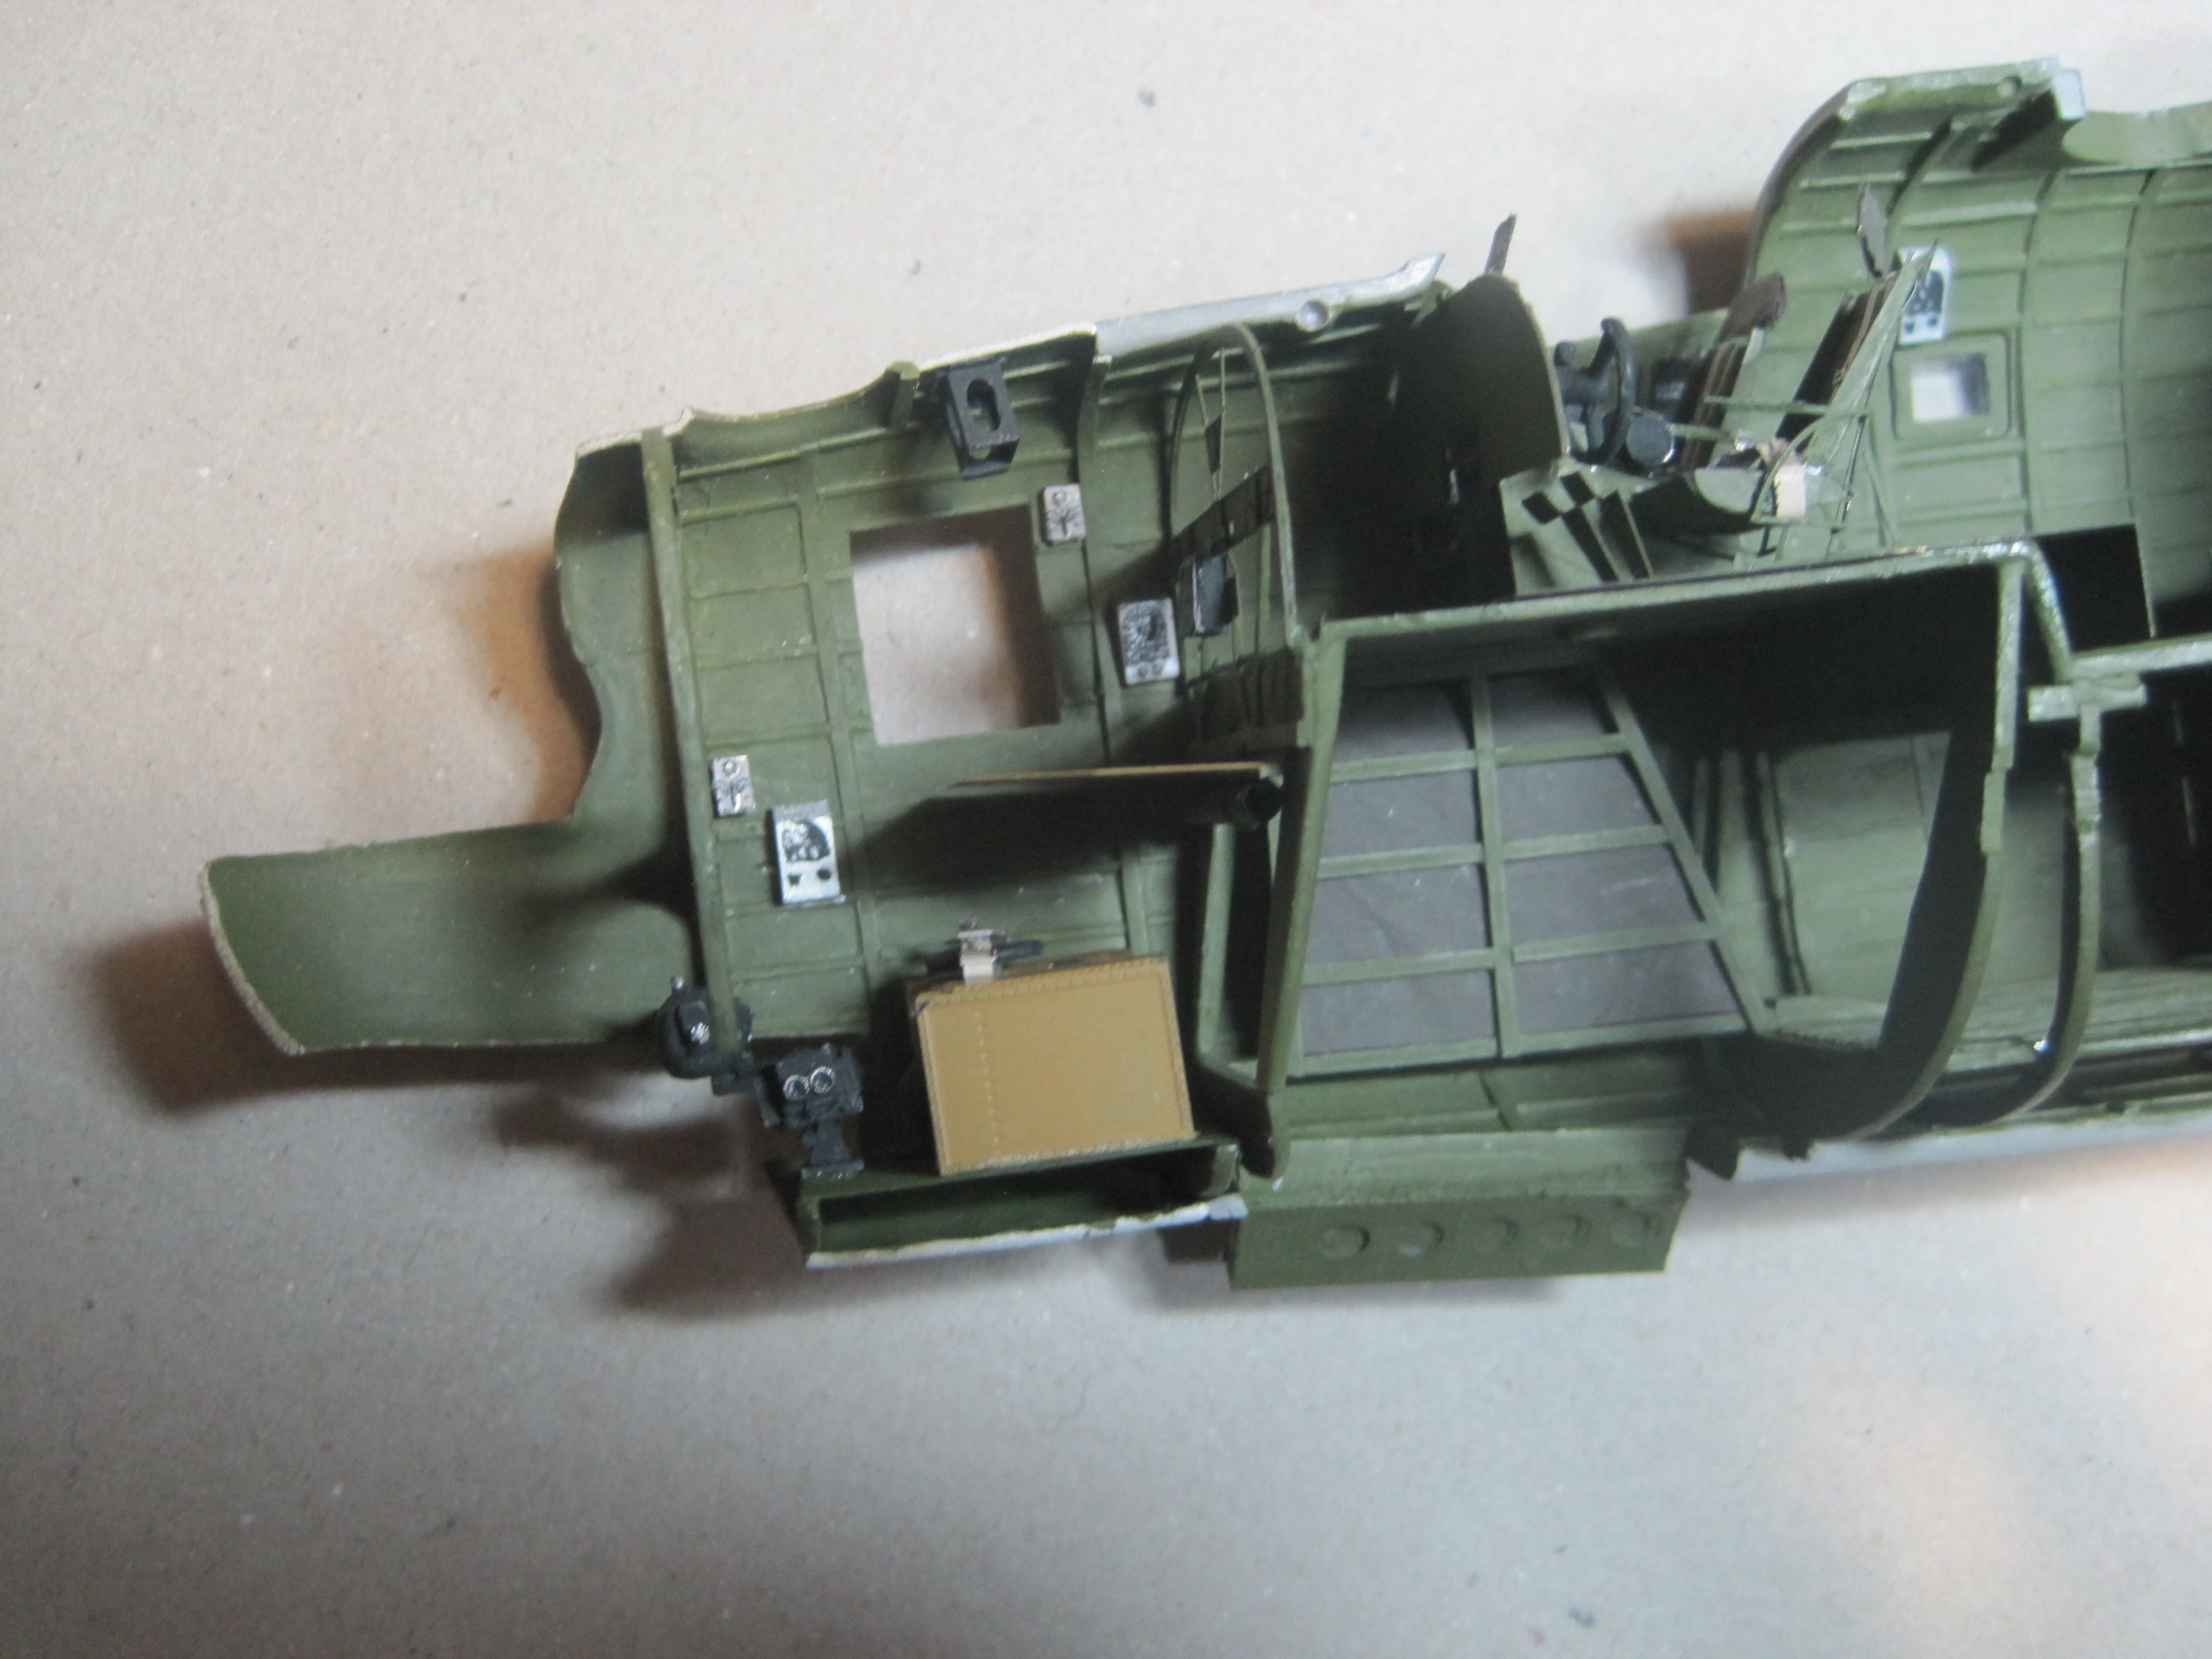
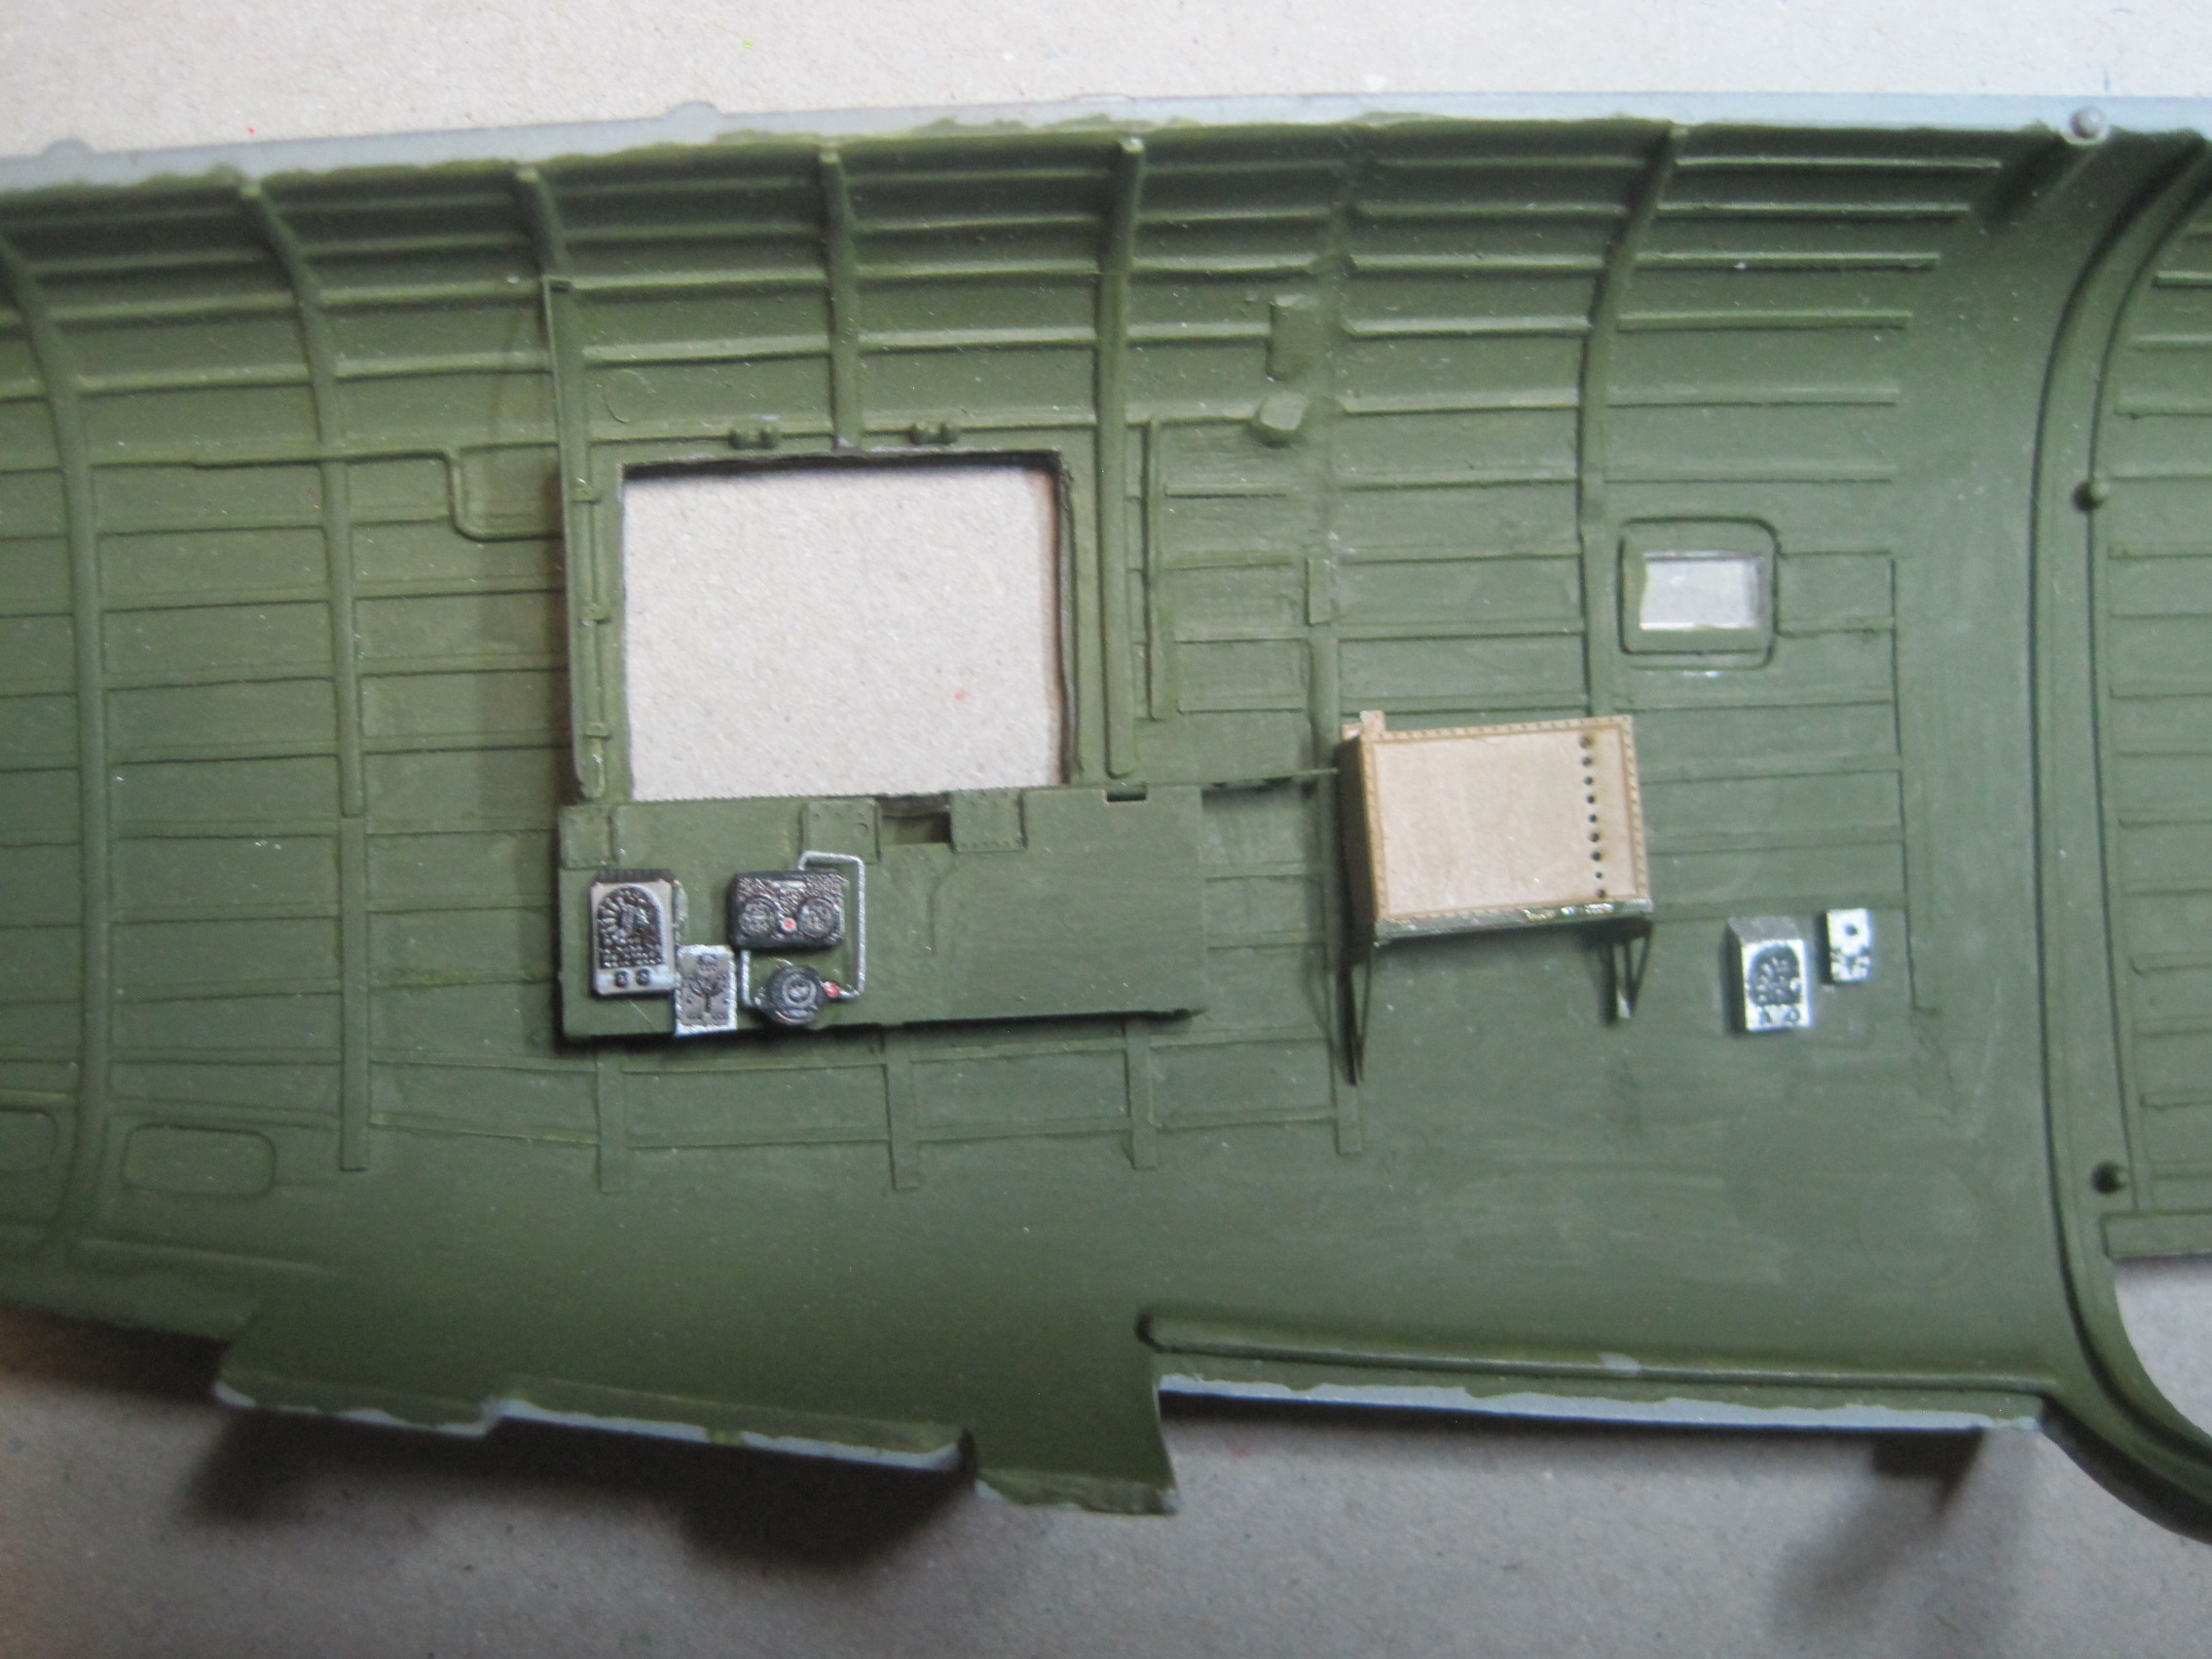
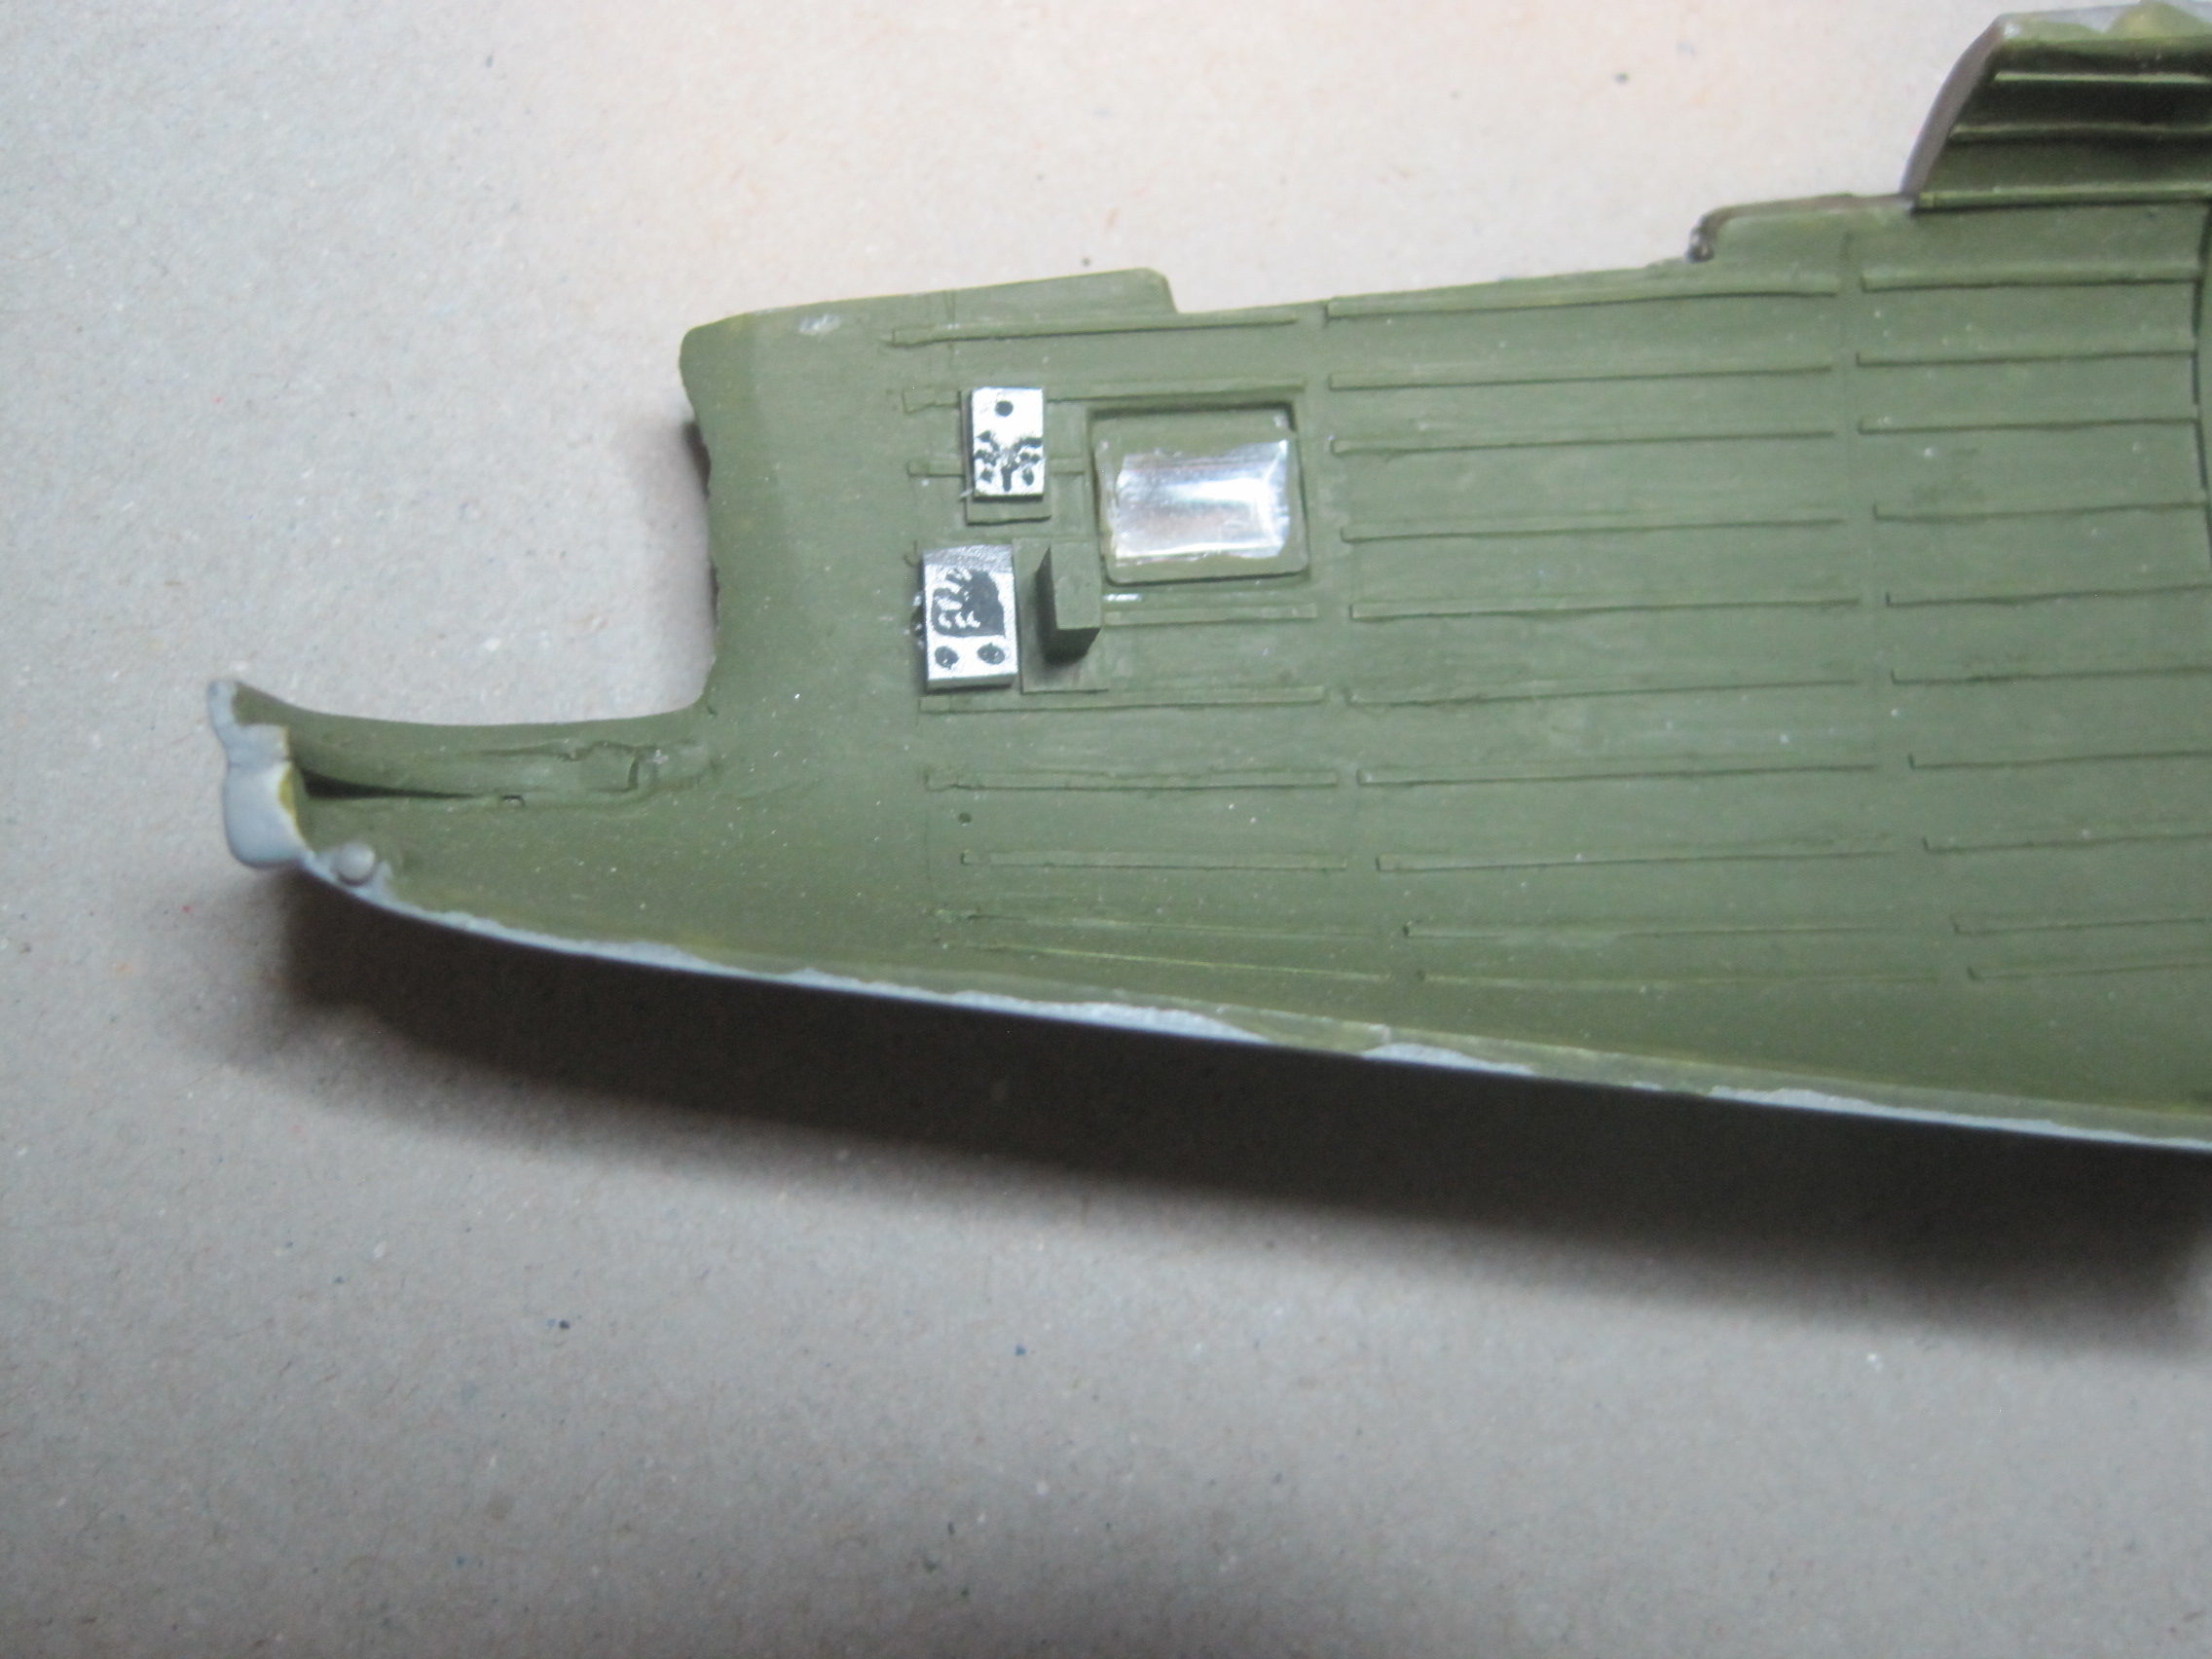
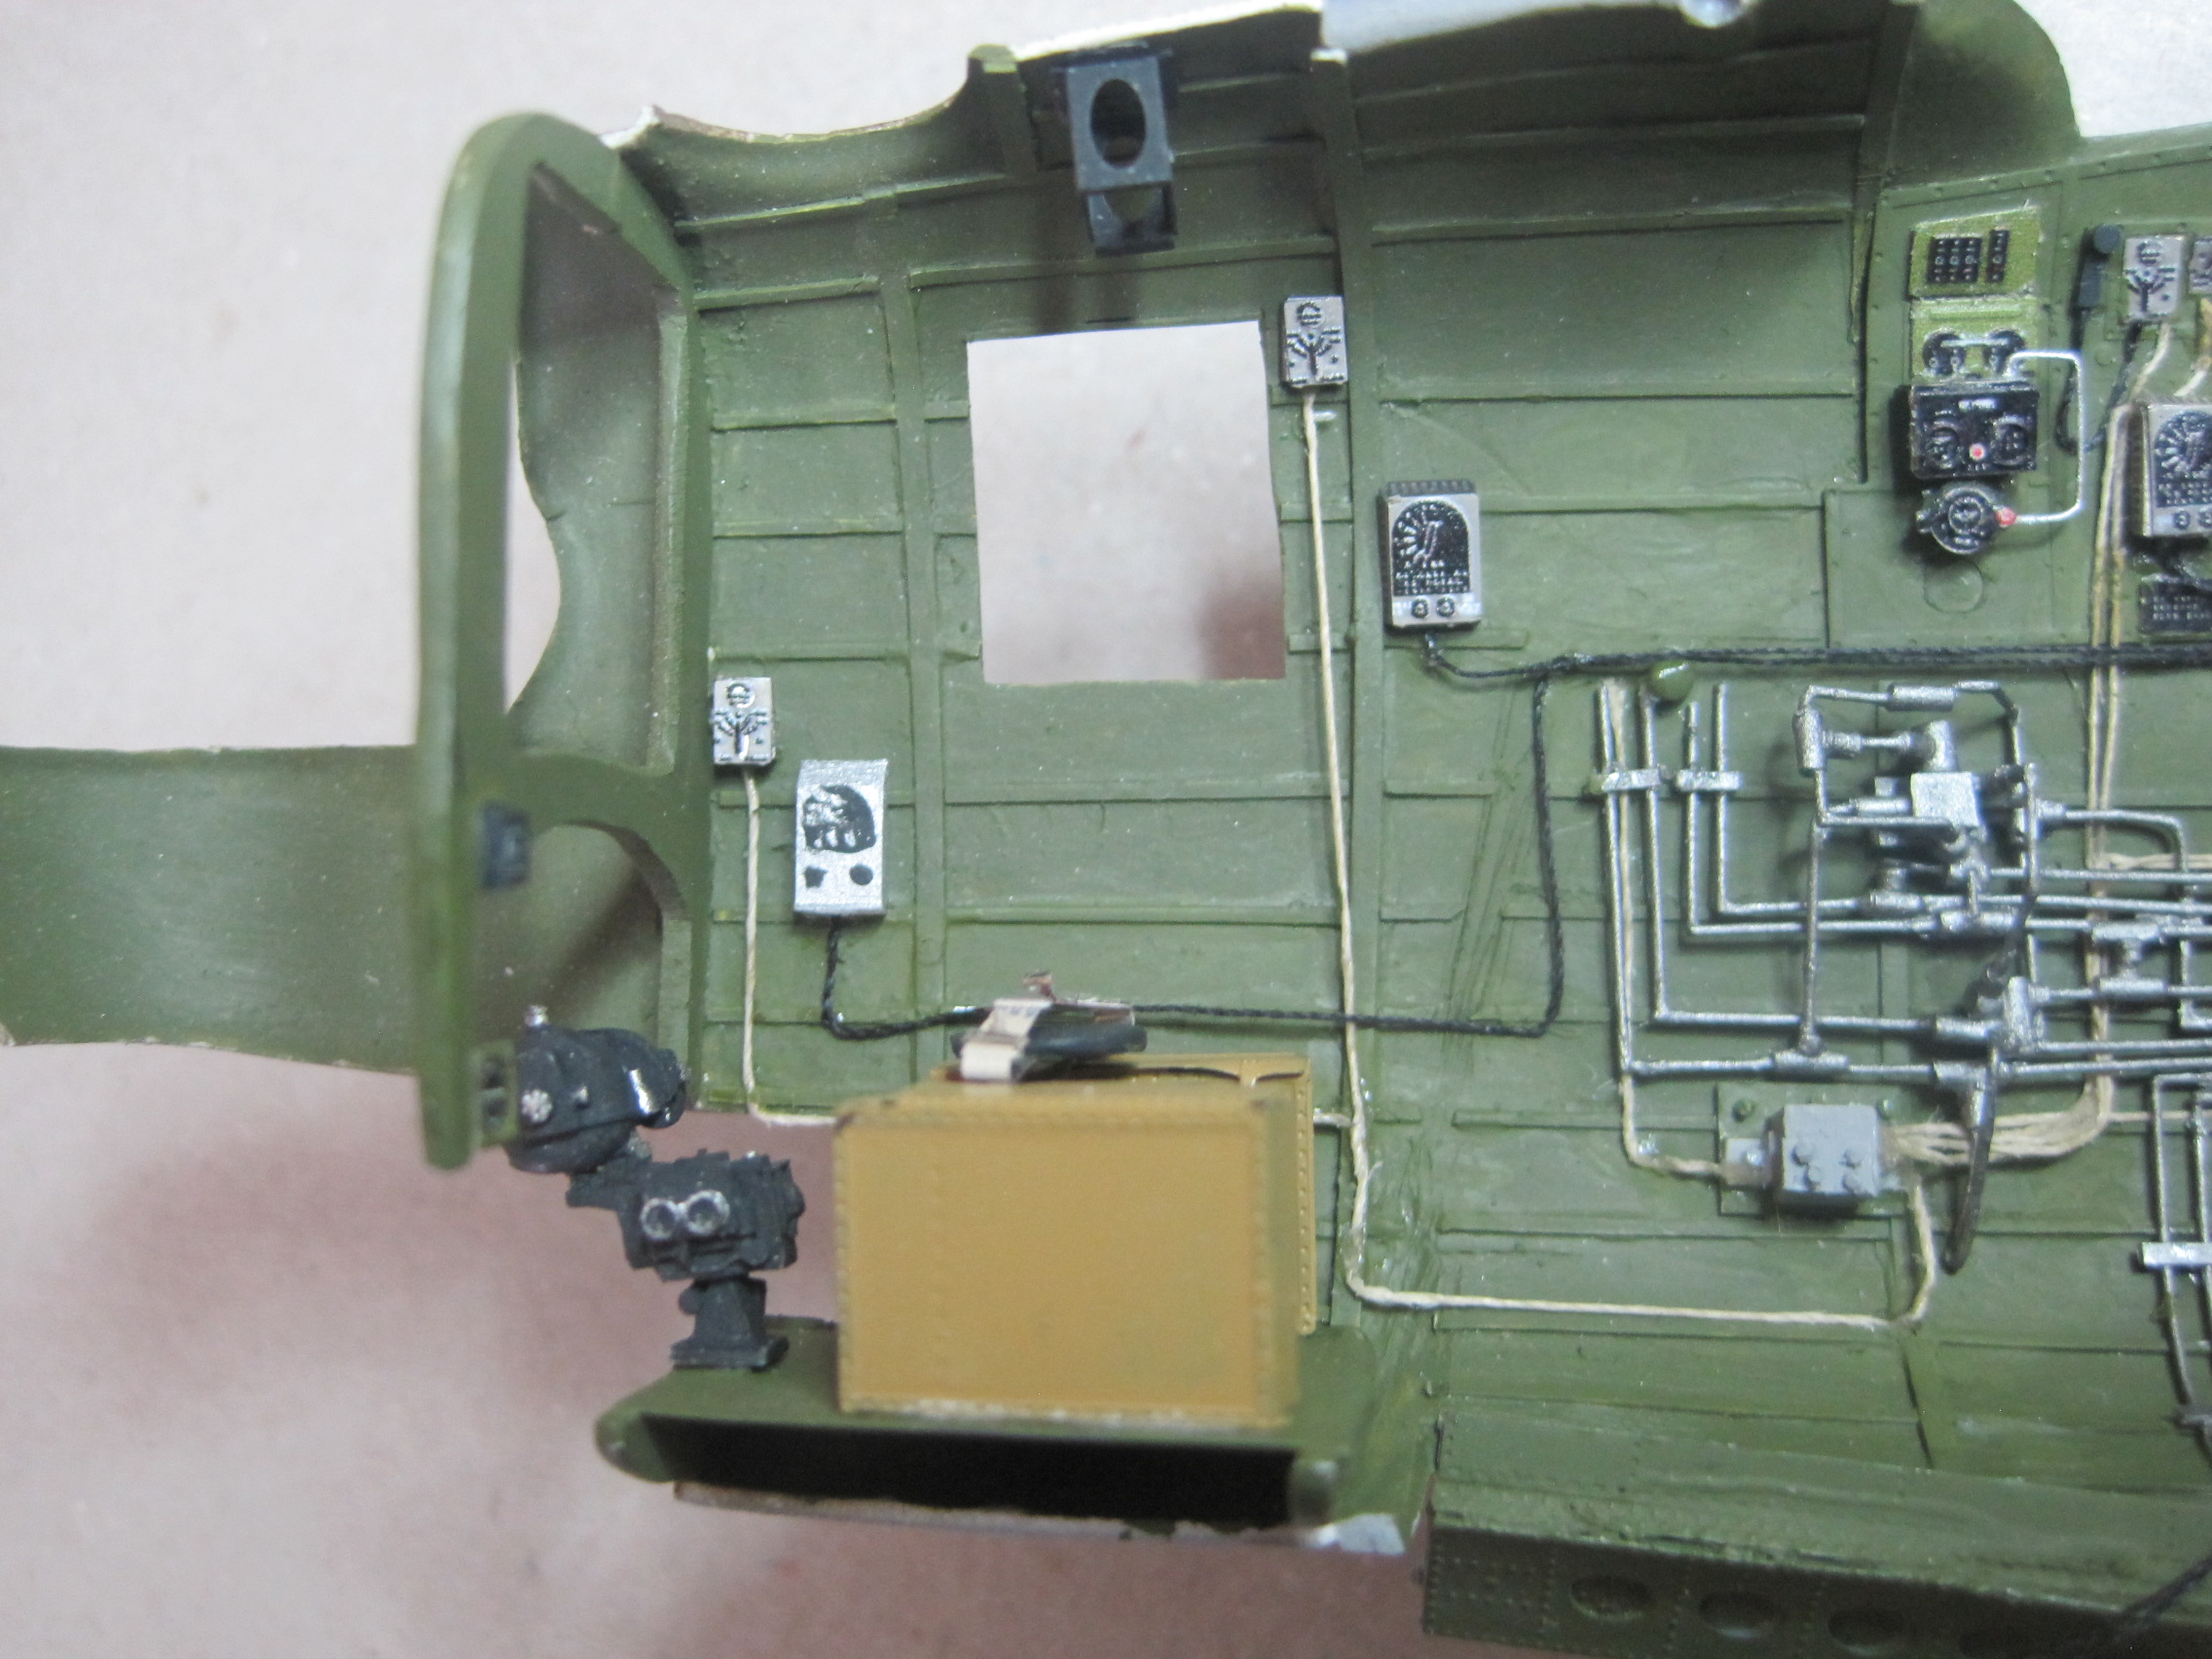
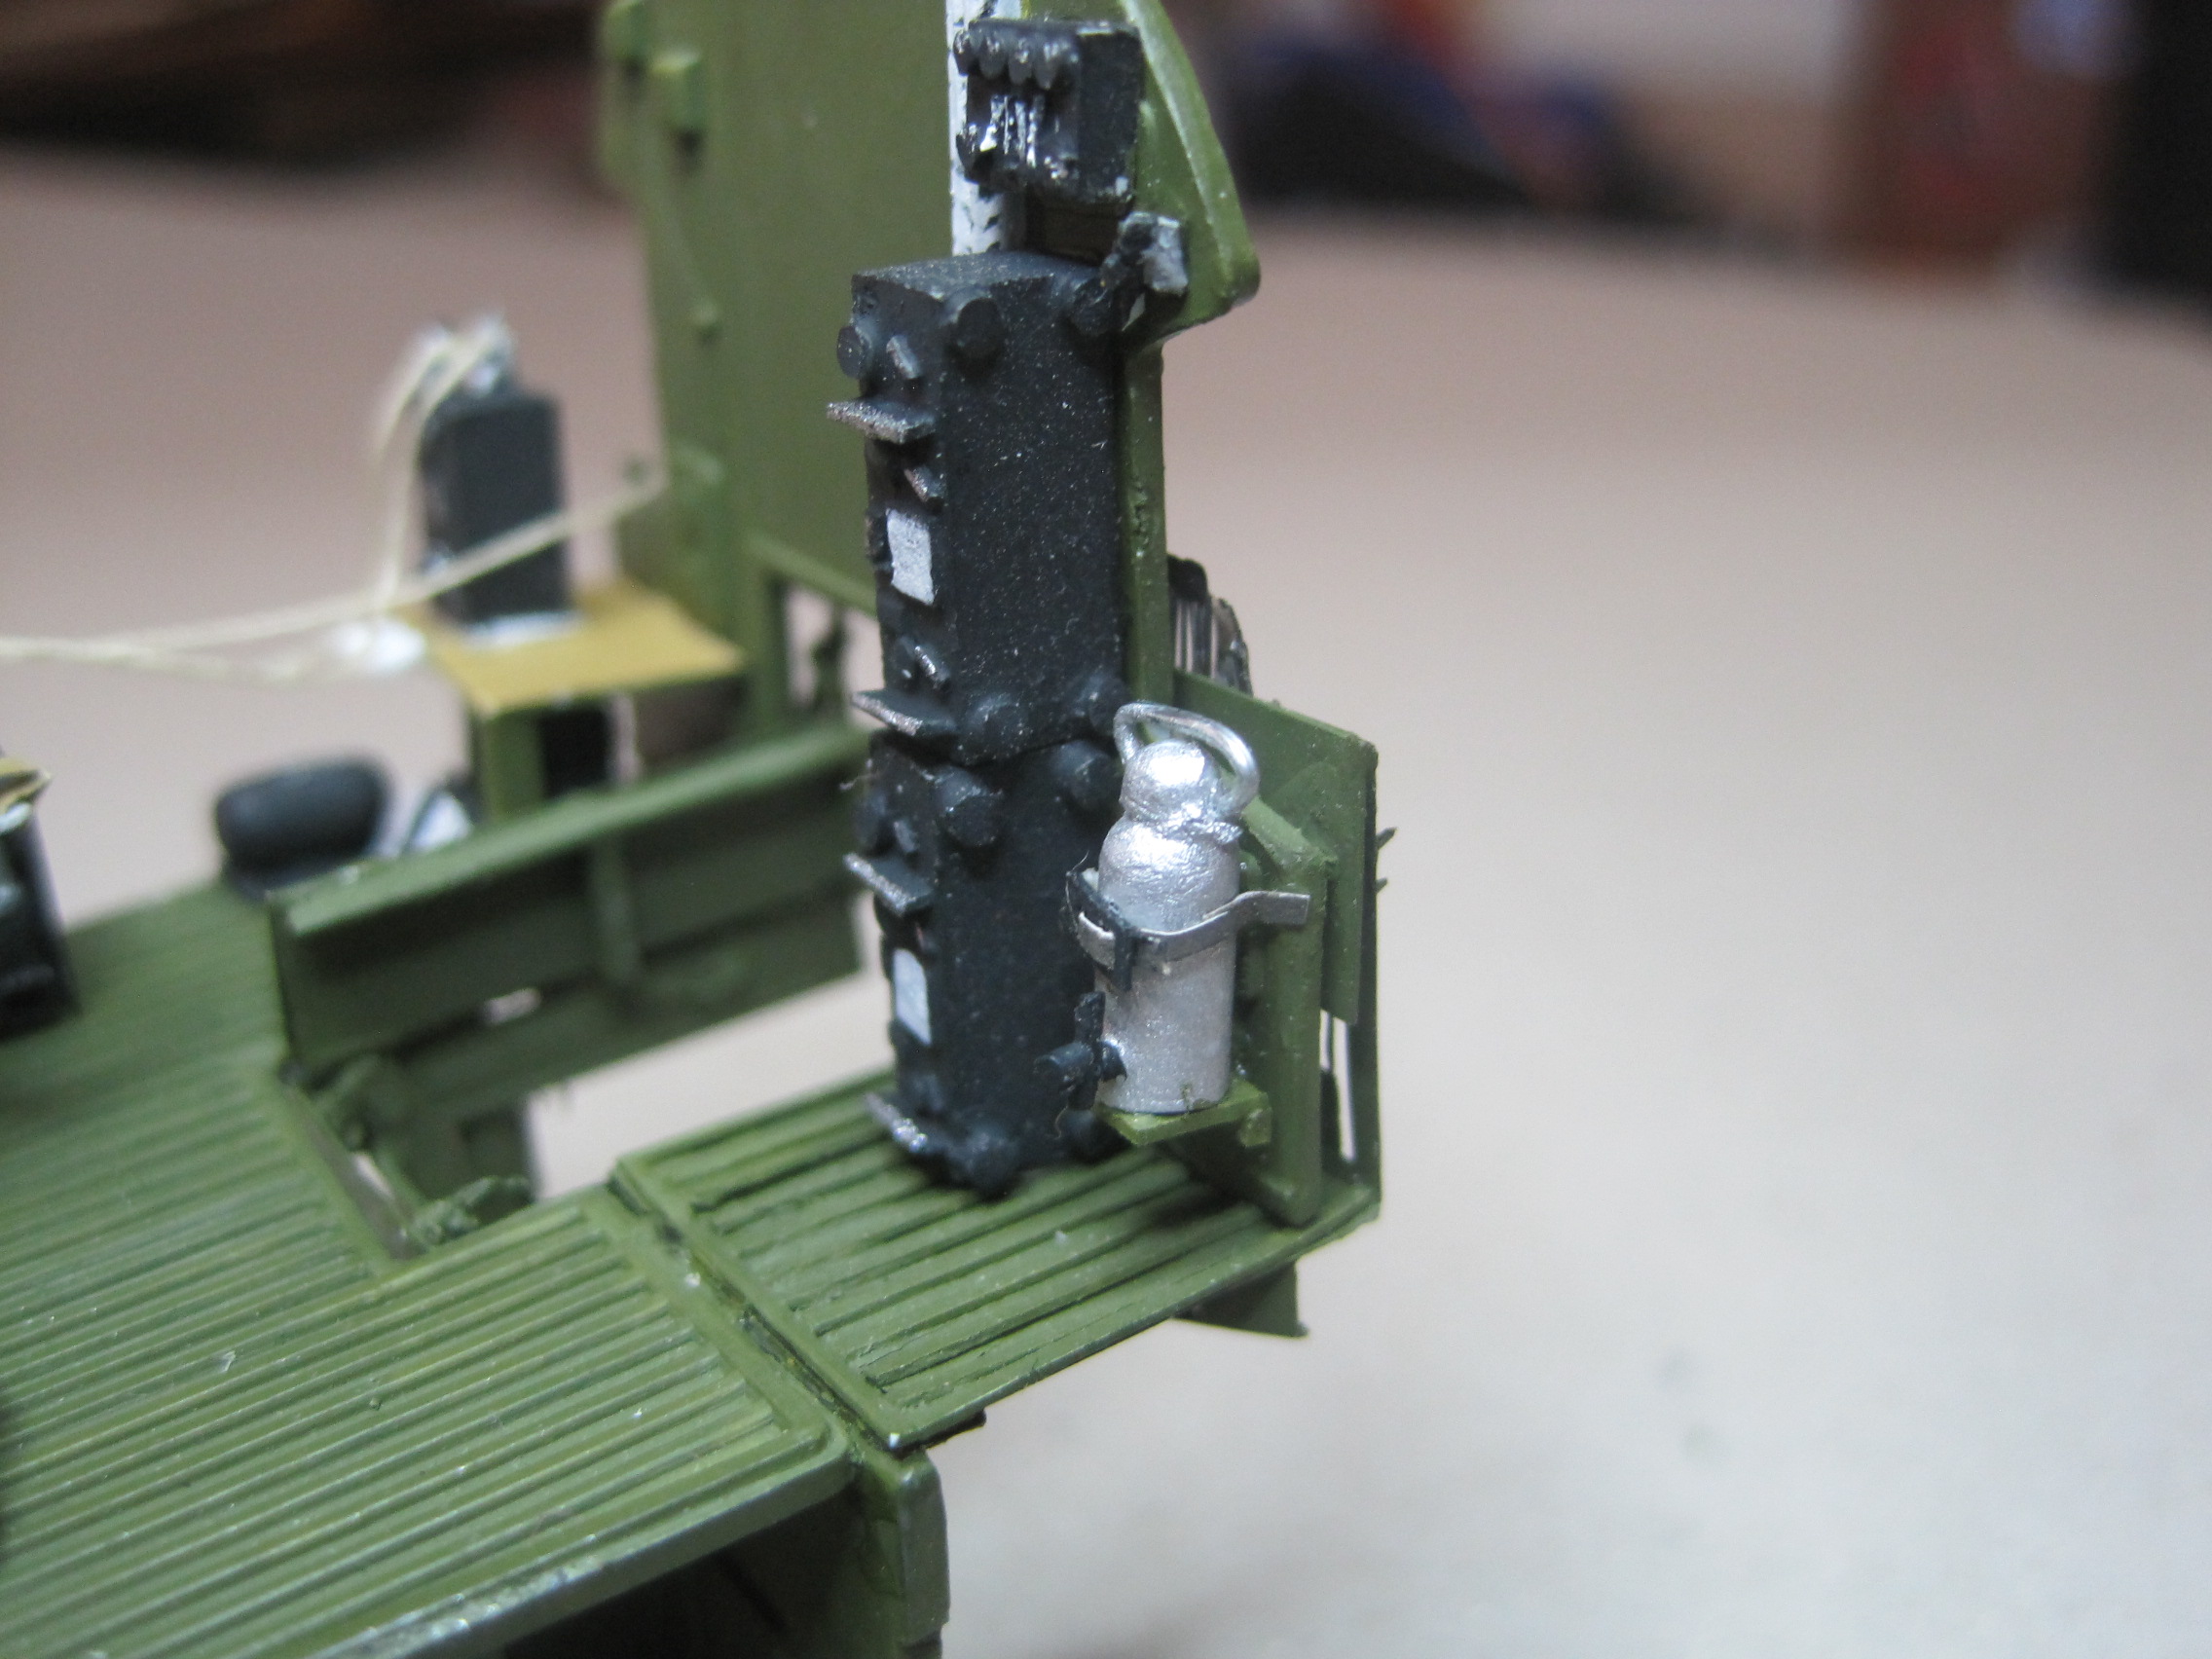
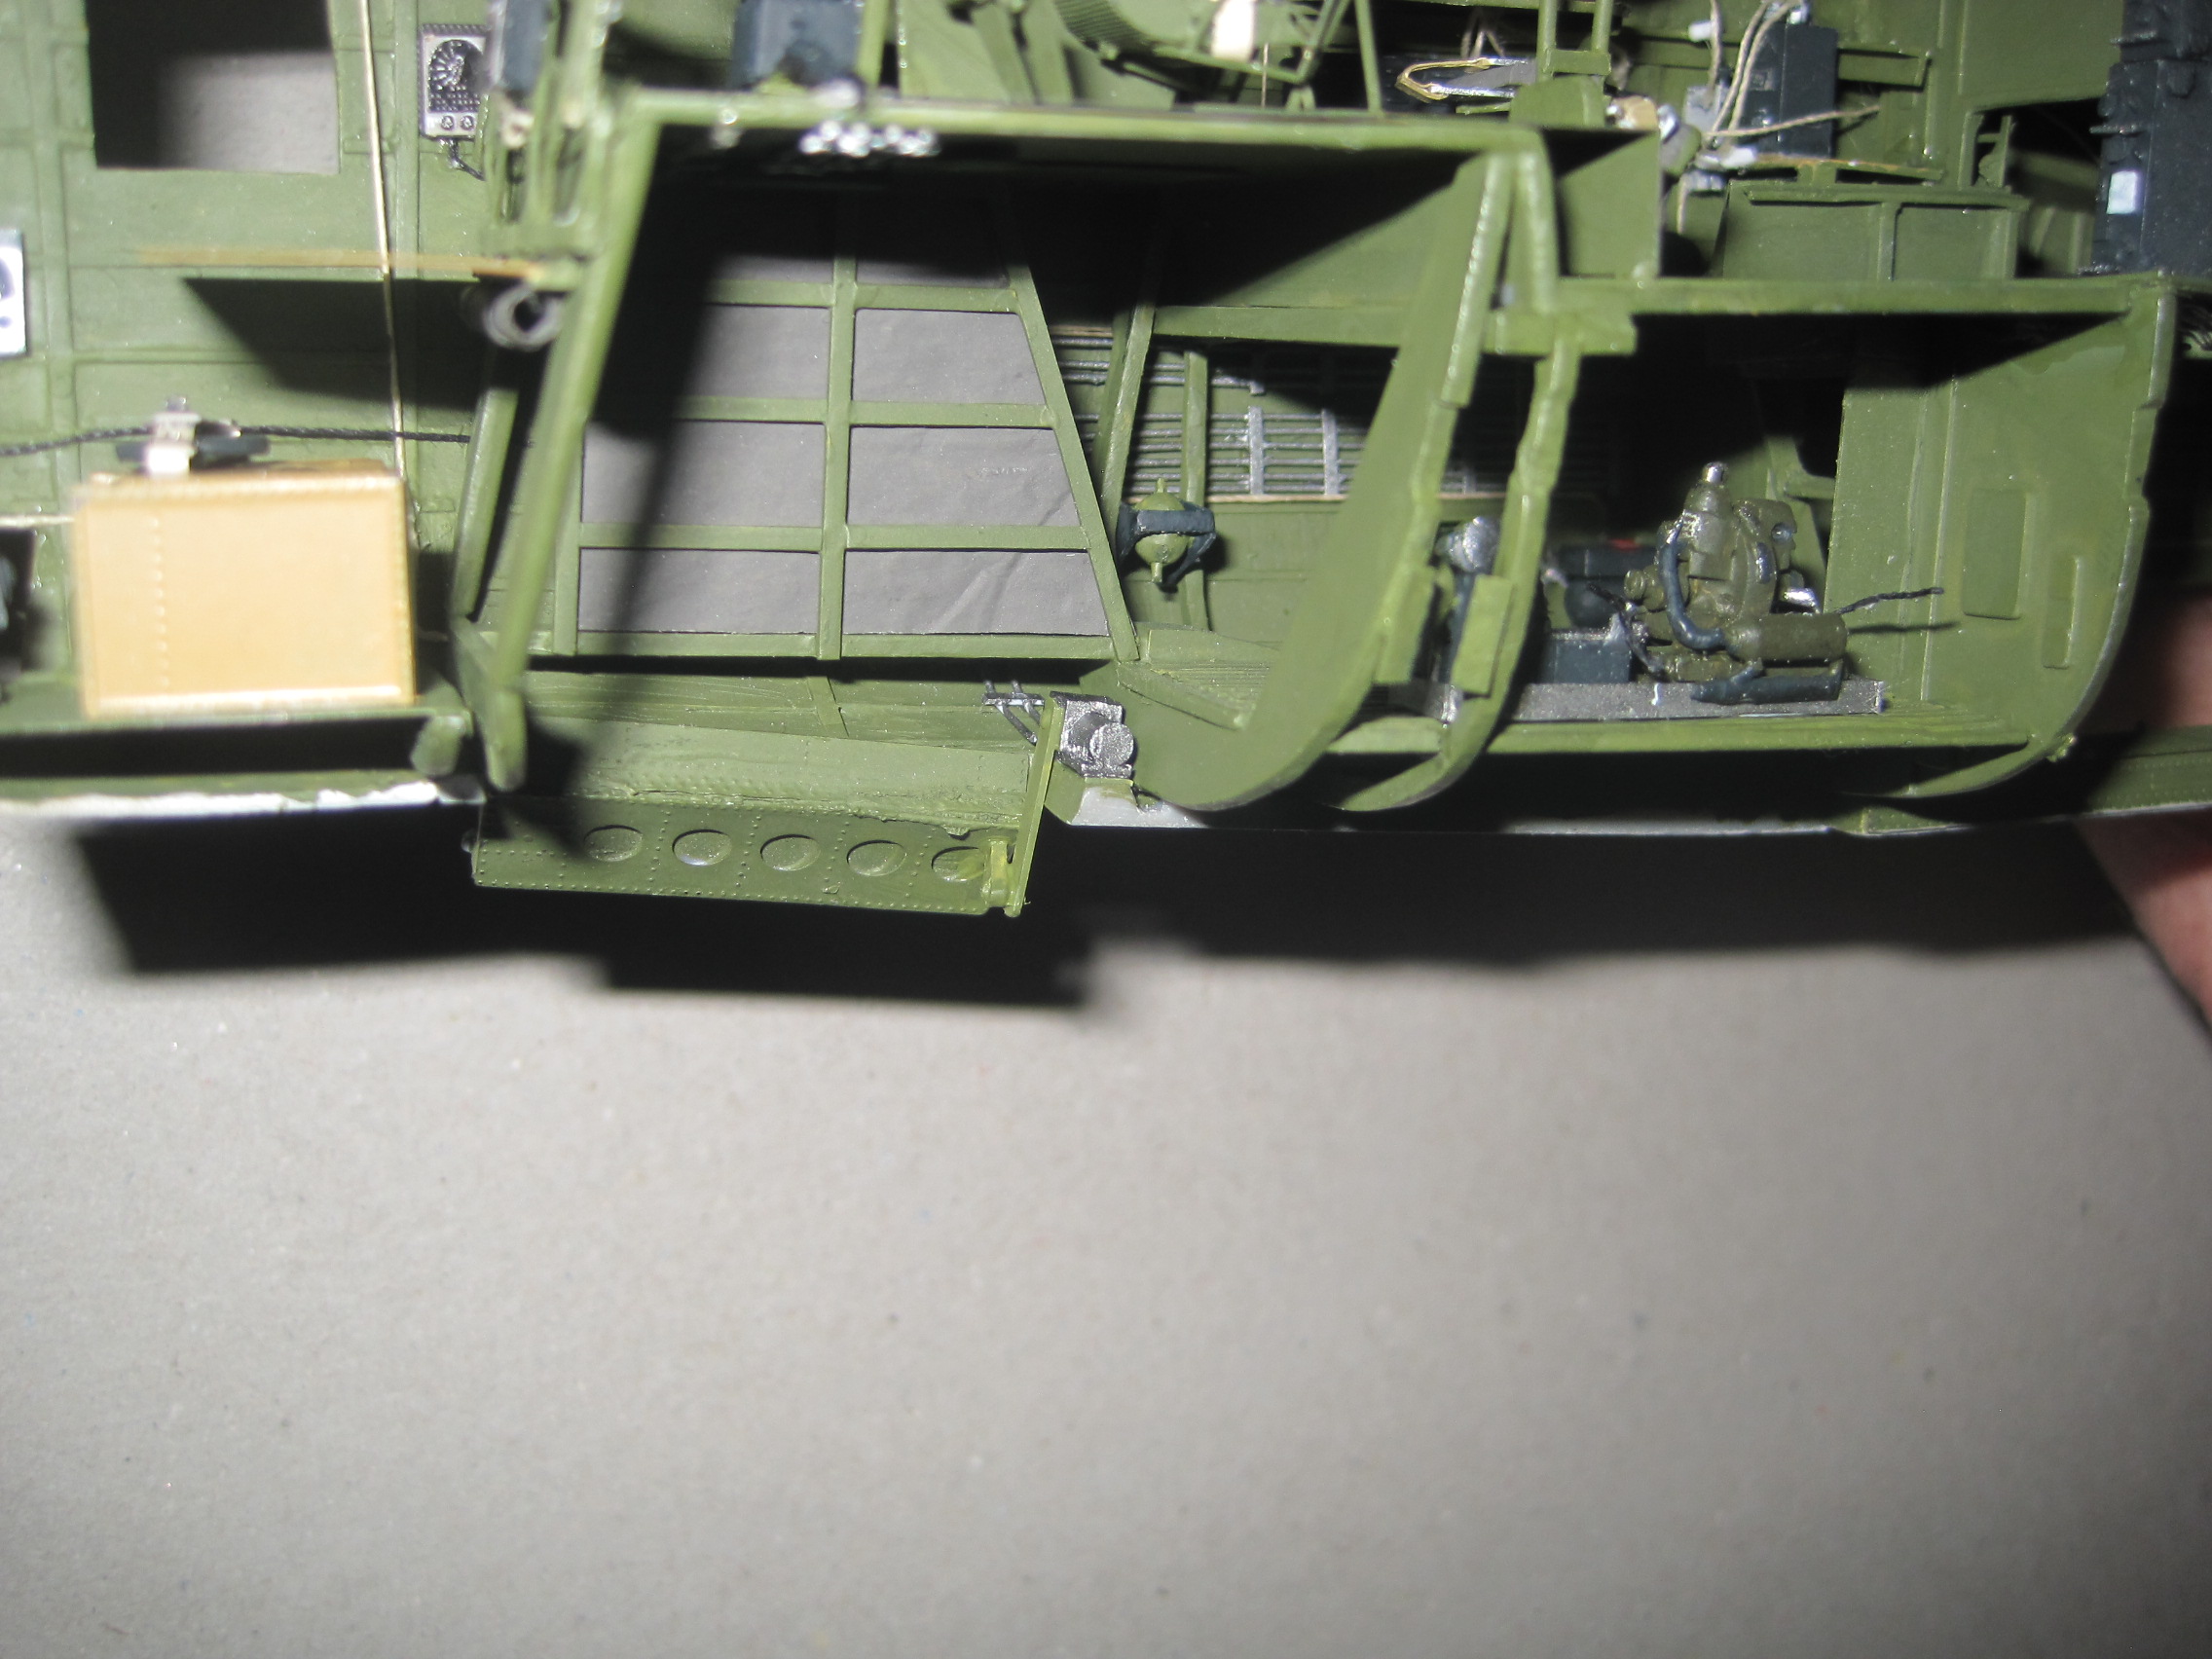
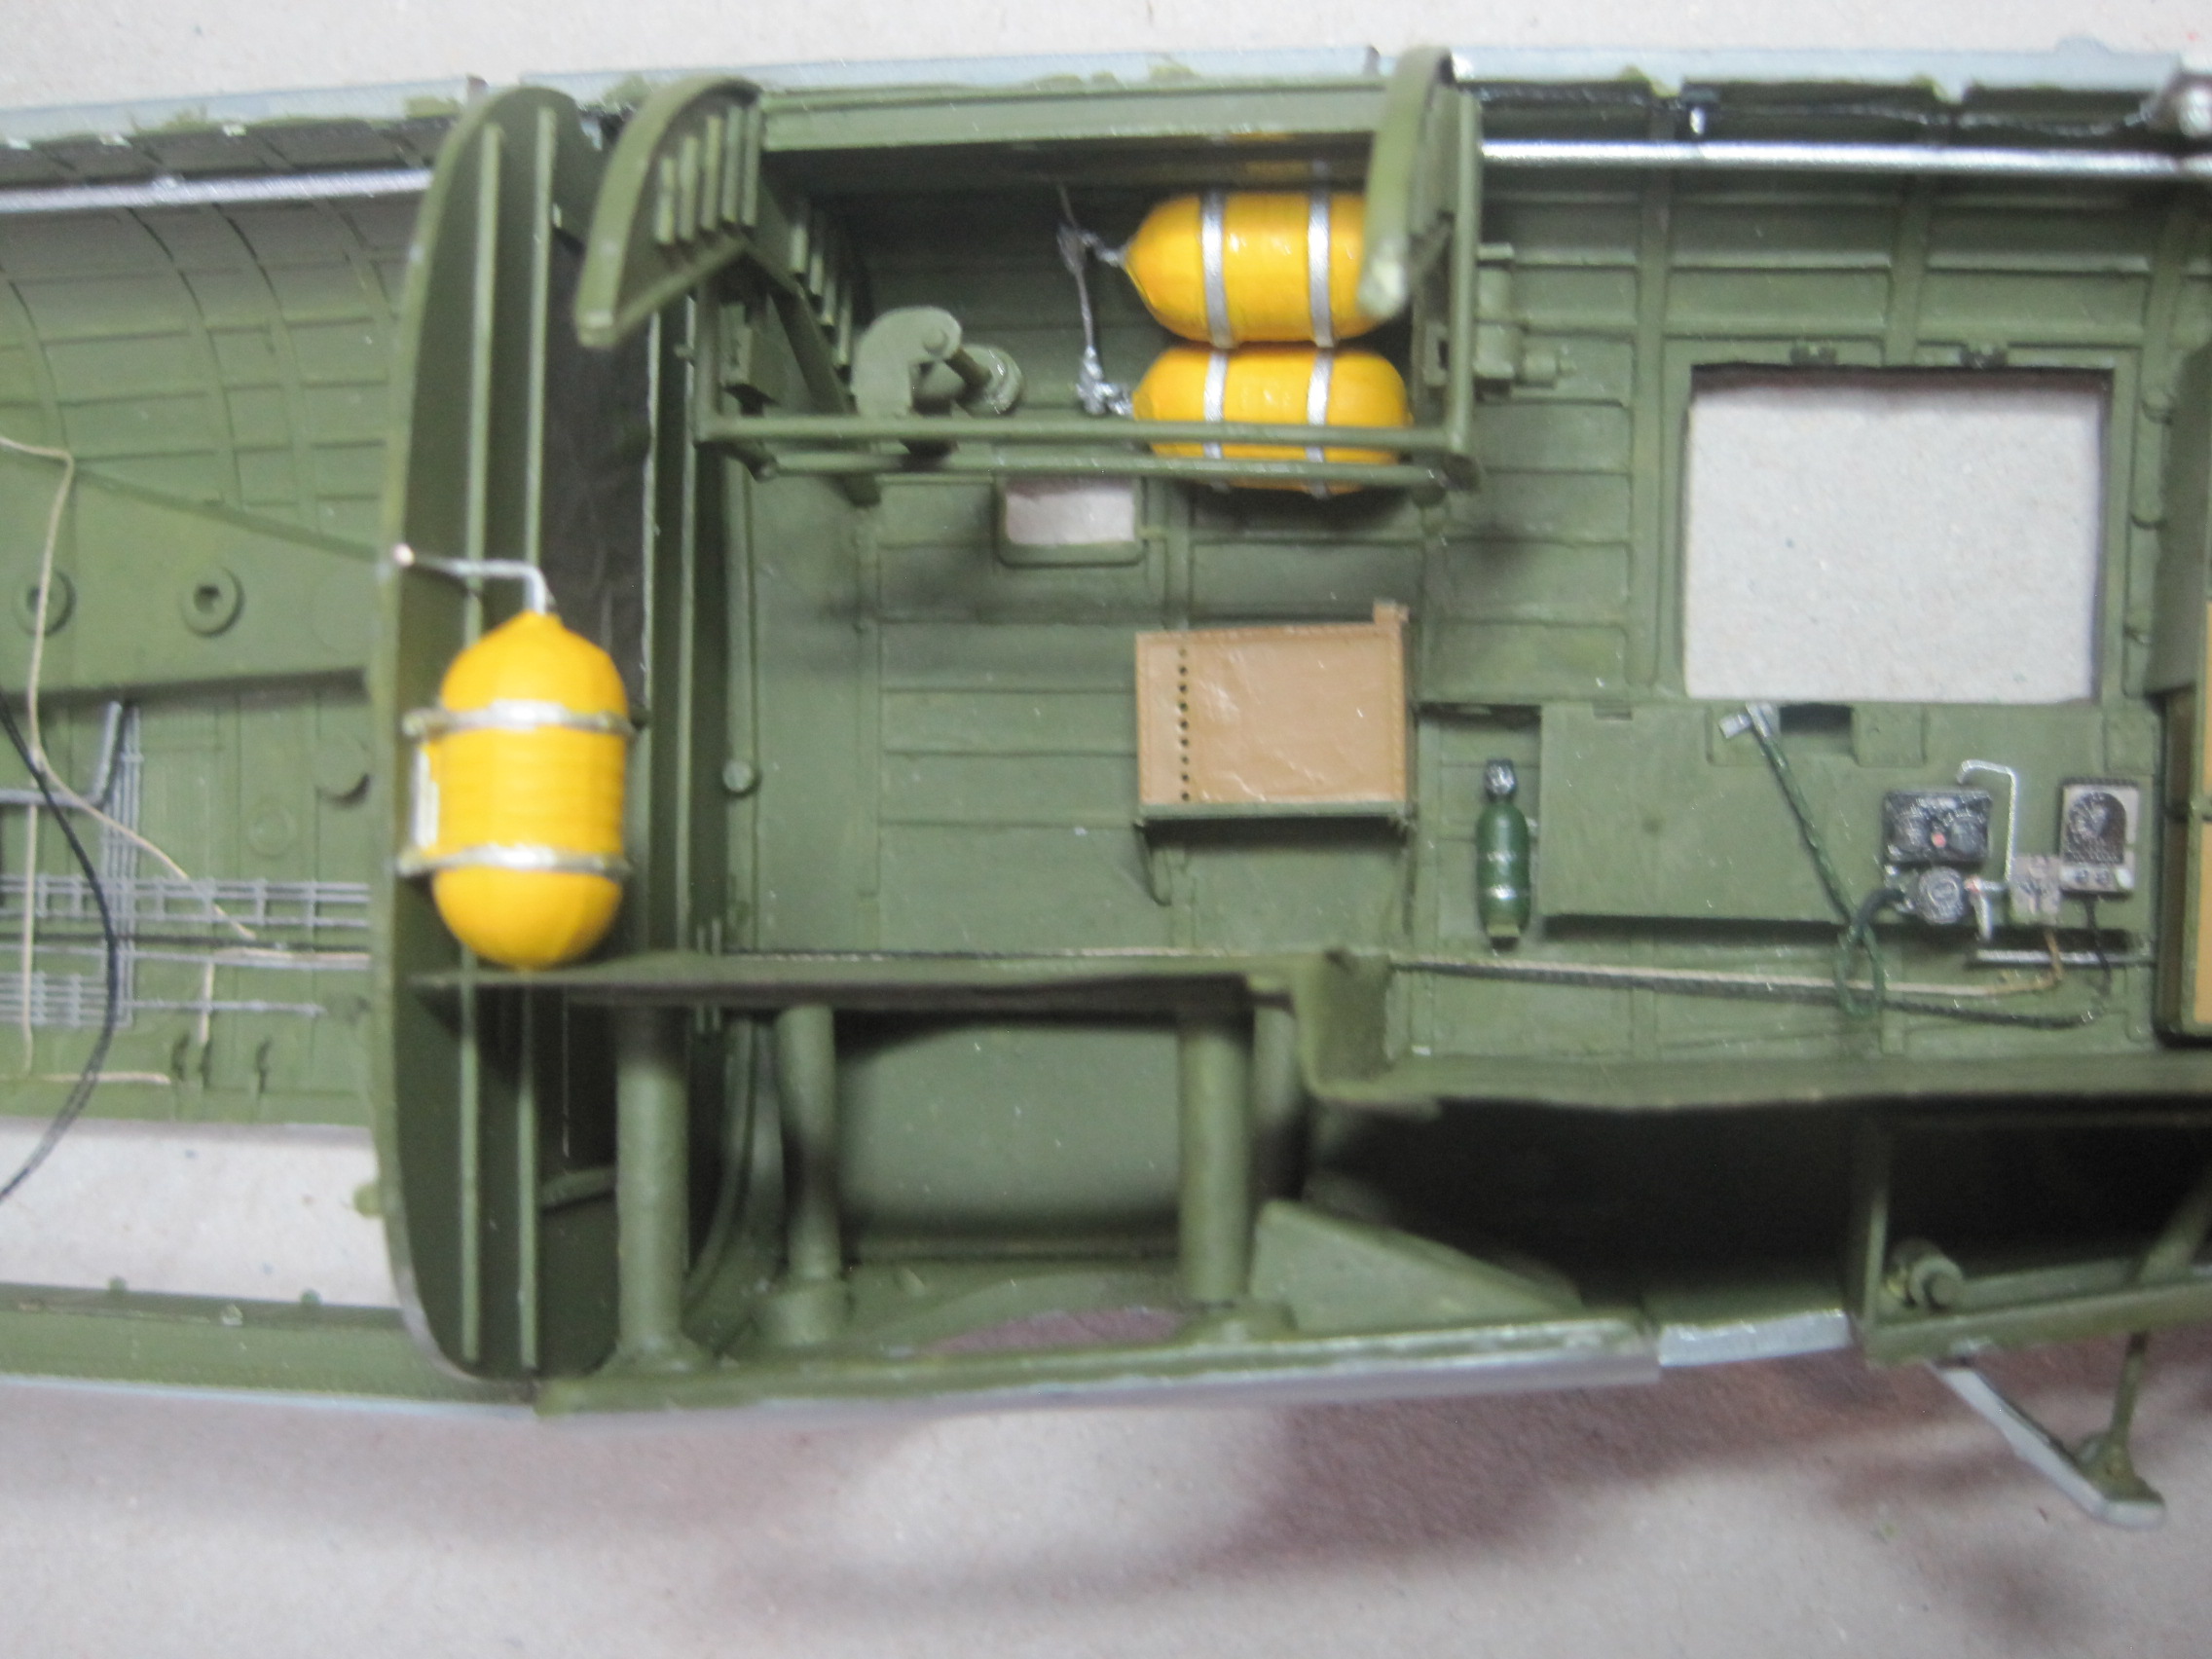
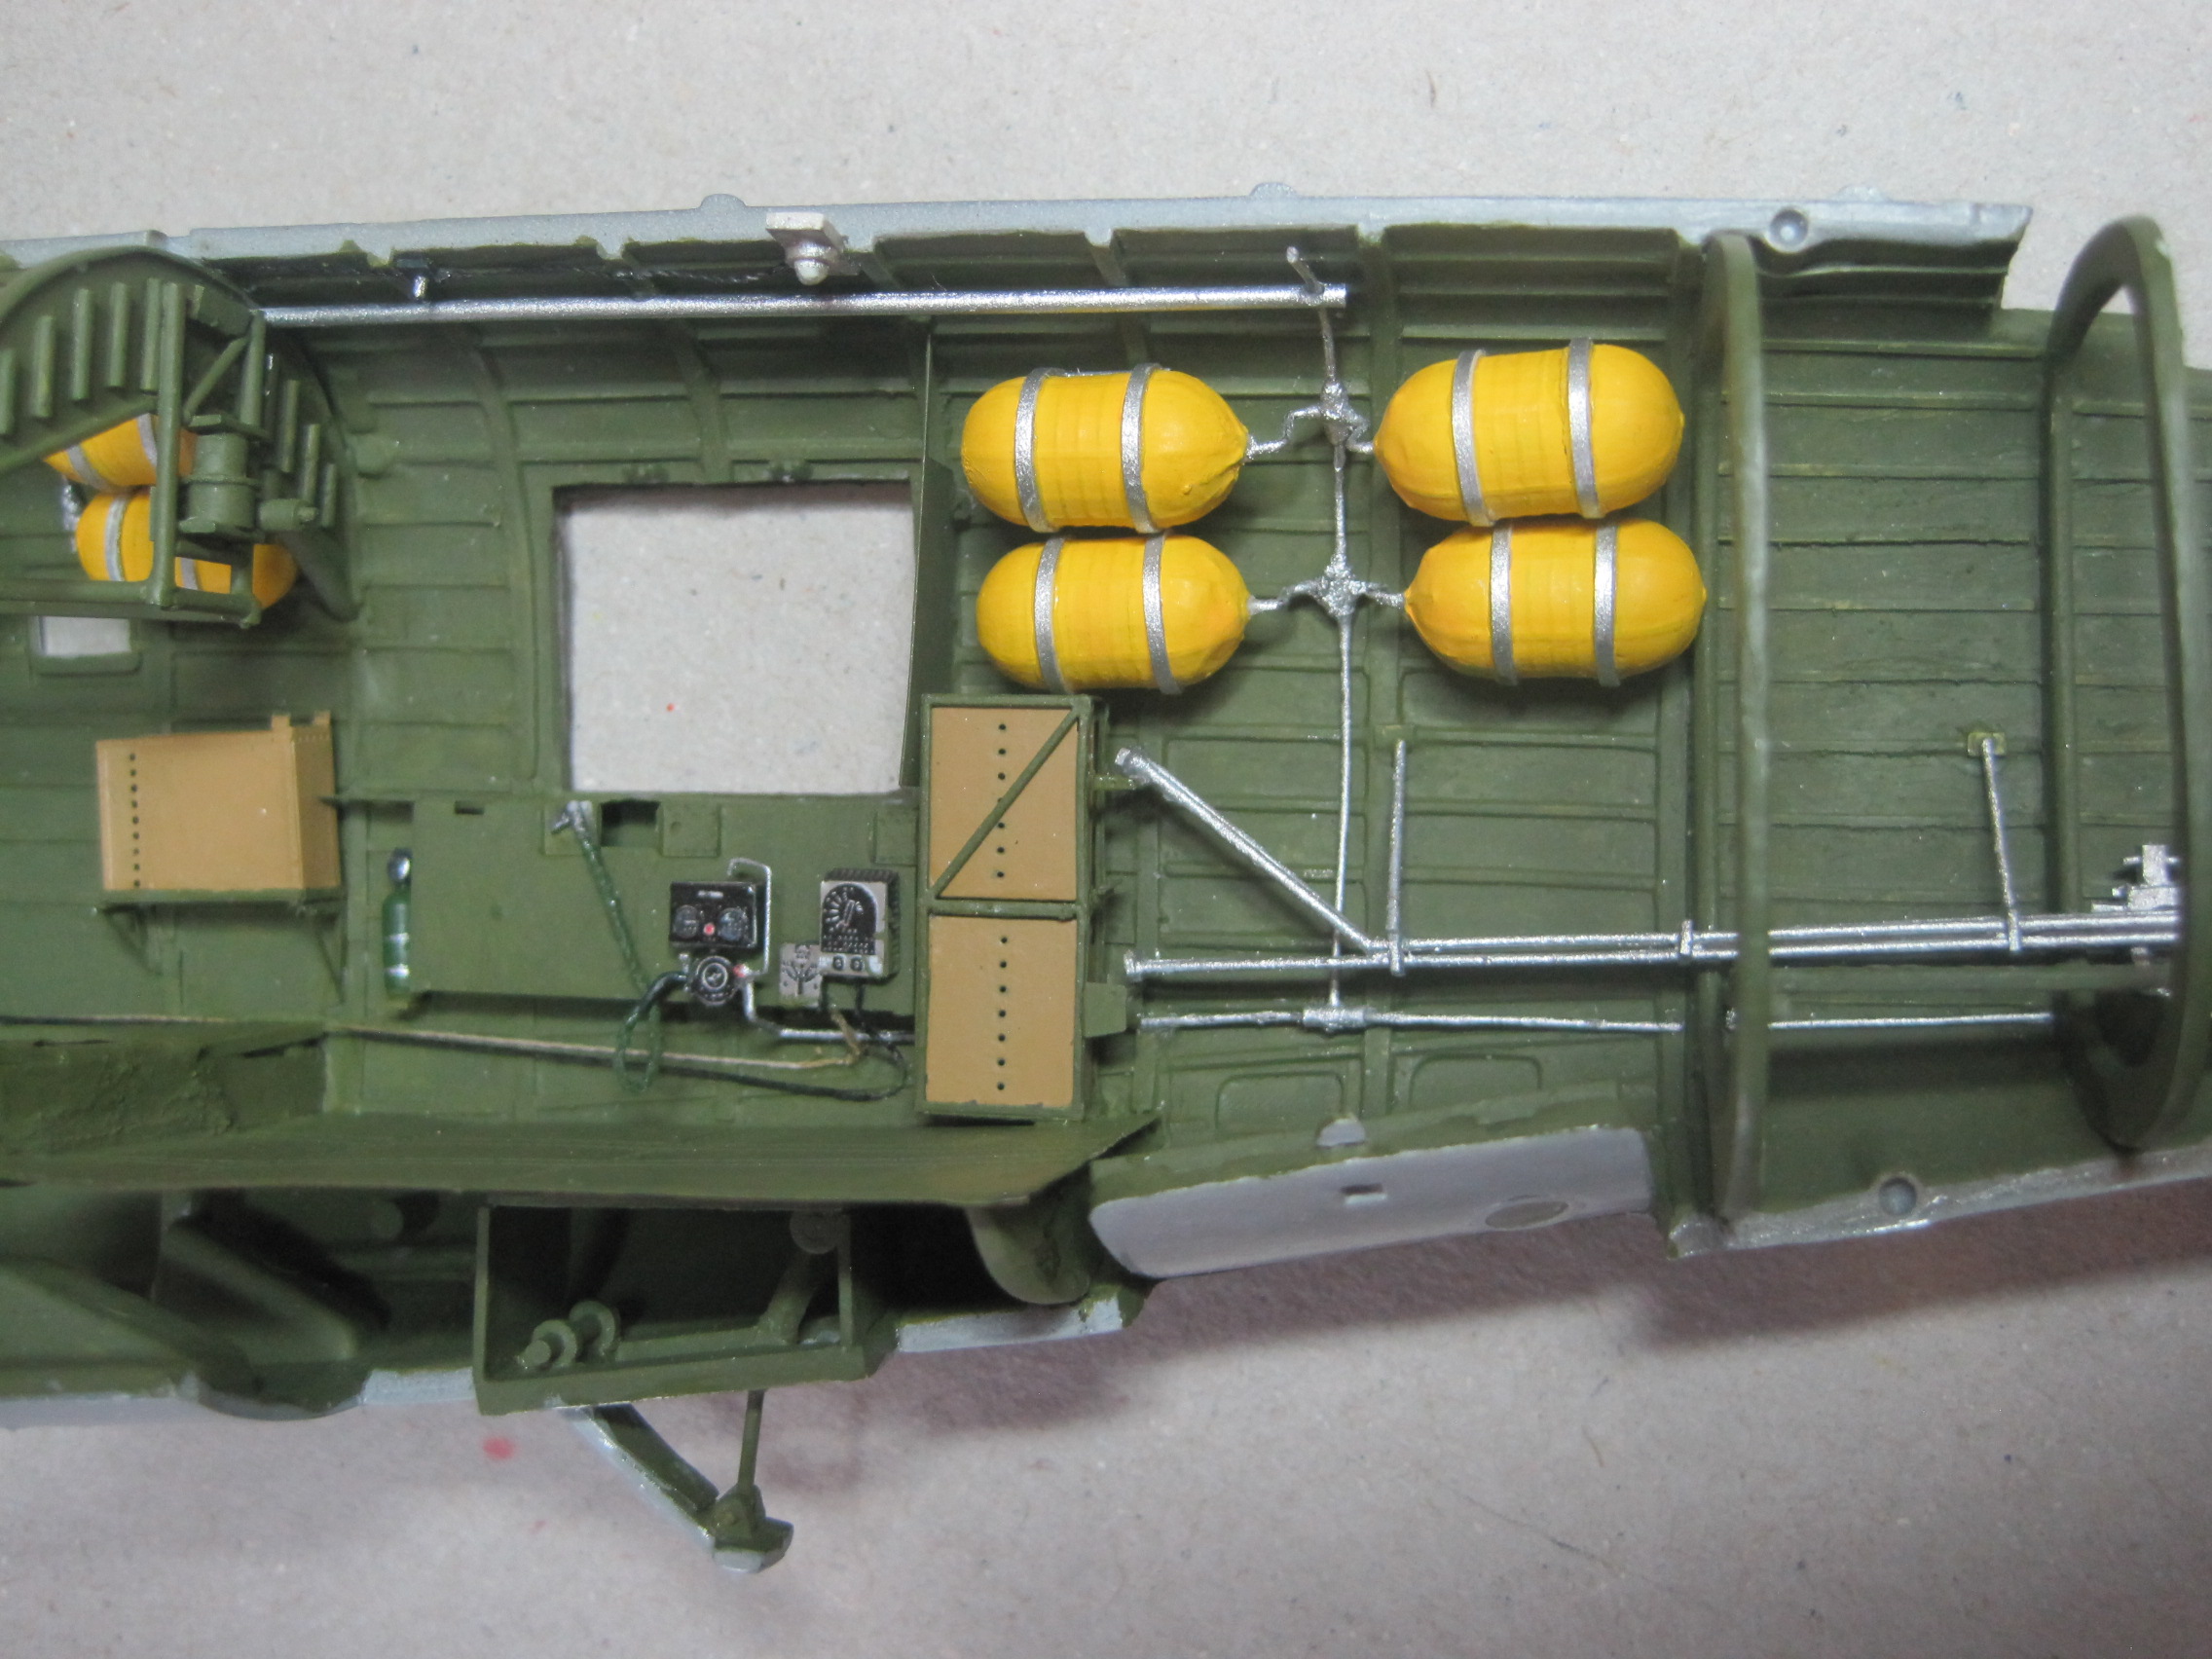
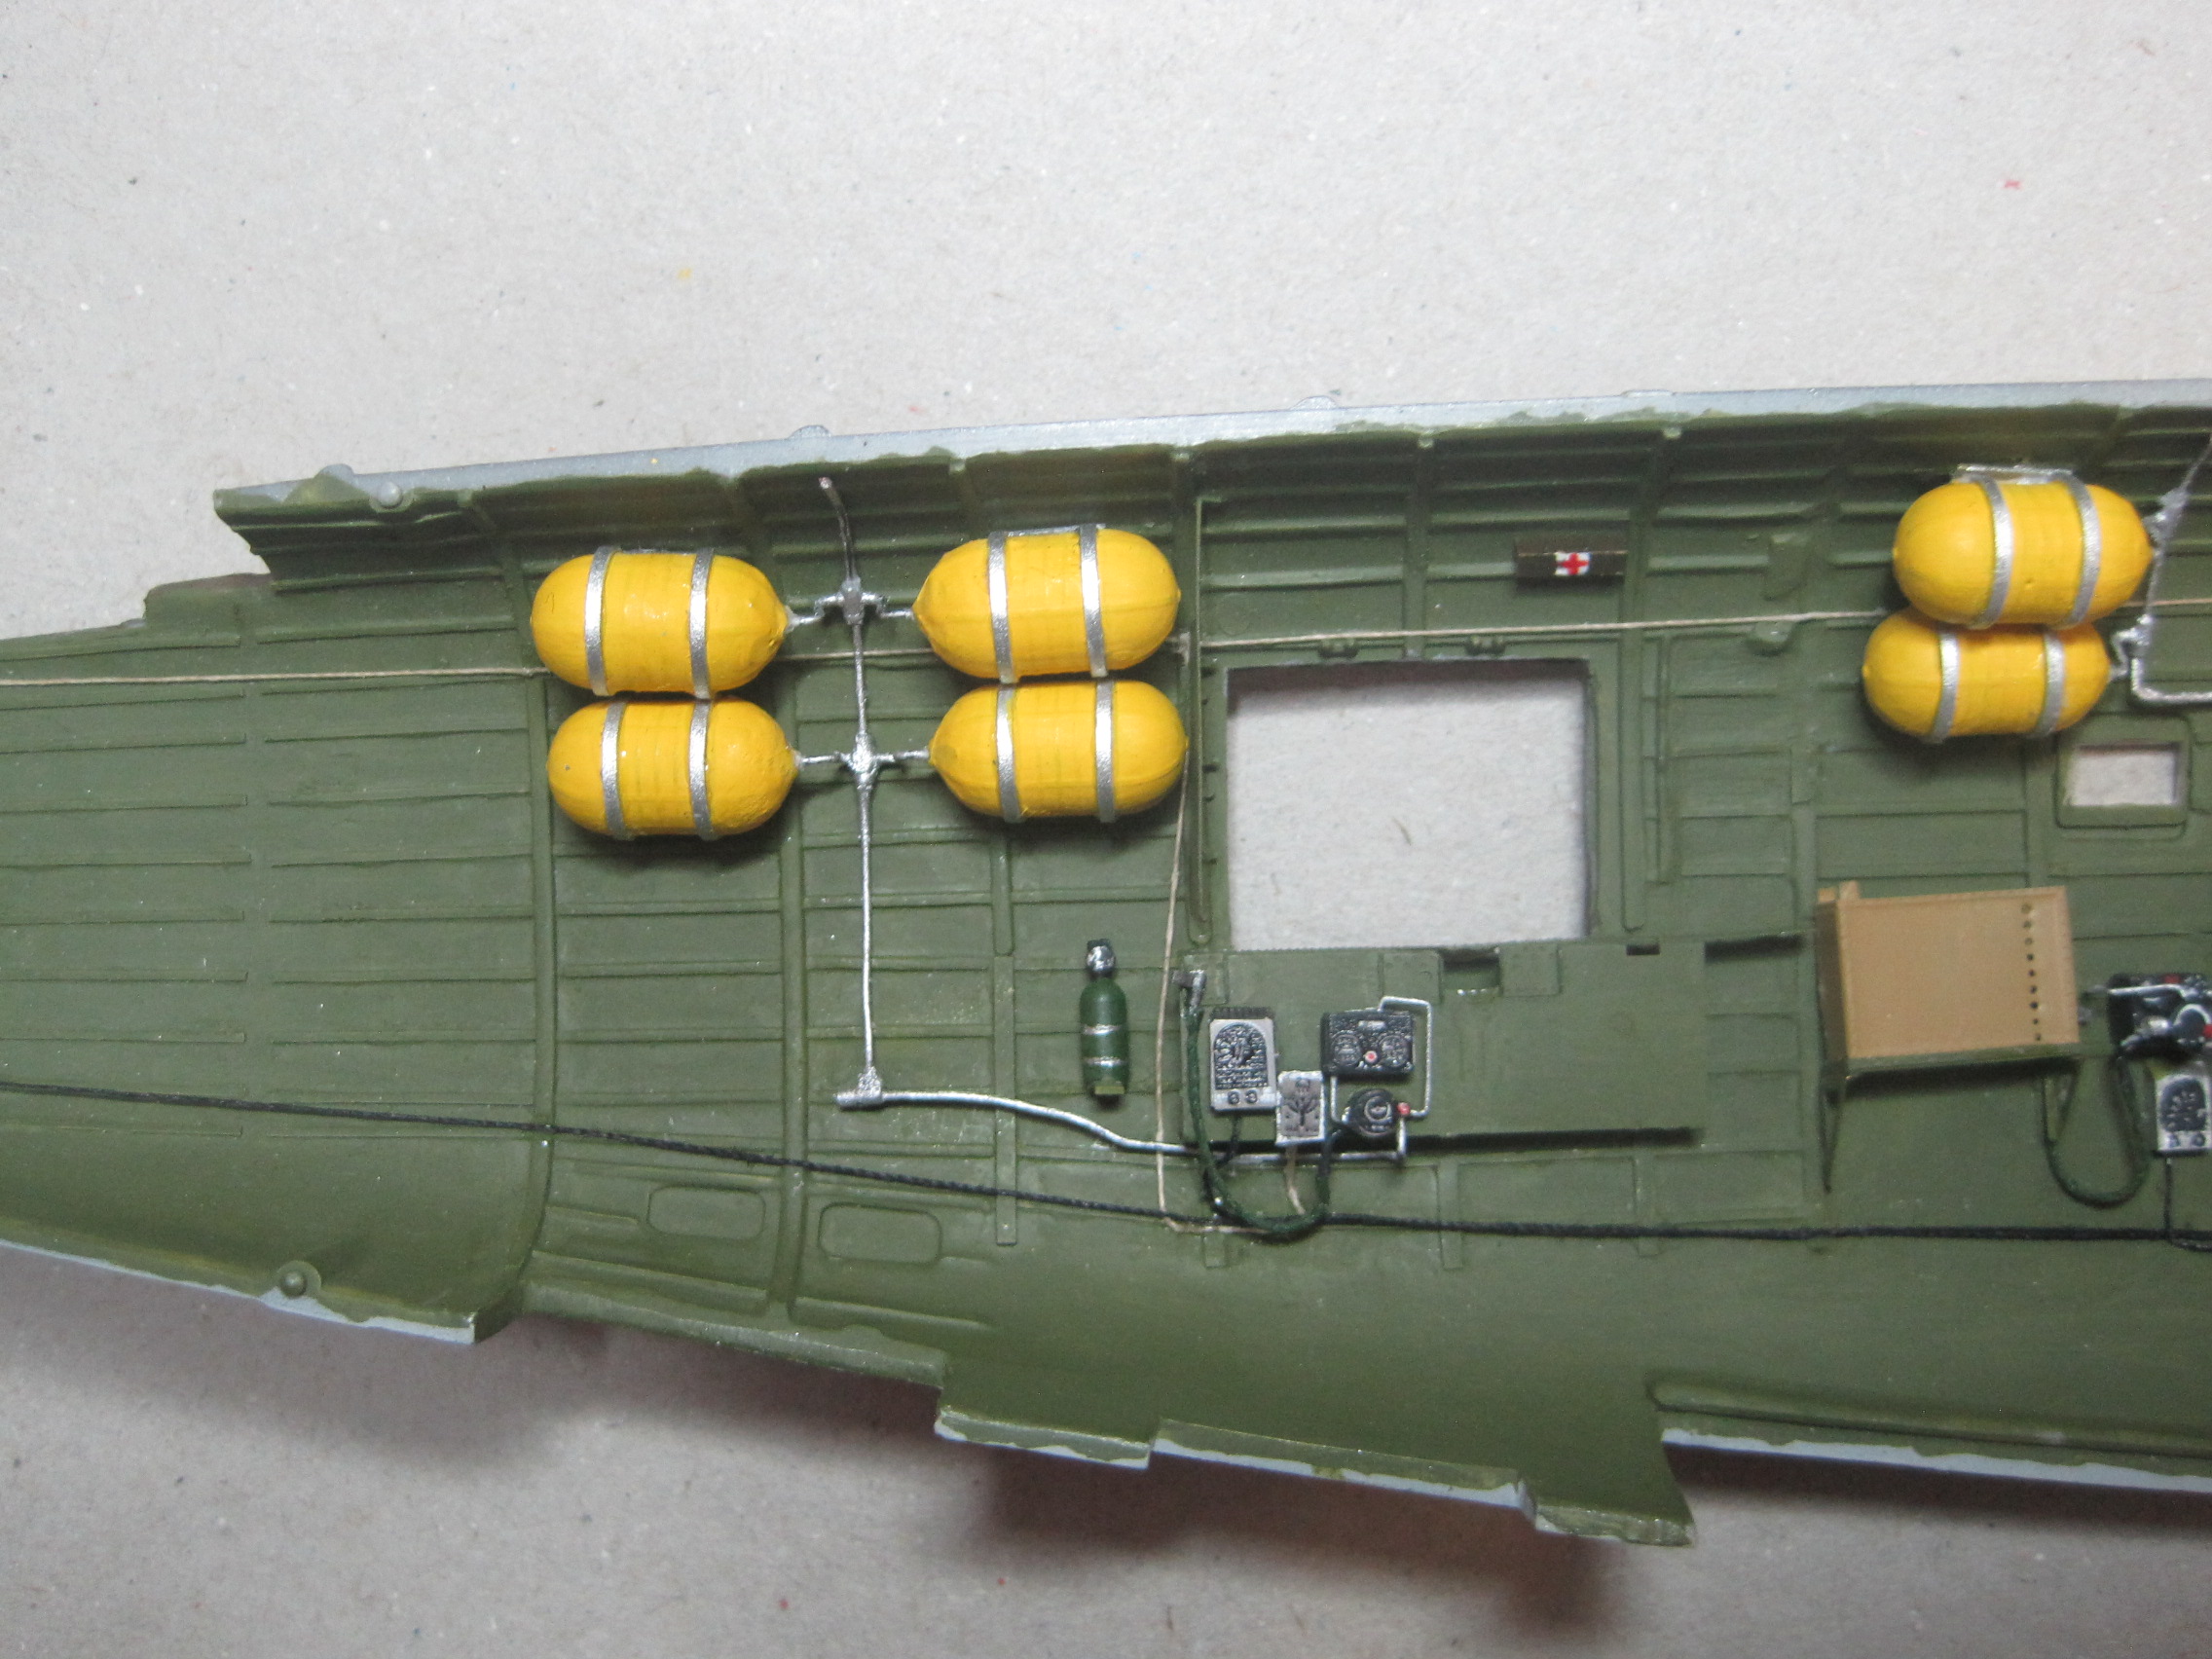
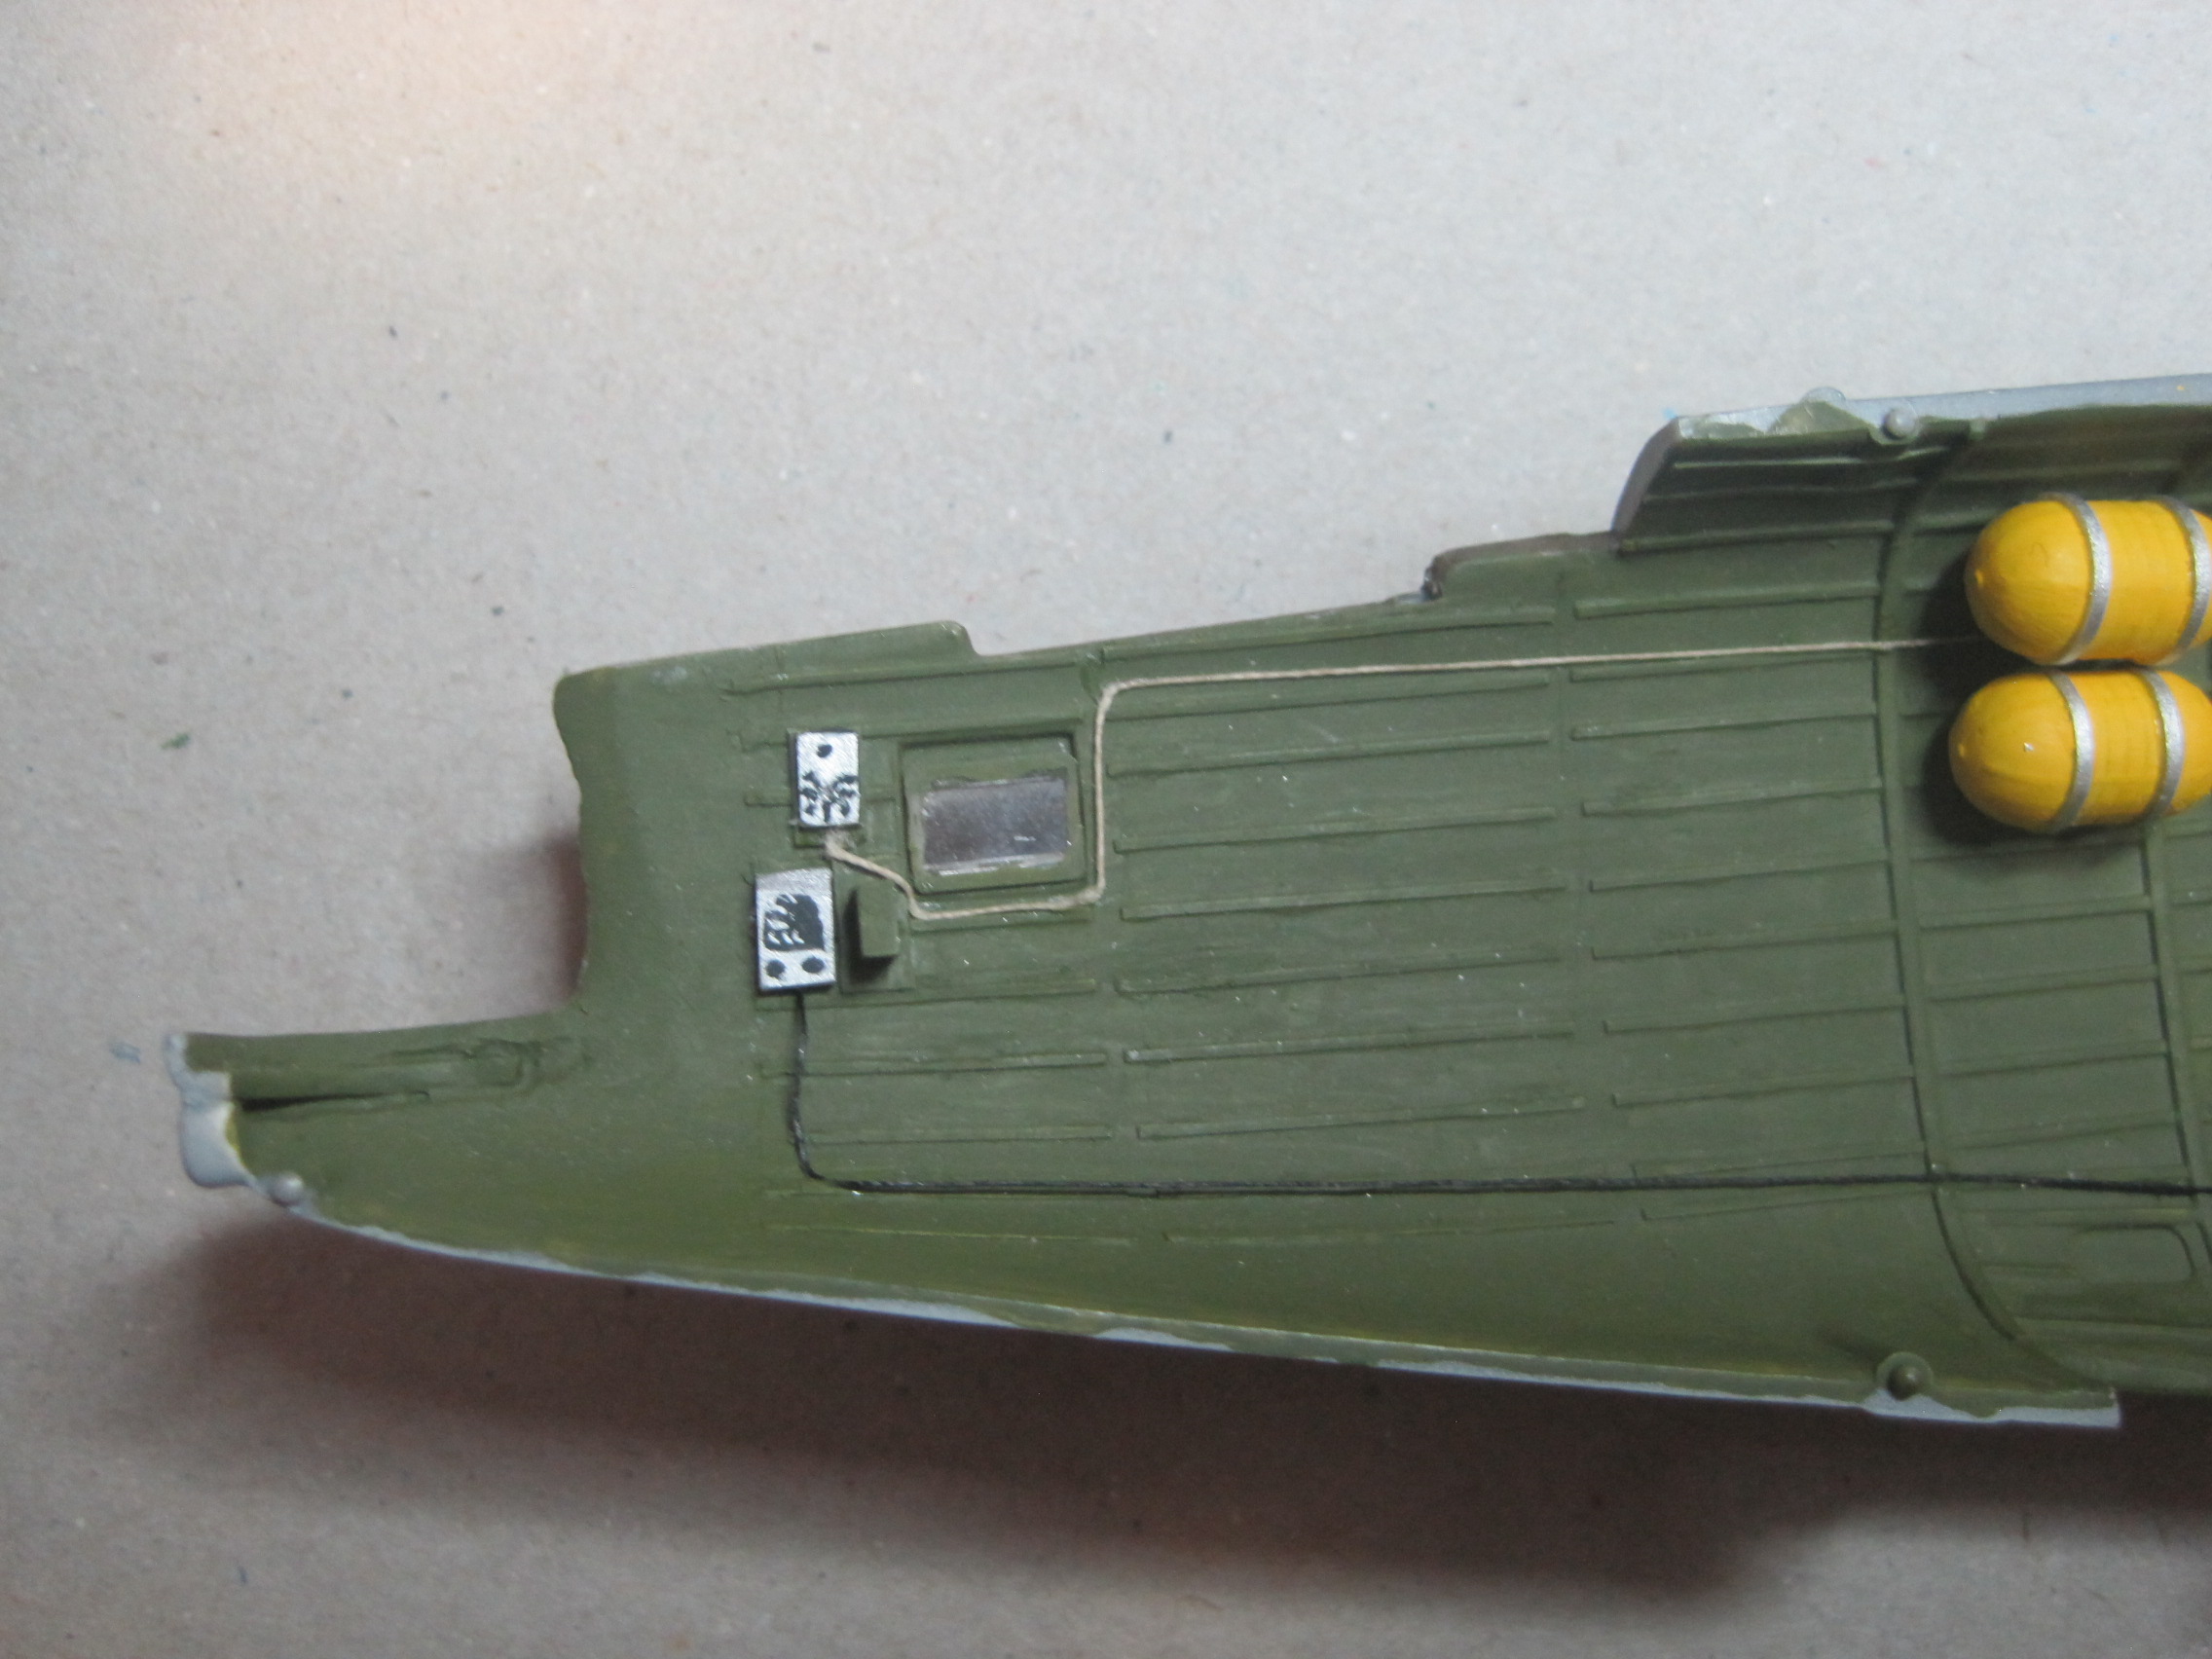
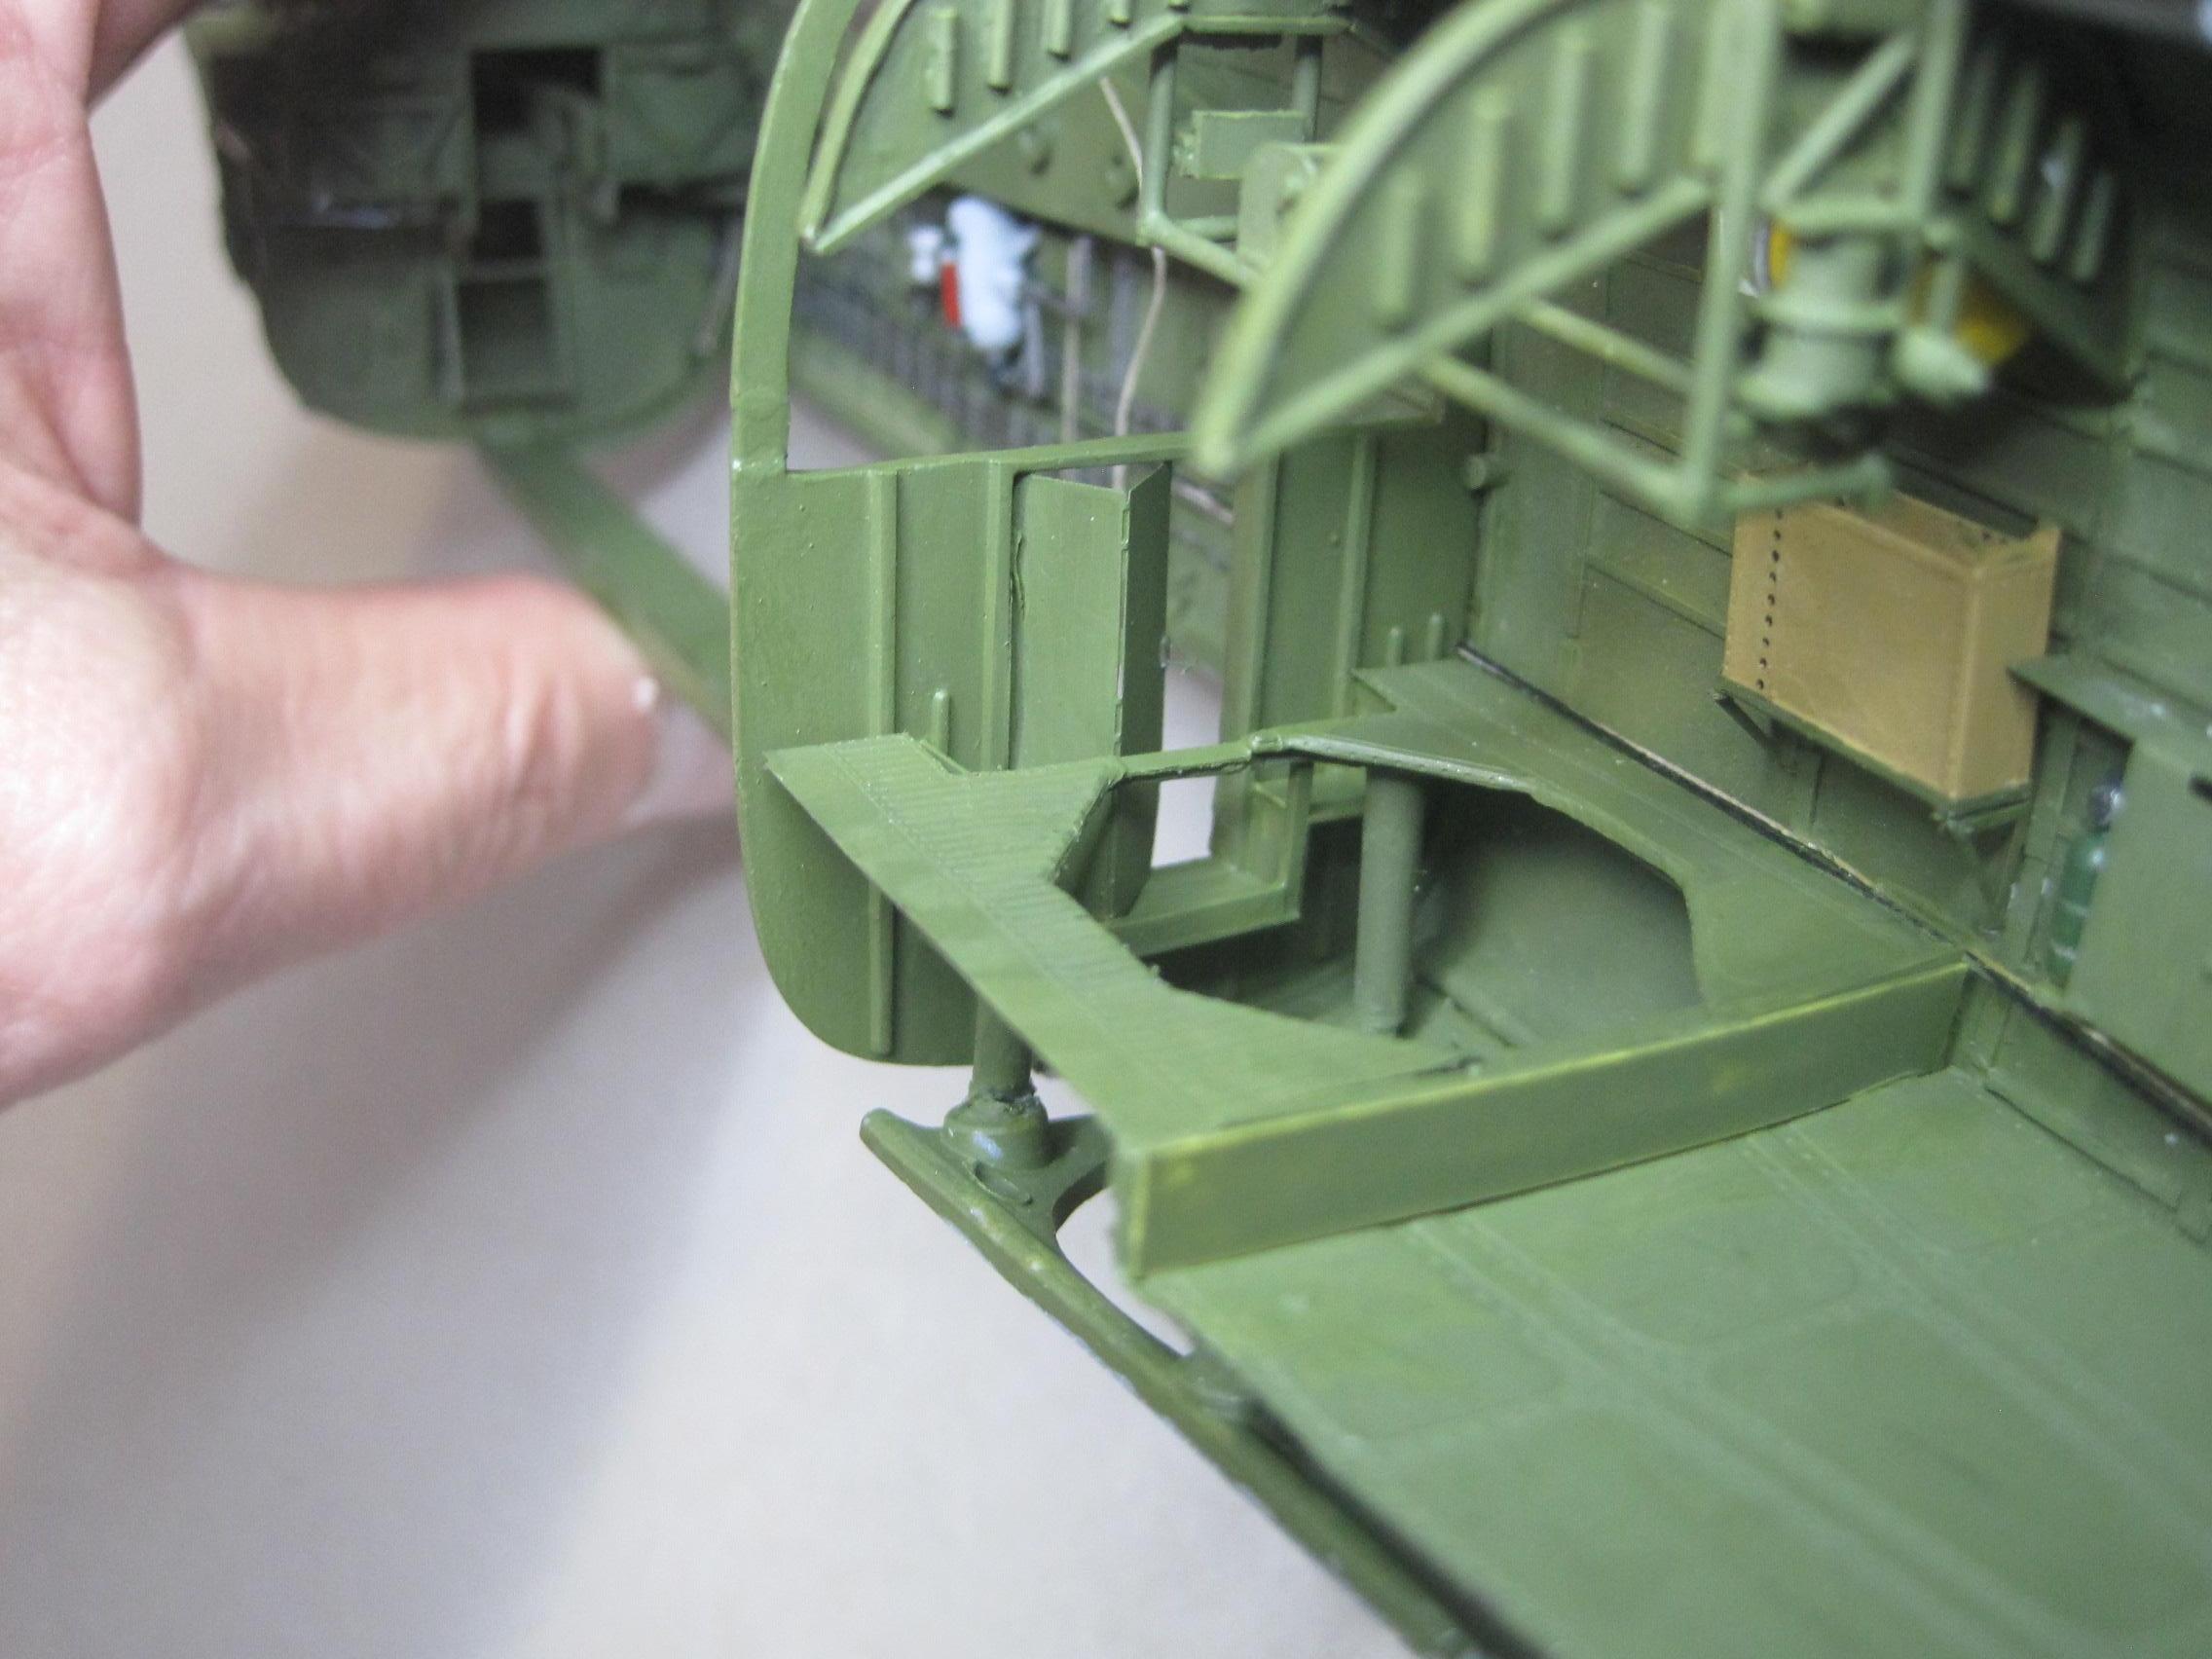
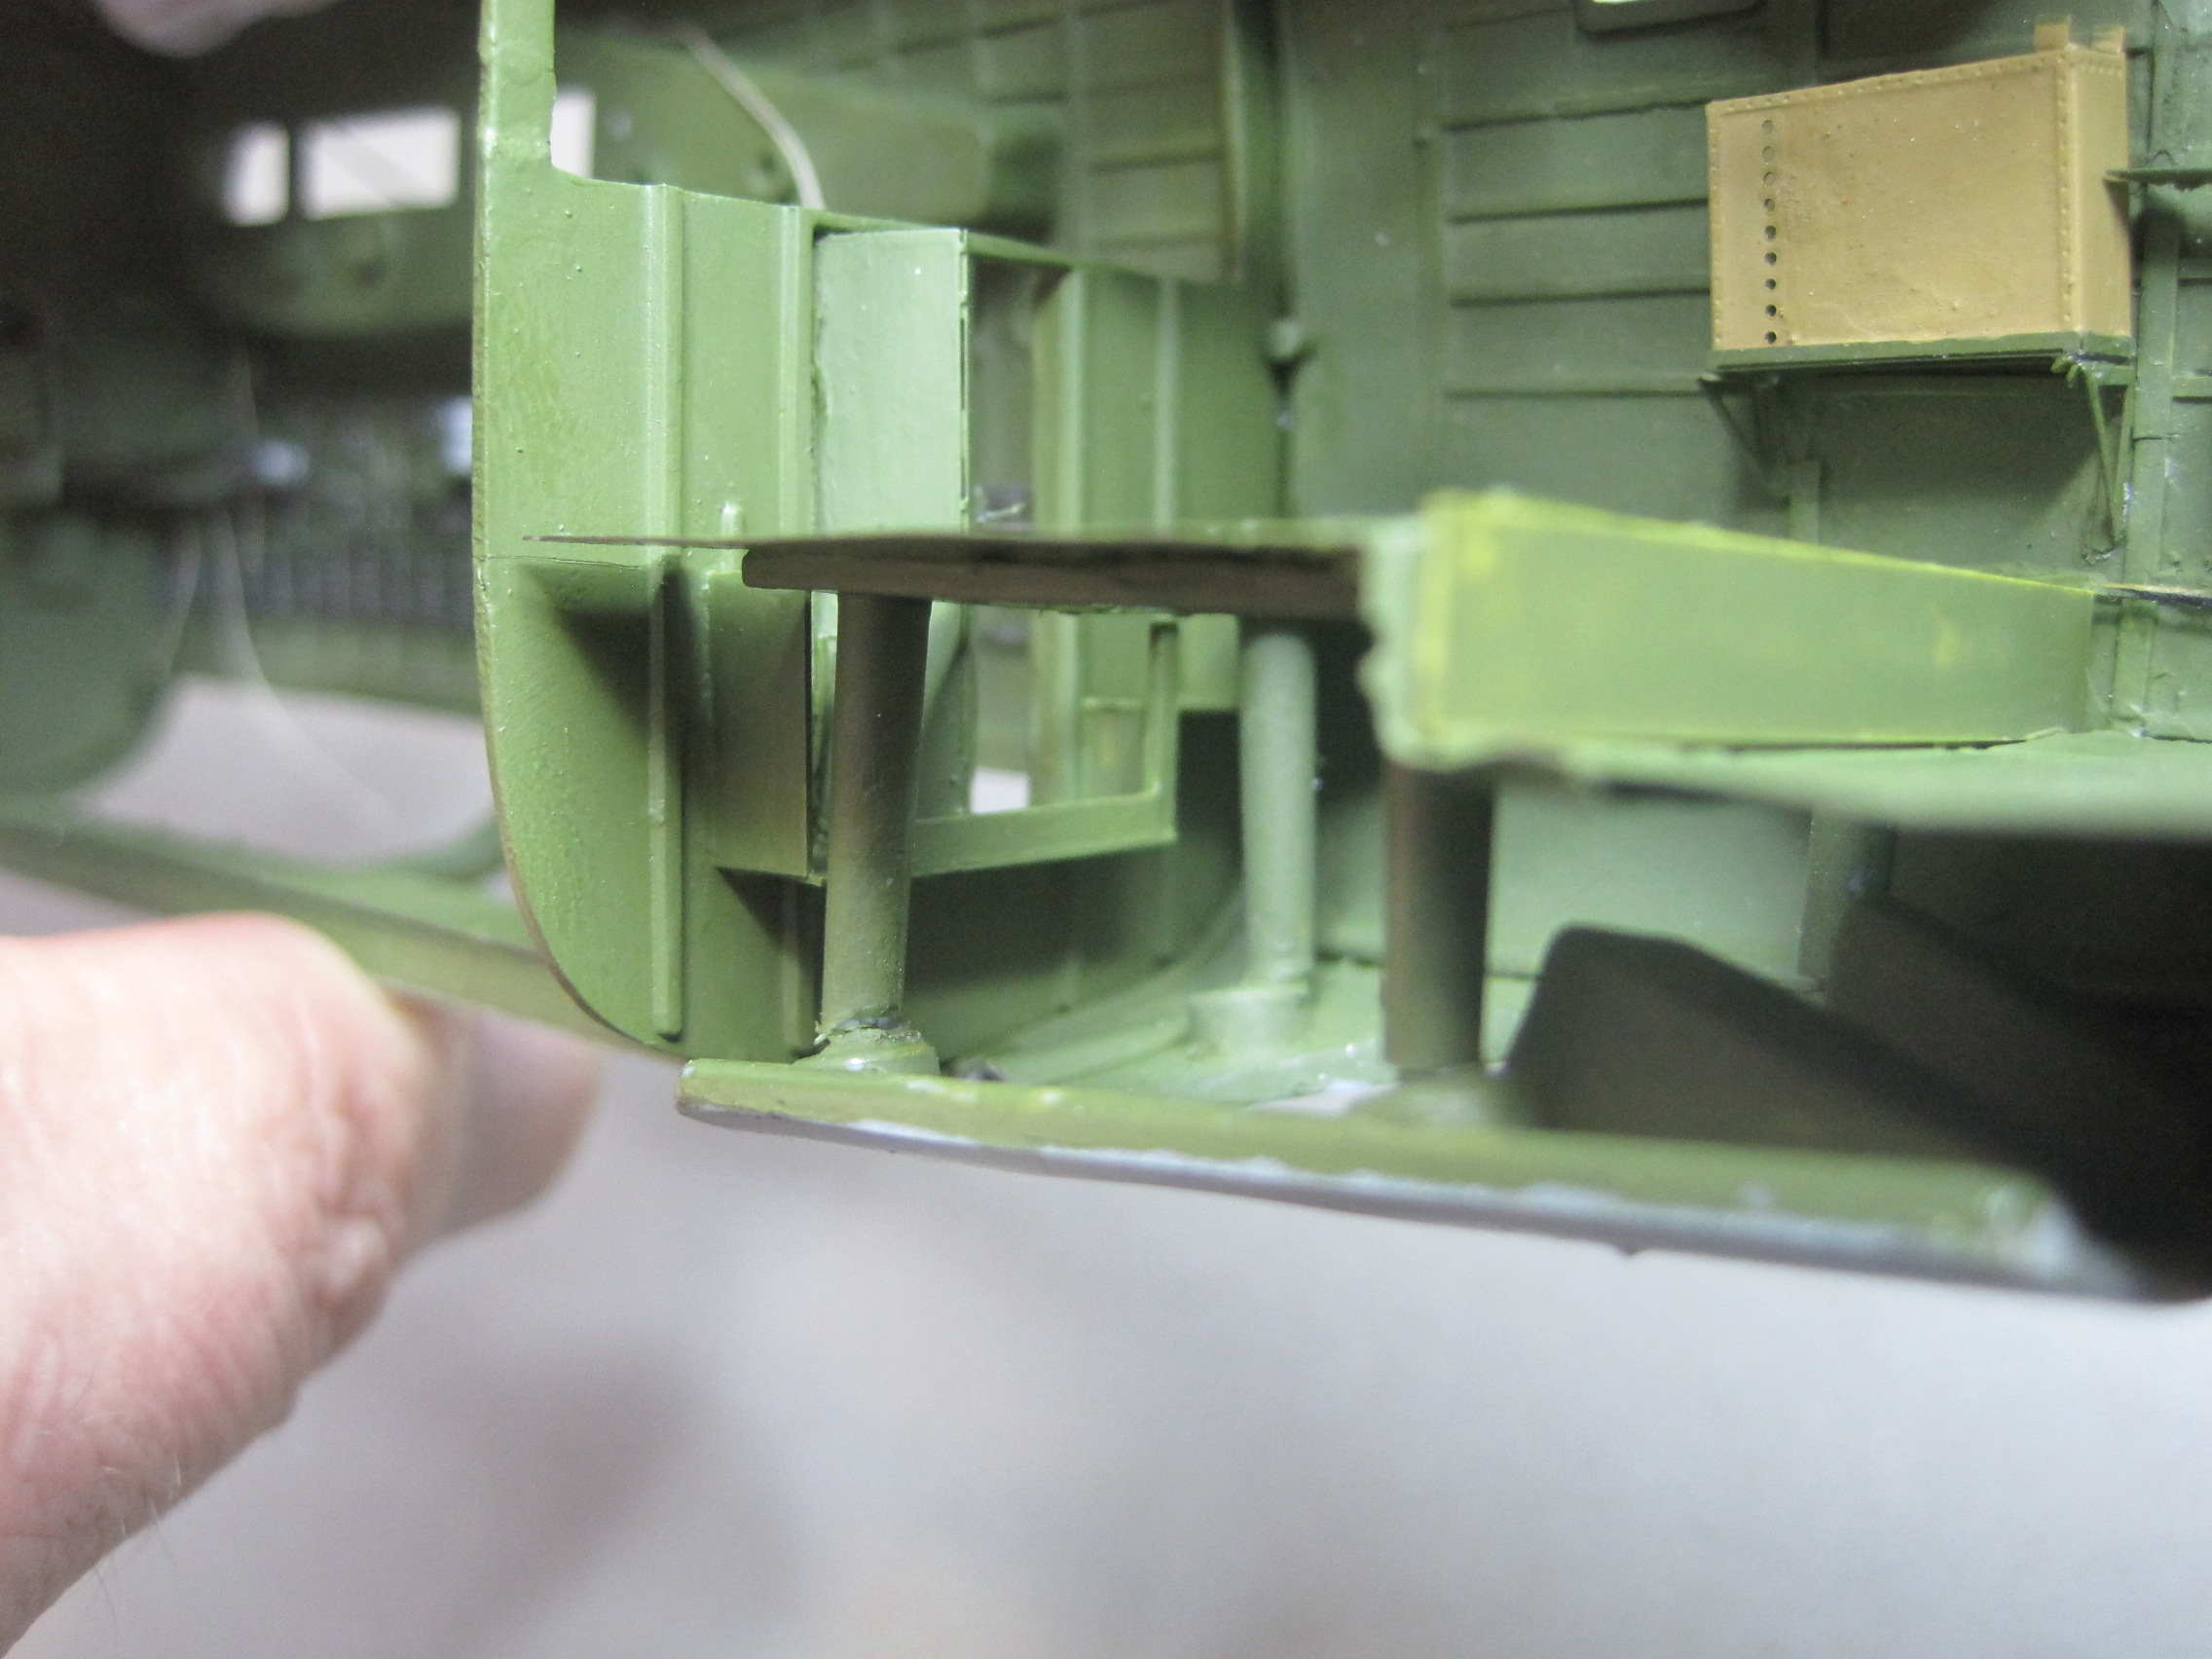
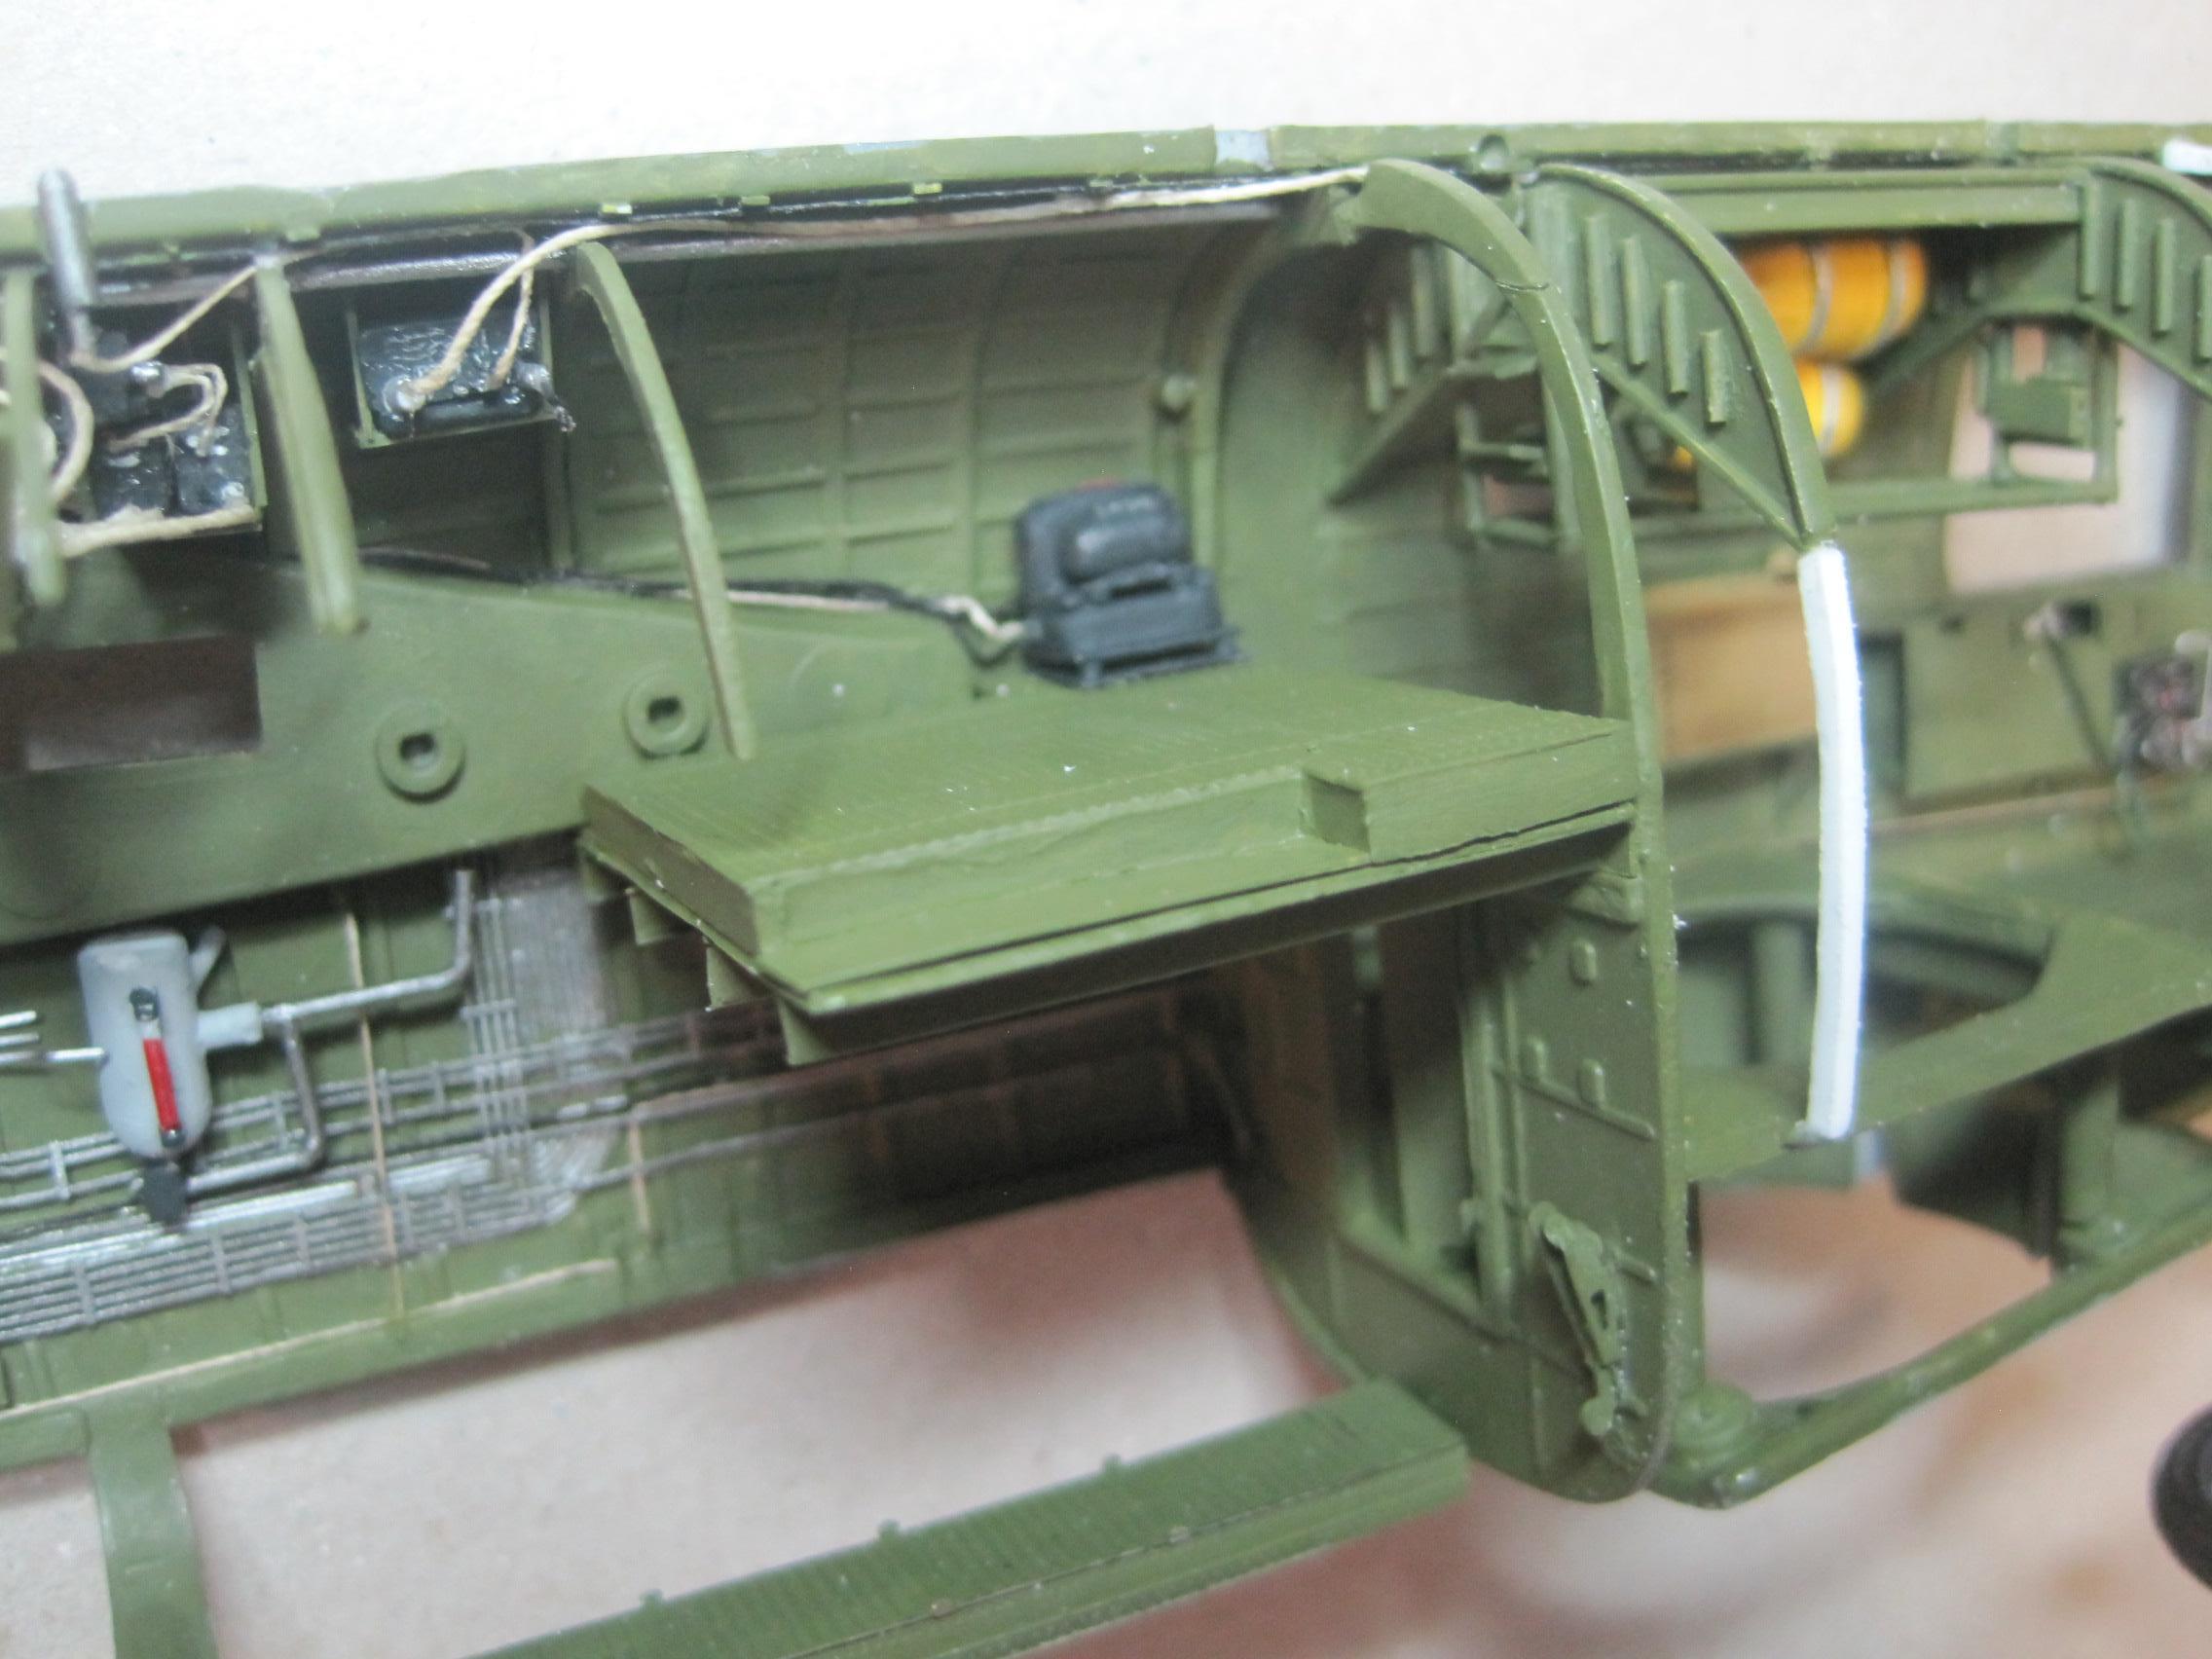
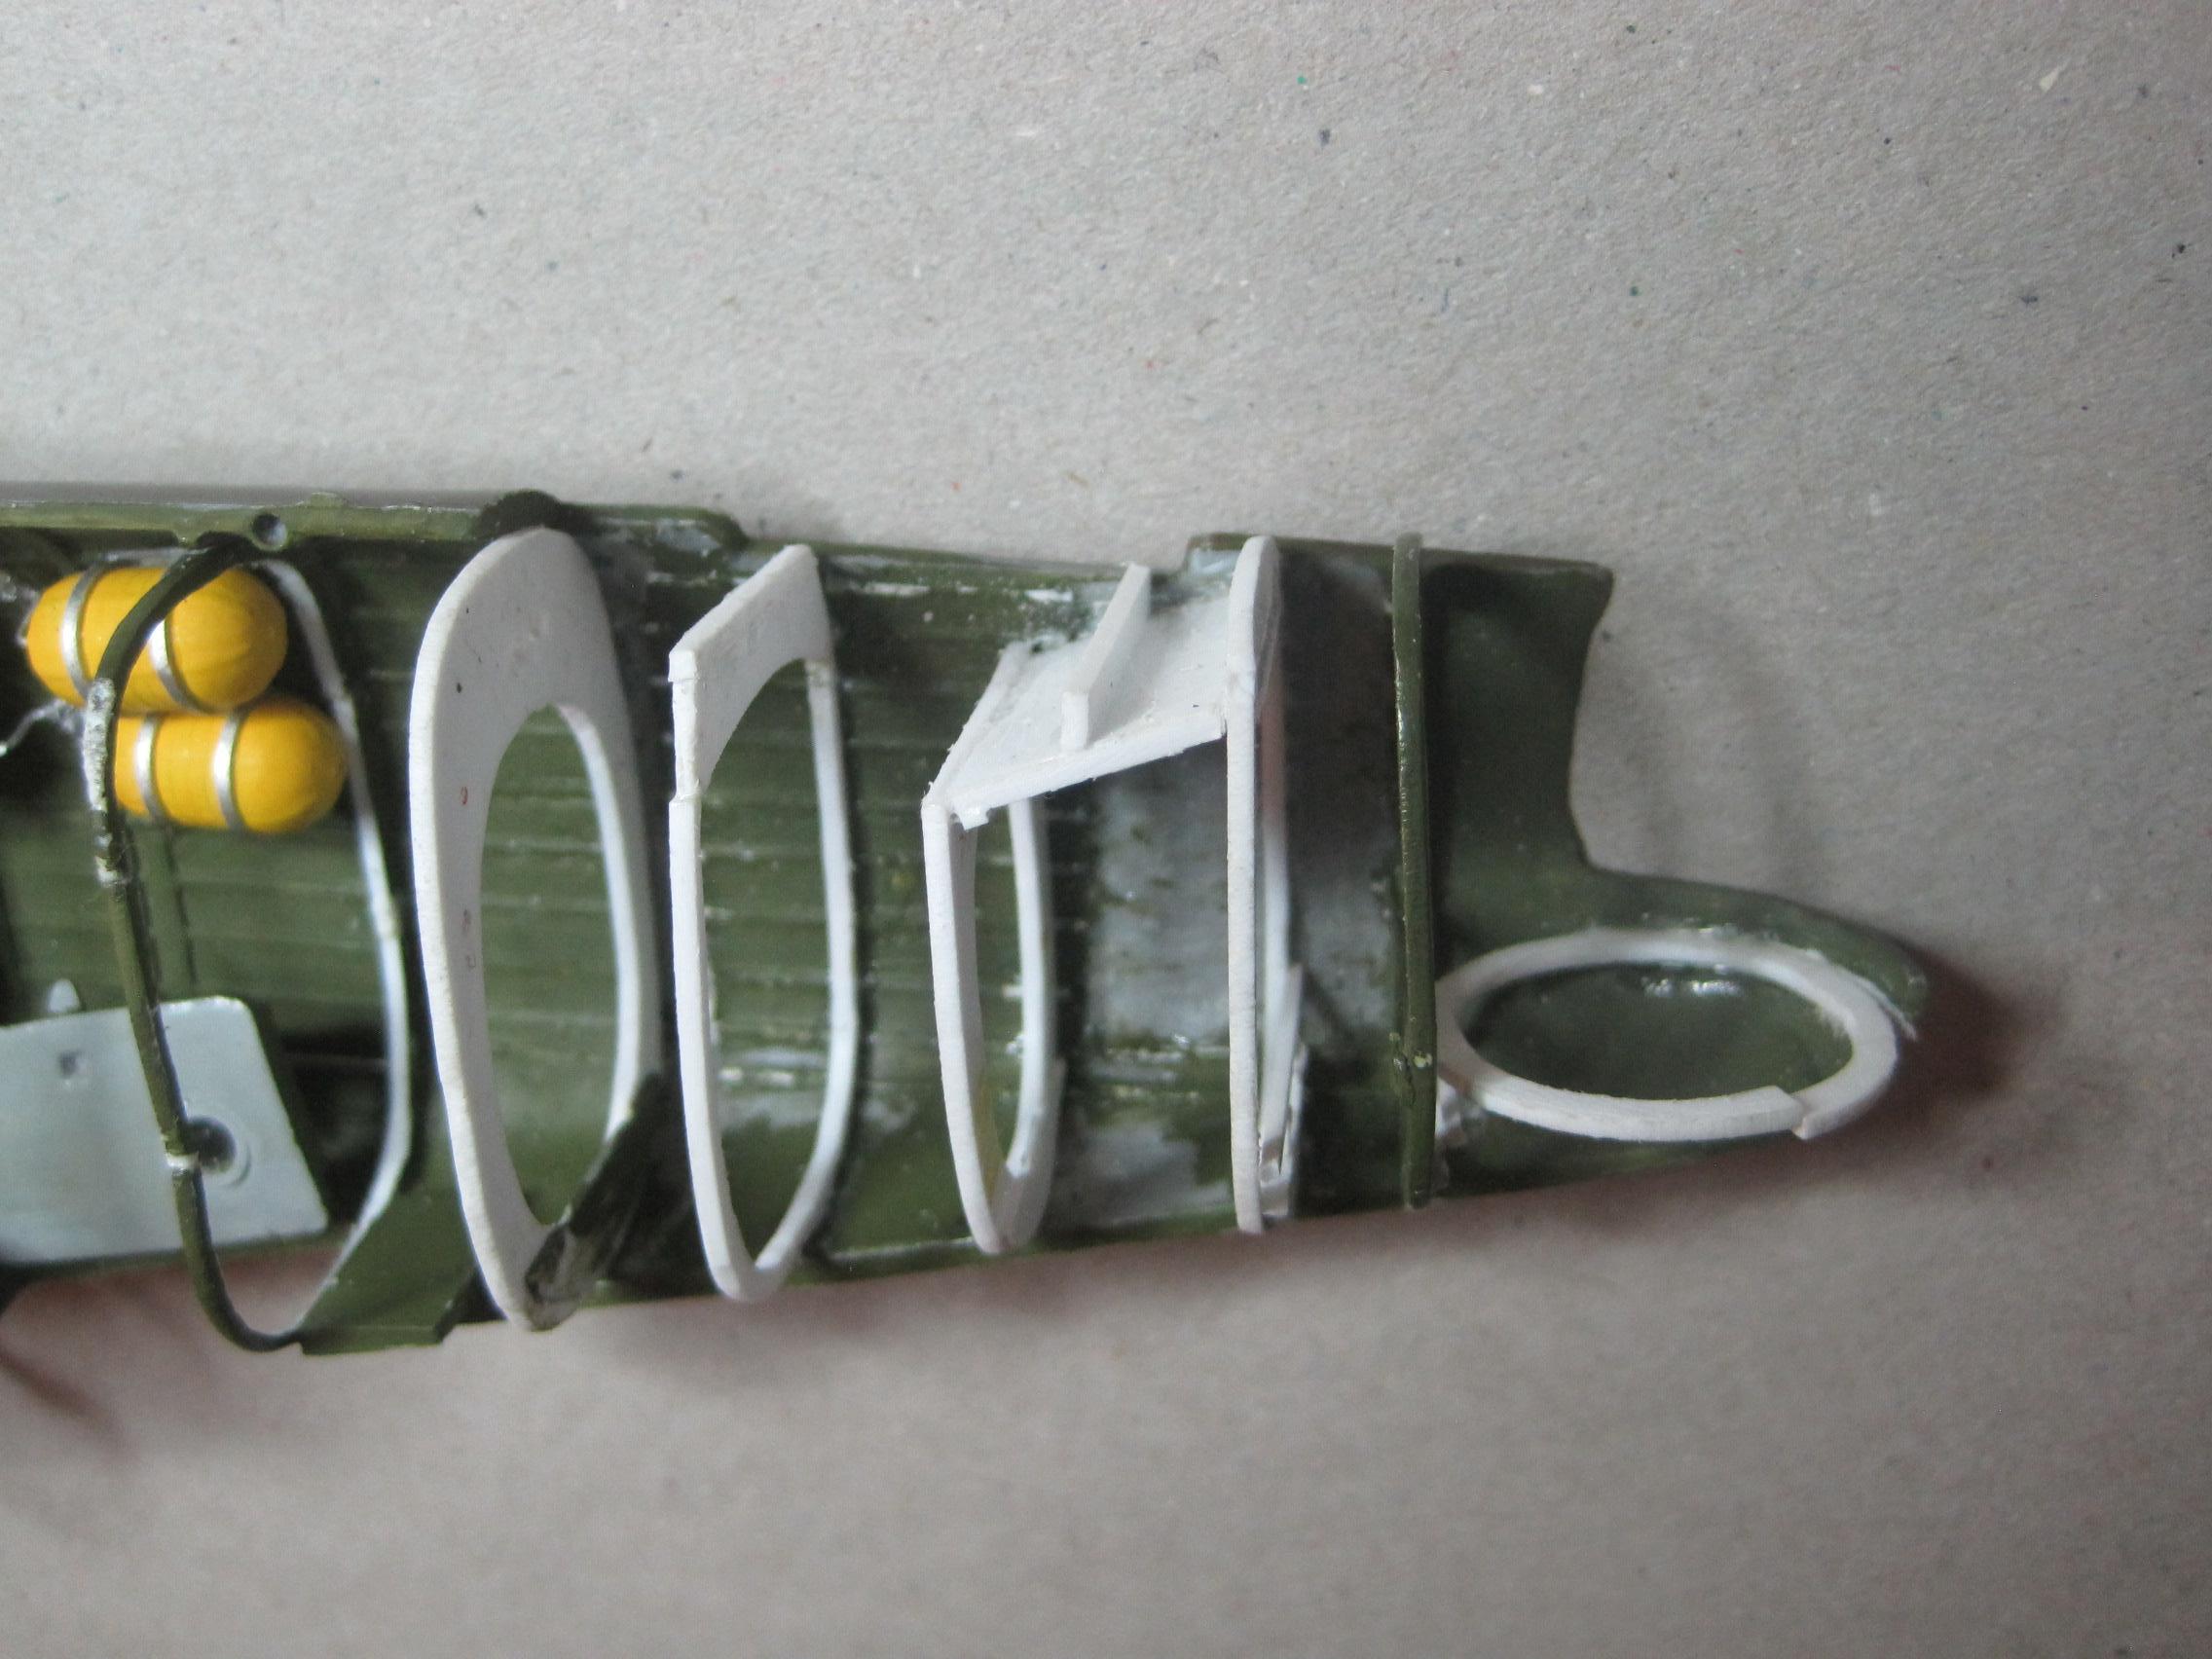
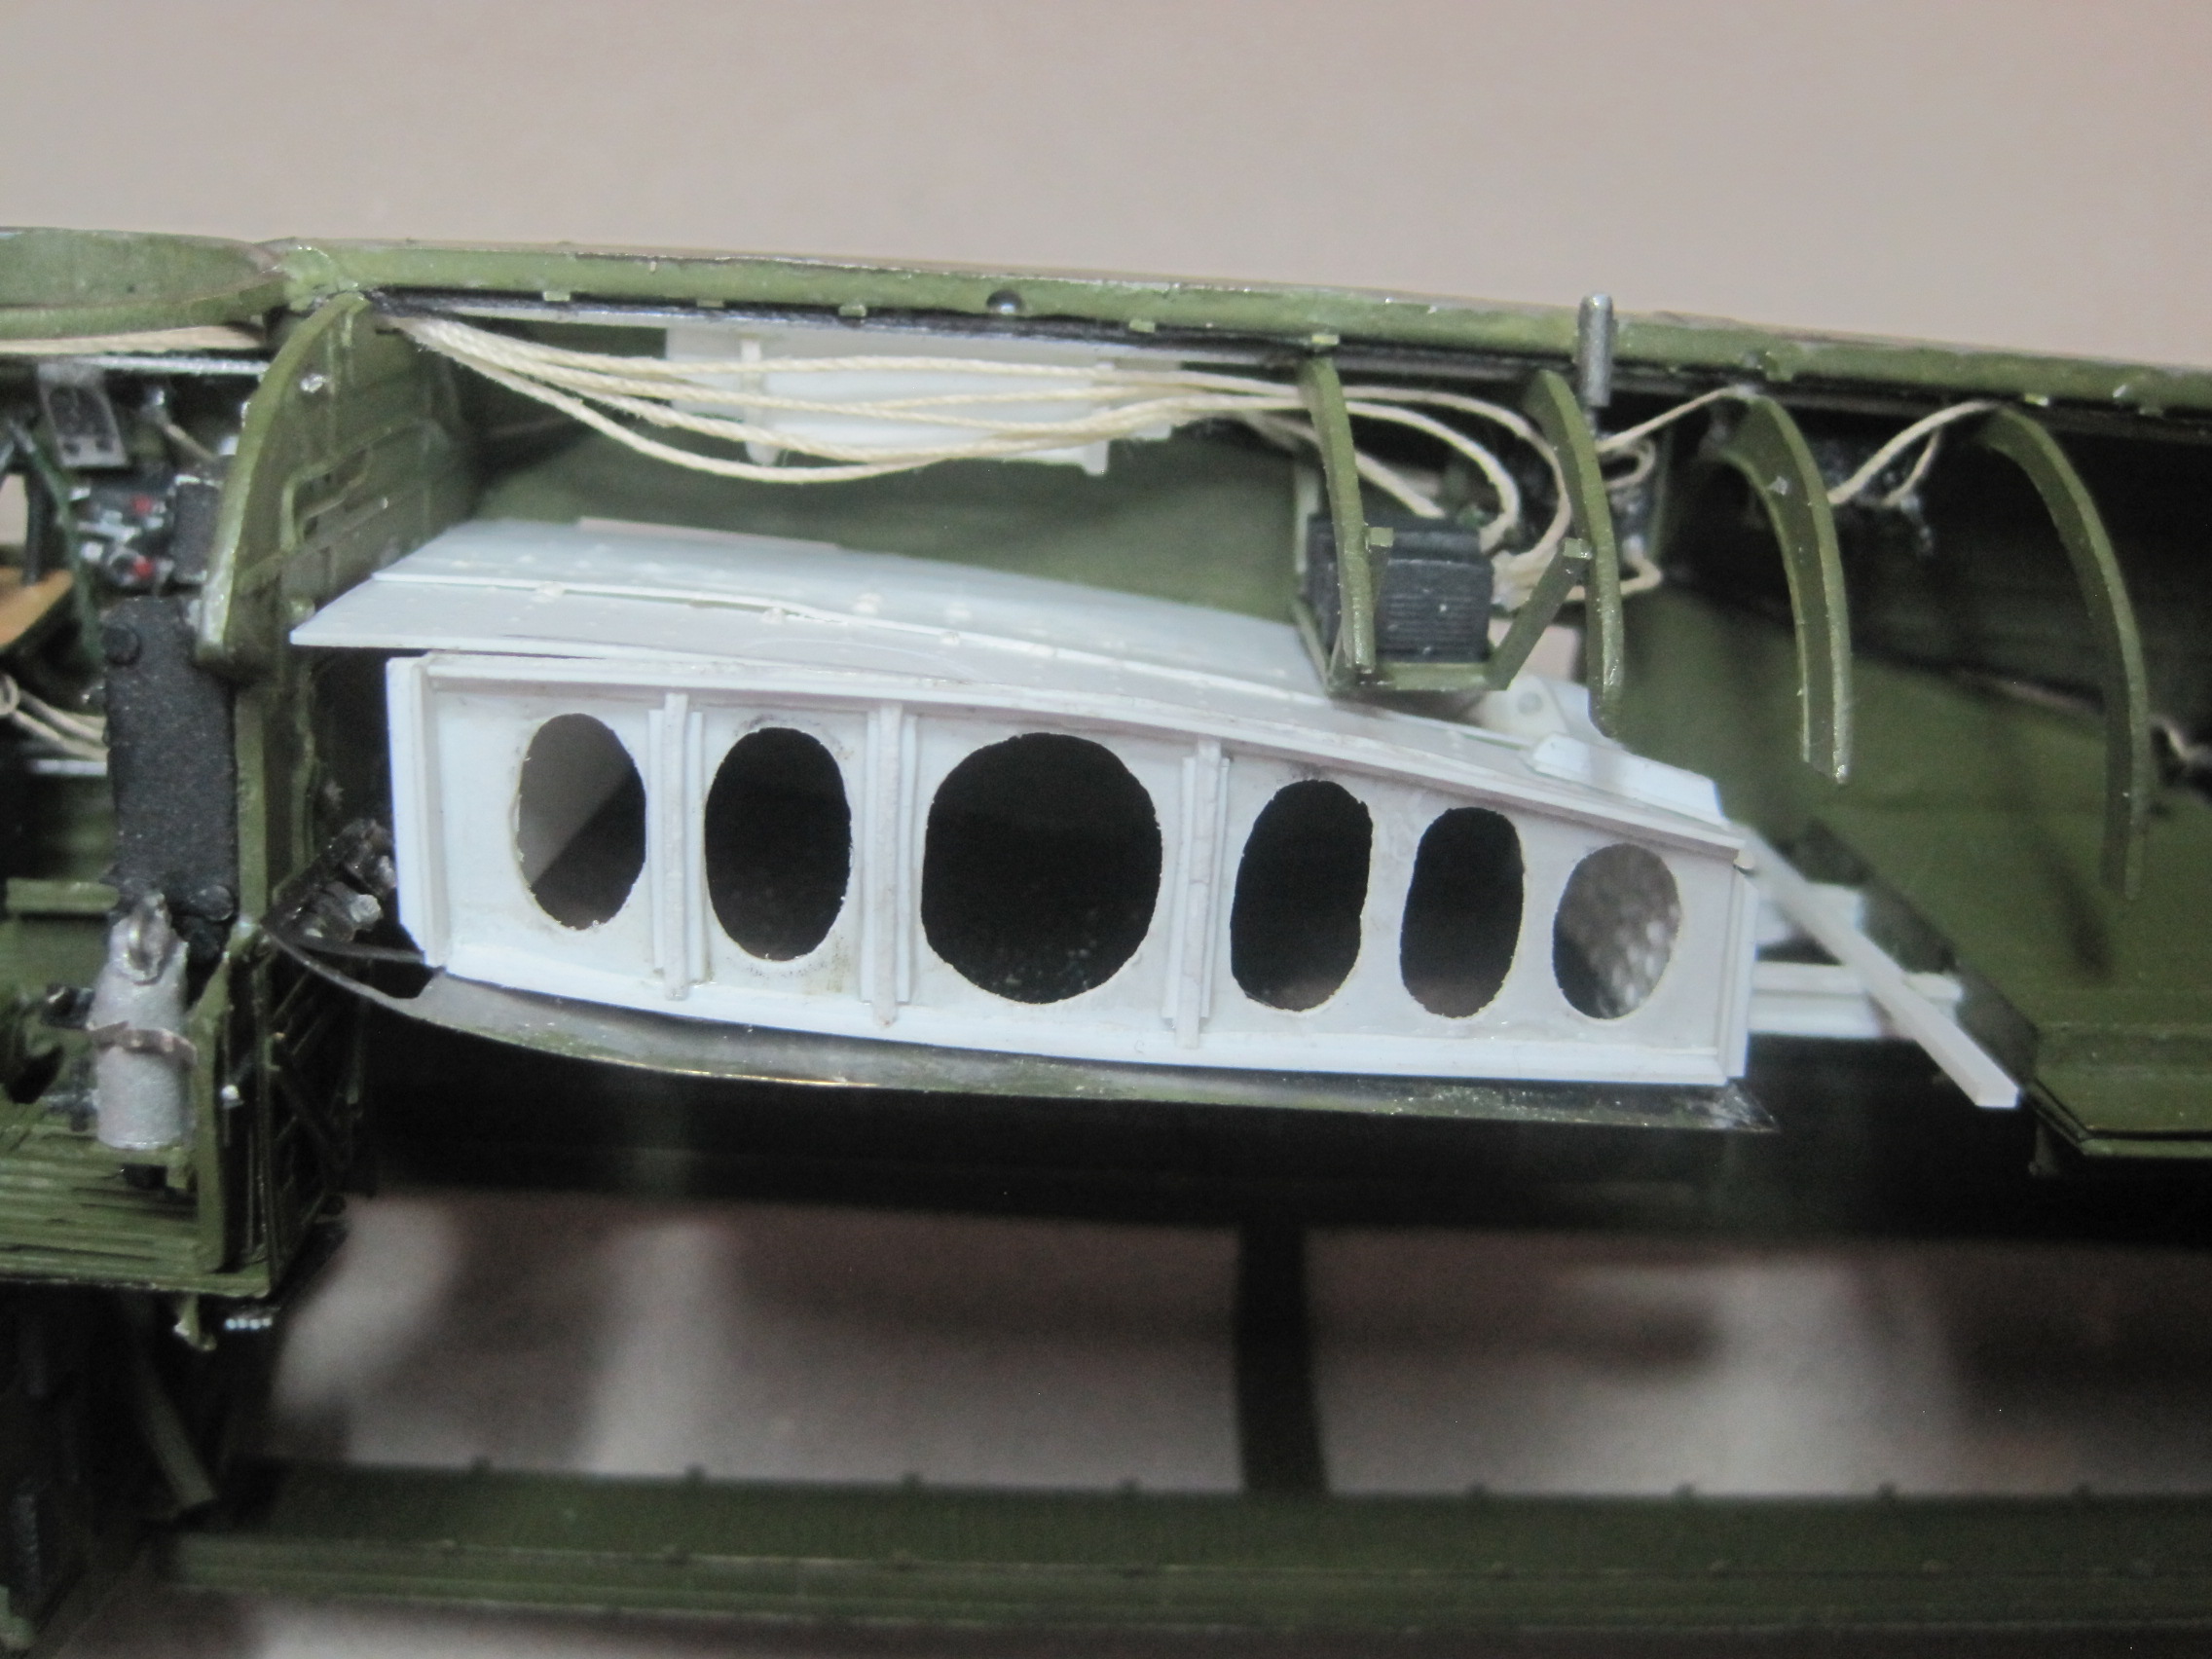
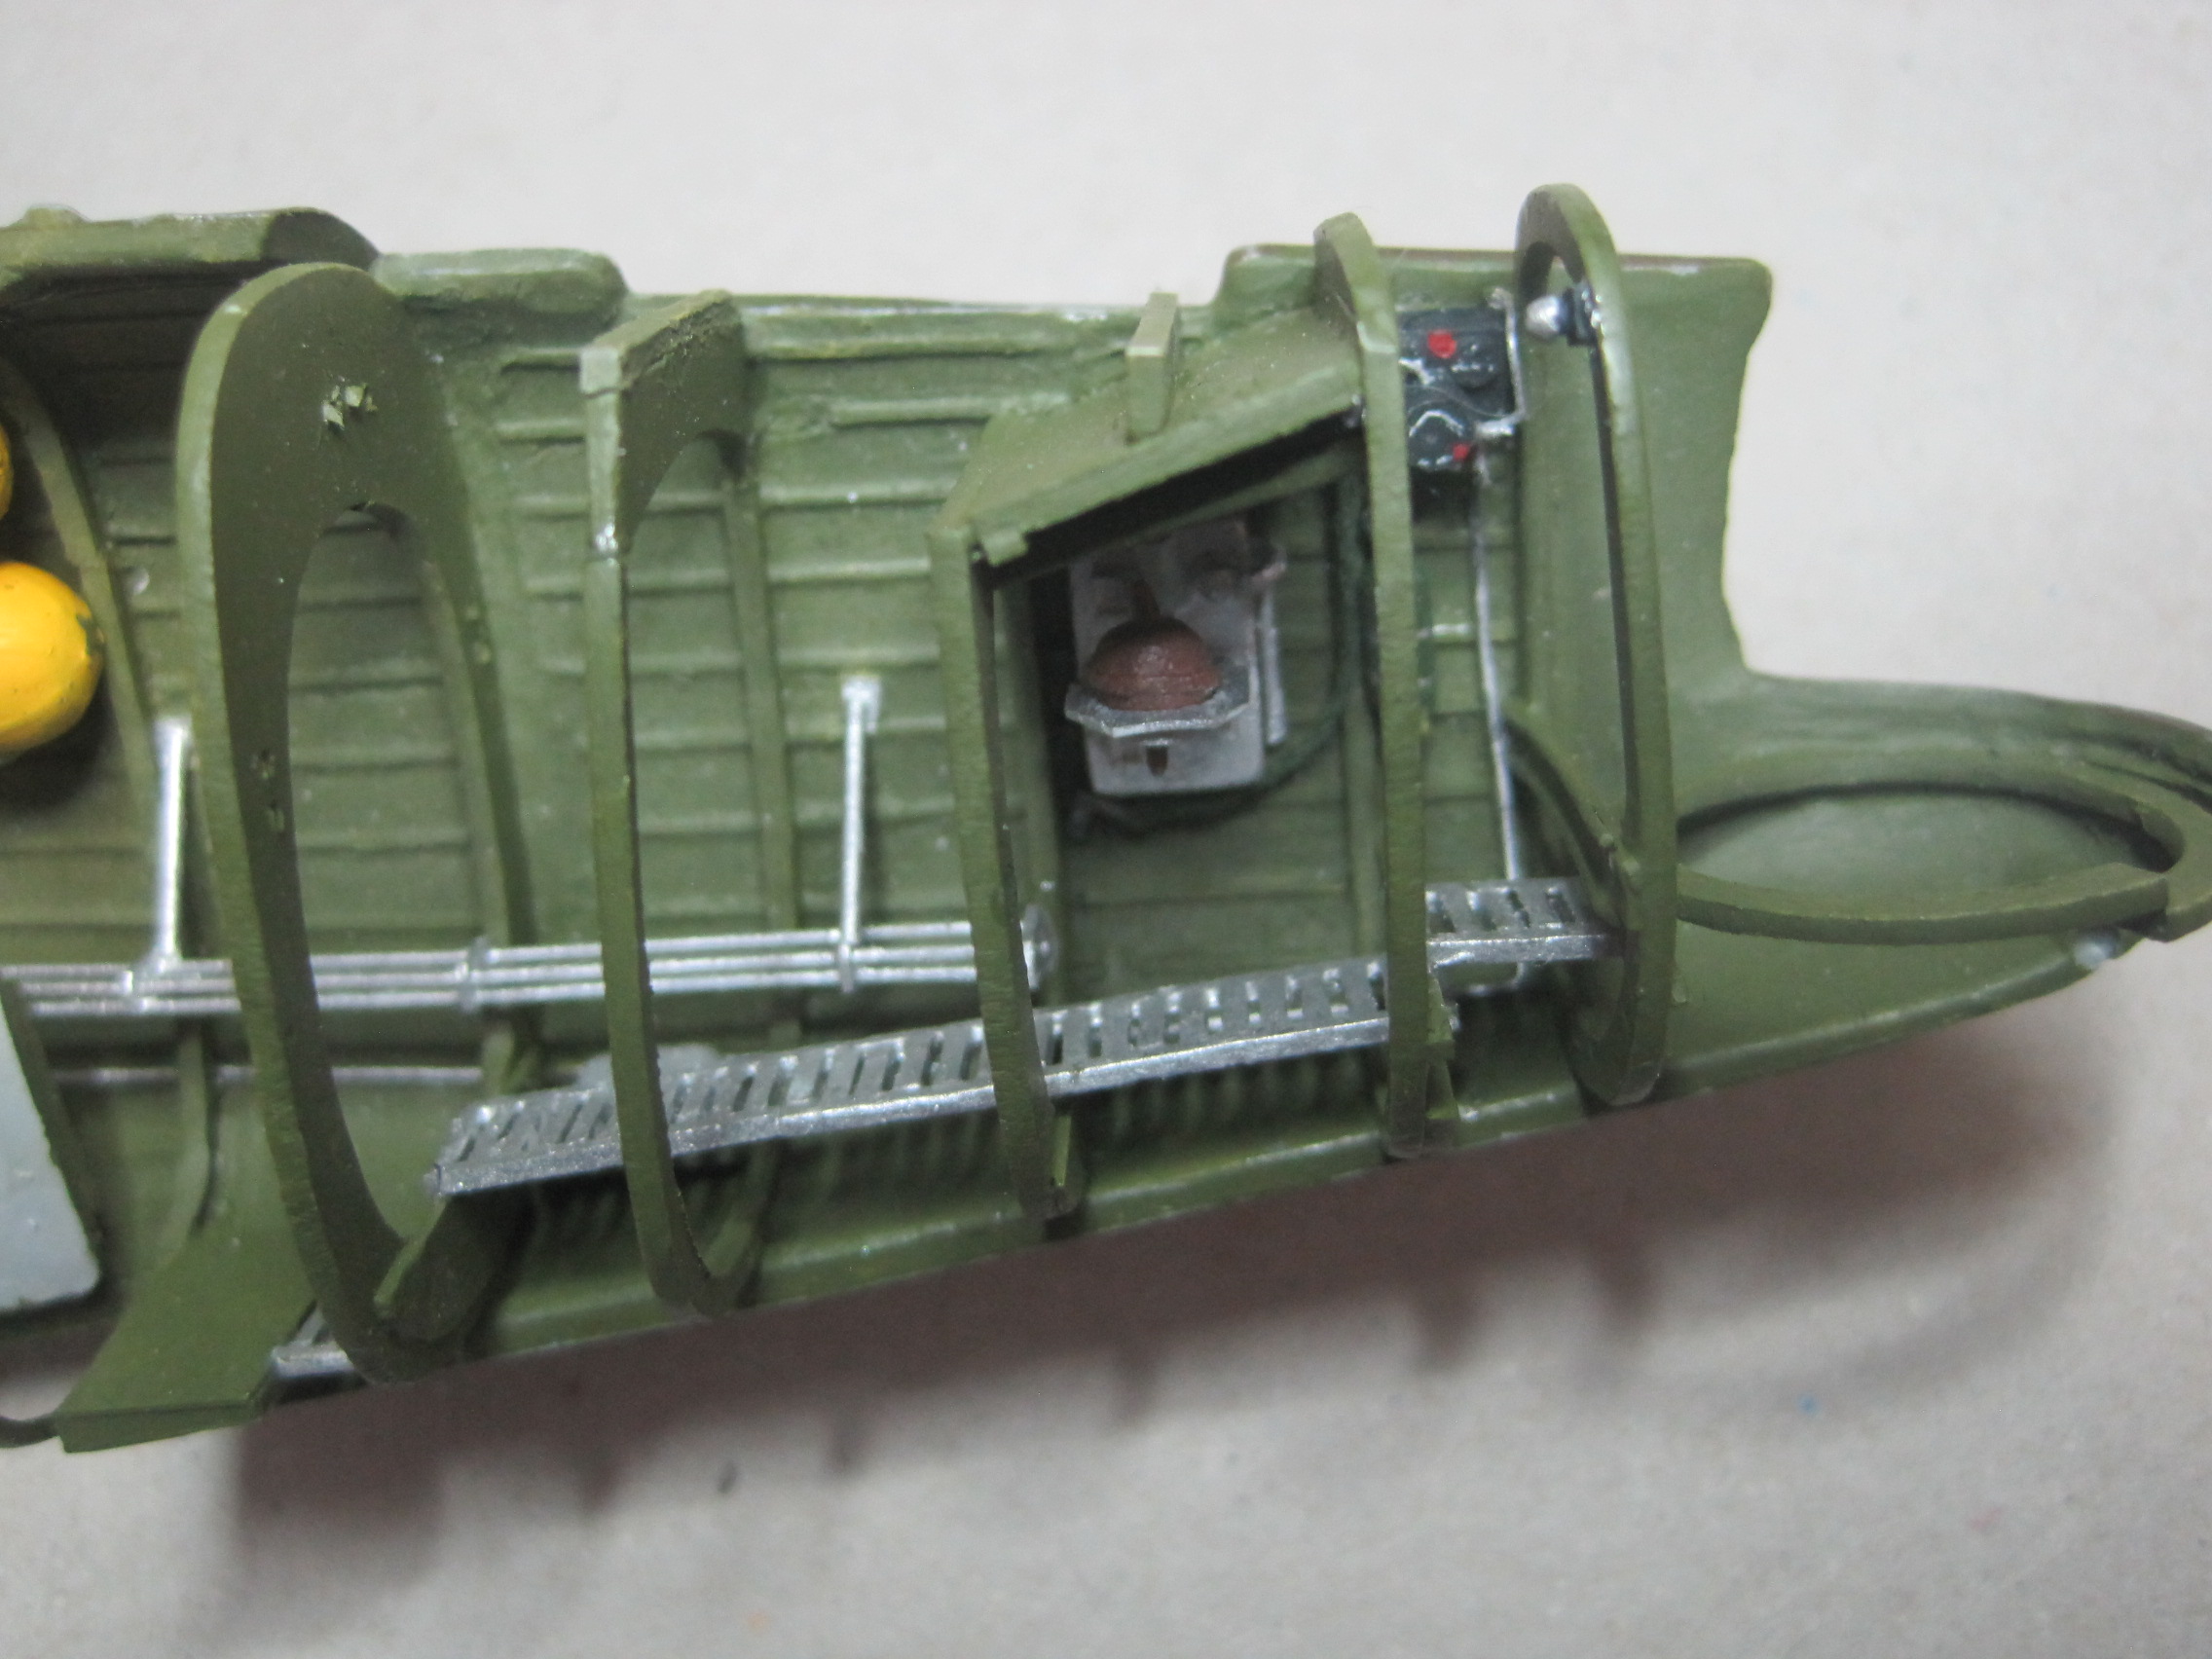
Thanks to Frederick Boucher's excellent photos I was able to figure out several errors I'd made in the rear section of the aircraft, and I've now corrected these as shown. Thanks so much for your help!
I'm still not quite sure how the roof of the bomb bay is constructed, but I'm starting to have some better ideas and hope to be able to confirm the construction details so I can finish out that area.
Here's the latest showing the corrections I've made.

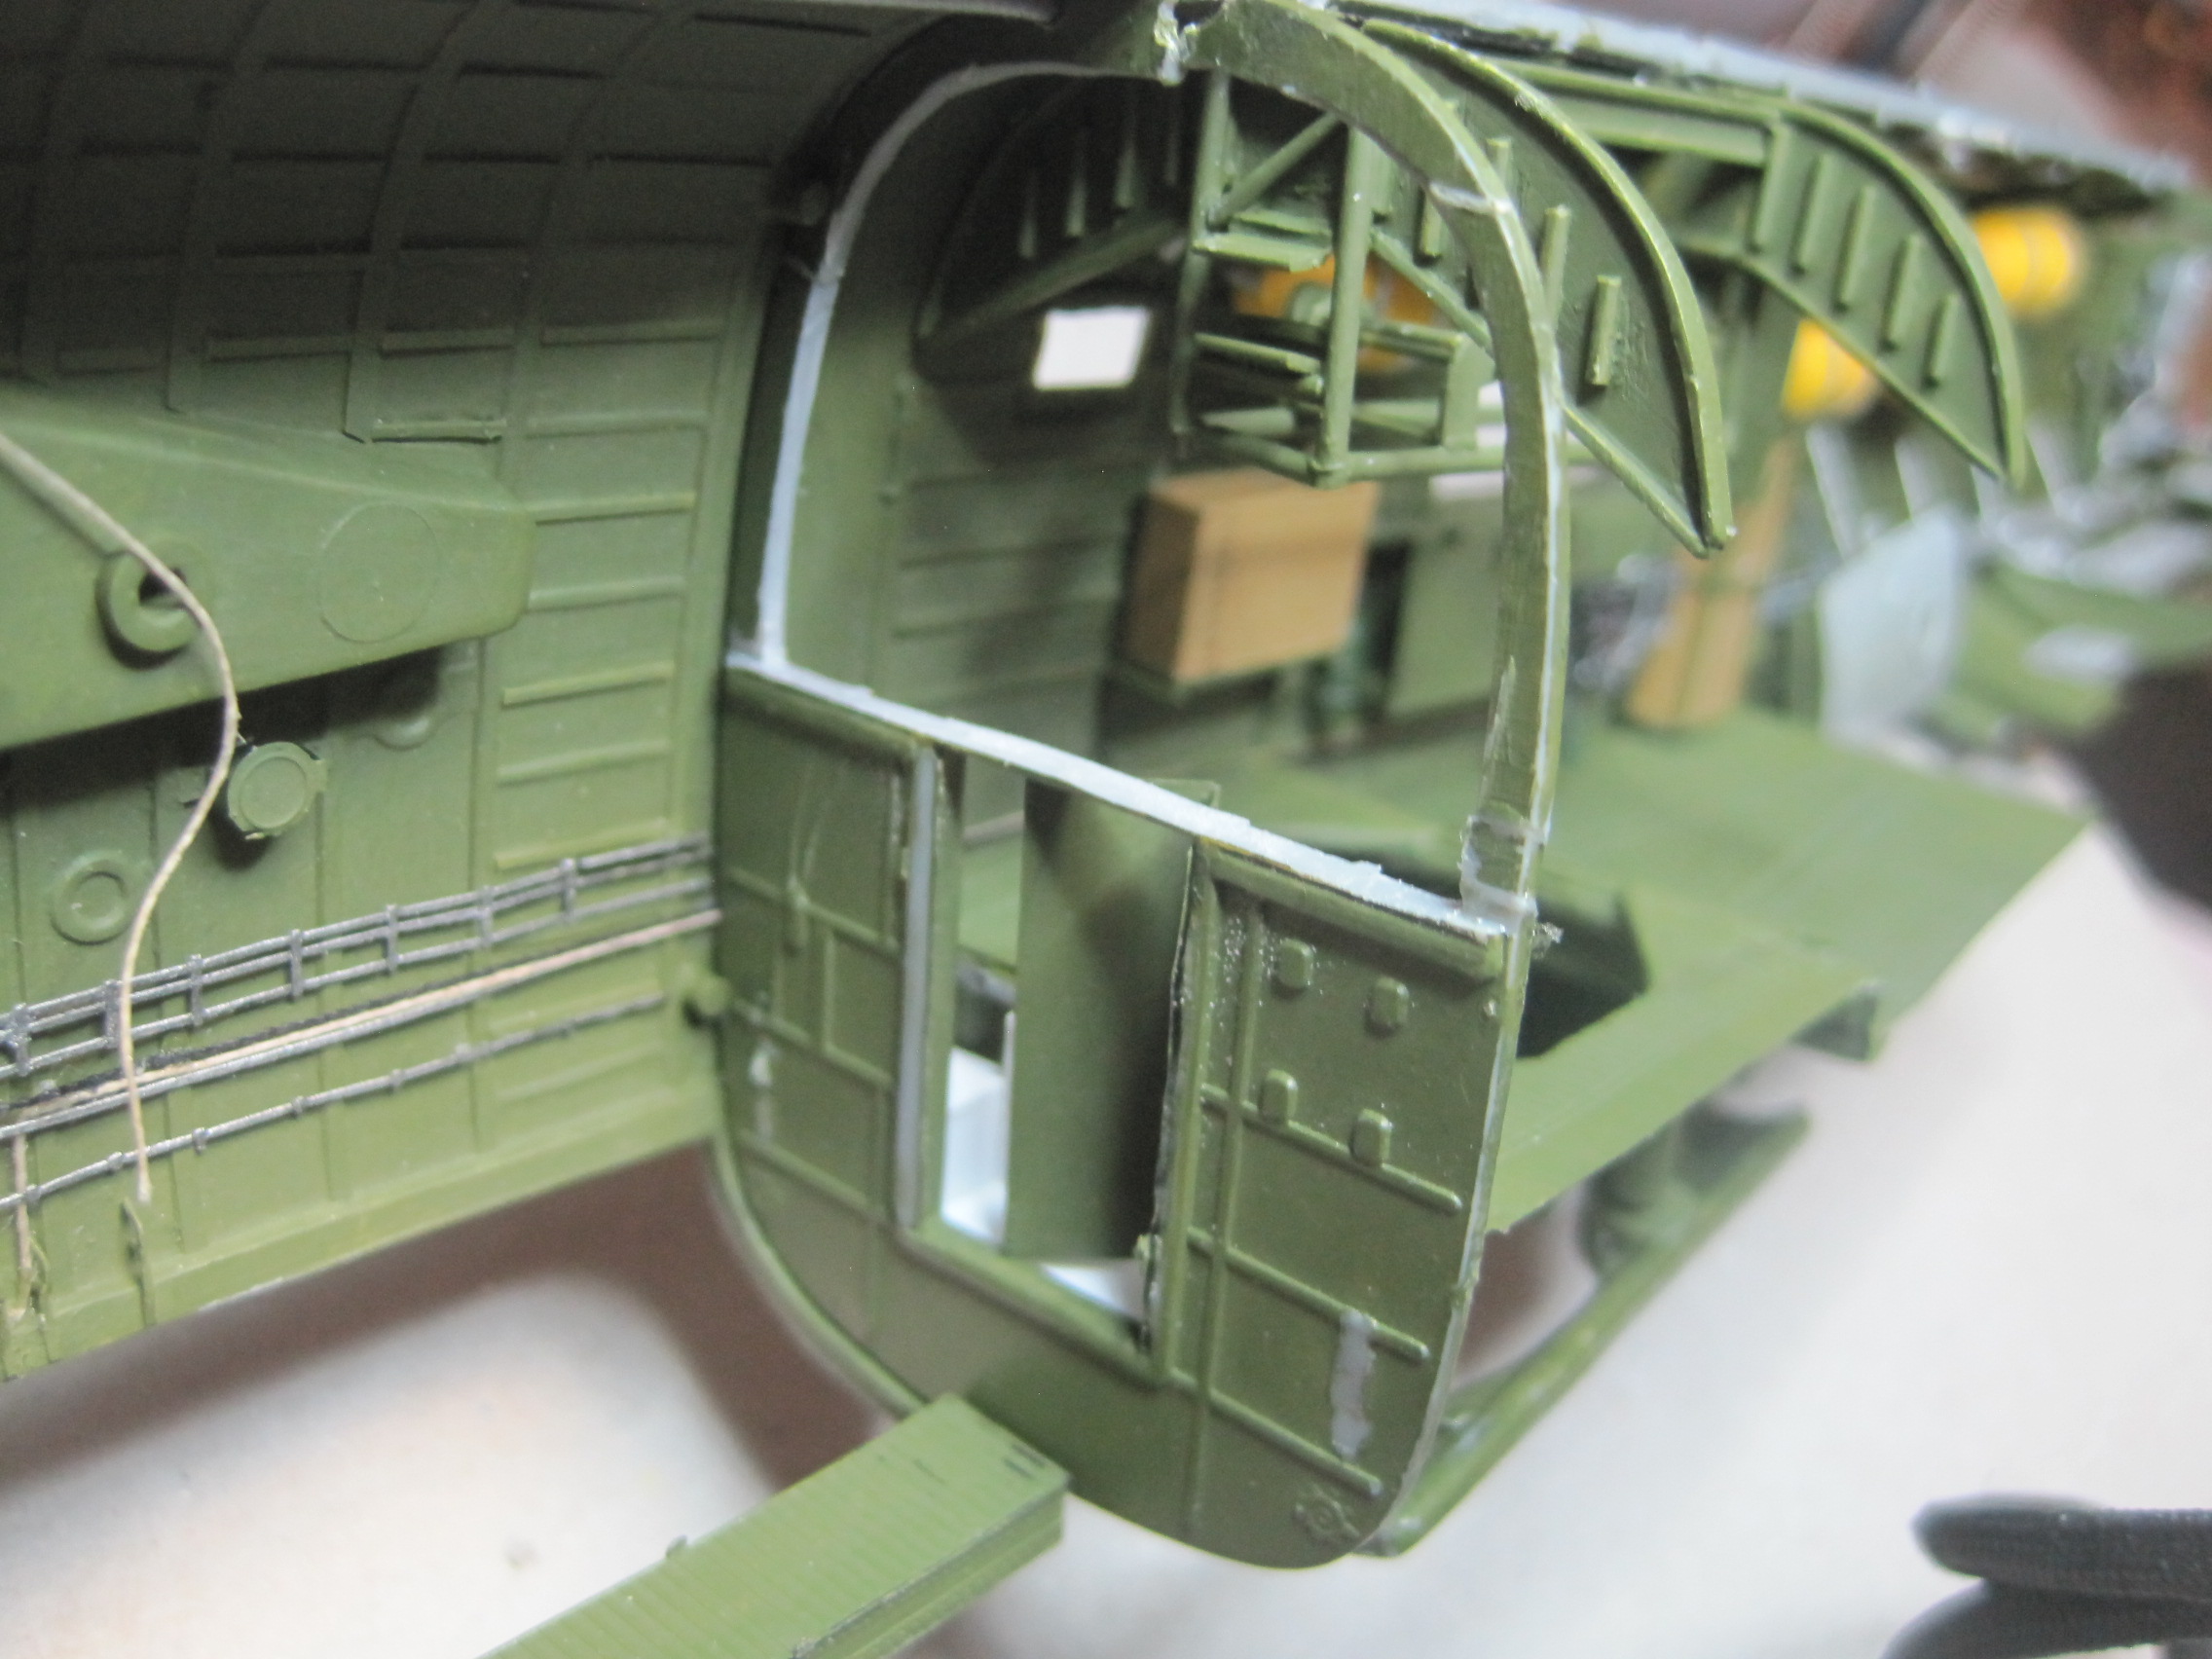

I'm still not quite sure how the roof of the bomb bay is constructed, but I'm starting to have some better ideas and hope to be able to confirm the construction details so I can finish out that area.
Here's the latest showing the corrections I've made.
thathaway3
Joined: September 10, 2004
KitMaker: 1,610 posts
AeroScale: 85 posts
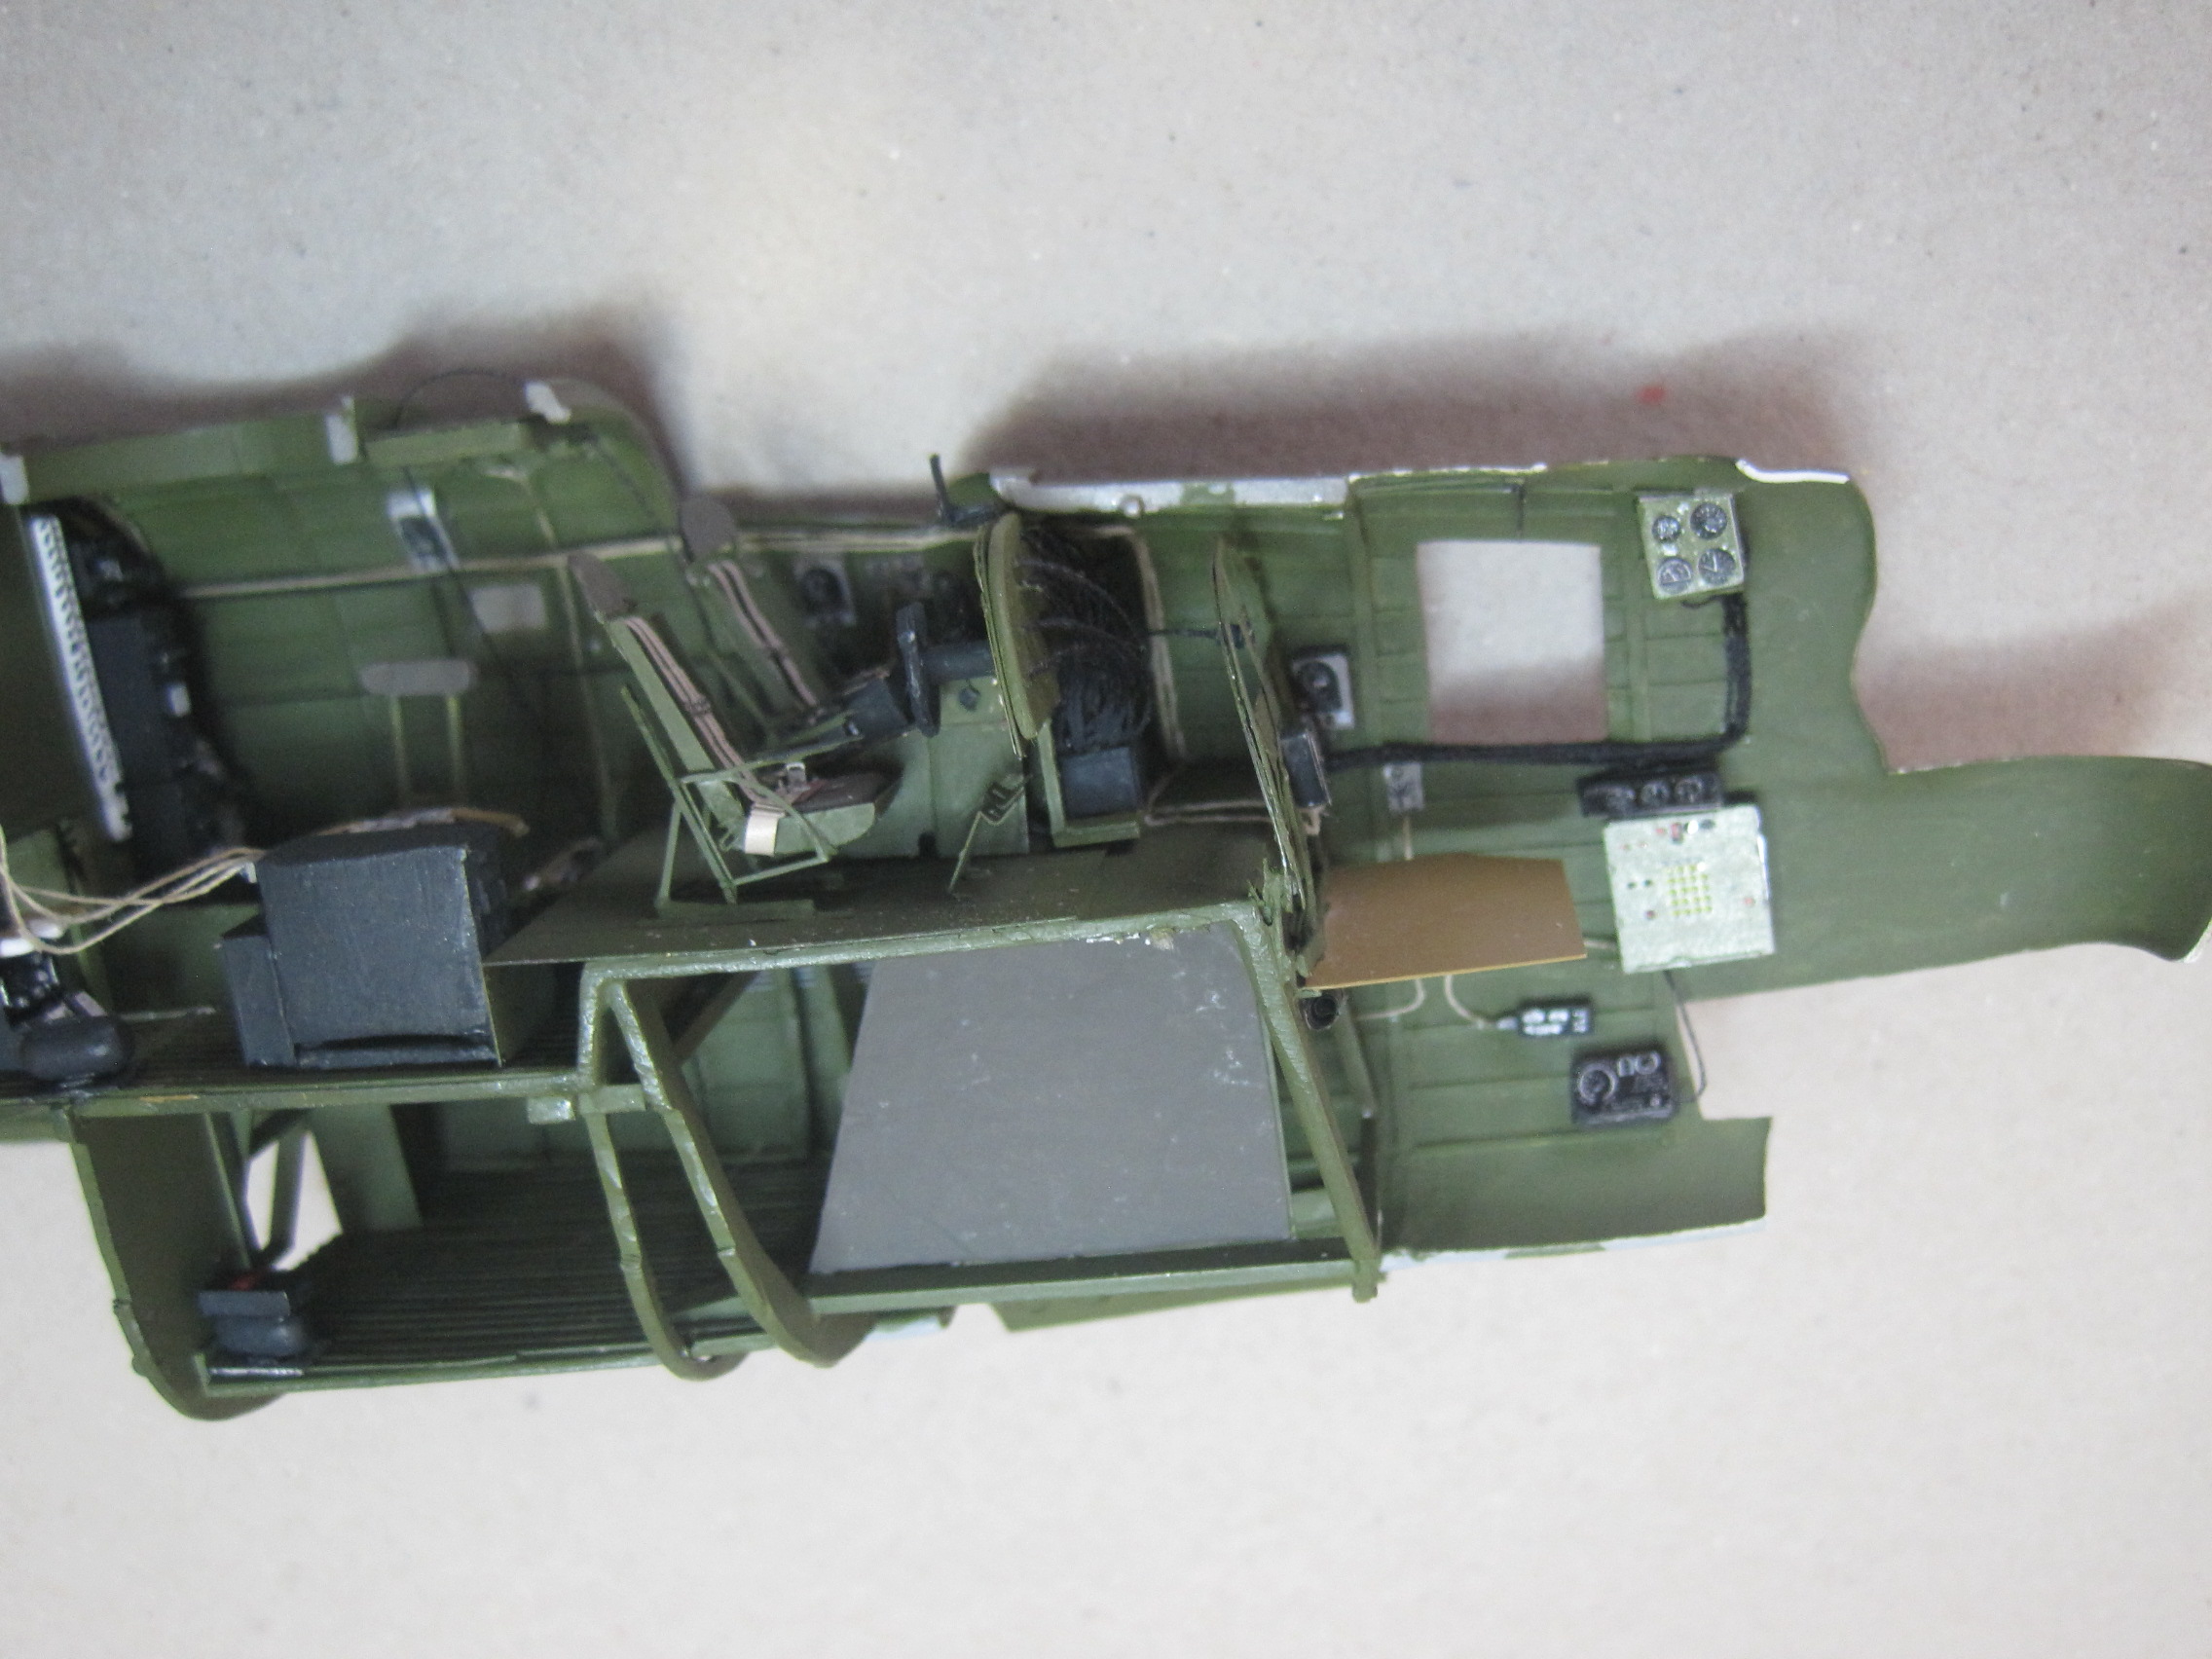
Posted: Monday, May 13, 2019 - 05:41 AM UTC
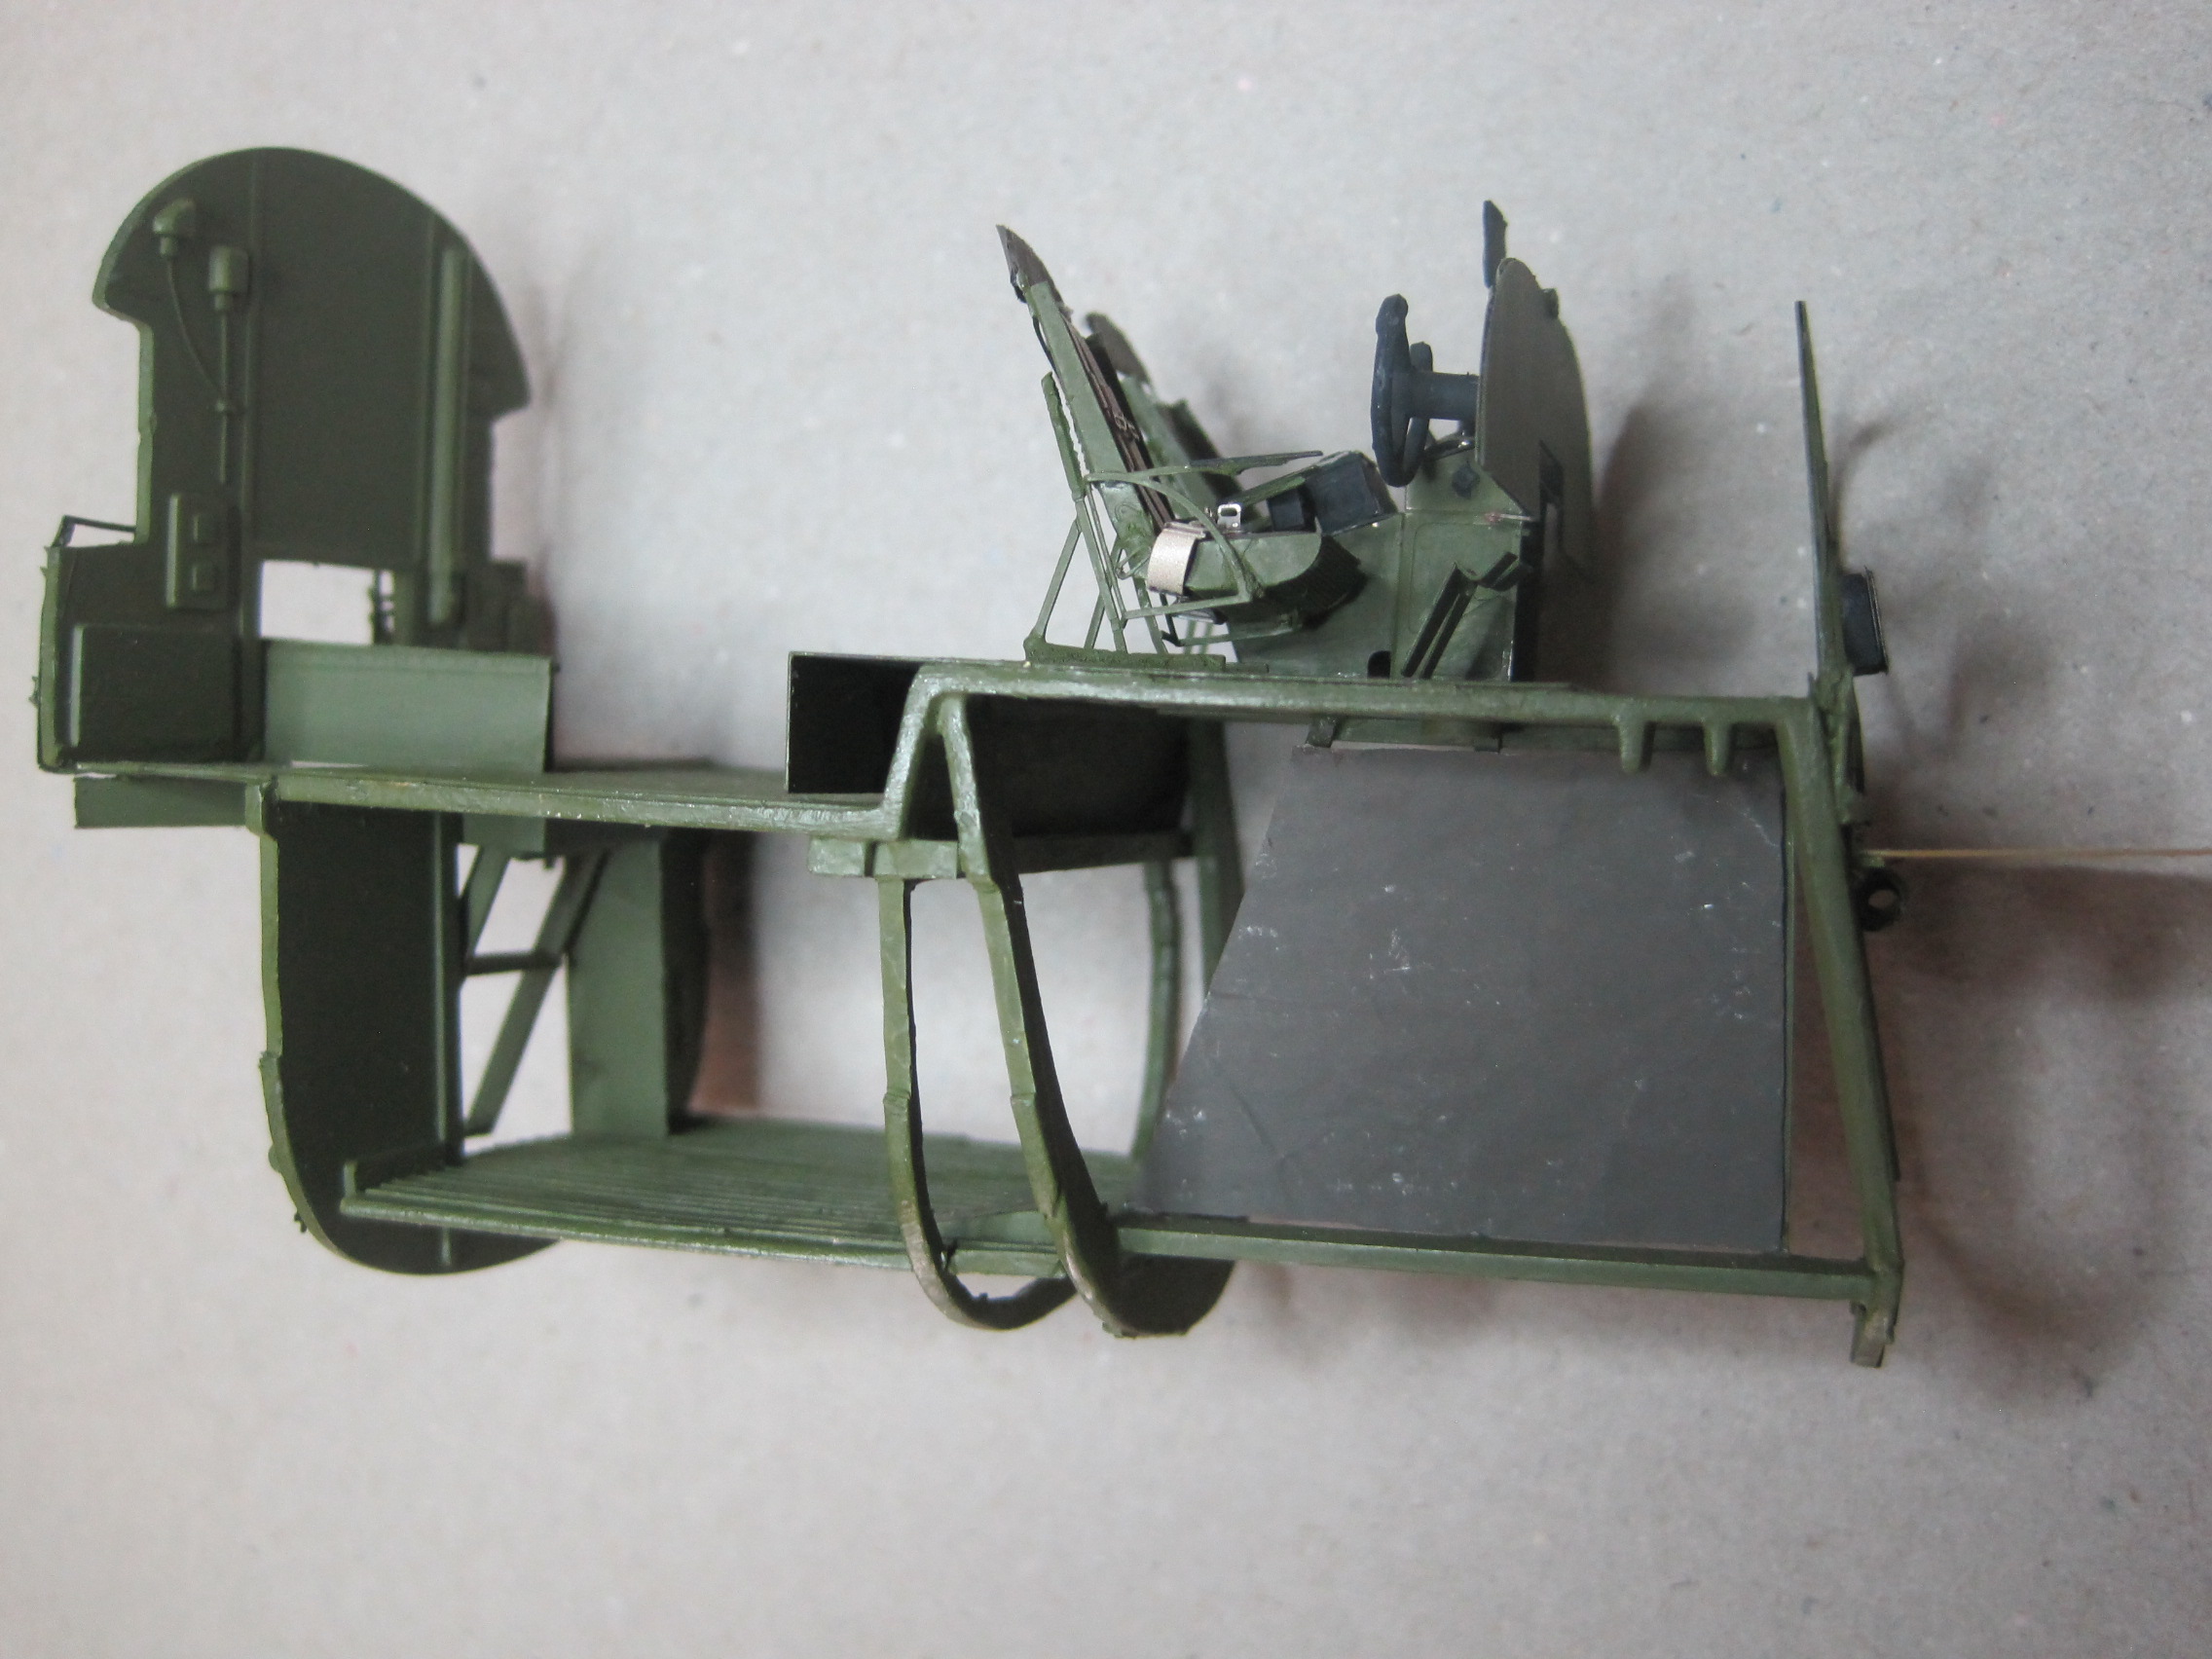
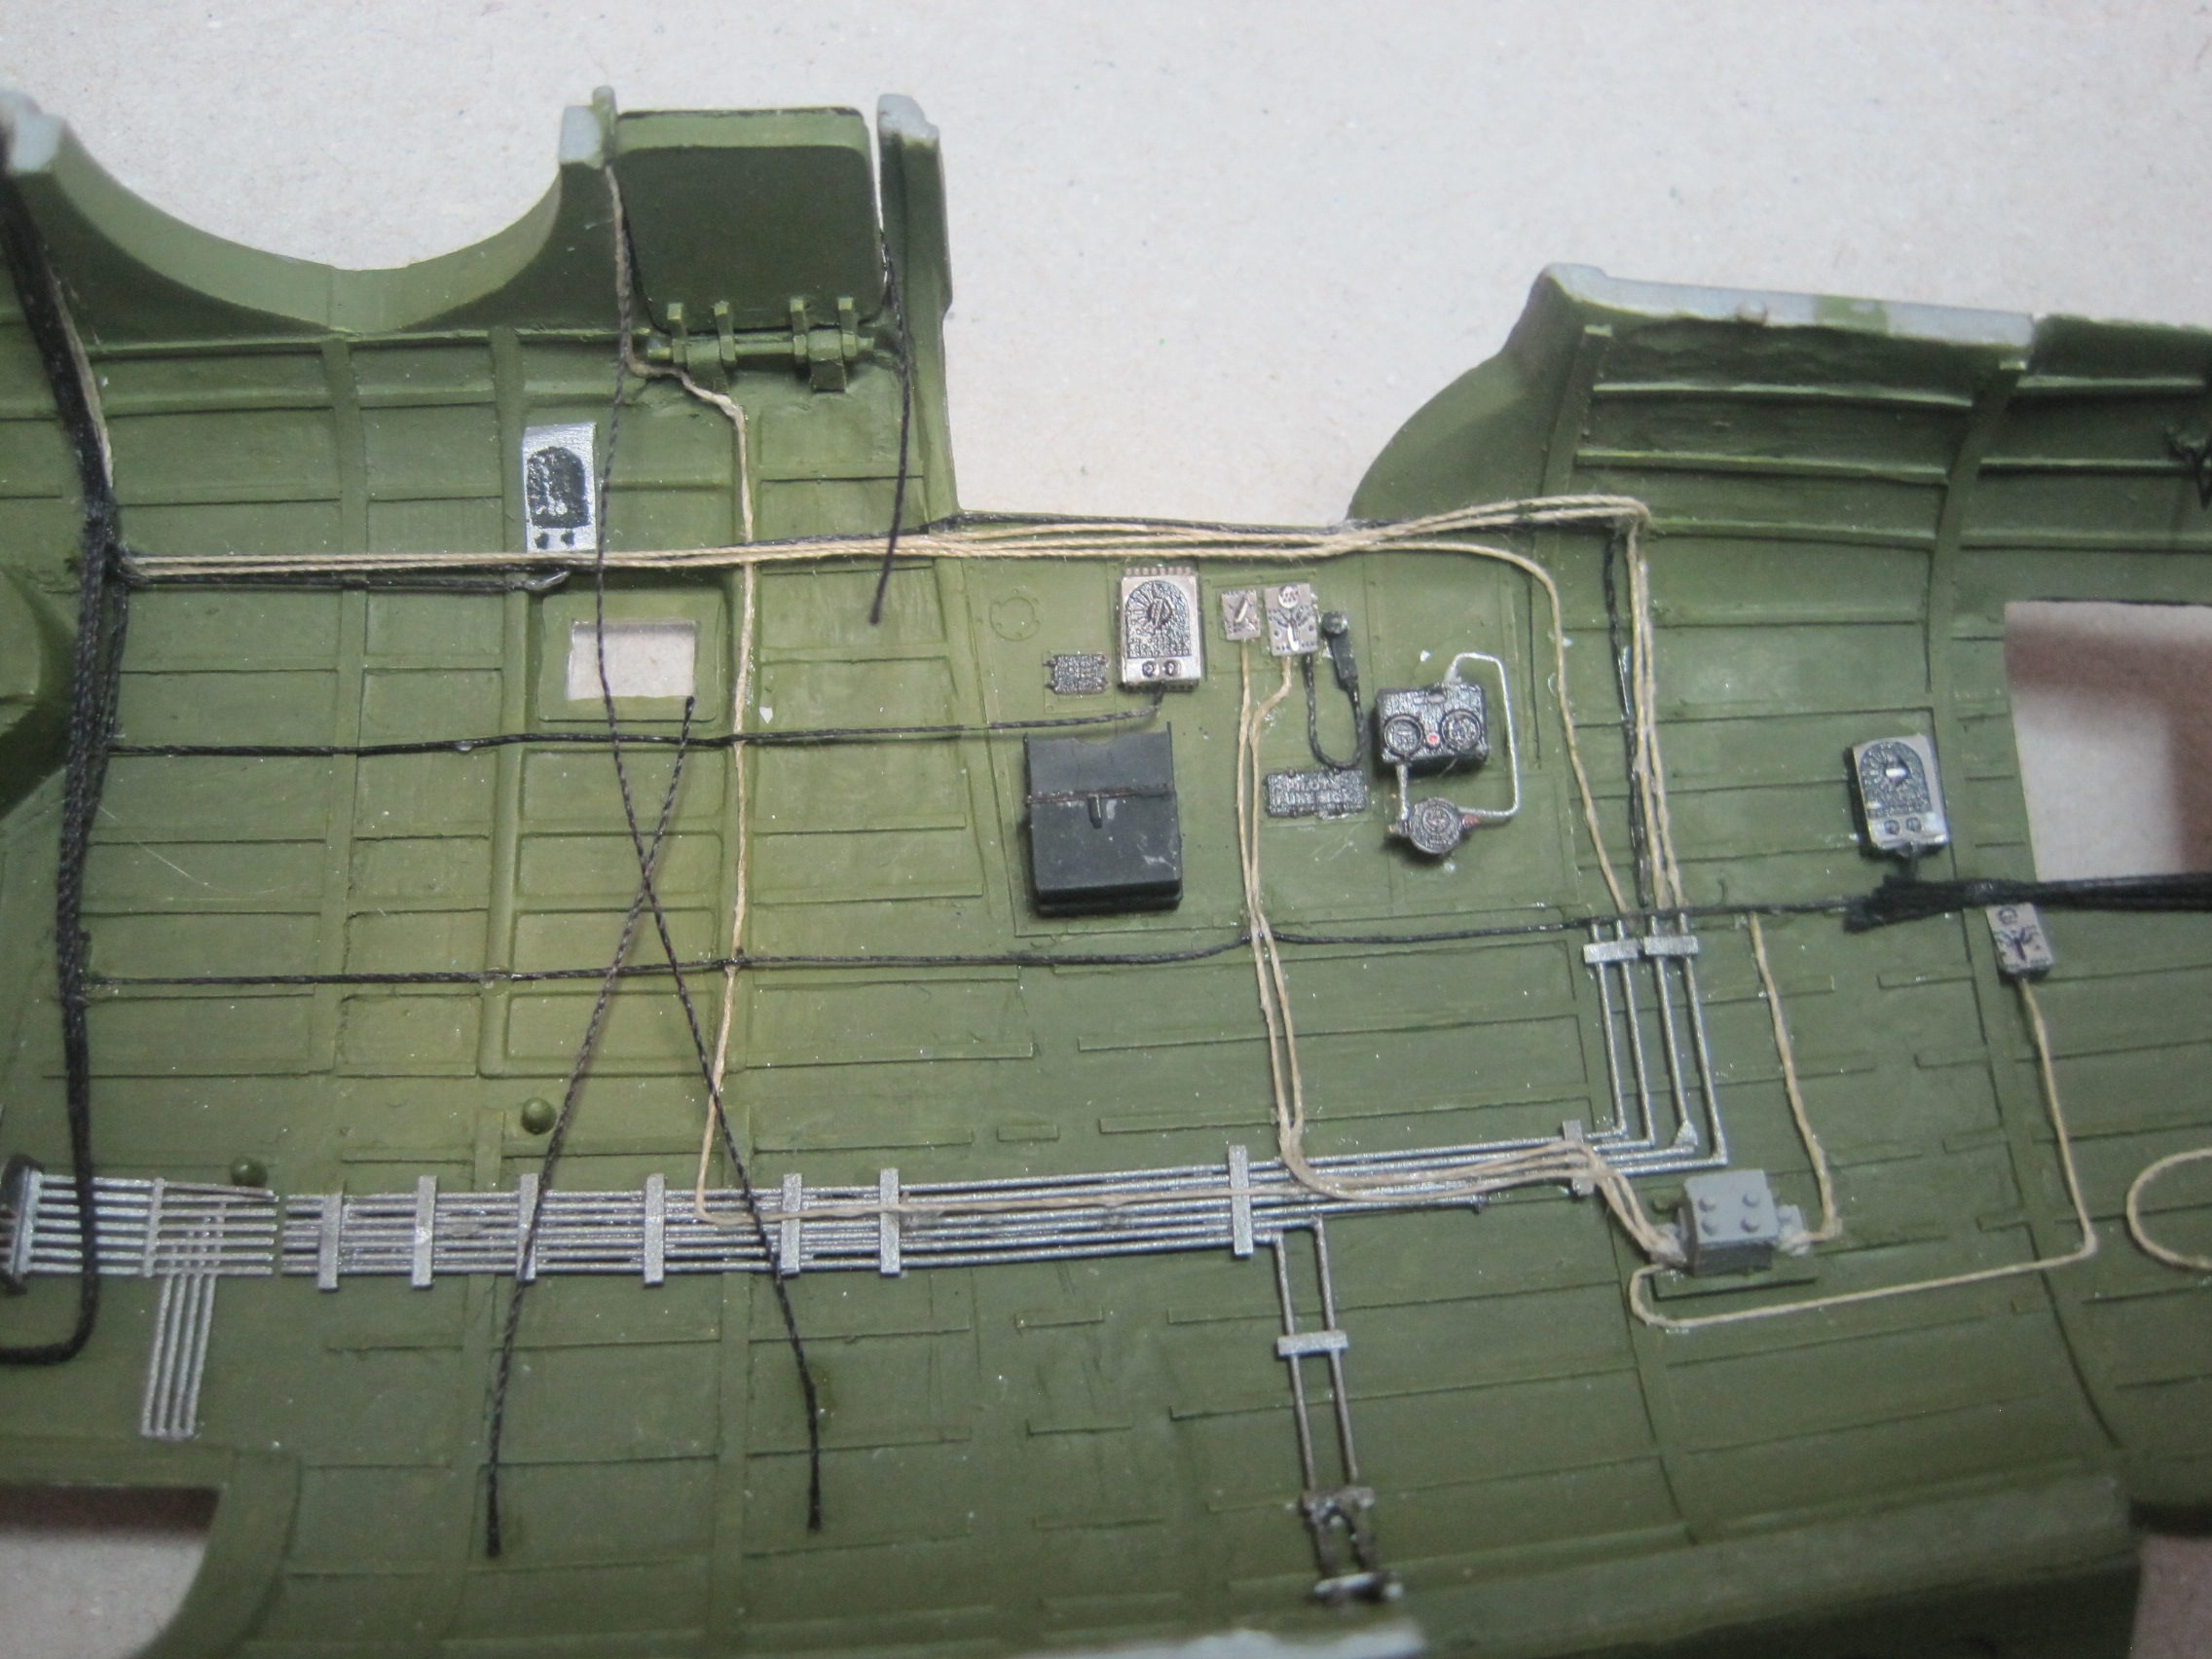
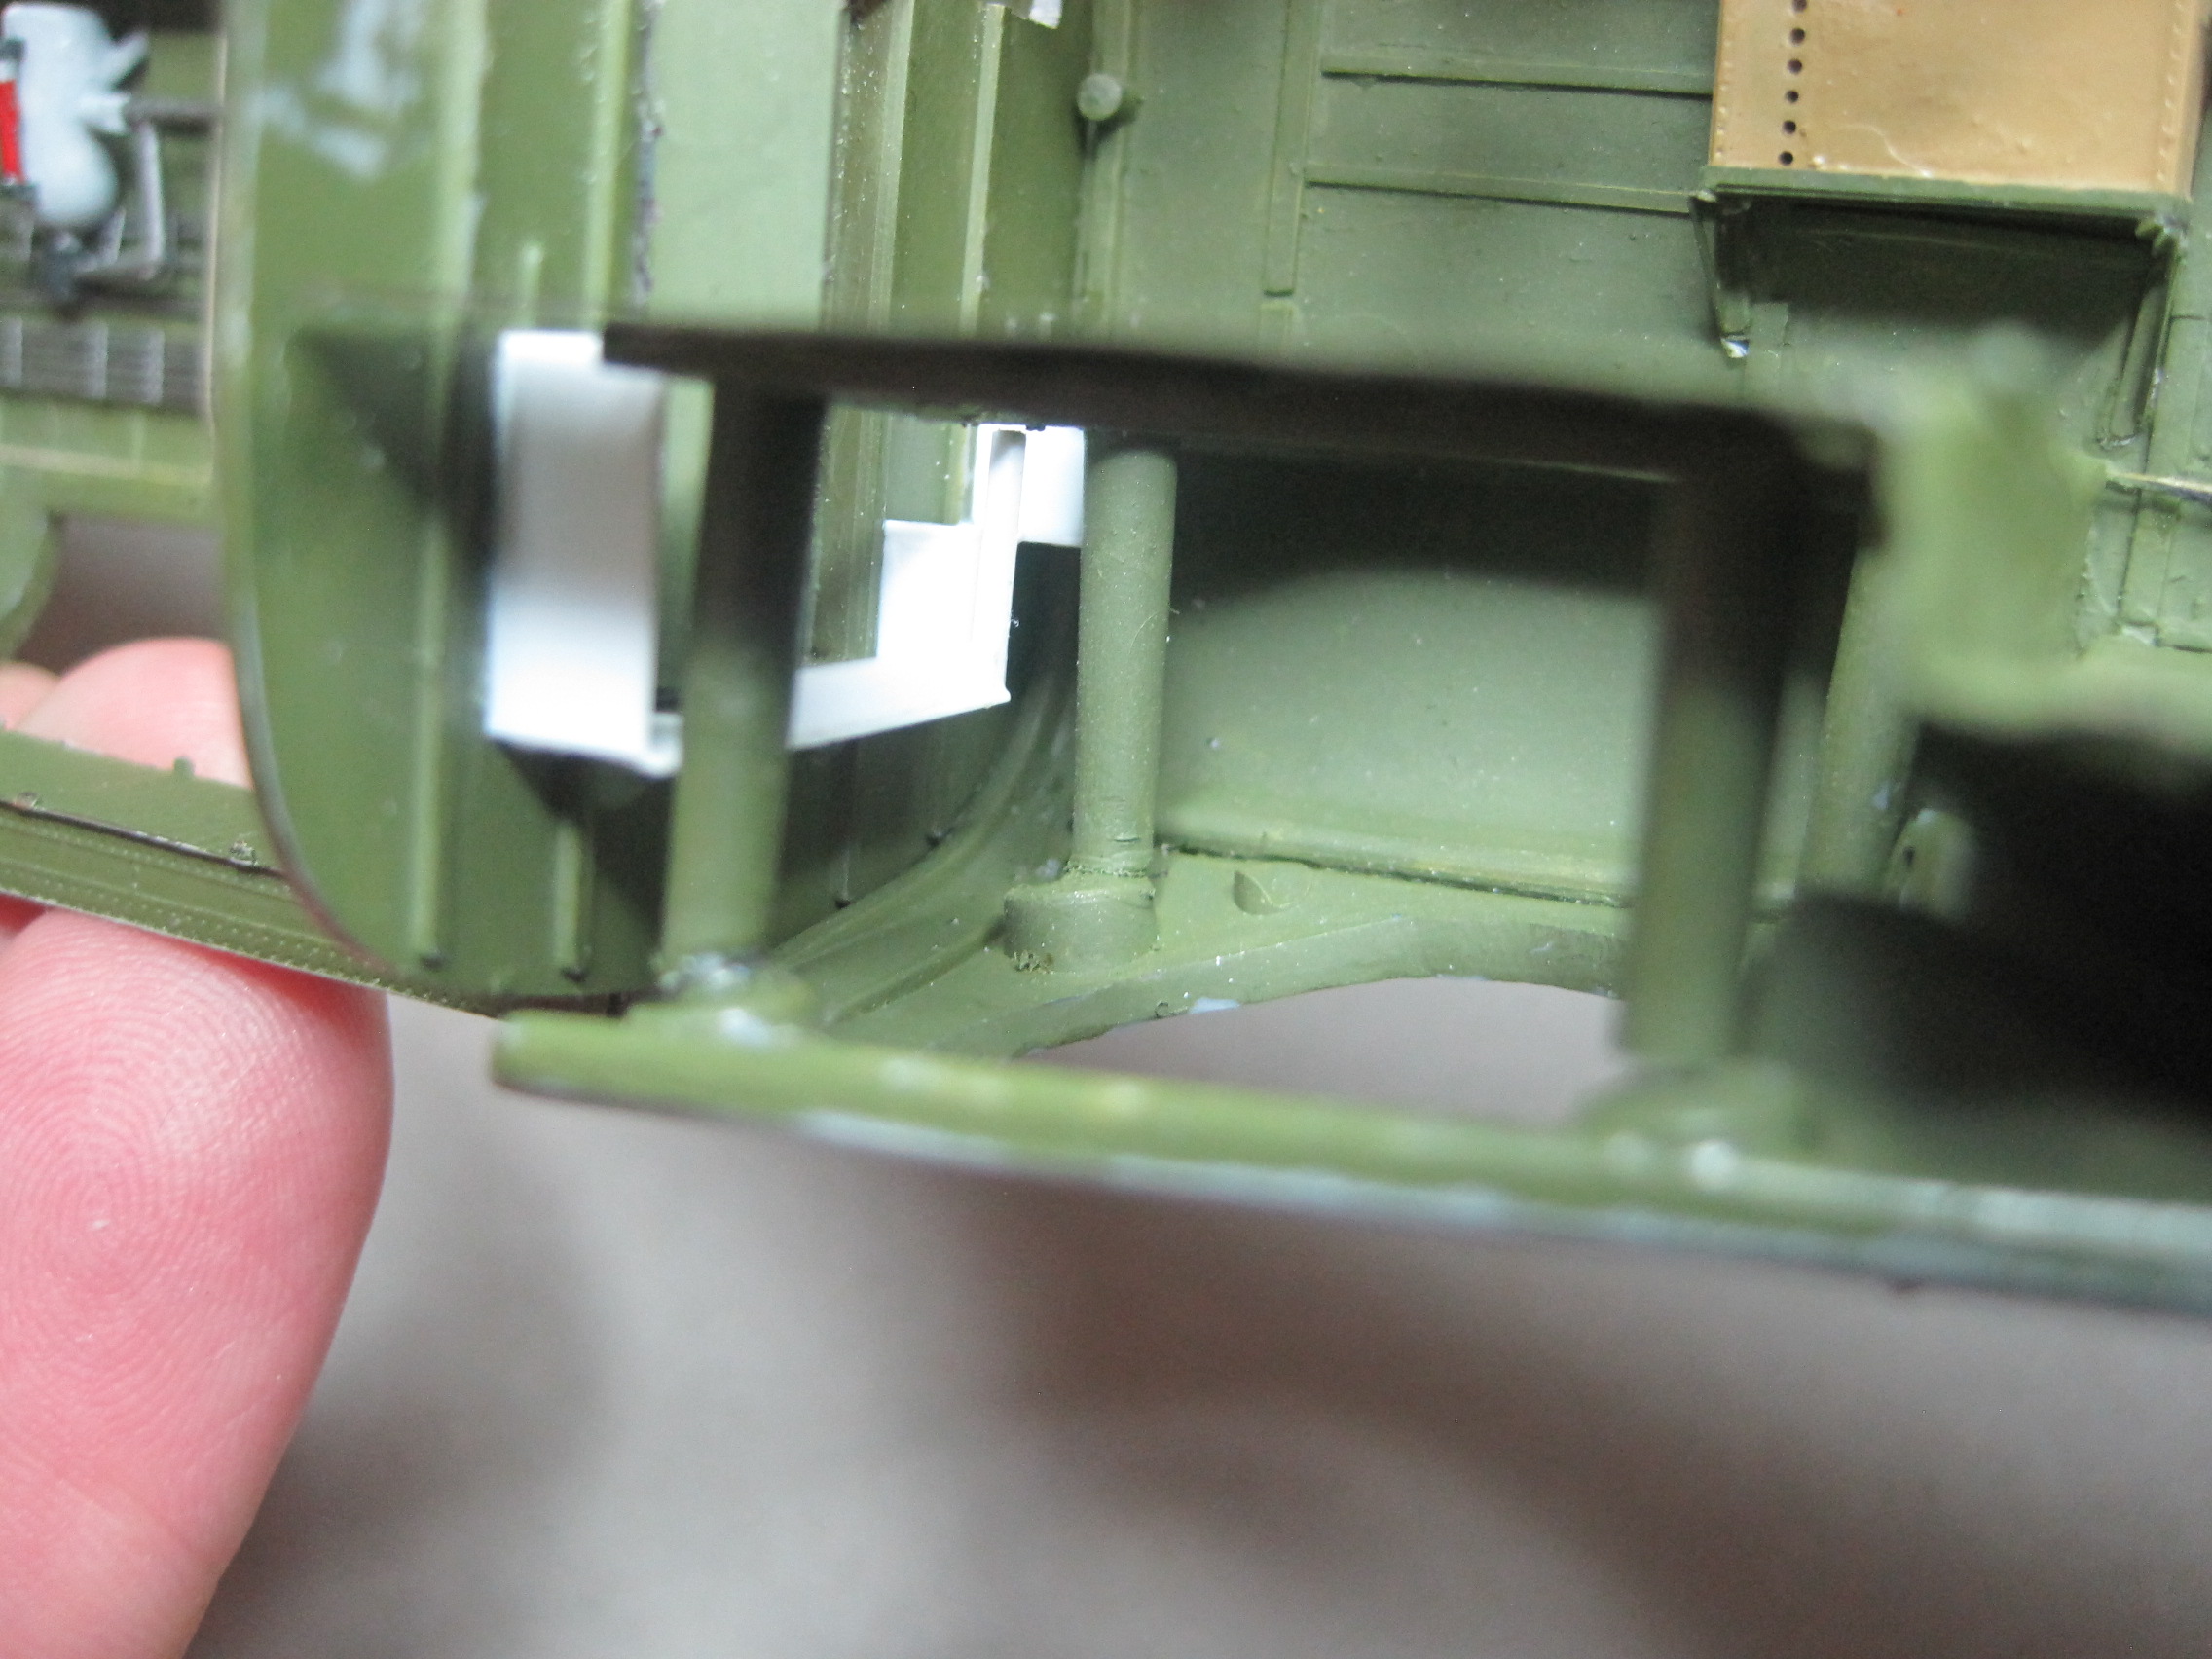
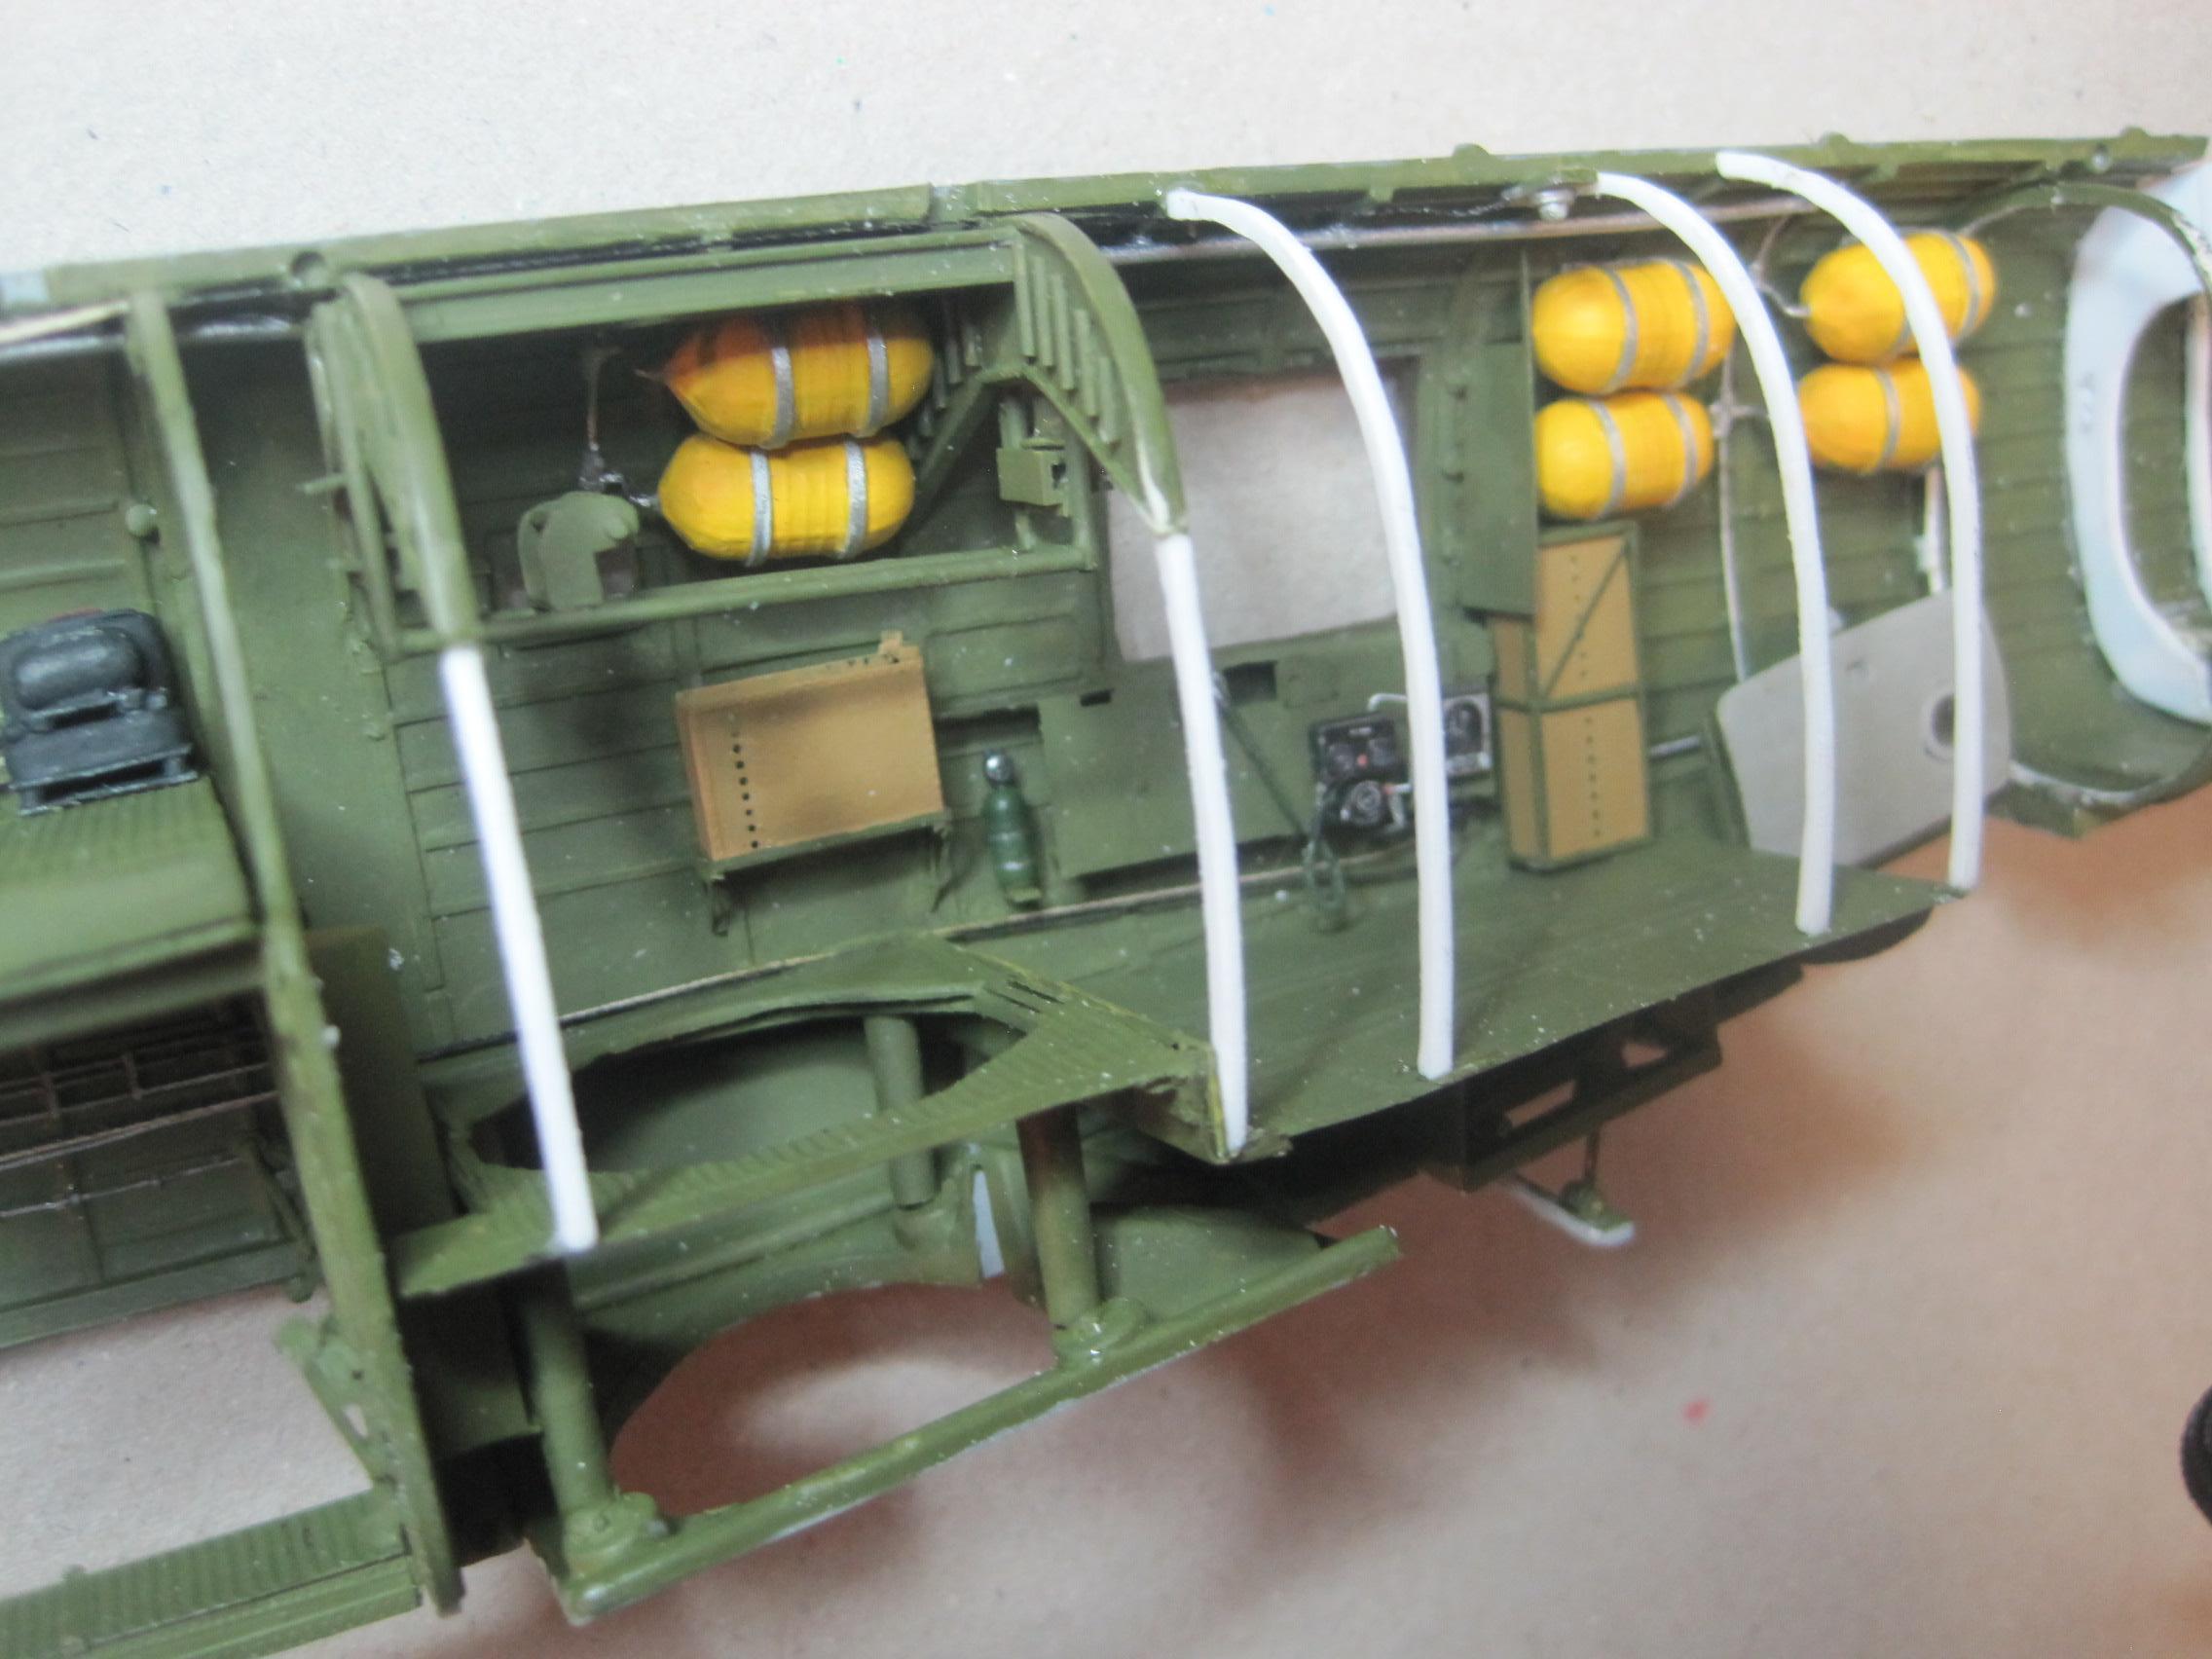
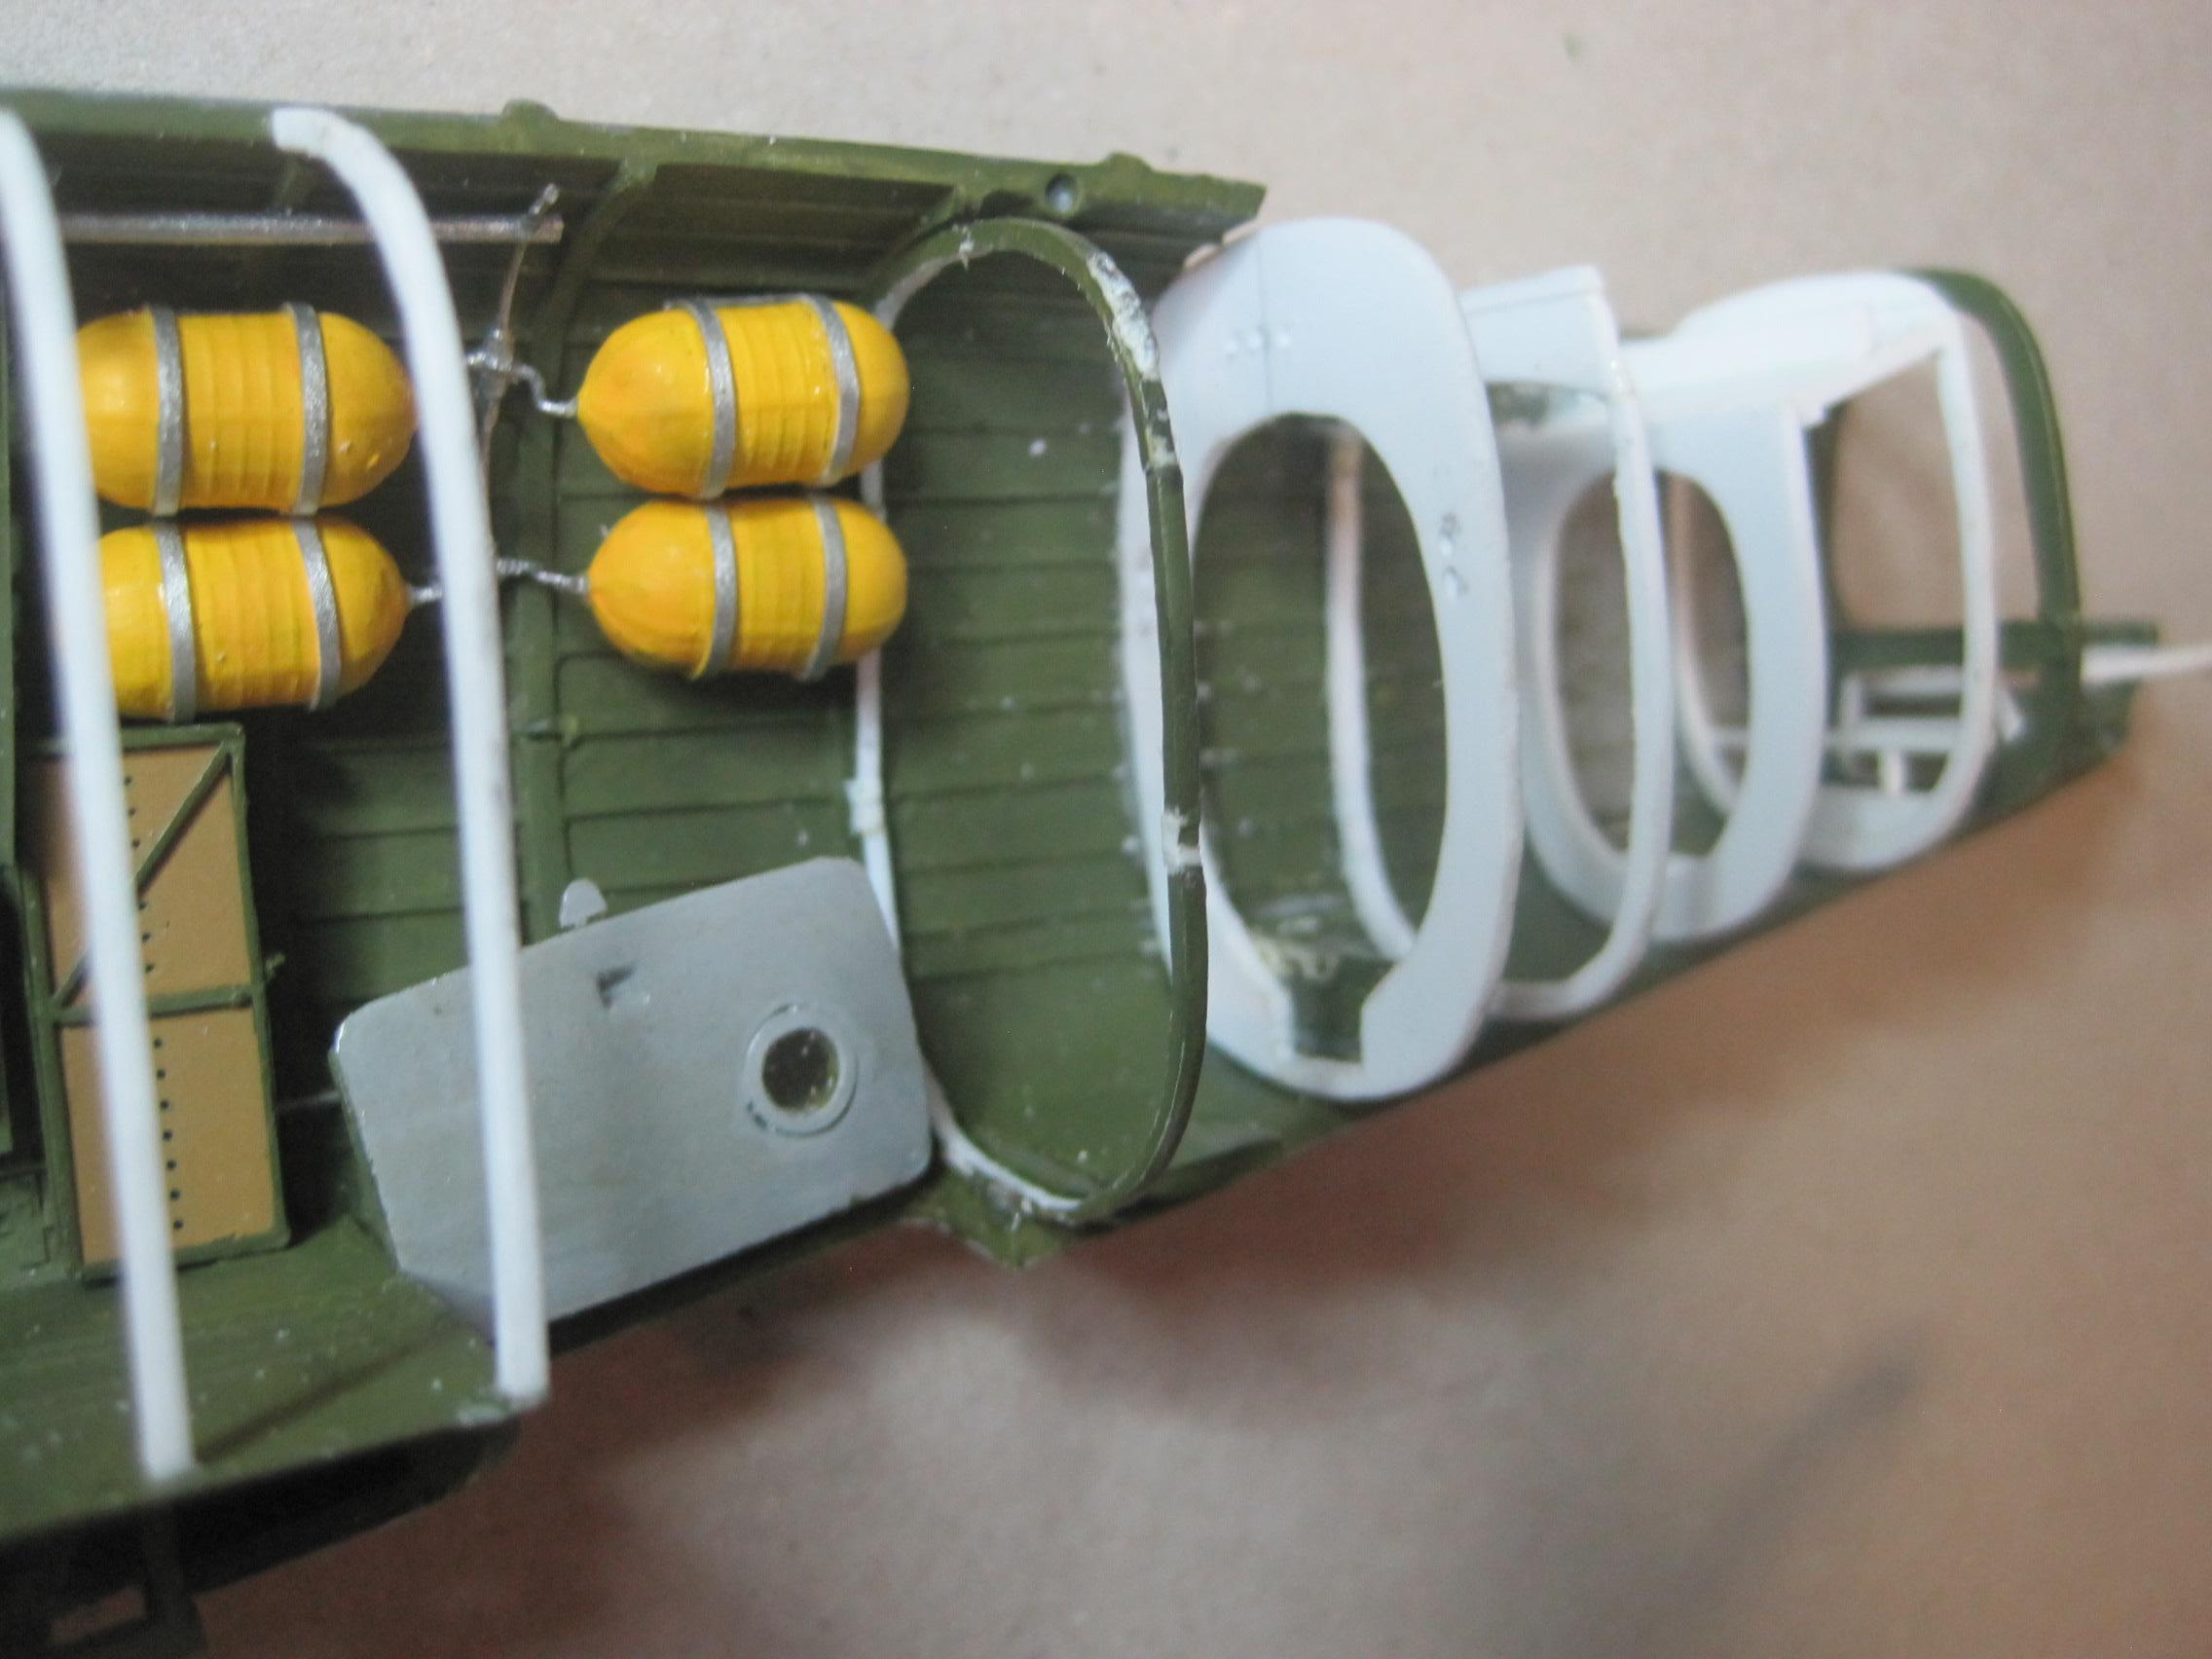
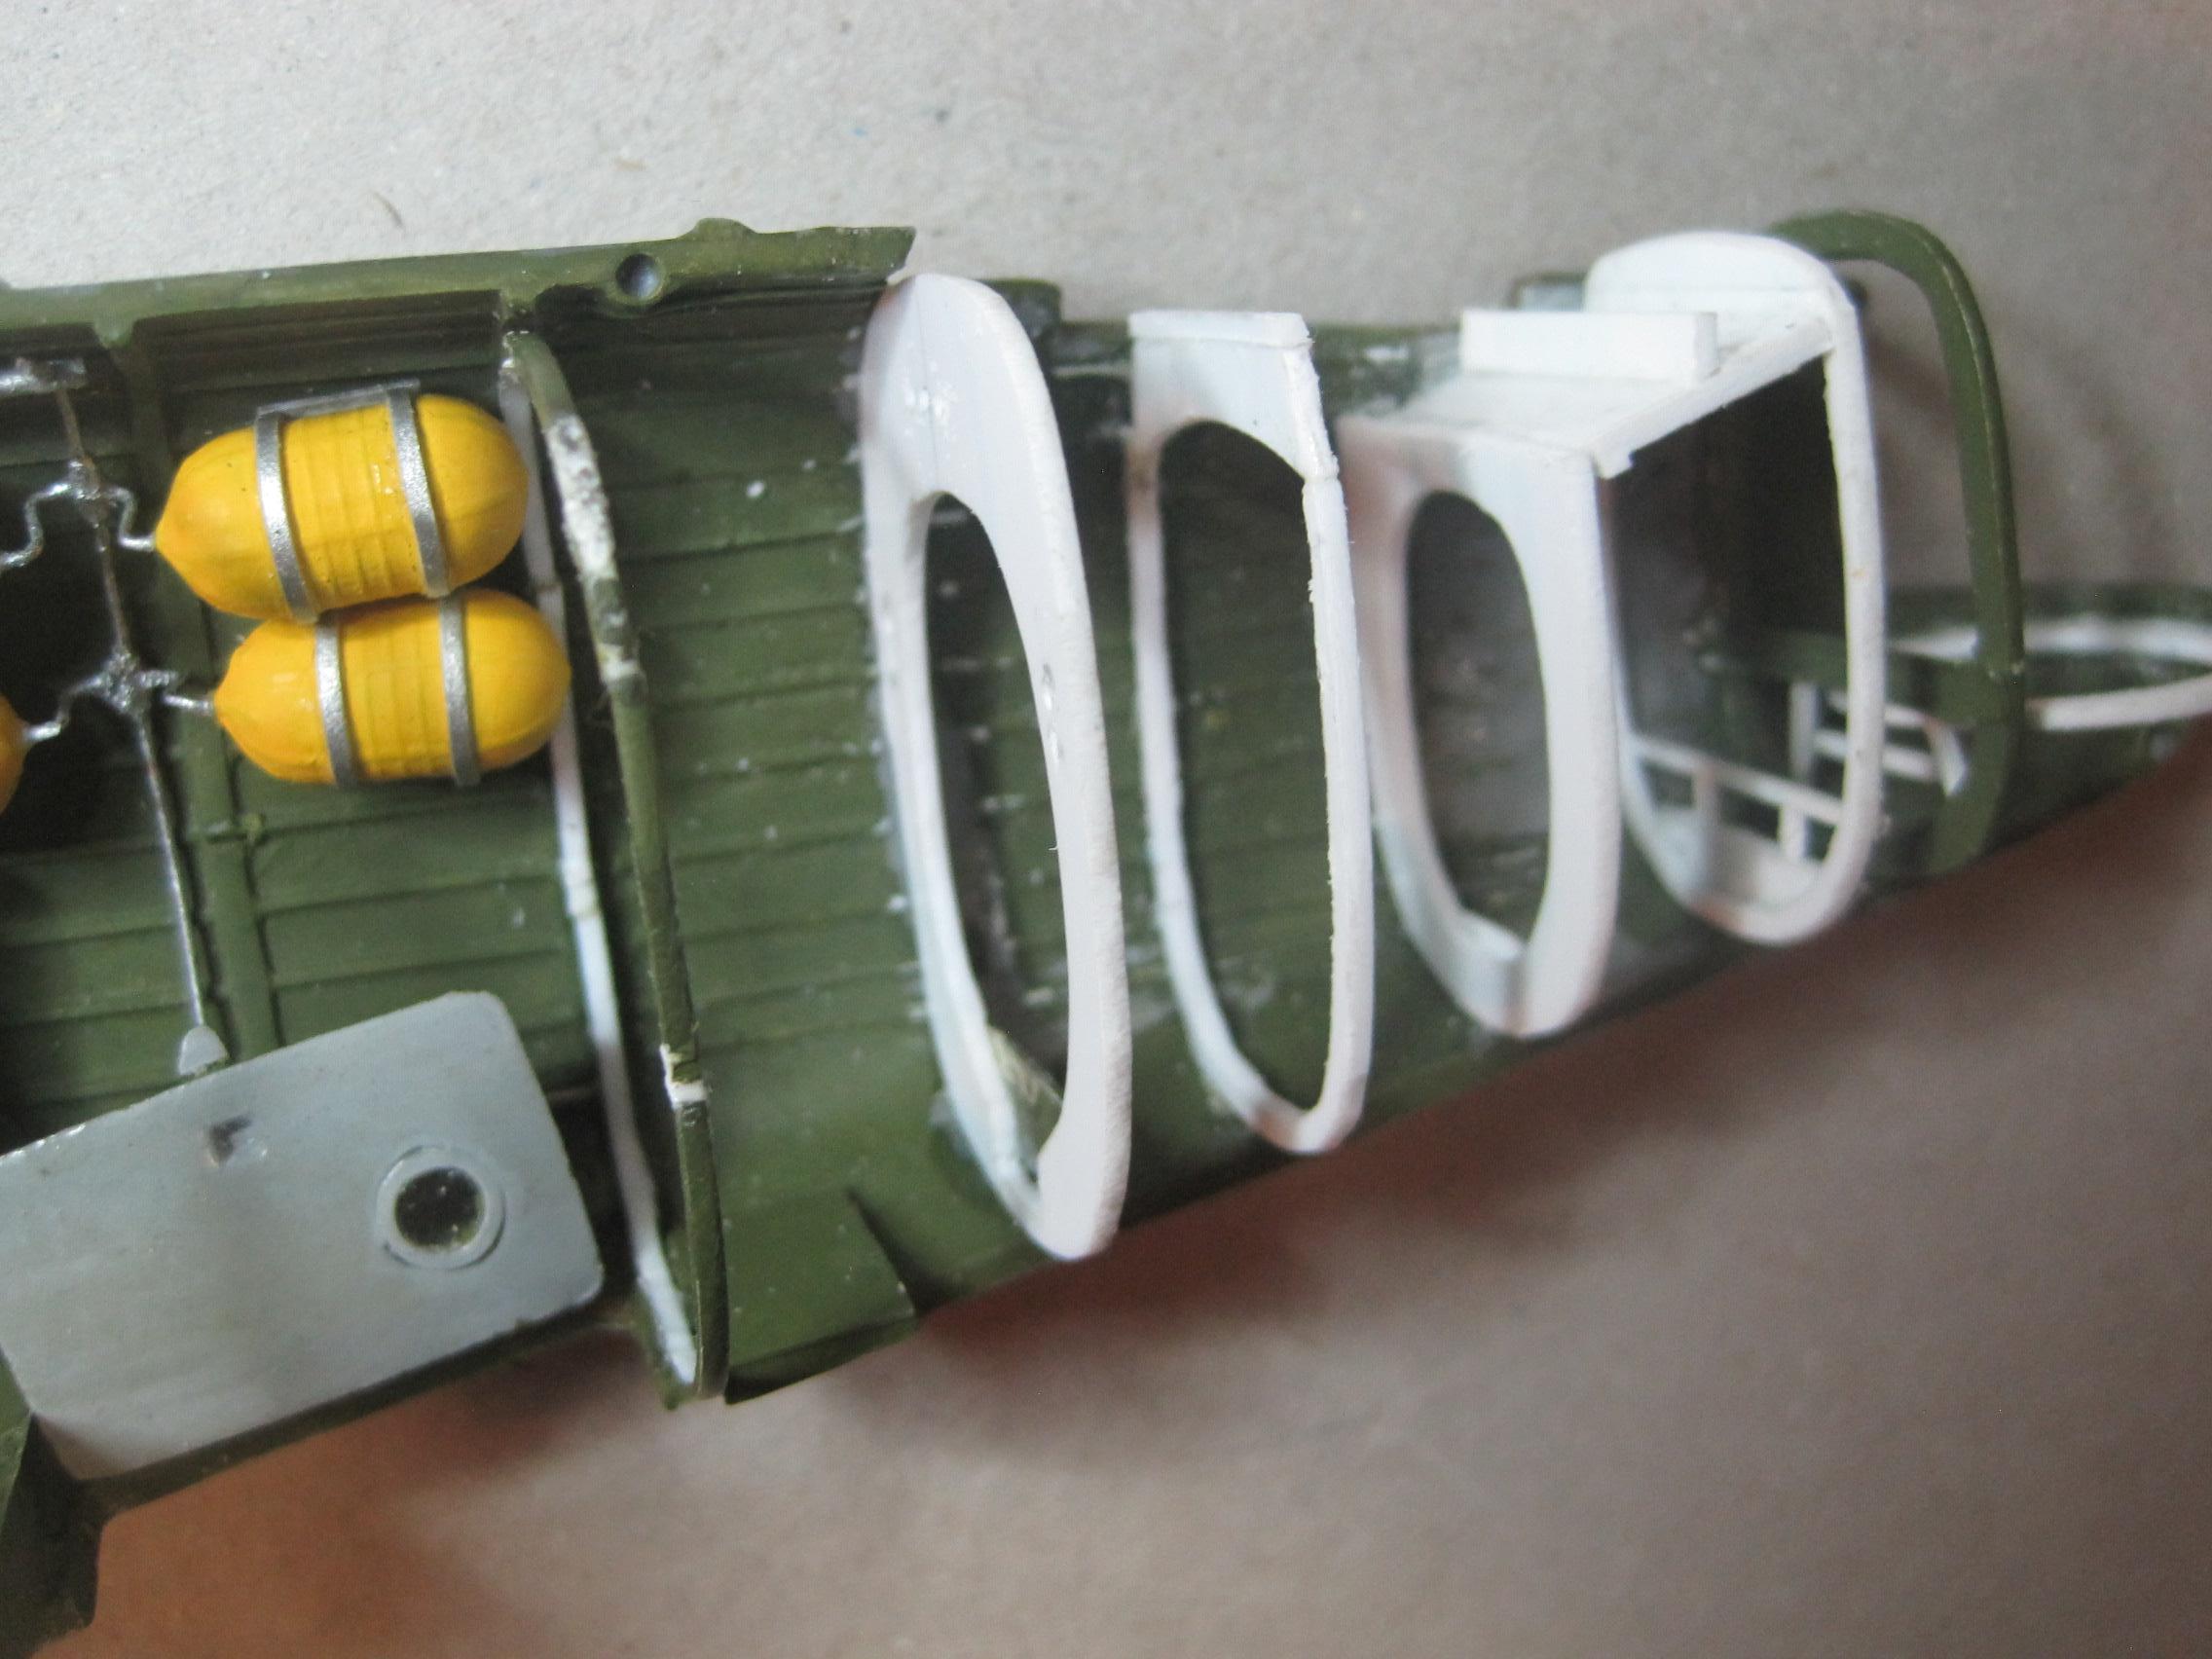
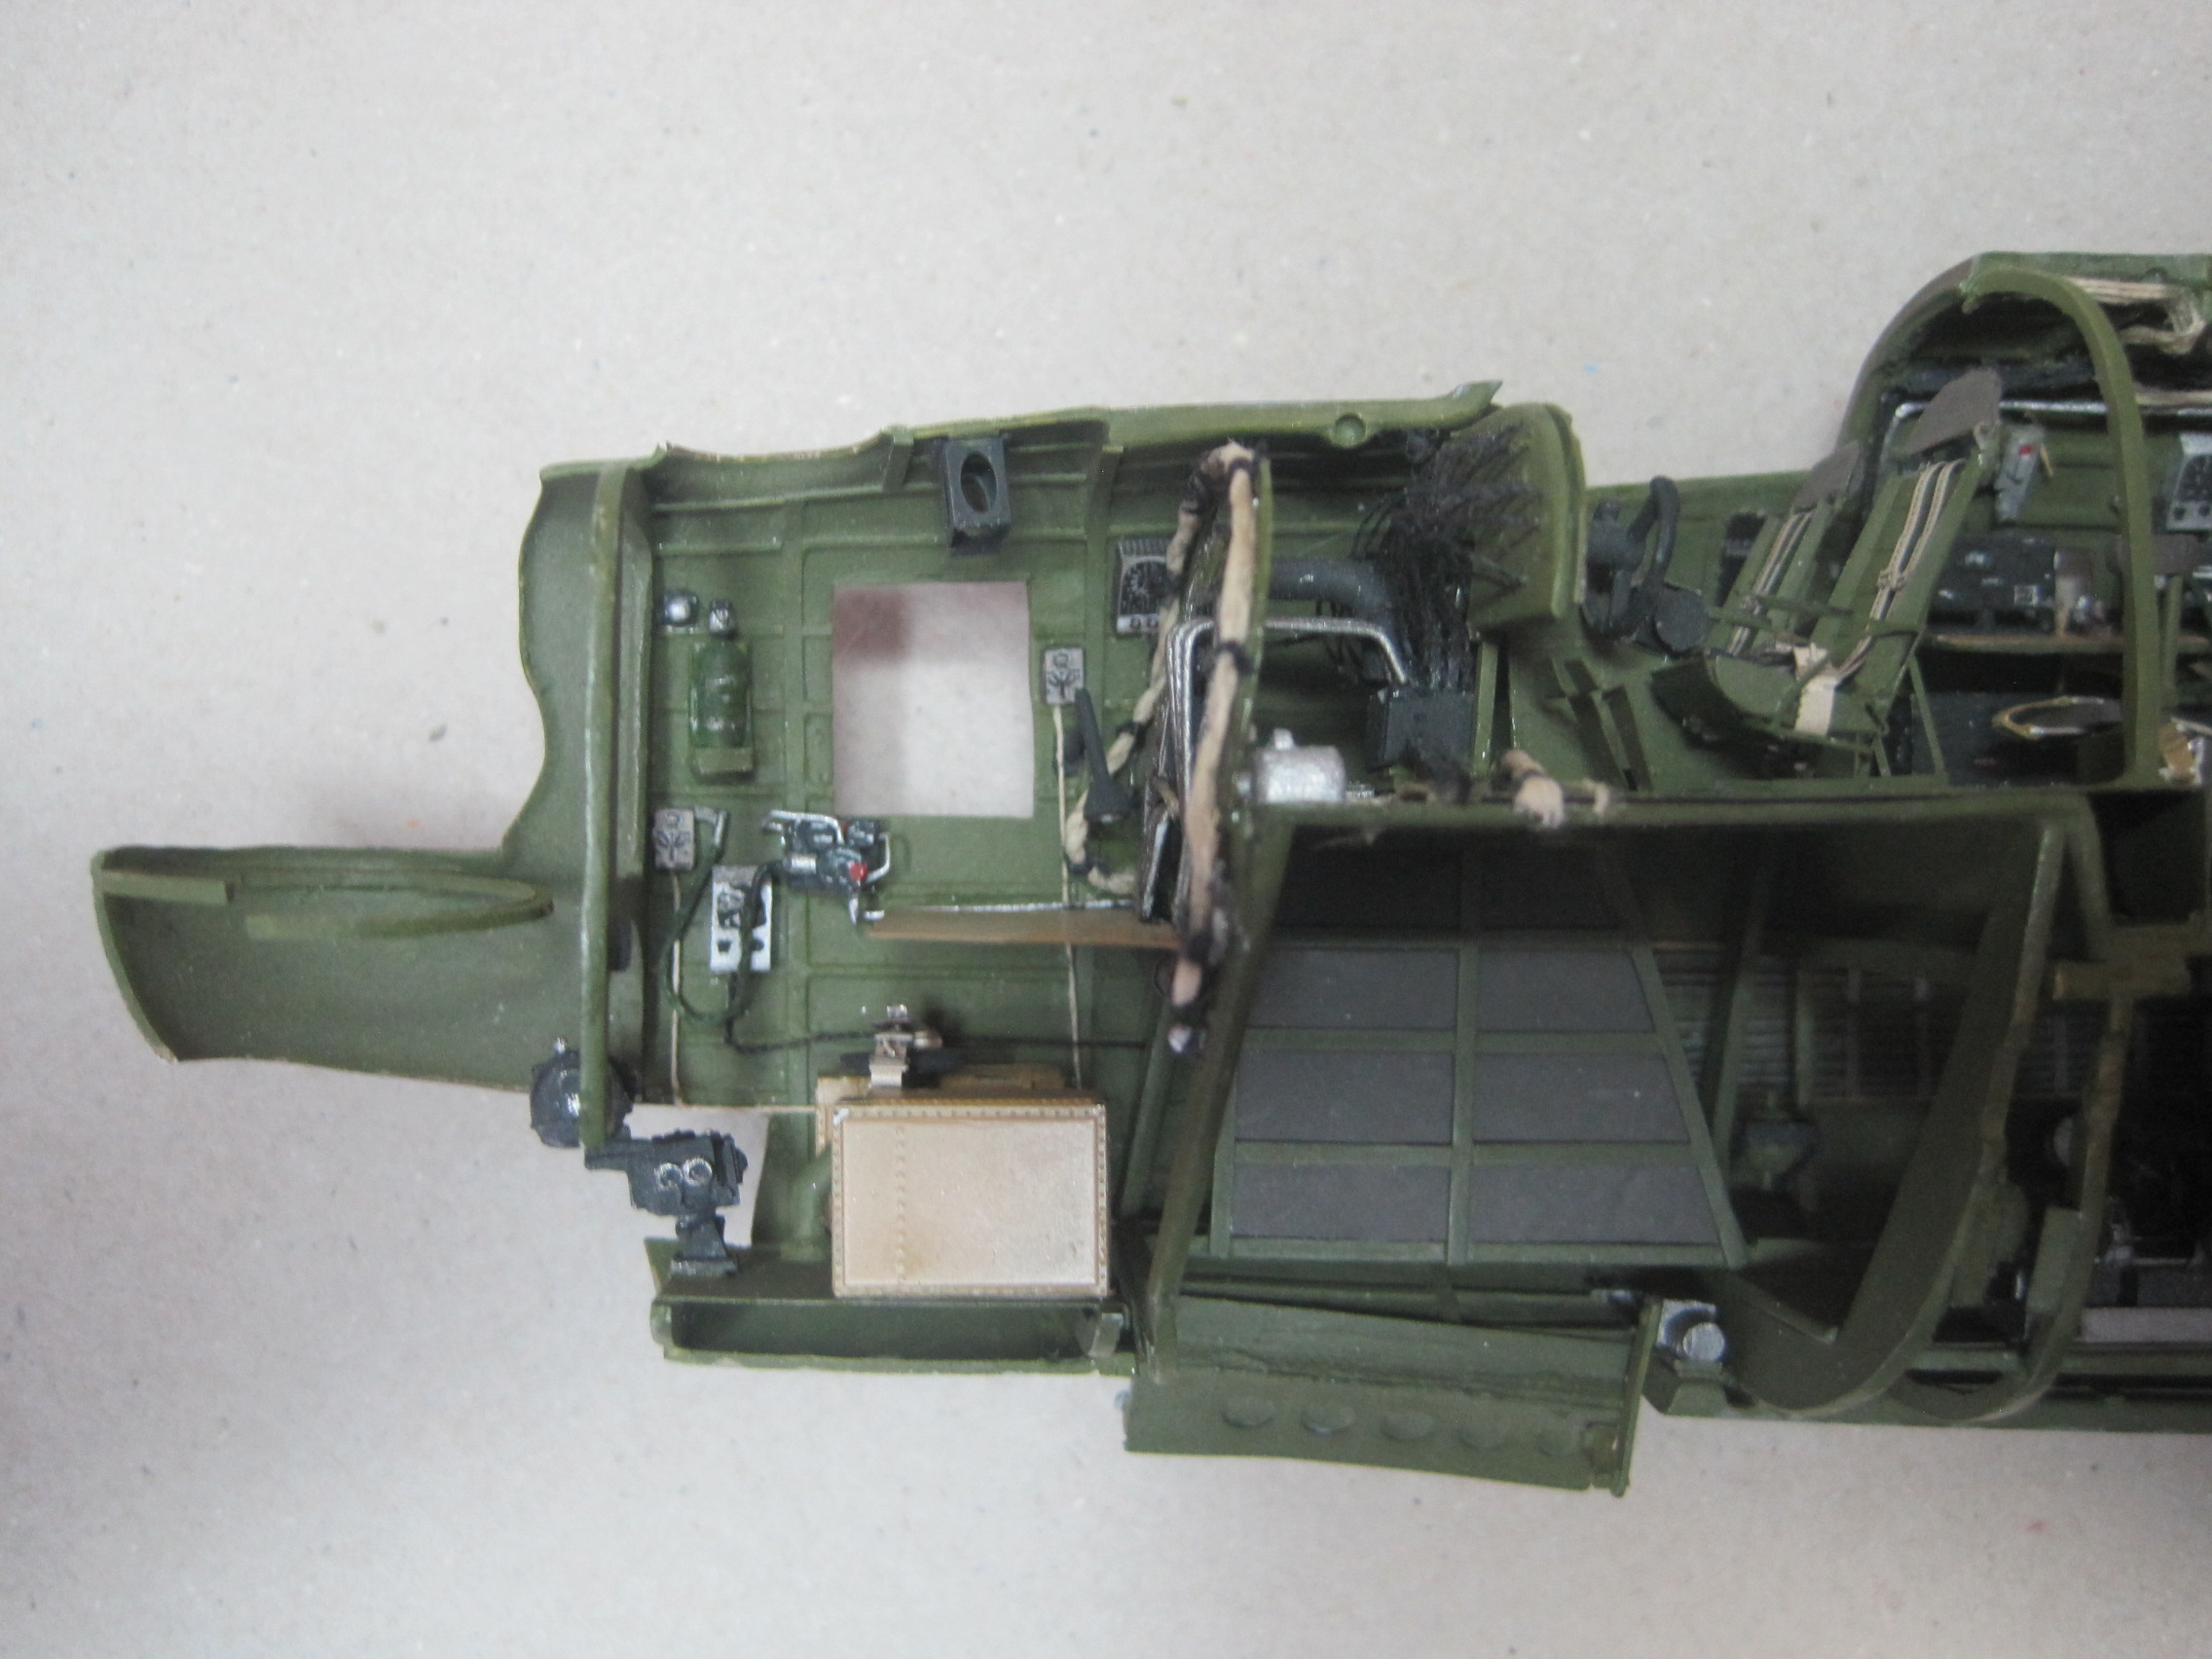
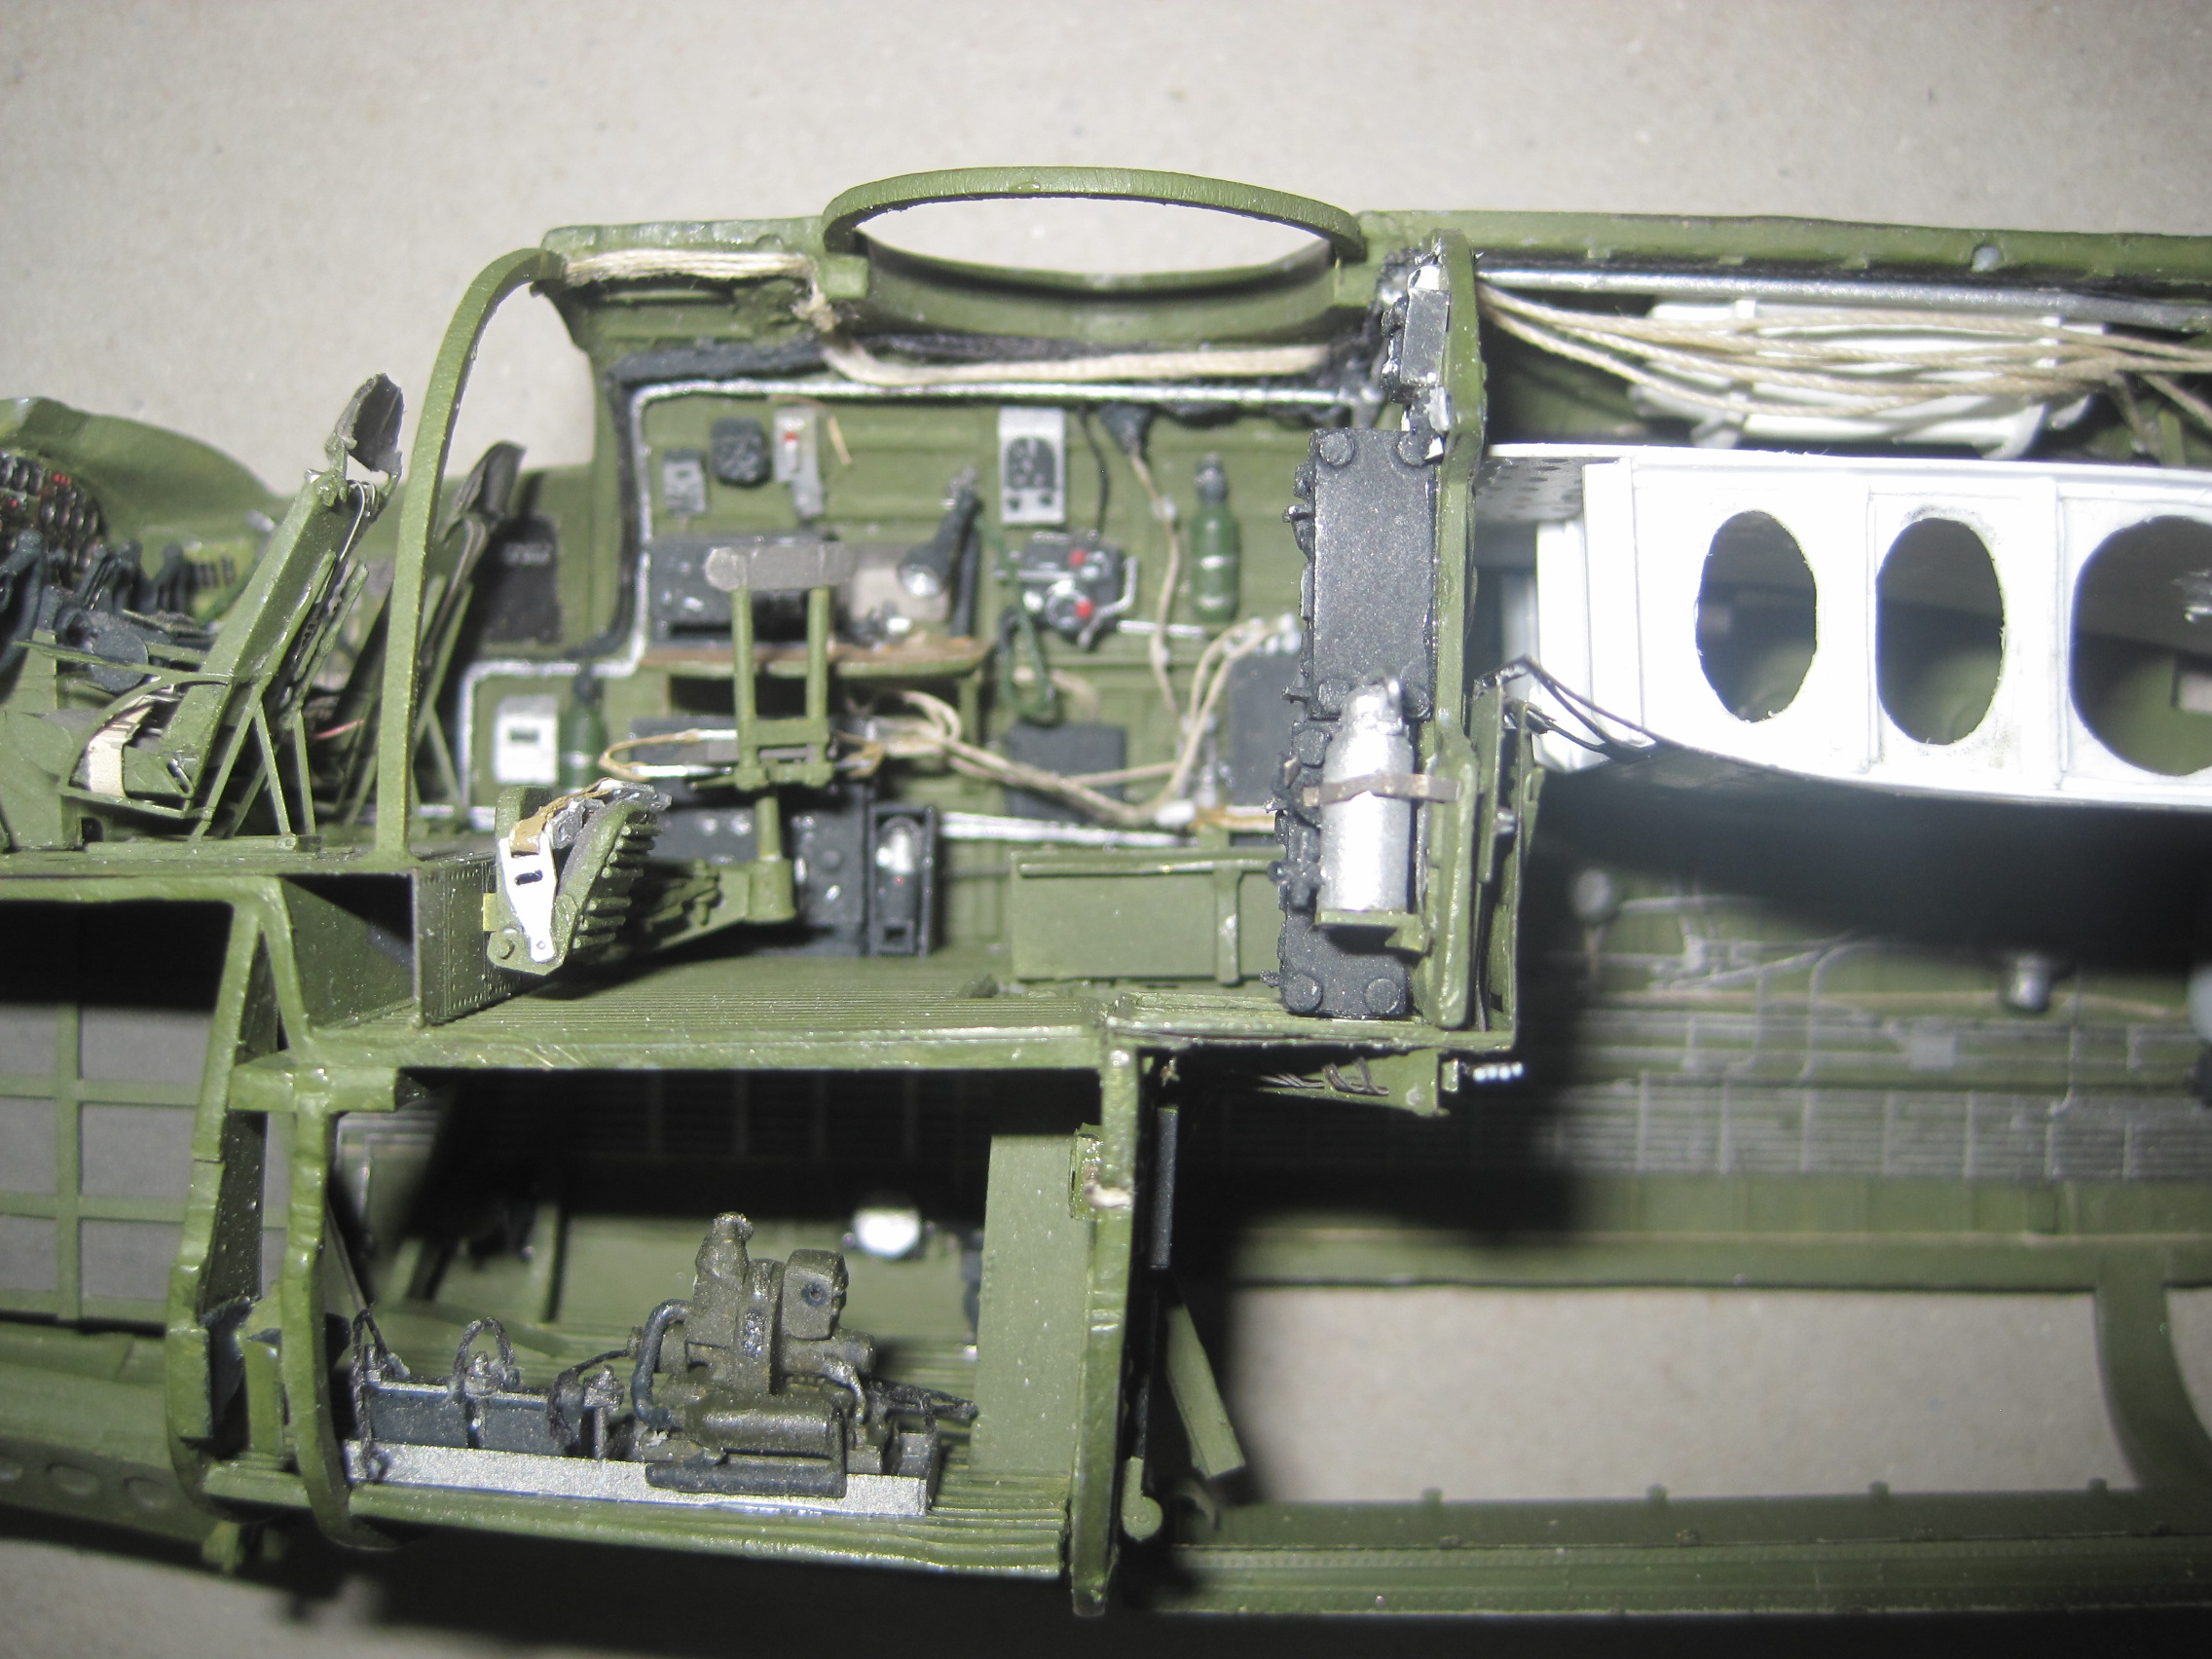
Time for an update. Since my last posting I have been able to get some extremely great reference information on the inside of the B-24. A docent from The Canada Aviation and Space Museum provided me with a whole bunch of interior photos and the Collings Foundation has an incredible resource at this website: http://vintagetin.net/B-24Witchcraft/J/ which has about a dozen 360 degree camera views from all over the aircraft which allow you to pan and zoom to your heart's content.
But as a result of all the great information I realized that I had to make quite a few corrections to some of the work I'd done, so below you can see the results of that.
Originally, I'd considered closing up the aircraft completely after I'd finished (I know, but I've done this with several other models before) but I've had a change of mind. In talking with the folks over at the Yankee Air Museum at Willow Run, since they have neither a complete B-24 nor a highly detailed model with the interior, they've agreed to accept mine for display when I (finally) complete it.
This has led me to decide to leave the two halves unassembled and display the model with the two interior sides open in one direction and the exterior in the other. And that meant I had to add some additional structure to the "main" (right) side of the model to accommodate some of the additional detail.
So below are the current photos and now that I've gotten my concept down (took quite a while to figure out how to proceed) I should be able to make better progress. Maybe.

Redhand

#522
Joined: January 20, 2013
KitMaker: 1,460 posts
AeroScale: 1,443 posts
Posted: Sunday, June 09, 2019 - 11:15 PM UTC
Quoted Text
This has led me to decide to leave the two halves unassembled and display the model with the two interior sides open in one direction and the exterior in the other. And that meant I had to add some additional structure to the "main" (right) side of the model to accommodate some of the additional detail.
Can you explain this better? I can't picture it. How many fuselage parts are you using? Two full interiors for a separate display, and then a closed up one with the wings, etc?

thathaway3
Joined: September 10, 2004
KitMaker: 1,610 posts
AeroScale: 85 posts
Posted: Monday, June 10, 2019 - 02:00 AM UTC
Quoted Text
Quoted Text
This has led me to decide to leave the two halves unassembled and display the model with the two interior sides open in one direction and the exterior in the other. And that meant I had to add some additional structure to the "main" (right) side of the model to accommodate some of the additional detail.
Can you explain this better? I can't picture it. How many fuselage parts are you using? Two full interiors for a separate display, and then a closed up one with the wings, etc?
Sorry if I wasn't clear. It's just one aircraft kit.
Imagine leaving the two fuselage halves not glued together. Think of an imaginary "hinge" right at the very nose of the aircraft and then pivoting the two fuselage halves around that "hinge" until they are pointed directly at each other. From one side you will see the interior of both halves, (pointed at each other nose to nose) and if you look at it from the opposite side, you'd see the exterior of both halves, again pointed at each other nose to nose. It was the only way I could figure out how you could see both the interior AND exterior of both halves of the aircraft.
Hope that helps.
Redhand
#522
Joined: January 20, 2013
KitMaker: 1,460 posts
AeroScale: 1,443 posts
Posted: Monday, June 10, 2019 - 03:08 AM UTC
Yes, I get it now. It's a very unconventional approach. I would have a hard time "going there" myself, though I see the reasoning.
Might one alternative be, if the Museum is willing to go along, 1/48 Scale photos as a backdrop to the completed, closed up fuselage?
Best,
Brian
Might one alternative be, if the Museum is willing to go along, 1/48 Scale photos as a backdrop to the completed, closed up fuselage?
Best,
Brian
thathaway3
Joined: September 10, 2004
KitMaker: 1,610 posts
AeroScale: 85 posts
Posted: Tuesday, June 11, 2019 - 07:02 AM UTC
Quoted Text
Yes, I get it now. It's a very unconventional approach. I would have a hard time "going there" myself, though I see the reasoning.
Might one alternative be, if the Museum is willing to go along, 1/48 Scale photos as a backdrop to the completed, closed up fuselage?
Best,
Brian
I'd considered that, but since I've decided on my current approach, some of the items I've built in to the primary (or right hand side) of the aircraft may not necessarily allow for the two halves to be completely closed up.
Before I decided on this approach I had to be extremely careful that everything I added was able to allow the two halves to close completely.
At this point I think I'd just as soon have people be able to actually see the interior directly as opposed to the photos.
We'll see how it turns out.
thompyt
Joined: July 27, 2006
KitMaker: 106 posts
AeroScale: 2 posts
Posted: Thursday, June 13, 2019 - 09:16 AM UTC
Leave the left side of the fuselage off, but add the wing and stabilizer back to the right half. Then you have a standing model.
thathaway3
Joined: September 10, 2004
KitMaker: 1,610 posts
AeroScale: 85 posts
Posted: Monday, June 17, 2019 - 05:17 AM UTC
Quoted Text
Leave the left side of the fuselage off, but add the wing and stabilizer back to the right half. Then you have a standing model.
I will be adding the right wing and the full stabilizer to the right hand side, and as you say that will leave a standing model with the nose gear, right strut and the ladder going into the rear hatch.
But there is also a lot of detail on the interior of the LH side and to leave that out would mean I'd also be losing the LH exterior which is where the nose art is.
So I'm really very reluctant to not include the LH side despite the issue with how else to support all of it. I'll most likely just use some clear posts to hold it up.
thathaway3
Joined: September 10, 2004
KitMaker: 1,610 posts
AeroScale: 85 posts
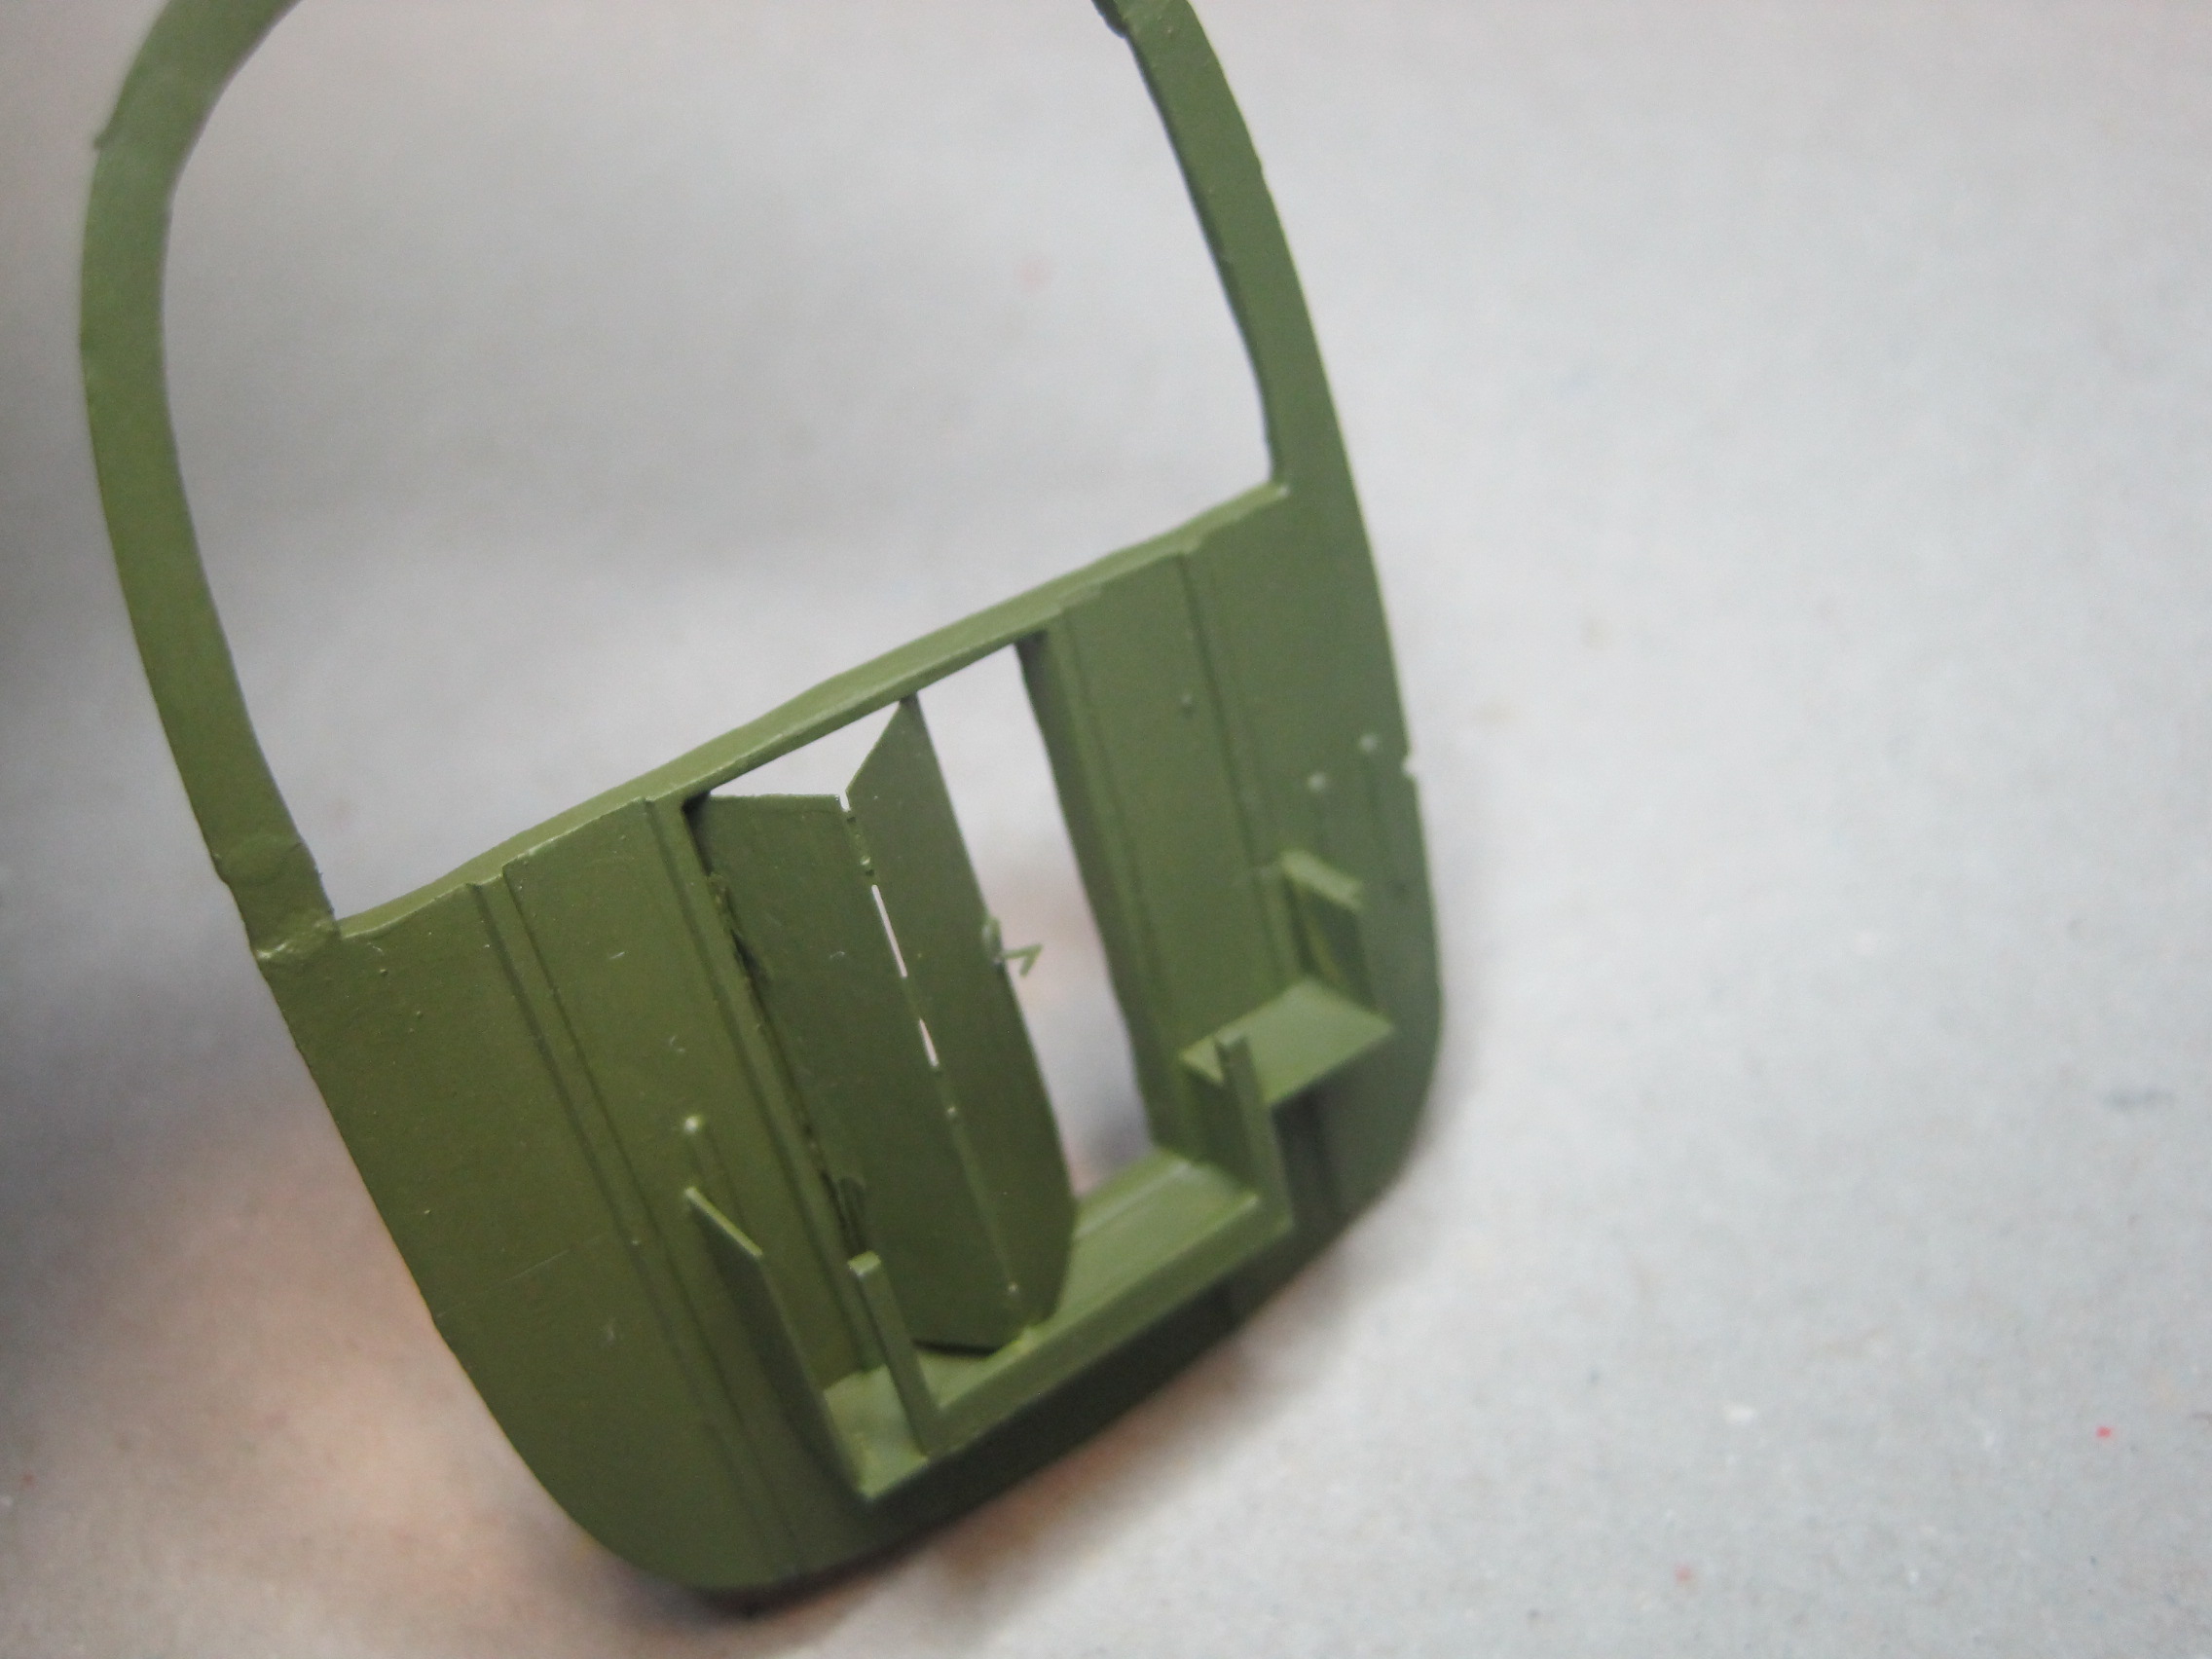
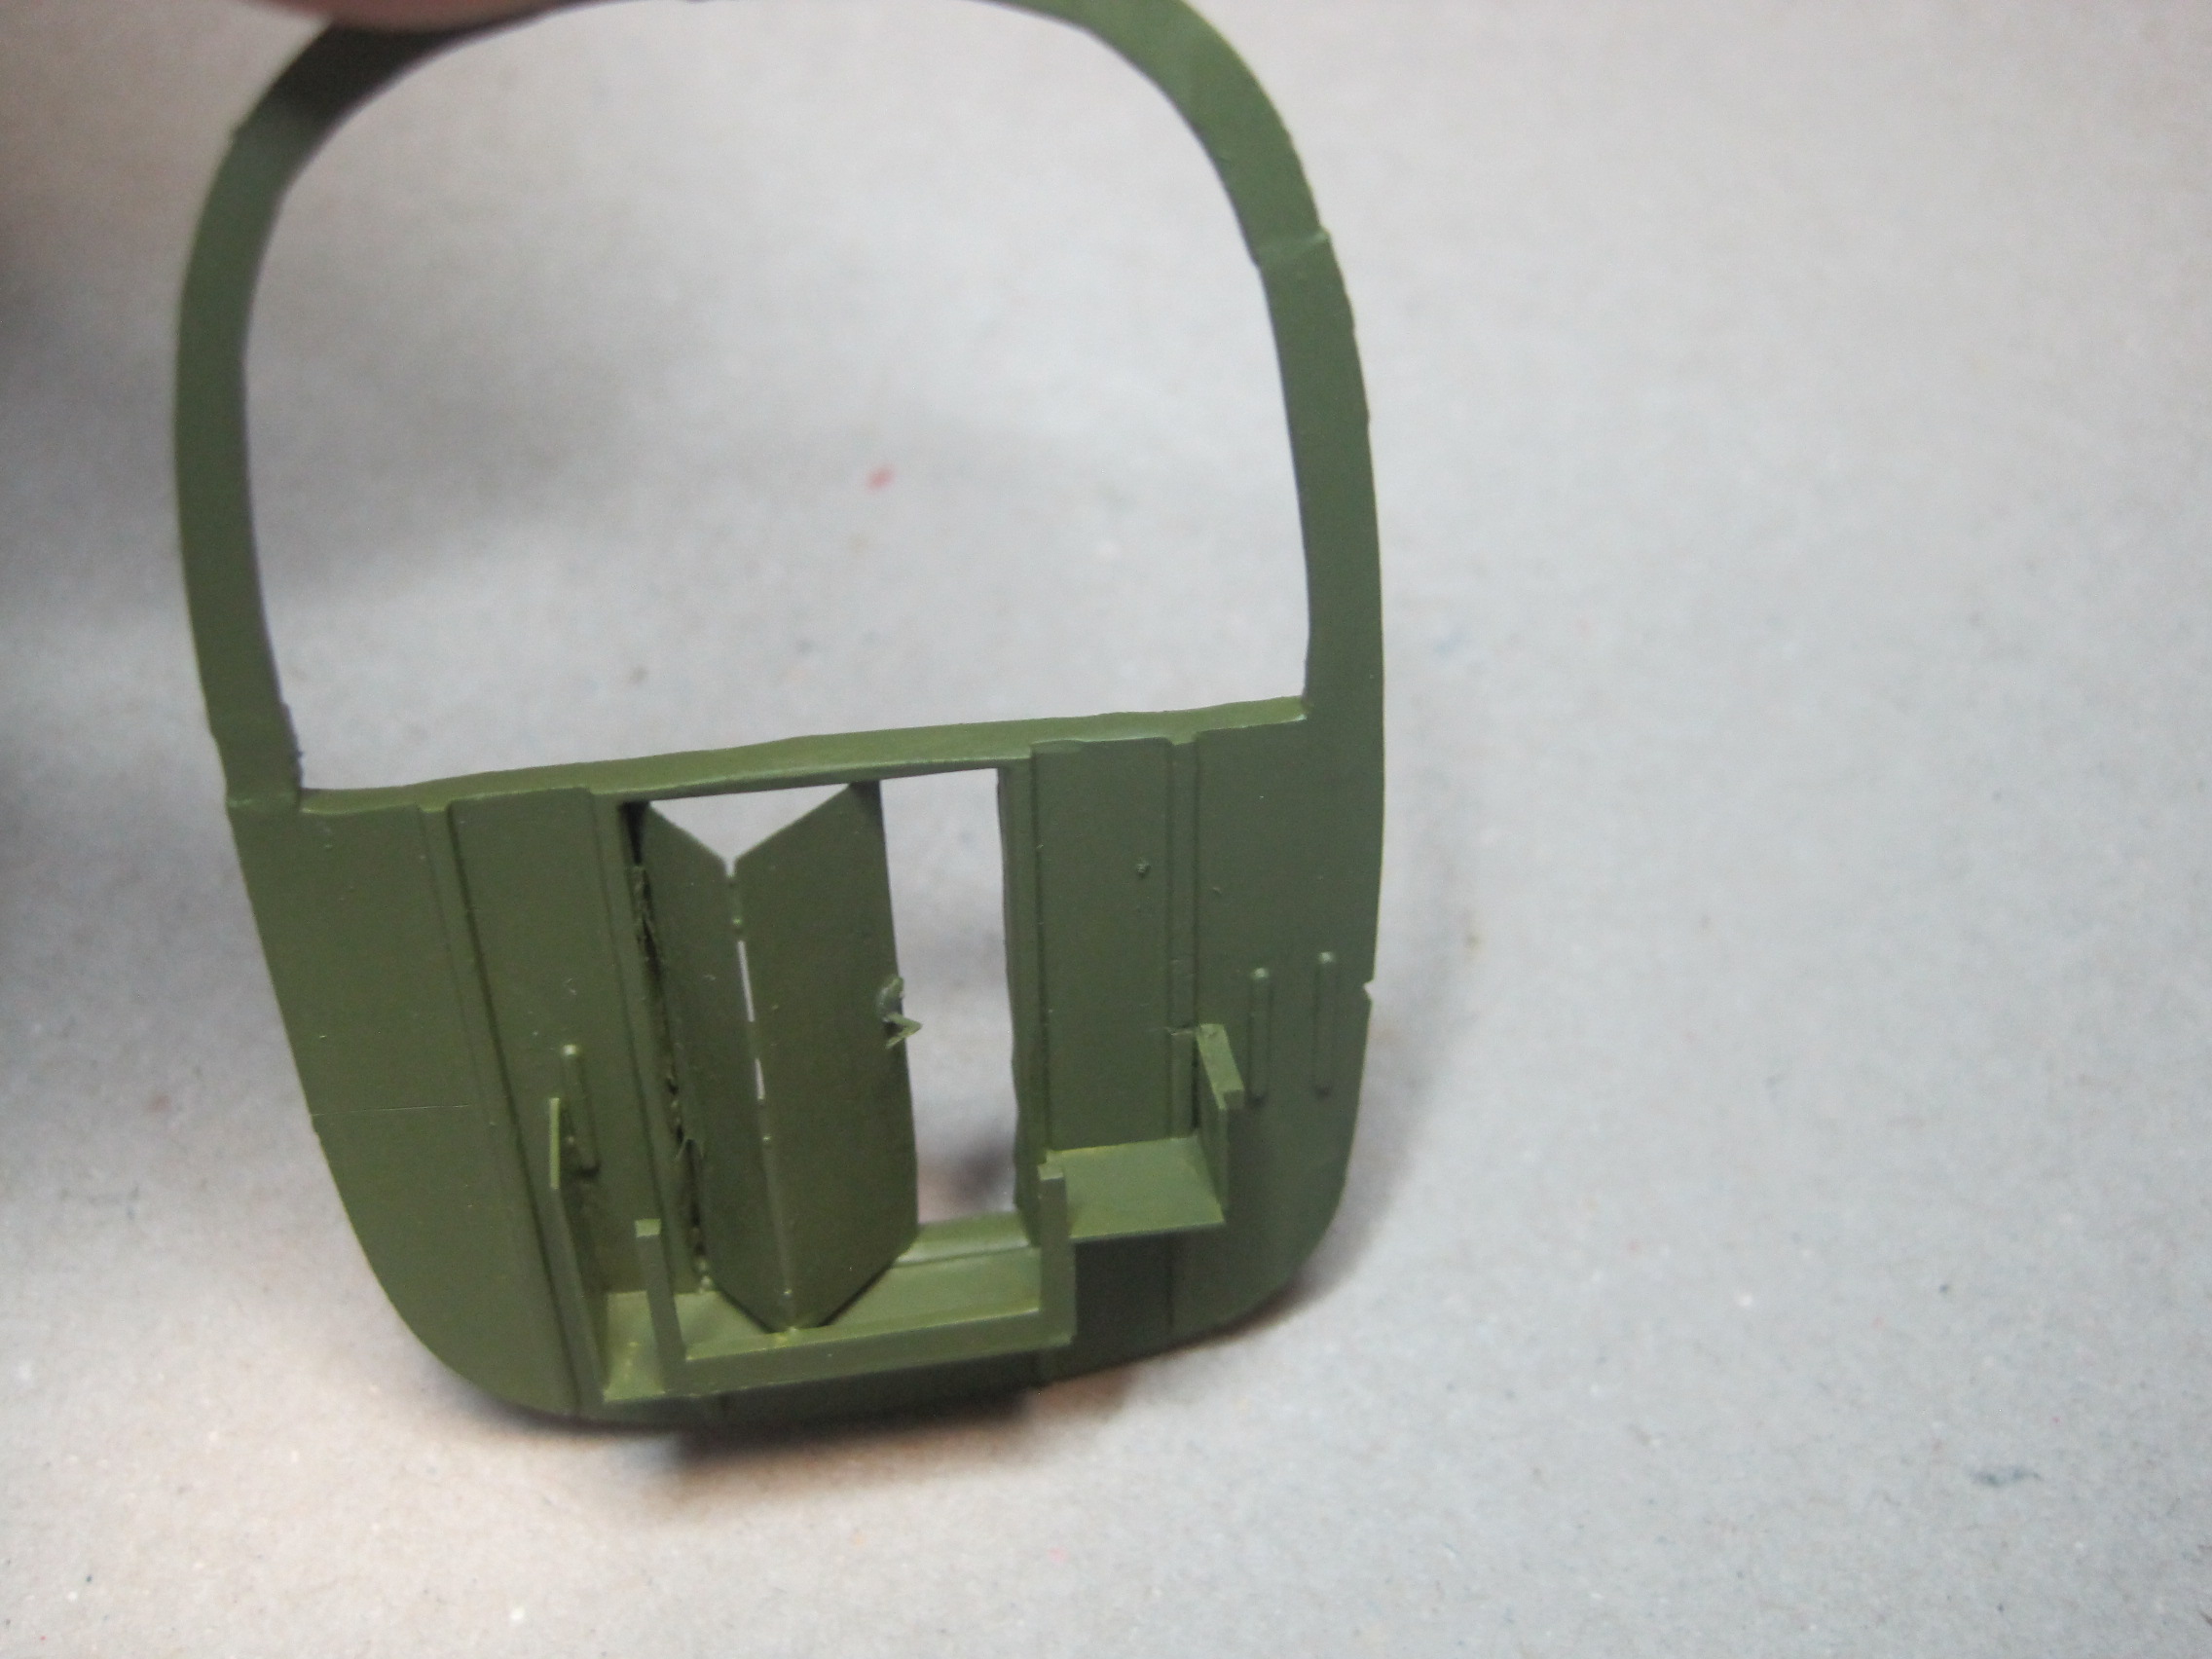
Posted: Wednesday, January 08, 2020 - 05:26 AM UTC
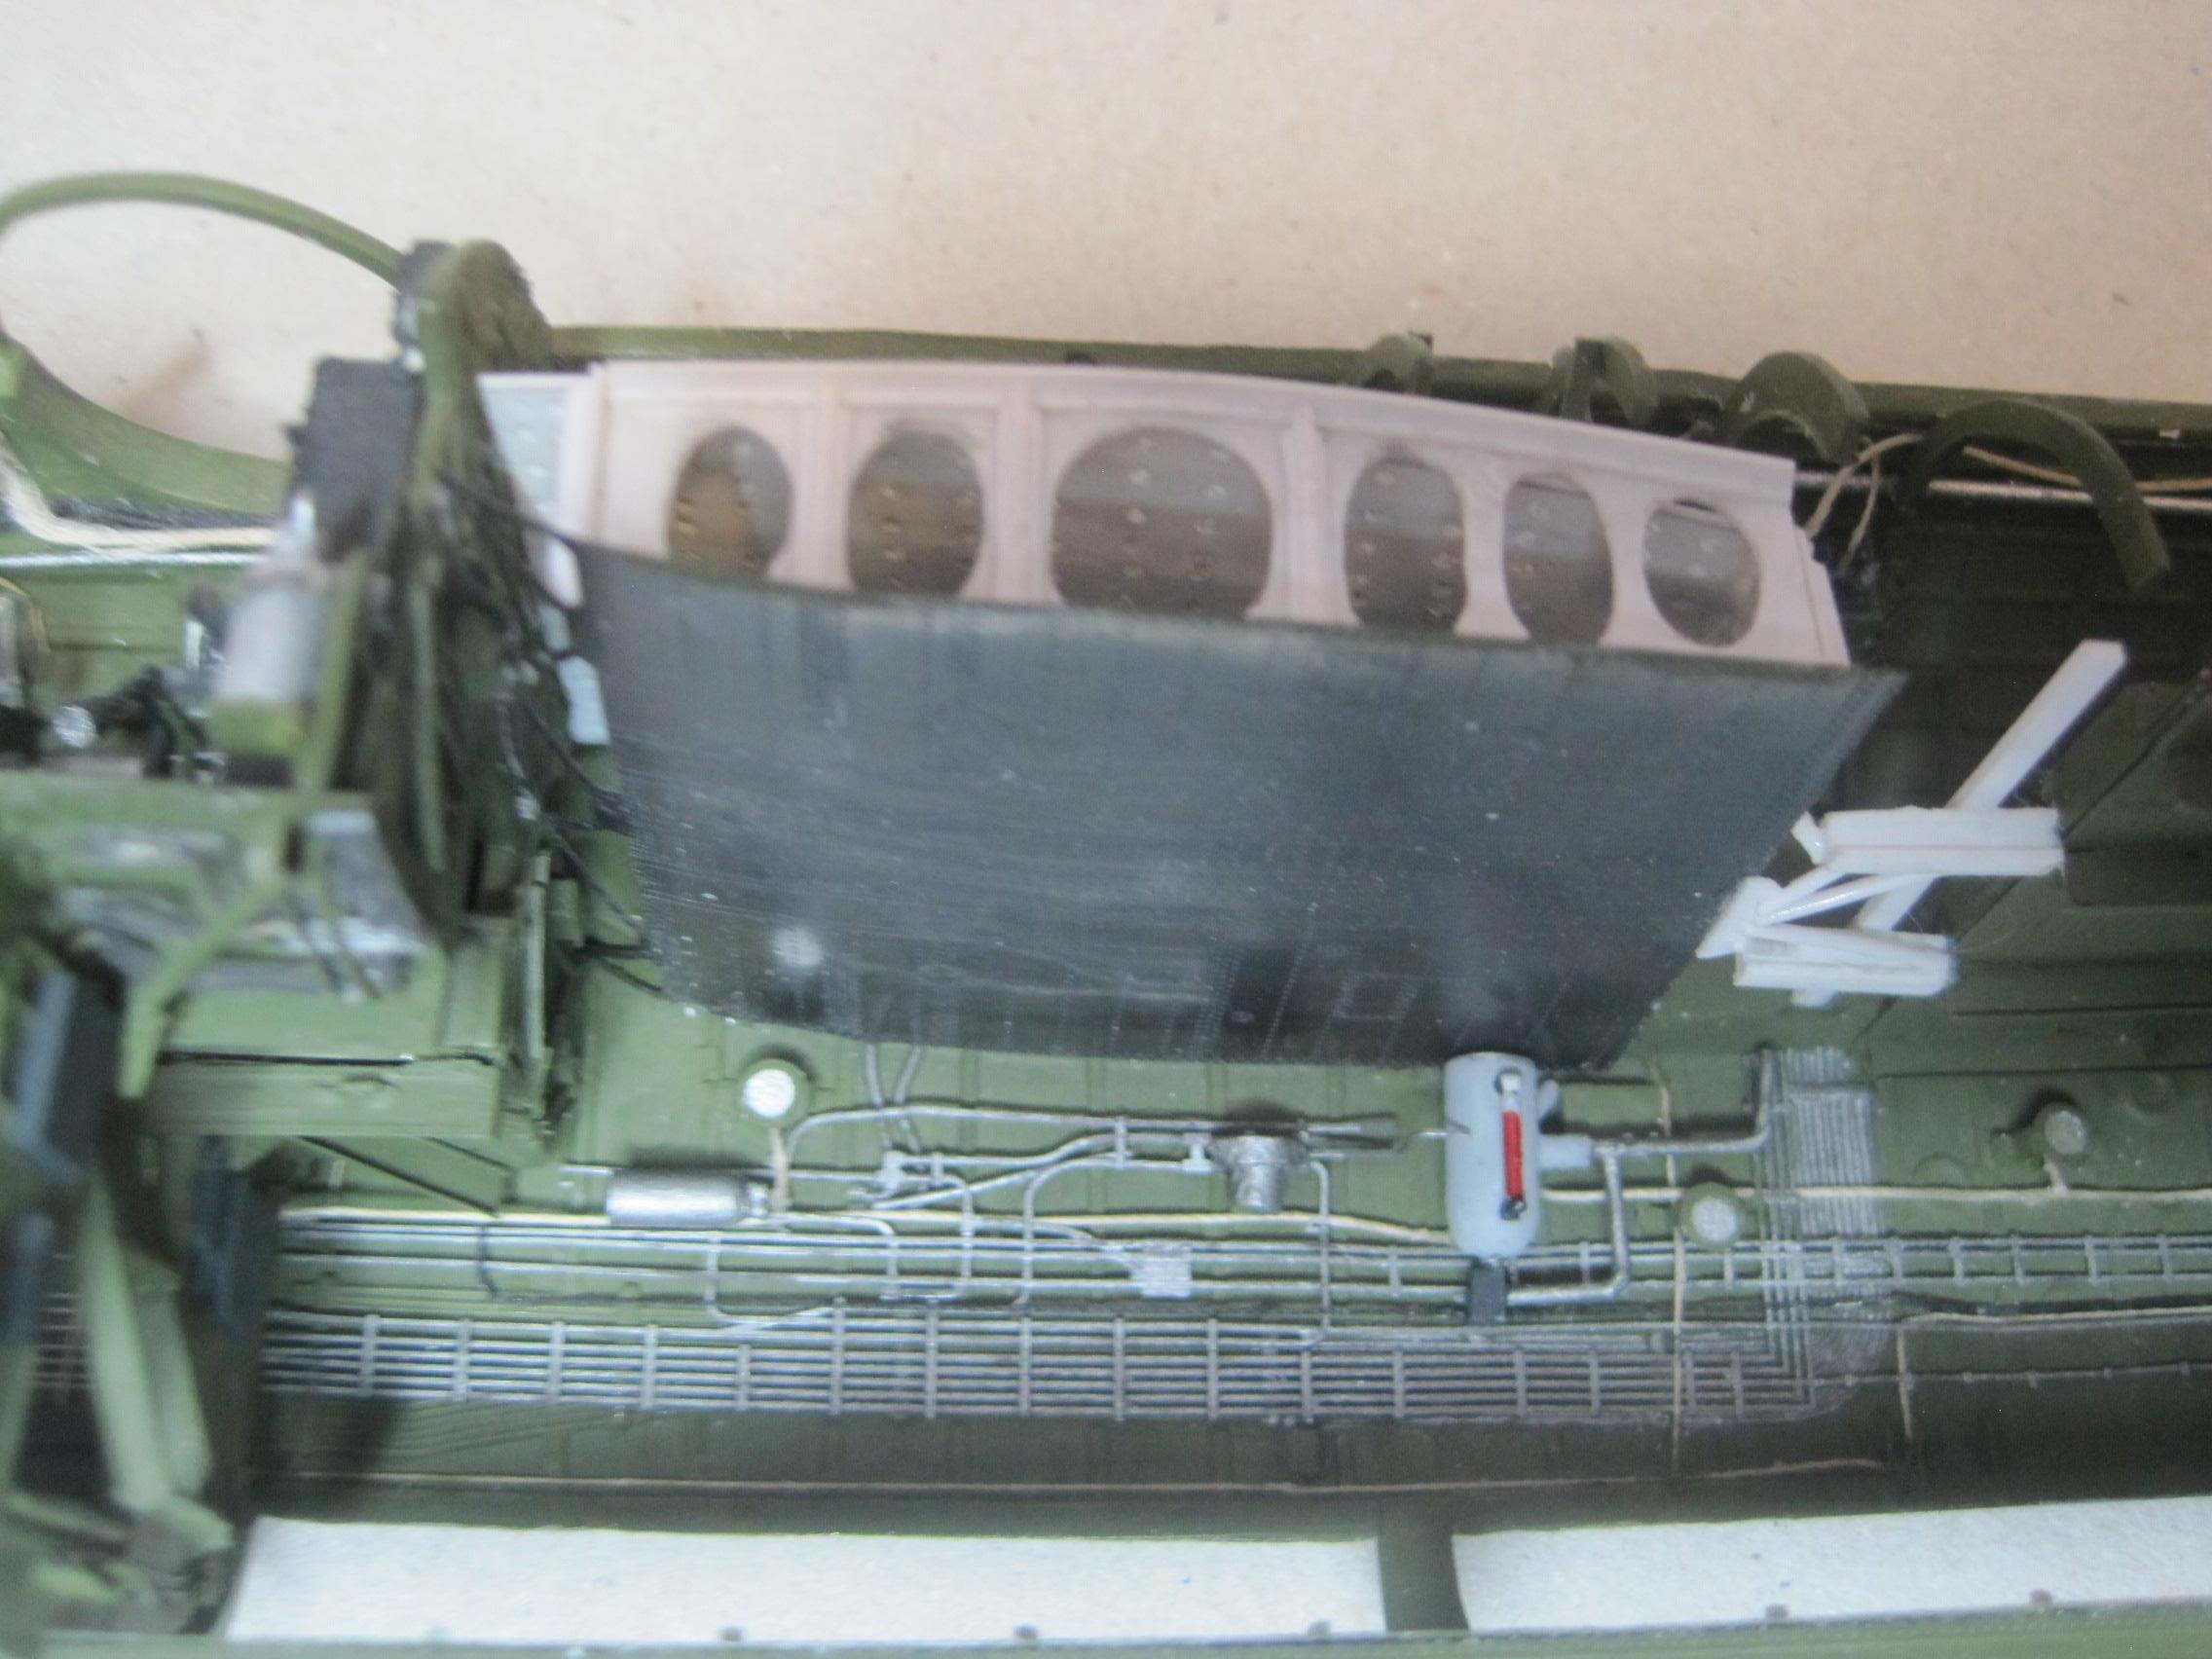
Like a lot of us I guess, sometimes you lose enthusiasm when you've been working on a project for a long time, and I put this one aside for a while. But I'm back at it and here are the latest shots. Part of the problem was trying to figure out just exactly what I wanted to do with the bomb bay section and fuel system. But I've come up with a plan I think will work.
The Yankee Air Museum, as always, has been VERY helpful in providing drawings (such as they are!) which has allowed me to figure out what and how to build. As an aside, the lead researcher at the museum told me that once they got into production of the -D model, Ford at Willow run never really totally updated the full aircraft drawing, just making adjustments to accommodate the newer parts being added as modifications.
The museum is planning an event in May to commemorate the 75th Anniversary of VE Day, and so with that as a hard deadline of completion of the model to be donated and displayed, hopefully that will provide the incentive to keep building
So here's the latest:
Redhand
#522
Joined: January 20, 2013
KitMaker: 1,460 posts
AeroScale: 1,443 posts
Posted: Saturday, January 11, 2020 - 02:56 AM UTC
Beautiful work. Are you still planning on the "full open" presentation when the model is complete?
thathaway3
Joined: September 10, 2004
KitMaker: 1,610 posts
AeroScale: 85 posts
Posted: Saturday, January 11, 2020 - 07:22 AM UTC
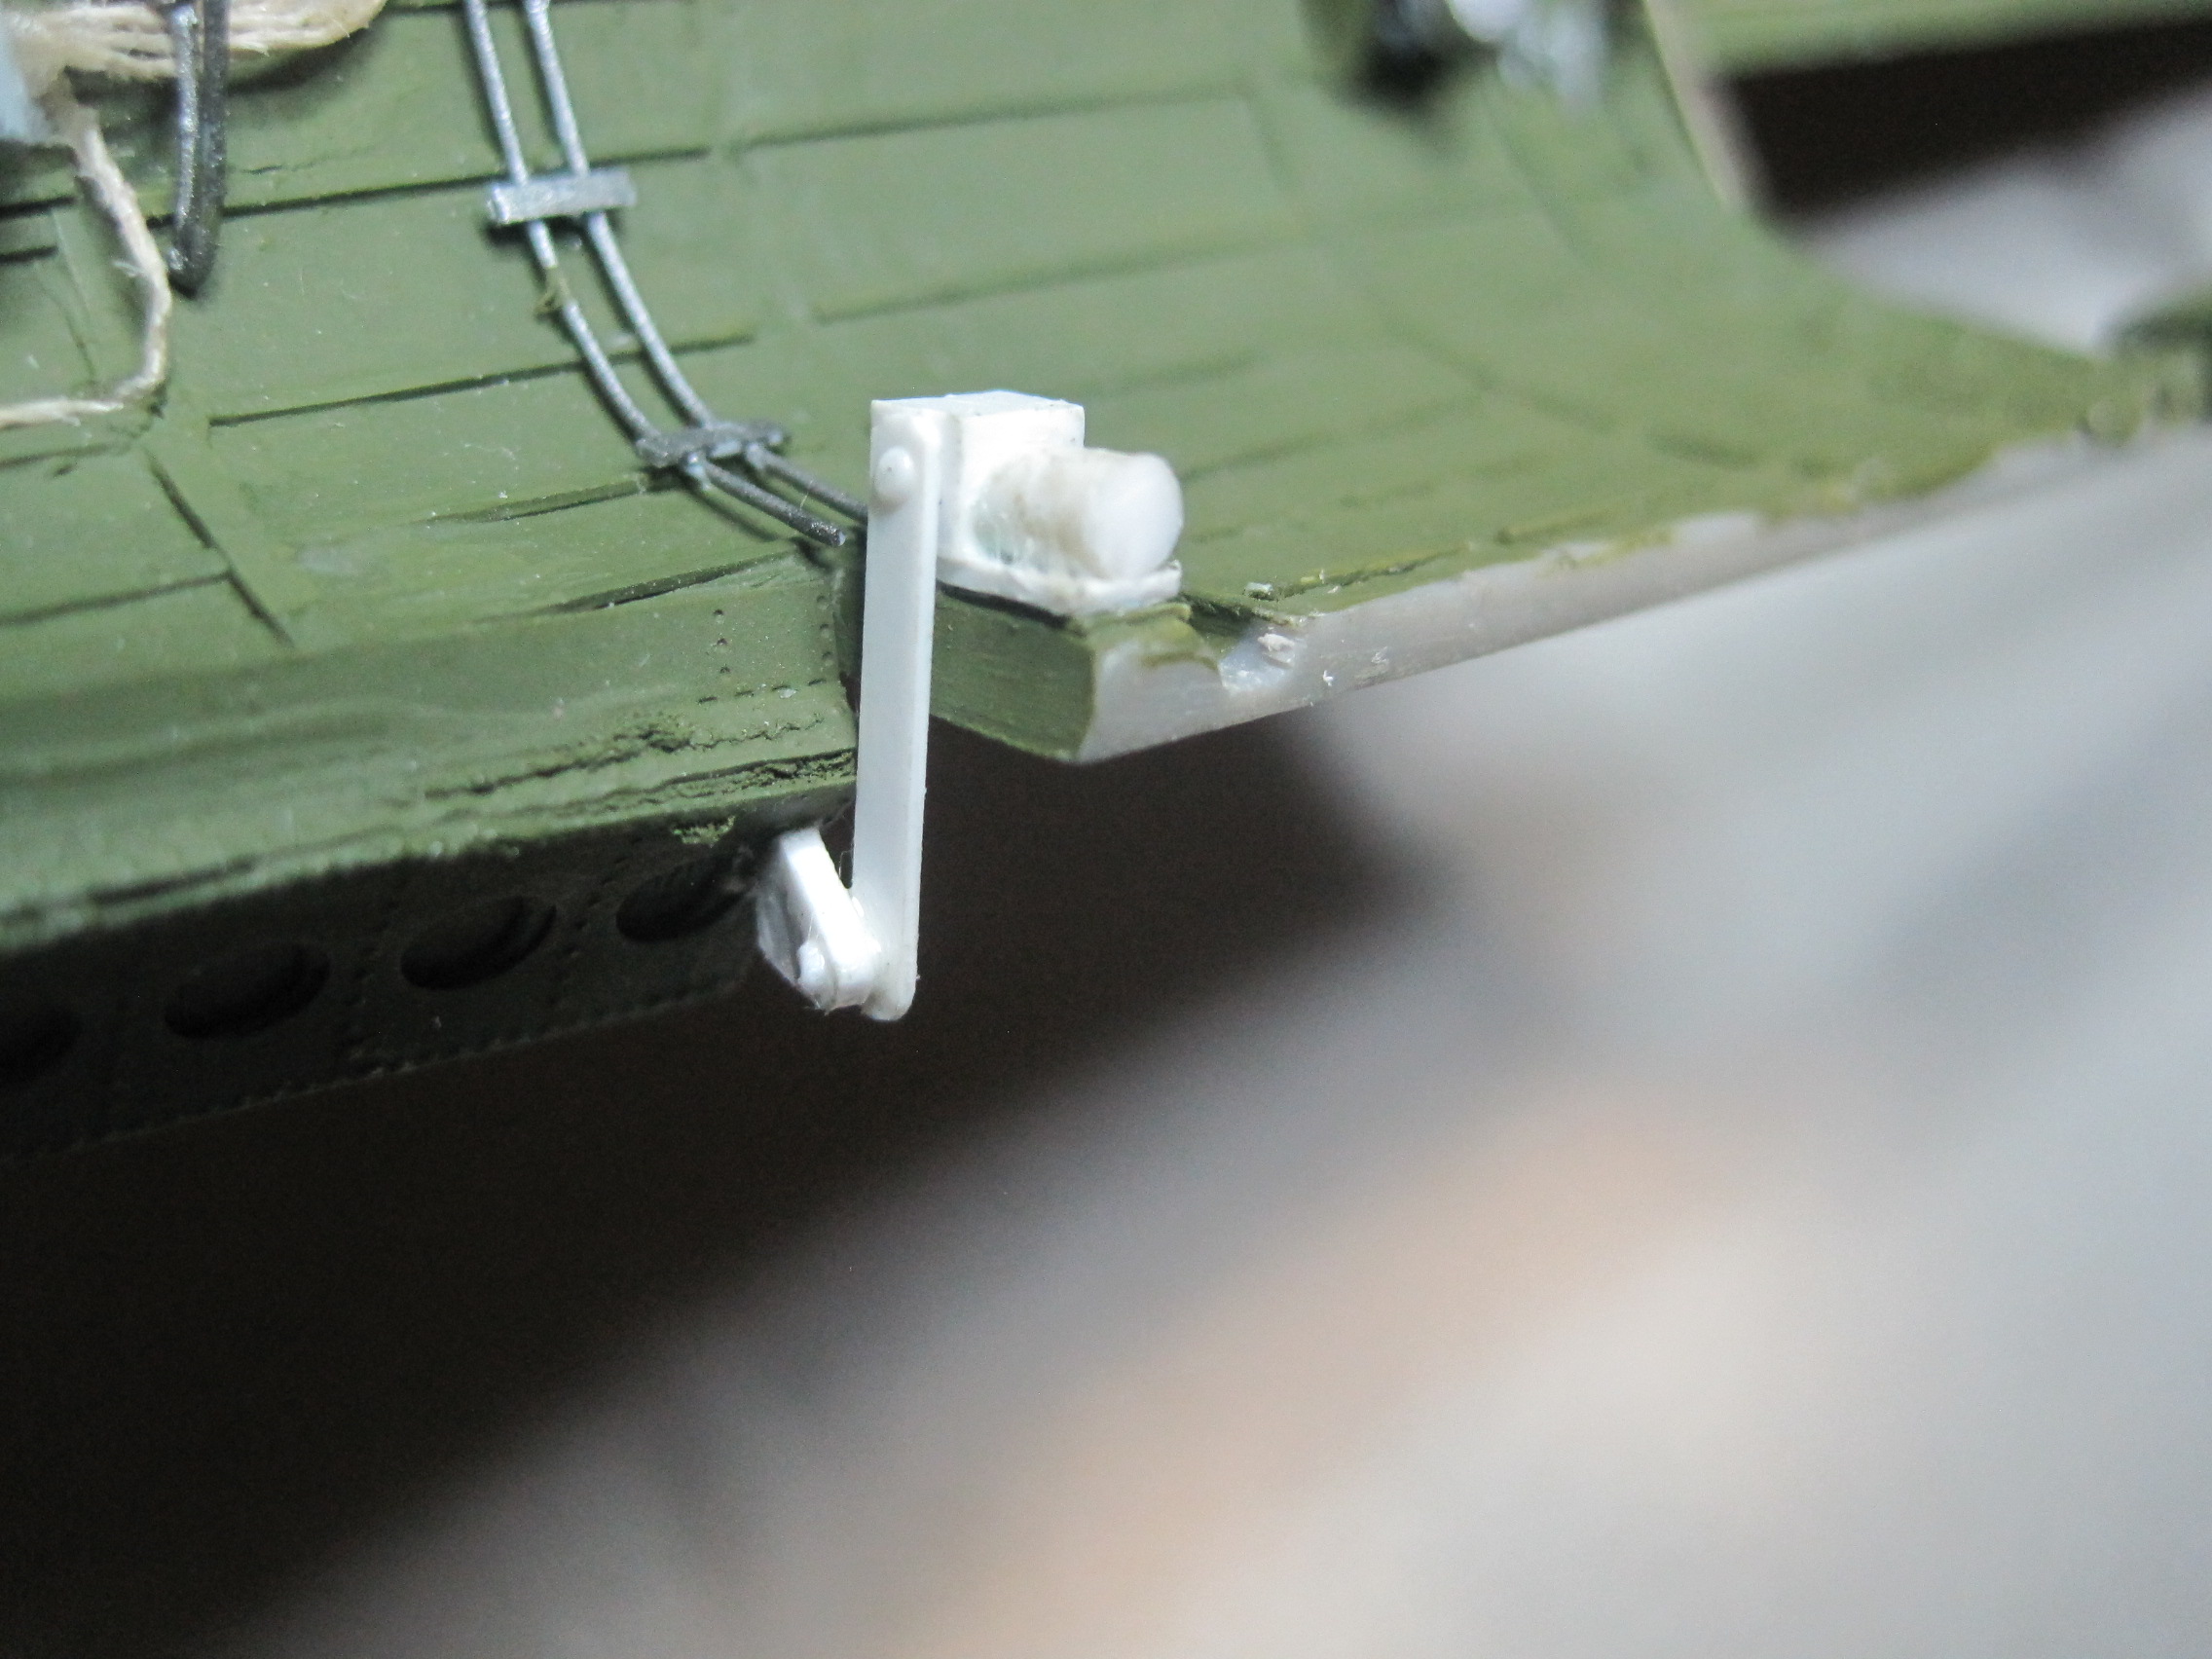
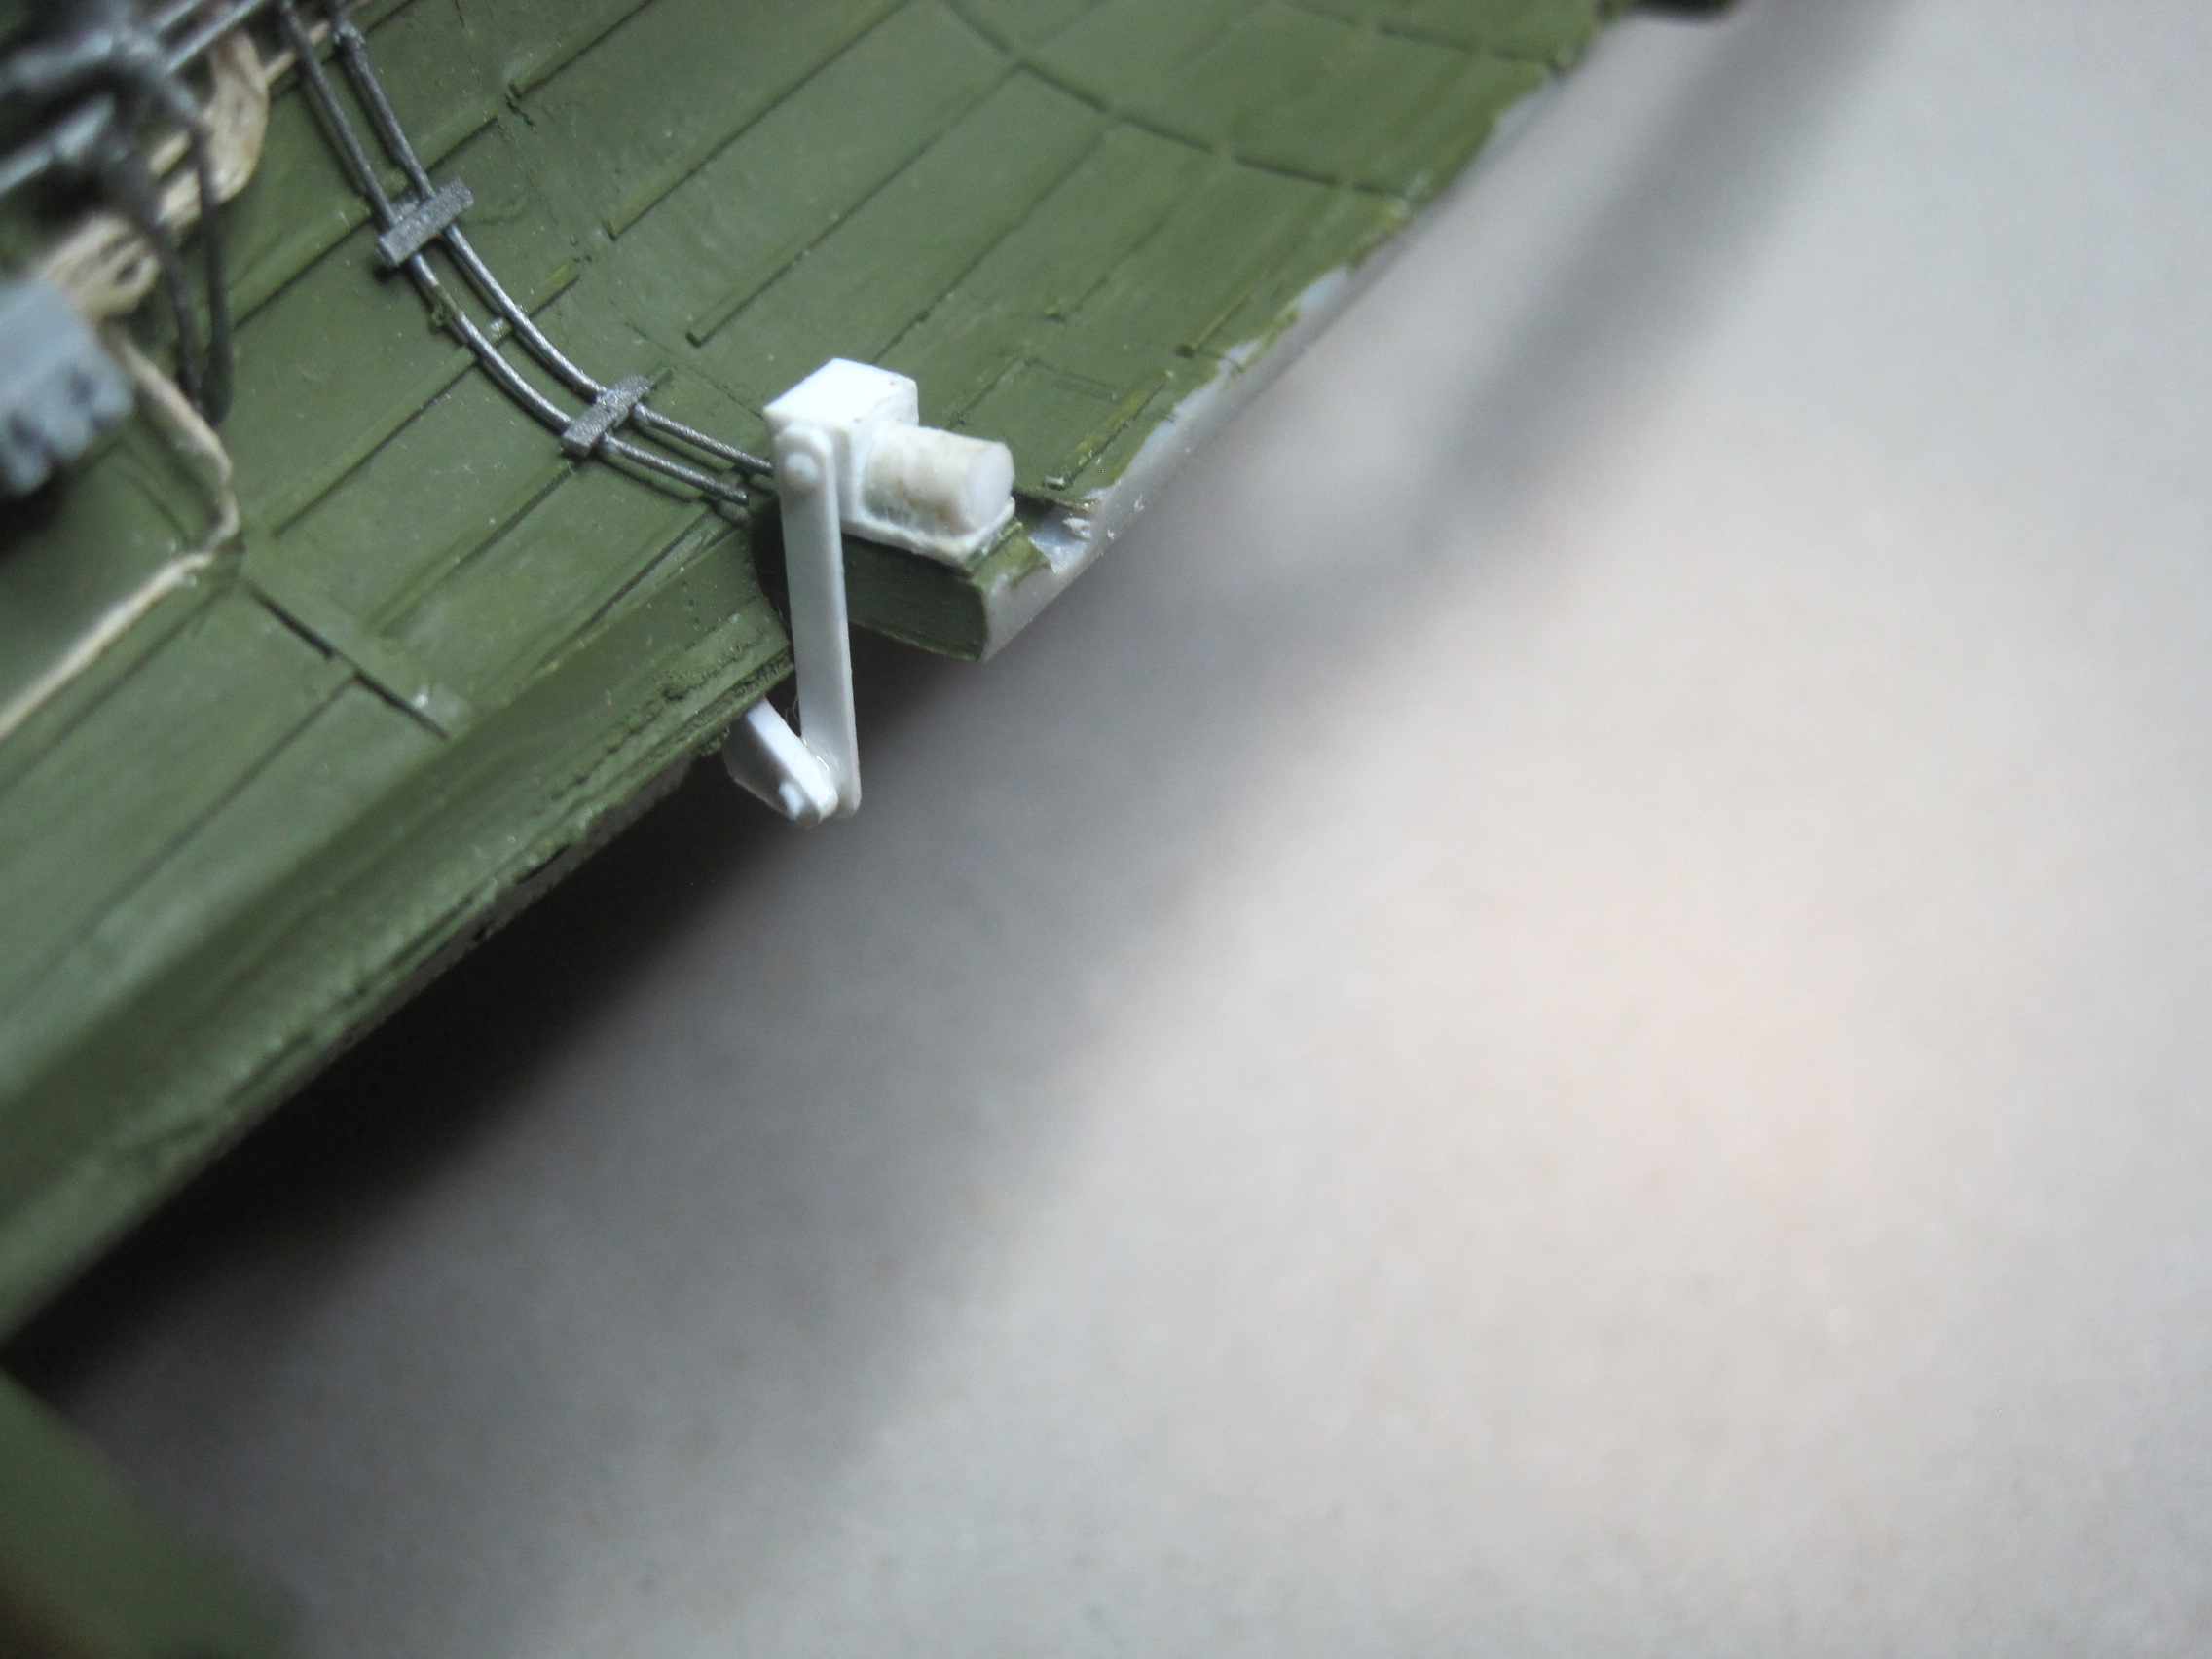
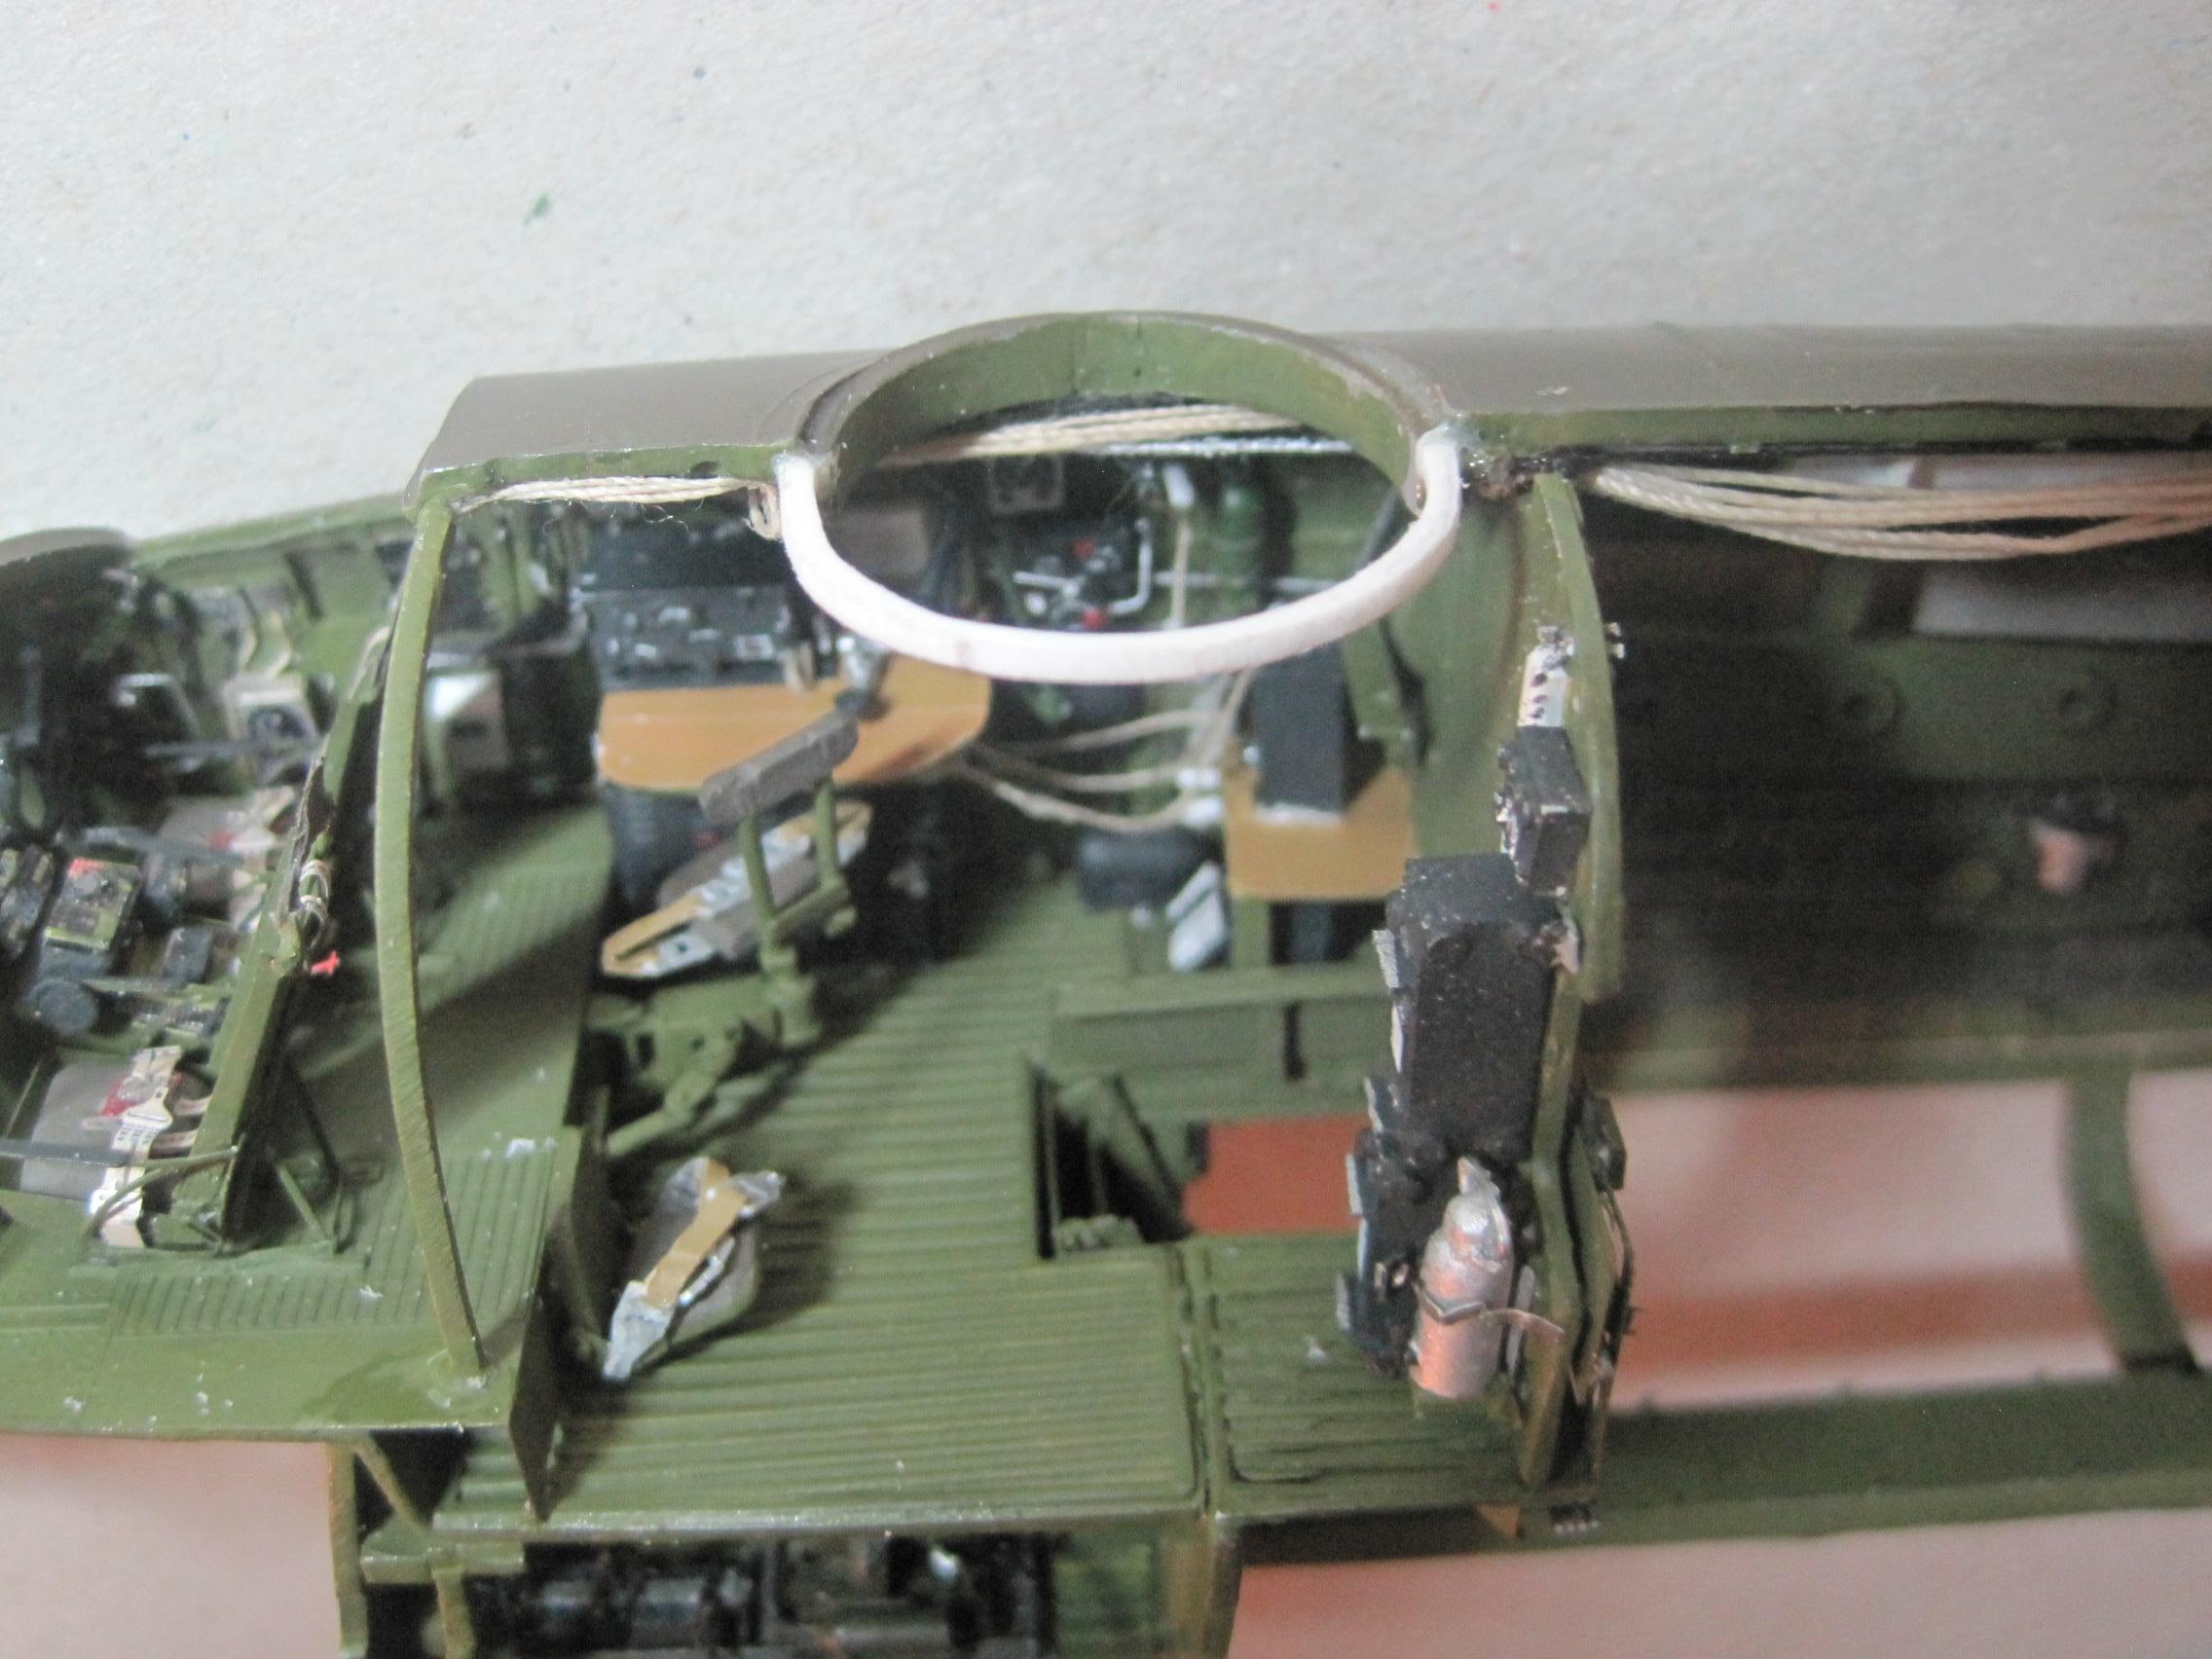
Thanks so much. Yes I am. As I've been doing additional work I've done some things that now make it no longer possible to put the two halves back together, like the rings I've made for the aircraft R/H side for the turrets to sit in.
 |

WEB HOSTING BY


Copyright ©2021 AeroScale and Kitmaker Network, a subsidiary of Silver Star Enterprises
All Rights Reserved. Please read our Conditions of Use and Privacy Policy.
All Rights Reserved. Please read our Conditions of Use and Privacy Policy.