World War II: Japan
Aircraft of Japan in WWII.
Hosted by Rowan Baylis
1/48 Hasegawa Ki 43 Hayabusa build
rdt1953
_VISITCOMMUNITY
New Jersey, United States
Joined: February 06, 2015
KitMaker: 1,098 posts
AeroScale: 900 posts
Posted: Tuesday, January 10, 2017 - 07:09 PM UTC

Quoted Text

Richard, is the interior color your mix or does Tamiya have a comparable shade?

Bob


Bob -

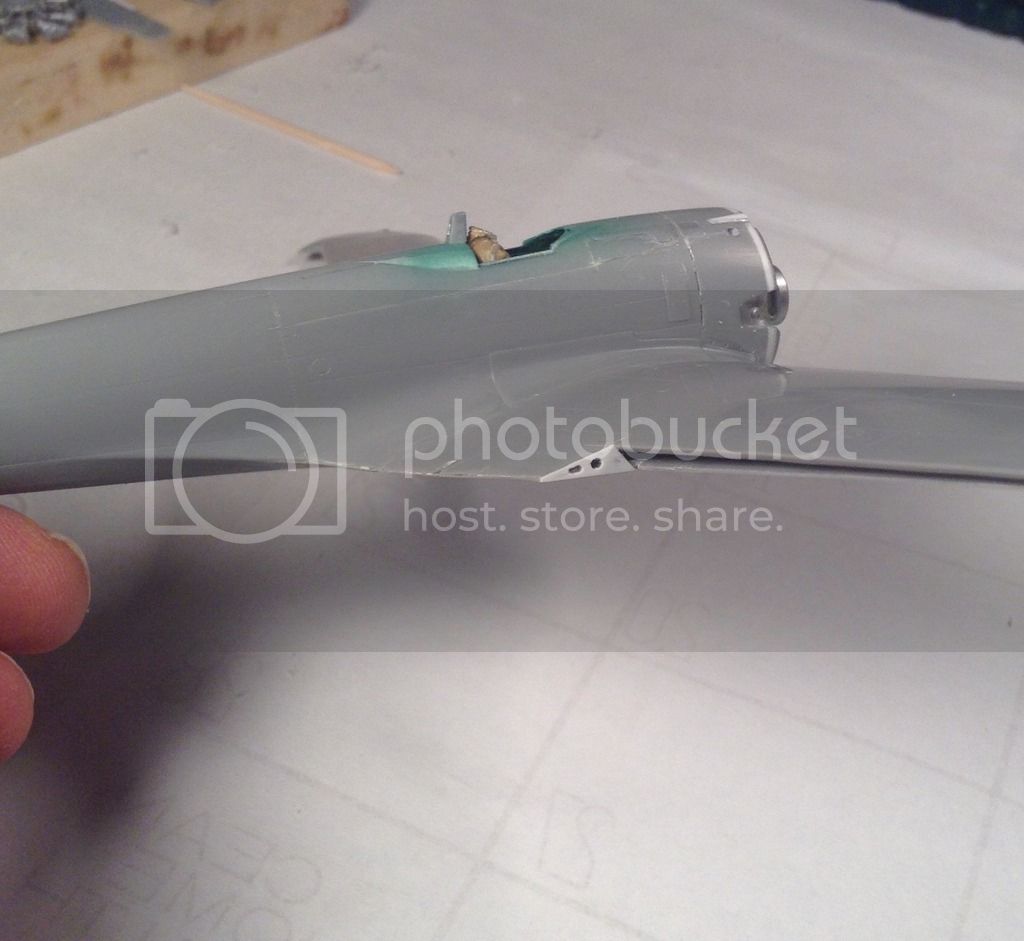
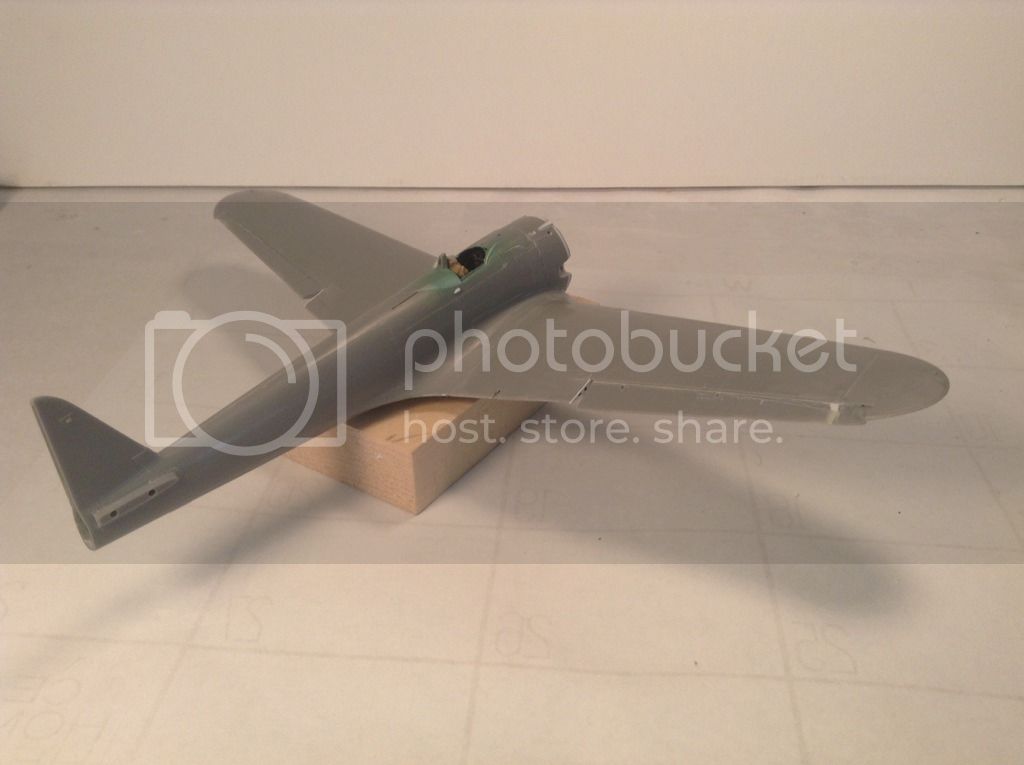
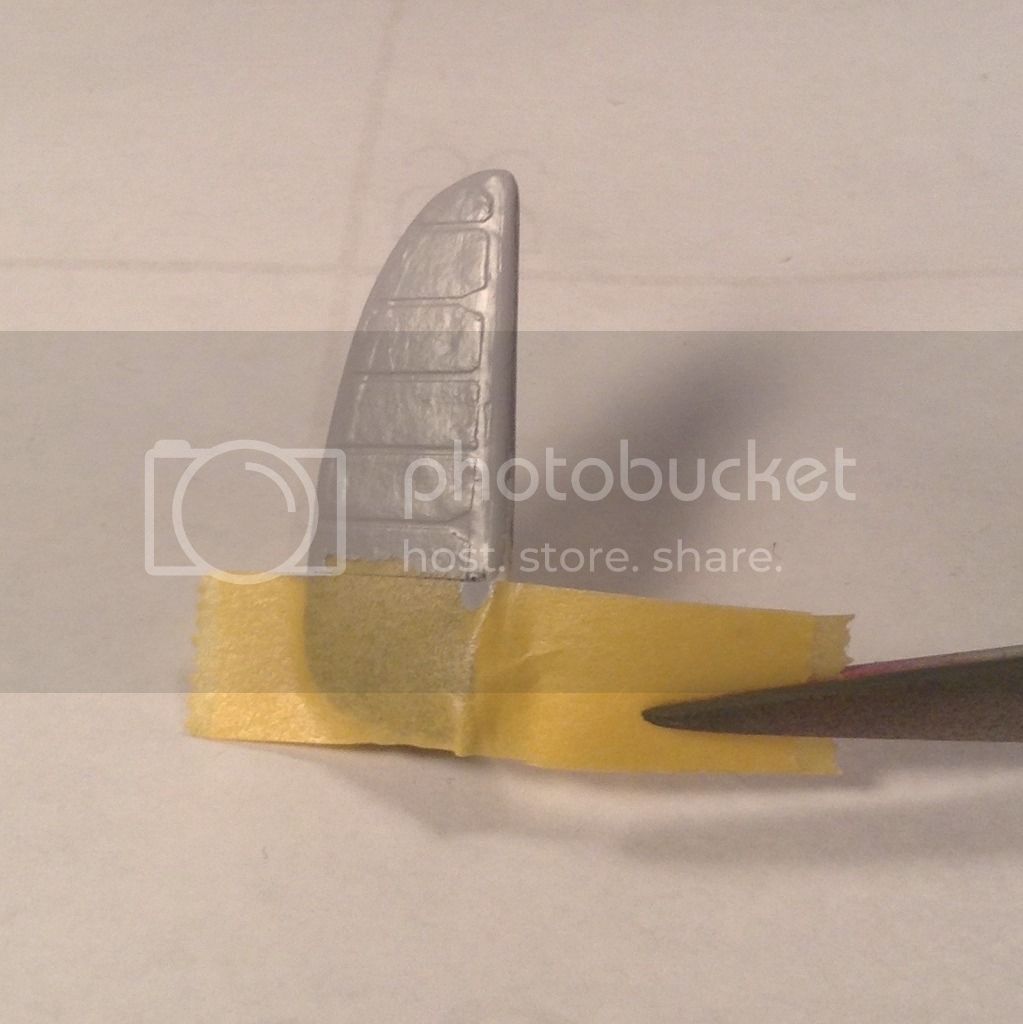
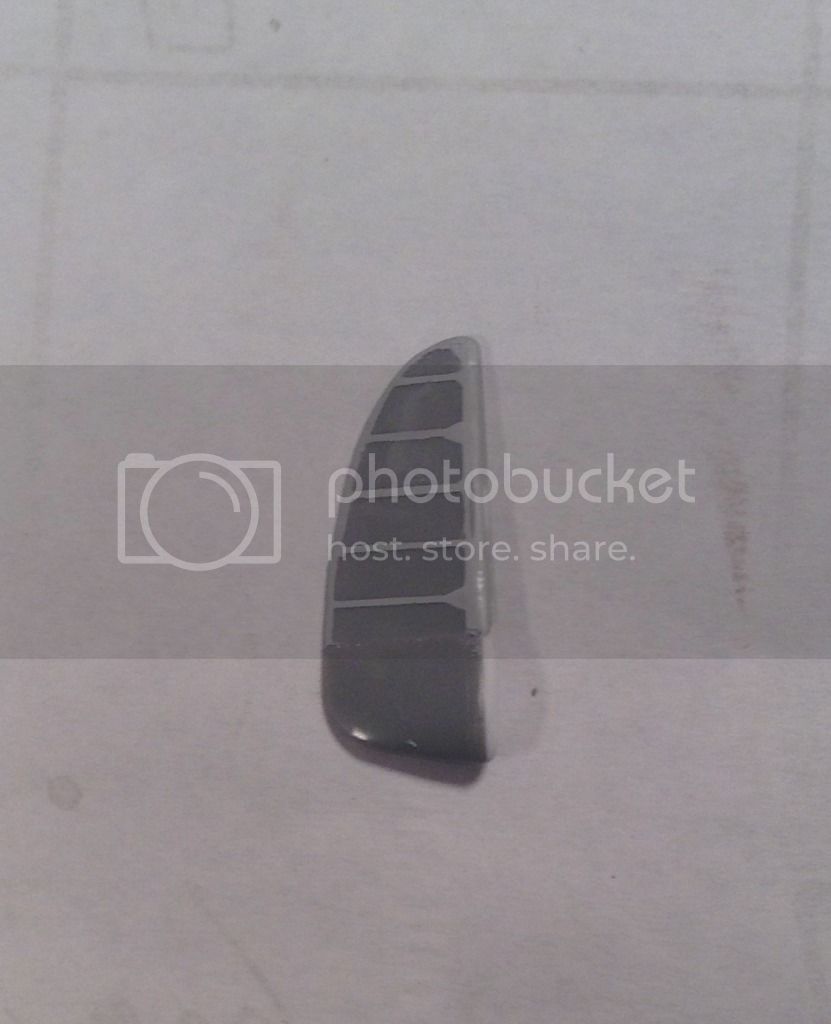
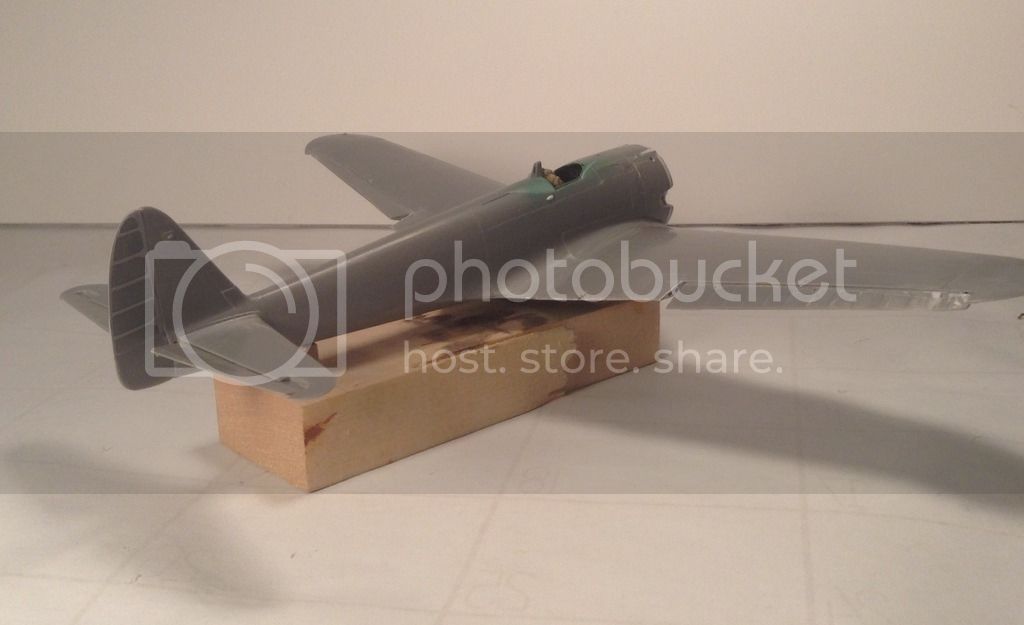
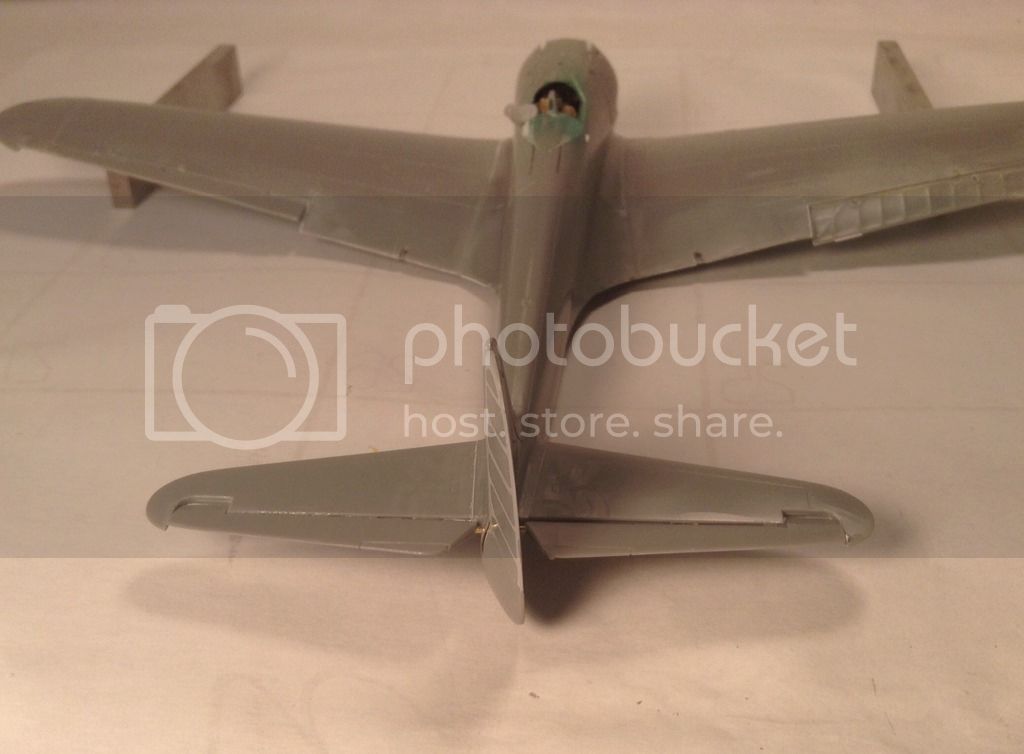
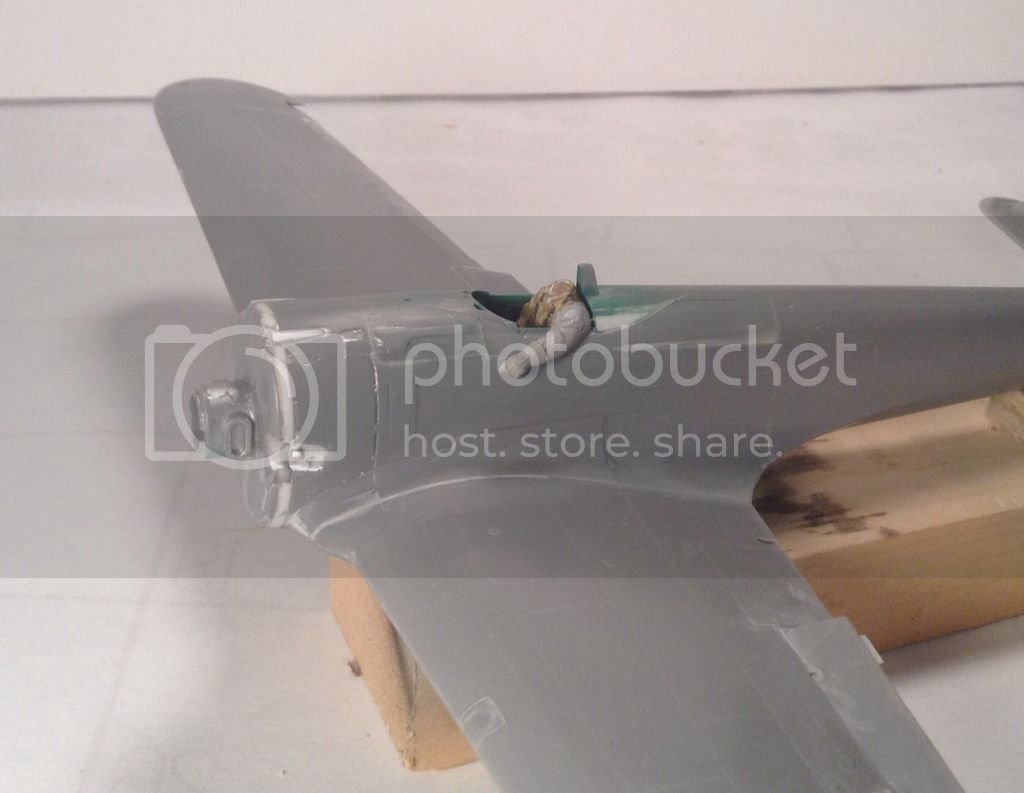
The post above ( the one with the picture of the instrument panel ) explains what I did paint wise. While the Vallejo Aotake looked right in terms of color I was unhappy with its high clear base content - it looked out of scale to me so I dusted it over with a highly thinned mix of Tamiya flats. You may want to read through the two links that Hubert nicely provided above regarding your choice of interior color- your type II Otsu certainly fits in the all Aotake interior category as the type II Otsu in the NASM collection with an original unrestored interior is all Aotake .

If you want to use Tamiya paint ( love them myself for spraying) you might first spray XF 16 Flat Aluminum cut with a few drops of Flat White . Cure overnight then dust over with a highly thinned bluish green - easy does it in many LIGHT coats until you achieve what you're after. The idea here is to give a transparent look while minimizing the metallic bit - in 1/48 scale it often looks like metal flake paint on a custom car IMHO .

I used Tamiya XF 8 Flat Blue , XF 26 Deep Green and XF 3 Flat Yellow . Pictures in " Japanese Aircraft Interiors" by Bob Mikesh show the color to be more To the greenish side. Play with the mix till you get what you want .
Hope this helps - Richard
Bigrip74
_VISITCOMMUNITY
Texas, United States
Joined: February 22, 2008
KitMaker: 5,026 posts
AeroScale: 2,811 posts
Posted: Tuesday, January 10, 2017 - 08:44 PM UTC
Richard, sorry that I did not completely read your prior posts it would have cleared up everything. Thanks for the tips.

Bob
rdt1953
_VISITCOMMUNITY
New Jersey, United States
Joined: February 06, 2015
KitMaker: 1,098 posts
AeroScale: 900 posts
Posted: Tuesday, January 10, 2017 - 10:10 PM UTC

Quoted Text

Richard, sorry that I did not completely read your prior posts it would have cleared up everything. Thanks for the tips.

Bob


No worries - my pleasure - Richard
Joel_W
Staff MemberAssociate Editor
AUTOMODELER
_VISITCOMMUNITY
New York, United States
Joined: December 04, 2010
KitMaker: 11,666 posts
AeroScale: 7,410 posts
Posted: Tuesday, January 10, 2017 - 11:13 PM UTC
Richard,
With the fit of the wings, which looks like you needed to do quite a lot of work, but the end result is near perfection. those Flaps fit perfectly. I'm more then impressed.

What did you use for a filler? Squadron White Stuff?

Joel
rdt1953
_VISITCOMMUNITY
New Jersey, United States
Joined: February 06, 2015
KitMaker: 1,098 posts
AeroScale: 900 posts
Posted: Wednesday, January 11, 2017 - 12:21 AM UTC

Quoted Text

Richard,
With the fit of the wings, which looks like you needed to do quite a lot of work, but the end result is near perfection. those Flaps fit perfectly. I'm more then impressed.

What did you use for a filler? Squadron White Stuff?

Joel


Joel-

The upper port wing needed plastic shim at the root from the leading edge aft to the knuckle where the joint turns more parallel to the fuselage. Elsewhere I used Gunze Mr White Putty which is probably similar to Squadron White . Seems to be Laquer or toulolene based. Final touch up with Tamiya surfacer brushed on. All wet
block sanded in between progressively starting with 600 when necessary down to 2000. For final polishing where needed I've lately been using Blue Magic Metal polish . I cut squares out of white cotton tees and spread a dab on the square and let it dry before using - this seems to let the solvents evaporate so it is more plastic friendly. I also now hit the finished white putty areas that need scribing with a swipe of thin CA. This seems to help with the crumbling a bit.

Thanks for looking in - Richard
Joel_W
Staff MemberAssociate Editor
AUTOMODELER
_VISITCOMMUNITY
New York, United States
Joined: December 04, 2010
KitMaker: 11,666 posts
AeroScale: 7,410 posts
Posted: Wednesday, January 11, 2017 - 01:03 AM UTC

Quoted Text


Quoted Text

Richard,
With the fit of the wings, which looks like you needed to do quite a lot of work, but the end result is near perfection. those Flaps fit perfectly. I'm more then impressed.

What did you use for a filler? Squadron White Stuff?

Joel


Joel-

The upper port wing needed plastic shim at the root from the leading edge aft to the knuckle where the joint turns more parallel to the fuselage. Elsewhere I used Gunze Mr White Putty which is probably similar to Squadron White . Seems to be Laquer or toulolene based. Final touch up with Tamiya surfacer brushed on. All wet
block sanded in between progressively starting with 600 when necessary down to 2000. For final polishing where needed I've lately been using Blue Magic Metal polish . I cut squares out of white cotton tees and spread a dab on the square and let it dry before using - this seems to let the solvents evaporate so it is more plastic friendly. I also now hit the finished white putty areas that need scribing with a swipe of thin CA. This seems to help with the crumbling a bit.

Thanks for looking in - Richard


Richard,
Thanks for the info.

I just applied a somewhat thick layer of hand brushed Tamiya gray primer sealer to the wheel wells, and for a change I was pleasantly surprised.

Joel


rdt1953
_VISITCOMMUNITY
New Jersey, United States
Joined: February 06, 2015
KitMaker: 1,098 posts
AeroScale: 900 posts
Posted: Saturday, January 14, 2017 - 09:30 PM UTC
I've been working on the ailerons -

Pieces of .010" styrene added to represent exposed frames -


Leading edges of ailerons built up with plastic , shaped , filled and sanded etc. -


Ailerons glued in place , small blister below canopy that was lost in sanding as well as tiny pip for antenna wire have been remade -


Engine work is stalled while awaiting 30 ga. wire for ignition harness.

Thanks for looking ! Richard
Bigrip74
_VISITCOMMUNITY
Texas, United States
Joined: February 22, 2008
KitMaker: 5,026 posts
AeroScale: 2,811 posts
Posted: Saturday, January 14, 2017 - 09:40 PM UTC
Richard, beautiful work, Love the attention to detail. I would need another magnification on my hood and smaller hands to even try to modify or add detail. Keep up the work and posts I am learning much.

Bob
rdt1953
_VISITCOMMUNITY
New Jersey, United States
Joined: February 06, 2015
KitMaker: 1,098 posts
AeroScale: 900 posts
Posted: Sunday, January 15, 2017 - 03:18 AM UTC

Quoted Text

Richard, beautiful work, Love the attention to detail. I would need another magnification on my hood and smaller hands to even try to modify or add detail. Keep up the work and posts I am learning much.

Bob


Thanks Bob - Watching your build as well - Richard
rdt1953
_VISITCOMMUNITY
New Jersey, United States
Joined: February 06, 2015
KitMaker: 1,098 posts
AeroScale: 900 posts
Posted: Sunday, January 15, 2017 - 03:29 AM UTC
Another short update -

Started getting the tail feathers together-

Elevators drilled out for .032" brass spar/shaft -


Fuselage drilled for elevator spar/shaft as parts of it can be seen between inboard ends of elevators and fuselage -


Horizontal stabs glued up to fuselage on glass plate w/ machinists blocks to keep all true-


Thanks for looking -as always all input welcome - Richard
Bigrip74
_VISITCOMMUNITY
Texas, United States
Joined: February 22, 2008
KitMaker: 5,026 posts
AeroScale: 2,811 posts
Posted: Sunday, January 15, 2017 - 09:06 AM UTC
Richard I have been making comparisons between the Hasegawa and Otaki kits:

H: wing roots seem to fit better than the O:
The tail and stabs look close, but the O: wing is much thicker and the LG well is really shallow.

But over all so far the O: is not bad for the price except for the canopy.

The H: would be a more pleasant build and you've shown a better base for modifying.

Your elevator modification almost makes me want to try on a future build.

Bob

Joel_W
Staff MemberAssociate Editor
AUTOMODELER
_VISITCOMMUNITY
New York, United States
Joined: December 04, 2010
KitMaker: 11,666 posts
AeroScale: 7,410 posts
Posted: Monday, January 16, 2017 - 01:30 AM UTC
Richard,
you're making excellent progress.

I've always glued a block of Evergreen strip to the front of the flying surface, then slowly sanded them to fit the concave surface I created on the wing portion. it takes a to of work to accomplish. Your method of just adding sheet plastic where needed is a no brainer. Seems to be a way better solution. I'll have to try it the next time I want to reposition the flying surfaces.

I really like how you added those mini spares to the wings in order to create the effect of an interior. Looks great.

last but not least, your method of equalizing all the flying surfaces to the same plane puts my ad hoc methods to shame.

Joel

rdt1953
_VISITCOMMUNITY
New Jersey, United States
Joined: February 06, 2015
KitMaker: 1,098 posts
AeroScale: 900 posts
Posted: Monday, January 16, 2017 - 05:04 AM UTC

Quoted Text

Richard I have been making comparisons between the Hasegawa and Otaki kits:

H: wing roots seem to fit better than the O:
The tail and stabs look close, but the O: wing is much thicker and the LG well is really shallow.

But over all so far the O: is not bad for the price except for the canopy.

The H: would be a more pleasant build and you've shown a better base for modifying.

Your elevator modification almost makes me want to try on a future build.

Bob


Bob -
Thanks for the comparison- I assume the Arii and Otaki kits are one and the same and while I am not certain I thought the Nichimo kit was a different mold but maybe not - perhaps someone out there would care to weigh in on this ?

The Hasegawa kit was not without its own wing to fuselage fit issues - perhaps unfair to judge by my effort given the fuselage was warped to start and possibly compounded by the modifications.
As to trying out the control surface mods - Go for it ! It's all part of the fun !
Happy modeling- Richard
rdt1953
_VISITCOMMUNITY
New Jersey, United States
Joined: February 06, 2015
KitMaker: 1,098 posts
AeroScale: 900 posts
Posted: Monday, January 16, 2017 - 05:16 AM UTC

Quoted Text

Richard,
you're making excellent progress.

I've always glued a block of Evergreen strip to the front of the flying surface, then slowly sanded them to fit the concave surface I created on the wing portion. it takes a to of work to accomplish. Your method of just adding sheet plastic where needed is a no brainer. Seems to be a way better solution. I'll have to try it the next time I want to reposition the flying surfaces.

I really like how you added those mini spares to the wings in order to create the effect of an interior. Looks great.

last but not least, your method of equalizing all the flying surfaces to the same plane puts my ad hoc methods to shame.

Joel


Joel-
I've done control surfaces the same way you described- in fact the rudder on this build was done that way . The elevators were solid and one piece so I cut halfway through from each side in a "v" fashion to create a v notch along the traililing edge of the stabs and a v shaped leading edge on the elevators which I simply rounded off. The ailerons presented problems in that they are longer chordwise on their bottom surface than the top so "faking " the leading edges presented less problems in posing them in their deflected positions.
Thanks for looking in - Richard
Joel_W
Staff MemberAssociate Editor
AUTOMODELER
_VISITCOMMUNITY
New York, United States
Joined: December 04, 2010
KitMaker: 11,666 posts
AeroScale: 7,410 posts
Posted: Monday, January 16, 2017 - 08:44 PM UTC

Quoted Text


Quoted Text

Richard,
you're making excellent progress.

I've always glued a block of Evergreen strip to the front of the flying surface, then slowly sanded them to fit the concave surface I created on the wing portion. it takes a to of work to accomplish. Your method of just adding sheet plastic where needed is a no brainer. Seems to be a way better solution. I'll have to try it the next time I want to reposition the flying surfaces.

I really like how you added those mini spares to the wings in order to create the effect of an interior. Looks great.

last but not least, your method of equalizing all the flying surfaces to the same plane puts my ad hoc methods to shame.

Joel


Joel-
I've done control surfaces the same way you described- in fact the rudder on this build was done that way . The elevators were solid and one piece so I cut halfway through from each side in a "v" fashion to create a v notch along the traililing edge of the stabs and a v shaped leading edge on the elevators which I simply rounded off. The ailerons presented problems in that they are longer chordwise on their bottom surface than the top so "faking " the leading edges presented less problems in posing them in their deflected positions.
Thanks for looking in - Richard


Richard,
I've never tried that V shaped cut. But I can see it as a real time saver. going to try it at the next opportunity.

Joel
rdt1953
_VISITCOMMUNITY
New Jersey, United States
Joined: February 06, 2015
KitMaker: 1,098 posts
AeroScale: 900 posts
Posted: Wednesday, January 18, 2017 - 12:52 AM UTC
More work on the tail -

I replaced the rib tape detail that was lost when thinning the trailing edge of the rudder by masking and painting with Tamiya surfacer. After unmasking the paint was wet sanded to make it barely there -


Elevators and rudder cemented in place -


And our pilot now has a left arm !


This makes the fuselage and cowl nearly ready for primer but I'm going to hold off until the engine is complete to minimize handling.

Thanks for looking ! Richard
thegirl
_VISITCOMMUNITY
Alberta, Canada
Joined: January 19, 2008
KitMaker: 6,743 posts
AeroScale: 6,151 posts
Posted: Wednesday, January 18, 2017 - 05:54 AM UTC
The devil is in the details ! Wonderful work


Terri
Joel_W
Staff MemberAssociate Editor
AUTOMODELER
_VISITCOMMUNITY
New York, United States
Joined: December 04, 2010
KitMaker: 11,666 posts
AeroScale: 7,410 posts
Posted: Wednesday, January 18, 2017 - 06:20 AM UTC
Richard,
The added details on the Rudder is certainly impressive. Very well done.

Joel
Bigrip74
_VISITCOMMUNITY
Texas, United States
Joined: February 22, 2008
KitMaker: 5,026 posts
AeroScale: 2,811 posts
Posted: Wednesday, January 18, 2017 - 08:42 AM UTC
DITTO what Joel stated, the rudder is IMPRESSIVE. Cannot wait to see a head on the pilot.
rdt1953
_VISITCOMMUNITY
New Jersey, United States
Joined: February 06, 2015
KitMaker: 1,098 posts
AeroScale: 900 posts
Posted: Thursday, January 19, 2017 - 06:53 AM UTC
Terri , Joel & Bob -

Thanks everyone!

I'm afraid our pilot is going to have a bit of a wait for his noggin!

Happy modeling - Richard
berndm
_VISITCOMMUNITY
Niedersachsen, Germany
Joined: March 26, 2014
KitMaker: 844 posts
AeroScale: 630 posts
Posted: Saturday, January 21, 2017 - 01:37 PM UTC
Amazing work which reveals your modelling skills.
rdt1953
_VISITCOMMUNITY
New Jersey, United States
Joined: February 06, 2015
KitMaker: 1,098 posts
AeroScale: 900 posts
Posted: Saturday, January 21, 2017 - 10:35 PM UTC

Quoted Text

Amazing work which reveals your modelling skills.


Bernd - Danke !

Richard
rdt1953
_VISITCOMMUNITY
New Jersey, United States
Joined: February 06, 2015
KitMaker: 1,098 posts
AeroScale: 900 posts
Posted: Tuesday, January 24, 2017 - 05:38 PM UTC
I've been exploring canopy options -

The kit canopy is very nice- reasonably thin and sharp frame detail.
The main drawback is the windscreen has an open notch at the bottom so that it can be dropped over the telescopic sight while the real aircraft has a hole that the sight inserts through.

I purchased two different vac canopy sets . The first is the Squadron offering made for them by Falcon. This is actually made for the Nichimo kit but it seems to fit the Hasegawa Oscar without any issues. It is very thin and while the detail is slightly soft the problem is it too has an elongated blister that must be cut away for the sight.

The second set is by Rob Taurus and it is made for the Hasegawa kit.
It is thinner than the injection canopy but slightly thicker than the Squadron set. The frame is nearly as crisp as on the injection parts and actually includes more detail. Most importantly it has a location marked on the windscreen for drilling a hole for the sight.

Here is the line up -


and the kit canopy -


the Squadron unit -


and the Rob Taurus version -


This is my first experience with vac canopies so I am inching forward but have not made up my mind yet - thanks are in order to Jessica and Joel and others for the very helpful advice.

I would value any other opinions from the readership as to which way to go .

Thanks for looking in ! Richard
Joel_W
Staff MemberAssociate Editor
AUTOMODELER
_VISITCOMMUNITY
New York, United States
Joined: December 04, 2010
KitMaker: 11,666 posts
AeroScale: 7,410 posts
Posted: Wednesday, January 25, 2017 - 12:45 AM UTC
Richard,
I've used the Squadron Falcon canopies from time to time and as you've seen, they're on the soft side. The Rob Taurus vac canopy looks absolutely perfect.

Joel
thegirl
_VISITCOMMUNITY
Alberta, Canada
Joined: January 19, 2008
KitMaker: 6,743 posts
AeroScale: 6,151 posts
Posted: Wednesday, January 25, 2017 - 06:27 AM UTC
I just started getting the Rob Taurus canopies . And the are far better then what squadron has . Looking forward on seeing this turns out .


Terri