

Early Aviation
Discuss World War I and the early years of aviation thru 1934.
Discuss World War I and the early years of aviation thru 1934.
Hosted by Jim Starkweather
Fokker E.IV - WNW 1/32

JackFlash

Joined: January 25, 2004
KitMaker: 11,669 posts
AeroScale: 11,011 posts
Posted: Friday, January 13, 2017 - 07:53 PM UTC
Very cool!

Mgunns
Joined: December 12, 2008
KitMaker: 1,423 posts
AeroScale: 1,319 posts

Posted: Thursday, January 19, 2017 - 07:32 AM UTC
The engine is a work of art as is the wing. This will certainly make an interesting set piece.

Scrodes

Joined: July 22, 2012
KitMaker: 771 posts
AeroScale: 763 posts
Posted: Thursday, January 19, 2017 - 11:43 PM UTC
Absolutely beautiful work!

Xirrcom

Joined: February 18, 2016
KitMaker: 92 posts
AeroScale: 90 posts
Posted: Friday, January 20, 2017 - 07:02 PM UTC
Hi,
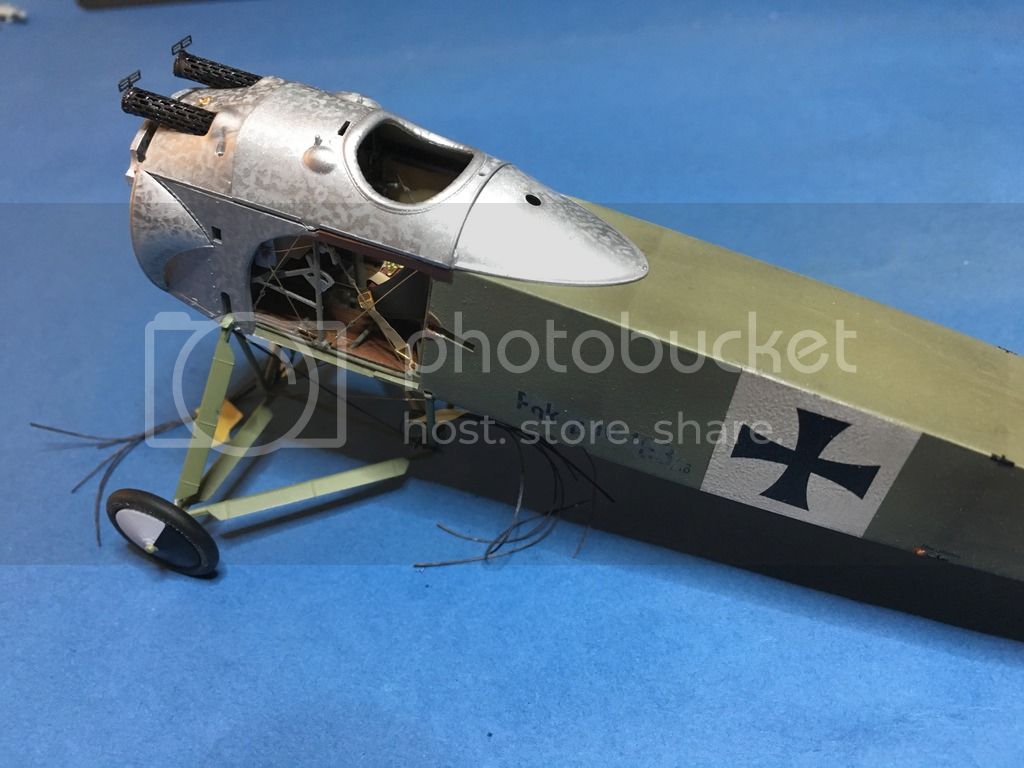
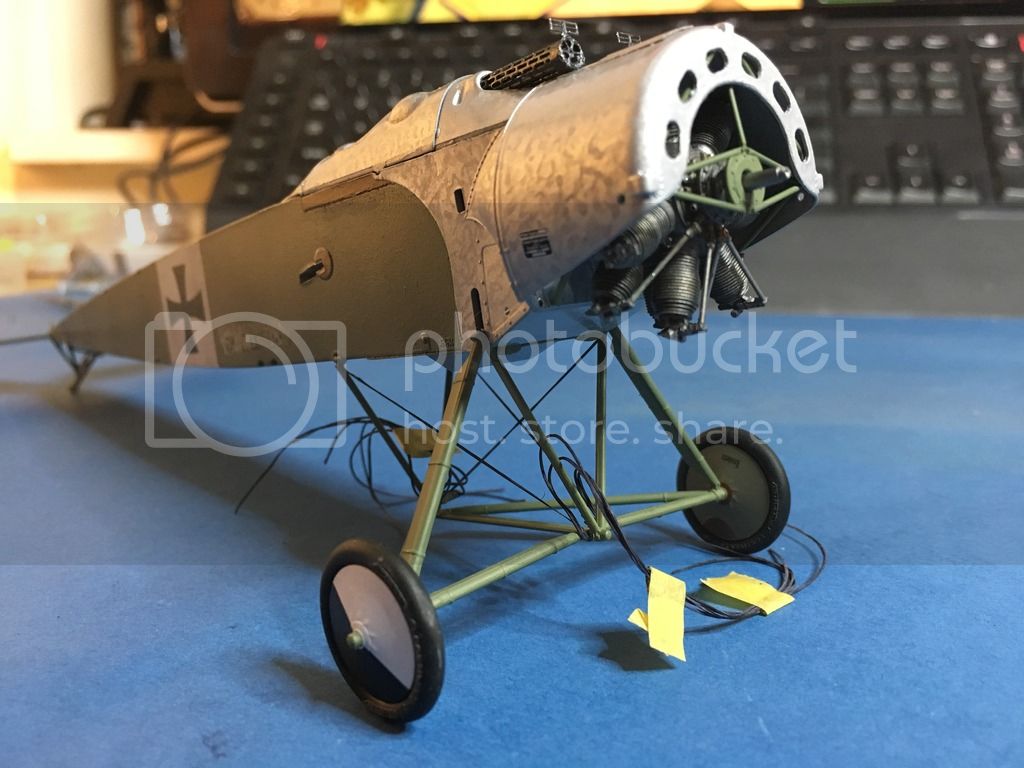
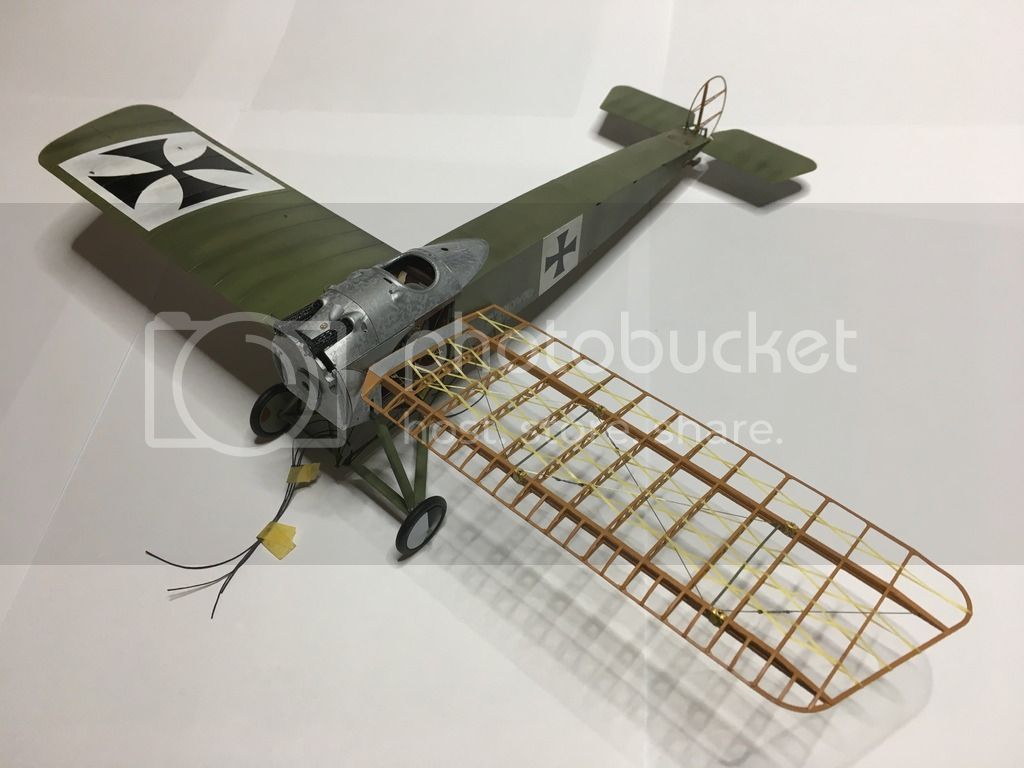
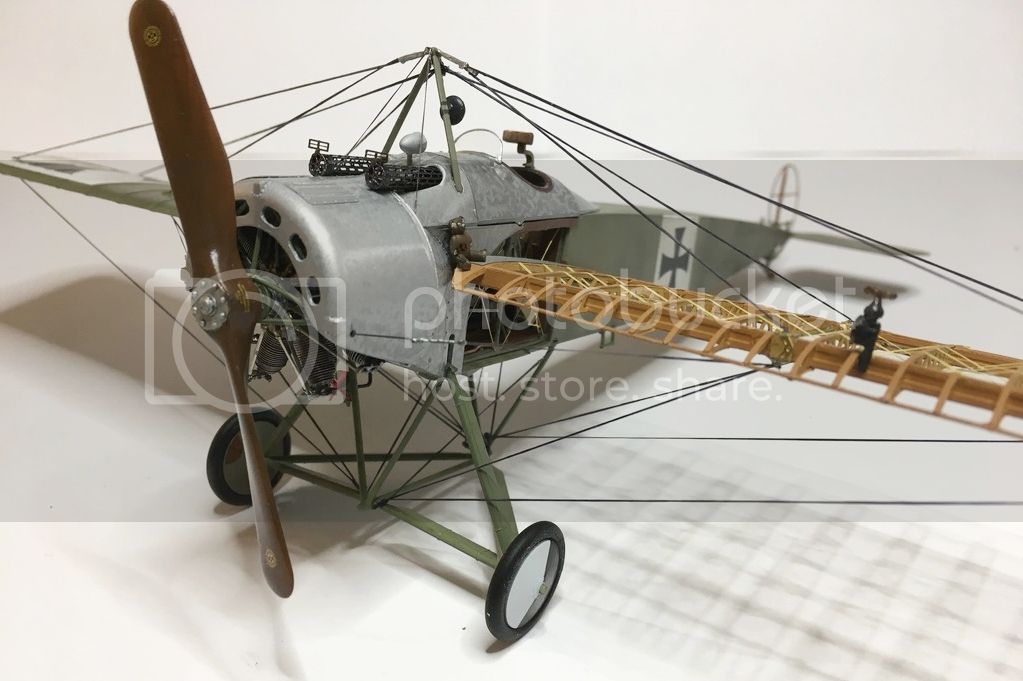
Added turned metal effect on the aluminium parts.
Undercarriage done with preliminary rigging. Decals partially added.
Added turned metal effect on the aluminium parts.
Undercarriage done with preliminary rigging. Decals partially added.
Xirrcom
Joined: February 18, 2016
KitMaker: 92 posts
AeroScale: 90 posts
Posted: Friday, January 20, 2017 - 07:05 PM UTC
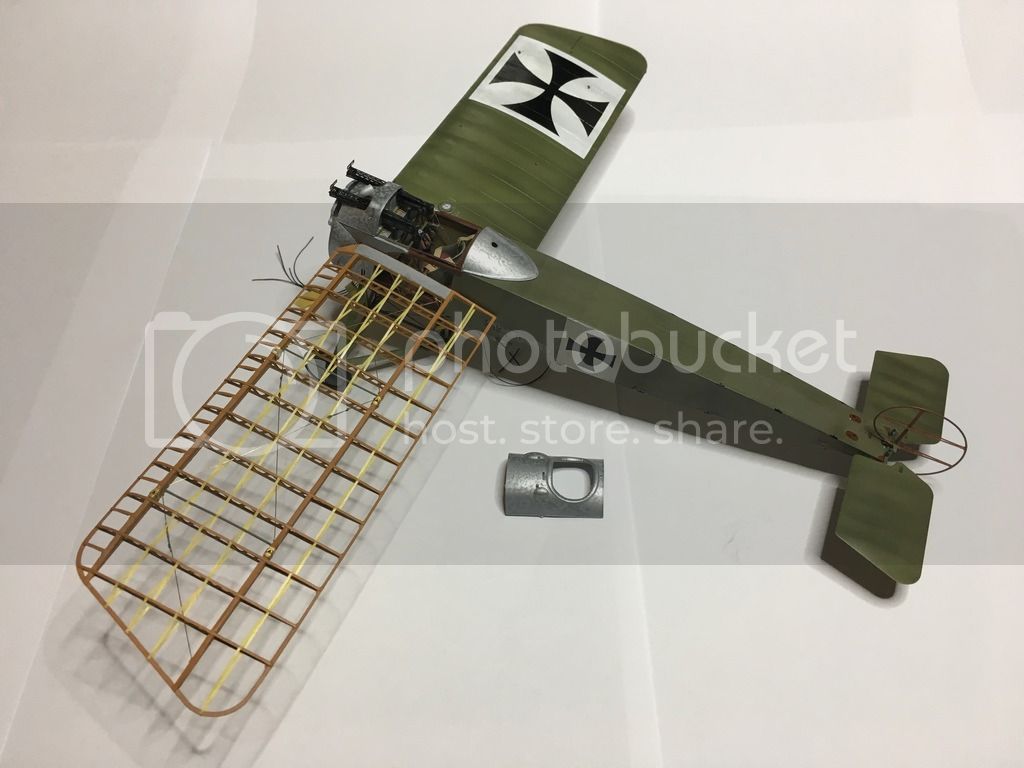
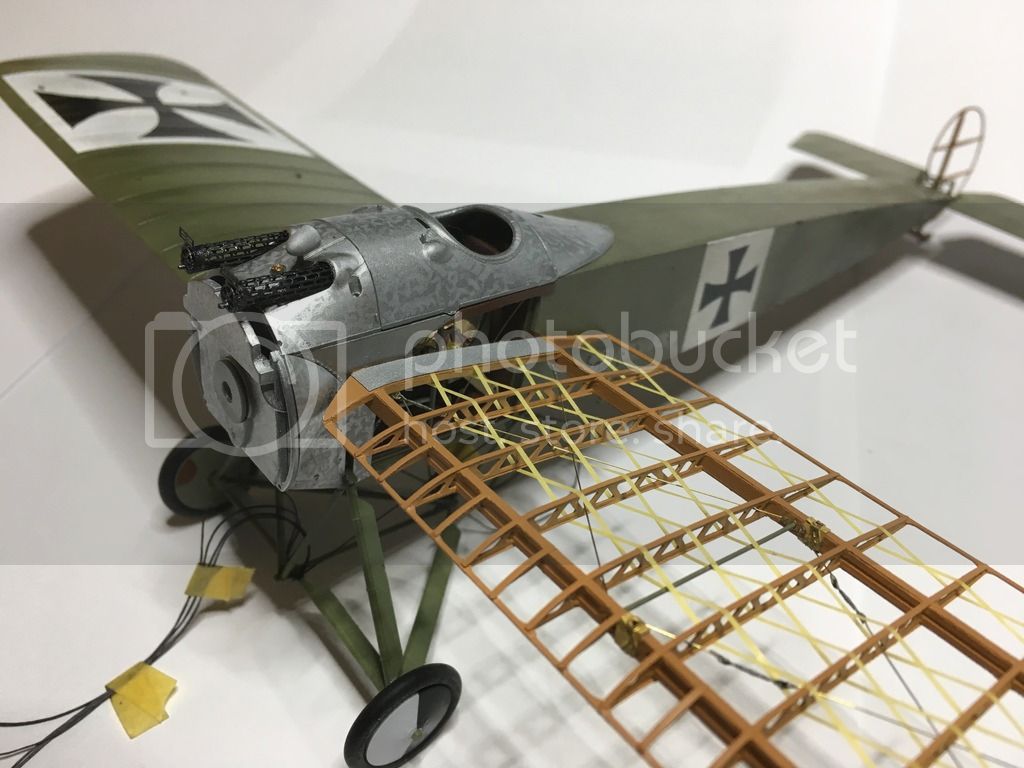
Dryfitted with engine and cowling (by Aviattic) - seems like a nano-fit  will have to work it out somehow.
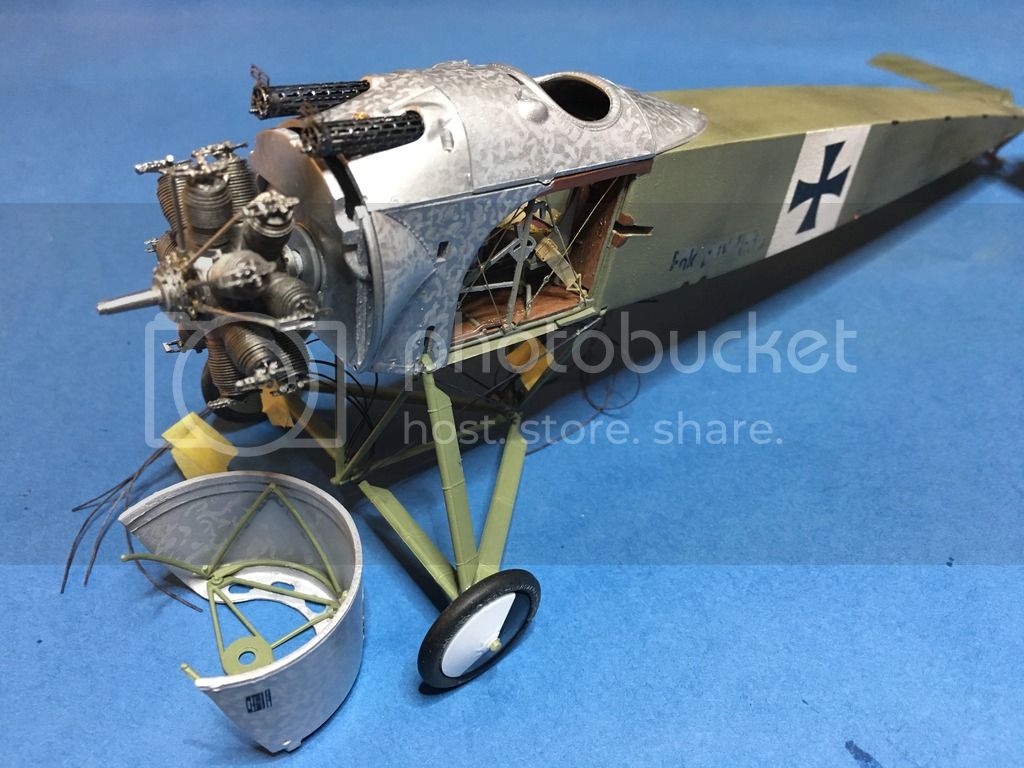
will have to work it out somehow. Xirrcom
Joined: February 18, 2016
KitMaker: 92 posts
AeroScale: 90 posts
Posted: Sunday, January 22, 2017 - 01:44 AM UTC
Hi guys,
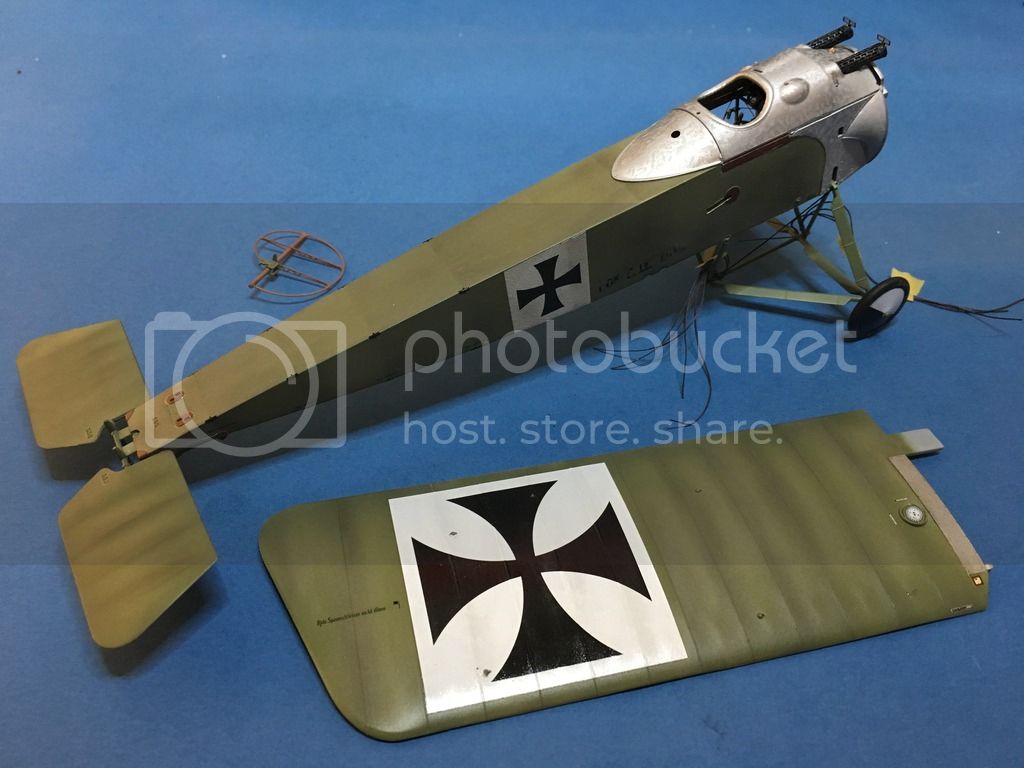
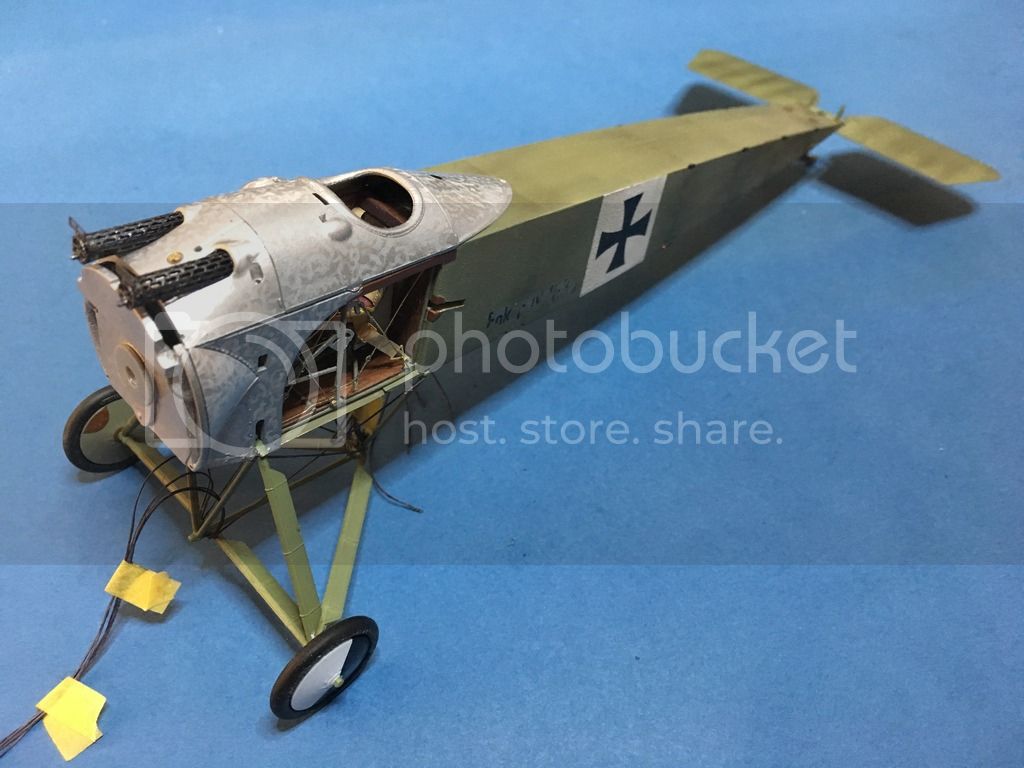
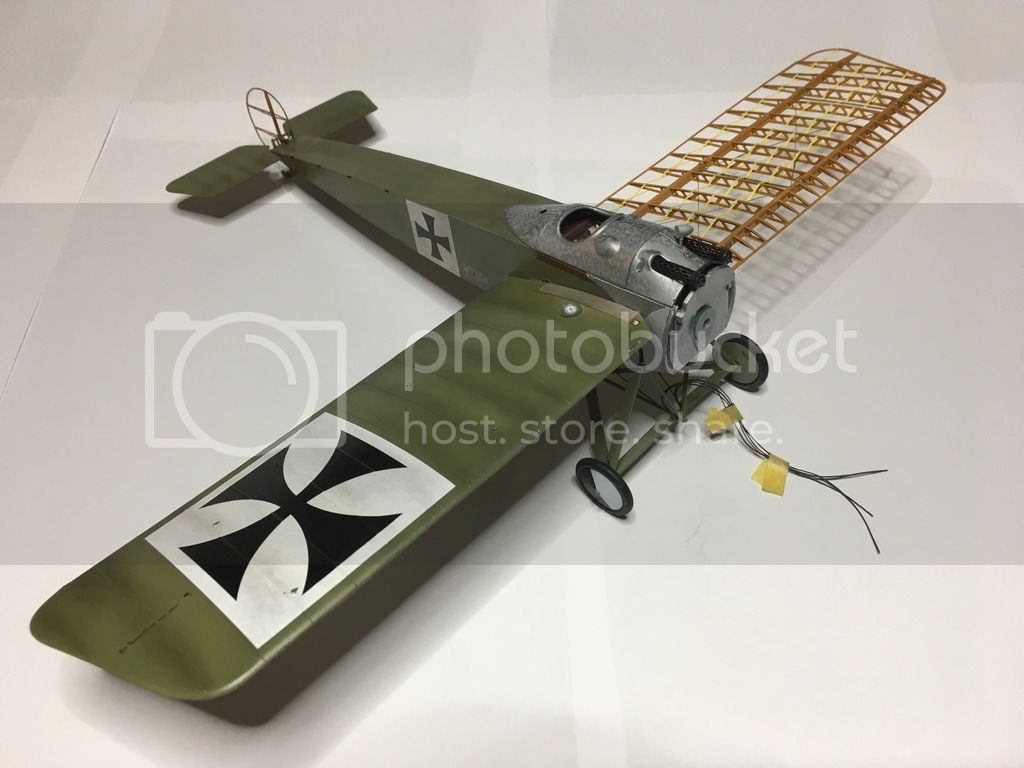
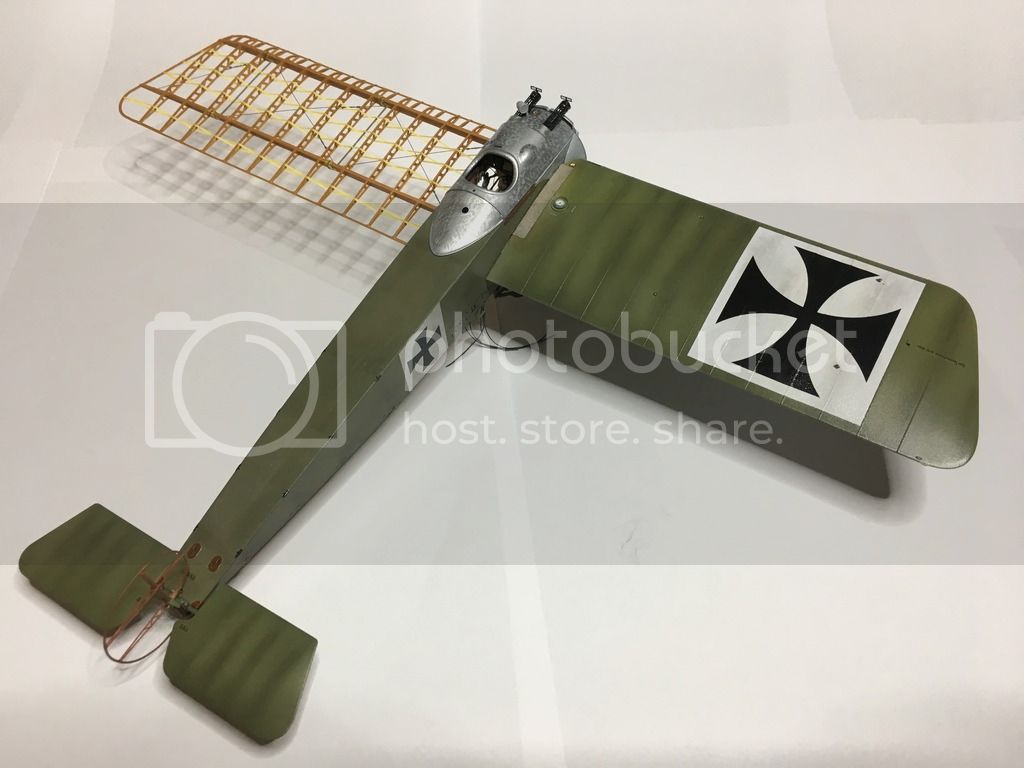
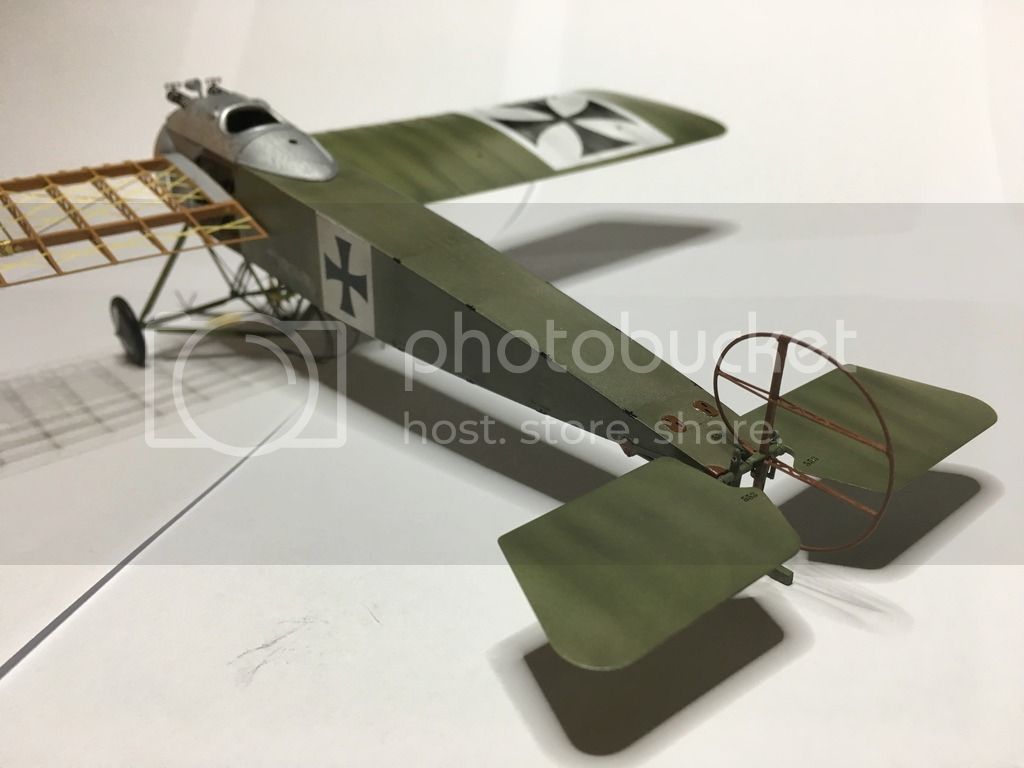
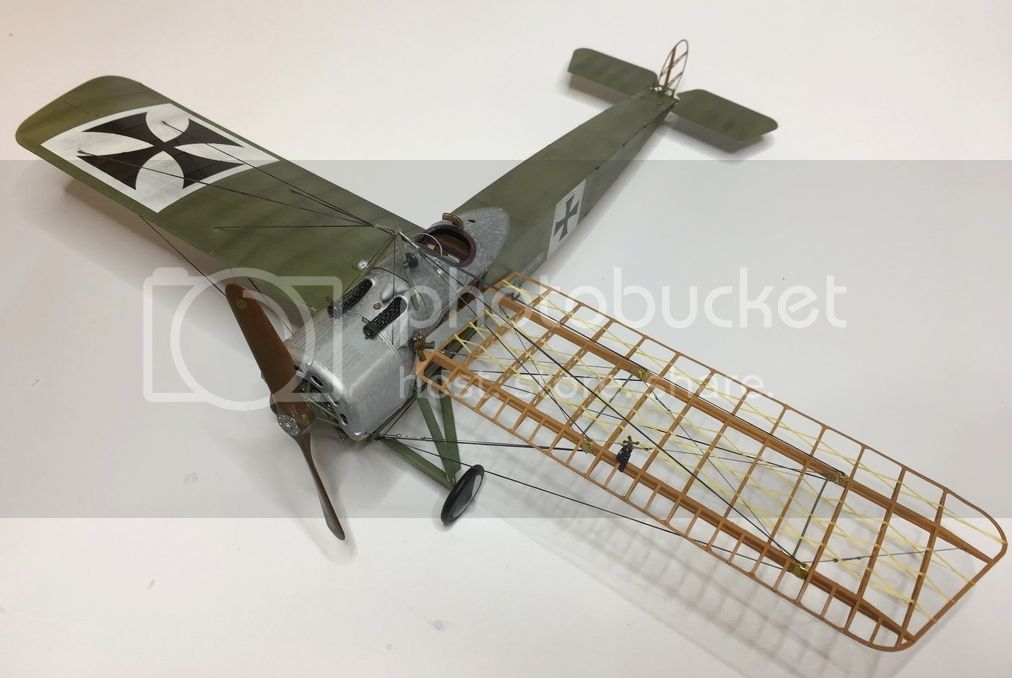
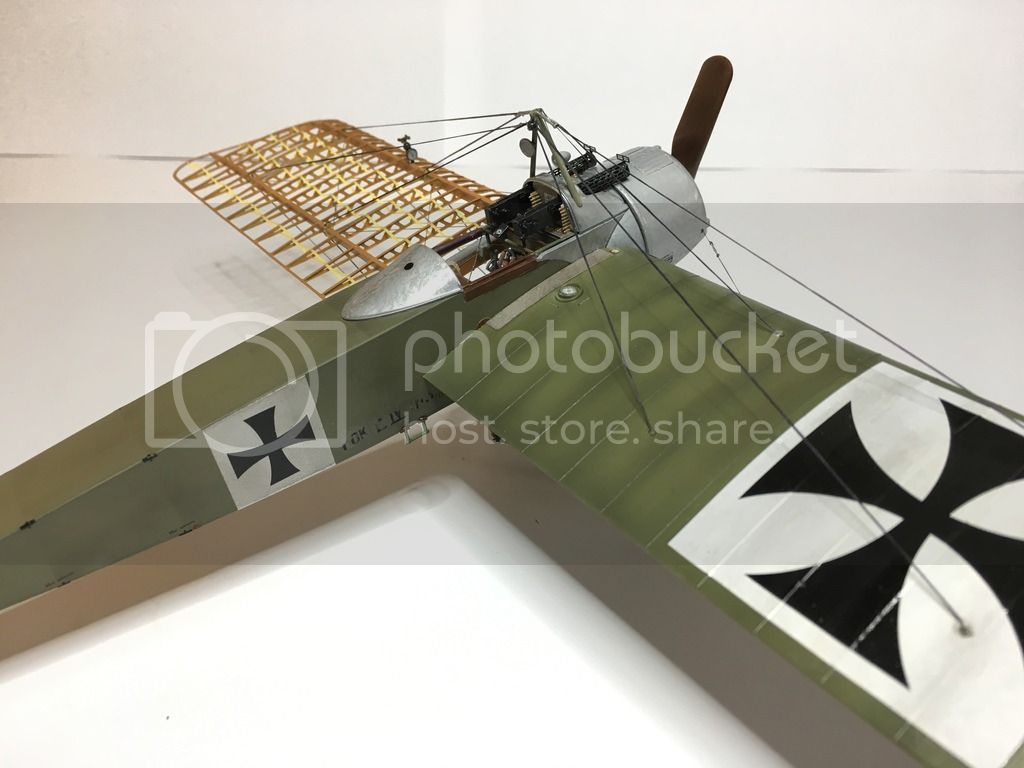
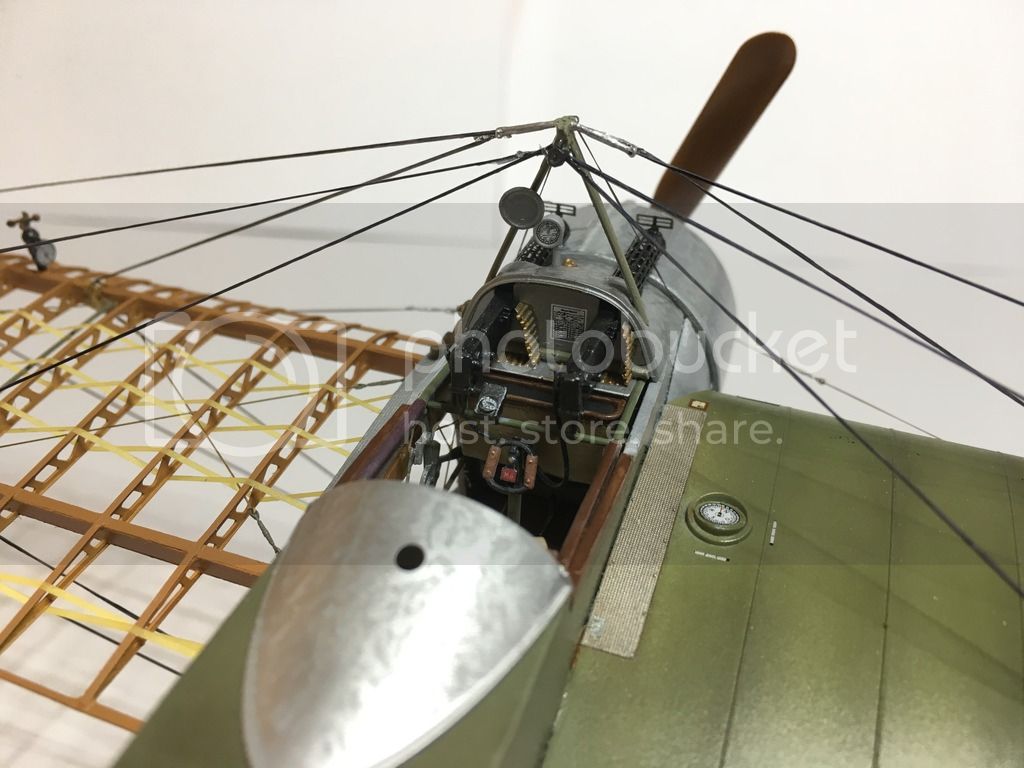
Got some spare time to finish main parts, so wings are done and assembled, elevator and rudder also attached to the fuselage.
Next step - rigging...
See ya soon,
Bart
Got some spare time to finish main parts, so wings are done and assembled, elevator and rudder also attached to the fuselage.
Next step - rigging...
See ya soon,
Bart

sithman
Joined: January 04, 2017
KitMaker: 2 posts
AeroScale: 2 posts
Posted: Sunday, January 22, 2017 - 02:32 AM UTC
FANTASTIC! and inspiring!
I have one question I have been wondering about.
A lot of wwi Model builders seem to lighten the low points and darken the highpoints on the wings of their aircraft as you have done as well. I thought (sorry!, I'm from an armour background) you darkened the low areas and lighten the high.
I ask because it looks good and I am about to embark on a couple of biplanes and really have no idea about shading and weathering these craft.
Xirrcom
Joined: February 18, 2016
KitMaker: 92 posts
AeroScale: 90 posts
Posted: Sunday, January 22, 2017 - 03:44 AM UTC
Quoted Text
A lot of wwi Model builders seem to lighten the low points and darken the highpoints on the wings of their aircraft as you have done as well. I thought (sorry!, I'm from an armour background) you darkened the low areas and lighten the high.
I ask because it looks good and I am about to embark on a couple of biplanes and really have no idea about shading and weathering these craft.
Hi Thomas!
I'm sure you are aware what subject you are touching here...
 just kidding
 Generally you have to think what do you want to represent and how. The difference between armour and WWI crafts is simply the material you are trying to model through painting and weathering. Opposite to metal parts in armour you are dealing here with canvas or fabric (mostly cotton and cellulose nitrate dope) enclosing wooden or plywood structures. I can comment only on my approach, and I'm far from saying that's the right one or the best looking.
So I start with general idea of what condition of the machine I'll be modelling. Generally I'm not fond of 'eavy weathering craze as in my opinion it's quite hard to achieve good results in scale and the amount of details you can loose during this process is too much for me
I rather treat weathering as a tool to bring up some interesting characteristics of the surfaces and details.But coming back to your question - if you imagine that wooden structure covered by fabric and then think how light will affect it. Of course it depends on the thickness of the fabric and with what was it covered, but generally it's going to be darker in the parts of the structure touching to fabric and lighter in areas with no structure beneath (due to light coming through). On top of that I'm thinking of weather conditions and if we imagine rainy and muddy environment it's also going to affect the looks of the model in similar way. Places where structure touches canvas will tend to dry slower and thus attract more dust and dirt. Of course that's applicable to lets say damp conditions
On the other hand you can have dry environment and there the situation changes. Those parts of structure touching to canvas are more prone to weathering (don't know if it's correct term: frayed) so you could accentuate those by making them lighter.Generally I follow the motto that model should make you happy and fun to work with
Cheers,
Bart
sithman
Joined: January 04, 2017
KitMaker: 2 posts
AeroScale: 2 posts
Posted: Sunday, January 22, 2017 - 09:35 PM UTC
Thank you so muchh for taking time to answer my noob question!
You explained it very well and helps me to understand better what I should be trying to achieve!
I too am not a fan of over weathering as I don't think it is realistic (just my pinion)
Again thank you! I can't wait to try it on my little Dr1 and Albatros!
Thomas
You explained it very well and helps me to understand better what I should be trying to achieve!
I too am not a fan of over weathering as I don't think it is realistic (just my pinion)
Again thank you! I can't wait to try it on my little Dr1 and Albatros!
Thomas

rdt1953
Joined: February 06, 2015
KitMaker: 1,098 posts
AeroScale: 900 posts
Posted: Sunday, January 22, 2017 - 11:04 PM UTC
Bart -
Thanks for sharing this - I've been watching from the start- absolutely beautiful workmanship.
Cheers - Richard
Thanks for sharing this - I've been watching from the start- absolutely beautiful workmanship.
Cheers - Richard

lespauljames

Joined: January 06, 2007
KitMaker: 3,661 posts
AeroScale: 369 posts

Posted: Monday, January 23, 2017 - 02:13 AM UTC
Bart, a masterful work. I love the aluminium effect you have achieved and the subtleties of your painting job. Bravo. The comments regarding the weathering are food for thought and have made me think a bit more about what I'm doing and why. Looking forward to the rest. J

Xirrcom
Joined: February 18, 2016
KitMaker: 92 posts
AeroScale: 90 posts
Posted: Monday, January 23, 2017 - 02:30 AM UTC
Quoted Text
Thank you so muchh for taking time to answer my noob question!
You explained it very well and helps me to understand better what I should be trying to achieve!
I too am not a fan of over weathering as I don't think it is realistic (just my pinion)
Again thank you! I can't wait to try it on my little Dr1 and Albatros!
Thomas
Thomas, no need to thank - that should be the place for such discussions

Please share your work with these early birds!
Bart

Xirrcom
Joined: February 18, 2016
KitMaker: 92 posts
AeroScale: 90 posts
Posted: Monday, January 23, 2017 - 02:33 AM UTC
Quoted Text
Bart -
Thanks for sharing this - I've been watching from the start- absolutely beautiful workmanship.
Cheers - Richard
Richard thank you for following the build
still quite a daunting task ahead with rigging. On the other hand sparse free time gives the opportunity to think some solutions over Bart
Xirrcom
Joined: February 18, 2016
KitMaker: 92 posts
AeroScale: 90 posts
Posted: Monday, January 23, 2017 - 02:36 AM UTC
Quoted Text
Bart, a masterful work. I love the aluminium effect you have achieved and the subtleties of your painting job. Bravo. The comments regarding the weathering are food for thought and have made me think a bit more about what I'm doing and why. Looking forward to the rest. J
Thanks James!
JackFlash
Joined: January 25, 2004
KitMaker: 11,669 posts
AeroScale: 11,011 posts
Posted: Thursday, January 26, 2017 - 02:17 PM UTC
Nice work.

CaptnTommy
Joined: October 26, 2009
KitMaker: 424 posts
AeroScale: 389 posts
Posted: Friday, January 27, 2017 - 12:49 AM UTC
Interesting your reply on weathering...
Having dealt with the current fabric (composites) in desert environments the leading edge would first wear off the paint/dope then would begin to wear through the fabric. (Composites PILL like a sweater) - daily inspections, before flight, will include the leading edges, regardless of the aircraft. I suppose, Extra thicknesses of fabric would be placed on the leading edge to lengthen the time to replacement. On H-60 helicopters Scotch packing tape was used at the beginning of Desert Storm, later a special, thicker tape was used. I am not sure what they use now.
The Turks and RAF Flew in the SAME location.
Enjoying the build, agree to light weathering on fabric.
Captn Tommy
Xirrcom
Joined: February 18, 2016
KitMaker: 92 posts
AeroScale: 90 posts
Posted: Wednesday, February 01, 2017 - 03:14 AM UTC
Hi Tom,
Thanks for sharing your experiences! Just wondering if by any chance you might have photos of such weathered fabric? Might be interesting to ponder...
Bart
Thanks for sharing your experiences! Just wondering if by any chance you might have photos of such weathered fabric? Might be interesting to ponder...
Bart
Xirrcom
Joined: February 18, 2016
KitMaker: 92 posts
AeroScale: 90 posts
Posted: Wednesday, May 03, 2017 - 08:21 PM UTC
Hi,
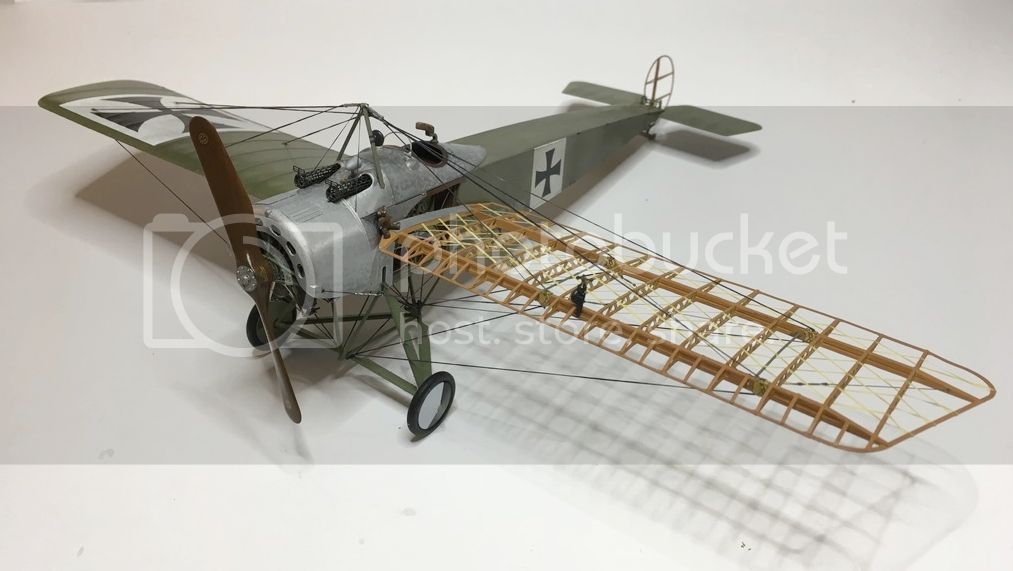
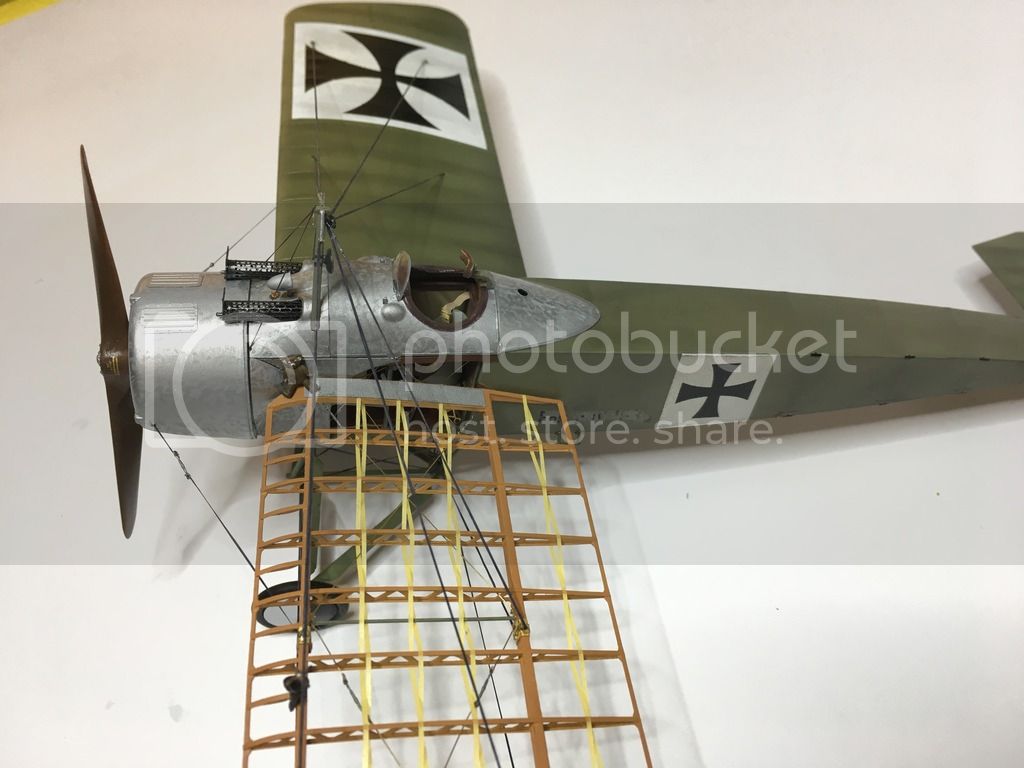
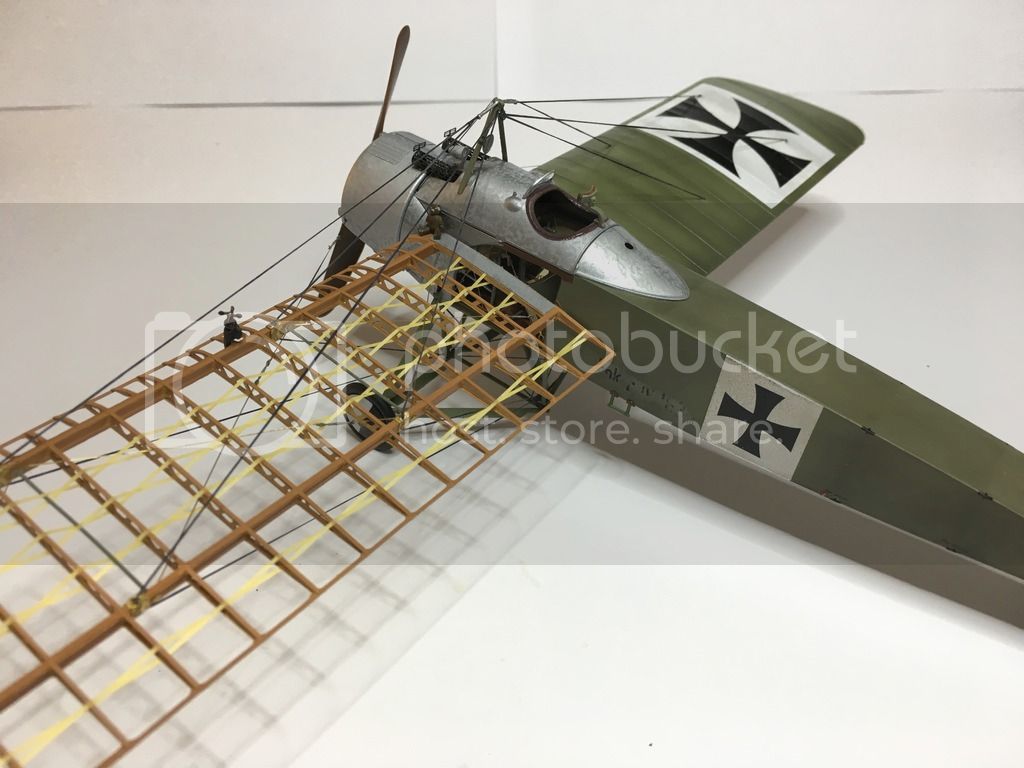
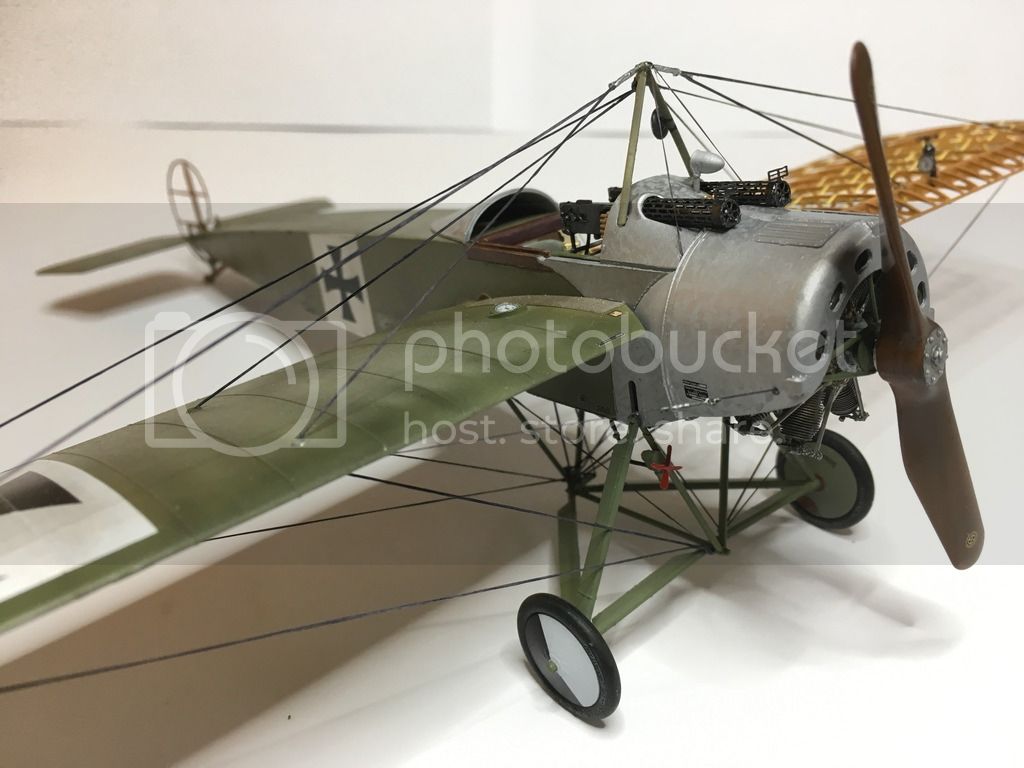
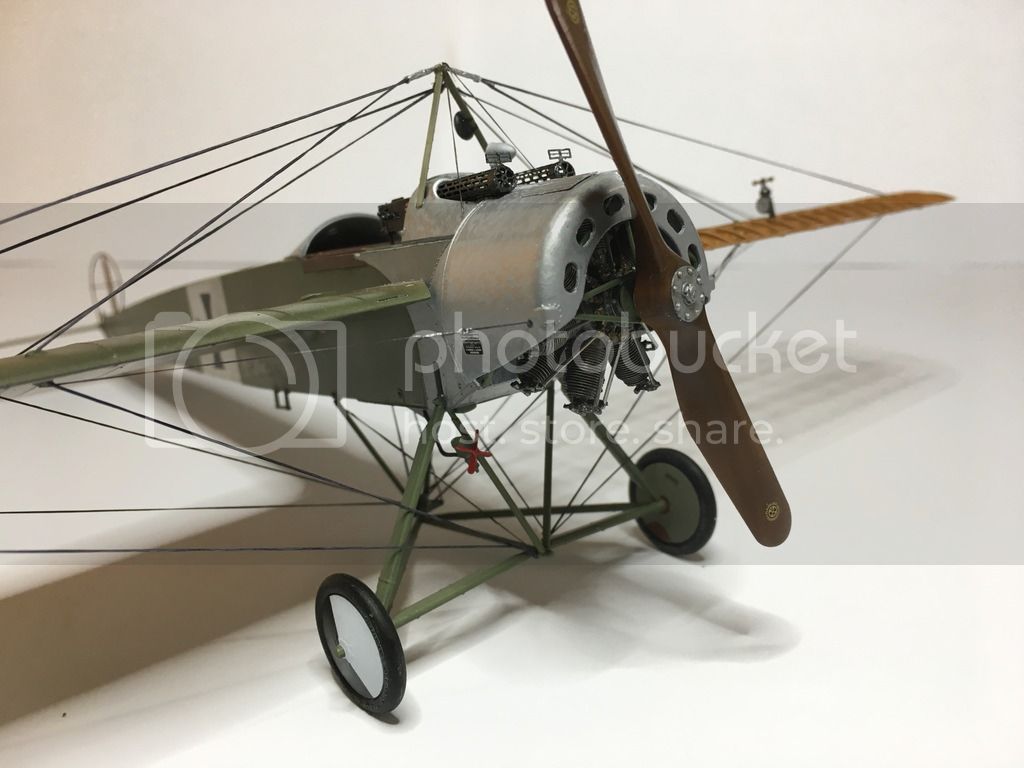
after a rather long break I finally made it to the closure of the E.IV project.
Did finish the rigging, engine and some other details.
Still to be done is the final light weathering.
after a rather long break I finally made it to the closure of the E.IV project.
Did finish the rigging, engine and some other details.
Still to be done is the final light weathering.
Xirrcom
Joined: February 18, 2016
KitMaker: 92 posts
AeroScale: 90 posts
Posted: Wednesday, May 03, 2017 - 08:23 PM UTC
Xirrcom
Joined: February 18, 2016
KitMaker: 92 posts
AeroScale: 90 posts
Posted: Wednesday, May 03, 2017 - 08:24 PM UTC
Scrodes
Joined: July 22, 2012
KitMaker: 771 posts
AeroScale: 763 posts
Posted: Wednesday, May 03, 2017 - 10:30 PM UTC
Oh wow, well done. Kept getting better with each post!
Sorry if I missed it, but how did you get that effect on the aluminum?
Sorry if I missed it, but how did you get that effect on the aluminum?

Merlin

#017


Joined: June 11, 2003
KitMaker: 17,582 posts
AeroScale: 12,795 posts

Posted: Thursday, May 04, 2017 - 12:09 AM UTC
Hi Bart
Simply fantastic!
All the best
Rowan
Simply fantastic!
All the best
Rowan


MerlinV

Joined: November 26, 2006
KitMaker: 608 posts
AeroScale: 602 posts

Posted: Thursday, May 04, 2017 - 05:54 PM UTC
Beautiful Job!
Imagine the drag all those cables must have created!
Cheers,
Hugh
Imagine the drag all those cables must have created!
Cheers,
Hugh
Xirrcom
Joined: February 18, 2016
KitMaker: 92 posts
AeroScale: 90 posts
Posted: Friday, May 05, 2017 - 01:15 AM UTC
Quoted Text
Oh wow, well done. Kept getting better with each post!
Sorry if I missed it, but how did you get that effect on the aluminum?
Hi Matt,
Thanks! As it goes for the aluminium effect what I did is first primed with glossy black, next coat is shiny aluminium (I use Alclad, but you can do it with any brand of your choice - important is that shiny part
. Next you use the same shiny aluminium paint and add a bit of matt white - not much just to make visible difference. With a brush make a pattern. As finish you can cover whole with clear cote but it might not be required - have to assess by yourself. Cheers Bart
Scrodes
Joined: July 22, 2012
KitMaker: 771 posts
AeroScale: 763 posts
Posted: Friday, May 05, 2017 - 04:11 AM UTC
wow, very cool. Which flat white did you add to the alclad? Did you apply it by brush at that point, or did you airbrush in a squiggle pattern?.
Fascinating technique.
Fascinating technique.
 |

WEB HOSTING BY


Copyright ©2021 AeroScale and Kitmaker Network, a subsidiary of Silver Star Enterprises
All Rights Reserved. Please read our Conditions of Use and Privacy Policy.
All Rights Reserved. Please read our Conditions of Use and Privacy Policy.