Air Campaigns
Want to start or join a group build? This is where to start.
OFFICIAL: Dive Bomber Campaign
Emeritus
_VISITCOMMUNITY
Uusimaa, Finland
Joined: March 30, 2004
KitMaker: 2,845 posts
AeroScale: 1,564 posts
Posted: Sunday, May 22, 2016 - 01:45 AM UTC
Not having had time to do some modeling in a while, I've been thinking this campaign would be a great way to get some modeling done again.

As for my entry, I'm leaving towards Revell's 1:72 scale JU 88 A-4. Would it be OK to participate with this one despite a start a very minor start being made on it a while ago already? Nothing major, just a small bunch of parts removed from the sprue and a couple glued together.


Emeritus
_VISITCOMMUNITY
Uusimaa, Finland
Joined: March 30, 2004
KitMaker: 2,845 posts
AeroScale: 1,564 posts
Posted: Tuesday, May 24, 2016 - 12:52 AM UTC
Well... I think I'll take that as a yes.

I've made a bit of start. Assembling wings, stabilizers, and cockpit components, filling ejector pin marks from areas where they might be visible in the finished model.


Having Hasegawa's kit of the same subject in my stash, I've been comparing them side by side. Really peculiar how Hasegawa has finer and more subtle panel lines and surface details (not to that Revell's are bad no by any means), but has really clunky propellers and seats, as well as somewhat simplistic cockpit interior, whereas Revell really shines in those areas.
kamadoma
_VISITCOMMUNITY
Philippines
Joined: December 24, 2015
KitMaker: 48 posts
AeroScale: 35 posts
Posted: Tuesday, May 24, 2016 - 03:21 AM UTC
So here's what I've done so far.

I've masked the painted yellow leading edge bands, and then painted the undersides with the same olive gray mix that I use for my Zeros. Afterwards I used some Silly Putty to mask where the wavy demarcation line would be.


And then I sprayed over with Tamiya XF-70 Dark Green 2, the same green I use for my Zeros too.


After the paint has cured, I removed to masks for the reveal. I'm really glad how this turned out!


I just found out that I still need to do a few more masking jobs for the red strips along the wing walk areas, so that will be my next agenda. I'm just hoping the weather would cooperate with me because rainy season has officially been declared by our local weather agency.
BoiseBlade
#523
_VISITCOMMUNITY
Idaho, United States
Joined: February 28, 2014
KitMaker: 342 posts
AeroScale: 250 posts
Posted: Tuesday, May 24, 2016 - 04:25 AM UTC
I am finally ready to put a coat of primer then pre-shade as well.

The scratch built bomb rack is completed as well.
This kit was the torpedo version. But they still supplied open or closed bomb bay.


kamadoma
_VISITCOMMUNITY
Philippines
Joined: December 24, 2015
KitMaker: 48 posts
AeroScale: 35 posts
Posted: Friday, May 27, 2016 - 06:32 PM UTC
For today, I decided to paint on some red strips for the wing walk area. I've also handpainted in some minor details like the exhausts and silver for the lights. After this, clear coat was added in preparation for decals.


And this is where a wrench got thrown into the works. As I tried to slide off the hinomaru decal on the bottom of the wing using a toothpick (which I always use for my past models), the decal crumbled. I consulted with other modelers and it turns out the decals on mine might have been old and dried. Nonetheless I still managed to apply the rest of the decals, this time using my thumb to slide them off. And they did require to be submerged in water for a long time before they slid off. As you can see in the photos, the portside hinomaru on the fuselage had some tiny cracks which I decided to leave as is.


So right now I'm almost done with the decals. I'll just have to check the local hobby shop if they have any hinomaru decal sheets, or I could try to find a stencil and paint in the hinomarus for the undersides of the wing. It's a stalemate as of now.
BoiseBlade
#523
_VISITCOMMUNITY
Idaho, United States
Joined: February 28, 2014
KitMaker: 342 posts
AeroScale: 250 posts
Posted: Saturday, May 28, 2016 - 05:56 AM UTC
Vincent,

Looking good, nice soft demarcation line using the putty.

I think I will probably do the same thing. I was going to use paper but lifted on the edges...But not now
Serlone
_VISITCOMMUNITY
Utrecht, Netherlands
Joined: February 23, 2011
KitMaker: 74 posts
AeroScale: 5 posts
Posted: Sunday, May 29, 2016 - 02:51 PM UTC
I've been back to building airplanes for a short while after a long time of building tanks etc and thought it would be nice to join this campaign.
I'll be building the hasegawa 1/72 1940 Mitsubishi Ki-51 (Sonia)


it will be an out of the box build.
i'll post some starting pics tonight.
eMan
#298
_VISITCOMMUNITY
Hong Kong S.A.R. / 繁體
Joined: August 08, 2002
KitMaker: 1,182 posts
AeroScale: 351 posts
Posted: Monday, May 30, 2016 - 01:35 PM UTC
Started to build my entry, Airfix 1/24 Ju87B-2 Stuka.

c4willy
#305
_VISITCOMMUNITY
Christchurch, New Zealand
Joined: February 01, 2006
KitMaker: 1,673 posts
AeroScale: 1,517 posts
Posted: Tuesday, May 31, 2016 - 12:31 PM UTC
Remco: Great little kit you've chosen there! I've got one stalled awaiting weathering and final finishing.

Eman: Hot damn buddy! I've got two in the stash, gonna be hanging on your every post!
Serlone
_VISITCOMMUNITY
Utrecht, Netherlands
Joined: February 23, 2011
KitMaker: 74 posts
AeroScale: 5 posts
Posted: Tuesday, May 31, 2016 - 12:43 PM UTC
a bit late but here are the pictures i promised


Chris: been lucky to buy a pile of older hasegawa kits recently
kamadoma
_VISITCOMMUNITY
Philippines
Joined: December 24, 2015
KitMaker: 48 posts
AeroScale: 35 posts
Posted: Friday, June 03, 2016 - 04:59 AM UTC
I'm finally done with my Judy, feel free to check out the campaign gallery for my photos! I really enjoyed this group build and I look forward to joining a lot more.
BoiseBlade
#523
_VISITCOMMUNITY
Idaho, United States
Joined: February 28, 2014
KitMaker: 342 posts
AeroScale: 250 posts
Posted: Tuesday, June 07, 2016 - 10:24 AM UTC
Here are the latest update images.

SGTJKJ
#041
_VISITCOMMUNITY
Kobenhavn, Denmark
Joined: July 20, 2006
KitMaker: 10,069 posts
AeroScale: 3,788 posts
Posted: Thursday, June 09, 2016 - 01:22 AM UTC
I am going old school for this one with the old hell diver. The matchbox kit has a tea nice colorful scheme. I hope it will look good when finished

SGTJKJ
#041
_VISITCOMMUNITY
Kobenhavn, Denmark
Joined: July 20, 2006
KitMaker: 10,069 posts
AeroScale: 3,788 posts
Posted: Thursday, June 09, 2016 - 11:24 PM UTC
After closer inspection this is a trainer version of the hell diver and without any bomb release mechanism. I will go hunting in the stash for something else that fits.
SGTJKJ
#041
_VISITCOMMUNITY
Kobenhavn, Denmark
Joined: July 20, 2006
KitMaker: 10,069 posts
AeroScale: 3,788 posts
Posted: Friday, June 10, 2016 - 10:45 AM UTC
I have now decided on the Skyraider. The last of the dedicated dive bombers. I do believe it was allowed by the campaign administrator earlier.

I will be building the Revell which is clearly a reboxing of some ancient kit. Bright white plastic that almost makes your eyes hurt and quite some flash and softish details. The decals look awesome though

SGTJKJ
#041
_VISITCOMMUNITY
Kobenhavn, Denmark
Joined: July 20, 2006
KitMaker: 10,069 posts
AeroScale: 3,788 posts
Posted: Sunday, June 12, 2016 - 02:46 AM UTC
A little progress on the Skyraider - the last of the line of dive bombers.

The plane can be made with folded wings. Not very often I get around kits with that feature - even if it requires the wings to be carved apart. So I decided to go for the feature.

More to follow soon

SGTJKJ
#041
_VISITCOMMUNITY
Kobenhavn, Denmark
Joined: July 20, 2006
KitMaker: 10,069 posts
AeroScale: 3,788 posts
Posted: Thursday, June 16, 2016 - 02:45 AM UTC
A little more progress on the Spad. Basic assemblies are done. Next is to finish the cockpit painting and get the wings attached.

More to follow soon

SGTJKJ
#041
_VISITCOMMUNITY
Kobenhavn, Denmark
Joined: July 20, 2006
KitMaker: 10,069 posts
AeroScale: 3,788 posts
Posted: Friday, June 17, 2016 - 02:13 AM UTC
Ready for painting to begin. More to follow

Emeritus
_VISITCOMMUNITY
Uusimaa, Finland
Joined: March 30, 2004
KitMaker: 2,845 posts
AeroScale: 1,564 posts
Posted: Wednesday, June 22, 2016 - 06:55 PM UTC
A month since my first update already... Way too much lazing, not nearly enough modeling.

Well, at least I've gotten something done.


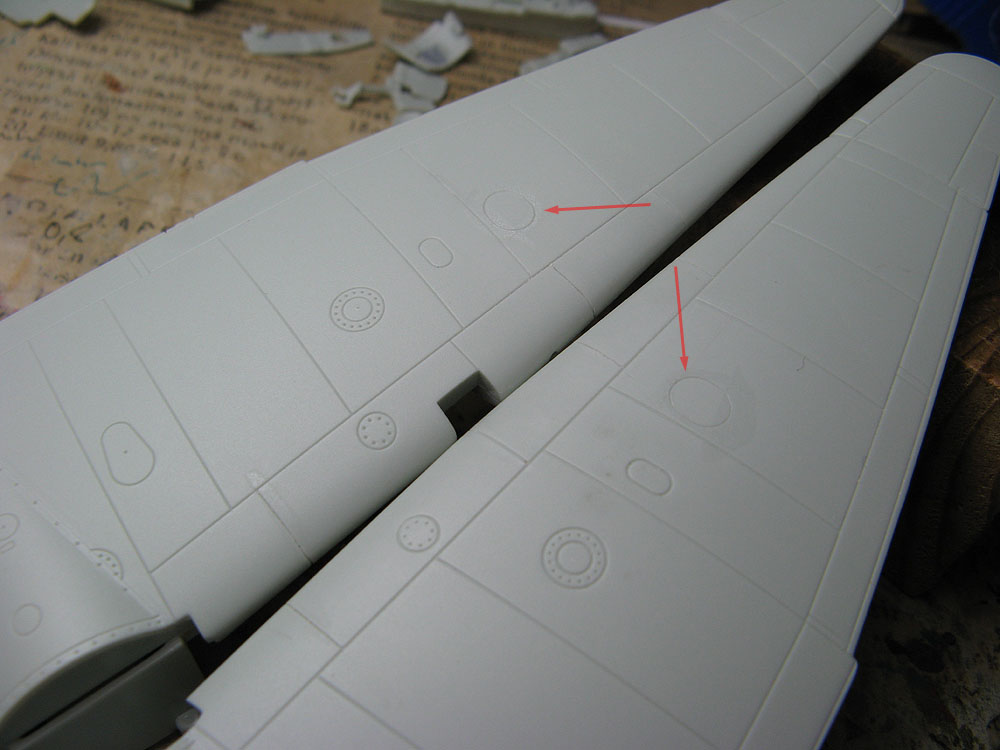
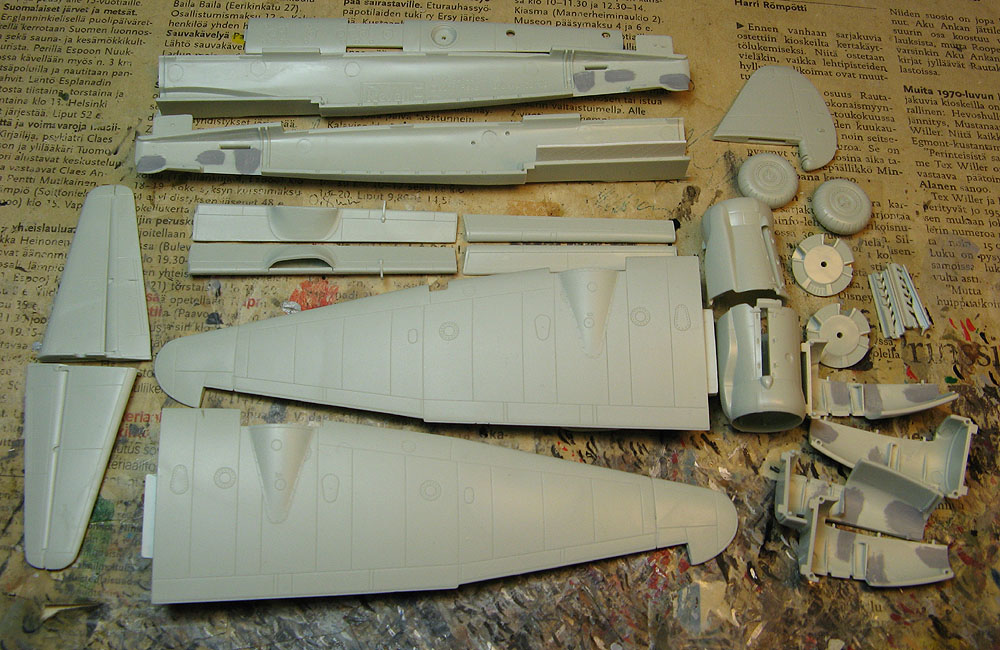
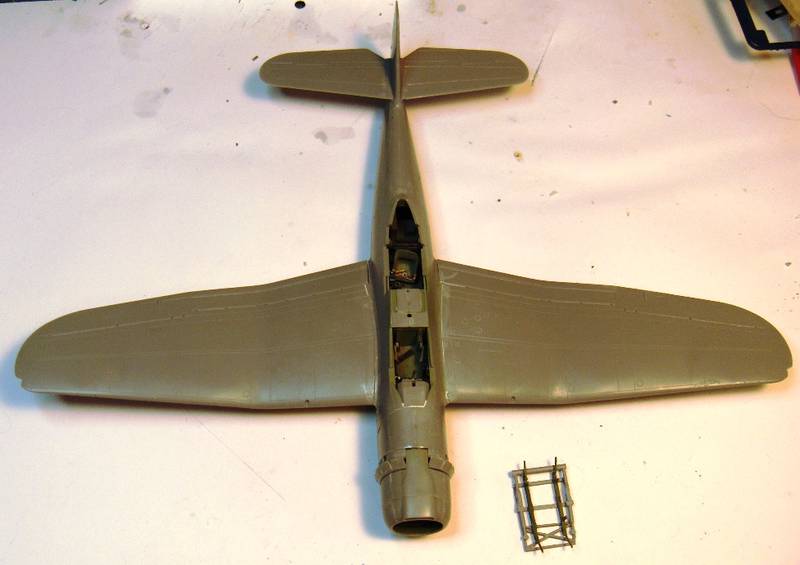
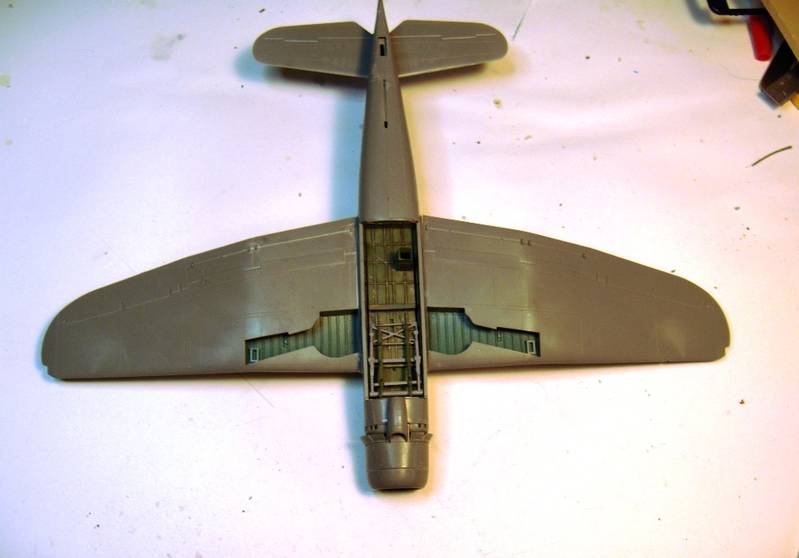
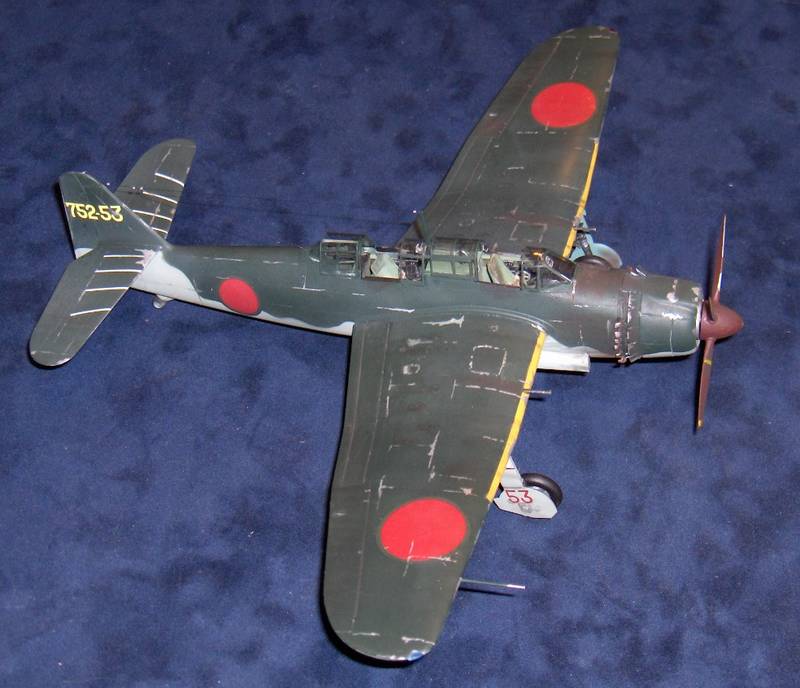
Wings together. For some inexplicable reason the upper wing halves had some panel lines on the leading edge that weren't present on the lower halves, and vice versa. Not a big deal to scribe the missing lines, but still something I wish the designers had bothered checking before the molds were made. The outboard oil fill ports were missing, so I scribed those in (pointed by arrows in pic).
I'm thinking I probably want to add some rivet detail to the model, but I'm not 100% sure yet of what extent I want to go with.


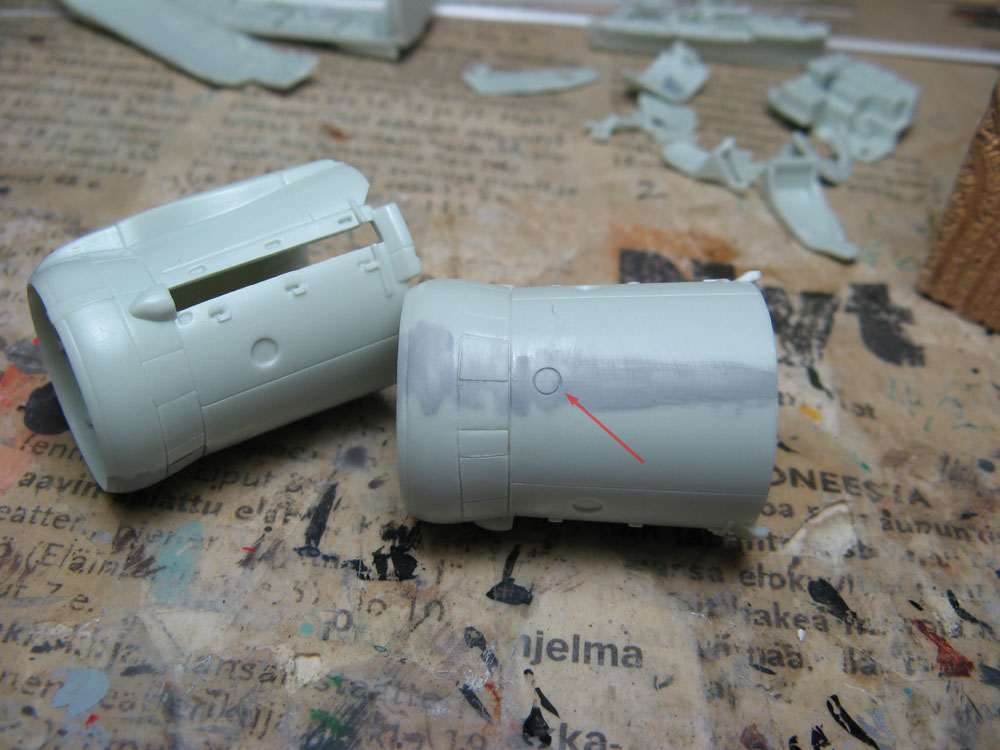
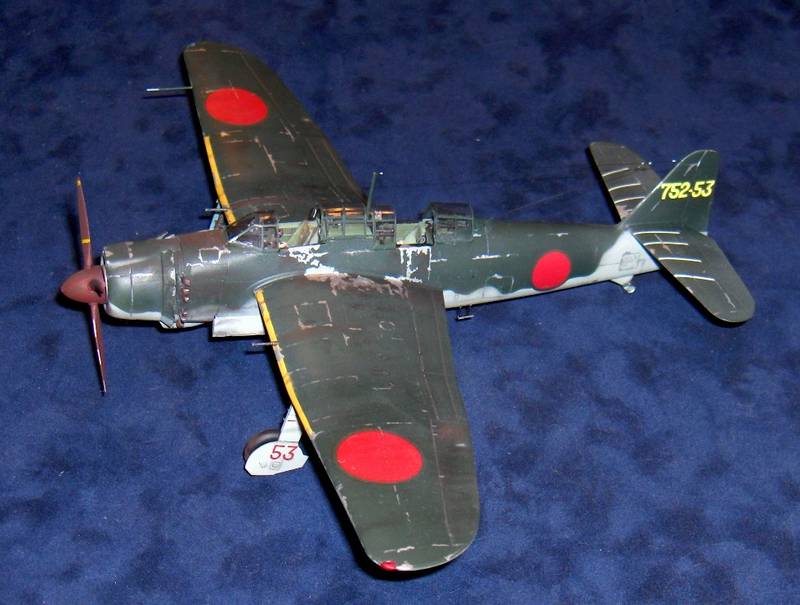
Engine nacelles assembled. Due to the nature of injection molding, the recessed detail on the sides near the edges of the nacelle halves had gotten shallow and indistinct, and needed rescribing to sharpen and deepen them. The circular detail (inspection hatch perhaps?) on top of the cowling behind the cowl flaps was represented as a raised circle, and suffered from being on the side of the molding, like the recessed details. Instead of trying to replicate the raised detailed, I followed the example of the Hasegawa kit I also have, and scribed them in instead using a circle template.


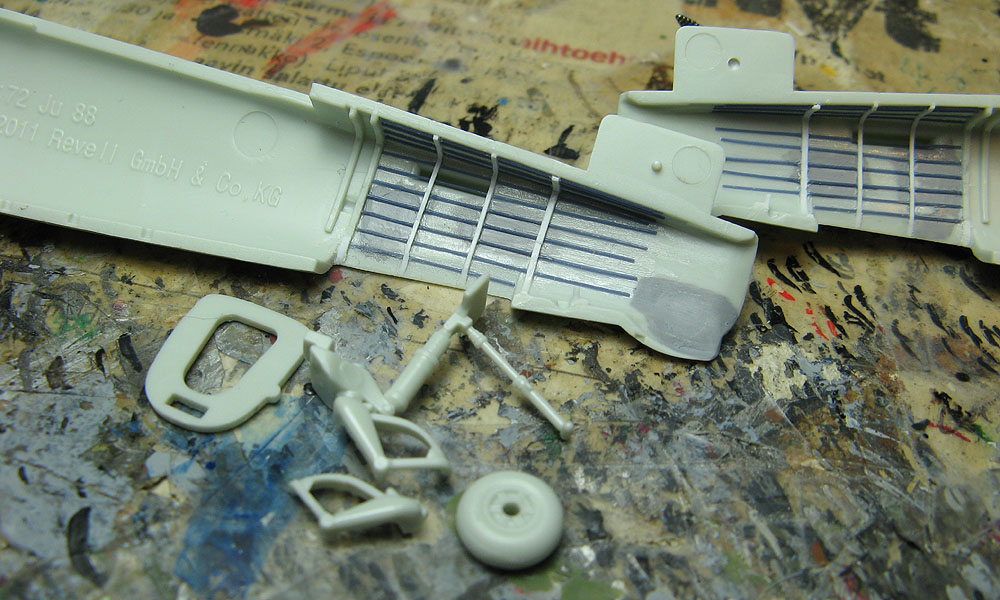
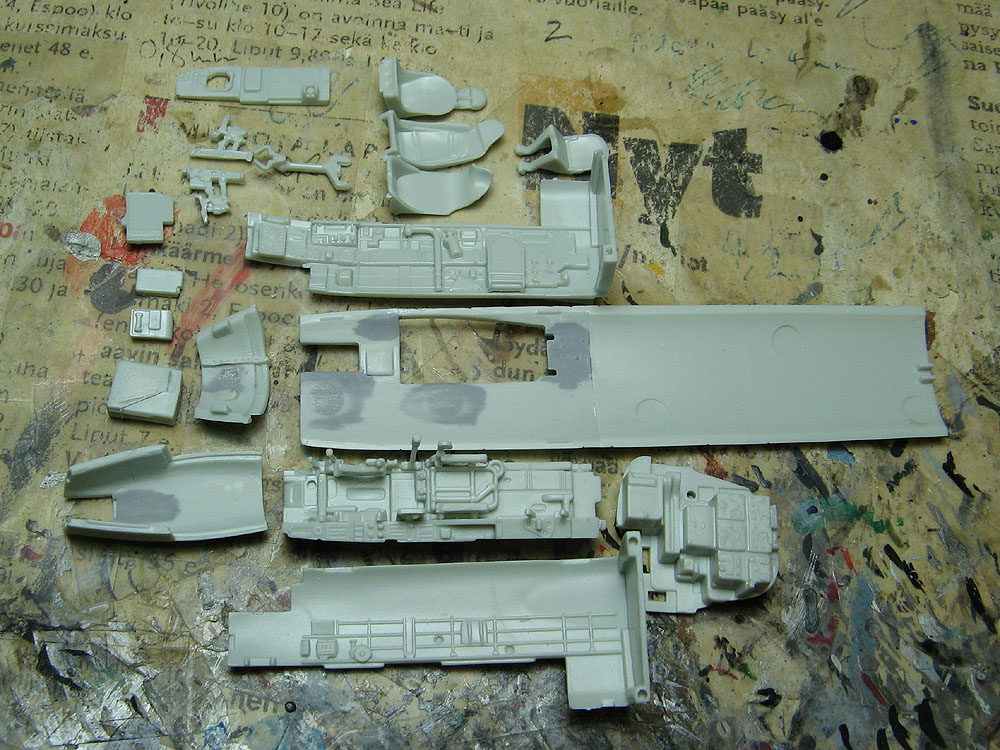
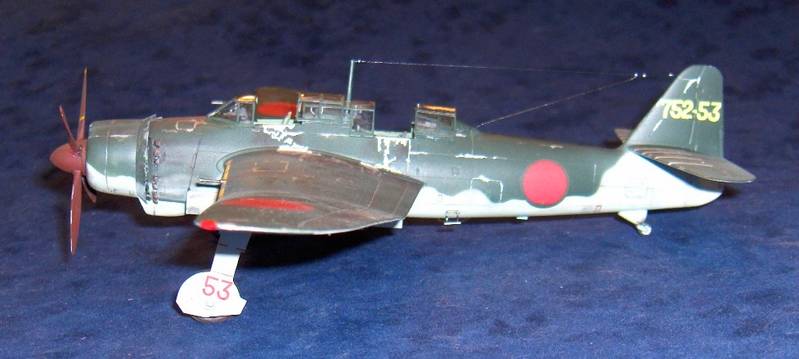
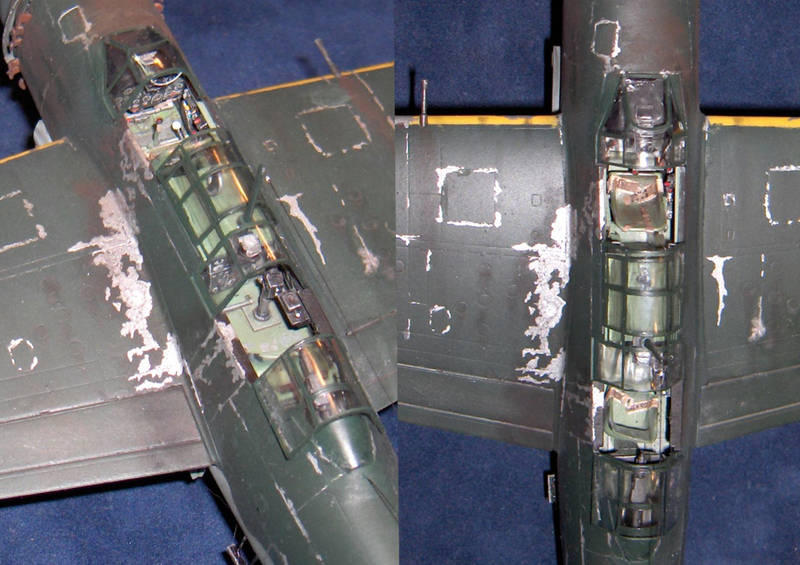
The tail landing gear bays were devoid of detail, so I added some with stretched sprue and styrene strip. The kit's instructions want the rear landing gear to be attached at the same time the fuselage halves are joined, but being a little wary of adding such rather delicate parts at such an early stage, I glued pieces of L-profile styrene strip behind the rear support locator holes so I could get it glued in place easier with the fuselage already together.
Now I'm contemplating extending that detailing past the bulkhead and adding some detail to the bulkhead as well.

Next I think I should really focus on the cockpit and try to get this build going again.
BoiseBlade
#523
_VISITCOMMUNITY
Idaho, United States
Joined: February 28, 2014
KitMaker: 342 posts
AeroScale: 250 posts
Posted: Thursday, June 23, 2016 - 07:04 AM UTC
Just a quick update to show I am still working on it.


SGTJKJ
#041
_VISITCOMMUNITY
Kobenhavn, Denmark
Joined: July 20, 2006
KitMaker: 10,069 posts
AeroScale: 3,788 posts
Posted: Sunday, July 10, 2016 - 12:19 PM UTC
Looks good, Jeff. Nice transition between the camouflage colors.

Having just started my vacation, I hope to get back to my Skyraider soon.
Kilo_Uniform
_VISITCOMMUNITY
Gauteng, South Africa
Joined: July 03, 2015
KitMaker: 280 posts
AeroScale: 141 posts
Posted: Sunday, July 10, 2016 - 01:57 PM UTC
Hi Everybody

Some nice work here.

I have been plugging along with my 1/72 Petlyakov Pe-2 from Airfix.

Construction is almost complete and I hope to post some photos soon (if I can figure out how).

Regards,
Kobus
Removed by original poster on 07/13/16 - 02:01:49 (GMT).
Removed by original poster on 07/13/16 - 02:05:04 (GMT).
BoiseBlade
#523
_VISITCOMMUNITY
Idaho, United States
Joined: February 28, 2014
KitMaker: 342 posts
AeroScale: 250 posts
Posted: Tuesday, July 12, 2016 - 07:09 AM UTC
Here is my completed project for this build.