OFFICIAL: Dive Bomber Campaign

#523
Idaho, United States
Joined: February 28, 2014
KitMaker: 342 posts
AeroScale: 250 posts
Posted: Monday, April 18, 2016 - 08:10 AM UTC
Chris,
You know me, I love Italian AC. It is too bad that the Breda BA-65 is a ground attach AC and not a dive bomber. Also some list the IMAM Ro.57 & 58 as Dive Bombers but the were actually designed as interceptors and ground attack as well. I would have done one of them if it fit. And since I cannot find the only true Dive bomber the Italian's had, the Breda Ba.201, I will do this one.
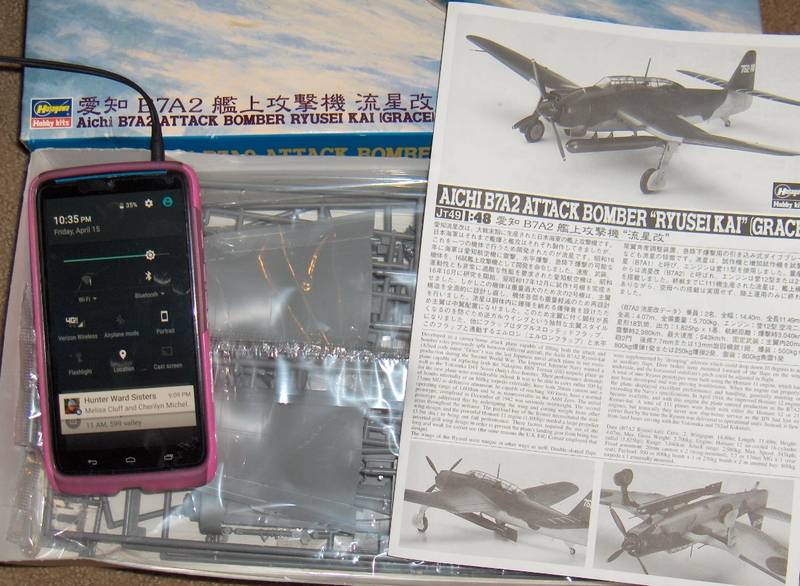
Aichi B7A Grace.
Philippines
Joined: December 24, 2015
KitMaker: 48 posts
AeroScale: 35 posts
Posted: Monday, April 18, 2016 - 08:22 PM UTC
@Jeff-D and Chris, so far the gap has been smaller than pictured after I've cemented the wings, so the putty was enough.
#305
Christchurch, New Zealand
Joined: February 01, 2006
KitMaker: 1,673 posts
AeroScale: 1,517 posts
Posted: Tuesday, April 19, 2016 - 06:03 AM UTC
Well done Vincent! The other thought that crossed my mind is that I've used styrene sprue as a spacer to push the fuselage walls out to meet the wings on occasion as well.
Philippines
Joined: December 24, 2015
KitMaker: 48 posts
AeroScale: 35 posts
Posted: Tuesday, April 19, 2016 - 07:57 PM UTC
Just managed to cement in the tail plane, and then I did a dry fit of the prop/spinner and canopy. You can also see the puttied wing root gap.

#305
Christchurch, New Zealand
Joined: February 01, 2006
KitMaker: 1,673 posts
AeroScale: 1,517 posts
Posted: Saturday, April 23, 2016 - 09:20 AM UTC
Not much of an update yet I'm waiting for a set of masks for the canopy before I commence painting the beast. After seeing the mottle Darren was
using I might try something similar on my SB2C-4 to see just how it goes especially on the lighter colours. I've seen browns and dirty greys used to subtly shade panels on US Navy jets. I might try something similar here.
#305
Christchurch, New Zealand
Joined: February 01, 2006
KitMaker: 1,673 posts
AeroScale: 1,517 posts
Posted: Sunday, April 24, 2016 - 06:25 AM UTC
#305
Christchurch, New Zealand
Joined: February 01, 2006
KitMaker: 1,673 posts
AeroScale: 1,517 posts
Posted: Sunday, April 24, 2016 - 08:09 AM UTC
And then after a little research I find this pic and colour profile of my bird!


In the pic it's obvious that the undersides are actually black however it would appear that there was also field camo applied as well. That can be easily seen in the pic on the long range wing tanks. So I'm inclined to agree with Messrs Italeri regarding the camo scheme, and will do it as per their instructions.
Illinois, United States
Joined: January 25, 2010
KitMaker: 110 posts
AeroScale: 88 posts
Posted: Sunday, April 24, 2016 - 10:54 PM UTC
My Hanschel for a twin campaign is almost ready, so i am going to start ... another Hanchel

My build for Dive Bomber Campaign is Henschel 123:

it is an old model with nice new resin cockpit. To bad that not much of that will be visible after completing the aircraft...
it has raised panel line, i did not decide yet what/if i am going to do with them.
#523
Idaho, United States
Joined: February 28, 2014
KitMaker: 342 posts
AeroScale: 250 posts
Posted: Monday, April 25, 2016 - 03:14 AM UTC
Awesome Chis!
Looking forward to seeing it.
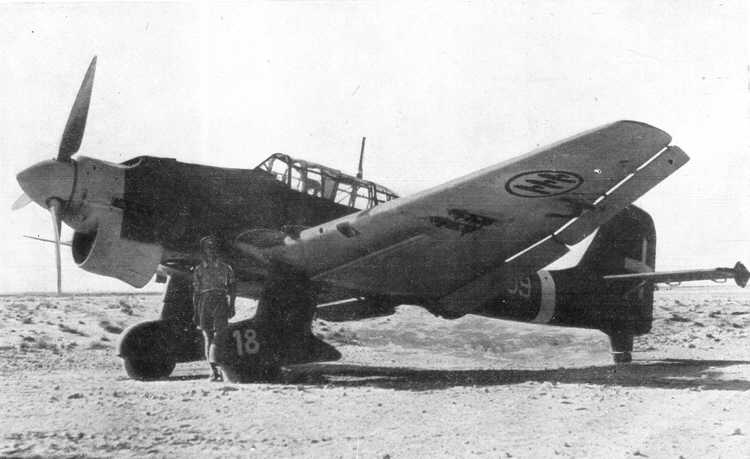
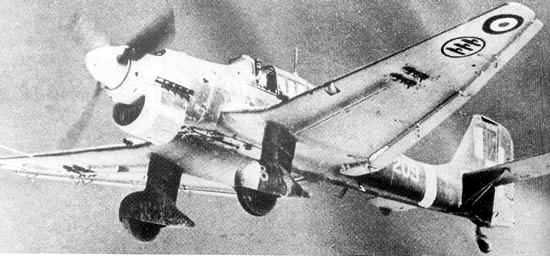
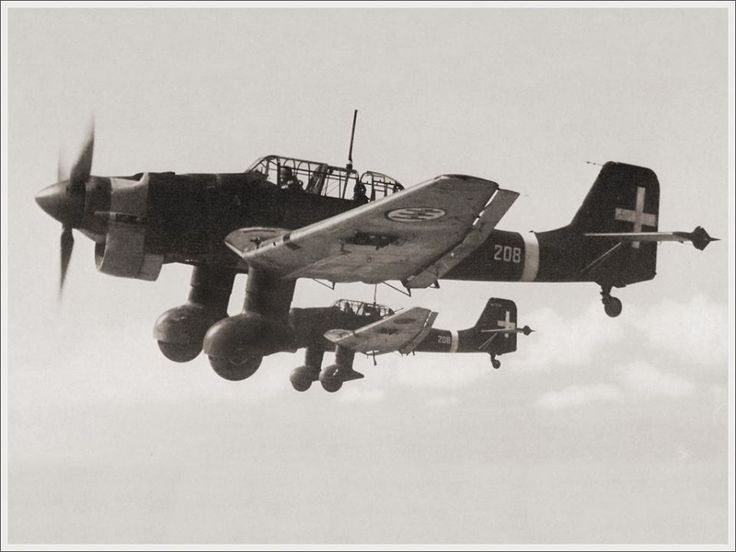
Found a few images myself.
This is 209 pre-capitulation.
This is it post
This is a squadron mate
Last but not least this is hard to tell what 2?? since it is blacked out.
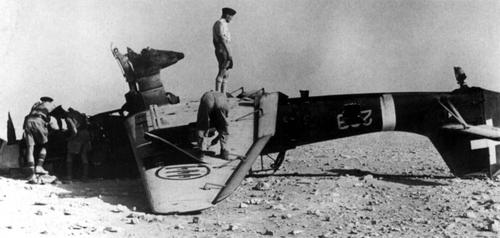
In most cases captured aircraft were left in their original colors with the deletion of national insignias. Colors were sometimes replaced with Italian camouflage colors, usually Grigio Mimetico or Grigio Azzurro Chiaro 1, depending on the period, for lower surfaces and Verde Mimetico 2 or Verde Oliva Scuro 2 on the upper surfaces.
Only on occasions during specific time did they use Black for night ops.
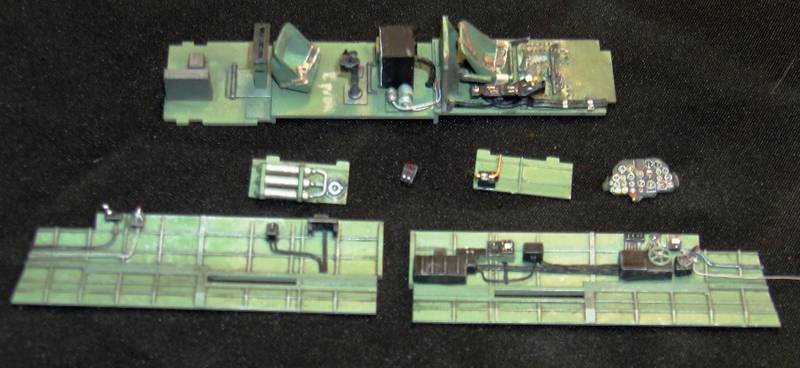
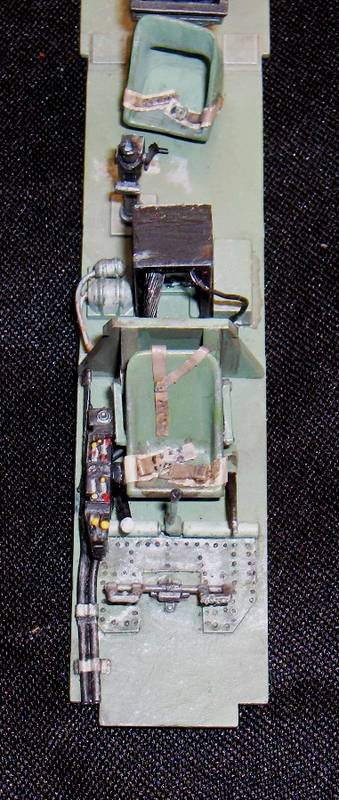
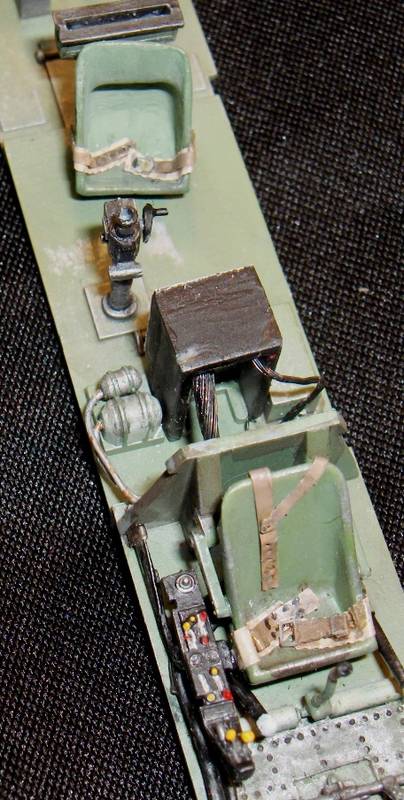
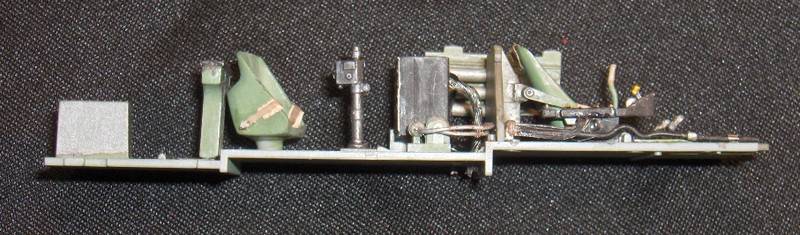
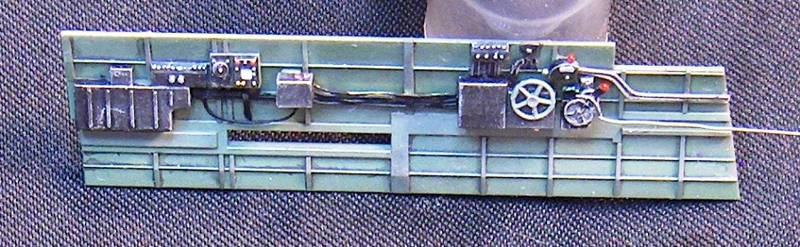
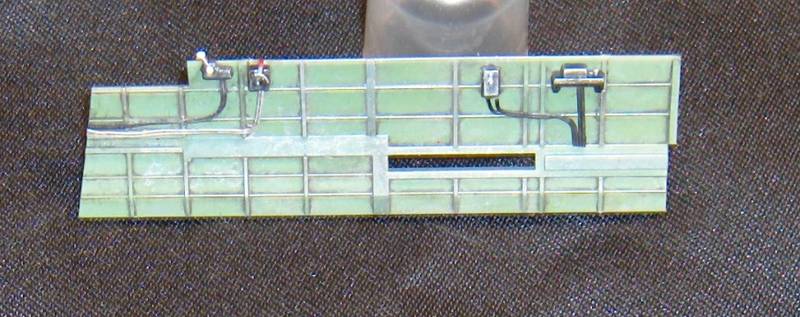
I should be posting some of my interior images soon.
I have been having issues with my electronics lighting in my Sub I am doing........
#305
Christchurch, New Zealand
Joined: February 01, 2006
KitMaker: 1,673 posts
AeroScale: 1,517 posts
Posted: Monday, April 25, 2016 - 12:48 PM UTC
Jeff that sucks buddy ... you could say they are "sub" par??
#523
Idaho, United States
Joined: February 28, 2014
KitMaker: 342 posts
AeroScale: 250 posts
Posted: Monday, April 25, 2016 - 07:22 PM UTC
Yep! lol
I decided to cut back and leave out some stuff and remove some fiber optics that I wanted. Maybe next time. It is my first attempt at lighting any of my models.
And OH by the way. Sorry I thought you were doing 209
#305
Christchurch, New Zealand
Joined: February 01, 2006
KitMaker: 1,673 posts
AeroScale: 1,517 posts
Posted: Friday, April 29, 2016 - 02:31 PM UTC
Small update my masks have arrived for the SB2C-4 and have been applied, time for paint!
#523
Idaho, United States
Joined: February 28, 2014
KitMaker: 342 posts
AeroScale: 250 posts
Posted: Sunday, May 01, 2016 - 09:03 AM UTC
#305
Christchurch, New Zealand
Joined: February 01, 2006
KitMaker: 1,673 posts
AeroScale: 1,517 posts
Posted: Sunday, May 01, 2016 - 02:03 PM UTC
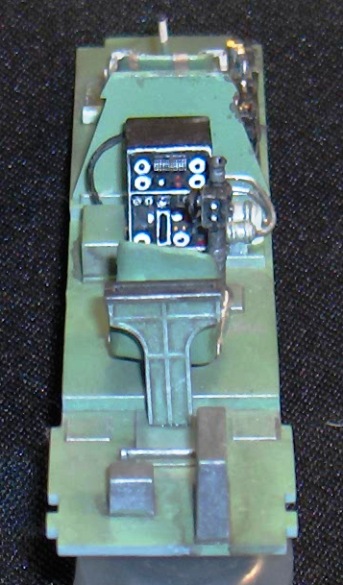
Nice interior Jeff, I'm guessing with the lack of hard photographic evidence then poetic license must come into play.
I've got the preshading done, I'm not to sure how it will turn out but this is a trial run so I'll be filing it away for future reference. And using the experience to refine the process to my satisfaction. Here are the pics of where I'm at with it now.


#523
Idaho, United States
Joined: February 28, 2014
KitMaker: 342 posts
AeroScale: 250 posts
Posted: Sunday, May 01, 2016 - 09:42 PM UTC
Chris,
Thanks
Yep Mostly for the wiring. I did redo some kit part from scratch and used some interior images of Kate's and Val's for some ideas.
Seat belts are scratch from foil with some PE buckles I have. Looking at most Japanese AC from the time they all seem to have the doubled layer like this.
Jeff
Ohio, United States
Joined: March 09, 2002
KitMaker: 818 posts
AeroScale: 137 posts
Posted: Tuesday, May 03, 2016 - 08:26 AM UTC
#523
Idaho, United States
Joined: February 28, 2014
KitMaker: 342 posts
AeroScale: 250 posts
Posted: Tuesday, May 03, 2016 - 08:26 PM UTC
Mike,
Looking good, can't wait to see finished product
Ohio, United States
Joined: March 09, 2002
KitMaker: 818 posts
AeroScale: 137 posts
Posted: Friday, May 06, 2016 - 06:48 AM UTC
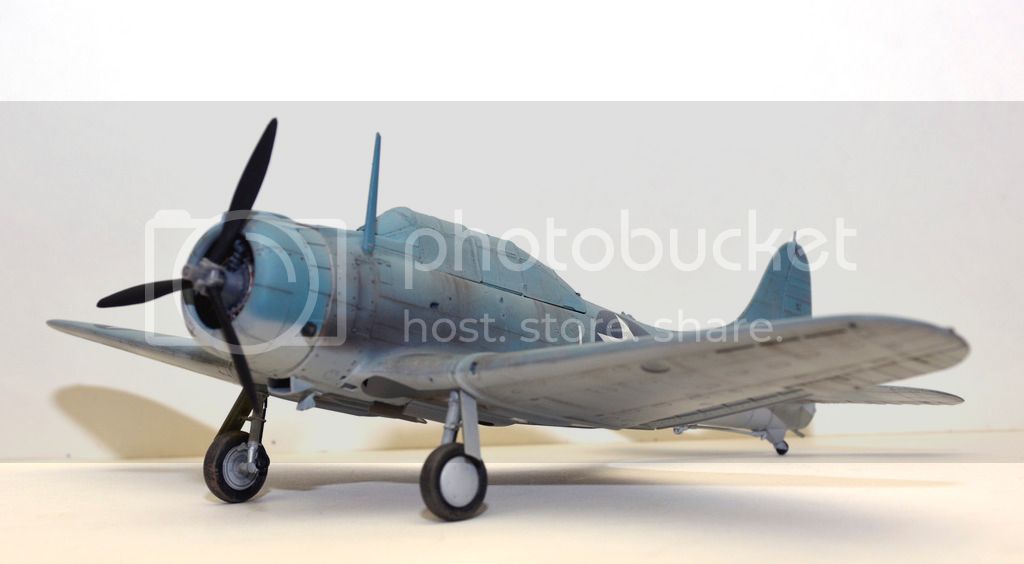
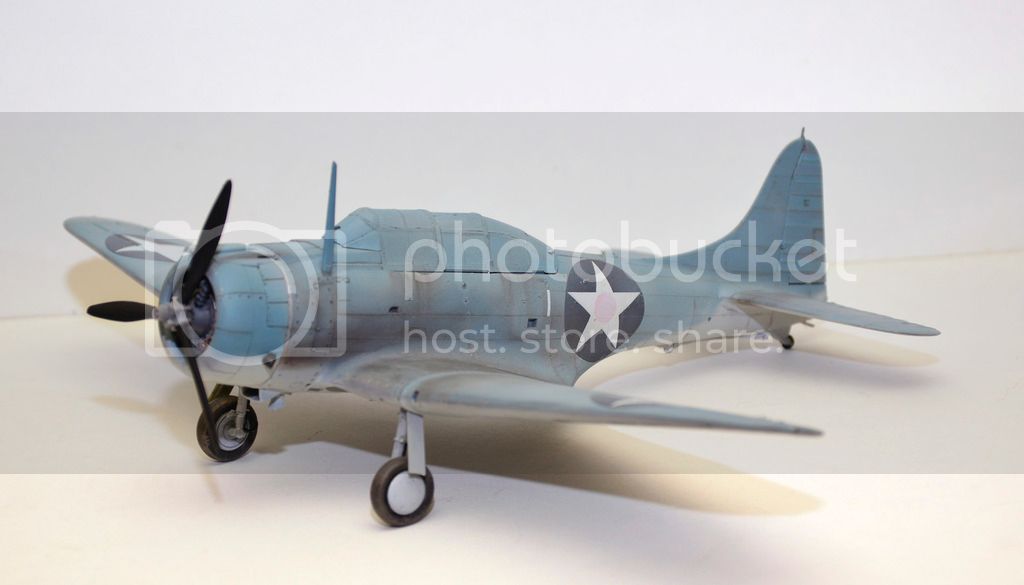
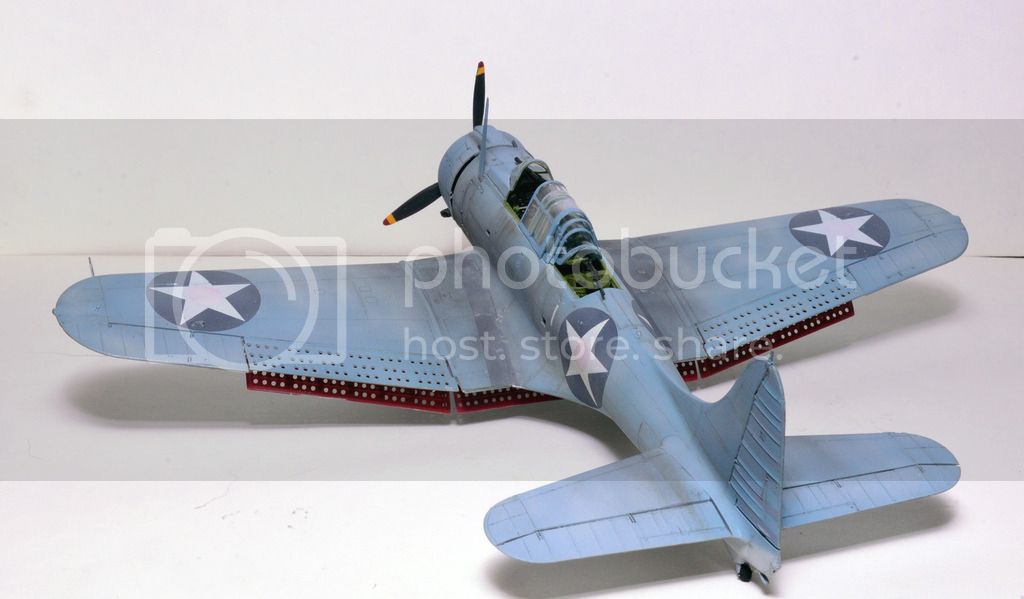
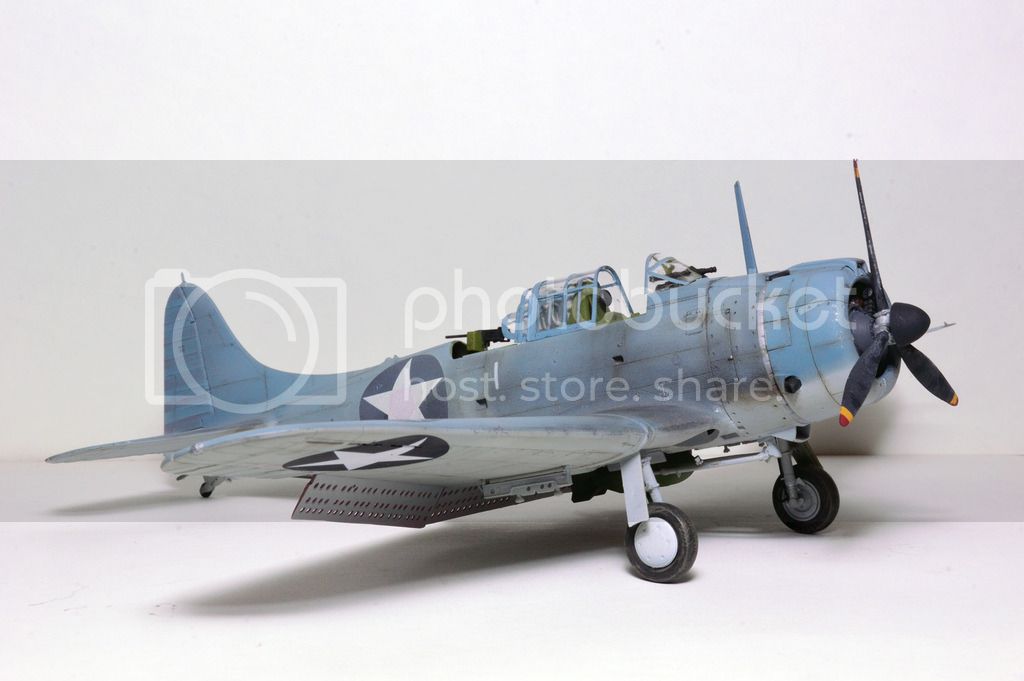
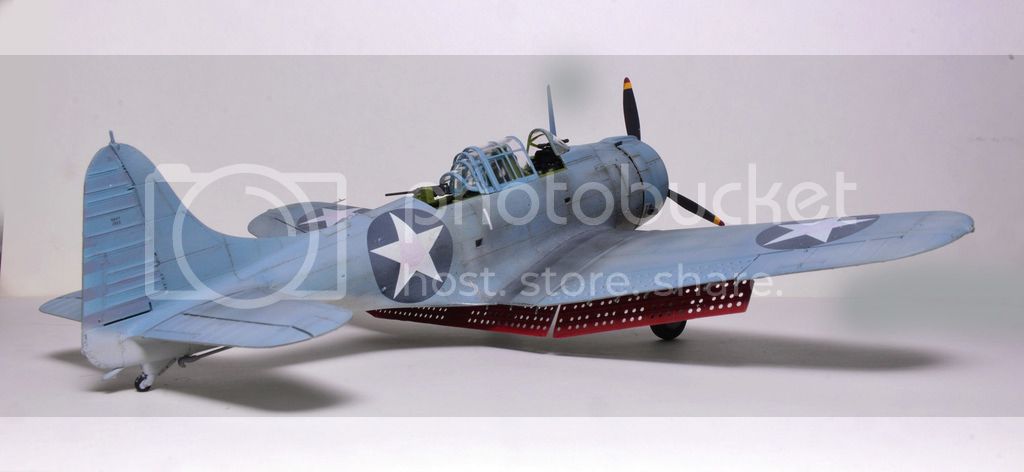
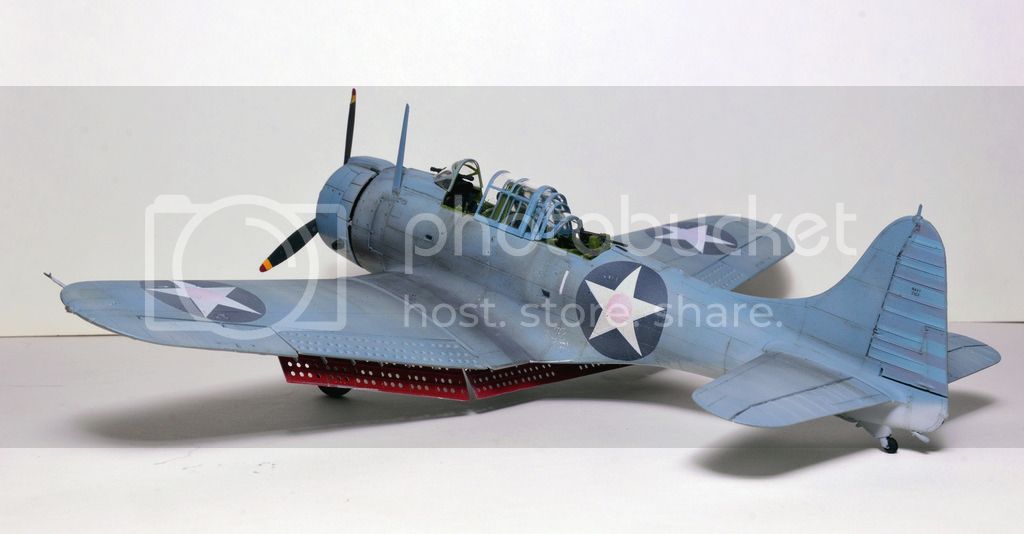
Accurate Miniatures 1/48 SBD-2 VMSB-241 Midway.
HENDERSON, LOFTON R.
Major, U.S. Marine Corps
Marine Scout-Bombing Squadron 241 (VMSB-241), Marine Aircraft Group 22 (MAG-22), Naval Air Station, Midway
Date of Action: June 4, 1942
Citation:
The Navy Cross is presented to Lofton R. Henderson, Major, U.S. Marine Corps, for extraordinary heroism as Squadron Commander of Marine Scout-Bombing Squadron TWO HUNDRED FORTY-ONE (VMSB- 241), during action against enemy Japanese forces in the Battle of Midway on June 4, 1942. With utter disregard for his own personal safety, Major Henderson, with keen judgment and courageous aggressiveness in the face of strong enemy fighter opposition, led his squadron in an attack which contributed materially to the defeat of the enemy. He was subsequently reported as missing in action. It is believed he gallantly gave up his life in the service of his country.
#424
Queensland, Australia
Joined: April 23, 2015
KitMaker: 4,648 posts
AeroScale: 1,938 posts
Posted: Friday, May 06, 2016 - 08:17 AM UTC
That is one great-looking SBD! Love the superior weathering.
Fantastic!
Gaz
"Artillery adds dignity, to what would otherwise be an ugly brawl."
Frederick The Great
#305
Christchurch, New Zealand
Joined: February 01, 2006
KitMaker: 1,673 posts
AeroScale: 1,517 posts
Posted: Saturday, May 07, 2016 - 02:31 AM UTC
I echo Gary's sentiments Mike that's a fine looking SBD and the historical information regarding it's pilot and his noteworthy actions is an added bonus thanks for sharing.
#305
Christchurch, New Zealand
Joined: February 01, 2006
KitMaker: 1,673 posts
AeroScale: 1,517 posts
Posted: Saturday, May 07, 2016 - 04:32 AM UTC
#424
Queensland, Australia
Joined: April 23, 2015
KitMaker: 4,648 posts
AeroScale: 1,938 posts
Posted: Saturday, May 07, 2016 - 05:20 AM UTC
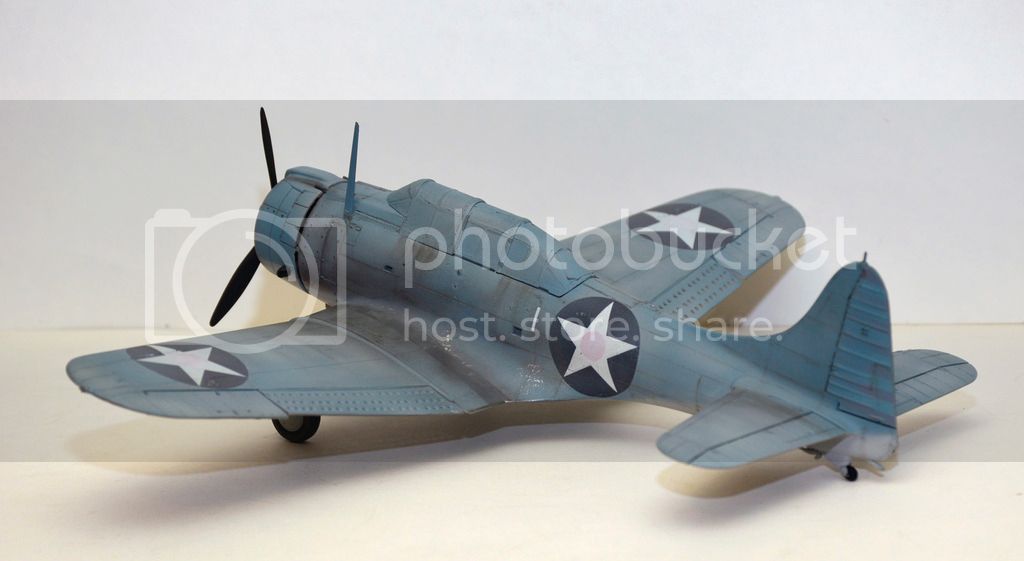
Chris,
Despite your decal issues, your Helldiver is looking great. Love the color scheme! Such an oddly shaped aircraft.
Gaz
"Artillery adds dignity, to what would otherwise be an ugly brawl."
Frederick The Great
#305
Christchurch, New Zealand
Joined: February 01, 2006
KitMaker: 1,673 posts
AeroScale: 1,517 posts
Posted: Saturday, May 07, 2016 - 08:38 AM UTC
Cheers Gaz! Yeah it's all wings and tail and looks rather out of proportion. Fuselage looks way to small for the rest of the airframe, hence the epitaph "Big tailed beast". it suffered from centre of gravity issues and lateral stability (hence the big tail) so simply lengthening the fuselage wasn't an ideal fix as it would have shifted the C.G. further back in an already unstable airframe.
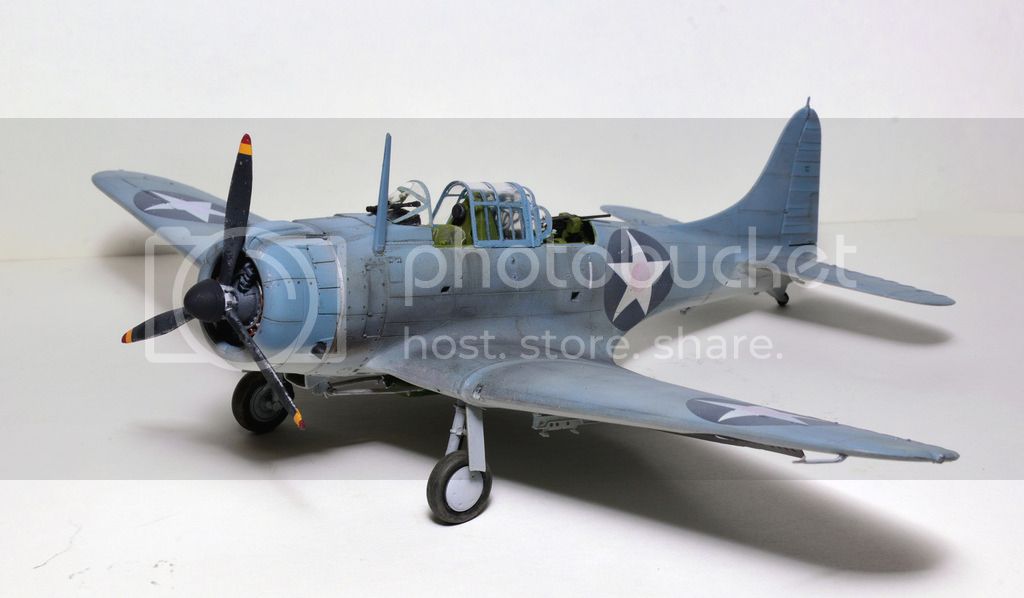
#523
Idaho, United States
Joined: February 28, 2014
KitMaker: 342 posts
AeroScale: 250 posts
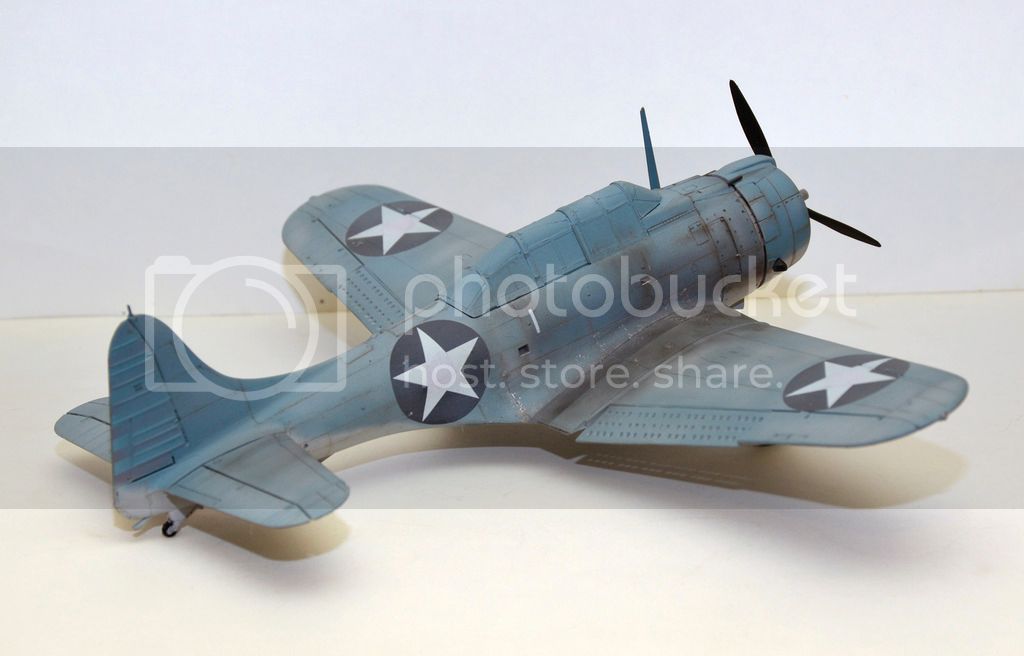
Posted: Sunday, May 08, 2016 - 10:37 PM UTC
Mike,
Simply Awesome!
That is a great job on the Dauntless.
From start to finish that is a superb job.
BZ!!!!!!!!!!!!!
Philippines
Joined: December 24, 2015
KitMaker: 48 posts
AeroScale: 35 posts
Posted: Saturday, May 14, 2016 - 01:50 PM UTC
Finally got back to this, hopefully there will be more painting progress next week. I just got done priming and painting yellow on the leading edges.