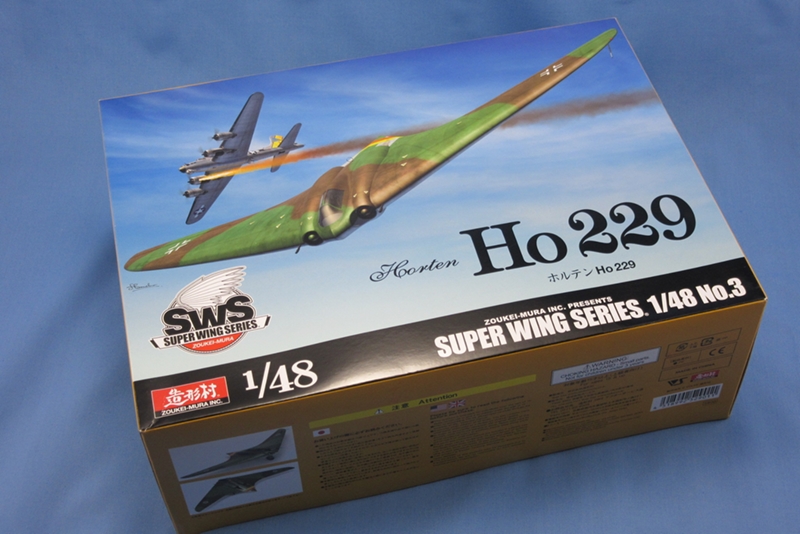
_GOTOBOTTOM
Pre-Flight Check
Constructive critique of your finished or in-progress photos.
Zoukei Mura SWS 1:48 Horton 229
PeeJay74
#363
_VISITCOMMUNITY
Pennsylvania, United States
Joined: January 08, 2014
KitMaker: 425 posts
AeroScale: 401 posts
Posted: Tuesday, February 16, 2016 - 05:42 AM UTC
This will be my build log for the Hangar Queen VII.


I am going to build Zoukei-Mura's new Super Wing Series 1:48 Horten 229. This is the third entry into their 1:48th scale line of kits, and is basically a scaled down version of the 1:32nd kit which came out a year ago. If you are not familiar with their kits, it builds from the airframe out giving a decent idea of how the actual aircraft was constructed. The entire outer skin is transparent, giving the builder the option to display all of that interior detail work if they choose, or paint it traditionally. I thought that was a unique way to engineer a kit, so when I saw they were releasing an Ho 229 in my scale I jumped at it.

The kit itself is based upon the NASM's V3 prototype which was captured towards the end of the war as part of Operation Paperclip. The V3 was a pre-production craft, and lacked a pressurized cockpit. This is faithfully recreated in the kit, with the cockpit being a complex tubular affair without actual sidewalls. It would have made for a cold and noisy ride. Photos of the actual aircraft can be found by Googling "NASM Ho 229".

Given the complex internal structures of the kit, I decided I wanted to get some better options for RLM paints than my Model Master enamels. I didn't want to sit around waiting for all of those parts to cure or I'd finish sometime next year. I ended up deciding on Gunze paints, having heard great things about their color accuracy and ease of use. Basically like Tamiya but no need to mix.


Originally I was only looking for an accurate RLM 02 acrylic-based paint, but I also needed Aotake for an additional project and USN Yellow Orange for yet another, and then the supplier was having a sale... so I ended up getting a bunch of new RLM stock. Delivery took about 3 weeks which didn't seem bad for free shipping from Taiwan.

Anyway, I will get this project started soon. More to come...
Joel_W
Staff MemberAssociate Editor
AUTOMODELER
_VISITCOMMUNITY
New York, United States
Joined: December 04, 2010
KitMaker: 11,666 posts
AeroScale: 7,410 posts
Posted: Thursday, February 18, 2016 - 01:16 AM UTC
Paul,
Great project. And with your modeling skills, I'm sure we're in for a great ride. I'll be coming right along from day 1.
Joel
PeeJay74
#363
_VISITCOMMUNITY
Pennsylvania, United States
Joined: January 08, 2014
KitMaker: 425 posts
AeroScale: 401 posts
Posted: Friday, February 19, 2016 - 05:02 AM UTC
@Joel - Thanks for the encouragement! I am hoping this gets me back in a building groove. I haven't been spending much time on the hobby lately.

Since this campaign is all about building brand new kits, I thought I would take some shots of the sprues to show what comes in the box. There are a total of 198 parts included, none of them spares. Every part has a place.

Many of the parts are very thin and delicate, so a good pair of side cutters and a supply of sharp blades is a must. Parts breakdown by sprue may be the best I have seen from any manufacturer. Each sub-assembly is contained on a single sprue so you don't have to go hunting through the whole box to find that one little part you need. Detail is very sharp, and no flash is present in my kit. Everything you could expect from a brand new kit. Ejector pin marks are practically non-existent, and sprue gates are small.

Here's a look:


Sprue A (x2) each contain one of the Jumo 004 engines. There is an option to build an engine display stand out of sections of the sprue frame, but I don't think i will bother since you can just leave the nacelle open to show them off.


Sprue B holds most of the framework for the fuselage.


Sprue C holds the remainder of the fuselage framing, the landing gear, and the cockpit framework.


Sprue D contains the Mk108 30mm cannons. Detail is excellent for the scale. The gas ports in the muzzle brake have been molded with hollow ends, albeit a bit shallow. (Below) In this scale though, it's a nice touch. They should be easy to improve with a micro drill, with no need for resin replacements.


Sprue E holds the outer skin for the main fuselage. We've come a long way since Monogram's Visible B-17G.


Sprue F has the nose. This is a good example of what I meant by sprue layout. This piece wouldn't fit on E so they gave it its own sprue instead of burying it in with other sub-assemblies.


Sprue G contains the internal wing framing structures.


Sprues H and I each contain one of the wing root attachment points. These are handed, so again to keep things straight for you they each get their own sprue so you don't mix them up while completing sub-assemblies. The wings can supposedly be press fit into these for easy disassembly later or for display purposes.


Sprue J has the left wing and nacelle shrouds.


Sprue K has the right wing and flaps.


Sprue L is the final sprue and holds the wing fuel tanks.

If anyone else is debating getting the kit you at least now have a good idea of what comes inside. Zoukei-Mura give you three options for finishing the kit right out of the box.

First, you can build the entire airframe up and display it as a skeleton with all of the internals open for viewing. I have to admit there is some appeal in the uniqueness of that approach but I plan to give mine skin.


The skeleton option. Photo from Zoukei-Mura's website.

Next, you can add all of the clear externals and leave it "visible". The sheer difficulty in joining all of those clear sections together without making a mistake with glue...? No thanks. Not to mention you would need to do some serious polishing to clear them up. If you look through some of the 1:32 scale builds out there, you can see some truly amazing work taking this option. The kit ends up looking like it was made of glass. But again, not for me.

Third, you assemble it normally and paint the outer clear pieces. Taking this option means you can skip a lot of the internal painting. I am planning something along this line. I am not sure exactly what yet. The aircraft was never operational so the you have a lot of freedom if you like the Luft '46 genre. The kit includes 3 fictional schemes for this and even more squadron markings. I am leaning towards keeping it close to the actual Operation Paperclip V3 Prototype but maybe with the idea it was actually captured and flown by Watson's Whizzers. I don't know, we'll see.

There is also a 4th option in the finish, but it isn't included out of the box. Zoukei-Mura tend to offer their own aftermarket upgrades for their kits. The 1:32nd has metal gear, turned brass gun barrels, resin pilots, and more. For the 1:48th kit they only have one offering so far, but it is really something: Custom fit wood grain decals to display the aircraft unpainted. I have to say it is really, really tempting. Steffen and Jean-Luc posted pics of this in the Nuremberg 2016 thread, I hope they don't mind I re-post one here to show it off.


The custom wood grain panel decals from Zoukei-Mura. They look stunning in my opinion. Photo by Jean-Luc.

So there we go. At $60 or thereabouts retail, you get a lot for your money in my opinion. I washed all of the plastic and set it out to dry. Tomorrow I should finally get to set things to glue!
Joel_W
Staff MemberAssociate Editor
AUTOMODELER
_VISITCOMMUNITY
New York, United States
Joined: December 04, 2010
KitMaker: 11,666 posts
AeroScale: 7,410 posts
Posted: Friday, February 19, 2016 - 08:11 AM UTC
Paul,
It would be a shame not to build and display at least some of that incredible detail. Have you considered some kind free handing of the clear sections, and then painting the rest so that some of each area of the aircraft allows for internal views ?

Joel
AussieReg
Staff MemberAssociate Editor
AUTOMODELER
#007
_VISITCOMMUNITY
Victoria, Australia
Joined: June 09, 2009
KitMaker: 8,156 posts
AeroScale: 3,756 posts
Posted: Friday, February 19, 2016 - 01:08 PM UTC
Paul, this looks absolutely amazing! I would consider drawing a line right down the centre and doing half skeleton and half wood grain. Then again I would consider buying a second kit and doing one of each, then a third in a what-if weather beaten operational scheme.

Really looking forward to whichever path you choose.

Cheers, D
Merlin
Staff MemberSenior Editor
AEROSCALE
#017
_VISITCOMMUNITY
United Kingdom
Joined: June 11, 2003
KitMaker: 17,582 posts
AeroScale: 12,795 posts
Posted: Saturday, February 20, 2016 - 02:06 AM UTC
Hi Paul

How about submitting this as a Review? It'll get far more attention than the forum and you've already taken the shots needed.

All the best

Rowan
PeeJay74
#363
_VISITCOMMUNITY
Pennsylvania, United States
Joined: January 08, 2014
KitMaker: 425 posts
AeroScale: 401 posts
Posted: Saturday, November 19, 2016 - 12:51 AM UTC
I am finally getting back to work on this. Golf season seems to kill my bench time, but now with the colder weather I should get to make some progress.

I have assembled the engines and gotten the majority of the paint and detailing done on them. Each is made up of 19 parts and the detail is impressive. I have seen resin engines with a lot less detail to them. ZM have included the major piping and fittings for the Jumo 004's, all I really need to do is decide how I want to display them and maybe add some wiring.


There are 15 parts in the major assembly, plus another 4 to add the piping. Detail is very impressive right out of the box.

The kit has 4 options for displaying the engines:

A. Buttoned up and mostly out of sight.
B. Buttoned up but with the nacelle cover left as clear plastic.
C. Mounted in the aircraft with the nacelle cover off.
D. On a custom display stand outside the finished aircraft.

I am sure there are a lot of super-detailers who like the idea of Option D, but I don't really care to have a gaping hole in my aircraft where the engine should be. If ZM had included some sort of engine faces to give the illusion of it being inside the closed nacelle I would probably go that route, but they only include the 2 complete detailed engines.

It would be a shame to not display some of that amazing detail so I am going to go with having one engine nacelle open to show it off. It also means I don't have to detail the other engine and can just install it with some basic painting.


One of the Jumo 004's assembled OOB and sitting on the included stand. ZM really did an outstanding job on them, a little added wiring will make them pop. I am ignoring the nasty mold seam on the rear half, it will be invisible inside the nacelle.

I was a little heavy handed with weathering the exhaust cone but I think it will be fine once I add some more details and washes.


This is basically what you will see through the top of the open nacelle.

Next up, the main fuselage frame...
Joel_W
Staff MemberAssociate Editor
AUTOMODELER
_VISITCOMMUNITY
New York, United States
Joined: December 04, 2010
KitMaker: 11,666 posts
AeroScale: 7,410 posts
Posted: Saturday, November 19, 2016 - 04:24 AM UTC
Paul,
It's really nice to see you back here, and see that you're at the bench again.

I know what you mean about giving up bench time for a chosen sport. I fished for years twice per week, 8 hours per outing. The season for me was Mid April to Mid Nov. During that time if I averaged 1 or 2 days per month modeling, that was a lot. These days I don't fish much, and then it's only for a half day.

The exhausts on your engines really look quite good to me.

Looking forward to your next update.

Joel
SpeedyJ
_VISITCOMMUNITY
Bangkok, Thailand / ไทย
Joined: September 17, 2013
KitMaker: 1,617 posts
AeroScale: 212 posts
Posted: Saturday, November 19, 2016 - 06:22 AM UTC
Nice work so far. I will follow this build with great interest

Regards,

Robert Jan
BigfootV
_VISITCOMMUNITY
Colorado, United States
Joined: December 24, 2005
KitMaker: 1,624 posts
AeroScale: 385 posts
Posted: Saturday, November 19, 2016 - 08:57 AM UTC
Hey Paul,

I'll be watching this one since I'm probably going to order the Skyraider A-1H or the He 219 A-O from VOLKS USA for my next project.

See ya in the funnies.......
thegirl
_VISITCOMMUNITY
Alberta, Canada
Joined: January 19, 2008
KitMaker: 6,743 posts
AeroScale: 6,151 posts
Posted: Saturday, November 19, 2016 - 07:16 PM UTC
Cool , will be tagging a long as I can with your build Paul .


Terri
PeeJay74
#363
_VISITCOMMUNITY
Pennsylvania, United States
Joined: January 08, 2014
KitMaker: 425 posts
AeroScale: 401 posts
Posted: Sunday, November 20, 2016 - 03:21 AM UTC
@Everyone - Thanks for all of the interest and encouragement.

I am really enjoying this kit, enough so that I may break down and pick up another of their 1:48 offerings. It's a really unique approach to engineering a model. If they end up scaling down the Do 335 I will definitely pick one up.

I started gluing the main fuselage framework together. There are 29 pieces in this sub-assembly, and it will form the base to mount the cannons, landing gear, engines, cockpit, and wings. Just like the real thing. The plastic is a little soft which is a good thing, the parts are so thin and tiny I fear they would snap immediately if it were at all brittle.


I glued the first 15 pieces to the fuselage frame together and then stopped for the day so everything could cure and set up. The penny was an idea shamelessly borrowed from Chuck Wojtkiewicz; it gives a good idea of the tiny diameter of the framing. Just don't expect me to imitate his awesome artwork!

The tiny frames did present me with a small issue to work out. There were some mold seams and micro flash present here and there. I picked up some molding flash sanders a while back, they were just the ticket.


These sanding bits chuck right into a Dremel tool and are perfect for those difficult to reach spaces. I use a cordless tool with lower RPM to reduce the risk of melting something. Much safer on thin parts than trimming with a sharp blade.

Once I add the remaining 14 parts, I'll prime and paint the framework so I can begin to add the other sub-assemblies.

More to come...
Joel_W
Staff MemberAssociate Editor
AUTOMODELER
_VISITCOMMUNITY
New York, United States
Joined: December 04, 2010
KitMaker: 11,666 posts
AeroScale: 7,410 posts
Posted: Monday, November 21, 2016 - 12:04 AM UTC
Paul,
I've never seen anything like a mold seam sander. Just might see if I can pick one package up.

BTW, I'm waiting for my Zoukei-Mura's 1/32 Skyraider H-1J to arrive. Should prove to be an incredible build experience.

Joel
PeeJay74
#363
_VISITCOMMUNITY
Pennsylvania, United States
Joined: January 08, 2014
KitMaker: 425 posts
AeroScale: 401 posts
Posted: Sunday, December 04, 2016 - 04:24 AM UTC
Time for another update!

I finished assembling the 29-piece fuselage frame and primed it with Mr. Surfacer 1500 Black. The framework seems fragile but actually is rather sturdy once its assembled. The tiny pipes all lend rigidity to each other without being brittle.


All primed up and ready for paint. The upper framework is just laying onto the main assembly to protect glue points.

After that had a chance to cure in my seed warmer (thanks for the tip Rowan!) I then layered Gunze Aqueous RLM 02 onto it. I lightly covered the undersurfaces, intentionally leaving them slightly darker than the upper sides to strengthen the impression of shadows. I picked out the finer details with Vallejo Model Colors acrylics, they are hands down my favorite paints for small brush work.


Everything is ready for a wash to make the details pop.

While that was going on I also assembled the landing gear, heat shrouds, cannon assemblies, and started in on the cockpit. They all have the base layer of paint on but each needs various detailing done. More on that next time.

My big accomplishment has been the engines. I decided to see how they looked with just some fine detail paintwork before I broke out the wires and went crazy. After picking out the tiny molded in detail with some color I decided I would be wasting time adding wires you wouldn't be able to see. I was really sure of this after I hit them with a wash of Tamiya's Black Panel Line Accent Color.

Detailed but lacking a wash:


And after the wash was applied and cleaned up:


I added nothing to those engines other than some paint, I really don't see the need to add anything to them now. Zoukei Mura molded in better detail than many resin engines I have seen. I do need to go back and touch up some tiny spots here and there but for the most part they will look just like that sitting in the frame. That is one of the things that has really made me enjoy this kit. If you spend time painting the little details you get a great result right out of the box.

I have also decided on her final paint scheme, but I'll save that for another day.

More to come...
Joel_W
Staff MemberAssociate Editor
AUTOMODELER
_VISITCOMMUNITY
New York, United States
Joined: December 04, 2010
KitMaker: 11,666 posts
AeroScale: 7,410 posts
Posted: Sunday, December 04, 2016 - 09:35 PM UTC
Paul,
The frame sure looks like a hornets nest, but I'm sure it went together without a single issue. Primer and paint made a huge difference.

As for those two engines, the Tamiya panel line wash made an absolutely huge difference in the transformation from plastic bits and pieces to what could be the actual engines.

I've been using both the Tamiya panel line wash which is enamel based, and the "Detailer" wash which is water based, and the results every time are outstanding and realistic.

Joel
wing_nut
_VISITCOMMUNITY
New Jersey, United States
Joined: June 02, 2006
KitMaker: 1,212 posts
AeroScale: 468 posts
Posted: Tuesday, December 13, 2016 - 06:01 PM UTC
Fine progress. I'll be looking into those sanders. Where did you get them?
PeeJay74
#363
_VISITCOMMUNITY
Pennsylvania, United States
Joined: January 08, 2014
KitMaker: 425 posts
AeroScale: 401 posts
Posted: Thursday, December 15, 2016 - 04:33 AM UTC
@Joel & Marc - I found those Molding Flash Sanders one day surfing through my usual sites. The company, Hobby Elements, didn't have a website but you can reach them by emailing [email protected] and asking about them. You can check out a review and video of them at Cybermodeler , I hope no one minds linking another site.

So back to the build.

I assembled the cockpit. This was the first section of the kit that I found a bit difficult. The parts are tiny, extremely thin, and have to be assembled in a somewhat complex fashion. I ended up doing it in phases, using the fuselage as an alignment guide. I glued the "sidewalls" to the rudder pedals using the fuselage to keep them straight and then let that sit overnight to cure. Once that was done I began adding more piping details to it and let each piece cure before moving on. It took a few days this way but in the end it worked great, everything was aligned properly and I used the bare minimum of glue to prevent the small parts from melting.


There are six parts in this tiny assembly. Keeping everything aligned was a pain. I taped the sidewalls to the fuselage and added each part one by one over several sessions.

The cockpit was sprayed with Gunze RLM 66 and set aside. I'll pick out the details with Vallejo and add a wash once the paint has cured. For the instrument panel, Zoukei Mura include individual dials or a complete set on a single decal. I think I'll try punching the individual dials and going that route first. The complete set is clear around the dials rather than the typical black film, but I want to use as little decal film as possible in the cockpit.

I also detailed the cannons. The muzzle and all of the gas breaks were drilled out with a micro drill. I painted them with Mr. Surfacer 1500 Black and then rubbed them down with shaved graphite from a standard pencil. This produces a very realistic metallic black in my opinion, actually far better than just spraying them with Alclad or another metallic paint since the graphite creates a drybrush type effect of highlights and shadows. If you spend a little effort detailing the cannon you will have no need for resin or brass aftermarket parts here.


A micro drill, some black primer, and a pencil. Voila!


I gloss coated everything I have built up to this point with several light mists of Future, minus the cannons which are done as is. Once the Future cures I'll give everything a wash and then put the main fuselage assembly together. Once that is done things should begin to fall together rapidly.

More to come soon, thanks for following along!
Joel_W
Staff MemberAssociate Editor
AUTOMODELER
_VISITCOMMUNITY
New York, United States
Joined: December 04, 2010
KitMaker: 11,666 posts
AeroScale: 7,410 posts
Posted: Friday, December 16, 2016 - 02:25 AM UTC
Paul,
You're making excellent progress for sure. I really like your technique for creating that gun metal look. Going to give it a try as I've never been really happy with my final results. I do think for a base color I'll try Nato Black as it has a excellent scale effect.
Joel
PeeJay74
#363
_VISITCOMMUNITY
Pennsylvania, United States
Joined: January 08, 2014
KitMaker: 425 posts
AeroScale: 401 posts
Posted: Sunday, December 18, 2016 - 03:32 AM UTC
@Joel - Thanks for the encouragement, it is appreciated!

Unfortunately, Houston we have a problem...

I got the cockpit ready for instrument decals and was a bit dismayed to see that the gauges are a bit lacking upon close inspection. When I first got the kit I gave everything the once over but didn't pay close attention to the instrument gauge faces. I think the detail will be impossible to make out so I went ahead and ordered a set of Luftwaffe gauges from Airscale. I have their USAAF gauges and placards and I am very impressed with the level of detail. I'm hoping the Luftwaffe set is as good.

For now, I am going to hold off working in the cockpit and switch my efforts to the wings and landing gear. There is plenty to be done elsewhere and the modular sub-assemblies allow me to keep going while the cockpit sits idle.


The cockpit painted up and ready for decals.


Not a great picture, but this will give some idea of what my concern is. Some of the gauges are fine and will work well, but on others the details are so thin as to disappear especially under gloss coats. I'll wait for the Airscale gauges and pick the best options for each.

On a related note, can anyone help me out and explain how Luftwaffe gauges are color coded? Red, Yellow, Blue, etc...
Joel_W
Staff MemberAssociate Editor
AUTOMODELER
_VISITCOMMUNITY
New York, United States
Joined: December 04, 2010
KitMaker: 11,666 posts
AeroScale: 7,410 posts
Posted: Sunday, December 18, 2016 - 03:51 AM UTC
Paul,
I can sense your frustration with the gauges. I'm wondering if the IP is just a reduced picture, so the gauges will appear that way. Have you given any thought to placing the decal on a white background, as that should help to add brightness to the white.
Joel
BigfootV
_VISITCOMMUNITY
Colorado, United States
Joined: December 24, 2005
KitMaker: 1,624 posts
AeroScale: 385 posts
Posted: Sunday, December 18, 2016 - 04:00 AM UTC
Hey Paul,

These links might help..........

https://airandspace.si.edu/collections/horten-ho-229-v3/

http://3.bp.blogspot.com/__0tuiFQFxS8/TNbC34GnMiI/AAAAAAAAAFk/hsuIy7thrFE/s1600/Instrument.jpg

HTH.

PeeJay74
#363
_VISITCOMMUNITY
Pennsylvania, United States
Joined: January 08, 2014
KitMaker: 425 posts
AeroScale: 401 posts
Posted: Sunday, December 25, 2016 - 03:52 AM UTC
@Brian - Thanks for the links, that NASM site has some excellent in-depth information in the restoration photos and notes. I need to repaint the heat shrouds for my engines now, they should be iridescent black not steel.

@Joel - I debated ways to make the kit decals work but that seemed pointless after the mailman came by yesterday...

Just a quick update on the holiday.

Airscale got my decals out to me in short order, they were waiting in the mail when we came home from our family Christmas dinner. They did not disappoint, the Luftwaffe gauges are every bit as detailed as the USAAF set I already had. I am going to use them and ditch the kit instrument panel set.


Merry Christmas to me from Airscale. I also got their set of Japanese instruments and another for early jets.


No comparison in my book, Airscale all the way.

That's it for now. I would log some bench time but it is Christmas after all.

Happy Holidays everyone, more to come soon...
Joel_W
Staff MemberAssociate Editor
AUTOMODELER
_VISITCOMMUNITY
New York, United States
Joined: December 04, 2010
KitMaker: 11,666 posts
AeroScale: 7,410 posts
Posted: Sunday, December 25, 2016 - 06:13 AM UTC
Paul,
No contest. Airscale is a winner by a mile.
Joel
BigfootV
_VISITCOMMUNITY
Colorado, United States
Joined: December 24, 2005
KitMaker: 1,624 posts
AeroScale: 385 posts
Posted: Sunday, December 25, 2016 - 09:01 PM UTC
Hello Paul,

Glad to help.

Have a safe New Year.

See ya in the funnies..........
PeeJay74
#363
_VISITCOMMUNITY
Pennsylvania, United States
Joined: January 08, 2014
KitMaker: 425 posts
AeroScale: 401 posts
Posted: Friday, December 30, 2016 - 08:48 AM UTC
Progress at last!

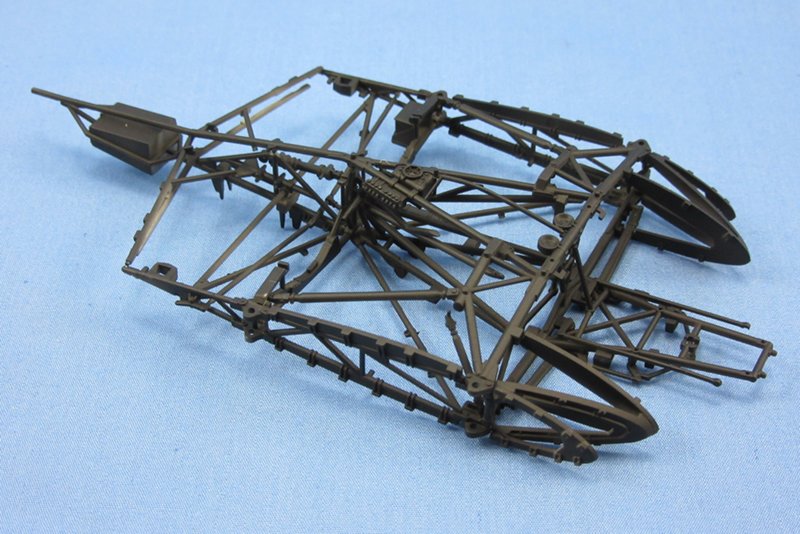
I finally managed to get everything in the main fuselage ready for assembly. The complexity means I had to paint everything before assembly, which of course makes glue fun to use. Clamps, a little bit of kabuki tape, and some Tamiya Extra Thin did the trick though.


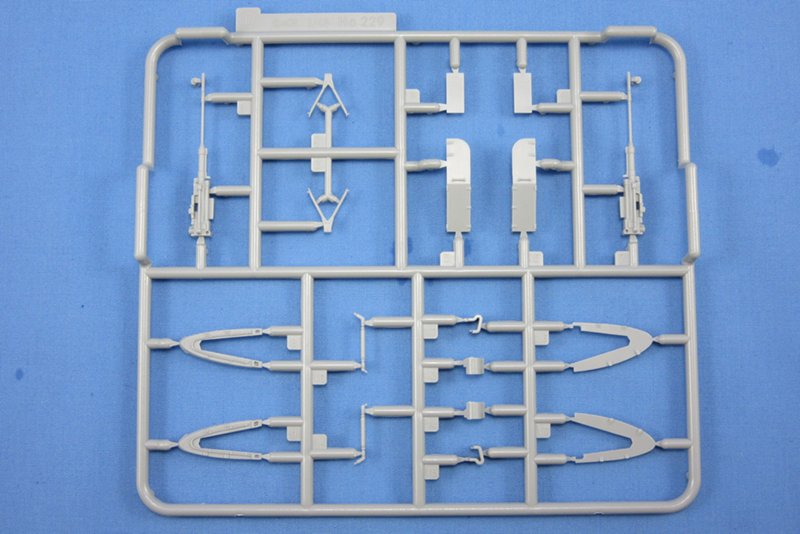
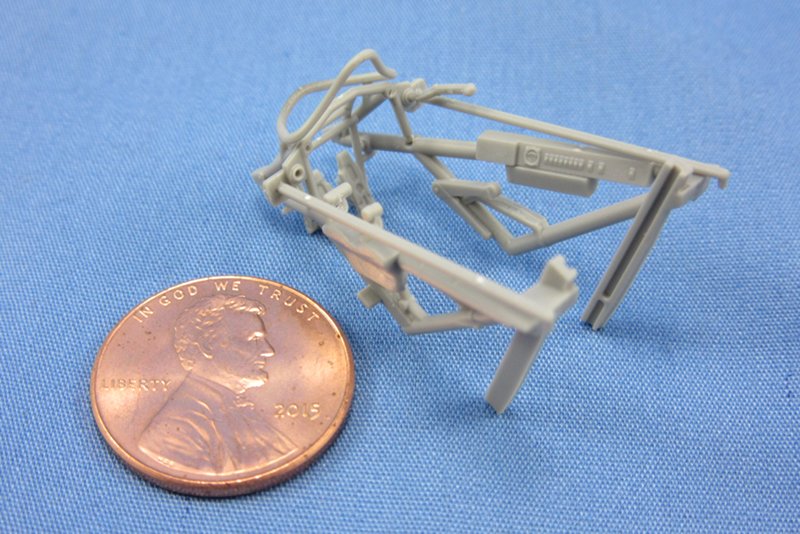
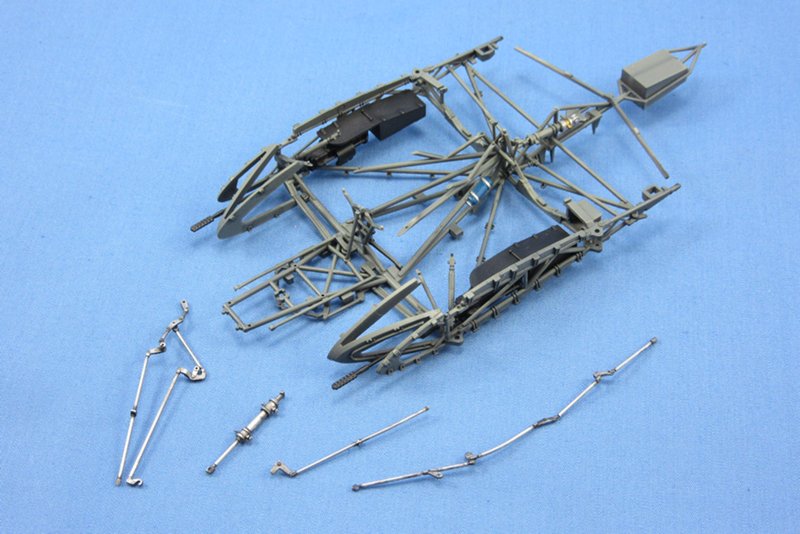
First up were these linkage rods.

The linkage have to be threaded through the fuselage piping, but not glued until after the cannons and engines are mounted. Sounds fun right? Zoukei Mura include an addendum to the instructions with multiple views of everything to show you where the linkage need to go. Through here, under that, left of this, insert a pin here, under this, and finally on top of that. Then grab the next piece... It actually wasn't that bad but lots of test fitting and careful planning are a must. The real problem is that these pipes all must sit at specific angles to attach to the frame properly, and the instructions really do not make the positions clear even with the addendum.

I lightly glued the linkage in place once I managed to get them in their proper positions, and then waited until I had everything together to fix them permanently. It proved to be a delicate balance of just enough extra thin to hold them but not so much I couldn't break the weld and re-position it a bit to its final proper angle.


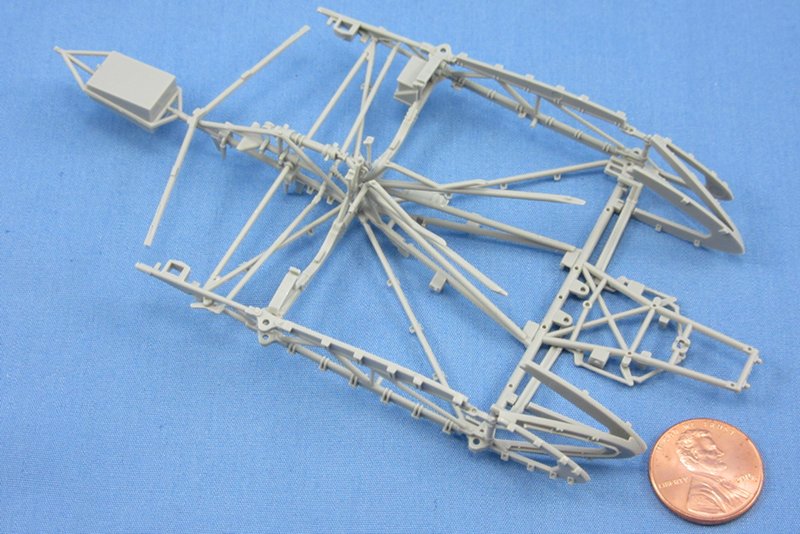
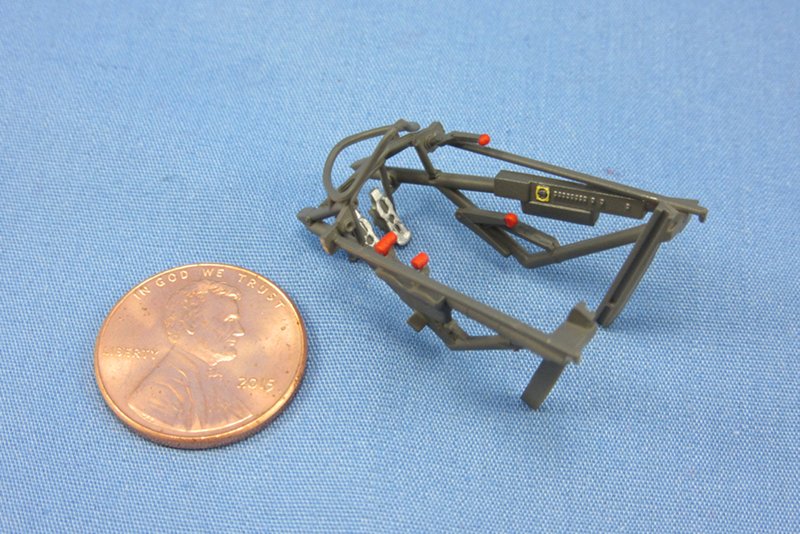
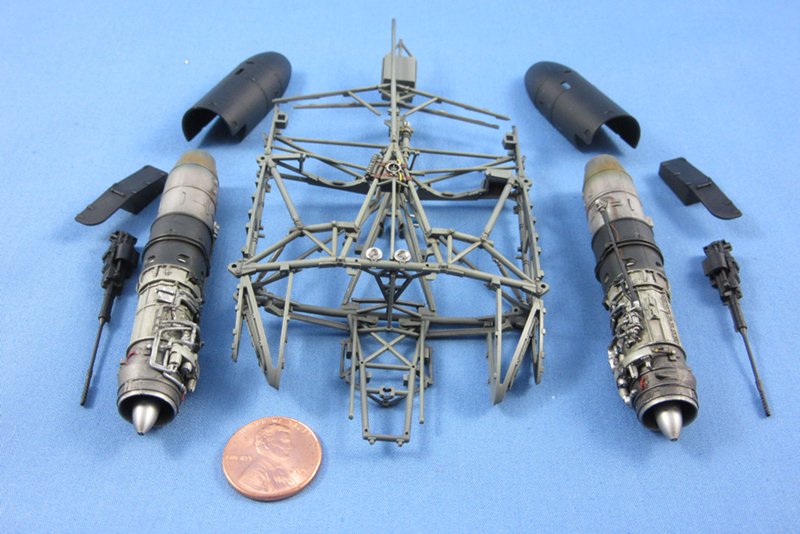
Next, all of this needs to go into there. It isn't obvious to look at but the piping is actually a bit of a rat's nest when you start sliding things inside the frame. The picture kind of makes it look open.

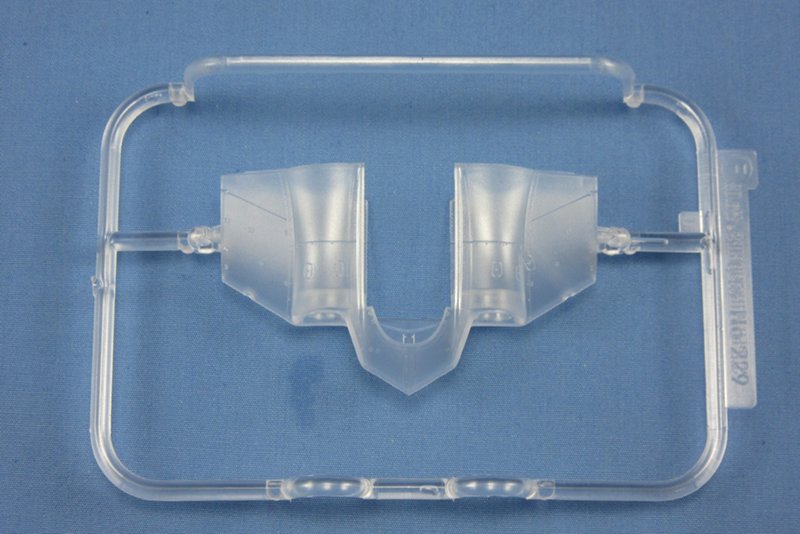
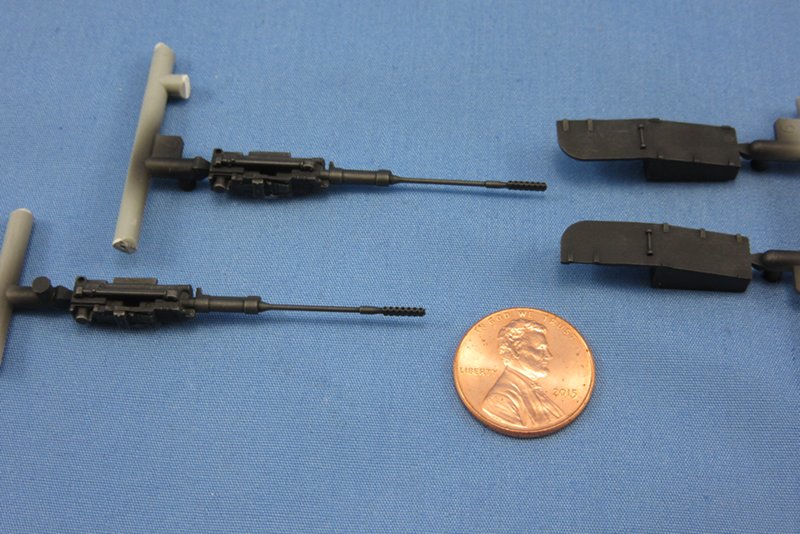
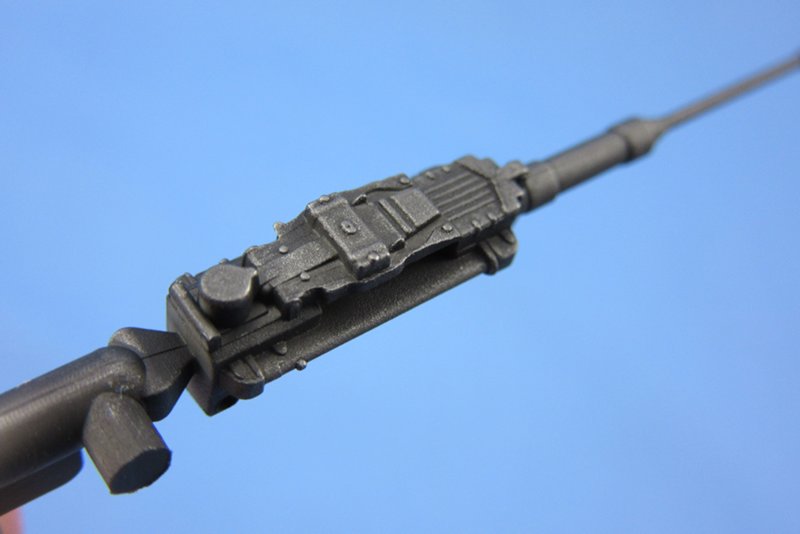
The cannons went in first. They mount to a small peg and the barrels have to be threaded through the piping. A little patience when doing this pays off and they will slide in place easy enough. The peg is the only glue point for the cannons though, and aligning them properly is a bit tricky. I used the clear nose section to check everything during this assemble. I put one sub-assembly on, checked alignment with the nose piece, then moved on to the next. This kept everything on its proper axis. The ammo feed chutes glue in place after the cannons are mounted.

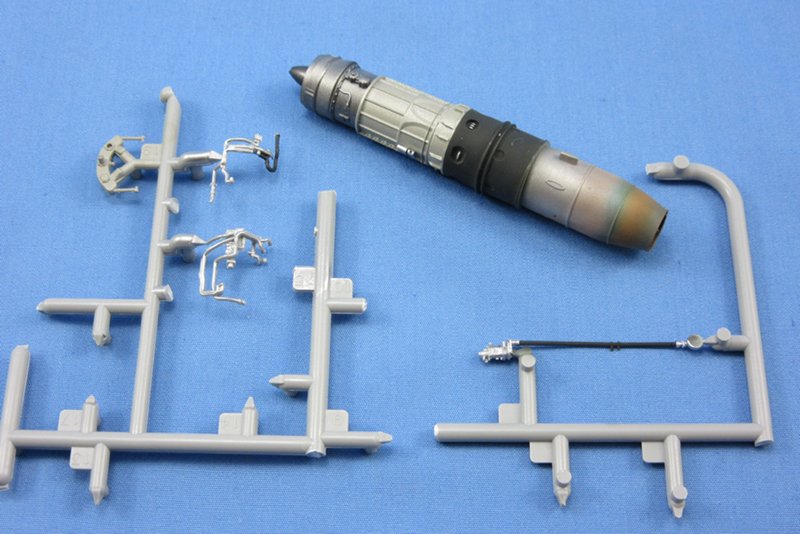
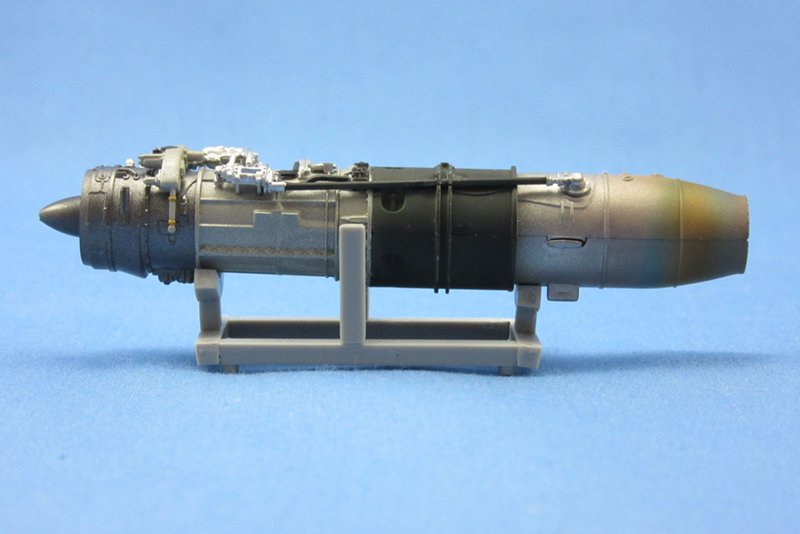
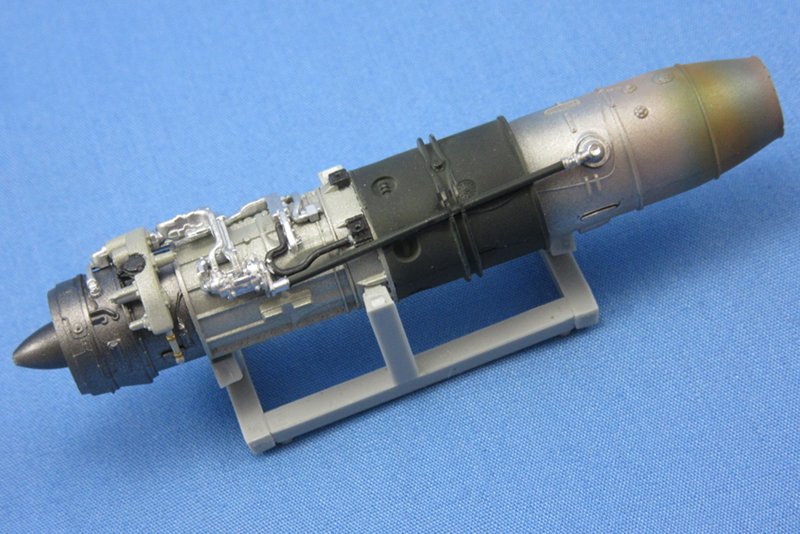
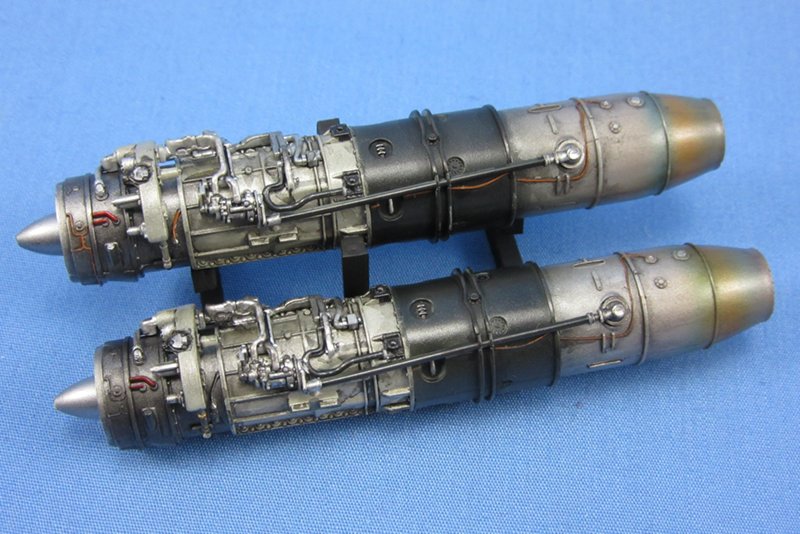
The engines were next and actually snap into place inside the heat shrouds if you spread the sides with just a little force. Not too much though, the shroud halves are actually clear plastic and a bit brittle. Once in place though, there is a solid tab and slot design which literally clicks into place. I didn't feel the need for any glue to hold them. Once that was done for both, I mounted them one at a time again checking each with the nose piece before doing anything else. The engines did not require glue either, they are a tight fit with very solid alignment pins and tabs to keep them straight. They will also literally click into position when you get them lined up correctly.

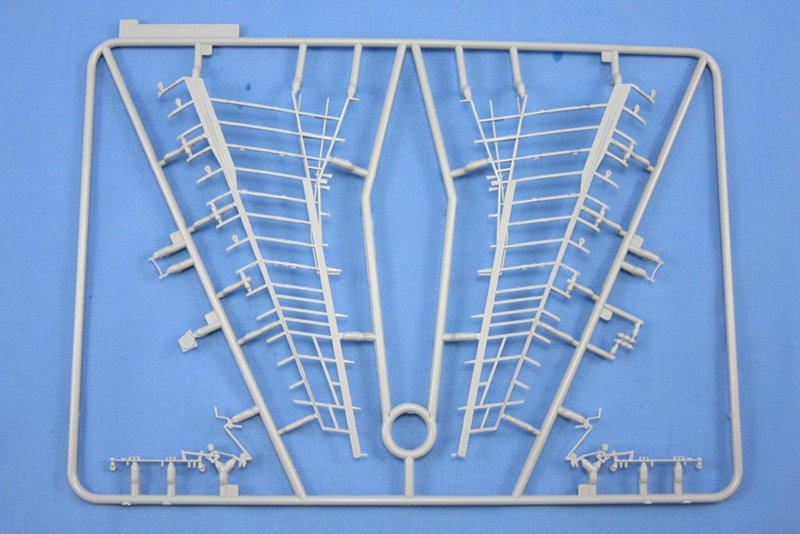
Once I had everything in place, it was time to add the top frame. This was a long and tedious process. To make sure the fuselage is properly assembled, you need to line up and glue the top frame to the lower assembly in thirty-nine different spots! Zoukei Mura include a helpful isometric diagram and top view of this step that shows you every spot, but it is not a simple matter of popping it on and applying some glue all at once. Thirty nine individual connections just are not going to line themselves up perfectly without a bit of help.

I tackled this step by first drilling out all of the holes underneath the top frame to improve the connection points. This ensured that I wouldn't have to force the parts together due to a closed or narrow locating hole. Next I chose a central point to work from. There is a large locating pin close to the middle of the frame. I glued the top piece to the lower assembly here and clamped it tightly until the glue set. Once that was accomplished I started working my way outward, lining everything up and giving the plastic time to set before I moved on to the next point. There were plenty of small connections which needed to be coaxed into fitting properly, and pipes that had to have their positions adjusted or relocated. Doing it this way took me the better part of the afternoon today to add just this one piece, but it worked perfectly.

As I mentioned earlier in the build, the plastic is slightly soft and flexible, and this was a big advantage when trying to work through this step. I didn't have to fear breaking the tiny frames while trying to bend them a bit this way or that. In the end, everything worked out well and I have the main fuselage completed.


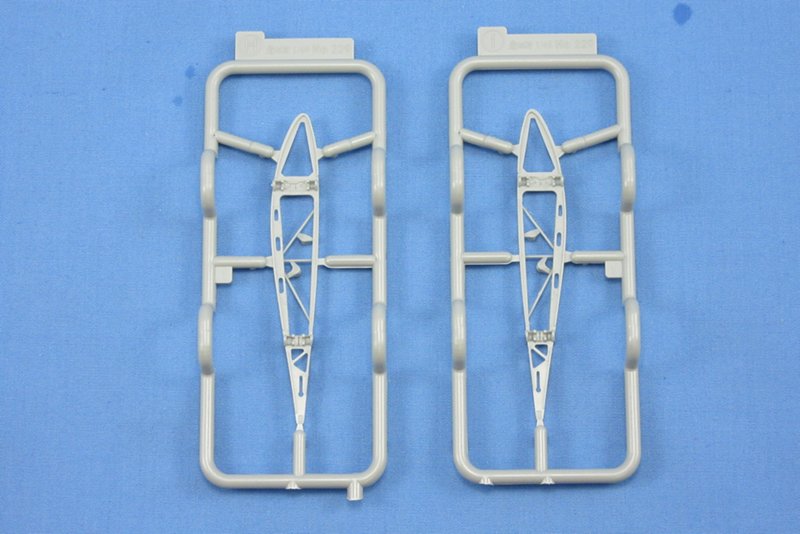
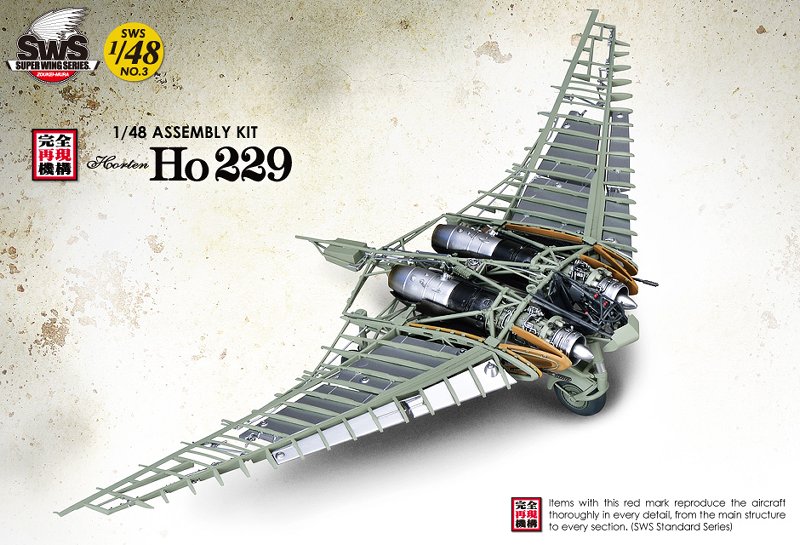
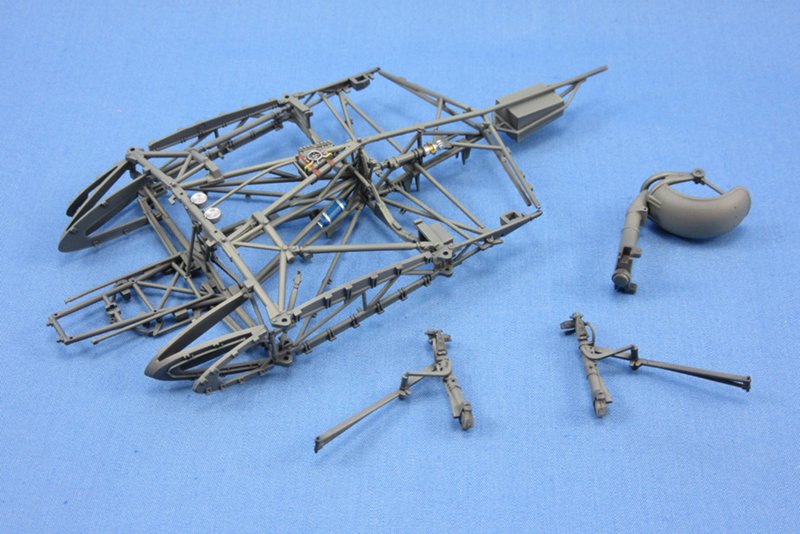
There are no less than 80 individual parts in this assembly. It is probably the most complex thing I have ever built out of plastic but in the end it worked out great. This is less a testament to my modeling skills than a nod to Zoukei Mura's marvelous engineering, with a little patience and forethought it goes together flawlessly.

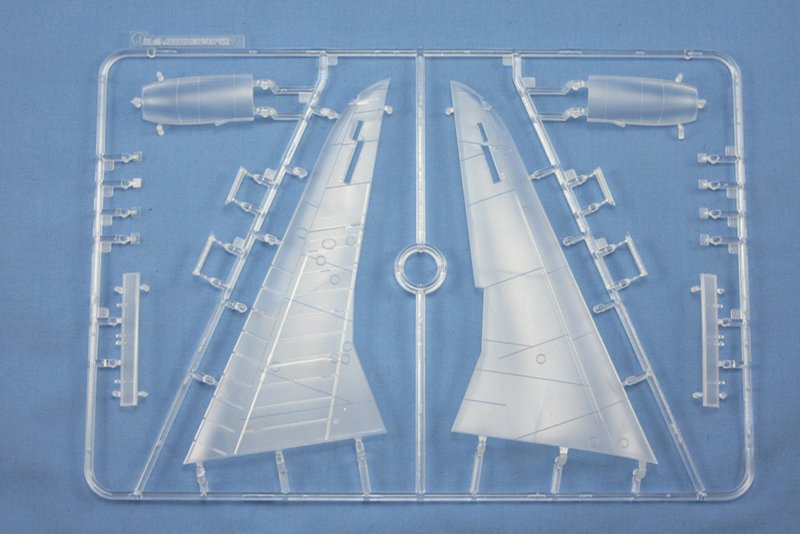
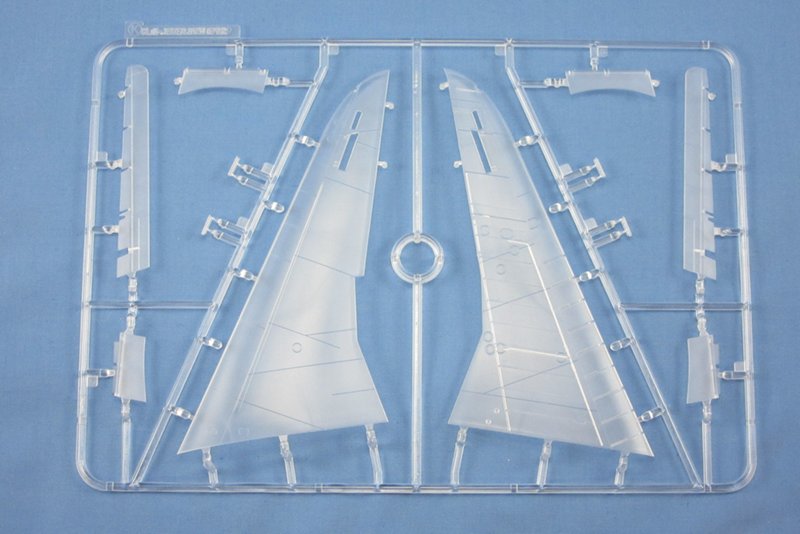
From here I need to finish the cockpit and add it, then do the same with the landing gear. Once that is out of the way the remaining construction should go quickly. The wings are much larger, more traditional structures to build. From here my main concern is going to be working with the clear skin sections. It is more brittle and less forgiving, but should be really interesting. This kit is definitely at the top of my list for favorite kit builds. I will obviously not complete it in time for the Hot Out Of The Molds II deadline, but I am not trying to rush and mess it up at this point.

More to come soon!
 _GOTOTOP