

Hosted by Rowan Baylis
Building Tamiya's 1/48 Lancaster

Redhand

#522

Joined: January 20, 2013
KitMaker: 1,460 posts
AeroScale: 1,443 posts
Posted: Sunday, May 08, 2016 - 11:57 PM UTC
Very nice!


GazzaS

#424

Joined: April 23, 2015
KitMaker: 4,648 posts
AeroScale: 1,938 posts

Posted: Monday, May 09, 2016 - 03:47 AM UTC
Paul,
Very impressive!
Gaz
Very impressive!
Gaz
Joel_W
Joined: December 04, 2010
KitMaker: 11,666 posts
AeroScale: 7,410 posts
Posted: Wednesday, May 11, 2016 - 05:19 AM UTC
Paul,
Your continued excellence in scratch building to a high degree is really evident in all those Formers and stringers. Usually when there are s many small individual pieces, they tend to be slightly out of line. The completed half of the fuselage really looks dead on.
As for drilling styrene, I'm sure that you use a starter punch to center the hole. Of course one still needs to measure and make sure that the starter hole is where it needs to be.
Joel


KelticKnot

Joined: May 11, 2015
KitMaker: 768 posts
AeroScale: 656 posts
Posted: Wednesday, May 18, 2016 - 07:57 PM UTC
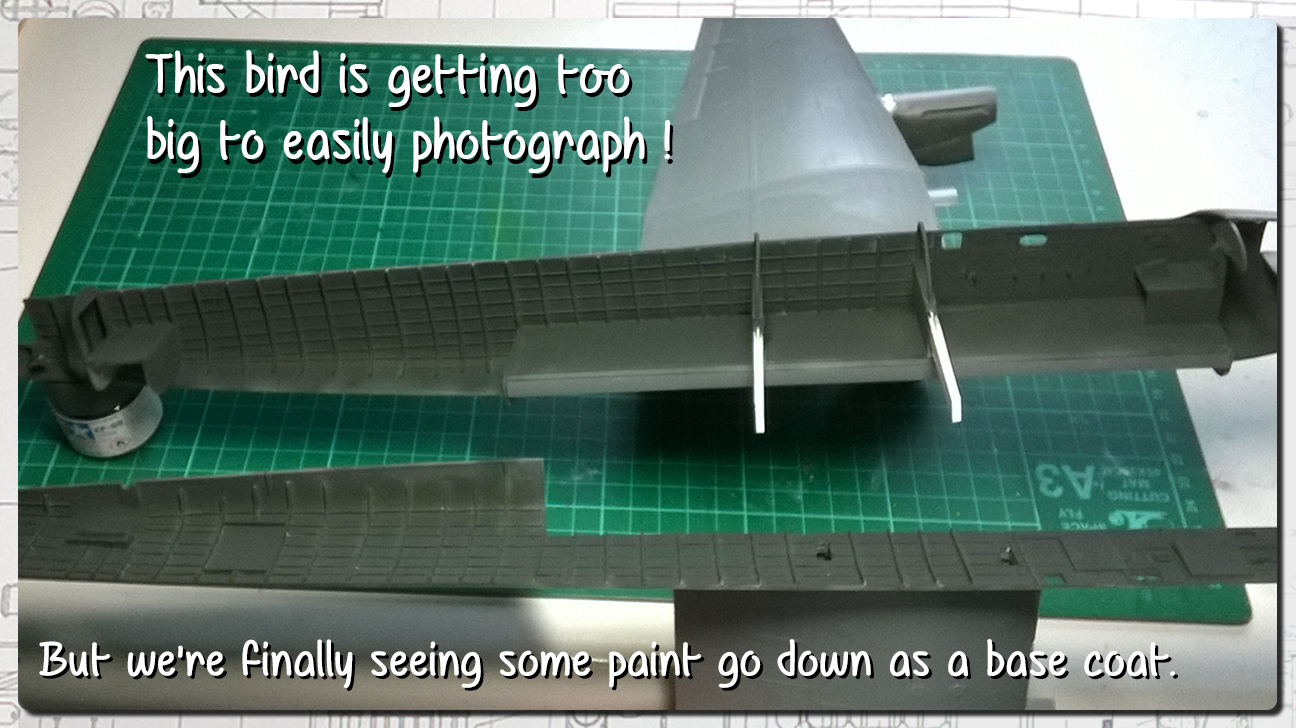
Well, it's taken me another week and a bit to get the second half of the fuselage kitted out with the structural components.
I'm so glad that this stage of the build is over, and if anyone sees me contemplating anything like this again in the future feel free to remind me of this moment !
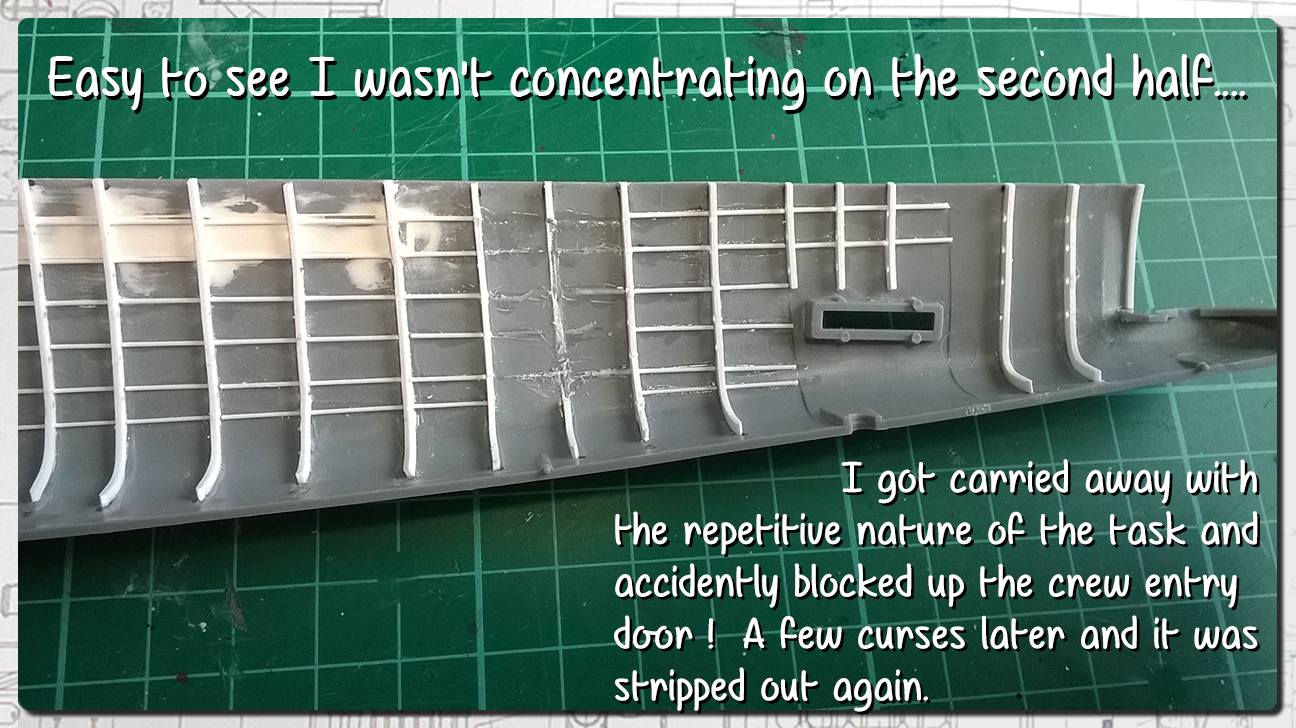
I'm really looking forward to getting this basic interior painted up tomorrow (hopefully, as it looks set to rain and the grass will have to wait to be cut )
)
I'm so glad that this stage of the build is over, and if anyone sees me contemplating anything like this again in the future feel free to remind me of this moment !
I'm really looking forward to getting this basic interior painted up tomorrow (hopefully, as it looks set to rain and the grass will have to wait to be cut
)
GazzaS
#424
Joined: April 23, 2015
KitMaker: 4,648 posts
AeroScale: 1,938 posts
Posted: Wednesday, May 18, 2016 - 11:21 PM UTC
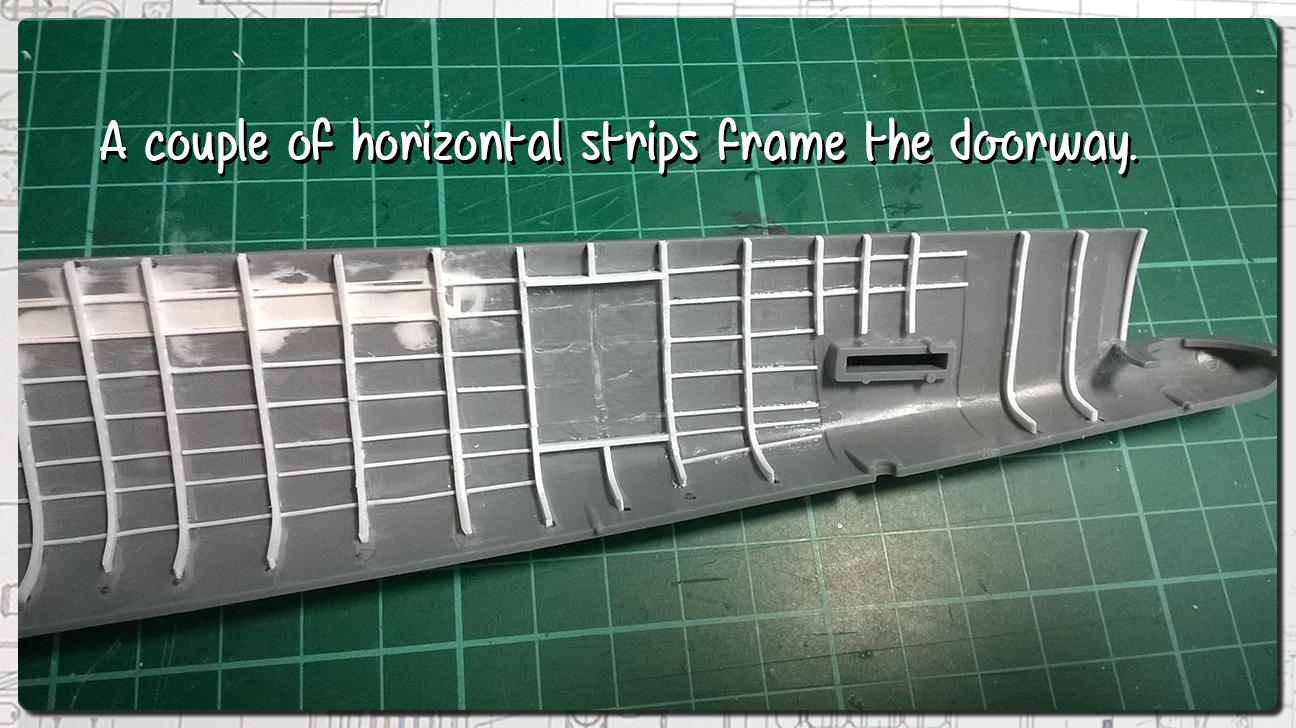
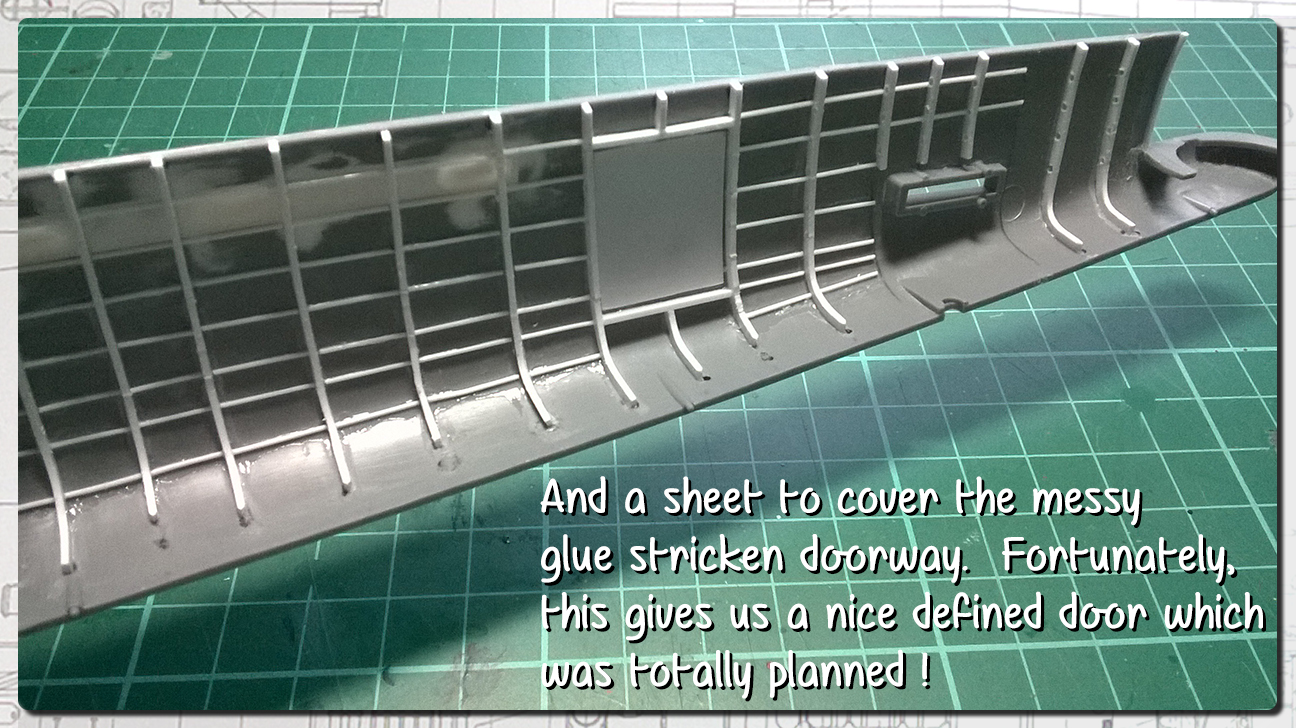
Paul,
Glad to see more progress! Good save on the almost obliterated door, too. I've had to reconfigure my bench layout to work on my behemoth... So I'm sure you'll be enjoying it even more once you join the halves.
Gaz
Glad to see more progress! Good save on the almost obliterated door, too. I've had to reconfigure my bench layout to work on my behemoth... So I'm sure you'll be enjoying it even more once you join the halves.
Gaz
KelticKnot
Joined: May 11, 2015
KitMaker: 768 posts
AeroScale: 656 posts
Posted: Thursday, May 19, 2016 - 01:16 AM UTC
Quoted Text
Paul,
Glad to see more progress! Good save on the almost obliterated door, too. I've had to reconfigure my bench layout to work on my behemoth... So I'm sure you'll be enjoying it even more once you join the halves.
Gaz
Thanks Gaz! Its been frustrating to put a lot of work in with nothing worth showing - nobody wants a blow by blow account of hundreds of tiny bits of repetitive gluing!
I'm mulling over at what point I need to close the halves. This interior scratchbuild has become so unique that the instruction sheet has been untouched for quite some time.
My hunch is to get this stage painted and shaded, close the halves and then start adding prepainted 'equipment' inside.
KelticKnot
Joined: May 11, 2015
KitMaker: 768 posts
AeroScale: 656 posts
Posted: Thursday, May 19, 2016 - 04:34 PM UTC
I spent a late night yesterday after I got drawn in to thinking about how to approach the problem of the custom nose art on this Lanc. I've never printed custom decals before however so any advice on the actual process would be most helpful.
Let me talk you through a bit of my process in making the image so far :
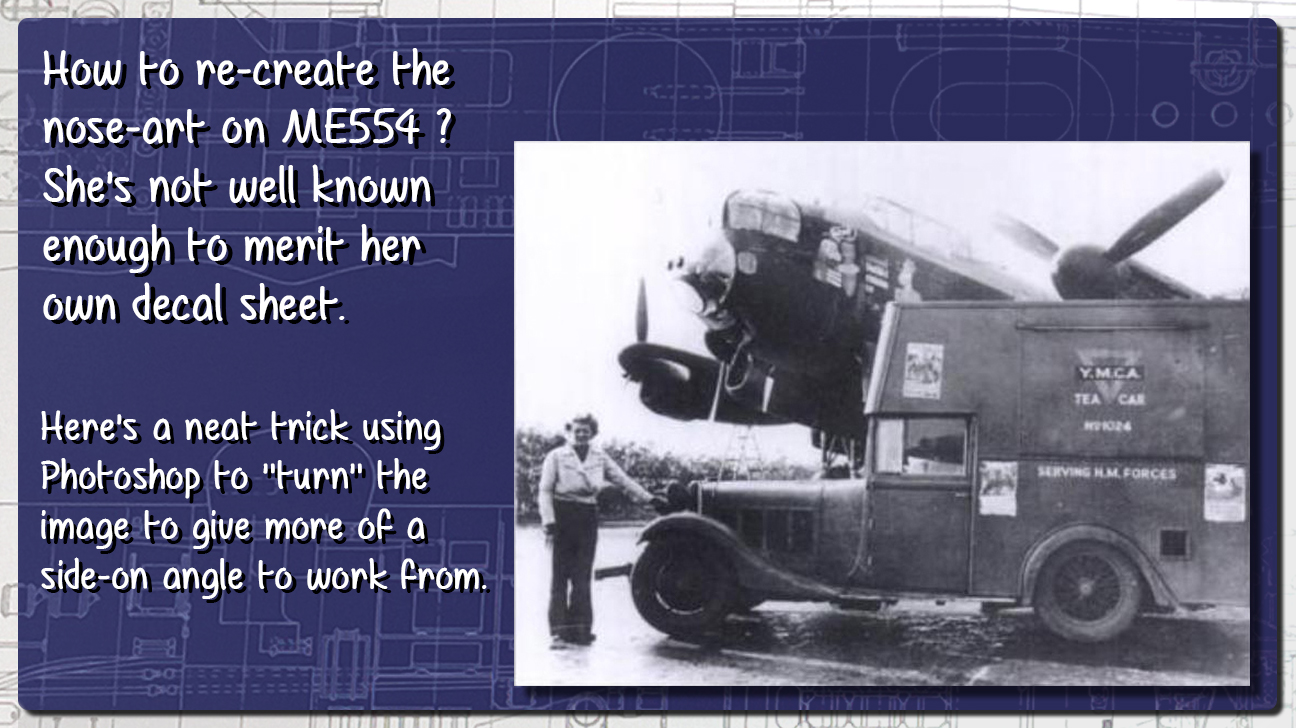

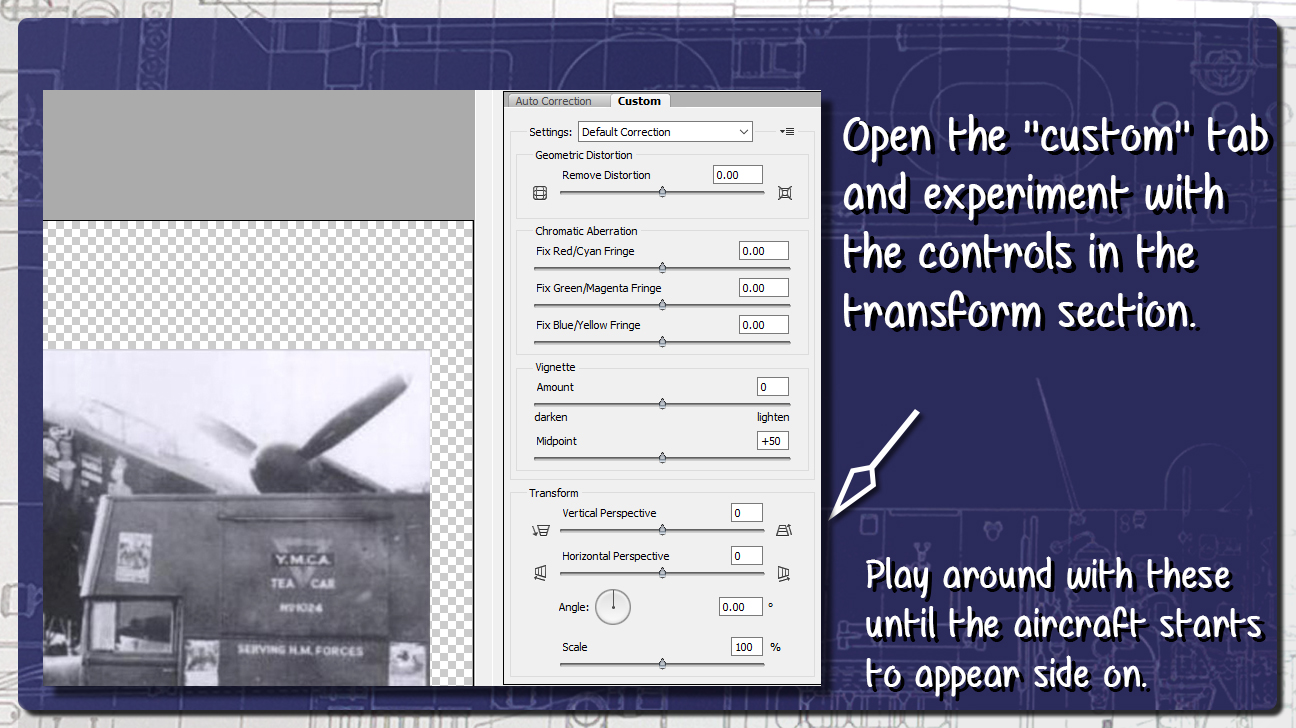
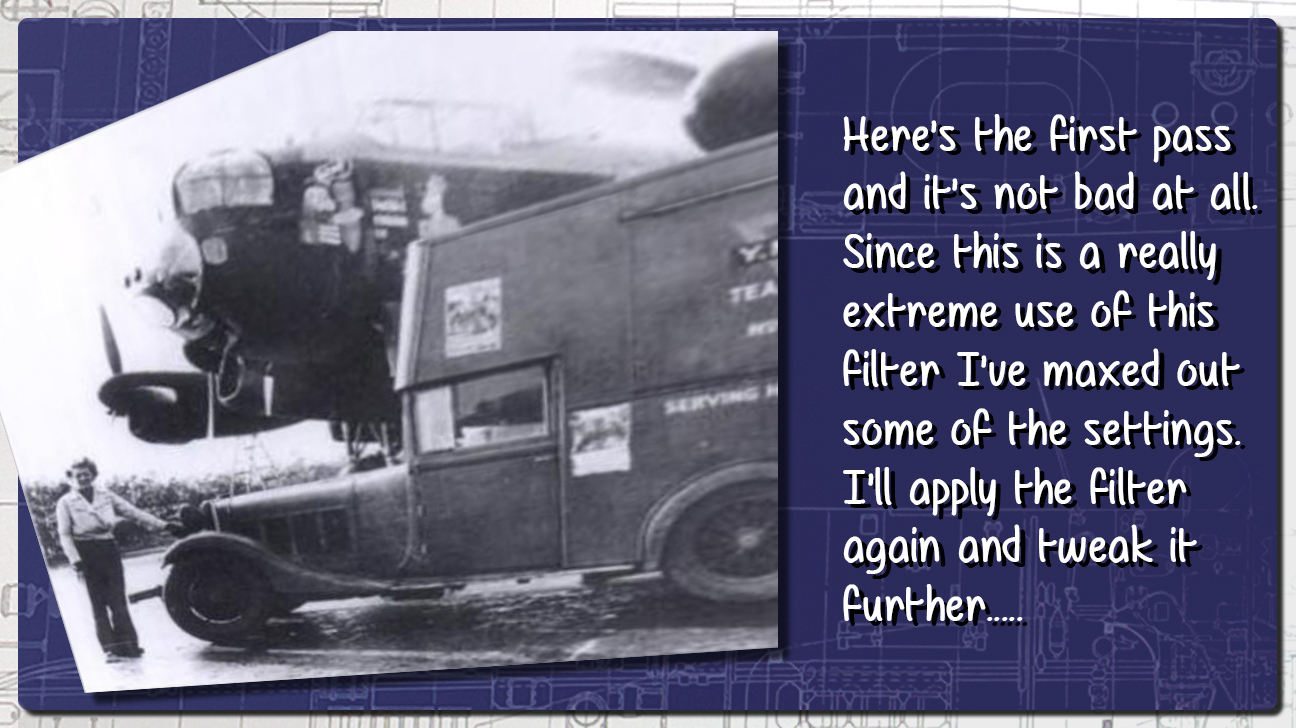
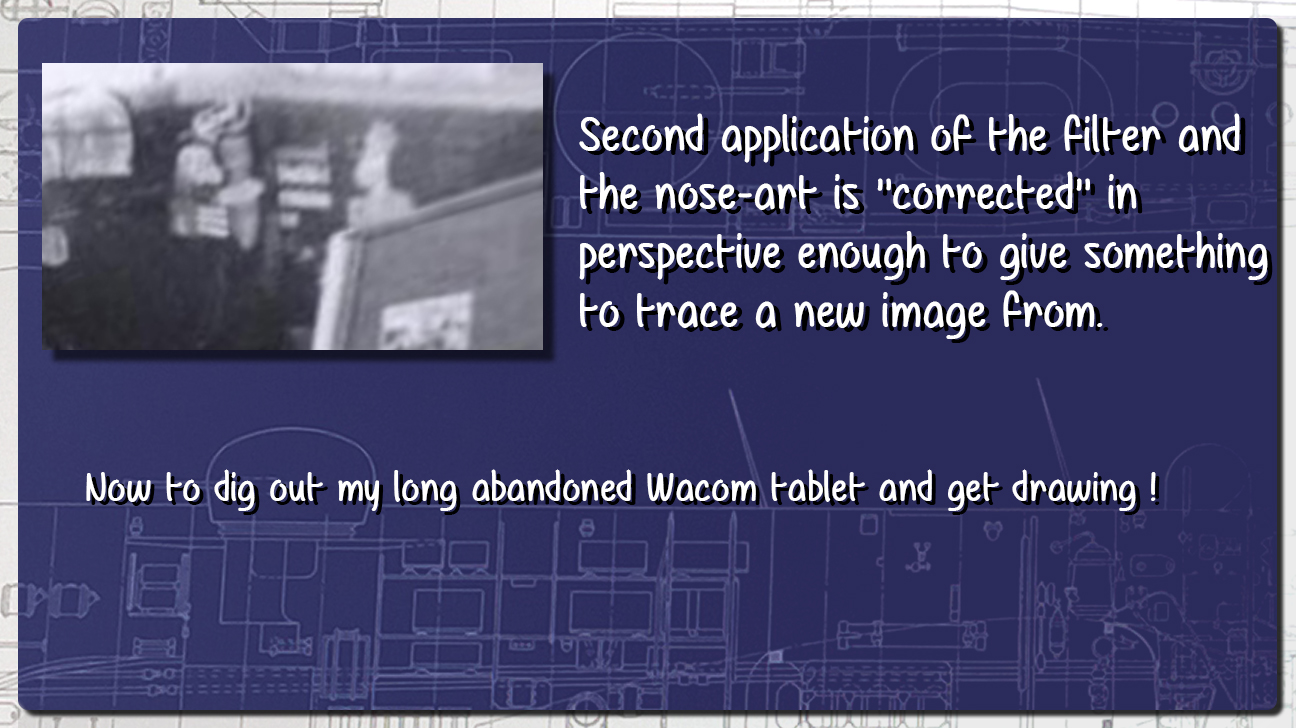
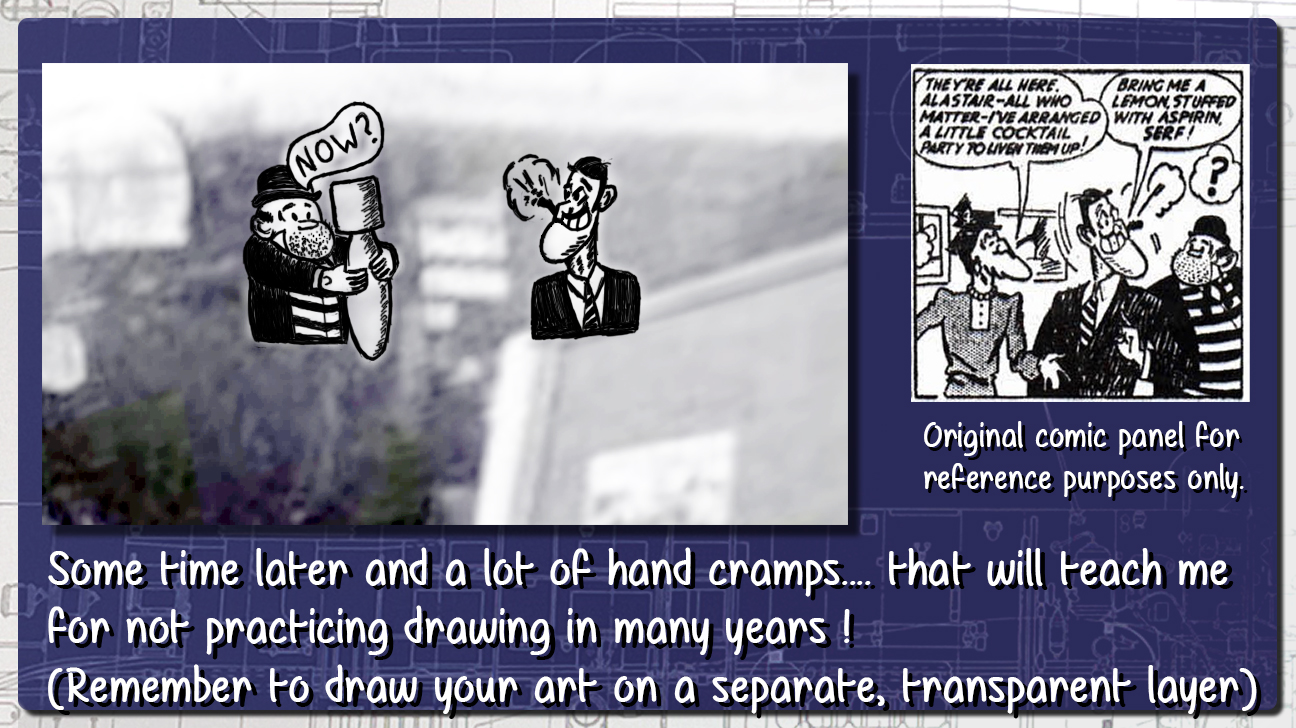
Let me talk you through a bit of my process in making the image so far :
GazzaS
#424
Joined: April 23, 2015
KitMaker: 4,648 posts
AeroScale: 1,938 posts
Posted: Friday, May 20, 2016 - 03:27 AM UTC
Hi Paul,
I've done some custom decals with varying amounts of success. Most of what little I know:
Buy decal paper from a company associated with model building! The first sheets I bought claimed to be good for models, but were in practice too thick.
Make sure your paper matches your copier. Laserjet paper won't work in an inkjet printer and vice versa.
Buy decal film if you can. If not, you can use lacquer. Spray one coat of lacquer, then give it a brush coat. Tiny pores in the spray coat may allow water to reach your printer ink.
If you are decaling anything but black over a light surface, you must have white decal paper. You've noticed that your kit decals all have white on the underside?
Using white paper means you have to trim it very closely. Even then you may need to touch up the white edges after the decal has dried with a little paint.
Depending on your printer, you may struggle with getting the size right. 'Photo' settings often want to fill a certain size of photo paper. With my printer I had to use 'document' settings to get the sizes right.
After testing on plain paper, change your print settings to high quality high gloss paper settings when you make your attempts at a final copy.
Conserving decal paper: you can try to fill an entire sheet with decals. Another option is to cut a piece of decal paper slightly larger than the decals on your test sheets. Using clear cellophane tape, tape your decal sheet piece over your previous print, then put this combined sheet into your printer just as the paper had been loaded before.
Good luck! I have to do nose art on my B-29 too.
Gaz
KelticKnot
Joined: May 11, 2015
KitMaker: 768 posts
AeroScale: 656 posts
Posted: Saturday, May 21, 2016 - 05:06 PM UTC
Thanks Gaz, some good advice there. I wont be decaling for a little while but its good to start thinking about such issues before they arise.
KelticKnot
Joined: May 11, 2015
KitMaker: 768 posts
AeroScale: 656 posts
Posted: Tuesday, May 31, 2016 - 07:46 PM UTC
It's been rather hectic in the last week or so as we've just bought a house ! Moving day is around six weeks away and i'm hoping to pack up the workspace last (plans are afoot for a new modelling space, never fear !)
I've still managed, however, to get in some time here and there on ME554 in order to keep steadily progressing.
I've still managed, however, to get in some time here and there on ME554 in order to keep steadily progressing.
GazzaS
#424
Joined: April 23, 2015
KitMaker: 4,648 posts
AeroScale: 1,938 posts
Posted: Tuesday, May 31, 2016 - 11:09 PM UTC
Paul,
Any progress is good! I tend to get very little done during the workday. Once I've walked the dogs and had dinner I'm hard-pressed to do much more than watch TV.
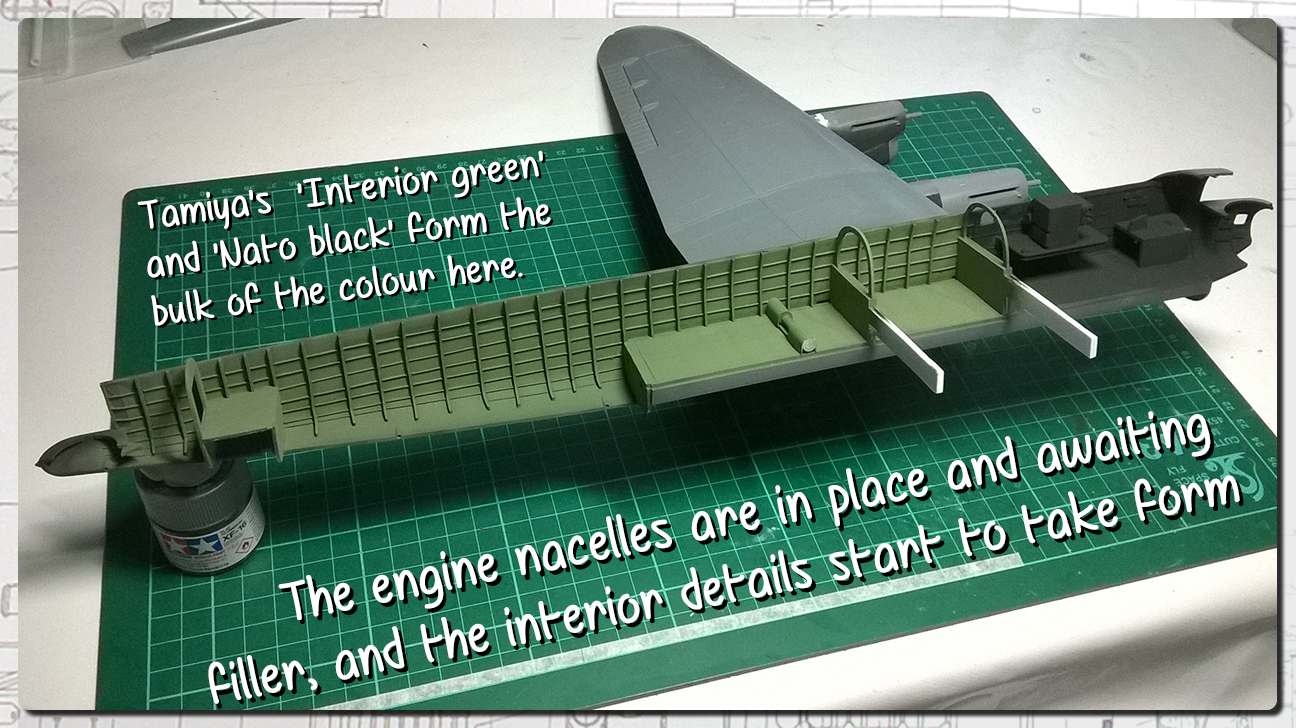
After the apllication of interior green, your framing looks even better!
Gaz
Any progress is good! I tend to get very little done during the workday. Once I've walked the dogs and had dinner I'm hard-pressed to do much more than watch TV.
After the apllication of interior green, your framing looks even better!
Gaz

Scrodes

Joined: July 22, 2012
KitMaker: 771 posts
AeroScale: 763 posts
Posted: Saturday, June 11, 2016 - 04:24 AM UTC
The part behind the rear spar is the hydraulic ram for the flaps. The inner rod runs right through to the outer flap and is a natural metal. the covers on either end of the ram in the interior is yellow. The rods that hand down from the ram's bar inside the flap are white.
This is VeRA's port wing, the photo needs to be rotated, but you get the idea.
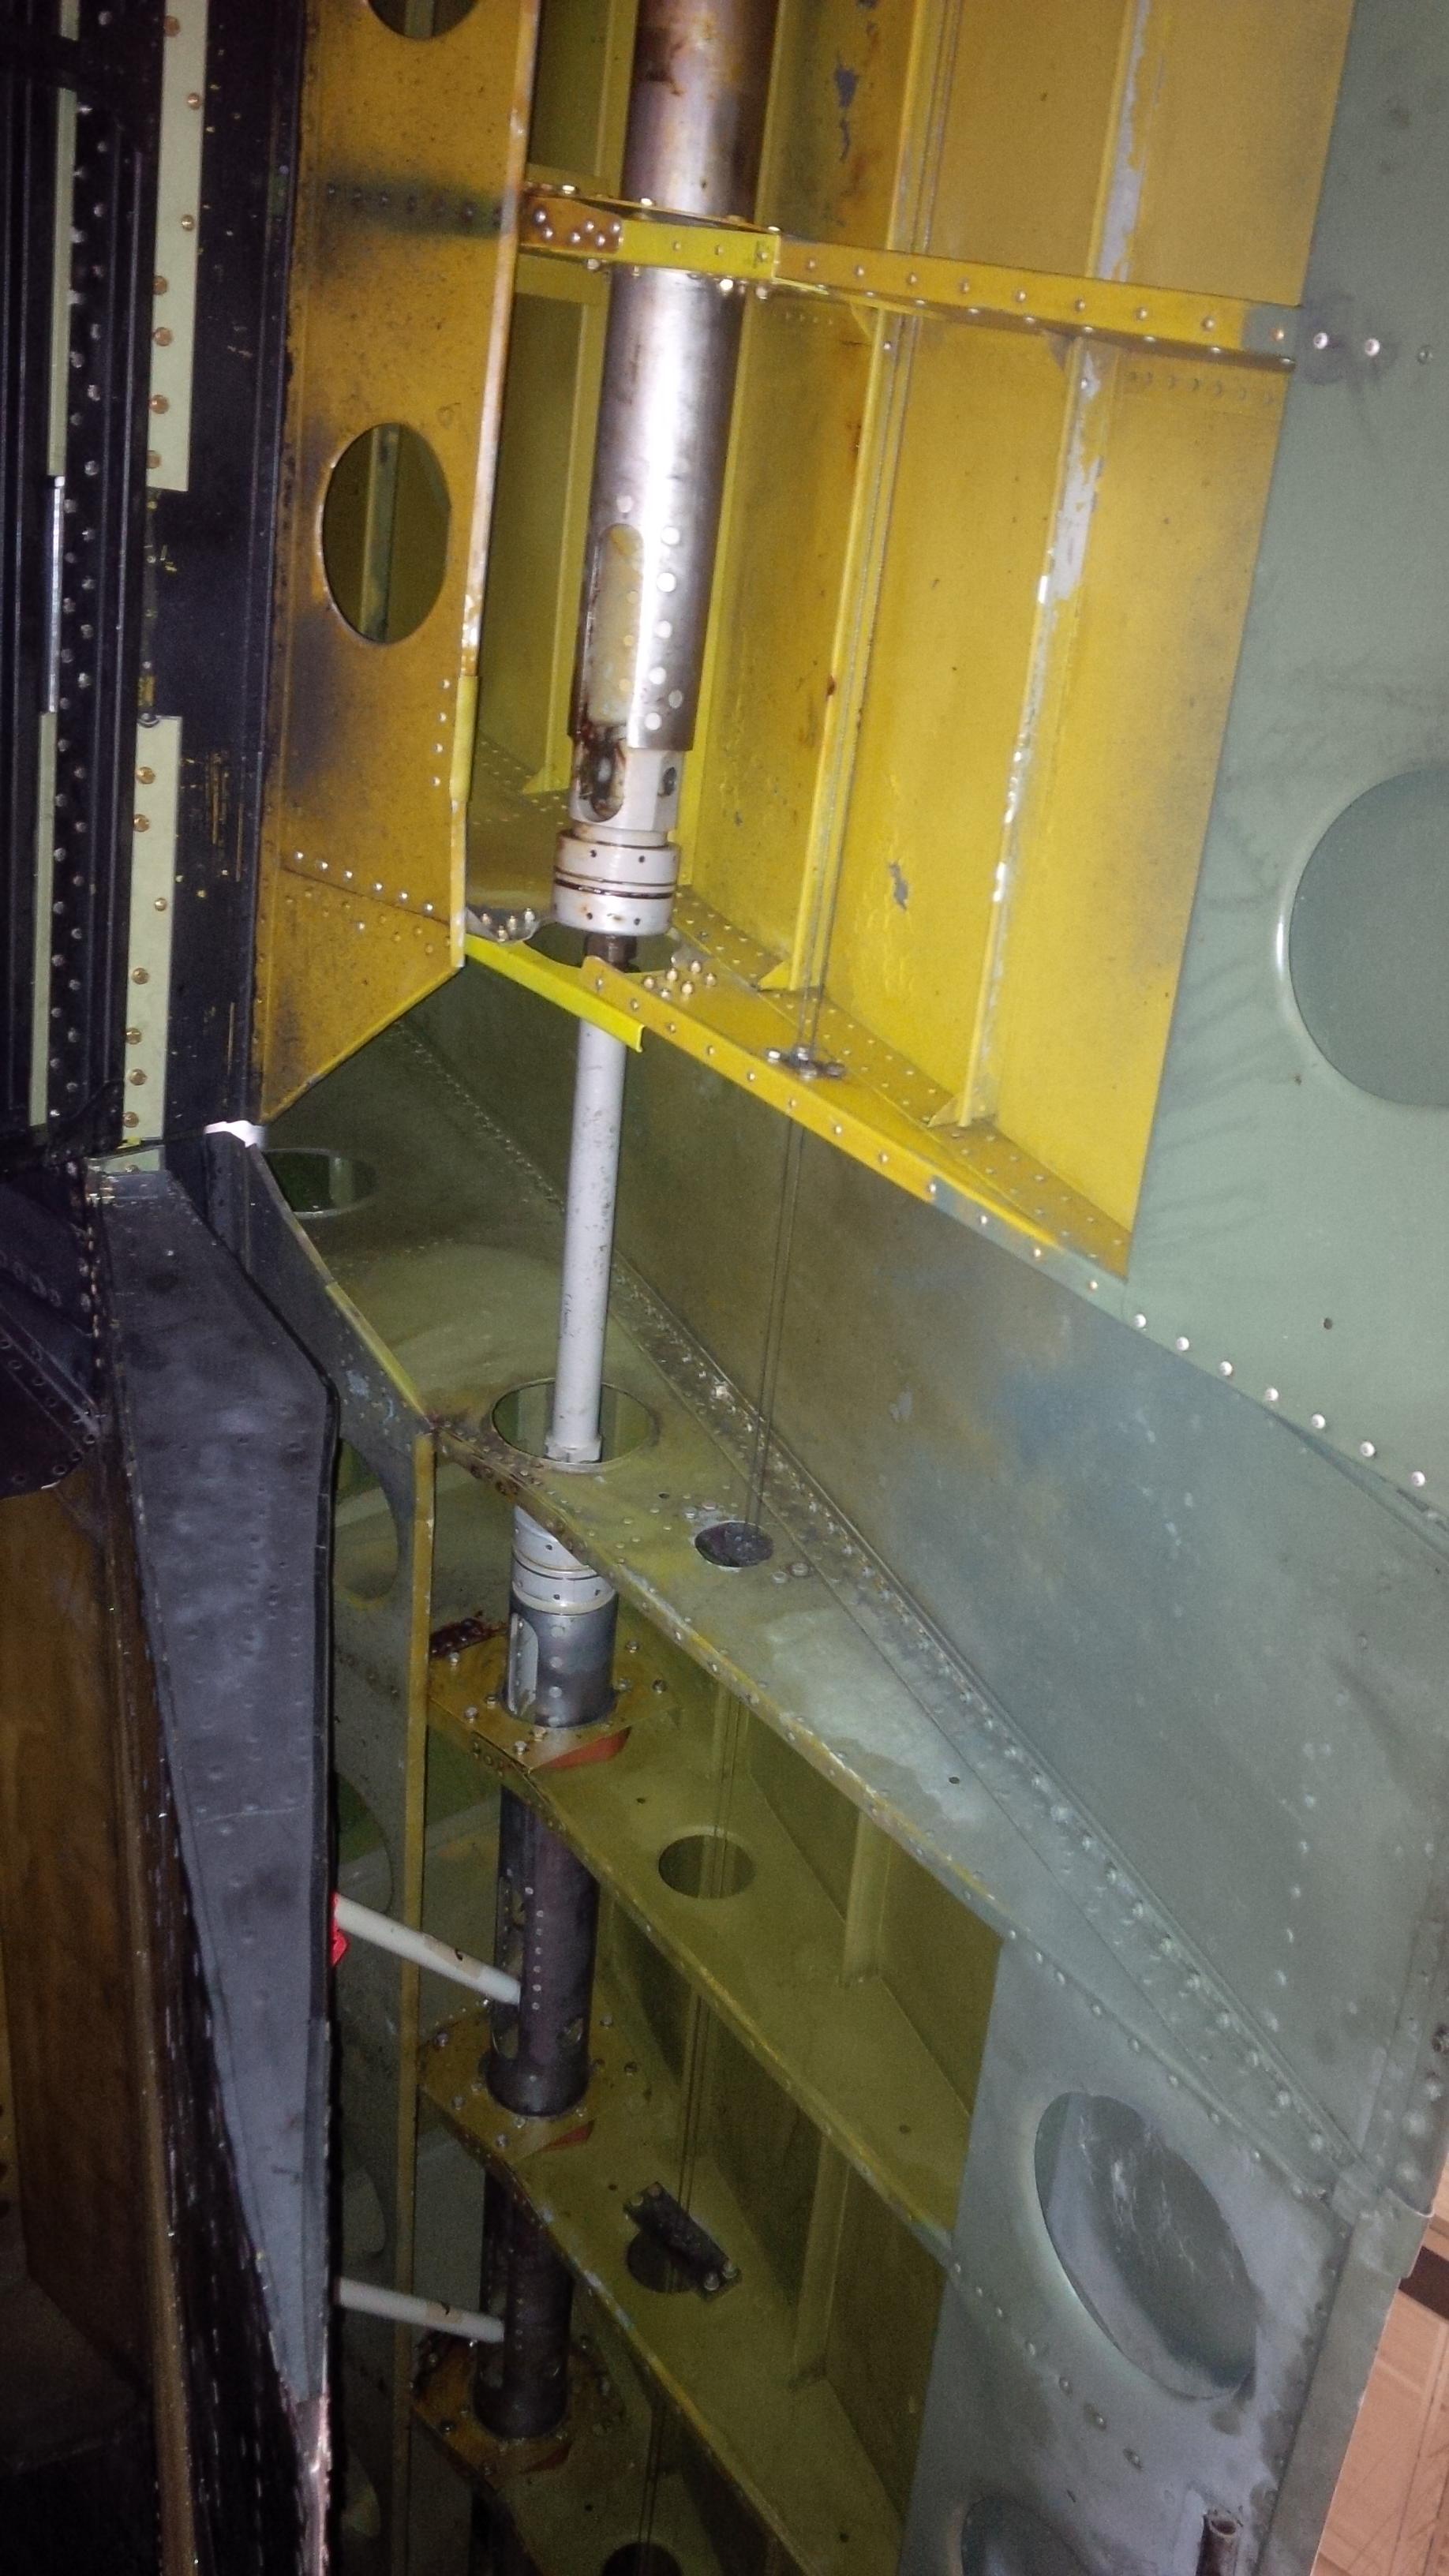
Inside the fuselage - port side in between the spars - the emergency hydraulic pump. This makes the worlds most annoying noise ever.

This is VeRA's port wing, the photo needs to be rotated, but you get the idea.
Inside the fuselage - port side in between the spars - the emergency hydraulic pump. This makes the worlds most annoying noise ever.
KelticKnot
Joined: May 11, 2015
KitMaker: 768 posts
AeroScale: 656 posts
Posted: Thursday, June 16, 2016 - 08:03 PM UTC
Thanks Matt, all photos gratefully received. There's no such thing as too much reference material !
Now four weeks to moving day and things are getting dismantled and packed. The workbench is a point of calm in the storm (I'm hoping to pack it all up in the last week to give me any chance to keep working on the Lanc)
I've been planning this mini build in my head for so long that it only took around an hour to do and only because I was stopping to take photos !
GazzaS
#424
Joined: April 23, 2015
KitMaker: 4,648 posts
AeroScale: 1,938 posts
Posted: Friday, June 17, 2016 - 03:06 AM UTC
Nice little bit of scratch building, mate! They look big on the pic's, but musthave been small and fiddly to scale?
Heh...fiddly to me. I'm a klutz. Maybe not fiddly to you...lol
Cheers,
Gaz
Heh...fiddly to me. I'm a klutz. Maybe not fiddly to you...lol
Cheers,
Gaz
KelticKnot
Joined: May 11, 2015
KitMaker: 768 posts
AeroScale: 656 posts
Posted: Friday, June 17, 2016 - 10:20 PM UTC
Hey Gaz!
No, they're not too tiny. The real scale ones are much bigger to my eye than the kind of ammo boxes you'd see on the back of a Sherman for instance.
I should remember to include something in the photos for scale.

No, they're not too tiny. The real scale ones are much bigger to my eye than the kind of ammo boxes you'd see on the back of a Sherman for instance.
I should remember to include something in the photos for scale.
KelticKnot
Joined: May 11, 2015
KitMaker: 768 posts
AeroScale: 656 posts
Posted: Friday, June 17, 2016 - 10:30 PM UTC
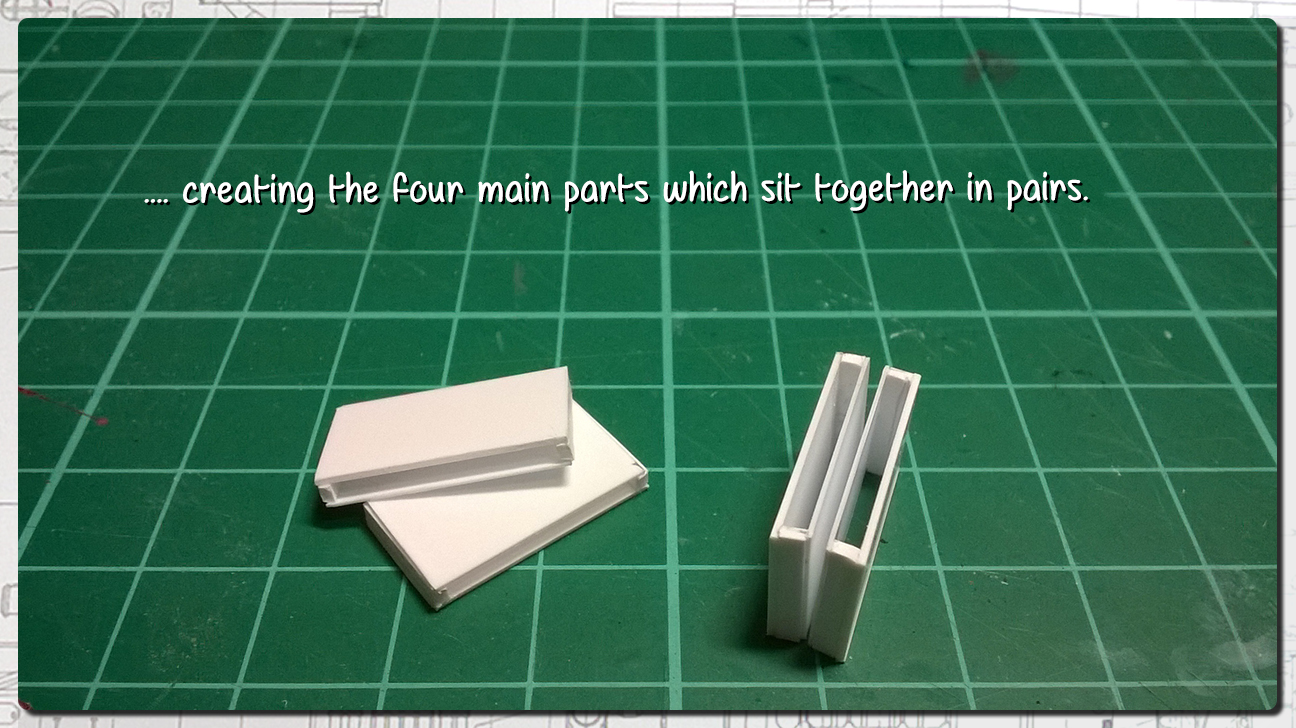
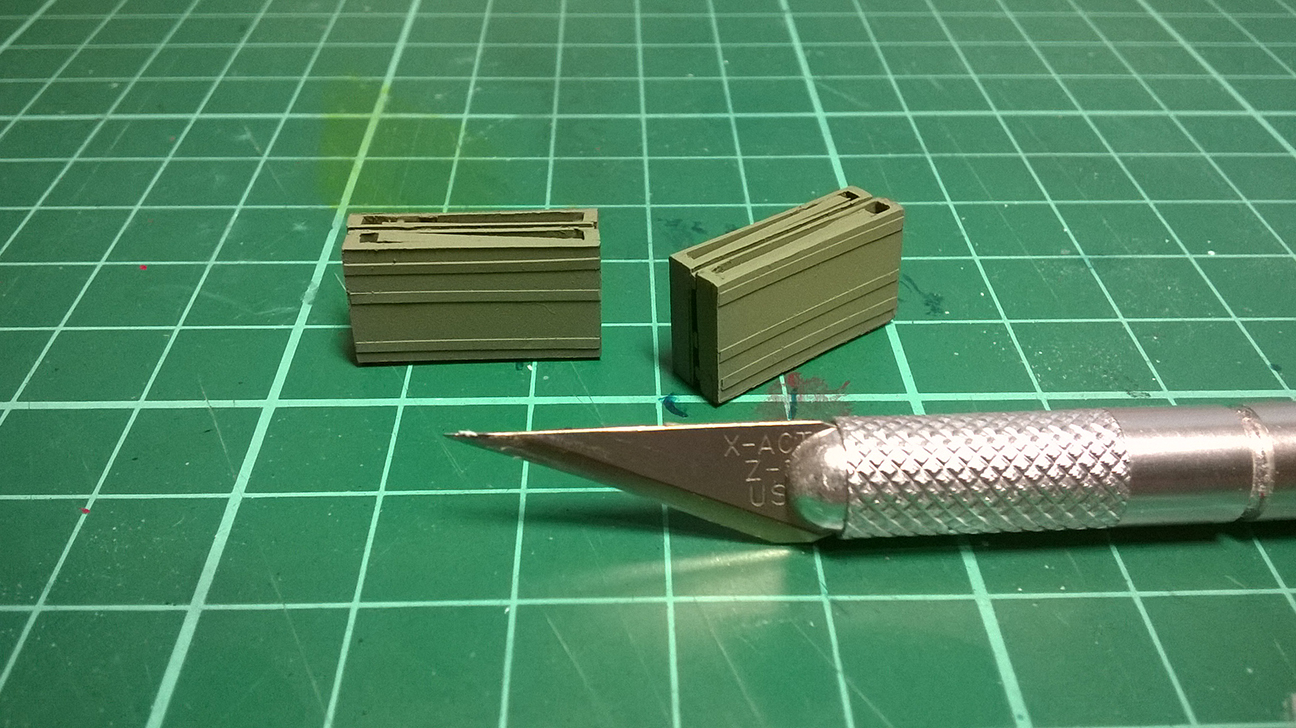
Here you go ....
As you can see, not too fiddly.
As you can see, not too fiddly.
GazzaS
#424
Joined: April 23, 2015
KitMaker: 4,648 posts
AeroScale: 1,938 posts
Posted: Saturday, June 18, 2016 - 02:18 AM UTC
Hah! You must be a neuro surgeon for your day job. Still fiddly for me. Althogh the larger panels wouldn't have been too bad, the edge panels would have challenged my manual dexterity.
Cheers!
Gaz
Cheers!
Gaz
Redhand
#522
Joined: January 20, 2013
KitMaker: 1,460 posts
AeroScale: 1,443 posts
Posted: Sunday, June 19, 2016 - 03:04 AM UTC
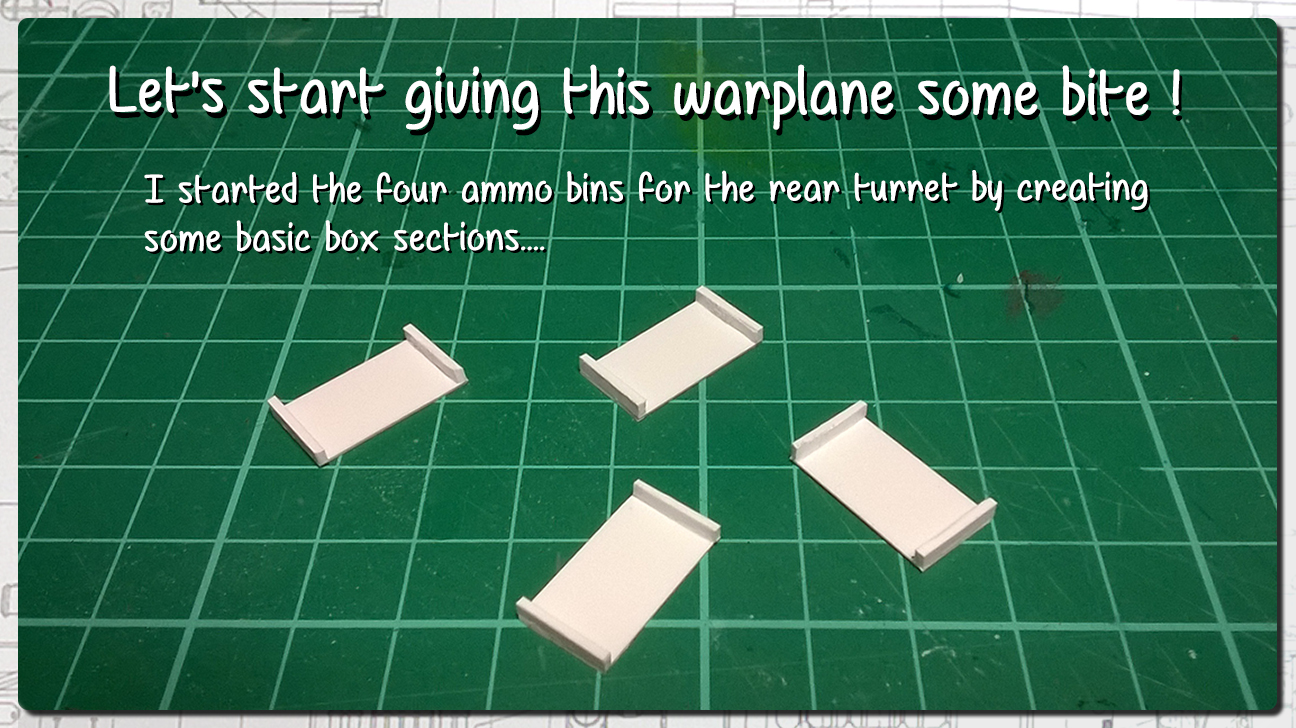
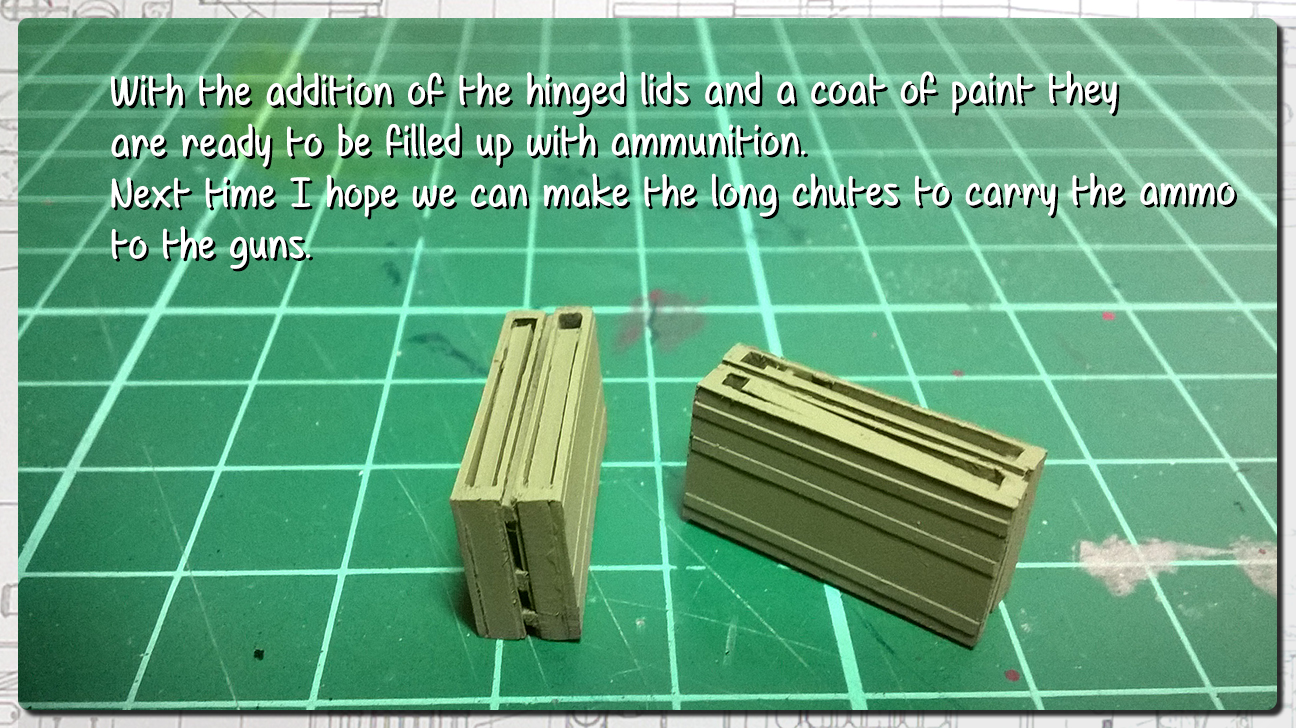
Paul, it is an exceptionally clean build. Great work on the ammo boxes.
KelticKnot
Joined: May 11, 2015
KitMaker: 768 posts
AeroScale: 656 posts
Posted: Sunday, June 19, 2016 - 05:32 PM UTC
Thank you Brian,
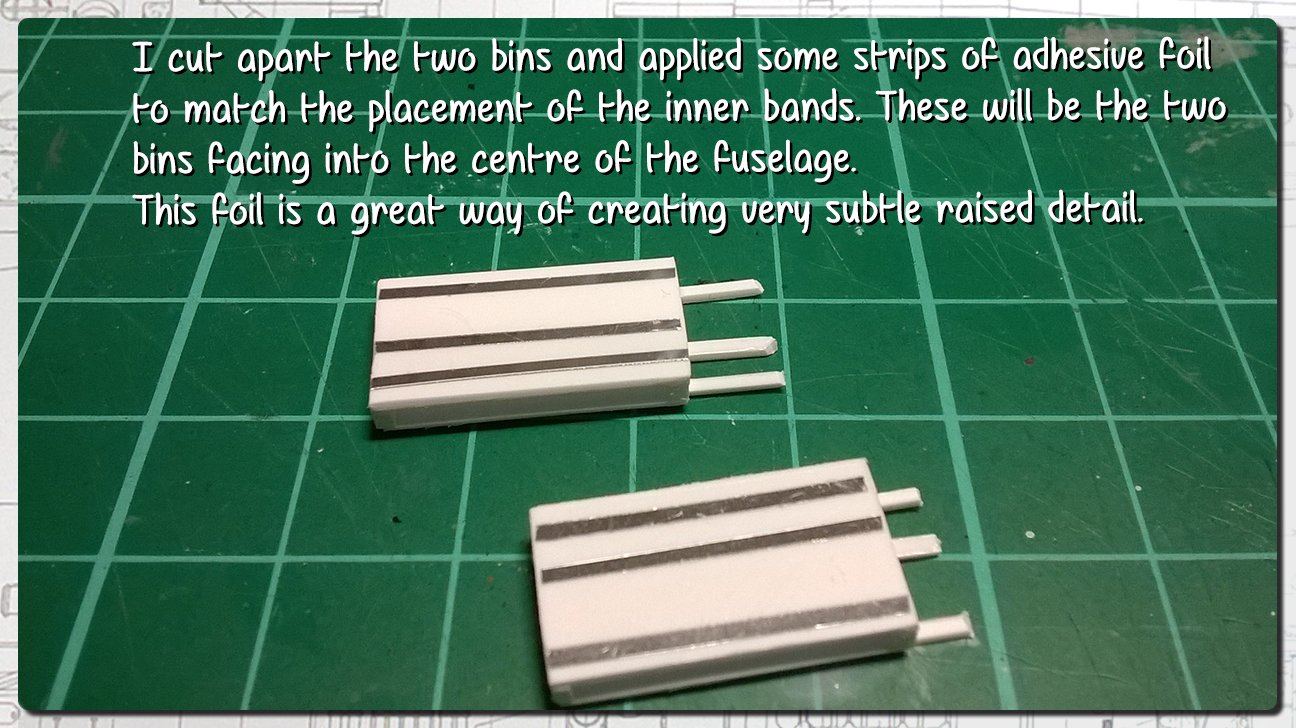
The adhesive foil is great stuff as it not only allows you to fine tune where you're sticking it but it gives you the opportunity to add raised detail like this that doesn't look clunky and over-scaled.
It came out of my partner's card-making craft supplies so I'm assuming it was probably bought from a craft hobby shop.
KelticKnot
Joined: May 11, 2015
KitMaker: 768 posts
AeroScale: 656 posts
Posted: Monday, June 20, 2016 - 06:51 PM UTC
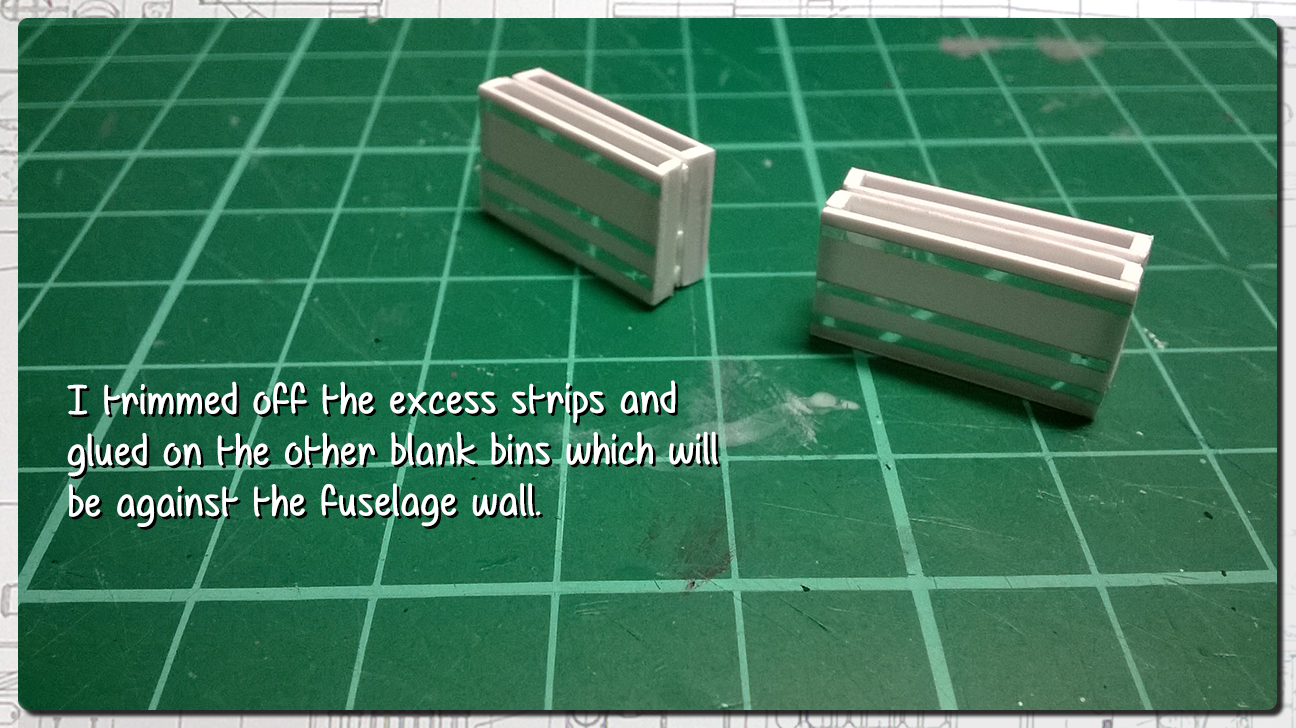
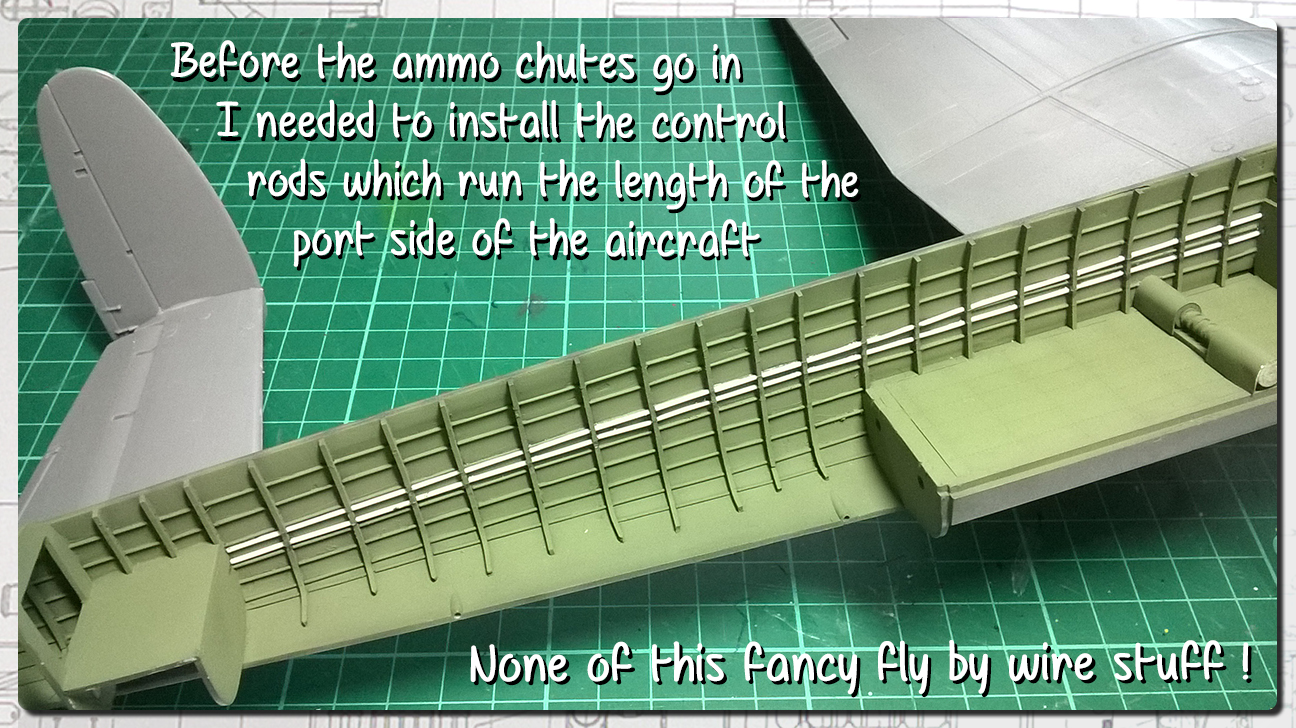
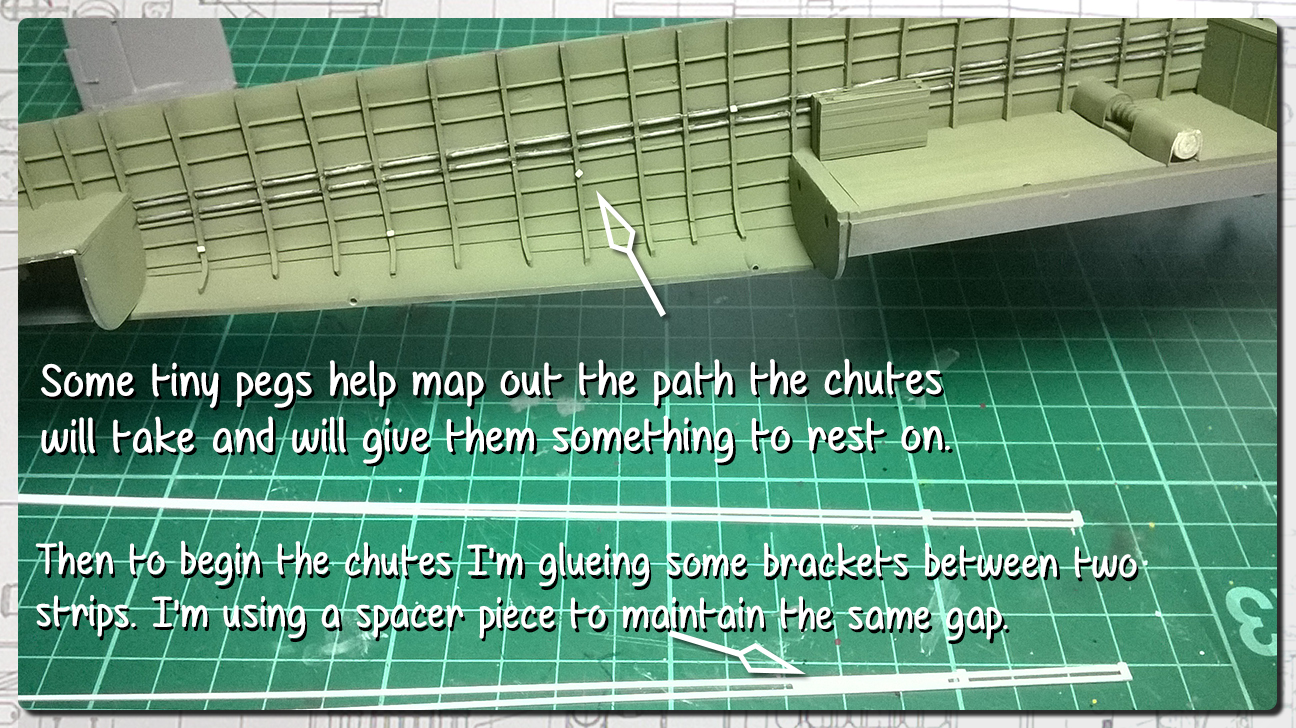
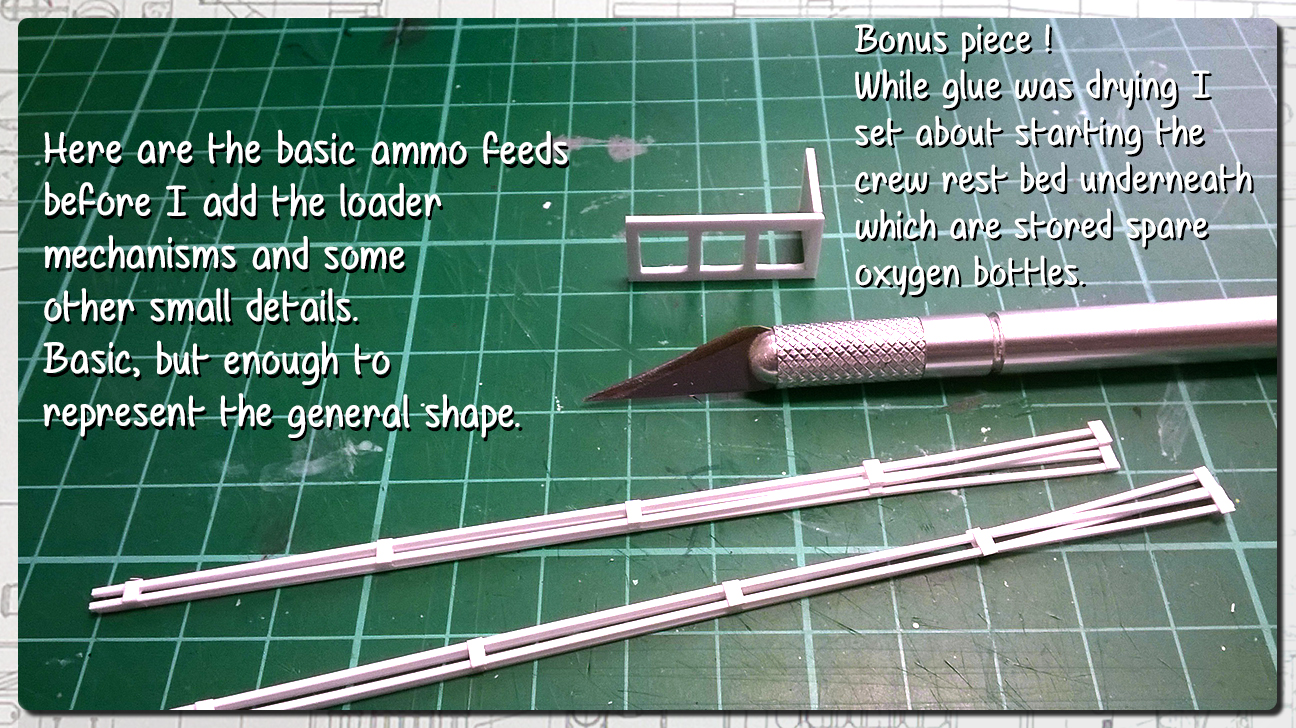
Freshly inspired by the way the ammo boxes came together so quickly I got stuck into the chutes today. Well... after a slight detour to fit other parts which I realised needed to sit behind the chutes!

Kilo_Uniform

Joined: July 03, 2015
KitMaker: 280 posts
AeroScale: 141 posts
Posted: Monday, June 20, 2016 - 07:42 PM UTC
Hi Paul,
Awesome work on the ammo bins! Thank you for the tip re the adhesive foil for some added detail - it really does add the extra depth and feel to the ammo bins.
Looking forward to the next update.
Regards,
Kobus
Awesome work on the ammo bins! Thank you for the tip re the adhesive foil for some added detail - it really does add the extra depth and feel to the ammo bins.
Looking forward to the next update.
Regards,
Kobus
KelticKnot
Joined: May 11, 2015
KitMaker: 768 posts
AeroScale: 656 posts
Posted: Tuesday, June 21, 2016 - 02:01 PM UTC
Thanks Kobus, once again I seem to have a renewed burst of enthusiasm and progress is coming swiftly!
GazzaS
#424
Joined: April 23, 2015
KitMaker: 4,648 posts
AeroScale: 1,938 posts
Posted: Tuesday, June 21, 2016 - 02:34 PM UTC
Paul,
Some very nice looking finework. Doubly impressed that the comtrol rods go through the ribs!
Great touch,
Gaz
Some very nice looking finework. Doubly impressed that the comtrol rods go through the ribs!
Great touch,
Gaz
KelticKnot
Joined: May 11, 2015
KitMaker: 768 posts
AeroScale: 656 posts
Posted: Tuesday, June 21, 2016 - 06:35 PM UTC
Thanks Gaz, I cheated the control rods though and cut and glued them in the same way as the stringers. Getting the actual holes to pass the rods through drilled in the correct places would have been a task too far !
I almost just glued them to the outside of the ribs in fact but I think the extra effort was worth it.
I almost just glued them to the outside of the ribs in fact but I think the extra effort was worth it.
KelticKnot
Joined: May 11, 2015
KitMaker: 768 posts
AeroScale: 656 posts
Posted: Wednesday, June 22, 2016 - 09:39 PM UTC
Good week for modelling so far. Little and often keeps things ticking over nicely.

 |

WEB HOSTING BY


Copyright ©2021 AeroScale and Kitmaker Network, a subsidiary of Silver Star Enterprises
All Rights Reserved. Please read our Conditions of Use and Privacy Policy.
All Rights Reserved. Please read our Conditions of Use and Privacy Policy.