Air Campaigns
Want to start or join a group build? This is where to start.
OFFICIAL: Hangar Queen 6
PeeJay74
#363
_VISITCOMMUNITY
Pennsylvania, United States
Joined: January 08, 2014
KitMaker: 425 posts
AeroScale: 401 posts
Posted: Sunday, May 29, 2016 - 05:28 AM UTC
Hasegawa 1/48 Fw 190F-8

I started this kit in 2014 and shelved it for some reason, then brought it back out for Hanger Queen V in 2015 but still didn't finish it. I decided to use it to get some practice with Luftwaffe schemes before I sprayed any paint on my Ho 229, so it looks like she will finally get her due. All of the fiddly bits are detailed and done, so she just needs paint and decals before final assembly.

Where I left off last year:


And some progress at last:


She'll be finished in 75/76/83 when she is done.
rochaped
_VISITCOMMUNITY
Lisboa, Portugal
Joined: August 27, 2010
KitMaker: 679 posts
AeroScale: 669 posts
Posted: Sunday, May 29, 2016 - 09:56 PM UTC
Welcome aboard Paul!

That's a fine Wurger you're making there.
I also have Hasegawa 190 A-5 on the bench at the moment and so far found it a lot easier to build than Trimaster/Dragon ones, one which I built some dozen years ago.

Regarding your build, altough I'm no expert on Wurgers (far from it)but I have the idea that the propeller blades were made of wood on late models like your F-8...but I might have the wrong idea thou

Cheers,
Pedro
PeeJay74
#363
_VISITCOMMUNITY
Pennsylvania, United States
Joined: January 08, 2014
KitMaker: 425 posts
AeroScale: 401 posts
Posted: Monday, May 30, 2016 - 02:02 AM UTC
Doh you are correct Pedro. I didn't pay attention when I was working on the prop. Fortunately that's an easy fix, it won't be hard to strip and repaint the blades.
PeeJay74
#363
_VISITCOMMUNITY
Pennsylvania, United States
Joined: January 08, 2014
KitMaker: 425 posts
AeroScale: 401 posts
Posted: Thursday, June 02, 2016 - 06:35 AM UTC
Hasegawa 1/48 Fw 190F-8

More painting progress, I added the RLM 75/83 top colors and then tried my hand at mottling. I am happy with the results, although I feel I was a little heavy-handed in spots. I imagine it would be a lot of work to go back, repaint it, and try to make it "perfect" which would also make it totally unrealistic. I'll just live with it. I still need to weather the paint so that may knock it down some anyway. This was the first kit I have used Gunze paints on, I am sold.

I also stripped the prop and repainted it to fix the chipping mistake. I'll redo some wear on the wooden blades using a lighter green to chip the RLM 70 instead of showing metal through.


rochaped
_VISITCOMMUNITY
Lisboa, Portugal
Joined: August 27, 2010
KitMaker: 679 posts
AeroScale: 669 posts
Posted: Thursday, June 02, 2016 - 03:14 PM UTC
Hi Paul,

Your 190 is going very well indeed! If you ask me, the mottling is just fine and like you said, some washes should tone down them a bit making them less conspicuous to the eye.

I also feel that Gunze acrylics are indeed the best around when it comes to free hand mottling, they are definitely my first choice, seconds being Vallejo Air brand.

Keep it up!

Cheers
Pedro
PeeJay74
#363
_VISITCOMMUNITY
Pennsylvania, United States
Joined: January 08, 2014
KitMaker: 425 posts
AeroScale: 401 posts
Posted: Thursday, June 09, 2016 - 10:09 PM UTC
Hasegawa 1/48 Fw 190F-8

I got started with decals finally. I am using a set of AM decals from Karaya, "Captured Butcherbirds vol. V". They went down well, being extremely thin. I unfortunately ended up with the serial number for the starboard side folding up on itself and couldn't recover it, but the others went on fine. Oh well.


Fw 190F-8 W.Nr. 583234 in her original Luftwaffe livery.


...And as she appeared after being taken as a war trophy by the 511th FS.


Karaya's decals, which contained insignia and markings but no stencils.

I used the Hasegawa decals for the seat armor warning placard and the spinner spiral, but don't plan to use any of the rest. The carrier film is too thick and sort of opaque on the Hasegawa stencils, so I ordered a set of Fw 190 stencils by Eduard. Once those arrive I'll be able to finish the decaling.
ViperAtl
_VISITCOMMUNITY
Georgia, United States
Joined: August 22, 2005
KitMaker: 331 posts
AeroScale: 135 posts
Posted: Friday, June 17, 2016 - 07:14 AM UTC
This is my 1/48 Tamiya P-51B Mustang that almost made it to the 1999 IPMS/USA Nationals but while taking the canopy masking off after putting on the final pieces in the hotel room I discovered that the canopy had fogged from Super Glue. About a year later I started to strip it down to do a different paint job and since I busted the Malcolm Hood it would be a standard canopy. During the ongoing cleaning process I would put the model in back in its box. A few years later I dragged it back out and continued working on it. One night I put it back in the box and the new cat, a.k.a. dog, jumped up and sat on it.


Back in the box for a few more years. Now the girlfriend wants me to clean out the Shelves of Doom before starting on something new. It's the Mustang's turn to be completed.

More damage that was glued up years ago.


Even got the nose and wings.


Let's see how this one turns out as I try to complete it for the 2016 IPMS/USA Nationals in Columbia, SC.

Here's a picture of Murphy dog. He's the brown one in the foreground.


rochaped
_VISITCOMMUNITY
Lisboa, Portugal
Joined: August 27, 2010
KitMaker: 679 posts
AeroScale: 669 posts
Posted: Friday, June 17, 2016 - 07:57 PM UTC
@Paul- Splendid work overall. The camo is very well made indeed and those decals seem top notch. An excellent piece of work mate!

Feels about time to get a campaign badge. Since I am not skilled in IT annoy one out there want to propose his/her toughts on this? I would value something different from the last HQ campaign.

@ Viperatl- What a journey your P-51 had so far 😄😄😄, it's time to drive forward the build, preferably away from your cat/dog 😜

Cheers
Robbd01
#323
_VISITCOMMUNITY
Arizona, United States
Joined: February 13, 2013
KitMaker: 791 posts
AeroScale: 213 posts
Posted: Friday, July 01, 2016 - 04:23 AM UTC
My update now that the year (and campaign) is over halfway over. I got through most of the painting. The RE2001 needs its white fuselage band painted which I overlooked thinking it was a decal. The Spit I will need to try to duplicate the blue/grey repaint it got just before being shipped to Malta. The instructions show that the repaint was light enough that you could still see the original temperate camo beneath it. Hope I don't over do it and loose all that effort masking/painting it so far. I am saving the canopy's for the very last.


Cheers


PeeJay74
#363
_VISITCOMMUNITY
Pennsylvania, United States
Joined: January 08, 2014
KitMaker: 425 posts
AeroScale: 401 posts
Posted: Saturday, July 02, 2016 - 03:49 AM UTC
Hasegawa 1/48 Fw 190F-8

Nearly done. I just need to add the boarding ladder and some antenna to the underside, then run the antenna wire to the tail. She shouldn't have any ordnance, but since the boxing came with that fancy SC1000 bomb I just had to sling it under there. Not historically accurate at all for the actual captured aircraft but what the heck it looks awesome under there.


I should be able to finish her tomorrow and shoot a few pics before she goes into the display cabinet.
Nito74
_VISITCOMMUNITY
Lisboa, Portugal
Joined: March 04, 2008
KitMaker: 5,386 posts
AeroScale: 635 posts
Posted: Saturday, July 02, 2016 - 09:17 PM UTC
mmhh I might go for this one.

My Su-27 started for the Showtime Campaign was never finished.
Also a Tamyia's Thunderjet I started last year that was never finished.


rochaped
_VISITCOMMUNITY
Lisboa, Portugal
Joined: August 27, 2010
KitMaker: 679 posts
AeroScale: 669 posts
Posted: Sunday, July 03, 2016 - 04:39 PM UTC
John, welcome aboard!

Your subject deserves a successful completion, gotta love the Su 27!

Abraço
Pedro
Nito74
_VISITCOMMUNITY
Lisboa, Portugal
Joined: March 04, 2008
KitMaker: 5,386 posts
AeroScale: 635 posts
Posted: Sunday, July 03, 2016 - 09:59 PM UTC
Obrugado Pedro !!

Let's hope it turns into a decent build.

Thanks for managing the Campaign.

Abraço,
J.
PeeJay74
#363
_VISITCOMMUNITY
Pennsylvania, United States
Joined: January 08, 2014
KitMaker: 425 posts
AeroScale: 401 posts
Posted: Friday, July 08, 2016 - 03:53 AM UTC
Hasegawa 1:48 Fw 190F-8

Calling this one done!

I added the antenna wire and wingtip lights, both went on smoothly thankfully. The butcher bird looks great sitting next to my 8th AF Mustang in the display cabinet. I nearly caused a catastrophe when I applied Eduard's data stencils; the water was too hot and I damaged some of the more delicate decals. I was worried about silvering but some Solvaset melted them right into the paint.


Vodnik
_VISITCOMMUNITY
Warszawa, Poland
Joined: March 26, 2003
KitMaker: 4,342 posts
AeroScale: 78 posts
Posted: Friday, July 08, 2016 - 12:45 PM UTC
Is the title of the campaign supposed to be a joke?

You know it's spelled HANGAR, right?...


hanger:


hangar:


Unless you actualy mean hanger queen:


rochaped
_VISITCOMMUNITY
Lisboa, Portugal
Joined: August 27, 2010
KitMaker: 679 posts
AeroScale: 669 posts
Posted: Friday, July 15, 2016 - 05:43 AM UTC
Quite right you are Pawel!
Thanks for spotting a typo that's been there, "hanging", since day 1 of this campaign

@ Paul- well done mate! Fantastic 190 even more unusual given its new owner registration

However, since we still do not have a campaign banner you will have to excuse me for the time being. More about this soon.

Cheers
Pedro
TmHippo
_VISITCOMMUNITY
United States
Joined: July 28, 2016
KitMaker: 42 posts
AeroScale: 42 posts
Posted: Wednesday, September 14, 2016 - 09:21 PM UTC
Good day to everyone!! I have decide to enter the hanger queen campaign with my nemesis, the plane that made me stop building models almost 5 years ago!! All was going well until I painted it anthe the paint flaked off when removing the masking tape! I also noticed that the Canopy is not aligned so I will attempt to fix that too


So any recommendations on how I should prep the surface for re-painting?
I will wash it as it has a good coating of dust oops
ViperAtl
_VISITCOMMUNITY
Georgia, United States
Joined: August 22, 2005
KitMaker: 331 posts
AeroScale: 135 posts
Posted: Saturday, September 24, 2016 - 03:56 AM UTC
Update on the Mustang rebuild.


I did manage to apply some primer and paint to the model. However during this process I had too much life get in the way and was unable to finish it for the IPMS/USA Nationals.

And I dropped it and broke a wingtip. Back in the box for a little while. But I will get back on this one and have it finished by the end of the year.

In the meanwhile I have a P-40N from the Shelves of Doom that is in pieces and needs to be finished. And I have a challenge by a friend to have it finished for a show in Cincy on Oct 8. Let's give this one a try.


Gotta get something finished, too many Hangar Queens on the Shelves of Doom.
rochaped
_VISITCOMMUNITY
Lisboa, Portugal
Joined: August 27, 2010
KitMaker: 679 posts
AeroScale: 669 posts
Posted: Saturday, September 24, 2016 - 06:24 AM UTC
Joe,
Either subjects look promising, although repairing a broken wing may not be a easy task.
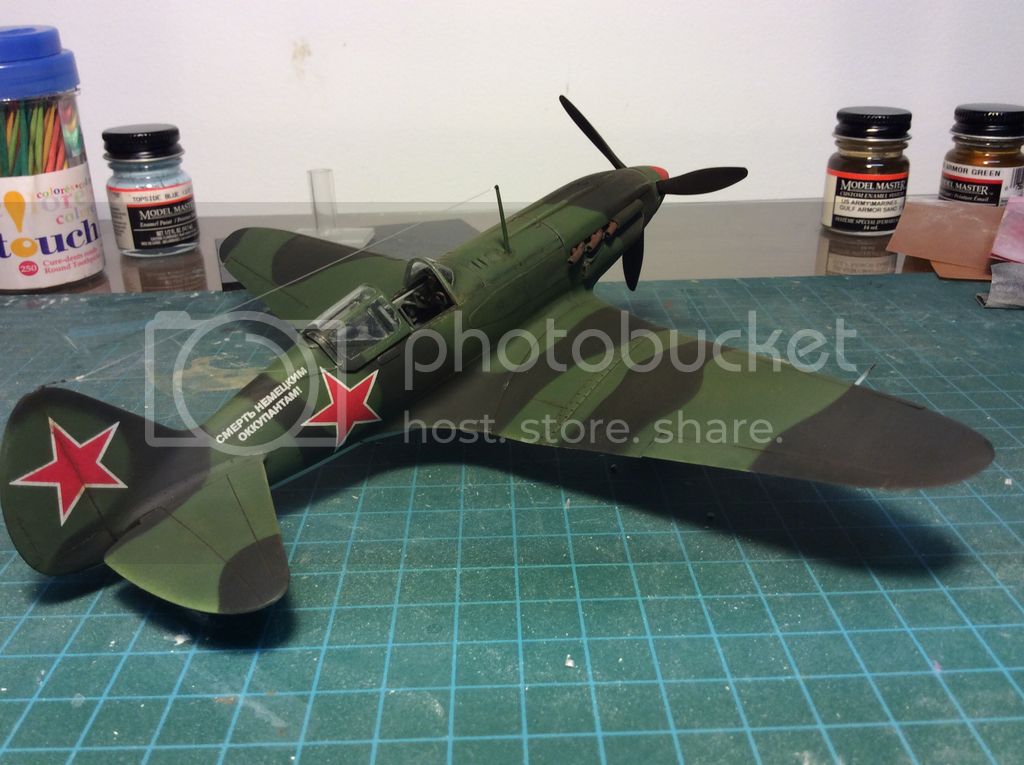
Hoping to see that P-40 going. We are indeed in the last phase of the campaign, 3 full months to go, and it is usually around this time that finished models start to pop up.
As for myself, I admit having barely nothing made on my shelf queen HQ6, so all I've written in the previous paragraph falls on me

Rodney,

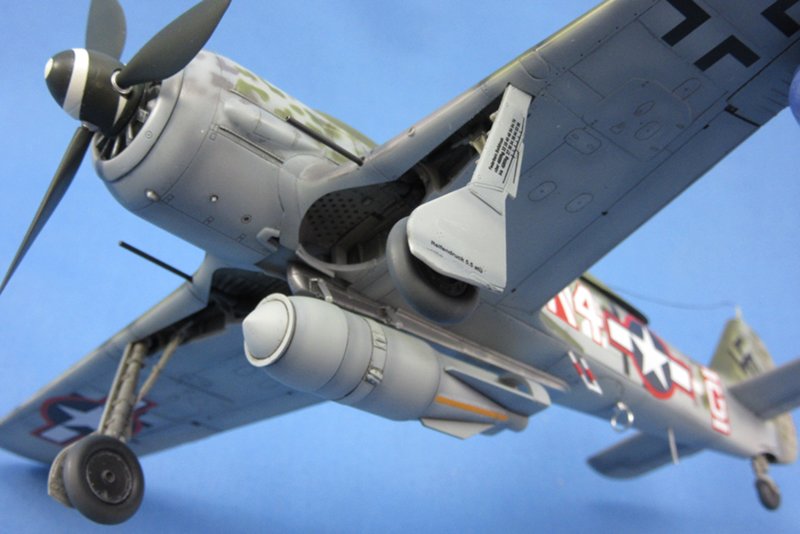
What a wonderful hanger queen you got there!
I have Monogram's he.111 H-4 stashed away since forever, all packed with a few goodies, enough to produce an H-6 variant. One day it will be on my bench...one day.

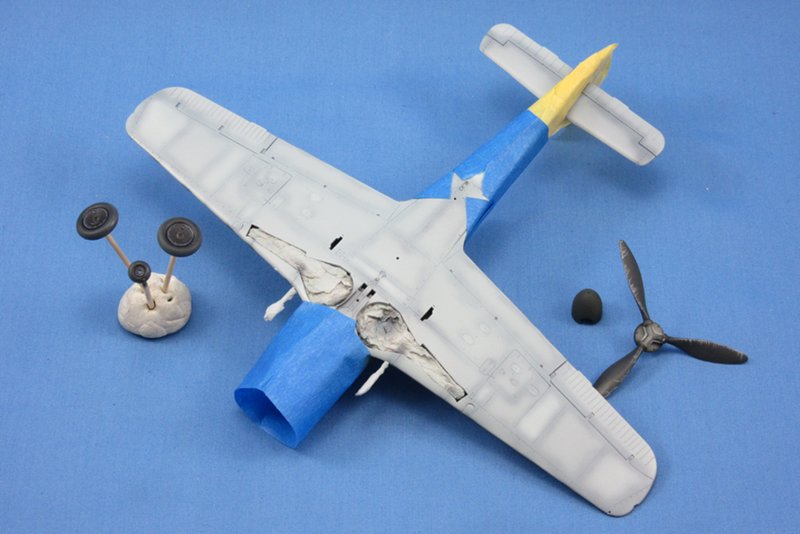
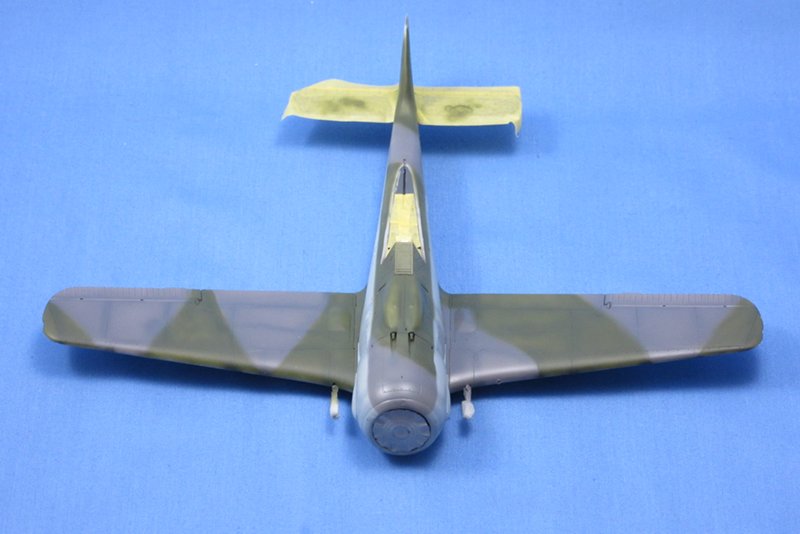
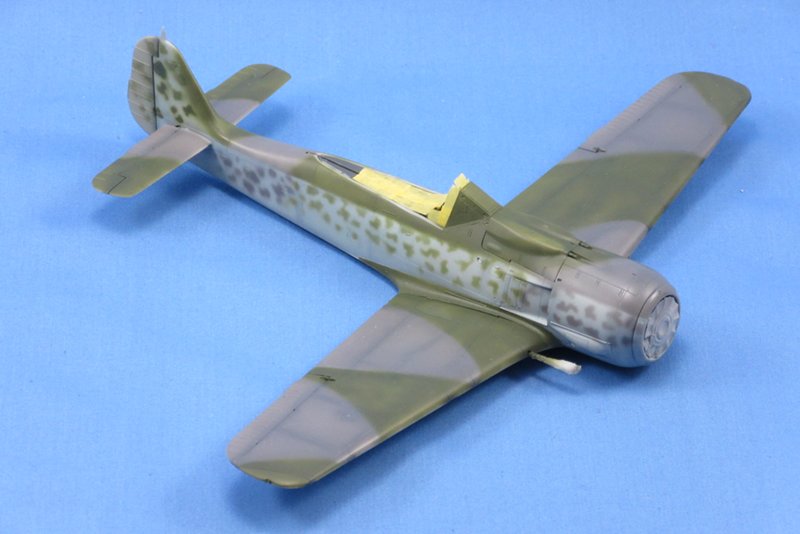
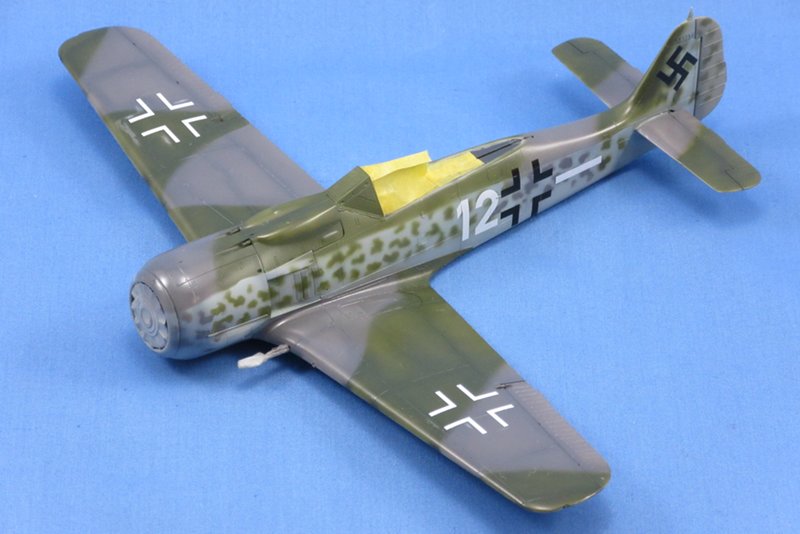
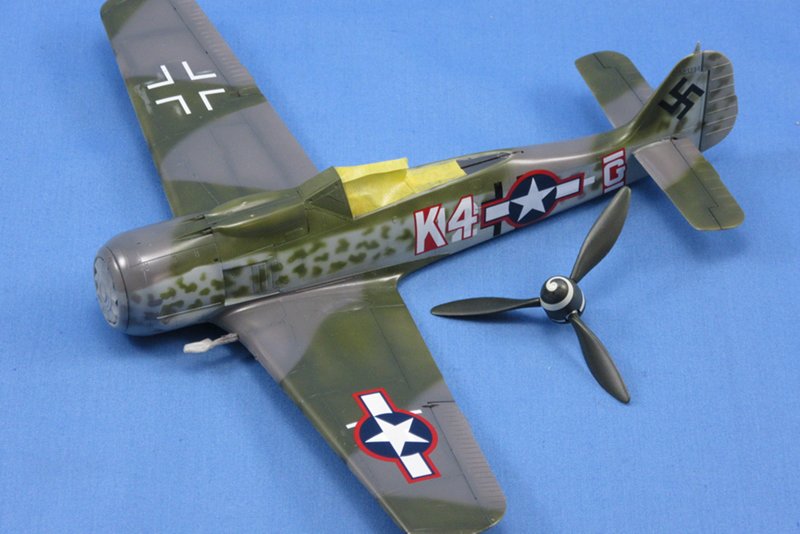
About that misfortune you had with stripped out paint, what I've done in a similar, albeit minor in area of damage, situation was to strip the remaining damaged paint, using the kit panels as boundaries, this enabled me to repaint without imperfections, such as overlapping or scale thickness in the paint layers.
The demarcation was made with Tamiya tape over post-it (or similar) paper type. The Tamiya tape area of contact as barely enough to sit the paper mask ov each panel line, thus preventing new or further damage in the paint below it.

I think I removed the damaged paint with a cotton bud wet with alcohol, but not 100% sure

Cheers
Pedro
wrenchy
_VISITCOMMUNITY
Saskatchewan, Canada
Joined: April 23, 2006
KitMaker: 140 posts
AeroScale: 89 posts
Posted: Sunday, October 16, 2016 - 02:27 AM UTC
Done, done and done! This MiG-3 was started for the "Overshadowed Fighters" campaign in 2014. ICM 1/48 kit with Eduard p.e., True Details wheels and Quickboost gear doors and guns. A fun build although a little overengineered in spots. I might weather it a bit more but for now it good.

rochaped
_VISITCOMMUNITY
Lisboa, Portugal
Joined: August 27, 2010
KitMaker: 679 posts
AeroScale: 669 posts
Posted: Sunday, October 16, 2016 - 03:11 AM UTC
Wow!
Congratulations Ryan for a superb looking model.
Your Mig-3 is wonderfully build, painted and very realistically weathered I'm my opinion.
The green/black(?) camo blends quite well indeed. It makes me want to build one myself

Please remember to upload a couple of photos on the campaign gallery, you can find the link at the beginning of this thread.

Cheers,
Pedro
MLD
_VISITCOMMUNITY
Vermont, United States
Joined: July 21, 2002
KitMaker: 3,569 posts
AeroScale: 419 posts
Posted: Sunday, November 06, 2016 - 06:31 AM UTC


A couple of OLD timey shelf/hangar queens.. 10 yrs +
Italeri 1/72 Mi-24D's. and UGLY...

The rear wall of the cockpit and front wall of the troop compartment are molded solid. In reality there is a passage there with some all but invisible electronic racks.


The 'fit' of the troop compartment doors is iffy at best. Solved one with plastic sheet shims, this one with perfect plastic putty, faired in with a wet q-tip. The second way is faster, easier and yields a better result.


In reality, neither of these will be done by 12/31, but the Northern Alliance Hind D from the Hasegawa D kit (built as a D and not the F in the instructions) has a better chance. More pics of that later.
SpaceXhydro
_VISITCOMMUNITY
England - South West, United Kingdom
Joined: March 13, 2015
KitMaker: 418 posts
AeroScale: 114 posts
Posted: Monday, November 07, 2016 - 12:36 AM UTC
I like these Hinds, Mike. shame i couldn't finish my one. but i started building a new mi-35m to replace my failed project. at least now i learned a few things about so i can build it much better this time.
MLD
_VISITCOMMUNITY
Vermont, United States
Joined: July 21, 2002
KitMaker: 3,569 posts
AeroScale: 419 posts
Posted: Monday, November 07, 2016 - 01:03 AM UTC
Hyder,
Given the overall poor fit on these part to part bits, I am worried as sub assemblies have to come together.
The front cockpit lip/rim has to fit the cockpit tub, the left and right fuselage halves AND the clear canopy.
Or said another way, not a chance in hell..
rochaped
_VISITCOMMUNITY
Lisboa, Portugal
Joined: August 27, 2010
KitMaker: 679 posts
AeroScale: 669 posts
Posted: Monday, November 07, 2016 - 03:20 AM UTC
Mike,

Those 2 Mi-24 are bonafide Hangar Queens alright. It must be a challenge for you to find motivation and get them going, taken in consideration your opinion on the difficulty to get the halves together in all in its right place.
Give your best on at least one. That Hind D has what it takes?

Cheers
Pedro