

Tim,
The cockpit looks very good, especially since the canopy will be closed. For me the key will be the ejector seat. Make it fool the viewers eyes as to detail, and the perception of a super detailed cockpit will logically follow.
Joel
Modern (1975-today)
Discuss the modern aircraft age from 1975 thru today.
Discuss the modern aircraft age from 1975 thru today.
Hosted by Jim Starkweather
F-16XL Build Blog
Joel_W

Joined: December 04, 2010
KitMaker: 11,666 posts
AeroScale: 7,410 posts
Posted: Friday, October 23, 2015 - 02:38 AM UTC


litespeed


Joined: October 15, 2009
KitMaker: 1,976 posts
AeroScale: 1,789 posts
Posted: Monday, October 26, 2015 - 01:09 AM UTC
Quoted Text
The cockpit looks very good, especially since the canopy will be closed.For me the key will be the ejector seat. Make it fool the viewers eyes as to detail, and the perception of a super detailed cockpit will logically follow.
Joel
You are correct there Joel. I think for this build I will try another material other than tape to depict the seat harnesses. I was looking at a metallic wrapper around the top of a bottle of wine and wondering about using strips of it to create the harnesses. Anyway I will experiment a bit as I am in no rush to build the seat just yet.
tim


SaxonTheShiba
Joined: February 01, 2009
KitMaker: 1,233 posts
AeroScale: 663 posts

Posted: Monday, October 26, 2015 - 01:56 AM UTC
Tim, nice work on the F-16XL. In regards to material for harnesses, wine bottle foil does indeed work well. Also, if you have a good relationship with your dentist, the discarded lead foil wrappers from X-ray film works well too.
Best wishes,
Ian
Best wishes,
Ian
litespeed
Joined: October 15, 2009
KitMaker: 1,976 posts
AeroScale: 1,789 posts
Posted: Monday, October 26, 2015 - 04:57 AM UTC
Quoted Text
Tim, nice work on the F-16XL. In regards to material for harnesses, wine bottle foil does indeed work well. Also, if you have a good relationship with your dentist, the discarded lead foil wrappers from X-ray film works well too.
Best wishes,
Ian
Discarded lead foil does sound like an excellent alternative Ian. I will ask my dentist for some on my next check up. Thanks for the tip.
tim
litespeed
Joined: October 15, 2009
KitMaker: 1,976 posts
AeroScale: 1,789 posts
Posted: Monday, October 26, 2015 - 05:29 AM UTC
Hi all
I was browsing some of my favourite on line model shops this evening when I spotted this release from Modelsvit
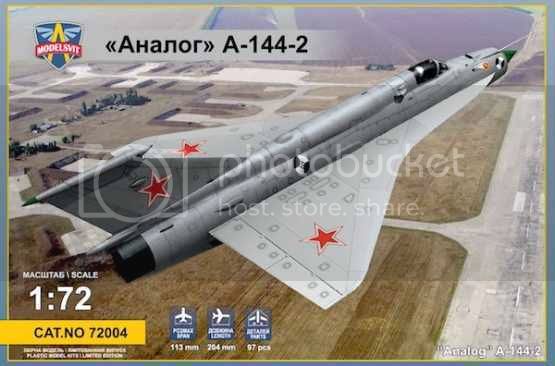
The MiG-21I was a flying test bed for the wings of the Tu-144. Two were built and from my internet research the two appear to have had various wing designs fitted. The fuselage appears to be a MiG 21M [?] and I was wondering about a future project to convert a Eduard MiG 21 into one of these aircraft. It would certainly make an interesting companion for the F-16 XL. I know AMC Models made a resin kit of these interesting looking test aircraft.
Tim
litespeed
Joined: October 15, 2009
KitMaker: 1,976 posts
AeroScale: 1,789 posts
Posted: Wednesday, October 28, 2015 - 01:23 AM UTC
Hi all
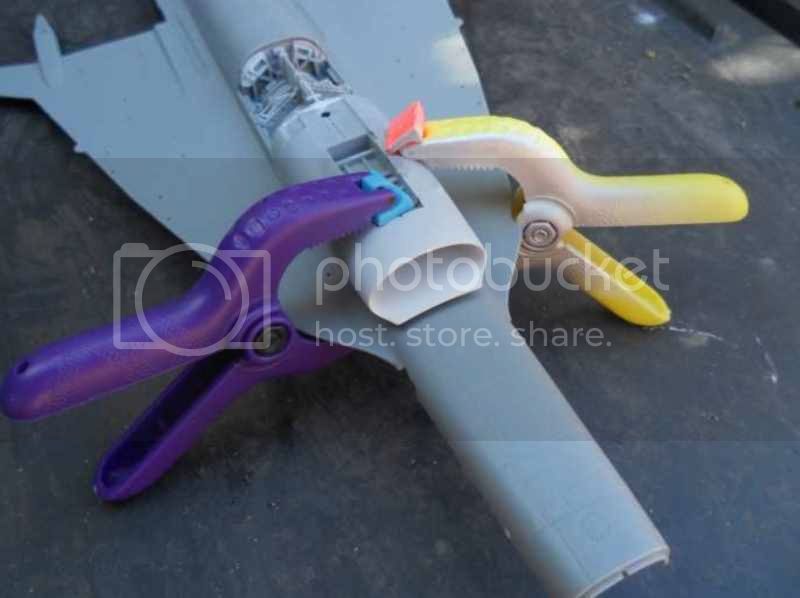
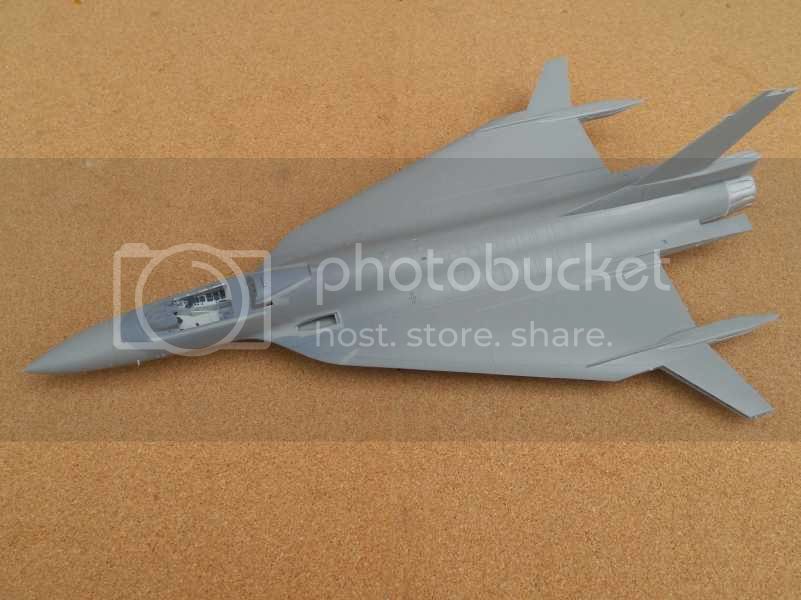
I have attached the completed and painted air intakes to the lower fuselage. The rear of the intake [A] with the primary compressor was fitted first. There are very positive location points to aid its positioning. Once the glue had set I added the forward part of the air intake [B]. The fit is very good indeed, but I did use a couple of clamps to hold everything in place whilst the glue set.
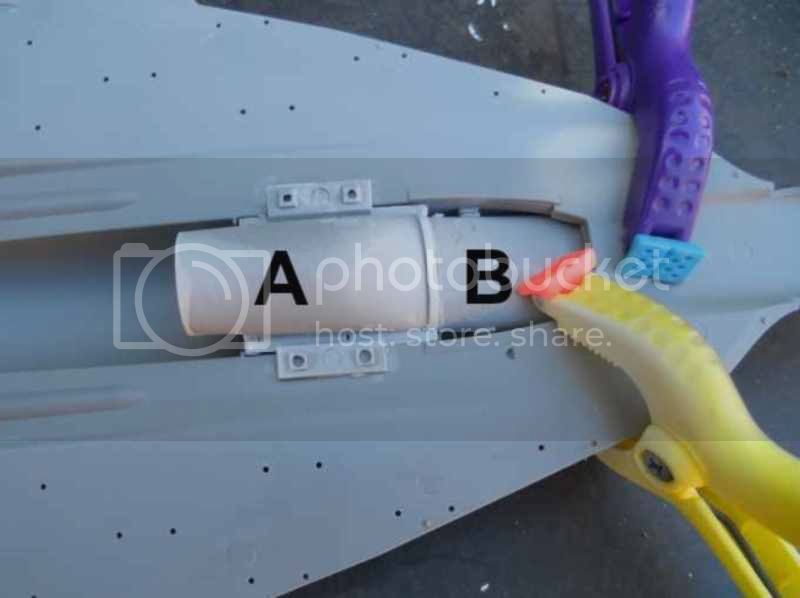
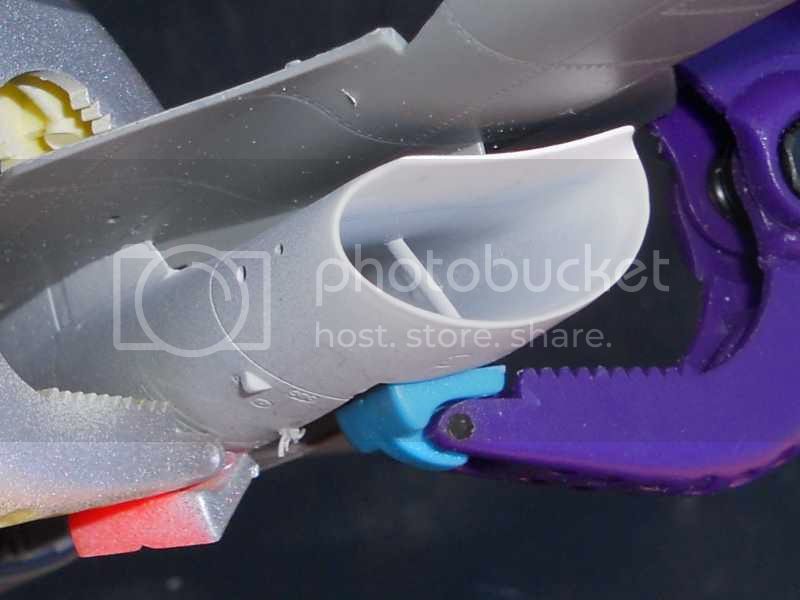
To be continued
Joel_W
Joined: December 04, 2010
KitMaker: 11,666 posts
AeroScale: 7,410 posts
Posted: Wednesday, October 28, 2015 - 07:37 PM UTC
Tim,
The fit looks perfect.
Joel
The fit looks perfect.
Joel
litespeed
Joined: October 15, 2009
KitMaker: 1,976 posts
AeroScale: 1,789 posts
Posted: Thursday, October 29, 2015 - 05:15 PM UTC
Quoted Text
Tim,
The fit looks perfect.
Joel
It is Joel. It fits really well without any need for sanding or filling. The clamps are necessary to ensure a tight fit while the glue sets.
tim
litespeed
Joined: October 15, 2009
KitMaker: 1,976 posts
AeroScale: 1,789 posts
Posted: Friday, October 30, 2015 - 01:49 AM UTC
Hi all
The F-16XL is beginning to take shape. I glued and clamped the upper and lower fuselage/wing halves together last night. The fit is not bad although I did file down a couple of areas for a better fit. The number of clamps gives the impression that the fit is poor, but the wing area is so big it needed quite a few clamps to hold it together whilst the glue set.
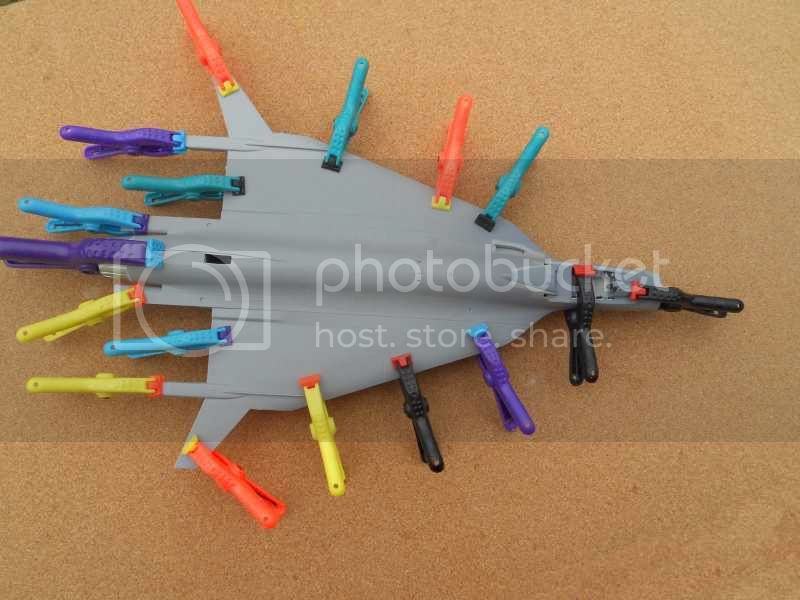
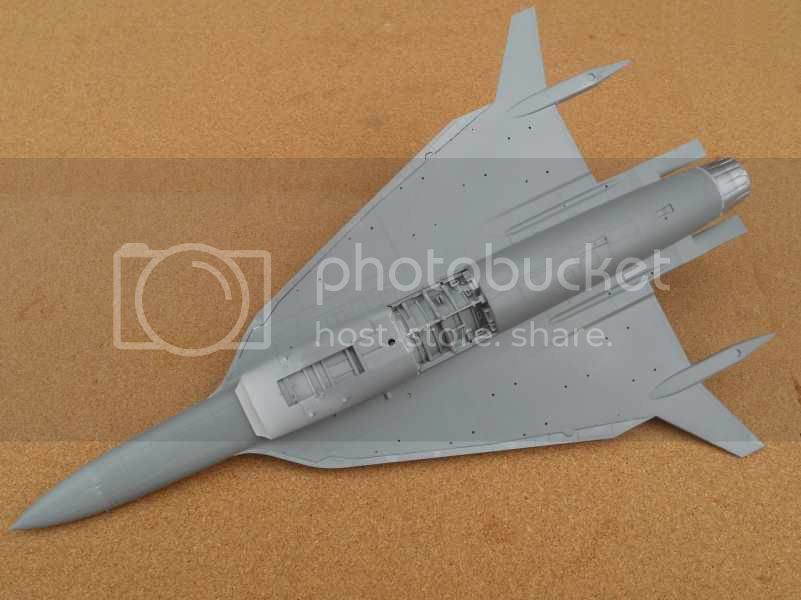
This evening the clamps came off and below you can see the results. I am not overly impressed with the join on the under surface of the wing, but the rest looks OK. Its going to be difficult to clean up the join just forward of the engine nozzle though because of the close proximity of the air brake. With hindsight it might have been better to separate the air brake from the wing and then fit it back later. I can still separate the airbrake, but it would have been easier before joining the halves.
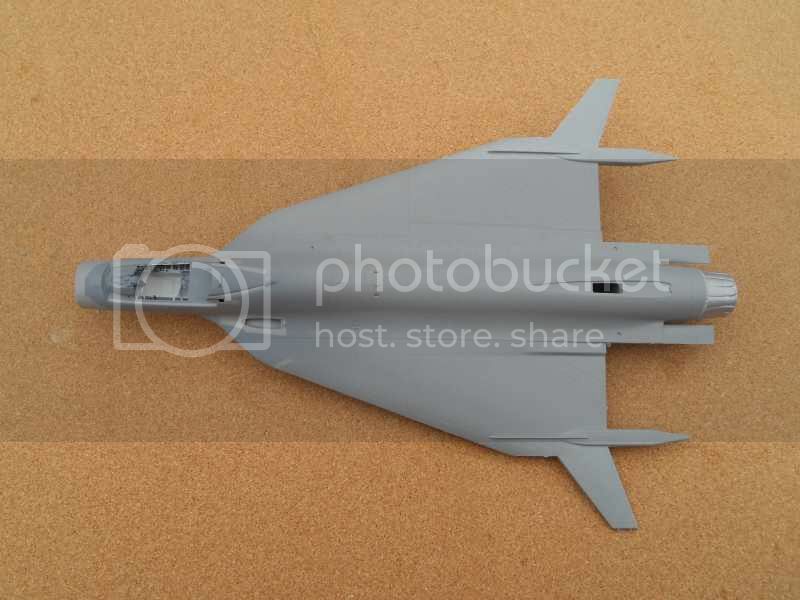
You can appreciate the load carrying capacity of the F-16XL from the number of holes on the under surface of the wing. The holes are for the weapon pylons. I was going to apply Milliput into the holes from the inside before joining the wings. But in my haste and excitement to join the halves of the airframe, I forgot.
To be continued
The F-16XL is beginning to take shape. I glued and clamped the upper and lower fuselage/wing halves together last night. The fit is not bad although I did file down a couple of areas for a better fit. The number of clamps gives the impression that the fit is poor, but the wing area is so big it needed quite a few clamps to hold it together whilst the glue set.

This evening the clamps came off and below you can see the results. I am not overly impressed with the join on the under surface of the wing, but the rest looks OK. Its going to be difficult to clean up the join just forward of the engine nozzle though because of the close proximity of the air brake. With hindsight it might have been better to separate the air brake from the wing and then fit it back later. I can still separate the airbrake, but it would have been easier before joining the halves.


You can appreciate the load carrying capacity of the F-16XL from the number of holes on the under surface of the wing. The holes are for the weapon pylons. I was going to apply Milliput into the holes from the inside before joining the wings. But in my haste and excitement to join the halves of the airframe, I forgot.
To be continued
Joel_W
Joined: December 04, 2010
KitMaker: 11,666 posts
AeroScale: 7,410 posts
Posted: Saturday, October 31, 2015 - 09:14 PM UTC
Tim,
I sense your concerns with that massive wing joint. It does look like there is quite a step to deal with on both sides.
Since you're not going to install the pylons, I would guess that a Gel or thick CCA glue is your best option at this point.
Joel
I sense your concerns with that massive wing joint. It does look like there is quite a step to deal with on both sides.
Since you're not going to install the pylons, I would guess that a Gel or thick CCA glue is your best option at this point.
Joel
litespeed
Joined: October 15, 2009
KitMaker: 1,976 posts
AeroScale: 1,789 posts
Posted: Sunday, November 01, 2015 - 01:27 AM UTC
Quoted Text
I sense your concerns with that massive wing joint. It does look like there is quite a step to deal with on both sides.
Since you're not going to install the pylons, I would guess that a Gel or thick CCA glue is your best option at this point.
I am going to try Milliput to fill the holes and the wing joint Joel. A good friend of mine has been using Milliput on his recent kits and I have been impressed. As long as the joint shows no sign of flexing then Milliput seems fine. It is also water soluble so that any excess filler can be wiped away with a damp cloth.
tim
Joel_W
Joined: December 04, 2010
KitMaker: 11,666 posts
AeroScale: 7,410 posts
Posted: Sunday, November 01, 2015 - 08:56 PM UTC
Quoted Text
Quoted Text
I sense your concerns with that massive wing joint. It does look like there is quite a step to deal with on both sides.
Since you're not going to install the pylons, I would guess that a Gel or thick CCA glue is your best option at this point.
I am going to try Milliput to fill the holes and the wing joint Joel. A good friend of mine has been using Milliput on his recent kits and I have been impressed. As long as the joint shows no sign of flexing then Milliput seems fine. It is also water soluble so that any excess filler can be wiped away with a damp cloth.
tim
Tim,
I can see using Milliput for all those holes. But I would think that those massive wing joints would have some flex to them from handling.
I've never tried Milliput, yet I have a brand new box for more then two years in my filler bin. Now that you mentioned that it's water soluble, I just may give it a try.
Joel
litespeed
Joined: October 15, 2009
KitMaker: 1,976 posts
AeroScale: 1,789 posts
Posted: Monday, November 02, 2015 - 08:57 PM UTC
Joel I tried Milliput a loooong time ago and I have to say I was not too impressed with it back then. It always felt a bit odd when the you mixed the two part filler. I also found it would crack very easily if the join was not joined properly or the join was subject to flexing. Watching my friend using it successfully recently has made me look at the product again. I really like the fact you can take of any excess filler using a damp cloth or sponge. It really cuts down the amount of sanding significantly, which can only be a good thing.
I will always resort back to my favourite method of filling gaps if there is any hint of flex: namely stretched sprue and liquid glue.
Talking of liquid glue I have been using Tamiya extra thin glue with this build. I have been very impressed with it so far. It evaporates very quickly so any over spill from a join disappears very fast. So there is little or no residue left to clean up.
tim
Joel_W
Joined: December 04, 2010
KitMaker: 11,666 posts
AeroScale: 7,410 posts
Posted: Wednesday, November 04, 2015 - 10:00 PM UTC
Quoted Text
Joel I tried Milliput a loooong time ago and I have to say I was not too impressed with it back then. It always felt a bit odd when the you mixed the two part filler. I also found it would crack very easily if the join was not joined properly or the join was subject to flexing. Watching my friend using it successfully recently has made me look at the product again. I really like the fact you can take of any excess filler using a damp cloth or sponge. It really cuts down the amount of sanding significantly, which can only be a good thing.
I will always resort back to my favourite method of filling gaps if there is any hint of flex: namely stretched sprue and liquid glue.
Talking of liquid glue I have been using Tamiya extra thin glue with this build. I have been very impressed with it so far. It evaporates very quickly so any over spill from a join disappears very fast. So there is little or no residue left to clean up.
tim
Tim,
I've yet to use stretched sprue and liquid glue, but I'm a long, long time user of strips of sheet plastic and liquid glue. I just may try stretched sprue as it's relatively easy to vary the thickness of the pull, and you don't have to cut pieces out of sheet.
As for liquid glue, I'm a true devotee of Tamiya Extra Thin. It's my primary glue for just the reasons you mentioned. Then it's their Orange cap which is a gel consistency, but it's drawback is that it dries just as fast, so I've gone back to the good old days of tube glue, where I need a longer working time. Used conservatively, it's still a excellent option.
Joel

Aurora-7

#360
Joined: June 18, 2003
KitMaker: 1,020 posts
AeroScale: 125 posts

Posted: Wednesday, November 04, 2015 - 10:45 PM UTC
This F-16 variant has a lot of fans. Here's one done of this kit from someone who has to get hold of any kit made of the 16XL.
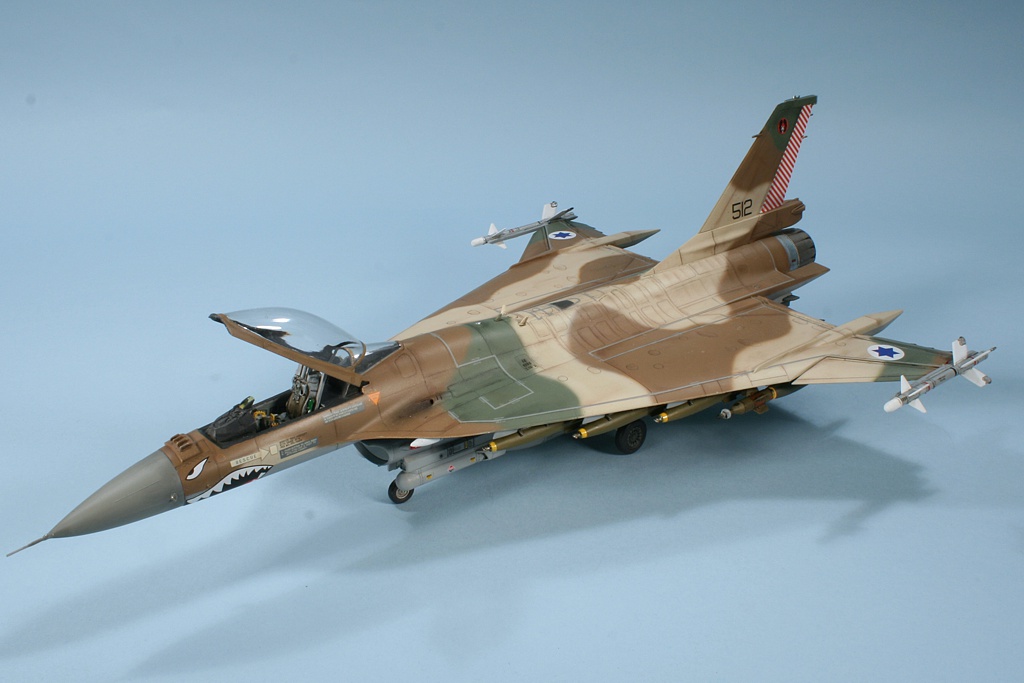
Thanks for posting your build process, Joel.
Thanks for posting your build process, Joel.

Joel_W
Joined: December 04, 2010
KitMaker: 11,666 posts
AeroScale: 7,410 posts
Posted: Thursday, November 05, 2015 - 02:18 AM UTC
Quoted Text
This F-16 variant has a lot of fans. Here's one done of this kit from someone who has to get hold of any kit made of the 16XL.
Thanks for posting your build process, Joel.
Michael,
an excellent What If build. But the build blog is Tim's, I'm just an very interested Aeroscale member, as Tim's build blogs are really excellent.
Joel
litespeed
Joined: October 15, 2009
KitMaker: 1,976 posts
AeroScale: 1,789 posts
Posted: Thursday, November 05, 2015 - 03:29 AM UTC
Welcome to this build log Michael, that is a rather tasty build of the F-16XL you have posted. The Israeli AF camouflage really suites the F-16XL a pity it did not enter service with any Air Force. It also looks pretty cool with weapons hanging from it. It is interesting to see the wing tip missiles and rails of this build; I am presuming it is the Skunkmodel Works release? They appear to run parallel with the ground. I think the rails are normally angled down on the F-16 generally and the F-16XL is no exception. That is something for me to look out for when I add the rails on my build. If mine looks half as good as that Michael, I will be very pleased:)
Thanks for your comments Joel, as ever they are much appreciated
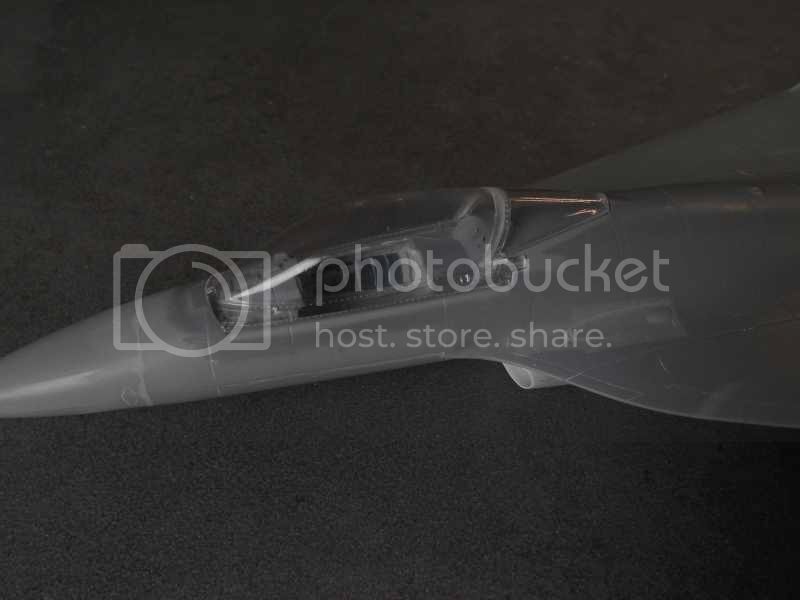
I have partially constructed the vertical tail; it is made up from seven parts not including the rudder. I am not going to add the rudder just yet as there are a few delicate static wicks on the trailing edge which could easily be broken off. There are a few more parts to add including the top of the tail fin and the brake parachute pack.
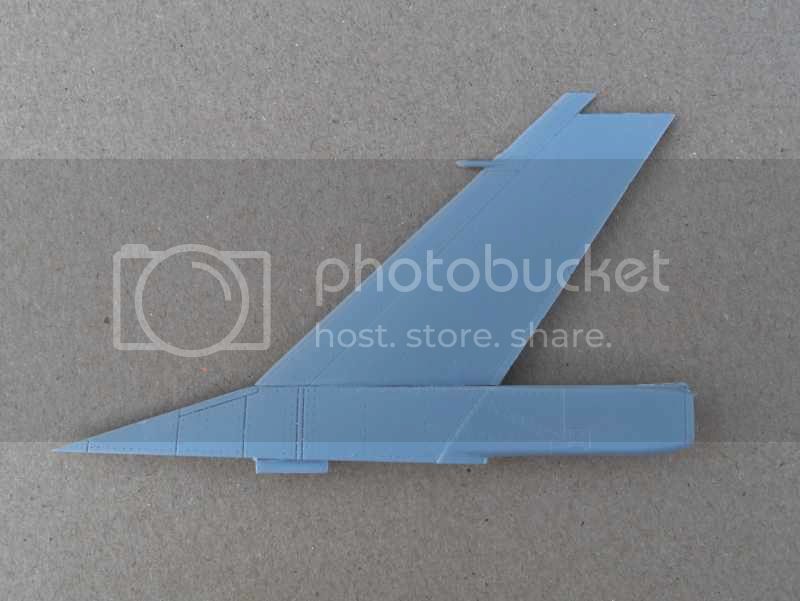
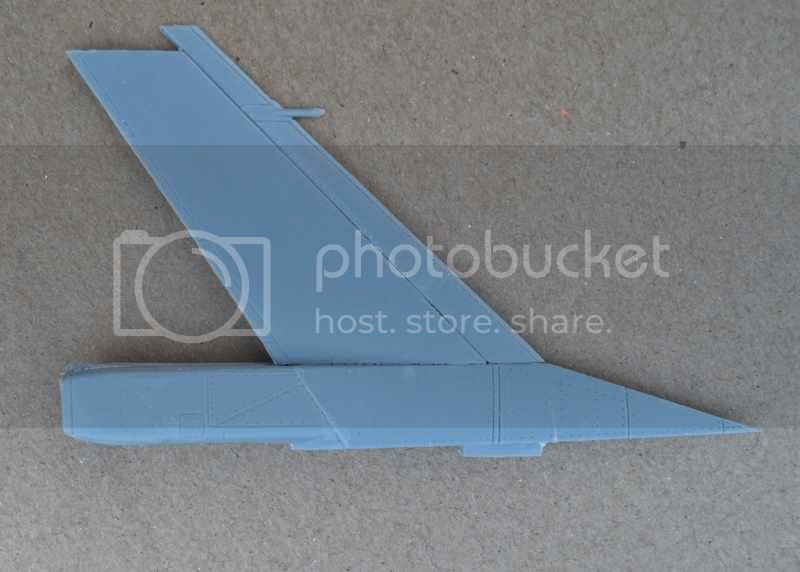
The vertical tail and the weighted nose have been added to the air frame. The F-16XL really is taking shape nicely. I checked the position of the nose carefully as with previous Kinetic F-16 kits the nose has had a decidedly unrealistic drooped look. There is no such problem with this release. The position of the nose looks most satisfactory.
To be continued
Thanks for your comments Joel, as ever they are much appreciated
I have partially constructed the vertical tail; it is made up from seven parts not including the rudder. I am not going to add the rudder just yet as there are a few delicate static wicks on the trailing edge which could easily be broken off. There are a few more parts to add including the top of the tail fin and the brake parachute pack.


The vertical tail and the weighted nose have been added to the air frame. The F-16XL really is taking shape nicely. I checked the position of the nose carefully as with previous Kinetic F-16 kits the nose has had a decidedly unrealistic drooped look. There is no such problem with this release. The position of the nose looks most satisfactory.


To be continued
Aurora-7
#360
Joined: June 18, 2003
KitMaker: 1,020 posts
AeroScale: 125 posts
Posted: Thursday, November 05, 2015 - 05:43 AM UTC
Oops, my apologies, Tim.
litespeed
Joined: October 15, 2009
KitMaker: 1,976 posts
AeroScale: 1,789 posts
Posted: Sunday, November 08, 2015 - 02:55 AM UTC
No problem Michael
litespeed
Joined: October 15, 2009
KitMaker: 1,976 posts
AeroScale: 1,789 posts
Posted: Monday, November 09, 2015 - 03:20 AM UTC
Hi all.
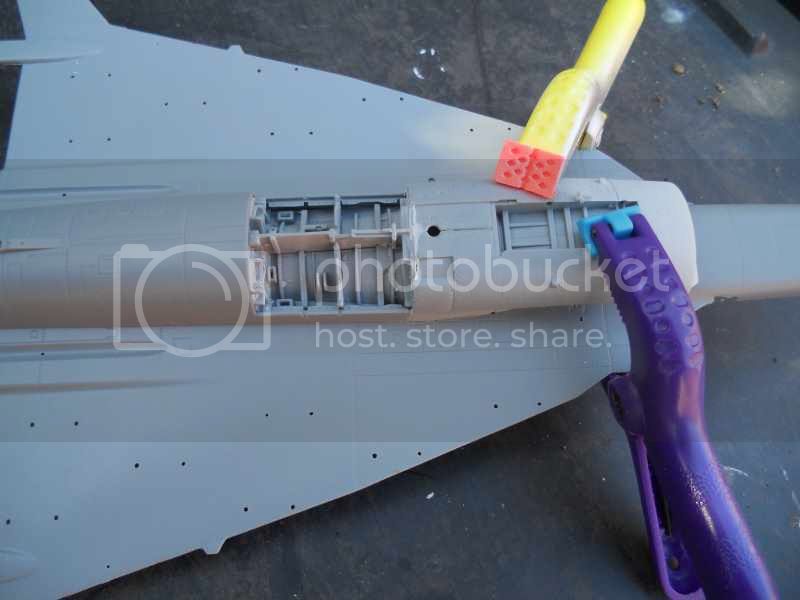
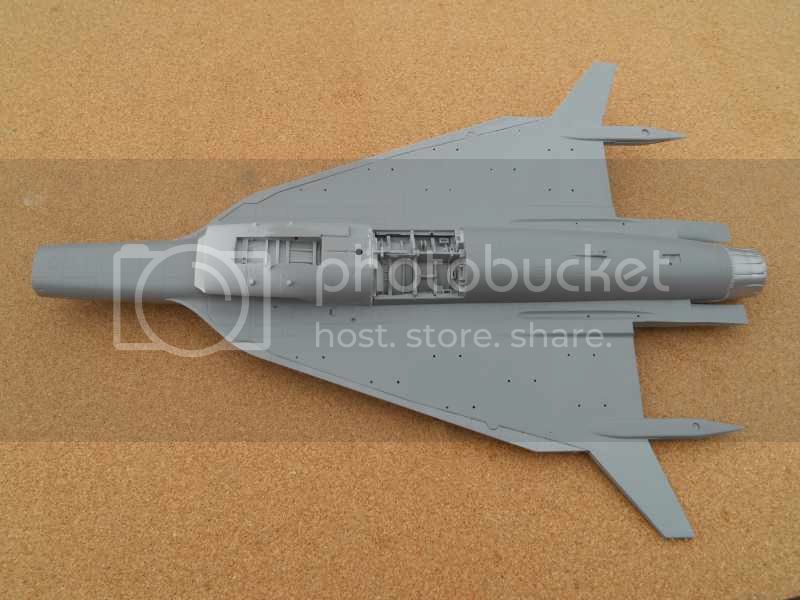
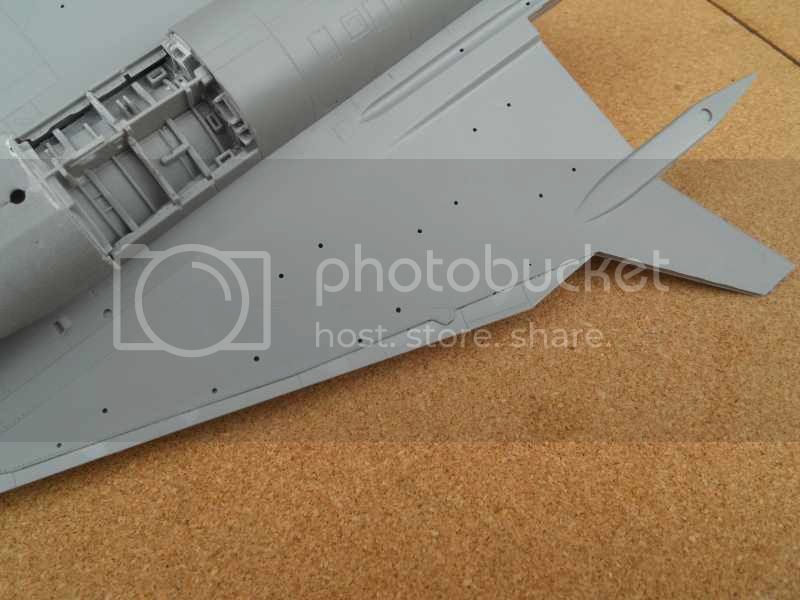
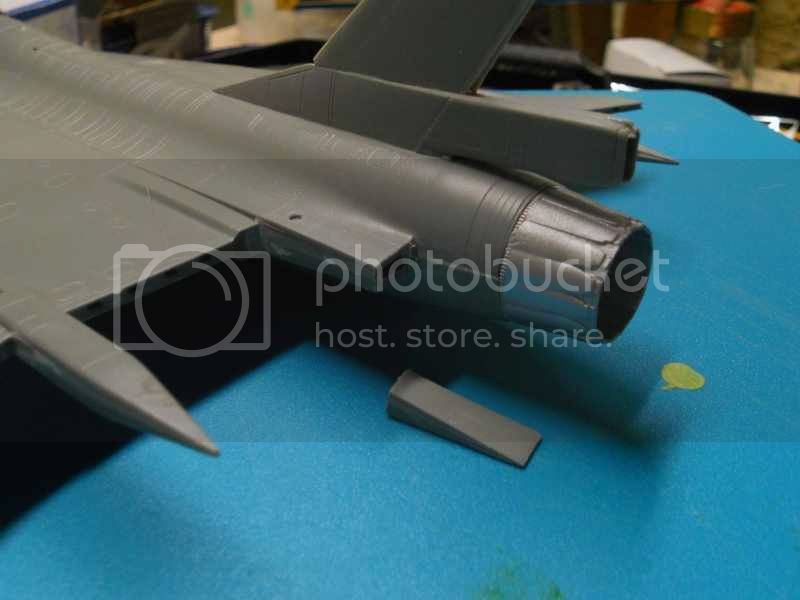
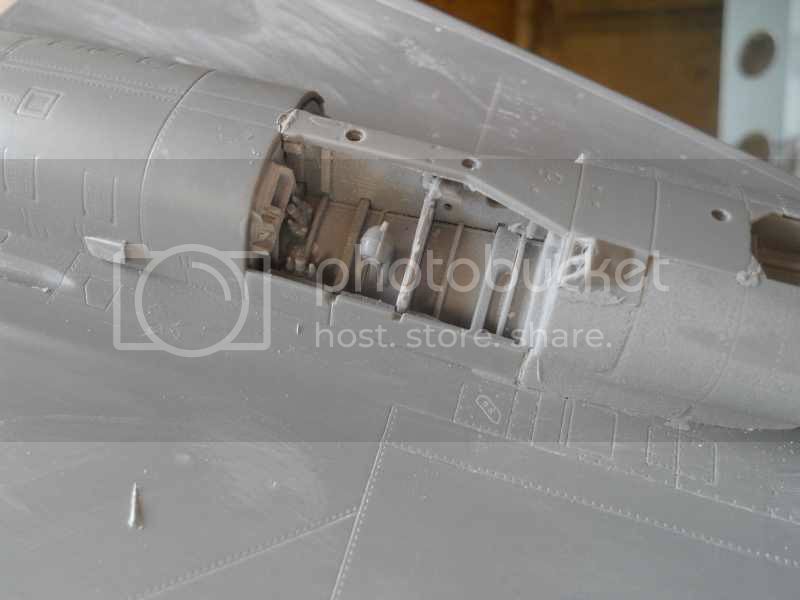
Looking over the airframe of the F-16XL I noticed a significant step in the join of the fuselage halves just forward of the engine nozzle [see image below]. Its almost impossible to clean up so I took the decision to saw off the air brakes. With the air brakes removed I can clean up the joins much more easily. It also makes it easier to mask and paint the area natural metal.
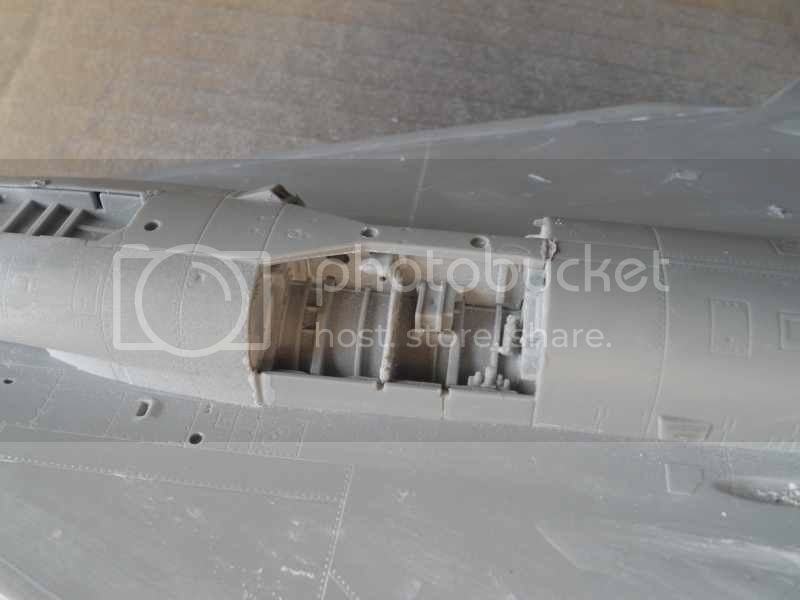
I have added the remaining parts for the main under carriage bay. The central panel surface panel dividing the two bays is a separate part. As you can see it needs to be blended in with the surrounding area. There is also a slight depression on the small vent [?] that needs filling.
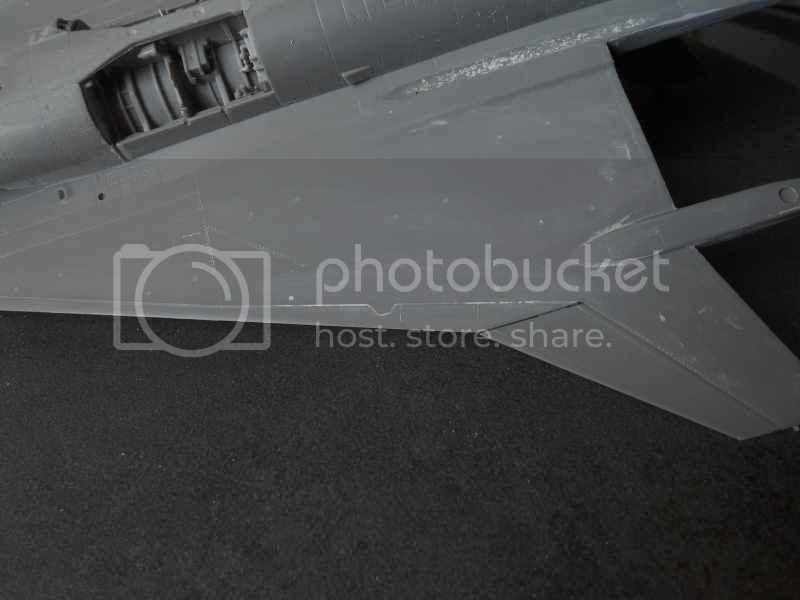
I have attached the Leading Edge Flaps [LEF] you can set them at two angles neutral or lowered. I have set mine in the neutral position. You may also be able to make out that the rather obvious join on the wing under surface and the holes for the weapon pylons are gradually being filled, filed and polished. I have been using Milliput as the main filler, and then finishing off with Mr Surfacer 500. Its the first time I have used Mr Surfacer and so far I have been very impressed.
To be continued
Looking over the airframe of the F-16XL I noticed a significant step in the join of the fuselage halves just forward of the engine nozzle [see image below]. Its almost impossible to clean up so I took the decision to saw off the air brakes. With the air brakes removed I can clean up the joins much more easily. It also makes it easier to mask and paint the area natural metal.

I have added the remaining parts for the main under carriage bay. The central panel surface panel dividing the two bays is a separate part. As you can see it needs to be blended in with the surrounding area. There is also a slight depression on the small vent [?] that needs filling.


I have attached the Leading Edge Flaps [LEF] you can set them at two angles neutral or lowered. I have set mine in the neutral position. You may also be able to make out that the rather obvious join on the wing under surface and the holes for the weapon pylons are gradually being filled, filed and polished. I have been using Milliput as the main filler, and then finishing off with Mr Surfacer 500. Its the first time I have used Mr Surfacer and so far I have been very impressed.

To be continued
litespeed
Joined: October 15, 2009
KitMaker: 1,976 posts
AeroScale: 1,789 posts
Posted: Tuesday, November 10, 2015 - 02:17 AM UTC
Hi all
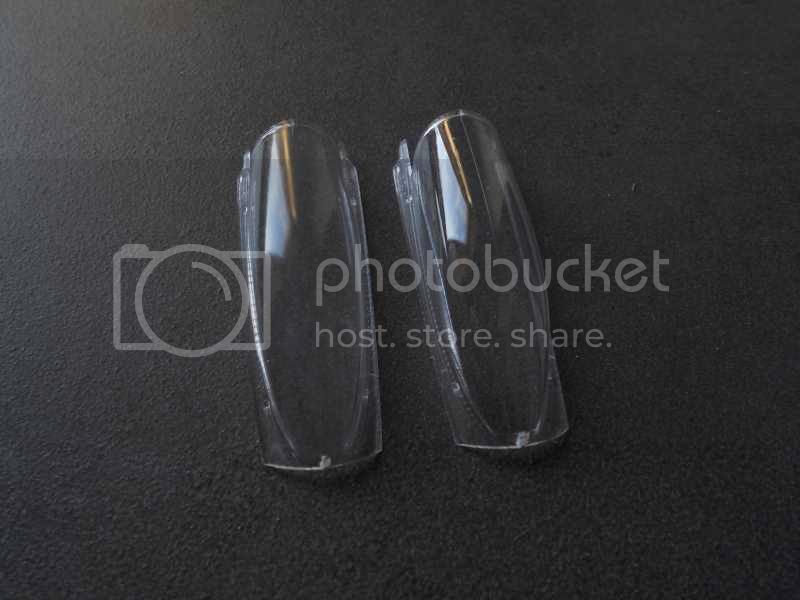
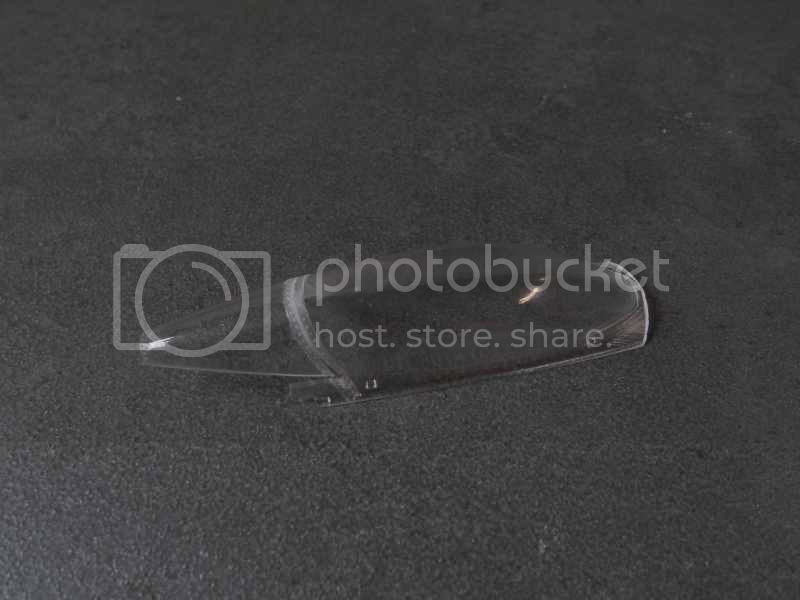
I had a closure look at the kits canopy and discovered there is an obvious seam line running the length of it. You can see it on the right hand side below. I decided to eradicate the mold line so I went to work with some sanding sticks and Alclad II Micromesh Polishing Cloth. As you can see from the left hand image the results are rather pleasing.
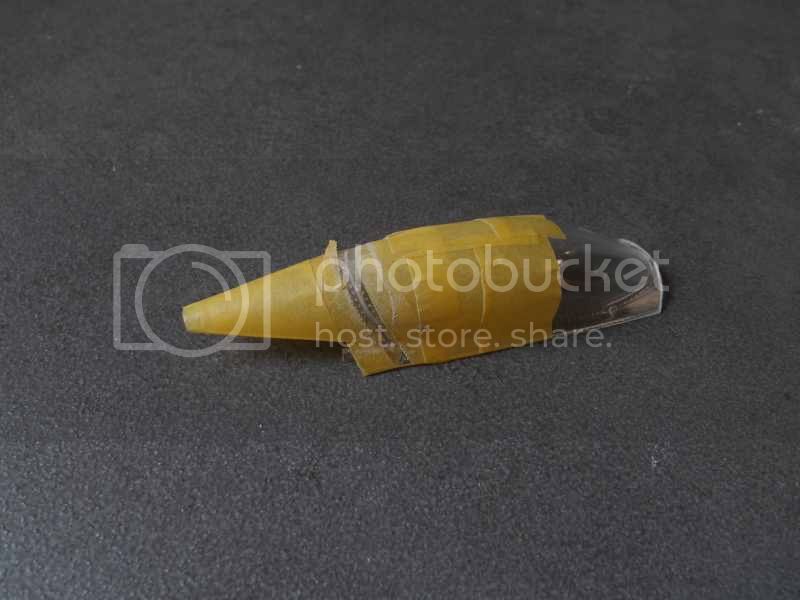
As already stated elsewhere in this blog I wanted to display the canopy closed so I glued the kits two part canopy together. The gap between the two parts of the canopy is not bad, but I wanted it to look a little less obvious. So I masked off the areas around the frame and filled the gap with Humbrol putty. To smooth the filler down I used Albion Alloys various grit mini sanding sticks to further minimise any damage to the clear parts. I tried the assembled canopy onto the fuselage and the fit is not bad at all. I will dip the completed canopy in Future to bring back its sparkle.
As you can see on the last photo I have added the cover over where the gun is normally located.
To be continued
I had a closure look at the kits canopy and discovered there is an obvious seam line running the length of it. You can see it on the right hand side below. I decided to eradicate the mold line so I went to work with some sanding sticks and Alclad II Micromesh Polishing Cloth. As you can see from the left hand image the results are rather pleasing.

As already stated elsewhere in this blog I wanted to display the canopy closed so I glued the kits two part canopy together. The gap between the two parts of the canopy is not bad, but I wanted it to look a little less obvious. So I masked off the areas around the frame and filled the gap with Humbrol putty. To smooth the filler down I used Albion Alloys various grit mini sanding sticks to further minimise any damage to the clear parts. I tried the assembled canopy onto the fuselage and the fit is not bad at all. I will dip the completed canopy in Future to bring back its sparkle.
As you can see on the last photo I have added the cover over where the gun is normally located.


To be continued
Joel_W
Joined: December 04, 2010
KitMaker: 11,666 posts
AeroScale: 7,410 posts
Posted: Tuesday, November 10, 2015 - 08:37 PM UTC
Tim,
Nice work on all those station holes. I've always had issues getting the unwanted ones to completely disappear. Takes application after application of Bondo Glazing putty, and finally a coat of thin CCA glue to seal and protect.
I'm really impressed with your efforts on the two piece canopy. That seam down the center line is totally gone. I've screwed up more canopies trying to remove one then I care to admit. As for the joint between the two sections, it looks perfect.
I've been using for years Micro mesh pads, but they're rather difficult to work with in tight corners. I didn't know that Alcad makes polishing cloths. Will take a look at them. I'm also thinking of experimenting with 00000 steel wool for polishing. It works wonders on raised wood stain, so I can't see why it wouldn't smooth out model paint as well.
Joel
litespeed
Joined: October 15, 2009
KitMaker: 1,976 posts
AeroScale: 1,789 posts
Posted: Thursday, November 12, 2015 - 02:13 AM UTC
Quoted Text
I didn't know that Alcad makes polishing cloths. Will take a look at them. I'm also thinking of experimenting with 00000 steel wool for polishing. It works wonders on raised wood stain, so I can't see why it wouldn't smooth out model paint as well.
Joel
Joel I have been using Alclads Micromesh polishing clothes for some time now. I bought a set of various grades including 3600, 4000, 6000, 8000, and 12000. As they are sheets they are very flexible and great for putting a fine shiny finish back onto the surface of plastic after any filling and blending. On the canopy to achieve the final polish I buff it up on a piece of old denim. This seems to restore 95% of the original transparency in the plastic. Dipping the canopy in Klear not only restores the transparency it adds a real glint to the surface.
I'm not sure about wire wool on plastic, I thought it would be too harsh. So I will be very interested to see how you get on with it. always worth a try.
tim
Joel_W
Joined: December 04, 2010
KitMaker: 11,666 posts
AeroScale: 7,410 posts
Posted: Thursday, November 12, 2015 - 03:28 AM UTC
Quoted Text
Quoted TextI didn't know that Alcad makes polishing cloths. Will take a look at them. I'm also thinking of experimenting with 00000 steel wool for polishing. It works wonders on raised wood stain, so I can't see why it wouldn't smooth out model paint as well.
Joel
Joel I have been using Alclads Micromesh polishing clothes for some time now. I bought a set of various grades including 3600, 4000, 6000, 8000, and 12000. As they are sheets they are very flexible and great for putting a fine shiny finish back onto the surface of plastic after any filling and blending. On the canopy to achieve the final polish I buff it up on a piece of old denim. This seems to restore 95% of the original transparency in the plastic. Dipping the canopy in Klear not only restores the transparency it adds a real glint to the surface.
I'm not sure about wire wool on plastic, I thought it would be too harsh. So I will be very interested to see how you get on with it. always worth a try.
tim
Tim,
Finishing steel wool grades of 0000-00000 are like using 8,000-12,000 polishing pads. The 00000 is so soft it literally falls apart as you polish with it. Just might do a little experimenting with polishing gloss and flat paints and see how it works. I'll post pics and my results for all to see.
Joel
litespeed
Joined: October 15, 2009
KitMaker: 1,976 posts
AeroScale: 1,789 posts
Posted: Monday, November 16, 2015 - 02:00 AM UTC
Hi all
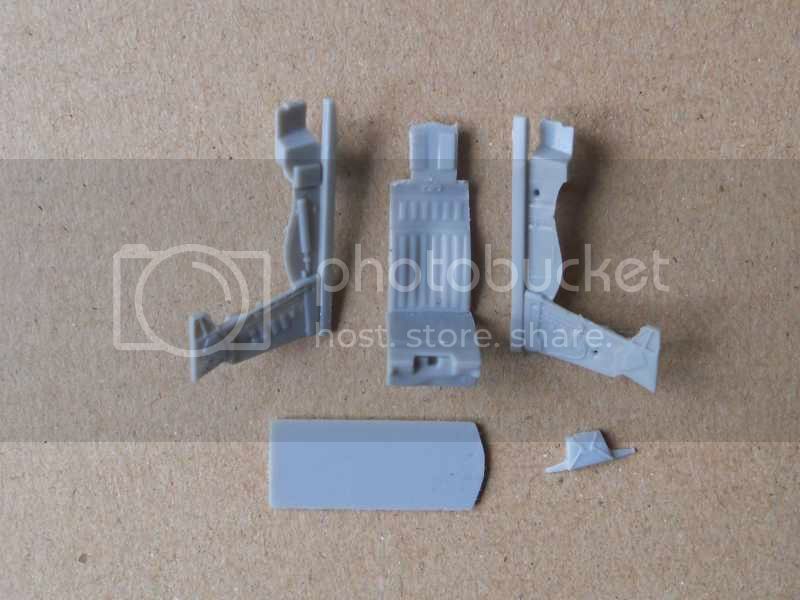
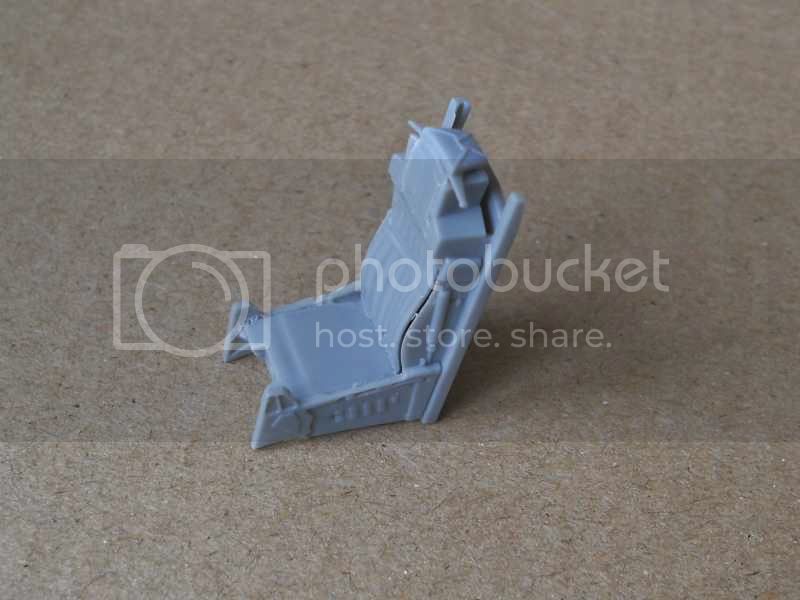
I have done a little bit of scratch building on the ACES II seat that is included with this kit. It does not look too bad although a resin one would be preferable. As this is an in box review I will use the one supplied. I have hopefully improved the look by adding some seat harnesses made from the foil from a bottle of wine. I also scratched built the firing handle using fine copper wire. One is included with the kit, but its not terribly convincing. There are two or three sink holes to fill in as well.
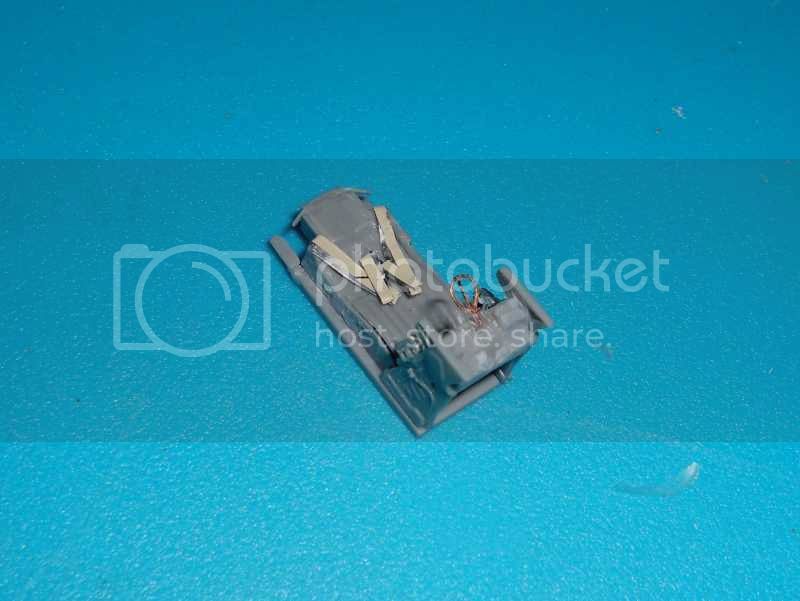
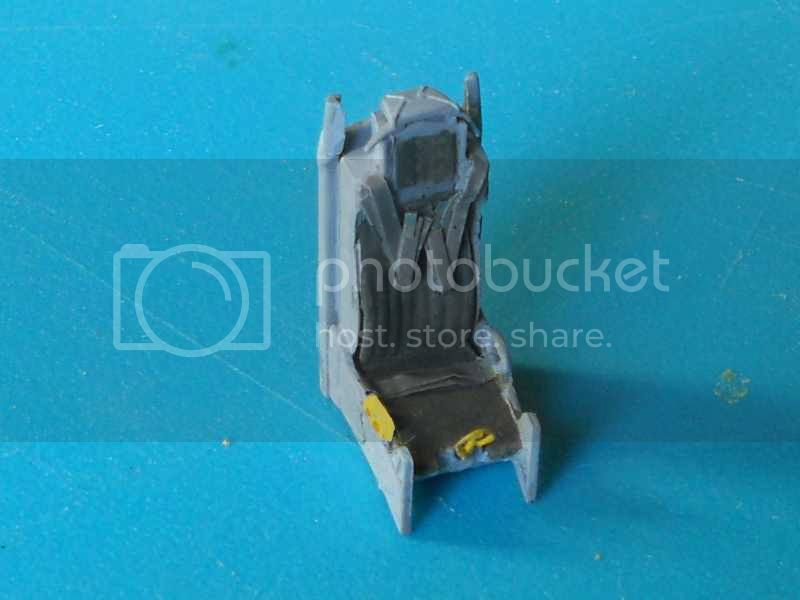
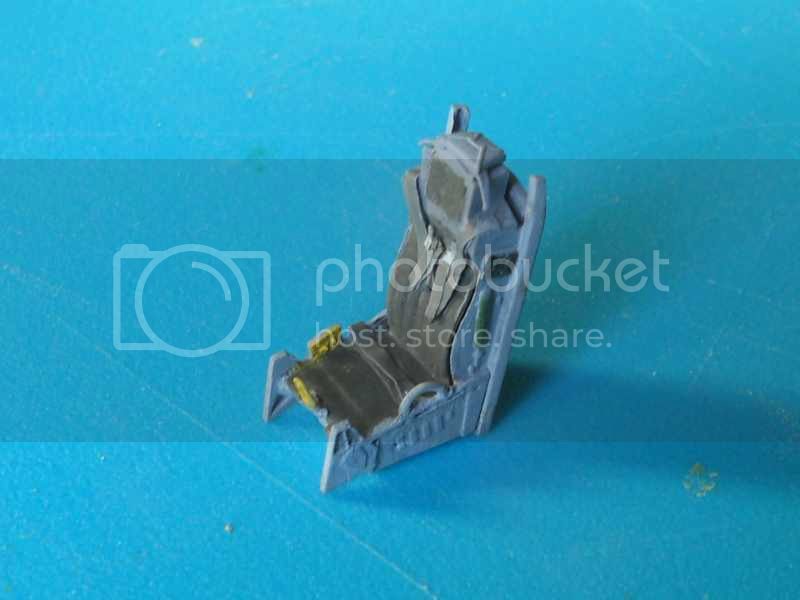
To be continued
I have done a little bit of scratch building on the ACES II seat that is included with this kit. It does not look too bad although a resin one would be preferable. As this is an in box review I will use the one supplied. I have hopefully improved the look by adding some seat harnesses made from the foil from a bottle of wine. I also scratched built the firing handle using fine copper wire. One is included with the kit, but its not terribly convincing. There are two or three sink holes to fill in as well.


To be continued
 |

WEB HOSTING BY


Copyright ©2021 AeroScale and Kitmaker Network, a subsidiary of Silver Star Enterprises
All Rights Reserved. Please read our Conditions of Use and Privacy Policy.
All Rights Reserved. Please read our Conditions of Use and Privacy Policy.