Air Campaigns
Want to start or join a group build? This is where to start.
OFFICIAL: Lifesavers Campaign
Konigwolf
_VISITCOMMUNITY
Tasmania, Australia
Joined: November 06, 2009
KitMaker: 368 posts
AeroScale: 27 posts
Posted: Sunday, November 01, 2015 - 05:30 PM UTC
Thanks Paul

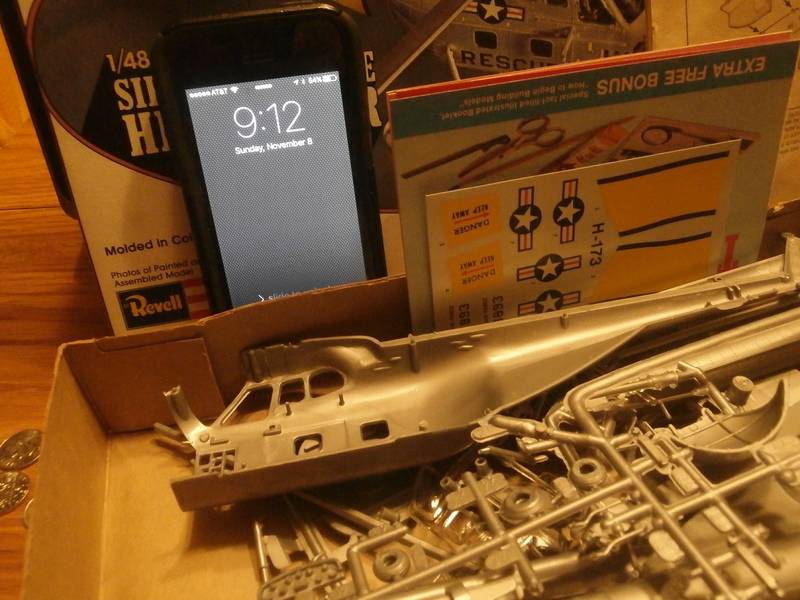
Well got some bench time on the kit this weekend (gotta love long weekends 
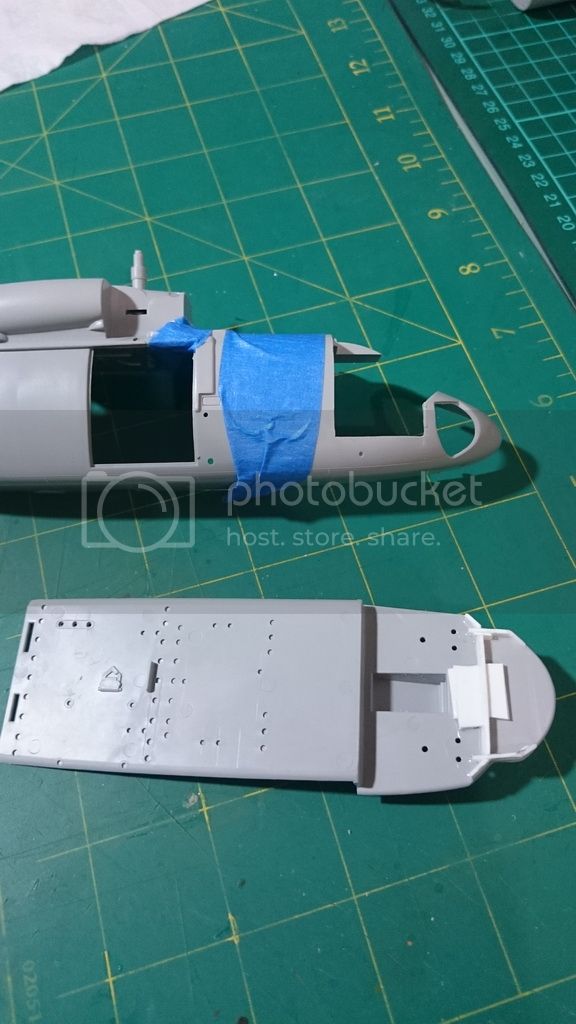
). Unfortunately didn't actually get a lot of building done. Before I bought this kit I read a few reviews which said overall it was sparse interior but otherwise went together well, all I can say is their version of "went together well" must be different to mine.

Biggest issue so far is the cockpit and cabin has no alignment points on the inside to lock it into position, making good alignment difficult. Probably not a major issue IF you are not going to have the cabin door open but if you are, things (roof and floor) need to lined up before the body halves are glued together or gaps will be obvious. Figuring out best fit and way to proceed has been taking most of the time.

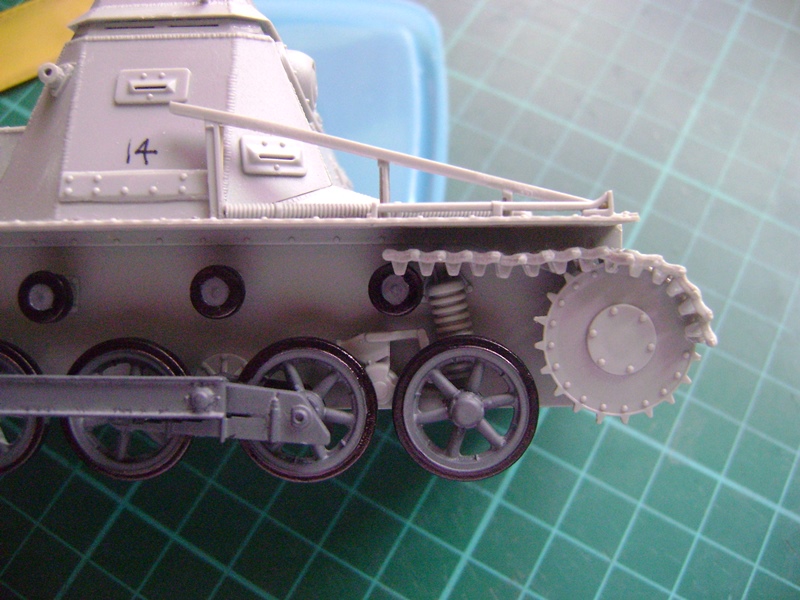
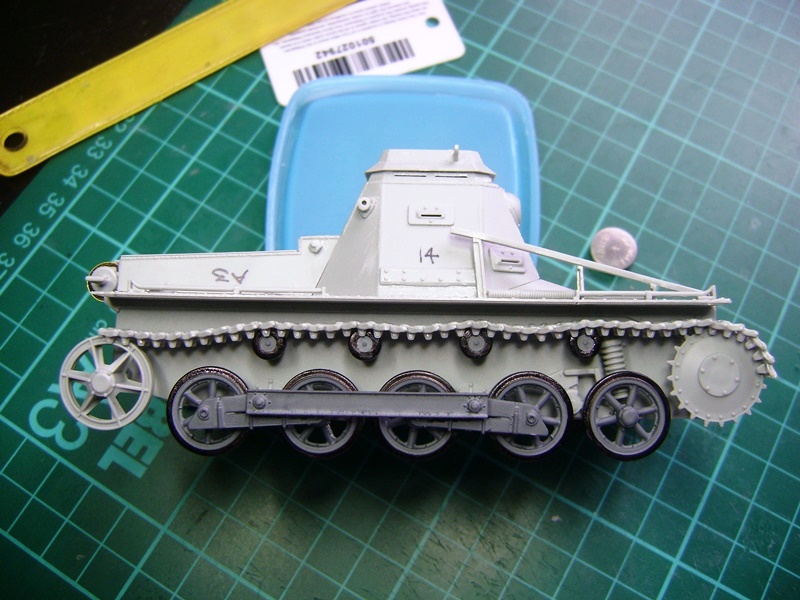
I have also been working on adding in some under floor details that are obvious through the lower front windows.

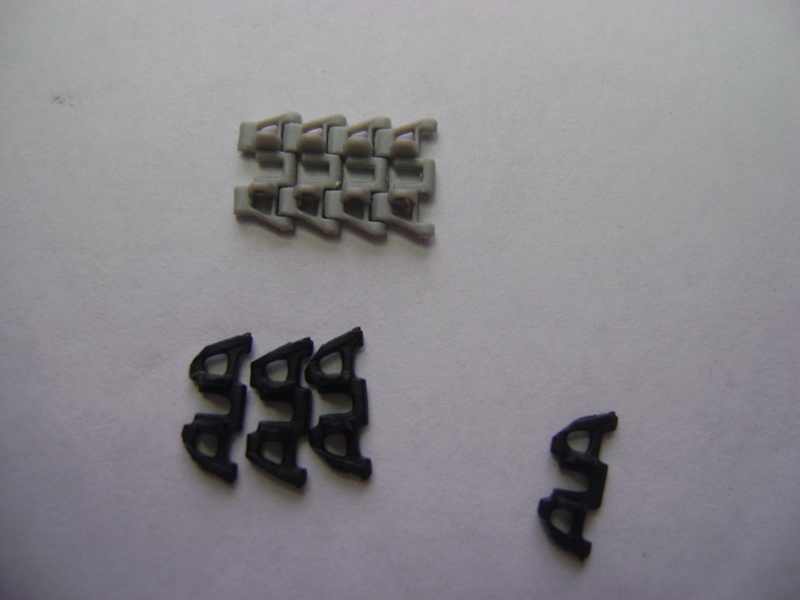
Also removed the right side cockpit door to replace with new version from the Skunkworks extras.


Antilles
_VISITCOMMUNITY
Nordrhein-Westfalen, Germany
Joined: March 22, 2015
KitMaker: 671 posts
AeroScale: 614 posts
Posted: Sunday, November 01, 2015 - 07:29 PM UTC
Hello Andrew,
nice start with Your Jayhawk. This choppper will turn out very colorful as well!

I used some spare time of this weekend too.

First, I applied a wash of brown and black oil colors onto the hull.


Followed by a slight shading of some panels with the airbrush in the direction of flight.


The difference is hardly seen in the two pictures. But, with the "normal" eye, the effect even seems to be too strong.

As the filters for the engine intakes were full plastic material, I tried to find a very fine mesh, but I did not find any suitable. Hence , I duplicated new cones out of the old ones with some clear plastic.
These new filters were airbrushed with a very thin mixture of smoke and aluminium.


Hopefully, this effect will work, when attached to the engine intake.

Oliver
tatbaqui
Staff MemberNews Reporter
ARMORAMA
#040
_VISITCOMMUNITY
Metro Manila, Philippines
Joined: May 06, 2007
KitMaker: 2,713 posts
AeroScale: 65 posts
Posted: Monday, November 02, 2015 - 04:17 AM UTC
Nice effect on the shading Oliver! Cheers, Tat
Konigwolf
_VISITCOMMUNITY
Tasmania, Australia
Joined: November 06, 2009
KitMaker: 368 posts
AeroScale: 27 posts
Posted: Monday, November 02, 2015 - 07:01 AM UTC
Ditto great job on the shading. Also the intake "mesh" is very convincing. Shaded just enough for some detail to be seen through.
tatbaqui
Staff MemberNews Reporter
ARMORAMA
#040
_VISITCOMMUNITY
Metro Manila, Philippines
Joined: May 06, 2007
KitMaker: 2,713 posts
AeroScale: 65 posts
Posted: Monday, November 02, 2015 - 06:35 PM UTC
Hello,

A quick check on how it sits:


It seems level so the next step is to mount the tracks. I will be using the ones from Master Box as I doubt there's enough left from the kit given the track links I lost due to breakage.

I've tried to straighten the warped antenna carrier and below is the farthest I got. Still needs a bit more work I guess. Anyways will get back to this later on.


But hey, it sure looks ok from this angle though!


Cheers,

Tat
Antilles
_VISITCOMMUNITY
Nordrhein-Westfalen, Germany
Joined: March 22, 2015
KitMaker: 671 posts
AeroScale: 614 posts
Posted: Wednesday, November 04, 2015 - 04:04 PM UTC
Nice progress Tat!
I guess, the carrier profile never was exactly straight on the original due some careless personnel .

Oliver
Antilles
_VISITCOMMUNITY
Nordrhein-Westfalen, Germany
Joined: March 22, 2015
KitMaker: 671 posts
AeroScale: 614 posts
Posted: Thursday, November 05, 2015 - 01:46 AM UTC
Hello everybody!
So I declare this model finished! I am not quite happy with the canopy glass as some primer crawled under the masks. I tried to remove most of this with a tooth pick. But some resisted onto the glass. Next time I will take more care. Hope You like the bird.


Oliver
KelticKnot
_VISITCOMMUNITY
Scotland, United Kingdom
Joined: May 11, 2015
KitMaker: 768 posts
AeroScale: 656 posts
Posted: Thursday, November 05, 2015 - 02:07 AM UTC
Congrats Oliver, first completed kit and another excellent (and colourful!) chopper in your collection. I like your subtle weathering a lot.
tatbaqui
Staff MemberNews Reporter
ARMORAMA
#040
_VISITCOMMUNITY
Metro Manila, Philippines
Joined: May 06, 2007
KitMaker: 2,713 posts
AeroScale: 65 posts
Posted: Thursday, November 05, 2015 - 04:07 AM UTC

Quoted Text

Nice progress Tat!
I guess, the carrier profile never was exactly straight on the original due some careless personnel .

Oliver


Great finish on your build Oliver, congrats!
KelticKnot
_VISITCOMMUNITY
Scotland, United Kingdom
Joined: May 11, 2015
KitMaker: 768 posts
AeroScale: 656 posts
Posted: Thursday, November 05, 2015 - 08:09 PM UTC
Quick update today:

Main structure of the flying bridge built and started some instrument panel painting. Basic so far but as you'll see this area clearly i'll put extra time into it.
Also some detailing inside the open panels below the windows and the railing there too.


Also started cutting some of the very delicate hand rails from the sprue to paint. Slow and steady with the razor saw is the way to go here!
Lots of fine detail to come....
PrickleHead
_VISITCOMMUNITY
Western Australia, Australia
Joined: December 31, 2013
KitMaker: 338 posts
AeroScale: 190 posts
Posted: Friday, November 06, 2015 - 03:29 PM UTC
Will be building Italeri's Wessex HAS.3 in yellow of the Royal Air Force Rescue


KelticKnot
_VISITCOMMUNITY
Scotland, United Kingdom
Joined: May 11, 2015
KitMaker: 768 posts
AeroScale: 656 posts
Posted: Friday, November 06, 2015 - 05:45 PM UTC
A great choice! I remember the RAF's yellow Wessex search and rescue choppers well.

I'm certainly no expert but i don't recall seeing this variant as an RAF chopper. Are you doing some modifications to the kit or just painting it yellow to represent the RAF?

*edit* that got me wondering - Wikipedia says the RAF chopper was the HAR.2 variant
Aurora-7
#360
_VISITCOMMUNITY
Connecticut, United States
Joined: June 18, 2003
KitMaker: 1,020 posts
AeroScale: 125 posts
Posted: Sunday, November 08, 2015 - 07:23 AM UTC
Time to start my H-19. I'll be finishing as a HO4S-3G for the Coast Guard in the early yellow scheme.


tatbaqui
Staff MemberNews Reporter
ARMORAMA
#040
_VISITCOMMUNITY
Metro Manila, Philippines
Joined: May 06, 2007
KitMaker: 2,713 posts
AeroScale: 65 posts
Posted: Sunday, November 08, 2015 - 02:12 PM UTC
Hello,

I had challenges in cleanly cutting the kit-supplied tracks off its sprues -- tiny and brittle, thus easily damaged by my clumsy hands. My Plan B was to use the ones from the Master Box Pz I Ausf B track set. While it was a breeze to cut these out, it was a nightmare when it came to fit!


With Plan B out, it's back to the kit supplied ones. I've spent the last couple of nights painstakingly cleaning them up. Patience has its rewards though -- as the links got together perfectly!

Started with the top run, and today finished both sides. Added some sag as well.


Need to go back and prepare some more links for the bottom runs.

Cheers,

Tat
KelticKnot
_VISITCOMMUNITY
Scotland, United Kingdom
Joined: May 11, 2015
KitMaker: 768 posts
AeroScale: 656 posts
Posted: Sunday, November 08, 2015 - 05:45 PM UTC
Welcome to Lifesavers Aurora, another brightly coloured build!
Tat, your perseverance with the track links will pay off by the looks of your results so far. The sag in the tracks really adds something.
tatbaqui
Staff MemberNews Reporter
ARMORAMA
#040
_VISITCOMMUNITY
Metro Manila, Philippines
Joined: May 06, 2007
KitMaker: 2,713 posts
AeroScale: 65 posts
Posted: Monday, November 09, 2015 - 04:34 AM UTC
Thanks Paul! Results after a late night:


Just a few more bits to put on, gaps to fill, and it'll be ready for the paint shop.

Cheers,

Tat
Antilles
_VISITCOMMUNITY
Nordrhein-Westfalen, Germany
Joined: March 22, 2015
KitMaker: 671 posts
AeroScale: 614 posts
Posted: Monday, November 09, 2015 - 08:06 PM UTC
Tat and Paul: Thanks for the congrats!

Tat: Your "chain-art" looks good from here.Have You just glued the chain and sticked the other part together? Or do You paint the whole part?

Paul: Nice going! Wish You a steady hand with the razor saw. As I remember, my last railing parts doubled after sawing.

PrickleHead and Aurora-7: You got some nice entries there. Is this the goold old Revell H-19 You are going to build Aurora-7 ? This was my first chopper kit .

Oliver
Aurora-7
#360
_VISITCOMMUNITY
Connecticut, United States
Joined: June 18, 2003
KitMaker: 1,020 posts
AeroScale: 125 posts
Posted: Tuesday, November 10, 2015 - 01:05 AM UTC

Quoted Text

Is this the goold old Revell H-19 You are going to build Aurora-7 ? This was my first chopper kit .


Indeed. I fancied opening up her fuselage and do some seating but I need to catch-up with some other campaign builds so it'll be close to out of the box. I just want to get some screens for the vents around the engine area. Maybe a little clean up for the cockpit.
fhvn4d
#159
_VISITCOMMUNITY
Massachusetts, United States
Joined: April 07, 2008
KitMaker: 803 posts
AeroScale: 42 posts
Posted: Tuesday, November 10, 2015 - 01:19 AM UTC
Heres my entry..... slightly futuristic but rescue services none the less... Thunderbird 2 and 4 from the Marionette series "Thunderbirds are go"


Calling it done for this bird!
tatbaqui
Staff MemberNews Reporter
ARMORAMA
#040
_VISITCOMMUNITY
Metro Manila, Philippines
Joined: May 06, 2007
KitMaker: 2,713 posts
AeroScale: 65 posts
Posted: Tuesday, November 10, 2015 - 03:33 AM UTC

Quoted Text

Tat and Paul: Thanks for the congrats!

Tat: Your "chain-art" looks good from here.Have You just glued the chain and sticked the other part together? Or do You paint the whole part?

Paul: Nice going! Wish You a steady hand with the razor saw. As I remember, my last railing parts doubled after sawing.

PrickleHead and Aurora-7: You got some nice entries there. Is this the goold old Revell H-19 You are going to build Aurora-7 ? This was my first chopper kit .

Oliver


Thanks Oliver! I wanted to work on the wheels and tracks as a sub-assembly, but in this case the wheels were a pain to work with so I just glued everything together. Tough to paint on the details, but will manage. Cheers, Tat
KelticKnot
_VISITCOMMUNITY
Scotland, United Kingdom
Joined: May 11, 2015
KitMaker: 768 posts
AeroScale: 656 posts
Posted: Thursday, November 12, 2015 - 04:28 PM UTC
Well done Brian, thats a really fun build. I had a diecast toy of Thunderbird 2+4 as a kid. Nice to see them again after all these years.
KelticKnot
_VISITCOMMUNITY
Scotland, United Kingdom
Joined: May 11, 2015
KitMaker: 768 posts
AeroScale: 656 posts
Posted: Thursday, November 12, 2015 - 05:14 PM UTC
Ok, a couple of photos of progress :

First off, a small piece went missing from the little box I keep parts in once detached from the sprue. No idea where it's gone to but I scratched a nice neat replacement. I believe it's called a Samson post? Corrections welcome !


And in-situ...


Other modification work included drilling out the top of this small part to better represent the mooring point (not sure of the technical term here). I might also drill out the other small points where you can see the rope passing through.


The bulk of my time has been taken up with all the thin railings, of which there are many. Tricky to get off the sprue and clean up and just as tricky to attach as almost every contact point has to be gradually sanded to allow the best fit.

fhvn4d
#159
_VISITCOMMUNITY
Massachusetts, United States
Joined: April 07, 2008
KitMaker: 803 posts
AeroScale: 42 posts
Posted: Thursday, November 12, 2015 - 05:55 PM UTC
You are doing an amazing job on that Airfix kit that was quite a challenging build imo.... so much so I tossed my first kit and decided to buy a second one .
Jessie_C
_VISITCOMMUNITY
British Columbia, Canada
Joined: September 03, 2009
KitMaker: 6,965 posts
AeroScale: 6,247 posts
Posted: Thursday, November 12, 2015 - 08:49 PM UTC
[quote]Other modification work included drilling out the top of this small part to better represent the mooring point (not sure of the technical term here). I might also drill out the other small points where you can see the rope passing through.

Your 'mooring points' are called fairleads
KelticKnot
_VISITCOMMUNITY
Scotland, United Kingdom
Joined: May 11, 2015
KitMaker: 768 posts
AeroScale: 656 posts
Posted: Friday, November 13, 2015 - 01:49 AM UTC
[quote]
Quoted Text

Other modification work included drilling out the top of this small part to better represent the mooring point (not sure of the technical term here). I might also drill out the other small points where you can see the rope passing through.

Your 'mooring points' are called fairleads


Thanks Jessie! There's a lot of unfamiliar jargon in the nautical world