

Dave,
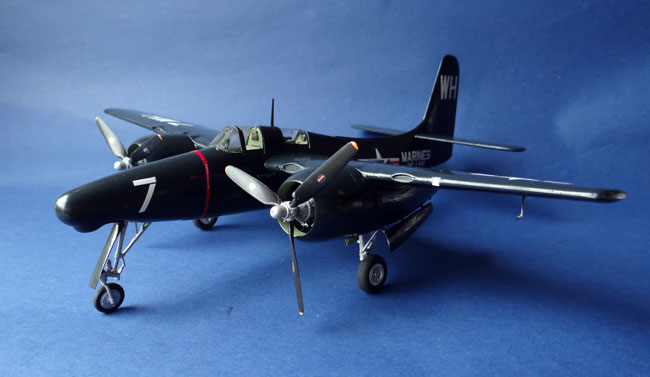
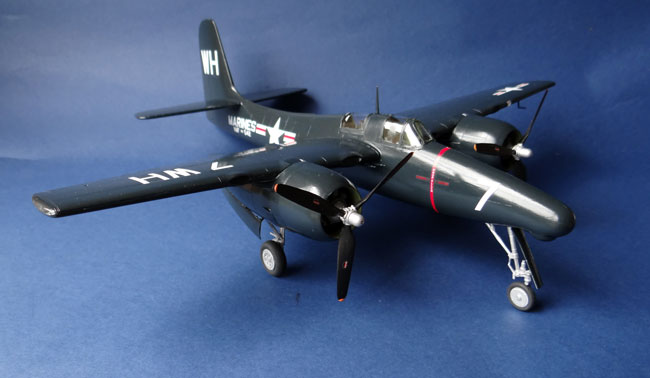
Your Tigercat looks great! Strange lines for a warplane, but an eye catcher for sure.
Damian,
Thanks!
Michael,
I wouldn't mind seeing a Javelin either. The Brits built some pretty rad looking jet aircraft!
Gary
Air Campaigns
Want to start or join a group build? This is where to start.
Want to start or join a group build? This is where to start.
Hosted by Frederick Boucher, Michael Satin
OFFICIAL: Bomber Fighters Campaign

GazzaS

#424

Joined: April 23, 2015
KitMaker: 4,648 posts
AeroScale: 1,938 posts

Posted: Monday, July 27, 2015 - 11:11 PM UTC

DaveCox

Joined: January 11, 2003
KitMaker: 4,307 posts
AeroScale: 272 posts

Posted: Tuesday, July 28, 2015 - 02:54 PM UTC
Complete:


MichaelSatin


Joined: January 19, 2008
KitMaker: 3,909 posts
AeroScale: 2,904 posts
Posted: Tuesday, July 28, 2015 - 07:28 PM UTC
Well, THAT was fast! Nice work Dave! That's two for you already, isn't it?
Michael
Michael
DaveCox
Joined: January 11, 2003
KitMaker: 4,307 posts
AeroScale: 272 posts
Posted: Tuesday, July 28, 2015 - 08:45 PM UTC
Quoted Text
Well, THAT was fast! Nice work Dave! That's two for you already, isn't it?
Michael
I'm on leave from work at the moment, so plenty of time to spend on modelling. That and the fast drying times of acrylic paints and modern glues. Already started on the 1/32 Lynx for the Rotors RPM campaign.
GazzaS
#424
Joined: April 23, 2015
KitMaker: 4,648 posts
AeroScale: 1,938 posts
Posted: Tuesday, July 28, 2015 - 11:02 PM UTC
Great looking job, Dave! Love the clean, gloss finish! Where's the armament on that thing?
DaveCox
Joined: January 11, 2003
KitMaker: 4,307 posts
AeroScale: 272 posts
Posted: Tuesday, July 28, 2015 - 11:29 PM UTC
Quoted Text
Great looking job, Dave! Love the clean, gloss finish! Where's the armament on that thing?
Thanks for the compliment - it's Tamiya gloss straight out of the jar and brush painted!
Armament is 4x20mm in the underside of the wing roots

scribbles101

Joined: May 25, 2013
KitMaker: 137 posts
AeroScale: 103 posts
Posted: Wednesday, July 29, 2015 - 12:20 AM UTC
@Dave - love both the tigercat and the lightning, they look great, but, holy cow!! You really do work fast! There was me thinking that I have been burning through entries for the fighter-bomber campaign at a rate of knots, but as far as speed goes, you are truly impressive!
@Michael - I'm going to have to agree with the others who have already answered you for this one - I would love to see that Javelin, partly because I love the way it looks, and also partly because I am seriously considering adding one to the stash myself
any way, here is an update on the Widow....finally.....

some of the interior bits all painted up and dry-brushed
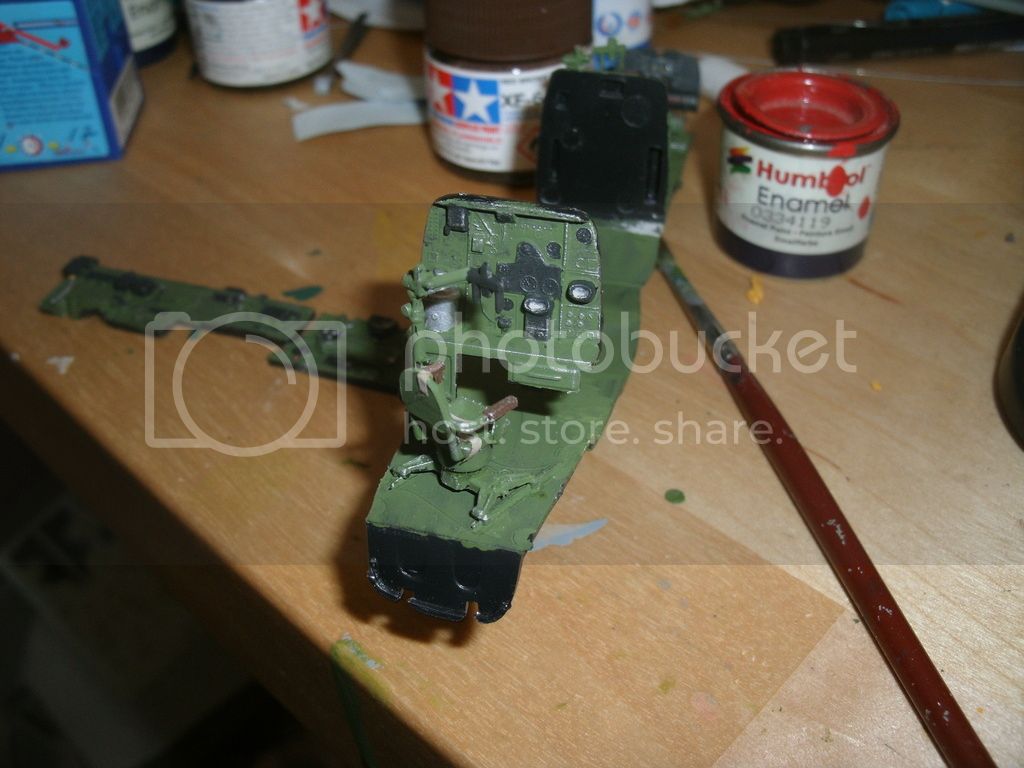
Radar operator's station
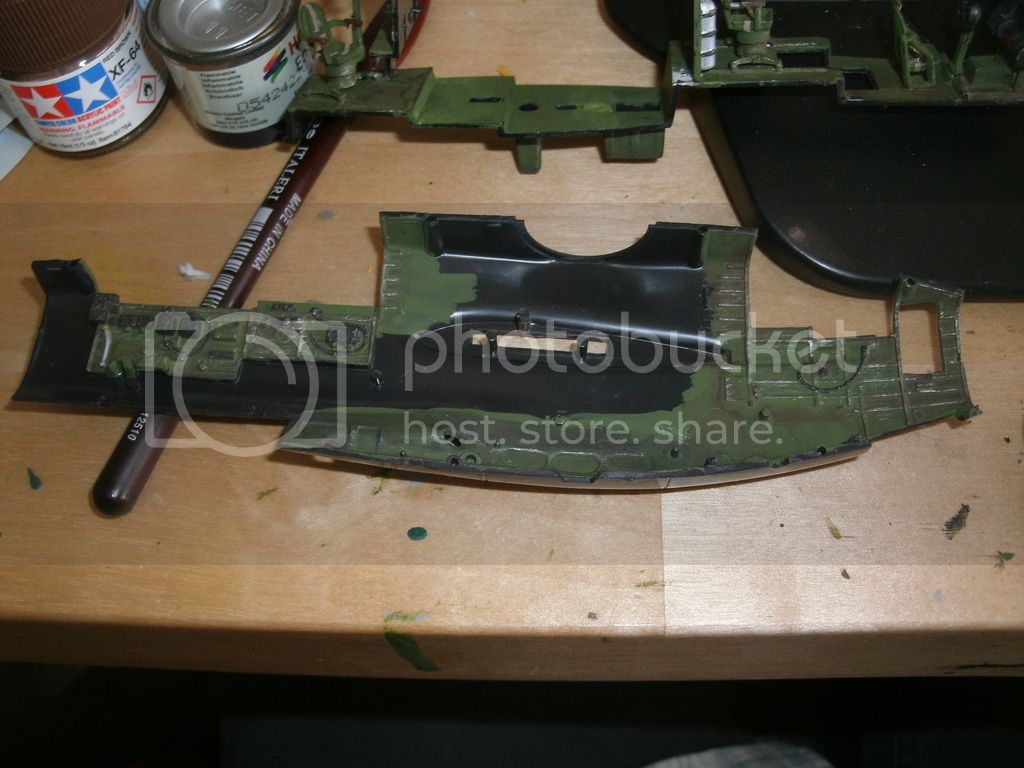
one of the fuselage halves painted and weathered where needed
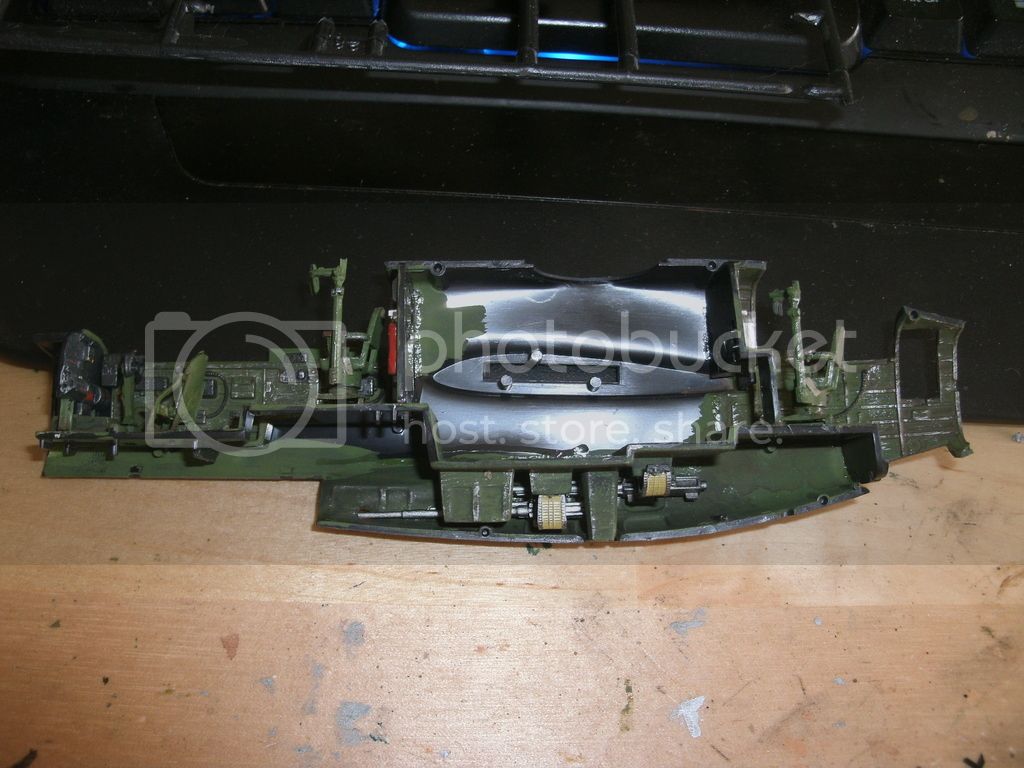
the very same fuselage half with interior detailing added and the cannon bay fully kitted out with two of the 4 20mm lead slingers. If anyone is interested, I have recently had to move one of those buggers, and not only are they really heavy - they are unbelievably awkward to carry as well!
Anyway, that is all from me so far - more to follow!
Cheers, Simon
@Michael - I'm going to have to agree with the others who have already answered you for this one - I would love to see that Javelin, partly because I love the way it looks, and also partly because I am seriously considering adding one to the stash myself
any way, here is an update on the Widow....finally.....
some of the interior bits all painted up and dry-brushed
Radar operator's station
one of the fuselage halves painted and weathered where needed
the very same fuselage half with interior detailing added and the cannon bay fully kitted out with two of the 4 20mm lead slingers. If anyone is interested, I have recently had to move one of those buggers, and not only are they really heavy - they are unbelievably awkward to carry as well!
Anyway, that is all from me so far - more to follow!
Cheers, Simon
MichaelSatin
Joined: January 19, 2008
KitMaker: 3,909 posts
AeroScale: 2,904 posts
Posted: Wednesday, July 29, 2015 - 05:46 AM UTC
Nice job Simon!
I'm starting to sense a ground swell in favor of the Flatiron!
Michael
I'm starting to sense a ground swell in favor of the Flatiron!
Michael
GazzaS
#424
Joined: April 23, 2015
KitMaker: 4,648 posts
AeroScale: 1,938 posts
Posted: Wednesday, July 29, 2015 - 12:17 PM UTC
Hello Campaigners!
Flatiron? Nickname for the Javelin? I have to admit I'm pretty weak when it comes to Cold War aircraft.
A slow week for model building. Waiting for paint to cure, experimenting with home-made decals, and enlisting my daughter's help. Is that cheating for a campaign?
Here is the painting as I have read she would be delivered to the airfield. RLM 75 top over RLM 76 undersides.
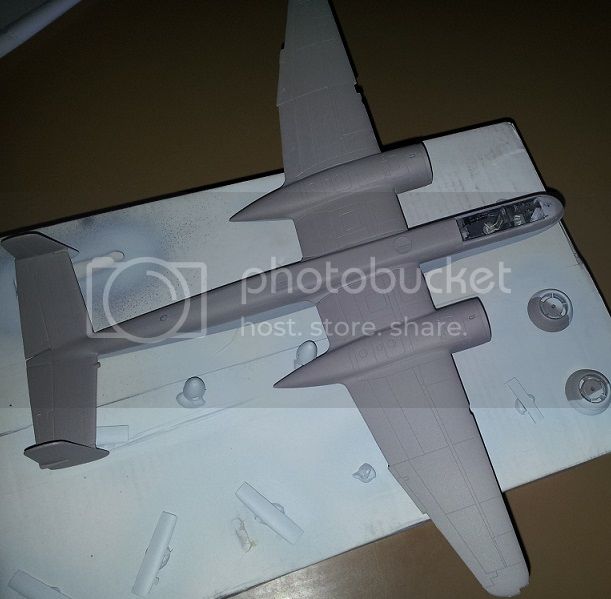
The paint colors I mixed myself from a mixture of Tamiya and Testors MM enamels.
According to what I read they got oversprayed at the unit level...so, I went gray first.
Here's where I enlisted my daughter's help. I feel that when I try to paint randomly, I always dislike what I see afterwards because patterns show. So, I asked my daughter Haylee to let her artistic expressions flow with liquid mask and a silicon paint brush. BTW, for those of you who seek a silicon tipped brush and are having difficulty finding one at your LHS or art supply store, try the chemist or any place that sells make-up and accessories for women. What you're looking for is an eye-liner pencil with a silicon tip. Pencil-point accuracy without little bristles sticking out.
Then I turned her loose with my airbrush. I have little skill or experience with an air brush and she had none. The goal was faint borders around the mask.
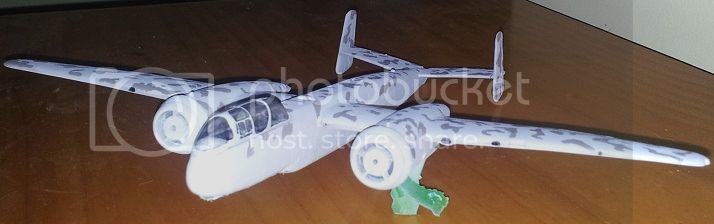
That didn't quite work out and I have more gray showing than I want...so I'll have to try more. But, I do like the patterns she made.
Thanks for reading,
Gary
Flatiron? Nickname for the Javelin? I have to admit I'm pretty weak when it comes to Cold War aircraft.
A slow week for model building. Waiting for paint to cure, experimenting with home-made decals, and enlisting my daughter's help. Is that cheating for a campaign?
Here is the painting as I have read she would be delivered to the airfield. RLM 75 top over RLM 76 undersides.
The paint colors I mixed myself from a mixture of Tamiya and Testors MM enamels.
According to what I read they got oversprayed at the unit level...so, I went gray first.
Here's where I enlisted my daughter's help. I feel that when I try to paint randomly, I always dislike what I see afterwards because patterns show. So, I asked my daughter Haylee to let her artistic expressions flow with liquid mask and a silicon paint brush. BTW, for those of you who seek a silicon tipped brush and are having difficulty finding one at your LHS or art supply store, try the chemist or any place that sells make-up and accessories for women. What you're looking for is an eye-liner pencil with a silicon tip. Pencil-point accuracy without little bristles sticking out.
Then I turned her loose with my airbrush. I have little skill or experience with an air brush and she had none. The goal was faint borders around the mask.
That didn't quite work out and I have more gray showing than I want...so I'll have to try more. But, I do like the patterns she made.
Thanks for reading,
Gary
MichaelSatin
Joined: January 19, 2008
KitMaker: 3,909 posts
AeroScale: 2,904 posts
Posted: Wednesday, July 29, 2015 - 06:16 PM UTC
Interesting process Gary! I'm not having a problem with your daughter helping out, it's nice to see the collaboration.
And yes, Flatiron was a nickname for the Javelin due (of course) to its shape.
Michael
And yes, Flatiron was a nickname for the Javelin due (of course) to its shape.
Michael
GazzaS
#424
Joined: April 23, 2015
KitMaker: 4,648 posts
AeroScale: 1,938 posts
Posted: Thursday, July 30, 2015 - 02:26 PM UTC
I hate it when my scratch-built part looks worse than the kit part I meant to replace. When I get a fret of white metal photo- etched parts, what is the metal?
Thanks for reading and responding.
Gary
Thanks for reading and responding.
Gary
GazzaS
#424
Joined: April 23, 2015
KitMaker: 4,648 posts
AeroScale: 1,938 posts
Posted: Saturday, August 01, 2015 - 05:07 AM UTC
Hello Everyone!
Only small things getting done while I wait for stuff to cure or tackle life's issues.

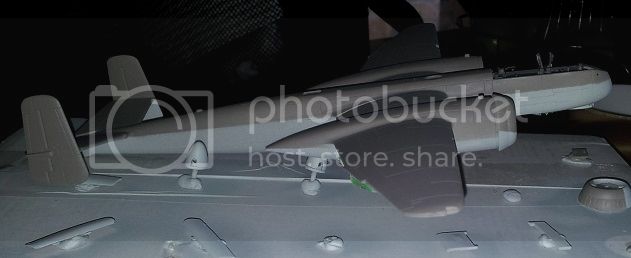
Dry fitted the props to see if I wanted to add any detail to the forward engine nacelles. Milled out definitely looks better than I could do with paint and brush.
I went around each gray area with an airbrush at low pressure with very thin RLM76. I'm hoping after gloss kote, pin wash, and dull cote, that they blend in further.

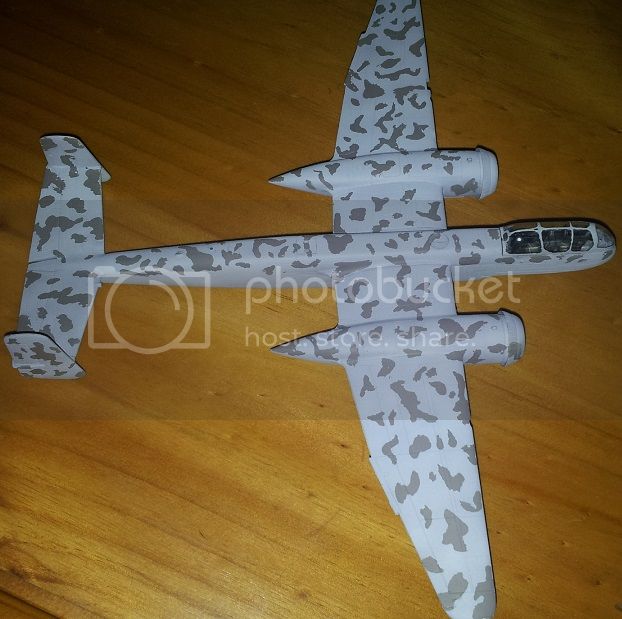
I also applied my first home-made decals. These are a bit thicker and rubbery than most decals I've found, and the decal softener takes quite a while to dry.
The upper wing kreuz are mine, whilst the swastikas are aftermarket.

I used MS Paint to make my decals and a Canon inkjet printer. Straight lines, letters, and numbers are pretty easy. I've got some older Japanese planes and I'm wondering if I'll be able to master the meatballs.
Thanks for looking.
Gary
Only small things getting done while I wait for stuff to cure or tackle life's issues.
Dry fitted the props to see if I wanted to add any detail to the forward engine nacelles. Milled out definitely looks better than I could do with paint and brush.
I went around each gray area with an airbrush at low pressure with very thin RLM76. I'm hoping after gloss kote, pin wash, and dull cote, that they blend in further.
I also applied my first home-made decals. These are a bit thicker and rubbery than most decals I've found, and the decal softener takes quite a while to dry.
The upper wing kreuz are mine, whilst the swastikas are aftermarket.
I used MS Paint to make my decals and a Canon inkjet printer. Straight lines, letters, and numbers are pretty easy. I've got some older Japanese planes and I'm wondering if I'll be able to master the meatballs.
Thanks for looking.
Gary

Bigrip74
Joined: February 22, 2008
KitMaker: 5,026 posts
AeroScale: 2,811 posts

Posted: Saturday, August 01, 2015 - 10:38 AM UTC
I have finally been able to work on my F104:


scribbles101
Joined: May 25, 2013
KitMaker: 137 posts
AeroScale: 103 posts
Posted: Monday, August 03, 2015 - 07:29 PM UTC
So.... more progress on the Black Widow
all has been going pretty smoothly I have to admit

Painting and weathering inside the undercarriage wells is all done
Tail booms and undercarriage fitted. No problems with this one, but the other was pretty warped, nothing I can really do to correct that, I will just use the elevator/stabiliser to pull it straight
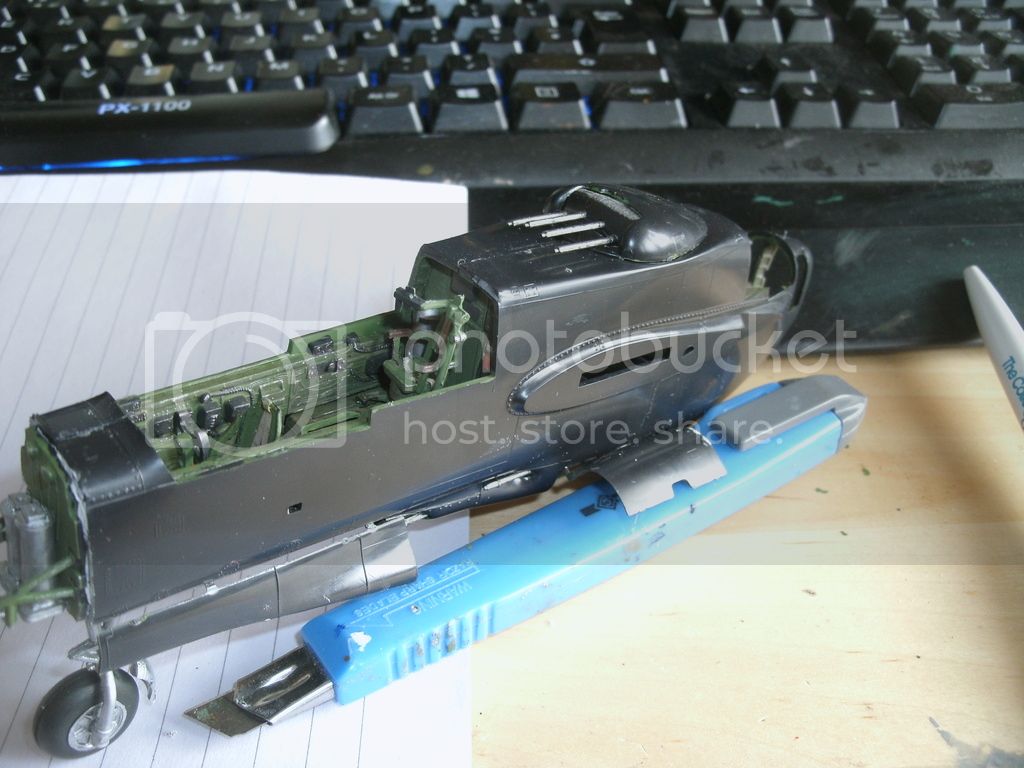
fuselage halves together and .50cal turret fitted
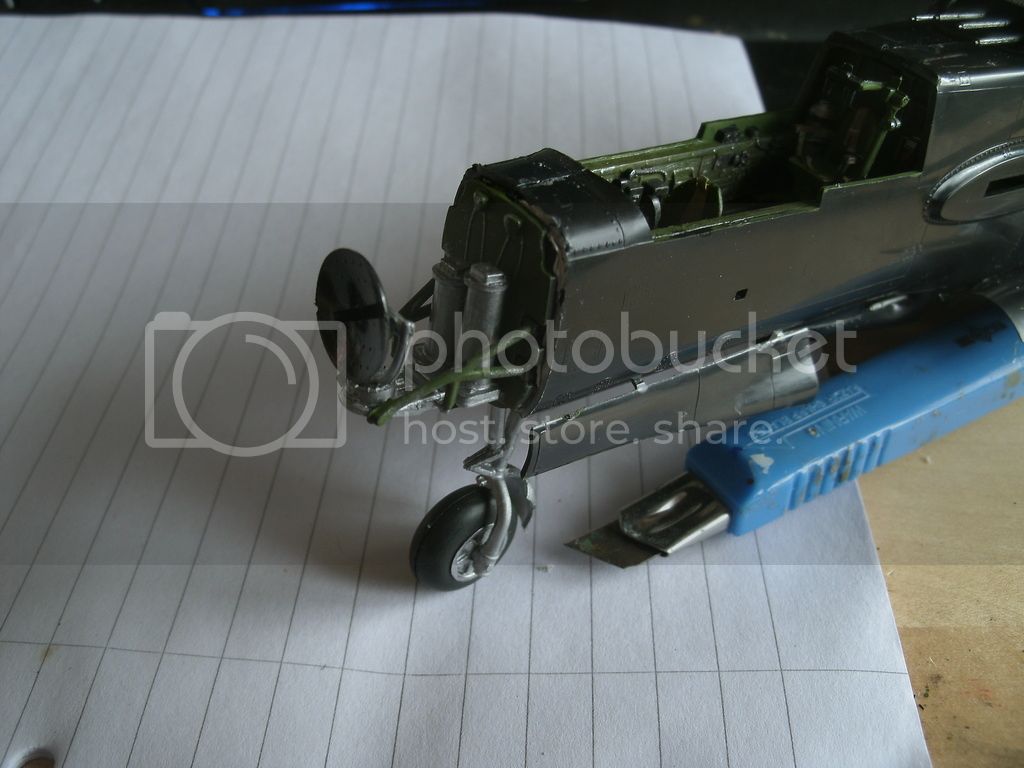
Radar gubbins, the cavity between the back plate of the radar assembly and the instrument panel is packed full of ballast in an attempt to prevent this thing from sitting on its tails.
so what does it do? ughhh......dammit.
In other news...I have started cutting out the areas in between the cooling flaps on the cowling where they are shown open
That's all for now, more will follow, I am planning to put a support leg into the rear of the fuselage to force the model to stand on it's wheels
Cheers, Simon
all has been going pretty smoothly I have to admit
Painting and weathering inside the undercarriage wells is all done
Tail booms and undercarriage fitted. No problems with this one, but the other was pretty warped, nothing I can really do to correct that, I will just use the elevator/stabiliser to pull it straight
fuselage halves together and .50cal turret fitted
Radar gubbins, the cavity between the back plate of the radar assembly and the instrument panel is packed full of ballast in an attempt to prevent this thing from sitting on its tails.
so what does it do? ughhh......dammit.
In other news...I have started cutting out the areas in between the cooling flaps on the cowling where they are shown open
That's all for now, more will follow, I am planning to put a support leg into the rear of the fuselage to force the model to stand on it's wheels
Cheers, Simon
MichaelSatin
Joined: January 19, 2008
KitMaker: 3,909 posts
AeroScale: 2,904 posts
Posted: Tuesday, August 04, 2015 - 03:52 AM UTC
Simon,
Try sticking some ballast behind the engines if you can. As long as it's in front of the main gear, it will help.
Michael
Try sticking some ballast behind the engines if you can. As long as it's in front of the main gear, it will help.
Michael
GazzaS
#424
Joined: April 23, 2015
KitMaker: 4,648 posts
AeroScale: 1,938 posts
Posted: Tuesday, August 04, 2015 - 01:48 PM UTC
Simon,
Your detail work looks great!
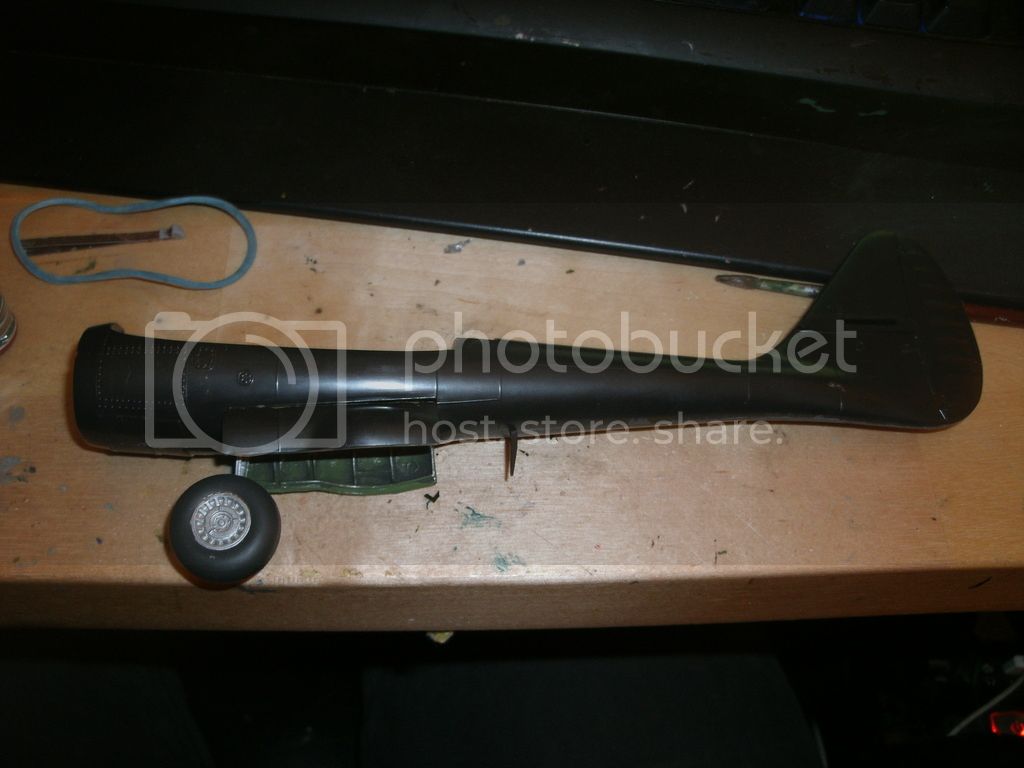
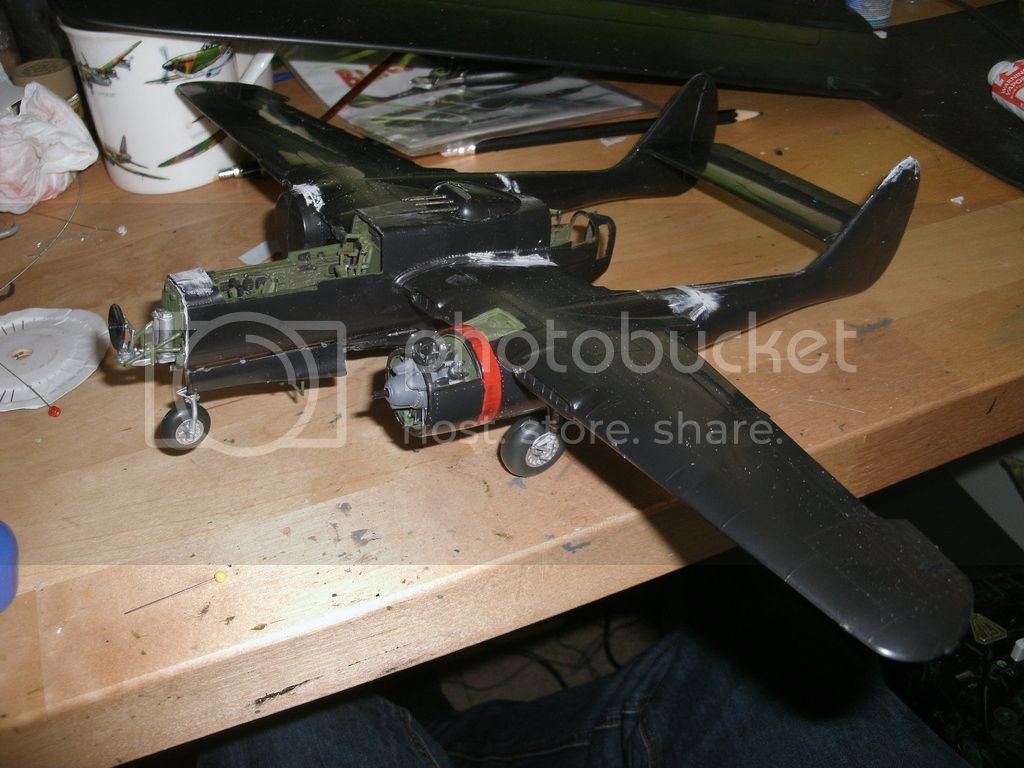
On to my heap. I'm entering the final stages. To my disgust, the wingtip lights for this plane are too large to fit, and too small for me to make smaller.

If filling with white glue repeatedly then sanding doesn't work, I'll build them with Bondic.
She's finally standing on all three feet.

Behind the landing light in the left wing I put a small piece of aluminum foil to give a reflective effect. NOt satisfied there, I used aluminum foil on the Oleos to make them stand out a little bit.
See, no prop at the back. The clear piece of plastic on the very tail is supposed to be painted silver. I think I'll foil it, too.

The decals, excluding the hakenkreuz are home made. Anything with the color white, or dark backgrounds provide extra challenges.

I've chosen the decals that portray Manfred Meurer's machine in 1944.
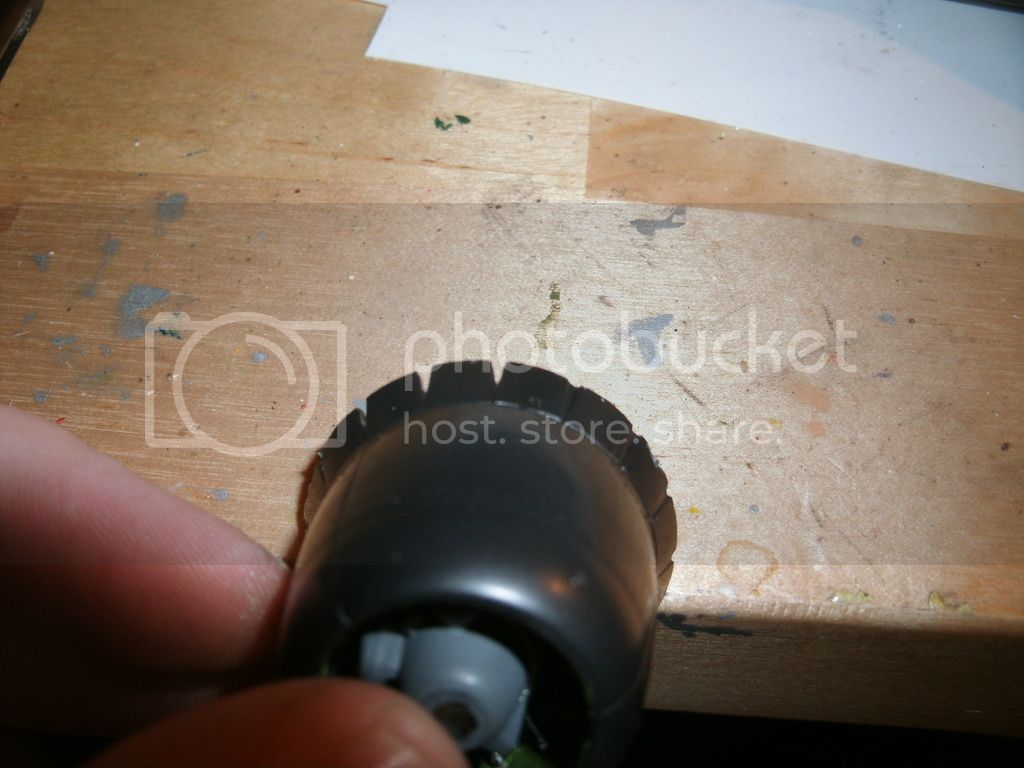
The wheels are quite donut-like on this kit. I tried to make them look used, but it hasn't come out right. I sanded the bottoms flat. Other than that, I only have to add more small parts externally(like the radar which I dread), spray with dullcoat, slap on the canopy, add aerials, and I'll be able to call this puppy done.
Thank you for reading!
Gary
Your detail work looks great!
On to my heap. I'm entering the final stages. To my disgust, the wingtip lights for this plane are too large to fit, and too small for me to make smaller.
If filling with white glue repeatedly then sanding doesn't work, I'll build them with Bondic.
She's finally standing on all three feet.
Behind the landing light in the left wing I put a small piece of aluminum foil to give a reflective effect. NOt satisfied there, I used aluminum foil on the Oleos to make them stand out a little bit.
See, no prop at the back. The clear piece of plastic on the very tail is supposed to be painted silver. I think I'll foil it, too.
The decals, excluding the hakenkreuz are home made. Anything with the color white, or dark backgrounds provide extra challenges.
I've chosen the decals that portray Manfred Meurer's machine in 1944.
The wheels are quite donut-like on this kit. I tried to make them look used, but it hasn't come out right. I sanded the bottoms flat. Other than that, I only have to add more small parts externally(like the radar which I dread), spray with dullcoat, slap on the canopy, add aerials, and I'll be able to call this puppy done.
Thank you for reading!
Gary
scribbles101
Joined: May 25, 2013
KitMaker: 137 posts
AeroScale: 103 posts
Posted: Tuesday, August 04, 2015 - 11:08 PM UTC
@Michael - thanks for the advise, I am planning to do just that but I dunno if there is enough room to stuff enough ballast in, this widow is VERY tail heavy, but I will definitely give it a shot
@Gary - I'm glad you like it! Gotta say, your He 219 looks great too!
@Gary - I'm glad you like it! Gotta say, your He 219 looks great too!
Bigrip74
Joined: February 22, 2008
KitMaker: 5,026 posts
AeroScale: 2,811 posts
Posted: Wednesday, August 05, 2015 - 06:10 AM UTC
@Gary: Nice job on your camo and printing of the markings.
@Dave: you are really nocking the builds out and I am just getting started.
@Simon.L the Widow is coming along and I am interested in the paint brush. It looks easy to hold.
@Michael: are you having fun yet with your build?
Bob
@Dave: you are really nocking the builds out and I am just getting started.
@Simon.L the Widow is coming along and I am interested in the paint brush. It looks easy to hold.
@Michael: are you having fun yet with your build?
Bob
GazzaS
#424
Joined: April 23, 2015
KitMaker: 4,648 posts
AeroScale: 1,938 posts
Posted: Sunday, August 09, 2015 - 08:05 AM UTC
Hi Everyone,
I've struggled and struggled with the radar aerials of this beast, and now I'm tired!

This model is done!
Anyway, I struggled to fit the kit set, and either broke em or couldn't get them to align properly. Then I tried a mixture of brass rod and copper wire. The wire was very fine, but too flexible. It bent and some bends I just couldn't get out. So, I settled on a mix of brass rod and stretched sprue. The PE in the kit was stainless steel. Some pieces had to be bent and twisted and I just couldn't do it without destroying them. Enough apologies, here is the final result.


Thank you for looking! Comments/questions/critique always welcome.
Gary
I've struggled and struggled with the radar aerials of this beast, and now I'm tired!
This model is done!
Anyway, I struggled to fit the kit set, and either broke em or couldn't get them to align properly. Then I tried a mixture of brass rod and copper wire. The wire was very fine, but too flexible. It bent and some bends I just couldn't get out. So, I settled on a mix of brass rod and stretched sprue. The PE in the kit was stainless steel. Some pieces had to be bent and twisted and I just couldn't do it without destroying them. Enough apologies, here is the final result.
Thank you for looking! Comments/questions/critique always welcome.
Gary
MichaelSatin
Joined: January 19, 2008
KitMaker: 3,909 posts
AeroScale: 2,904 posts
Posted: Sunday, August 09, 2015 - 08:20 PM UTC
Ugly, but very nicely done!
I've got the D.VII on its gear and decals and semi-gloss coat on, so almost done with it. Hoping to get started on the Jav next weekend.
Michael
I've got the D.VII on its gear and decals and semi-gloss coat on, so almost done with it. Hoping to get started on the Jav next weekend.
Michael
GazzaS
#424
Joined: April 23, 2015
KitMaker: 4,648 posts
AeroScale: 1,938 posts
Posted: Monday, August 10, 2015 - 10:43 AM UTC
Thanks Michael.
scribbles101
Joined: May 25, 2013
KitMaker: 137 posts
AeroScale: 103 posts
Posted: Saturday, August 15, 2015 - 05:38 PM UTC
@Gary - that is a very nice looking build you have there! Congrats
@Bob - since you are interested, the paintbrush in the picture is an Italeri sable tip brush, size 000, I also have sizes 00 and 0 as I bought them as a set, they are by far the most comfortable detail brushes I have, and I highly recommend them if you are doing fine detail painting,they are also surprisingly useful in jet engine restoration, as I found out yesterday
I started with this in the morning
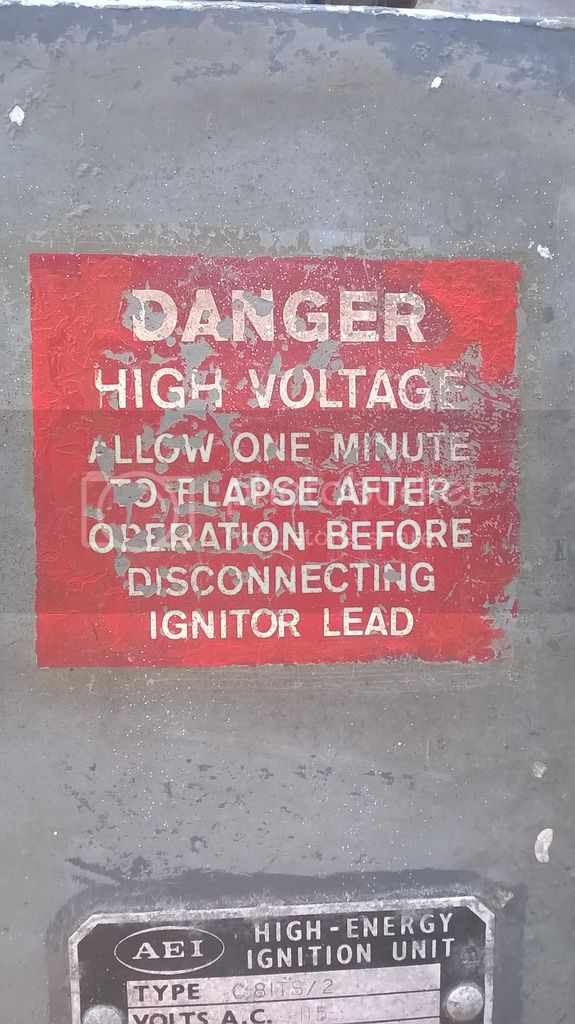
and got it looking like this by lunch time
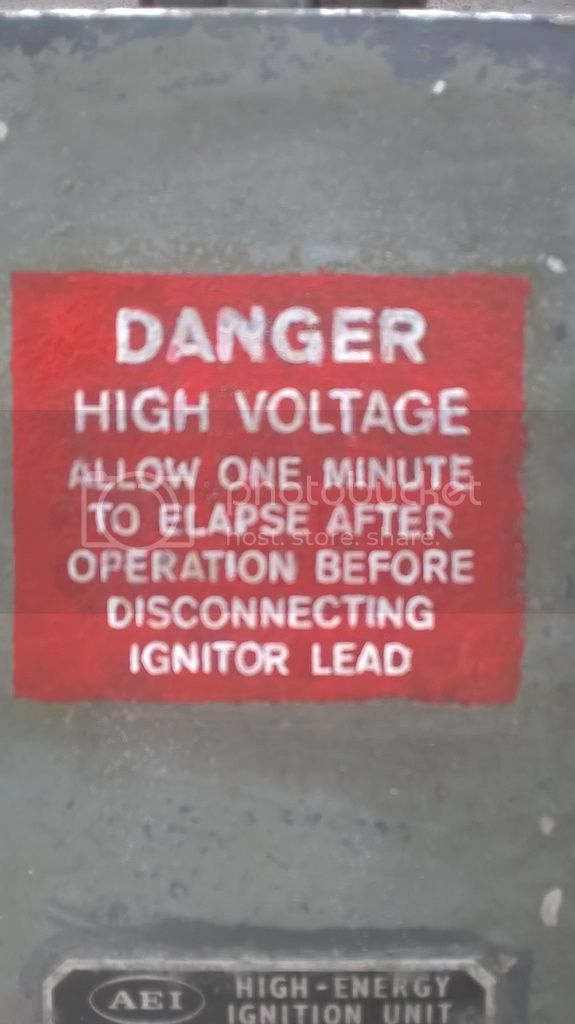
the photo is a tad blurry but you get the idea, I don't have a picture of the finished warning notice, but it is not mu different from the second shot, just a tiny bit neater!
You do some pretty odd stuff when volunteering at the DeHavilland museum!
@Bob - since you are interested, the paintbrush in the picture is an Italeri sable tip brush, size 000, I also have sizes 00 and 0 as I bought them as a set, they are by far the most comfortable detail brushes I have, and I highly recommend them if you are doing fine detail painting,they are also surprisingly useful in jet engine restoration, as I found out yesterday
I started with this in the morning
and got it looking like this by lunch time
the photo is a tad blurry but you get the idea, I don't have a picture of the finished warning notice, but it is not mu different from the second shot, just a tiny bit neater!
You do some pretty odd stuff when volunteering at the DeHavilland museum!
lfetz145
Joined: May 18, 2014
KitMaker: 69 posts
AeroScale: 67 posts
Posted: Sunday, August 16, 2015 - 07:58 PM UTC
Would an FW190 be applicable for this campaign? If so, I'm in with this kit! 

North4003

Joined: August 01, 2012
KitMaker: 960 posts
AeroScale: 391 posts
Posted: Sunday, August 16, 2015 - 08:04 PM UTC
Wonderful builds going on. I'm undecided about my entry.
MichaelSatin
Joined: January 19, 2008
KitMaker: 3,909 posts
AeroScale: 2,904 posts
Posted: Monday, August 17, 2015 - 07:33 PM UTC
Quoted Text
Would an FW190 be applicable for this campaign? If so, I'm in with this kit!
Absolutely I'd say the D-9 was an interceptor Logan!
Michael
 |

WEB HOSTING BY


Copyright ©2021 AeroScale and Kitmaker Network, a subsidiary of Silver Star Enterprises
All Rights Reserved. Please read our Conditions of Use and Privacy Policy.
All Rights Reserved. Please read our Conditions of Use and Privacy Policy.