

Please do go ahead with it.
Air Campaigns
Want to start or join a group build? This is where to start.
Want to start or join a group build? This is where to start.
Hosted by Frederick Boucher, Michael Satin
OFFICIAL: Lockheed Air and Space Campaign

JClapp

#259

Joined: October 23, 2011
KitMaker: 2,265 posts
AeroScale: 1,715 posts

Posted: Wednesday, June 10, 2015 - 02:22 PM UTC
Hey Mark, I was hoping you would bring that out. 
Please do go ahead with it.
Please do go ahead with it.

JClapp
#259
Joined: October 23, 2011
KitMaker: 2,265 posts
AeroScale: 1,715 posts
Posted: Wednesday, June 10, 2015 - 02:30 PM UTC
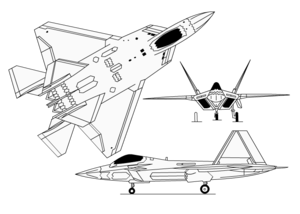
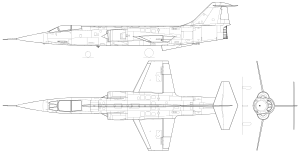
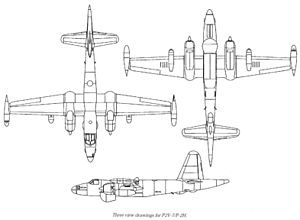
A new page, more kits started, so an update set of profiles - so far we have these types represented


A nice looking catalog!
A nice looking catalog!

KelticKnot

Joined: May 11, 2015
KitMaker: 768 posts
AeroScale: 656 posts
Posted: Wednesday, June 10, 2015 - 07:02 PM UTC
Blackbird is getting back to her happy place......


DaveCox

Joined: January 11, 2003
KitMaker: 4,307 posts
AeroScale: 272 posts

Posted: Friday, June 12, 2015 - 05:14 PM UTC
The F-80 is finished, and I'm glad. In one of the earlier photos I showed how warped the forward fuselage was - in fact almost everything other than the undercarriage legs and wheels was warped. Never seen anything like it! I got fed up with filling and sanding, and it's obvious in the pics. Decals are made up from the spares box, and totally ficticious.
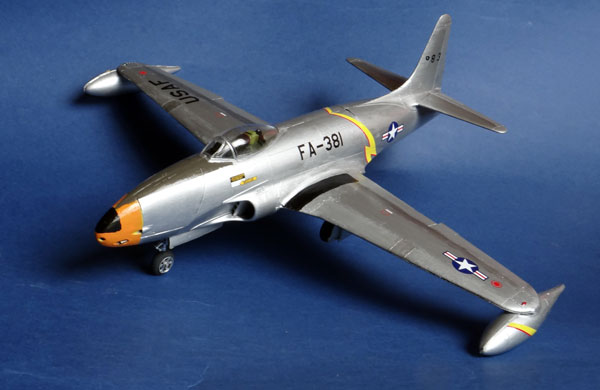
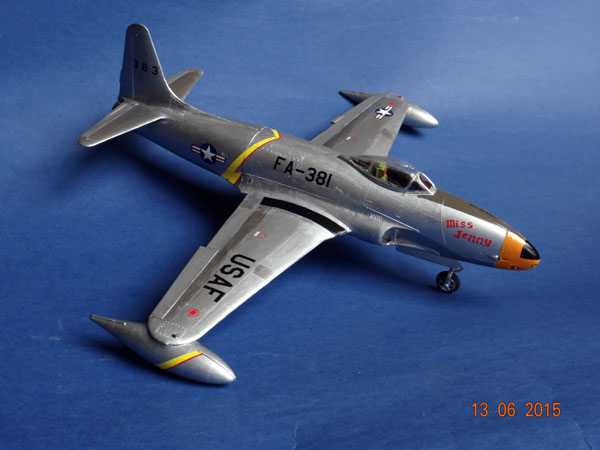
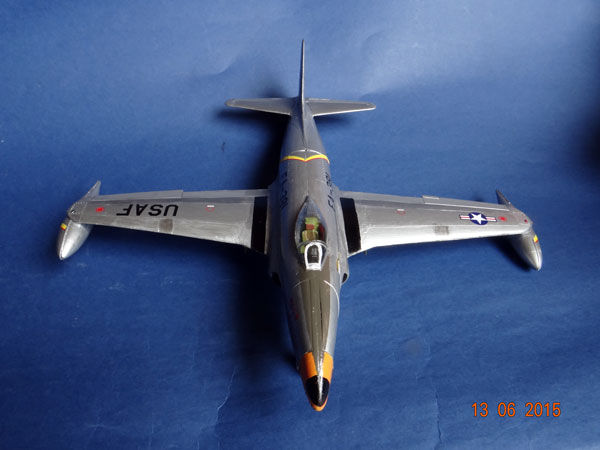
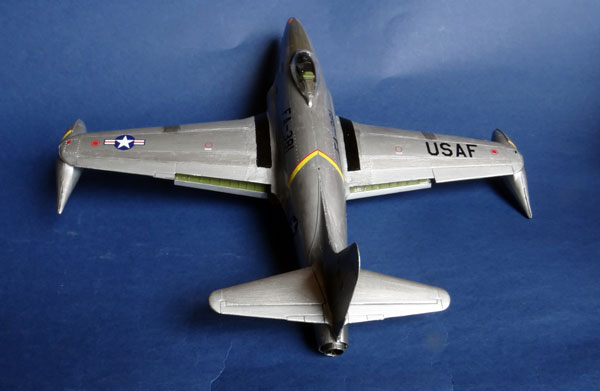
The wing joint is mostly superglue, and then baking powder on top of wet superglue. Glue and filler in one hit.
The wing joint is mostly superglue, and then baking powder on top of wet superglue. Glue and filler in one hit.

JClapp
#259
Joined: October 23, 2011
KitMaker: 2,265 posts
AeroScale: 1,715 posts
Posted: Friday, June 12, 2015 - 06:52 PM UTC
Four days start to finish. impressive. 
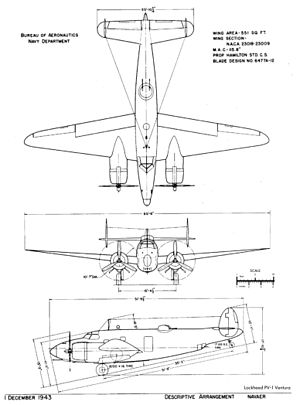
meanwhile I havent opened my box of Neptunes in weeks...
meanwhile I havent opened my box of Neptunes in weeks...

Antilles

Joined: March 22, 2015
KitMaker: 671 posts
AeroScale: 614 posts
Posted: Saturday, June 13, 2015 - 04:26 PM UTC
Dave: Wow, You are really fast as a lightning!
This weekend I painted the two birds in the colour of the German Marineflieger.


After a coat of gloss I started decalling. This went all well for the double-seater.

For the single-seater, I bought some extra decals to make a plane, that I have seen in the aerodrome of Nordholz in northern Germany.
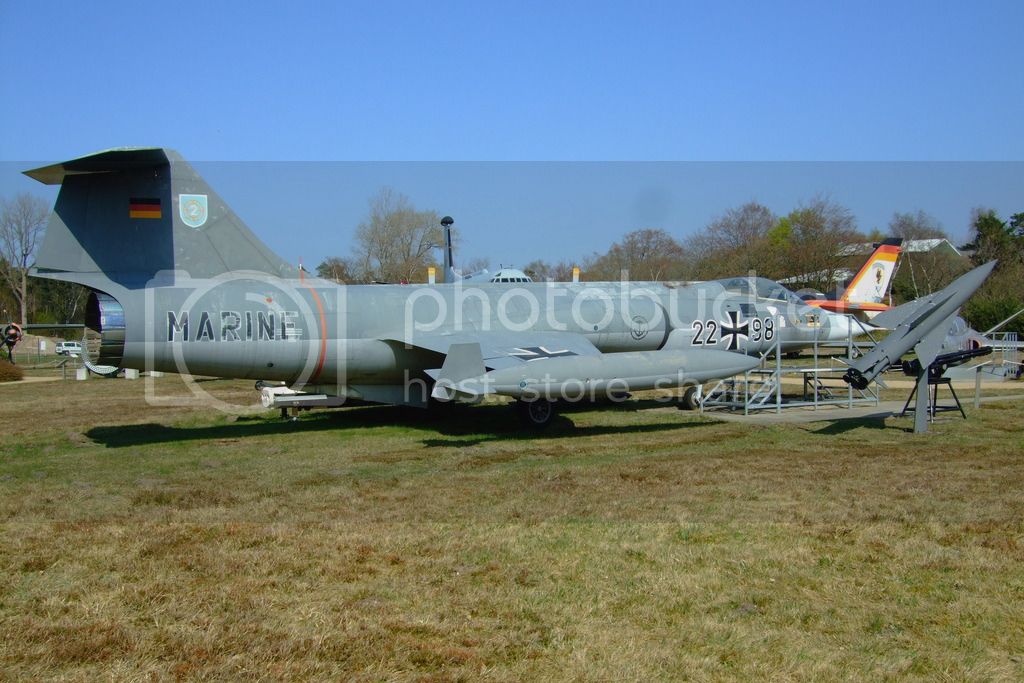
But, there are plenty of decals, and I cannot imagine, how they can all be stuck onto the little surface of this plane.

Oliver
This weekend I painted the two birds in the colour of the German Marineflieger.
After a coat of gloss I started decalling. This went all well for the double-seater.
For the single-seater, I bought some extra decals to make a plane, that I have seen in the aerodrome of Nordholz in northern Germany.
But, there are plenty of decals, and I cannot imagine, how they can all be stuck onto the little surface of this plane.
Oliver
KelticKnot
Joined: May 11, 2015
KitMaker: 768 posts
AeroScale: 656 posts
Posted: Saturday, June 13, 2015 - 08:07 PM UTC
Wow, are you sure you didn't buy 1/32 decals???? 
Good luck with those mate.
Dave, seriously four days? Good stuff, its taken me four days to paint the top surface of mine. Lol
Good luck with those mate.
Dave, seriously four days? Good stuff, its taken me four days to paint the top surface of mine. Lol
Stoker

Joined: February 07, 2015
KitMaker: 58 posts
AeroScale: 19 posts
Posted: Sunday, June 14, 2015 - 05:27 AM UTC
Hi Everybody
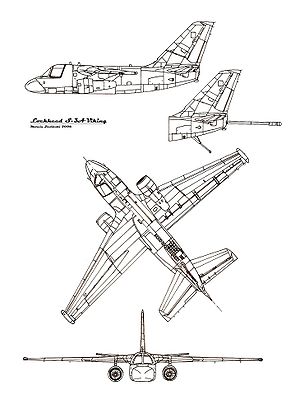
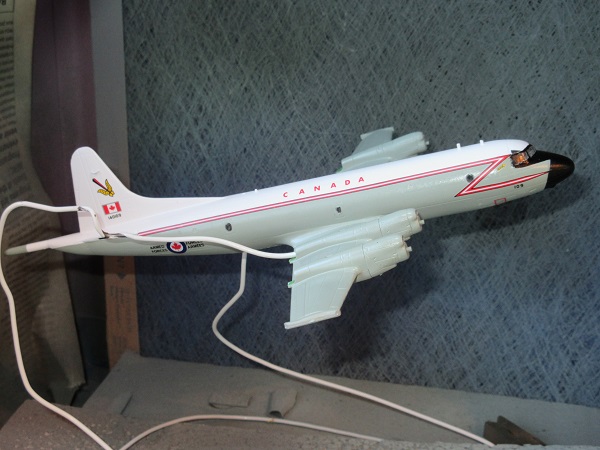
I've made a lot of progress on the Aurora. Its painted and I have started decaling it. The masking and painting around the windows almost turned it into a hanger queen but I got it done and I'm happy with it. The decals are nice but a very stubborn to come off of the backing paper. Once they do come off they snug down nicely on the aircraft. Attempting to get the long stripes off the backing caused it to be broken into several pieces but actually went on the model easily and I was able to get it lined up with most of the breaks unnoticeable Hope to have it completed next week, still have the other side to do and the propellers to paint...
Ron
I've made a lot of progress on the Aurora. Its painted and I have started decaling it. The masking and painting around the windows almost turned it into a hanger queen but I got it done and I'm happy with it. The decals are nice but a very stubborn to come off of the backing paper. Once they do come off they snug down nicely on the aircraft. Attempting to get the long stripes off the backing caused it to be broken into several pieces but actually went on the model easily and I was able to get it lined up with most of the breaks unnoticeable
Hope to have it completed next week, still have the other side to do and the propellers to paint... Ron
JClapp
#259
Joined: October 23, 2011
KitMaker: 2,265 posts
AeroScale: 1,715 posts
Posted: Sunday, June 14, 2015 - 07:14 PM UTC
Looks great Ron! Love the lightning stripe! 
@ Oliver, what have you started! There is no rule that you must put every single one of those stencils on that tiny model!
The paint looks very good, nice two color work on the under side.
@ Oliver, what have you started!
There is no rule that you must put every single one of those stencils on that tiny model! The paint looks very good, nice two color work on the under side.
KelticKnot
Joined: May 11, 2015
KitMaker: 768 posts
AeroScale: 656 posts
Posted: Monday, June 15, 2015 - 05:52 PM UTC
Ron that's looking excellent. As I also have some very long stripe decals I'm a little nervous about that stage fast approaching. Fingers crossed !
Antilles
Joined: March 22, 2015
KitMaker: 671 posts
AeroScale: 614 posts
Posted: Wednesday, June 17, 2015 - 07:59 PM UTC
Ron:The stripe looks really fine. I have one to do on my H-19, I plan to build for the rotary campaign, but I am confused, if I shall use a decal or try to paint  .
.
As the decals on the 104 G are on , I don´t want to do any decalling the next days
  . The surface was sealed. Subsequently an oil wash of brown mixed with black was applied. Ready for some more aging with pigments!


Oliver
. As the decals on the 104 G are on
, I don´t want to do any decalling the next days . The surface was sealed. Subsequently an oil wash of brown mixed with black was applied. Ready for some more aging with pigments! Oliver
KelticKnot
Joined: May 11, 2015
KitMaker: 768 posts
AeroScale: 656 posts
Posted: Wednesday, June 17, 2015 - 11:12 PM UTC
Oliver, they are looking fantastic! A really nice pairing.
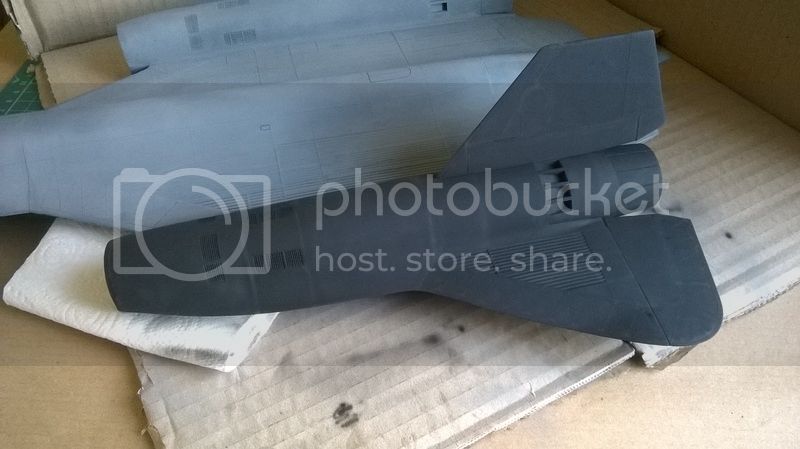
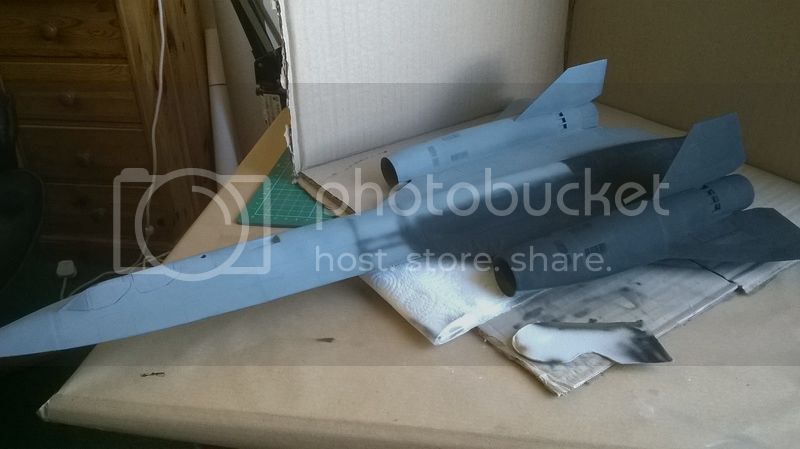
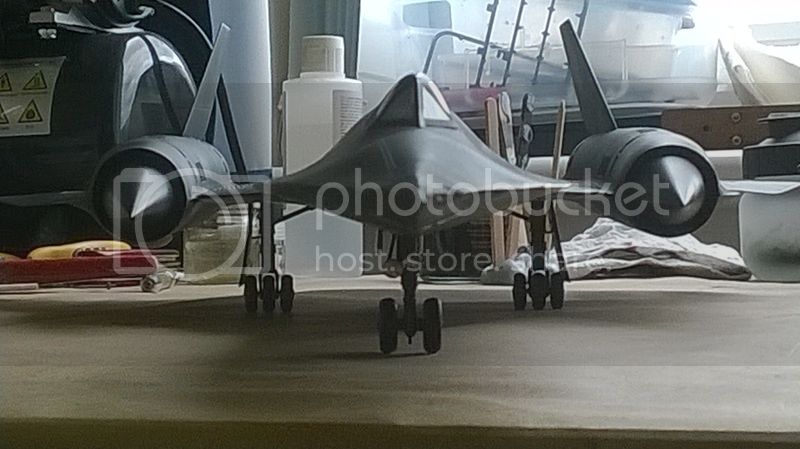
I've been shooting multiple thin clear coats over the blackbird and getting ready for decals. Painting has been giving me hand cramps as this is the first time I've properly airbrushed 😎
I've tried to go panel by panel letting the grey primer subtly show through along the panel lines. After decals I think I'll try using some pastels to bring out those dusty panel lines that are quite a hallmark of the SR71. picks to follow if I get back to it tonight. 😊
JClapp
#259
Joined: October 23, 2011
KitMaker: 2,265 posts
AeroScale: 1,715 posts
Posted: Thursday, June 18, 2015 - 03:15 AM UTC
Super work Oliver! 
KelticKnot
Joined: May 11, 2015
KitMaker: 768 posts
AeroScale: 656 posts
Posted: Thursday, June 18, 2015 - 08:32 PM UTC
So I'm done with the plastic! Undercarriage and doors all fitted with a lot of swearing at fiddly bits.
Apologies for the rather crappy photos.... i'm actually starting to wonder how to do this monster justice when it's complete. Any advice out there for photographing large models??
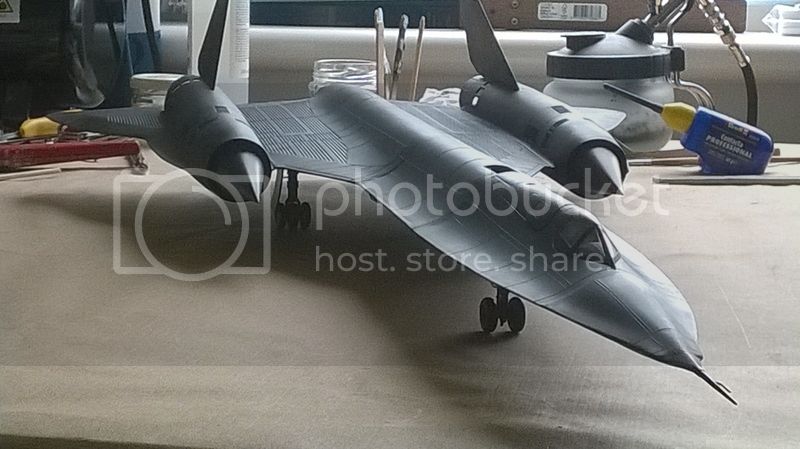
Plenty of weathering and shading to go then cross your fingers for me that the decal sheet has stood the test of time and will co-operate. I'd rather spend cash on my next model and not on decal replacements.
Apologies for the rather crappy photos.... i'm actually starting to wonder how to do this monster justice when it's complete. Any advice out there for photographing large models??
Plenty of weathering and shading to go then cross your fingers for me that the decal sheet has stood the test of time and will co-operate. I'd rather spend cash on my next model and not on decal replacements.
JClapp
#259
Joined: October 23, 2011
KitMaker: 2,265 posts
AeroScale: 1,715 posts
Posted: Thursday, June 18, 2015 - 08:42 PM UTC
That's alot of big black bird all right! Cant help you with photographing, that thing is at least twice as long as my biggest model.
The decal - Do you have a scanner? for safety, scan that decal sheet at 300dpi and save it as a png file, before cutting.
If the original turns out to be unusable I can reprint the decal for you, on Microscale paper and mail it to you for the price of postage.
The decal - Do you have a scanner? for safety, scan that decal sheet at 300dpi and save it as a png file, before cutting.
If the original turns out to be unusable I can reprint the decal for you, on Microscale paper and mail it to you for the price of postage.
KelticKnot
Joined: May 11, 2015
KitMaker: 768 posts
AeroScale: 656 posts
Posted: Thursday, June 18, 2015 - 09:26 PM UTC
Thanks Jonathan, that sounds like very sound advice.
Antilles
Joined: March 22, 2015
KitMaker: 671 posts
AeroScale: 614 posts
Posted: Friday, June 19, 2015 - 03:00 AM UTC
Paul and Jonathan: Thanks for the nice comments.
Paul: Wow, the size of this bird is really awesome. I do not know, if I could handle such a huge plane while airbrushing, without a damage to the bird or the sorroundings.
Paul: Wow, the size of this bird is really awesome. I do not know, if I could handle such a huge plane while airbrushing, without a damage to the bird or the sorroundings.
KelticKnot
Joined: May 11, 2015
KitMaker: 768 posts
AeroScale: 656 posts
Posted: Friday, June 19, 2015 - 03:37 AM UTC
Oliver, that made me laugh! And you're right of course, I've forgotten it's size and bashed the pitot tube against everything on my desk including the overhead lamp so many times that I'm astounded that its still attached. It's not even bent!!
Antilles
Joined: March 22, 2015
KitMaker: 671 posts
AeroScale: 614 posts
Posted: Friday, June 19, 2015 - 04:02 AM UTC
Paul, not even bent? Well, that sounds more like the good old Airfix plastic, doesn't it?
Antilles
Joined: March 22, 2015
KitMaker: 671 posts
AeroScale: 614 posts
Posted: Monday, June 22, 2015 - 12:24 AM UTC
Just finished my starfighter twins after final assmebly and weathering . These kits are rather nice fitting, excluding the canopies in my case. So here are some final photos:


Curious about more Lookheed birds in this fantastic campaign.
Oliver
. These kits are rather nice fitting, excluding the canopies in my case. So here are some final photos: Curious about more Lookheed birds in this fantastic campaign.
OliverKelticKnot
Joined: May 11, 2015
KitMaker: 768 posts
AeroScale: 656 posts
Posted: Monday, June 22, 2015 - 01:31 AM UTC
They look awesome Oliver, if I didn't know better i'd say they were 1/72 not smaller. Especially on the single seated those extra decals make all the difference.
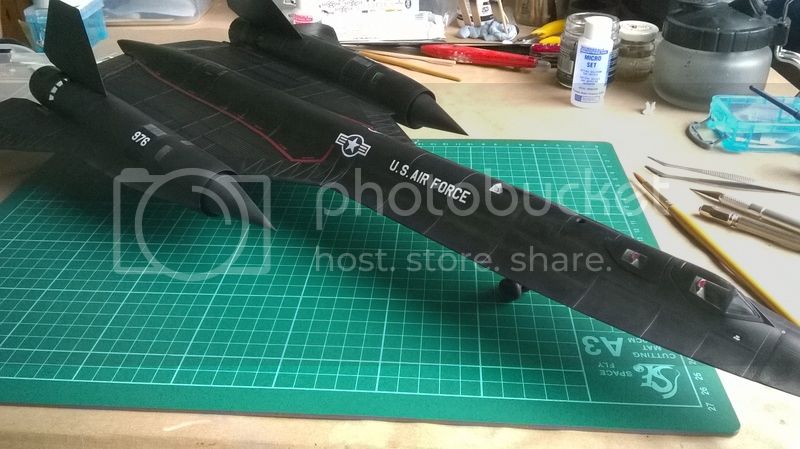
I've started decals on the blackbird. First long red stripe wasn't pretty as I foolishly tried to lay it down in one go. The opposite side I cut the decal into sections and it looks much better. A bit of paint touchup on the first one should fix things.
I was wavering over which scheme to do but decided to go with the high-vis standard scheme. The low-Vis markings are nice but in an soppy gesture to the missus i'm mixing the 972 and 956 markings to get 976, her birth year. Who says romance is dead !!!!
KelticKnot
Joined: May 11, 2015
KitMaker: 768 posts
AeroScale: 656 posts
Posted: Tuesday, June 23, 2015 - 11:06 PM UTC
Coming along nicely.
Antilles
Joined: March 22, 2015
KitMaker: 671 posts
AeroScale: 614 posts
Posted: Tuesday, June 23, 2015 - 11:21 PM UTC
Paul: Yes, this big bird really looks great, carry on!
Oliver
Oliver

md72
#439
Joined: November 05, 2005
KitMaker: 4,950 posts
AeroScale: 3,192 posts

Posted: Tuesday, June 23, 2015 - 11:52 PM UTC
Most excellent work folks!
I've managed to only get 1 part half glued on in the last week.
I've managed to only get 1 part half glued on in the last week.

KelticKnot
Joined: May 11, 2015
KitMaker: 768 posts
AeroScale: 656 posts
Posted: Saturday, July 04, 2015 - 01:03 AM UTC
I've made little progress this week though I wanted to get as close to finished as I could.
Decals are done but a few of them have silvered but only after I put down a clear coat. They looked ok before that....
Also I did a bit of weathering with pastels last night and got a nice effect but I've now learned that it dulled too much after sealing in. I'll need to remember to exaggerate this kind of work a bit in future.
Trial and error eh?
Nearly there though!
 |

WEB HOSTING BY


Copyright ©2021 AeroScale and Kitmaker Network, a subsidiary of Silver Star Enterprises
All Rights Reserved. Please read our Conditions of Use and Privacy Policy.
All Rights Reserved. Please read our Conditions of Use and Privacy Policy.