

Air Campaigns
Want to start or join a group build? This is where to start.
Want to start or join a group build? This is where to start.
Hosted by Frederick Boucher, Michael Satin
OFFICIAL: Sea Plane Campaign 2014

mrockhill

Joined: June 17, 2009
KitMaker: 566 posts
AeroScale: 507 posts

Posted: Sunday, October 19, 2014 - 08:03 AM UTC
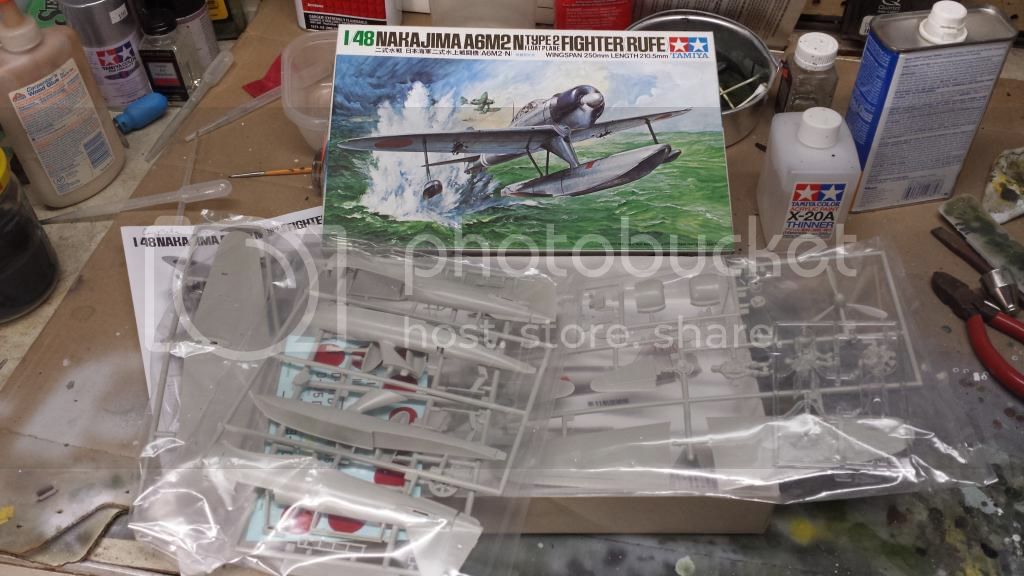
Alot of good looking builds going on here. Im a little late to the party but should be plenty of time for this basic old tamiya a6m2-n rufe kit. At this stage im planning on an a basic build, maybe minor cockpit improvements to see if I like it well enough to use the open canopy. Scheme will be the basic tannish light gray with kit decals unless something cooler and cheap shows up.

tinbanger

Joined: February 04, 2008
KitMaker: 2,507 posts
AeroScale: 1,814 posts

Posted: Sunday, October 19, 2014 - 08:23 AM UTC
Welcome Mike!
Plenty of time left.

Plenty of time left.

SGTJKJ

#041

Joined: July 20, 2006
KitMaker: 10,069 posts
AeroScale: 3,788 posts

Posted: Sunday, October 19, 2014 - 07:50 PM UTC
Mike, nice choice of kit. I actually build this last year. It goes together like a dream, but as you point out the cockpit could do with a little updating.
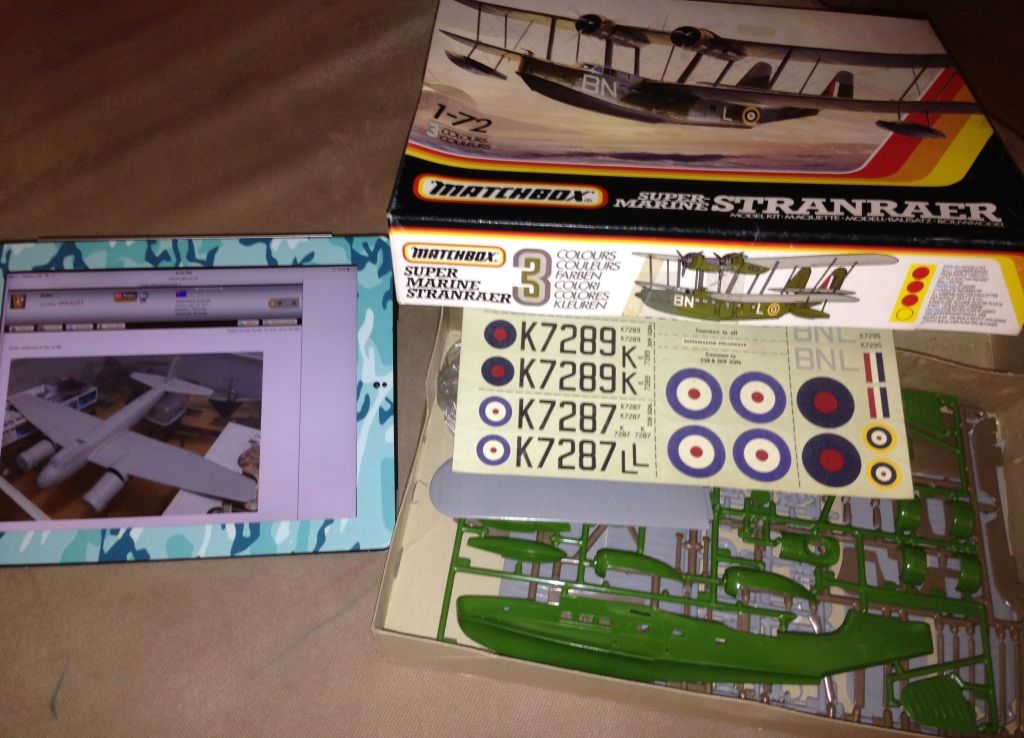
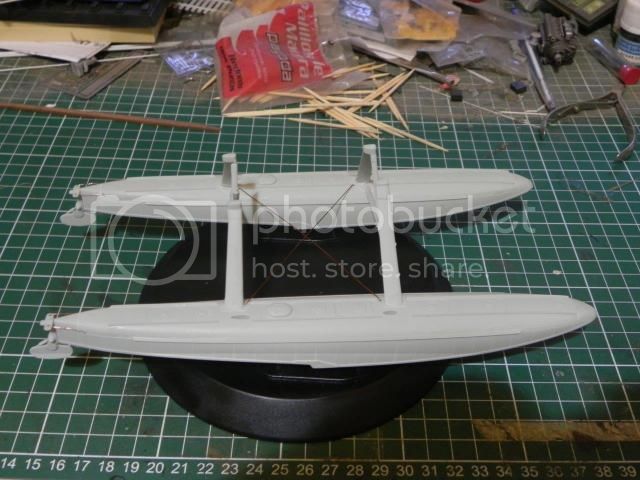
I have now settled on the Stranaer for this campaign. The start picture is attached. I will try to do the rigging no matter what. It is rigging or bust
More to follow
I have now settled on the Stranaer for this campaign. The start picture is attached. I will try to do the rigging no matter what. It is rigging or bust
More to follow


SGTJKJ
#041
Joined: July 20, 2006
KitMaker: 10,069 posts
AeroScale: 3,788 posts
Posted: Wednesday, October 22, 2014 - 07:44 PM UTC
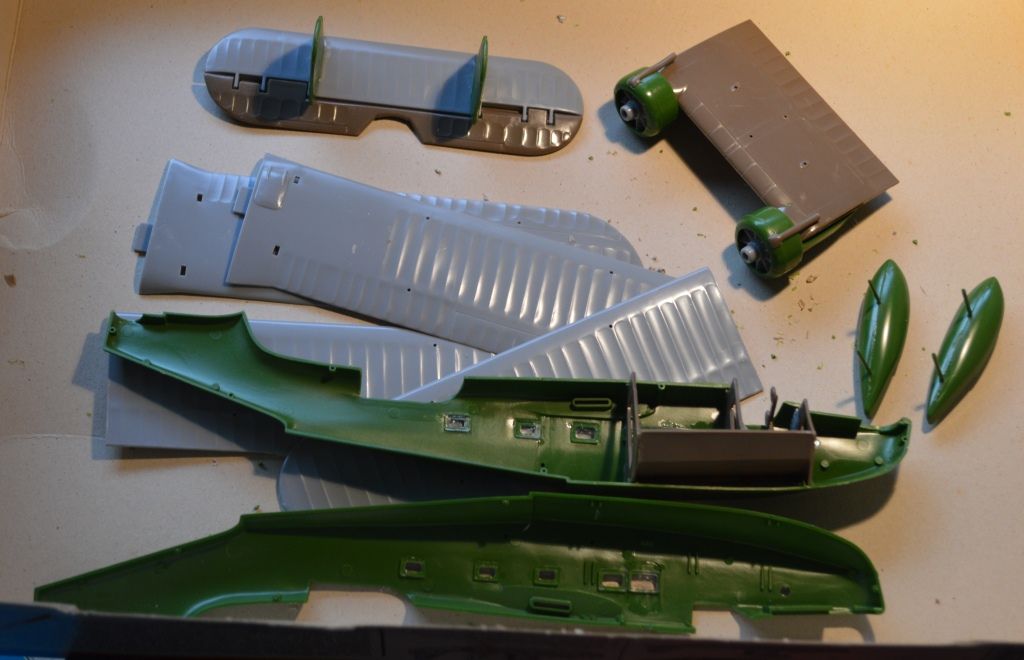
Slow and modest progress, but progress none the less.
More to follow soon
More to follow soon


ljames0874

Joined: August 15, 2012
KitMaker: 408 posts
AeroScale: 365 posts

Posted: Thursday, October 23, 2014 - 03:49 AM UTC
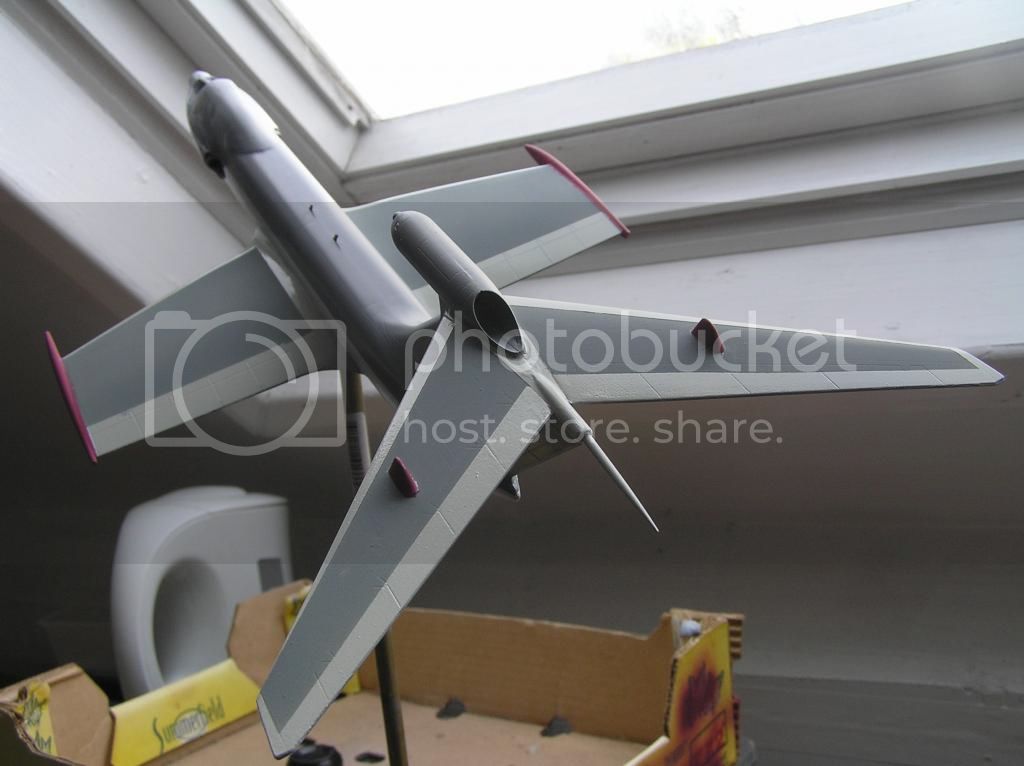
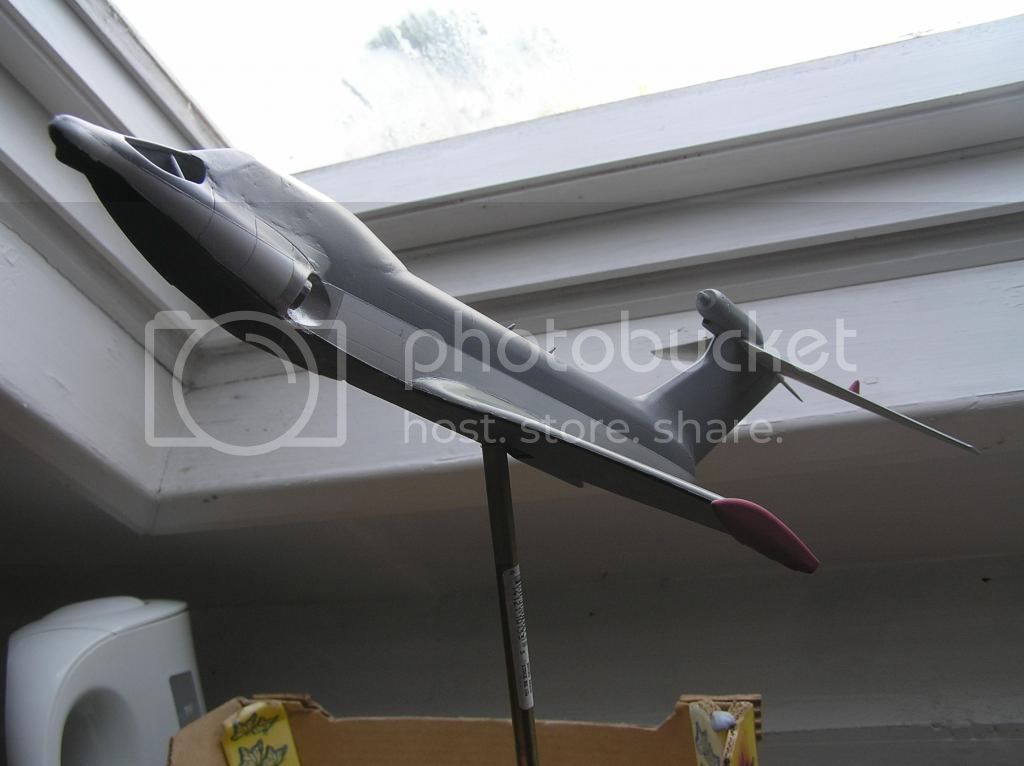
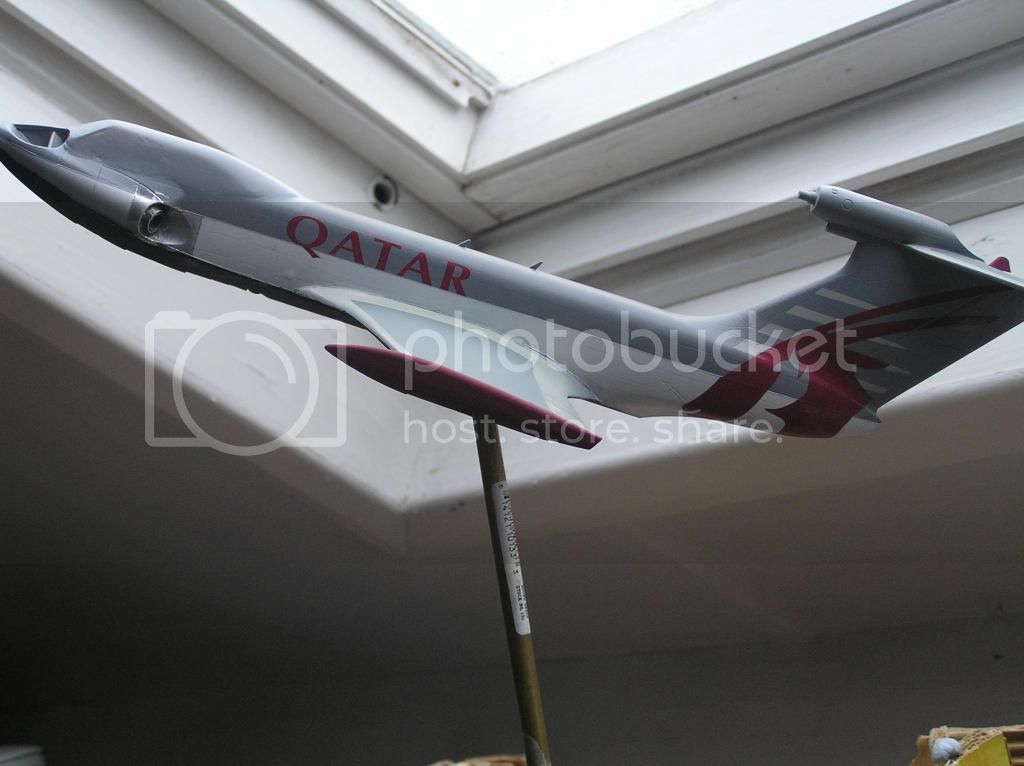
More progress on the Ekranoplan. All the colours are on, all the masking is off, and I have made a start on the Qatar Airways livery decals.
Cheers Everybody!
Cheers Everybody!
mrockhill
Joined: June 17, 2009
KitMaker: 566 posts
AeroScale: 507 posts
Posted: Friday, October 24, 2014 - 01:31 PM UTC
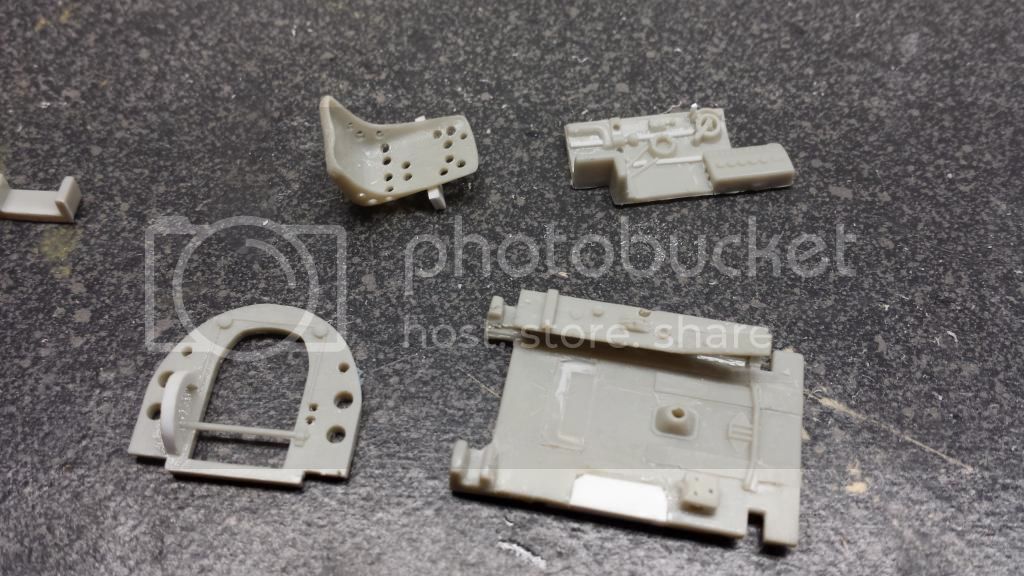
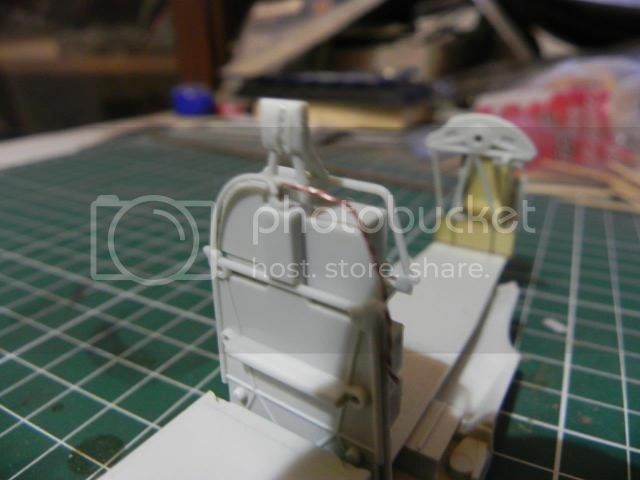
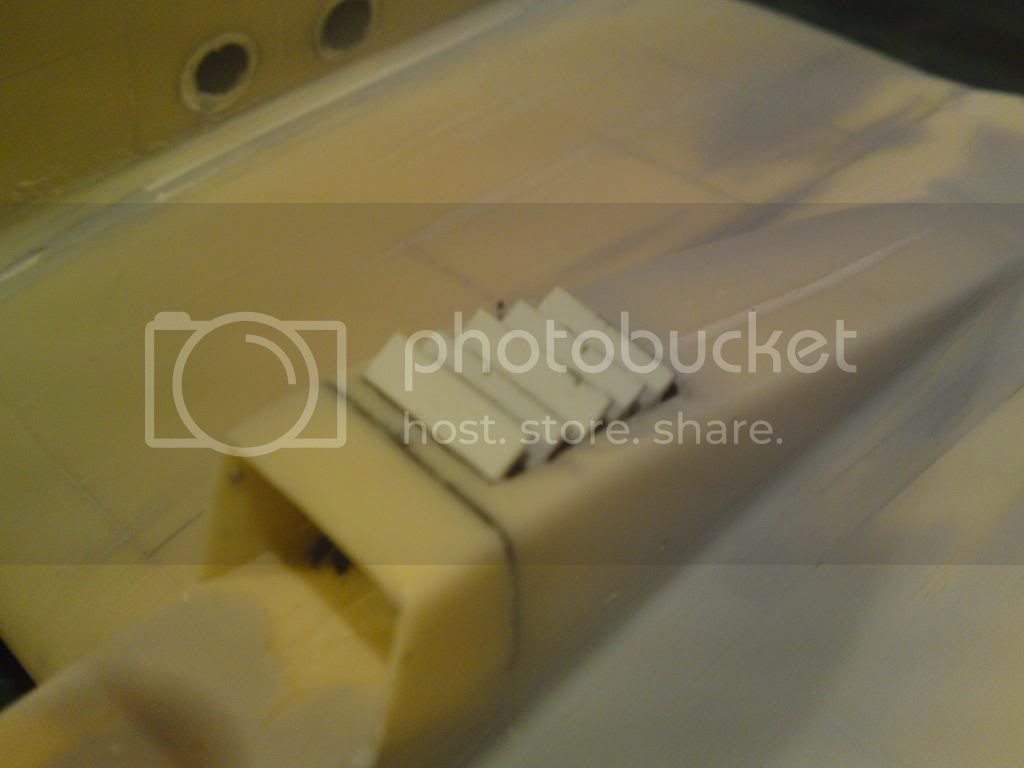
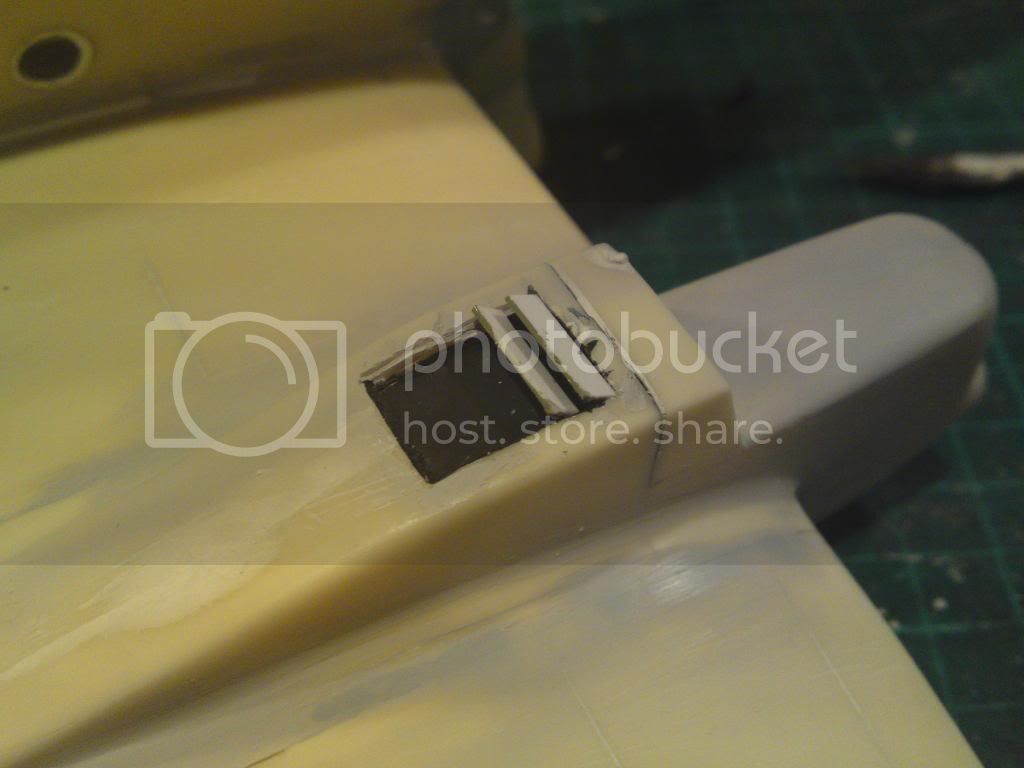
Im thinking ive lost touch with the definition of "minor" in relation to the mentioned cockpit improvements on my Rufe.
I thought about adapting a hasegawa zero cockpit, it would be done by now and id be closing the plane up this weekend. Instead I decided to try my hand at making my own detail and its coming along rather well.
Of course a profusion of references for inspiration. Not shooting for accuracy and im not measuring anything other than to ensure things are even, level and symmetrical, at least roughly. kind of wishing id have invested in a punch set by now, im thinking about scratching a new dash. But here is where progress stands tonite, along with a pic of the crime scene.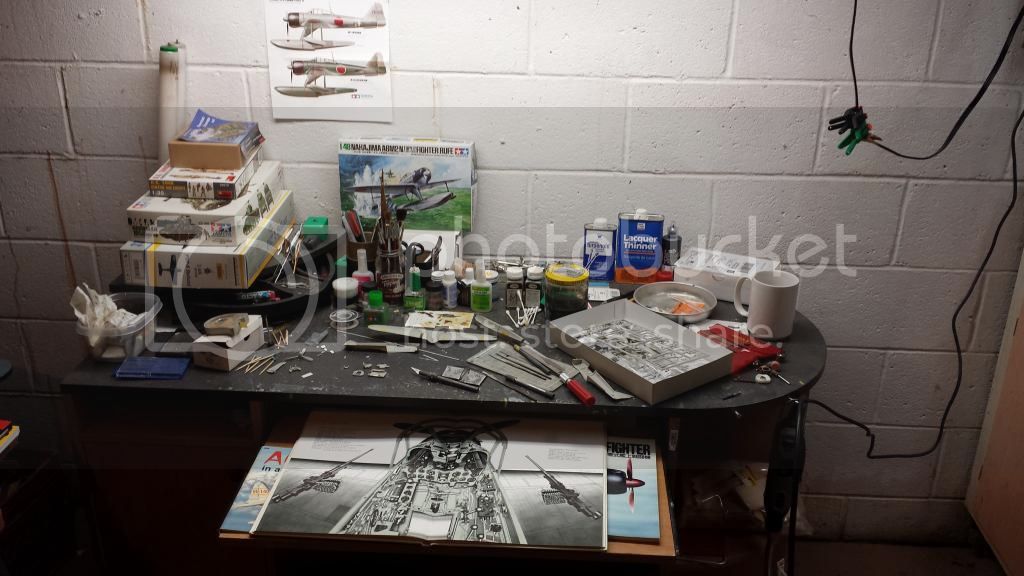

c4willy

#305

Joined: February 01, 2006
KitMaker: 1,673 posts
AeroScale: 1,517 posts

Posted: Friday, October 24, 2014 - 02:38 PM UTC
Hmmm a little of your A.M.S is showing Mike! What you've shown us looks great so far keep up the excellent work ..... and that goes for the rest of you! Some damn fine works going on!

SHAKY962

Joined: May 21, 2012
KitMaker: 765 posts
AeroScale: 316 posts

Posted: Friday, October 24, 2014 - 06:49 PM UTC
A little update


tinbanger
Joined: February 04, 2008
KitMaker: 2,507 posts
AeroScale: 1,814 posts
Posted: Friday, October 24, 2014 - 11:42 PM UTC
A lot of nice builds going on! I hope to get back to mine this weekend!

JClapp
#259
Joined: October 23, 2011
KitMaker: 2,265 posts
AeroScale: 1,715 posts

Posted: Saturday, October 25, 2014 - 06:27 AM UTC
Quoted Text
More progress on the Ekranoplan. All the colours are on, all the masking is off, and I have made a start on the Qatar Airways livery decals.
haha
 that is stunning!
now you have to make a sea surface dio base for that beast, a la...


stukaace

Joined: January 03, 2006
KitMaker: 39 posts
AeroScale: 39 posts
Posted: Saturday, October 25, 2014 - 07:43 AM UTC
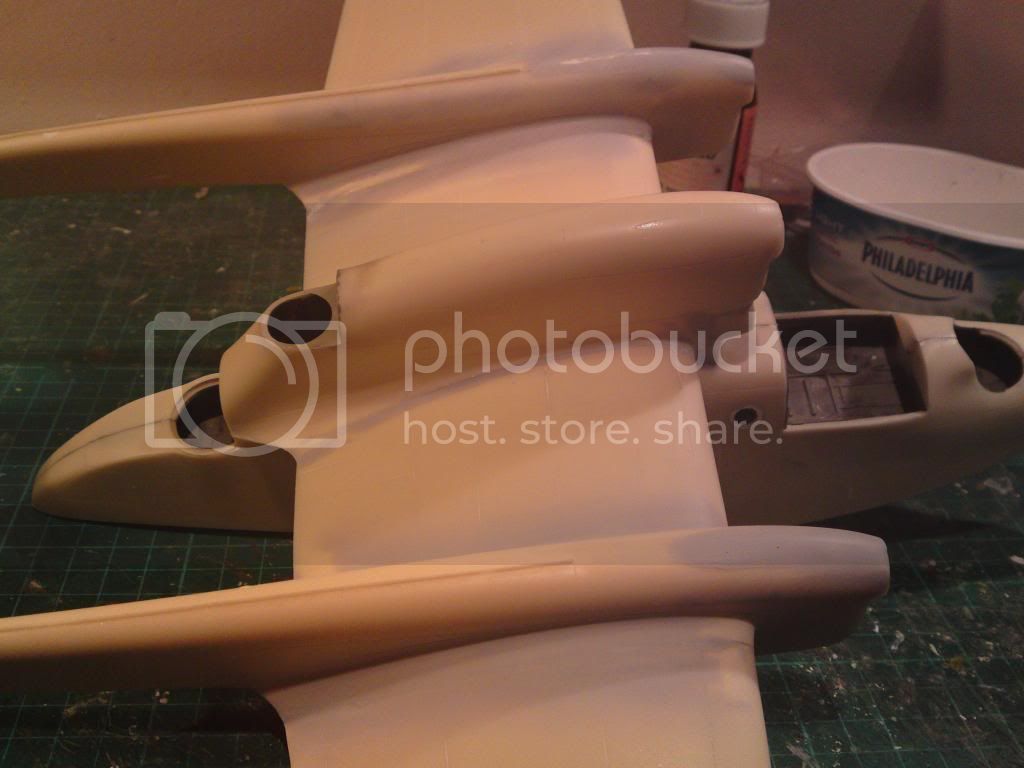
I left my last update with the problem of the Bv138's out of true vertical tail surfaces. I'm pleased to report that with plenty of boiling water and some slight scalding of the fingers the tail surfaces are vertical again. I'm not totally satisfied with the result but it was the best I could achieve!!
I then turned to my tube of Perfect Putty and filled all the large gaps. After drying the great 'sand off' began.
When satisfied smooth joints were achieved I airbrushed some primer over the joints to see how well sanding had gone.
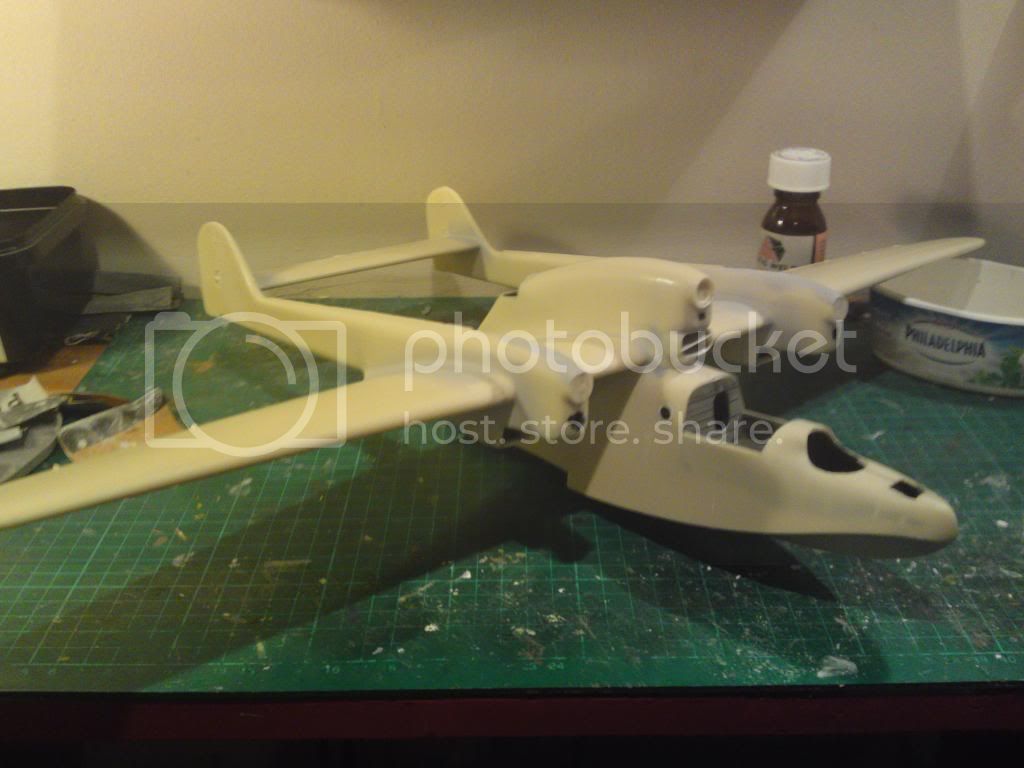
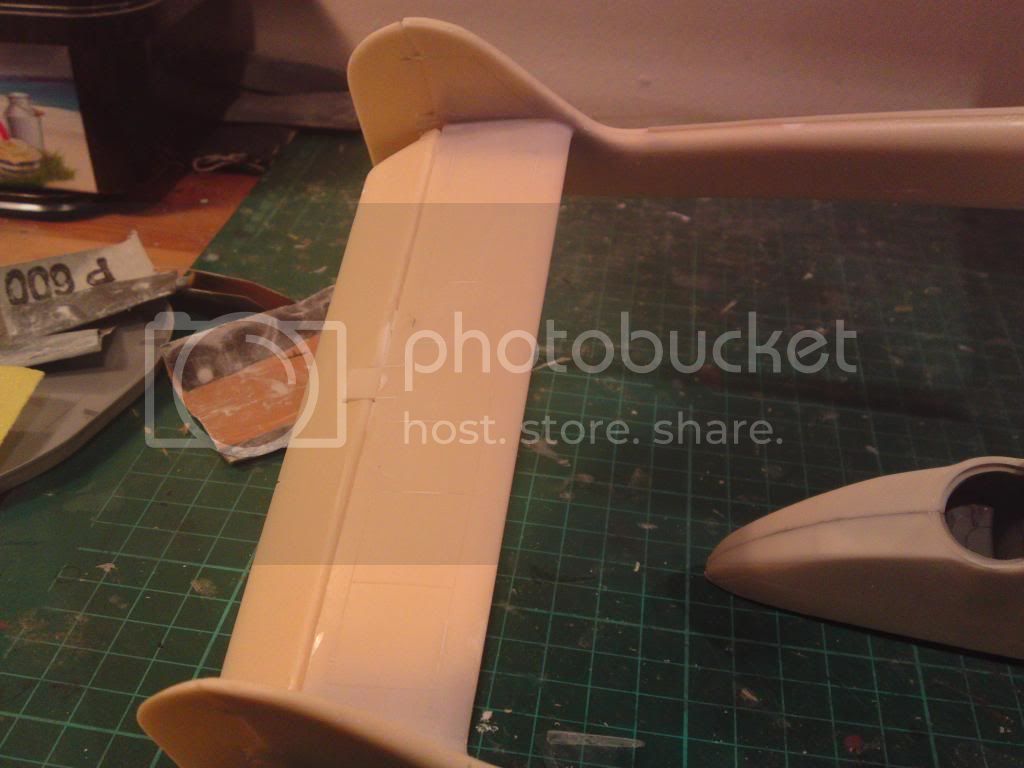
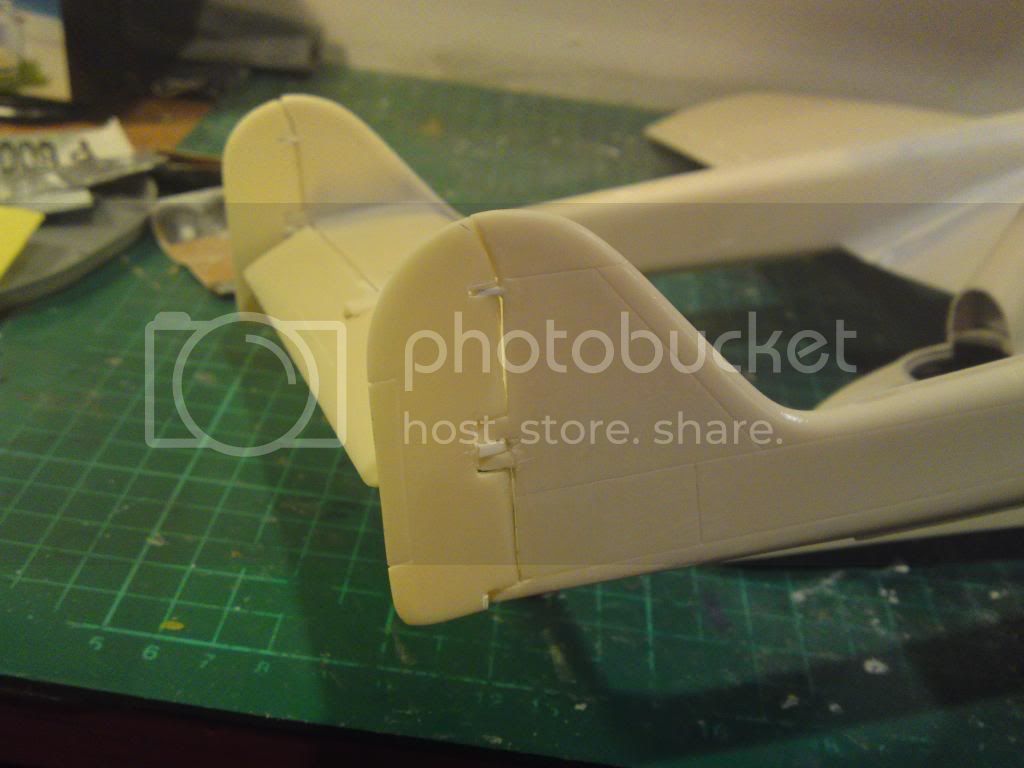
The last two photos show deflected rudders and elevator, some plastic stock was used to replace the hinges as the resin ones were lost when cutting the rudders free.
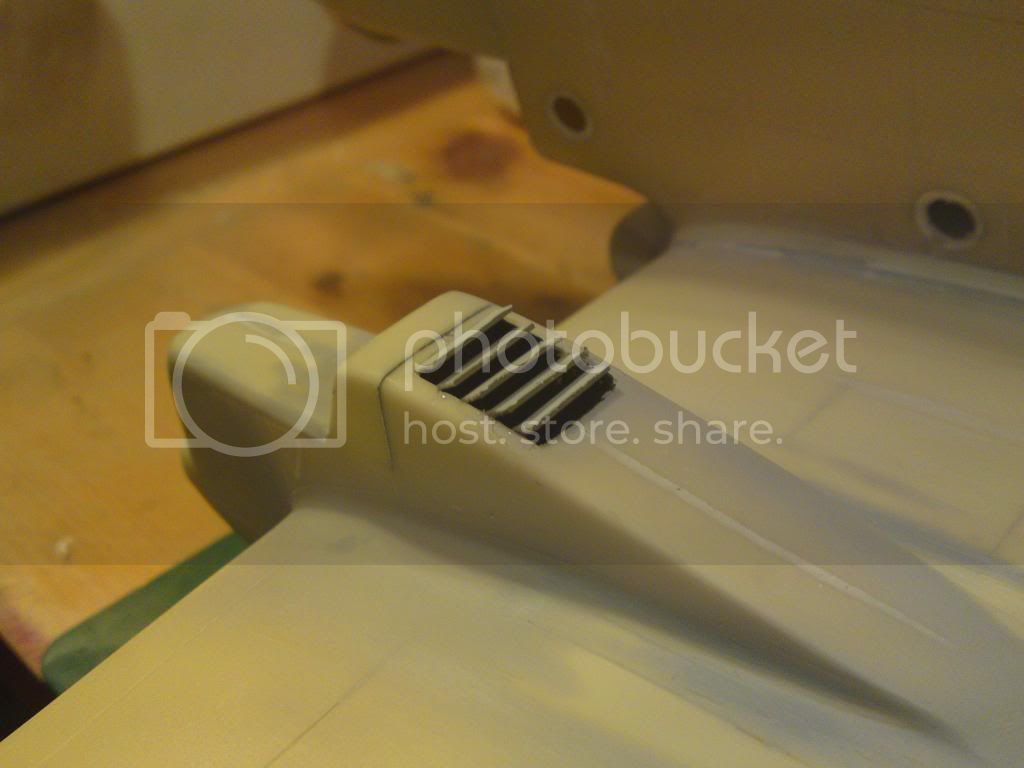
Above photos show the cooling outlet louvres. I drilled and carved out the apertures then added the doors from plasticard. These outlets are a prominent feature of the Bv138 and add some interest to the airframe. The kit does not portray these louvres very well.
My next step will be to commence detailing the cockpit.
I am very impressed by the other builds in this campaign and it's good to see new ones appearing.
Cheers Andy
I then turned to my tube of Perfect Putty and filled all the large gaps. After drying the great 'sand off' began.
When satisfied smooth joints were achieved I airbrushed some primer over the joints to see how well sanding had gone.
The last two photos show deflected rudders and elevator, some plastic stock was used to replace the hinges as the resin ones were lost when cutting the rudders free.
Above photos show the cooling outlet louvres. I drilled and carved out the apertures then added the doors from plasticard. These outlets are a prominent feature of the Bv138 and add some interest to the airframe. The kit does not portray these louvres very well.
My next step will be to commence detailing the cockpit.
I am very impressed by the other builds in this campaign and it's good to see new ones appearing.
Cheers Andy
ljames0874
Joined: August 15, 2012
KitMaker: 408 posts
AeroScale: 365 posts
Posted: Saturday, October 25, 2014 - 07:57 PM UTC
Quoted Text
now you have to make a sea surface dio base for that beast
Yep, I am doing! I have acquired some Vallejo Water effects, some foam snow and a cheap picture frame for that very purpose!


Blespooky

Joined: June 03, 2014
KitMaker: 277 posts
AeroScale: 36 posts
Posted: Saturday, October 25, 2014 - 08:45 PM UTC
1:72 Airfix Fairey Swordfish
Lee: I'm saving up my change for a ticket on that Qatar monster, who can resist with such a great paint job.
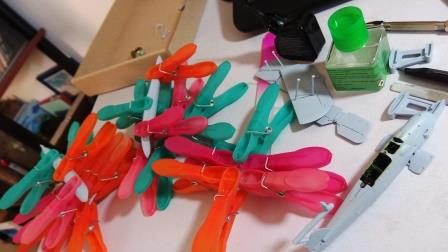
Everyone was putting up lots of photos so I thought I would show some comical progress. I have just finished another campaign and can now concentrate on this floating bird.
In any case, there will be no laundry today!
Bryan
Lee: I'm saving up my change for a ticket on that Qatar monster, who can resist with such a great paint job.
Everyone was putting up lots of photos so I thought I would show some comical progress. I have just finished another campaign and can now concentrate on this floating bird.
In any case, there will be no laundry today!
Bryan
tinbanger
Joined: February 04, 2008
KitMaker: 2,507 posts
AeroScale: 1,814 posts
Posted: Sunday, October 26, 2014 - 12:03 AM UTC
Bryan ! It's as Seaplane campaign! not a clothe peg campaign 
c4willy
#305
Joined: February 01, 2006
KitMaker: 1,673 posts
AeroScale: 1,517 posts
Posted: Sunday, October 26, 2014 - 07:40 AM UTC
Hi Andy the Bv138 is looking great! I have the super model kit in 1/72nd to build and even in 1/72nd the kit is big! Yours must be positively gargantuan. What references are you using? The super model kit is fairly light on internal details and I need information on how too detail it.
c4willy
#305
Joined: February 01, 2006
KitMaker: 1,673 posts
AeroScale: 1,517 posts
Posted: Sunday, October 26, 2014 - 10:00 AM UTC
@Lee: I love the Erkonplan! I've seen the walk around for this and the one they euphemistically call the Caspian sea monster. I'd love to build one one day but they are currently outside my "era". Having said that if one were to fall into my lap (read priced cheaply enough) I'd build that mother farther in a nano second! I also look forward to seeing it on the "briney" so to speak.
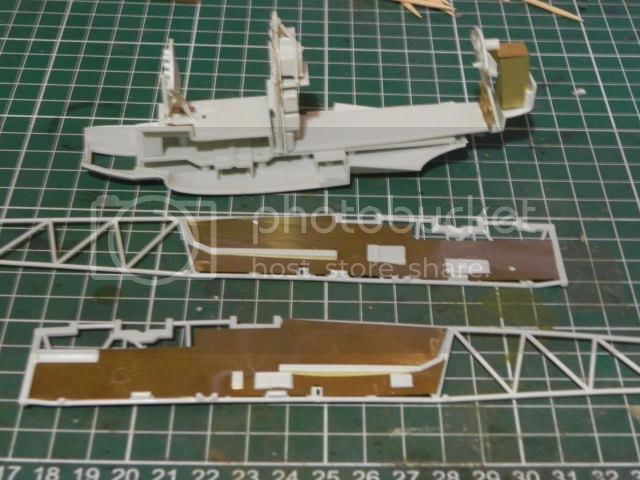
@Jose: Love what I see so far Jose, refresh my memory which photo etch set are you using for this build?
@Bryan: Interesting use of clamps Bryan, it's a little hard to see but what are you clamping? It would appear to be some what out of shape given that it's being held so rigidly?
@Jose: Love what I see so far Jose, refresh my memory which photo etch set are you using for this build?
@Bryan: Interesting use of clamps Bryan, it's a little hard to see but what are you clamping? It would appear to be some what out of shape given that it's being held so rigidly?

phantom_phanatic309
#372

Joined: March 10, 2010
KitMaker: 2,568 posts
AeroScale: 1,619 posts
Posted: Sunday, October 26, 2014 - 10:09 AM UTC
Afraid I'm going to have to bow out of this campaign. Just feel Like I've taken on too much at the minute and doubt I'd be able to give my choice of build justice.
I'll be watching all the builds here with interest.
Best of luck to everyone.
Stephen
I'll be watching all the builds here with interest.
Best of luck to everyone.
Stephen

tinbanger
Joined: February 04, 2008
KitMaker: 2,507 posts
AeroScale: 1,814 posts
Posted: Sunday, October 26, 2014 - 10:21 AM UTC
Hi Stephen!
Sorry to see that you have to drop out of the campaign!
There is still plenty of time to do a build, I hope you find the time to join us later.
Richard.
Sorry to see that you have to drop out of the campaign!
There is still plenty of time to do a build, I hope you find the time to join us later.
Richard.
mrockhill
Joined: June 17, 2009
KitMaker: 566 posts
AeroScale: 507 posts
Posted: Sunday, October 26, 2014 - 01:30 PM UTC
Alot of good weekend progress going on here! That ekronoplan definitely wins for originality. The BV is also coming along nicely, another very interesting choice. Looking forward to seeing the swordfish sans the clothespins. Heres where I am sunday evening.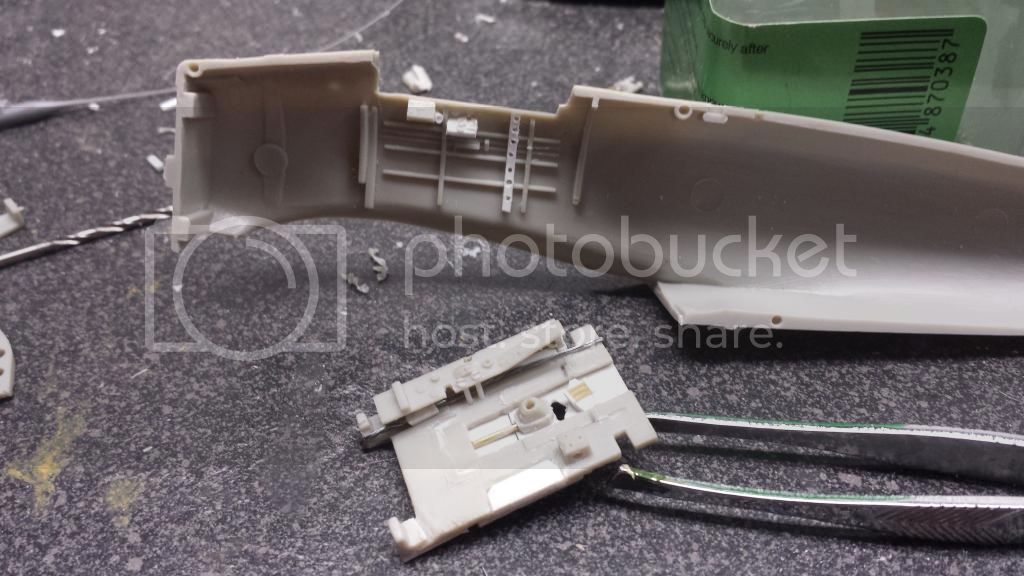
I keep digging my hole deeper but it keeps being worth it
I keep digging my hole deeper but it keeps being worth it
ljames0874
Joined: August 15, 2012
KitMaker: 408 posts
AeroScale: 365 posts
Posted: Sunday, October 26, 2014 - 07:22 PM UTC
Thanks for the comments chaps, I am having a lot of fun with this little project!
@Chris - all 3 Ekranoplan types are available, all in 1/144. My A-90 (by Revell) is out of production, but readily available on E-Bay. Zvedza recently issued their own moulding of the A-90, again not too expensive. The other two Ekranoplan variants,the Alexiev Lun (armed) and the KM (Caspian Sea Monster) have both been modelled by Anigrand Craftswork in resin, and all I can say about the price is, be prepared to sell your grandmother!
@Chris - all 3 Ekranoplan types are available, all in 1/144. My A-90 (by Revell) is out of production, but readily available on E-Bay. Zvedza recently issued their own moulding of the A-90, again not too expensive. The other two Ekranoplan variants,the Alexiev Lun (armed) and the KM (Caspian Sea Monster) have both been modelled by Anigrand Craftswork in resin, and all I can say about the price is, be prepared to sell your grandmother!
Blespooky
Joined: June 03, 2014
KitMaker: 277 posts
AeroScale: 36 posts
Posted: Monday, October 27, 2014 - 10:36 AM UTC
Hey everyone,
I have removed the clothespins from all the wings and floats and everything looks good but I have a snag. The supports for the rear stabilizers are according to reference photos supposed to be strong straight bars while the kit part has warped fragile plastic ones. In addition, the port side supports are to short (most likely from modeler error in some way)
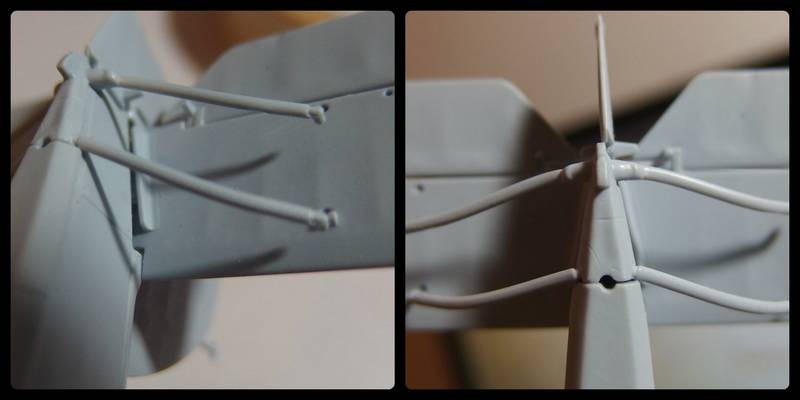
I could use some advice, should I cut out the plastic and replace it with straightened copper wire? Can I heat the plastic and stretch and straighten it a bit without destroying it? (There is no brass rod available in Israel).
Thanks in advance,
Bryan
I have removed the clothespins from all the wings and floats and everything looks good but I have a snag. The supports for the rear stabilizers are according to reference photos supposed to be strong straight bars while the kit part has warped fragile plastic ones. In addition, the port side supports are to short (most likely from modeler error in some way)
I could use some advice, should I cut out the plastic and replace it with straightened copper wire? Can I heat the plastic and stretch and straighten it a bit without destroying it? (There is no brass rod available in Israel).
Thanks in advance,
Bryan
mrockhill
Joined: June 17, 2009
KitMaker: 566 posts
AeroScale: 507 posts
Posted: Monday, October 27, 2014 - 04:11 PM UTC
I would replace it. Copper wire could work if the diameter is close and you have some around but it may be difficult to get it straight and keep it that way.
Id try stretching some sprue if it was me. Easy to do and within a couple tries you should be able to make a piece close in size.
Id try stretching some sprue if it was me. Easy to do and within a couple tries you should be able to make a piece close in size.
SGTJKJ
#041
Joined: July 20, 2006
KitMaker: 10,069 posts
AeroScale: 3,788 posts
Posted: Monday, October 27, 2014 - 09:48 PM UTC
Hi Bryan
I would use some plastic rod. it must be possible to get in Israel or order over the internet. It is easy to work with and will keep strait.
Hope that helps.
I would use some plastic rod. it must be possible to get in Israel or order over the internet. It is easy to work with and will keep strait.
Hope that helps.
Removed by original poster on 10/29/14 - 14:52:12 (GMT).
Removed by original poster on 10/29/14 - 14:57:30 (GMT).
 |

WEB HOSTING BY


Copyright ©2021 AeroScale and Kitmaker Network, a subsidiary of Silver Star Enterprises
All Rights Reserved. Please read our Conditions of Use and Privacy Policy.
All Rights Reserved. Please read our Conditions of Use and Privacy Policy.