Air Campaigns
Want to start or join a group build? This is where to start.
OFFICIAL: Sea Plane Campaign 2014
stukaace
_VISITCOMMUNITY
England - West Midlands, United Kingdom
Joined: January 03, 2006
KitMaker: 39 posts
AeroScale: 39 posts
Posted: Monday, September 29, 2014 - 07:51 AM UTC
Hi all another update on my Bv138 build (the joy of being retired extra building time!)

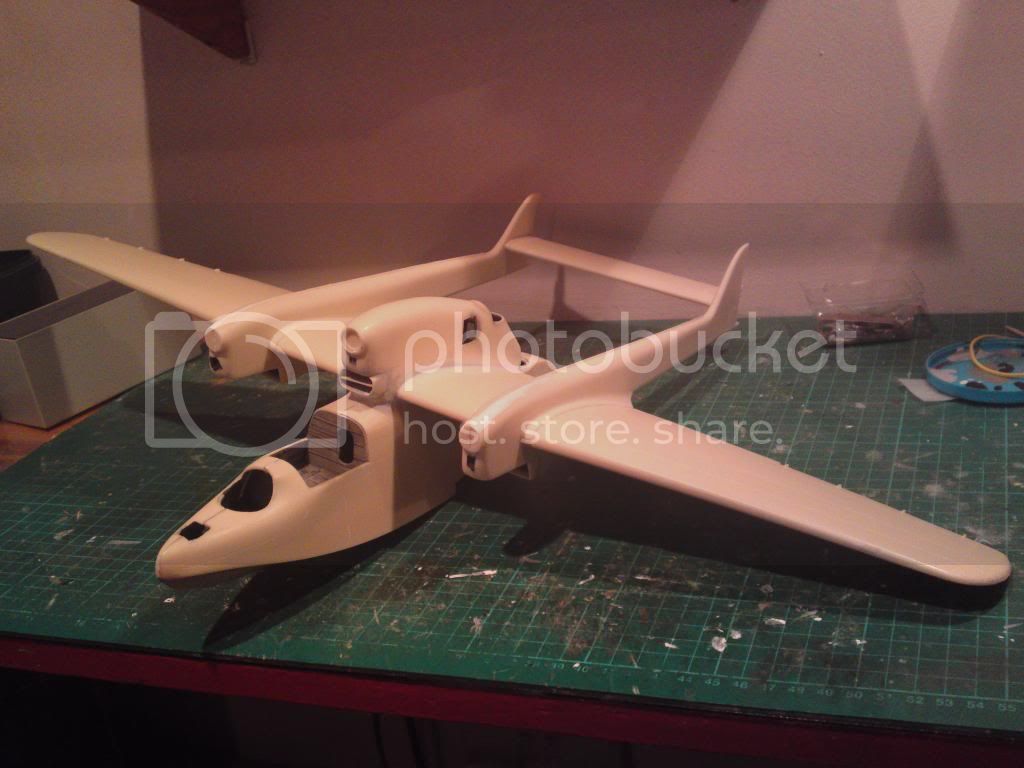
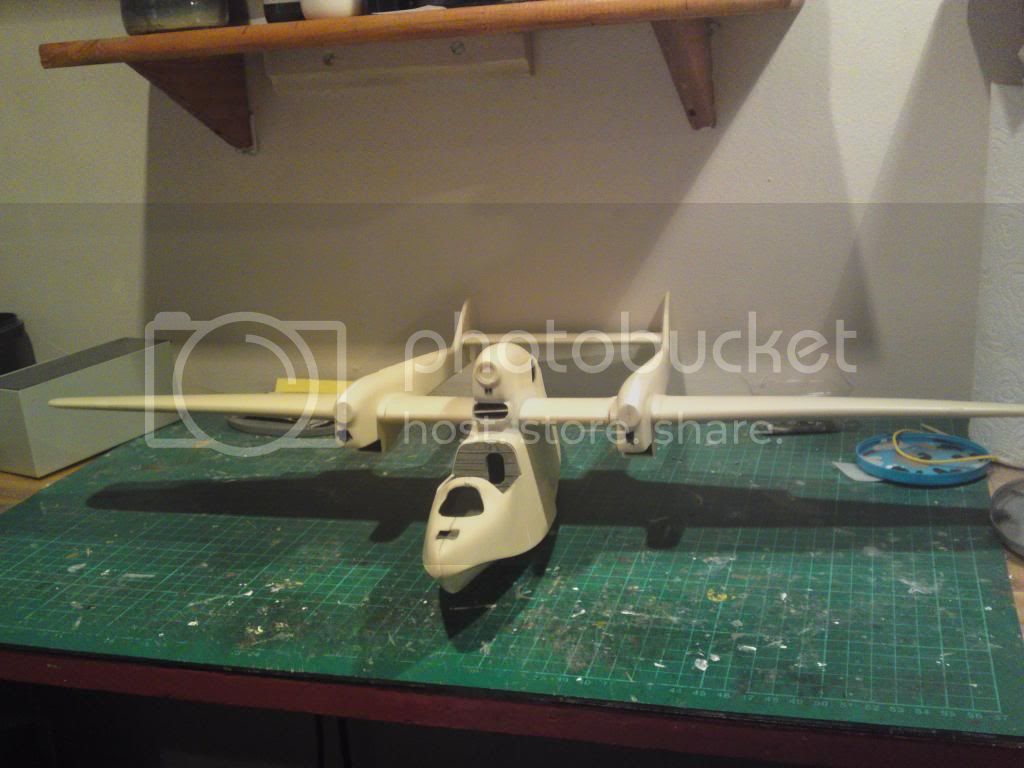
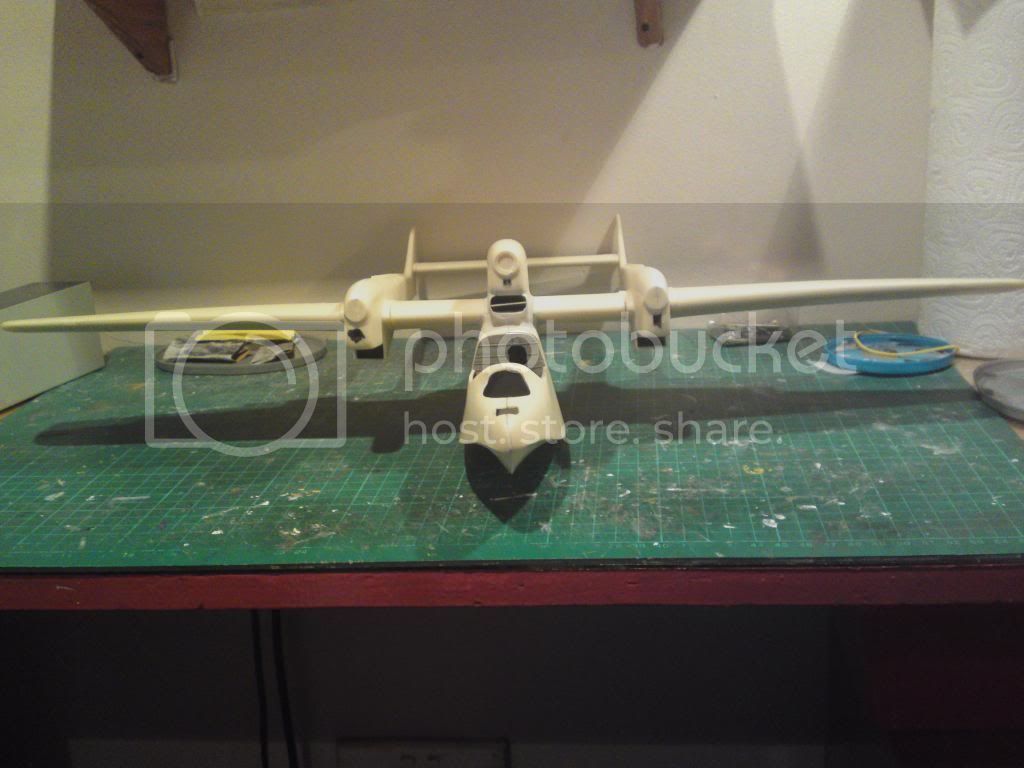
Having joined the wing centre section to the fuselage I now set about adding the booms complete with engine nacelles to the wings. I had previously added brass tube wing spars, these greatly eased this process. Loads of superglue and some masking tape,the result:-


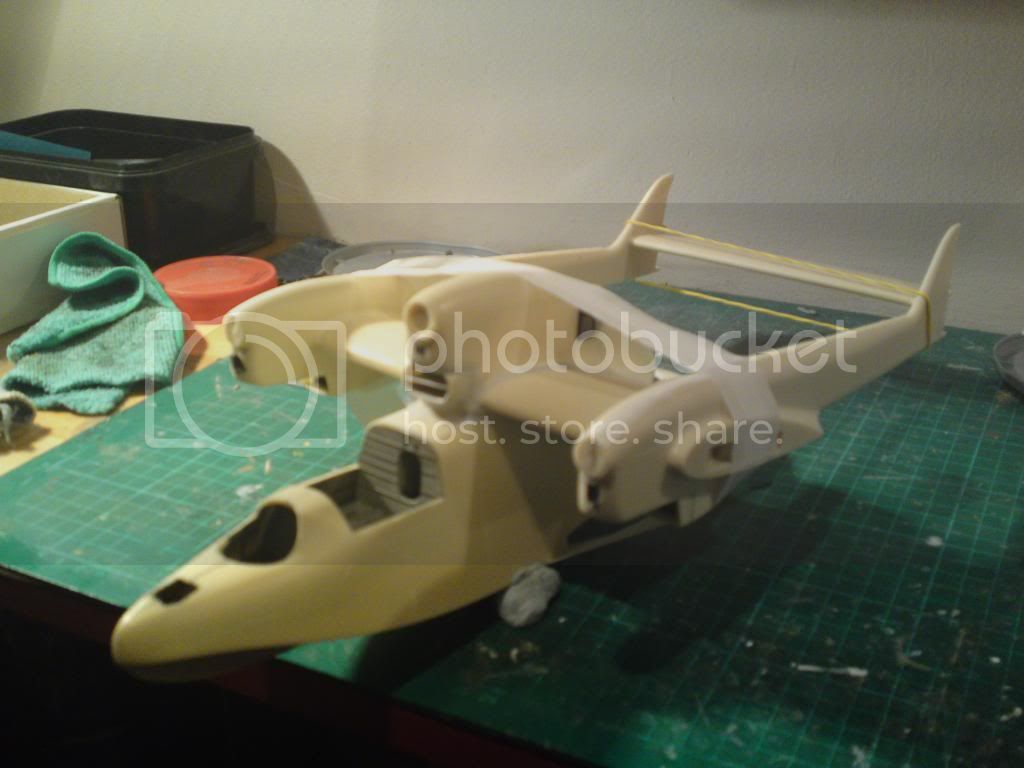
I forgot to mention that I added the tailplane at this stage as well.

With the benefit of the speed cyanoacrylate glue dries I was also able to attach the outer wing sections in this session.


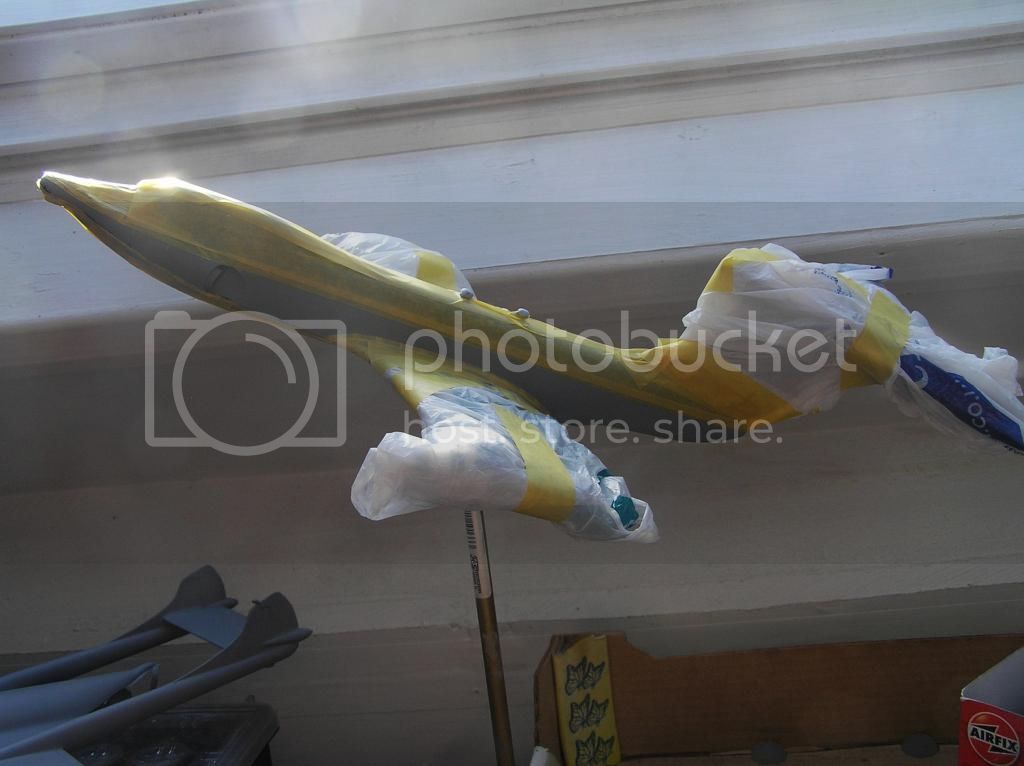
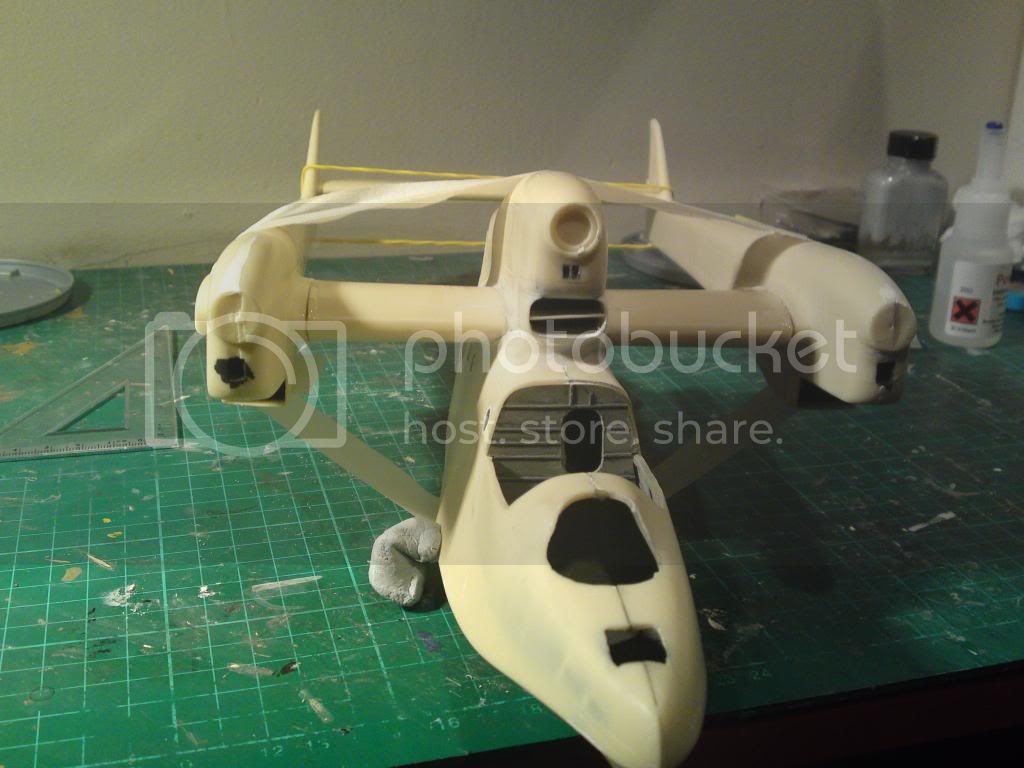
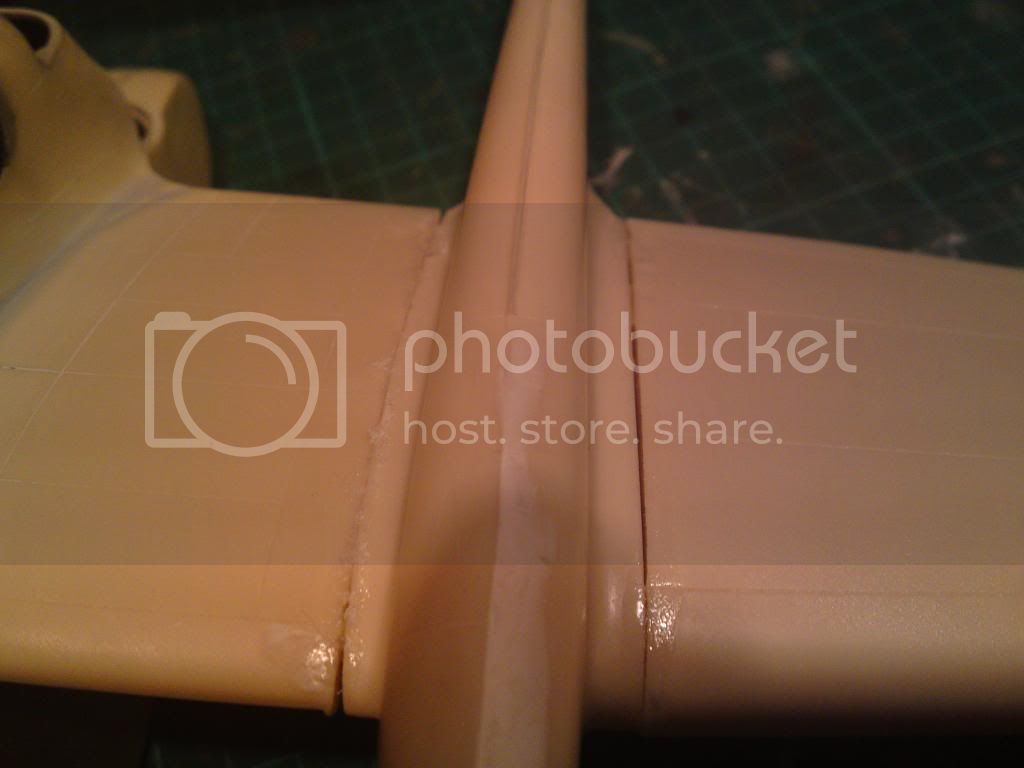
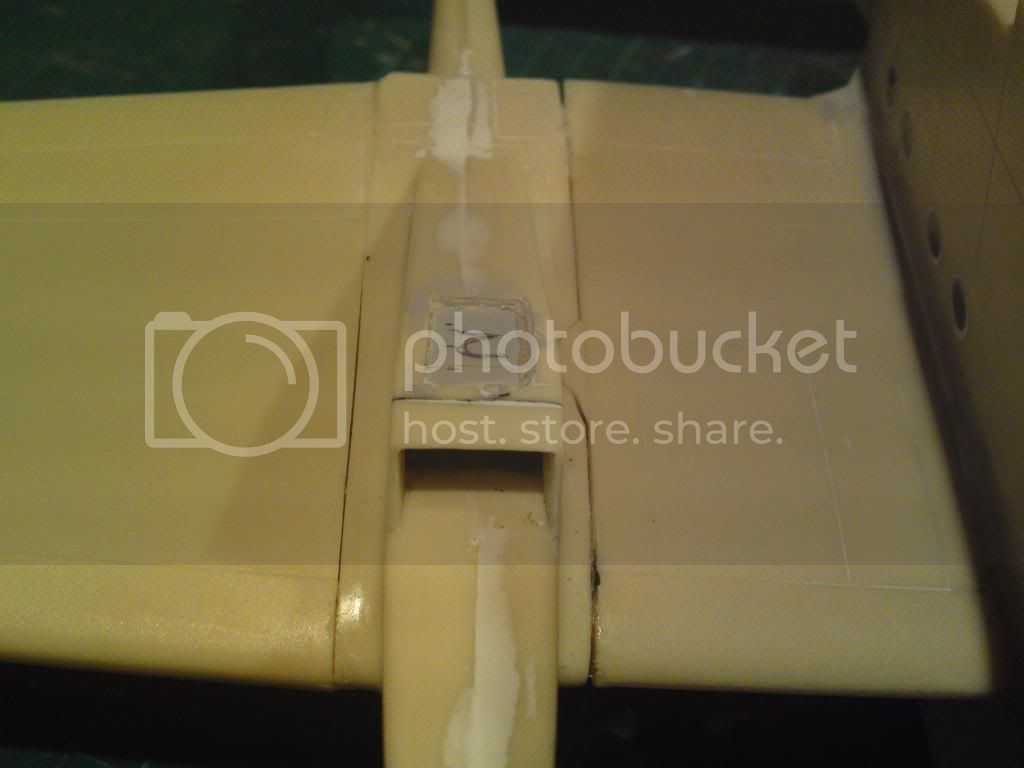
After attaching the wings I found the port wing and boom were out of alignment during my attempt to modify this I snapped off part of the booms wing root as the following set of photos show. They also show the gaps to be filled!!


[imghttp://i1291.photobucket.com/albums/b548/andyjames51/HERSCHELL-HP/Pictures/Bv138%20HMI/12032013095_zps8e7a8bcf.jpg[/img]


Having the wing back in alignment, I was unsure about the rear of the booms as the vertical tailplanes didn't appear to be vertical but canted inwards. At the moment I am unsure whether its my building or warped booms!
I will leave my update there while I try to decide what the problem is and find a solution.

May I say I am impressed by the builds and variety of types chosen keep up the good work.

cheers Andy
tinbanger
_VISITCOMMUNITY
Ontario, Canada
Joined: February 04, 2008
KitMaker: 2,507 posts
AeroScale: 1,814 posts
Posted: Monday, September 29, 2014 - 09:14 AM UTC
Andy! The joy of resin
Don't give up.
c4willy
#305
_VISITCOMMUNITY
Christchurch, New Zealand
Joined: February 01, 2006
KitMaker: 1,673 posts
AeroScale: 1,517 posts
Posted: Monday, September 29, 2014 - 09:24 AM UTC
Hi Andy thanks for the kind comments regarding the Kyofu. I echo Richards sentiment don't let the resin beat you. The finished results are always stunning!
stukaace
_VISITCOMMUNITY
England - West Midlands, United Kingdom
Joined: January 03, 2006
KitMaker: 39 posts
AeroScale: 39 posts
Posted: Monday, September 29, 2014 - 08:40 PM UTC
Richard & Chris many thanks for your positive comments. Resin kits certainly try your patience but I'm sure that some boiling water will straighten out the problem, literally !!!

Cheers Andy
tinbanger
_VISITCOMMUNITY
Ontario, Canada
Joined: February 04, 2008
KitMaker: 2,507 posts
AeroScale: 1,814 posts
Posted: Saturday, October 04, 2014 - 06:29 AM UTC
On with my resin entry.
Wings and pointy bits are now on, time to get the filler out again!:-

ljames0874
_VISITCOMMUNITY
England - South East, United Kingdom
Joined: August 15, 2012
KitMaker: 408 posts
AeroScale: 365 posts
Posted: Monday, October 06, 2014 - 12:30 AM UTC
Looking good everyone!

Just a quick update on the Ekranoplan. The beast (or should that be "Caspian Sea Monster"?) is primed, and the upper half of the fuselage has been sprayed Airbus Grey. The hull and wing undersides are flat black. Both these areas have been meticulously masked off ready for the lower half of the fuselage to be sprayed gloss white.


Cheers Everyone!
Mcleod
_VISITCOMMUNITY
Alberta, Canada
Joined: April 07, 2010
KitMaker: 1,028 posts
AeroScale: 939 posts
Posted: Monday, October 06, 2014 - 01:53 AM UTC
Looking back through this thread, there are some very interesting builds going on.

Richard - That S-23 resin boat must be large and heavy in 1/72. I'll be curious to see how your going to deal with those windows. Great job so far.

Andy - Wonderful work on your BV138. I do hope you find a solution with the issue's your having. It's a beautiful model.

Lee - I never even heard of an 'Ekranoplan' until you pulled yours out. You are doing a lovely job on an interesting subject.

Well done all
tinbanger
_VISITCOMMUNITY
Ontario, Canada
Joined: February 04, 2008
KitMaker: 2,507 posts
AeroScale: 1,814 posts
Posted: Monday, October 06, 2014 - 08:24 AM UTC
Hi Ben
The windows are resin and not very clear! The model comes with paint masks so that should help.
rochaped
_VISITCOMMUNITY
Lisboa, Portugal
Joined: August 27, 2010
KitMaker: 679 posts
AeroScale: 669 posts
Posted: Monday, October 06, 2014 - 09:04 AM UTC
Hi All,

It's time for me to start going with my project for this campaign. My expectations towards the out come are not high, mainly because this will be my first seaplane while adult modeler...I just want to finish it on time as a basis

So here are the goodies and the Arado 196 A-5 1/48 from Italeri
[url=https://flic.kr/p/pgRKmM]

Cheers
Pedro
tinbanger
_VISITCOMMUNITY
Ontario, Canada
Joined: February 04, 2008
KitMaker: 2,507 posts
AeroScale: 1,814 posts
Posted: Monday, October 06, 2014 - 10:01 AM UTC
Welcome Pedro.
Plenty of time left for your build , good luck!
rochaped
_VISITCOMMUNITY
Lisboa, Portugal
Joined: August 27, 2010
KitMaker: 679 posts
AeroScale: 669 posts
Posted: Tuesday, October 07, 2014 - 09:13 AM UTC
Thanks Richard
GreginOK
_VISITCOMMUNITY
United States
Joined: September 09, 2014
KitMaker: 16 posts
AeroScale: 16 posts
Posted: Tuesday, October 07, 2014 - 03:50 PM UTC
The Airfix Duck is progressing. The wing is a bit wobbly, but it looked like putting the top wing on instead if the bottom wings was the way to go.


Greg
tinbanger
_VISITCOMMUNITY
Ontario, Canada
Joined: February 04, 2008
KitMaker: 2,507 posts
AeroScale: 1,814 posts
Posted: Wednesday, October 08, 2014 - 03:56 AM UTC
Greg looking good!
Paint came out nice.
GreginOK
_VISITCOMMUNITY
United States
Joined: September 09, 2014
KitMaker: 16 posts
AeroScale: 16 posts
Posted: Wednesday, October 08, 2014 - 10:07 AM UTC
Now with bottom wings!


Greg
SHAKY962
_VISITCOMMUNITY
Buenos Aires, Argentina
Joined: May 21, 2012
KitMaker: 765 posts
AeroScale: 316 posts
Posted: Friday, October 10, 2014 - 07:39 PM UTC
Well I see some wonderful works here!!!!
Here is my entry

tinbanger
_VISITCOMMUNITY
Ontario, Canada
Joined: February 04, 2008
KitMaker: 2,507 posts
AeroScale: 1,814 posts
Posted: Saturday, October 11, 2014 - 12:30 AM UTC
Welcome to the campaign Jose!
SHAKY962
_VISITCOMMUNITY
Buenos Aires, Argentina
Joined: May 21, 2012
KitMaker: 765 posts
AeroScale: 316 posts
Posted: Saturday, October 11, 2014 - 07:20 AM UTC
Thanks for the welcome Richard
SGTJKJ
#041
_VISITCOMMUNITY
Kobenhavn, Denmark
Joined: July 20, 2006
KitMaker: 10,069 posts
AeroScale: 3,788 posts
Posted: Wednesday, October 15, 2014 - 10:35 PM UTC
Great builds in this campaign. I am in!

I might find one of my old Straerner Matchbox kits or something different, but I am in for sure
tinbanger
_VISITCOMMUNITY
Ontario, Canada
Joined: February 04, 2008
KitMaker: 2,507 posts
AeroScale: 1,814 posts
Posted: Wednesday, October 15, 2014 - 11:03 PM UTC
Welcome Jesper!
SGTJKJ
#041
_VISITCOMMUNITY
Kobenhavn, Denmark
Joined: July 20, 2006
KitMaker: 10,069 posts
AeroScale: 3,788 posts
Posted: Wednesday, October 15, 2014 - 11:36 PM UTC
Thanks, Richard! Great to be onboard.

The rigging on this baby already makes me sweat! Does anybody have a rigging diagram?

Maybe I will take the easy route and skip the rigging altogether. On the other hand if it is done correctly it could look awesome!


SHAKY962
_VISITCOMMUNITY
Buenos Aires, Argentina
Joined: May 21, 2012
KitMaker: 765 posts
AeroScale: 316 posts
Posted: Thursday, October 16, 2014 - 10:00 AM UTC
A little update
I start with the cockpit and the floats.....


tinbanger
_VISITCOMMUNITY
Ontario, Canada
Joined: February 04, 2008
KitMaker: 2,507 posts
AeroScale: 1,814 posts
Posted: Friday, October 17, 2014 - 03:52 AM UTC
That's a lot of weight you have glued in!
May end up with a nose sitter!
c4willy
#305
_VISITCOMMUNITY
Christchurch, New Zealand
Joined: February 01, 2006
KitMaker: 1,673 posts
AeroScale: 1,517 posts
Posted: Friday, October 17, 2014 - 10:01 AM UTC
@Jose: Looking forward to your build Jose, I've had this kit on my must have list for way too long! Your progress so far looks fantastic.

@Jesper: Yes! Go the Straerner Matchbox kit! I have one of these to build and I've kept putting it off till my rigging skills are better. Looking forward to seeing what you do to rig it should you decide to!

I'm still progressing with my build I've used a chalk pastel wash for the panel lines for the first time. Just showed me I need to make sure my gloss coat is a little more uniform! Ah well live and learn. I've used two different washes a dark grey for the underside and a dark brown/black for the top as the grey/black seemed to disappear into the green camo. I also think that the panel lines will be more prominent after a coat of matte clear.


Jessie_C
_VISITCOMMUNITY
British Columbia, Canada
Joined: September 03, 2009
KitMaker: 6,965 posts
AeroScale: 6,247 posts
Posted: Friday, October 17, 2014 - 01:35 PM UTC
It's entirely possible to rig a Strainer without going mad. It only looks complicated
Here's mine:

Each pair of struts has one simple X running fore and aft. There is one landing wire and two flying wires running spanwise between each strut both fore and aft. (I chose to ignore the doubled flying wires on my model. It's hard to see it if you're not looking for it anyway).

The floats have an X between the struts and two supports running to a point on the bottom of the lower wing 3 ribs away from the float centreline both inboard and outboard.
SGTJKJ
#041
_VISITCOMMUNITY
Kobenhavn, Denmark
Joined: July 20, 2006
KitMaker: 10,069 posts
AeroScale: 3,788 posts
Posted: Friday, October 17, 2014 - 06:48 PM UTC
Thanks for all the tips on the rigging. I will try and see if I have the courage. If not thing else it will be a good training exercise.

More to come