1/32 Hasegawa J2M3 Raiden
Berlin, Germany
Joined: February 20, 2005
KitMaker: 204 posts
AeroScale: 99 posts
Posted: Tuesday, July 01, 2014 - 07:49 AM UTC
Hi there,
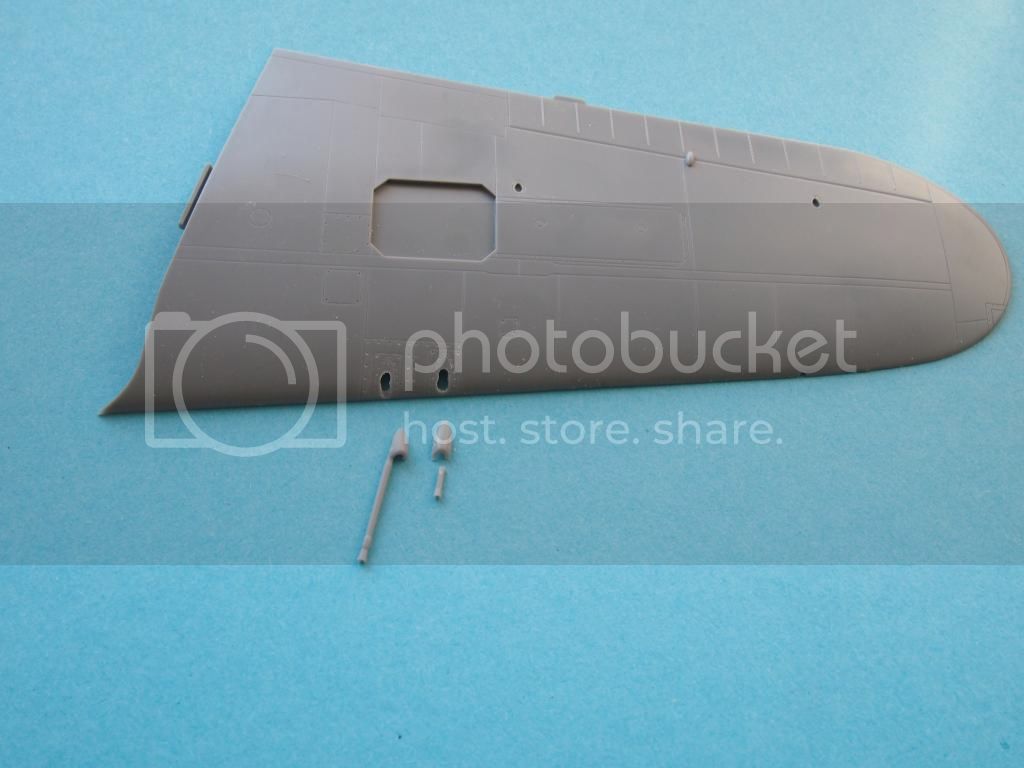
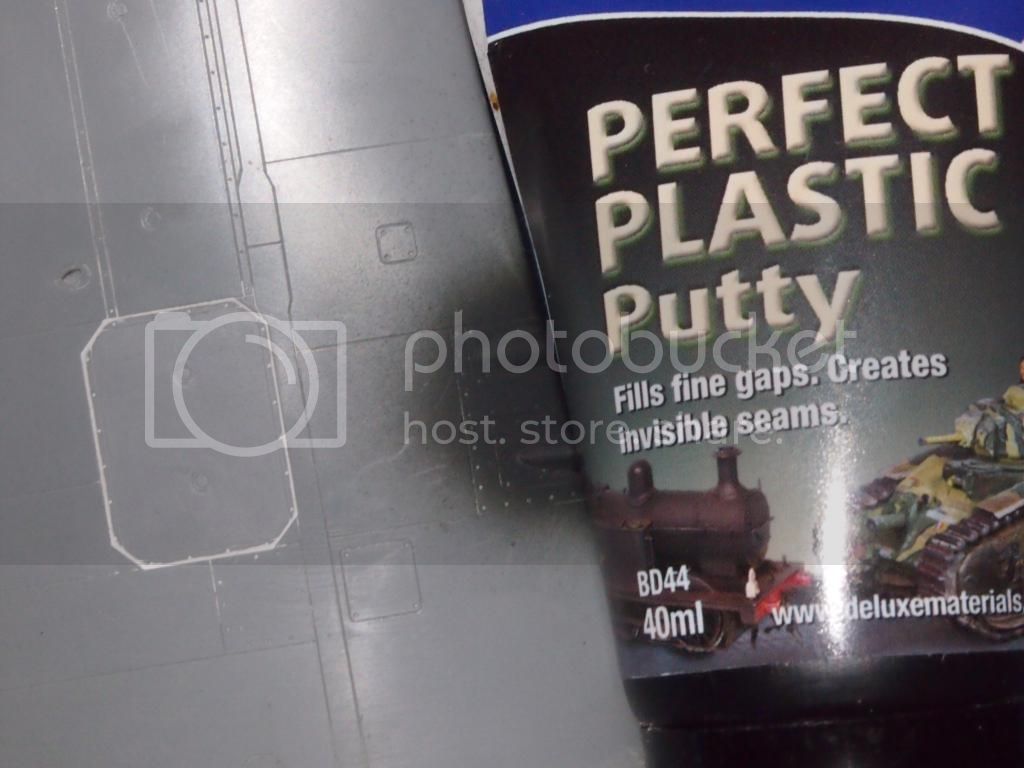
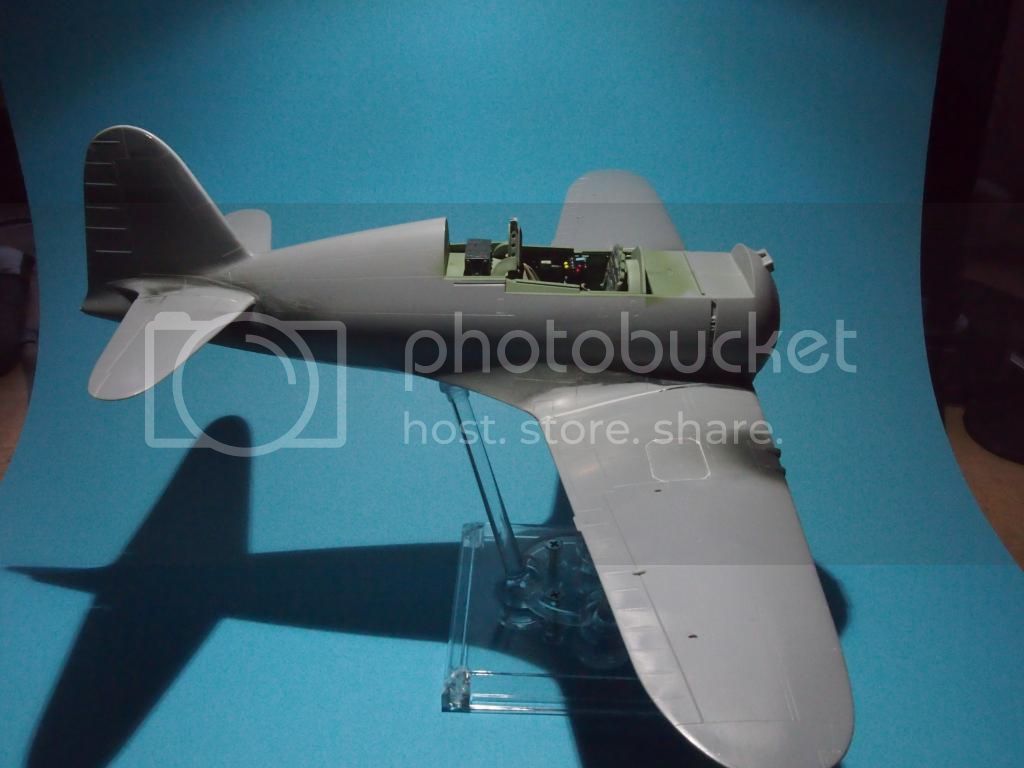
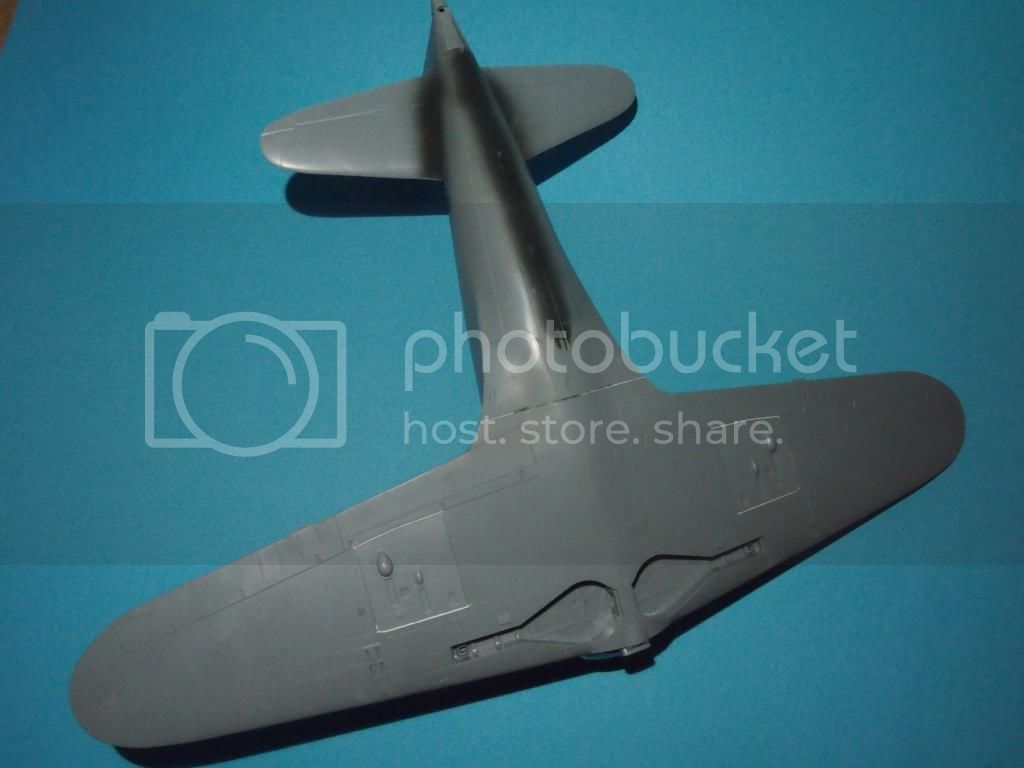
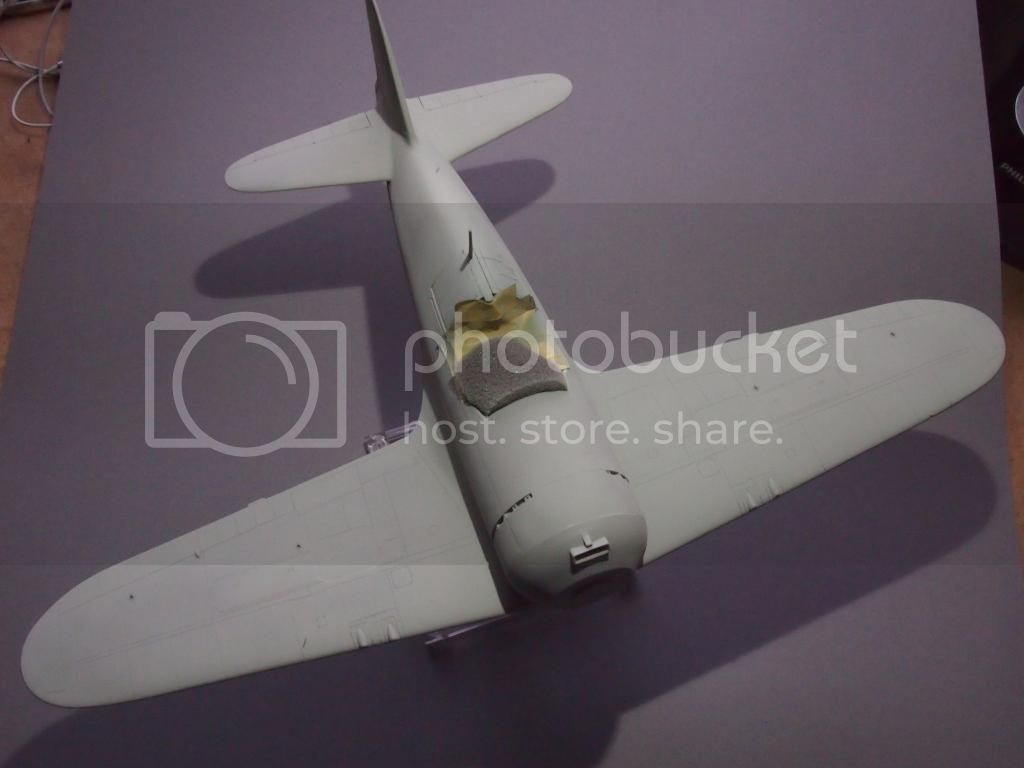
I moved on with the Raiden. On the wings I had to cut out the holes for the guns, most of it will be hidden by the small gun covers. Next were some panels on the upper and lower wings. They were a little bit to small and I used some filler.
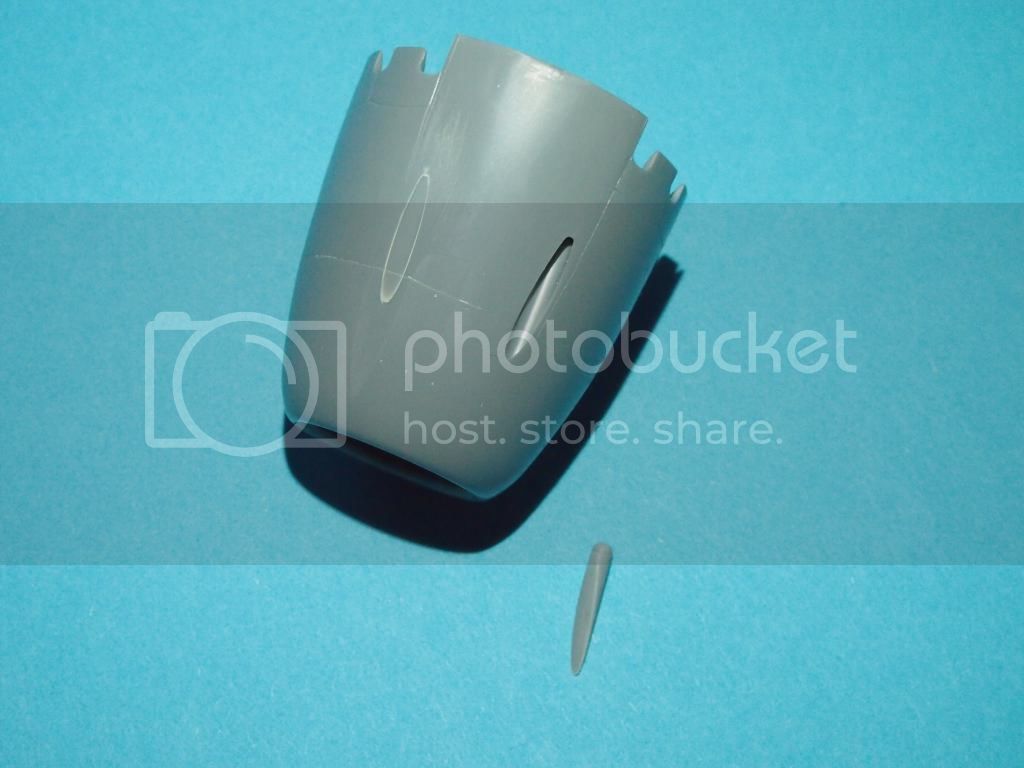
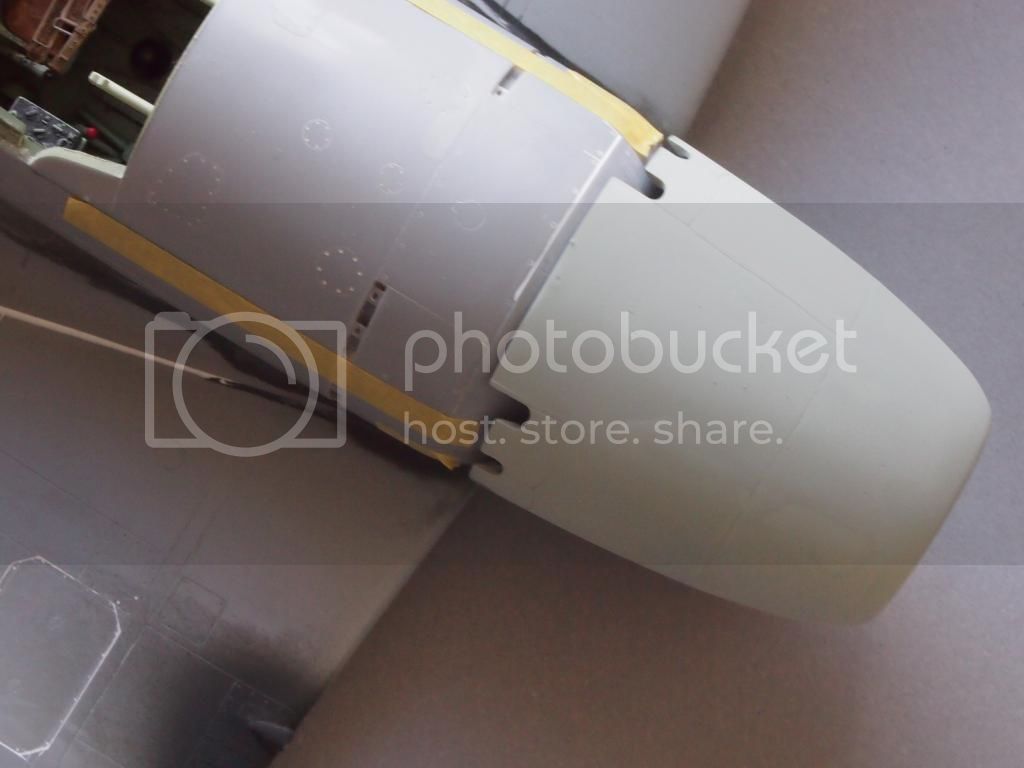
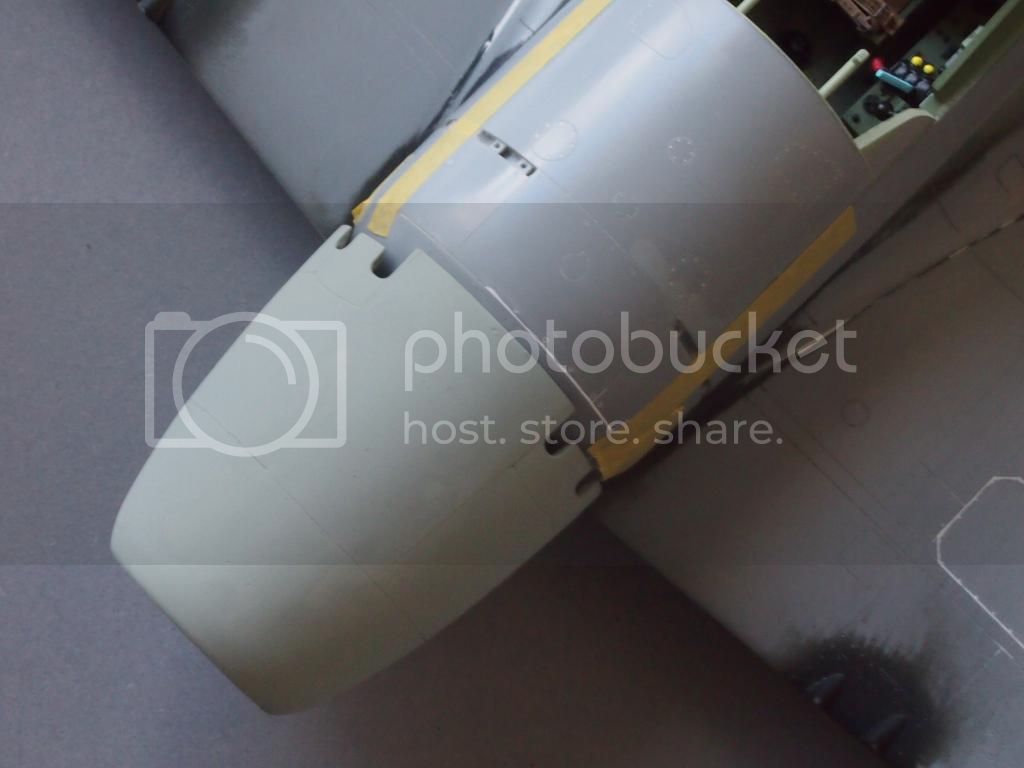
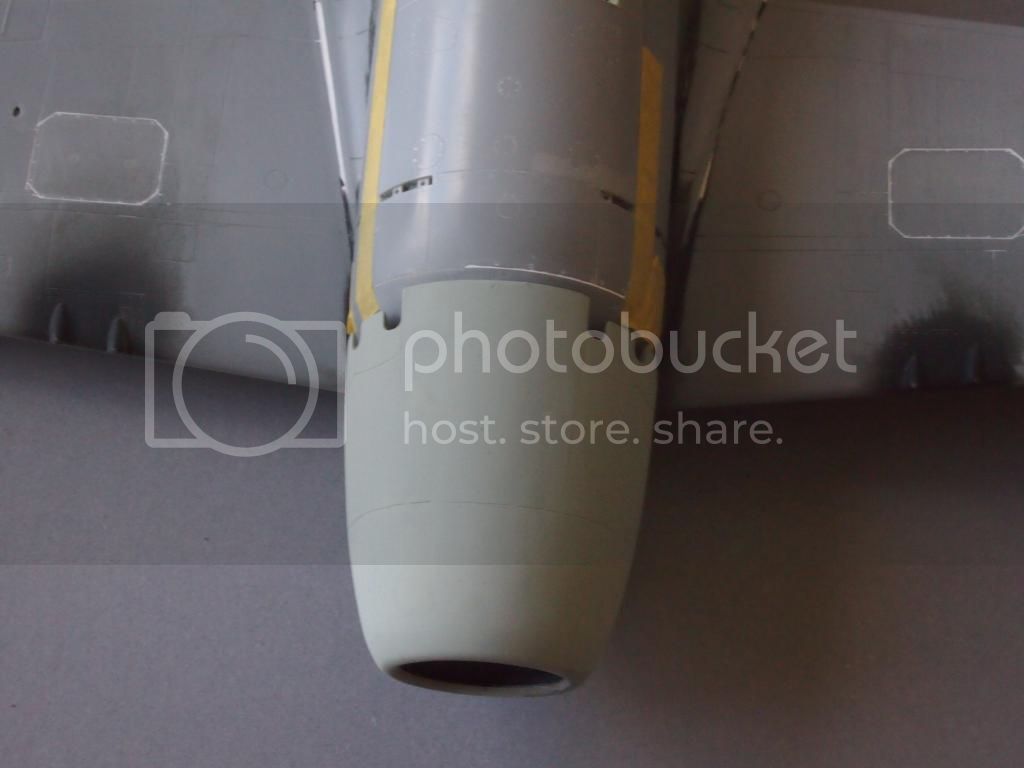
The cowling comes as one piece. Due to different Raiden types you have to close two gun holes with the shown parts which gave me a lot of sanding.

That's all for tonight, thanks for stopping by ...
kind regards ro
Joel_W
 Associate Editor
New York, United States
Joined: December 04, 2010
KitMaker: 11,666 posts
AeroScale: 7,410 posts
Posted: Wednesday, July 02, 2014 - 01:37 AM UTC
Robert,
Nice job filling in those small seams. I've never seen that brand of putty before. Is it like Squadron Green Stuff, or more like the Vallejo white putty, which btw is excellent for filling small seams and sanding marks without the need to sand/polish.
Joel
On my Workbench:
Monogram 1/24 scale 427 Shelby Cobra
Just Completed:
Beemax 1/24 scale BMW M3 E30 1992 Evolution II
Berlin, Germany
Joined: February 20, 2005
KitMaker: 204 posts
AeroScale: 99 posts
Posted: Wednesday, July 02, 2014 - 03:10 AM UTC
Quoted Text
Robert,
Nice job filling in those small seams. I've never seen that brand of putty before. Is it like Squadron Green Stuff, or more like the Vallejo white putty, which btw is excellent for filling small seams and sanding marks without the need to sand/polish.
Joel
Joel,
I think it's more like the Vallejo stuff which I don't have. The great thing about the Plastic Putty is there is minimal to no shrinkage. And you can wipe it away with a wet cotton bud.
kind regards ro
Berlin, Germany
Joined: February 20, 2005
KitMaker: 204 posts
AeroScale: 99 posts
Posted: Wednesday, July 02, 2014 - 07:30 AM UTC
Joel_W
Associate Editor New York, United States
Joined: December 04, 2010
KitMaker: 11,666 posts
AeroScale: 7,410 posts
Posted: Thursday, July 03, 2014 - 01:26 AM UTC
Robert,
A really nice job on the engine. Too bad that just a tad of the front of it will be visible, but the effect should make the effort worth it.
Sounds like both white putties are Acrylic based, and about the same product. Used correctly they do a fantastic job.
Joel
On my Workbench:
Monogram 1/24 scale 427 Shelby Cobra
Just Completed:
Beemax 1/24 scale BMW M3 E30 1992 Evolution II
Berlin, Germany
Joined: February 20, 2005
KitMaker: 204 posts
AeroScale: 99 posts
Posted: Thursday, July 03, 2014 - 06:57 AM UTC
Hi to all,
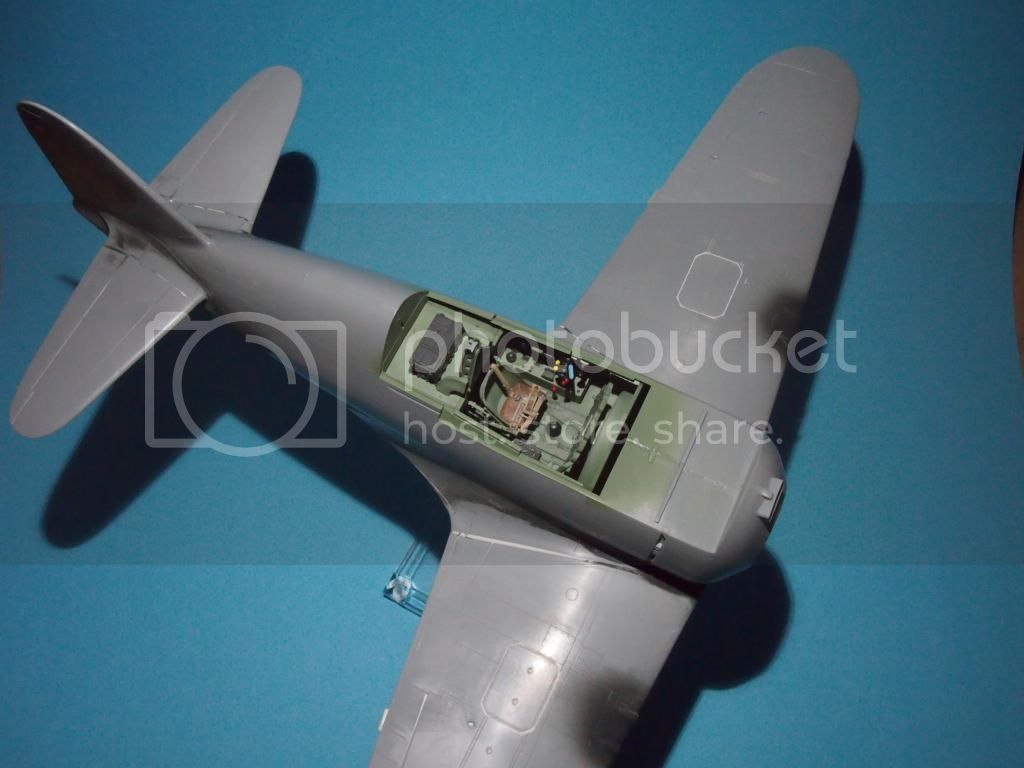
slowly it's going to look like a Raiden

greetings ro
Joel_W
Associate Editor New York, United States
Joined: December 04, 2010
KitMaker: 11,666 posts
AeroScale: 7,410 posts
Posted: Friday, July 04, 2014 - 05:41 AM UTC
Robert,
You're almost at the painting stage. I keep on looking at your white putty even in the wing roots. No sanding, no loss of detail. Maybe I should expand my use of the Vallejo White putty and see what happens. I'm just concerned that over time the putty will continue to dry and shrink, leaving seams that show.
Joel
On my Workbench:
Monogram 1/24 scale 427 Shelby Cobra
Just Completed:
Beemax 1/24 scale BMW M3 E30 1992 Evolution II
Berlin, Germany
Joined: February 20, 2005
KitMaker: 204 posts
AeroScale: 99 posts
Posted: Saturday, July 05, 2014 - 10:03 AM UTC
Quoted Text
Robert,
You're almost at the painting stage. I keep on looking at your white putty even in the wing roots. No sanding, no loss of detail. Maybe I should expand my use of the Vallejo White putty and see what happens. I'm just concerned that over time the putty will continue to dry and shrink, leaving seams that show.
Joel
Yes Joel, I totally agree. I think the main thing to watch with all the acrylic putty is the seams shouldn't be to large or wide. Sometimes I also prefer CA glue, there's no shrinkage and with the help of some kicker you can instantly start with sanding.
greetings ro
Berlin, Germany
Joined: February 20, 2005
KitMaker: 204 posts
AeroScale: 99 posts
Posted: Saturday, July 05, 2014 - 10:14 AM UTC
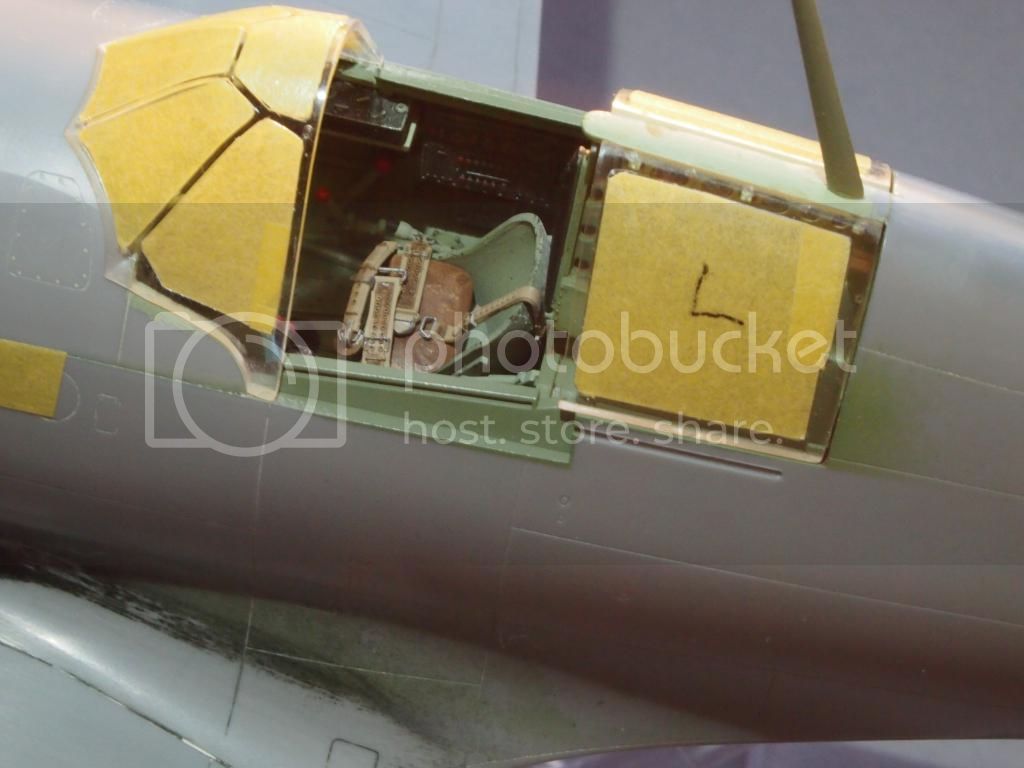
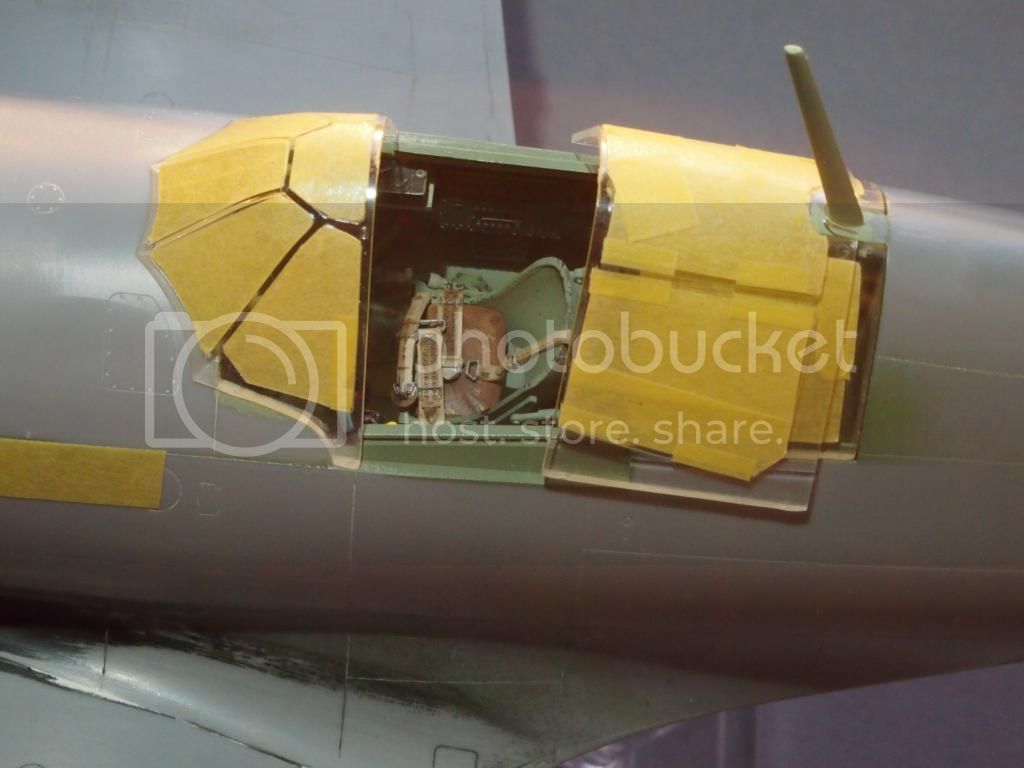
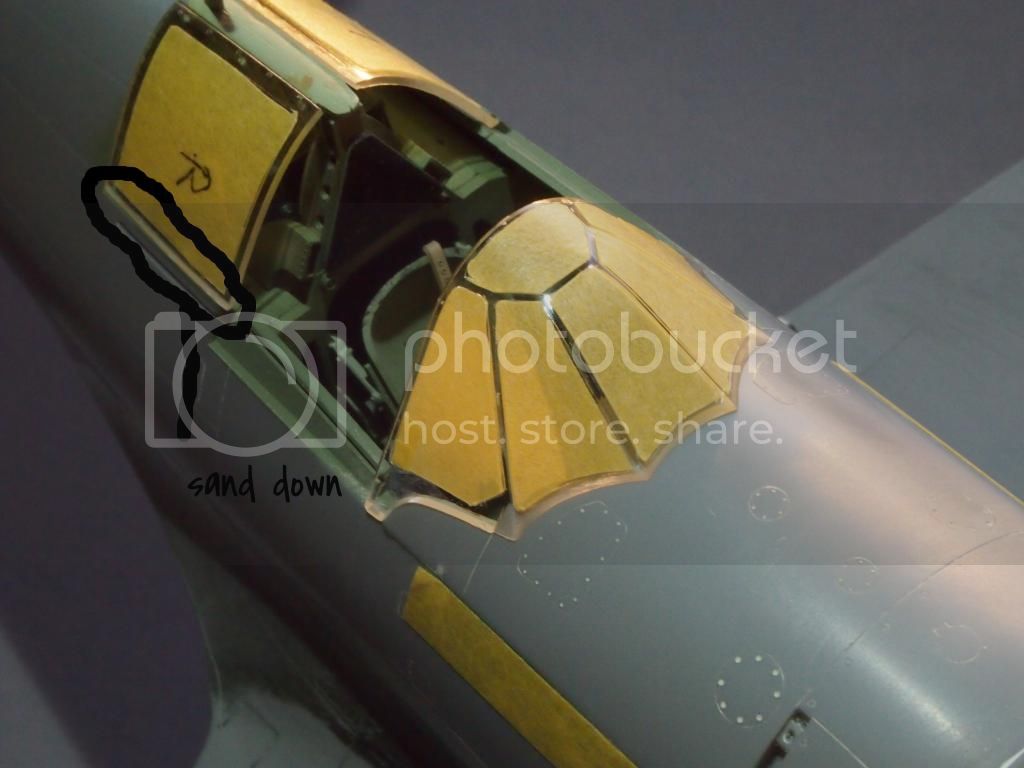
Today I worked on the canopy parts. Here I got the same problem Mal mentioned before. The rear window on the right side showed a bad overhang on top, so I sanded this down to get a better fit. As I will leave the canopy open maybe it's not to visible. All the parts were masked with Tamiya tape cut with a new blade.
Also a nice touch: today the postman brought the painting masks from Mal Mayfield

(thanks a lot Mal).
Joel_W
Associate Editor New York, United States
Joined: December 04, 2010
KitMaker: 11,666 posts
AeroScale: 7,410 posts
Posted: Saturday, July 05, 2014 - 10:35 AM UTC
Robert,
Nice consistent job of masking. the sanding and re-fitting of the rear glass looks like have a more then decent fit.
Joel
On my Workbench:
Monogram 1/24 scale 427 Shelby Cobra
Just Completed:
Beemax 1/24 scale BMW M3 E30 1992 Evolution II
Holdfast
President 
#056
England - South West, United Kingdom
Joined: September 30, 2002
KitMaker: 8,581 posts
AeroScale: 4,913 posts
Posted: Saturday, July 05, 2014 - 07:11 PM UTC
Ive just started masking, or thinking of masking my canopies
I'm glad that you manage to fit the cowling gun trough fillers accurately, mine are a bit of a mess

But I'm hopeful that I can recover
There are 4 rear side glazing panels, 2 are for the closed option and for the open one. There is no reason for this other than one set is smaller, or has a different profile to allow the sliding part to fit over them. I'm sort of hoping that ether the panels for the closed option fit better!
I'm glad that the masks have arrived
I managed to cut the chrysanthemum kill markings as well
MAL the MASK
BULLDOG # 6 (President)
BEWARE OF THE FEW
Sappers: First in, last out. (UBIQUE)
It's not the same, better, but not the same.
Berlin, Germany
Joined: February 20, 2005
KitMaker: 204 posts
AeroScale: 99 posts
Posted: Saturday, July 05, 2014 - 10:31 PM UTC
Hi Mal,
to be honest I have the same problems with the engine cowling. In the meantime I have already sanded down and refilled the gun ports three times and they can still be seen

On the following pics it's not that clear as in reality. We should have gone for the prototype which has them open ...
And yes your paint masks look stunning, hopefully I can do them justice ...
greetings ro
Uusimaa, Finland
Joined: March 30, 2004
KitMaker: 2,845 posts
AeroScale: 1,564 posts
Posted: Sunday, July 06, 2014 - 03:48 AM UTC
Coming along very nicely!

Have you tried superglue for smoothing out those gun trough plug seams? I often use it for spots like this.
Joel_W
Associate Editor New York, United States
Joined: December 04, 2010
KitMaker: 11,666 posts
AeroScale: 7,410 posts
Posted: Sunday, July 06, 2014 - 04:04 AM UTC
For stubborn blending situations like this, and I've had more then my fair share of them, I use either Tamiya Gray primer or Mr. Primer Surfacer 1,000 hand brushed on. When dry I very light sand starting with 600 then 4,000 & 6,000. I usually get it pretty smooth after two applications.
The issue is usually caused by a combination of the filler not completely drying, as it shrinks while it dries before being sanded, and sanding it below the surface line. I try to always sand at a angle across the surface rather then along it for that reason.
Joel
On my Workbench:
Monogram 1/24 scale 427 Shelby Cobra
Just Completed:
Beemax 1/24 scale BMW M3 E30 1992 Evolution II
JPTRR
Managing Editor #051
Tennessee, United States
Joined: December 21, 2002
KitMaker: 7,772 posts
AeroScale: 3,175 posts
Posted: Sunday, July 06, 2014 - 09:04 AM UTC
Robert,
Wonderful Raiden!
Here are photos of Chino's J2M3 cockpit, mainly in original paint. No help with powerplant controls, unfortunately.
http://www.j-aircraft.com/walk/ron_cole/j2m/j2m3.htm 
If they demand your loyalty, give them integrity; if they demand integrity, give them your loyalty.--Col John Boyd, USAF
Any plan where you lose your hat is a bad plan.
Berlin, Germany
Joined: February 20, 2005
KitMaker: 204 posts
AeroScale: 99 posts
Posted: Monday, July 07, 2014 - 08:46 AM UTC
Quoted Text
Coming along very nicely!
Have you tried superglue for smoothing out those gun trough plug seams? I often use it for spots like this.
Thanks Eetu for stopping by, yes I often use superglue for seams, the problem here was I sanded to much and parts of the round edge were gone.
greetings ro
Berlin, Germany
Joined: February 20, 2005
KitMaker: 204 posts
AeroScale: 99 posts
Posted: Monday, July 07, 2014 - 08:49 AM UTC
Quoted Text
For stubborn blending situations like this, and I've had more then my fair share of them, I use either Tamiya Gray primer or Mr. Primer Surfacer 1,000 hand brushed on. When dry I very light sand starting with 600 then 4,000 & 6,000. I usually get it pretty smooth after two applications.
The issue is usually caused by a combination of the filler not completely drying, as it shrinks while it dries before being sanded, and sanding it below the surface line. I try to always sand at a angle across the surface rather then along it for that reason.
Joel
Joel, years ago I had a pot of Mr. Surfacer 500, but I found the stuff to be quite smelly. Maybe the one you mentioned is much more finer?
best regards ro
Berlin, Germany
Joined: February 20, 2005
KitMaker: 204 posts
AeroScale: 99 posts
Posted: Monday, July 07, 2014 - 08:50 AM UTC
Hi Frederick,
thanks a lot for the link. The pics are great.
kind regards ro
Joel_W
Associate Editor New York, United States
Joined: December 04, 2010
KitMaker: 11,666 posts
AeroScale: 7,410 posts
Posted: Monday, July 07, 2014 - 11:06 AM UTC
[quote
Joel, years ago I had a pot of Mr. Surfacer 500, but I found the stuff to be quite smelly. Maybe the one you mentioned is much more finer?
best regards ro[/quote]
Robert,
No really. They're all lacquer based, so there is a strong order.
Joel
On my Workbench:
Monogram 1/24 scale 427 Shelby Cobra
Just Completed:
Beemax 1/24 scale BMW M3 E30 1992 Evolution II
Berlin, Germany
Joined: February 20, 2005
KitMaker: 204 posts
AeroScale: 99 posts
Posted: Wednesday, July 09, 2014 - 07:20 AM UTC
Hi there,
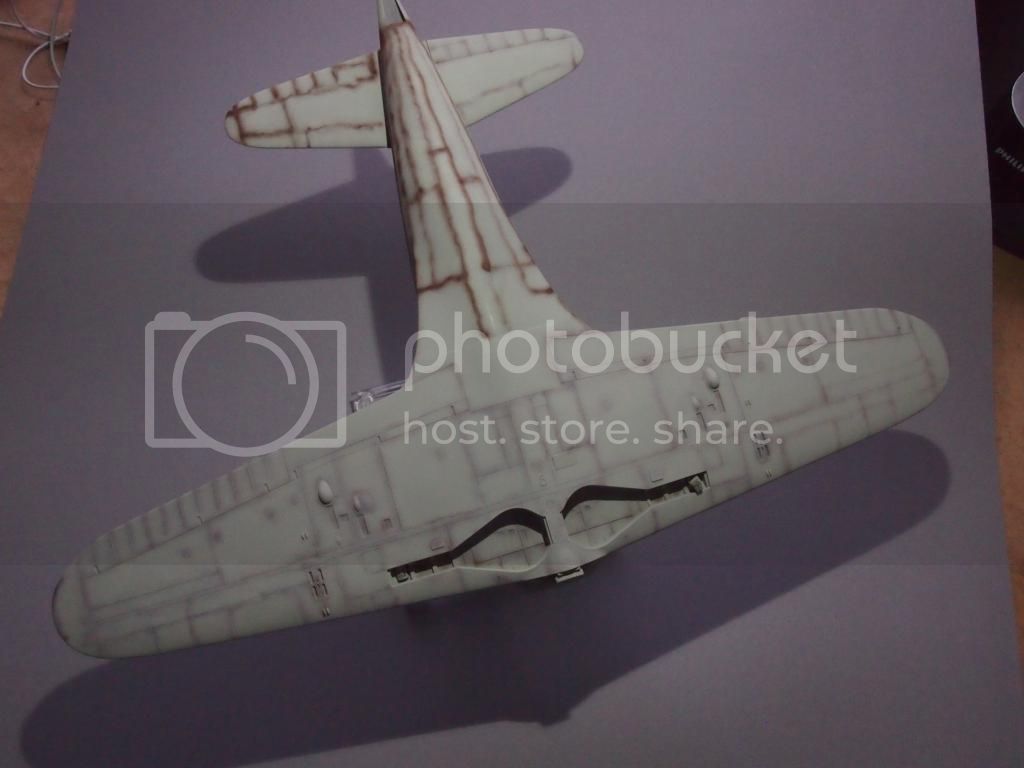
now the Raiden was ready for the paint job. I started with priming the whole model with Tamiya's XF-12 (J.N. Grey). It's the color for the underside. Followed by a rough pre-shading on the underside with a brown tone. Next step will be a post shading of all the panels to bring hopefully everything together.
kind regards ro
Joel_W
Associate Editor New York, United States
Joined: December 04, 2010
KitMaker: 11,666 posts
AeroScale: 7,410 posts
Posted: Thursday, July 10, 2014 - 02:43 AM UTC
Robert,
Interesting concept pre-shading with Brown. Still looks a little too bold in the last picture. I would try to tone it down with another li9ght coat of JN Gray.
Joel
On my Workbench:
Monogram 1/24 scale 427 Shelby Cobra
Just Completed:
Beemax 1/24 scale BMW M3 E30 1992 Evolution II
Berlin, Germany
Joined: February 20, 2005
KitMaker: 204 posts
AeroScale: 99 posts
Posted: Thursday, July 10, 2014 - 07:48 AM UTC
Quoted Text
Robert,
Interesting concept pre-shading with Brown. Still looks a little too bold in the last picture. I would try to tone it down with another li9ght coat of JN Gray.
Joel
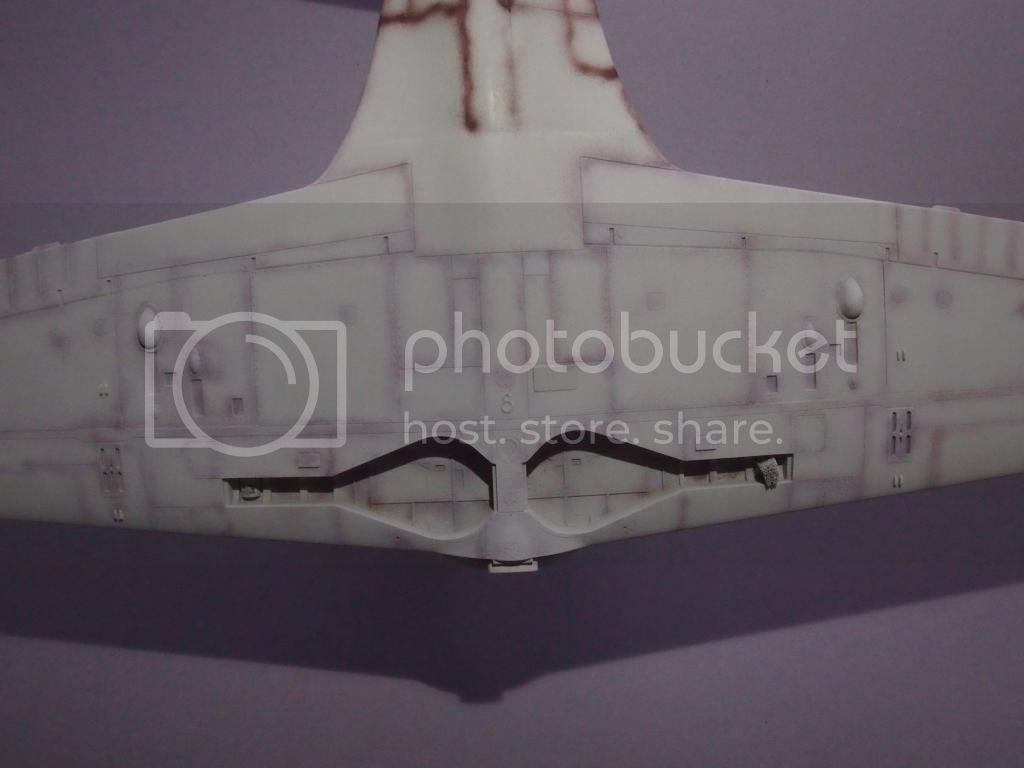
Joel, the idea behind the brown was not to go to dark but you are right at the moment it's not so convincing.
greetings ro
Berlin, Germany
Joined: February 20, 2005
KitMaker: 204 posts
AeroScale: 99 posts
Posted: Thursday, July 10, 2014 - 07:53 AM UTC
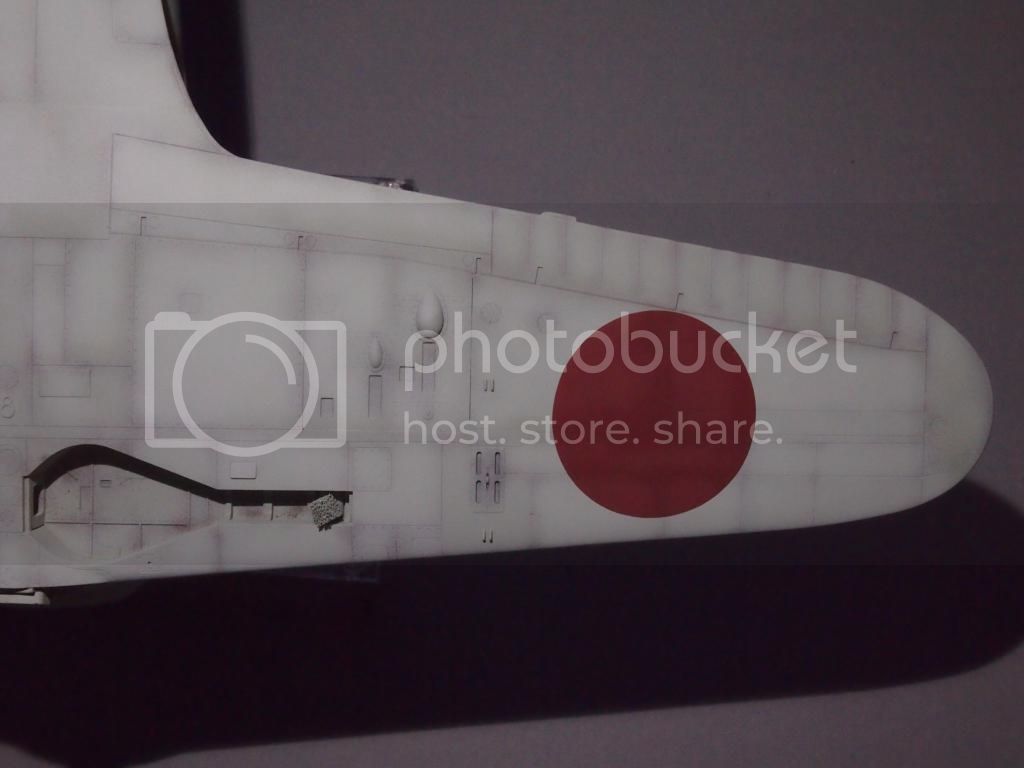
Hi to all,
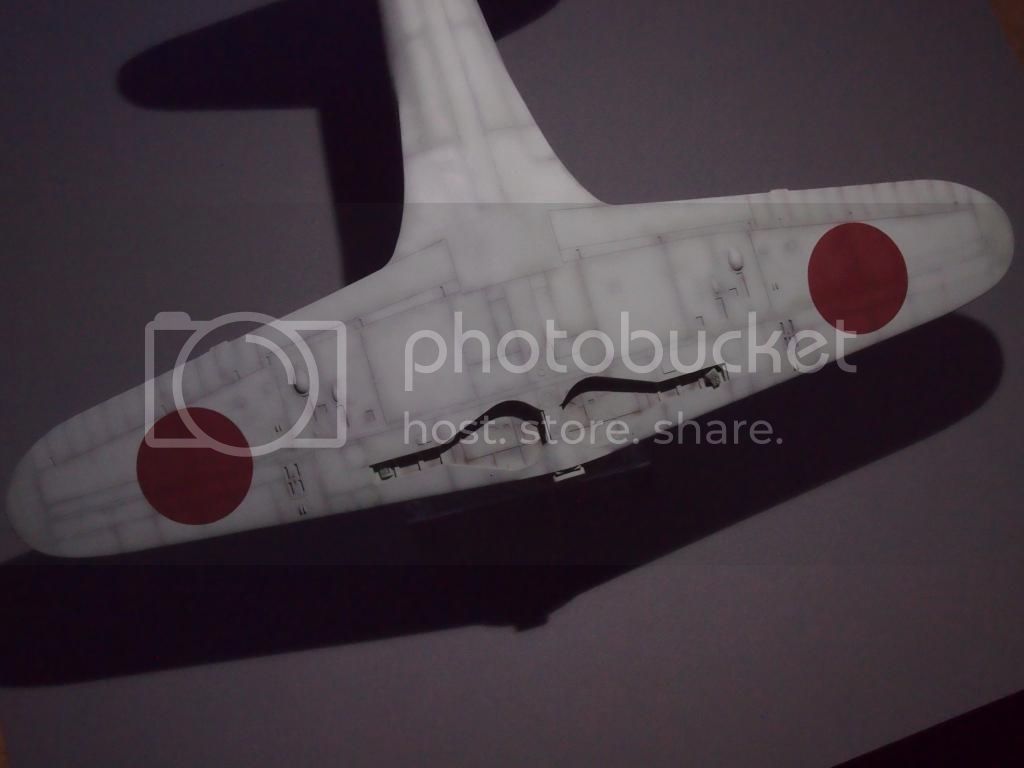
I went on with the paint job. First I tried to blend everything on the underside more together. Then came Mal' wonderful masks. I used them for the first time and so I was a little bit nervous. Yes, I know it's not so special (a simple rondel) but I was very pleased with the painted effect.
Joel_W
Associate Editor New York, United States
Joined: December 04, 2010
KitMaker: 11,666 posts
AeroScale: 7,410 posts
Posted: Thursday, July 10, 2014 - 08:58 AM UTC
Robert,
Now the bottom looks really good. Nice going. As for the painted on Roundels, not only do they look painted on (because they are), but your pre-shading works wonders with them as well. For me to accomplish that with decals is a much more involved weathering process.
Joel
On my Workbench:
Monogram 1/24 scale 427 Shelby Cobra
Just Completed:
Beemax 1/24 scale BMW M3 E30 1992 Evolution II
Berlin, Germany
Joined: February 20, 2005
KitMaker: 204 posts
AeroScale: 99 posts
Posted: Thursday, July 17, 2014 - 06:36 AM UTC