

Very nice indeed - keeps getting better !
Watching anxiously as ever ... Keep at it Gentlemen.
Cheers- Richard
World War II
Discuss WWII and the era directly before and after the war from 1935-1949.
Discuss WWII and the era directly before and after the war from 1935-1949.
Hosted by Rowan Baylis
1/48 B-17F Build - 303rd BGs Luscious Lady

rdt1953

Joined: February 06, 2015
KitMaker: 1,098 posts
AeroScale: 900 posts
Posted: Friday, July 17, 2020 - 01:16 PM UTC

Redhand

#522
Joined: January 20, 2013
KitMaker: 1,460 posts
AeroScale: 1,443 posts
Posted: Friday, July 17, 2020 - 02:10 PM UTC
Quoted Text
Watching anxiously as ever ... Keep at it Gentlemen.
Cheers- Richard
Yes. After ALL this time I daresay it's "end in sight" time or perhaps "the beginning of the end."
After H.G. finishes riveting the fuselage the major steps that will remain include essentially scratch-building the ball turret, painting the props, gluing the wings on, the delicate task of aligning the main landing gear and then the bomb bay doors, completing the repairs and upgrades to the nose, including the Plexiglas front, and refurbished guns throughout the aircraft. (Not necessarily in that order.)
He will be doing some extra things to the top turret canopy and to the cockpit windows.
Then, of course, there is the whole matter of primer coats and what will be a very elaborate mosaic of different OD tones, neutral grays, exhaust and supercharger staining on the upper and lower wings, and all the other myriad details that go into finishing a project of this size.
Years ago I saw a fantastic build by a Greek guy of a Mark II Halifax from the old and horrible FM kit. This was in 1/48. I've written about it here before.
The build is off the Internet now, and I sure wish that I had printed it out and turned it into a PDF before that happened. What the guy did included widening the fuselage when his precise measurements showed that the fuselage was actually too narrow to accommodate a realistic mid-upper turret. That simply blew me off the planet.
But what I remember most was him describing the build by saying that a project of that magnitude never really "ended," but rather was halted at a very advanced level of construction. That's kind of how I see this project too, for obvious reasons.
It would be great if it was done this year but I don't insist on any deadlines. The dream of building/having built "the perfect B-17F model" has been with me for over 21 years now, and I guess seven since I started "Luscious Lady" myself. So I can afford to wait. See the prior posts where I talked about the book-related, commission build of "Vicious Virgin," which never happened.
In the meantime, I'll continue my own work on new kits and repairs of things I've bought.
"Stay Safe."
Brian

Redhand
#522
Joined: January 20, 2013
KitMaker: 1,460 posts
AeroScale: 1,443 posts
Posted: Friday, July 17, 2020 - 03:26 PM UTC
MORE FUSELAGE RIVETING, AND A BEFORE AND AFTER
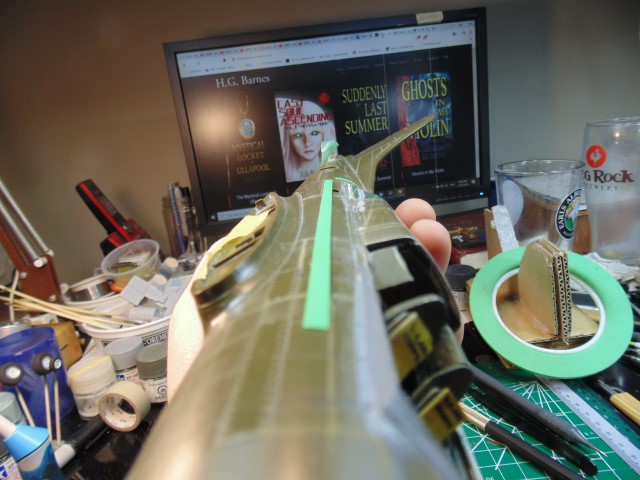
And note the computer screen.
Ahhhhhhhhhhhh!
And
Before and after.

Thanks, Karl!
Ahhhhhhhhhhhh!
And
Before and after.
Thanks, Karl!
Redhand
#522
Joined: January 20, 2013
KitMaker: 1,460 posts
AeroScale: 1,443 posts
Posted: Saturday, July 18, 2020 - 03:04 PM UTC
SOME "RIVETING PHOTOS"
Looks like the pace of work in Edmonton is speeding up, no? I am pleased!
Here we see H.G.'s riveting work extending farther aft.
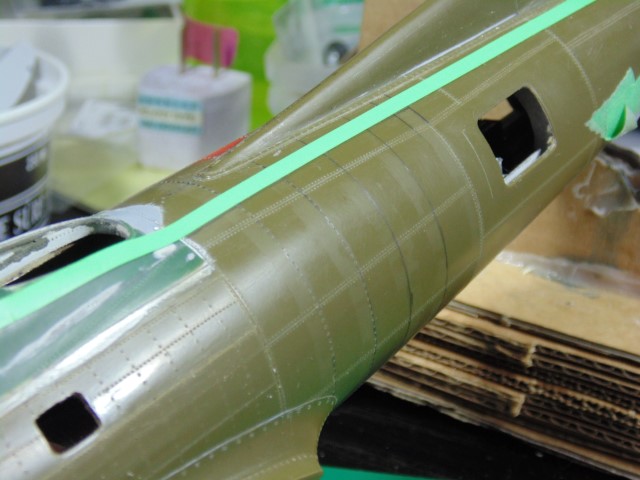
Ending with this pleasing view,
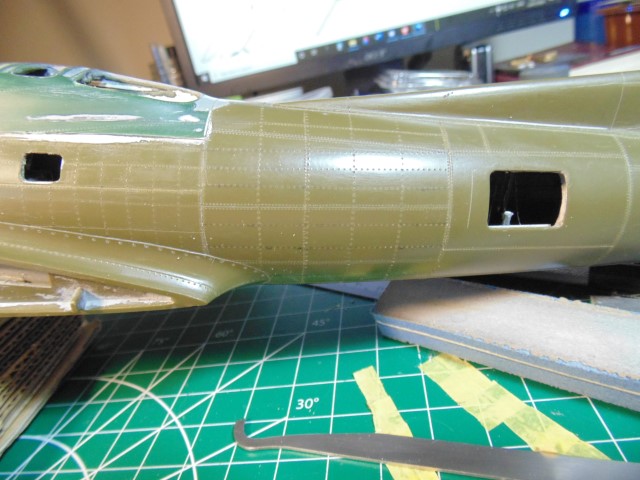
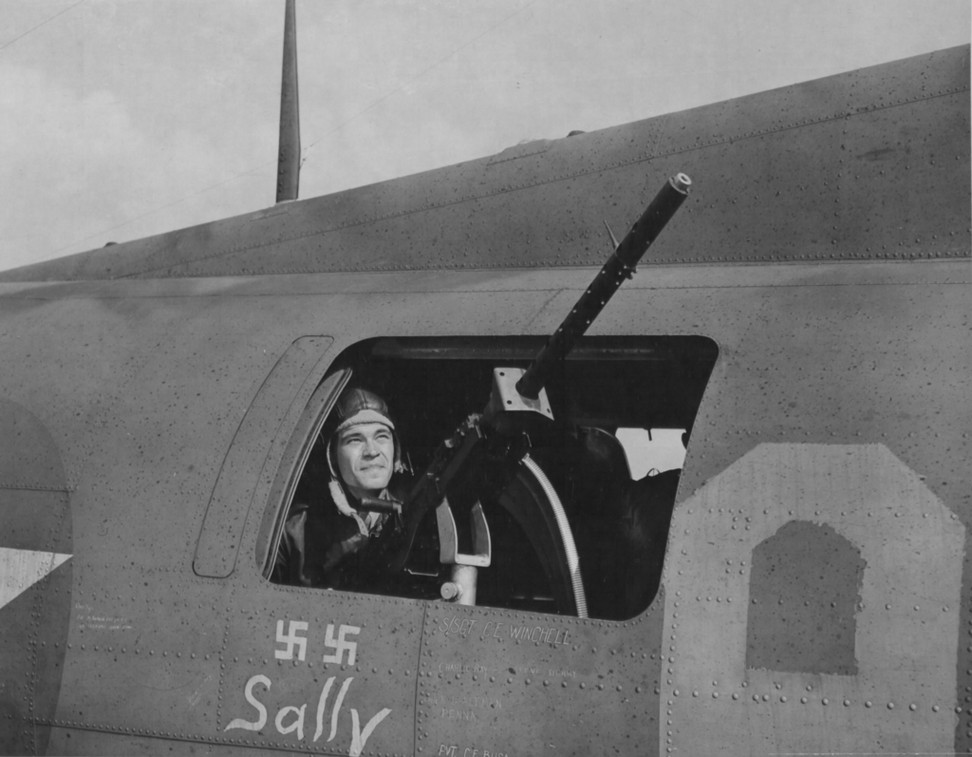
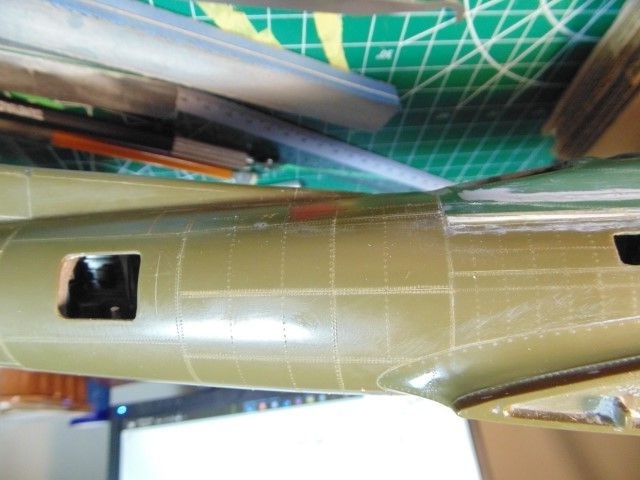
Take a look at the post for the waist gun. It's positioning is big aggravation. Why?
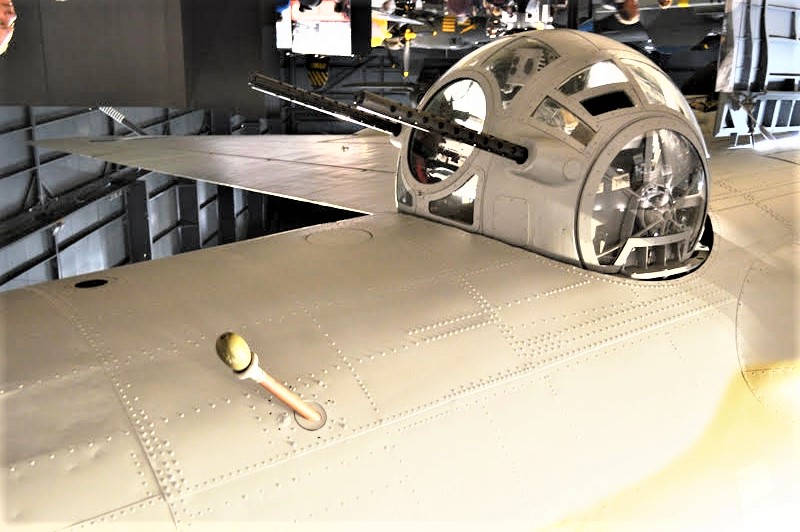
In some F Models it as centered, as we can see here on the "Memphis Belle."
But that's far from definitive. Check you this:

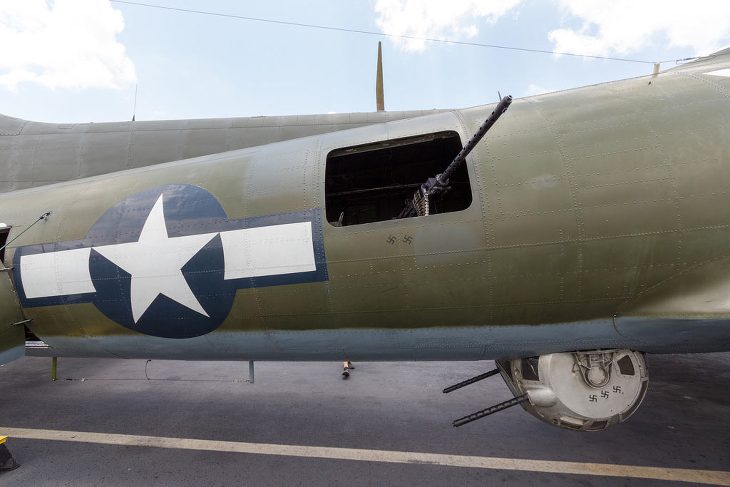
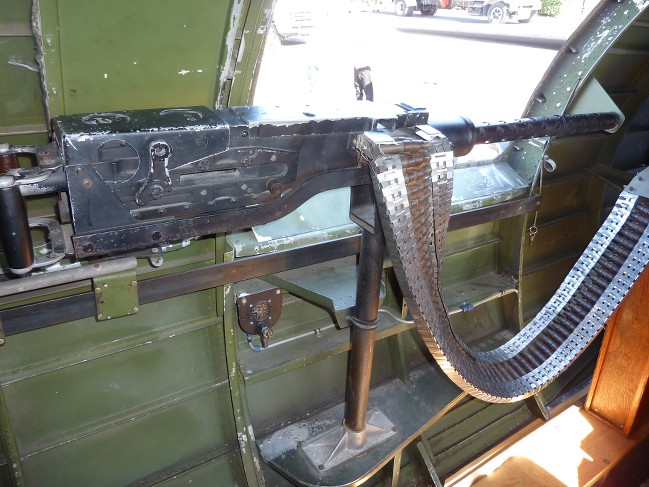
These last two pics are restorations, but it seems pretty clear to me that the positioning of the waist guns was not uniform.
Something to think about when you build your own.
I really don't know where they were on "Luscious Lady."

And now back to the main feature. this one is upside down but right side up,
And "tinkering" with the tail is obviously taking place.
Here you can see H.G.'s work improving the opening of the tail wheel well.
SO MUCH WORK!
Looks like the pace of work in Edmonton is speeding up, no? I am pleased!
Here we see H.G.'s riveting work extending farther aft.
Ending with this pleasing view,
Take a look at the post for the waist gun. It's positioning is big aggravation. Why?
In some F Models it as centered, as we can see here on the "Memphis Belle."
But that's far from definitive. Check you this:
These last two pics are restorations, but it seems pretty clear to me that the positioning of the waist guns was not uniform.
Something to think about when you build your own.
I really don't know where they were on "Luscious Lady."
And now back to the main feature. this one is upside down but right side up,
And "tinkering" with the tail is obviously taking place.
Here you can see H.G.'s work improving the opening of the tail wheel well.
SO MUCH WORK!
Redhand
#522
Joined: January 20, 2013
KitMaker: 1,460 posts
AeroScale: 1,443 posts
Posted: Saturday, July 18, 2020 - 03:48 PM UTC
BUT WAIT, THERE'S MORE!
Somehow I missed these:
That's some fine detail on the wing root structure!
And I believe this is H.G. measuring the thickness of the wing itself to see how good the fit will be.
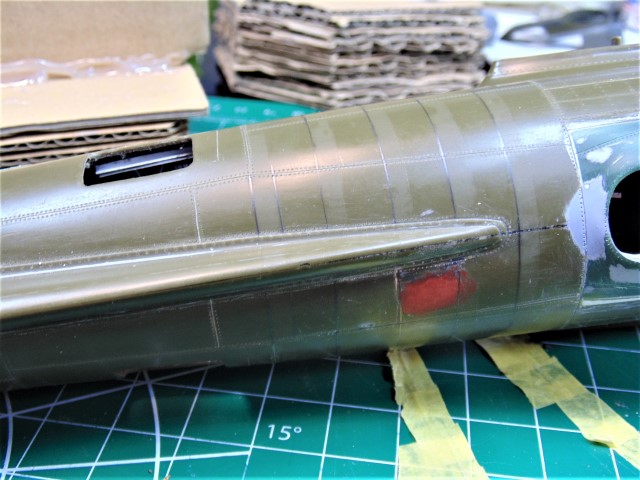
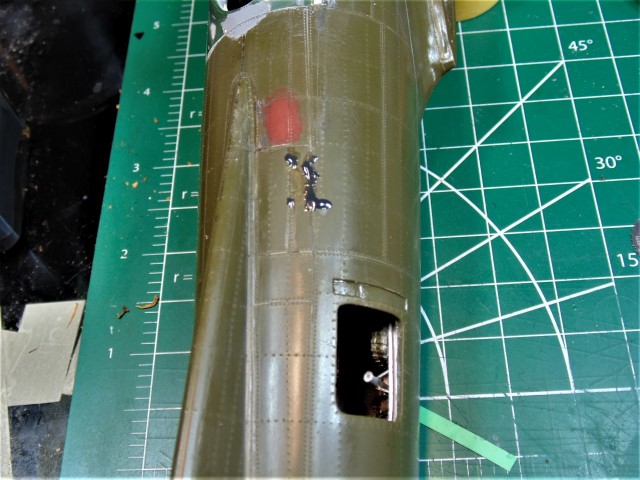
And what is this?
The great red spot of Jupiter?

I am told it is some special filler to stop the plastic at the spot from chipping and flaking away, as it was before the fix. The plastic was so old!
 Which brings me to a minor meditation on time itself. I'll be 71 this September and I started working on "Half A Wing" in 1985. That's 35 years ago. The vets I interviewed were just a few years older than I am now, and I am not sure there is a single veteran of the 303rd Bomb Group still alive. A typical young crewman flying in these aircraft would have been born anywhere from 1920-1925, which would make a survivor today almost a century old.
I know the modelers who do WWI aircraft are comfortable with the fact that they are replicating a long-gone history, but the people I wrote about are within my living memory, and it's a shock being reminded they are all gone.
It's something else to think about, and I'll leave it at that.
Somehow I missed these:
That's some fine detail on the wing root structure!
And I believe this is H.G. measuring the thickness of the wing itself to see how good the fit will be.
And what is this?
The great red spot of Jupiter?
I am told it is some special filler to stop the plastic at the spot from chipping and flaking away, as it was before the fix. The plastic was so old!
Which brings me to a minor meditation on time itself. I'll be 71 this September and I started working on "Half A Wing" in 1985. That's 35 years ago. The vets I interviewed were just a few years older than I am now, and I am not sure there is a single veteran of the 303rd Bomb Group still alive. A typical young crewman flying in these aircraft would have been born anywhere from 1920-1925, which would make a survivor today almost a century old. I know the modelers who do WWI aircraft are comfortable with the fact that they are replicating a long-gone history, but the people I wrote about are within my living memory, and it's a shock being reminded they are all gone.
It's something else to think about, and I'll leave it at that.
Joel_W
Joined: December 04, 2010
KitMaker: 11,666 posts
AeroScale: 7,410 posts
Posted: Sunday, July 19, 2020 - 03:39 AM UTC
Brian,
HG's work just continues to amaze me. How he scribes and rivets looks so simple, because he's so skilled at it. It's like watching a F1 race, and on TV looks like anyone can do it. The average person couldn't even make it out of the pit box without loosing control of the car, assuming that they don't stall it.
As for the red putty, looks like one of the many types of Bondo that you find in auto body shops. I still use the Glazing/Spot putty for certain jobs. It doesn't chip, sands, seals, and is a perfect surface for paint.
Joel

Redhand
#522
Joined: January 20, 2013
KitMaker: 1,460 posts
AeroScale: 1,443 posts
Posted: Sunday, July 19, 2020 - 04:15 PM UTC
ADVANCE TO THE REAR
But before going to more work on the after fuselage, I want to say H.G. didn't even realize his computer screen showed some of his books in one of the pictures in an earlier post. That's a separate world which he didn't want to tout here. (Just saying).


The left horizontal stab gets reinstalled.
And my favorite views.
And THIS:
Why, because of THIS:
I may have covered this before, but what pleases me most about the build is not just that H.G.'s workmanship makes the build shine, but also where it intersects with mine!
I do feel that the wires and hoses hanging down from the waist overheard are one of many nice touches that show not just skill but the collective thought behind it. It is an extra bit of realism.

FOR NOW!
But before going to more work on the after fuselage, I want to say H.G. didn't even realize his computer screen showed some of his books in one of the pictures in an earlier post. That's a separate world which he didn't want to tout here. (Just saying).
The left horizontal stab gets reinstalled.
And my favorite views.
And THIS:
Why, because of THIS:
I may have covered this before, but what pleases me most about the build is not just that H.G.'s workmanship makes the build shine, but also where it intersects with mine!
I do feel that the wires and hoses hanging down from the waist overheard are one of many nice touches that show not just skill but the collective thought behind it. It is an extra bit of realism.
FOR NOW!
Joel_W
Joined: December 04, 2010
KitMaker: 11,666 posts
AeroScale: 7,410 posts
Posted: Monday, July 20, 2020 - 01:04 AM UTC
Brian,
I still marvel at the level of HG's scribing and riveting. Every line is absolutely perfect, never seems to wander off of the dead on path, and there's no visible variation in width or depth. Having failed numerous times in my aircraft modeling days to re-scribe and re-rivet even small lines, his consistency just isn't human. And yes, I know that I'm back on my soap box he has to be an Alien for sure, but he never seems to make an error or a goof.
Joel
Redhand
#522
Joined: January 20, 2013
KitMaker: 1,460 posts
AeroScale: 1,443 posts
Posted: Monday, July 20, 2020 - 01:20 AM UTC
Quoted Text
He asked me to thank you for your comments. Brian,
I still marvel at the level of HG's scribing and riveting. Every line is absolutely perfect, never seems to wander off of the dead on path, and there's no visible variation in width or depth.
Joel
Redhand
#522
Joined: January 20, 2013
KitMaker: 1,460 posts
AeroScale: 1,443 posts
Posted: Monday, July 20, 2020 - 11:43 PM UTC
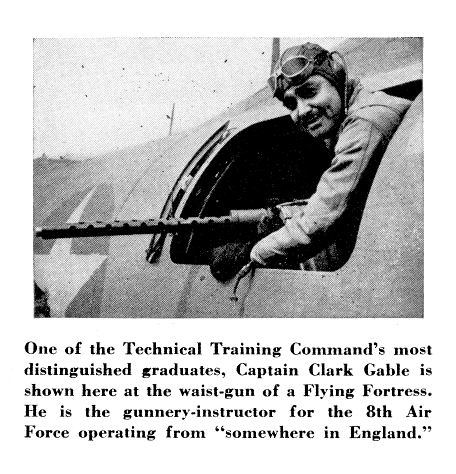
DEFLECTION SHOTS
From John Gillespie Magee's High Flight, of course.
Mostly, we airplane modelers are earthbound, leaving to the imagination "what it must have been like," and wondering what innate skills the German Experten and Allied aces possessed to pull off the perfect deflection shot.
Occasionally, however, such feats are replicated in mundane plastic injection molds--the perfect deflection shot, so to speak.
This, I think, is an example.
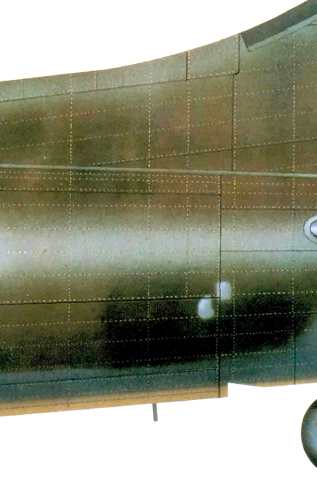
We start with the bare metal fuselage of the "Memphis Belle." Boy, she's gorgeous in her birthday suit. Look at that rivet detail.
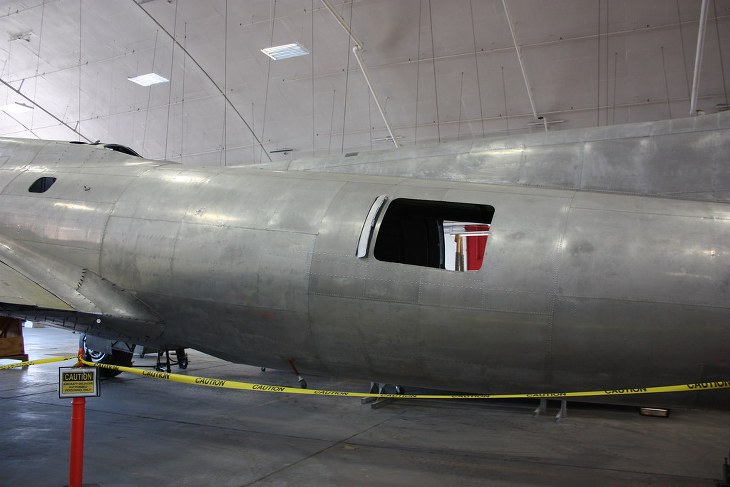
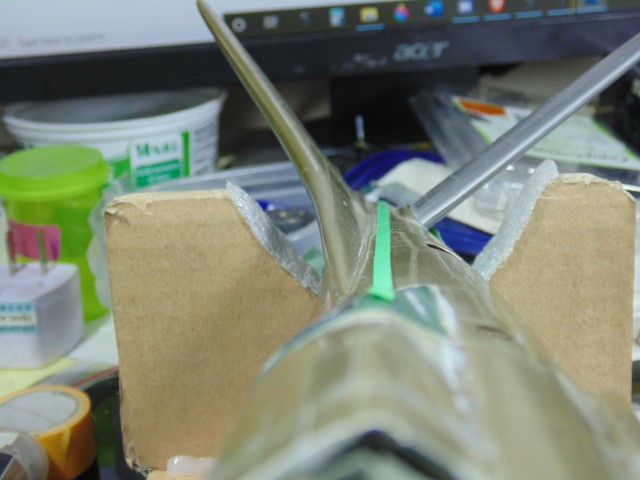
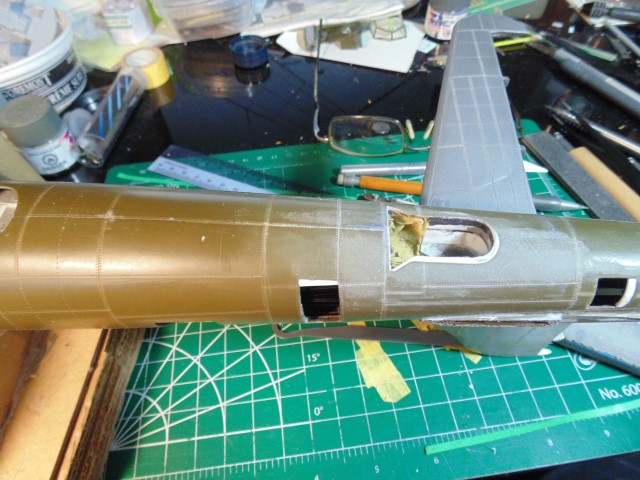
The body really is more than panel lines, but note the open wind deflector ahead of the waist window.
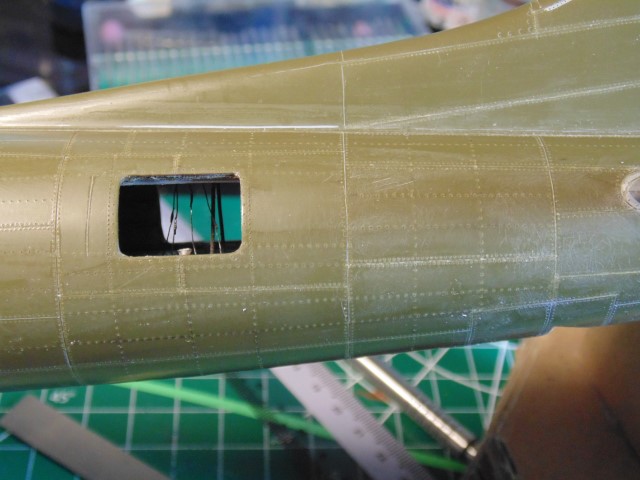
Now watch this.
The recess is perfectly excavated.
But wot about the deflector itself?
H.G.'s not finished, but already I'd call this a perfect deflection shot. I'm not even gonna ask how he did it. What's the point?
But if you're wondering how the waist gunners managed to hit anything with their hand-held .50s, check out this video. Hitting a Moving Target for World War 2 Bomber Gunners (1944 - Restored)
Quoted Text
Sunward I've climbed and joined the tumbling mirth of sun-split clouds -
and done a hundred things You have not dreamed of -
From John Gillespie Magee's High Flight, of course.
Mostly, we airplane modelers are earthbound, leaving to the imagination "what it must have been like," and wondering what innate skills the German Experten and Allied aces possessed to pull off the perfect deflection shot.
Occasionally, however, such feats are replicated in mundane plastic injection molds--the perfect deflection shot, so to speak.
This, I think, is an example.
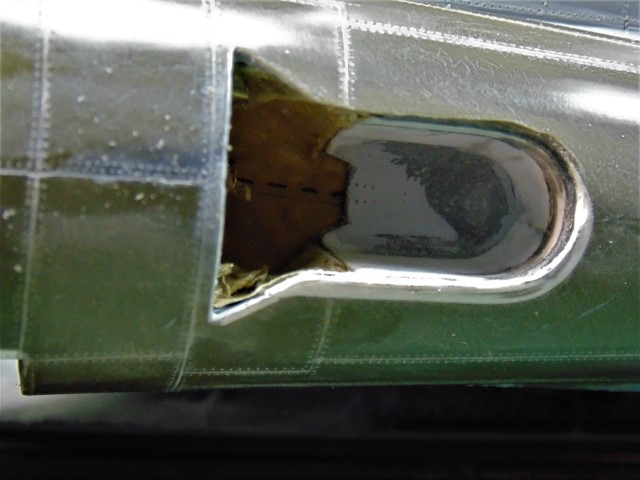
We start with the bare metal fuselage of the "Memphis Belle." Boy, she's gorgeous in her birthday suit. Look at that rivet detail.
The body really is more than panel lines, but note the open wind deflector ahead of the waist window.
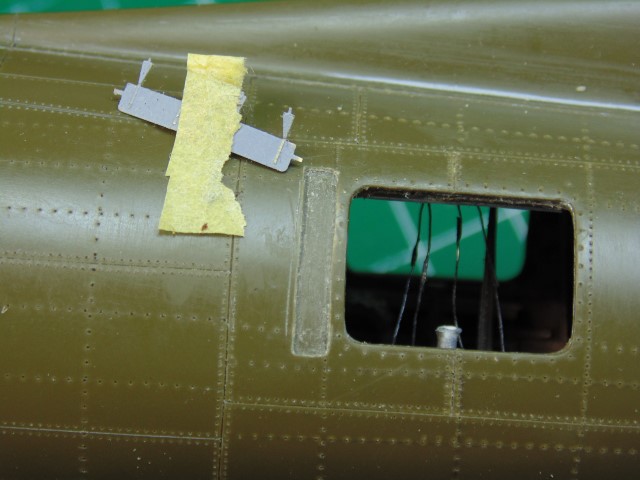
Now watch this.
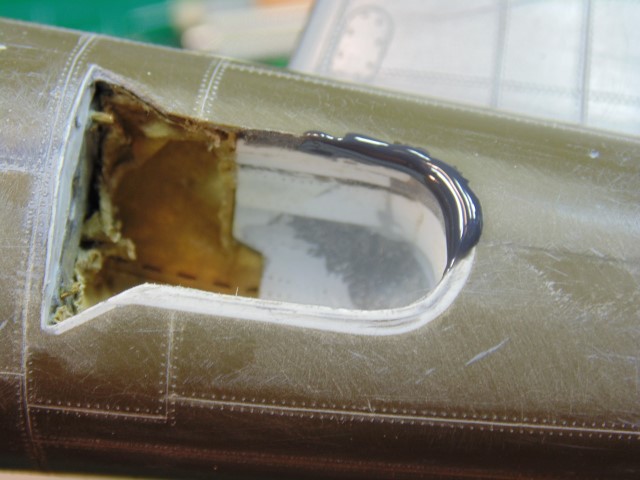
The recess is perfectly excavated.
But wot about the deflector itself?
H.G.'s not finished, but already I'd call this a perfect deflection shot. I'm not even gonna ask how he did it. What's the point?
But if you're wondering how the waist gunners managed to hit anything with their hand-held .50s, check out this video. Hitting a Moving Target for World War 2 Bomber Gunners (1944 - Restored)
Redhand
#522
Joined: January 20, 2013
KitMaker: 1,460 posts
AeroScale: 1,443 posts
Posted: Tuesday, July 21, 2020 - 04:31 PM UTC
TO THE TAIL
H.G.'s riveting work has finally reached the tail.
On the way, here is a view of the corrections he is making to the tail wheel well edge with the fuselage.
Before doing this work below,
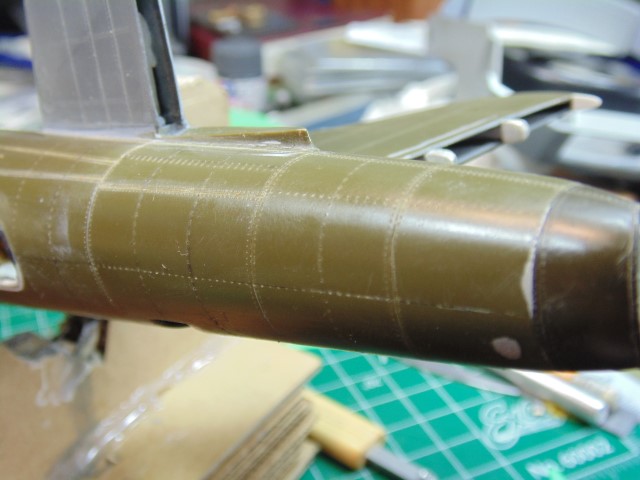
He asked me what I thought about replicating this from the "Memphis Belle."
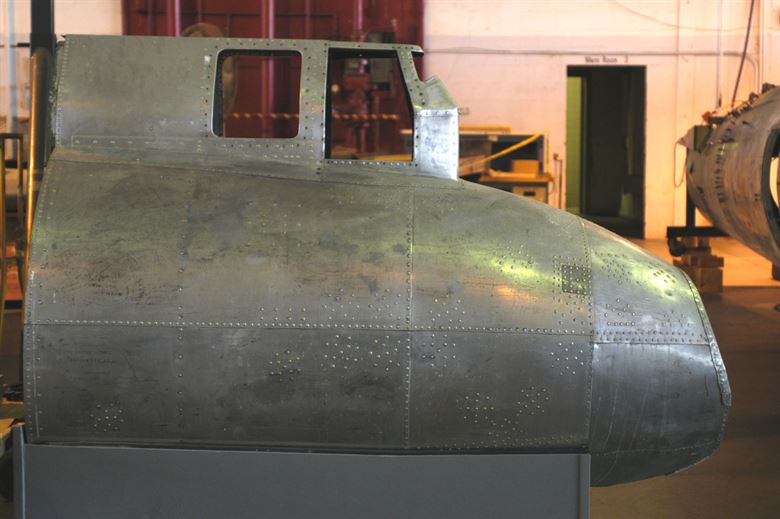
A close look shows rivets placed throughout the structure like stars in the night sky.What is fascinating is that we are surely seeing multiple repairs of battle damage that the Belle acquired during its combat career.
I include it because these views are not something one sees every day. Fascinating evidence of combat. [Wrong! See Karl's remarkable explanation below.]
H.G.'s riveting work has finally reached the tail.
On the way, here is a view of the corrections he is making to the tail wheel well edge with the fuselage.
Before doing this work below,
He asked me what I thought about replicating this from the "Memphis Belle."
A close look shows rivets placed throughout the structure like stars in the night sky.
I include it because these views are not something one sees every day. Fascinating evidence of combat.
KPHB17FE
Joined: January 12, 2015
KitMaker: 292 posts
AeroScale: 292 posts
Posted: Tuesday, July 21, 2020 - 09:58 PM UTC
Those "stars in the night" were not all patches. There were reinforcements there for armor plate. Said armor was not installed but the doublers were there. One of those cases where manufacturing and reality did not keep up with one another. I will see if I can find the drawing that shows those.
EDIT: The plan at one point was to have five pieces of armor on each side of the tail gunner. Those circles were for mounting of the rubber standoffs that held the armor away from the skin. On the right side of the drawing you can see how the standoffs and the armor were attached.
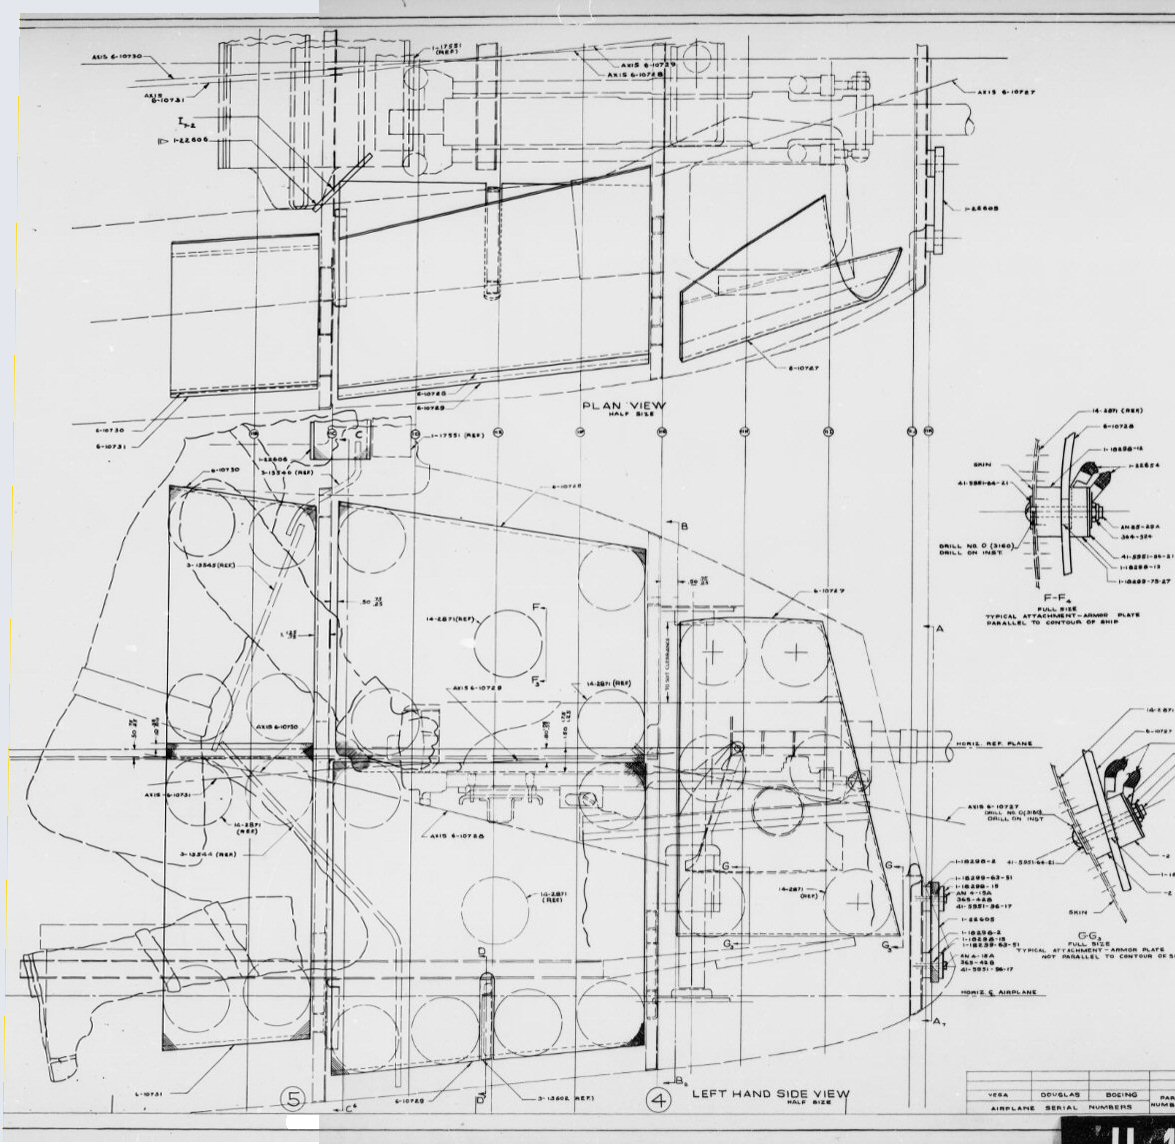
EDIT #2: This is the drawing for those doublers, the drawing is officially labeled 14-2871 "PATCH INST. ARMOR SUPT."
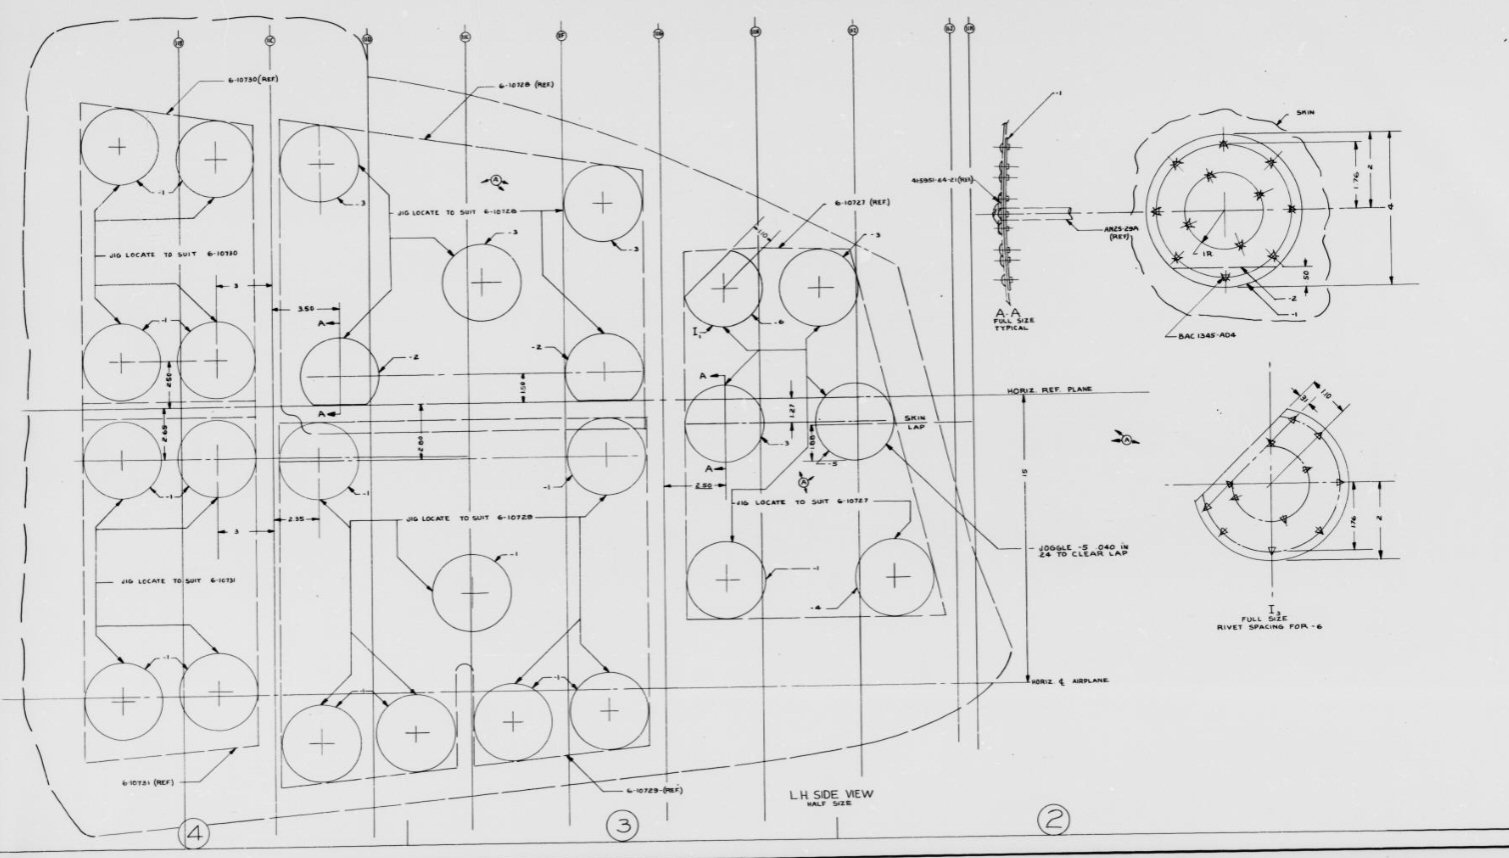
EDIT: The plan at one point was to have five pieces of armor on each side of the tail gunner. Those circles were for mounting of the rubber standoffs that held the armor away from the skin. On the right side of the drawing you can see how the standoffs and the armor were attached.
EDIT #2: This is the drawing for those doublers, the drawing is officially labeled 14-2871 "PATCH INST. ARMOR SUPT."
Redhand
#522
Joined: January 20, 2013
KitMaker: 1,460 posts
AeroScale: 1,443 posts
Posted: Tuesday, July 21, 2020 - 10:35 PM UTC
I will let H.G. know. Thanks for this remarkable info.
KPHB17FE
Joined: January 12, 2015
KitMaker: 292 posts
AeroScale: 292 posts
Posted: Tuesday, July 21, 2020 - 11:06 PM UTC
I don't think it would apply to your airplane, this was apparently only on some very early aircraft. I wouldn't want him to attempt needless extra work  !
!
!Redhand
#522
Joined: January 20, 2013
KitMaker: 1,460 posts
AeroScale: 1,443 posts
Posted: Tuesday, July 21, 2020 - 11:18 PM UTC
Quoted Text
I don't think it would apply to your airplane, this was apparently only on some very early aircraft. I wouldn't want him to attempt needless extra work
Thanks for that too!
Redhand
#522
Joined: January 20, 2013
KitMaker: 1,460 posts
AeroScale: 1,443 posts
Posted: Wednesday, July 22, 2020 - 04:53 PM UTC
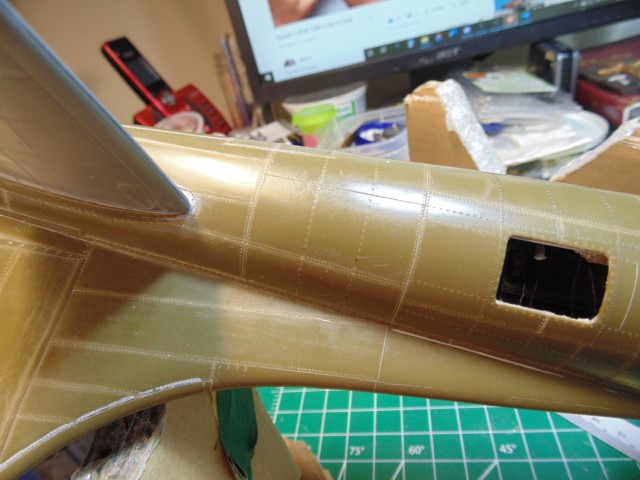
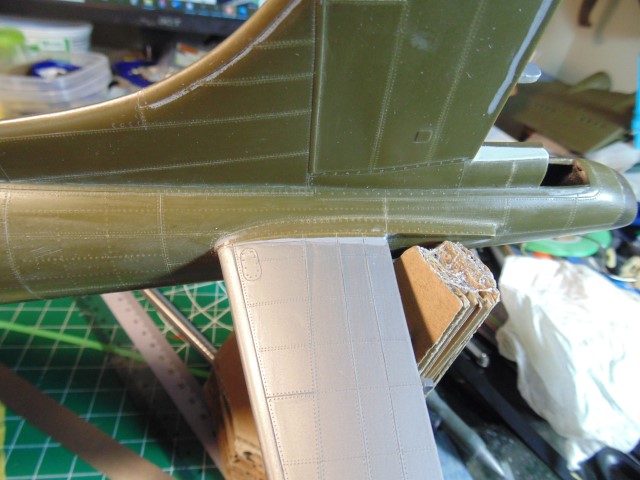
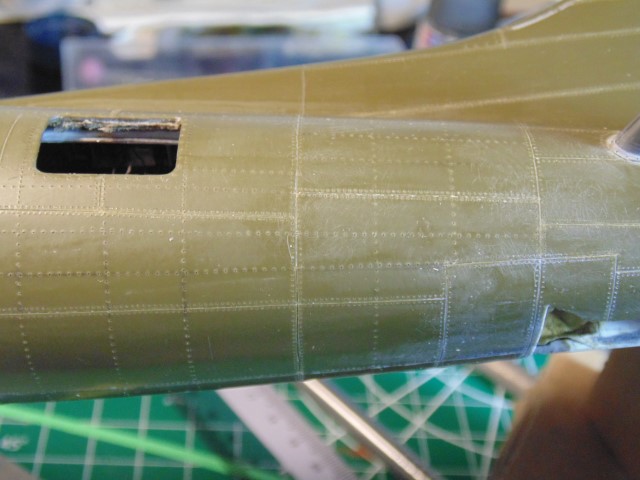
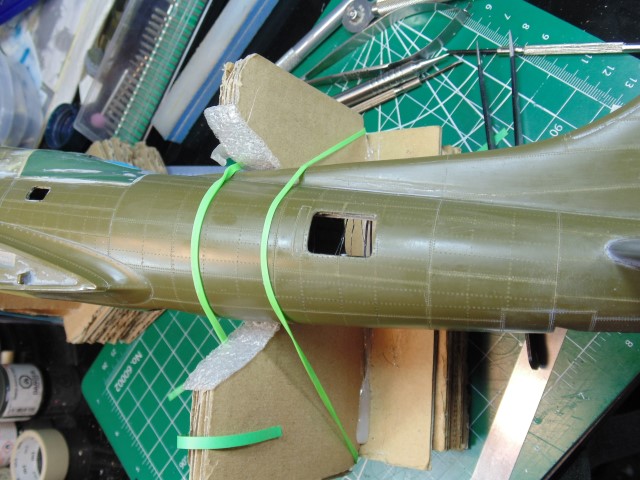
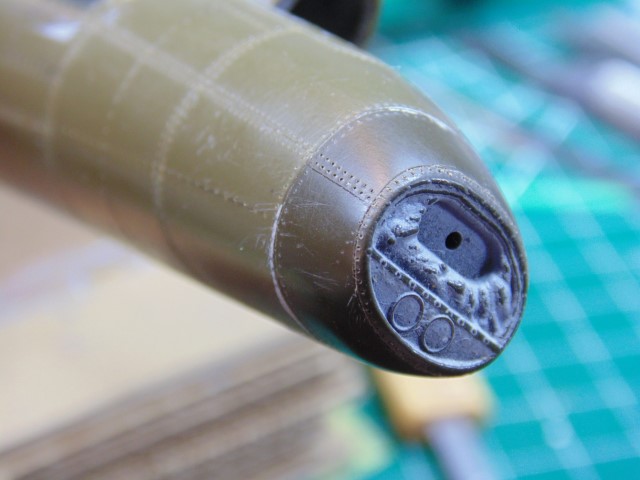
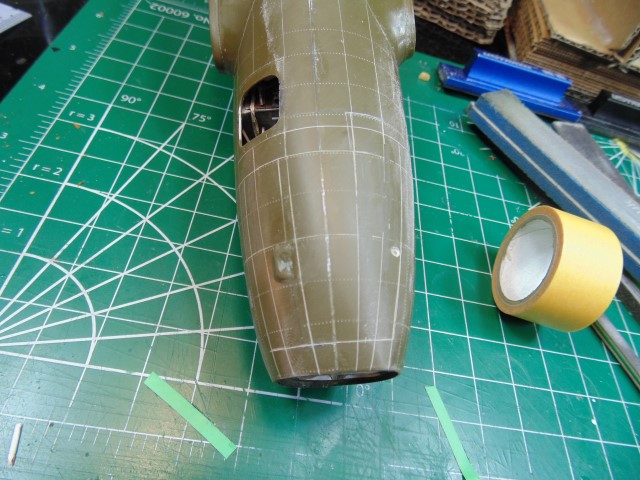
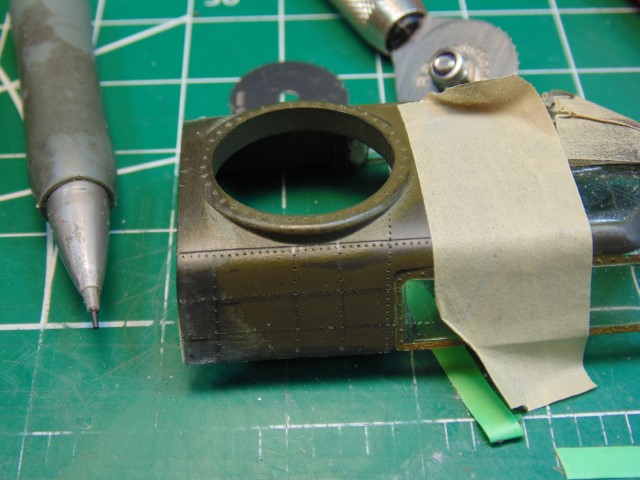
BALL TURRET AREA DETAILS
Here is the area being riveted.
The thing that looks like an ice cream cone (sort of) is the base for a streaming wire radio aerial that is paid out like a fishing line and that is cranked back in by the radio man on a spool.
And here is the work!
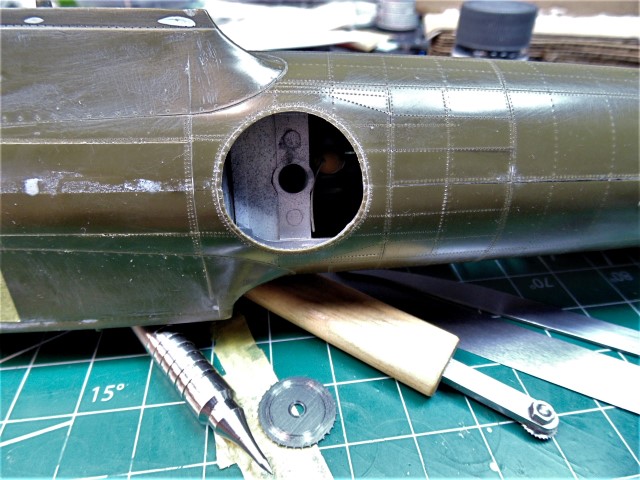
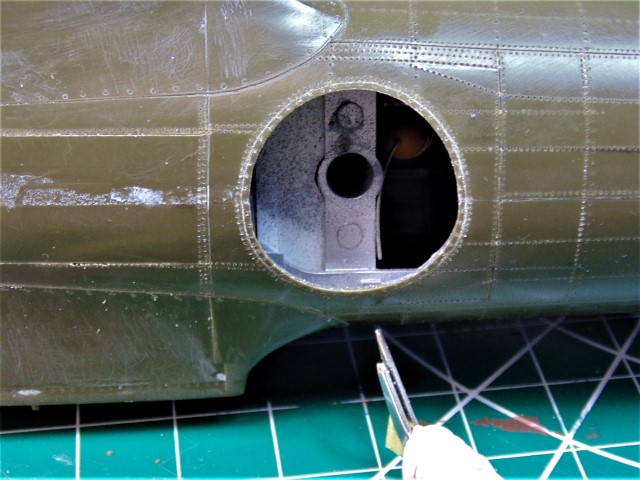
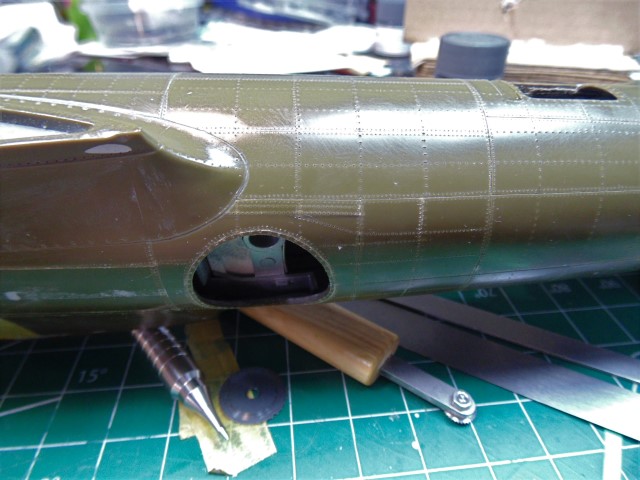
I just love the delicate riveting around the circumference of the ball turret opening!
And finally, the area around the trailing antenna opening (to be installed later).
It's great to see this increasing tempo of work and continuing progress!
Here is the area being riveted.
The thing that looks like an ice cream cone (sort of) is the base for a streaming wire radio aerial that is paid out like a fishing line and that is cranked back in by the radio man on a spool.
And here is the work!
I just love the delicate riveting around the circumference of the ball turret opening!
And finally, the area around the trailing antenna opening (to be installed later).
It's great to see this increasing tempo of work and continuing progress!
Redhand
#522
Joined: January 20, 2013
KitMaker: 1,460 posts
AeroScale: 1,443 posts
Posted: Sunday, July 26, 2020 - 03:16 PM UTC
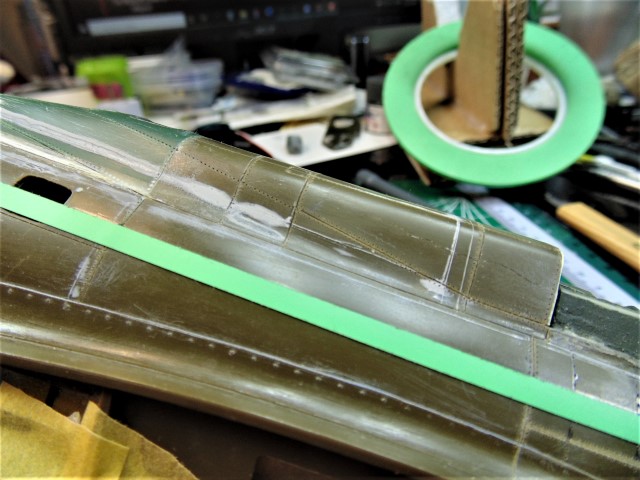
"THE DAY OF SANDING AND REFILLING BEGINS"
That's what HG said to me when he emailed this picture.
He is getting around to the detailed corrections that I knew were inevitable. What we see here is his work correcting shrinkage on the port side rear of the vertical stabilizer.
Truth be told, I had not even noticed the problem! But here is what HG said.
So, basically, he goes from this
to this.
With more work to follow until he has a flat surface on which he can re-scribe the panel lines and create replacement rivets.
To get there he had to have a flat sanding surface that was rigid. That is why the rudder attachments that Art, my North Carolina friend, installed have been supplemented with additional plugs inserted by HG.
Other areas of the build received the same careful attention.
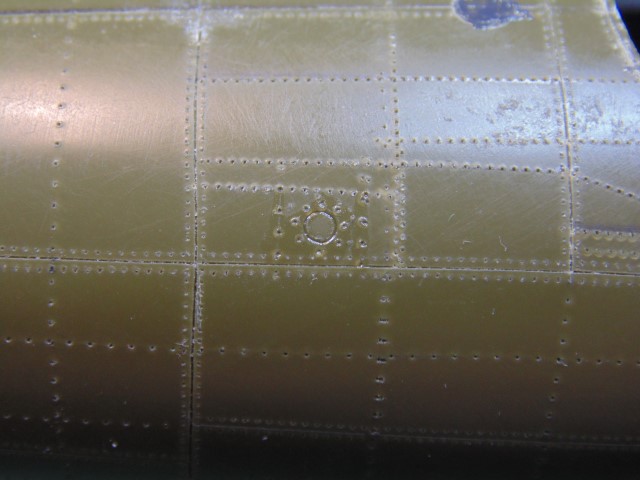
Check out these before-and-after shots of the bottom of the nose.

Obviously, the part of the driftmeter extending through the fuselage will have to be replaced.
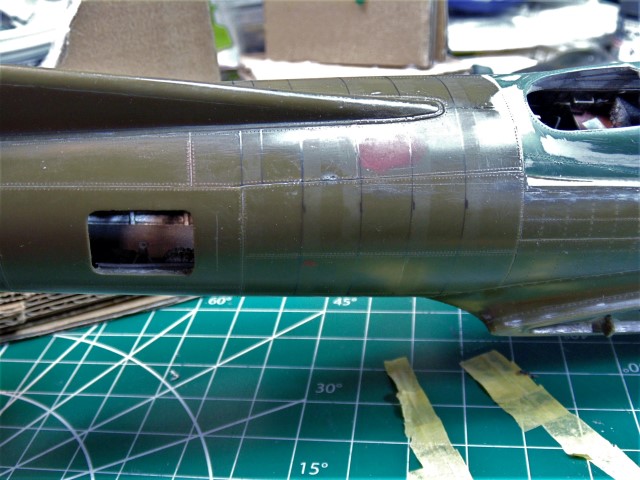
Another area that is a persistent problem is at the forward end of the vertical stabilizer structure where the plastic had chipped and flaked. Here you see the repair in progress.
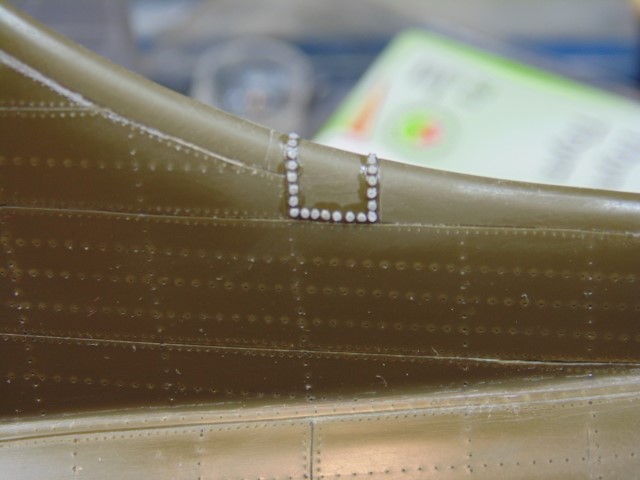
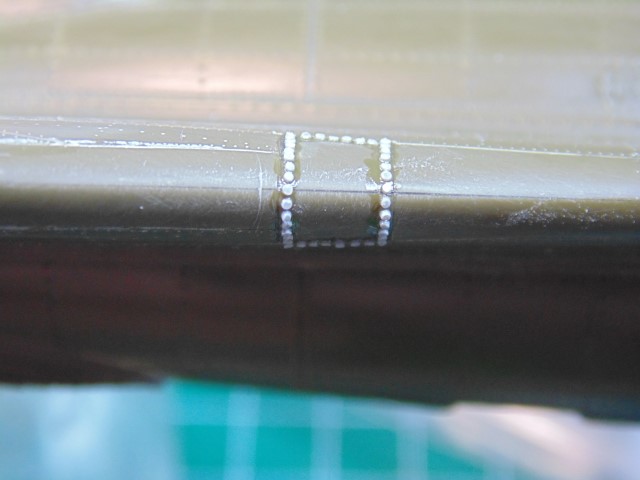
I'm going to go to another part of the same area to show some special work that goes beyond simple riveting. HG is working to replicate this section of the vertical stabilizer structure:
Here is the work so far, but it is not finished.
Finally, I will close this post with some eye candy on the cockpit roof.
The detail speaks for itself.
Also. Note certain additions to my "On my workbench" description of this build below. Credit where credit is due.
That's what HG said to me when he emailed this picture.
He is getting around to the detailed corrections that I knew were inevitable. What we see here is his work correcting shrinkage on the port side rear of the vertical stabilizer.
Truth be told, I had not even noticed the problem! But here is what HG said.
Quoted Text
I use the file as a block sander as they do in actual automotive repair.... You can see the low spots from shrinkage, which need another layer. When applying the next layer you have to use a pushing motion to remove as many bubbles from the grooves of scratches.
So, basically, he goes from this
to this.
With more work to follow until he has a flat surface on which he can re-scribe the panel lines and create replacement rivets.
To get there he had to have a flat sanding surface that was rigid. That is why the rudder attachments that Art, my North Carolina friend, installed have been supplemented with additional plugs inserted by HG.
Other areas of the build received the same careful attention.
Check out these before-and-after shots of the bottom of the nose.
Obviously, the part of the driftmeter extending through the fuselage will have to be replaced.
Another area that is a persistent problem is at the forward end of the vertical stabilizer structure where the plastic had chipped and flaked. Here you see the repair in progress.
I'm going to go to another part of the same area to show some special work that goes beyond simple riveting. HG is working to replicate this section of the vertical stabilizer structure:
Here is the work so far, but it is not finished.
Finally, I will close this post with some eye candy on the cockpit roof.
The detail speaks for itself.
Also. Note certain additions to my "On my workbench" description of this build below. Credit where credit is due.
rdt1953
Joined: February 06, 2015
KitMaker: 1,098 posts
AeroScale: 900 posts
Posted: Sunday, July 26, 2020 - 10:27 PM UTC
Brian -
Very much impressed with all that is being done . It looks like it wont be long till primer and paint .
What is the plan for markings ? Are decals available for this aircraft ? Custom made ? Painted on with masks ? Inquiring minds want to know !
Very much impressed with all that is being done . It looks like it wont be long till primer and paint .
What is the plan for markings ? Are decals available for this aircraft ? Custom made ? Painted on with masks ? Inquiring minds want to know !
Redhand
#522
Joined: January 20, 2013
KitMaker: 1,460 posts
AeroScale: 1,443 posts
Posted: Monday, July 27, 2020 - 10:44 AM UTC
Quoted Text
Brian -
Very much impressed with all that is being done . It looks like it wont be long till primer and paint .
What is the plan for markings ? Are decals available for this aircraft ? Custom made ? Painted on with masks ? Inquiring minds want to know !
Yes, decals are available this aircraft.
Kits-World makes a set.
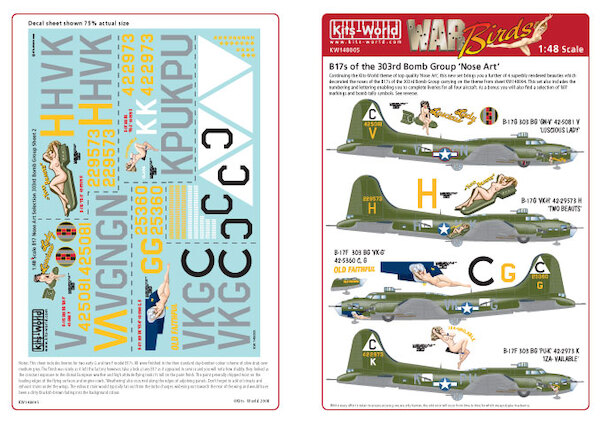
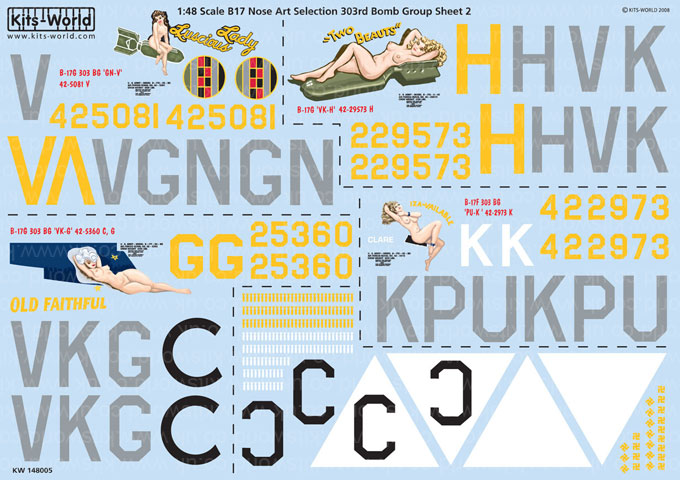
It's kind of amusing, but the decal manufacturer's inspiration for the set is yours truly. I say that because the decals for Luscious Lady and many other 303rd Bomb Group aircraft are taken from the Mark Styling artwork in the second 303rd BG book that I wrote.

One of the most pleasurable experiences I have had in my life regarding World War II aviation history was collecting the photographs of the book and working directly with Mark to get the profiles in it as complete and correct as possible. You won't see me credited anywhere on the decal sheet but that's okay. I'm enjoying the benefits of "my own work" in this build.
I think we have all the markings that we need from this decal sheet and others, including some old Cutting Edge decal sets that have greyed-out stars for B-17s.
I'm also looking forward to HG's paintwork. He plans to paint the aircraft with lacquers and is talking about a highly subtle weathering look including a variety of olive drab tones, different base colors based on subcontractor sourcing of things like the vertical stabilizer, and different colors for the outer wing panels slightly darker than the rest of the aircraft. This we learn from Karl.
Also, I have no doubt that HG knows how to scientifically weather the aircraft based on the research that we have done (again with Karl's help) for exhaust staining on the upper and lower wings and around the superchargers, etc. So, when painted the model should be highly realistic.
KPHB17FE
Joined: January 12, 2015
KitMaker: 292 posts
AeroScale: 292 posts
Posted: Monday, August 03, 2020 - 06:54 AM UTC
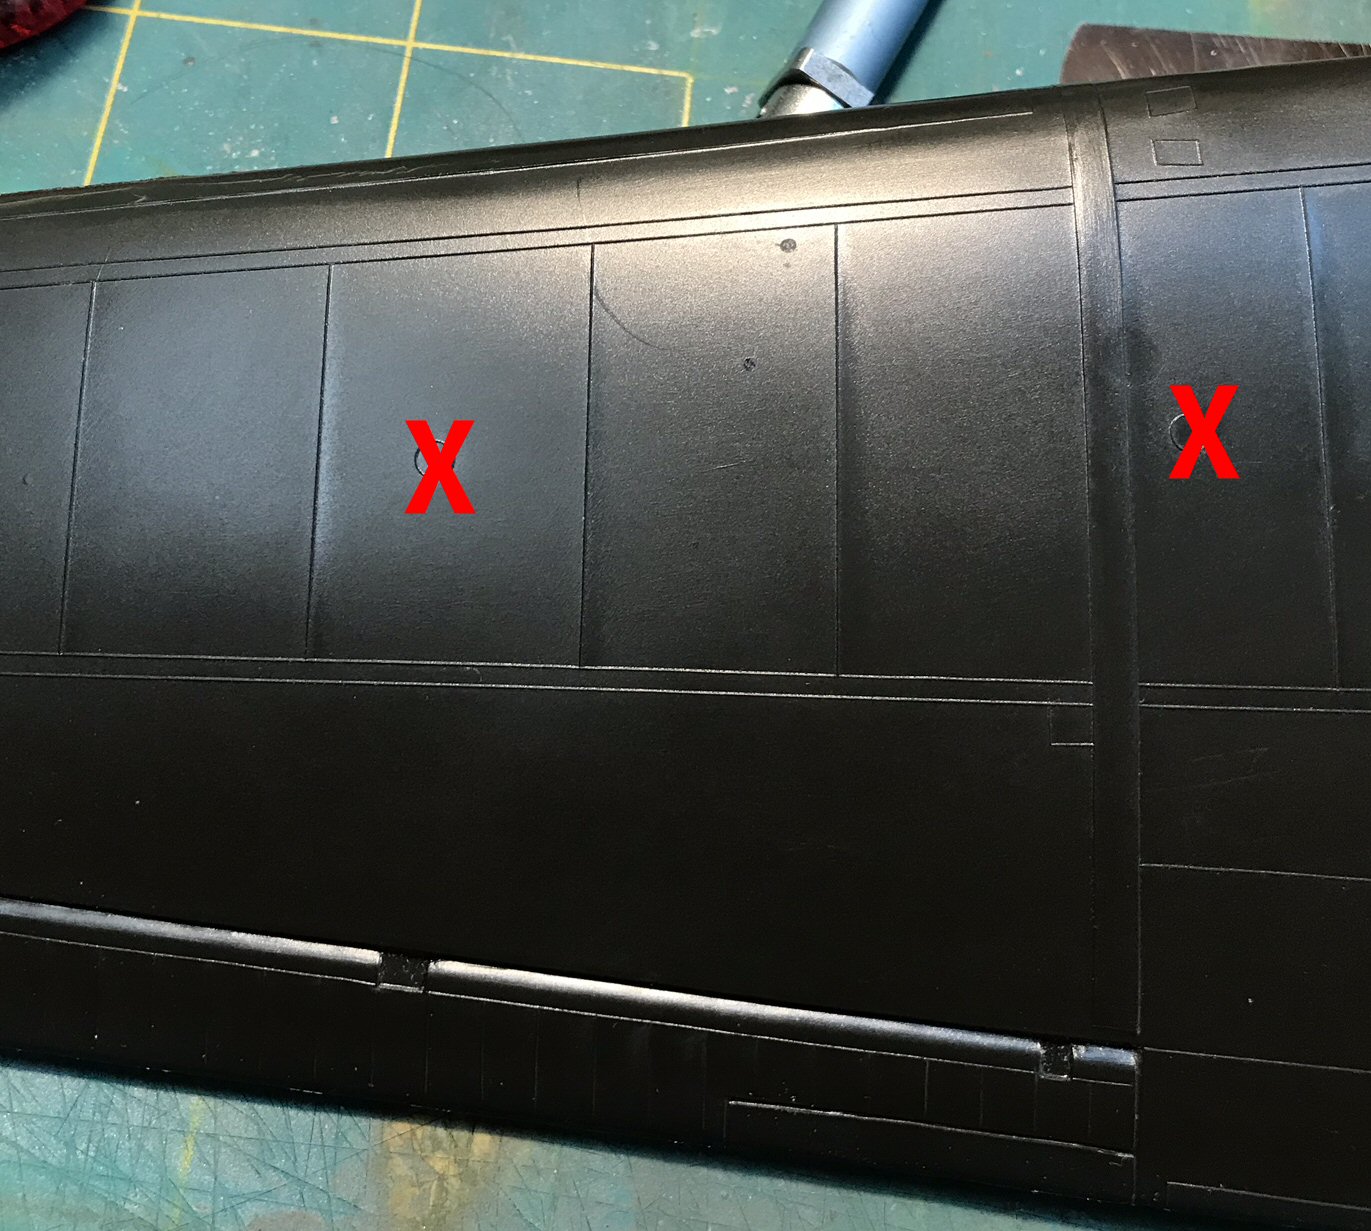
Brian, I am too lazy to go back through this, where is he at on the wings? I was tinkering with one of mine and remembered that these early airplanes would not have had the "Tokyo tanks". So the fillers should be removed. No big deal, just sand them off. Couldn't recall if we had addressed this point or not.
Redhand
#522
Joined: January 20, 2013
KitMaker: 1,460 posts
AeroScale: 1,443 posts
Posted: Monday, August 03, 2020 - 07:09 AM UTC
Quoted Text
Brian, I am too lazy to go back through this, where is he at on the wings? I was tinkering with one of mine and remembered that these early airplanes would not have had the "Tokyo tanks". So the fillers should be removed. No big deal, just sand them off. Couldn't recall if we had addressed this point or not.
Karl:
I think you did but I will double-check with him. Right now he is dealing with the fuselage details around the bomb bay doors, though I expect he won't grapple with the doors and actuators till the wings and landing gear are on. Also, the ball turret is on the horizon.
LL definitely did not have Tokyo Tanks so we will make sure this is right.
Thanks!
Brian
Redhand
#522
Joined: January 20, 2013
KitMaker: 1,460 posts
AeroScale: 1,443 posts
Posted: Friday, August 07, 2020 - 02:14 PM UTC
Karl:
The wing fuel configuration was corrected. No "Tokio Tanks" on this one.
The wing fuel configuration was corrected. No "Tokio Tanks" on this one.
Redhand
#522
Joined: January 20, 2013
KitMaker: 1,460 posts
AeroScale: 1,443 posts
Posted: Friday, August 07, 2020 - 03:01 PM UTC
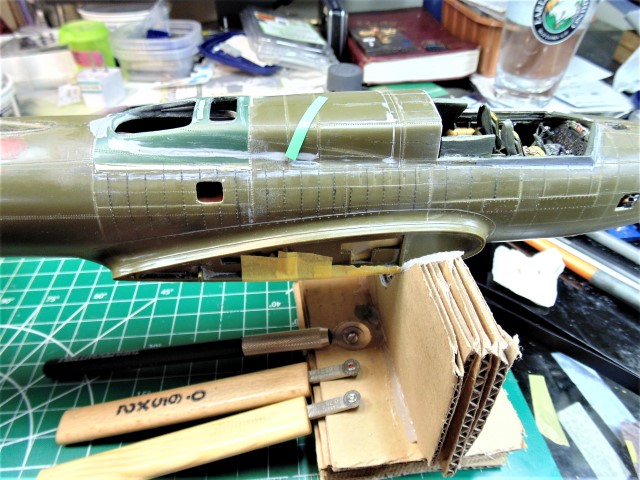
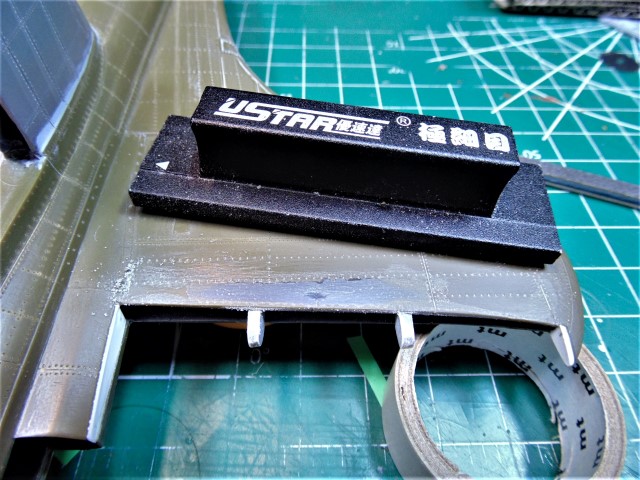
ON TO THE BOMB BAY!
When I finished the interior of the bomb bay years ago, I always wondered how the delicate task of marrying the bomb bay interior and the door hinge openings to the bomb bay door legs would go.
Well, come along if you were wondering also.
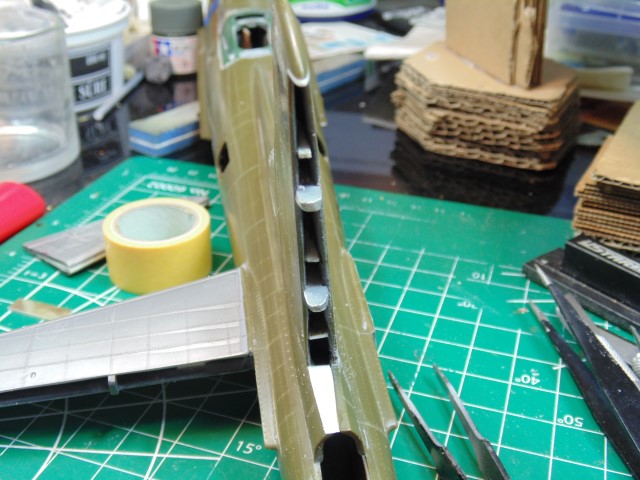
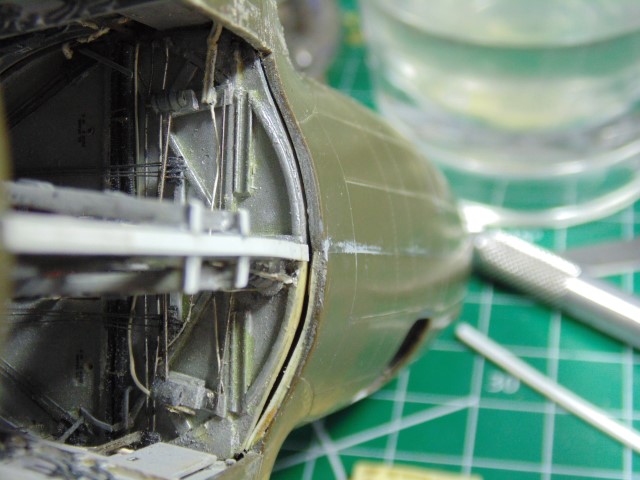
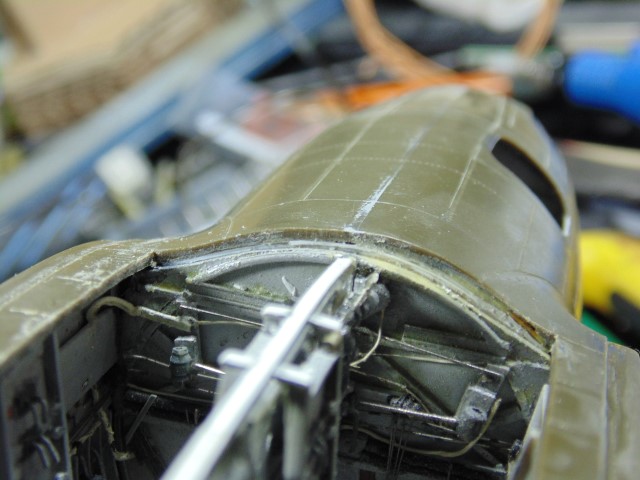
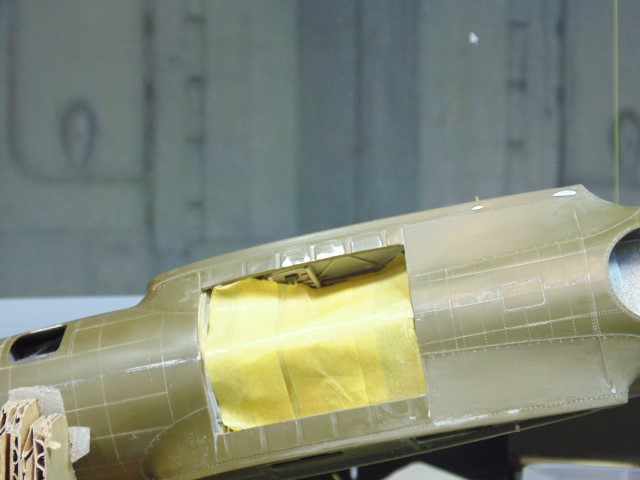
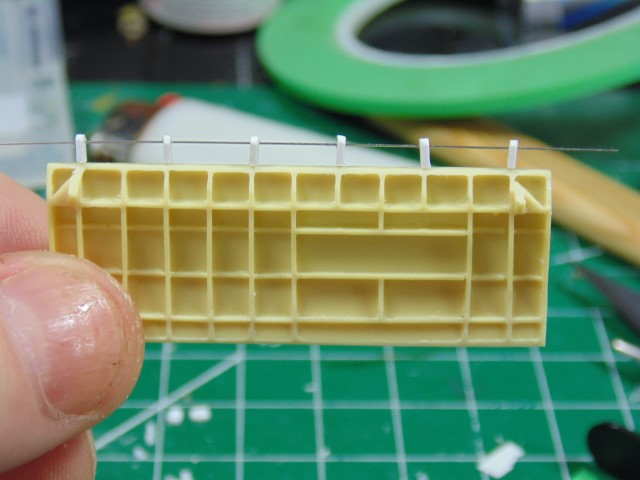
Here is how I left the bomb bay structure, give or take a few bent wires along the way, and some damage in handling. About a third of the way in from the sidewalls are dark gray cylinders that represent the actuation motor connections for the ballscrews to the bomb bay doors.
I knew this gap between the fuselage and the bottom of the forward bomb bay bulkhead would have to be filled.
Here you can say HG's initial filling effort.
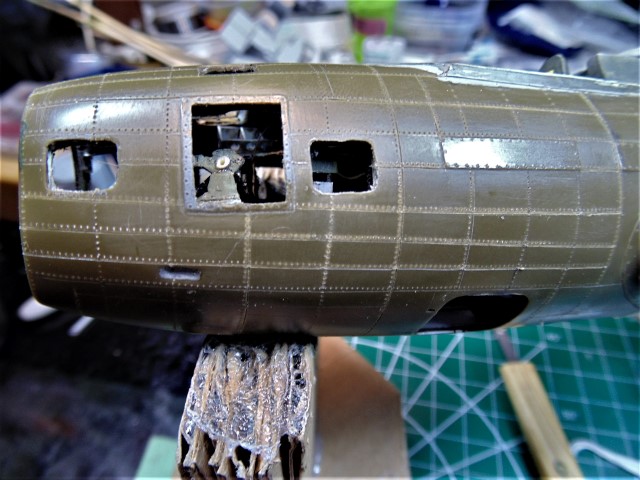
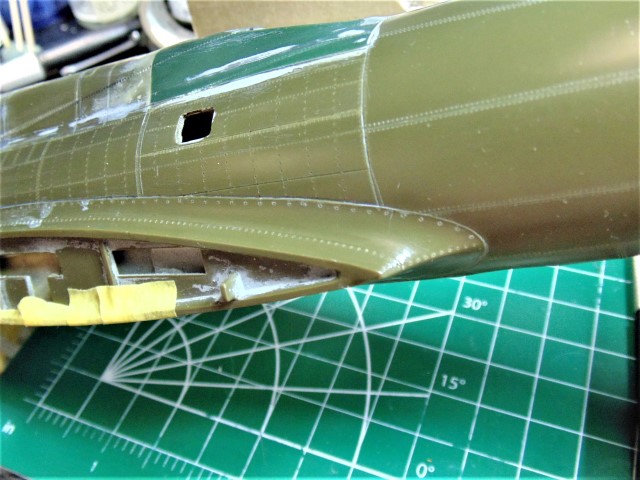
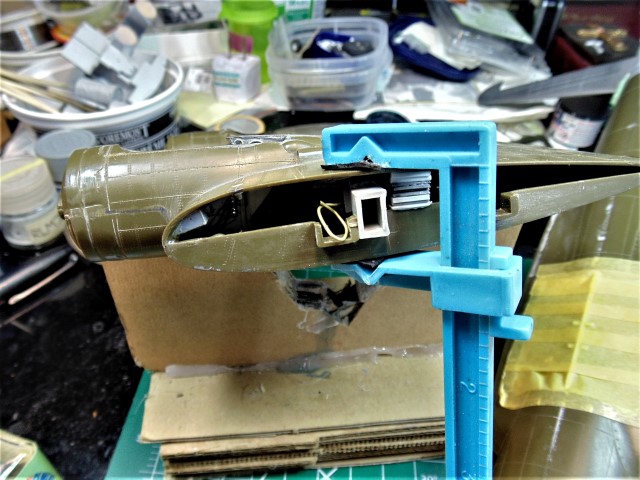
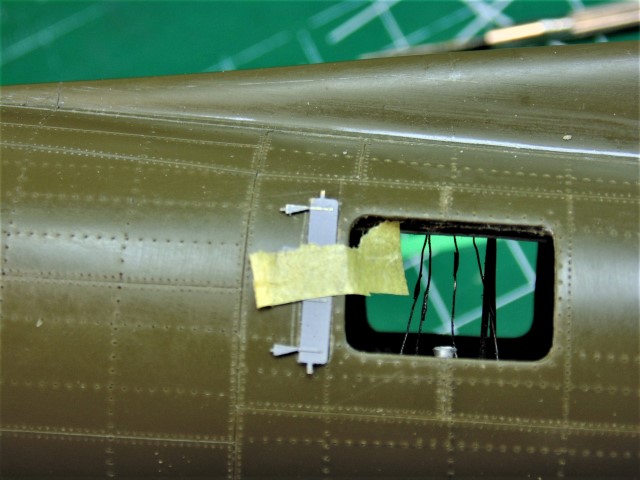
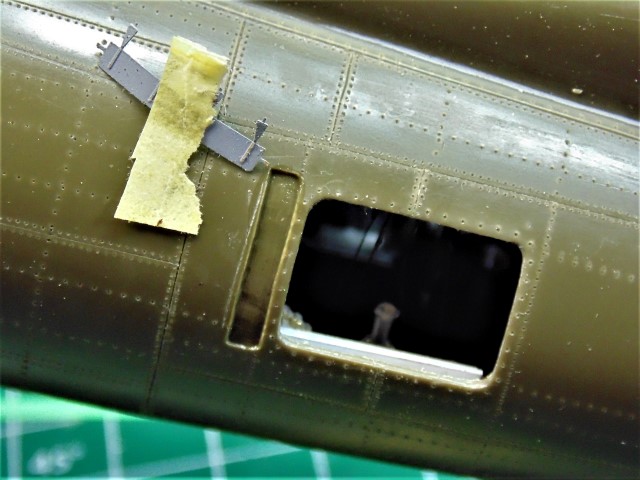
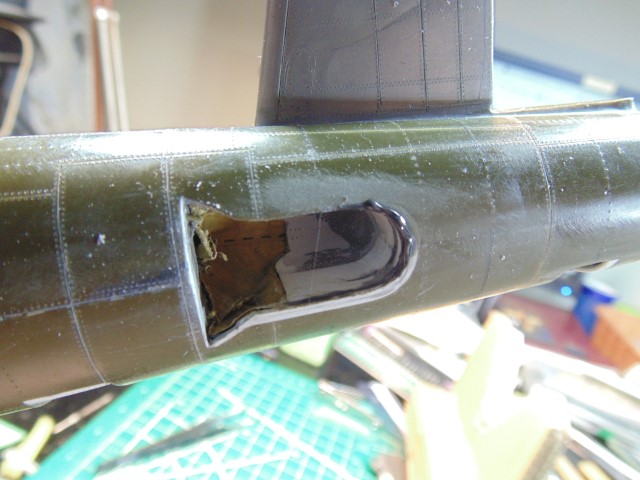
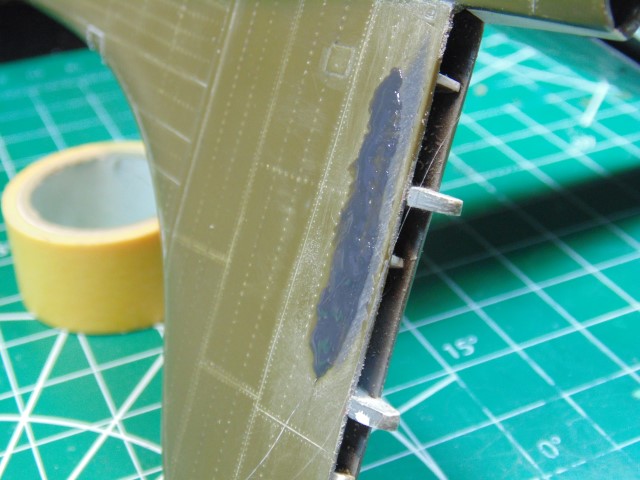
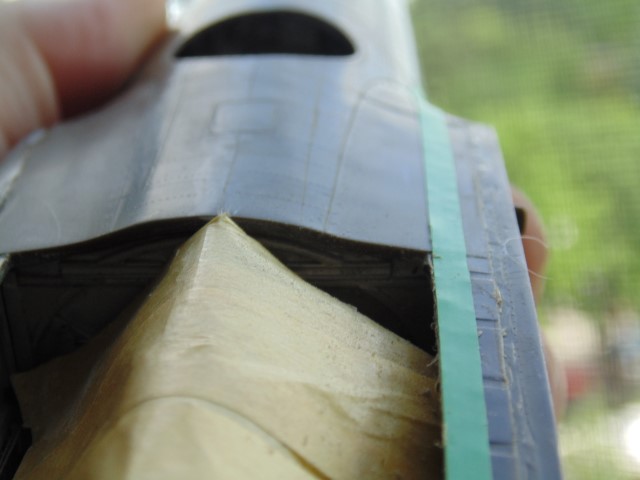
Now let's move to the port and starboard sides of the bomb bay opening.
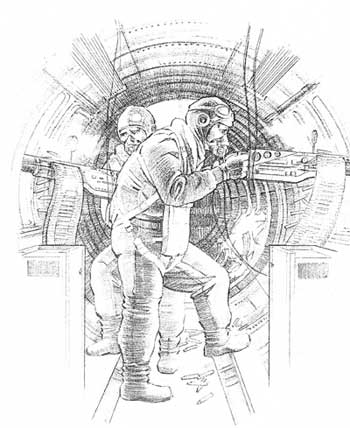
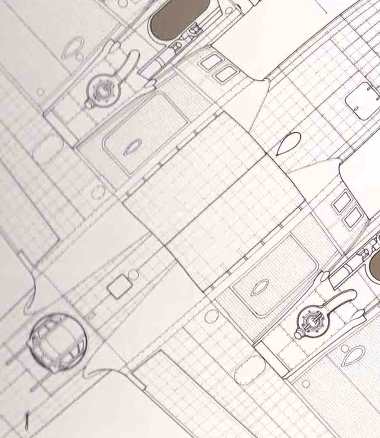
One of the structural defects in the fuselage in this area is how long the notches to each side of the door openings are. There are six of them and they are meant to hold door legs. However on the real thing they are not nearly this long or thick. And, of course, they have openings for the legs. As HG says,
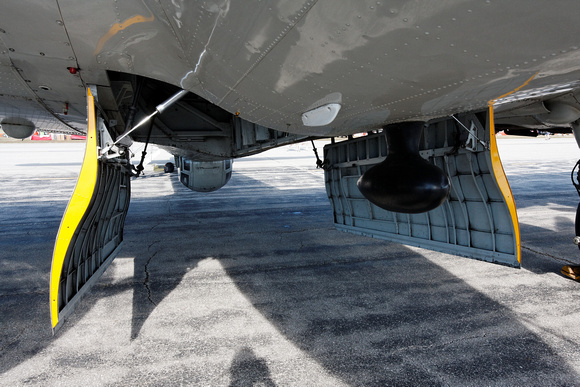
Compare the drawing
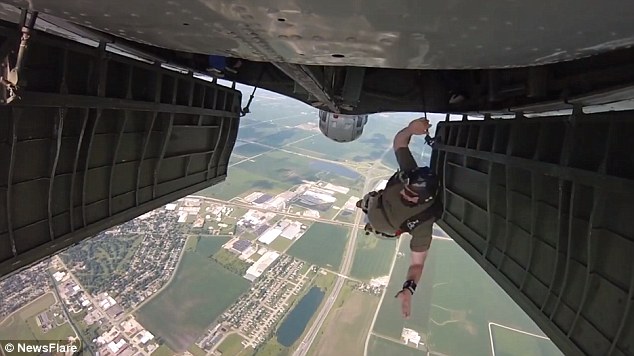
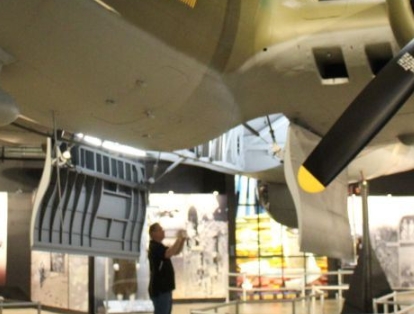
And this photo of some crazy guy bailing out through the bomb bay in a "warbird."
to what the model looks like
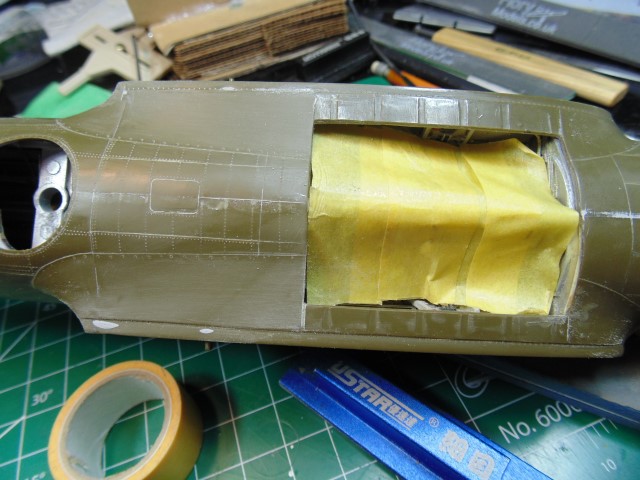
Here you can see some of the surgery needed to make it look more accurate.
And here compare the corrected top (note the rivet line near the pointer)
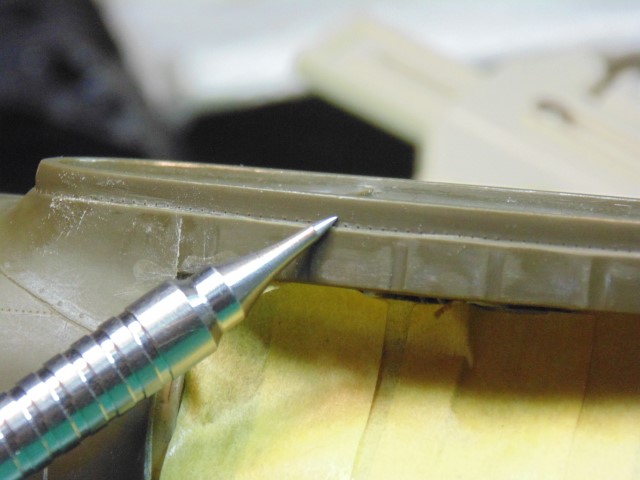
with the bottom, though the differences are perhaps subtle, at least they were to me at first glance.
But, as I told HG, "I trust your judgment on this."
Ultimately, this is the look we are looking for.
The next post is coming up shortly and will be on the doors themselves.
When I finished the interior of the bomb bay years ago, I always wondered how the delicate task of marrying the bomb bay interior and the door hinge openings to the bomb bay door legs would go.
Well, come along if you were wondering also.
Here is how I left the bomb bay structure, give or take a few bent wires along the way, and some damage in handling. About a third of the way in from the sidewalls are dark gray cylinders that represent the actuation motor connections for the ballscrews to the bomb bay doors.
I knew this gap between the fuselage and the bottom of the forward bomb bay bulkhead would have to be filled.
Here you can say HG's initial filling effort.
Now let's move to the port and starboard sides of the bomb bay opening.
One of the structural defects in the fuselage in this area is how long the notches to each side of the door openings are. There are six of them and they are meant to hold door legs. However on the real thing they are not nearly this long or thick. And, of course, they have openings for the legs. As HG says,
Quoted Text
So, the biggest accuracy correction is opening up the bottom where the legs of the bomb bay doors are supposed to fit into the fuselage, and rotate from the horizontal to vertical while the doors are being opened and closed.
Compare the drawing
And this photo of some crazy guy bailing out through the bomb bay in a "warbird."
to what the model looks like
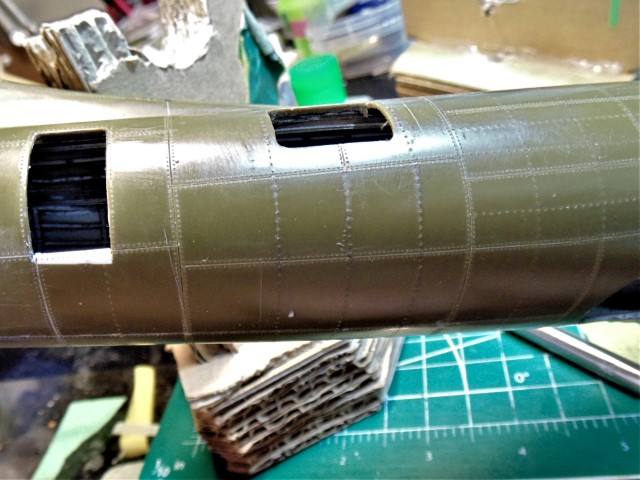
Here you can see some of the surgery needed to make it look more accurate.
And here compare the corrected top (note the rivet line near the pointer)
with the bottom, though the differences are perhaps subtle, at least they were to me at first glance.
But, as I told HG, "I trust your judgment on this."
Ultimately, this is the look we are looking for.
The next post is coming up shortly and will be on the doors themselves.
Redhand
#522
Joined: January 20, 2013
KitMaker: 1,460 posts
AeroScale: 1,443 posts
Posted: Friday, August 07, 2020 - 03:24 PM UTC
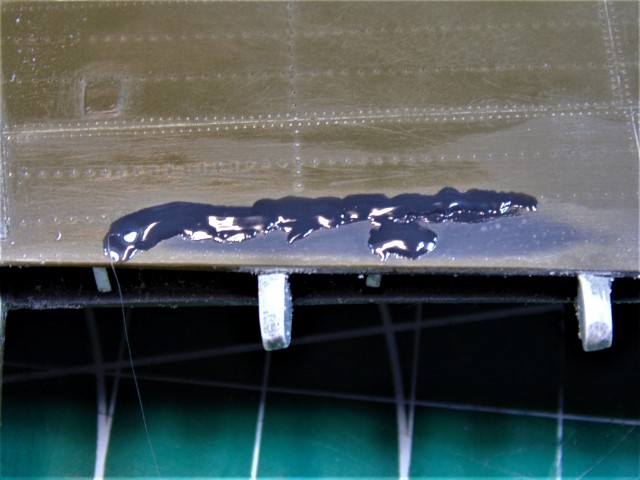
BOMB BAY DOOR CORRECTIONS
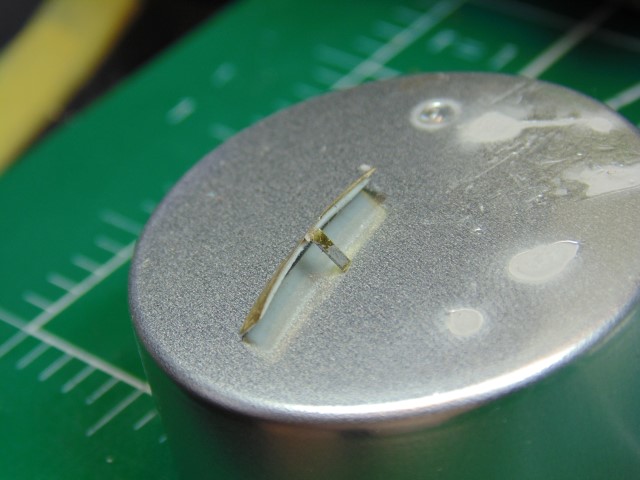
Here is what one damaged door looked like when both arrived at HG's place.
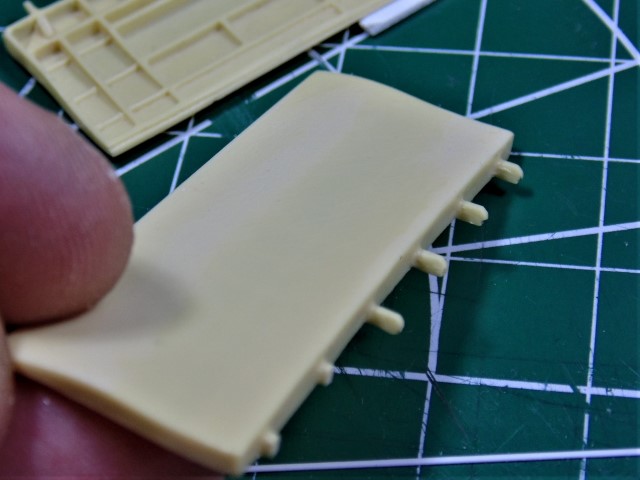
I already knew that the broken off legs were going to be a problem. I just wasn't sure how he would fix this.

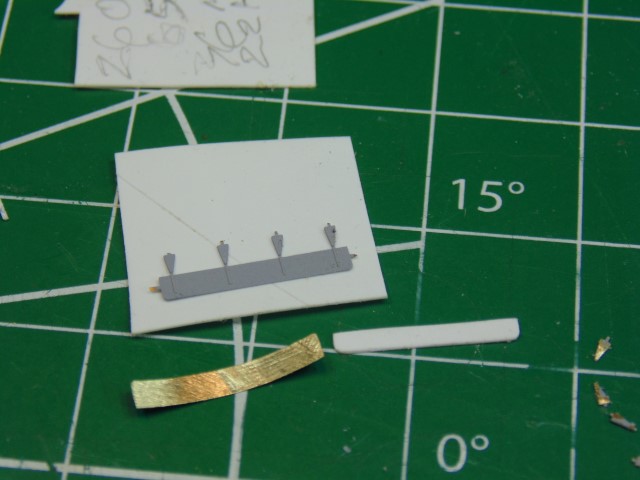
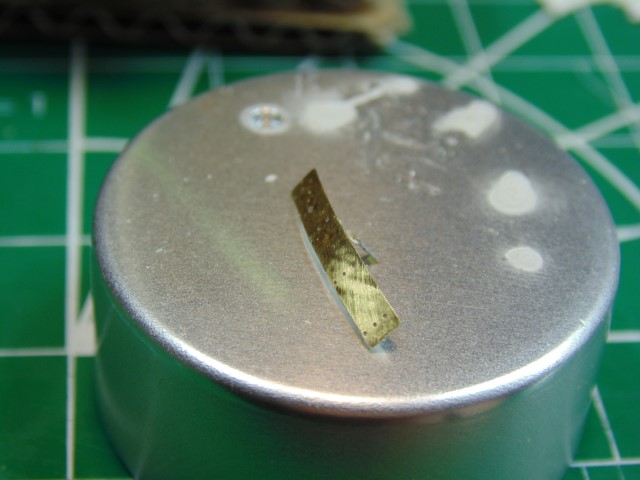
He began by cutting all the legs off of the door that had a couple of missing ones.
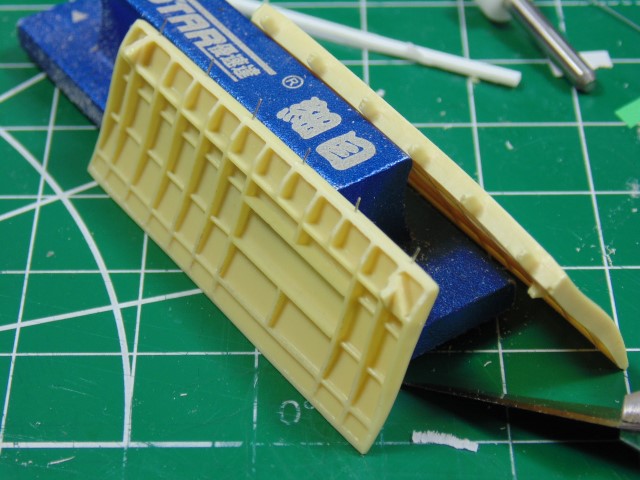
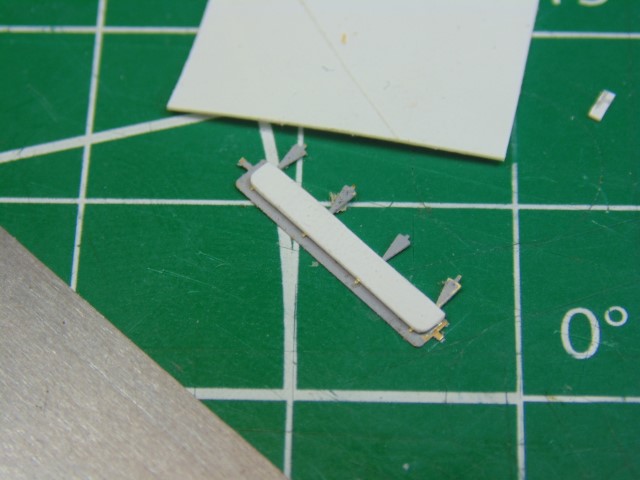
And after making a detour for priming, he not only put wires into the locations where the door legs would fit but also scratch-built new door legs!
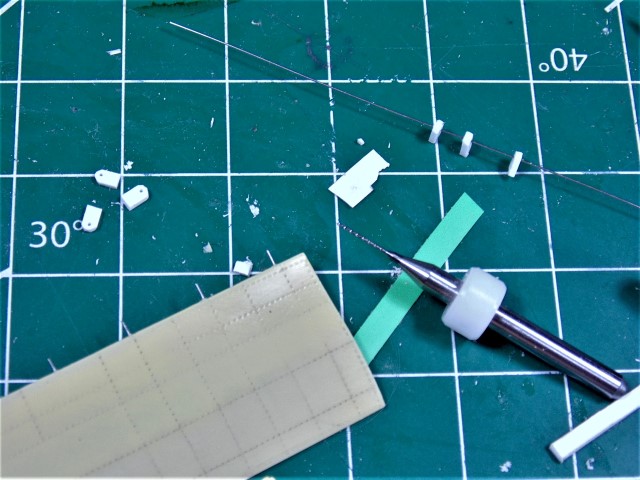
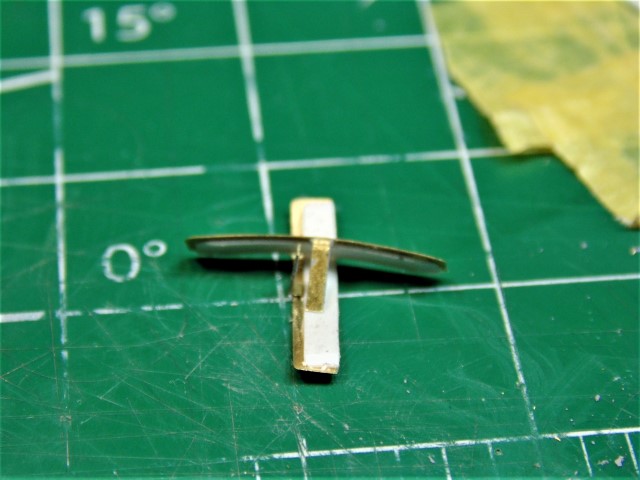
And here is his ingenious way of pre-positioning the new legs so that when he goes to glue them they will be at the right angles.

HG normally doesn't complain much about the work, but this effort brought forth an UHG! in print.
I can only imagine! I knew something like this was in the cards, but it's one thing to imagine it and it's another to see it.
I guess we'll have to wait until the work continues to see whether he replicates this work on the other door with the undamaged six legs, or whether the scratch-build here already matches what is there. My suspicion is that we will see both doors with new legs.
Worth getting up for in the morning if you ask me.
Here is what one damaged door looked like when both arrived at HG's place.
I already knew that the broken off legs were going to be a problem. I just wasn't sure how he would fix this.
He began by cutting all the legs off of the door that had a couple of missing ones.
And after making a detour for priming, he not only put wires into the locations where the door legs would fit but also scratch-built new door legs!
And here is his ingenious way of pre-positioning the new legs so that when he goes to glue them they will be at the right angles.
HG normally doesn't complain much about the work, but this effort brought forth an UHG! in print.
I can only imagine! I knew something like this was in the cards, but it's one thing to imagine it and it's another to see it.
I guess we'll have to wait until the work continues to see whether he replicates this work on the other door with the undamaged six legs, or whether the scratch-build here already matches what is there. My suspicion is that we will see both doors with new legs.
Worth getting up for in the morning
if you ask me. Joel_W
Joined: December 04, 2010
KitMaker: 11,666 posts
AeroScale: 7,410 posts
Posted: Saturday, August 08, 2020 - 01:32 AM UTC
Brian,
As usual I'm just amazed at the level that HG works at. Those bomb bay doors hinges/leg replacements are amazing. Making one to scale would be hard enough, but HG did six of them with the hinge holes to boot, and all look exactly the same.
As I said before, I'd really love to see your one of a kind master piece finished, and on display in some museum where it surely belongs before my time comes, or equally worse, but most likely my eyesight completely fails. (more eye surgery scheduled for Aug 24 in my one good eye as they couldn't find a lens script that I could actually benefit from, plus Cataract to be removed just for the fun of it).
Joel
 |

WEB HOSTING BY


Copyright ©2021 AeroScale and Kitmaker Network, a subsidiary of Silver Star Enterprises
All Rights Reserved. Please read our Conditions of Use and Privacy Policy.
All Rights Reserved. Please read our Conditions of Use and Privacy Policy.